
HOLIDAY DONATION DRIVE - SUPPORT MSW - DO YOUR PART TO KEEP THIS GREAT FORUM GOING! (Only 69 donations so far out of 49,000 members - Can we at least get 100? C'mon guys!)
×


AJohnson
-
Posts
2,034 -
Joined
-
Last visited
Content Type
Profiles
Forums
Gallery
Events
Everything posted by AJohnson
-
 Hi Jack great to see you back model making and with new toys to play with. Looking good, just a quick check on the anchor stocks with your nice brass strip additions, are these just dry fit? The stocks are on upside down I think, they should be ‘flat’ on the top side near the anchor ring and the ‘taper’ faces down towards the flukes, if I’ve made myself clear 🤔
 -
How rude! 🤣🤣🤣 (he says rubbing a bruise from a recent fall!) You go for it Andy, rightly so it’s your kit! 👍
- 92 replies
-
- 11
-

-

-
Shipman is right, the predominant standard for the fabric wing Hurricane’s was silver undersides; quickly being replaced with varying schemes of black/white emergency identification schemes. The fabric wings versions did not last long and were lost in large numbers either in the air or on the ground. If you are set on Duck-egg underneath then you would be on safer ground with an all metal winged, three bladed prop Mk.1 kit. Or do the initial silver underneath without the black/white for a Summer ‘39 version. I have built this kit a few times and it is a nice easy build. I did a set of Battle of France models including a Hurricane.
-
Thanks B.E. “Nisha” is my first Vanguard kit, a world away from the Caldercraft ones I have built prior to this. I think the fact the “kit building” part of these go as smoothly as they do, means the modelling “effort” can be put into any creative elements you wish to add yourself. A double edged sword, as if I’d just built it “out of the box” it would have been finished months ago! 🤣. The effort in learning my way around Edgar J. March’s books (I love looking through musty old books and doing a bit of research) finding details I want to add, easily outweighs the actual “kit” work, a testament to Chris’s design, the way good kits should be. The newcomer and the more seasoned amongst us can derive equal pleasure from building them. 👍
- 206 replies
-
- 5
-
-
- Vanguard Models
- Brixham trawler
- (and 2 more)
-
Ahem, well, apologies whilst I blow the dust and cobwebs off this build log! 😂 I have been successfully 'prevaricating about the bush' with this build for a good six months now, so high time I strapped back in and did some more before the calendar changes! One of the things that has been bothering me since I decided to add a trawl beam is that I had already glued down a load of fish in creates and crew members, well I've bitten the bullet and decided to move them, to make way for the trawl beam and netting. This has left some marks on the deck, but these will be covered by the stowed fishing net and beam - see the mock up of the positioning where I'm holding the beam in place. I have also, whilst relocating the crew, realised I have been neglecting their "Elf" and Safety and so made amends with the addition of a life ring attached to the companionway. Next up I think need to finish the net and just see how it behaves when I try and scrunch it up into the space available, my gut is telling me there might be too much material for it to look 'right' at scale, so I may need to modify it - we shall see! 🤔 Other tasks to do, finish the sails with addition of bolt ropes and the boom, then it is time for rigging I believe. 😬 I Think I need to do the standing rigging first in order to be able to lash the forward end of the trawl beam. Still feeling my way back into this one, so other items may also crop up I have forgotten about...


- 206 replies
-
- 15
-
-
- Vanguard Models
- Brixham trawler
- (and 2 more)
-
Nice work on the Stencils and airbrush camouflage. Happy New Year to you also Mike! 🎉🥳
-
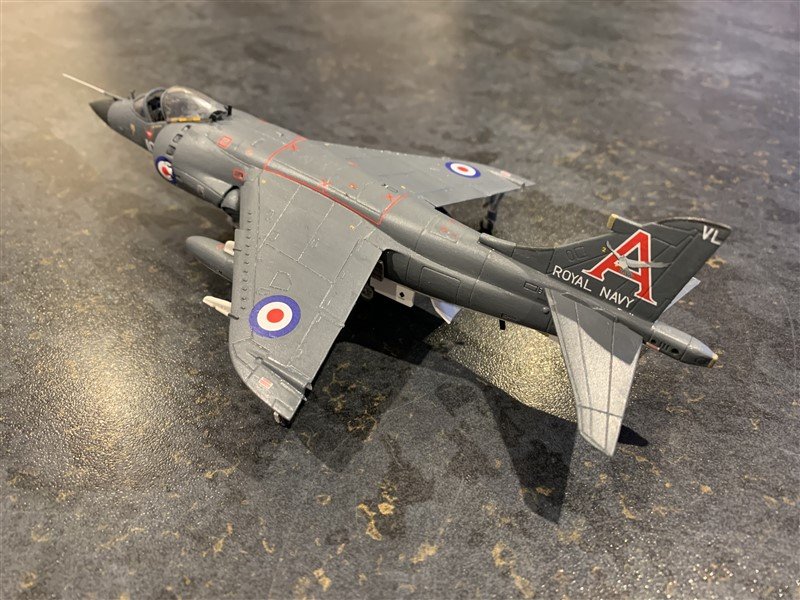
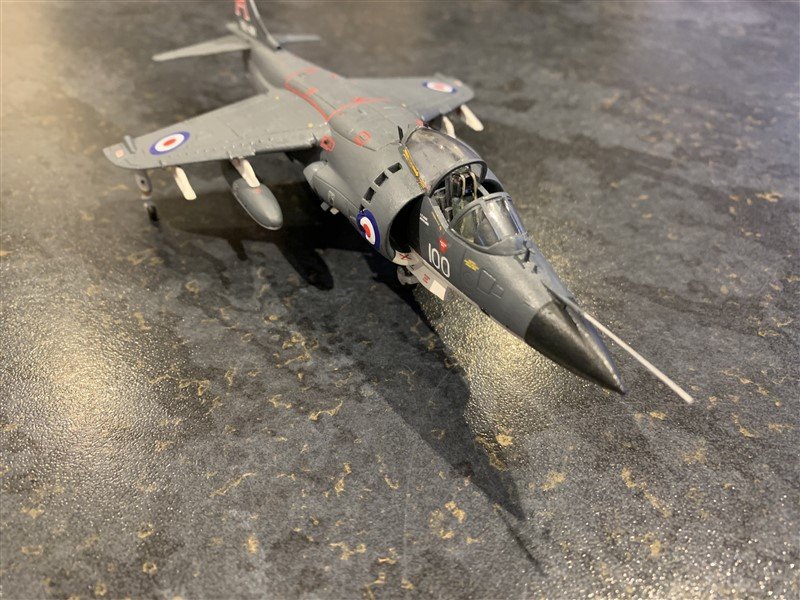
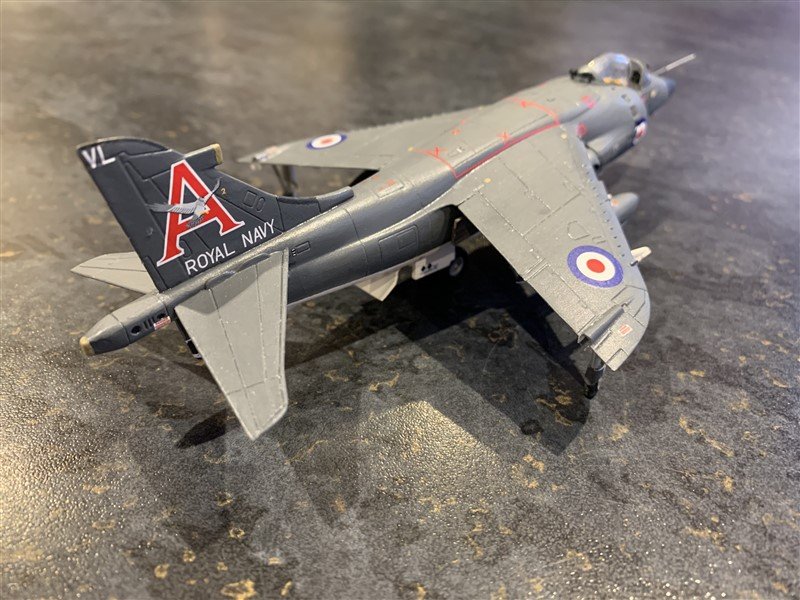
Sea Harrier FRS1 by AJohnson - FINISHED - Airfix - 1:72
AJohnson replied to AJohnson's topic in Non-ship/categorised builds
Yes it is an impressive kit (from a distance 😉). I built the Sea Harrier conversion years ago and had it until my young Son took it flying one day and it fell victim to his rough style of ”flying” around the house…. To mashup the well known journalistic quote from the Falkland’s war “I counted them all out, but unfortunately not all back.” 🤣 -
Sea Harrier FRS1 by AJohnson - FINISHED - Airfix - 1:72
AJohnson replied to AJohnson's topic in Non-ship/categorised builds
I do indeed need some AV8Bs Alan, the Harrier is a plane that invokes pride (it was an export success in the opposite direction than usual across the pond for a change!) and a bit of shame (for we no long operate it, when other nations still do 😏) F35B is now our mount, well it is when we launch it without the FOD covers on the air intakes! Doesn’t make for a good submersible! 🤣 -
Love the way this diorama is looking now, great attention to the details.
-
Sea Harrier FRS1 by AJohnson - FINISHED - Airfix - 1:72
AJohnson replied to AJohnson's topic in Non-ship/categorised builds
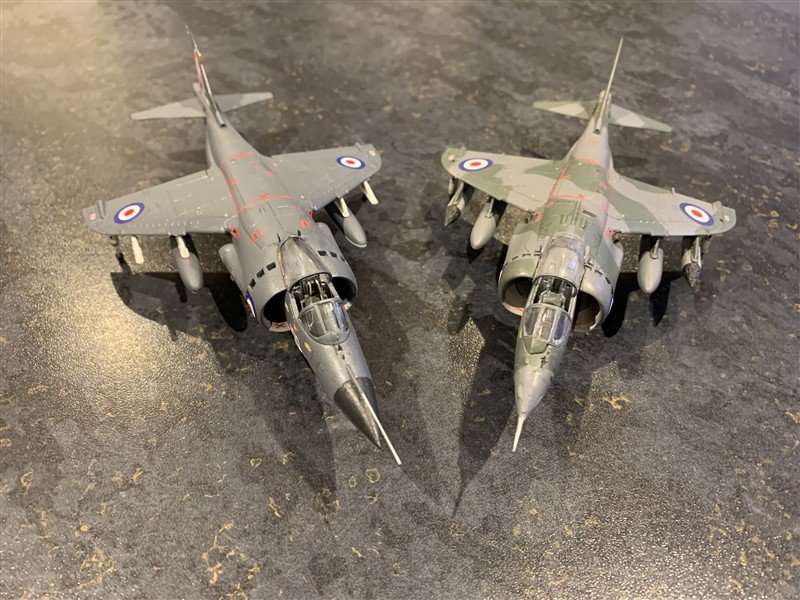
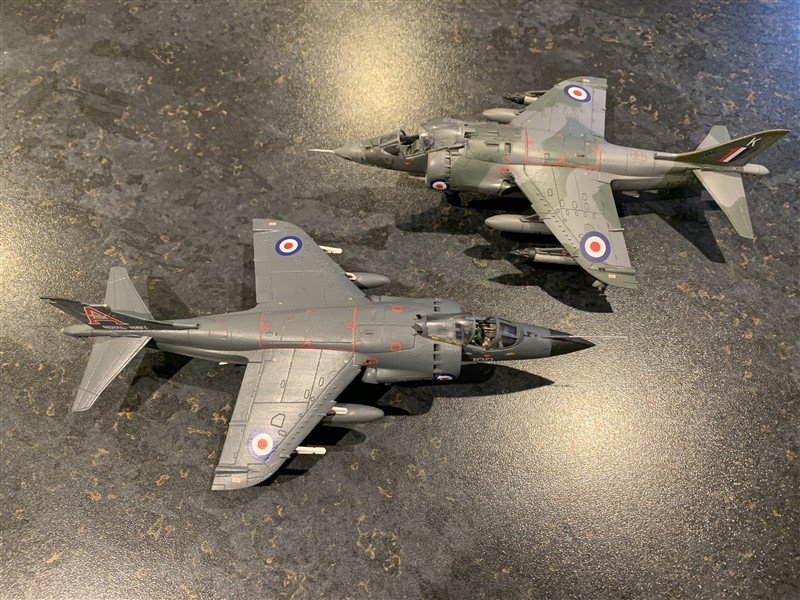
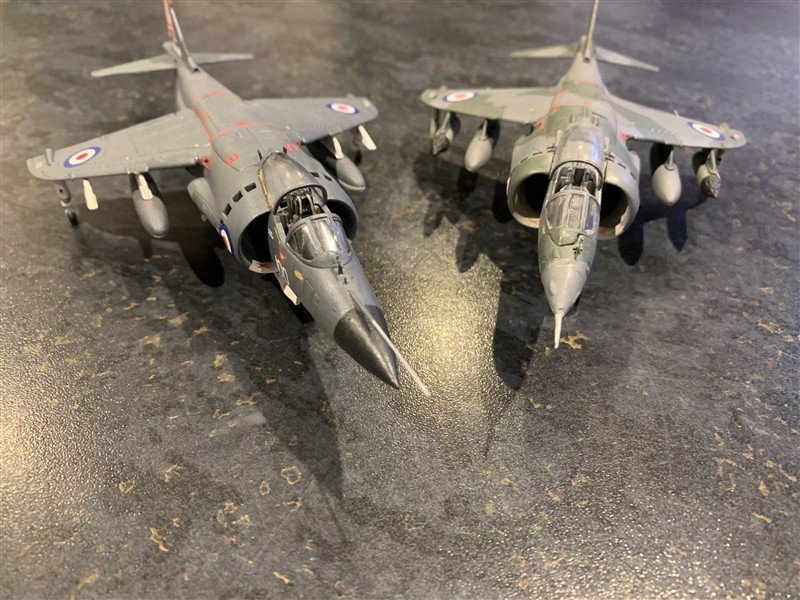
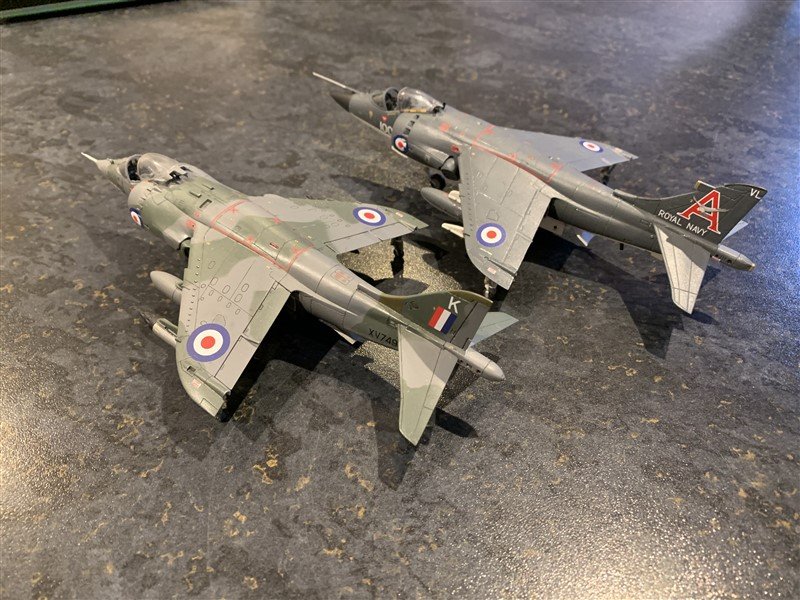
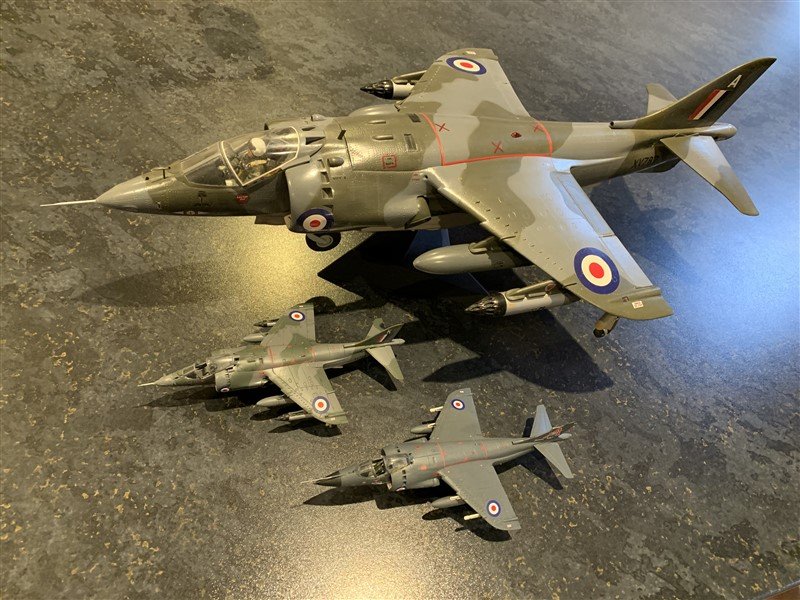
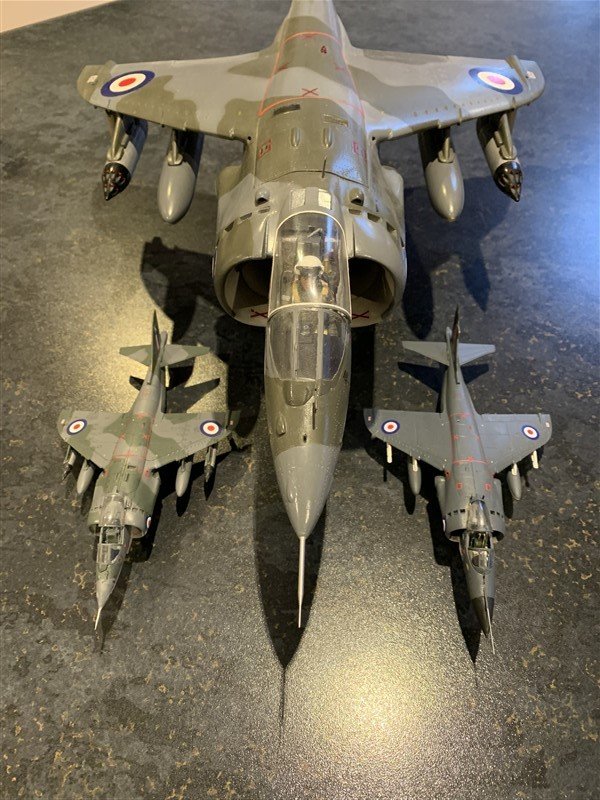
Final update, finished this little Sea Harrier off, not a great build, but it is now off the shelf! Thankyou all for following along and the comments and suggestions regarding primers and decal solutions etc. very helpful. Hope you are all having a good Christmas break; we have been indoors having caught Covid-19, first my mother in-law, then my daughter and now me have it; nothing too bad more like a bad cold or mild flu, but breathing becoming a bit laboured this last day or so. Final pictures include the Harrier GR.1a I built about four years ago (a much better kit.) alongside the Granddaddy 1/24, the venerable 1970's vintage Airfix for scale comparison! Now back to the boatyard for a bit to finish off my "Nisha" and Bounty" - but don't worry non-ship builders, I'll still be lurking around here, besides I have a 1/24 Typhoon (Car-door version) and 1/24 Spitfire IXc that are calling to me.... 😆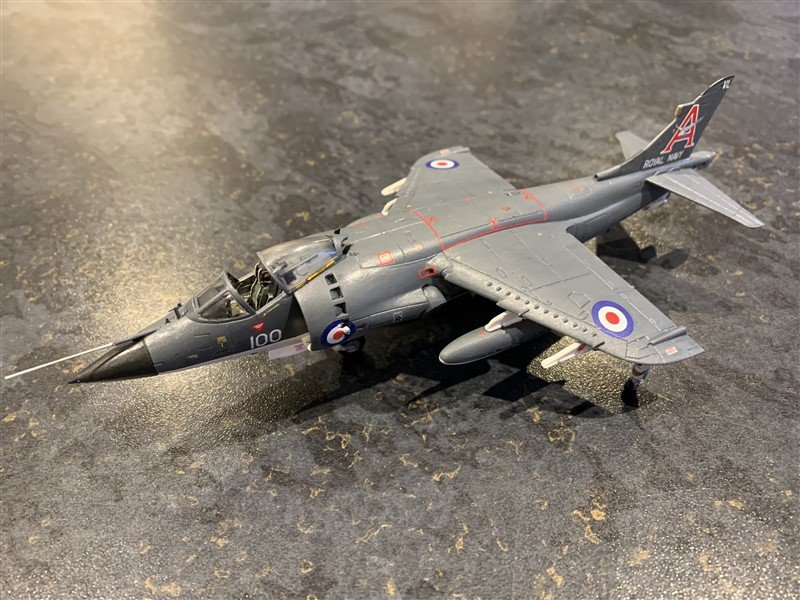
- 71 replies
-
- 18
-
-

-
Sorry about the end to your career and medical discharge. Hope you have things sorted for you going into 2023. Enjoy your new tools from the “Admiral”! 😉
-
Oooh, now if one thing can be forgiven for “accidentally on a purpose” being included in a delivery, then a Hawker Sea Fury would do it! 🤣 Blimey wish someone would do a big scale un! 😉
-
Fokker Dr1 by Javlin - FINISHED - Revell - 1/28 - PLASTIC
AJohnson replied to Javlin's topic in Non-ship/categorised builds
Very nicely done! 👏- 24 replies
-
- 10
-

-
-
Hi Dave, those multi-hand clamp thingies are very useful, don't know how I got on without one before! 🤦♂️ You are making fine progress once more. Hope you have a great Christmas and New Year!
-
Sea Harrier FRS1 by AJohnson - FINISHED - Airfix - 1:72
AJohnson replied to AJohnson's topic in Non-ship/categorised builds
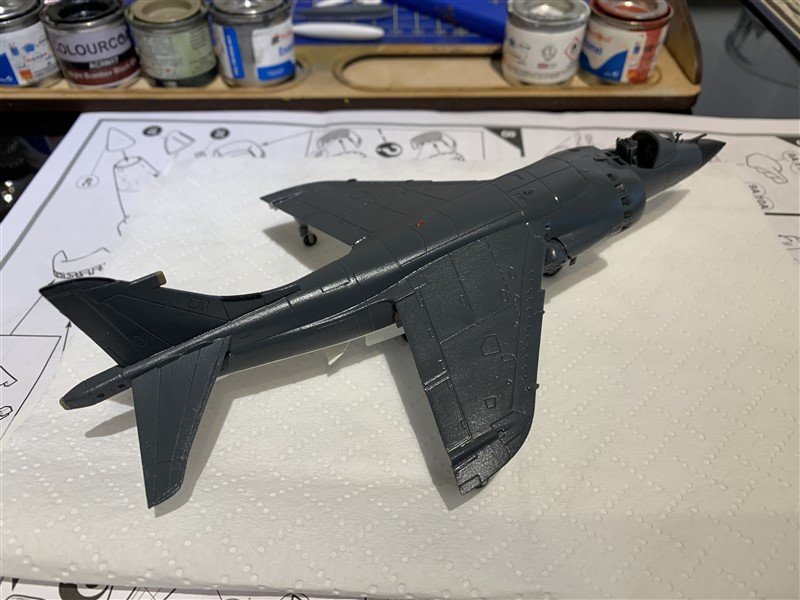
Hi Gang, It has been a little while since the last update, but RL. (nothing dramatic, just work, chores etc.) and a general lack of enthusiasm for this kit has slowed progress down recently. But I have pushed on as I have developed the knack over the years for not finishing projects and I'm in the mode of tidying up a few of these still! This kit is one of Airfix's poorest more recent moulds and has a fair few errors on it and general lack of detail; especially compared to their more recent 1/72 Harrier GR.1, a much better kit. So I have not really put my best efforts into this one, it may live on the top shelf when done. Anyway, grumble over - we are nearly ready for the decals 😁 Just need the gloss coat to cure. Next update will probably be the big reveal as not a lot left to do, just glue on the wing pylons, fuel tanks and canopy, plus the tiny pitot tube and aerials. I just would like to finish by saying "thank you" for all the likes and comments and I wish you all a Happy Christmas and very best wishes for 2023!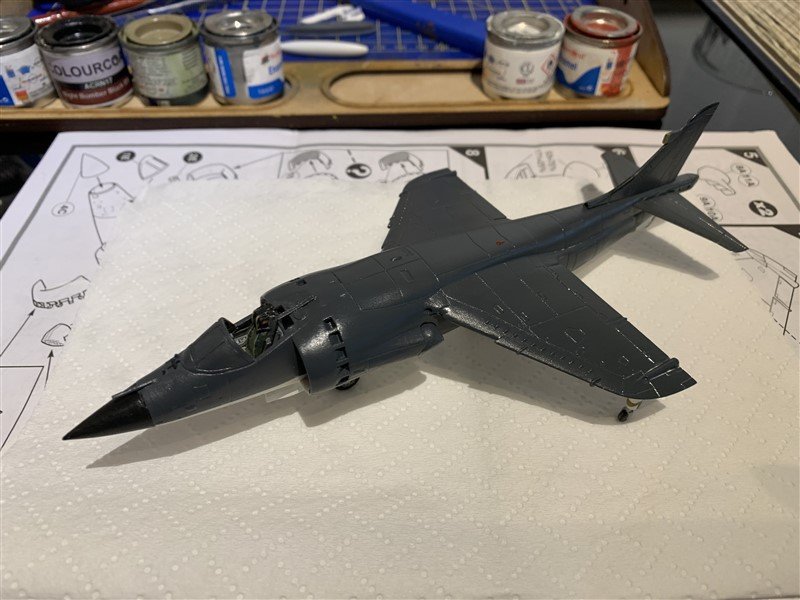
- 71 replies
-
- 12
-
-
Well the news over on the “Vanguard Models” thread has put this one to bed for me at least! 😃
-
And to you to OC, hope you have a good Christmas and New Year. 🎄
-
😆 - He certainly does!
-
Welcome to MSW Tim!
-
Looking real good Andy. Like the aftermarket wheels.
-
Welcome to MSW David!
-
Hi all, I did get a reply from John Wright today and he said the they still intend to release the Surprise kit, but other business priorities have take over and they are very short of production space. They hopefully fixing that in a few months, but no date for when they’ll then be starting on Surprise, so my guess is it won’t be 2023….