HOLIDAY DONATION DRIVE - SUPPORT MSW - DO YOUR PART TO KEEP THIS GREAT FORUM GOING! (Only 75 donations so far out of 49,000 members - C'mon guys!)
×


Thukydides
-
Posts
1,347 -
Joined
-
Last visited
Content Type
Profiles
Forums
Gallery
Events
Everything posted by Thukydides
-
 Thanks, I have not decided yet. When I first started this build I was aiming for a more realistic depiction and had planned to add sails. However, as things have progressed I have moved in a more stylistic, artistic direction and so I don’t think sails as I had originally planned would fit. So basically I am trying to decide between no sails or furled sails. I have seen some examples of furled sails that I think would fit with the current theme, but I am unsure if (1) it would look that much better than no sails and (2) if I could do a good enough job not to “spoil” the model. I think I am going to do some more research and make a decision at a later date, but at this point I am leaning towards no sails as my depiction is thematically trying to look like a contemporary model and very few of those had sails. That being said I am open to suggestions of models with a similar artistic style I could look at which did indeed use sails.
- 562 replies
-
- 1
-

-
- vanguard models
- alert
- (and 2 more)
-
@allanyed I have noticed that Lees at times makes reference to cutters as if they are different, but never clarifies if his general statements applied to them. One of the shortcomings of the Alert book is that Goodwin rarely clarifies (particularly in the drawings section) why he is arranging things the way he is. Another great example of this is our previous discussion on the rigging of the cannons. So it is hard to tell if he is just making an assumption or if he read some tibit at some point which indicated that Cutters had their shrouds rigged in this fassion.
- 562 replies
-
- 1
-
-
- vanguard models
- alert
- (and 2 more)
-
That is looking really good. You are making great progress.
-
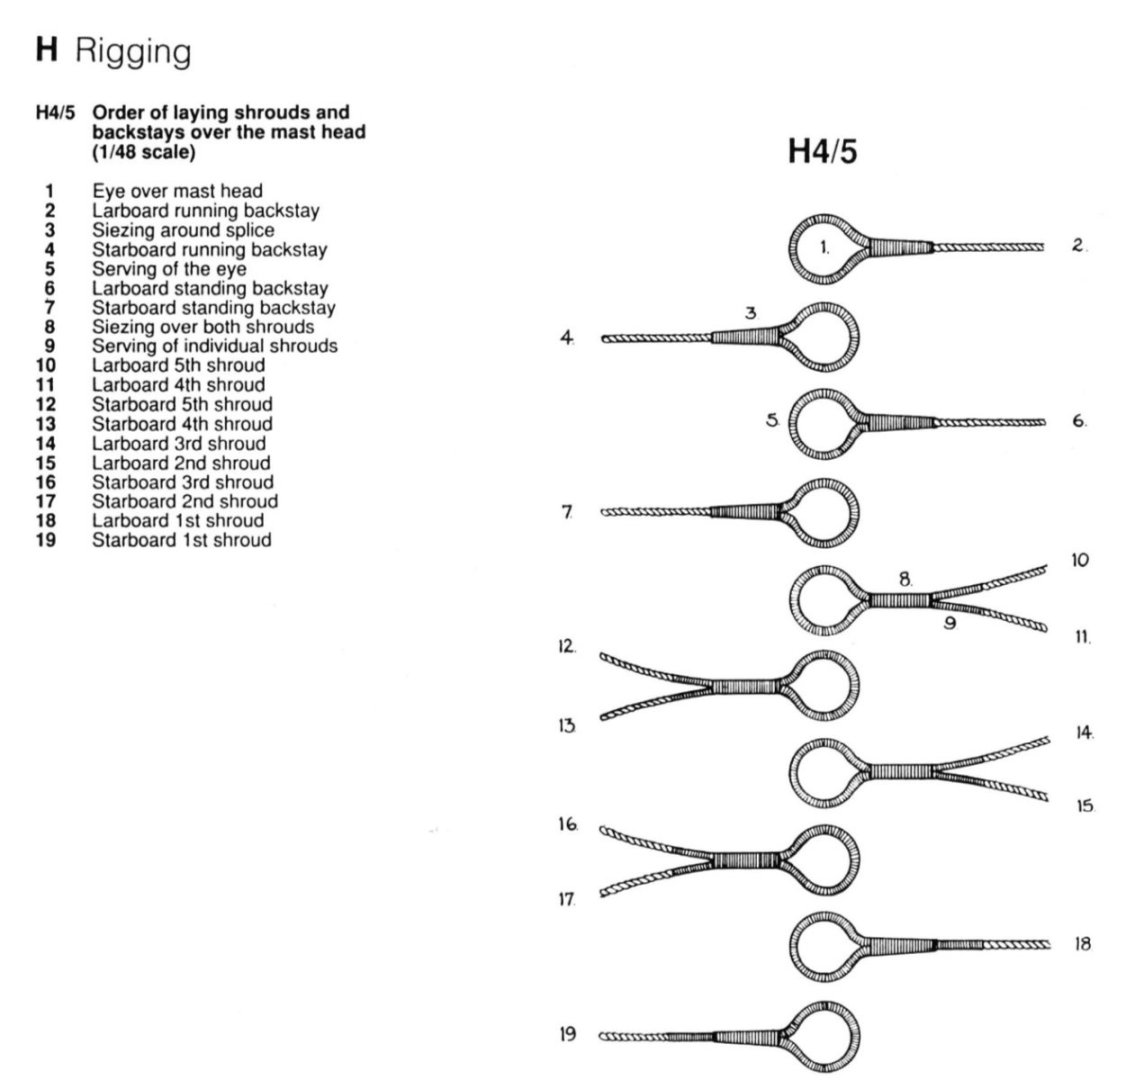
Thanks coming from such an accomplished builder that is a real compliment :). For the shrouds I relied primarily on the Goodwin Alert book. In it he arranges them as follows: What makes it complicated is in other parts of the book he refers to the 5th shroud (#s 12 and 10) as the standing backstay. Here he refers to 6 and 7 as the standing backstays and then also has single eye splices for the running backstays as well. I ultimately have decided to dispense with the extra standing backstays and will just be rigging a running backstay. So I will have 4 shrouds and 1 standing backstay and 1 running backstay. Since the running backstay has to be an individual eye splice (due to the angle), I thought going with the Goodwin arrangement of having the first shrouds be done individually since they are seized all the way down made the most sense. In general for better or for worse as this is my first build I have relied heavily on Goodwin. If I was doing the whole thing over again I might question this a bit more.
- 562 replies
-
- 4
-
-
- vanguard models
- alert
- (and 2 more)
-
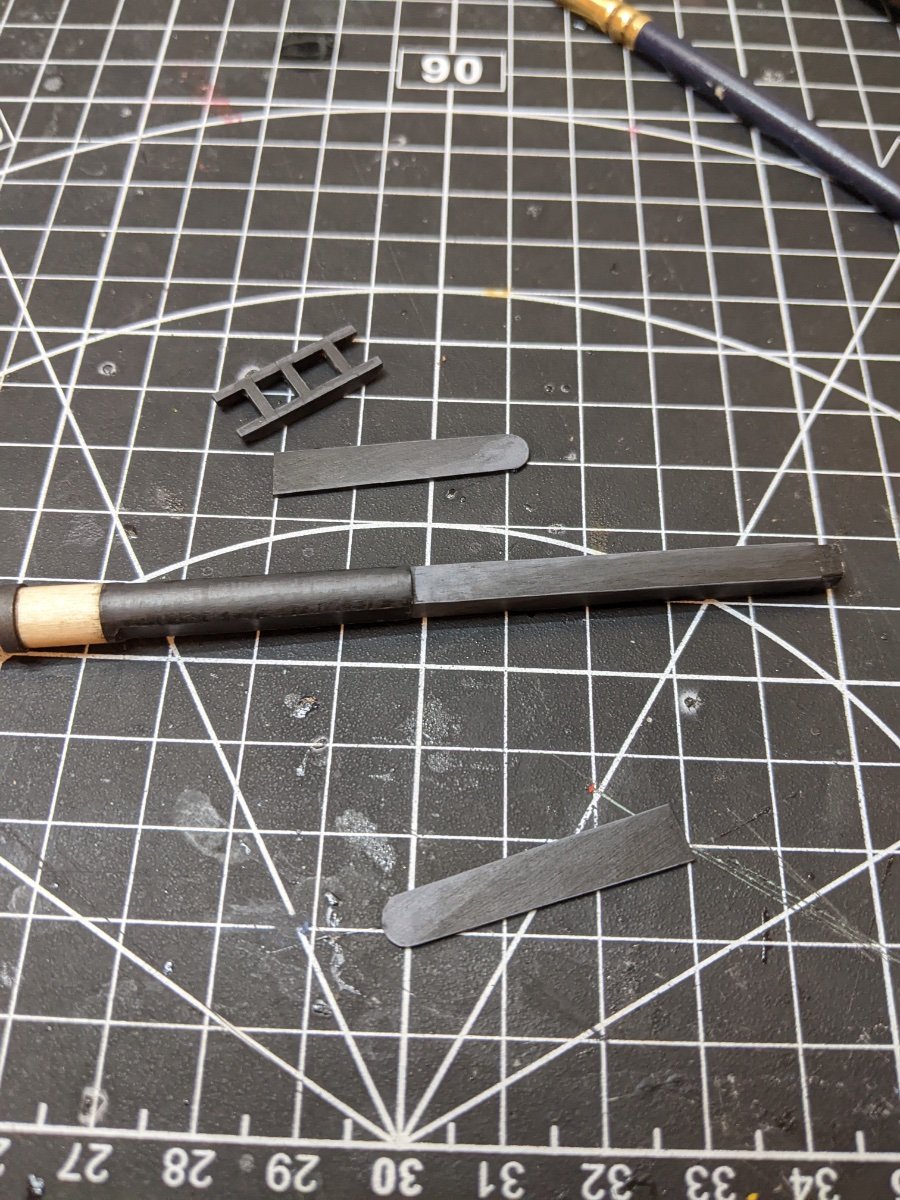
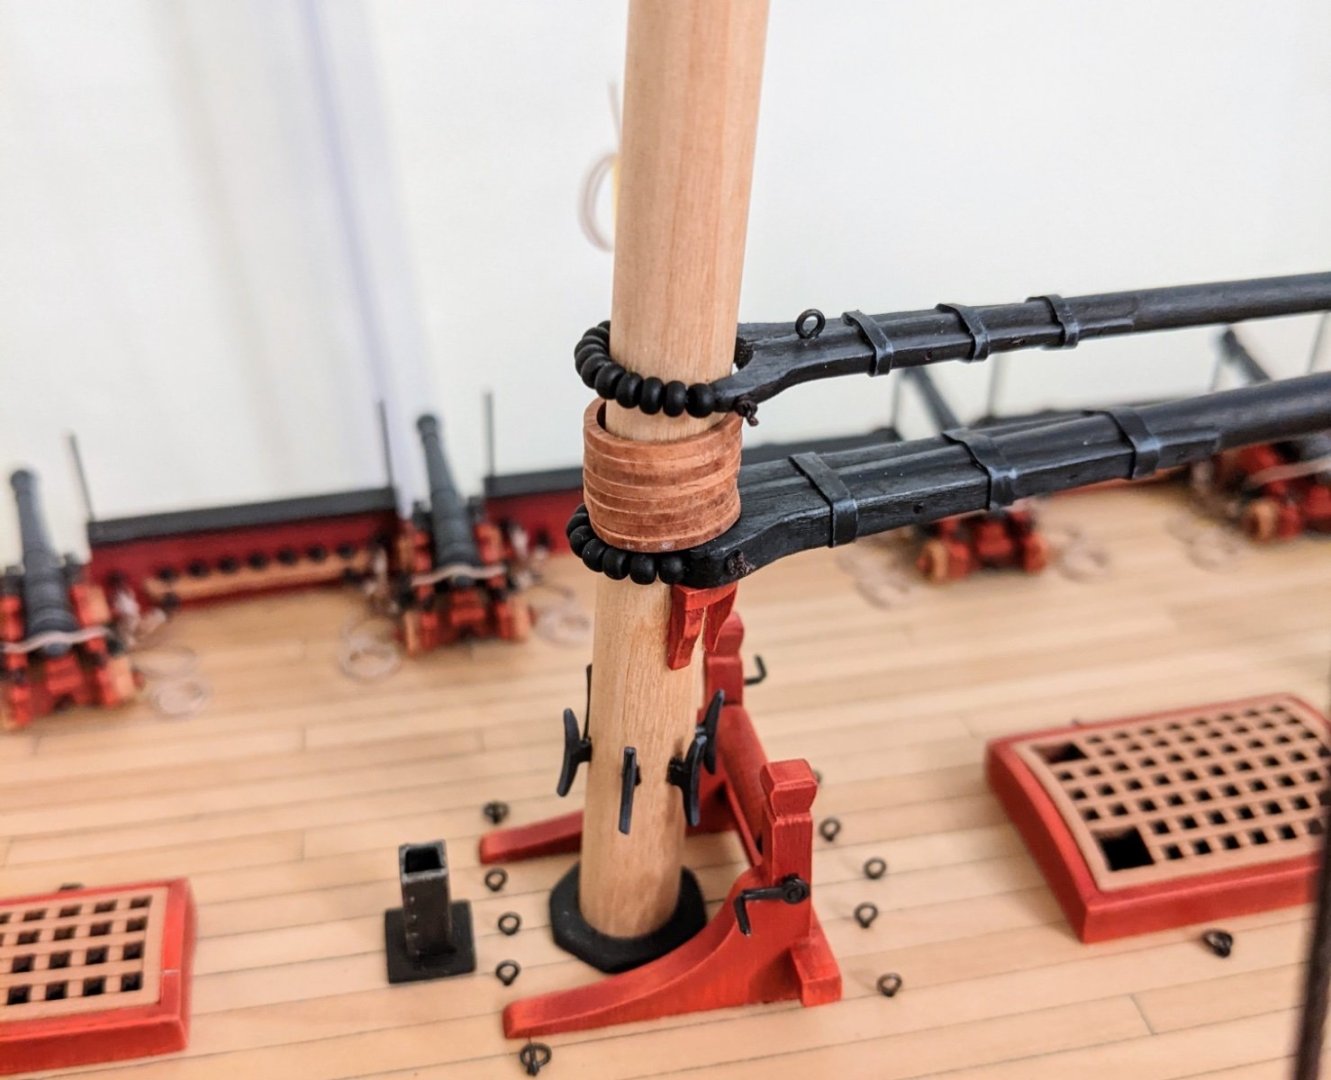
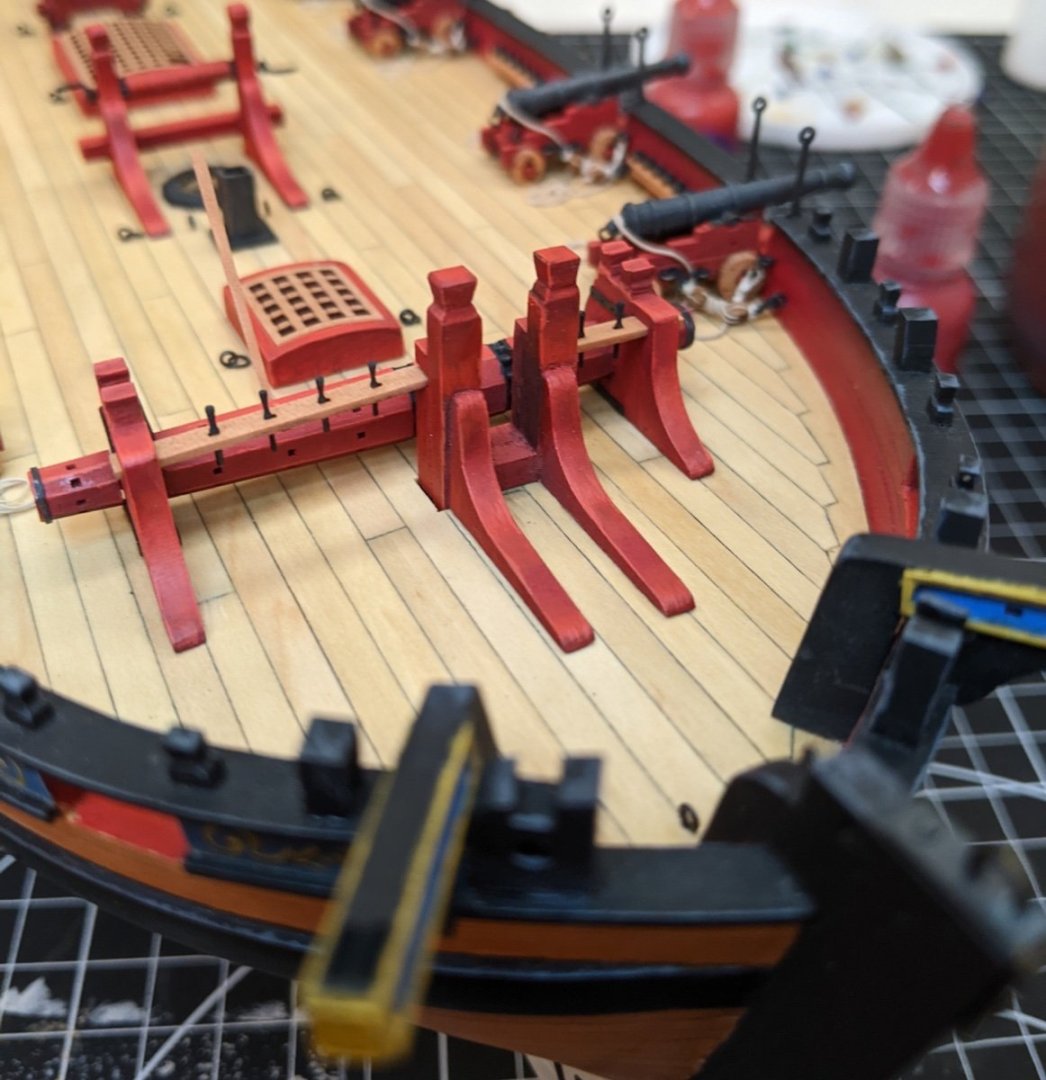
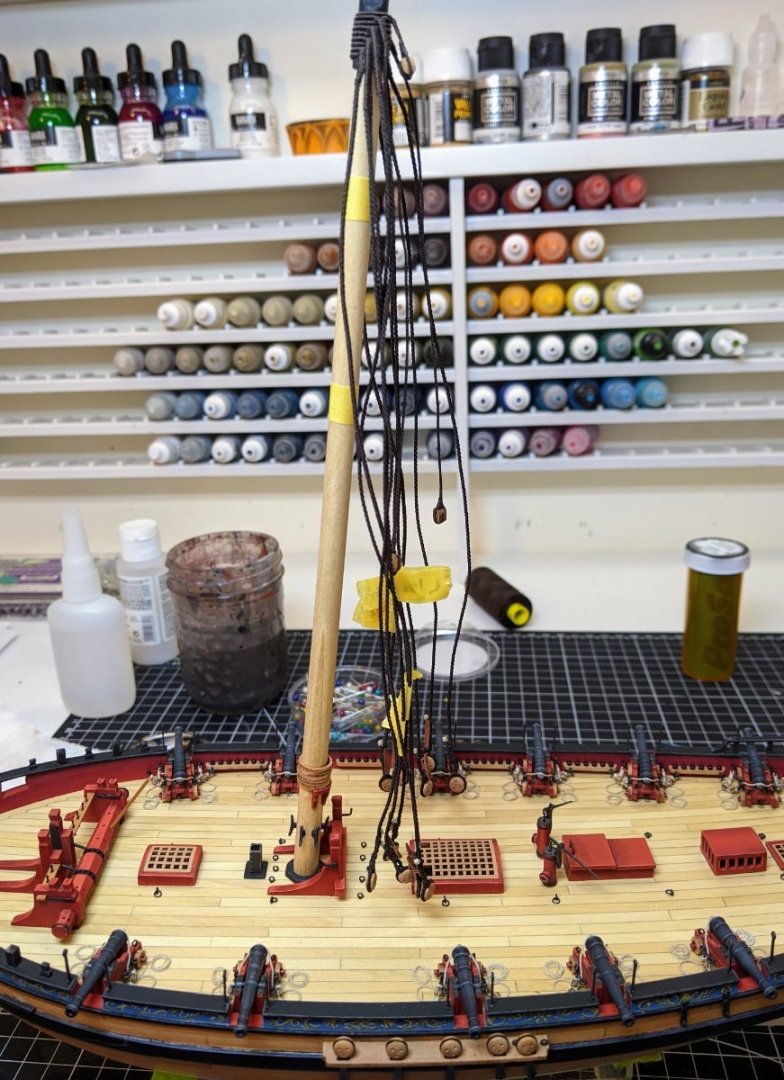
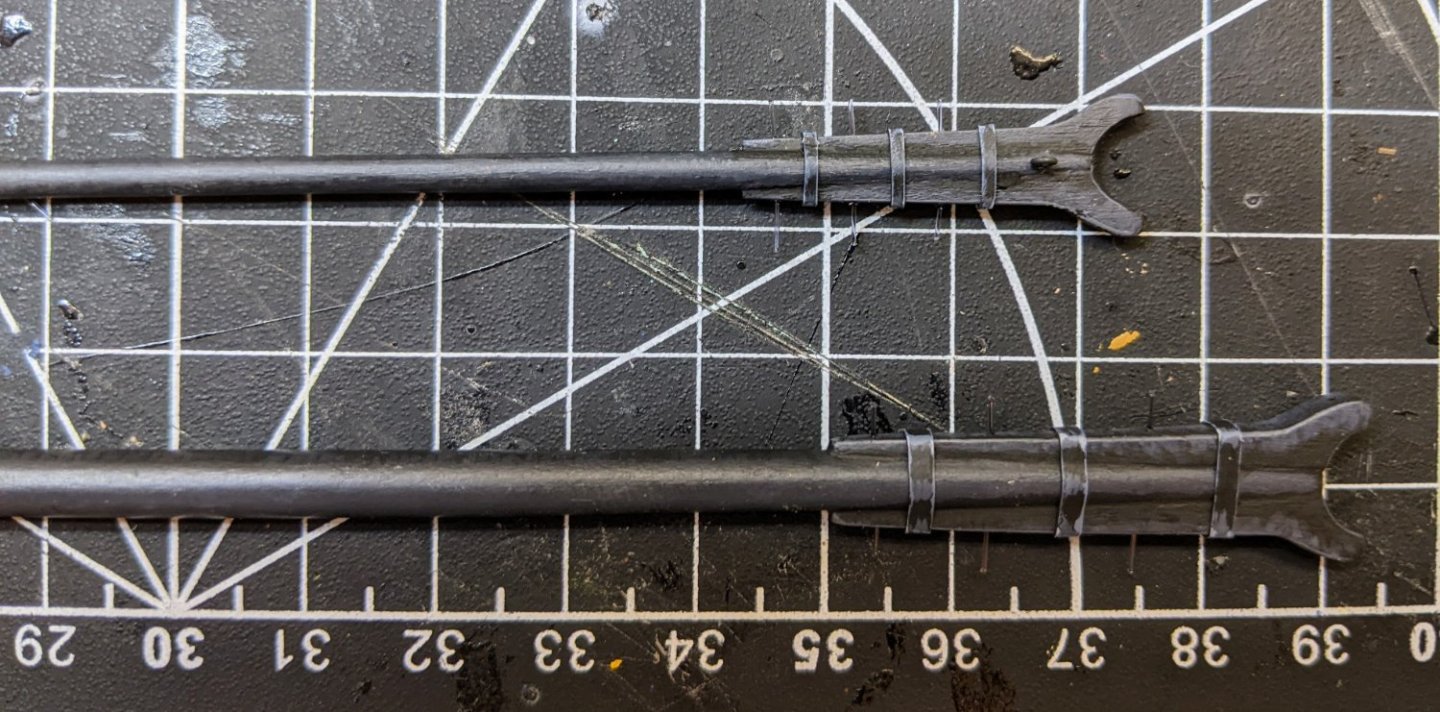
Log #59: Finishing the Mainmast As noted in log #57 I have been working on finishing up the shrouds in preparation for attaching them to the model. The final thing that needed to be done before I could begin putting everything in place was to finish the Mainmast. First up was to attach the boom and the gaff. The kit provided parell beads seemed a bit small for my upsized boom jaws so I ordered some matt black beads form amazon. In theory they were meant to be all the same size, but in practice they came in a fairly wide variety of sizes. Using my calipers I measured and categorized them using the smallest fore the gaff and the largest for the boom. Then I removed the mast from the model for the last time to finish the painting. This could be done on model, but it is much easier when you are able to move it around to get the best angle. The process was similar to previous painting explanations. I will note that it is important to make sure all of the highlights are consistent and any reflection points match all over the model. So for example I made sure the reflection points on the round part matched those on the pumps. With that all done it was time to attach the first of the shrouds. These are only loosely in place for the moment with just enough tension to hold the lines straight so they start to get used to the position they will be in. I will be going through and retensioning everything once all the stays and shrouds for the lower mast are in place. I have not previously shown this, but I did size the cleats to the shrouds before fastening the shrouds to the ship. The two first shrouds are now done and I will be sequentially adding the remaining ones.


- 562 replies
-
- 10
-
-

-
- vanguard models
- alert
- (and 2 more)
-
That is really interesting, great find
-
Thank you very much. It is always nice to hear that people have found the log helpful.
- 562 replies
-
- 3
-
-
- vanguard models
- alert
- (and 2 more)
-
Thanks @mugje and @jpalmer1970 and everyone else for all the likes and encouragement. I am still plugging away on the lower mast and hopefully will have more to show soon. In the meantime see below for a preview of coming attractions.

- 562 replies
-
- 8
-
-
- vanguard models
- alert
- (and 2 more)
-
What is the brand and how do you like it? Is it very precise? Like you I have limited hobby space and so no room for a large tool shop so I am always interested in smaller versions of these tools.
- 122 replies
-
- 1
-
-
- Artesania Latina
- Pen Duick
- (and 1 more)
-
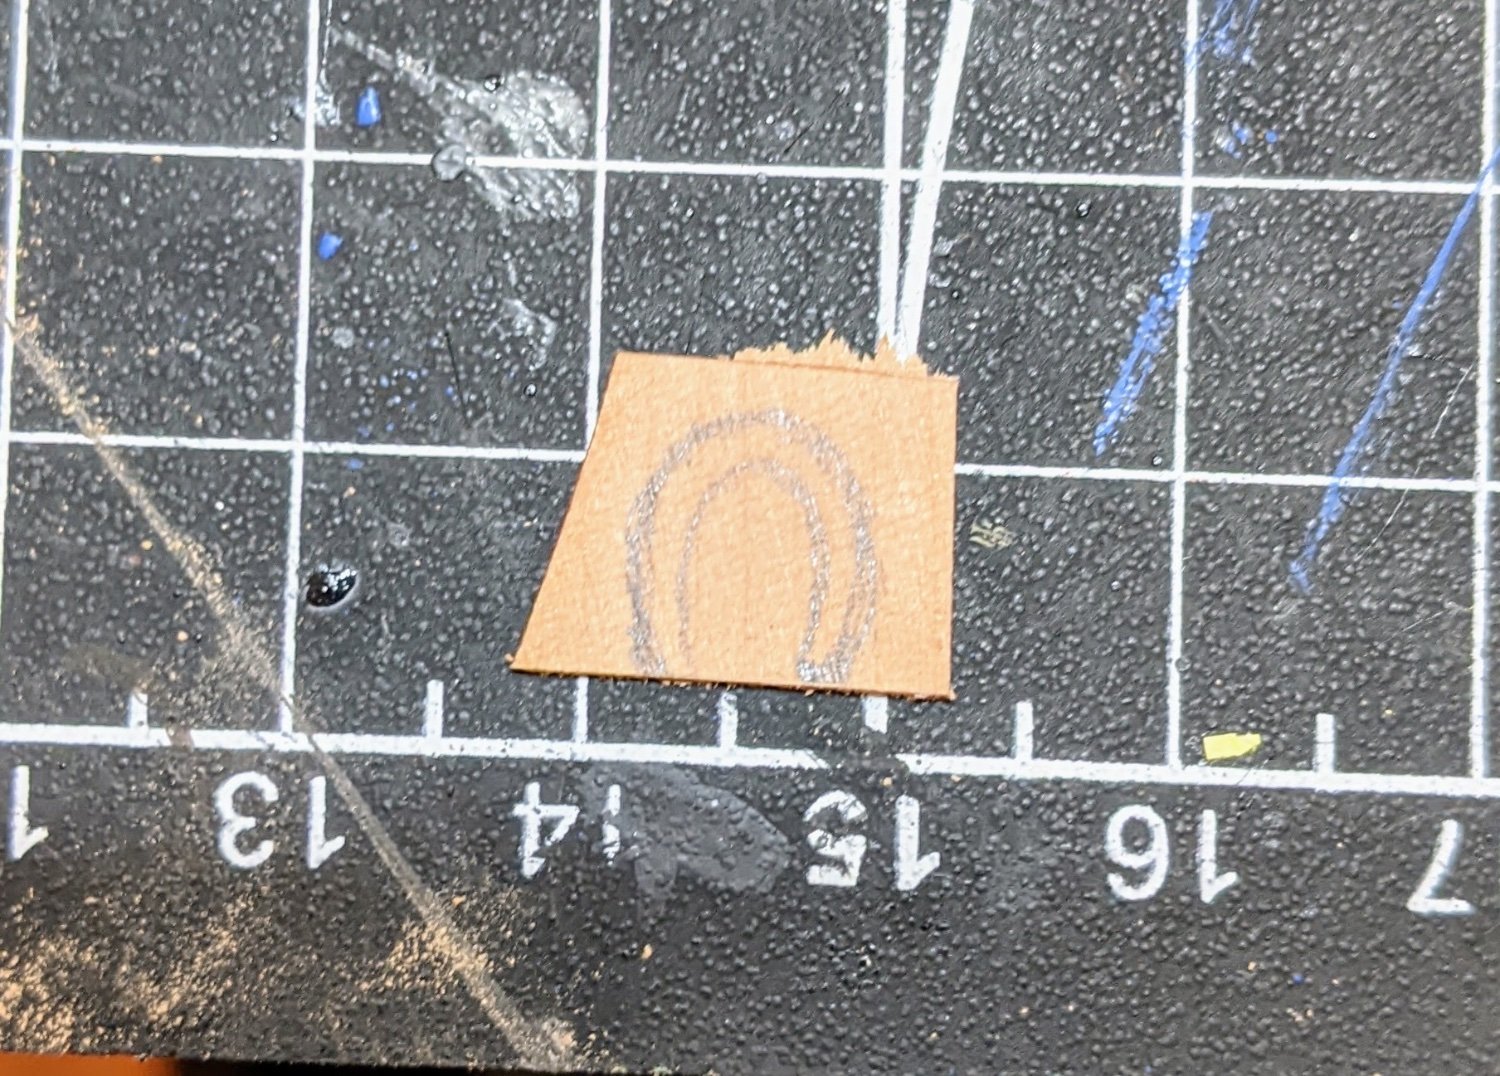
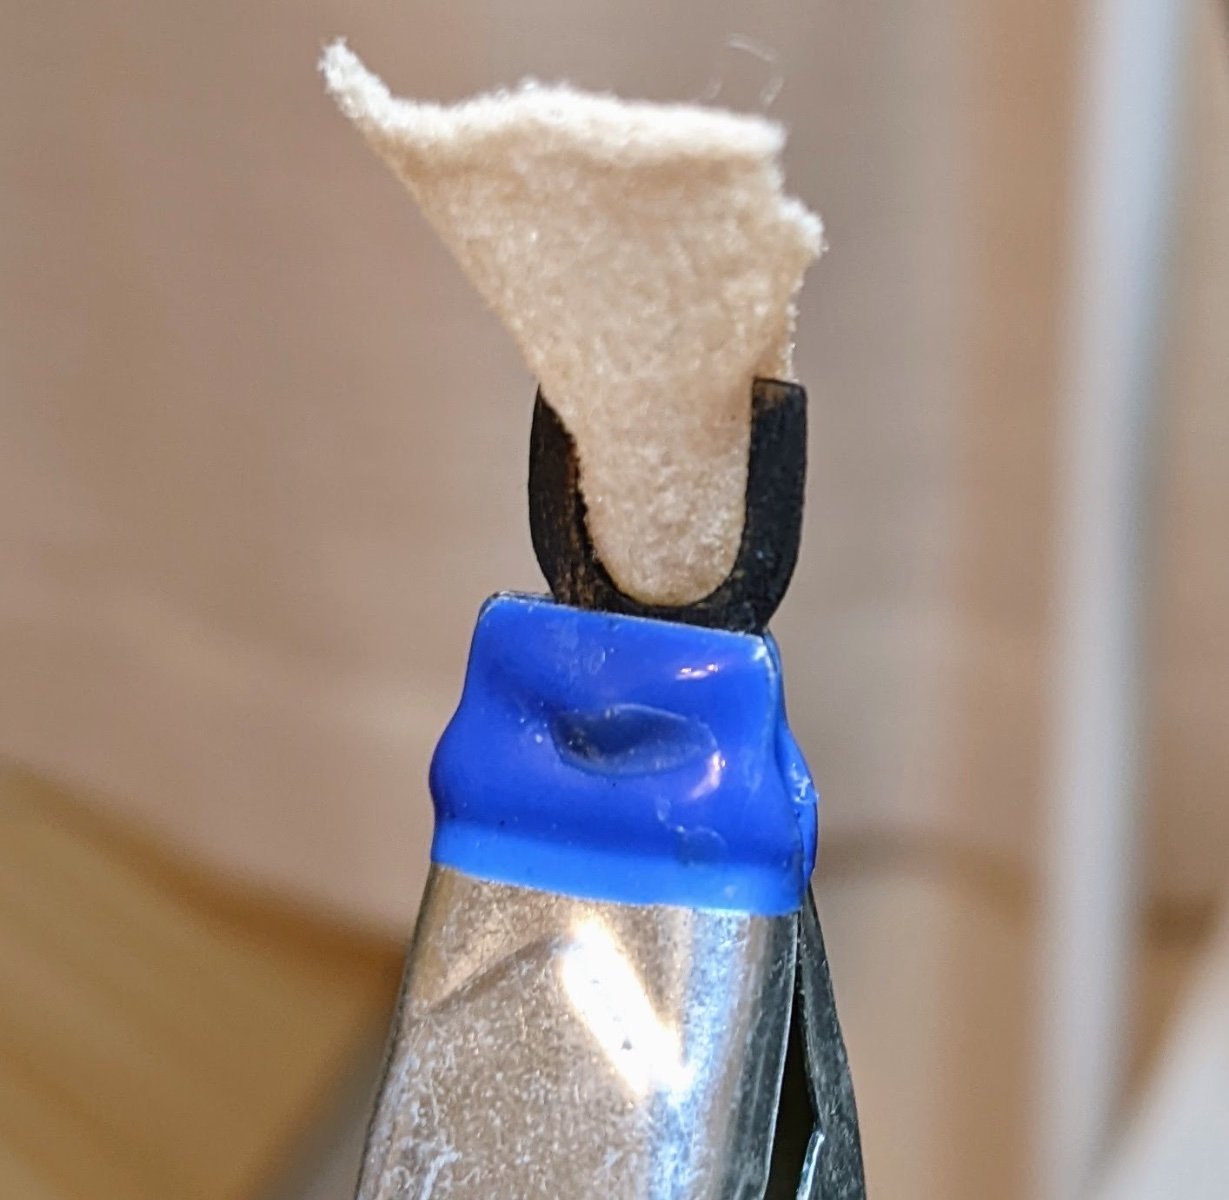
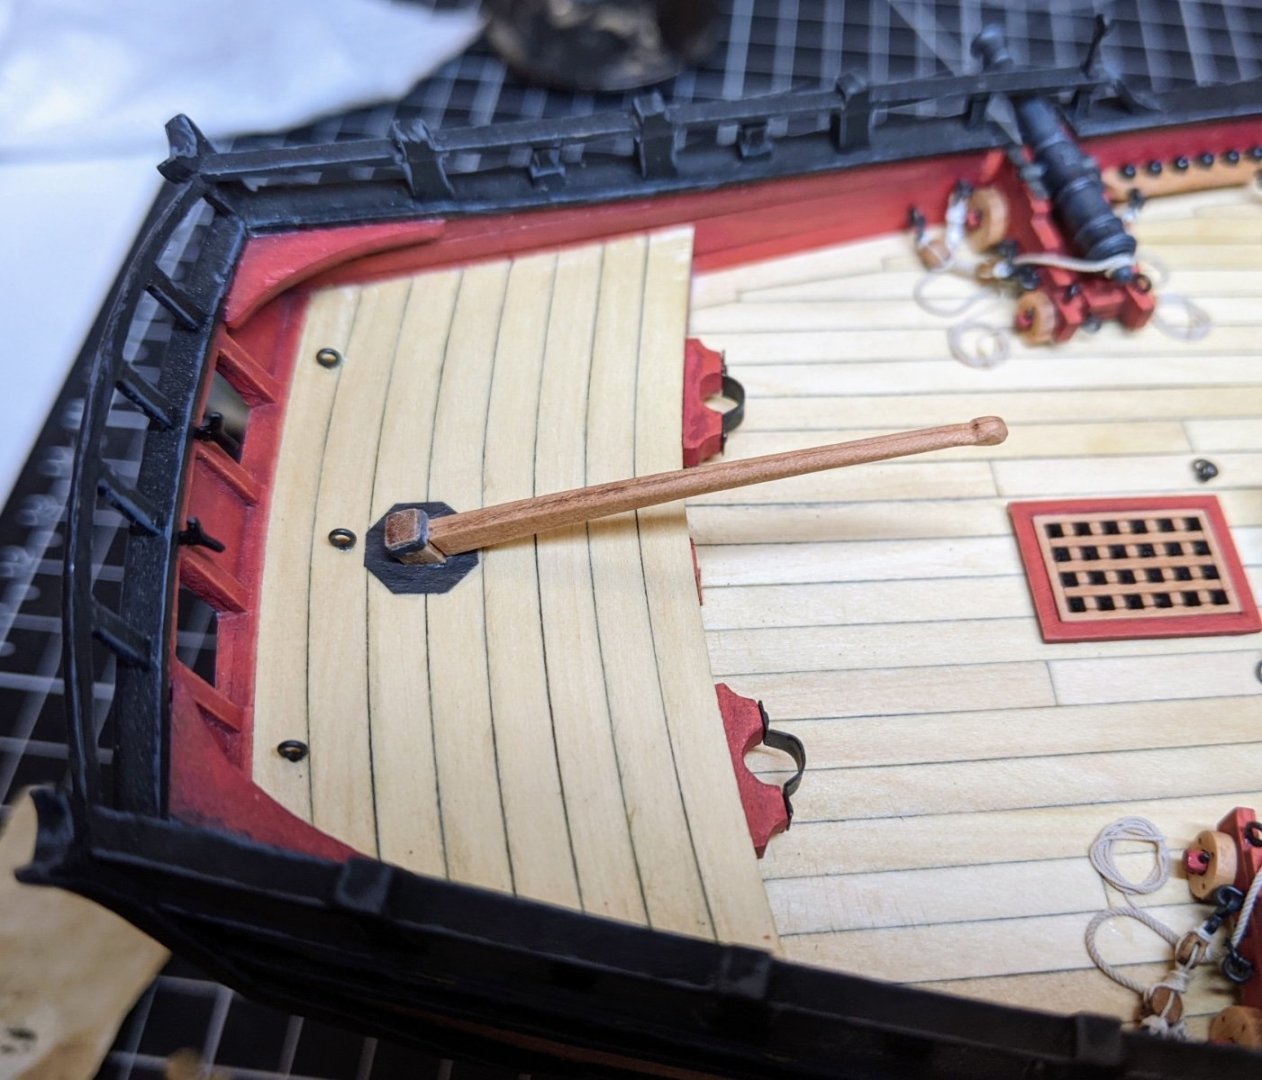
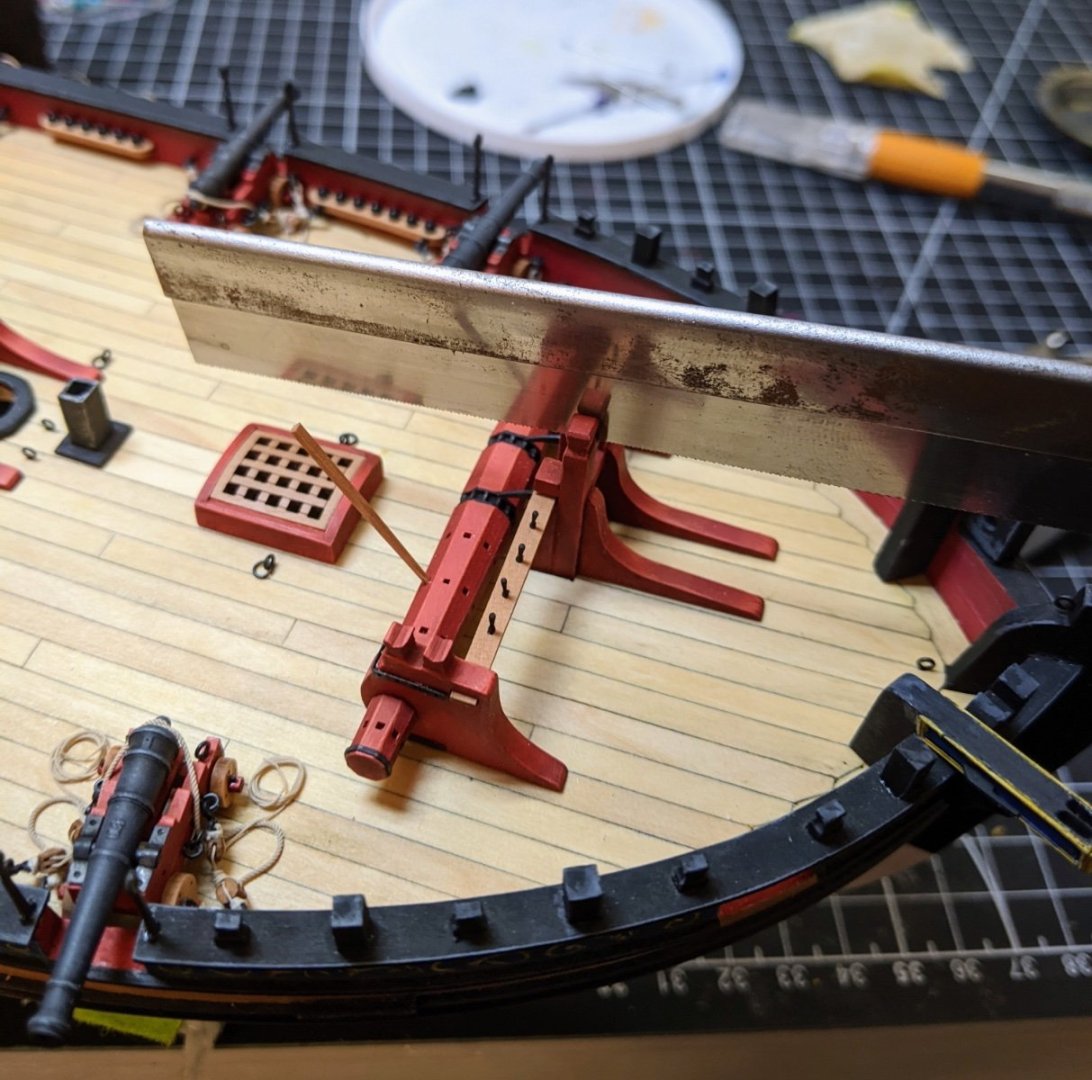
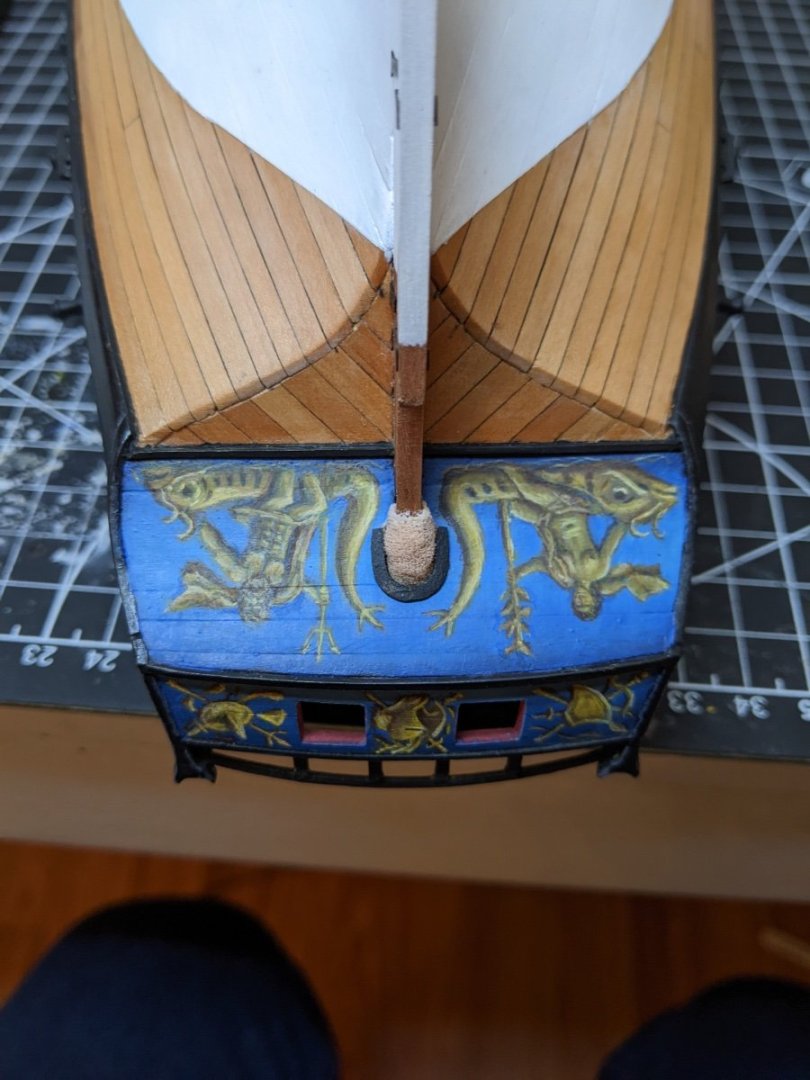
Log #58: Revisiting the Rudder and the Windlass I seem to have a bad habit of deciding not to do something and then some time later, when it is much harder to accomplish the task, decide I want to do it after all. Inspired by @dunnock’s excellent job with the rudder cover, the more I looked at Alert the more the omission bothered me. And so I found myself attempting to install a cover on the tiller and the rudder. I sketched out the rough shape for the horseshoe on an off cut of 1mm pear and then carefully cut it out and sanded it till it was approximately 0.5mm thick. I then attached a bit of the same material I previously used for the mouses (a bowling alley sock similar to tights). This ultimately proved to have too pronounced a weave which I had to correct for later with many layers of varnish and paint. I then glued it to the lower counter and folded over the excess to tuck inside to give it bulk. This ended up not being quite enough and so I slipped an extra bit into it as well. I then glued it in place with wood glue and manipulated it to get the appropriate shape. Then came many layers of paint and varnish to give it a sort of tarred look. I also painted the horseshoe with a bit of a metalic look to give the impression of metal. This is a similar process to how I have previously described, just for metal you make your transitions much more dramatic and the reflection points more pronounced. The only thing on this I will note is when painting reflections it is important to make sure they all line up and so the reflection points match where the highlights on the counter background are. I also made a quick tiller cover using the same tissue paper I used for the rope ends. This time I just painted it the mix of black and dark brown that I used for the mouse to give it the impression of being tarred. I have long been looking at the windlass as the kit arrangement (though much easier) does not look quite as nice as the Iron bars laid out in the Goodwin drawings. So after looking at it for a while I decided to attempt to modify it. This involved very careful sawing and then sanding and painting the area. The painting did not take long and most of this area will be covered up and not be visible once the bowsprit is in. I mostly painted it a darker red to accentuate the shadow the area will be in. I do think the effect of these two changes really adds to the look and I am pleased I went back. Also I am pleased that nothing broke of fell off when I flipped it over :).


- 562 replies
-
- 18
-
-
-
- vanguard models
- alert
- (and 2 more)
-
Very clean work. I am always impressed by the care you take with your work to get it just right.
- 840 replies
-
- 3
-
-
- winchelsea
- Syren Ship Model Company
- (and 1 more)
-
It's looking great, that is some very fiddly work. I am not sure how you do it at that scale. I have enough trouble with blocks on a 1/64 model 😄.
-
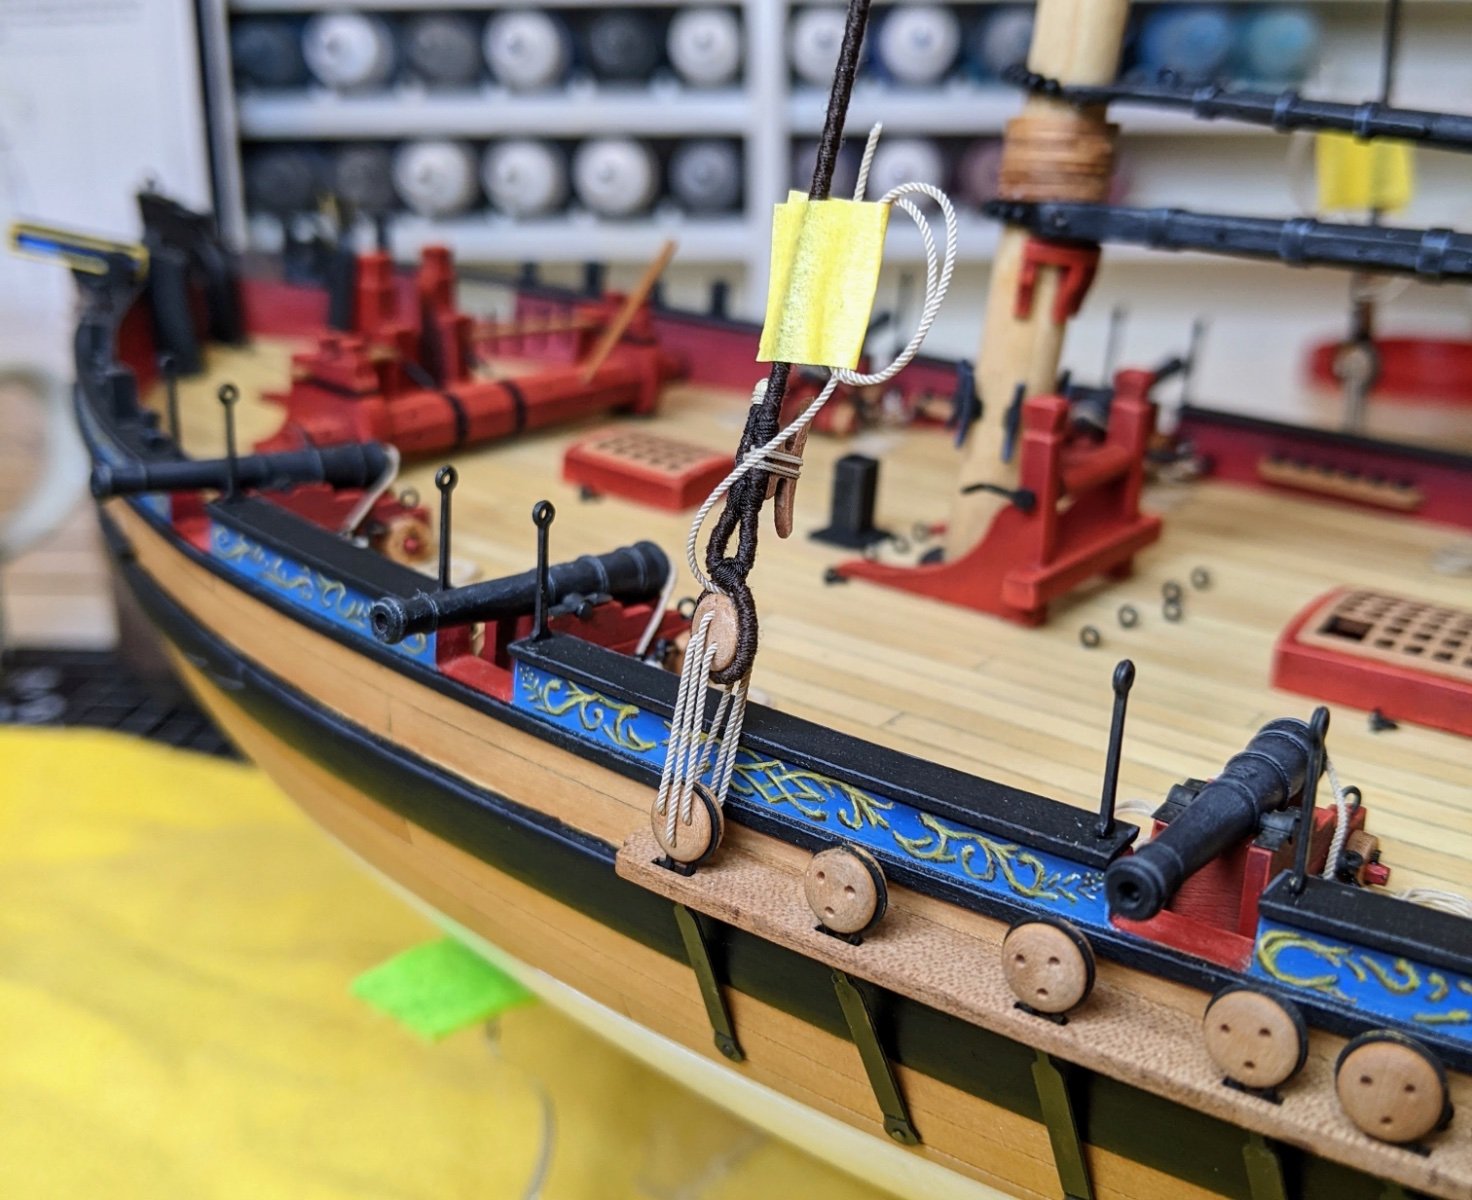
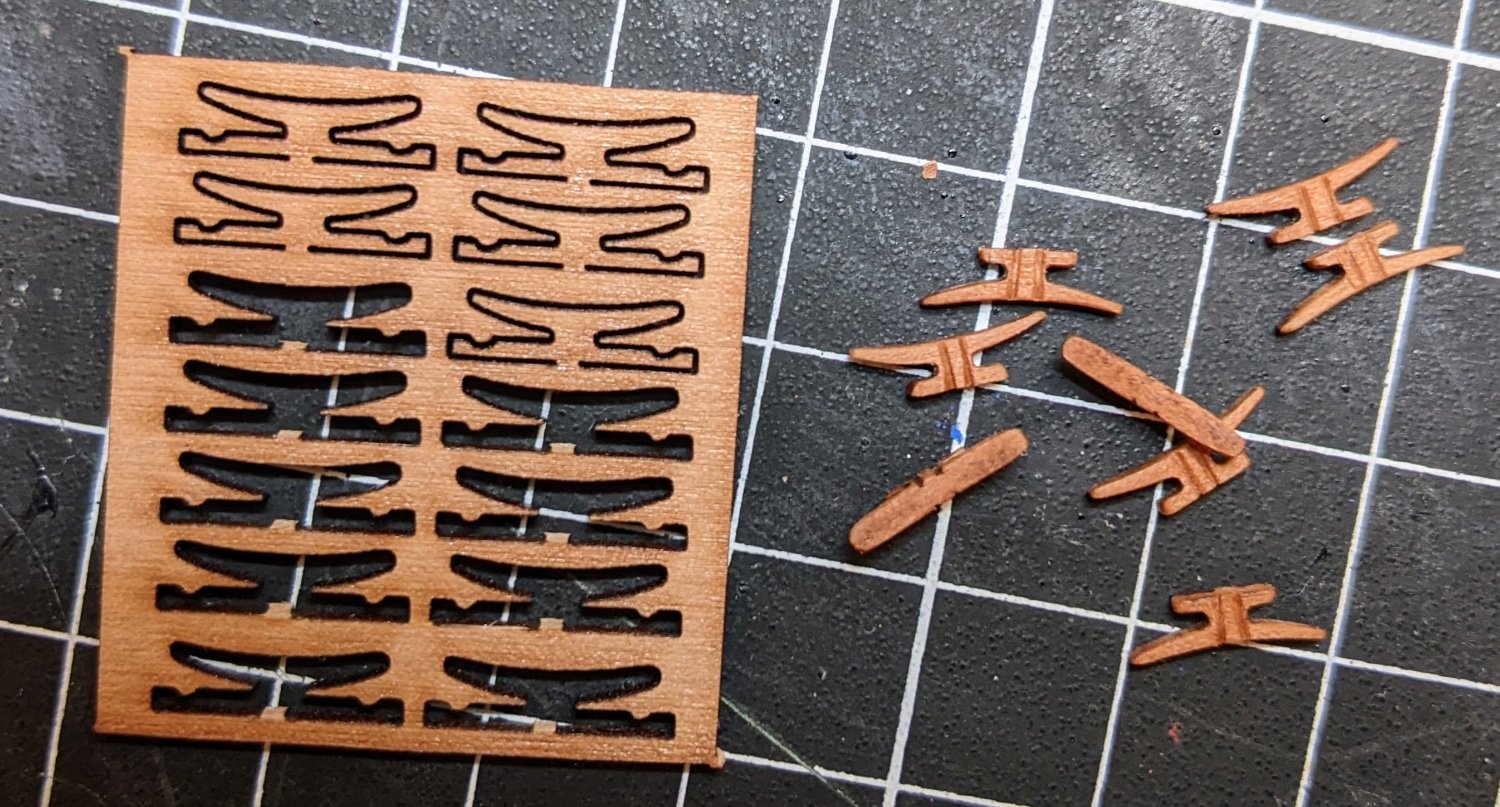
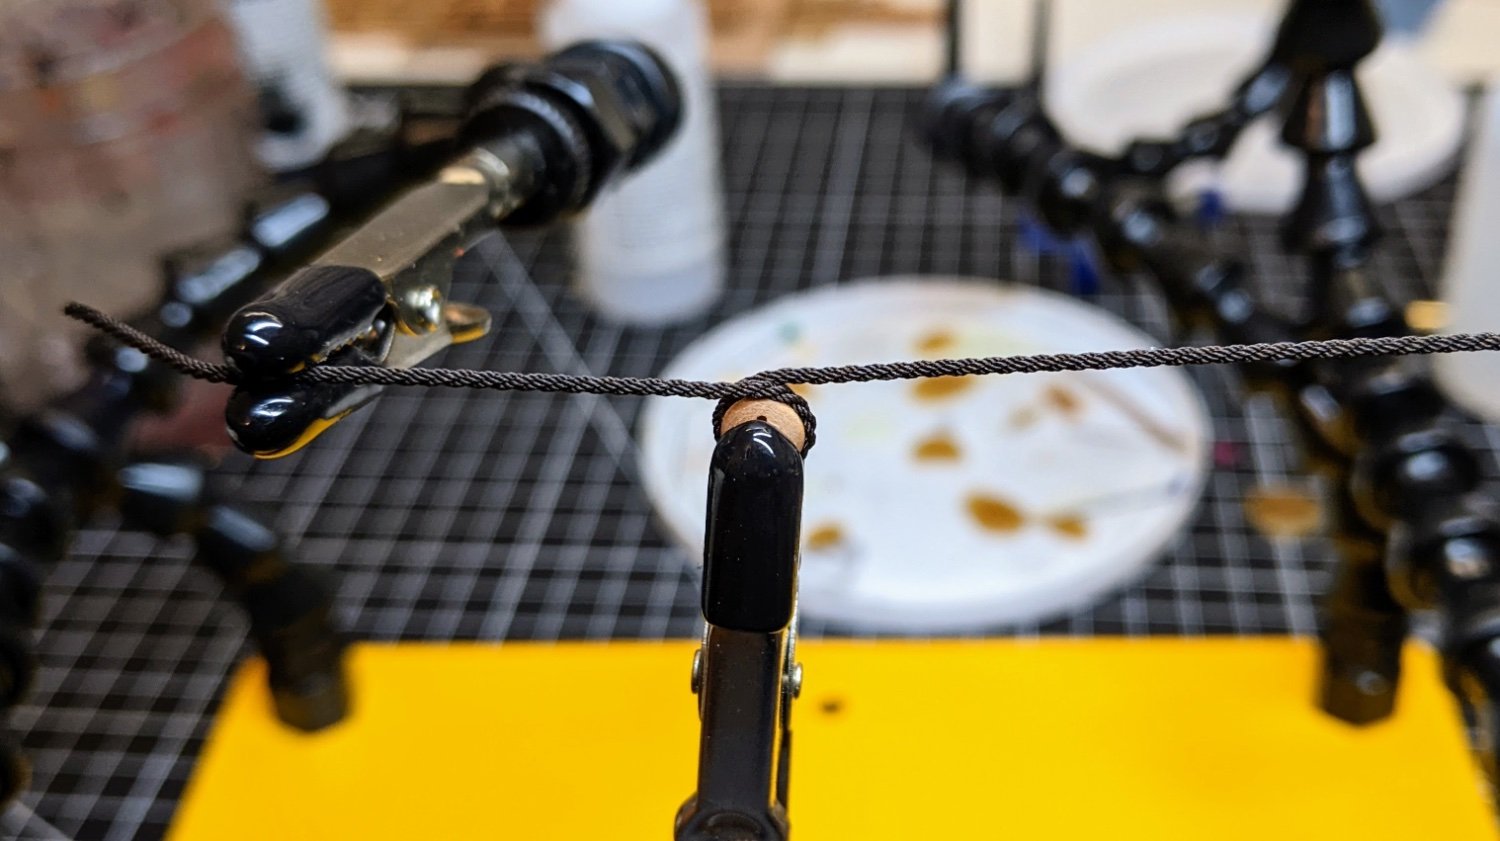
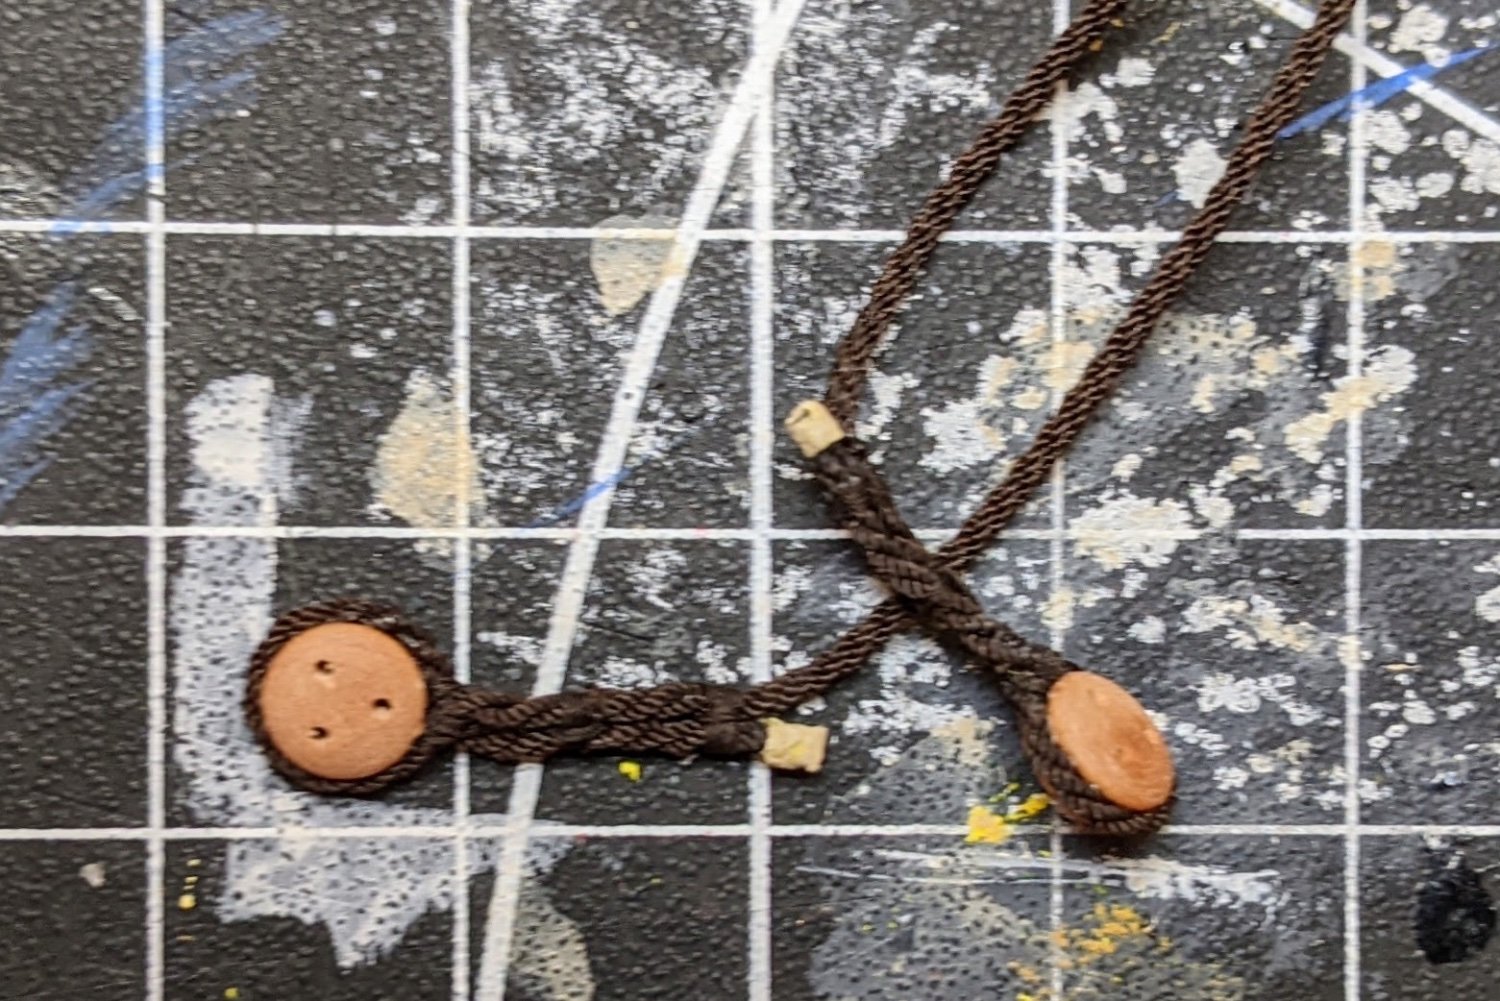
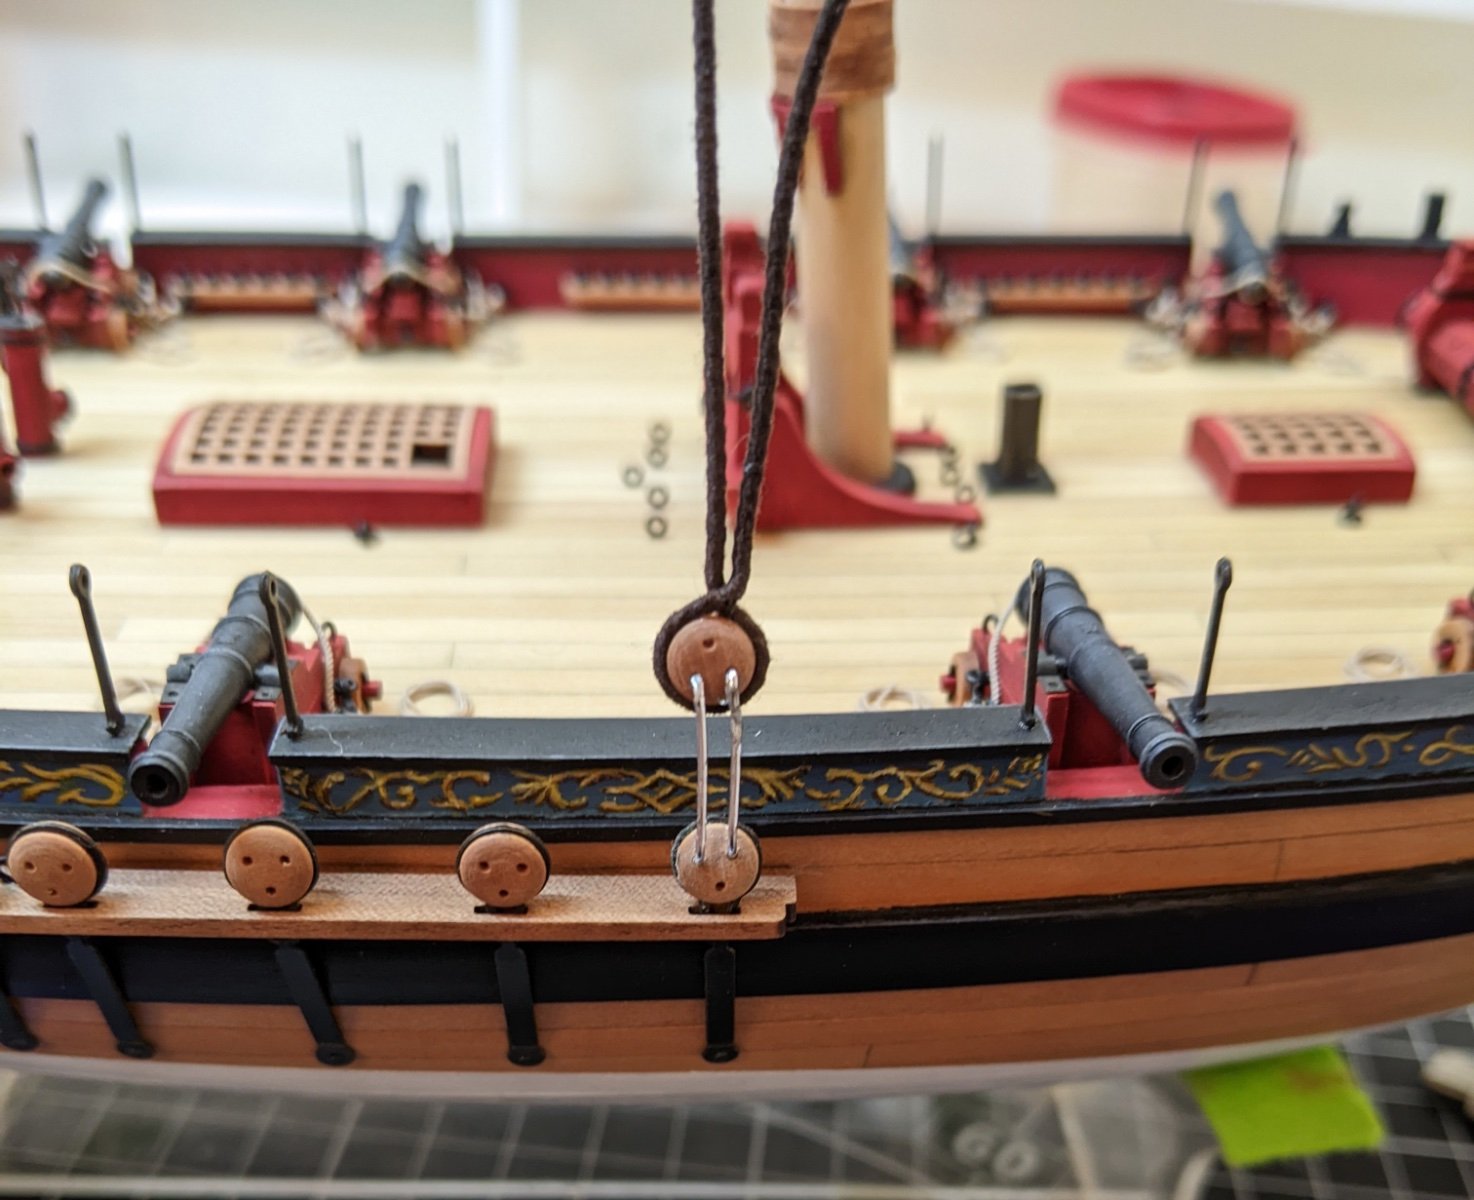
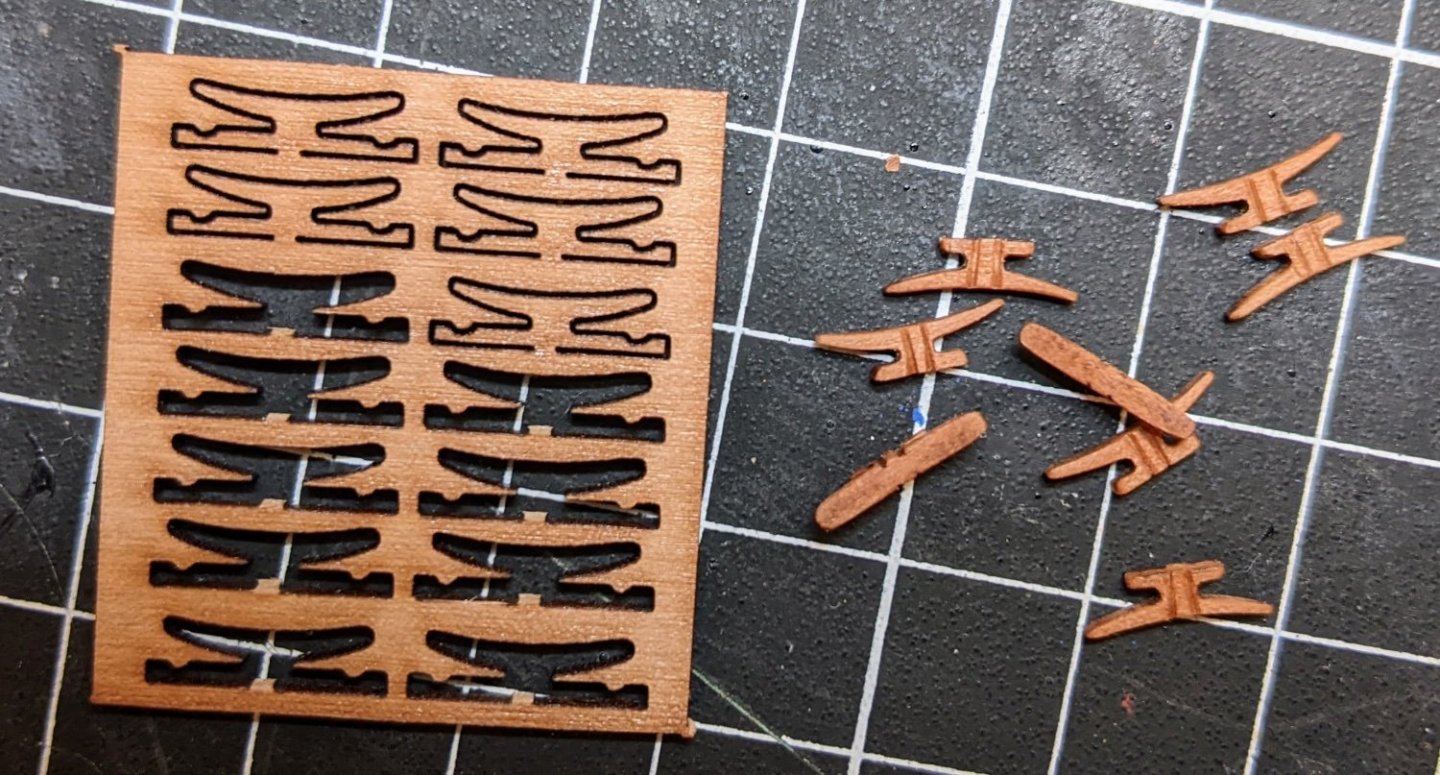
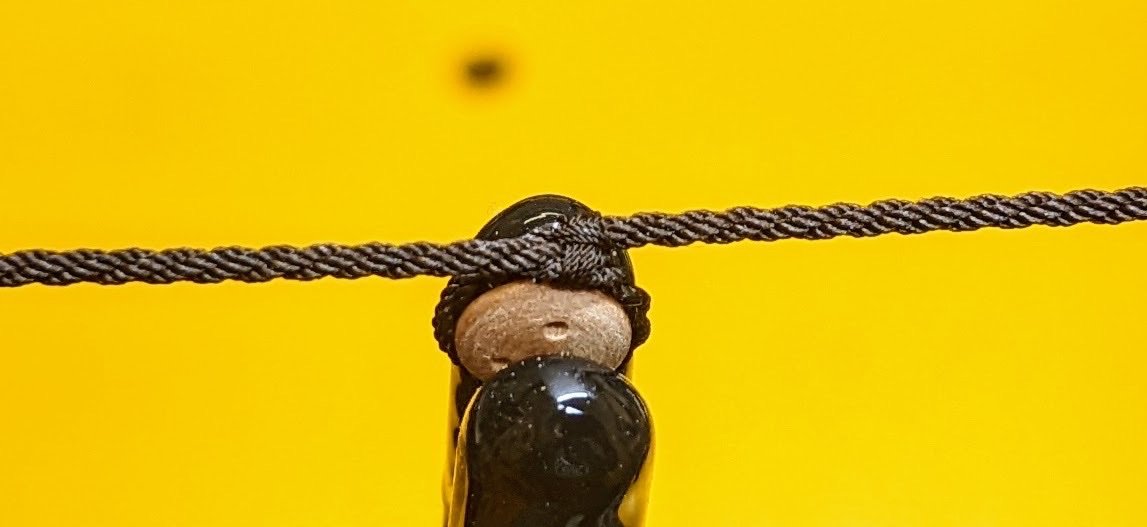
Log #57: The Shrouds Part II Work has slowed down a bunch mostly due to difficulties with the rigging. I have made at least four attempts at the pendents for the spar halliards and though I think I now have a acceptable solution, I don’t have much yet to show for the work. Despite this I have also been making slow progress on the shrouds. This represents work that has been going on in the background for the last month or more. First step was to make a jig to correctly space the deadeyes based on the plans. I used a fair bit of tension for this step to ensure that when I come to attaching the deadeyes I have wiggle room without pulling them too close together. A small bit of super glue was used to hold the deadeye in the correct position. As a note of caution I used it in too many spots and it caused some issues later when it came time to seize them. I would recommend just a small drop at the bottom, this is not for securing them, rather is just to hold it in the correct position until the seizing can be added. After doing this I labled each of the shrouds (as now the order they go on matters since I have set the lengths) and removed them from the model. Using my knockoff quad hands I got of amazon I held the deadeye in place and then pulled the two ends of the shroud tight. I then seized them together using a sewing needle and some 0.2mm thread I got @BenD to custom make for me. As a note I turned my deadeyes right handed as I used cable laid rope for the shrouds. If I had used shroud laid rope the correct method would be to turn them left handed. With the seizing done I made the decision to also add the canvas caps to the end of the ropes. To do this I took some tissue paper (the kind you put in gift bags) and painted it an off white to look like canvas. In case anyone wants the specific colours I first painted it with citadel’s palid witch flesh and then with karak stone. I did this in a haphazard fashion to not fully cover the previous layer to give colour variation to it. I cut out a small ‘L’ shape to form the cover. This was carefully folded over the top of the rope end using a very small drop of super glue to hold the center in place and then watered down matt varnish to adhere it to the model. I then did a quick whipping with 0.25mm rope and covered the whole thing with another layer of matt varnish and left it to dry (note: the picture below shows the state of affairs right before whipping). Once dry I cut the ends and then again added another watered down layer of varnish. At this point I also decided to make some modifications to the shroud cleats to make them look more like the diagram in Lees. This was a slow process of sanding and carefully cutting notches with my craft knife and then filing the grooves with a triangle file. Once complete I used a small spot of super glue to attach them to the shrouds. Once the fully dry I can remove the shrouds from the model and add rope to attach them as well. As a final note I also attached the plates for the running backstay. At this point I only attached the bottom bolt as I want to be able to adjust their angle depending on what exactly I do with the running backstay.


- 562 replies
-
- 13
-
-
- vanguard models
- alert
- (and 2 more)
-
I am of the same mind. In fact I often prefer plastic to represent metal as it is easier to get things to scale and then I can paint it to look like metal. You are doing a great job Chris, I have nothing but good things to say about your kits speaking as a first time builder. I am glad to see that you are having so much success as demonstrated by the high demand for your kits.
-
Looking good, it is always nice to see things finally attached after you have been working on them off model for so long.
-
I like it, small things like these are great ways to upgrade the model. I have no idea the upper cover is the correct shape or not, but I believe BE in his alert log used a square one. Not sure if this was based on intuition or historical evidence. I suspect there was no standard way of doing them.
- 152 replies
-
- 2
-
-
- Vanguard Models
- Cutter
- (and 2 more)
-
That's the problem, if you could do it all over again you would be much more organized. Also you don't have the benefit of many ideas from other build logs (as you are leading the way here). I would say that almost every change I made to alert that the idea didn't come from another build log I did later than I should have and consequently it was more complicated than it needed to be.
- 152 replies
-
- 2
-
-
- Vanguard Models
- Cutter
- (and 2 more)
-
Welcome to MSW
-
I do have a tentative plan, but I don't want to say anything until I have the major parts of it figured out and I am sure what I am going to do. This was always planned to be my test run in the hobby and I have largely tried to stay pretty close to the kit arrangement. I want my next one to really push the limits of what I think I can do with a kit. I am doing some research in the background, but there are enough unanswered questions yet that I have not absolutely decided. Realistically even at my current pace I won't have alert finished until mid to late 2024 so lots of time yet to change my mind.
- 562 replies
-
- 4
-
-
- vanguard models
- alert
- (and 2 more)
-
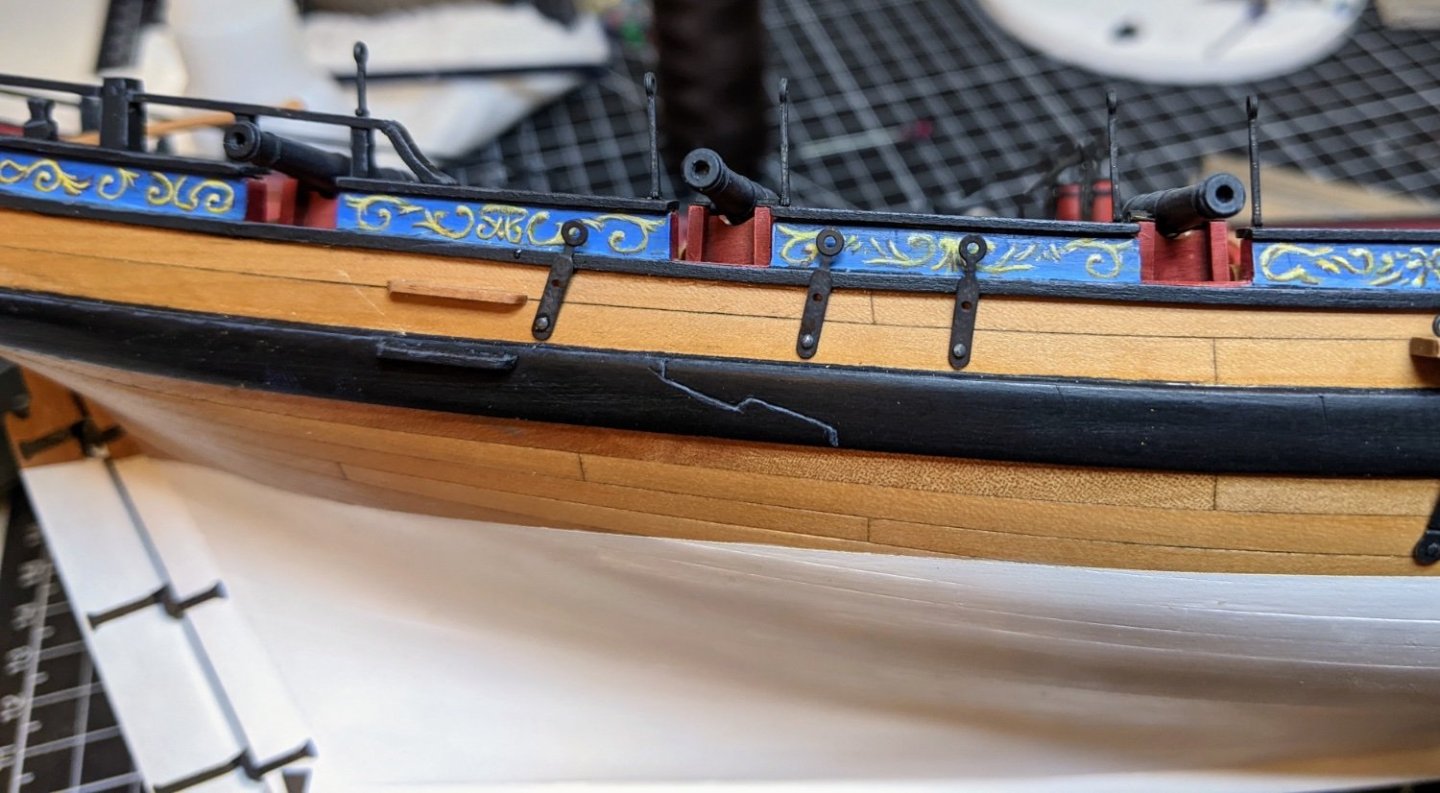
Minor update, I got the iron bands on the gaff and the boom as well as added the eyebolt to the gaff. Both Goodwin and the kit plans have the eyebolt further from the jaws, but Lees seems to suggest that this was only the practice after 1818 and so I went with him. I also painted the bands to try and help them stand out and give the illusion of metal. One of the challenges with close up photos is that the transitions for the colours look very abrupt when in real life they blend together much better.
- 562 replies
-
- 17
-
-
- vanguard models
- alert
- (and 2 more)
-
It is looking really nice and smooth now. Great job on the painting.
- 122 replies
-
- 1
-
-
- Artesania Latina
- Pen Duick
- (and 1 more)
-
This is not as hard as you might think especially since you would mostly just be filling and smoothing the gaps between the wood pieces and the resin balls. You just need one of those silicone clay shapers so you can easily push it around into the cracks. Given the care and skill you have demonstrated I would think it well within your abilities. In any case the build is looking great and whatever you decide to do I suspect it will turn out well.
- 648 replies
-
- 5
-
-
- Indefatigable
- Vanguard Models
- (and 1 more)