Thukydides
-
Posts
765 -
Joined
-
Last visited
Content Type
Profiles
Forums
Gallery
Events
Everything posted by Thukydides
-

Mini Bench Drill Press
Thukydides replied to Gregory's topic in Modeling tools and Workshop Equipment
This is my problem, my workshop is my bedroom or (if I am generating much sawdust) my kitchen table. So I have almost no room for any large tools. So I am always interested in small things like this that will potentially enable me to at least be more accurate and speedy than using my hand held pin vice. -
Perhaps it meant that small nails (as opposed to large ones) were used to make it not hold on to the keel as well as of the nails had been driven deep into the keel. Alternatively is it possible the false keel was still coppered? Just separately than the rest and the small nails redera to nails that held this copper to the false keel but didn't go through to the keel itself?
-
I think you made the right choice. Where they are not obscured if you paint them first it shouldn't be to bad, especially if they are going to be a lighter colour than the hull. The detail looks like it would work with drybrushing well which is minimal effort and if you paint the hull later, the overspill won't matter. Could even consider masking them off after painting if you are worried about the steadiness of your hand, but hard corners tend to be pretty easy to follow as long as you take your time and don't try to get right up to the edge immediately.
- 505 replies
-
- 3
-

-
- Quadrireme
- radio
- (and 1 more)
-
I have the veritas ones and they are really nice, only about 3 inches long each. https://www.leevalley.com/en-ca/shop/tools/hand-tools/miniature-tools/chisels/72391-veritas-miniature-chisels?item=05P8501
-
Looks great Allan
-
Great job, looks very nice.
-
Welcome to MSW
-
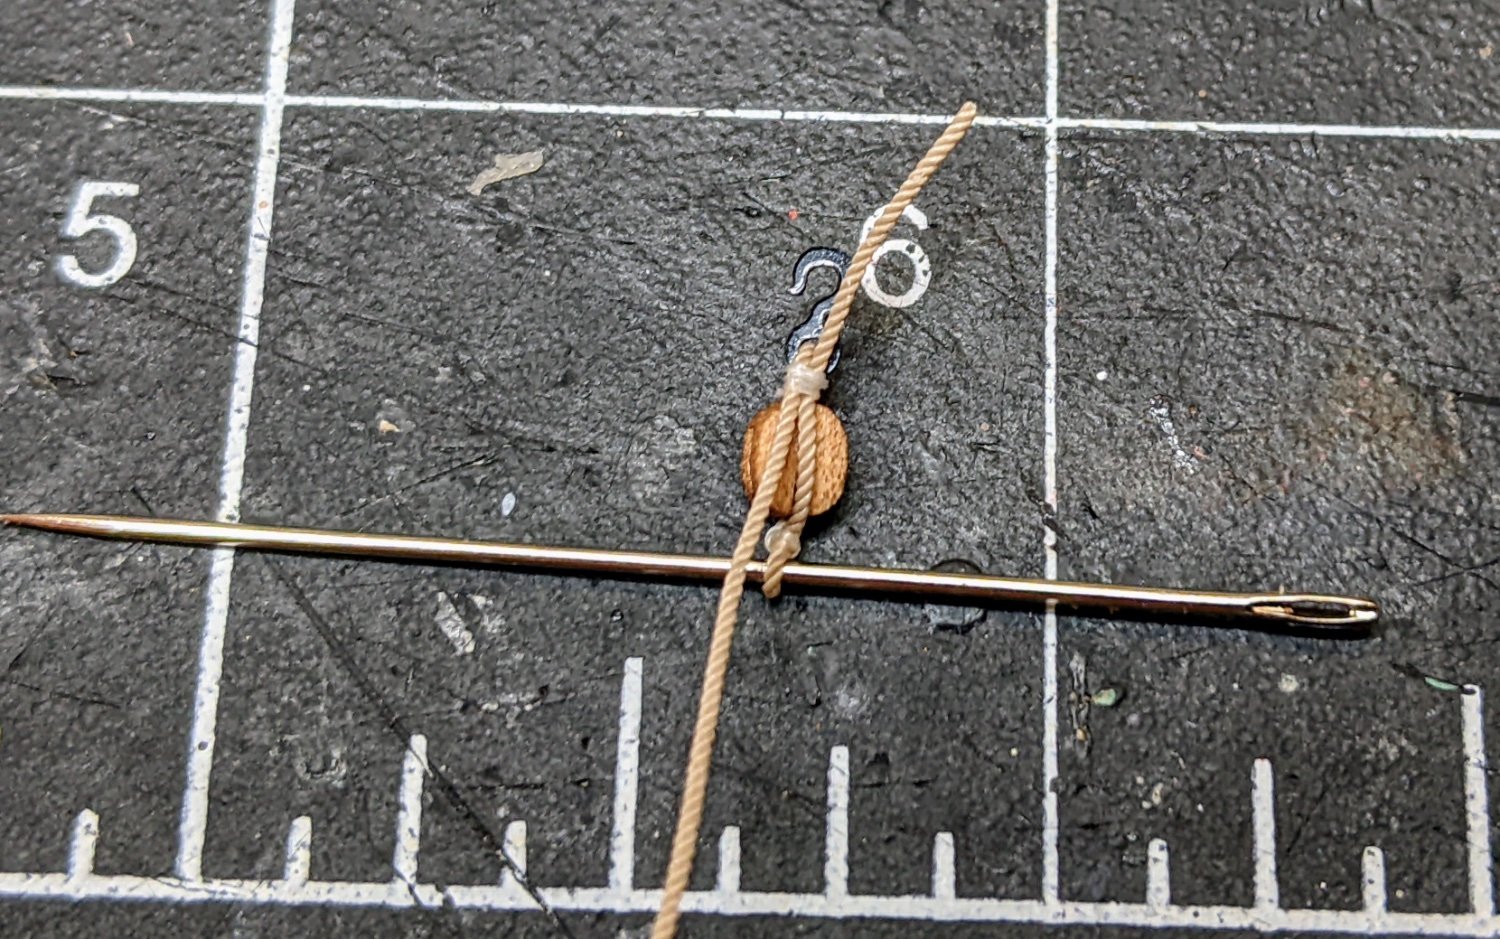
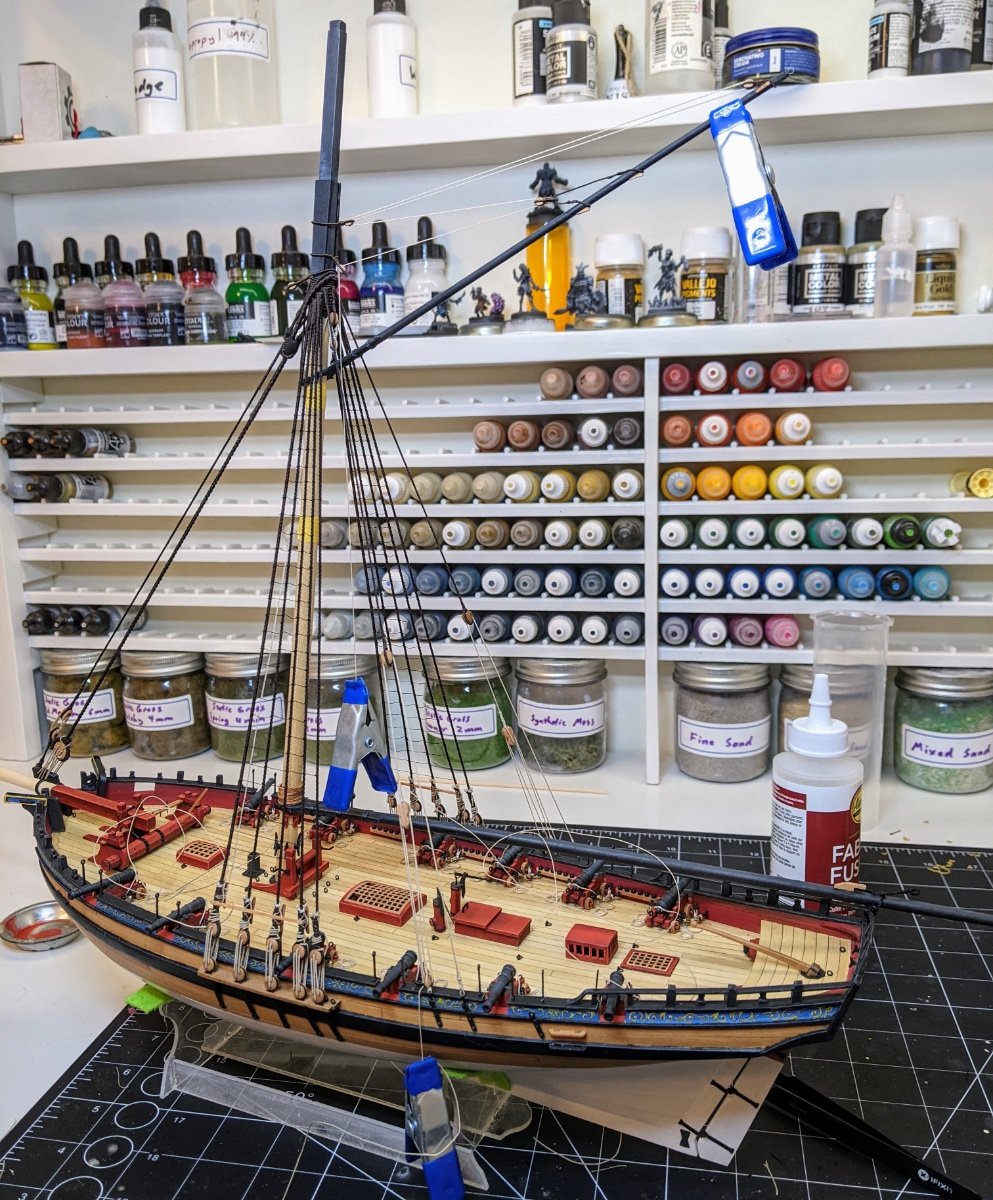
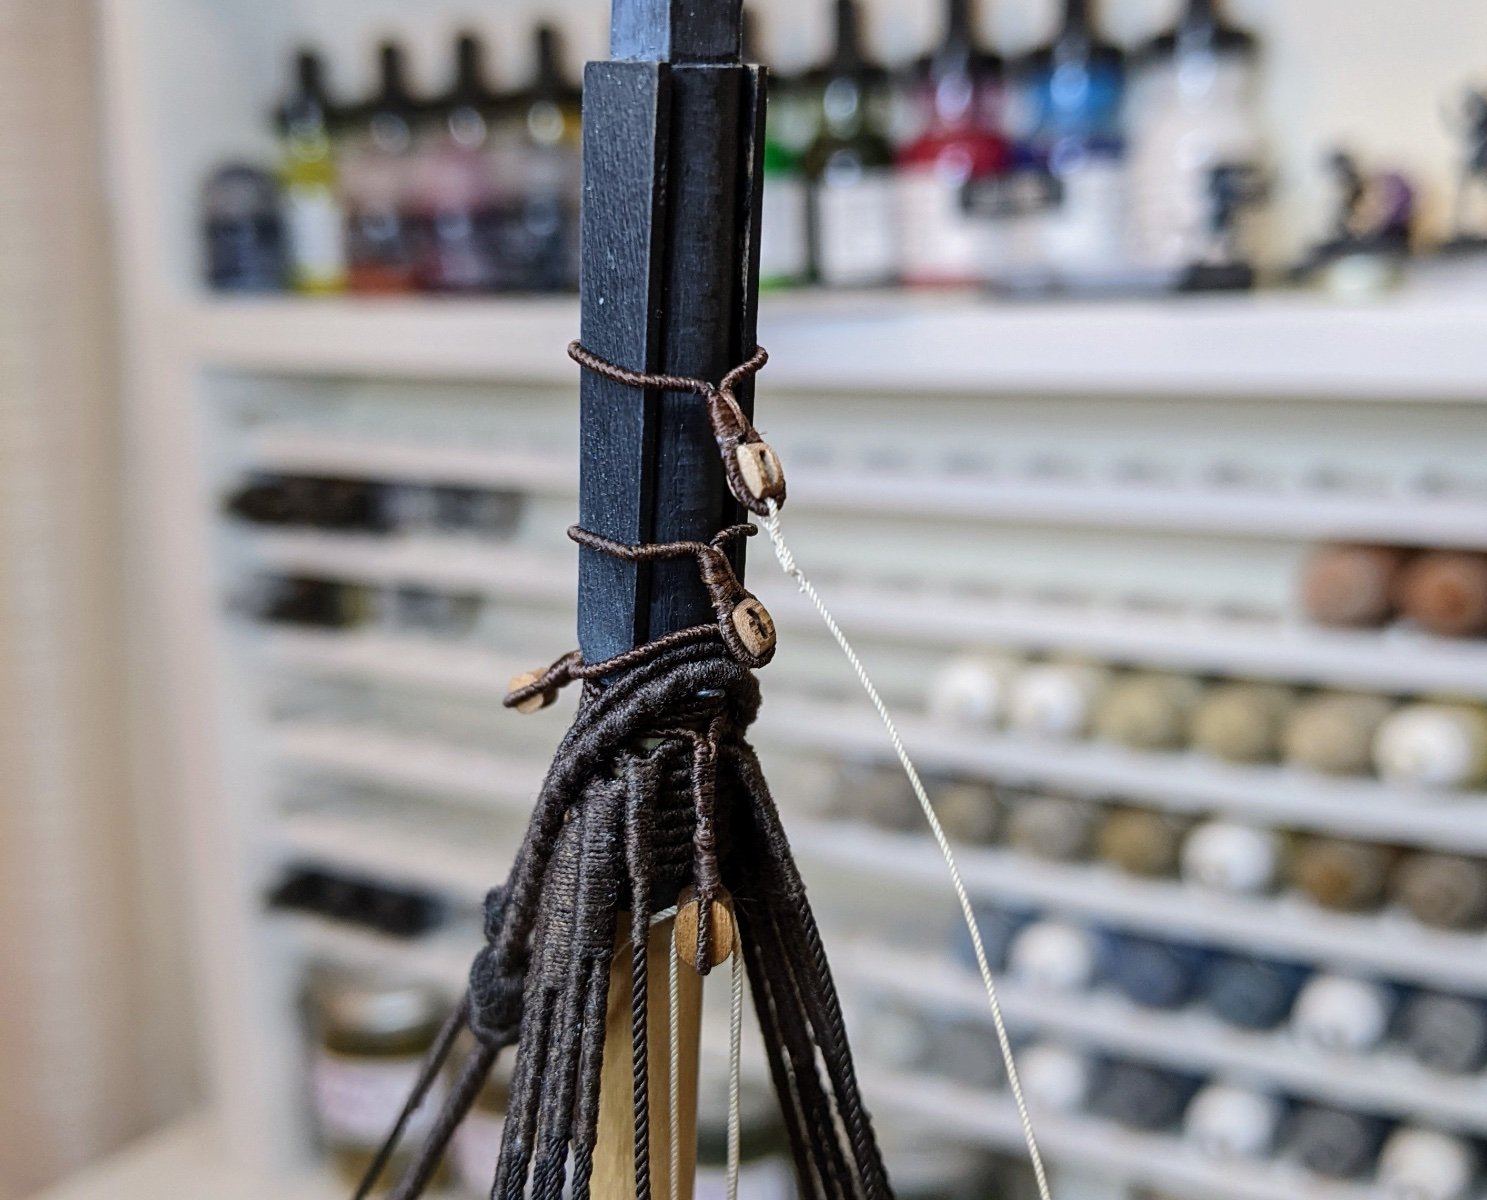
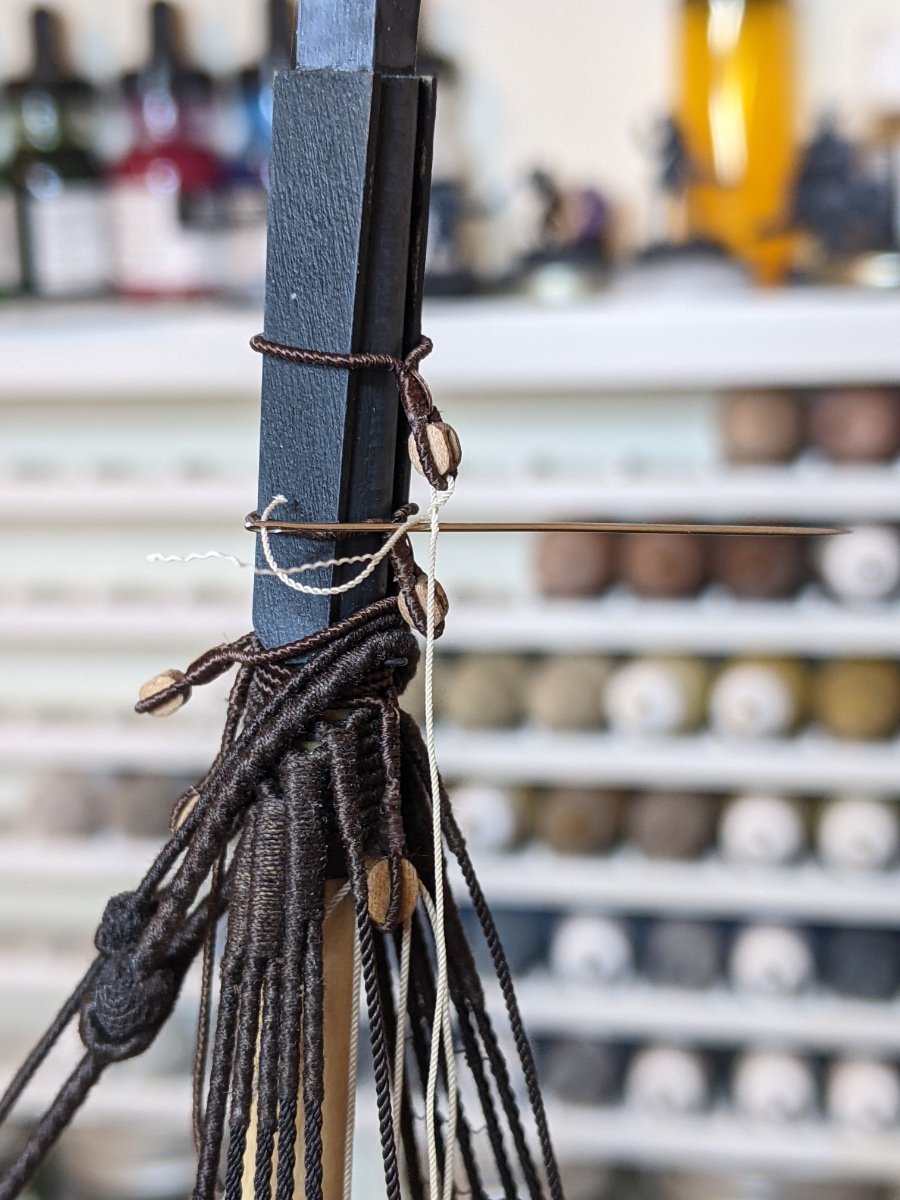
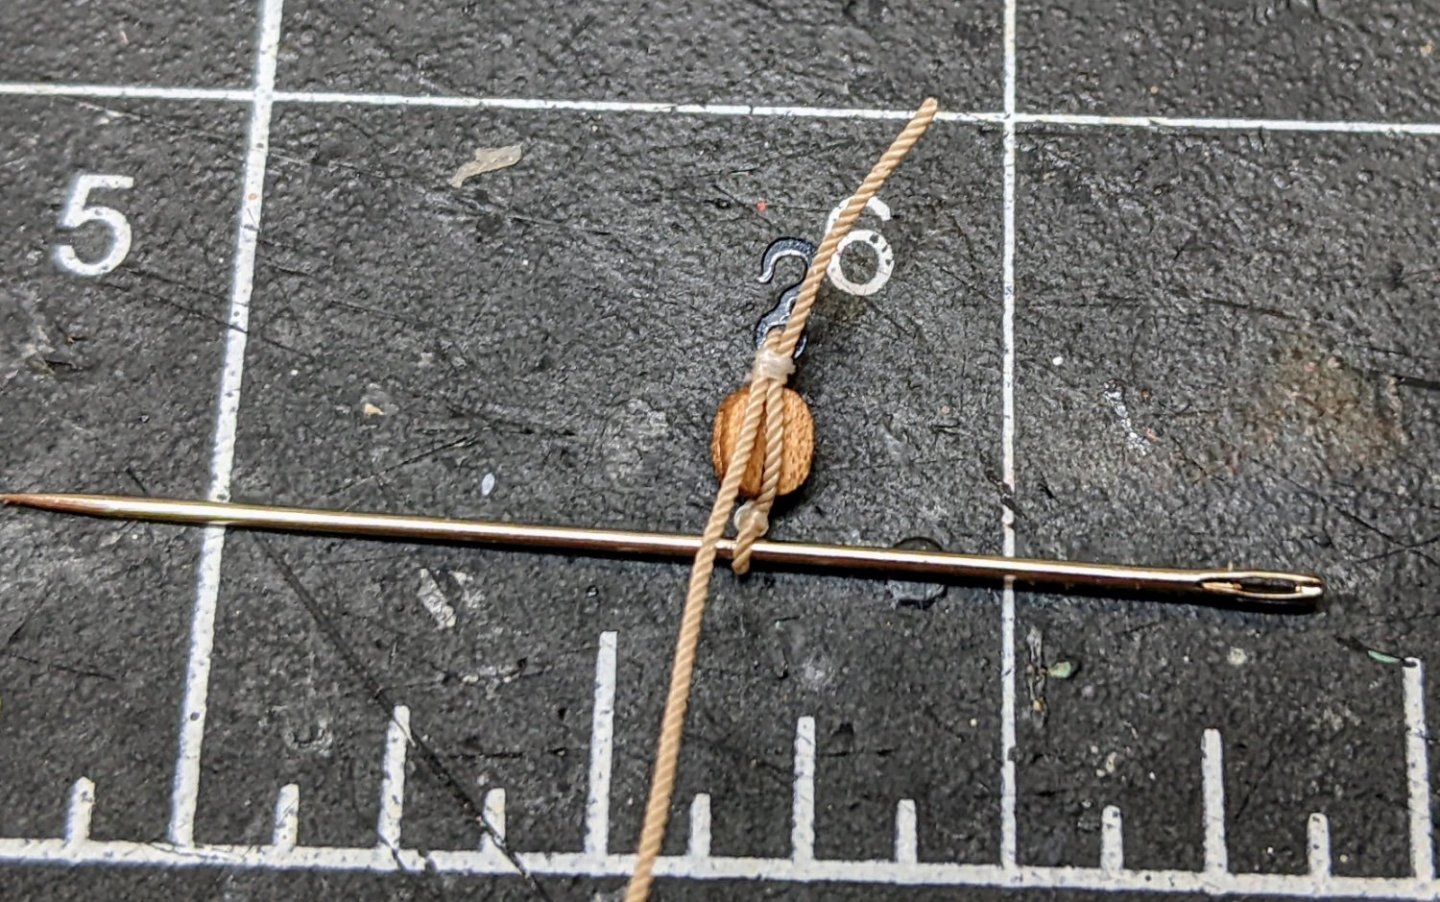
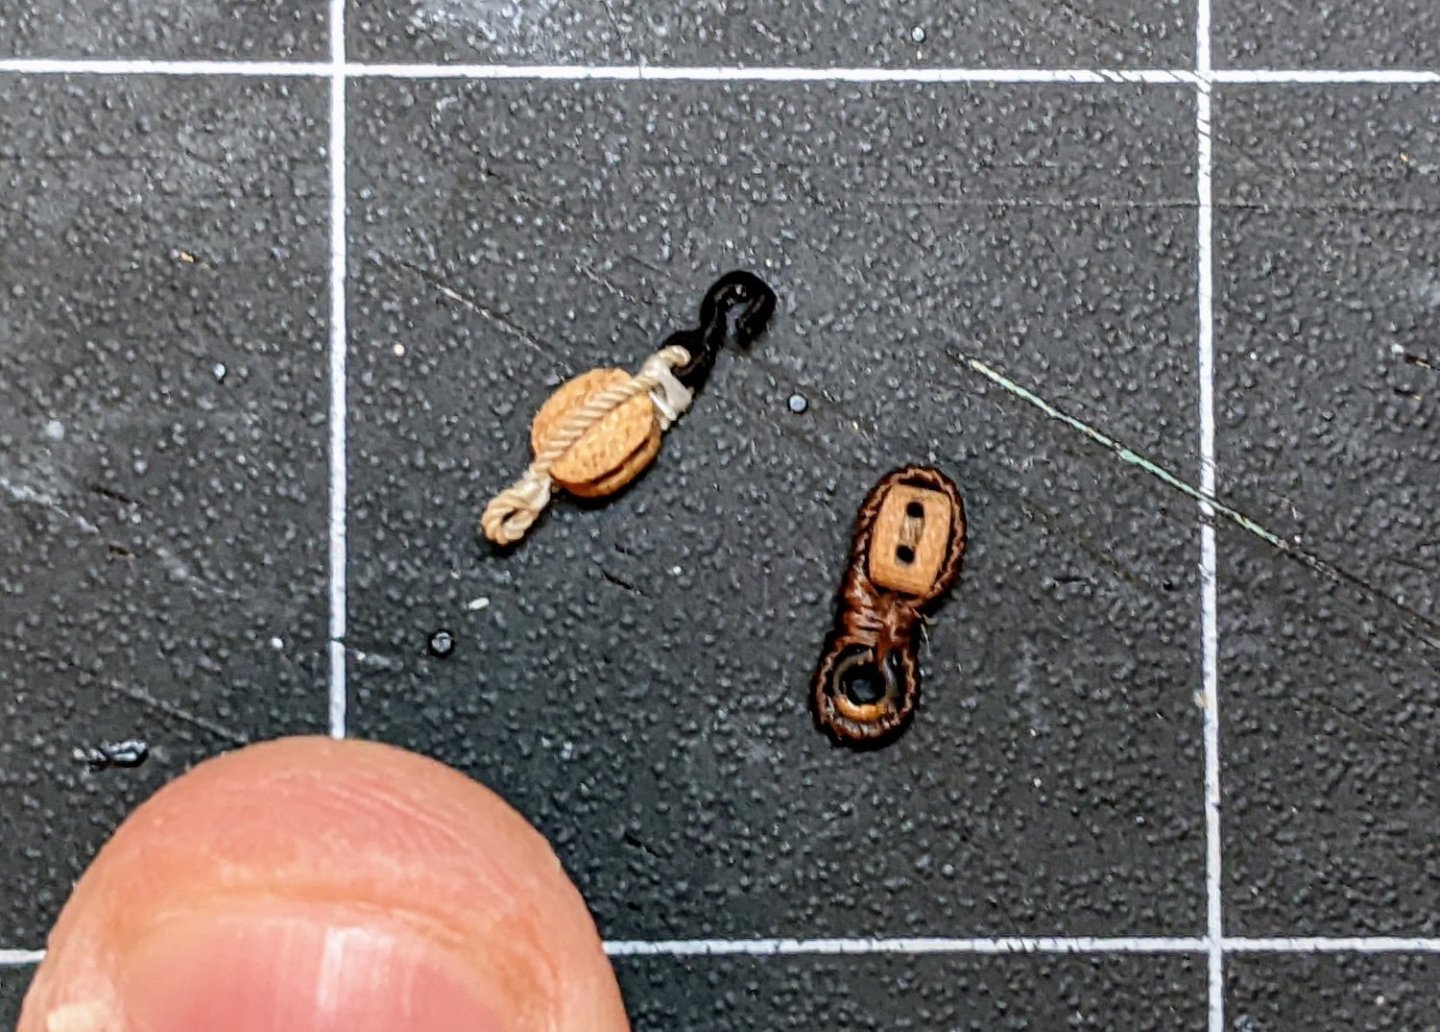
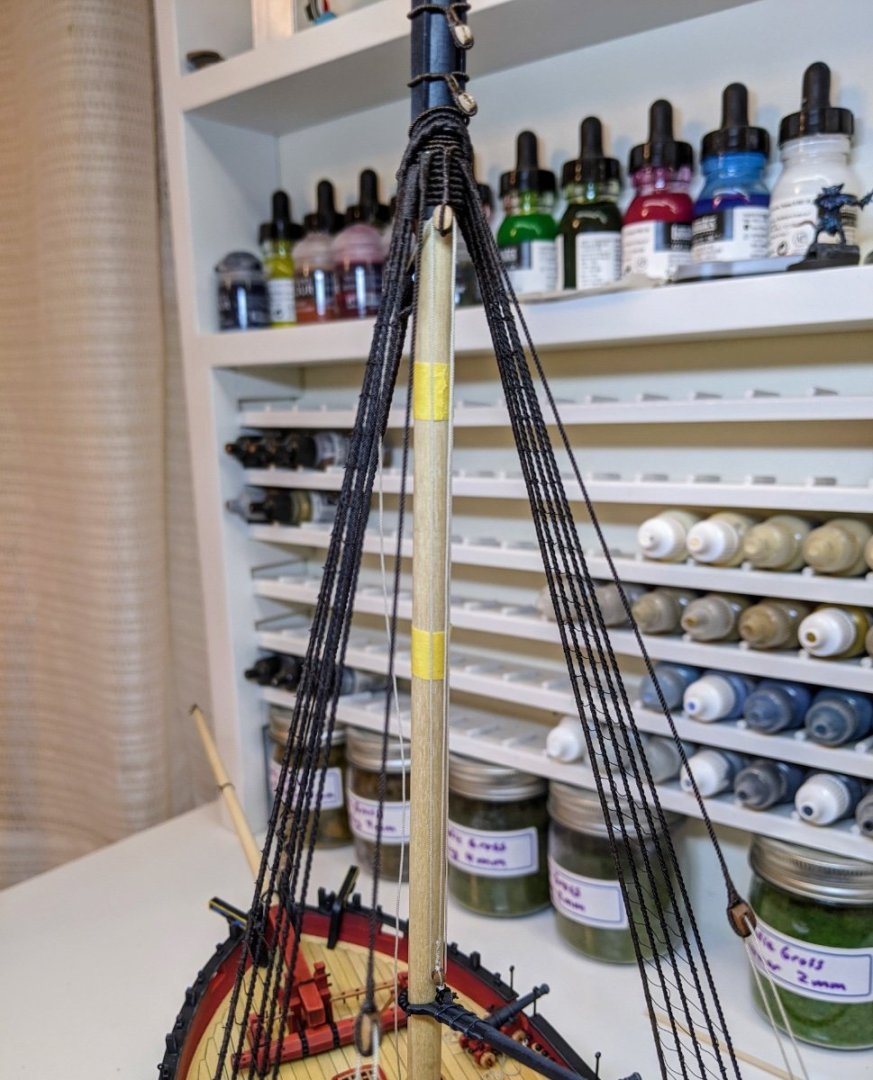
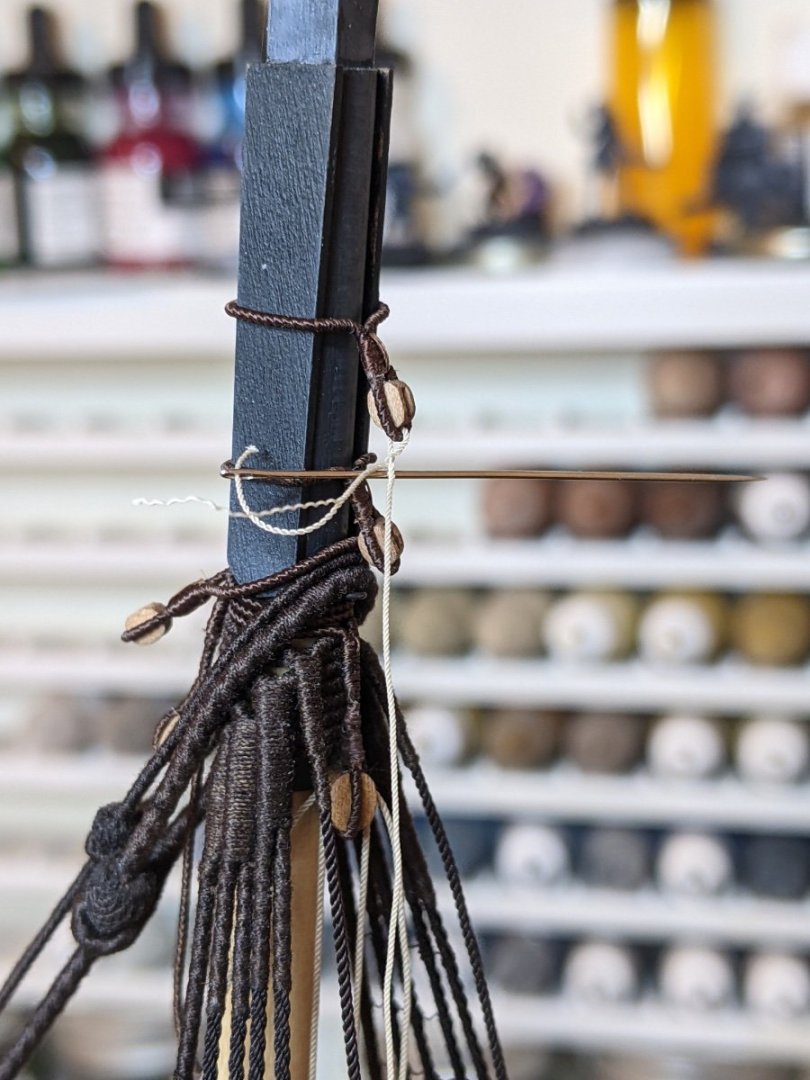
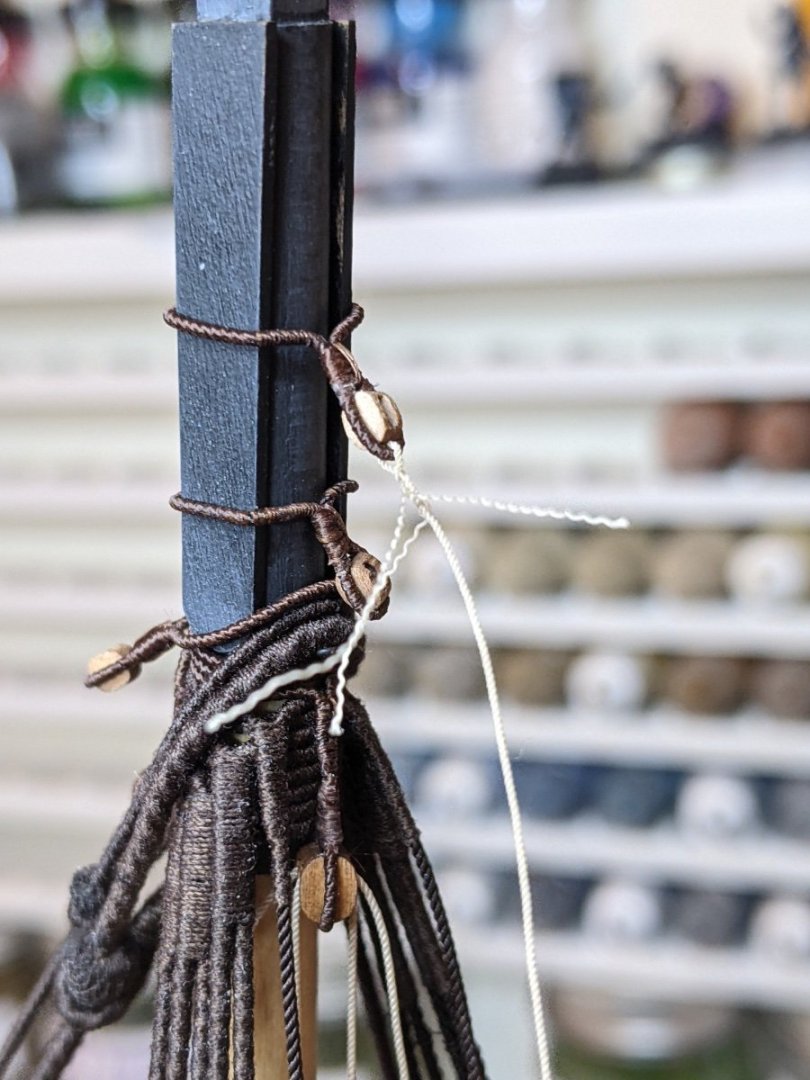
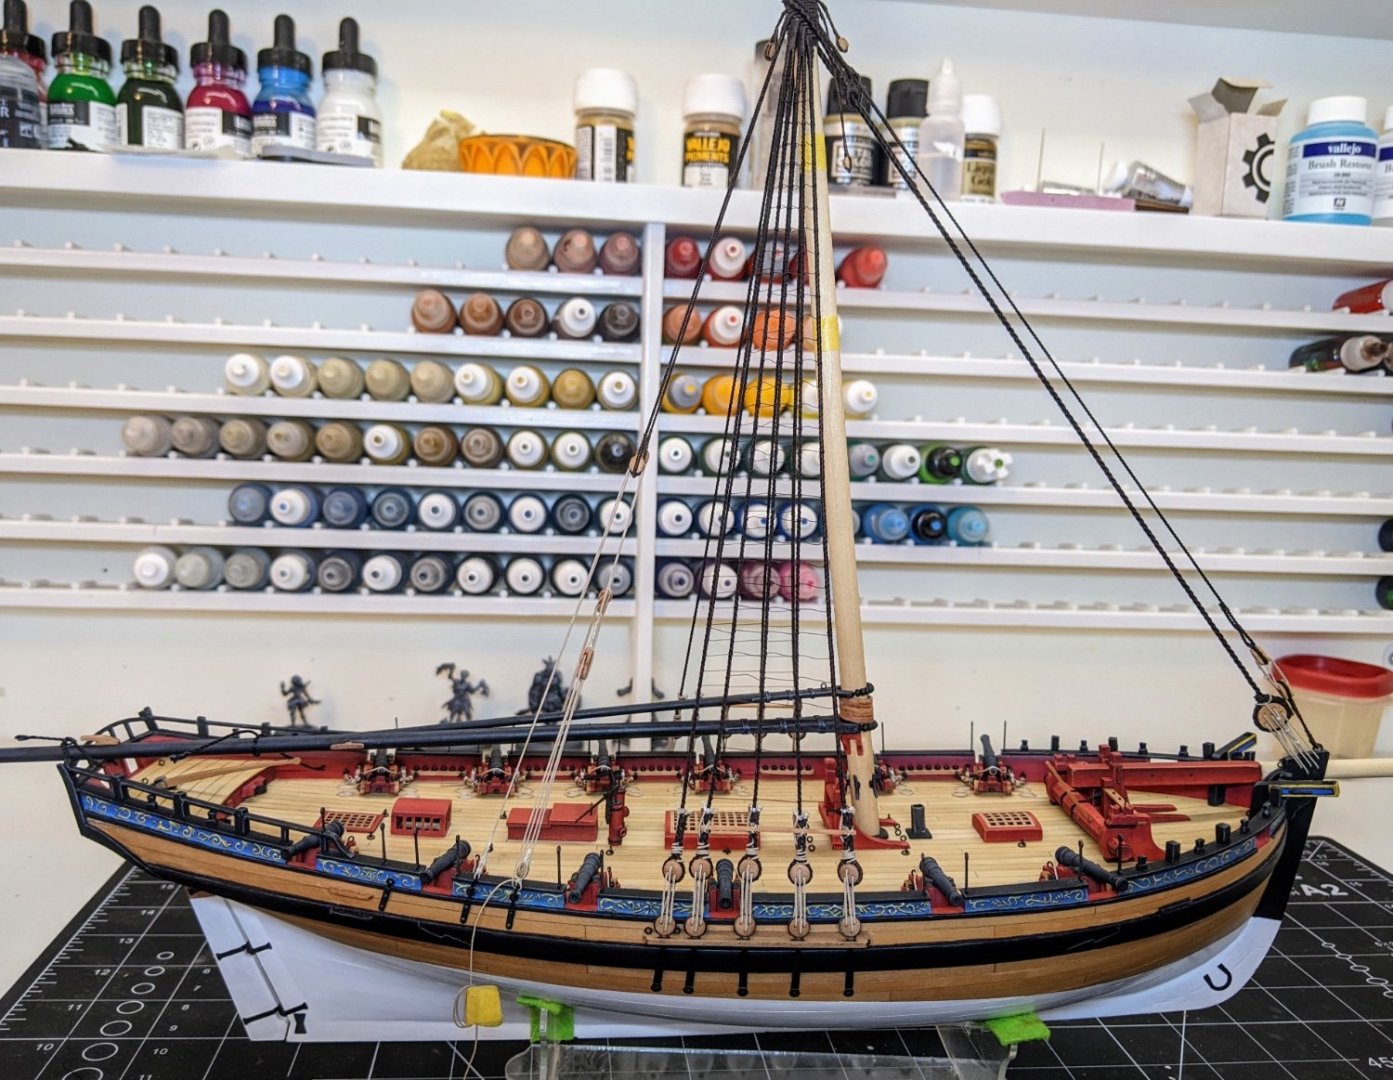
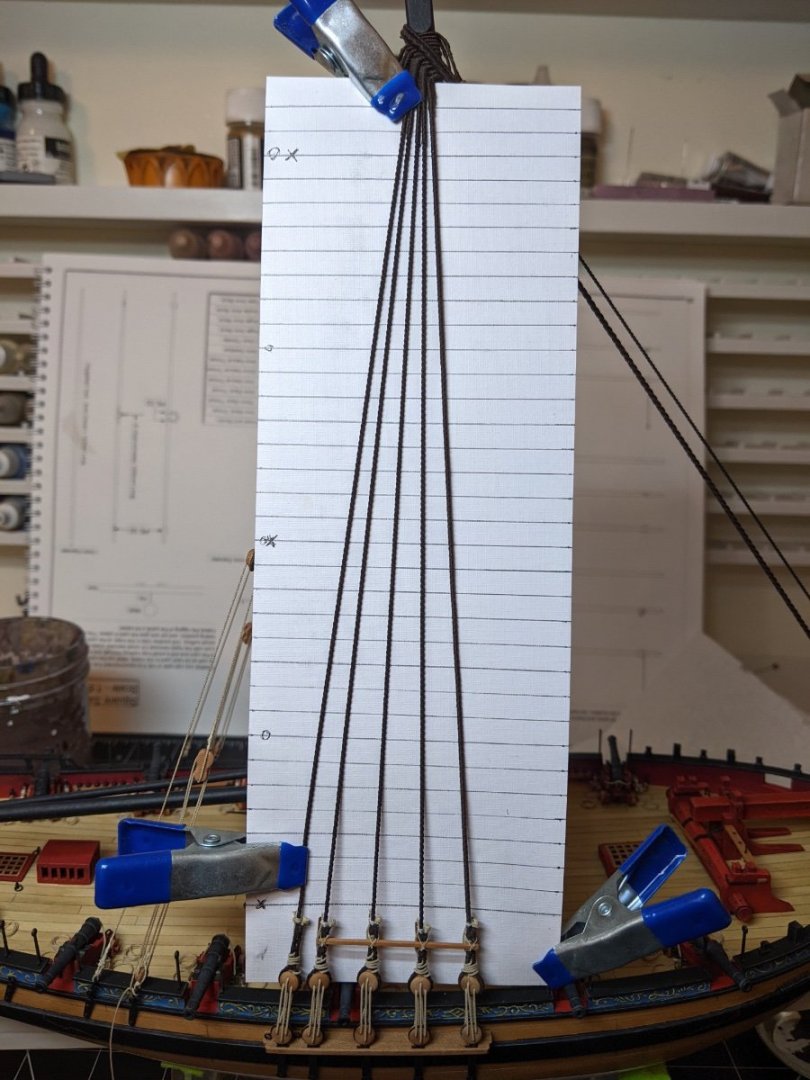
Log #70: Rigging the Gaff With the ratlines out of the way and lots of lessons learned I have now moved back to a more fun part of the build. I do enjoy the rigging as it always feels like there is tangible progress when you are doing it. My plan is to rig the gaff and boom first followed by the topmast and then slowly work my way forward. Step one was to prepare the necessary blocks. I tried a new technique for attaching hooks based on suggestions given back when I was rigging the cannons. It seemed to turn out pretty well so I may continue playing with the method you can find more detail on in @glbarlow’s cheerful log. And here is the final result along with a block for the gaff peak halliard. The rigging of the gaff is a bit confusing as it is called different things by steel and the alert book, but I think the discussion is best summarized by directing you to @Blue Ensign‘s log here. The main difference from my perspective is that I had previously decided to use smaller blocks for the peak halliard (or outer tie) than the throat halliard (or inner tie). This meant that the steel rope sizes (3.5 and 3 inch circ. respectively) did not make much sense as I would be using the smaller blocks with the thicker rope. In the end I just reversed the sizes using .45mm and .35mm rope. This may not be technically correct, but it visually lines up with what I have already done. I have also come up with a new way of faking a splice. I think this looks better than my previous attempts and though I may play with the method some more I thought I would share it. The first step was to use a needle to pull the rope through itself. I did this twice, first one way and then the other. Once I had done this I split off one of the rope strands and repeated the process. I then split off a second strand and pulled only one strand through twice. The end result is progressively less of the rope woven into itself. This final result was coated with watered down fabric glue and left to dry. Once dry I used a scalple to remove the ends leaving the imitation splice. With that I have the gaff raised. I am currently using clips to hold things in tension until they stretch a little to hold their shape. Please note that I currently have everything only temporarily secured and I am aware that the throat halliard is tied off on the wrong place (it is meant to tie off at the bits). I need to do some more research to figure out what all these tie offs look like and where the excess rope should go before I secure everything permenantly.


- 493 replies
-
- 25
-
-

-
- vanguard models
- alert
- (and 1 more)
-
This will make a great starter kit I think. Looks great.
-
A wash is diluted paint which has a few other additives in it to help it flow into recesses better. So it collects at the edges giving it definition. A number of brands including vallejo, army painter and games workshop all produce washes in various colours. You should definitely prime them black (make sure you wash them with warm soapy water and an old tooth brush first to get rid of any oils). Then there are a lot of options afterwards. You could leave them as is or if you want them to look a bit nicer you could look into weathering powder as BE suggested. If you want to put a bit more effort in, using a combination of dry brushing and washes can get you a really nice finish. I did not bother varnishing after I painted mine as I liked the sheen I had and the acrylic paint should be fine. Enamel paint is another type of paint which some find produces nice results, but it is a bit more difficult to handle than acrylic.
-
It looks fantastic. The weathering is spot on.
-
So that was pretty much what I did, I did the top and bottom ones, then the middle, then half way between each of those and so on. I think part of the problem was I was using the hair dryer to relax the lines, but it may have made them shrink a bit and pull it in more as early on I was not seeing the same degree of hour glass shape. Either that or the collective tension of the rope exacerbated it more as more lines were attached. Thanks everyone for the advice. Next time I will try to take more care and maybe experiment a bit more before committing stuff to the model.
- 493 replies
-
- 5
-
-
- vanguard models
- alert
- (and 1 more)
-
@mtbediz that is a really good idea, I will have to keep that one in mind. Thanks.
- 493 replies
-
- 2
-
-
- vanguard models
- alert
- (and 1 more)
-
Great job, it looks very clean. Good to see you back at it.
-
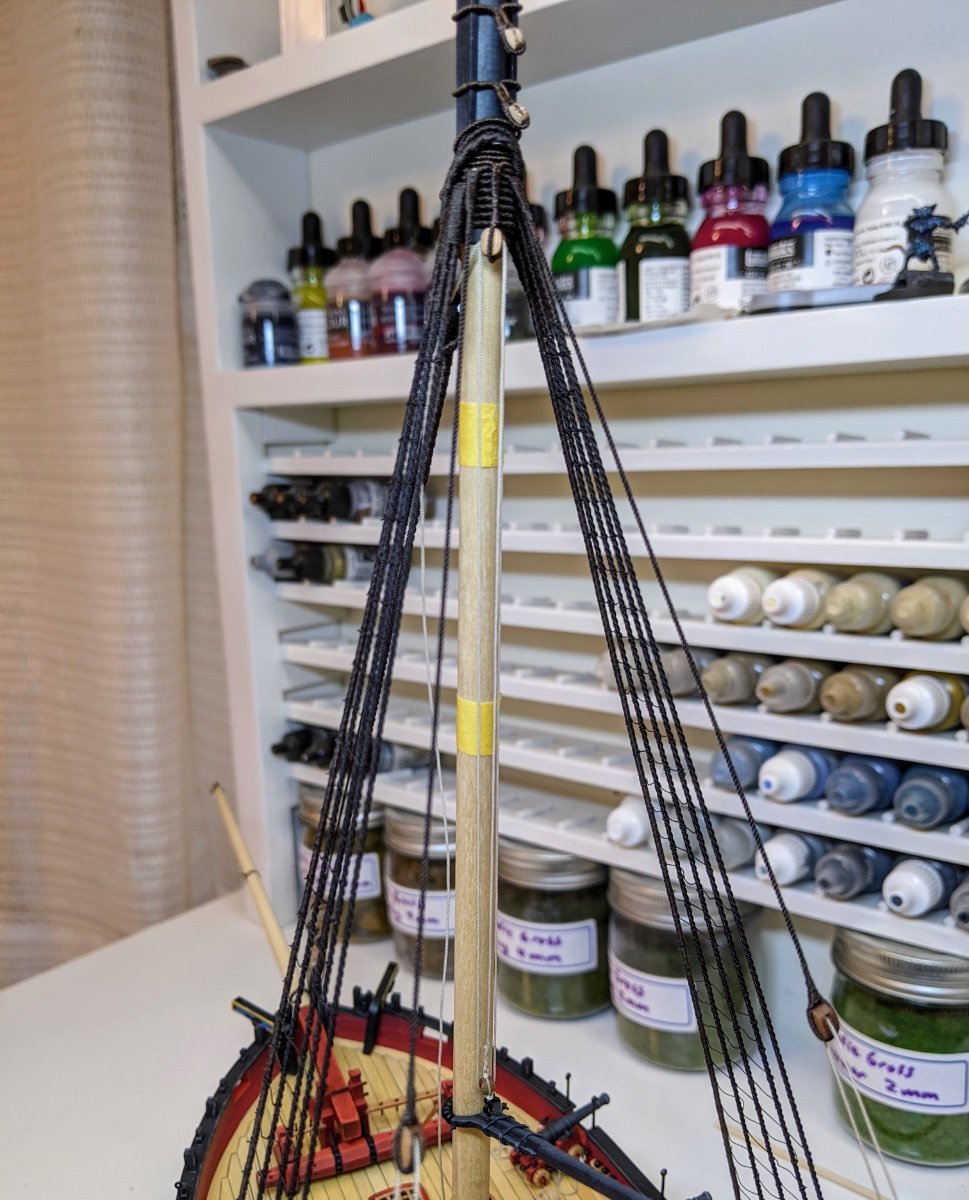
Log #69: Ratlines Complete The ratlines are finally complete. I can say without a doubt that this has been the most tedious part of the whole build. How people have the patience for the ratlines on Victory I really don’t know. Thank you for all the encouraging feedback on the commander. I have put him to the side now as I still need to varnish him to take some of the sheen off certain colours of the paint (particularly the light blue). I will likely not attach him to the ship until the very end as even though I will be pinning him, the risk that he is either in the way of a line I want to run or that I catch him as I am rigging is too great. The second time round on the shrouds I tried to be more methodical and also played with using the hair dryer as I went along. The ultimate result of this was funnily enough a worse job than the previous time. Try as I might I couldn’t get the ratlines to stop pulling in the shrouds and so this side has more of a pronounced curve to the shrouds. This was incredibly frustrating, but in the end I just couldn’t face pulling them all off and starting again. I will just use this side as the back of the model :). I did learn a lot of lessons about what not to do so maybe next time I will be able to do a better job. I might also experiment with different materials as though the definition on the rope I used is really nice, getting the correct tension was really hard due to how inflexible it was. I also need to pay more attention to the tension of the lower ratlines as opposed to the upper ones. Lots of lessons learned.

- 493 replies
-
- 23
-
-
-
- vanguard models
- alert
- (and 1 more)
-
Looks great. As a fellow miniature painter I approve of the use of edge highlights.
-
Thank you. The key with the eyes is to build in the shadows and then use a brush with a very good point to put in the eyeballs and the pupils. The process described in the video takes a while so is not really practical if you are doing a whole bunch of figures, but if you have one you need to look good I find it works every time.
- 493 replies
-
- 4
-
-
- vanguard models
- alert
- (and 1 more)
-
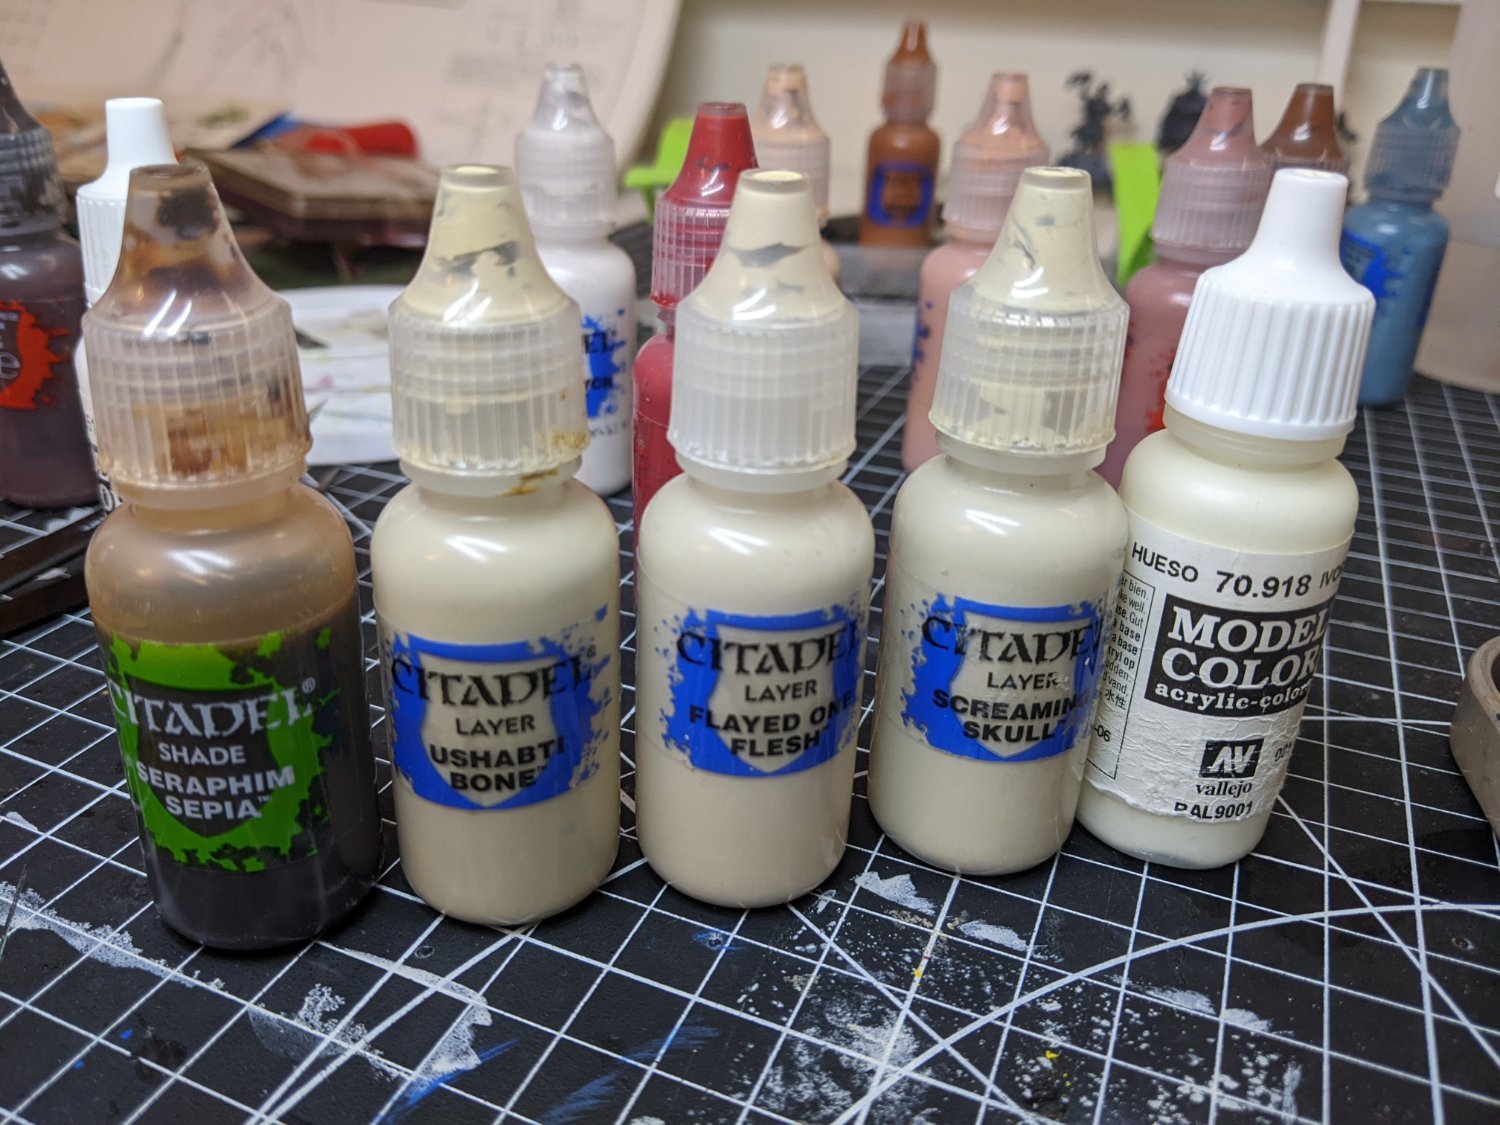
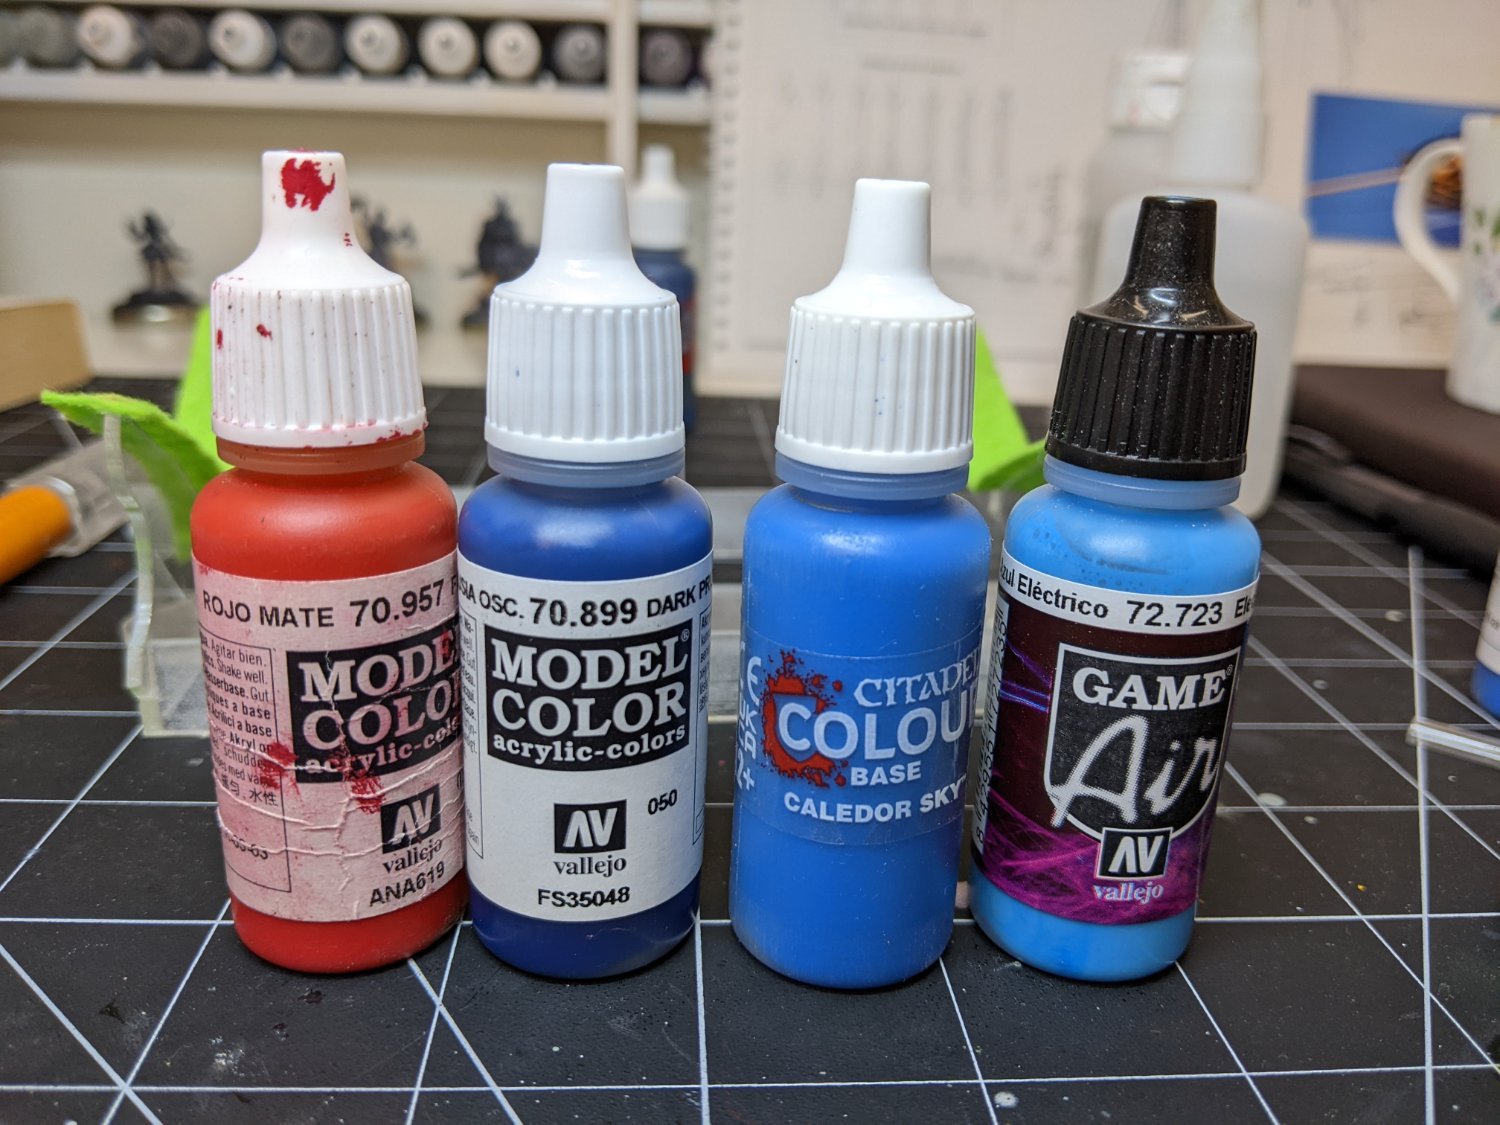
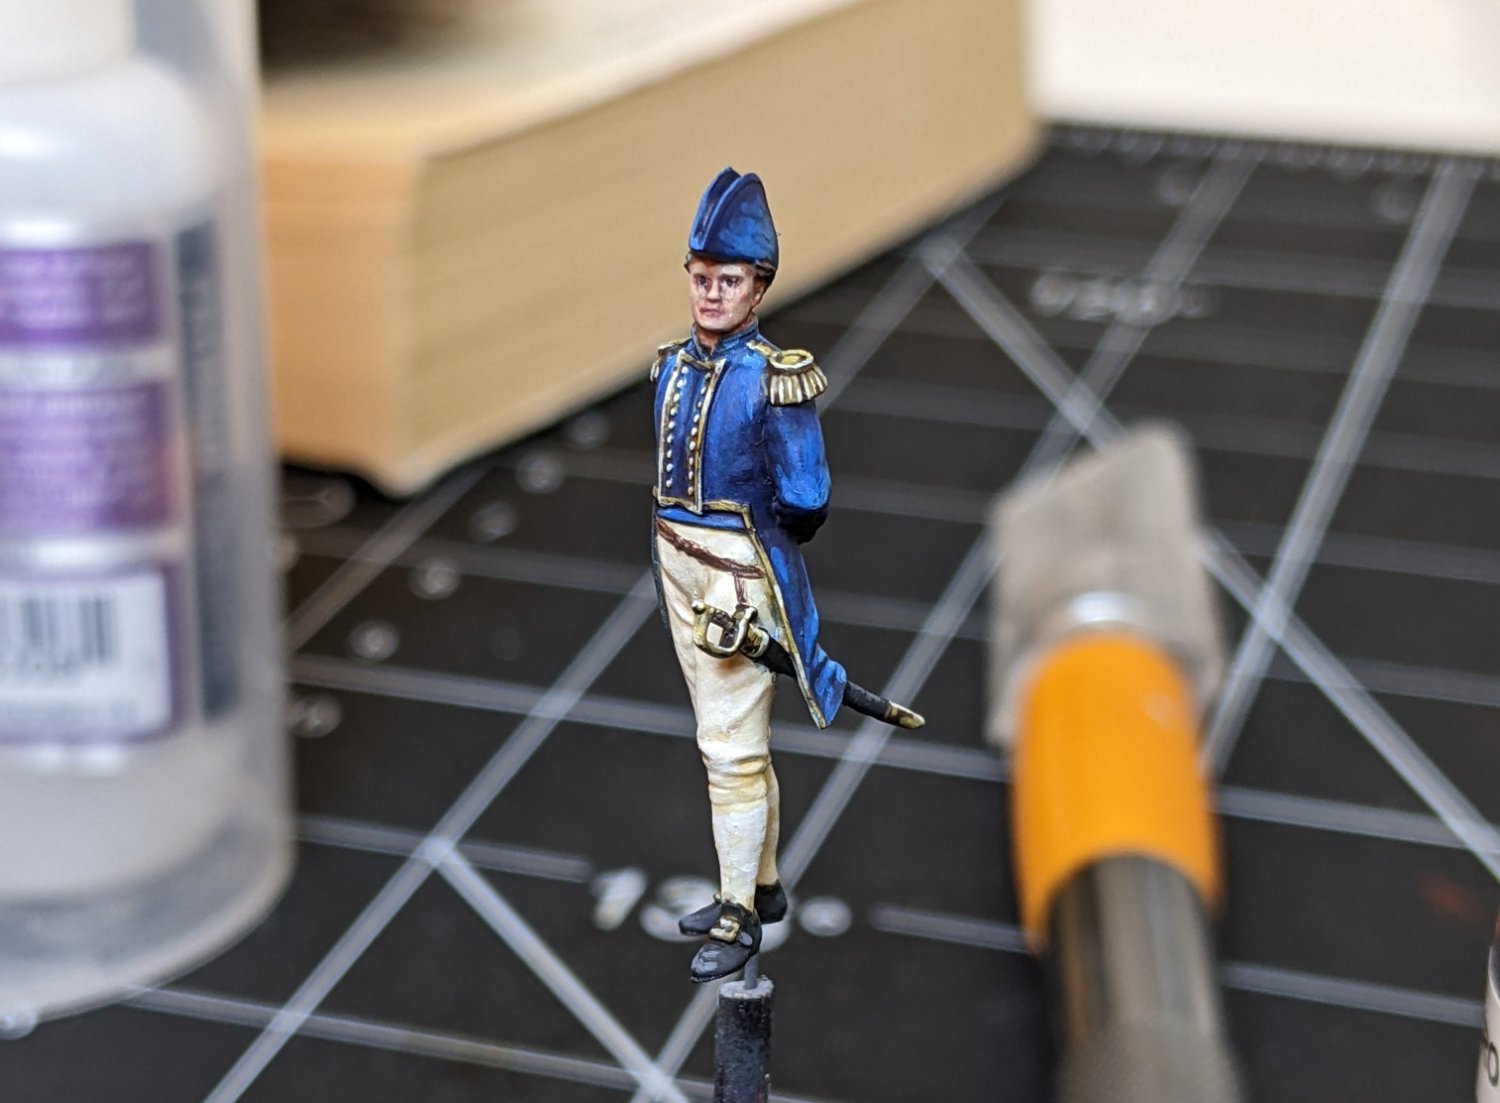
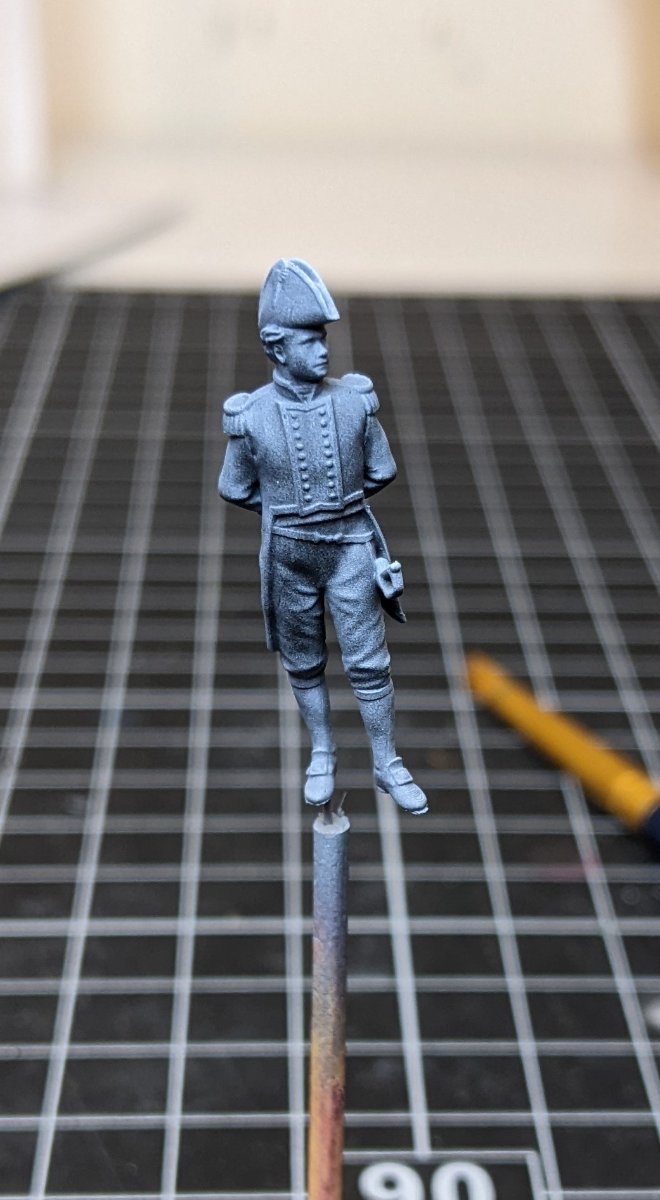
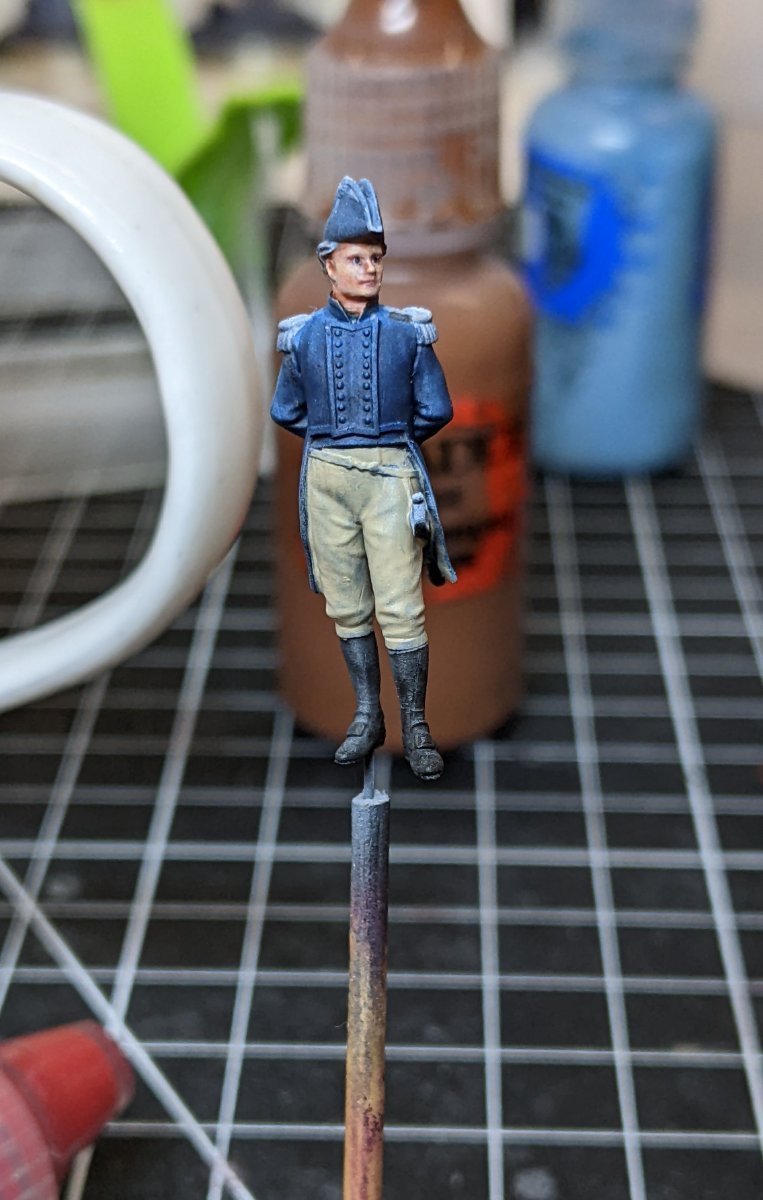
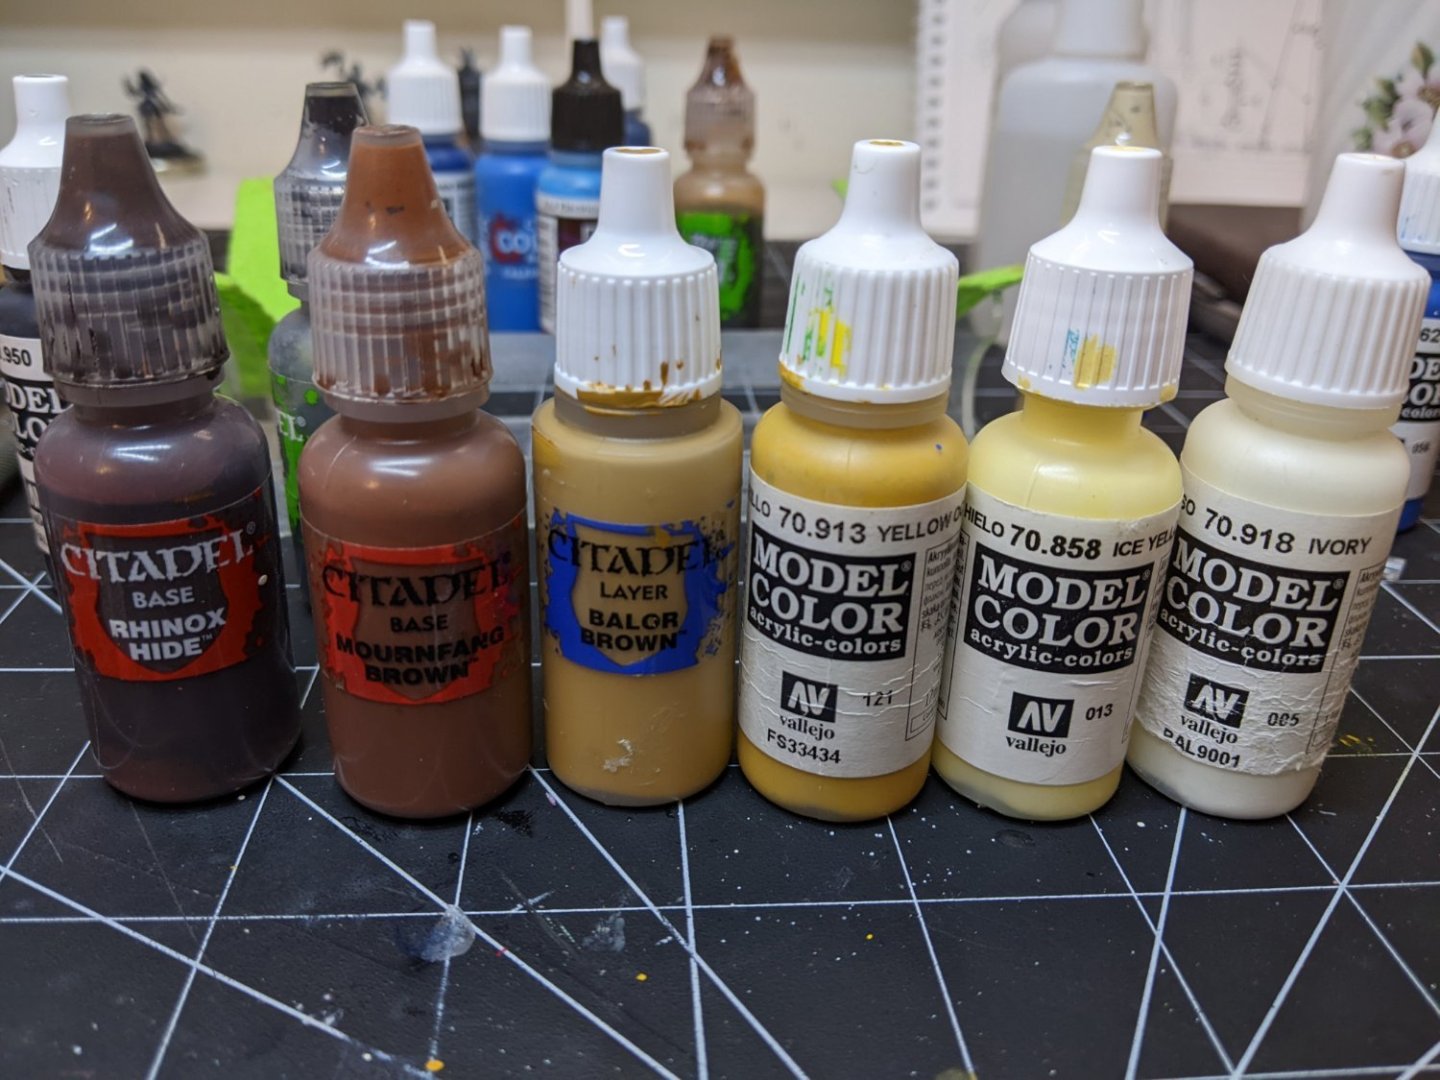
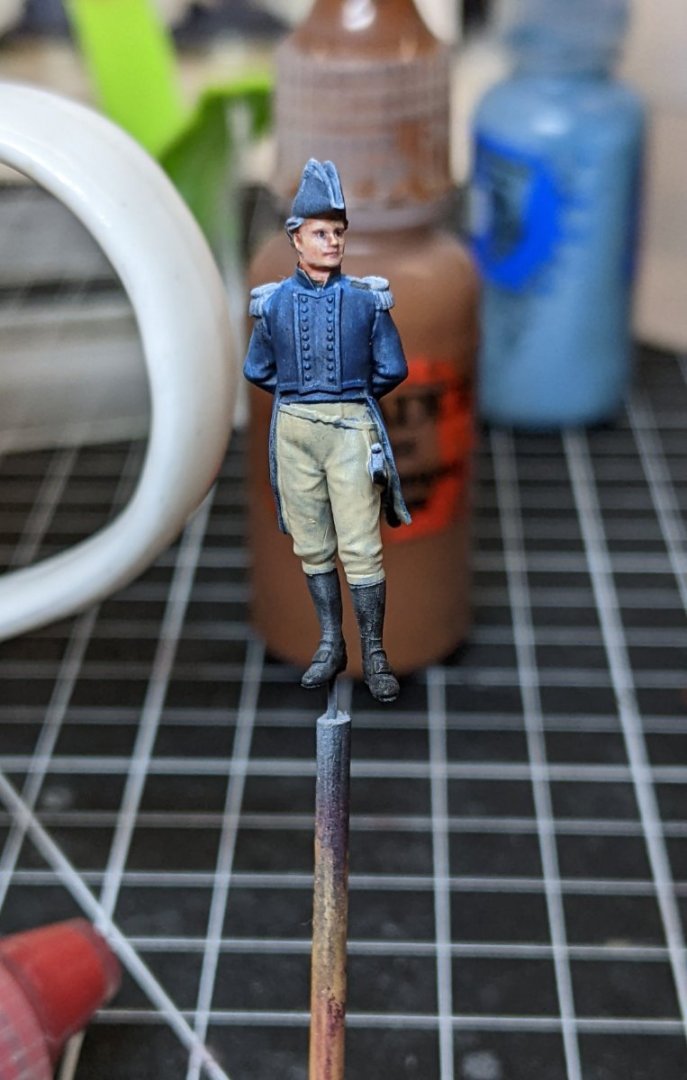
Log #68: Master & Commander Thank you to everyone who has stopped by for the comments and encouragement. I continue to slowly work on the rat lines, but decided to take a bit of a break to do something a bit more fun. As I have previously shown I ordered a figure from vanguard models which I plan to include on Alert to demonstrate scale. To start things I cut it off of the base and primed it in black before doing a zenithal highlight with white ink. The zenithal highlight does two things. First it helps me to get a feel for the model and second it highlights the areas that will be brighter giving me less work later. The next step was to base coat the colours and start work on the face. As a general rule I like to paint inside out. Starting with the hardest to reach areas and then moving on to the easier ones. My go to for painting white skin is the following tutorial. You can see below the state of affairs after the base costs and the skin done. Note at this point I mistakenly thought he was wearing boots, this was corrected later. Next up was the pants and socks. After difficult to reach, my next priority is to paint the hard colours, the ones that don't cover very well. The paints I used for the pants can be seen below. Then I painted the coat and here are the paints used for it. You may be wondering why I have red on a blue coat. The reason is that I find for making shadows I like to mix in a colour from the other side of the colour wheel. In this case I went with red as I wanted a warm purple for the shadows. And then finally the gold details. I did this in a non-metalic metal style using the following paints. And here was the final result. Not the smoothest gradients I have ever done, but good enough. Particularly when you are looking at it from normal viewing distances it holds up well enough.


- 493 replies
-
- 32
-
-
-
- vanguard models
- alert
- (and 1 more)
-
Well done on getting the rat lines done, you made quicker work of them than me. I think you plan make sense. One thing you can do is just temporarily put them in place and then see how everything else plays out before securing them.
- 148 replies
-
- 2
-
-
- Vanguard Models
- Cutter
- (and 2 more)
-
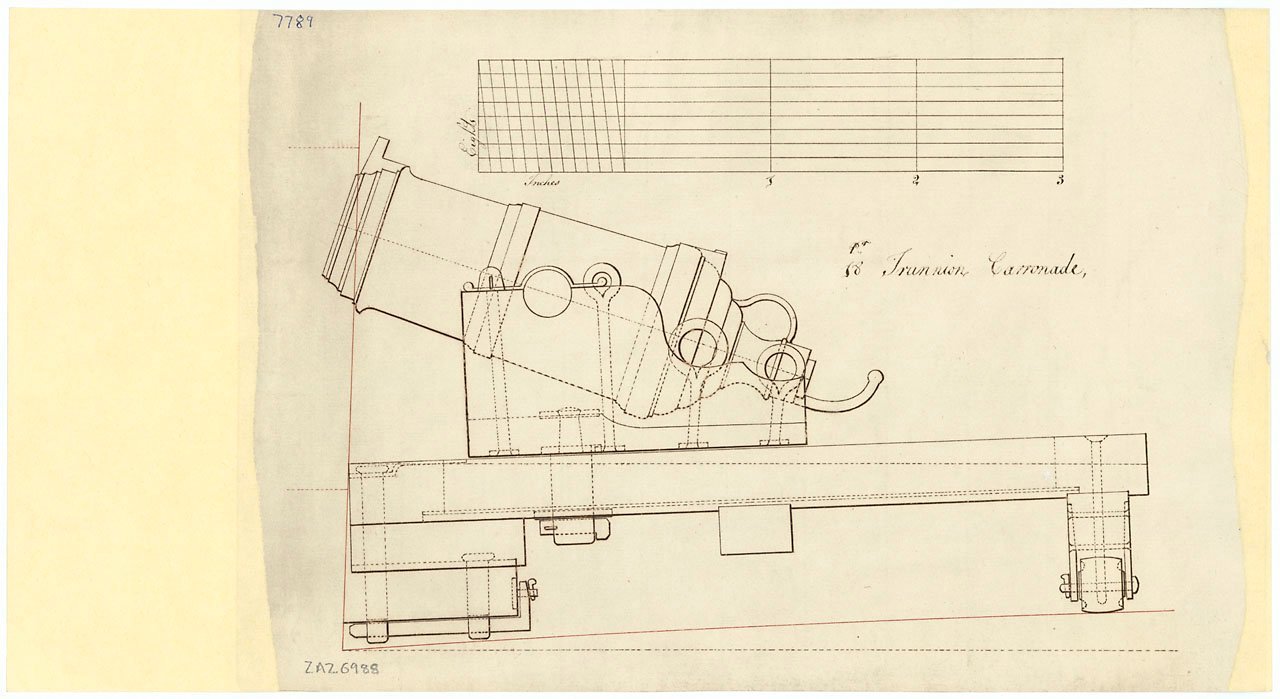
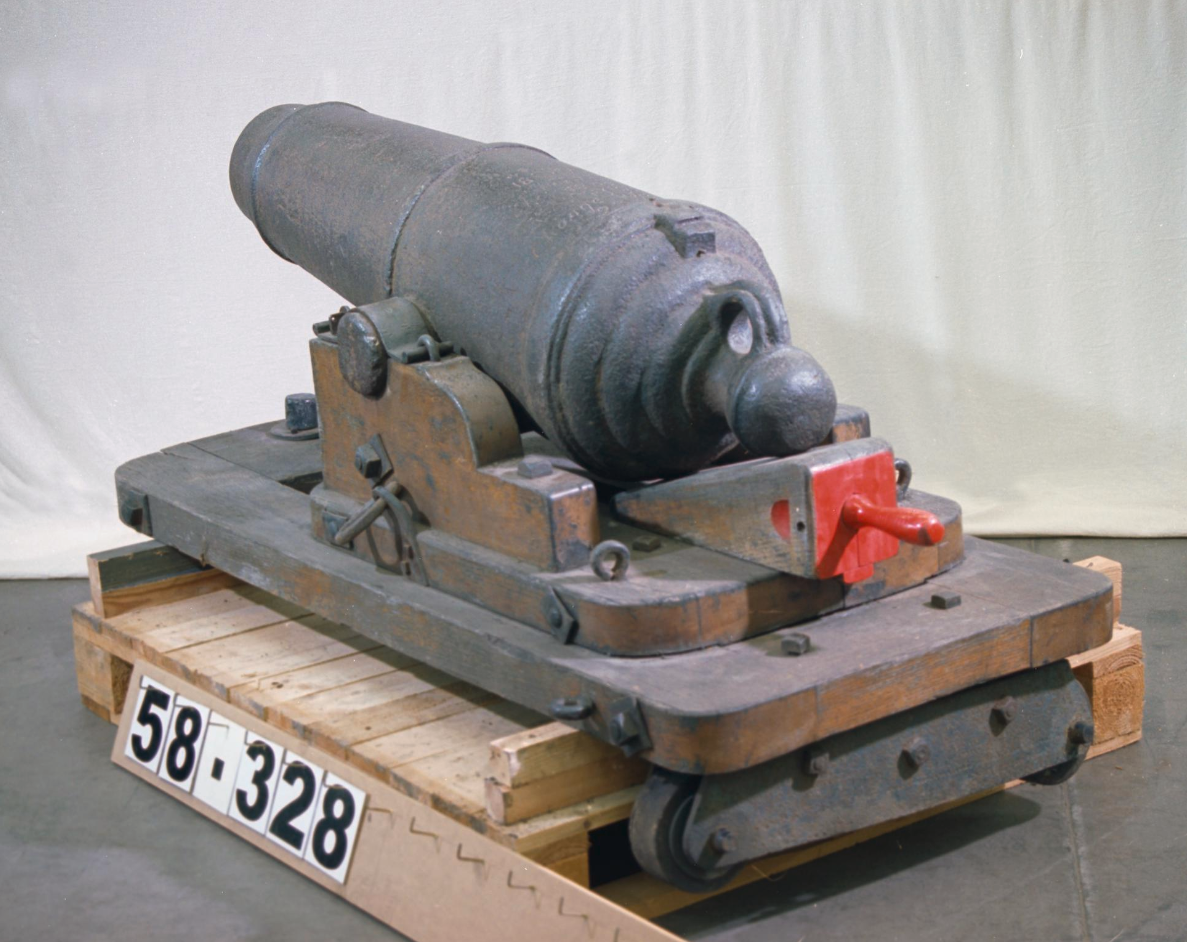
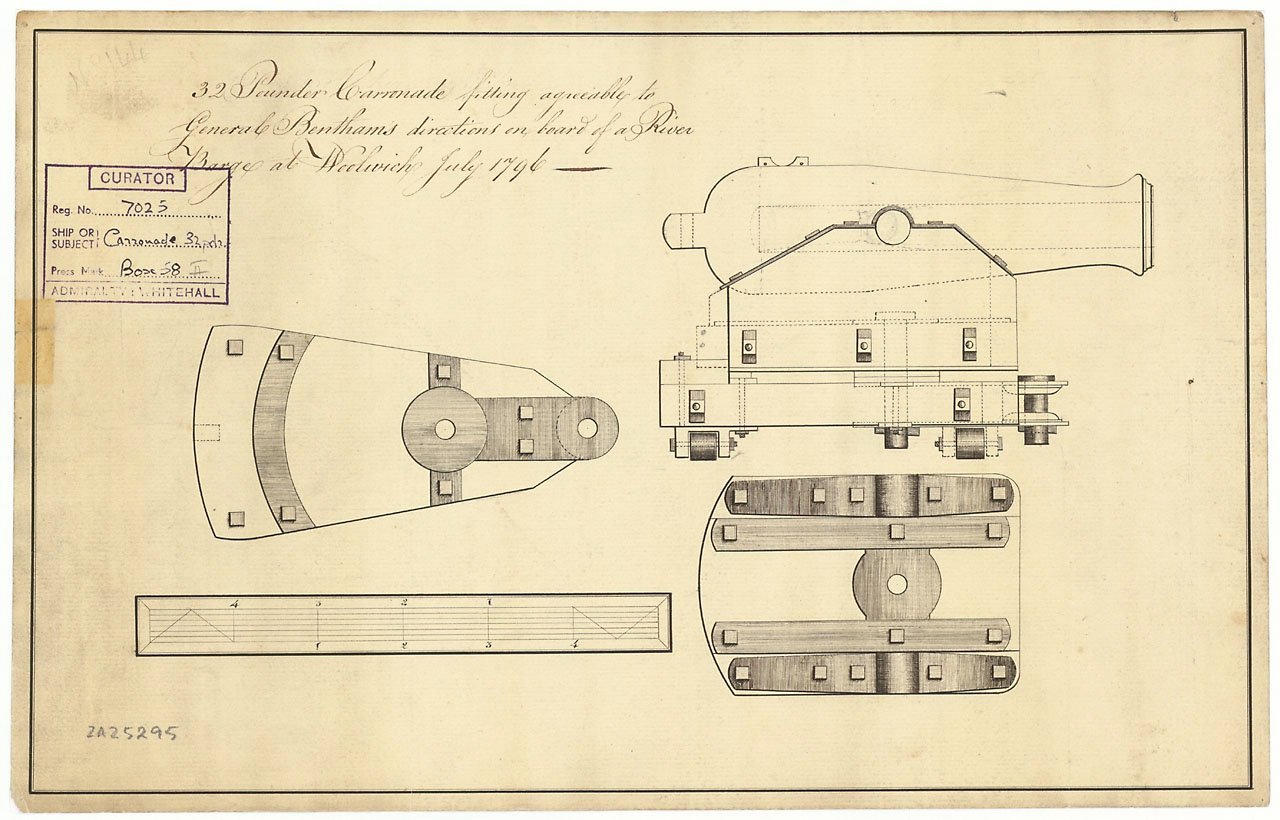
It is looking really good. One question I have is regarding the type of carronade used. Most primary sources I have been able to find seem to use the older style carronade mount for the 1780s and 90s. For example see this image from the RMG. https://www.rmg.co.uk/collections/objects/rmgc-object-86779 These were originally adempted to be mounted inboard, but that didn't work as you noted due to he problem of setting the shrouds on fire. So they started to mount them outboard. Even as late as 1802 similar styles appear still to be in use, for example see this one from the Museum of Wales. You can see how the shape is starting to resemble the later shape now, but they still don't have the pin mechanism of elevation on the go yet. They are also still using the old style of carriage with the carronade attached There is also this one from 1796, which was made for a river barge that has a completely different configuration, but importantly note that there is no pin yet. https://www.rmg.co.uk/collections/objects/rmgc-object-85086 What is the RA Library, I would be interested in seeing more info on the drawing as most examples I have seen of early carronades seem to not have the pin.
-
That is the problem, there are so many different compelling ways to theme the model. They all involve tradeoffs in terms of what they show and so I am very sympathetic as I am constantly torn as to what I like the best. This is particularly true when these things take potentially years to build so whatever you decide you are stuck in that theme for a while.
-
Fantastic work as always. One question I have which I have never been able to reconcile in my head is are the margin plank and the waterway meant to be the same piece of wood (ie we just use the thin strip as a cheat that looks close enough)? Most of the cross-sections I see seem to have the waterway extend under the bulwark planking, or is that the margin plank?