


Paul Le Wol
-
Posts
486 -
Joined
-
Last visited
Content Type
Profiles
Forums
Gallery
Events
Posts posted by Paul Le Wol
-
-
Steve, congratulations on finishing this boat. She is perfect!
-
-
-
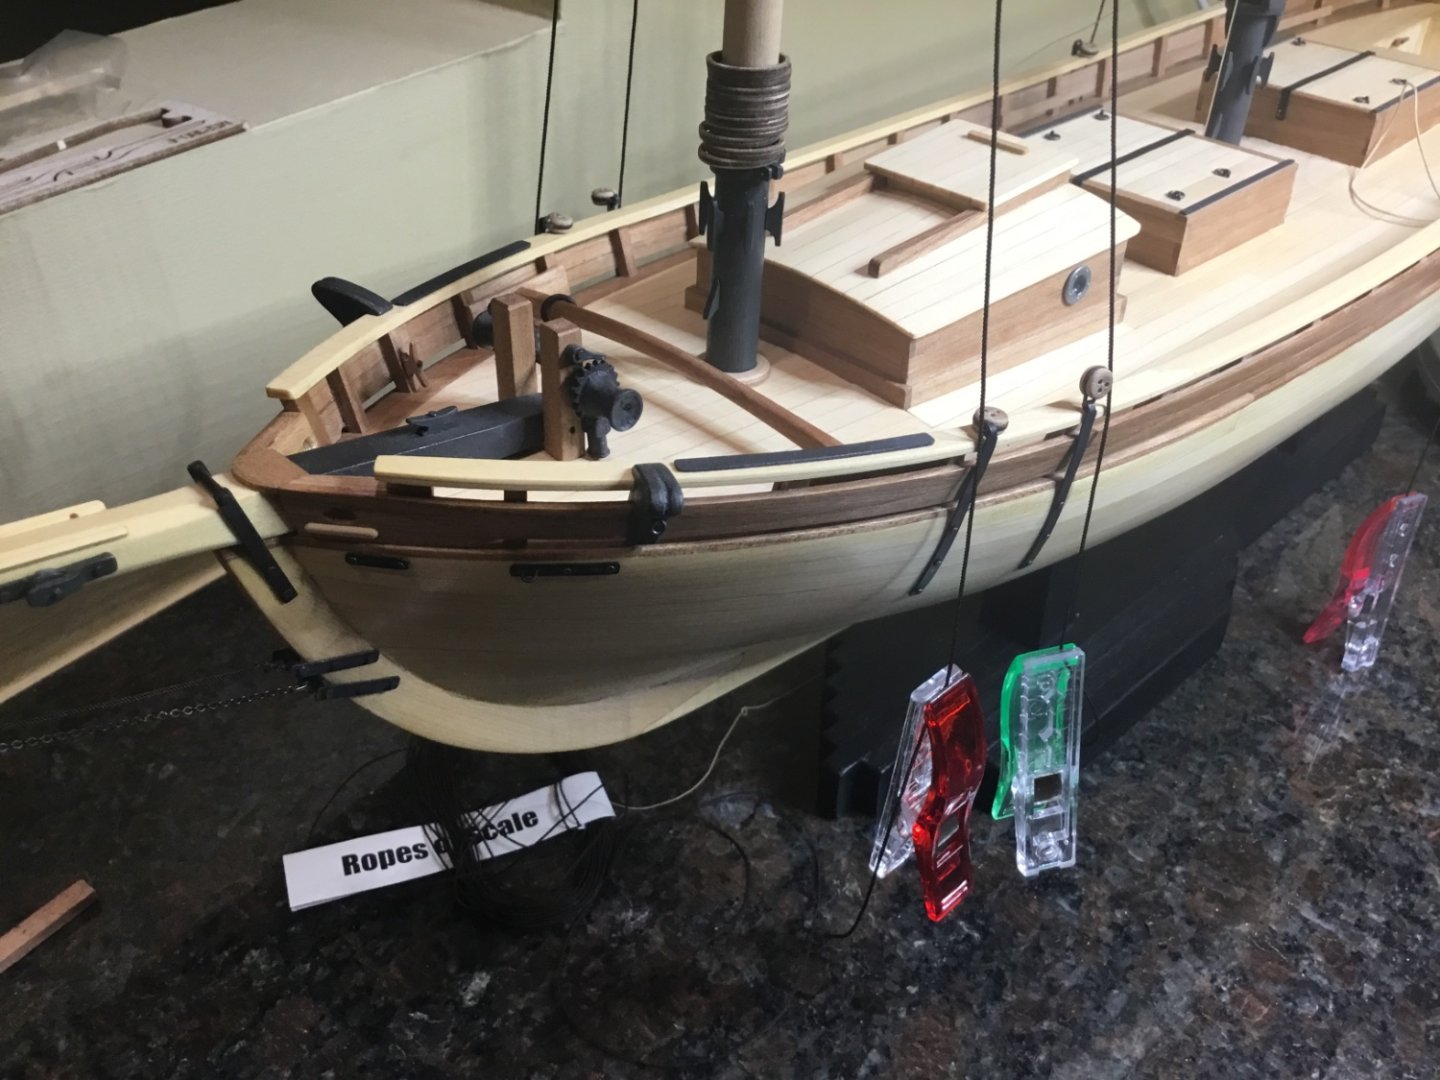
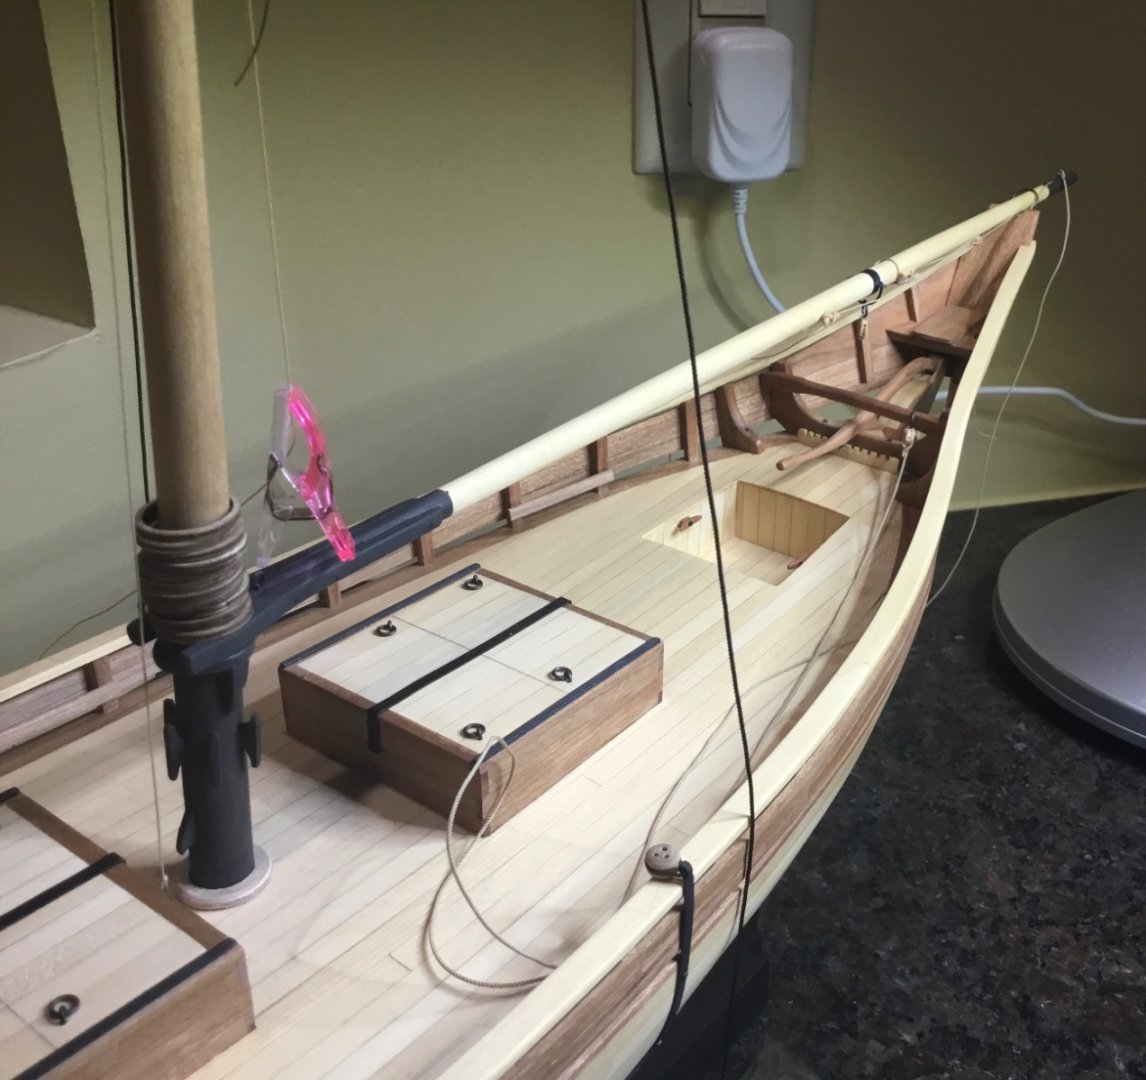
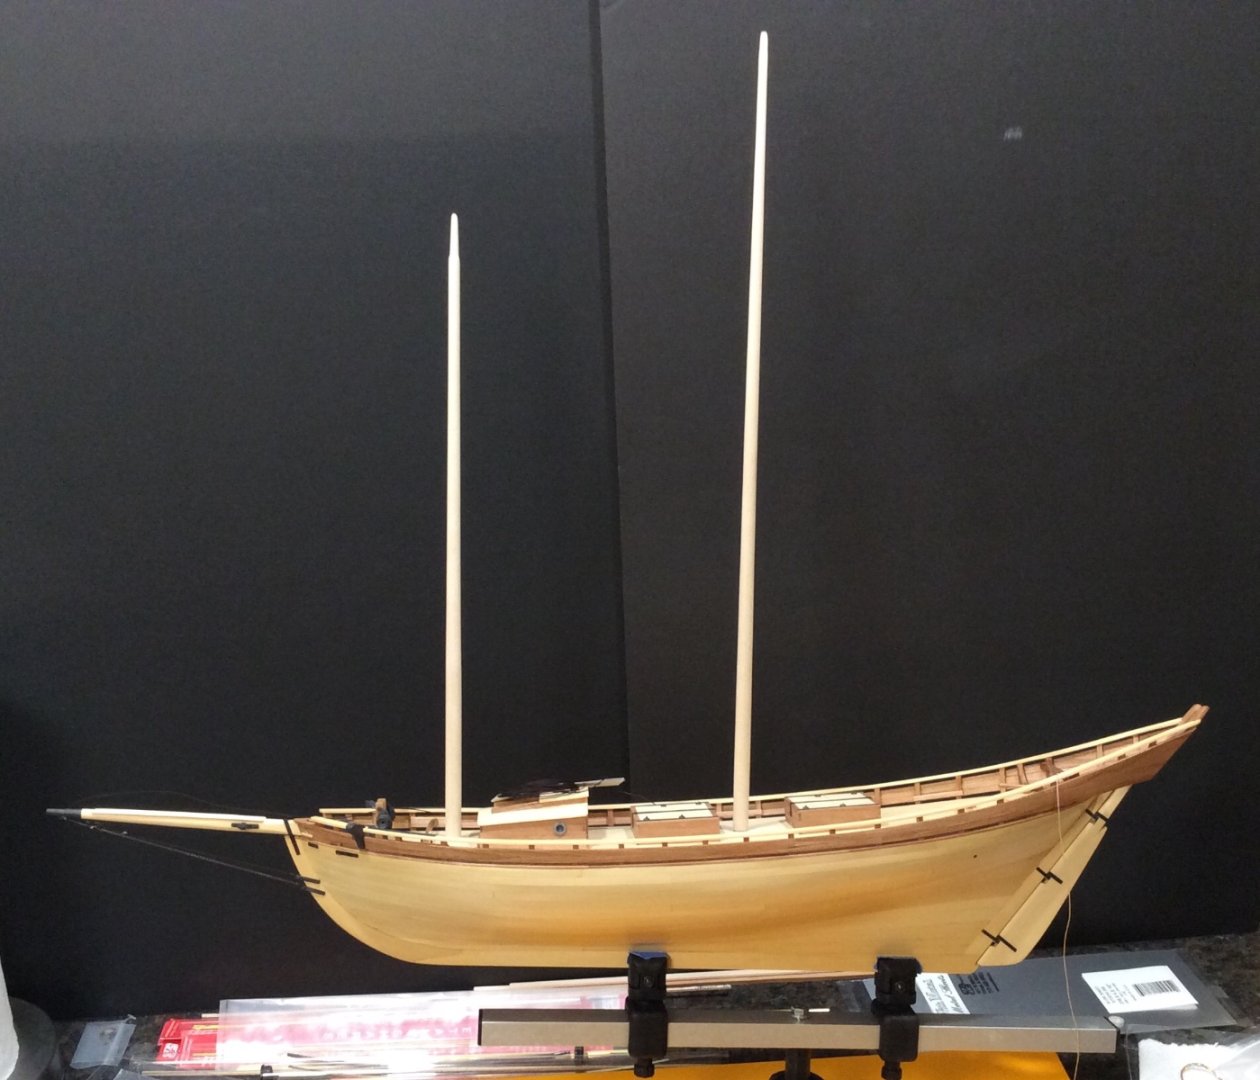
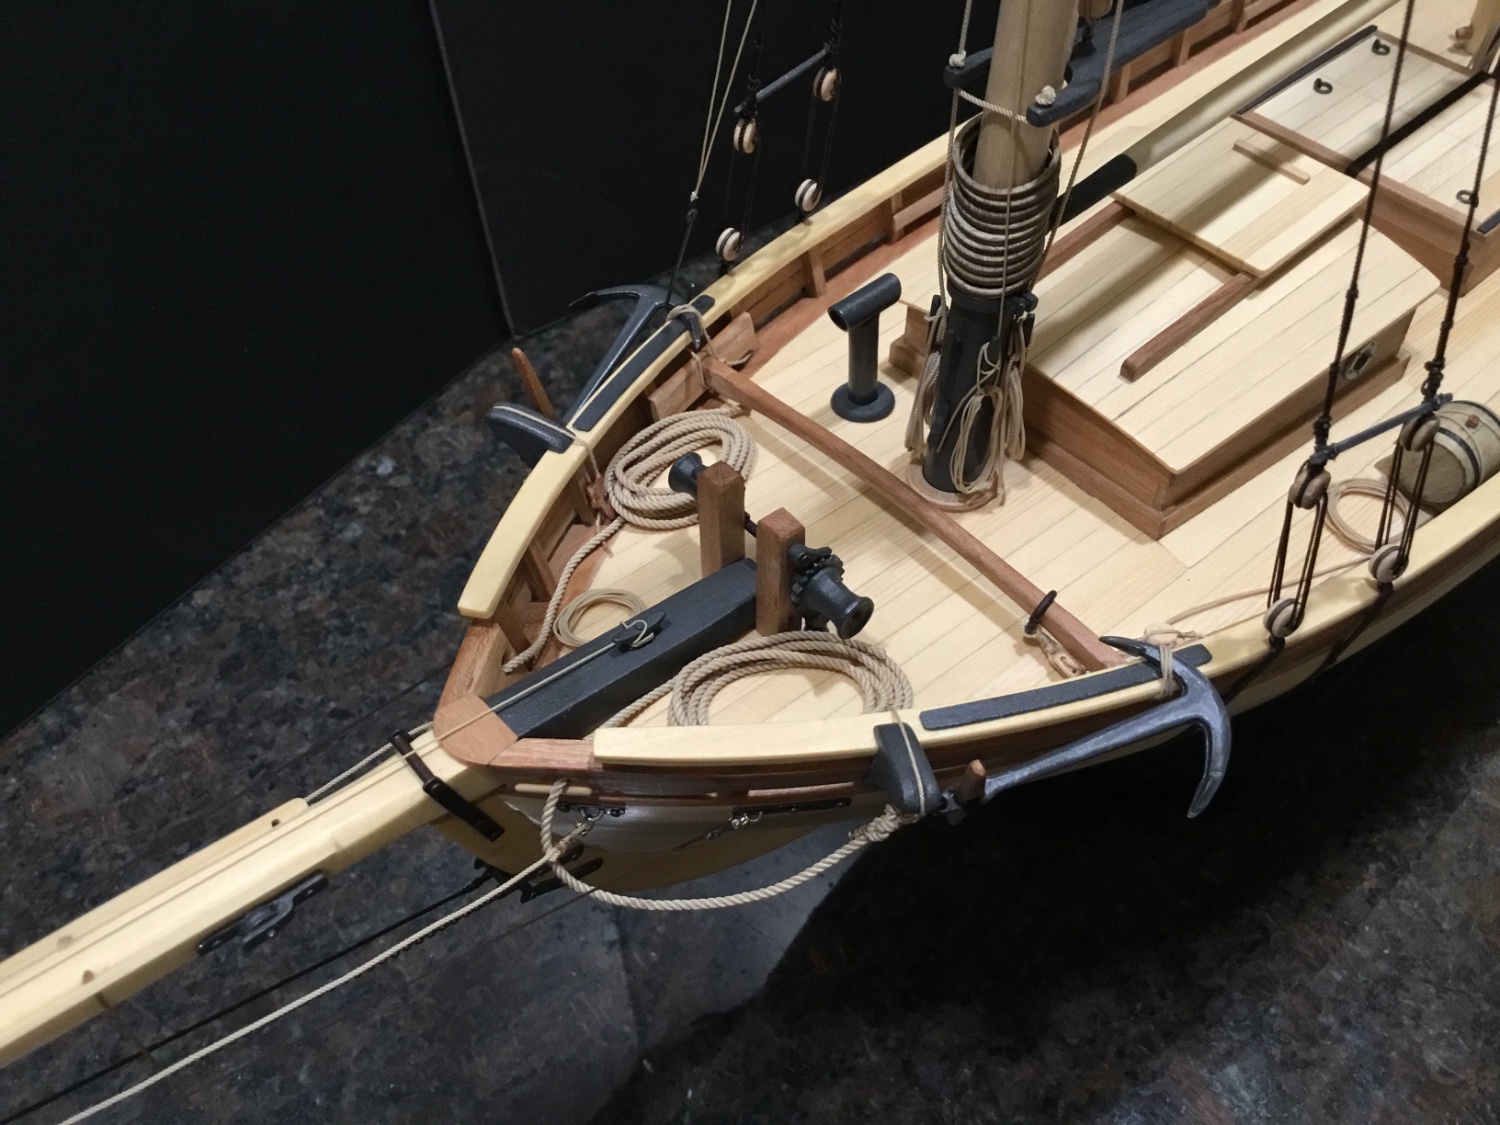
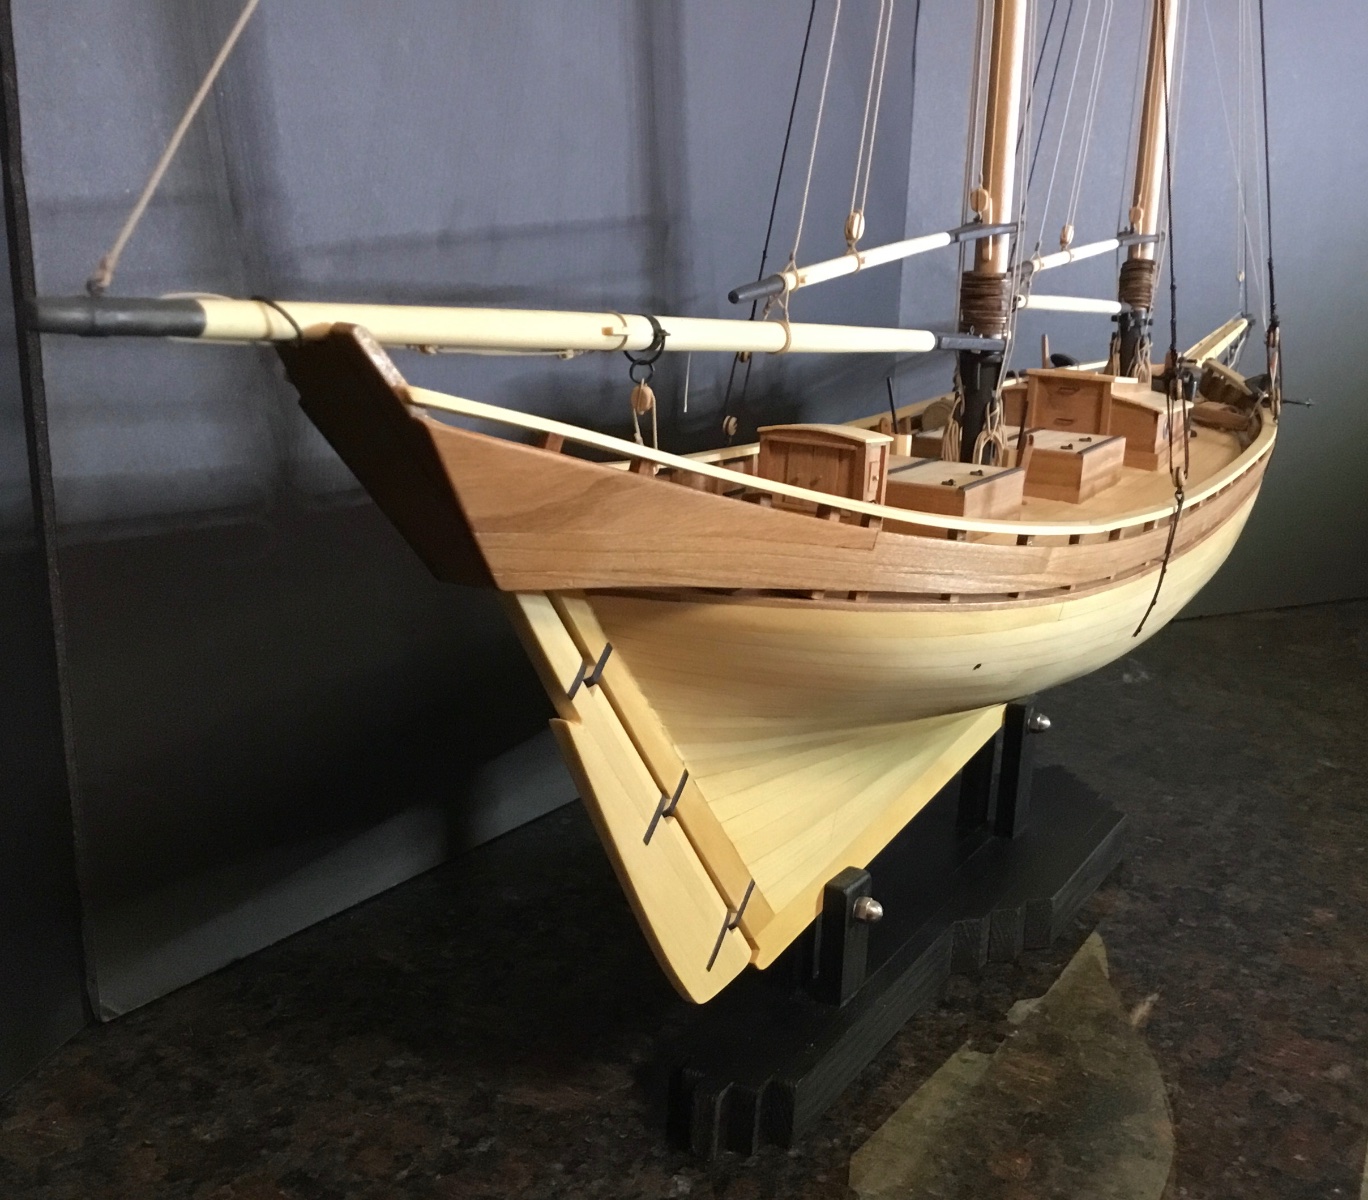
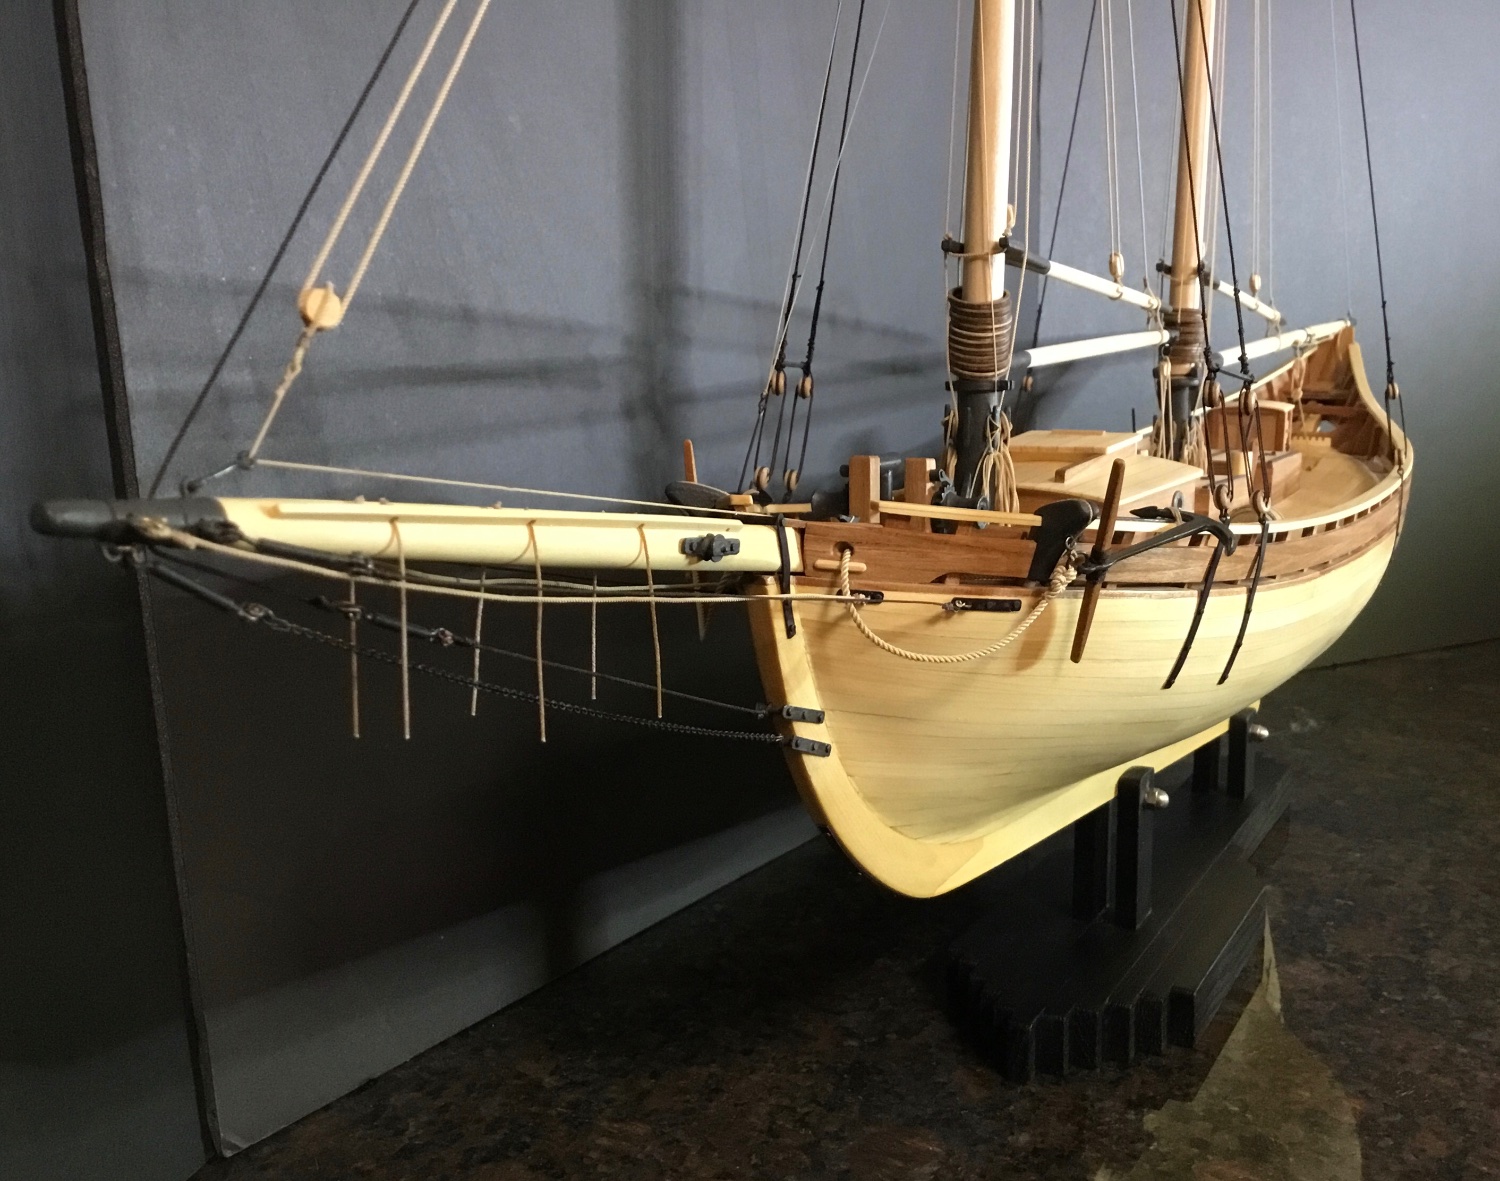
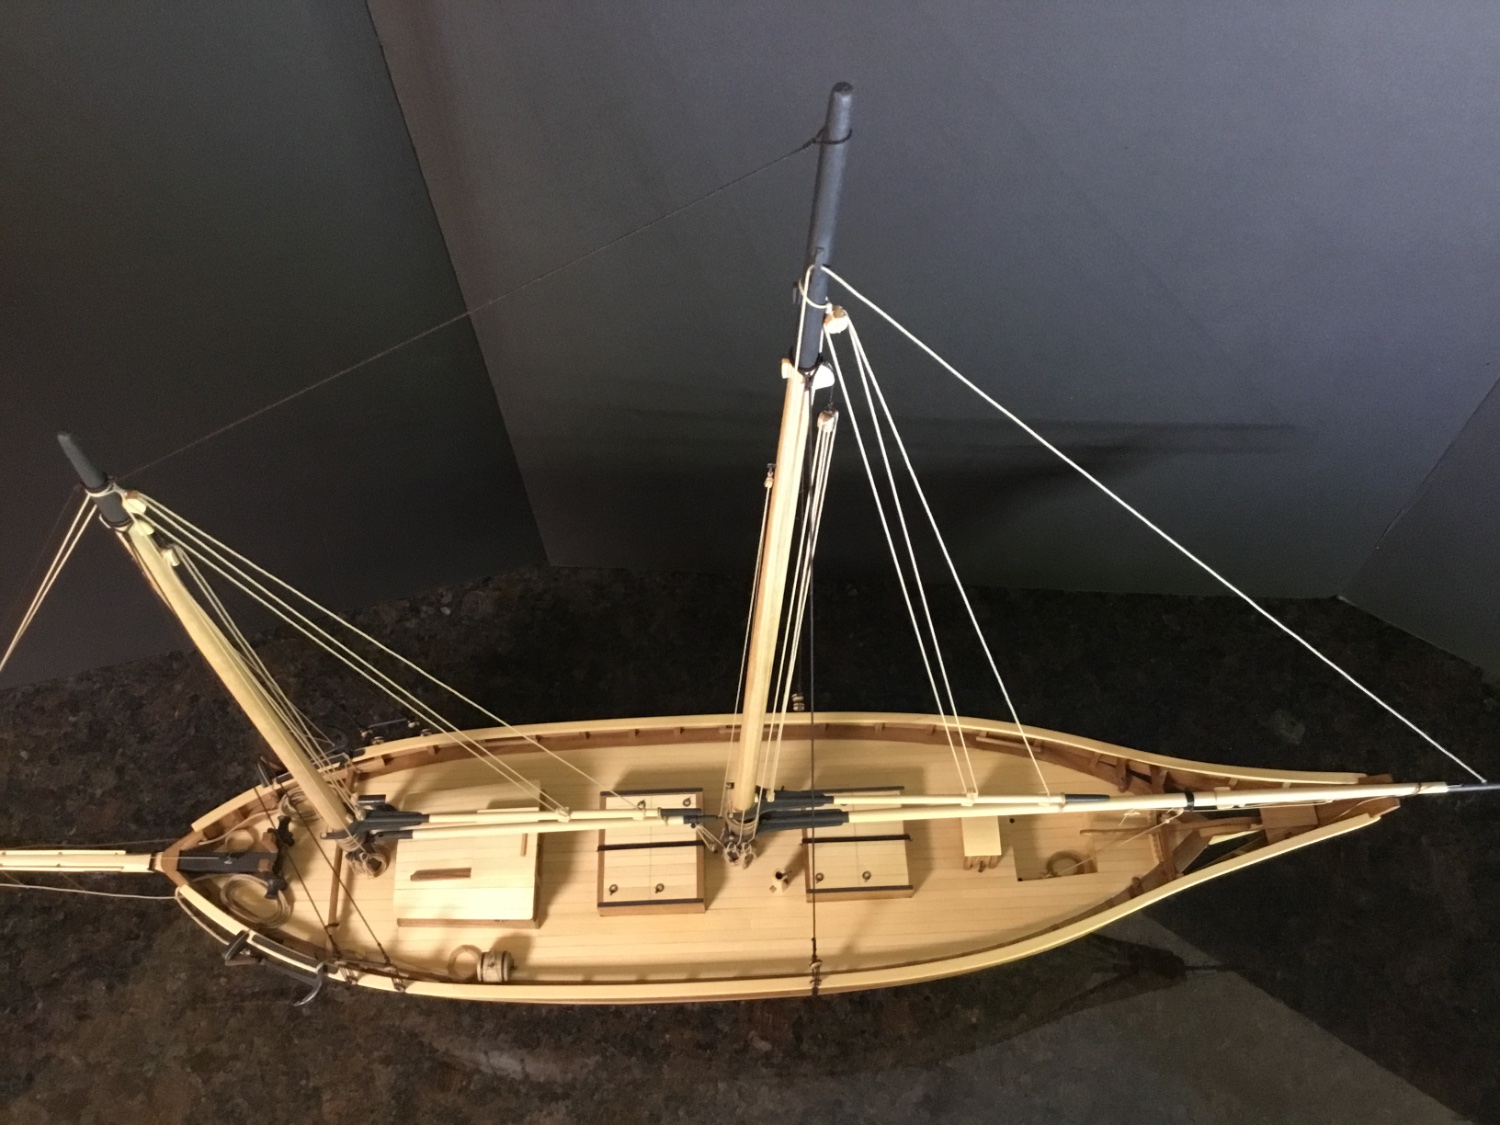
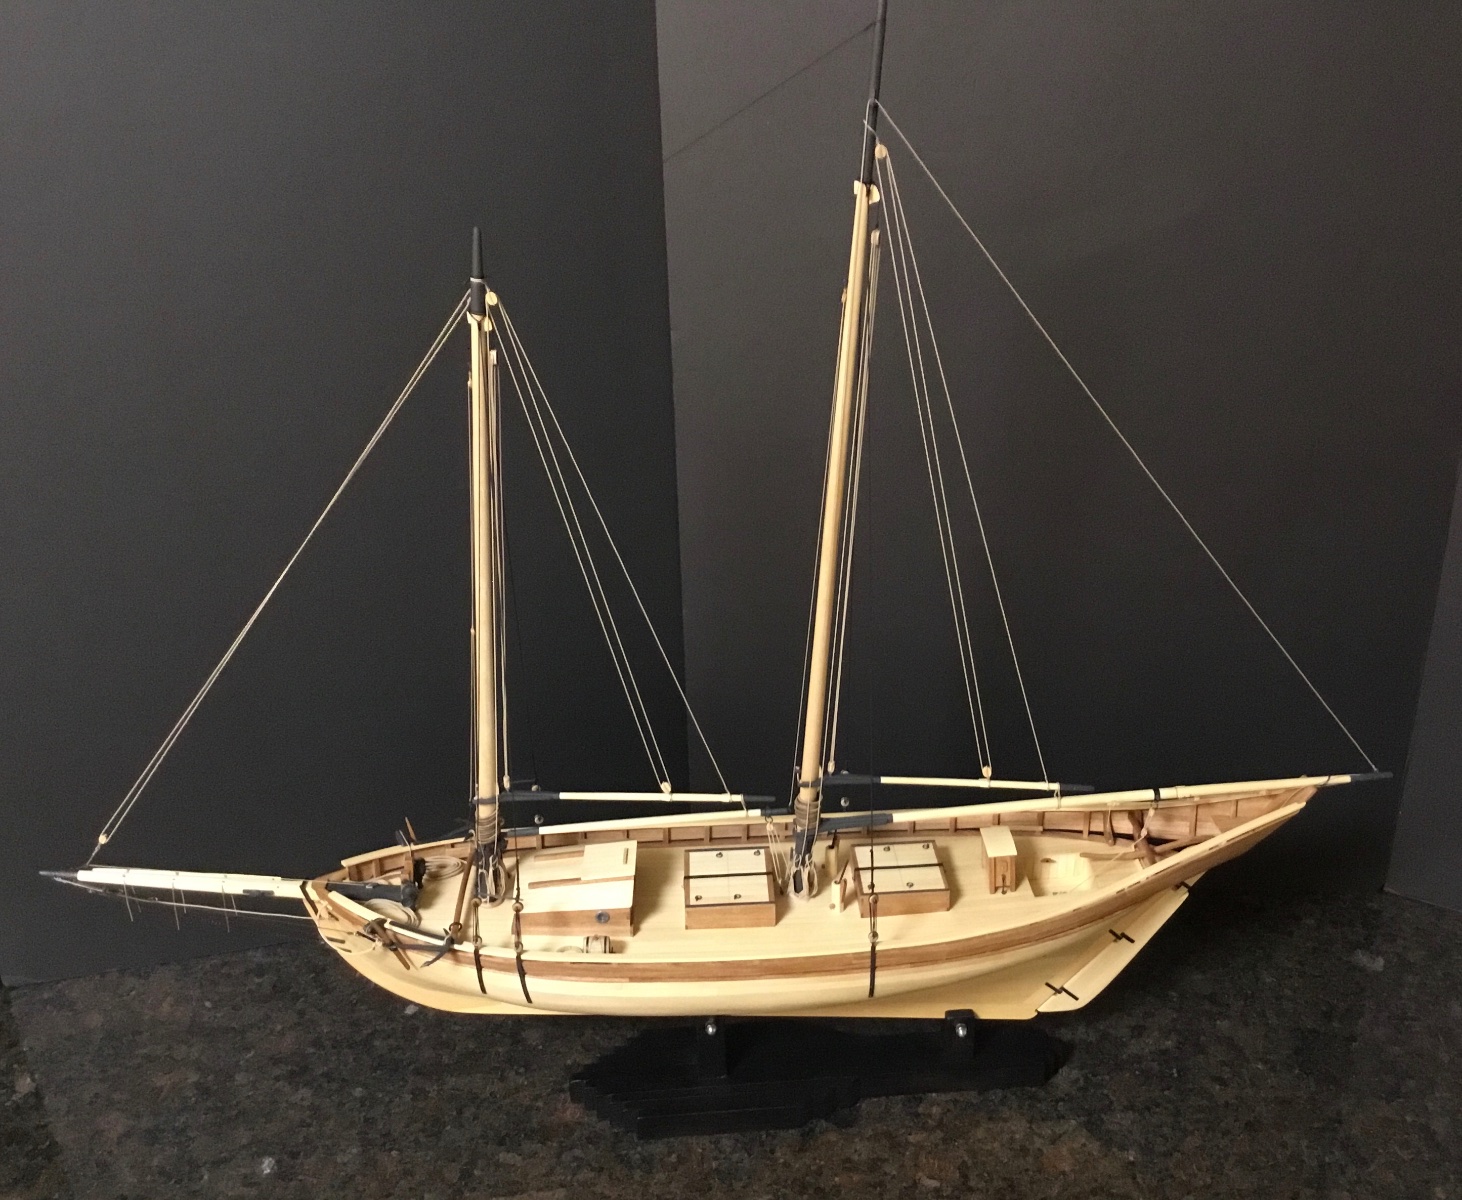
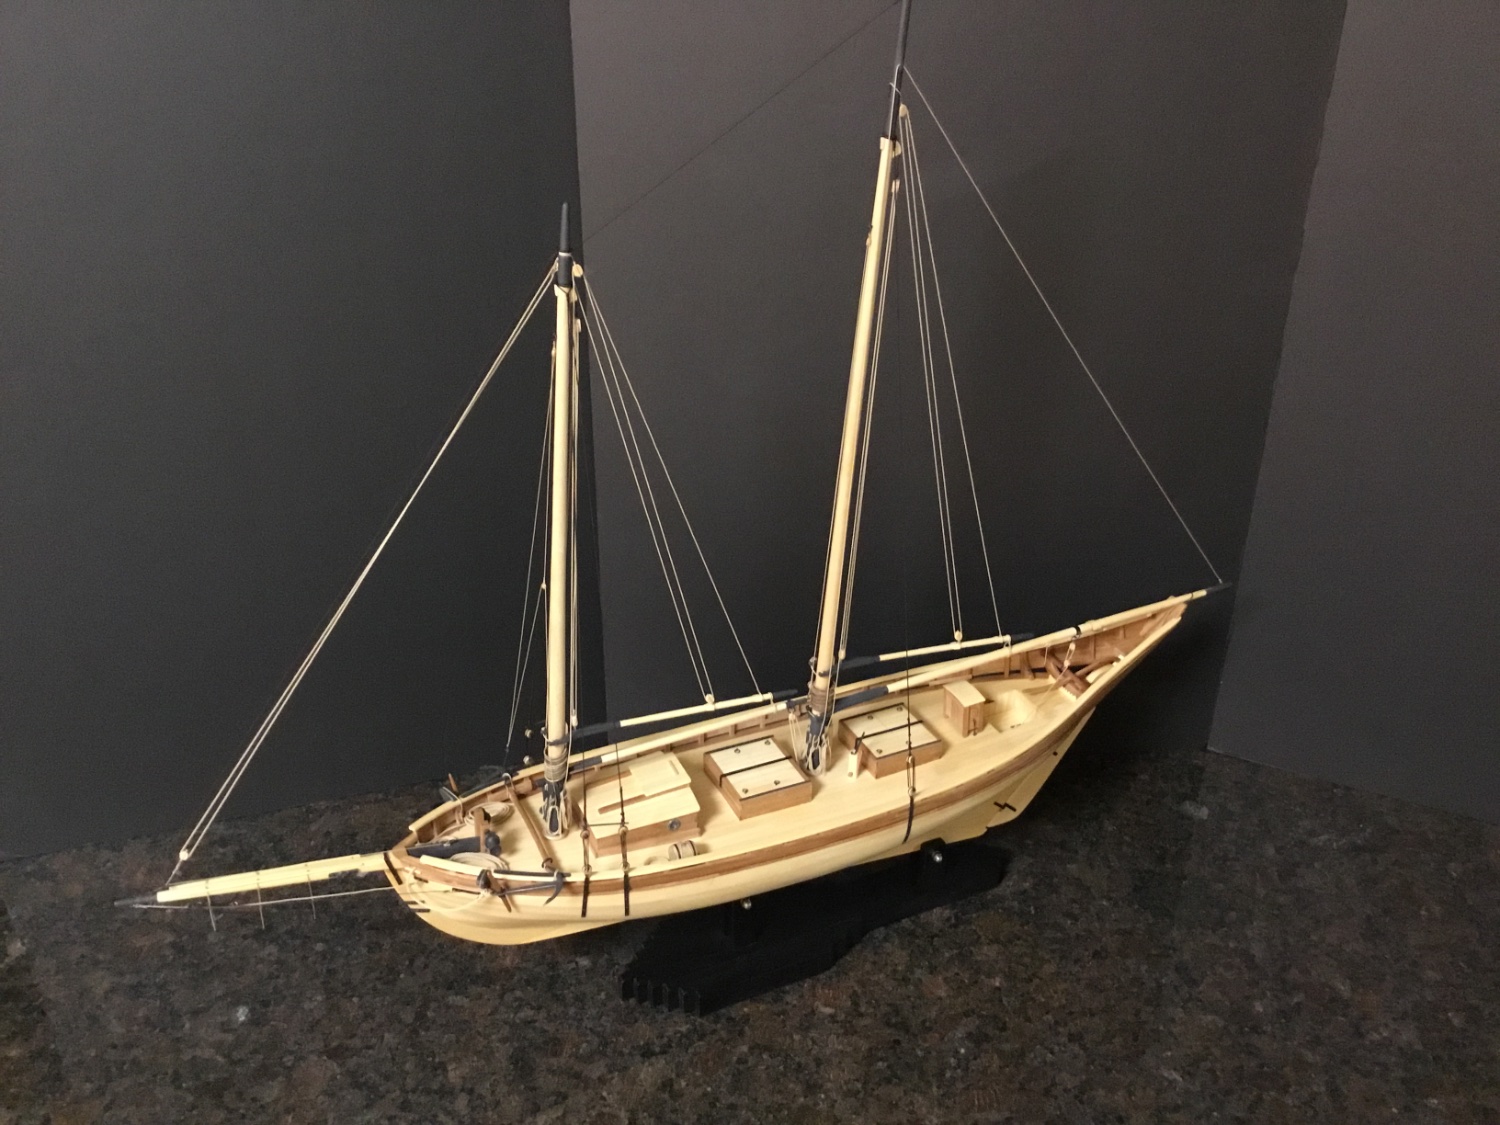
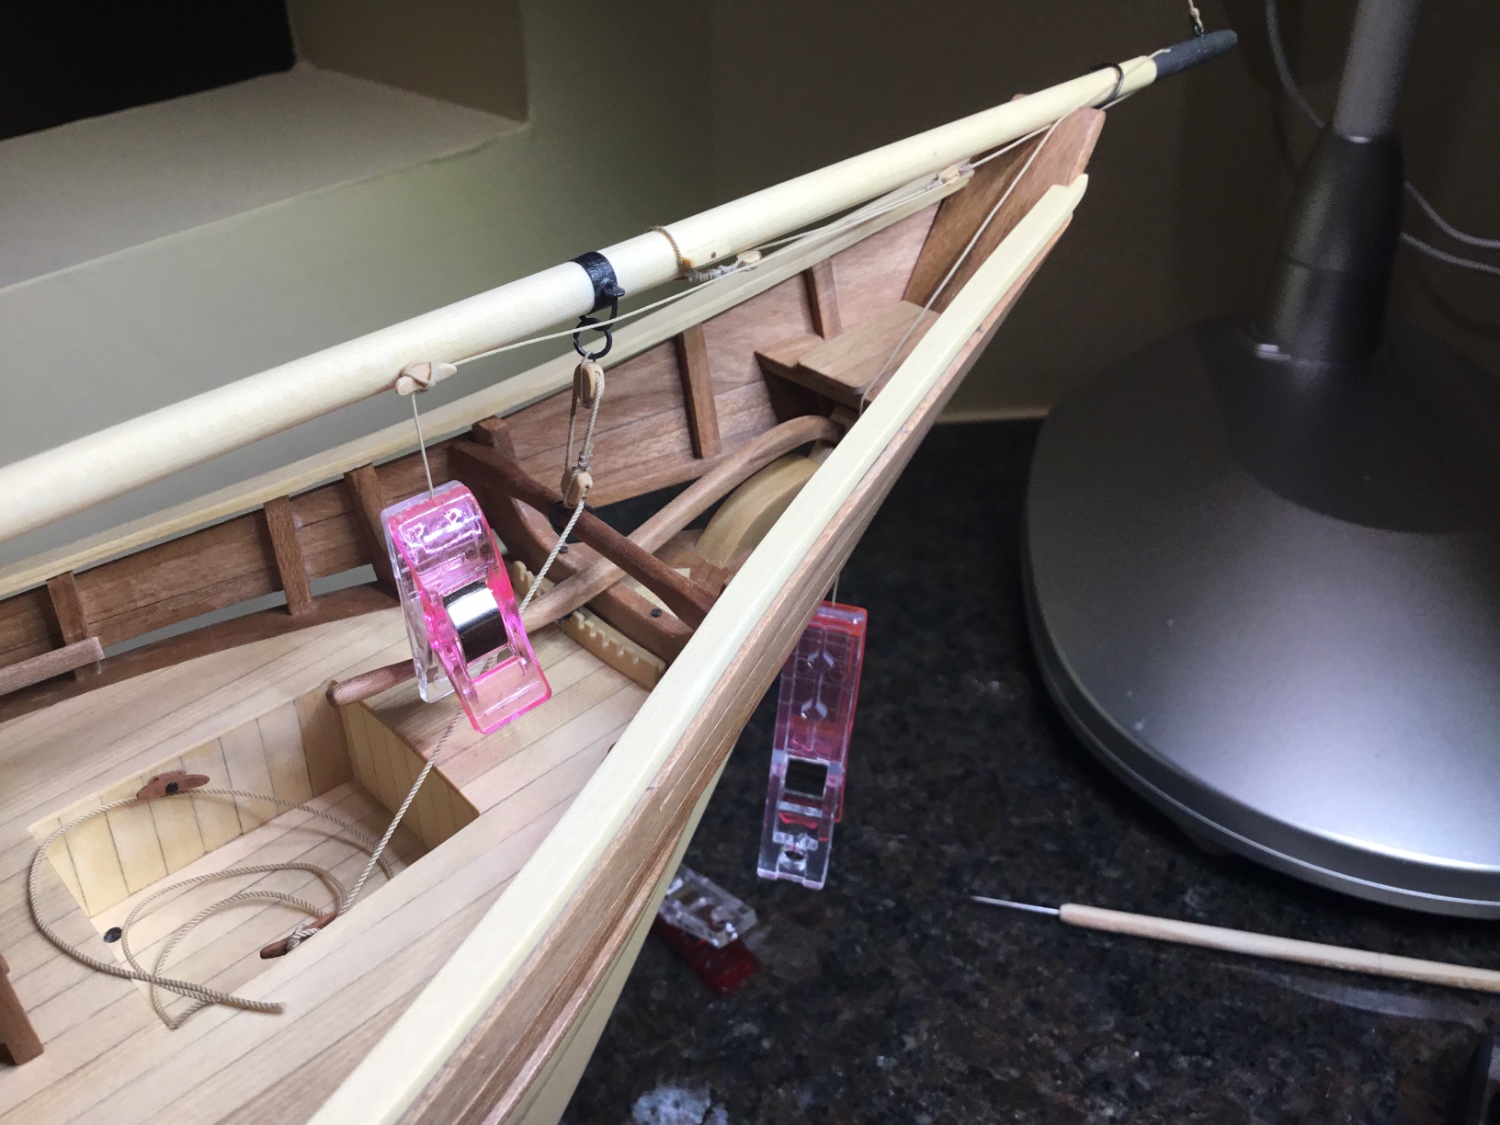
Hi Everyone, hope you are all well. Thank you for all of the likes and comments. This is the last update for this log. The Pinky is Finished! The pump handles are stowed in the pump the way they are in the Schooner Prophet video. I guess just to keep them out of the way

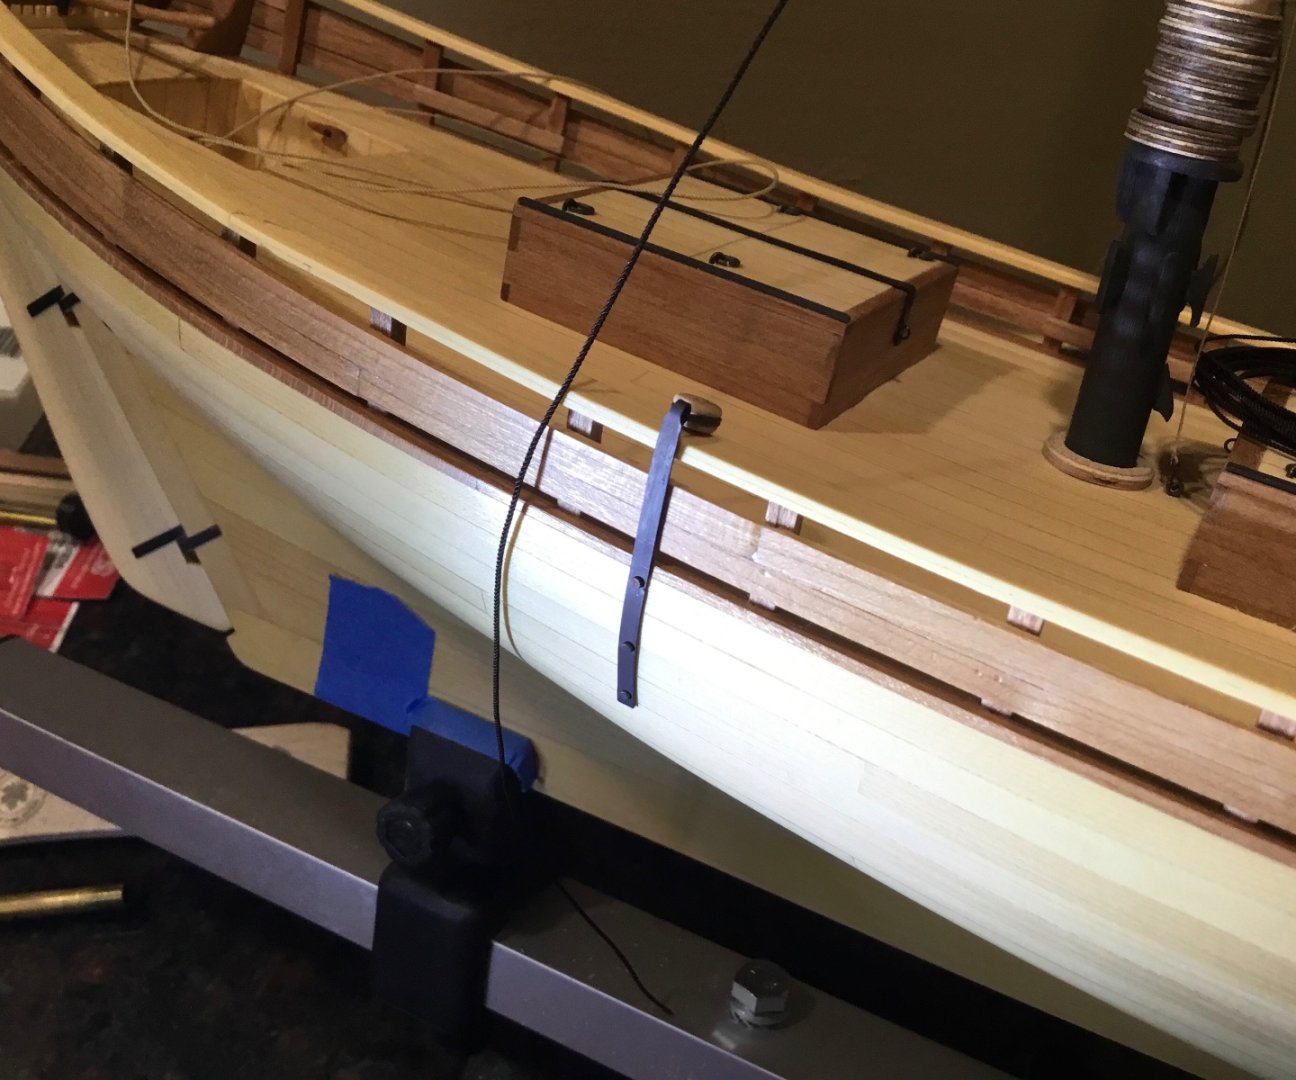
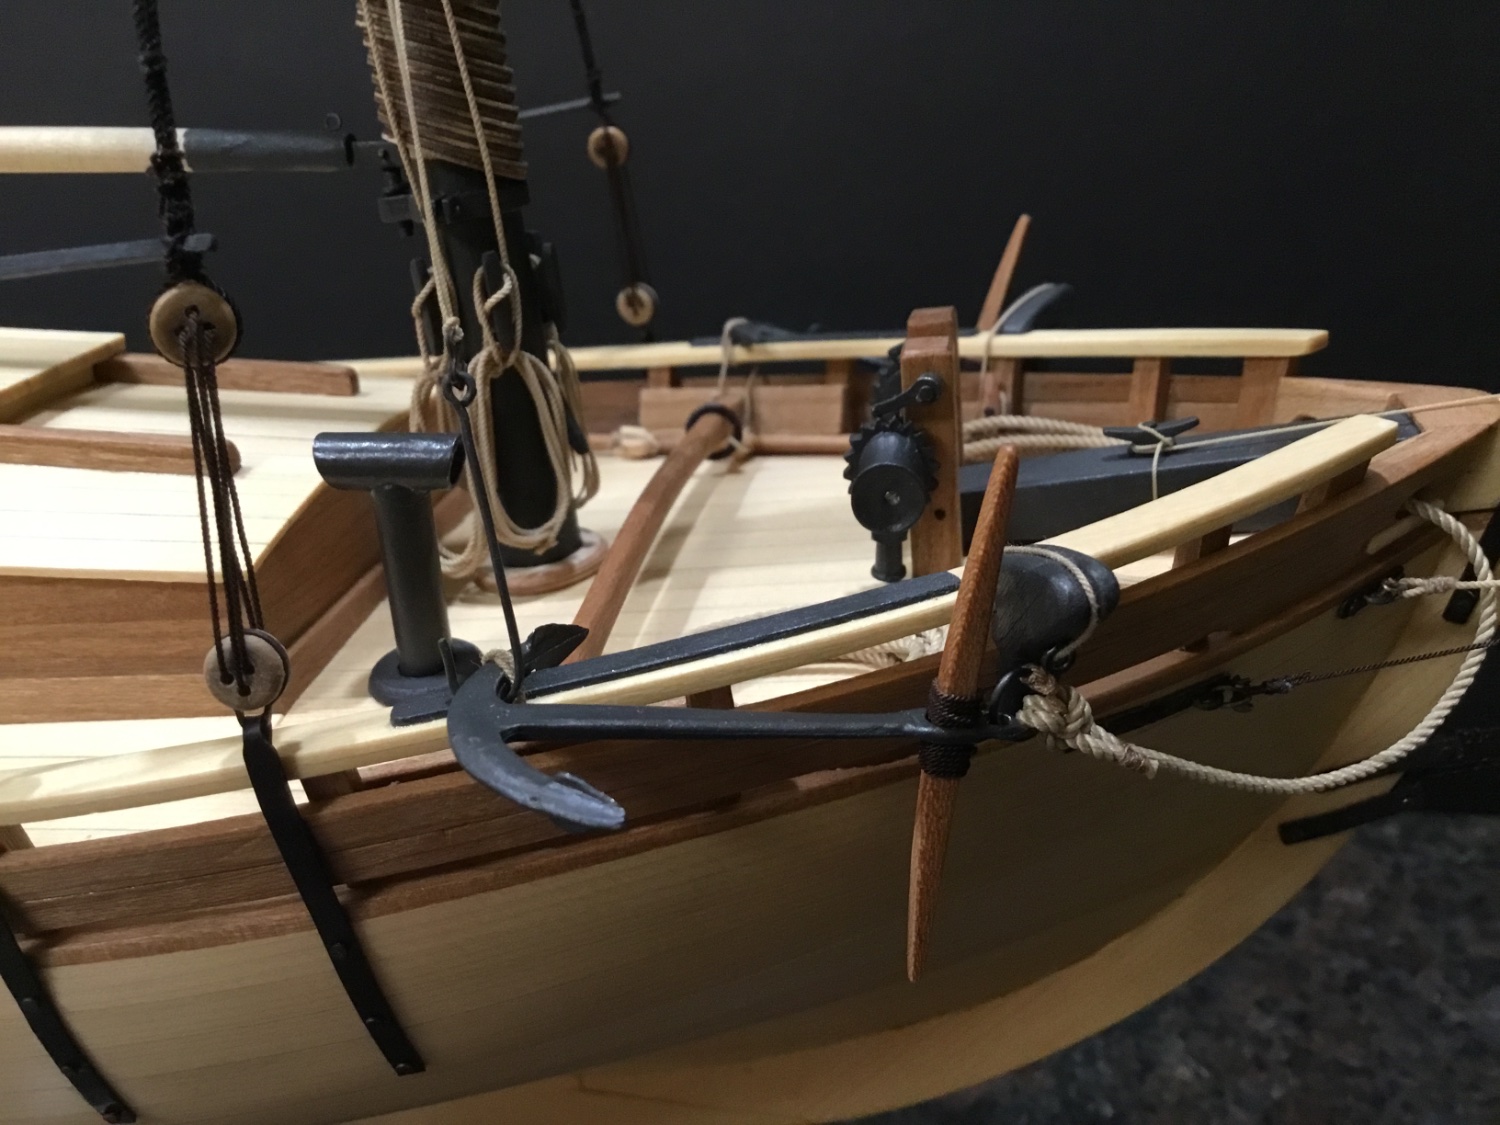
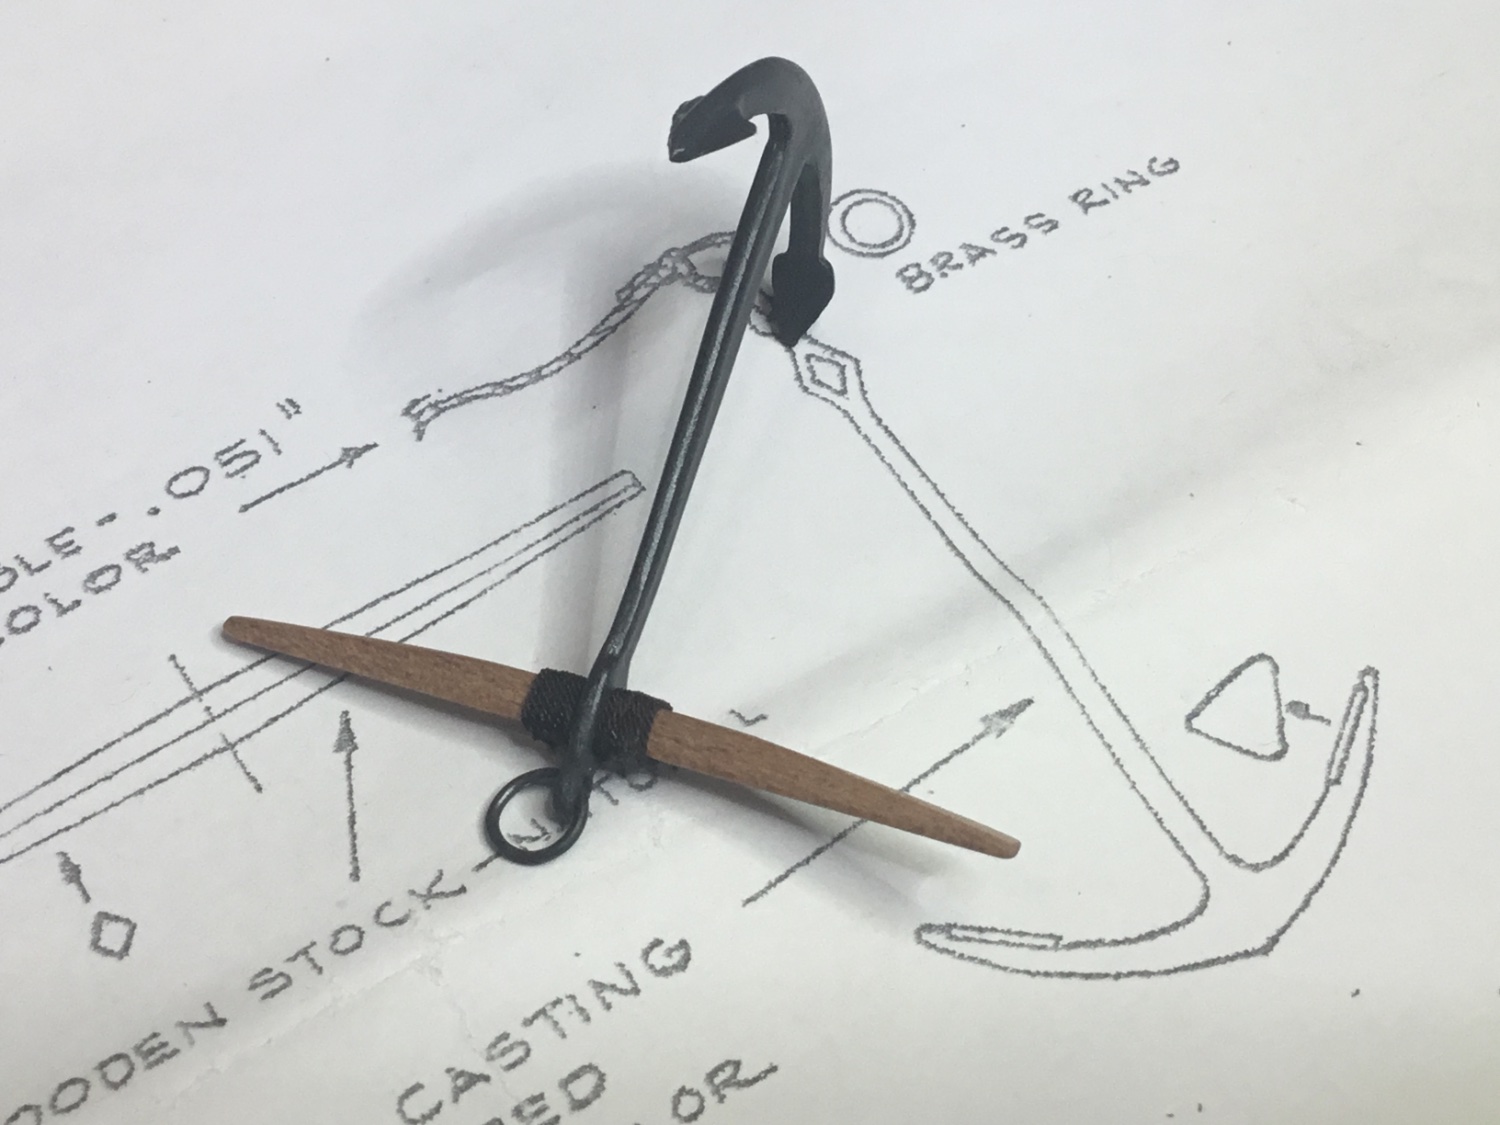
The anchors are mounted. The plans call for .051” anchor rope but I used .047”. I think it looks heavy enough. The jib club isn’t being used right now so the jib club topping lift is being used as an anchor tackle. It has a fish hook attached to it which is hooked to the starboard anchor.


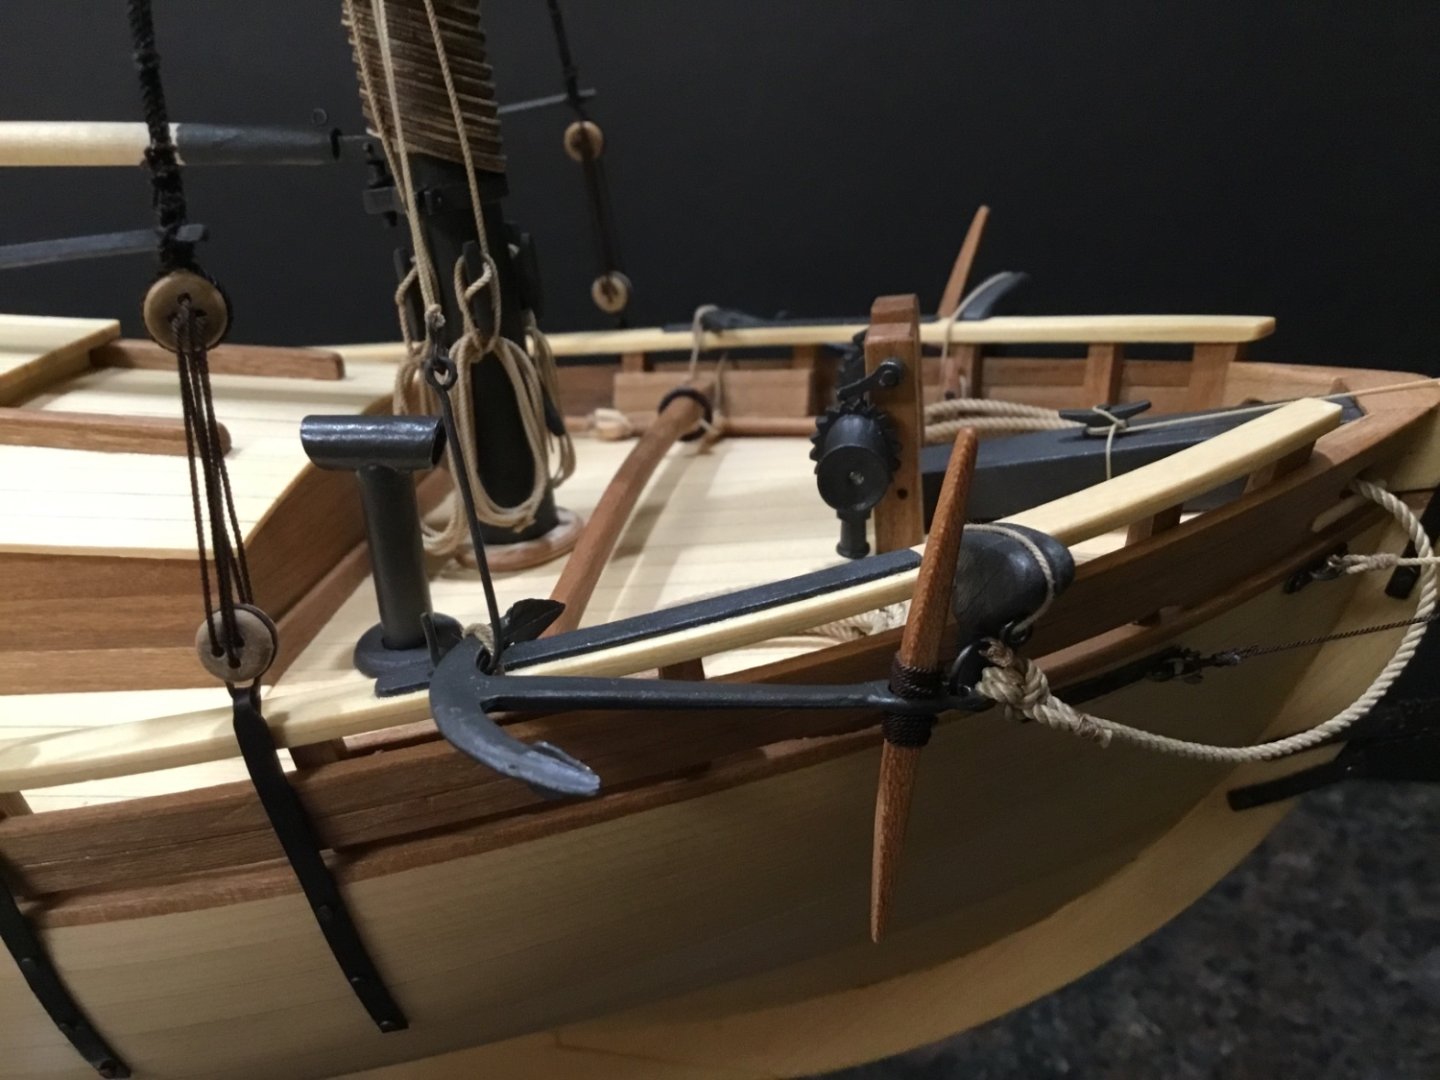

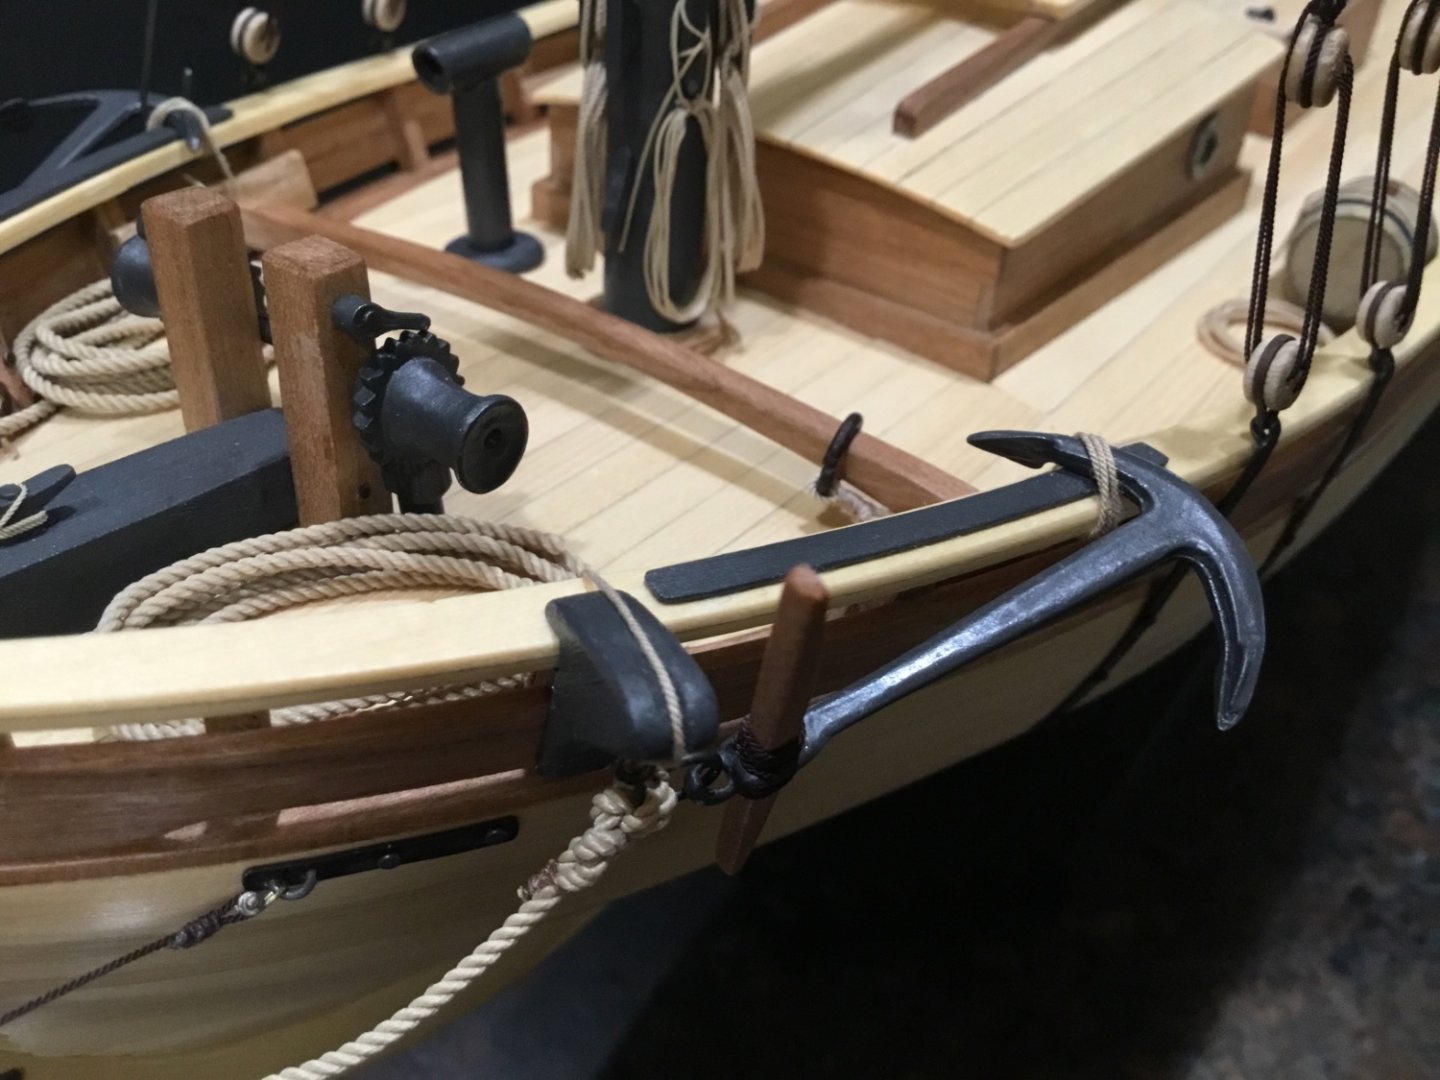
The foot ropes had to be remade longer because the were not attached to the correct points on the bowsprit. And now just some pictures of the finished boat.
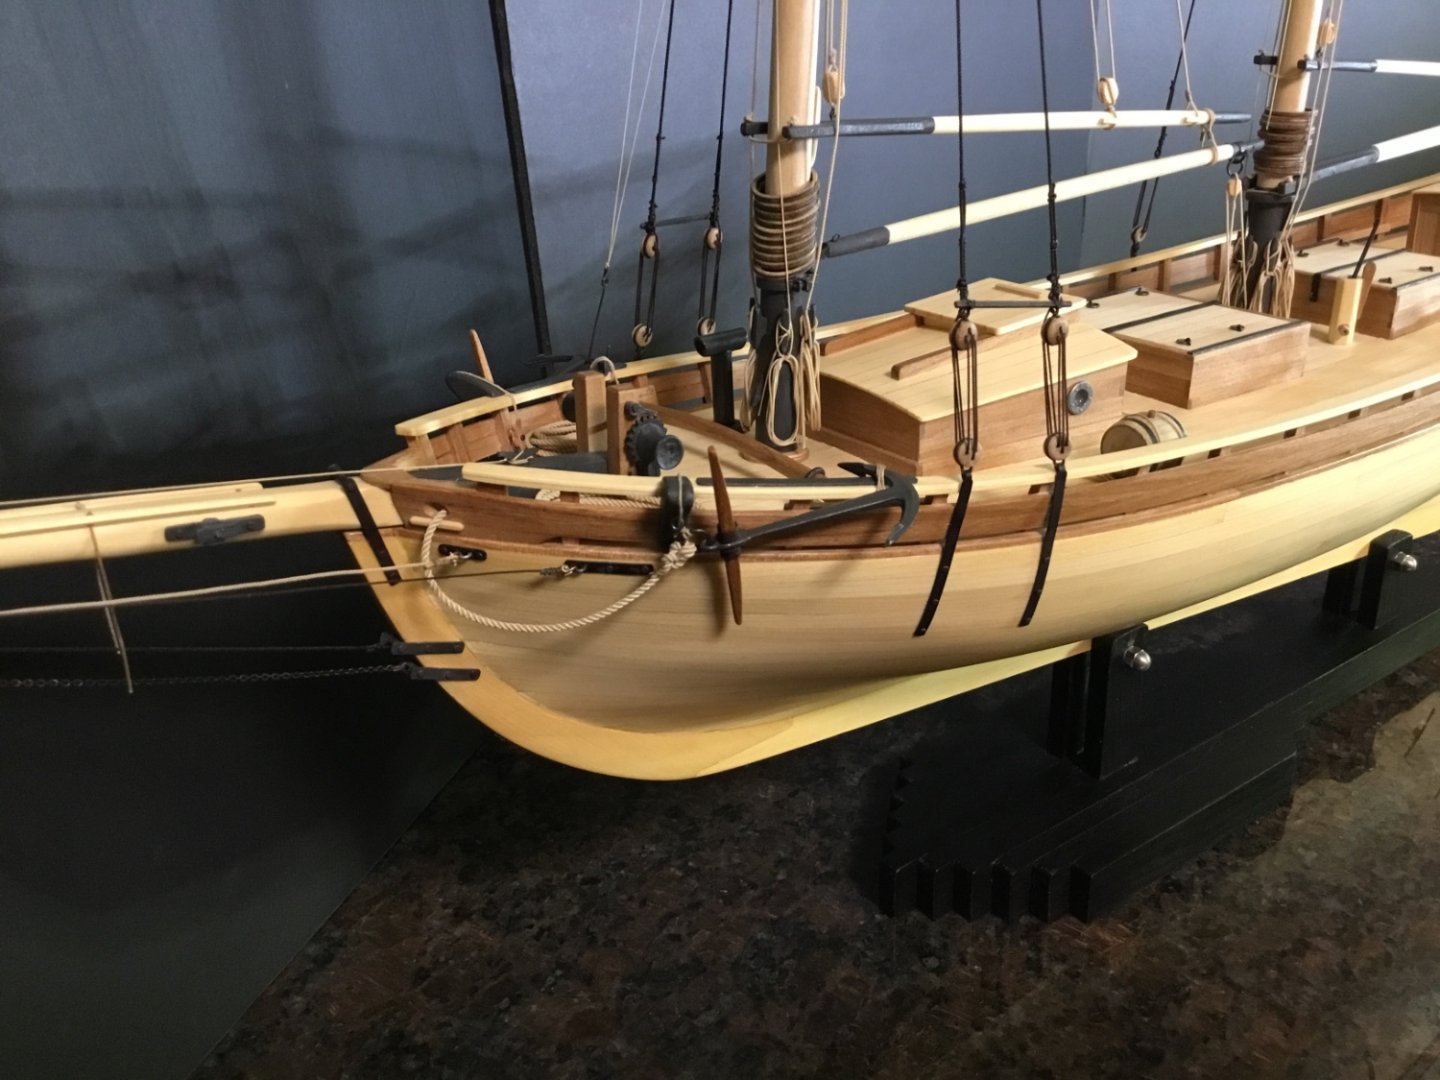
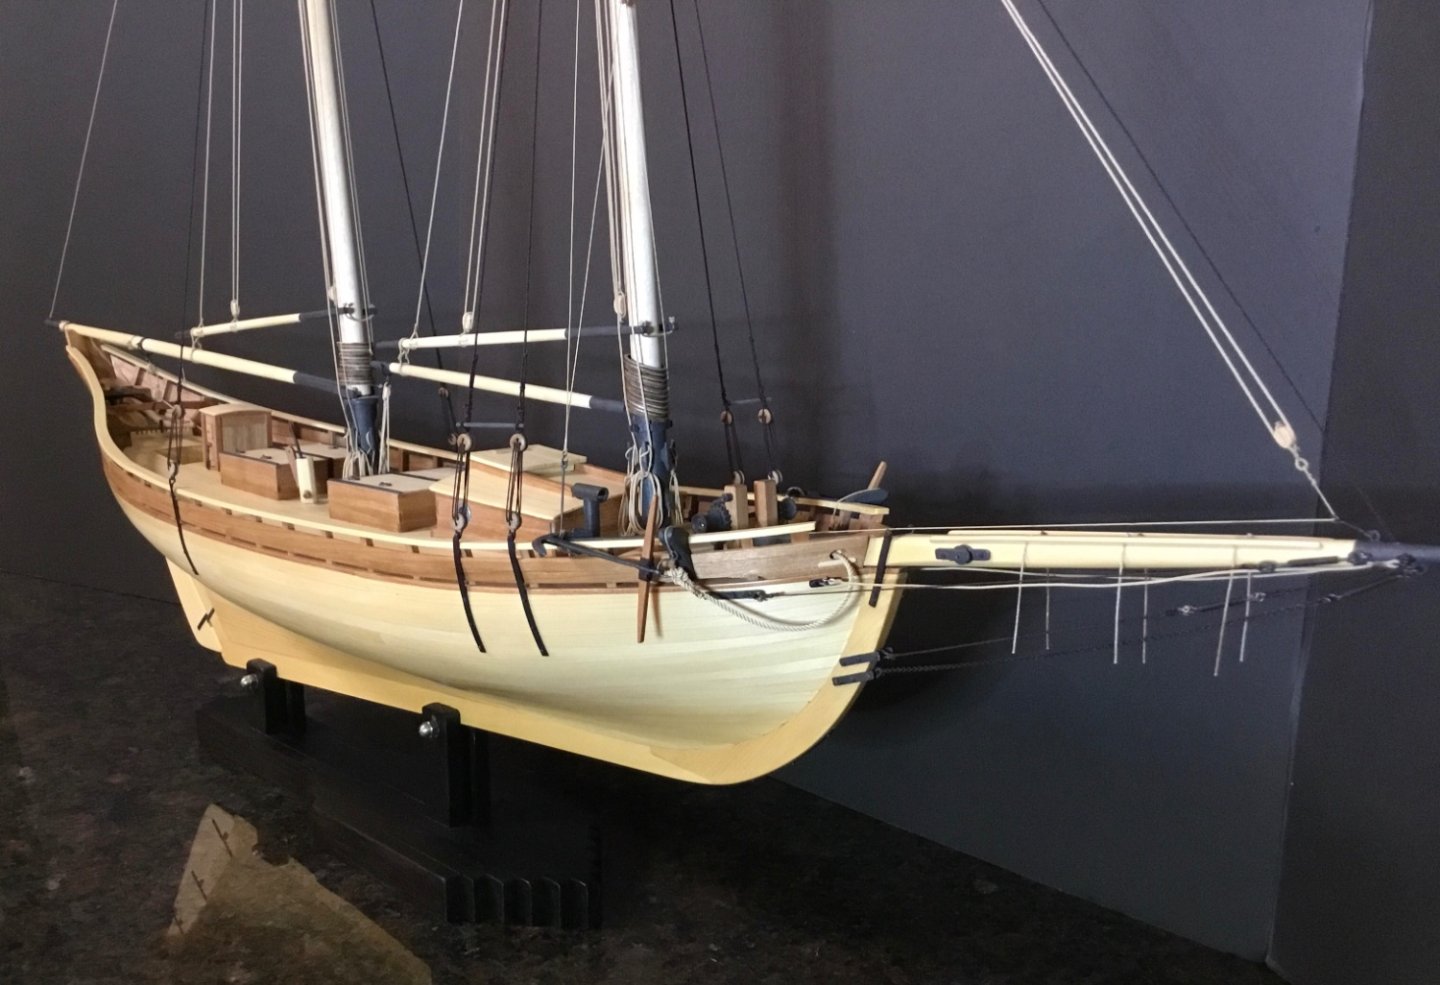
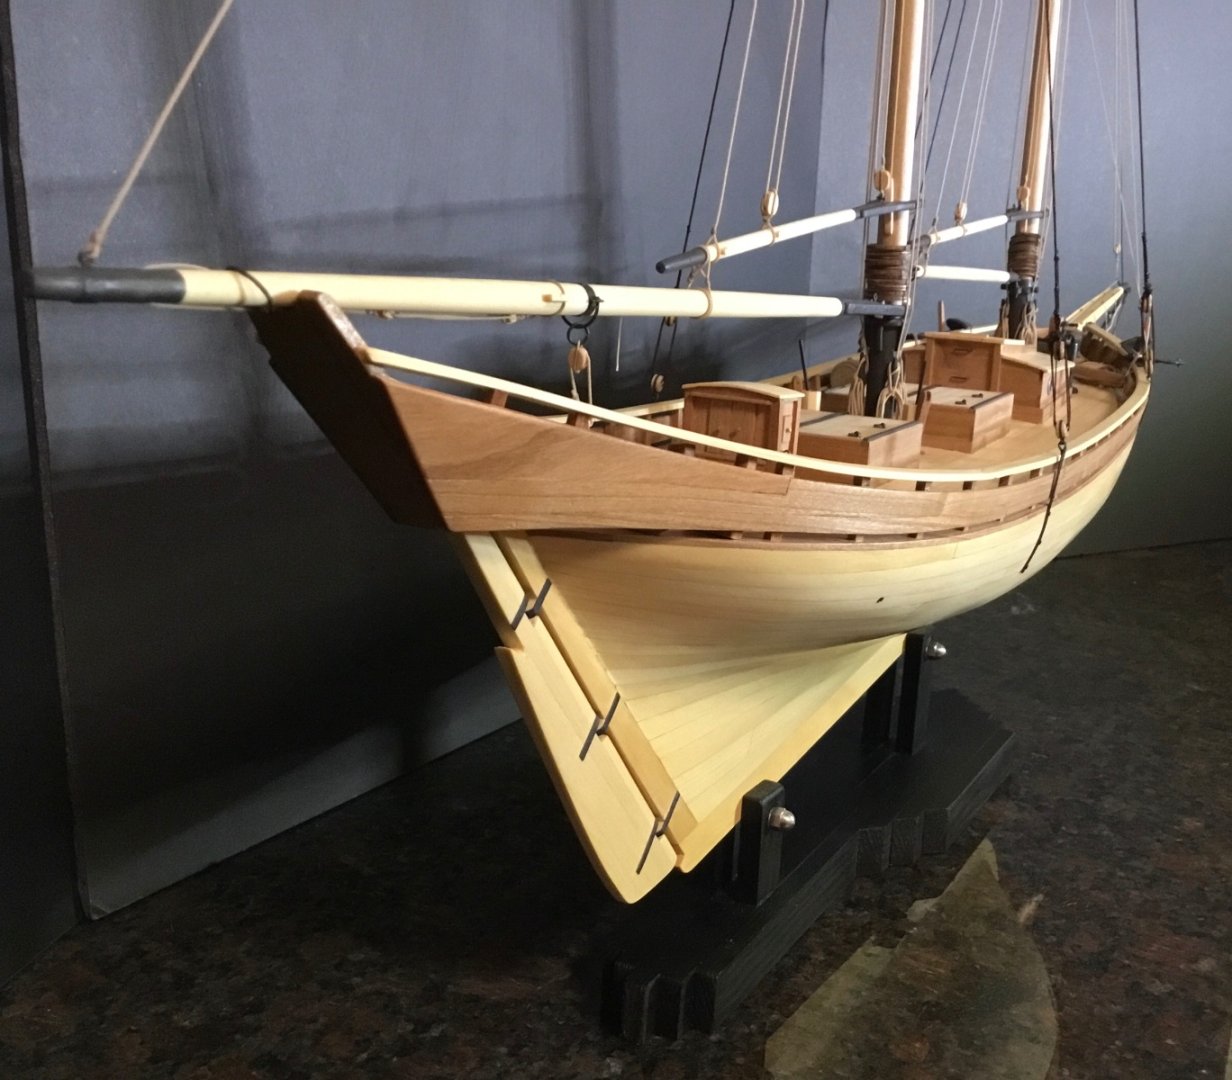

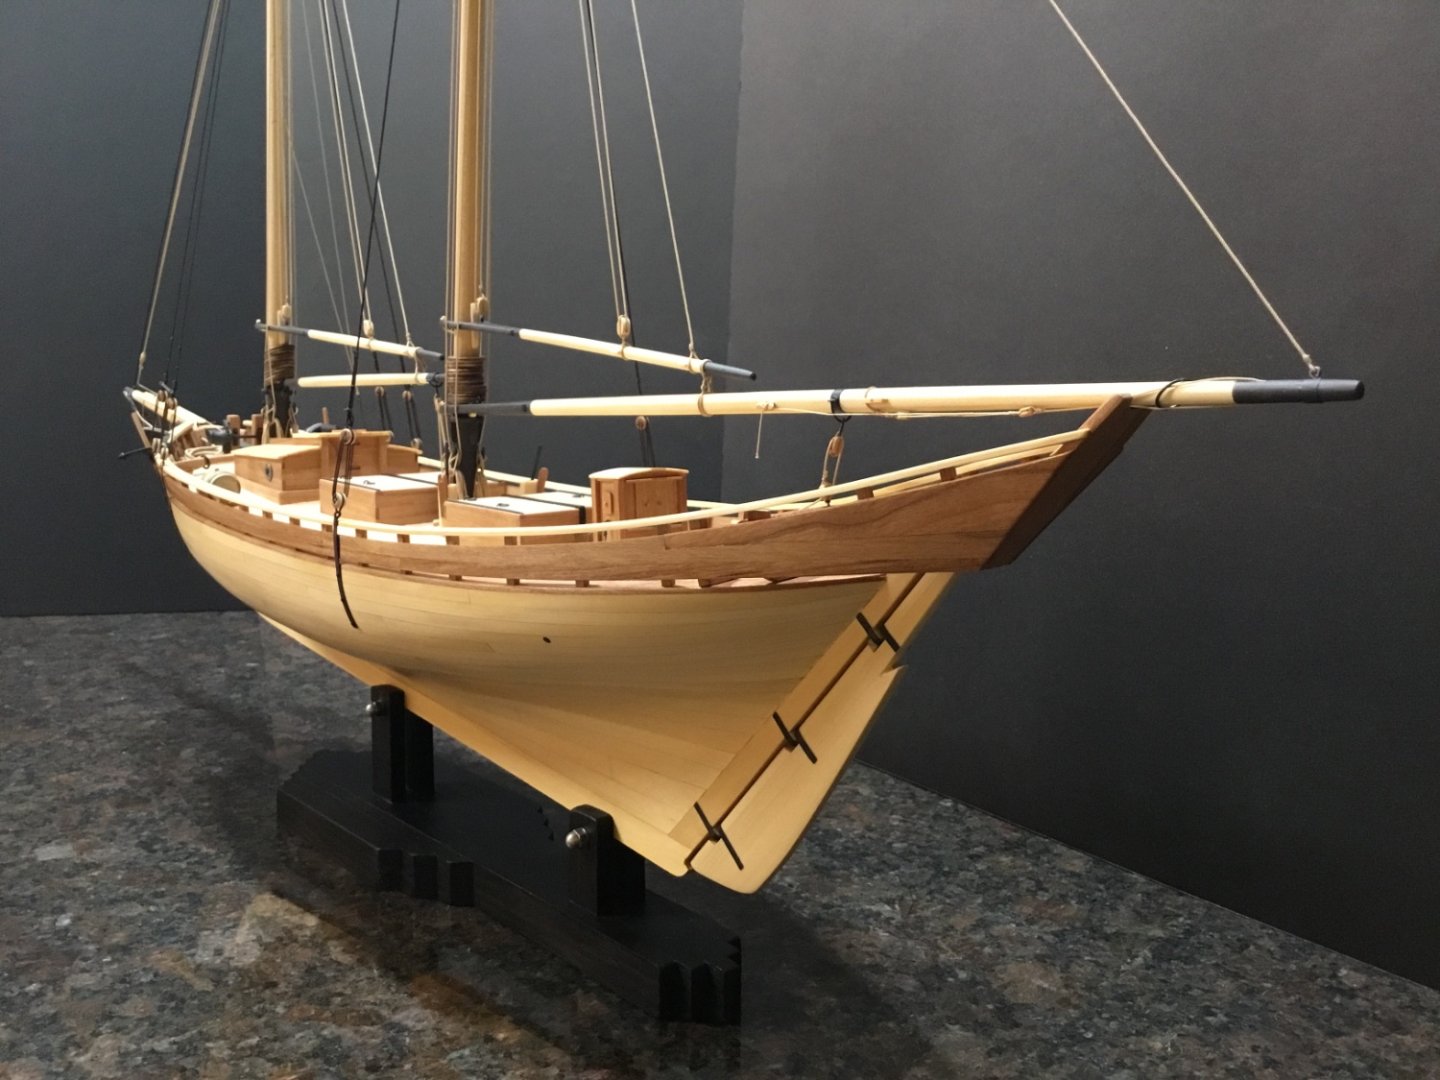


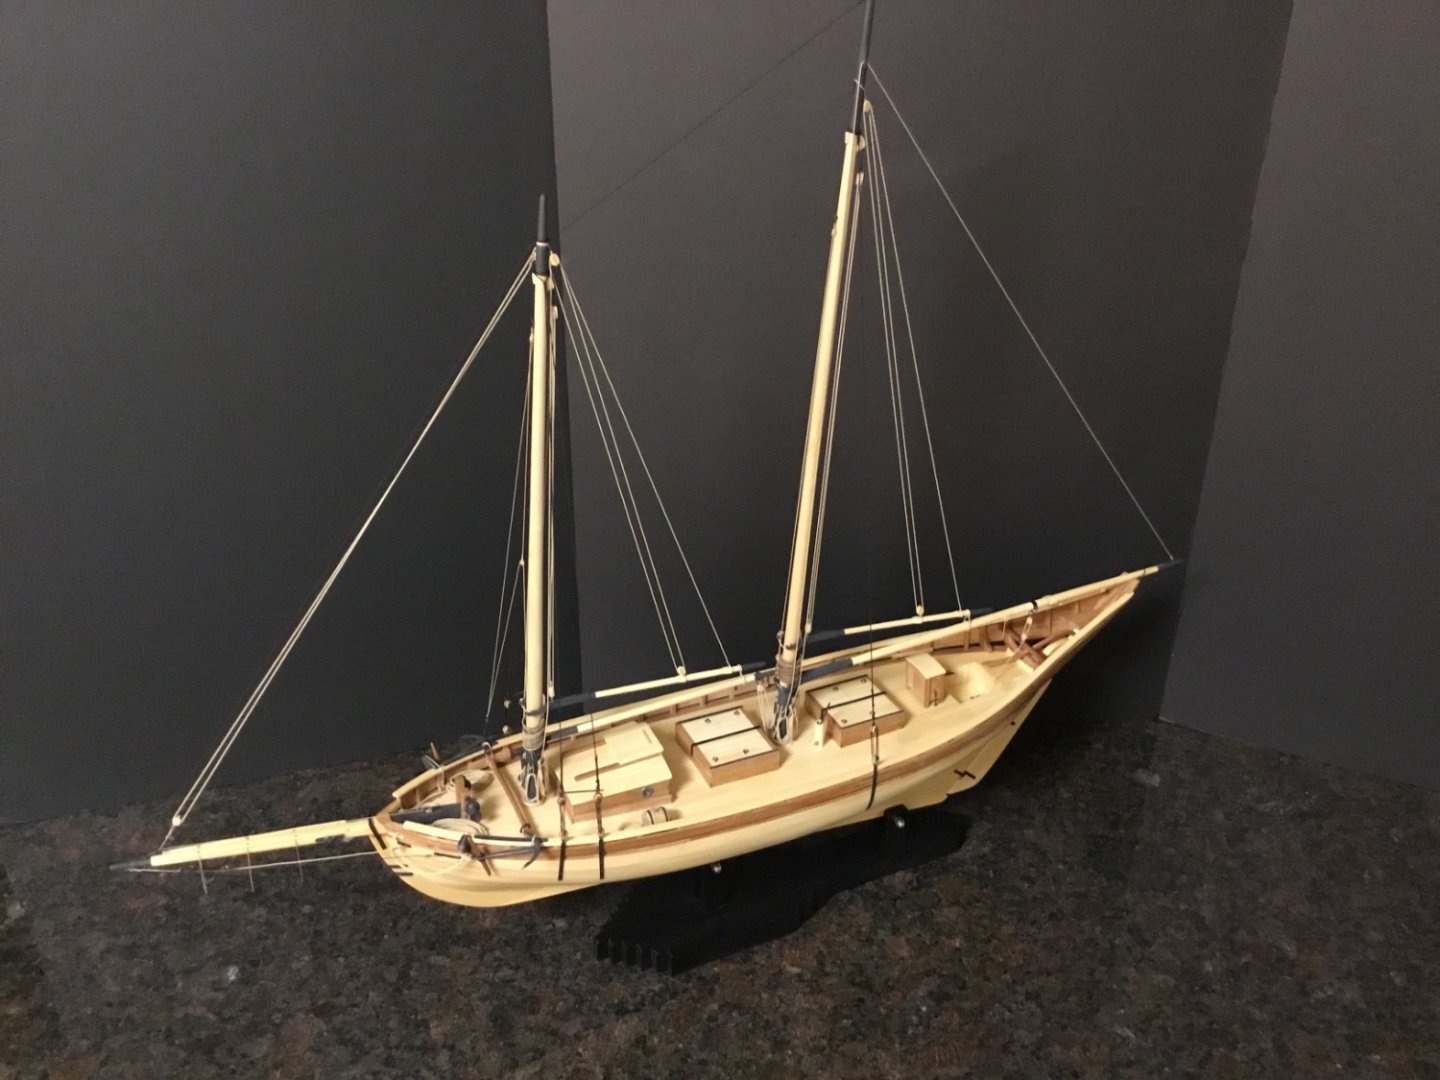
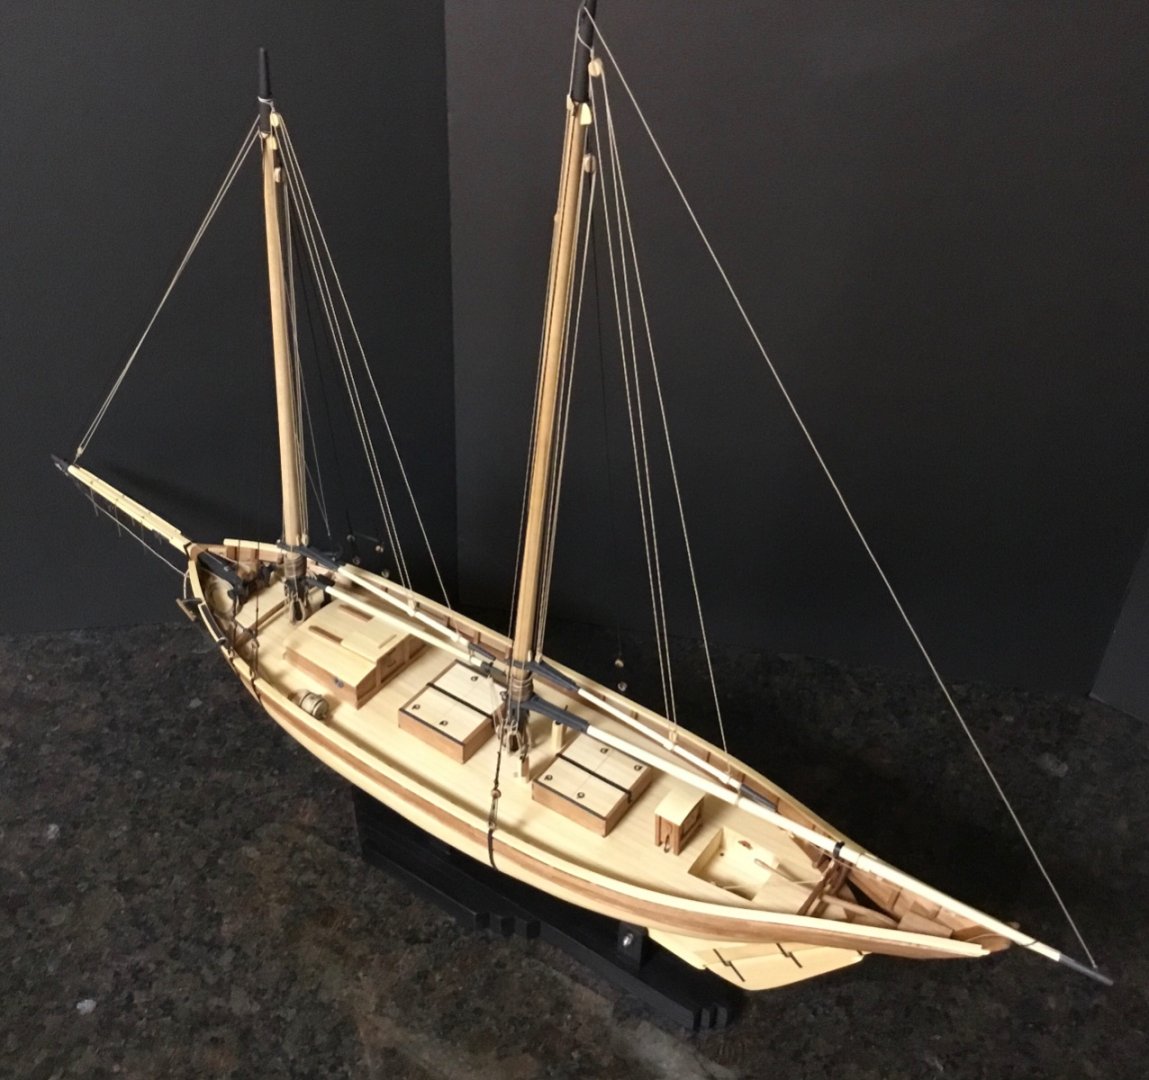
My apologies for some of the fuzzy pics. Thank you everyone for your generous support during this build. It is greatly appreciated.
- Matt D, TheDuckDetective, Knocklouder and 10 others
-
 9
9
-
 4
4
-
Steve, that is one incredibly good looking boat!
- Jack12477 and Knocklouder
-
2
-
-
I’m the same way Vladimir, I like to find a home for things that I’ve made. But it’s nice to have one model around that you can look at every day. I hope you keep your Glory. ( at least until you build something that will take its place.)
-
Hi Vladimir, if this were my Glory, I would sit there half the day every day just looking at her. Such a beautiful ship.
-
I agree. That was a good decision Dave. One heck of a difference isn’t there.
-
-
-
-
-
-
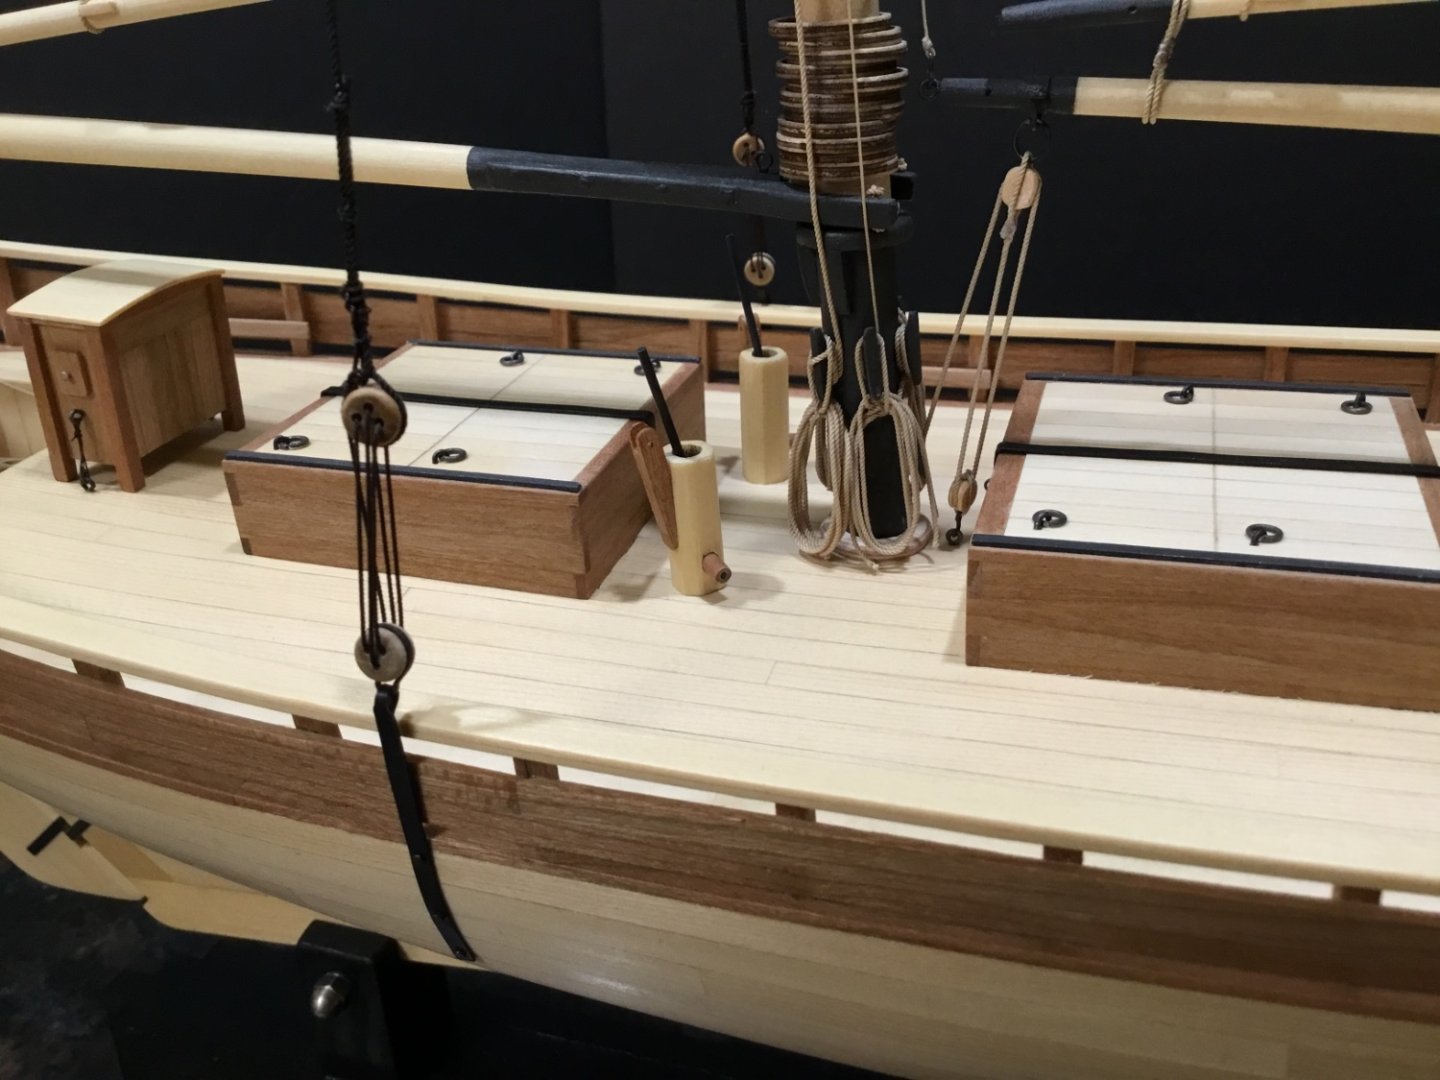
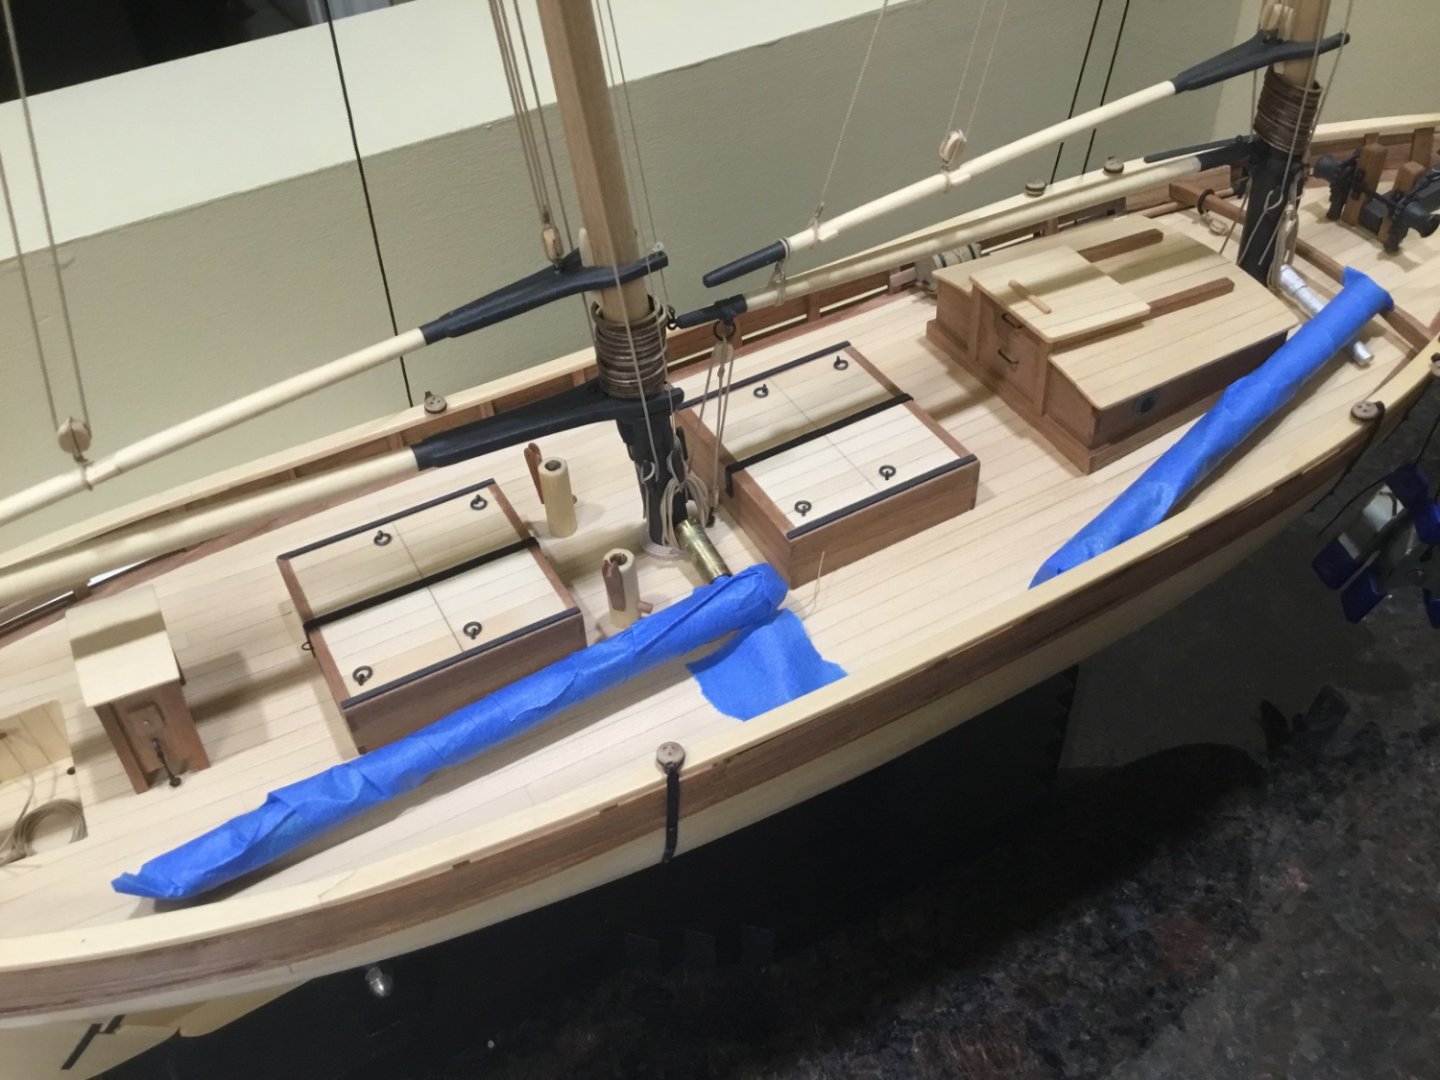
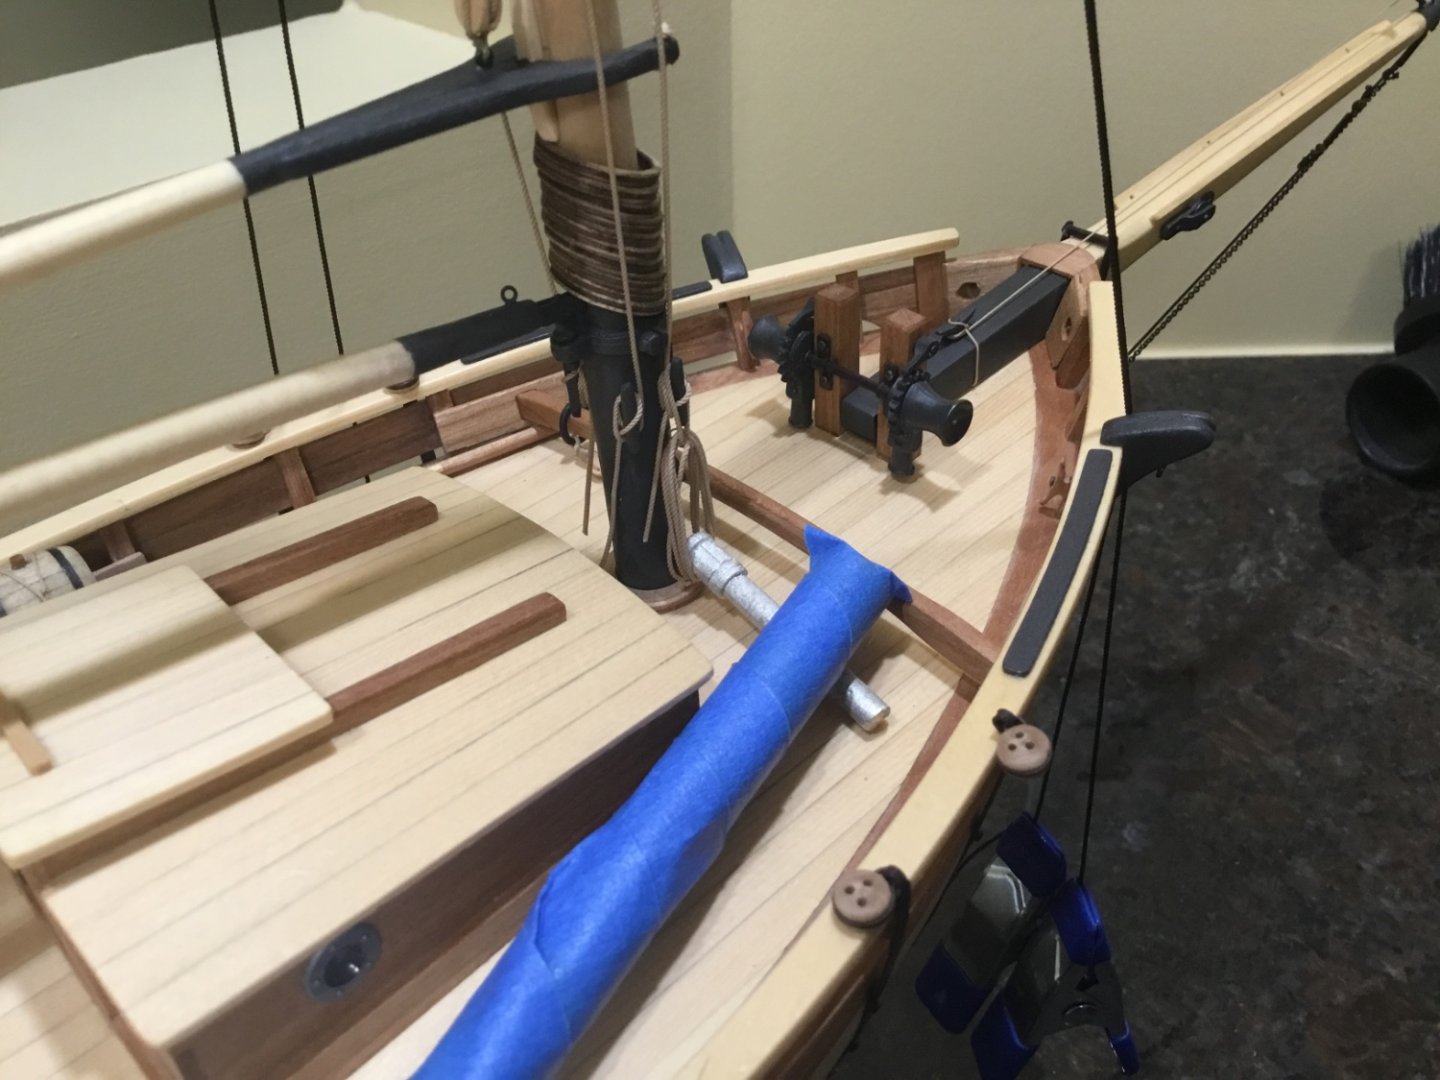
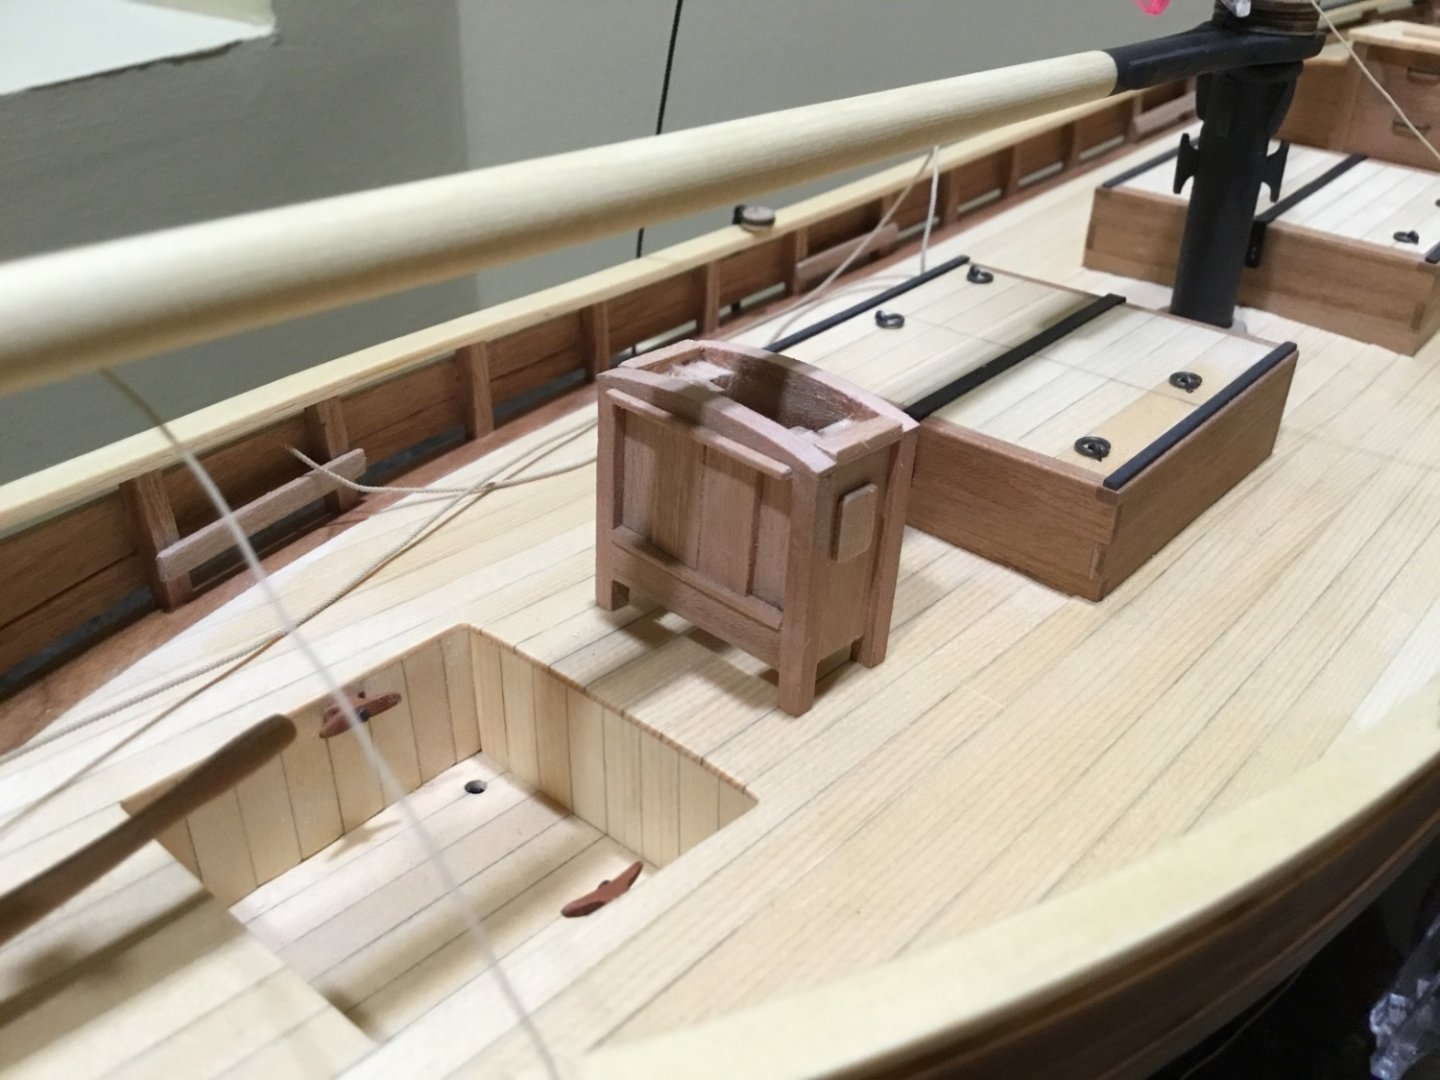
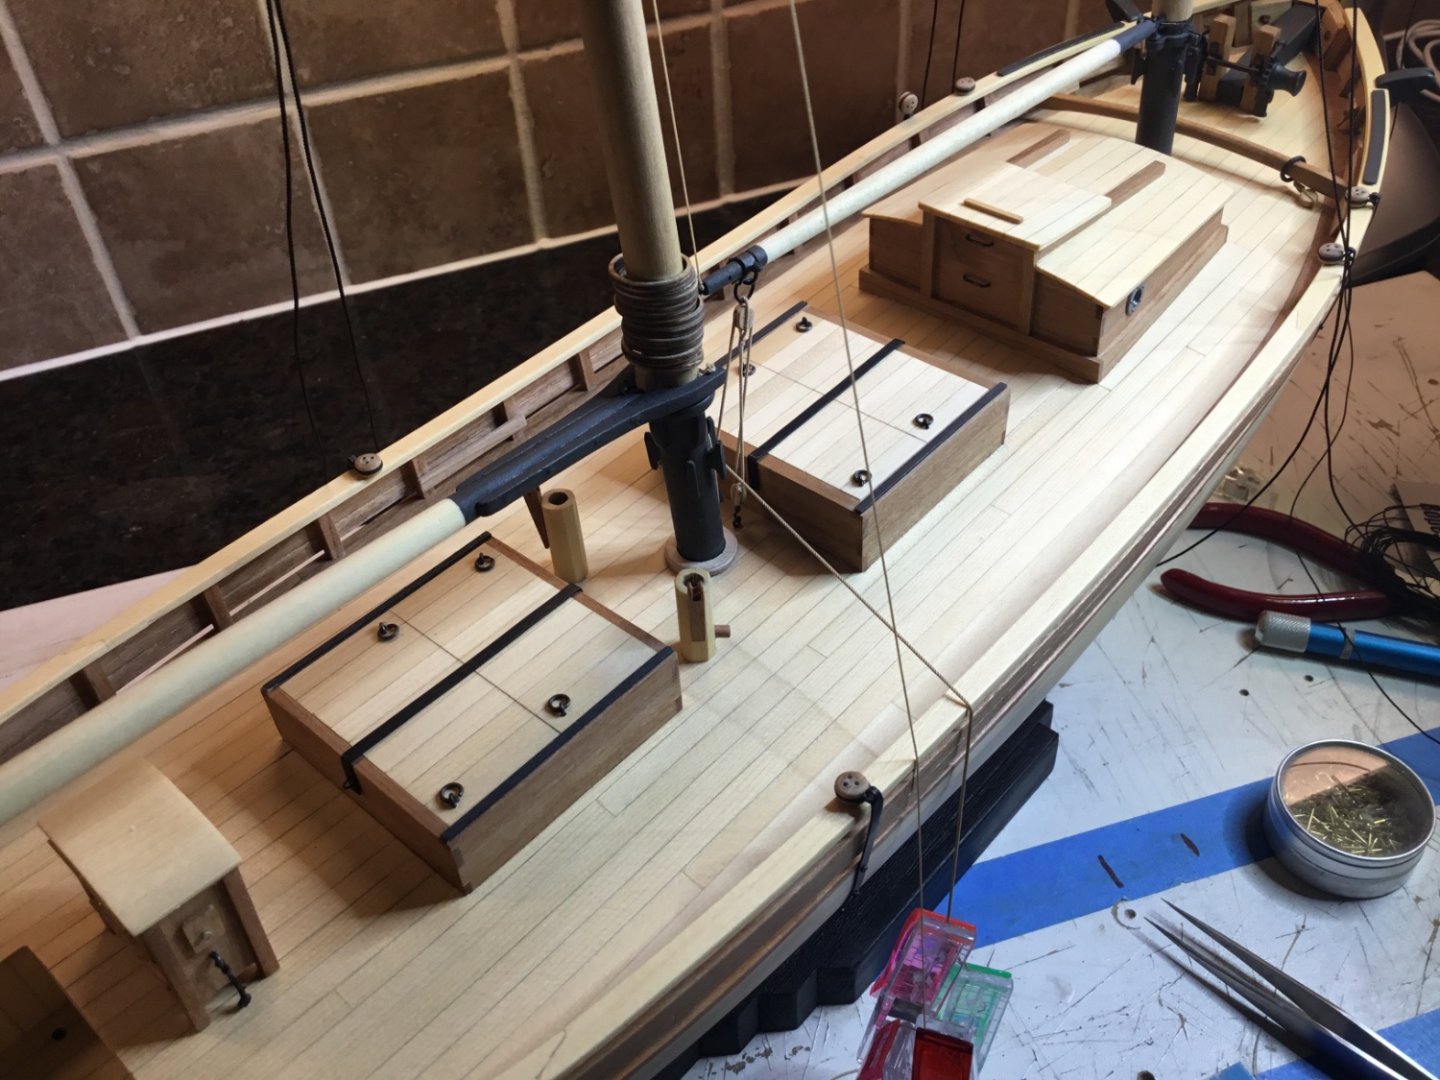
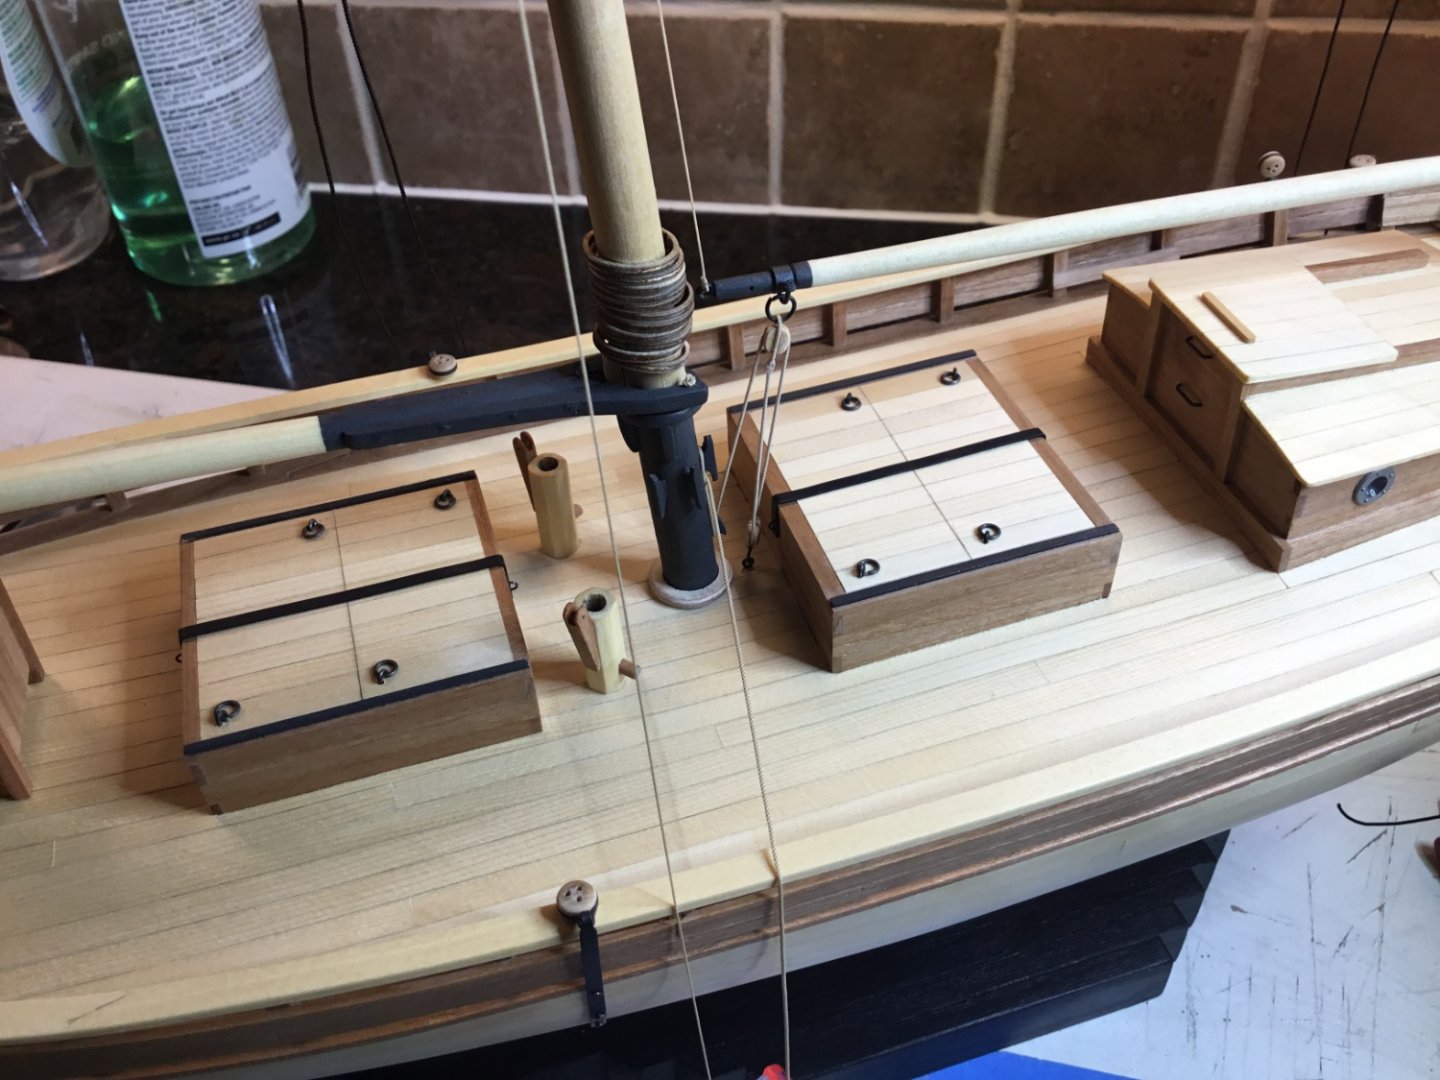
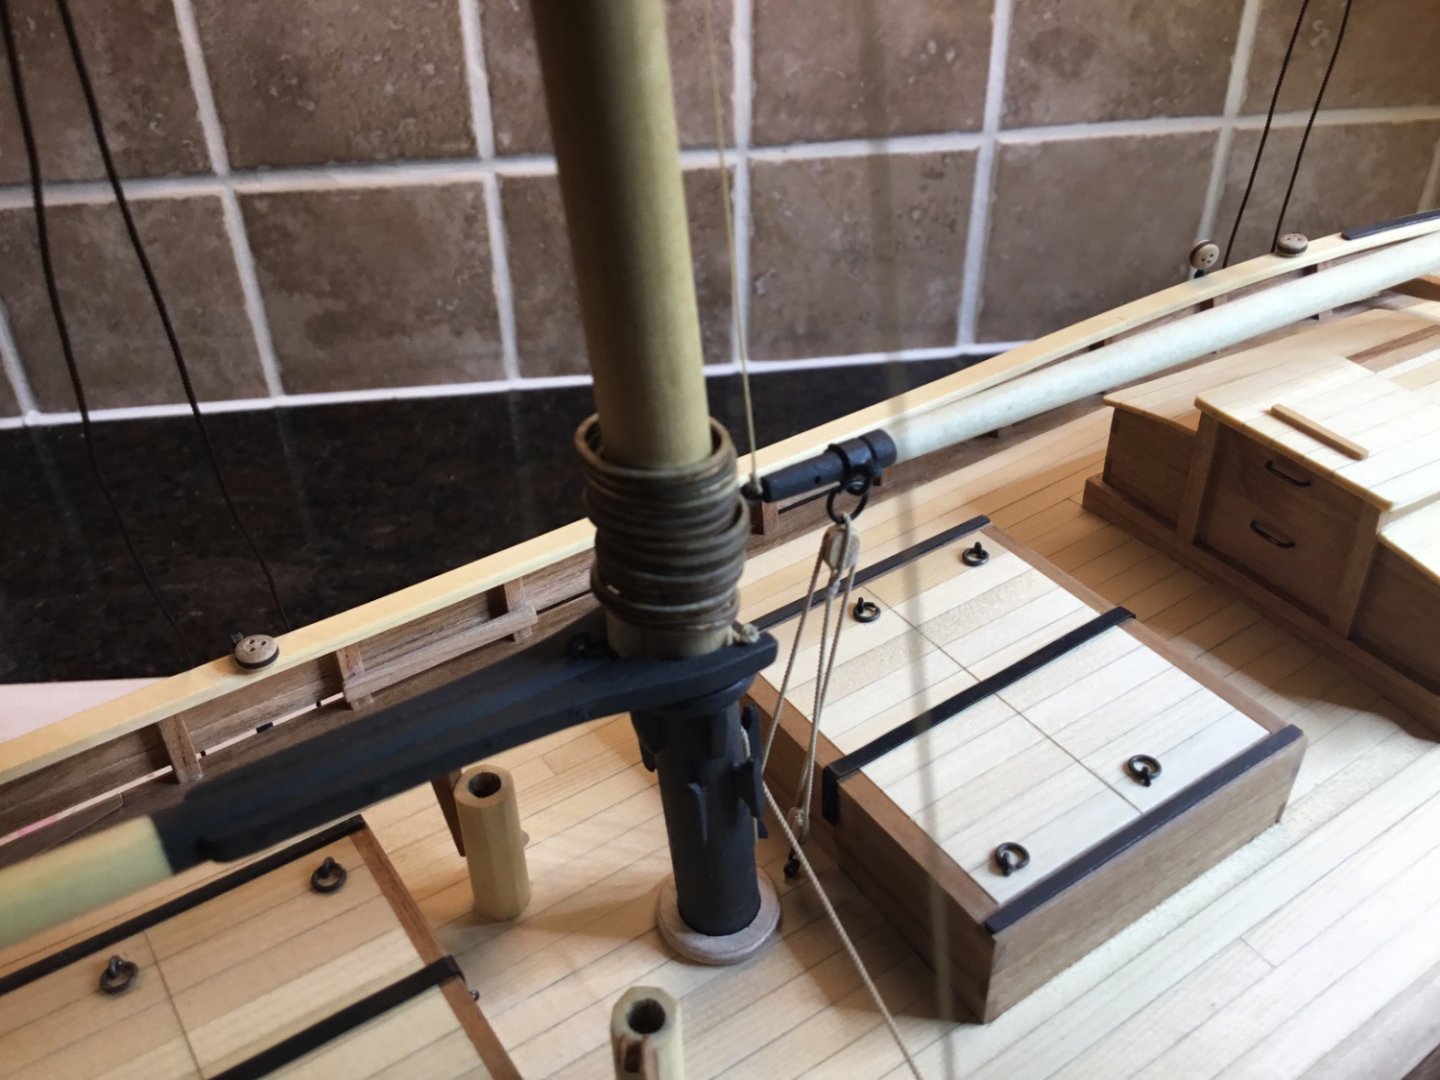
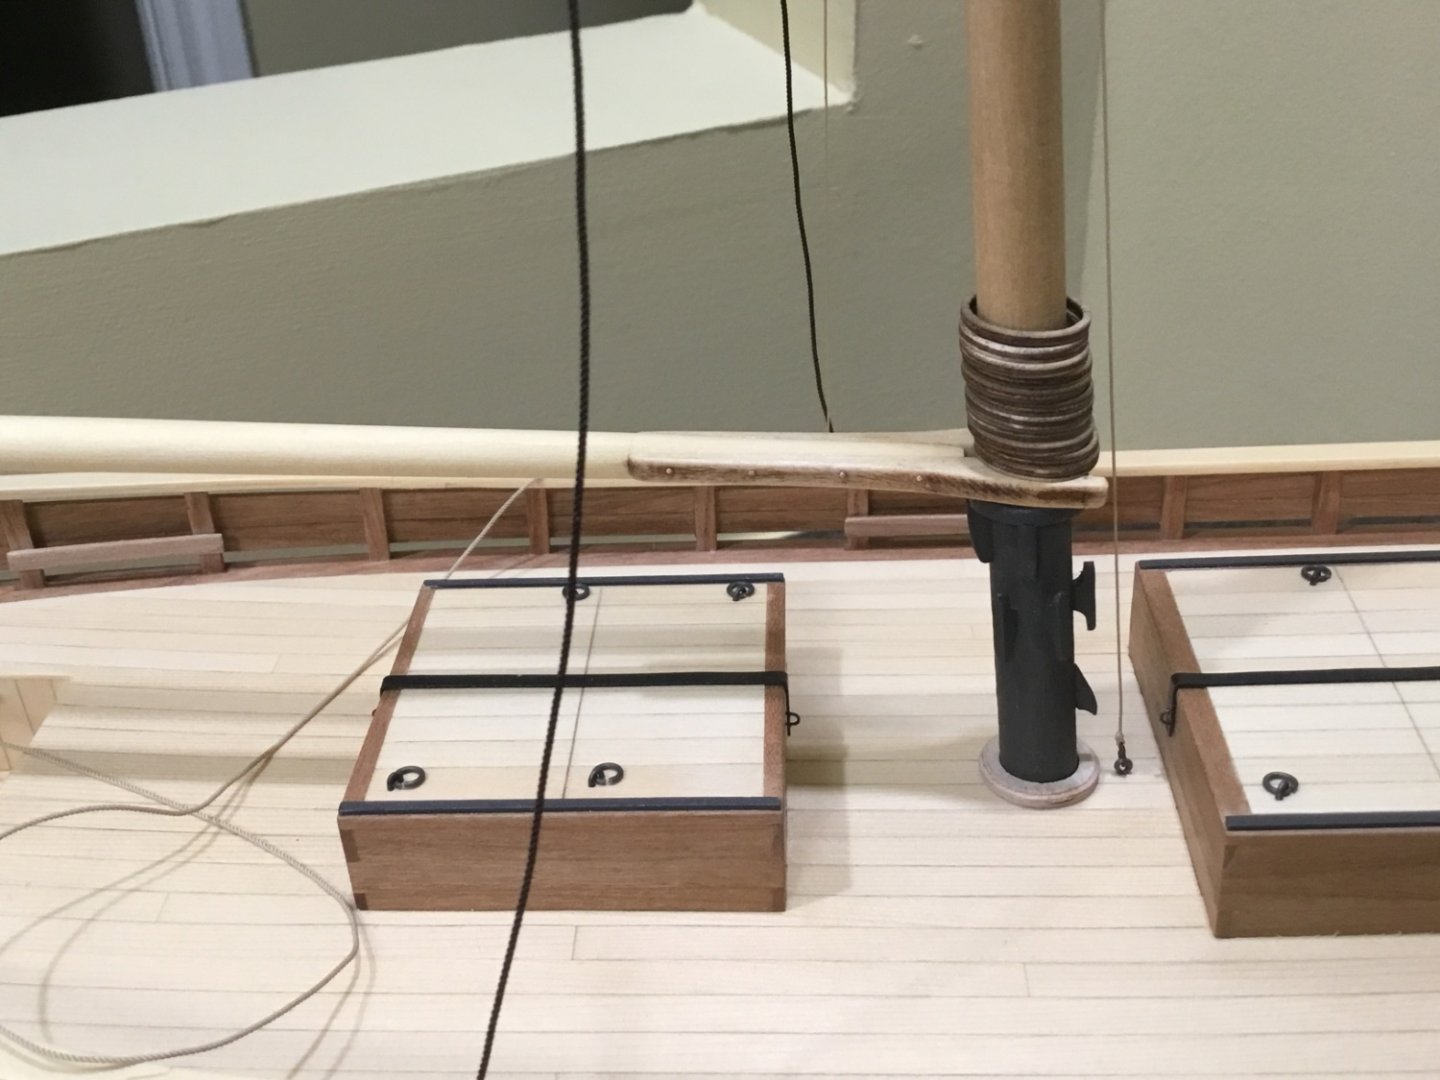
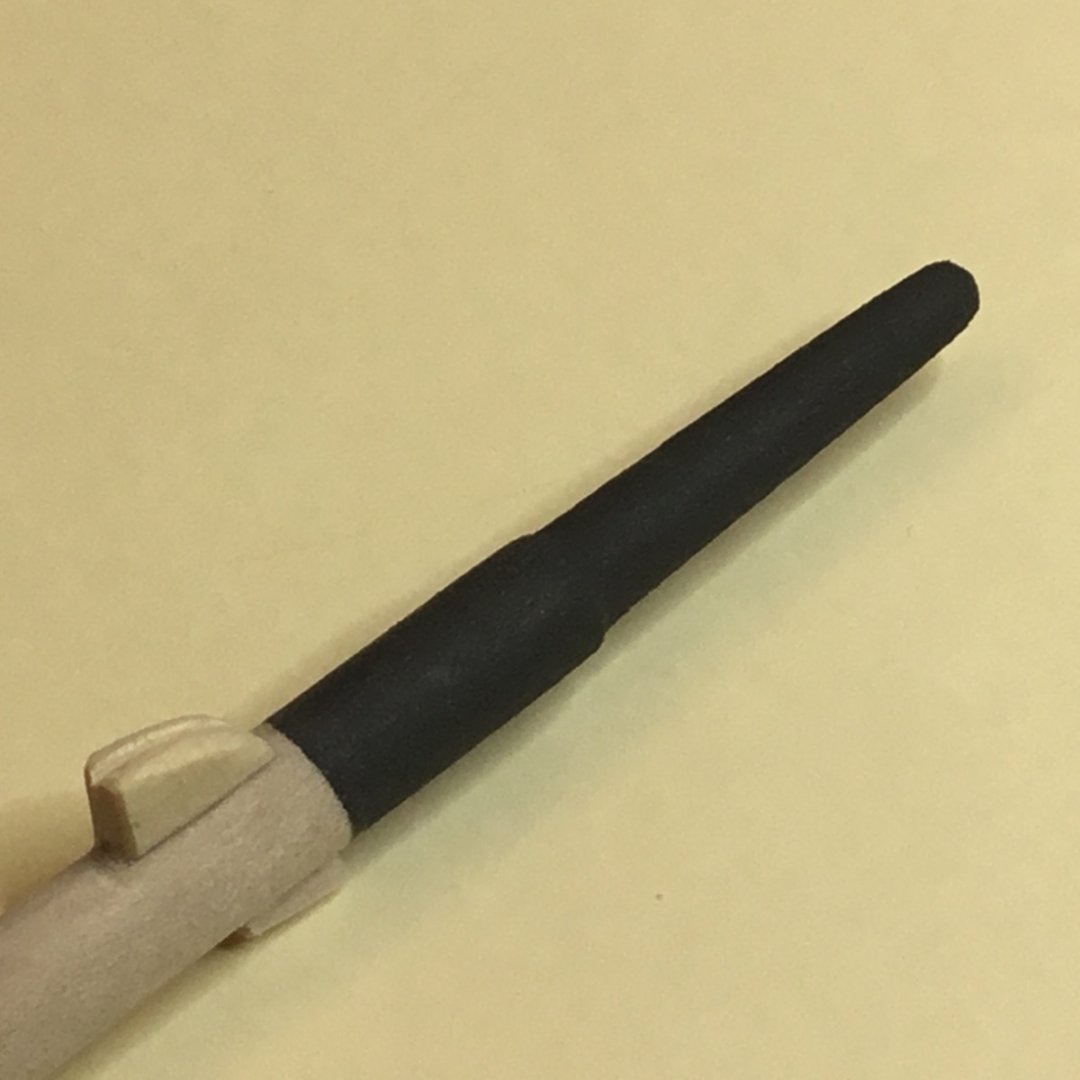
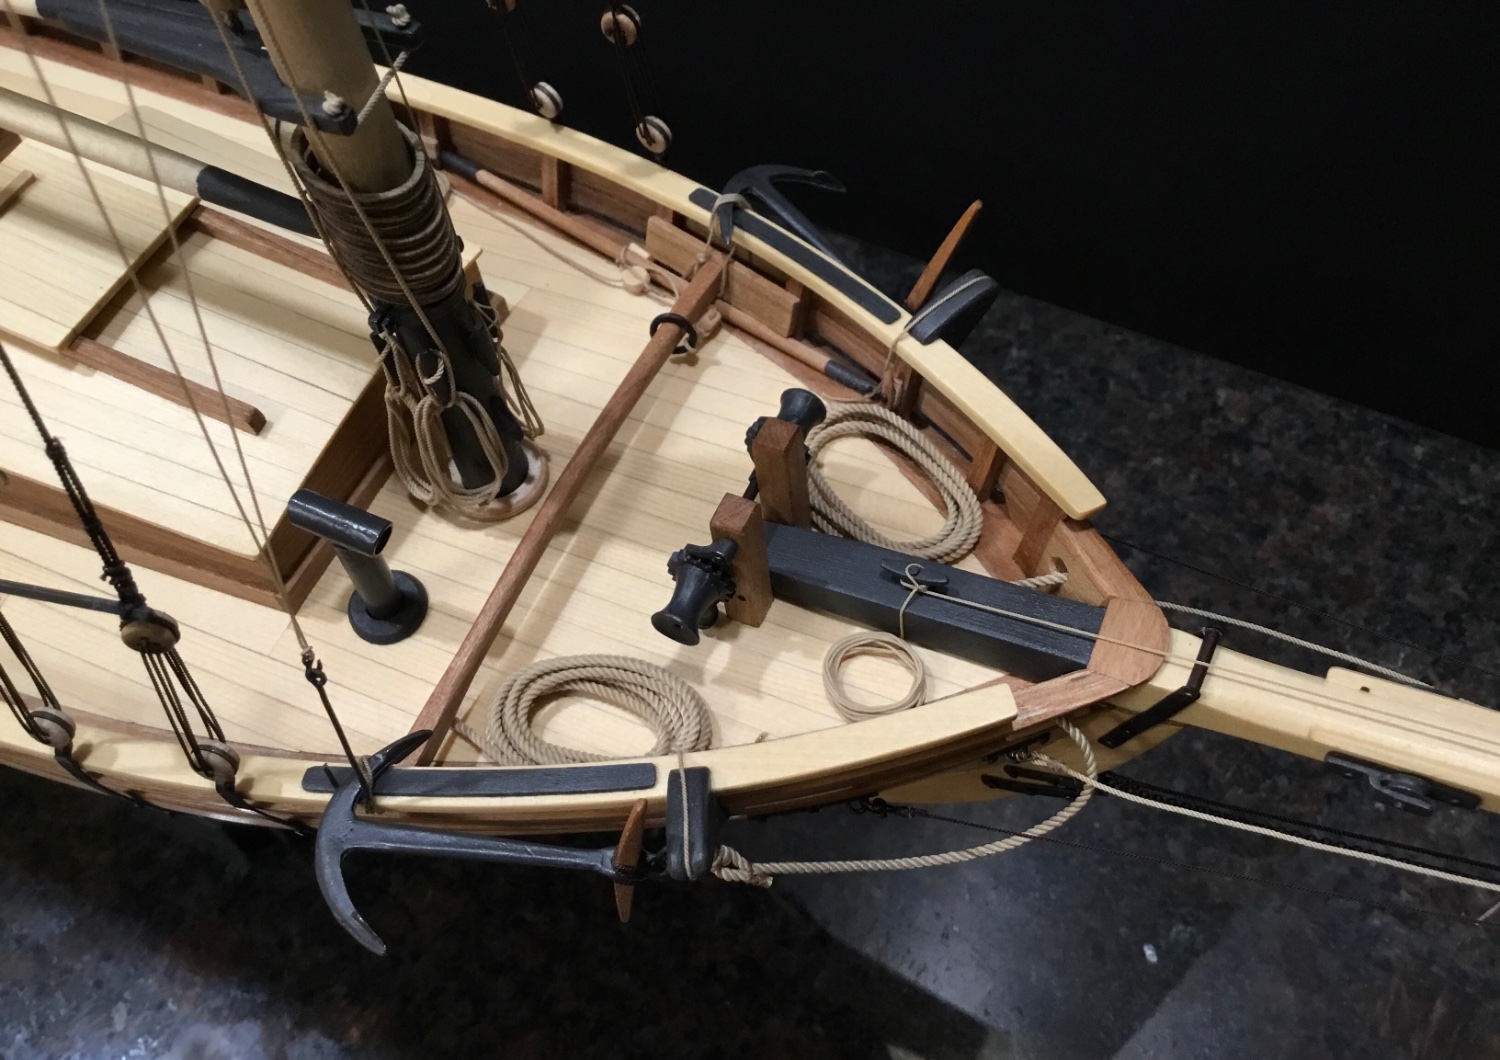
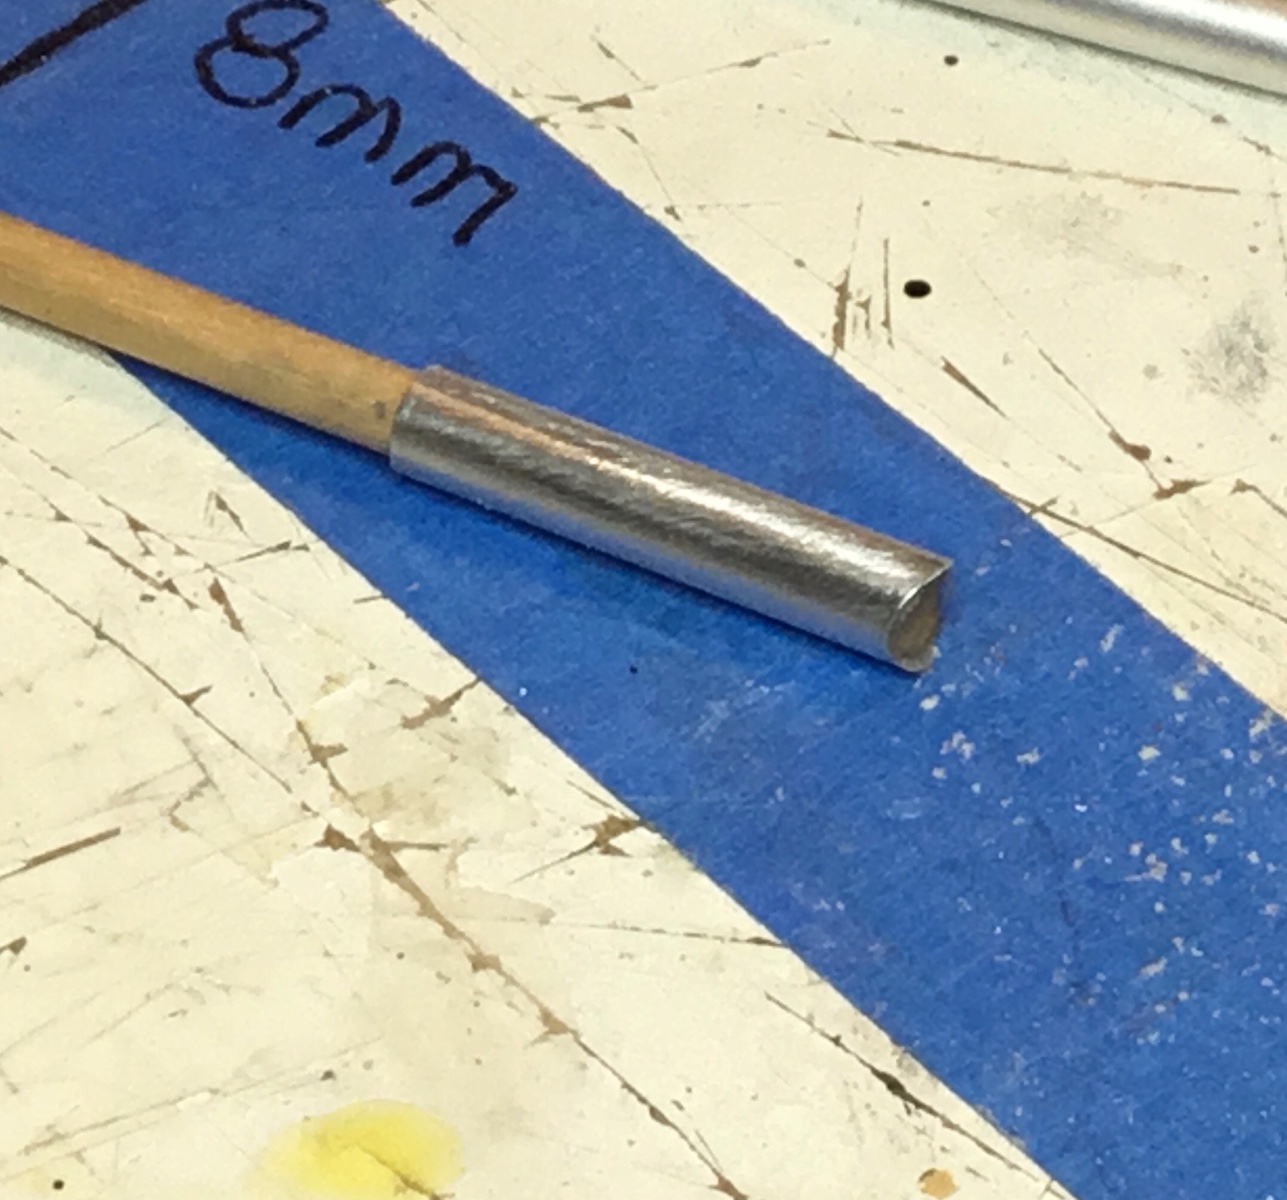
Hi Everyone, hope you are all well. Thank you very much for dropping by and for the Likes. A bunch of little things were cleaned up this week. The stove pipe was made with 5mm aluminum tubing. A 4mm dowel was pushed into it and glued with CA. A pin was inserted into each end of the dowel for pinning to the deck and for attaching the T-piece at the top of the pipe.

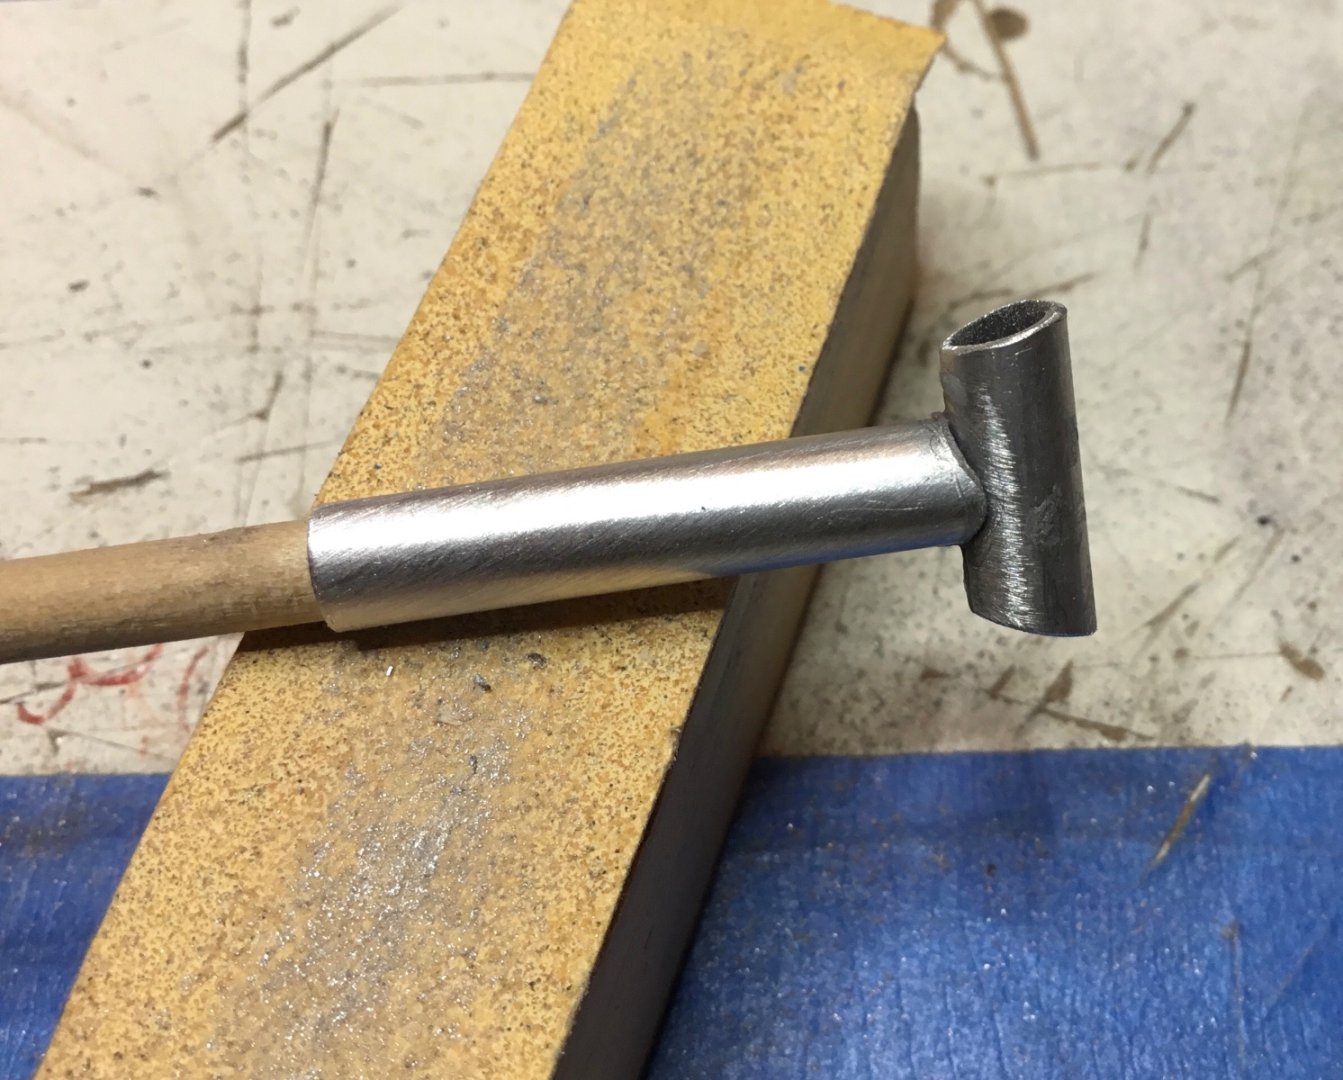
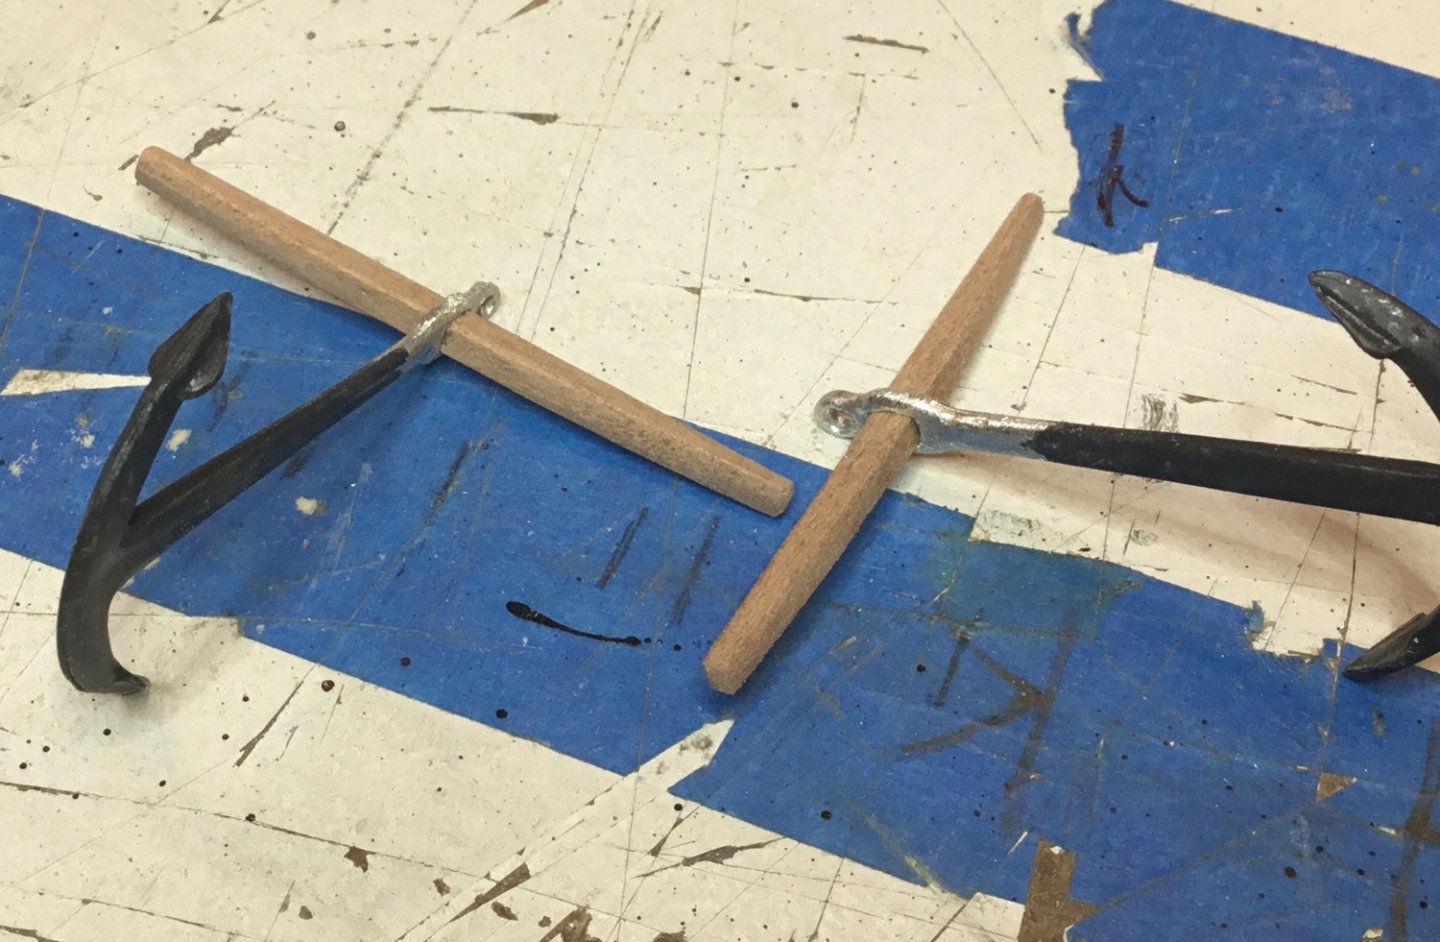
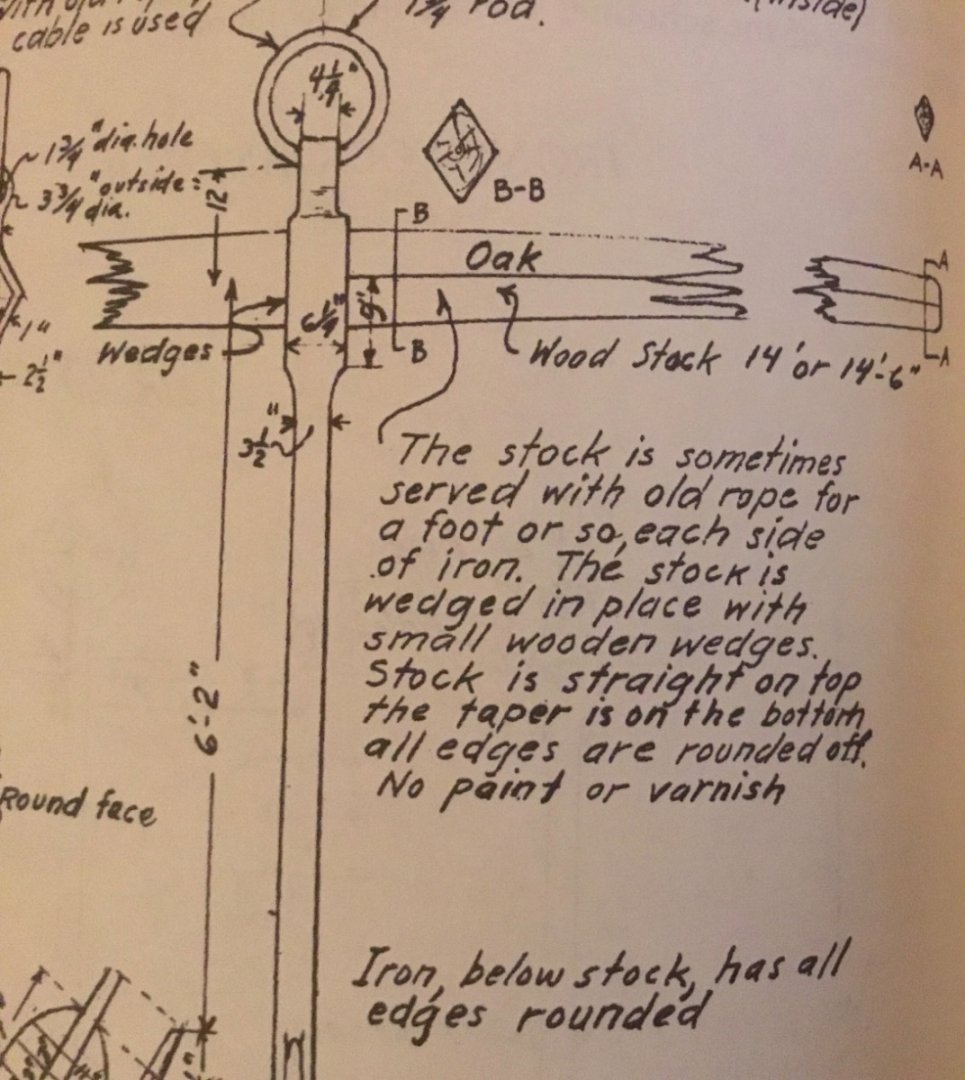
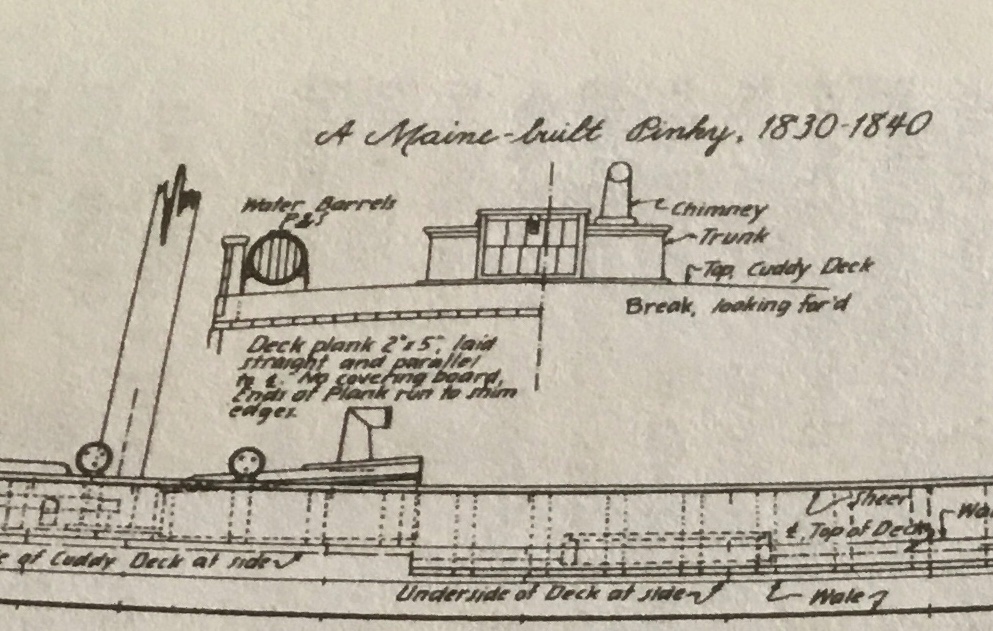
Stocks were made for the cast anchors. The anchor section in Chapelle’s American Fishing Schooners shows an anchor from a large schooner so I used some of those details when attaching the stock to the shank.

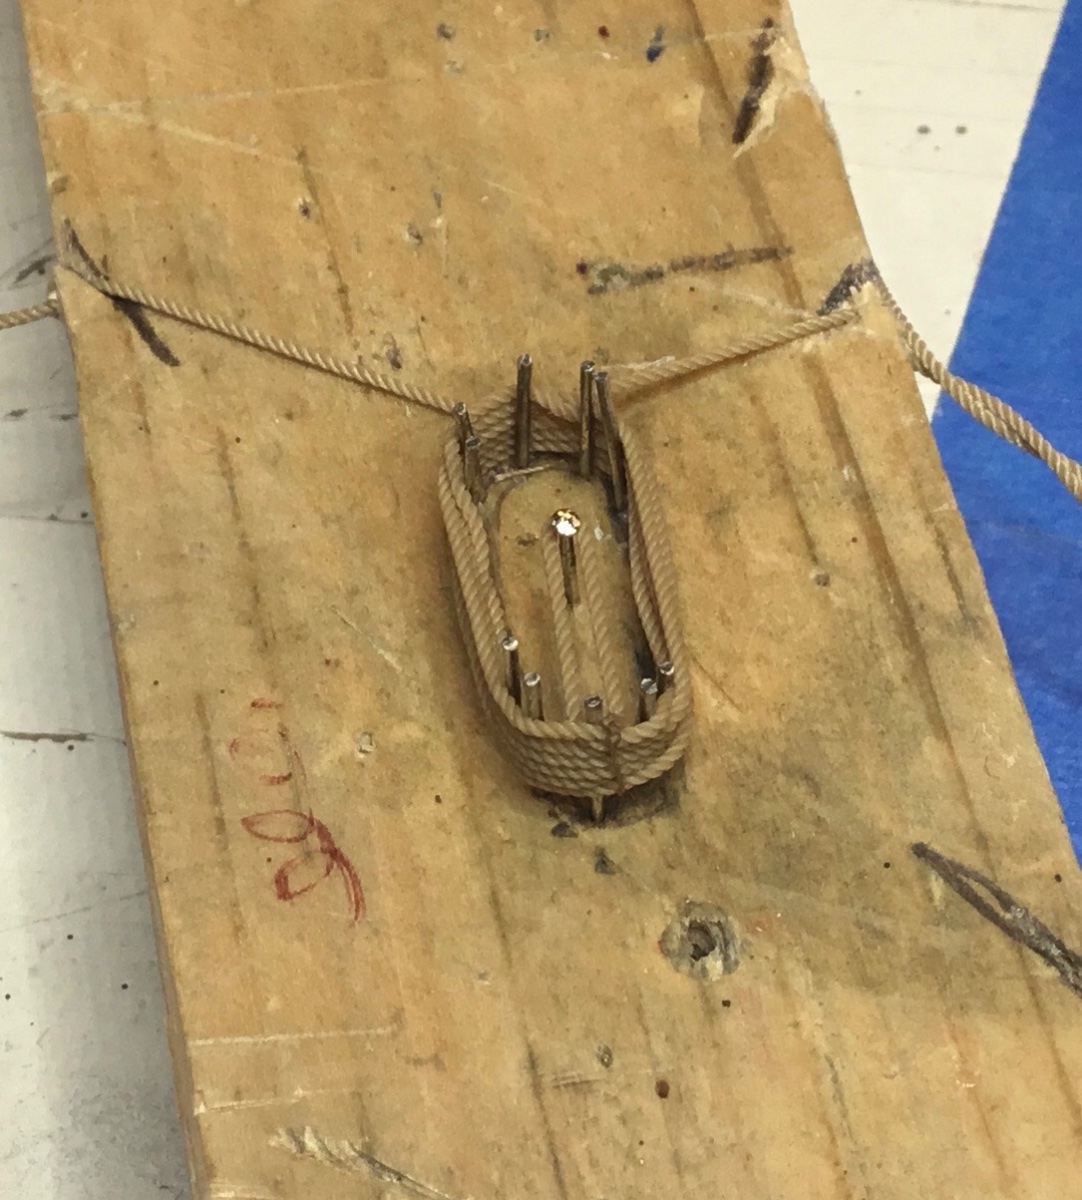
The dreaded ( for me ) rope coils were next. Cotton thread was used to tie the top of the coil through the loop and the free ends at the bottom of the coil

Drill bits were used to weigh them down while they had diluted PVA brushed on them. Three coats were applied over the course of a day

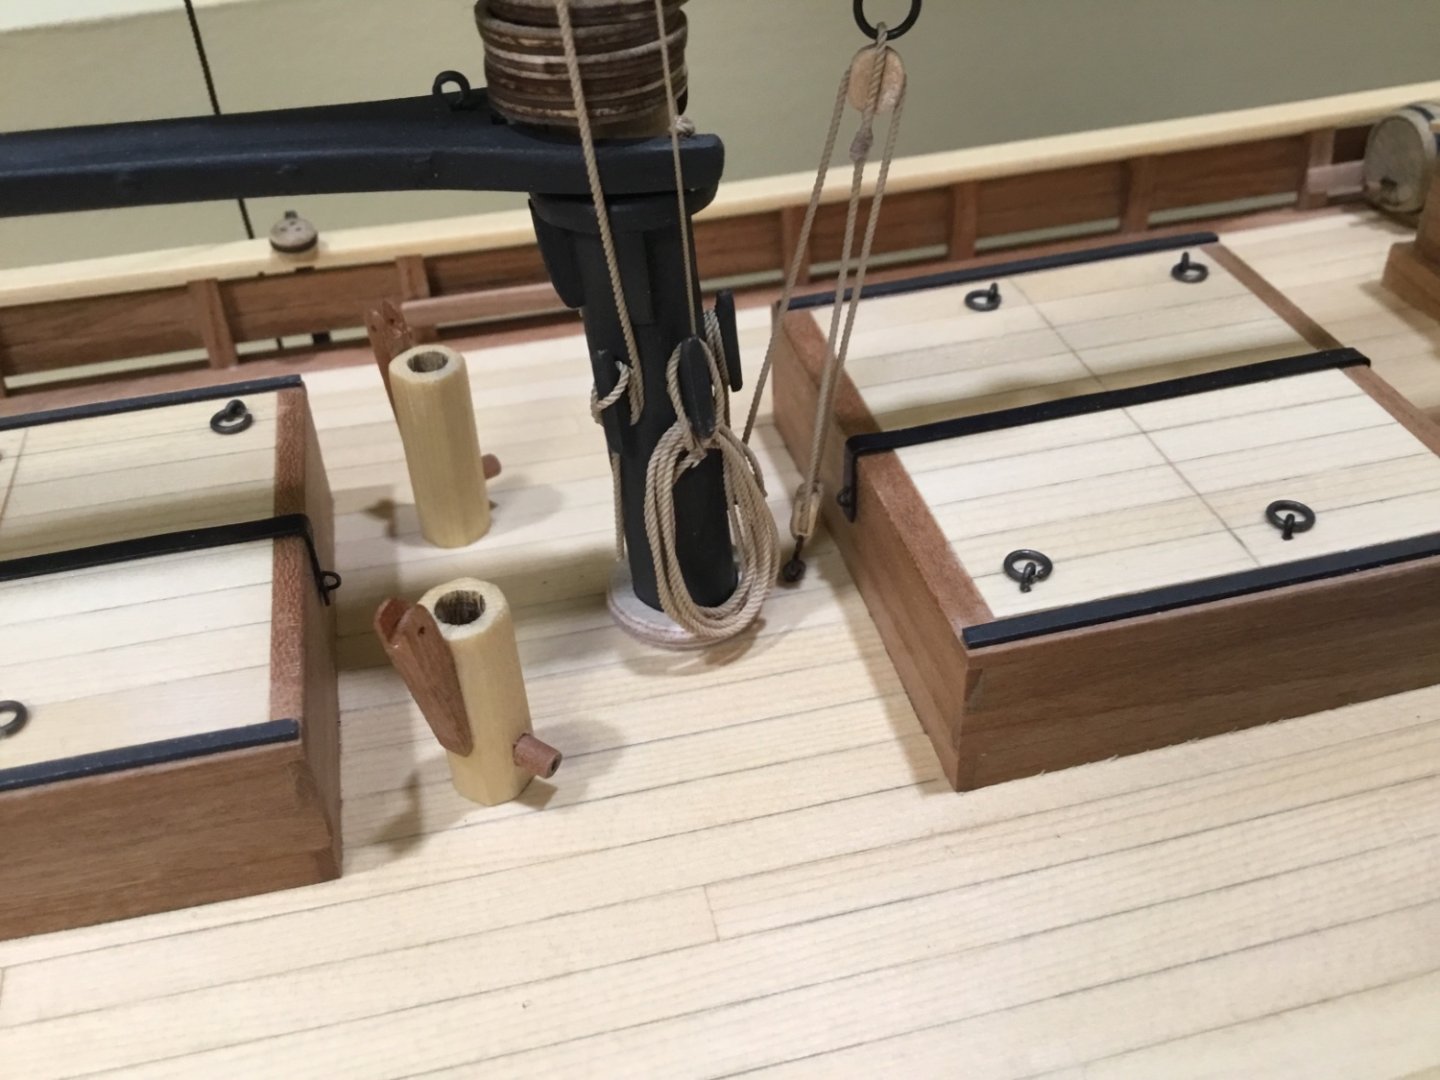
They still need a bit of shaping. Then the stack was glued to the deck.

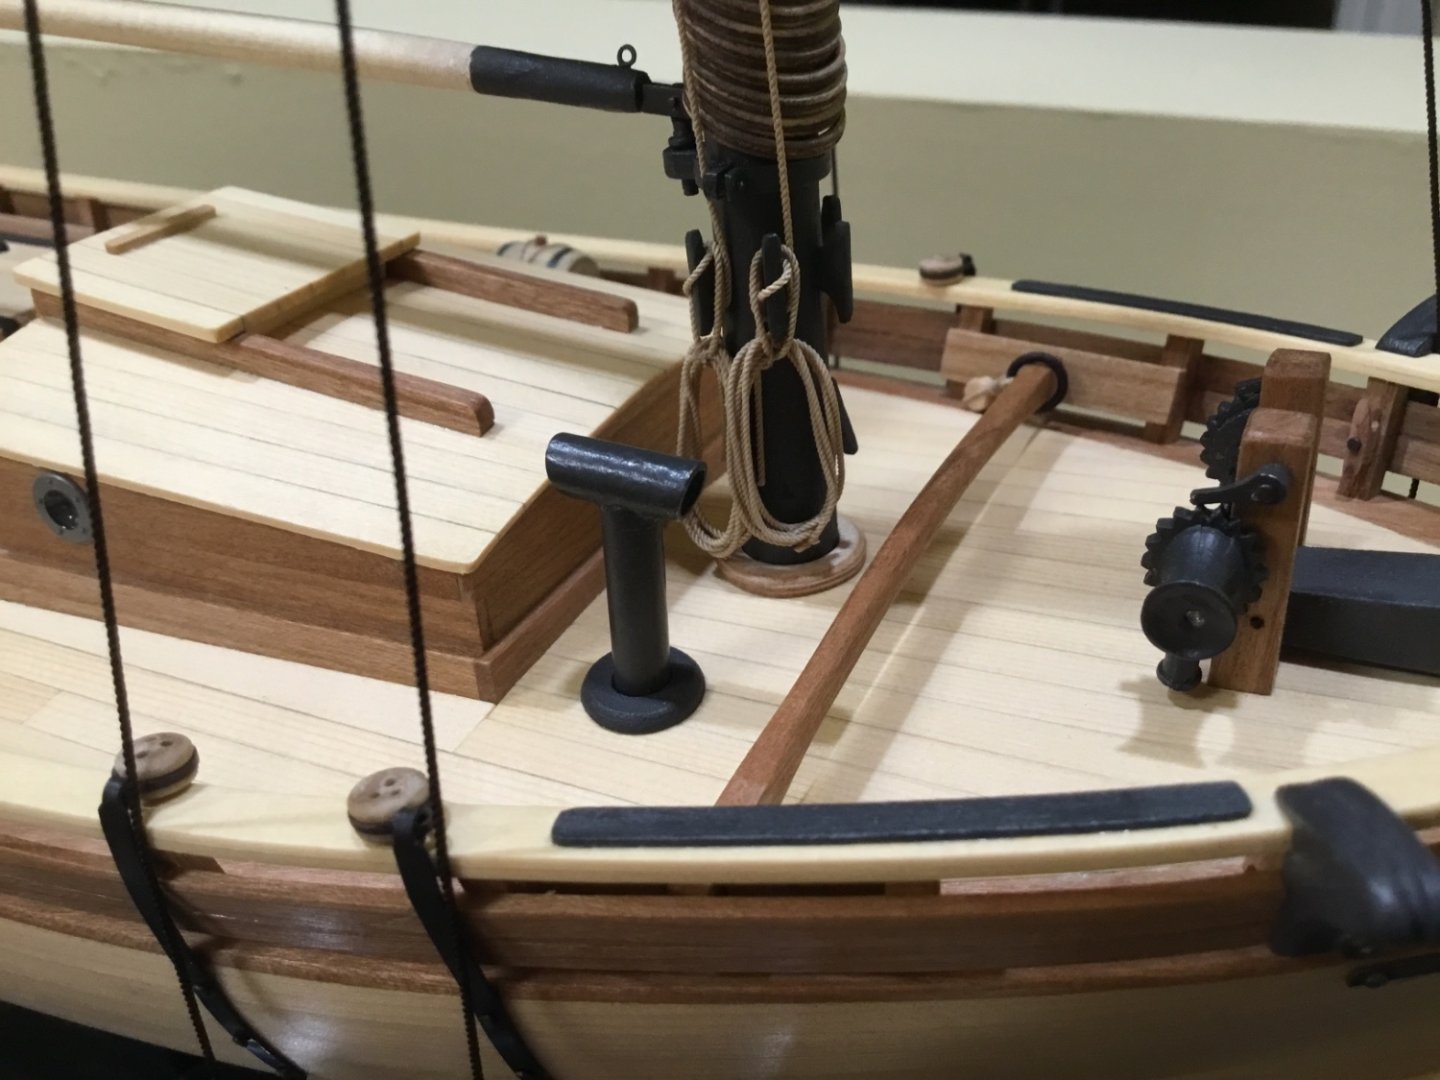
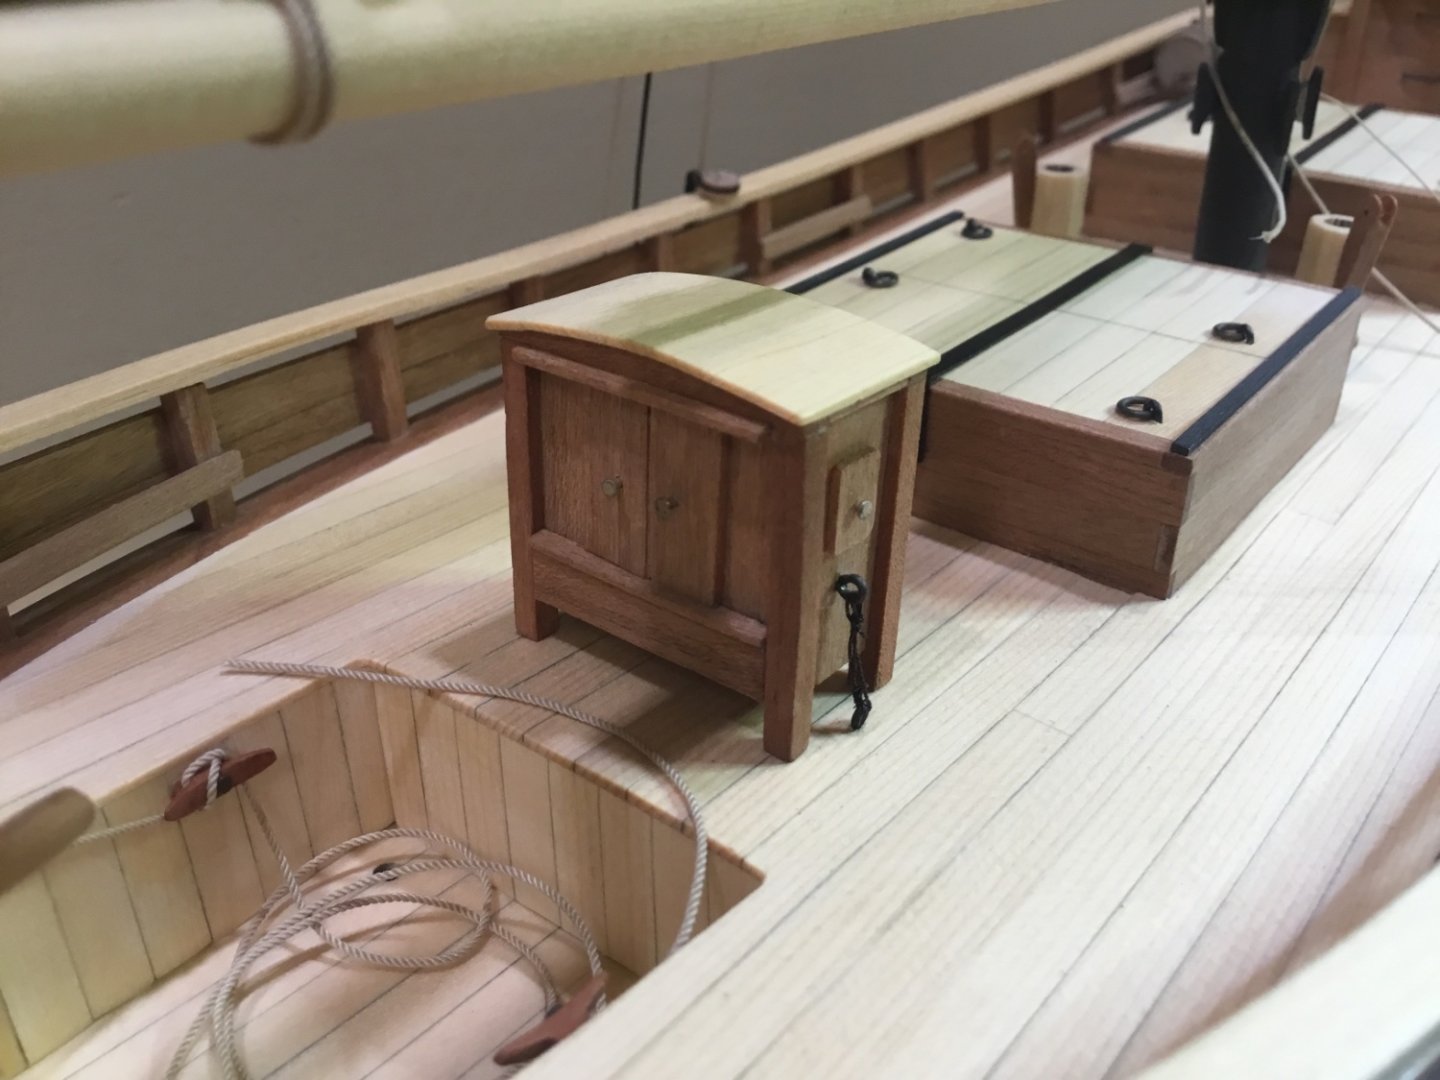
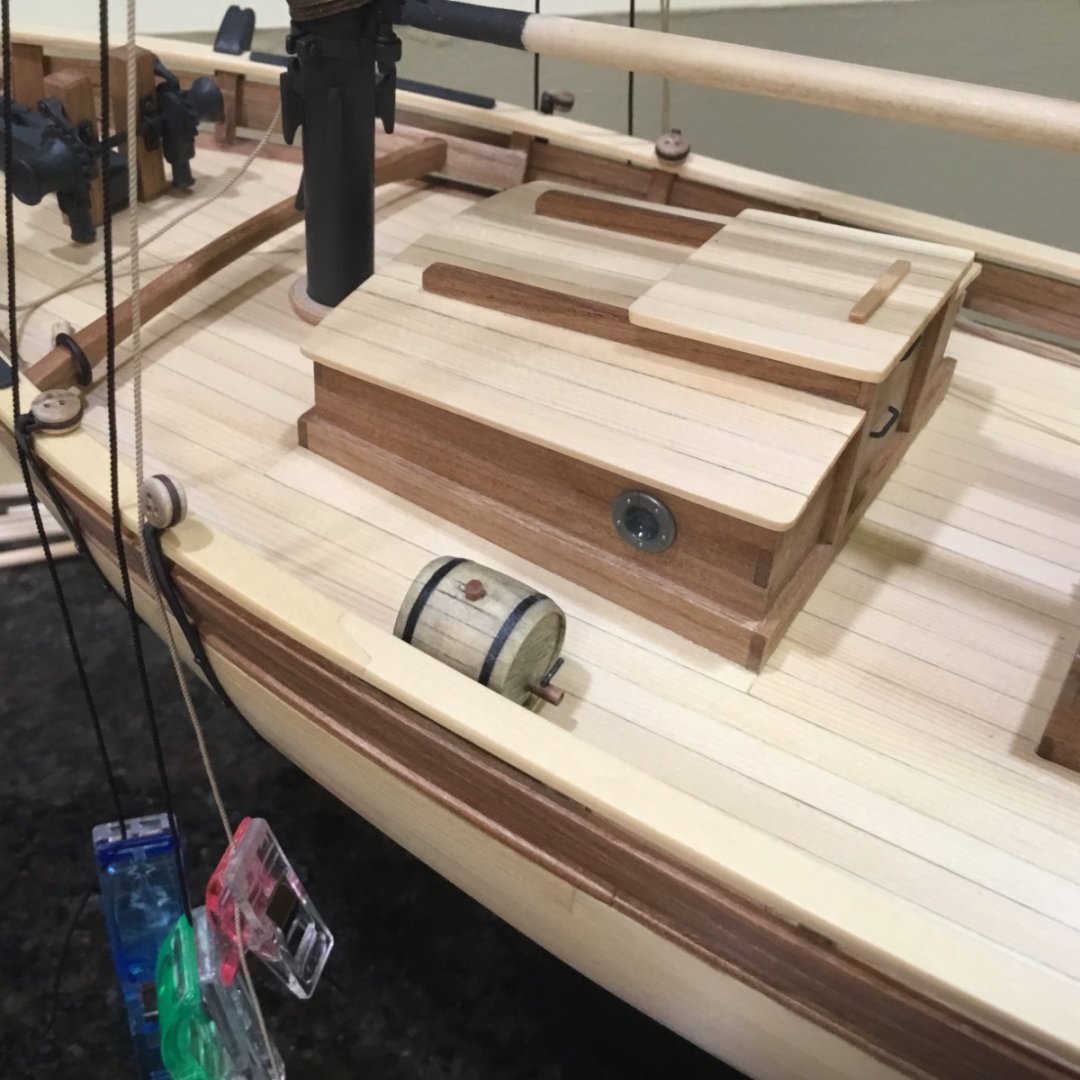
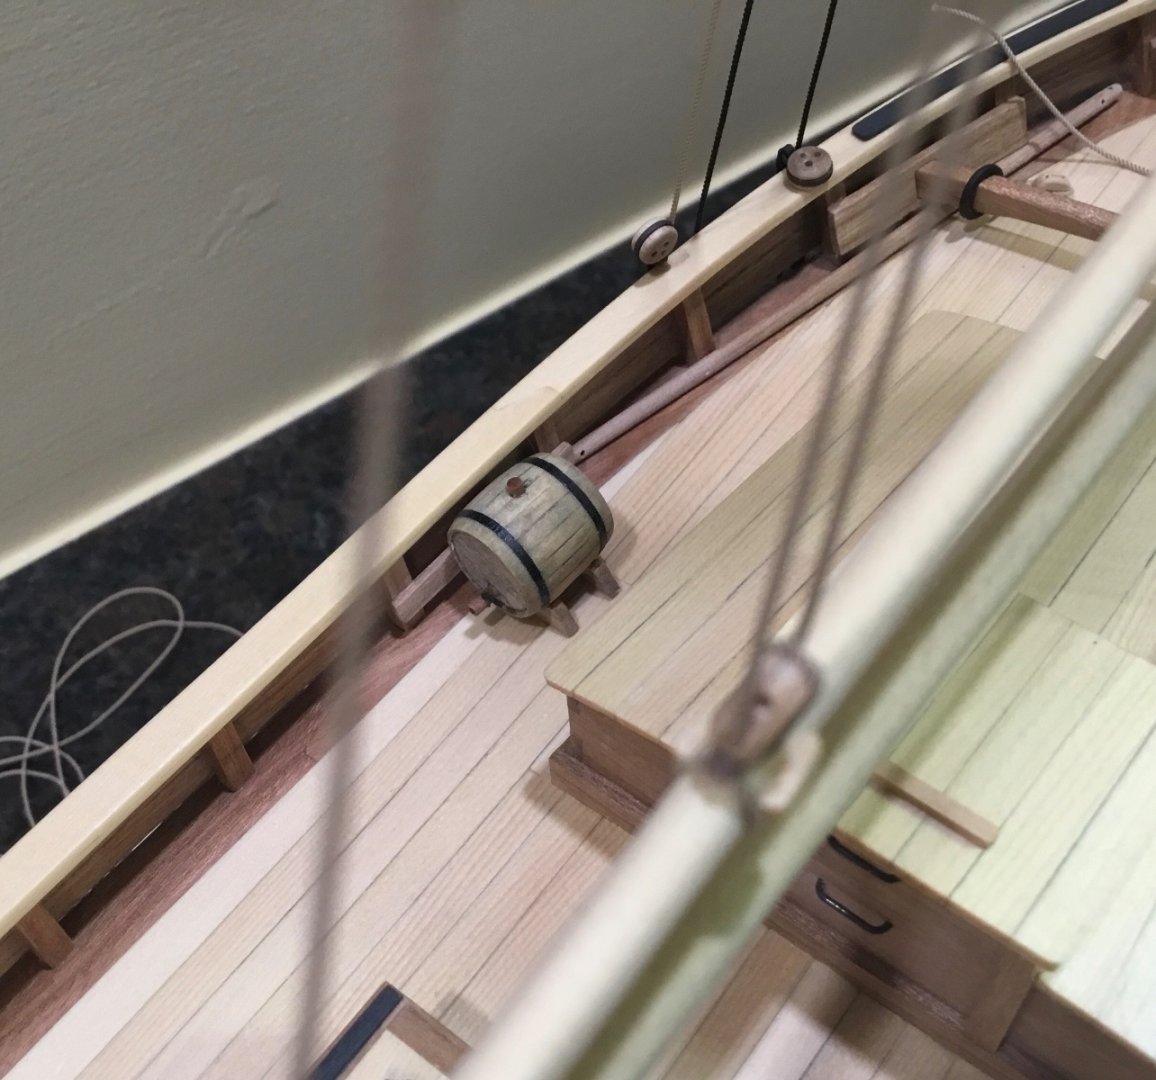
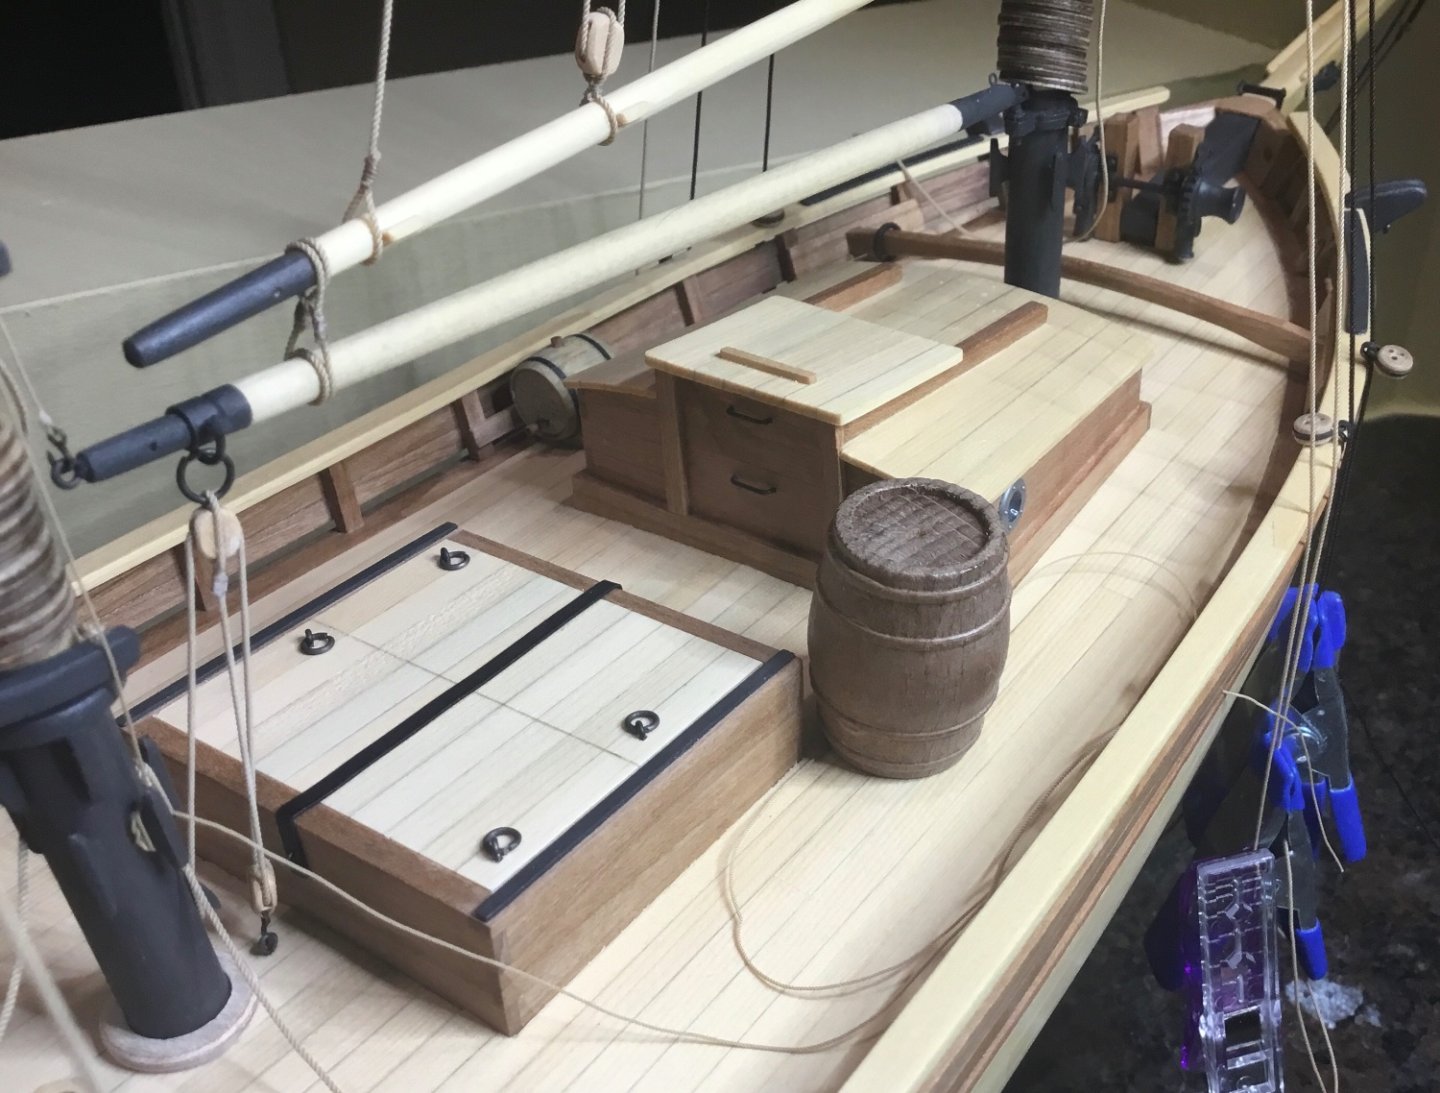
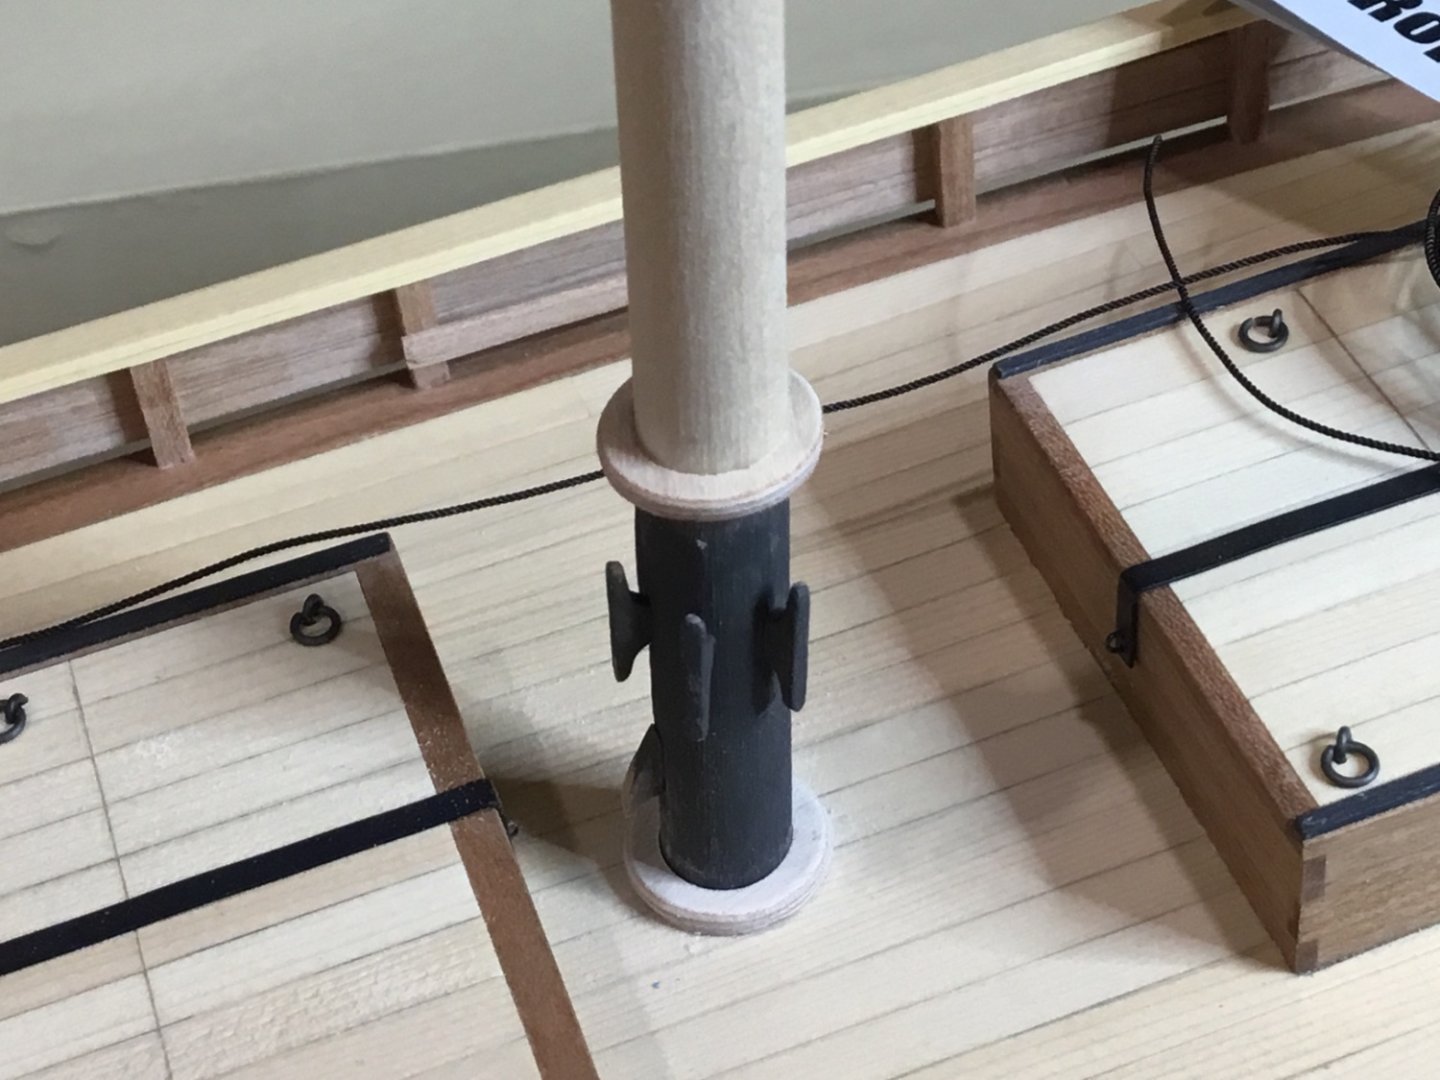
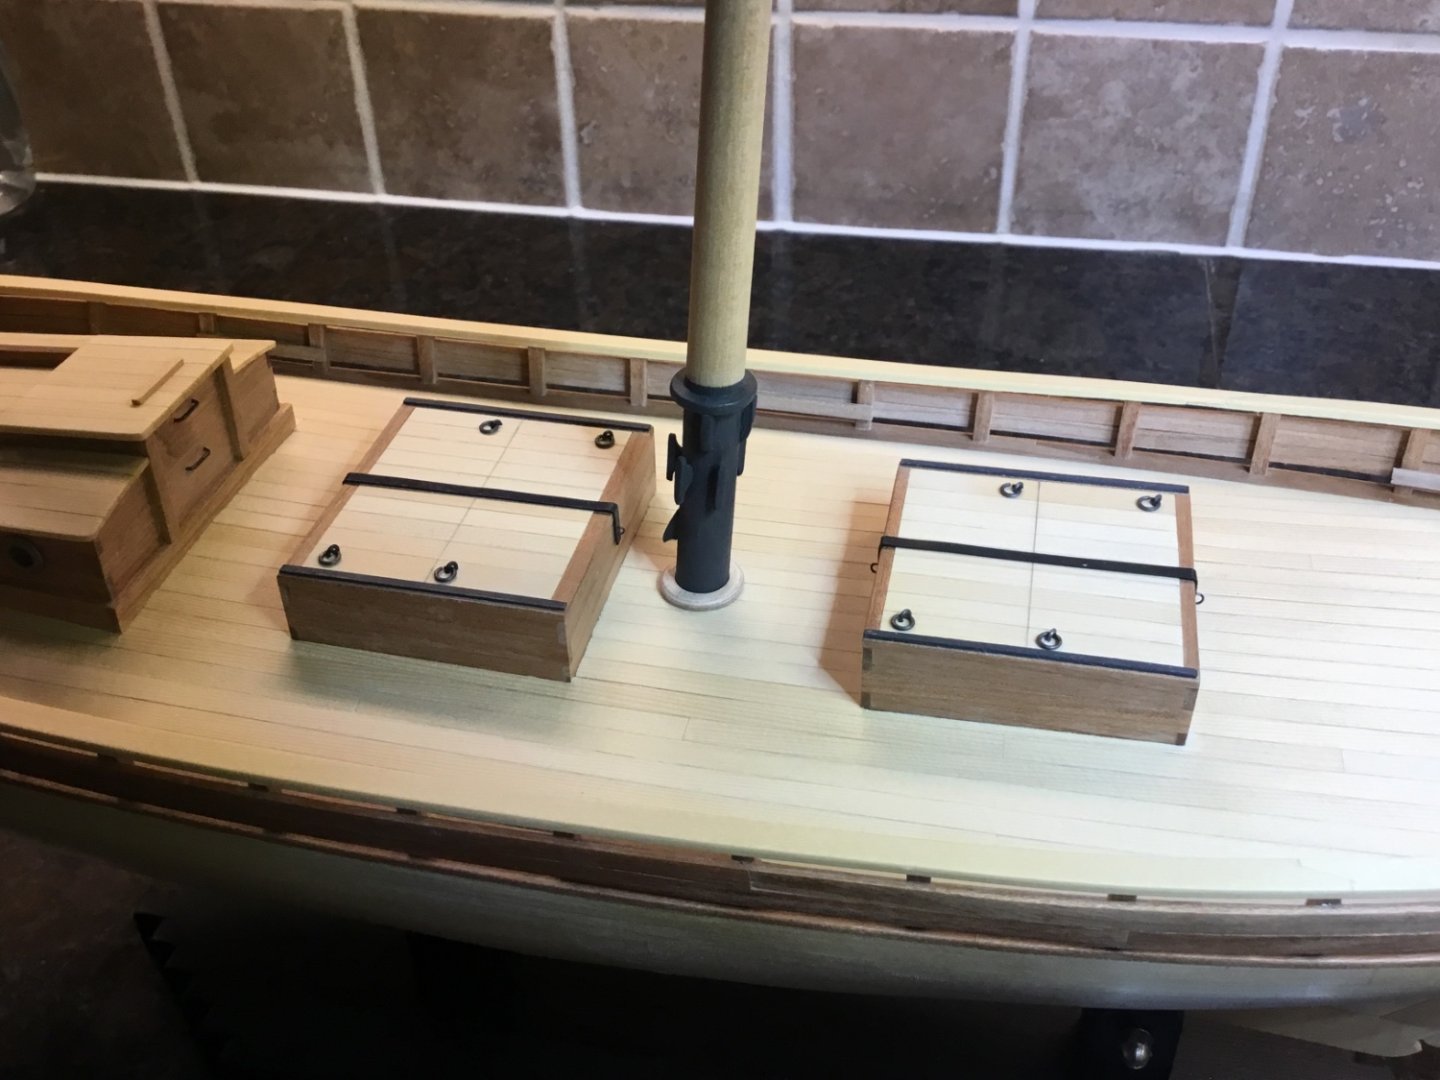
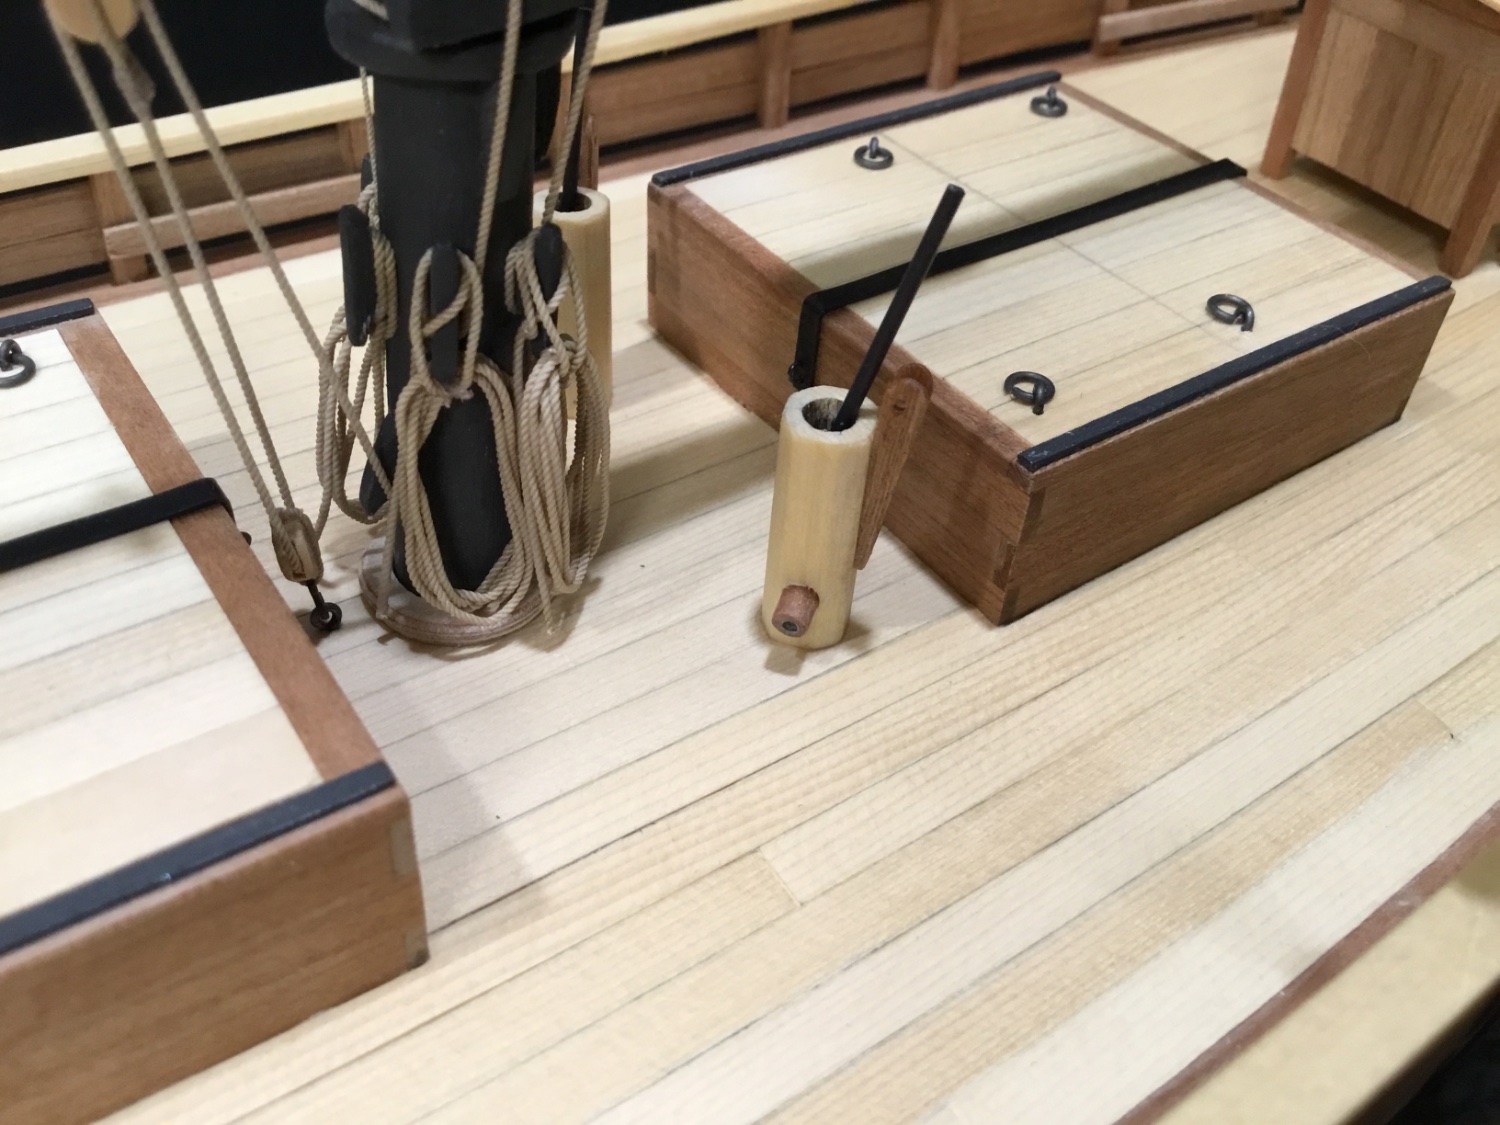
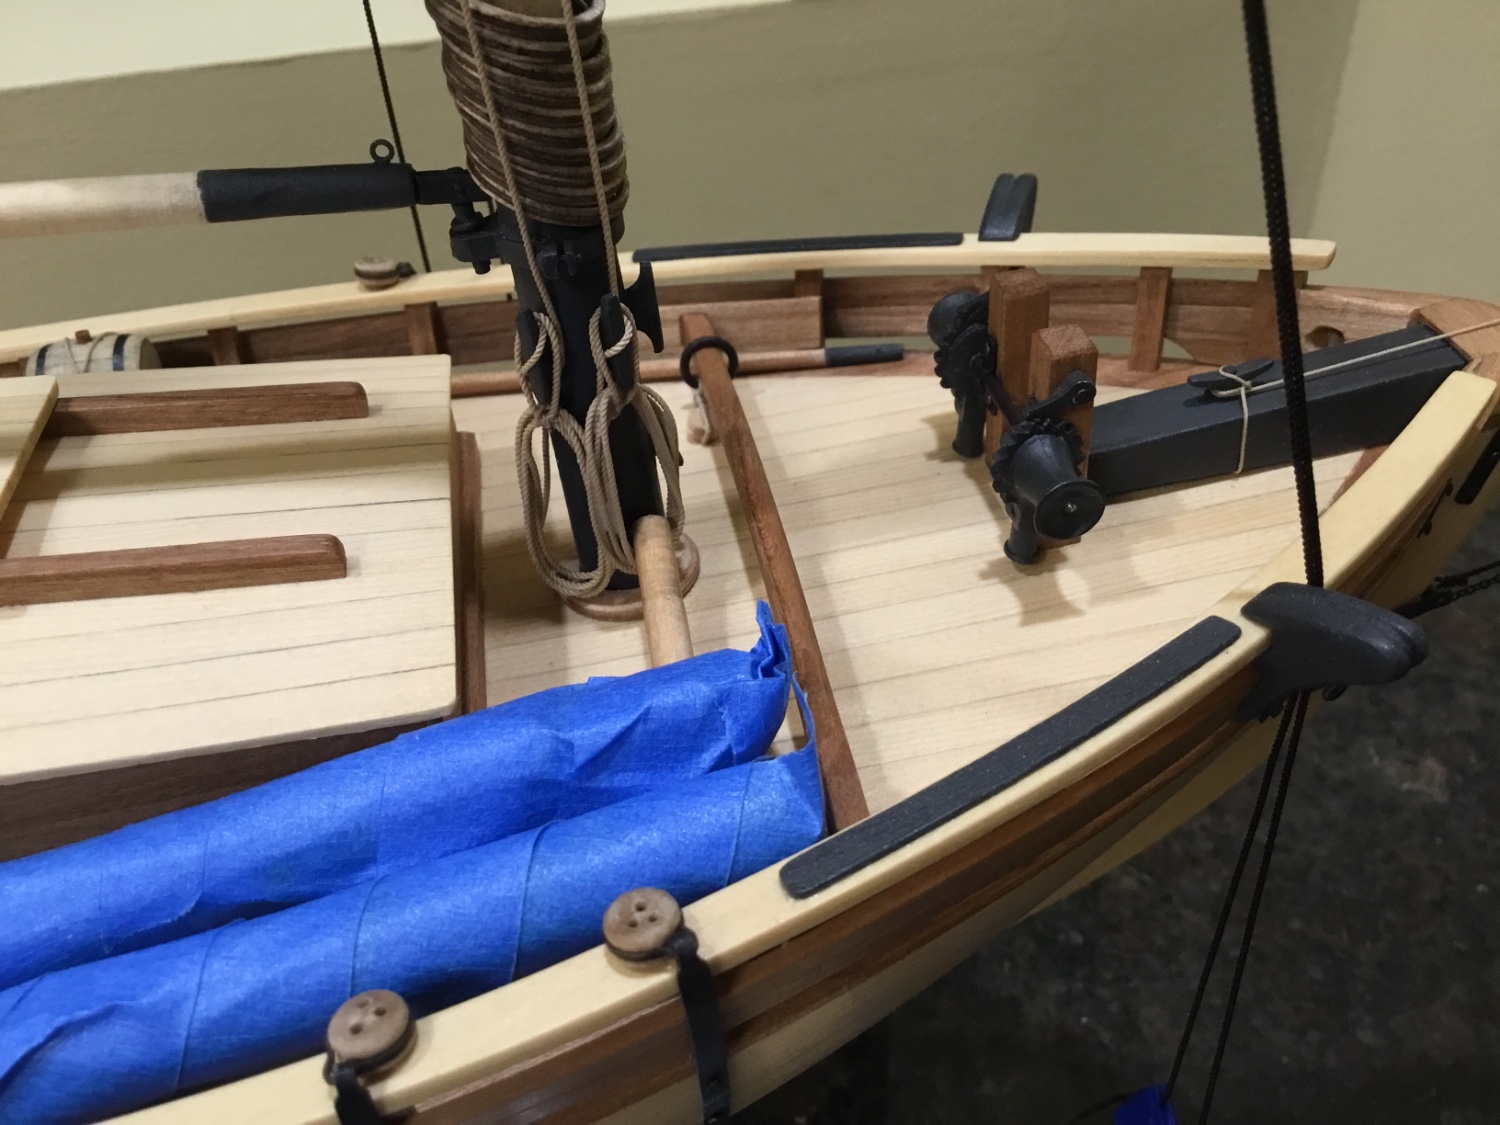
Belaying points were finished up and the firkin was lashed down

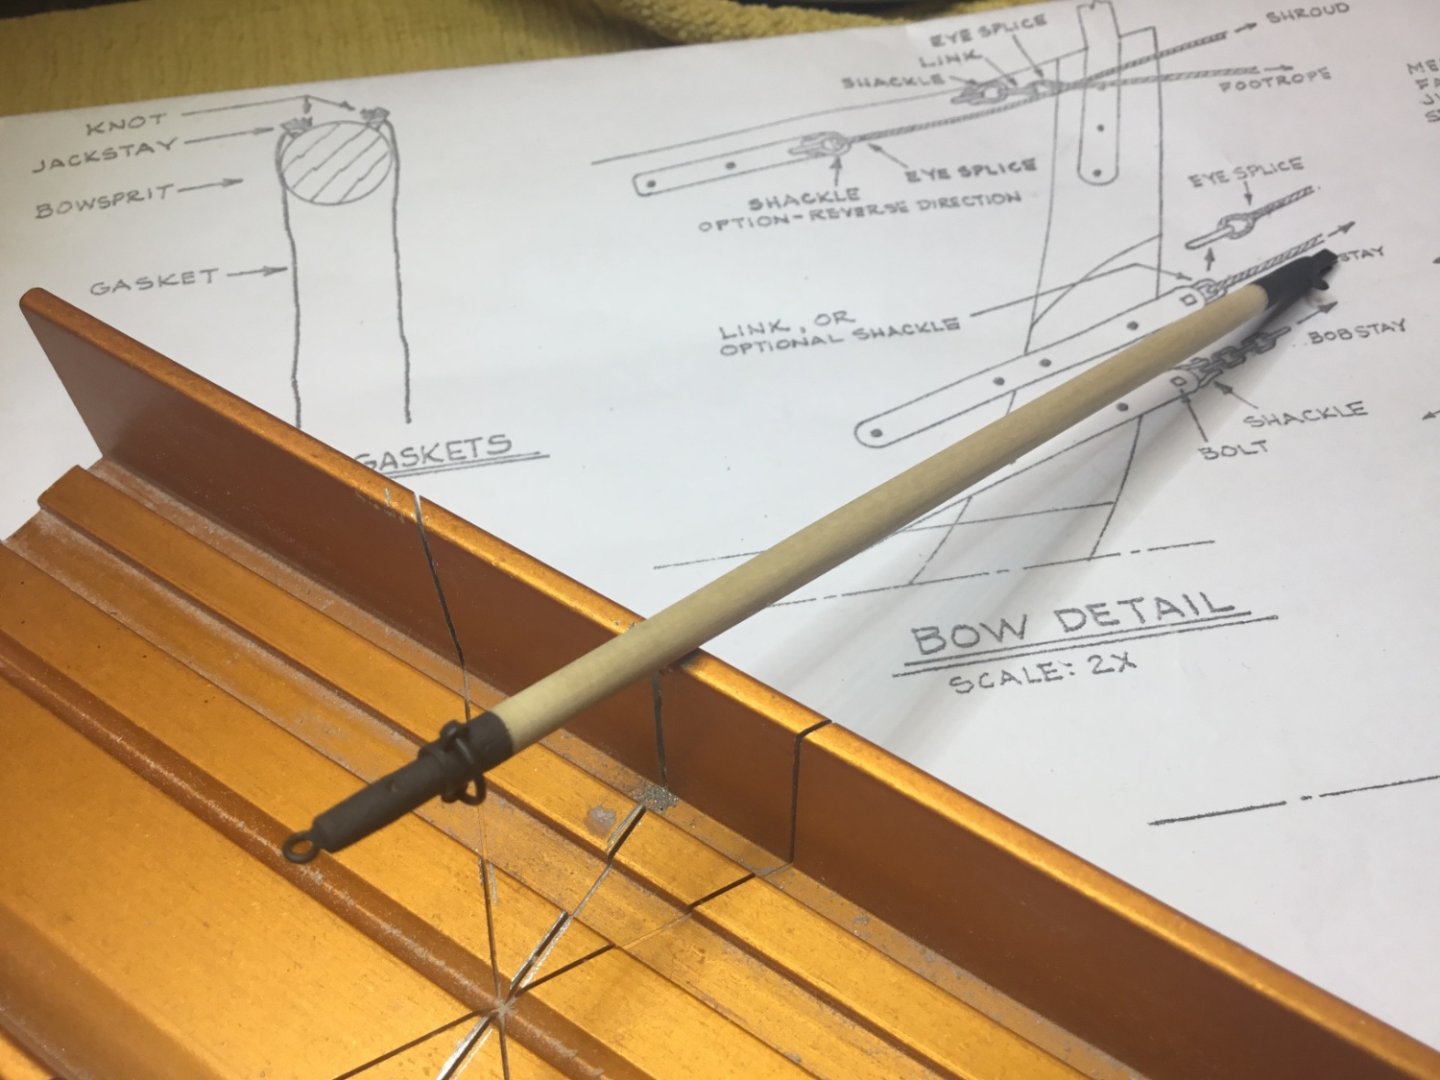
Foot ropes were added to the bowsprit. The gaskets are still being coated with PVA to convince them to hang a little nicer.
Now it’s time to start on the port side. Take care and hope to see you soon.
-
A lot of your books come with plans and/ or CDs. I’m assuming that they would not be eligible to be produced as e-books.
- thibaultron, mtaylor and Canute
-
3
-
-
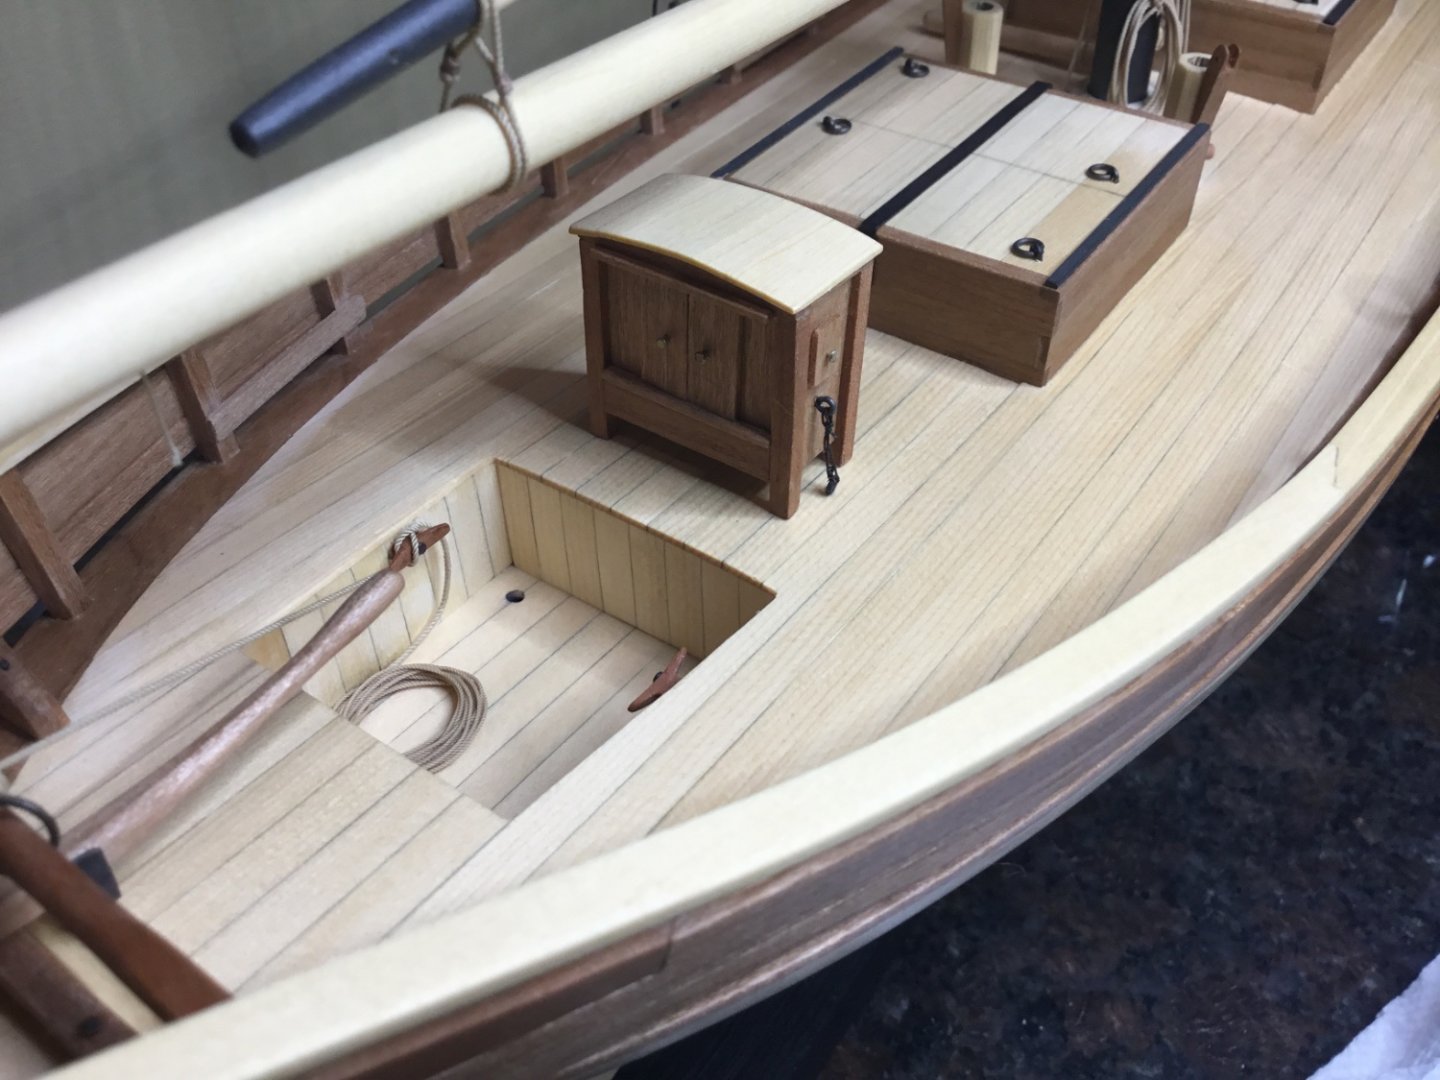
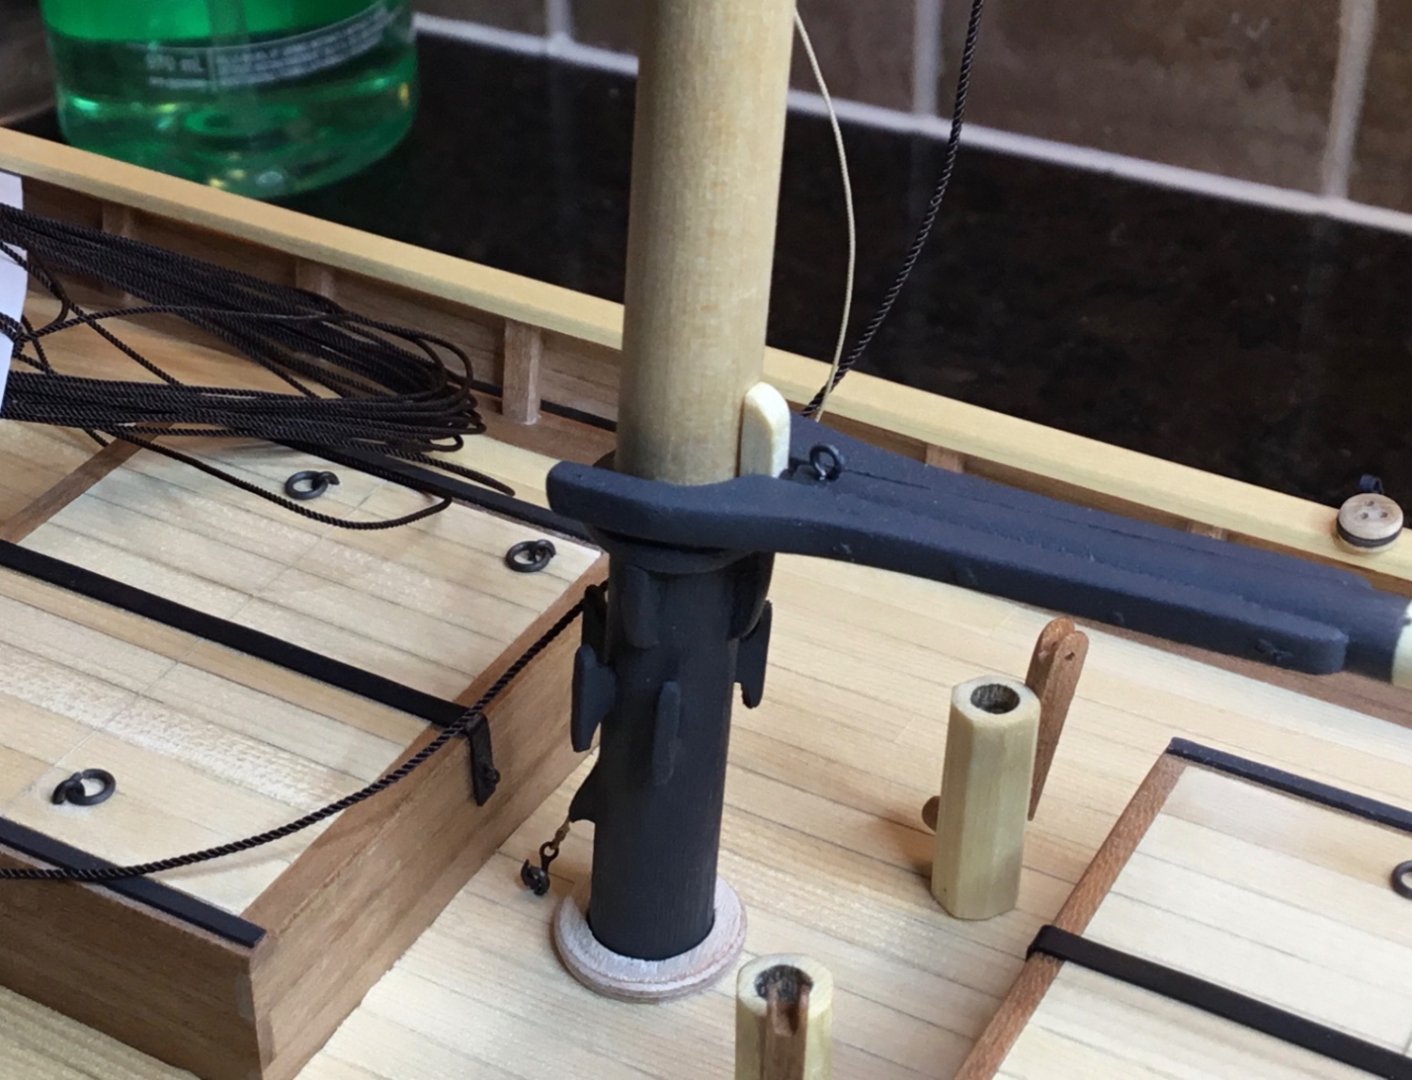
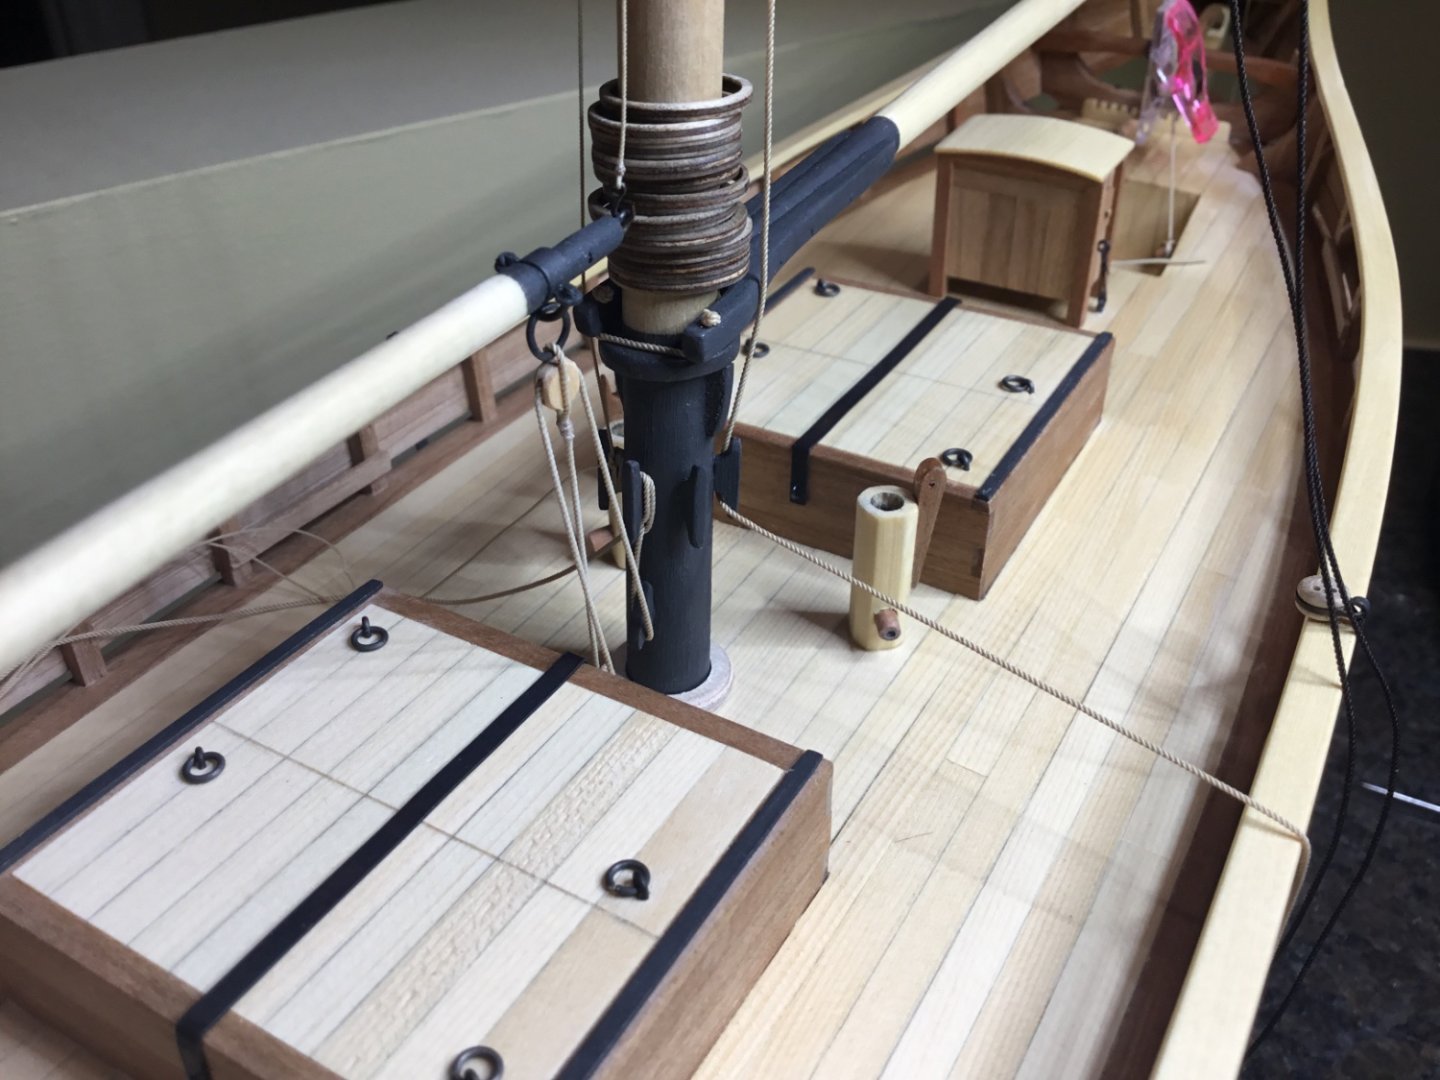
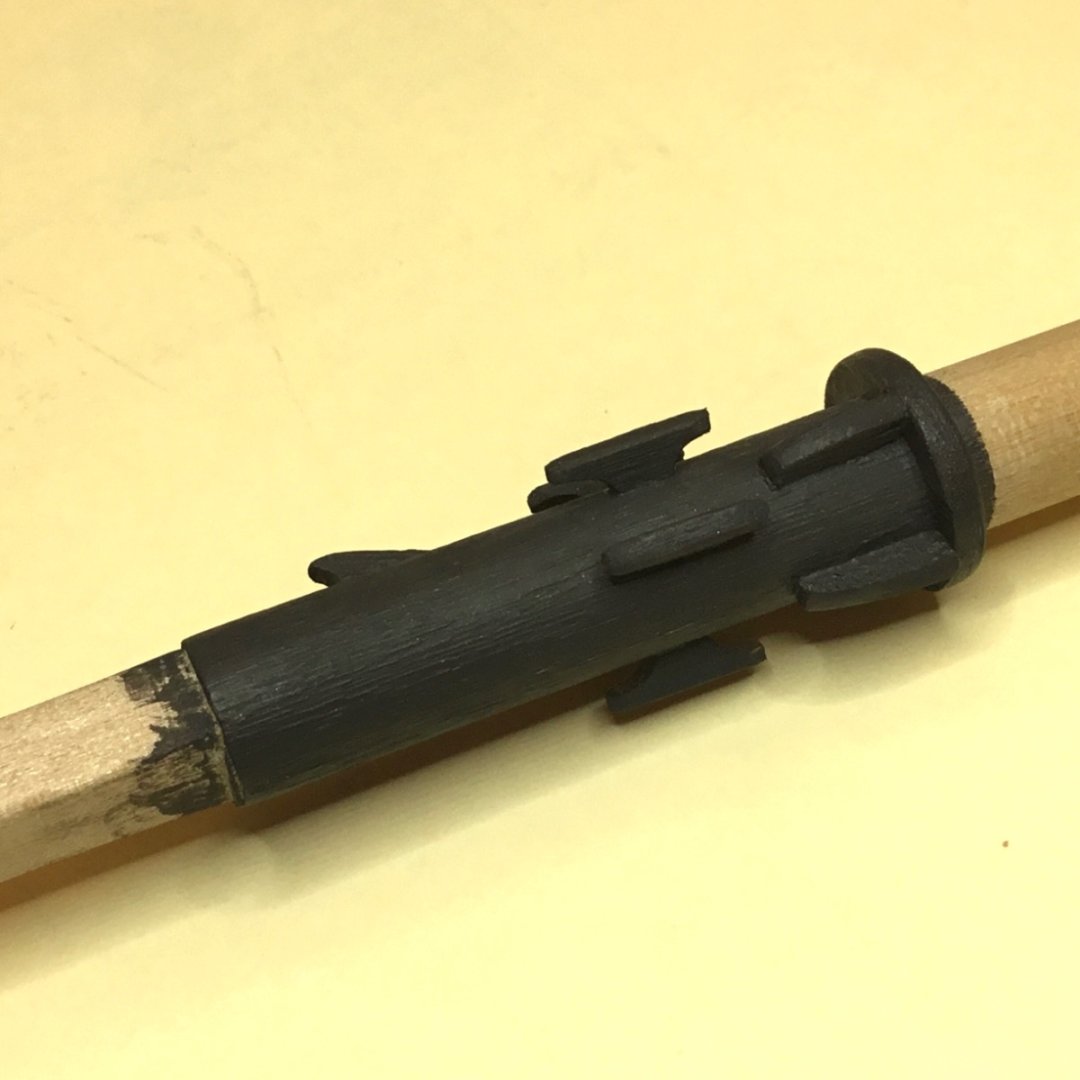
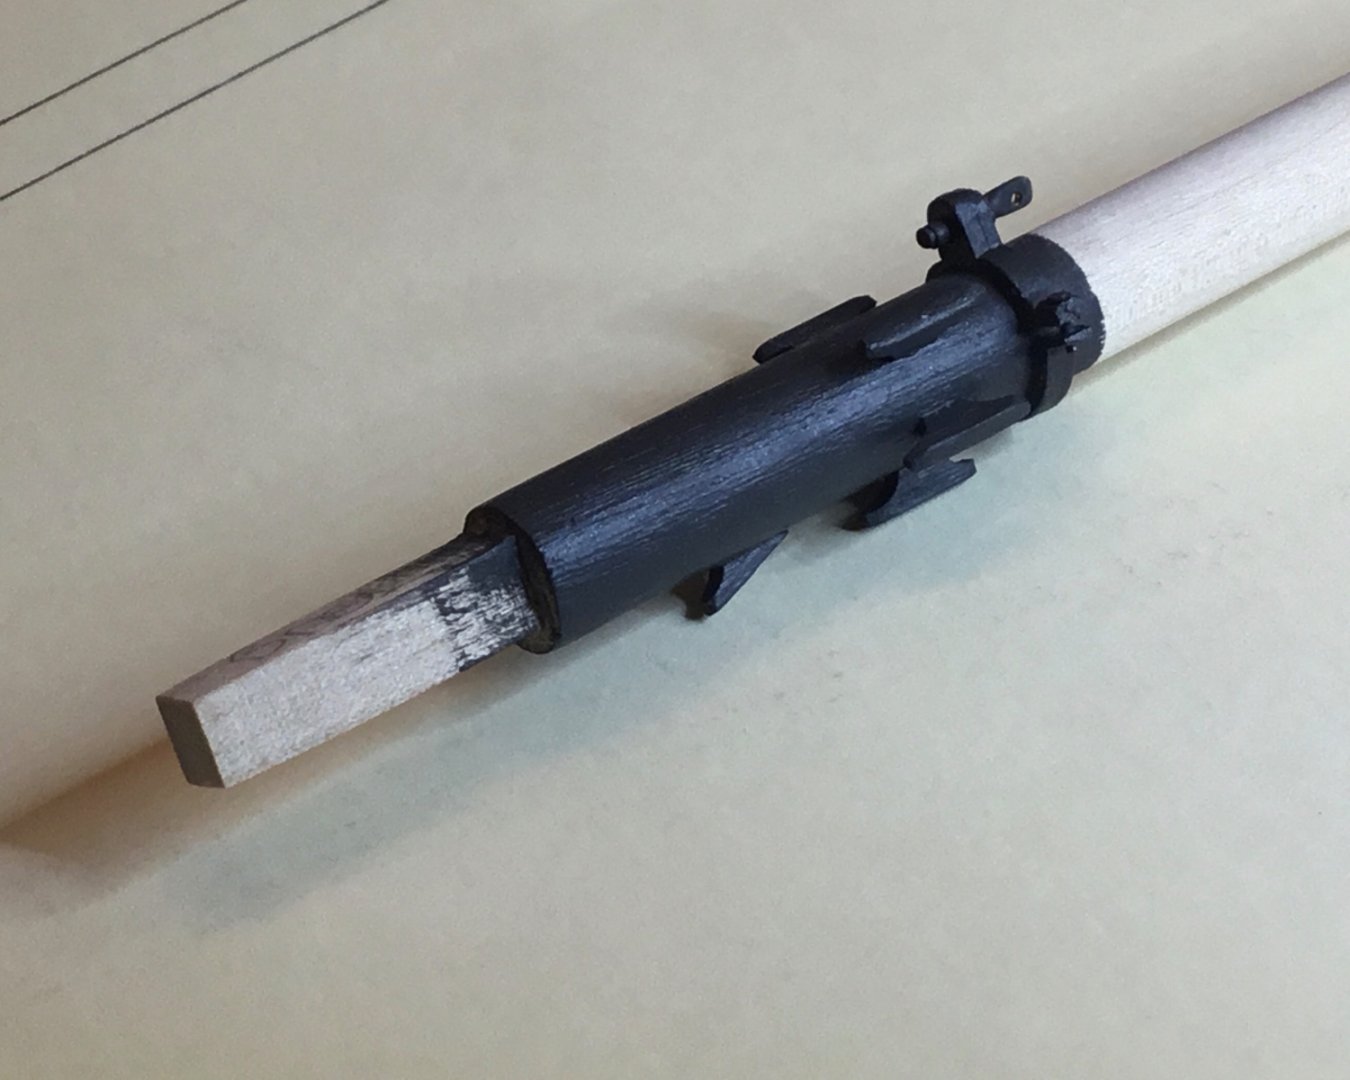
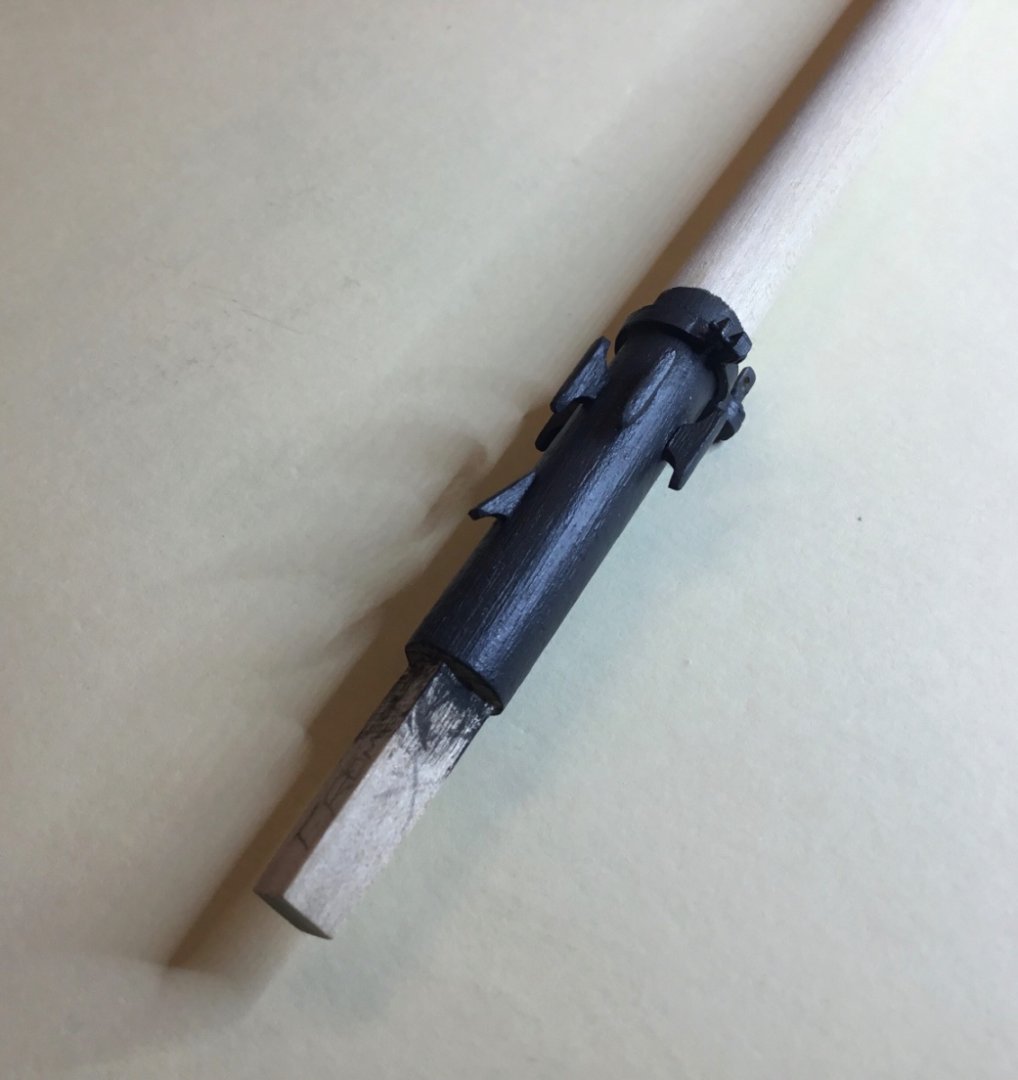
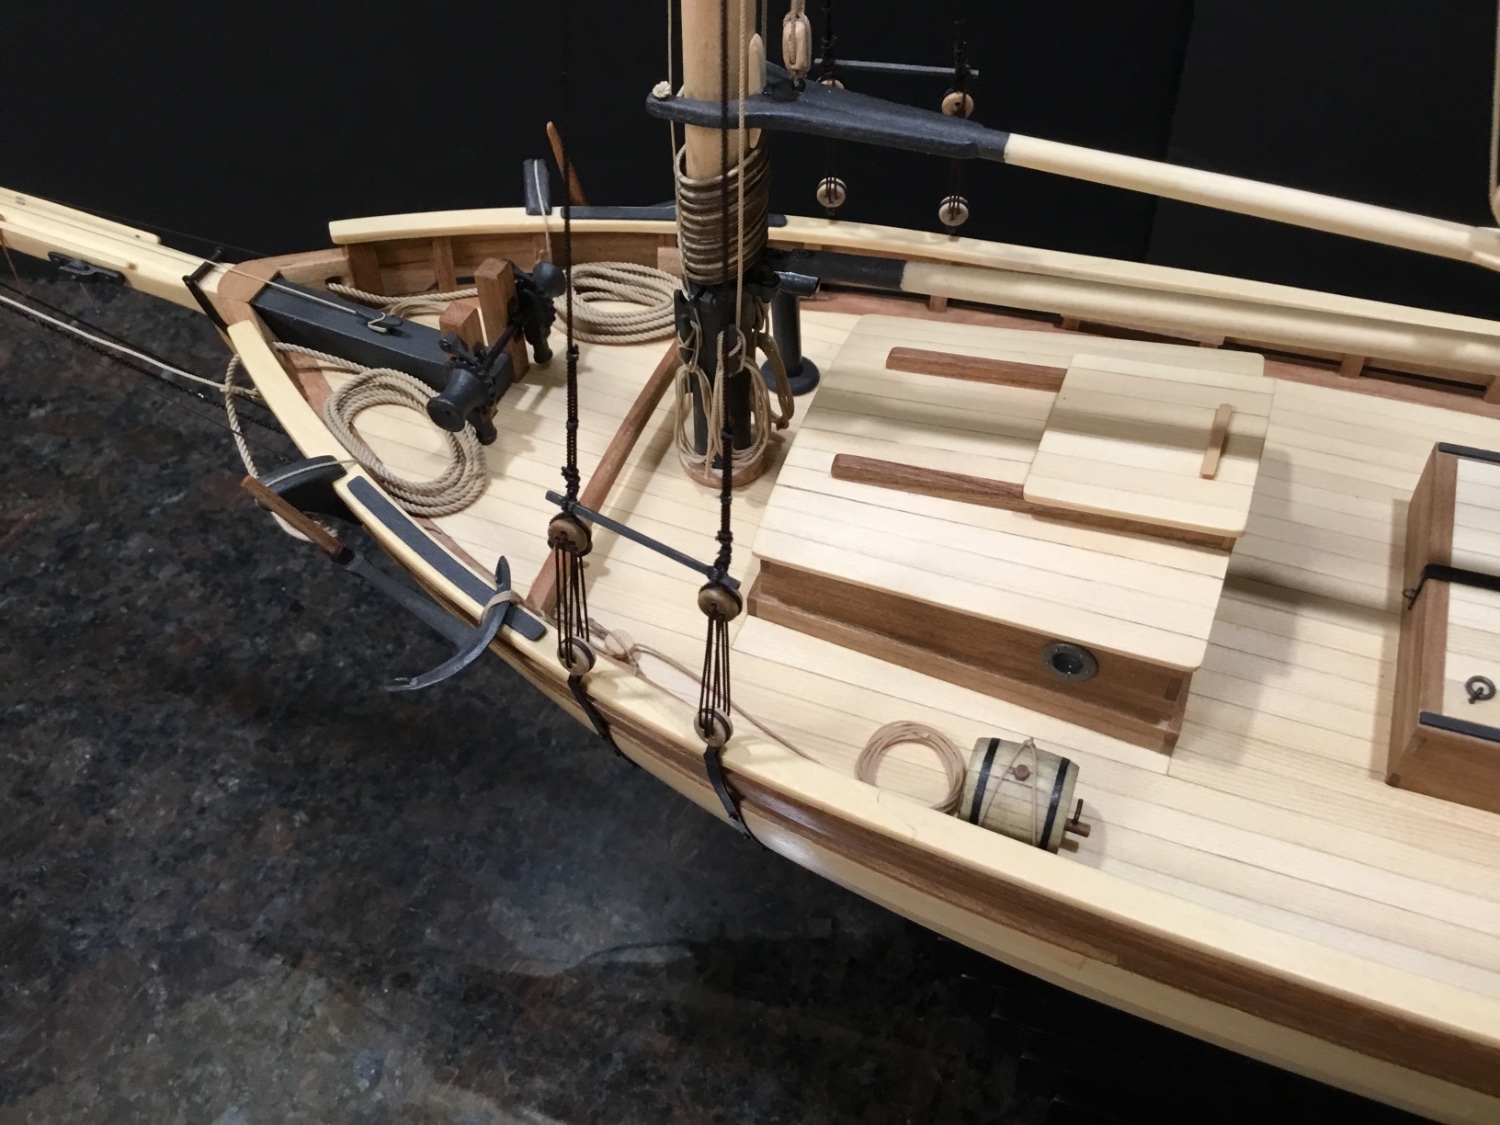
Hi Everyone, hope you are all well. Thank you for your Likes. They are very appreciated. I’ve been working on booms, gaffs, deck furnishings and rigging. So a bit of everything. I have been watching an excellent YouTube video made by Outlandish Marine called “ The Schooner Prophet: Camden to Rockland “. It has shots of many interesting details so I’m taking cues from some of them. First up is the binnacle.


Next came the pumps.
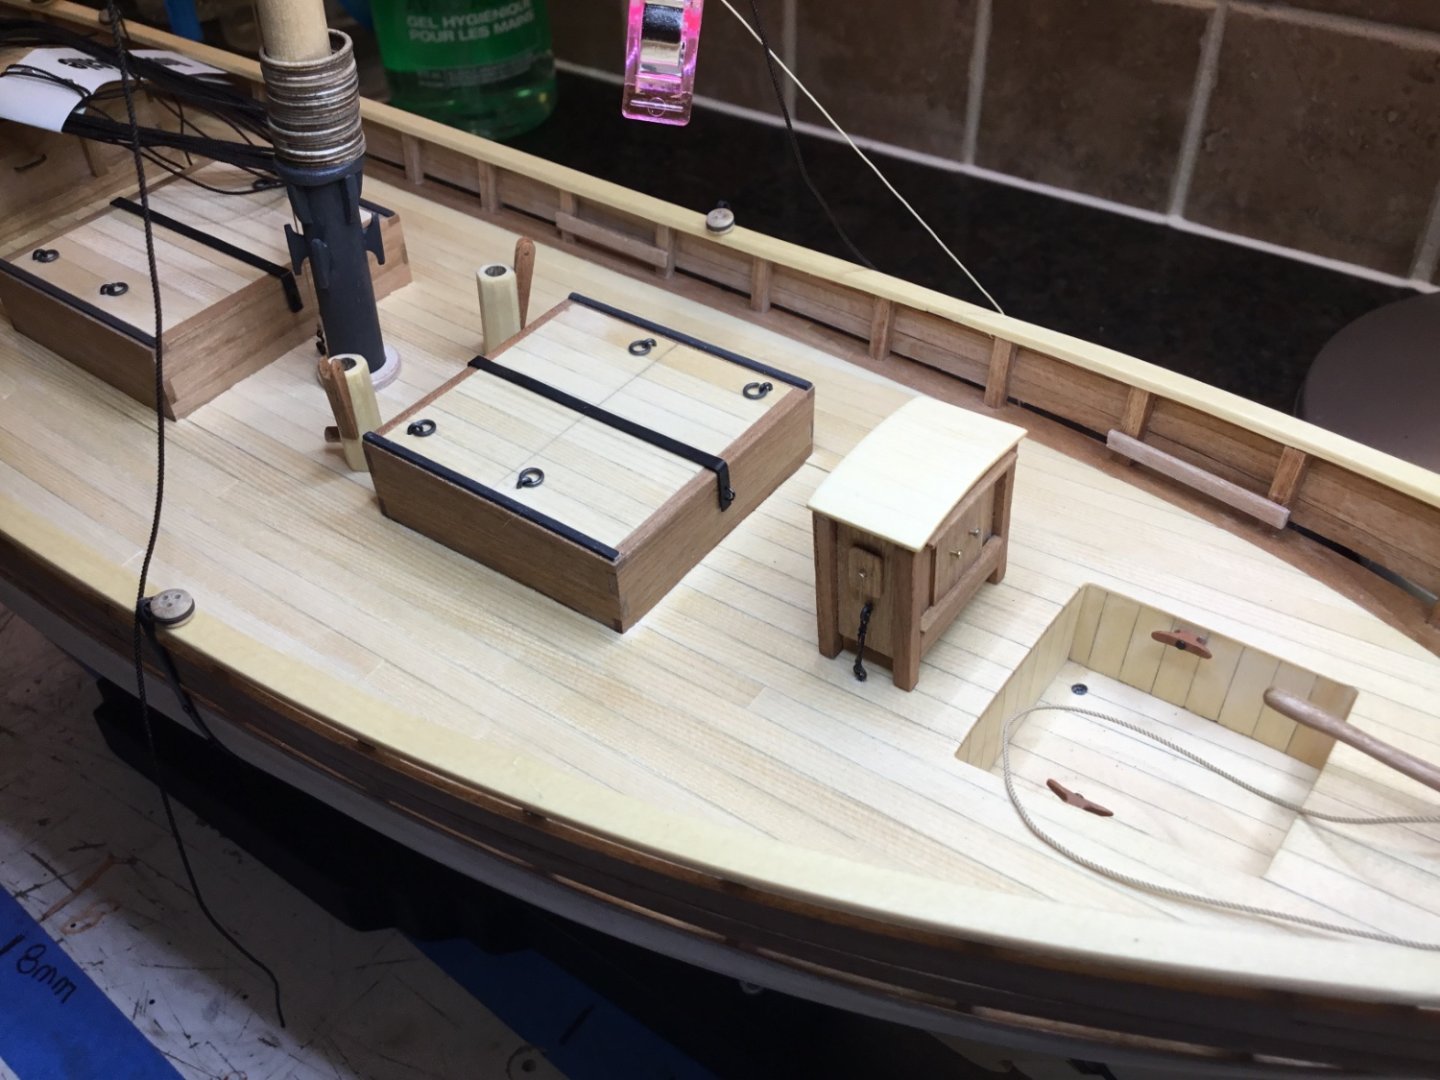
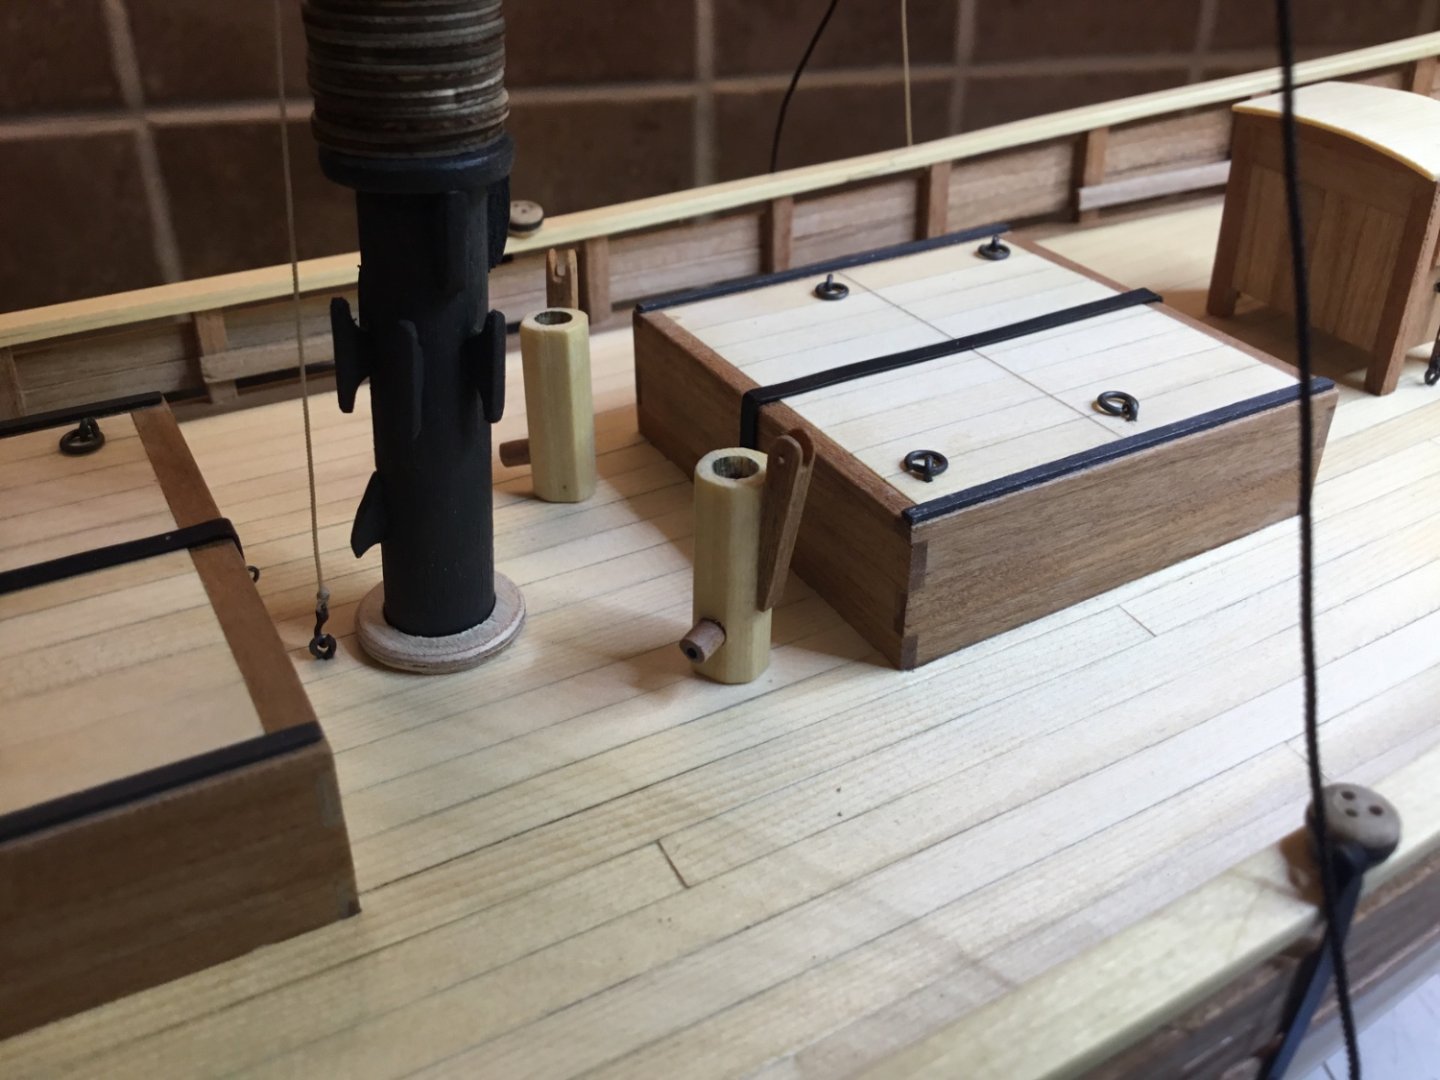
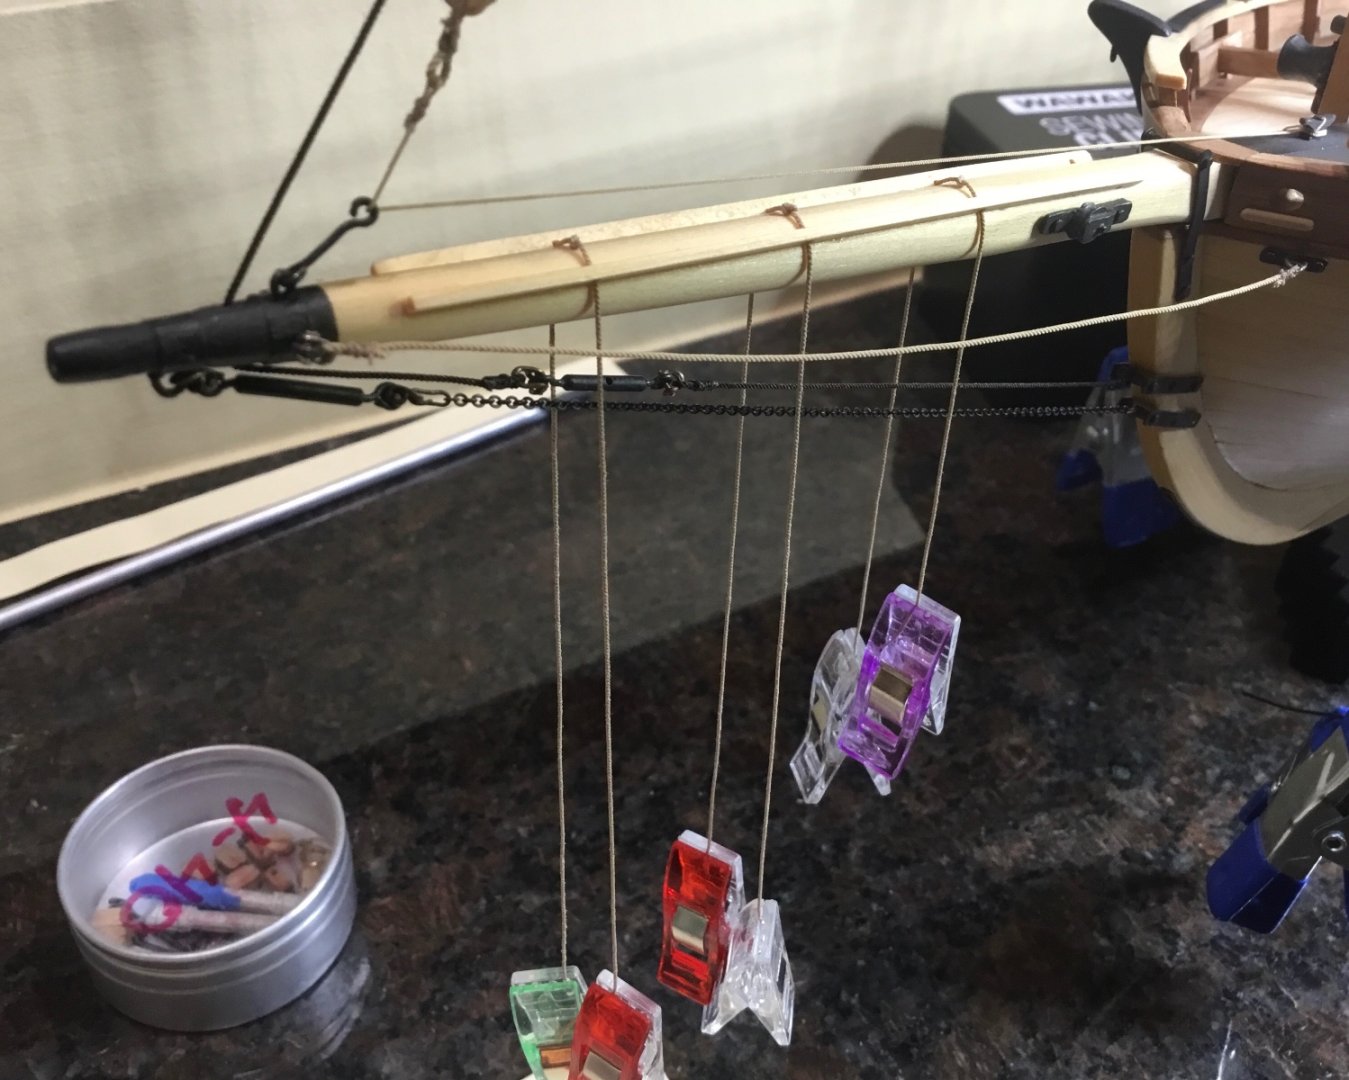
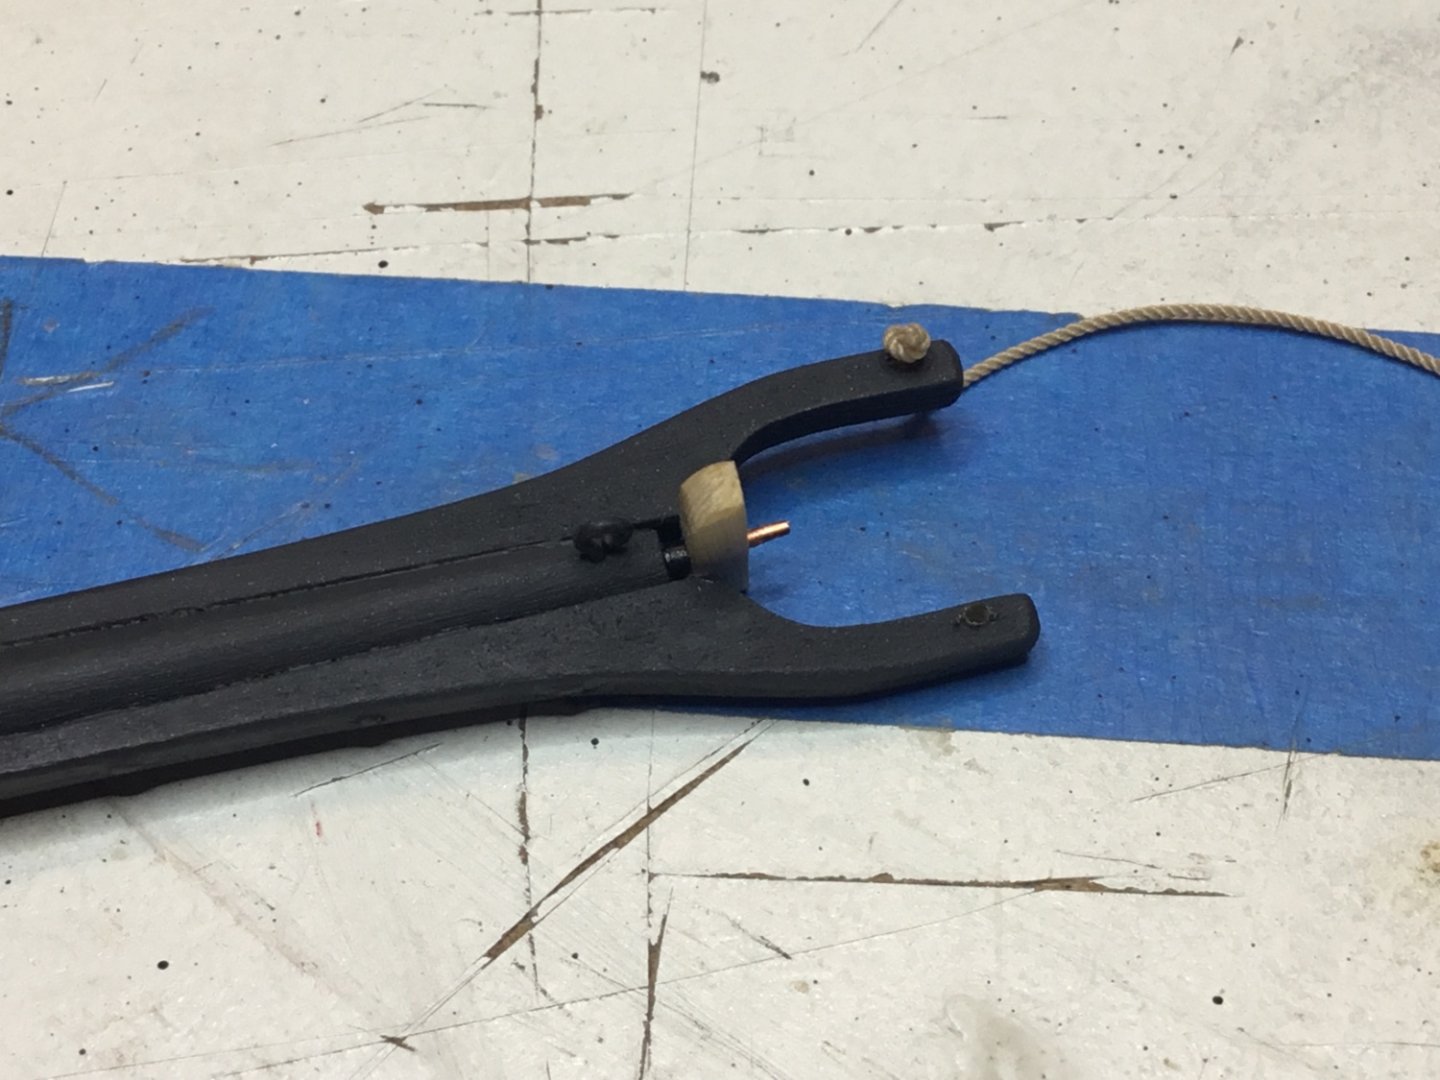
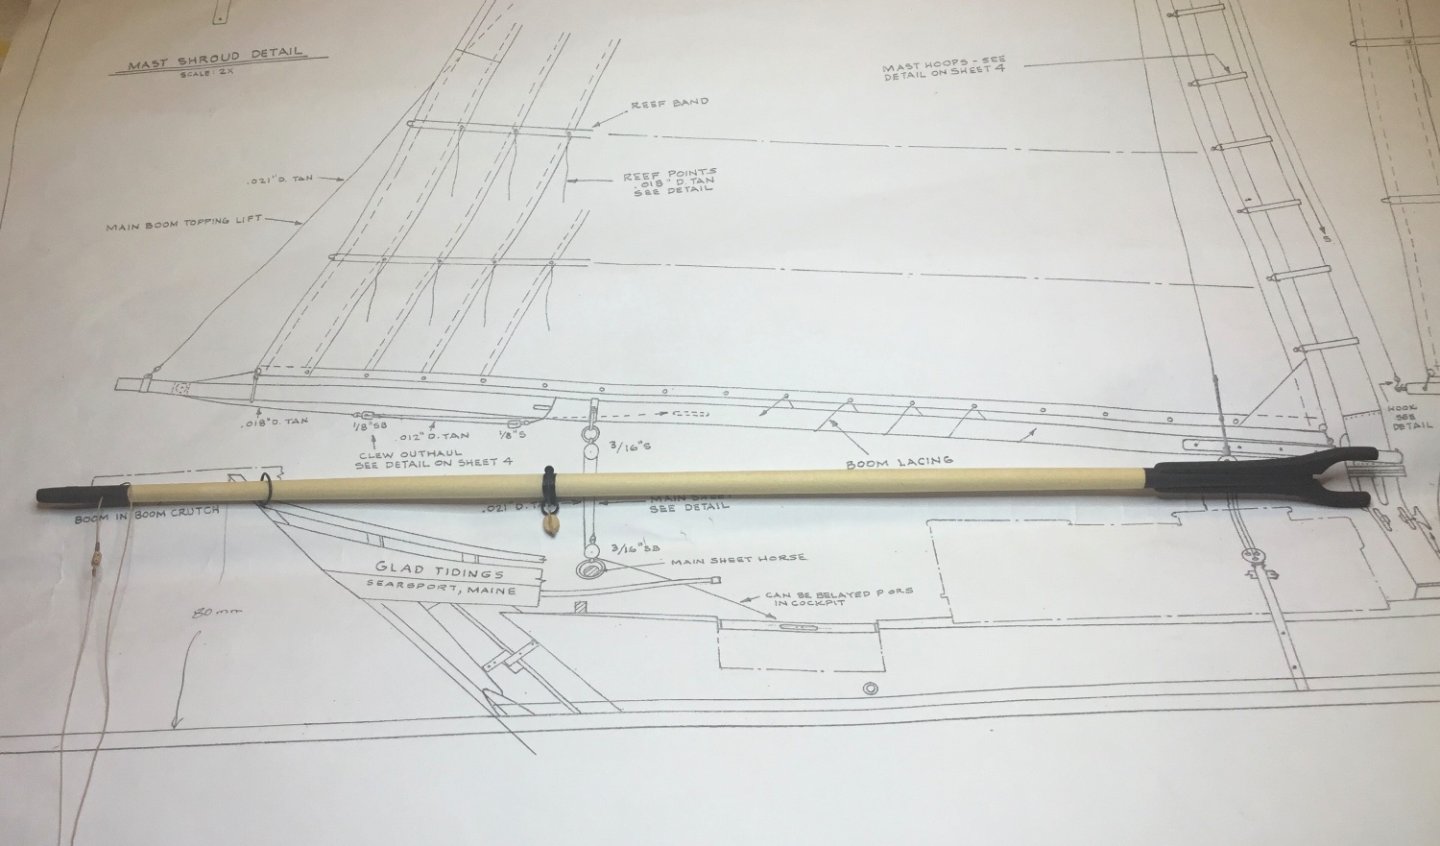
Once they were mounted the booms were finished being rigged as much as possible and then mounted. The main boom’s clapper is pinned to the end of the boom with #22 wire. A piece of insulation is between the clapper and the boom let’s the boom flex a bit if needed
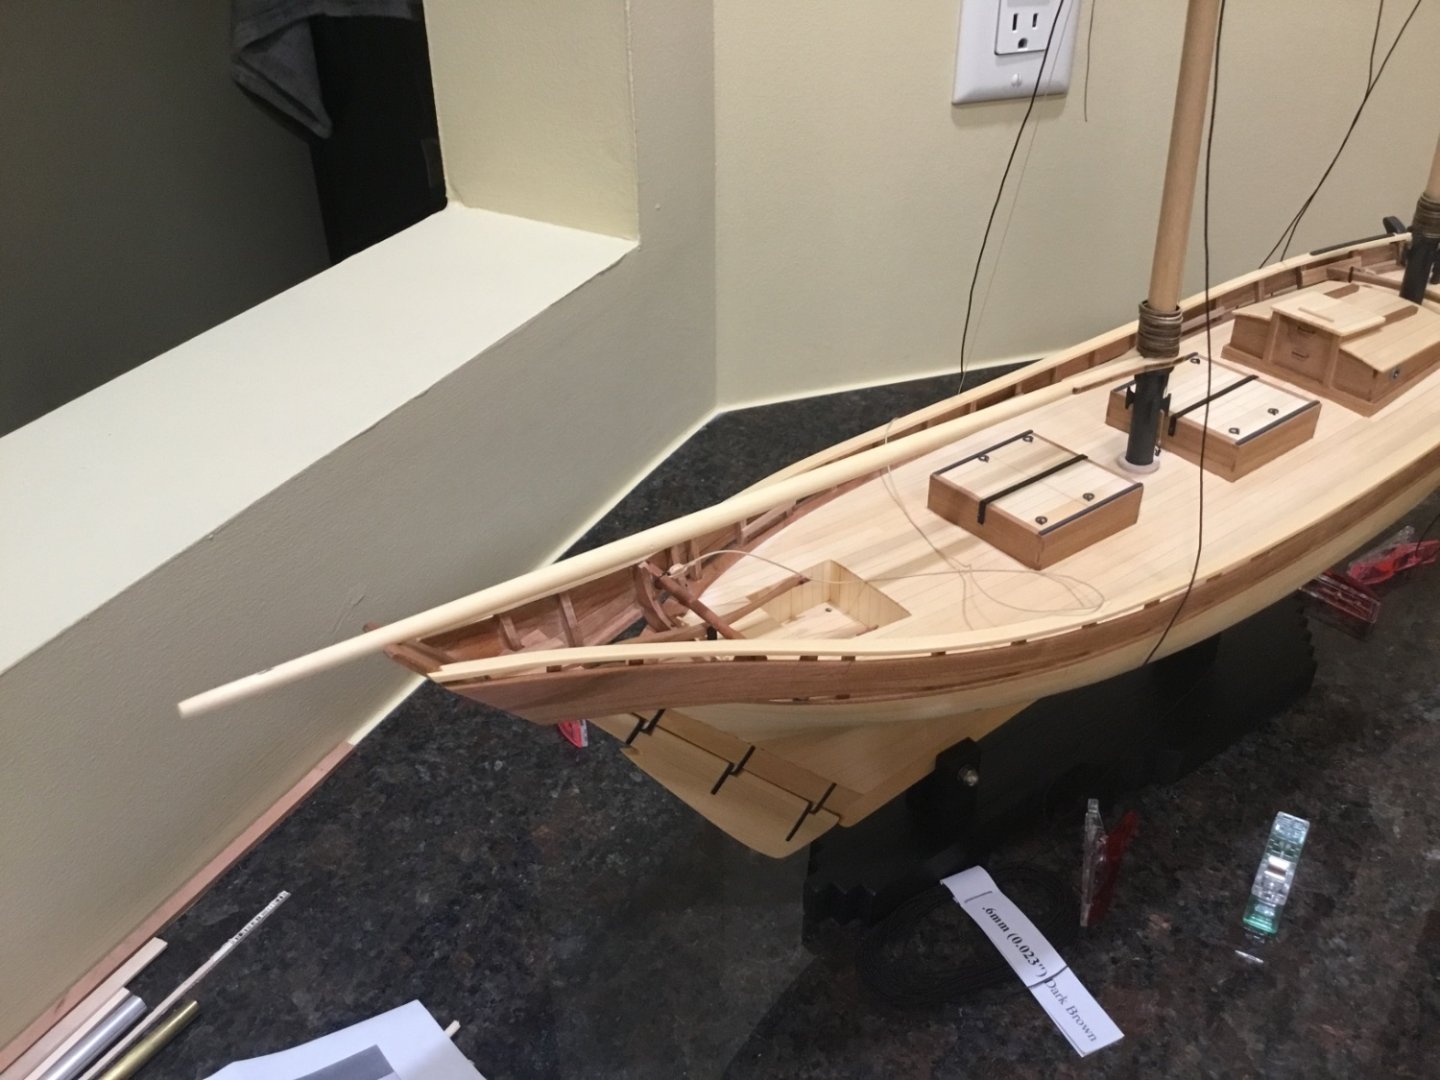
Then the fore boom was mounted and rigged.

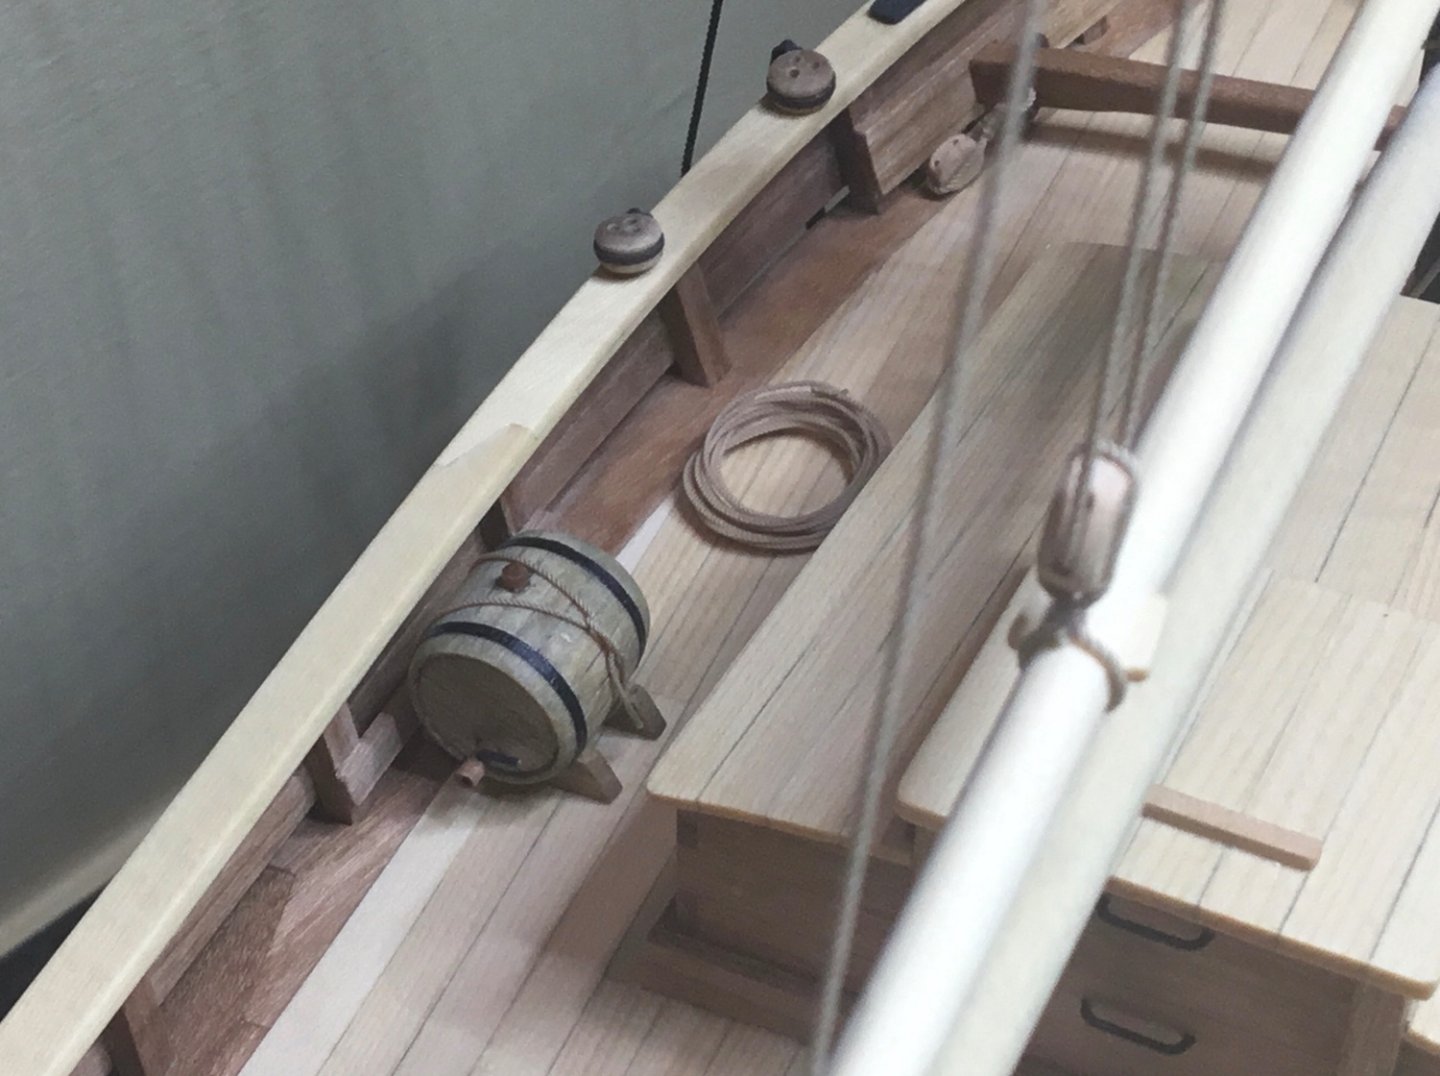
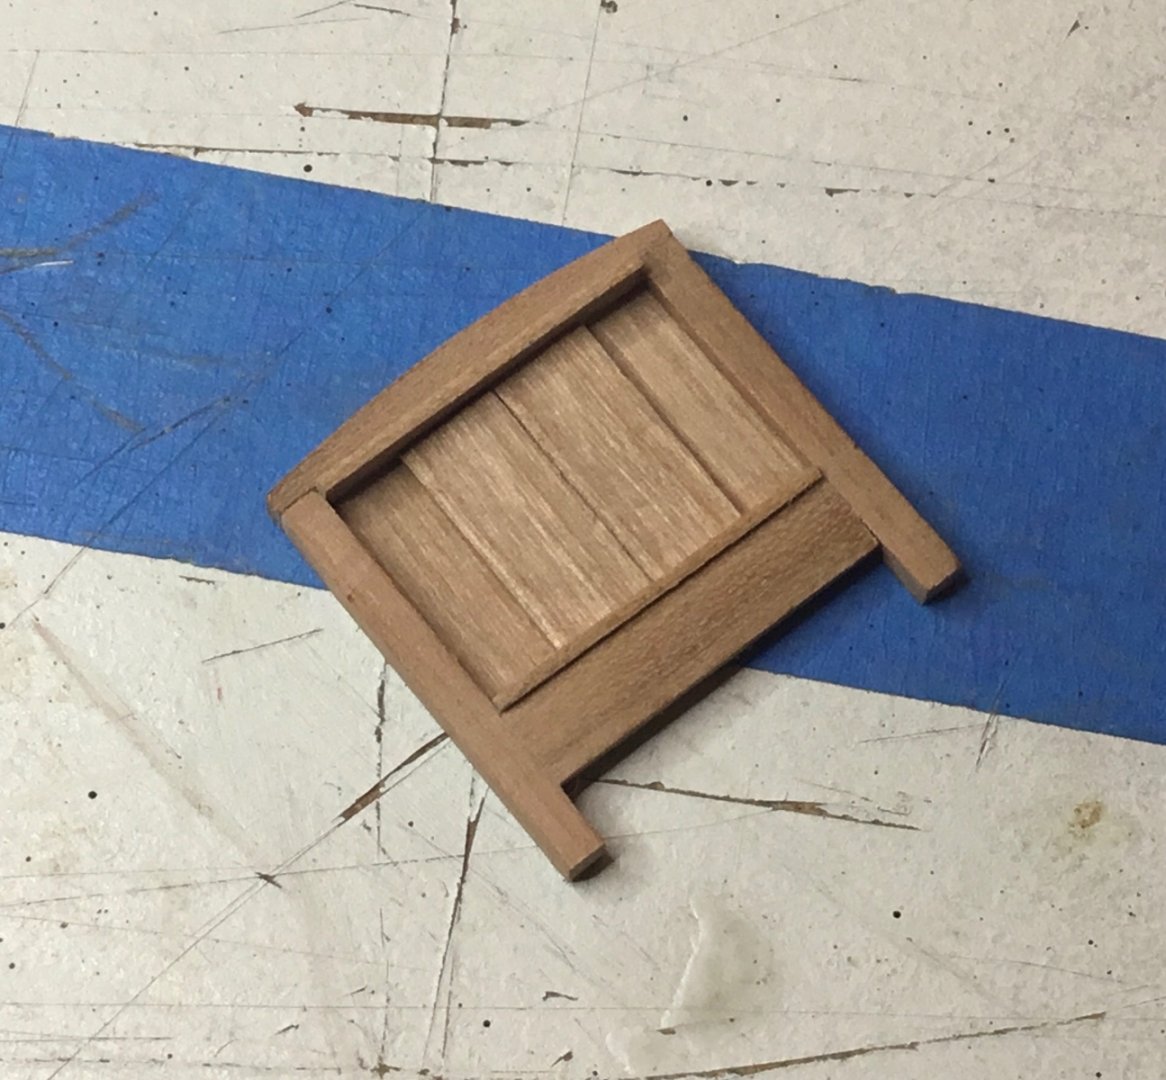
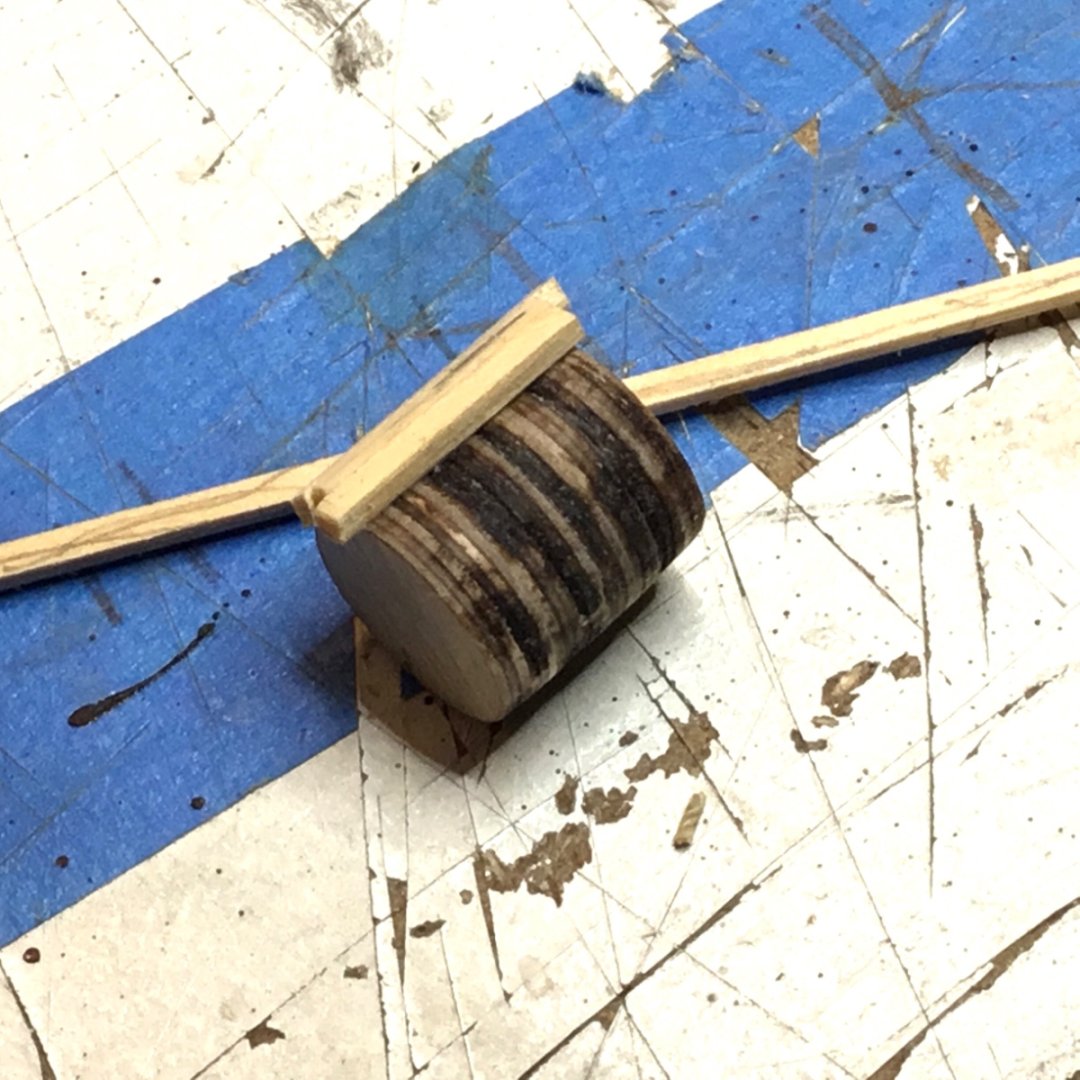
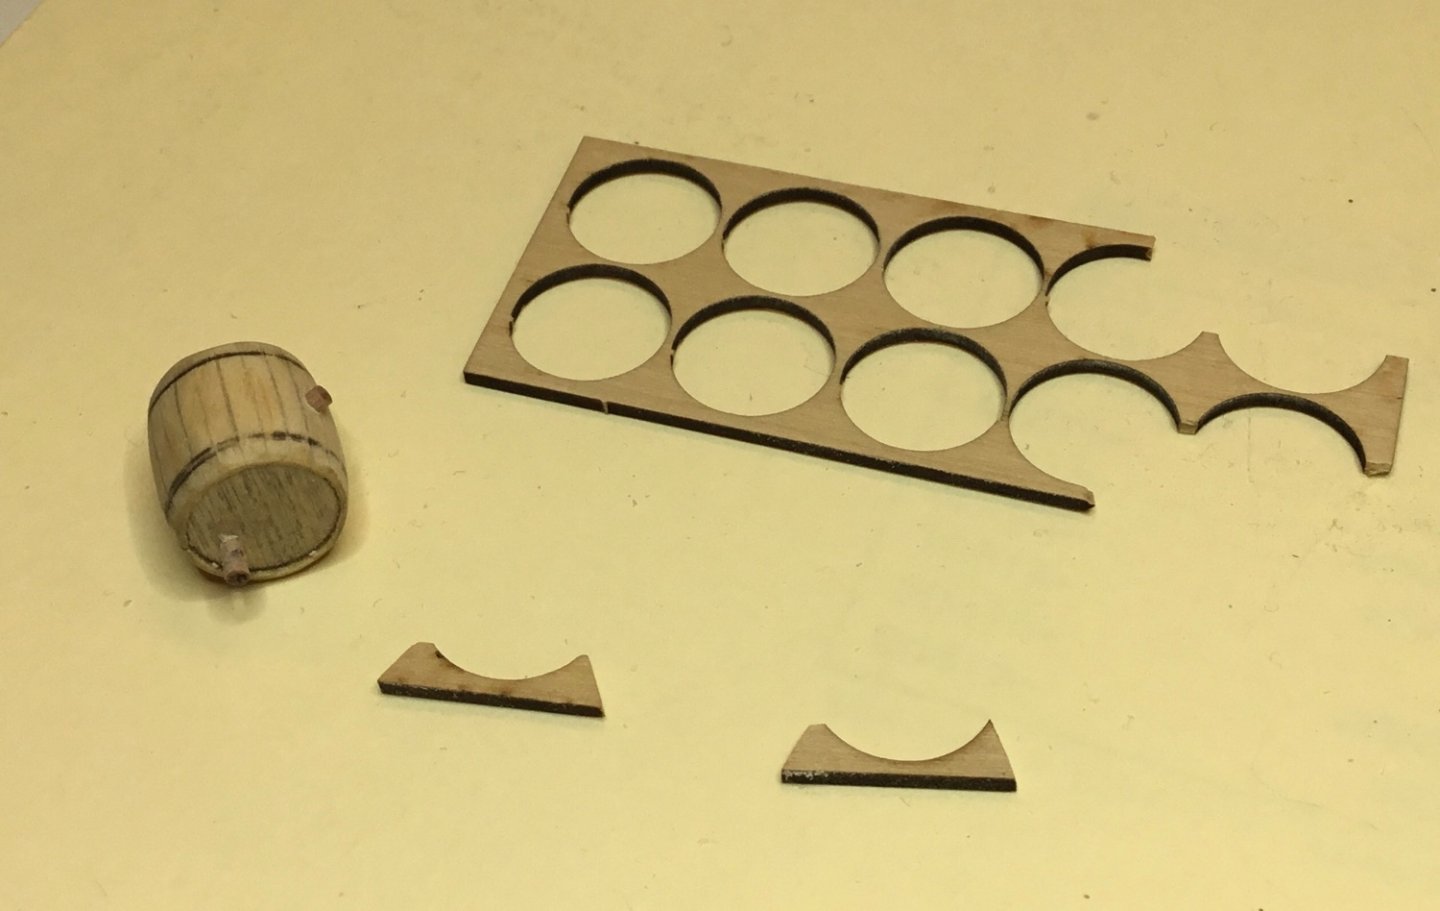
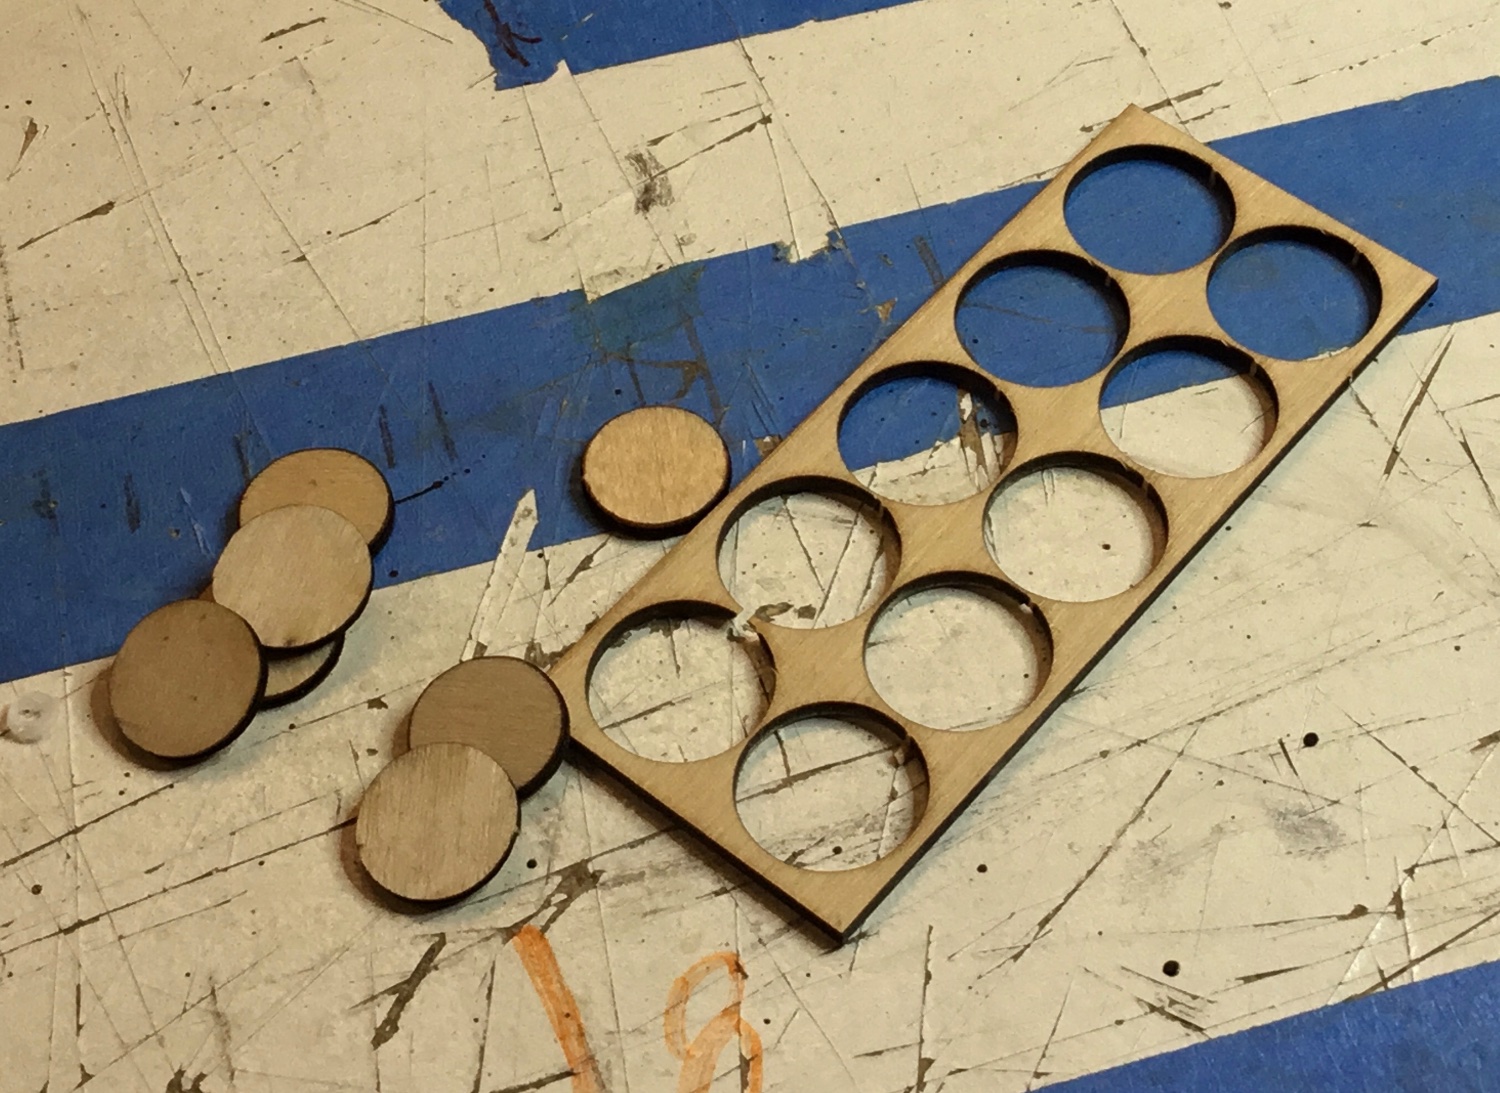
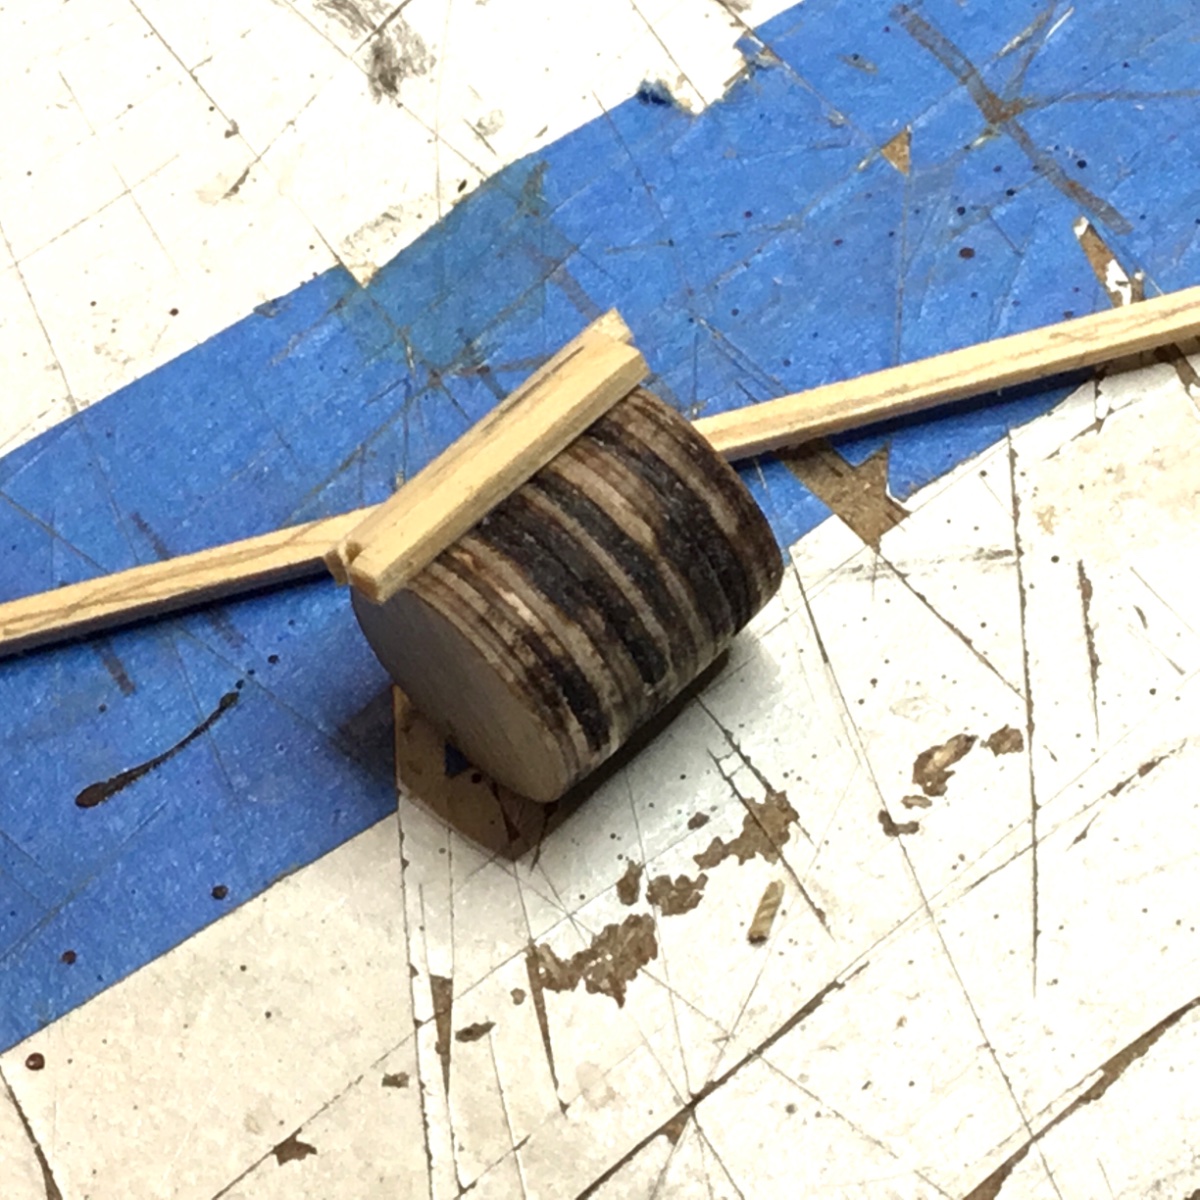
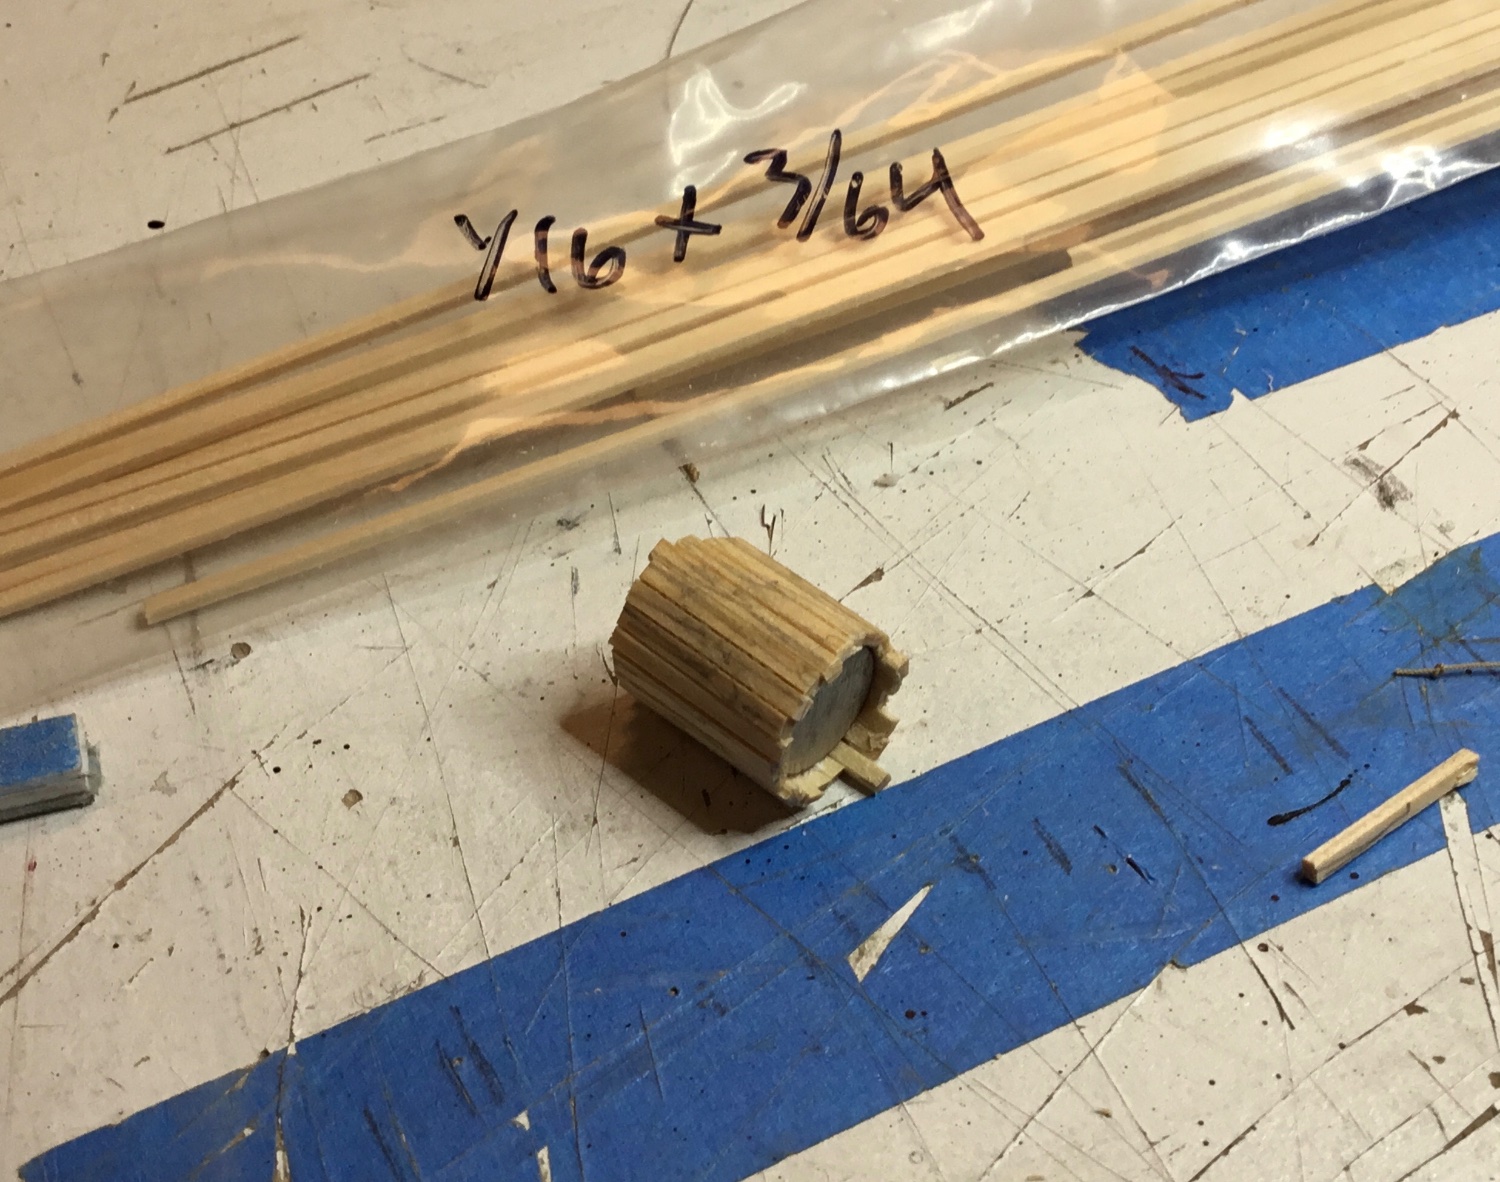
The supplied water barrels were too big for where they were to be mounted so a new one was made. This is what I was going for.
There was a lot of scrap left over from the mast hoops. Nine of the plywood disks were glued together and covered with 1/16” strips of AYC. The back corners of the strips were relieved to let them fit together more closely.


The hoops are made with art tape. Gave it a test fit on deck. Not sure if there’ll be one made for starboard. The gaffs where mounted in the same manner as the booms.
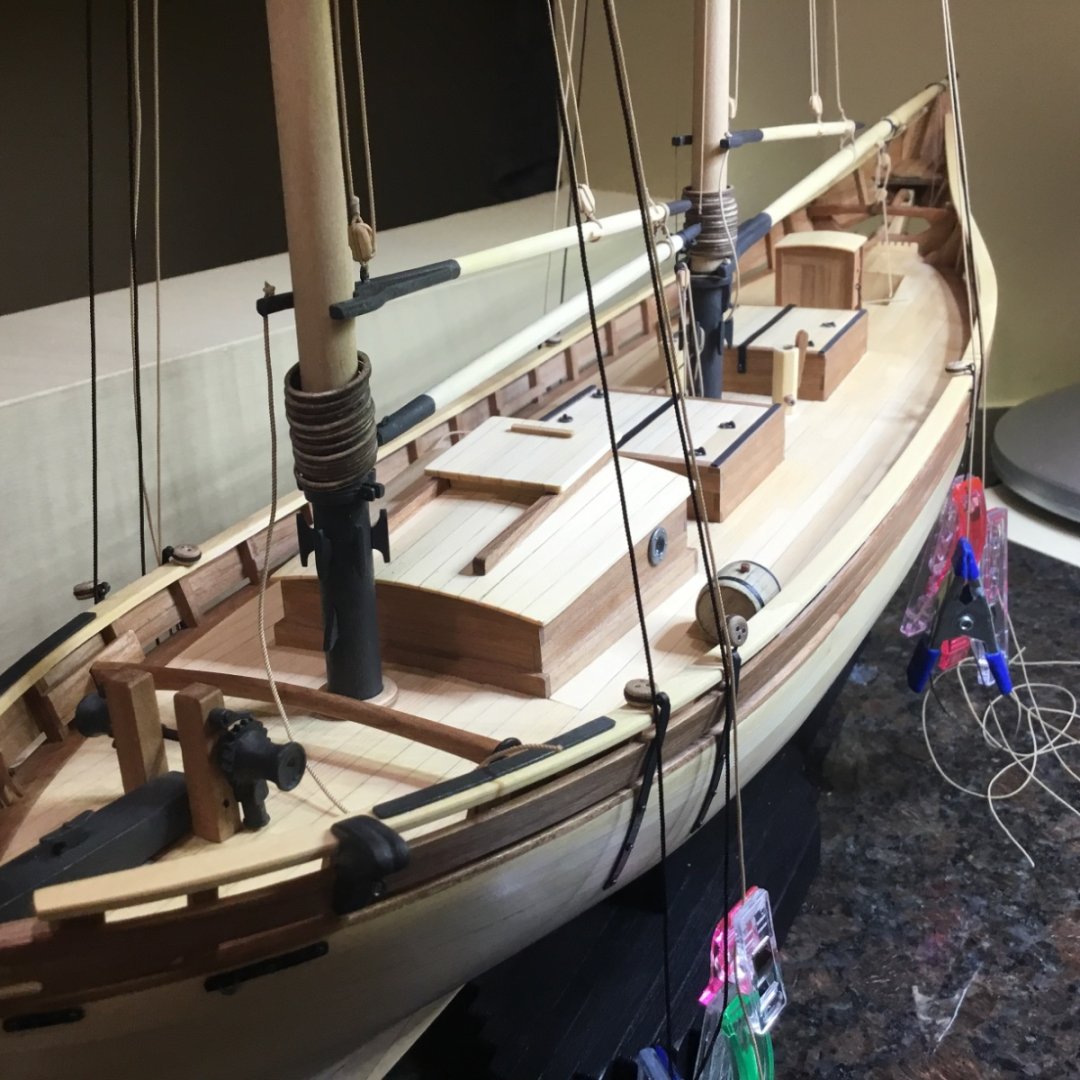
Getting close to completion. Just have anchors, stove pipe and a bit of rigging to finish. Hope to see you next time.
- No Idea, bobandlucy, Knocklouder and 10 others
-
5
-
8
-
Phil, congratulations on finishing this wonderful ship. I like those sails A LOT!
- Edwardkenway, Old Collingwood, Canute and 3 others
-
5
-
 1
1
-
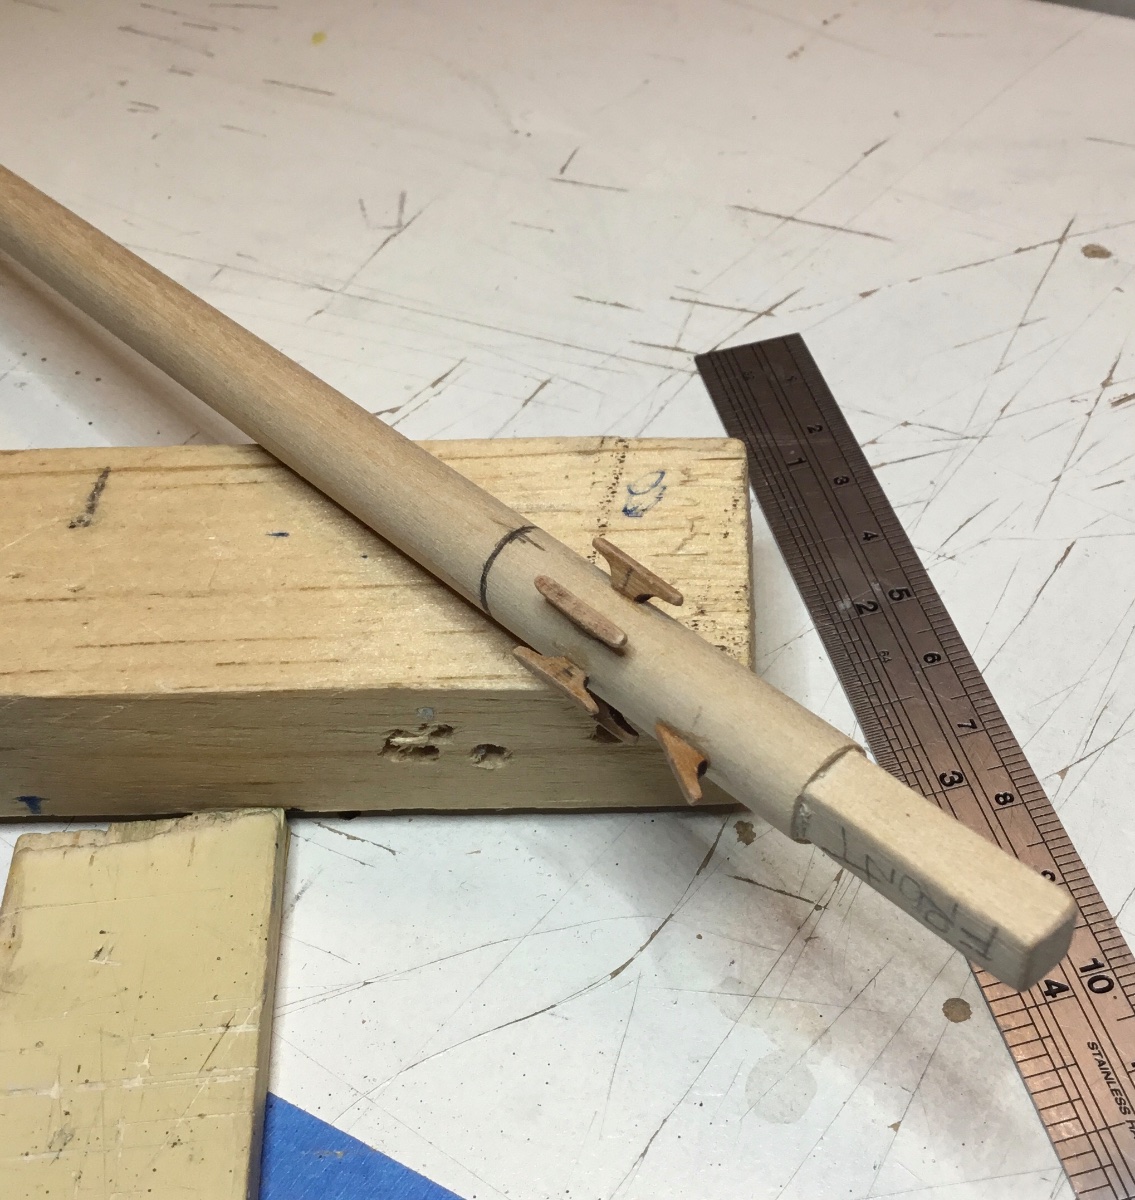
Hi Everyone, Happy New Year to all of you. Thank you very much for the Likes and comments. The fore boom and the main boom have been made. I substituted the supplied dowels with AYC square strips. The fore boom was made with 3/16 x 3/16 strip. First turned into an octagon then rounded and tapered.
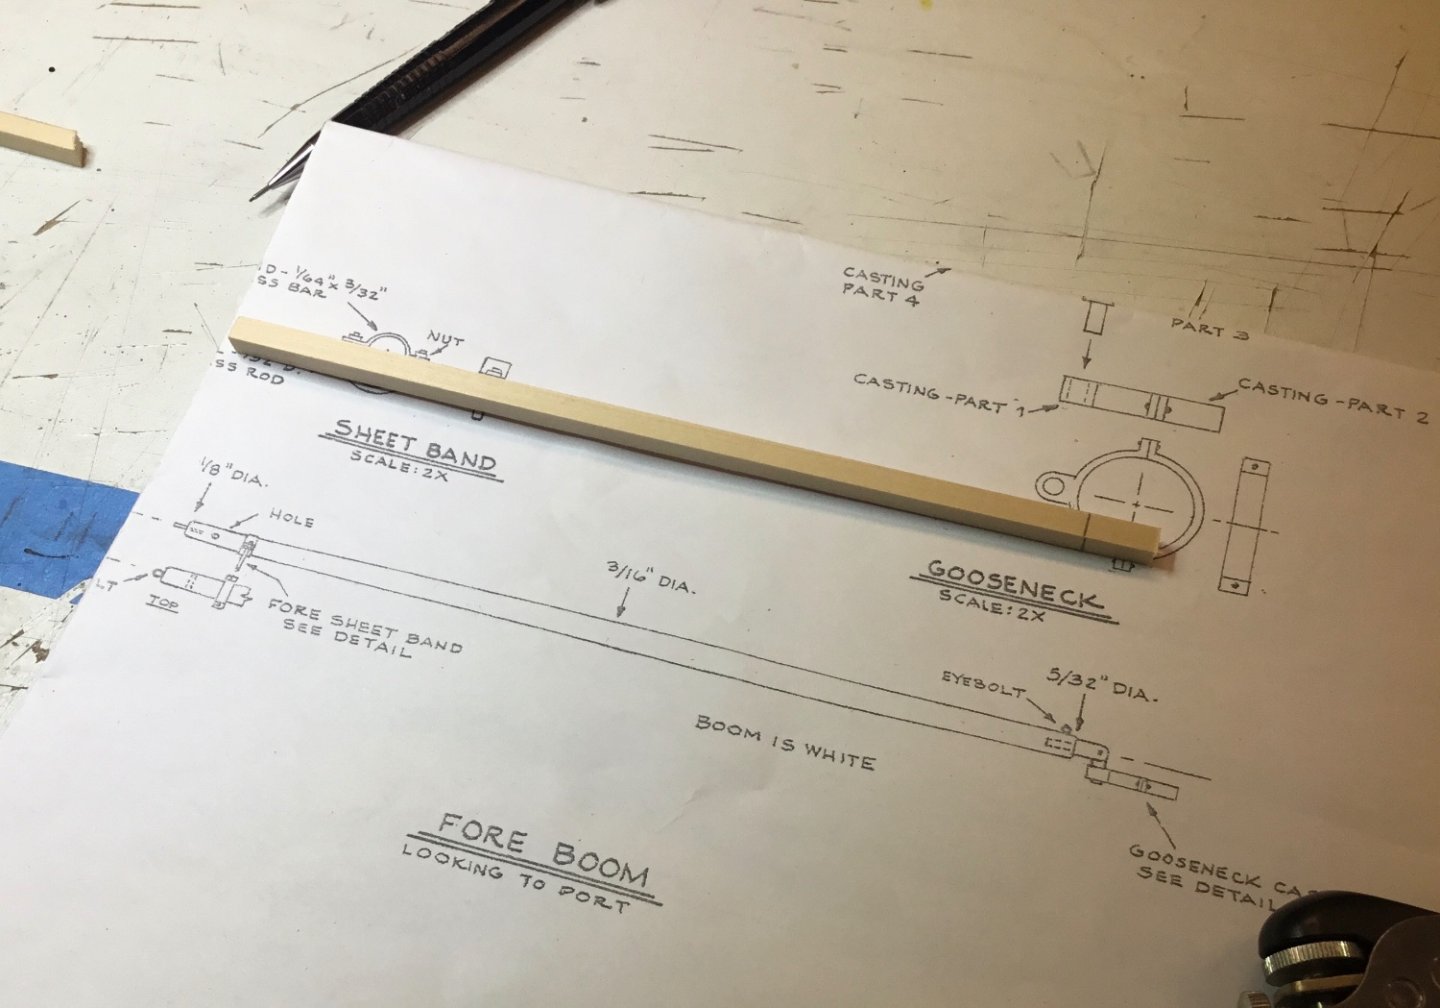
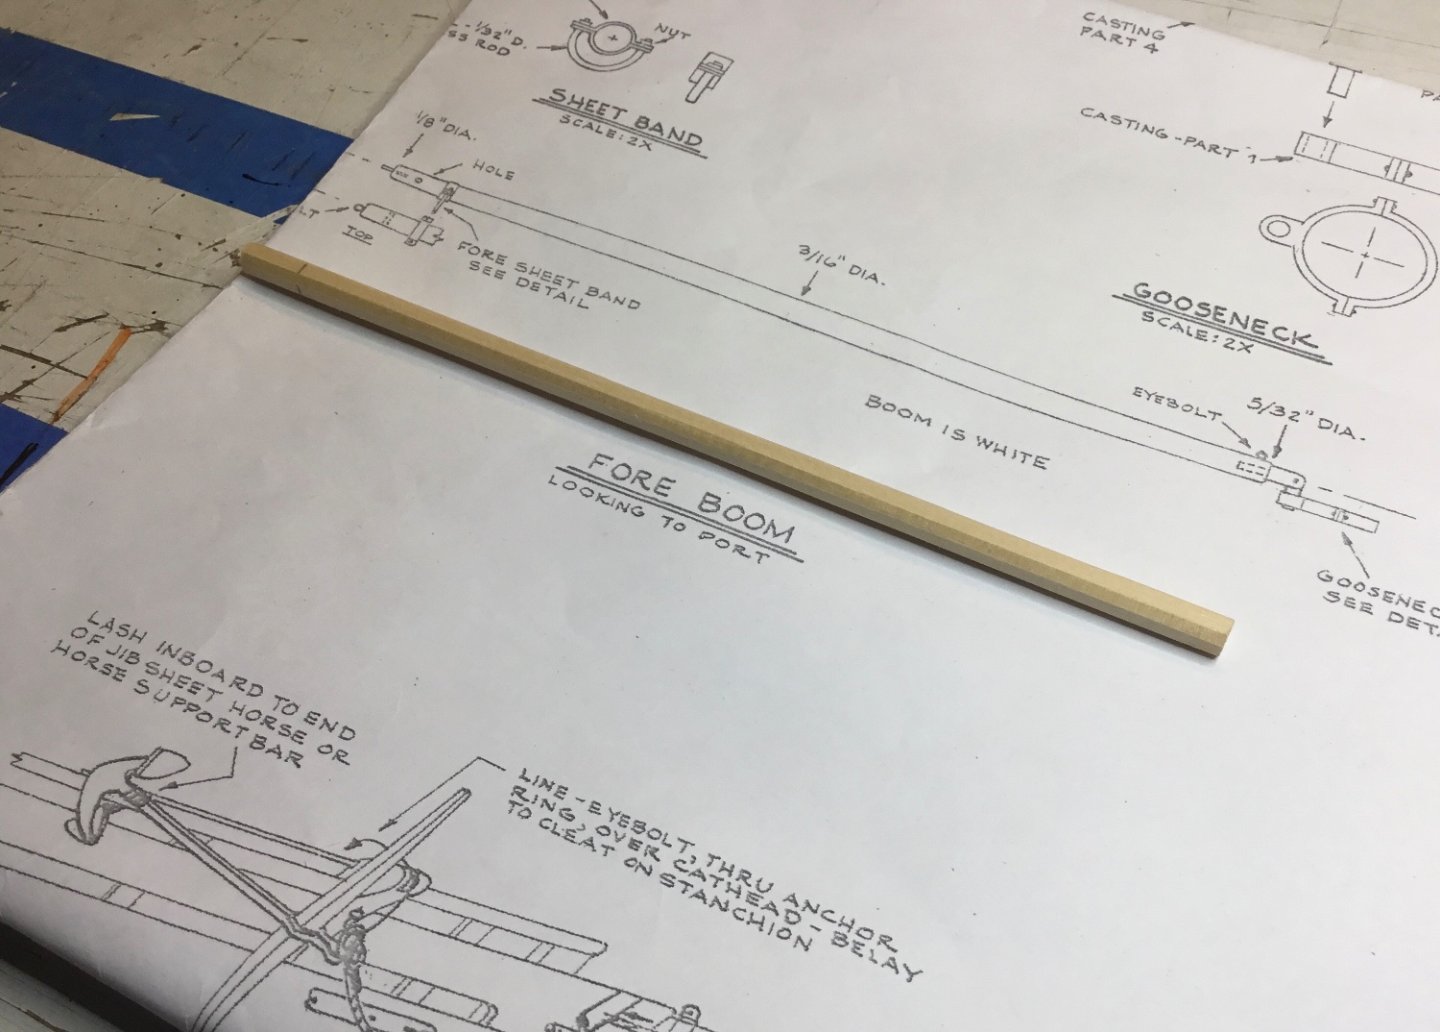
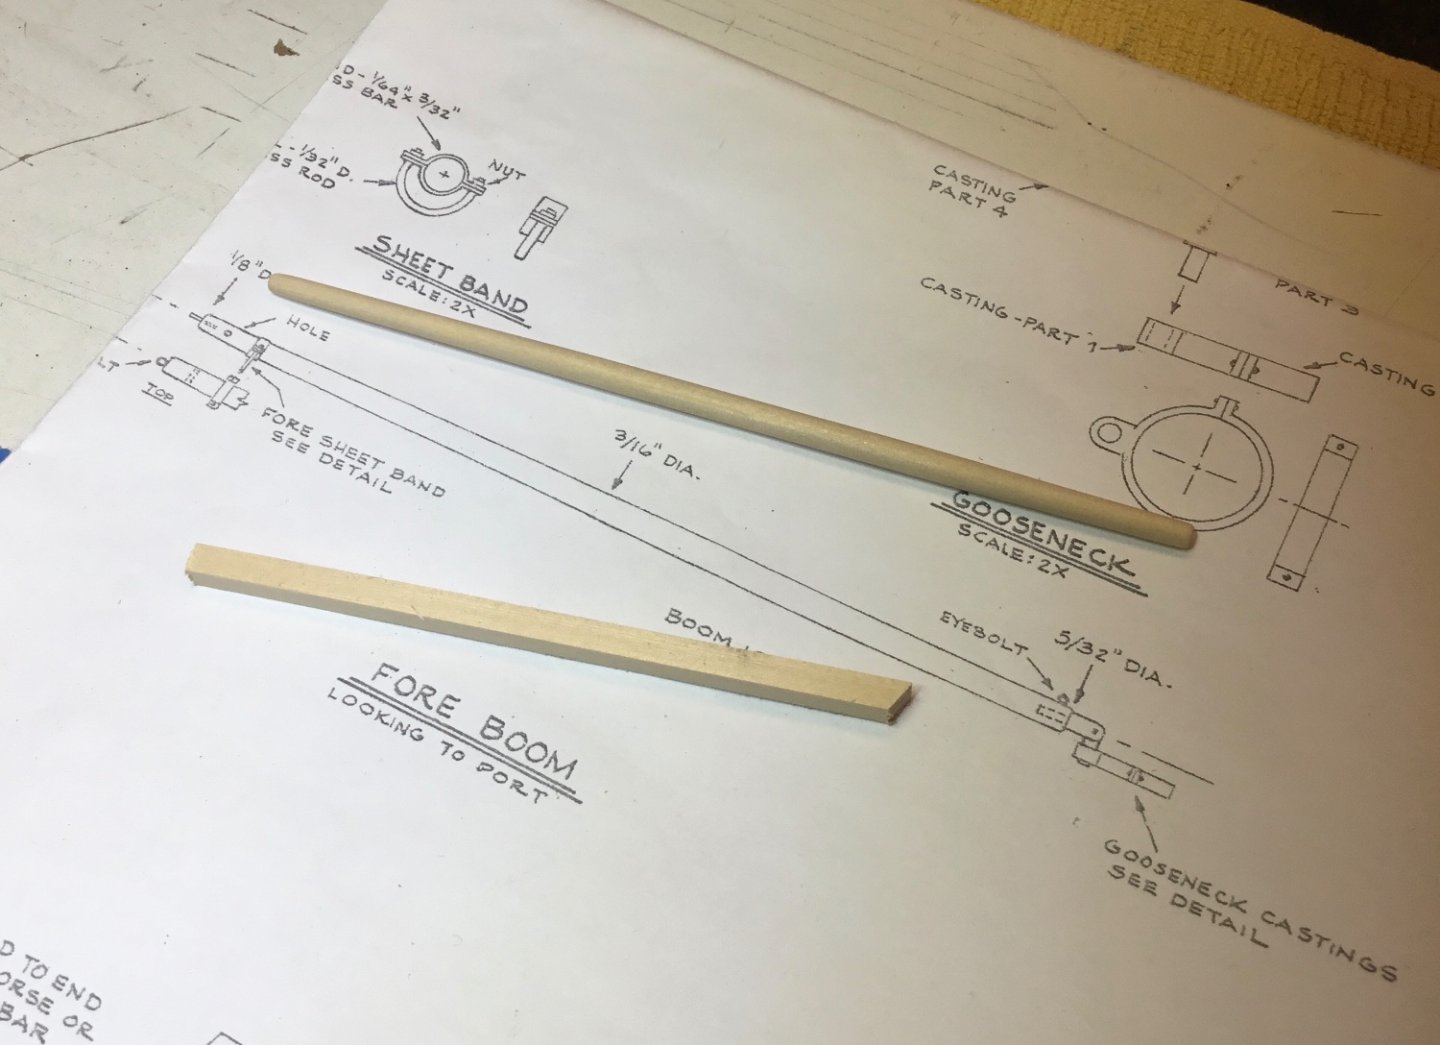
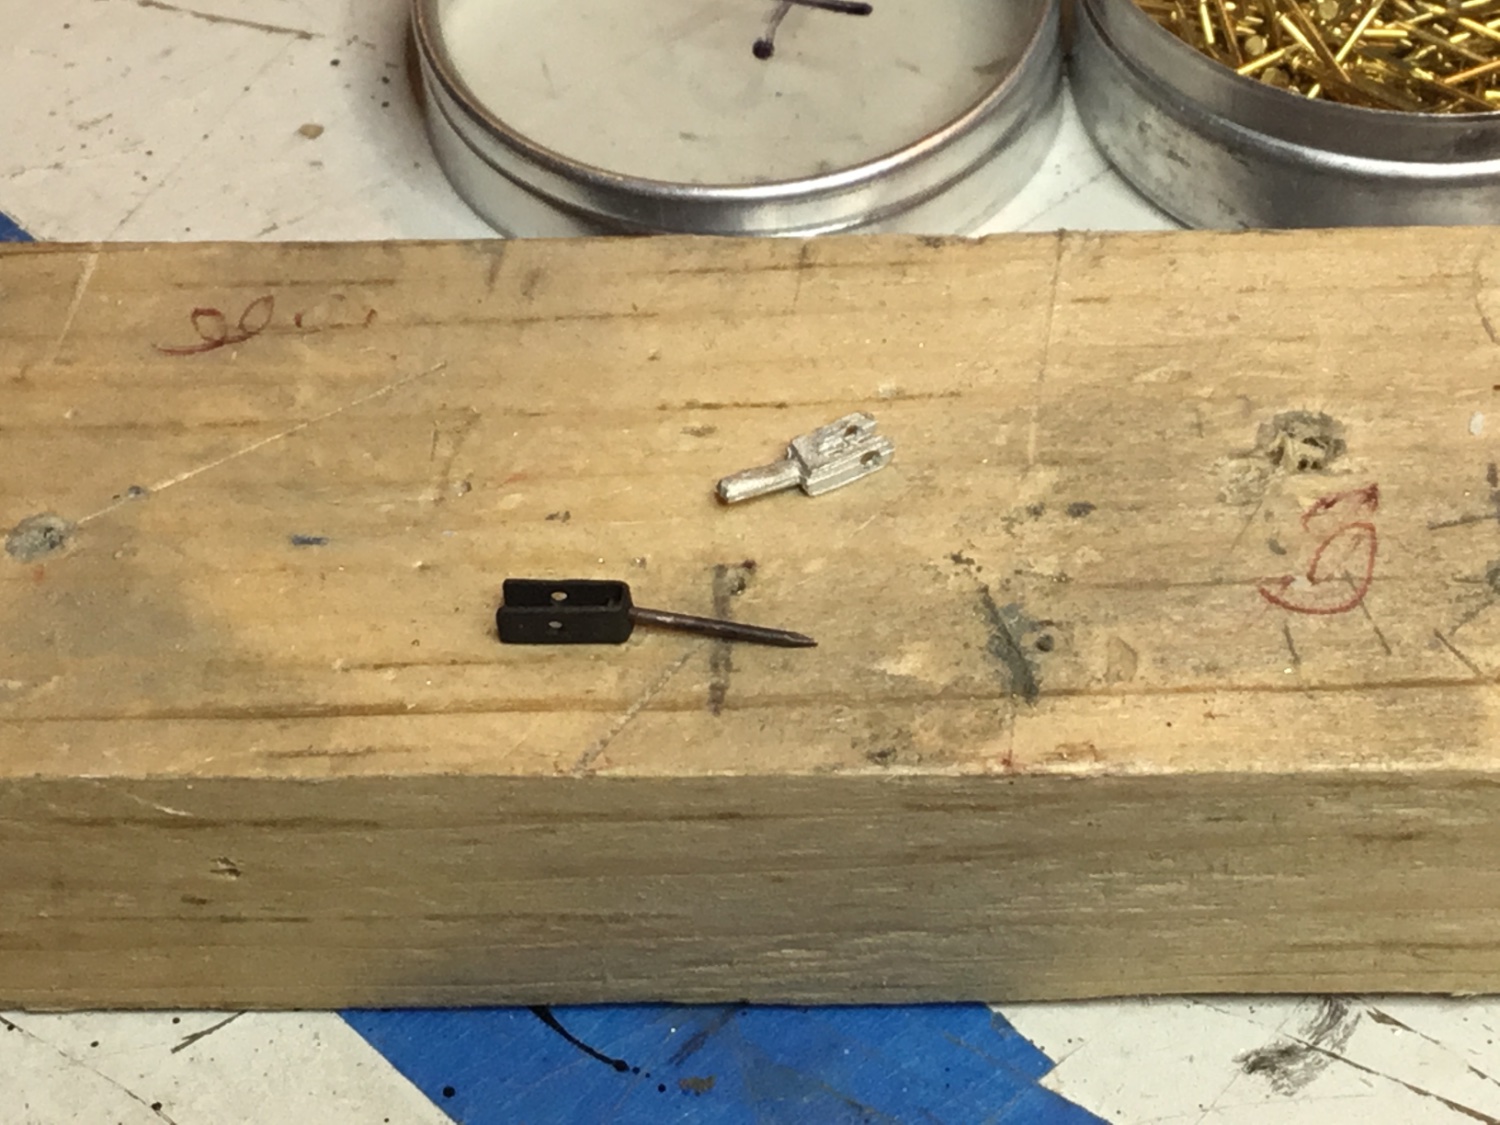
A new bracket was made ( from brass ) to attach to the pin in the gooseneck because I didn’t trust the supplied one to not disintegrate like the supplied pin did.

Next the main boom was made using 1/4” x 1/4” AYC. The supplied jaws were glued and pinned with 22 gauge copper wire. As much rigging as possible will be done before it is mounted.
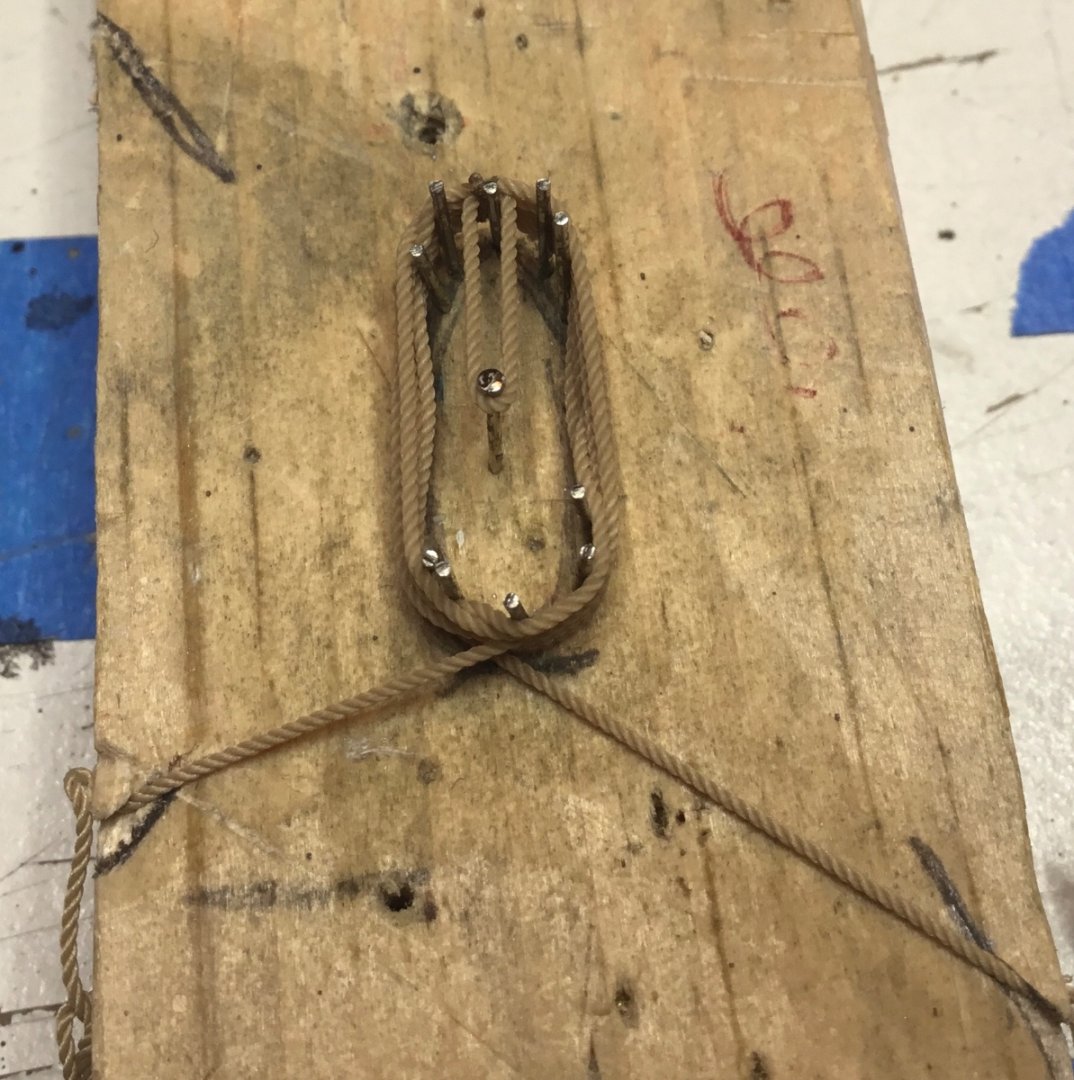
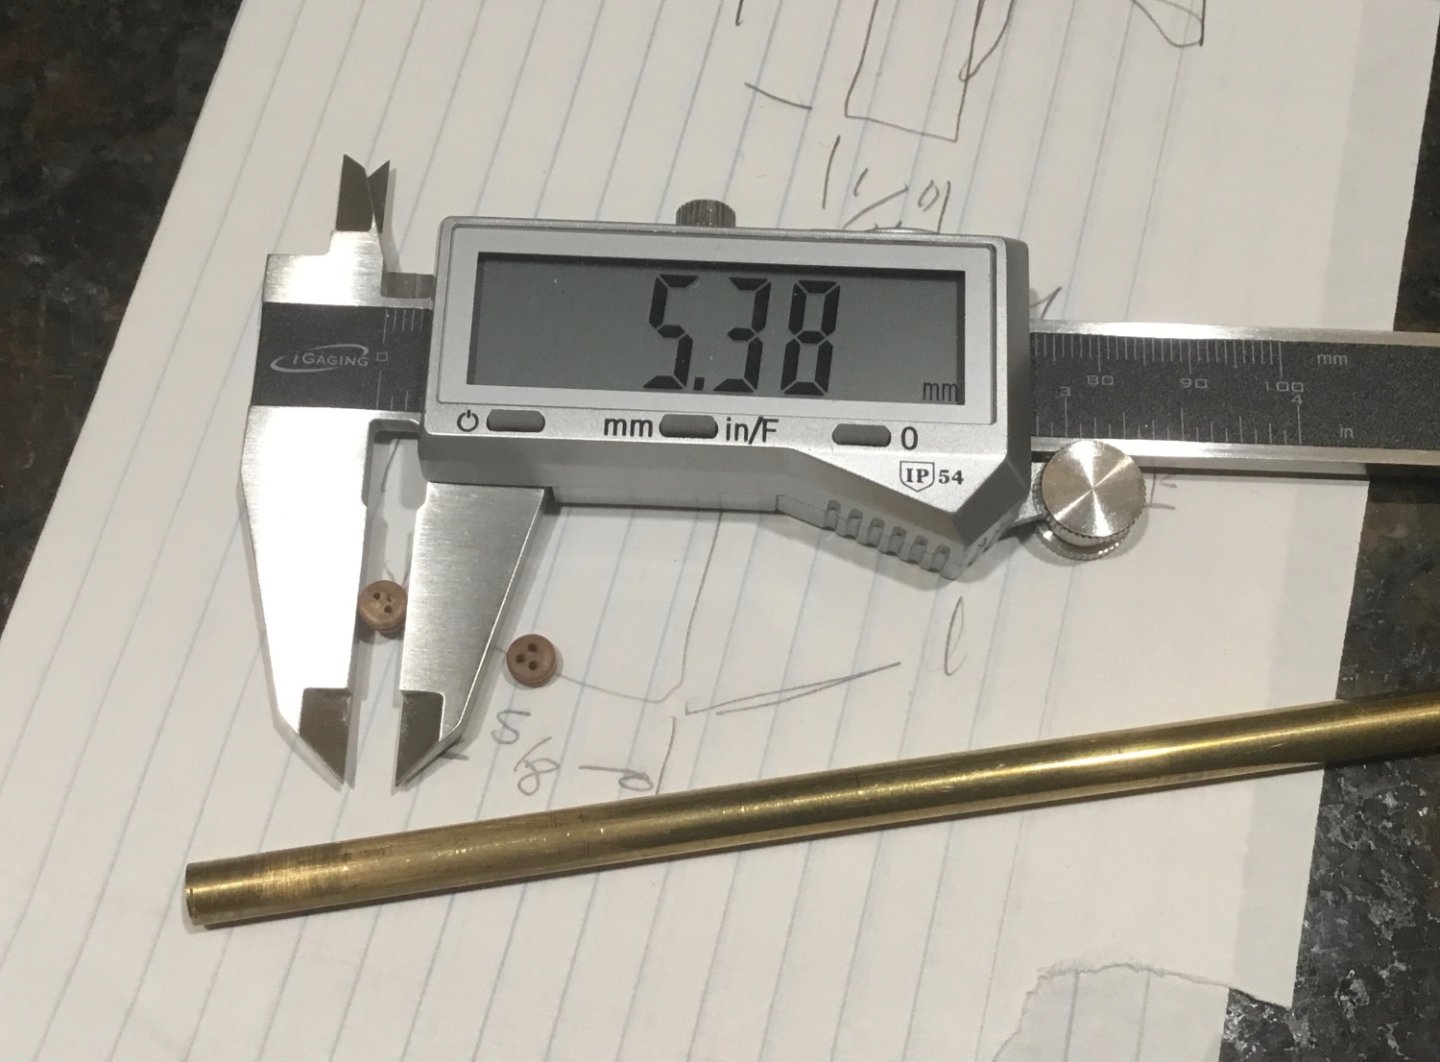
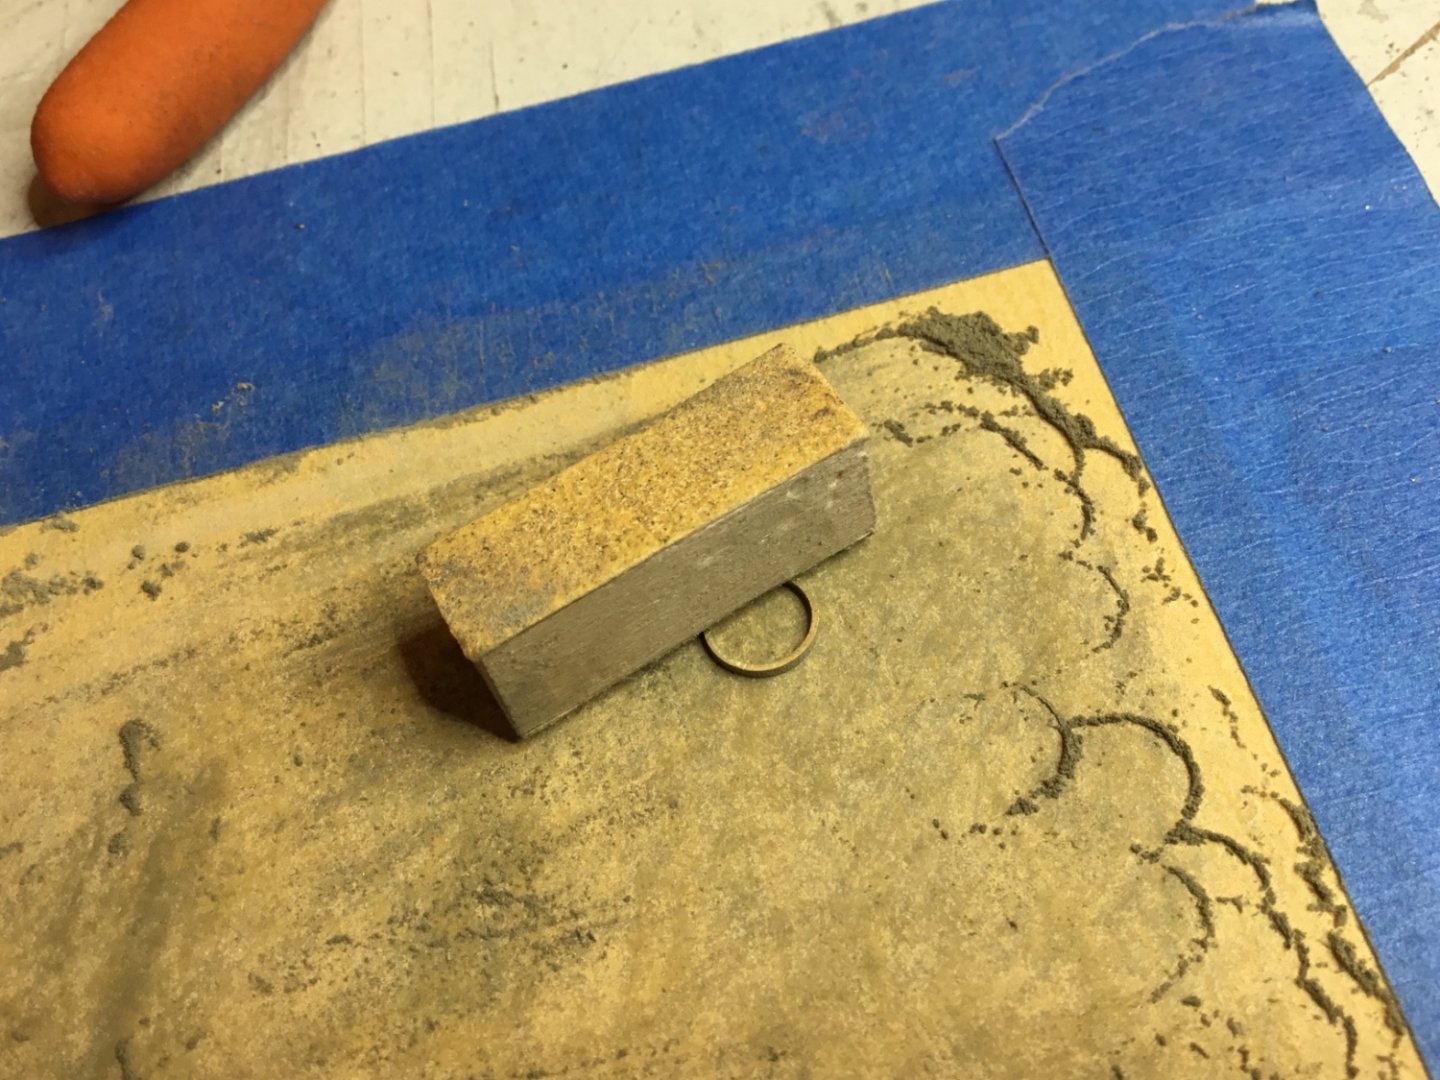
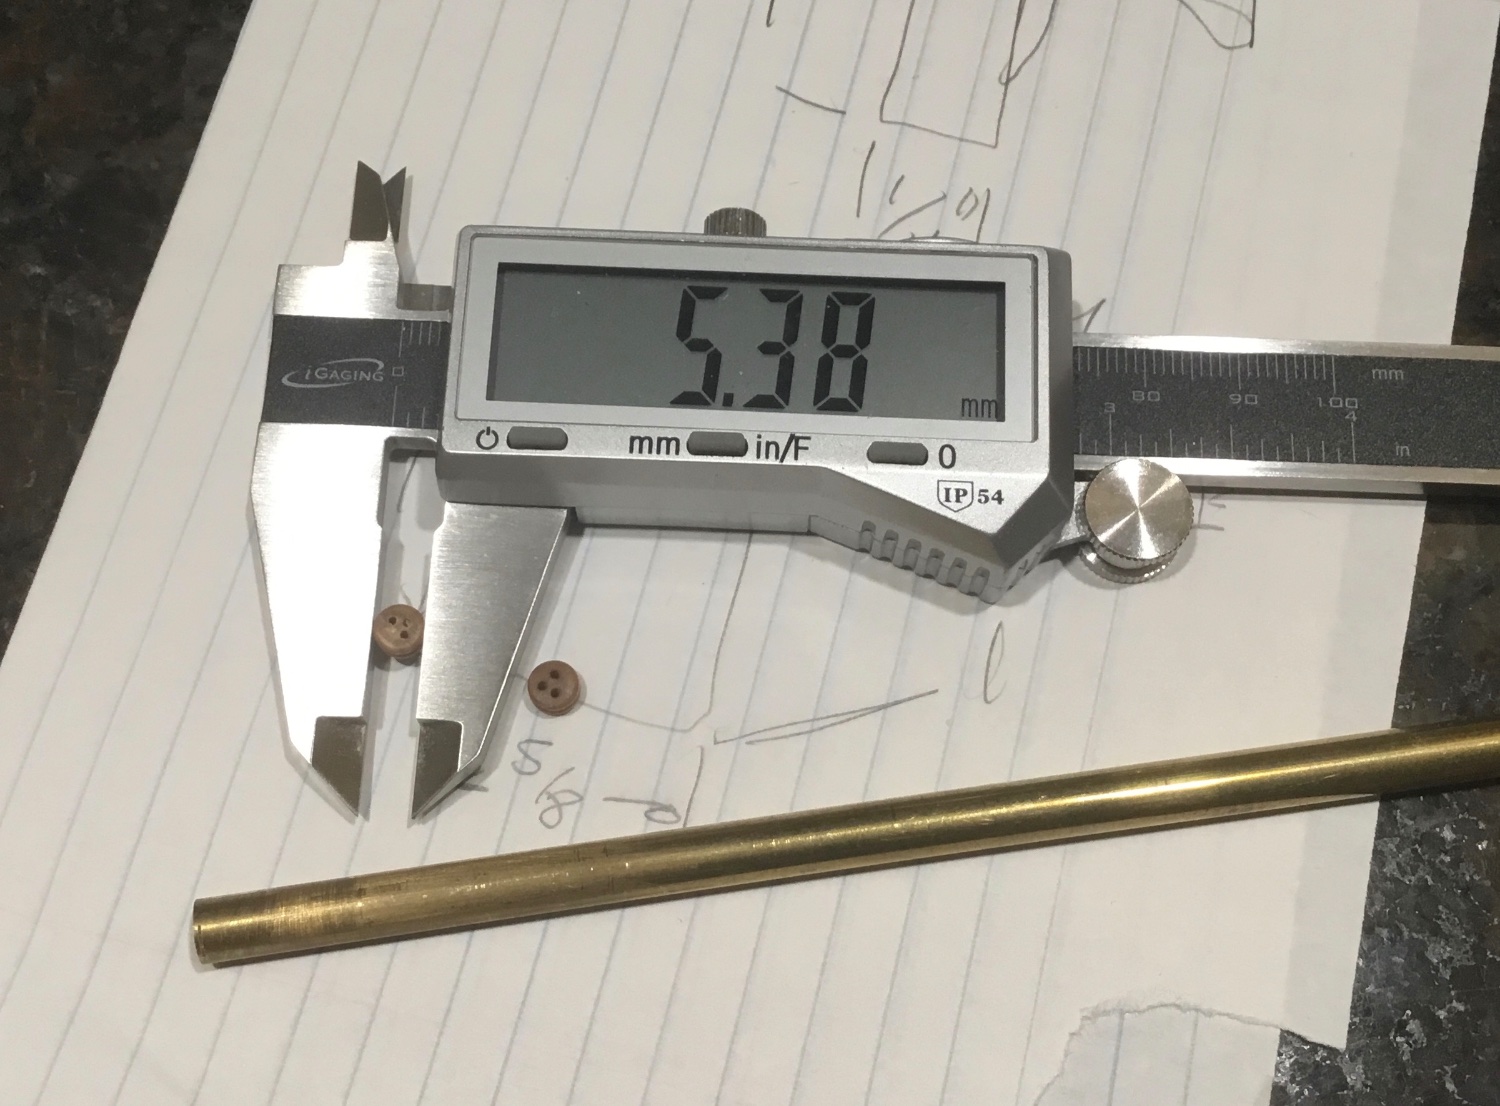
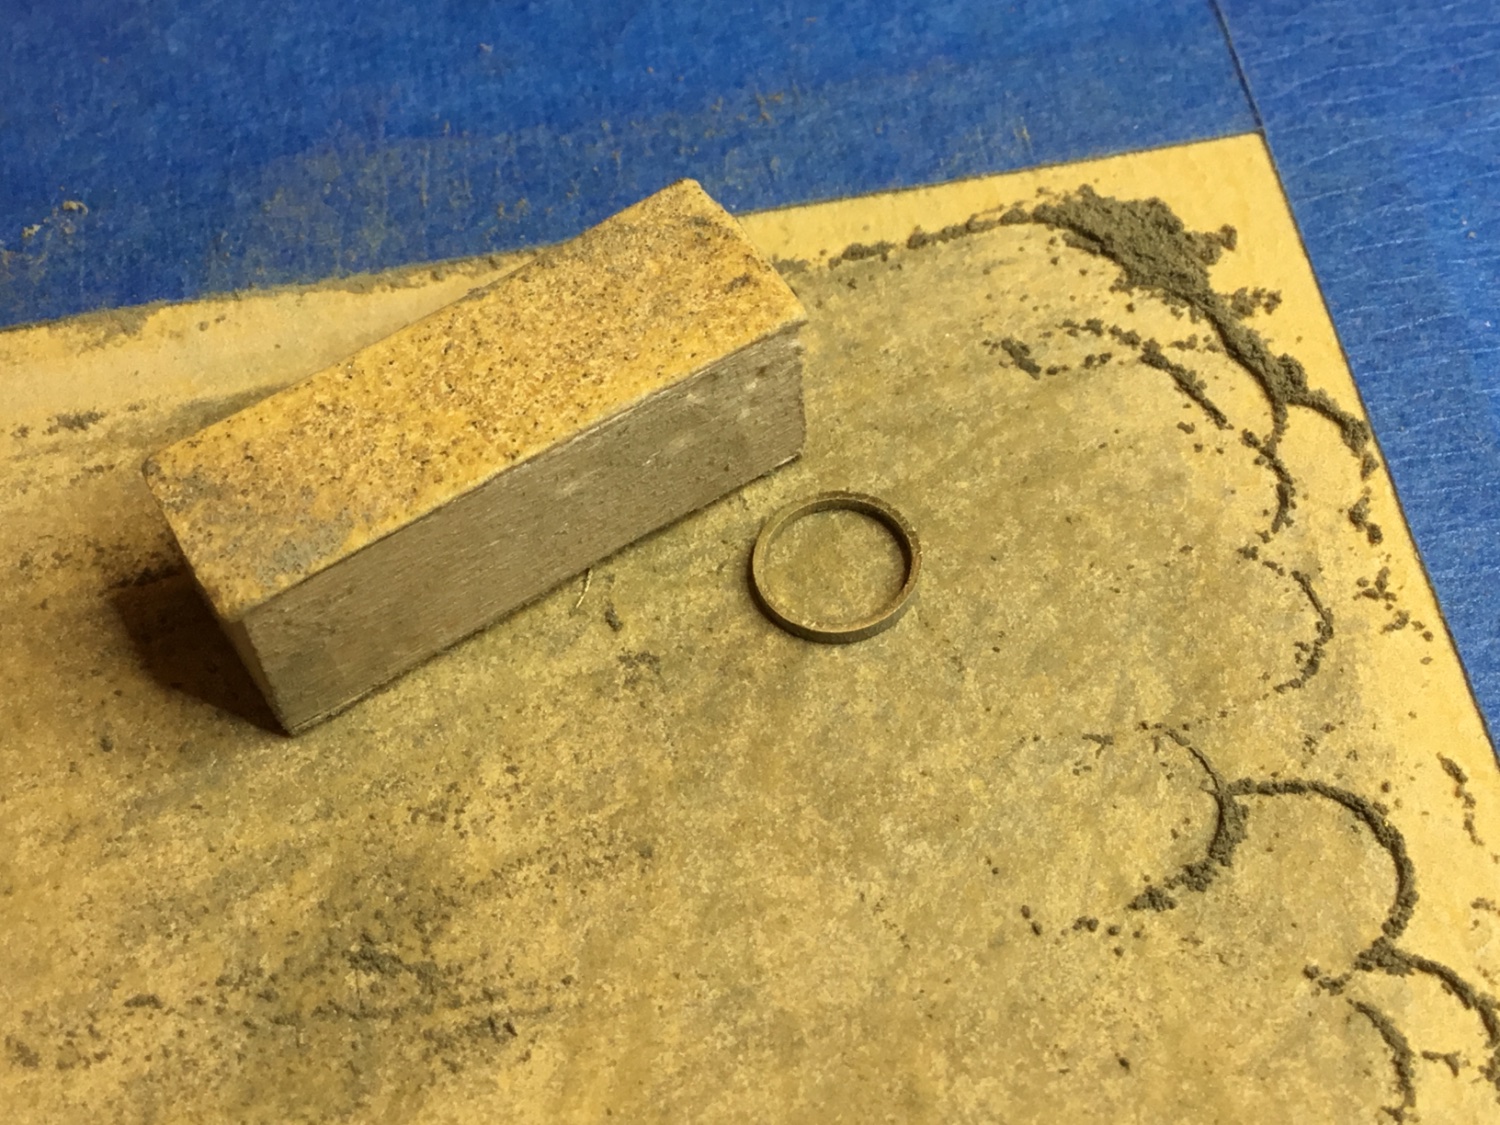
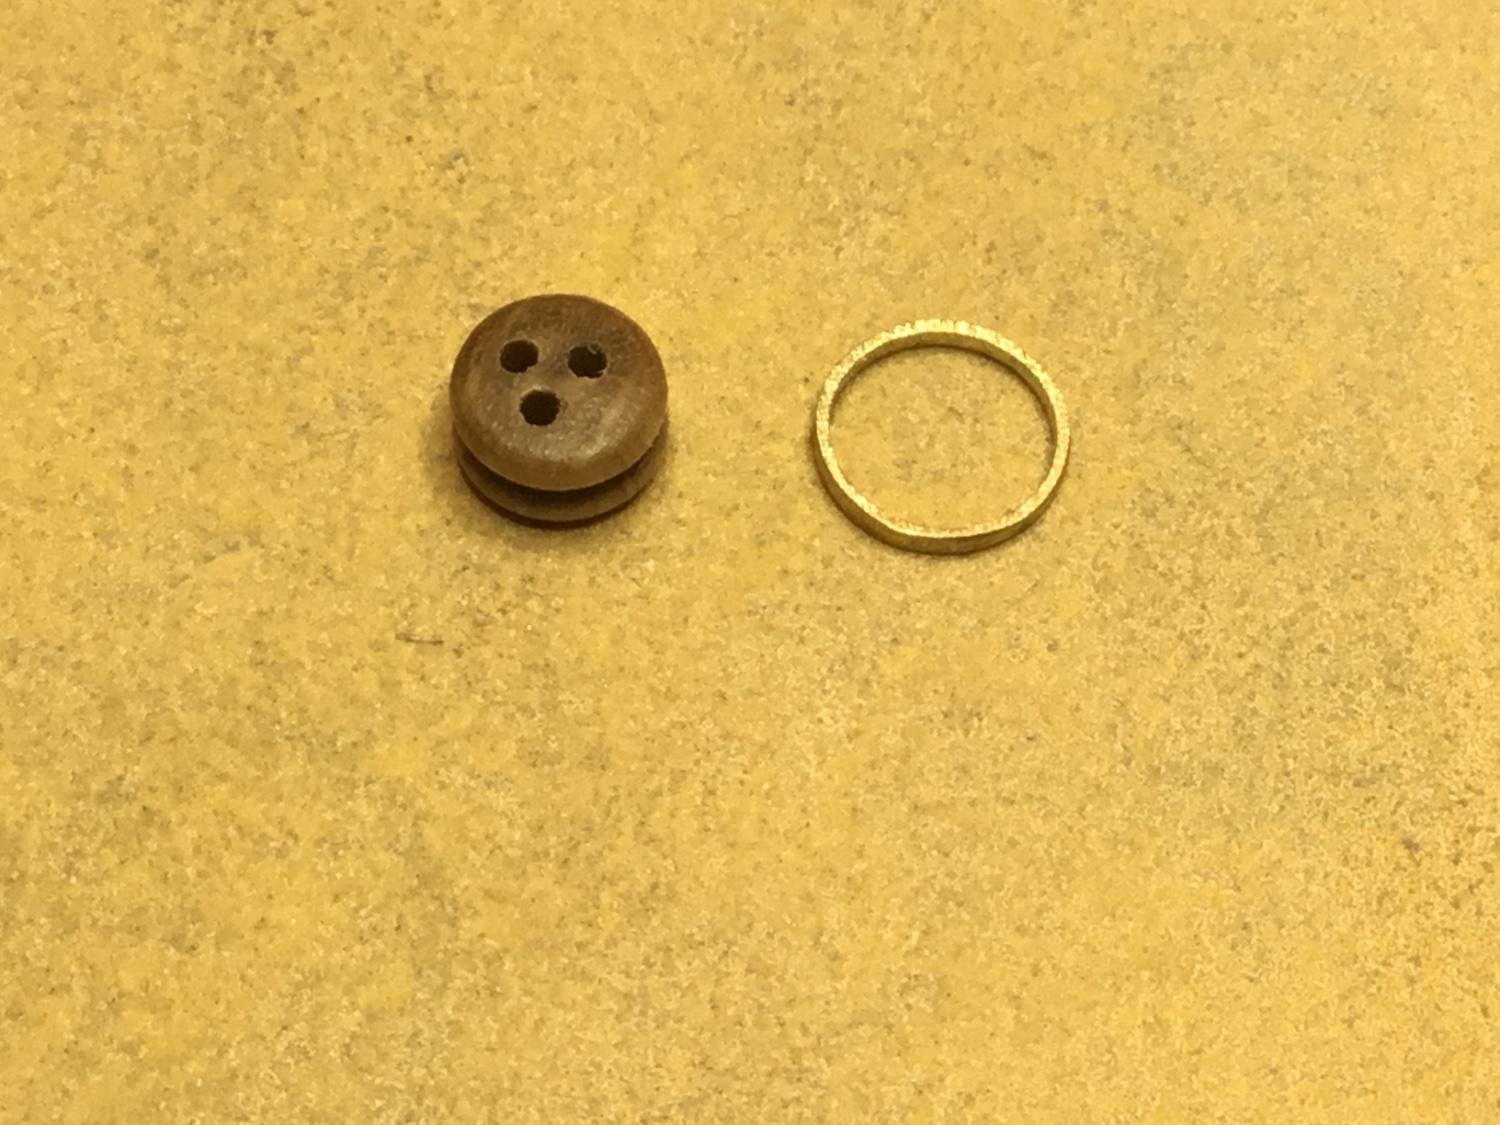
The deadeyes were made using rings cut from 1/4” brass tube.
The rings are sanded down on 320 grit paper using a push block that has 150 grit paper taped to it


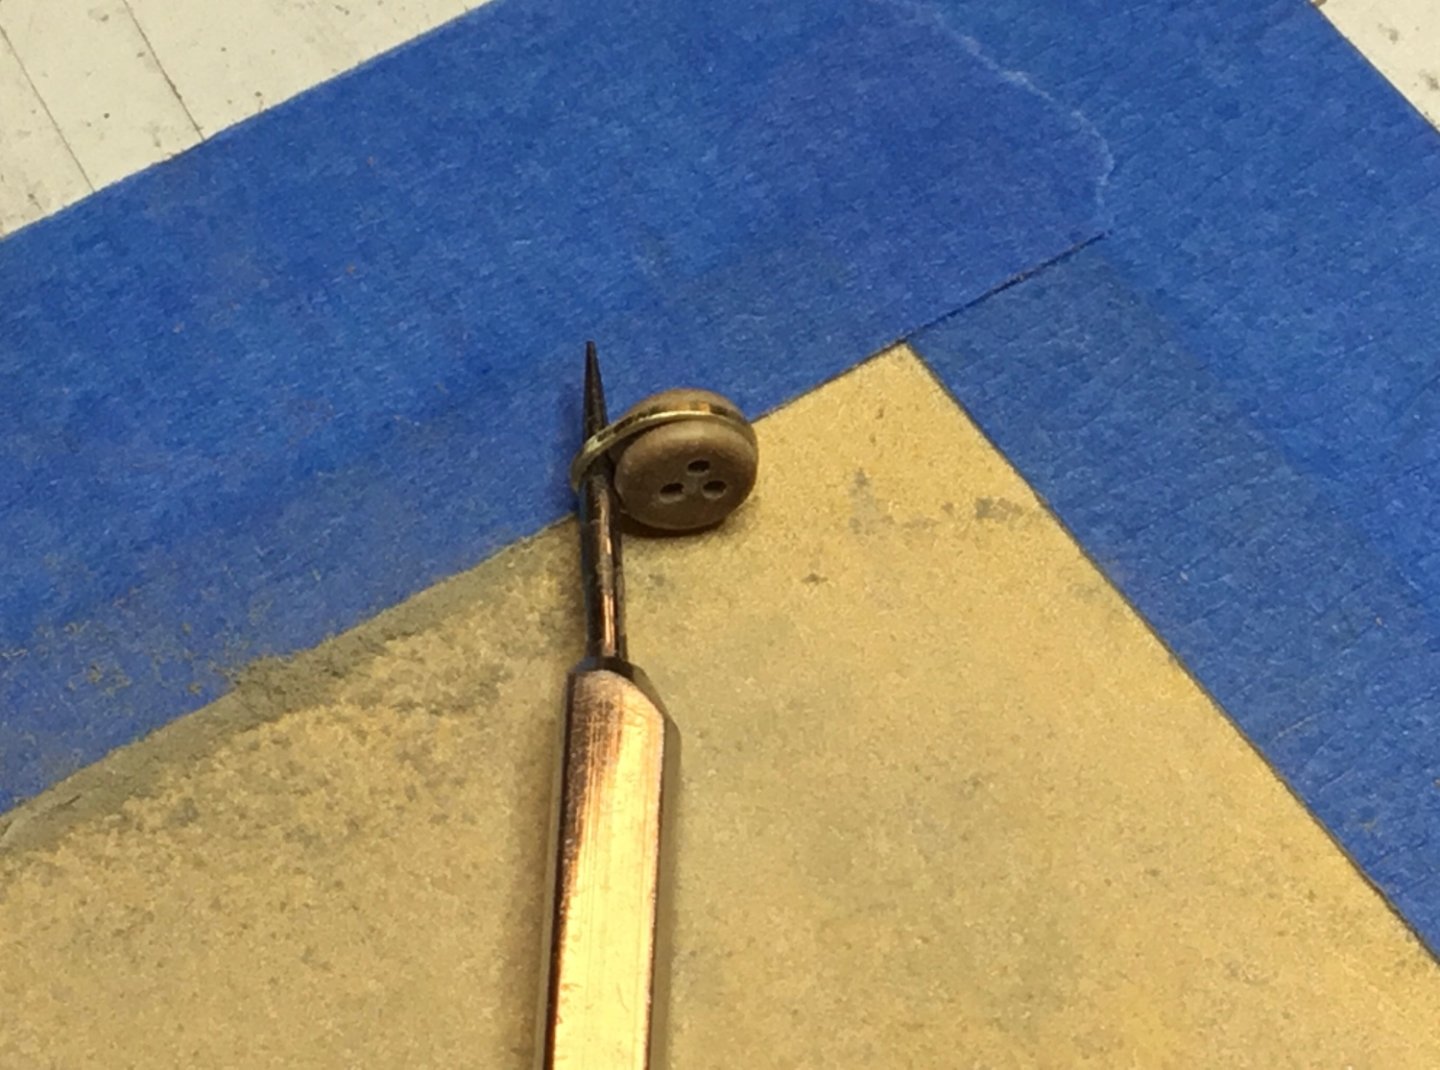
Dividers were used to start the shaping process and then switched out with round nose plies and needle nose pliers to complete the shaping. The whole thing was dropped into the blackener. Not sure how they managed to do it but no matter which way the deadeyes are oriented, the holes are skewed.

The plans call for the strops to be bolted to the chainplates but I went for this simplified version. I was just glad to get them all mounted to the boat.
The binnacle has just been started so I want to get that mounted before the booms are attached. Hope to see you next time -
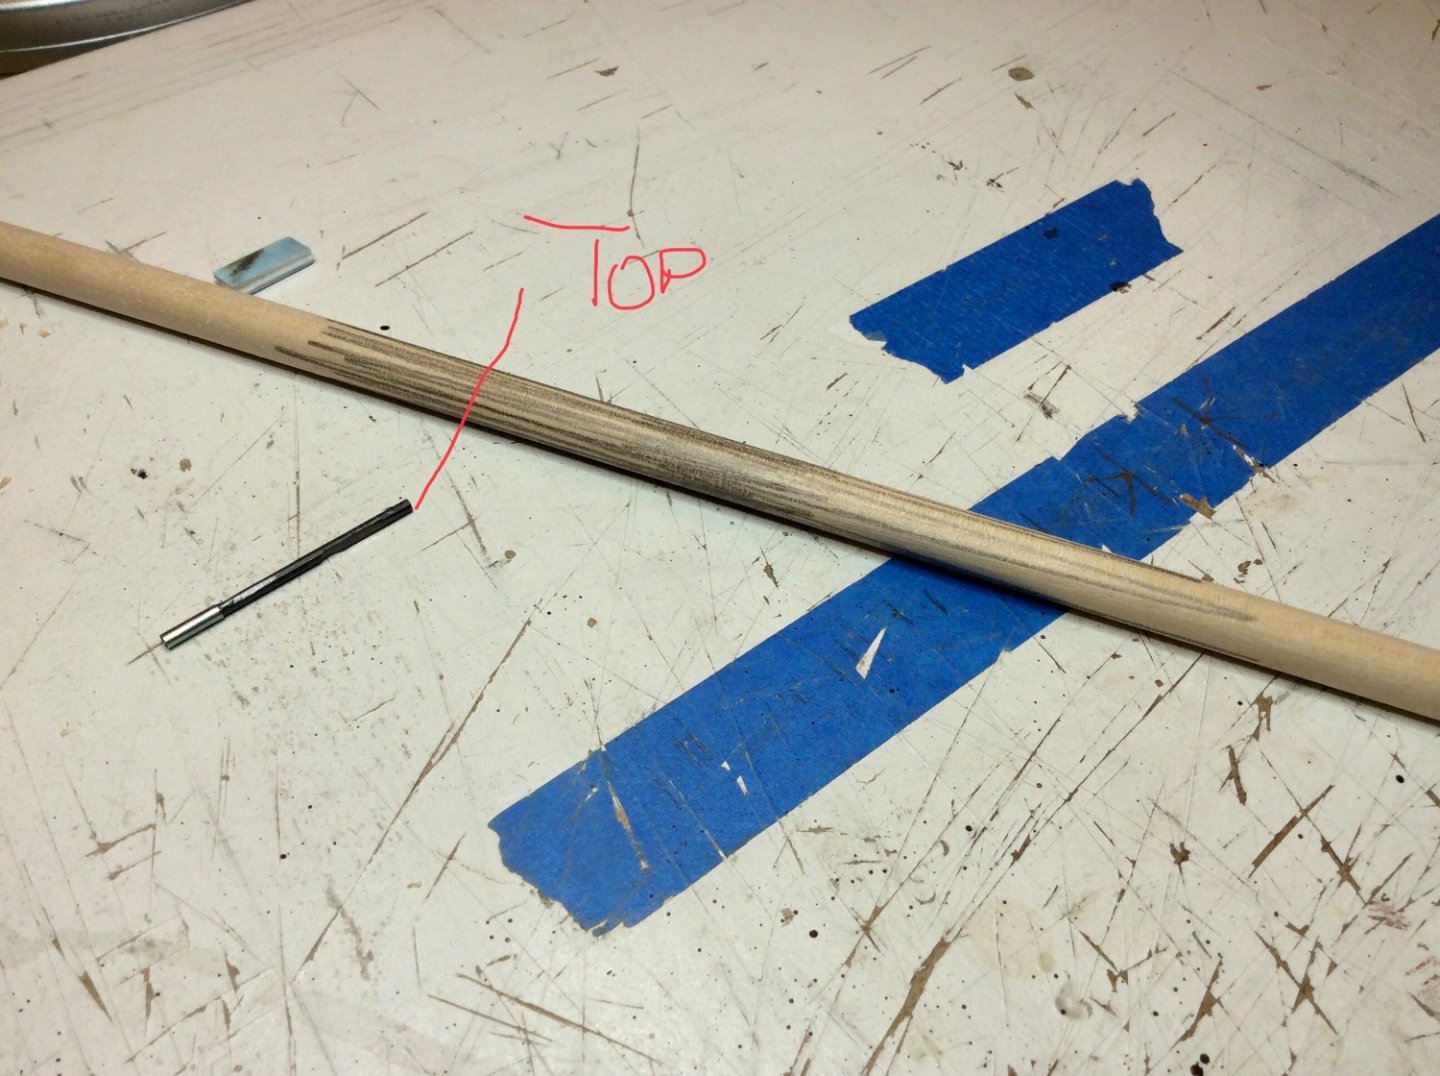
Hi Dave, I’m using a mini block plane and sandpaper. The area of the dowel that I want to remove stock from is darkened with a pencil lead so that you can see where you have planed. Starting at the top of the mast work your way down adding a few more inches each time you finish planing. Once you get to the part of the mast that doesn’t need tapering, go back to the top and start the process over again. I used 120 grit paper every once in a while between planing. If there’s a bit of a wow in the dowel more material can be removed from one side than the other. Took about an hour to do this one so it is kind of time consuming.


- RichardG, mtaylor, GrandpaPhil and 1 other
-
4
-
Hi Wookie, a while ago Chuck started a thread called “Take the “ 2 build log challenge” !!! Any Takers”. ( You’ll have to search for it ) It is worth a read just so that you can see that members are indeed trying to resolve the issue you and many others are facing. In the meantime just go to other build logs of subjects that interest you and leave comments there. Make sure to add a link to your build log in your signature so that they can have a look at your work. Good luck with your build. It’s looking good.
- Ryland Craze, allanyed and Wintergreen
-
3
-
-
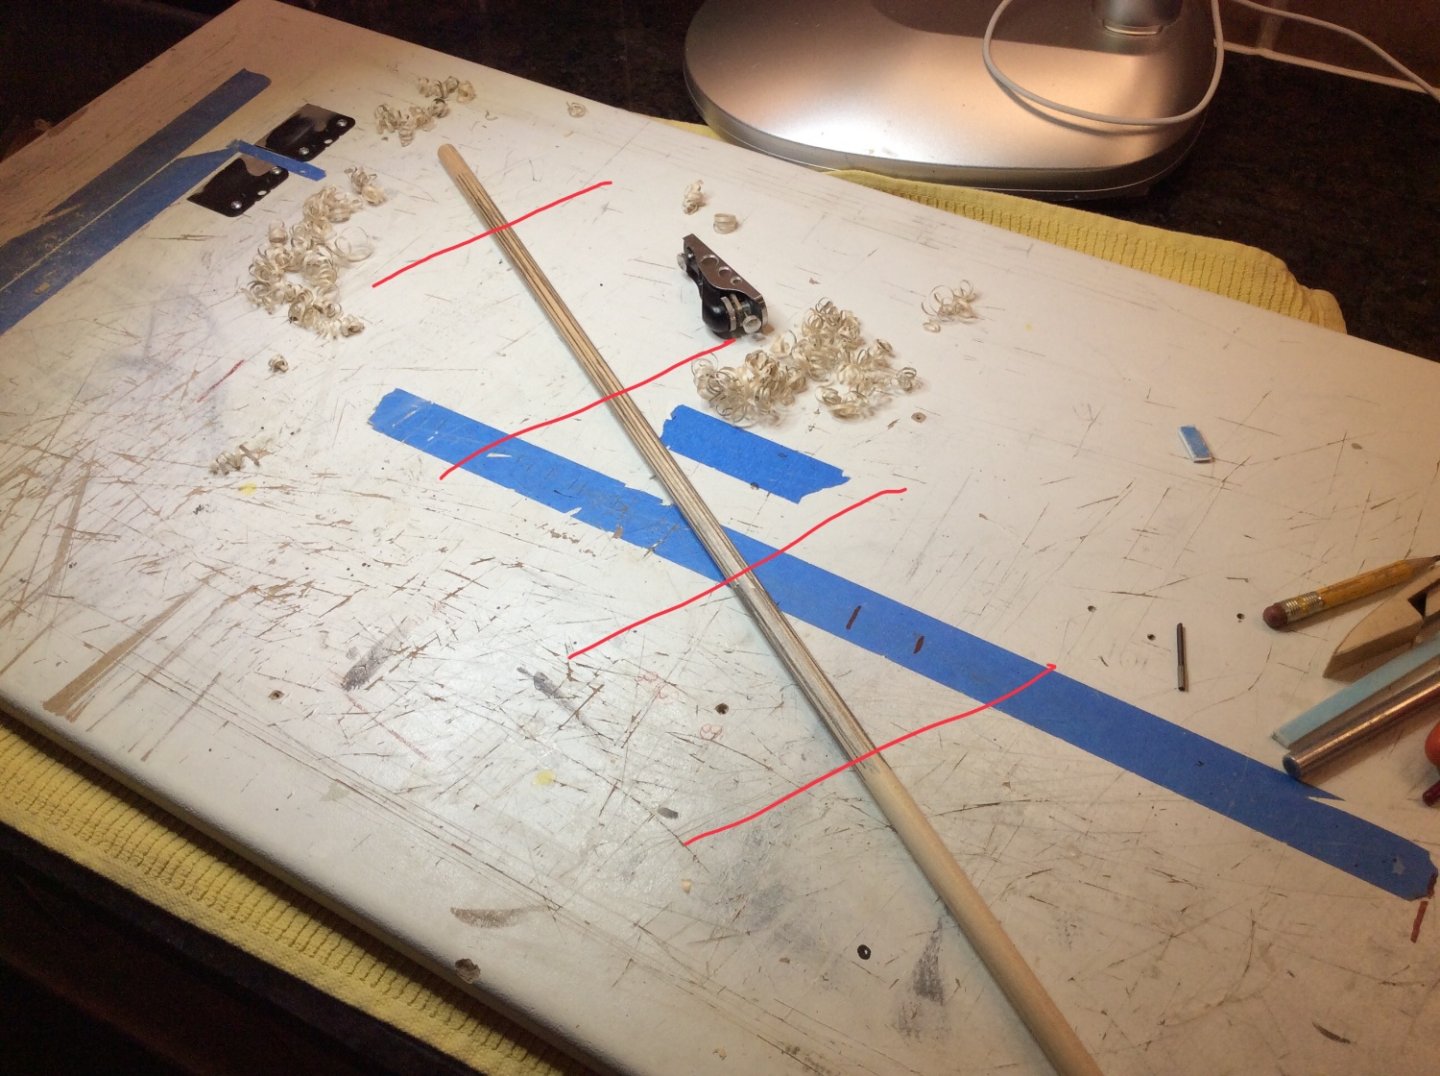
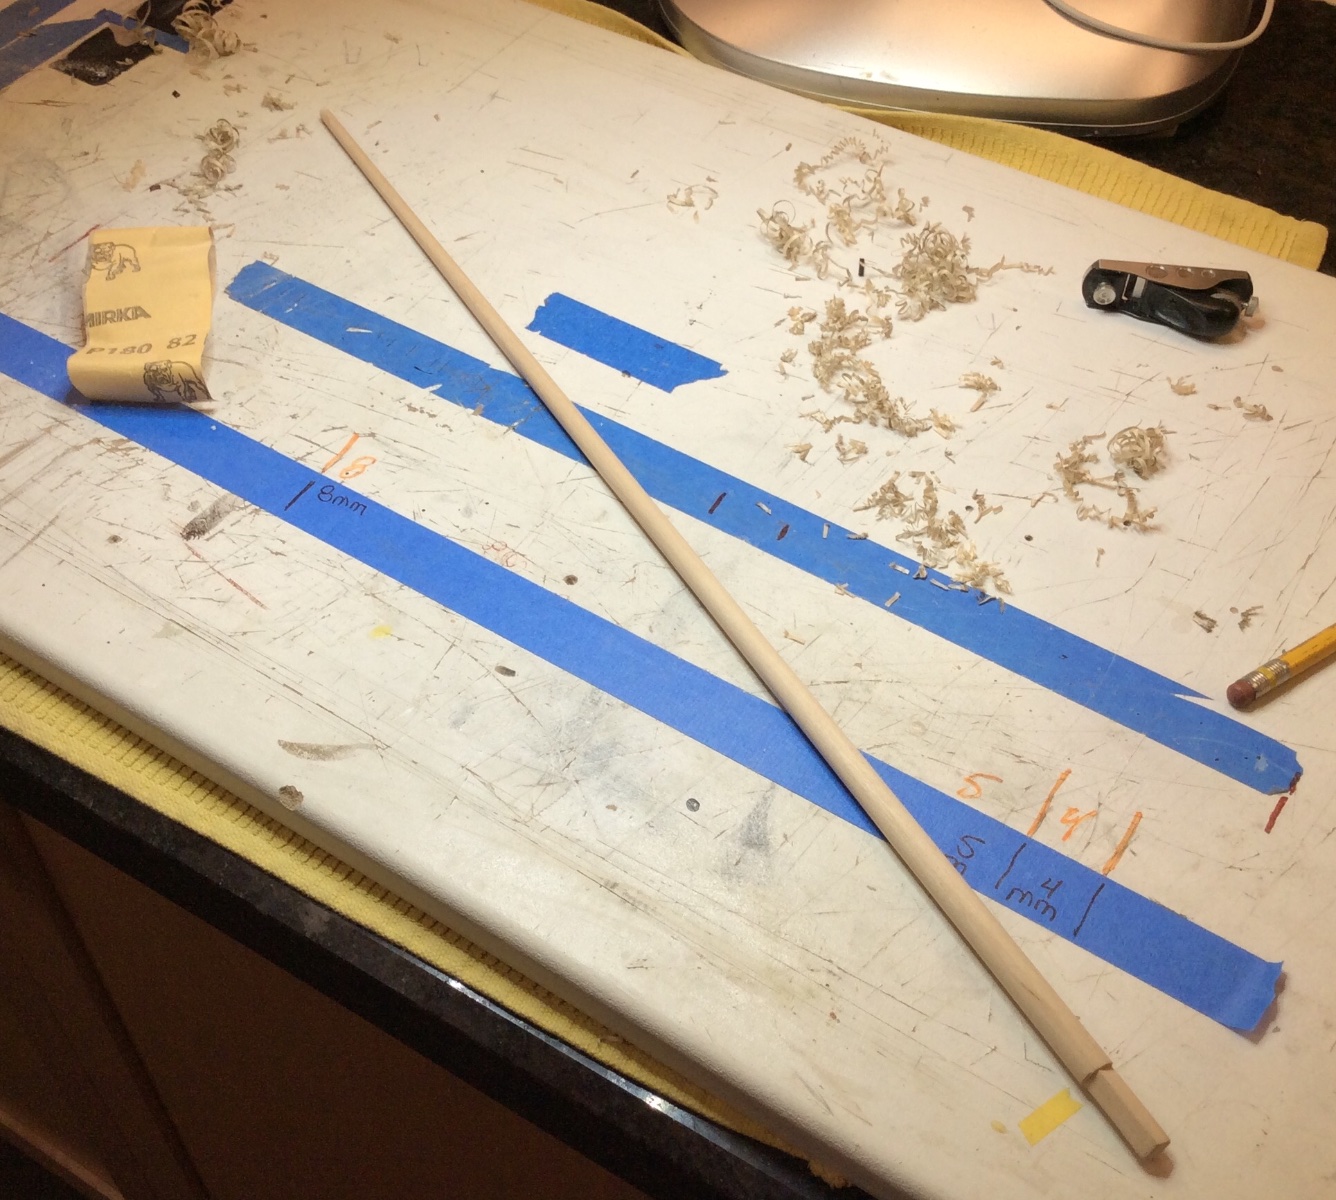
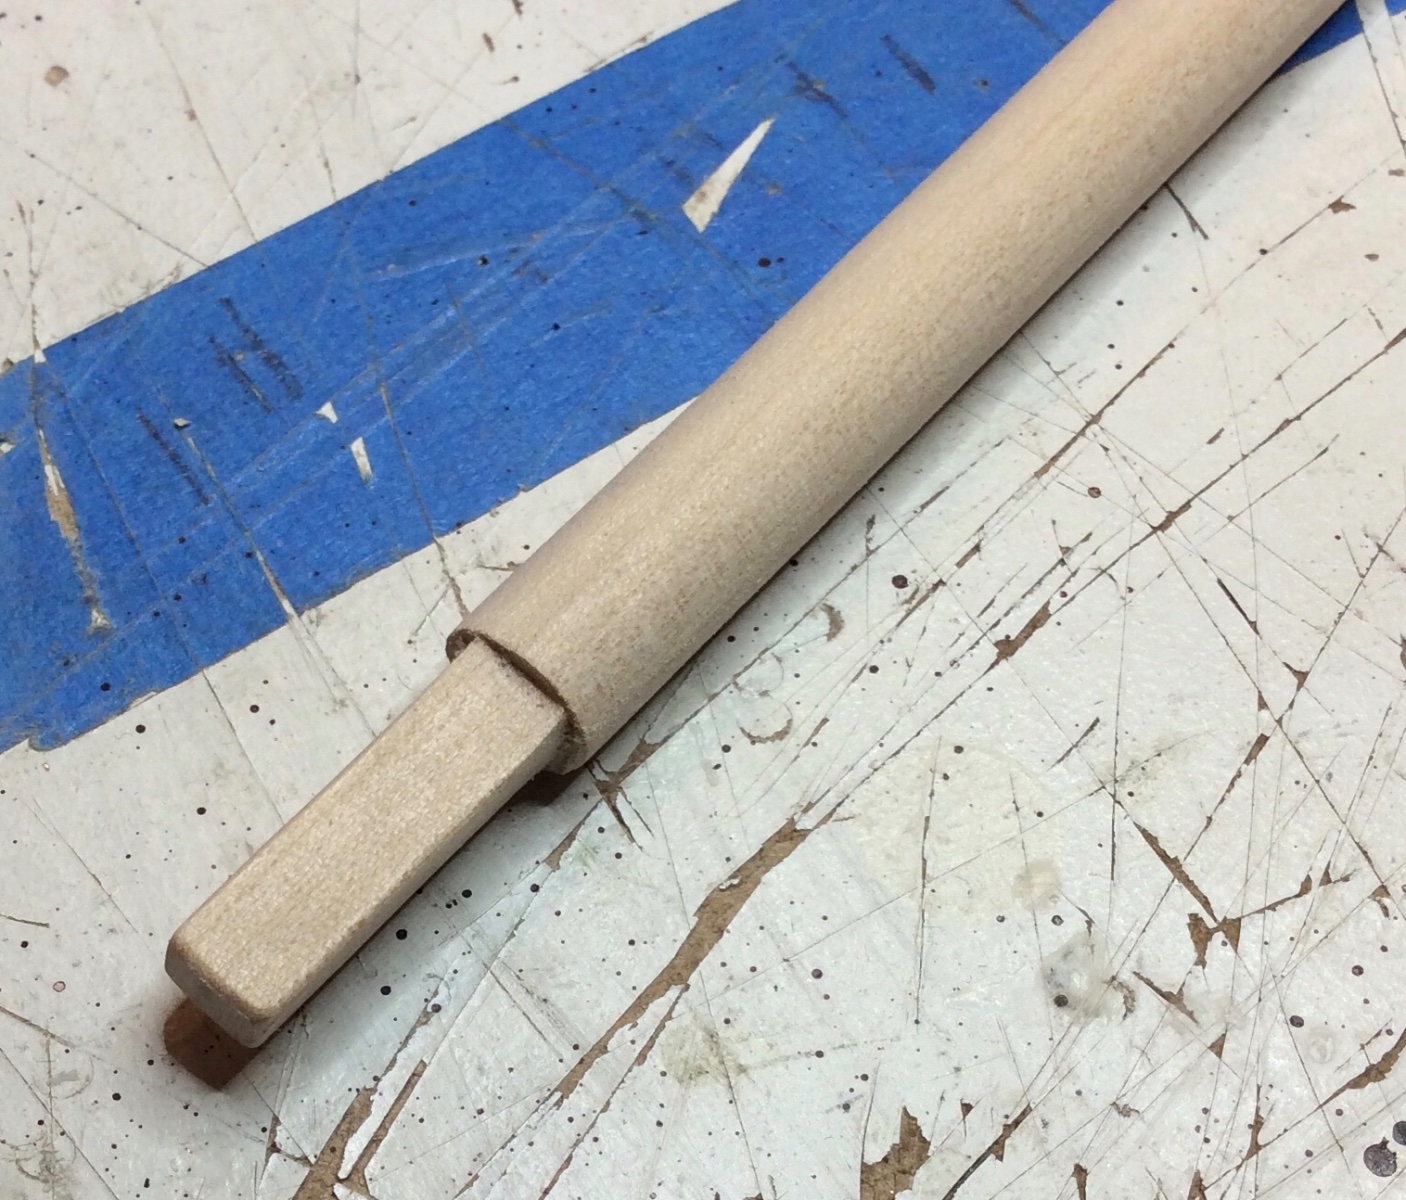
Happy Boxing Day Everyone, hope you all had a Merry Christmas. As usual I didn’t do what I said I was going to do. Ended up working on both masts. The kit comes with 3/8” basswood dowels. Started by making a tenon to fit into the deck opening.

Used the tapering method where you blacken with pencil the area that you want to remove material from ( so that you know where you have planed) and then plane that area. Starting with a few inches at the top, blacken and plane.


Each time you blacken, add a few more inches down the mast.
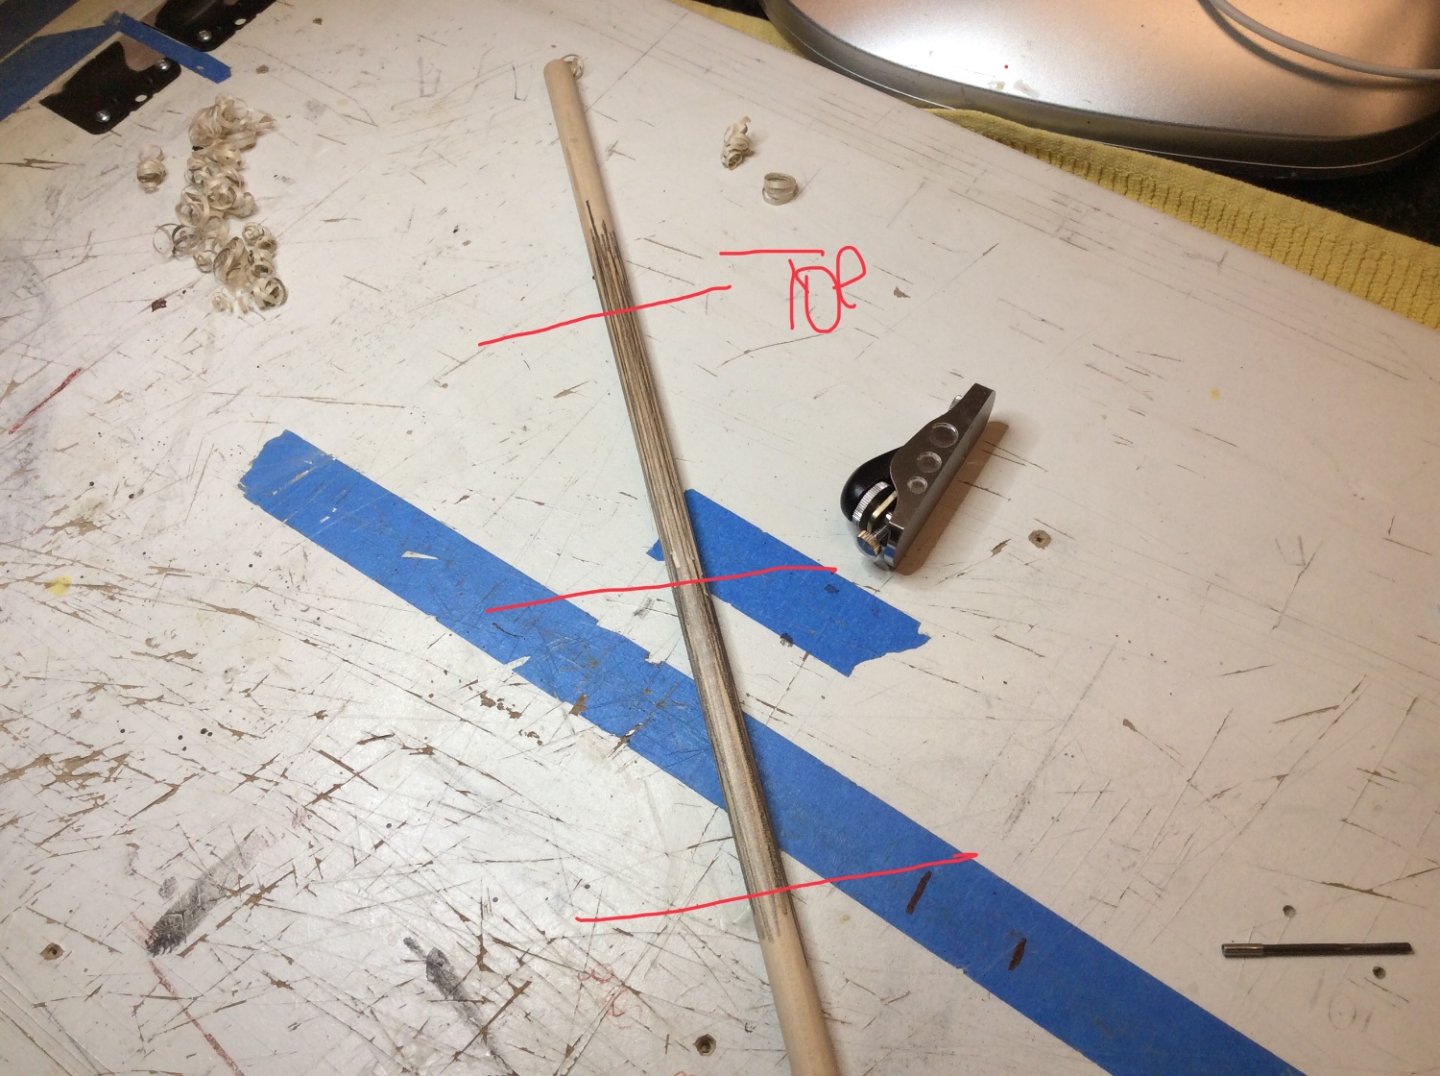

When you get down to where the tapering stops, start back at the top and repeat the whole process again until you have the amount of tapering you need. Eventually you will work your way back up to the top as the lower mast has enough taper and you end up at this point.

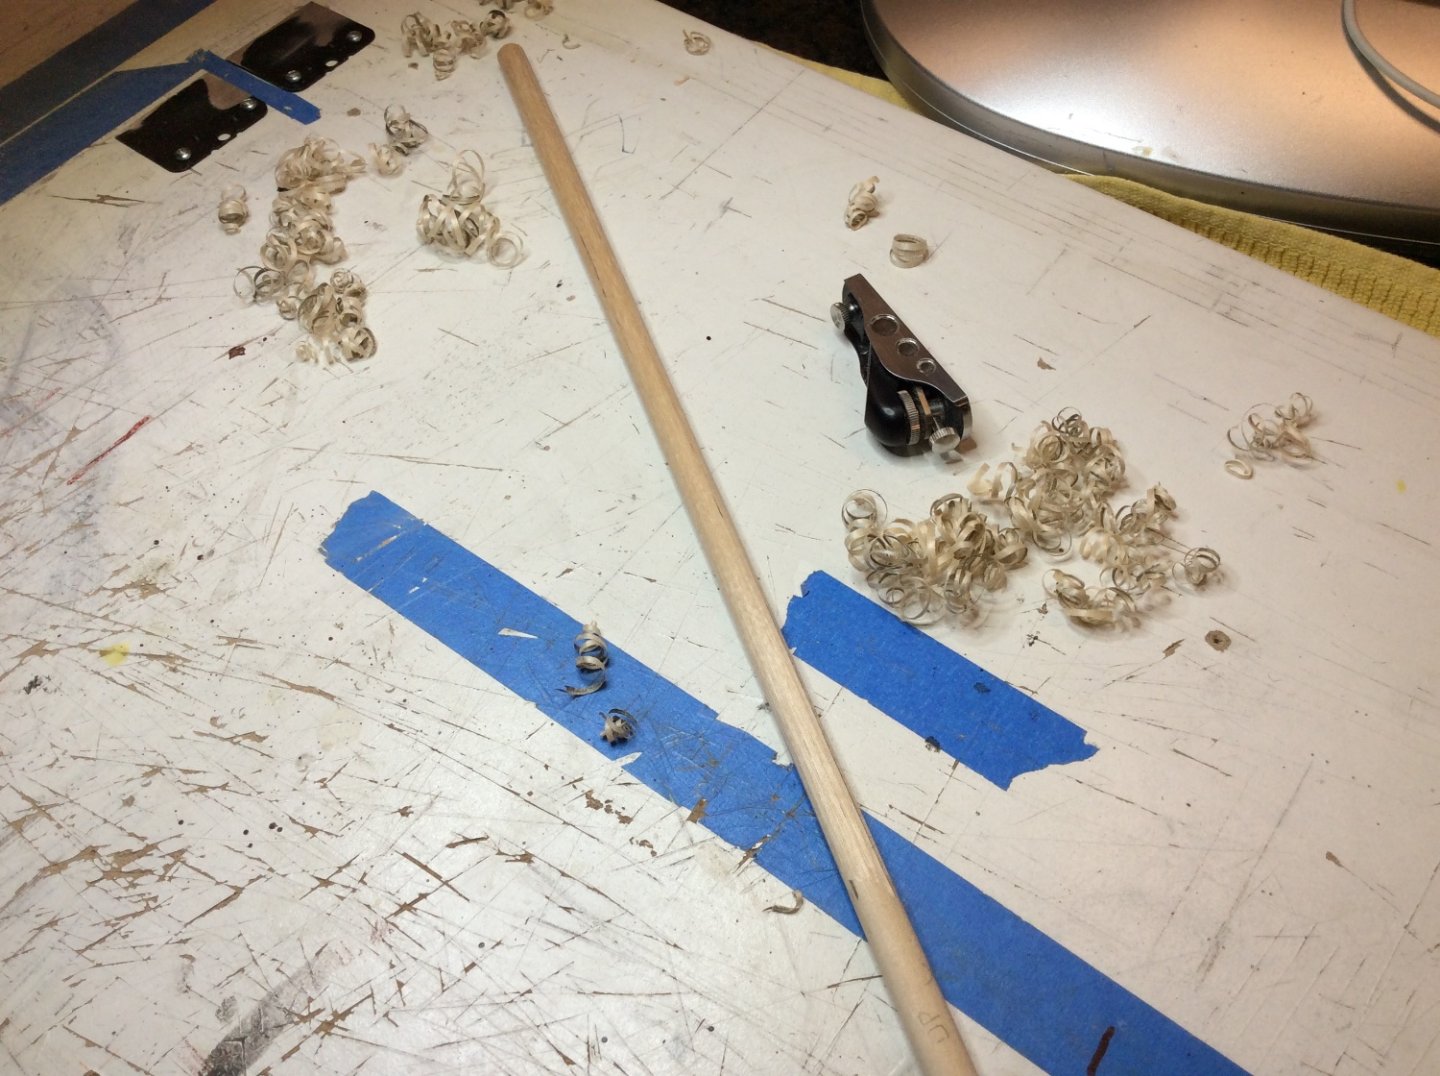
I ran 120 grit sandpaper up and down a few times between planing if needed and finished with 320 grit paper. Probably 90% of the material was removed by the plane so very little saw dust. Then gave the masts a test fit.
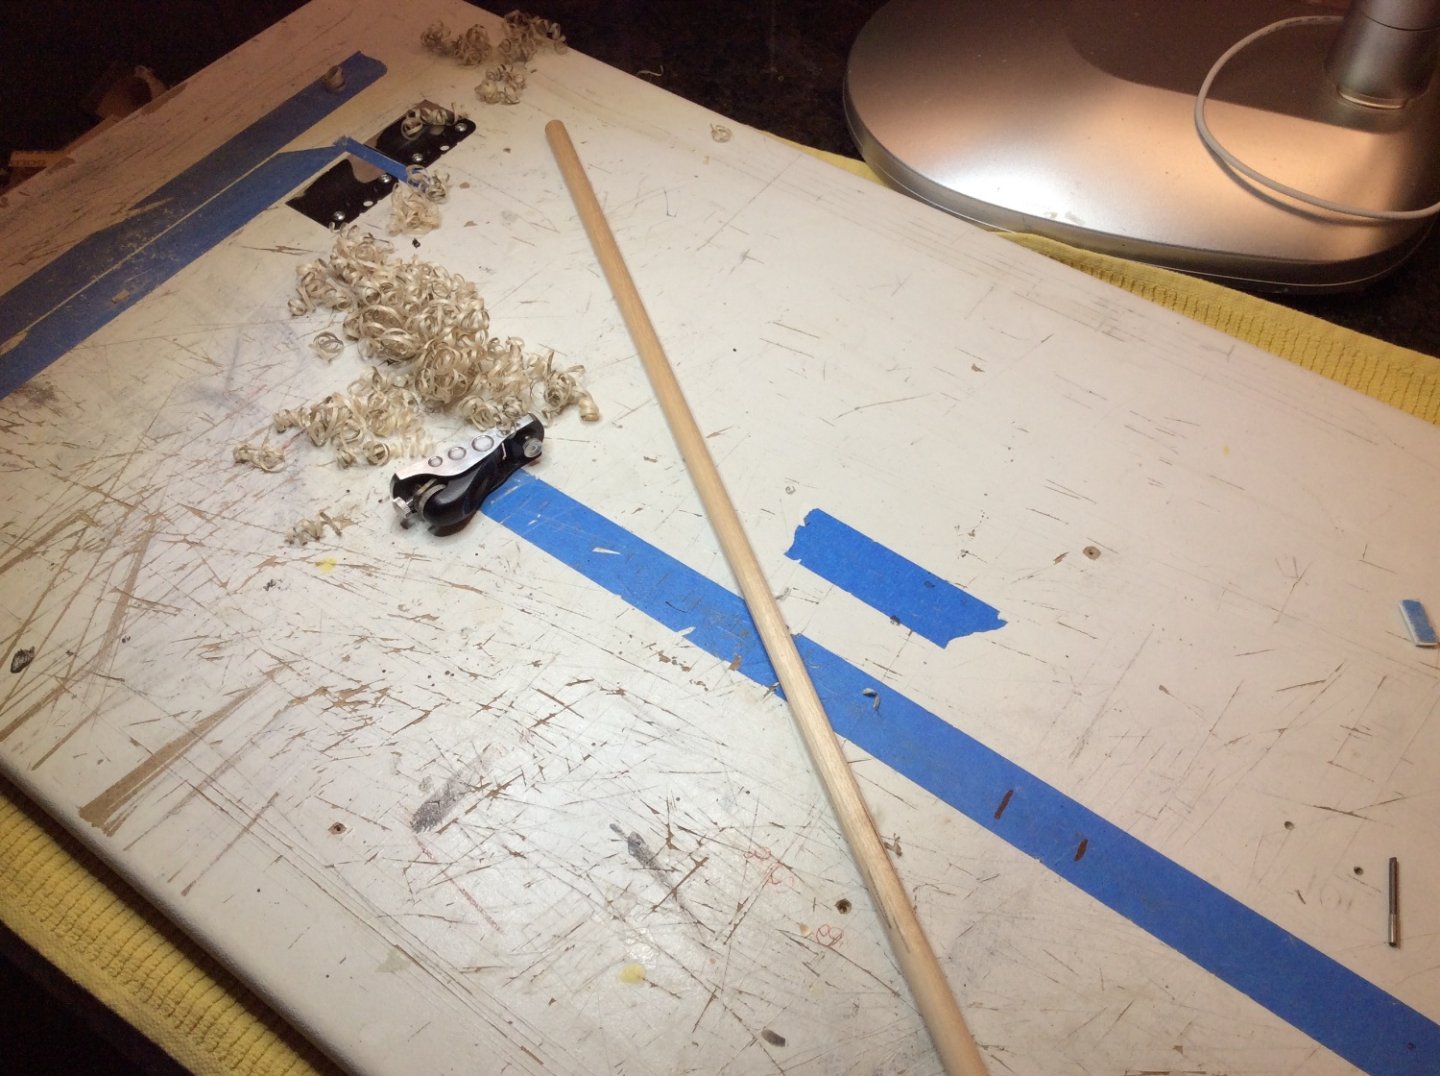
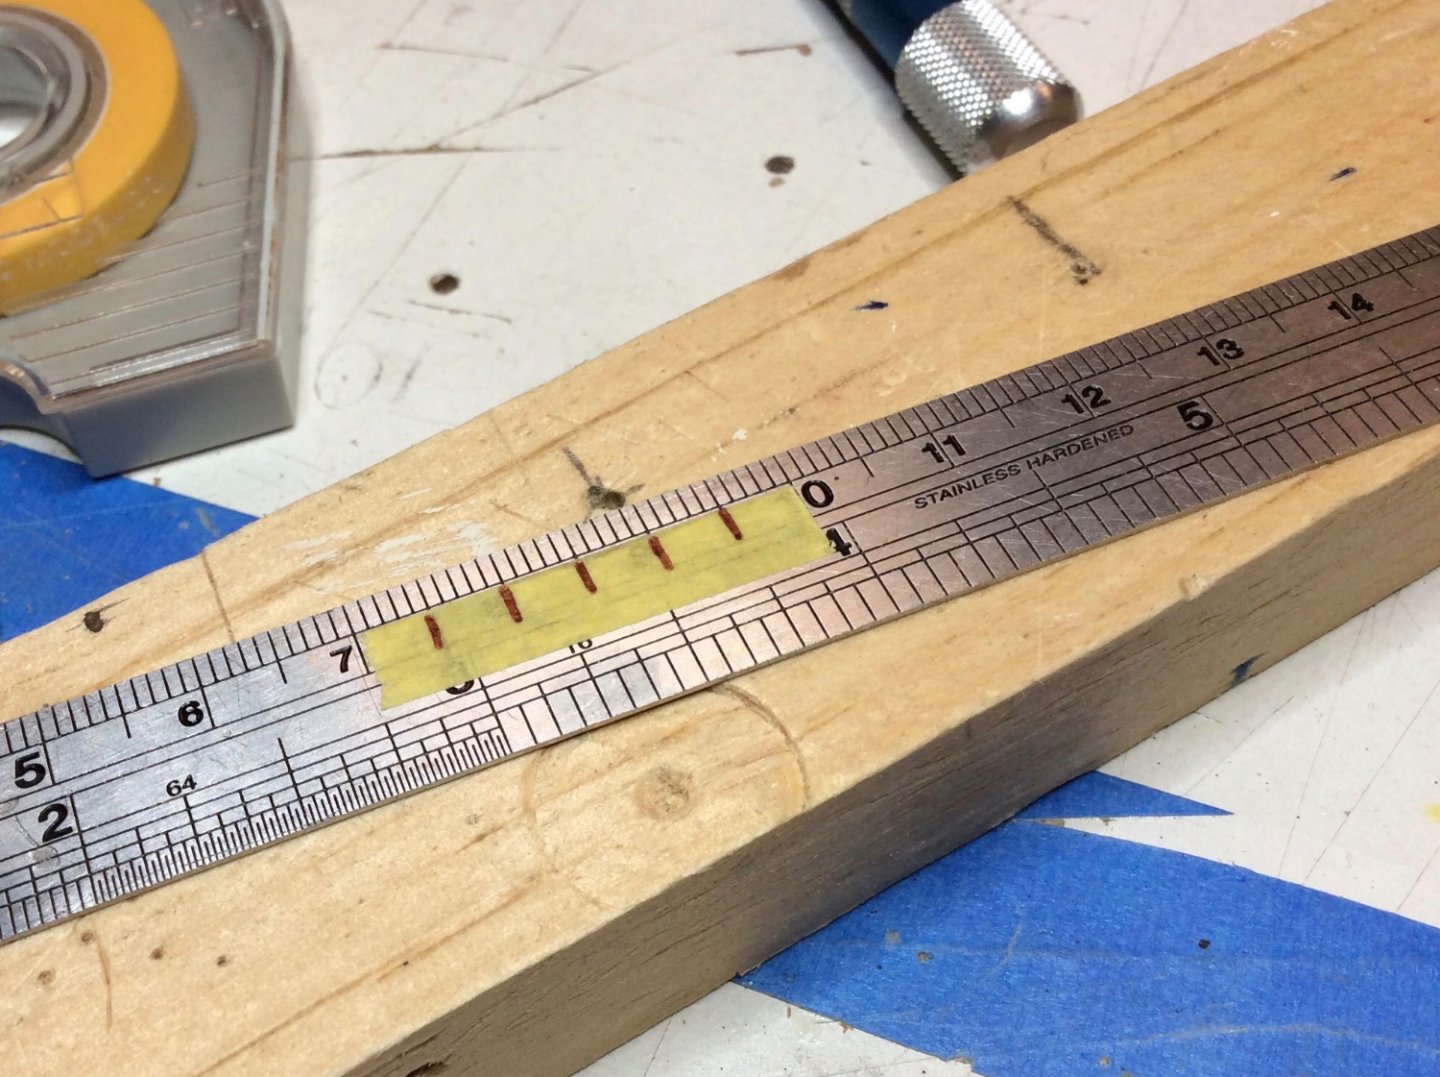
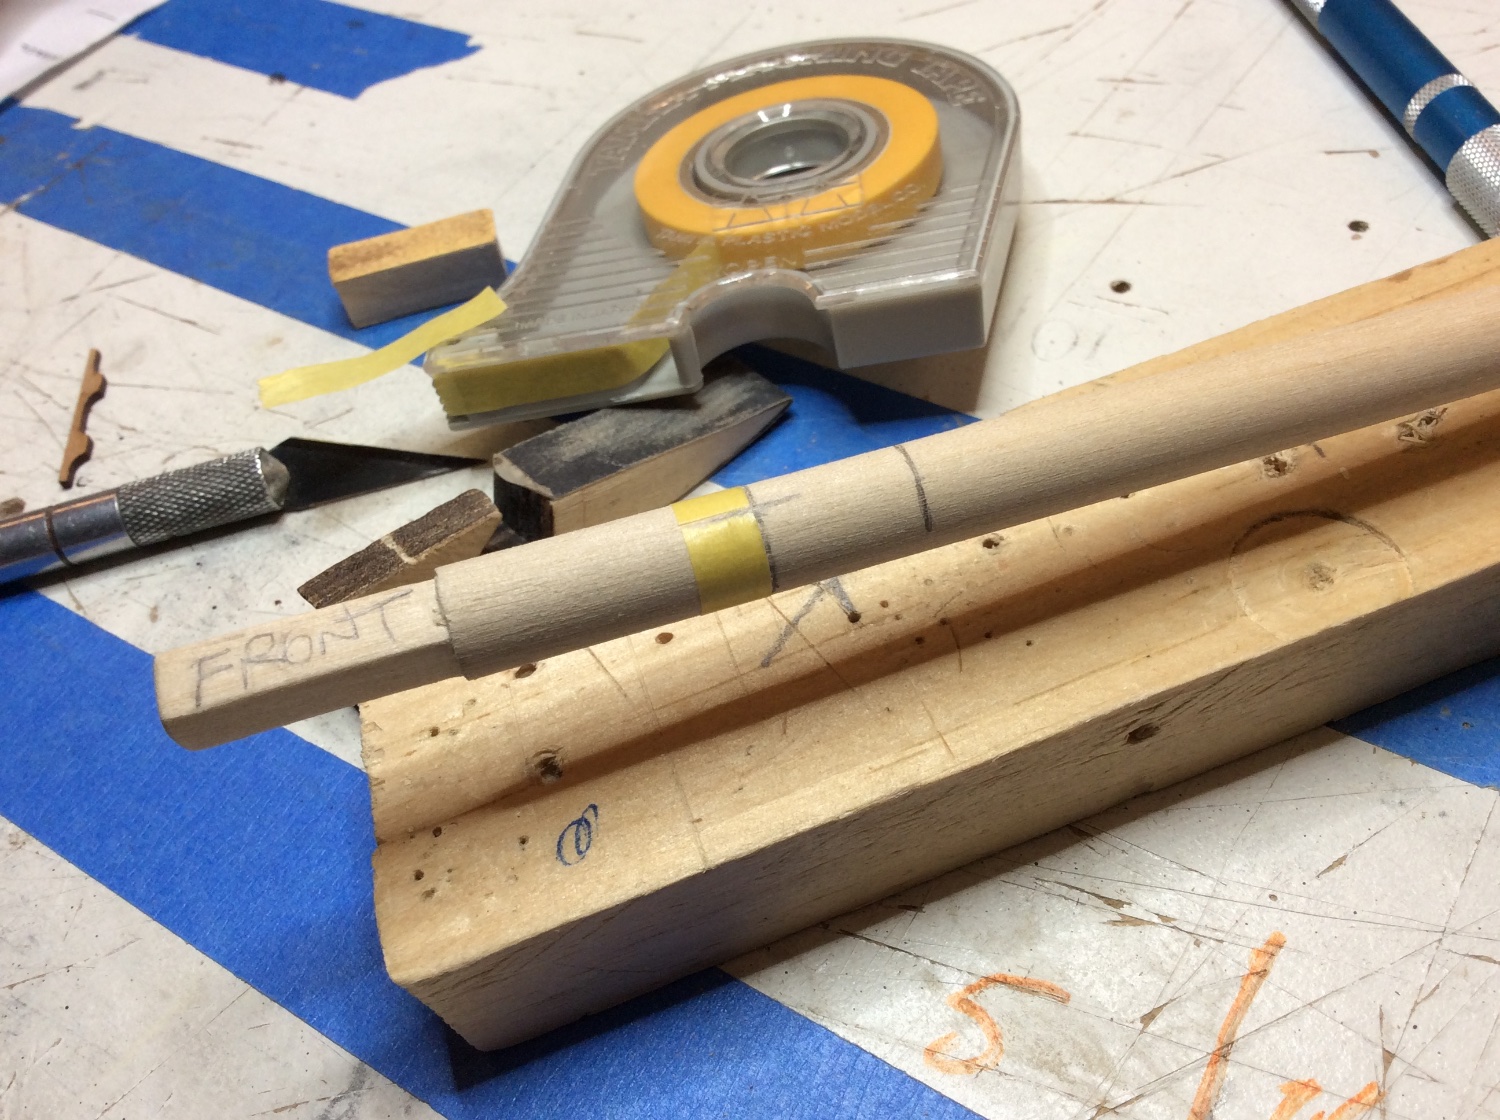
Both masts have the same number of cleats laid out the same way. Located the fore most cleat and marked the mast. Ran a piece of tape from that mark, around the mast and back to the mark. Removed the tape and stuck it to a ruler. In this case the tape was 30mm long and needed to be divided into six sections so it worked out pretty good. Stuck the tape back on the mast and laid out the holes for the rest of the cleats.


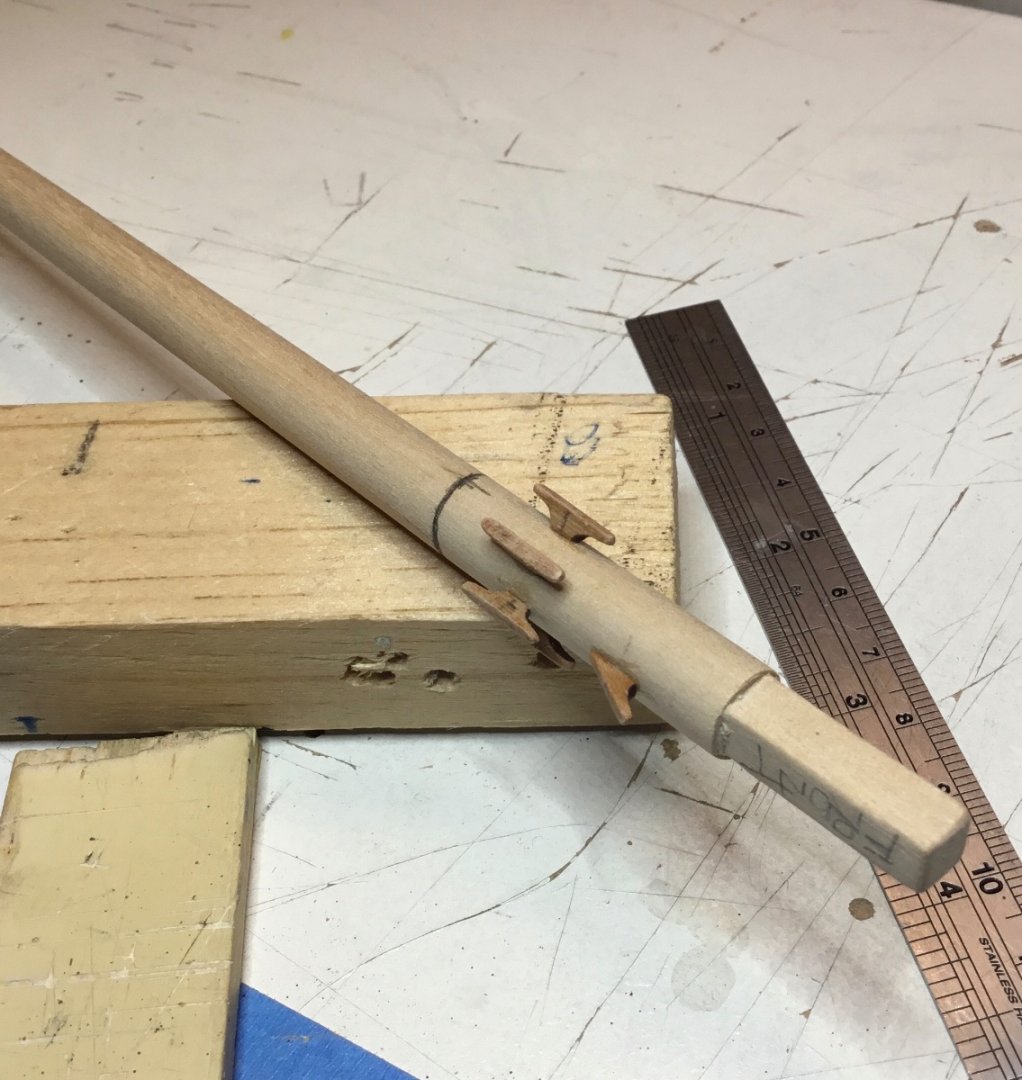
The mast coats and the main boom rest were all made the same way. Two pieces of 3/64” plywood were glued together. 3/8 holes were drilled in the plywood and the rest was all sawing , cutting and sanding.
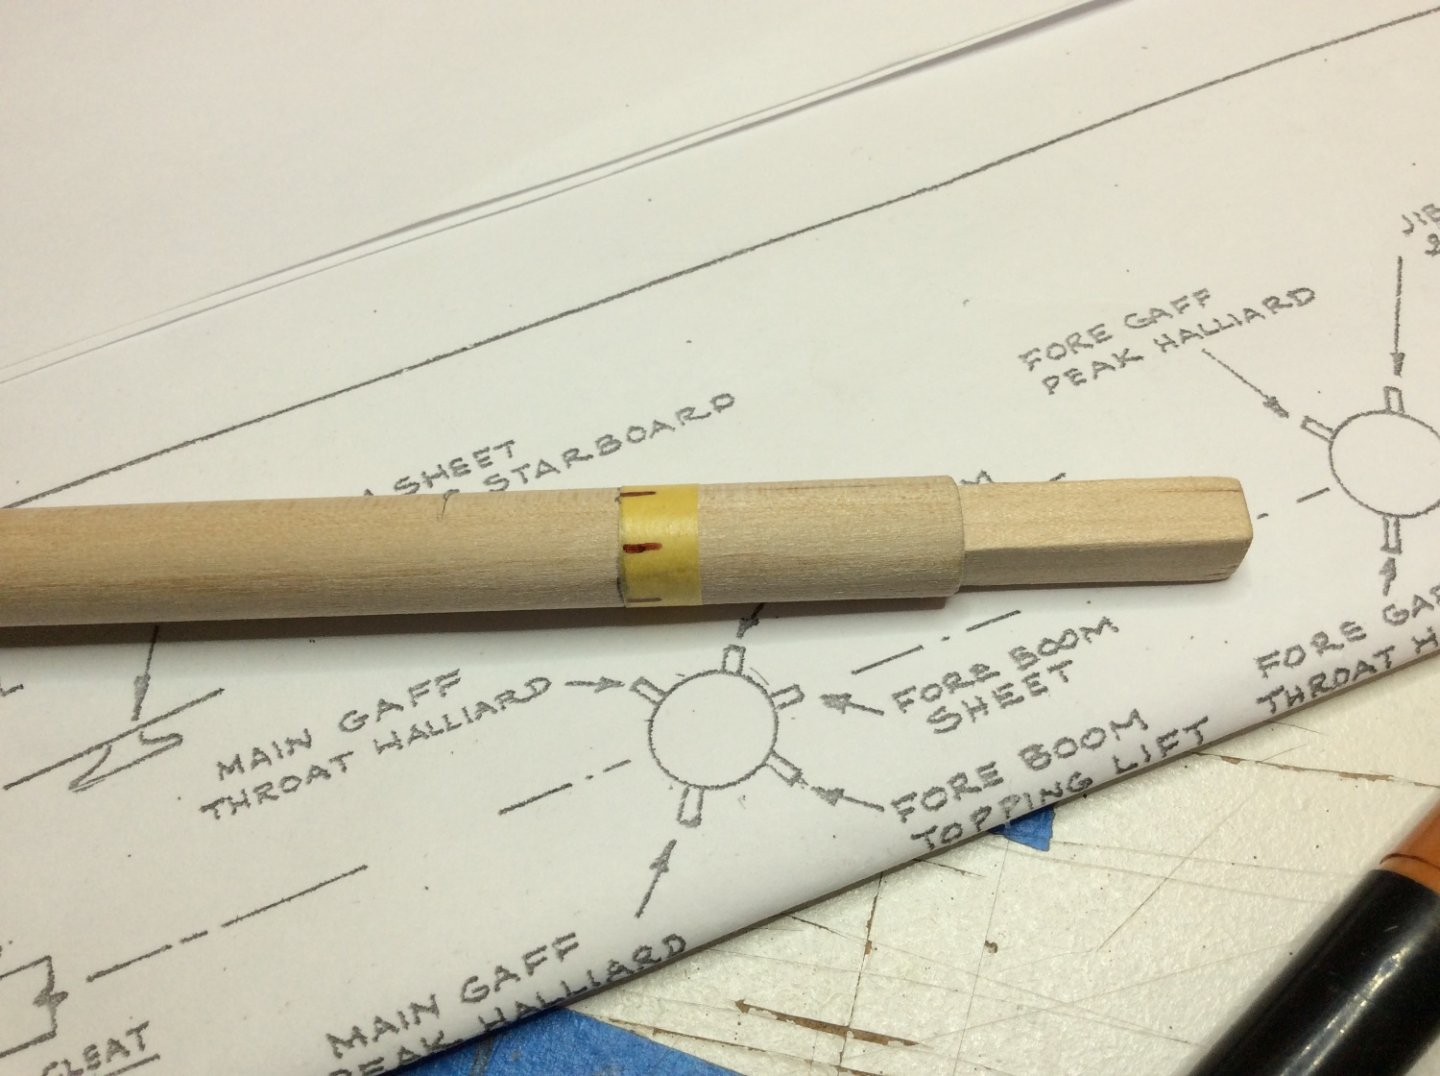
The throat halliard lead blocks were made by sandwiching a 1/32” strip of wood between two 1/16” strips.
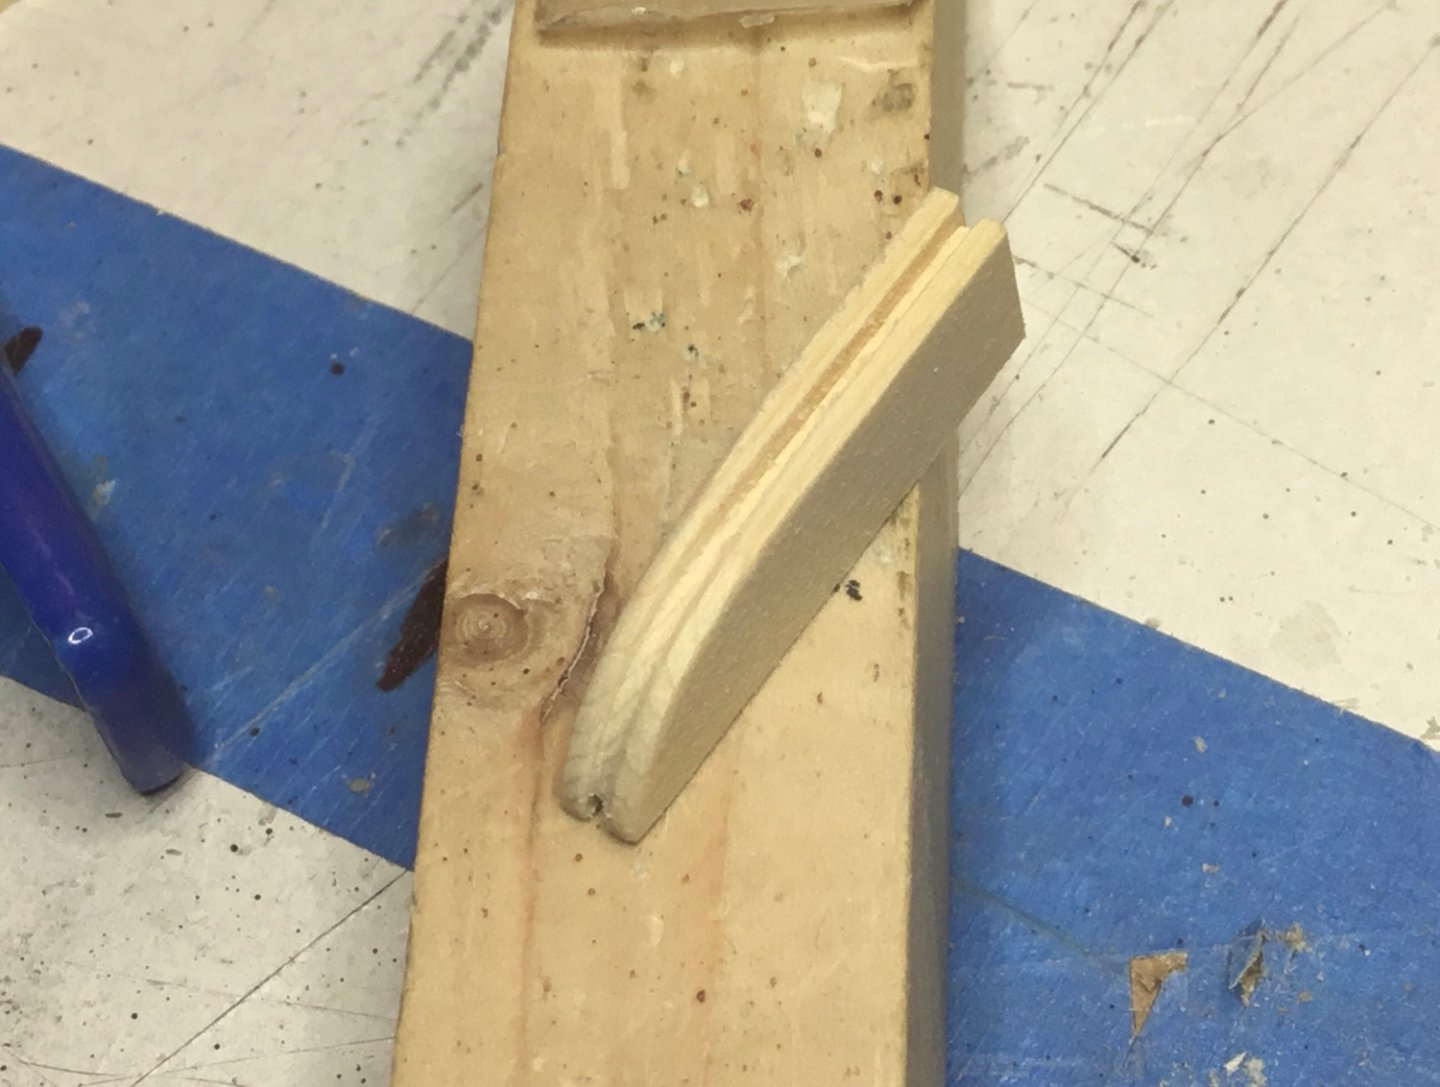
‘The cheek block was made using a Technell 3mm x 1mm brass sheave from The Crafty Sailor and 1/16” brass strip.
The main mast gets a test fit.
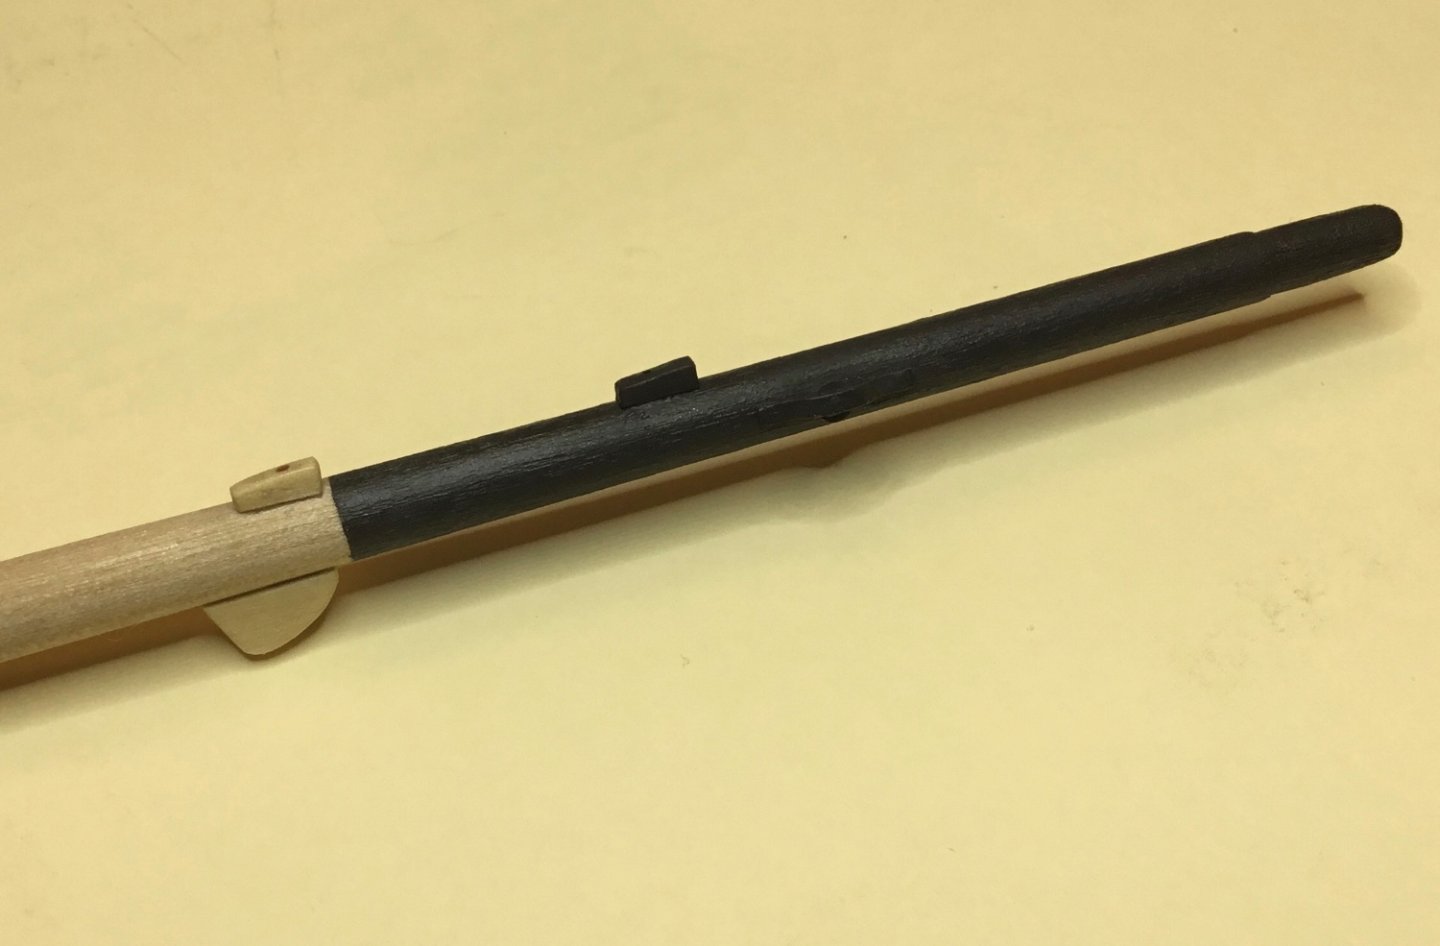
The fore mast has a gooseneck mounted for the fore boom. It was attached with CA. Brass nails are used to simulate the bolts holding the two parts together. The kit supplied pin that sits in the gooseneck disintegrated when I tried to clean off the flash so a new one was made with 1/16” brass tube. The top of the tube was squashed, shaped and drilled. A ring made with #24 copper wire was glued just under the flattened part to keep the pin in place.
The fore mast gets a test fit.

Finished stepping the masts.

Have a great New Years and I hope to see you in 2023.
- ccoyle, BobG, Knocklouder and 8 others
-
11


Thank you for having me aboard!
in New member Introductions
Posted
Hi Joe, welcome to the forum. Your Dory and Pram look exceptional. Hopefully one day you’ll be able to post some pictures of your RC aircraft.