


Dave_E
-
Posts
1,249 -
Joined
-
Last visited
Content Type
Profiles
Forums
Gallery
Events
Posts posted by Dave_E
-
-
-
WOW, you guys sure come through in the quick. Thank you all. Mark, I value those words as I have done the same. I have a couple things I bought thinking I’d use them in ship building… never touched them while building the Lady Nelson. 😖
I dusted off and cleaned my old bench top sander and mounted some machine blocks to the bed and have some 320 on the disk now. I have a bench top drill press and band saw, 2 dremils and a million bits and chucks plus all the hand tools that I used building the LN.I do plan to purchase things like cannon kits, and the hardware and the wood. So I guess the hardest thing I see now would be the bulkheads and keel parts.
I do not see purchasing any laser cutters or 3D stuff… all out of my wheelhouse and wouldn’t get past the Admiral. 😆
-
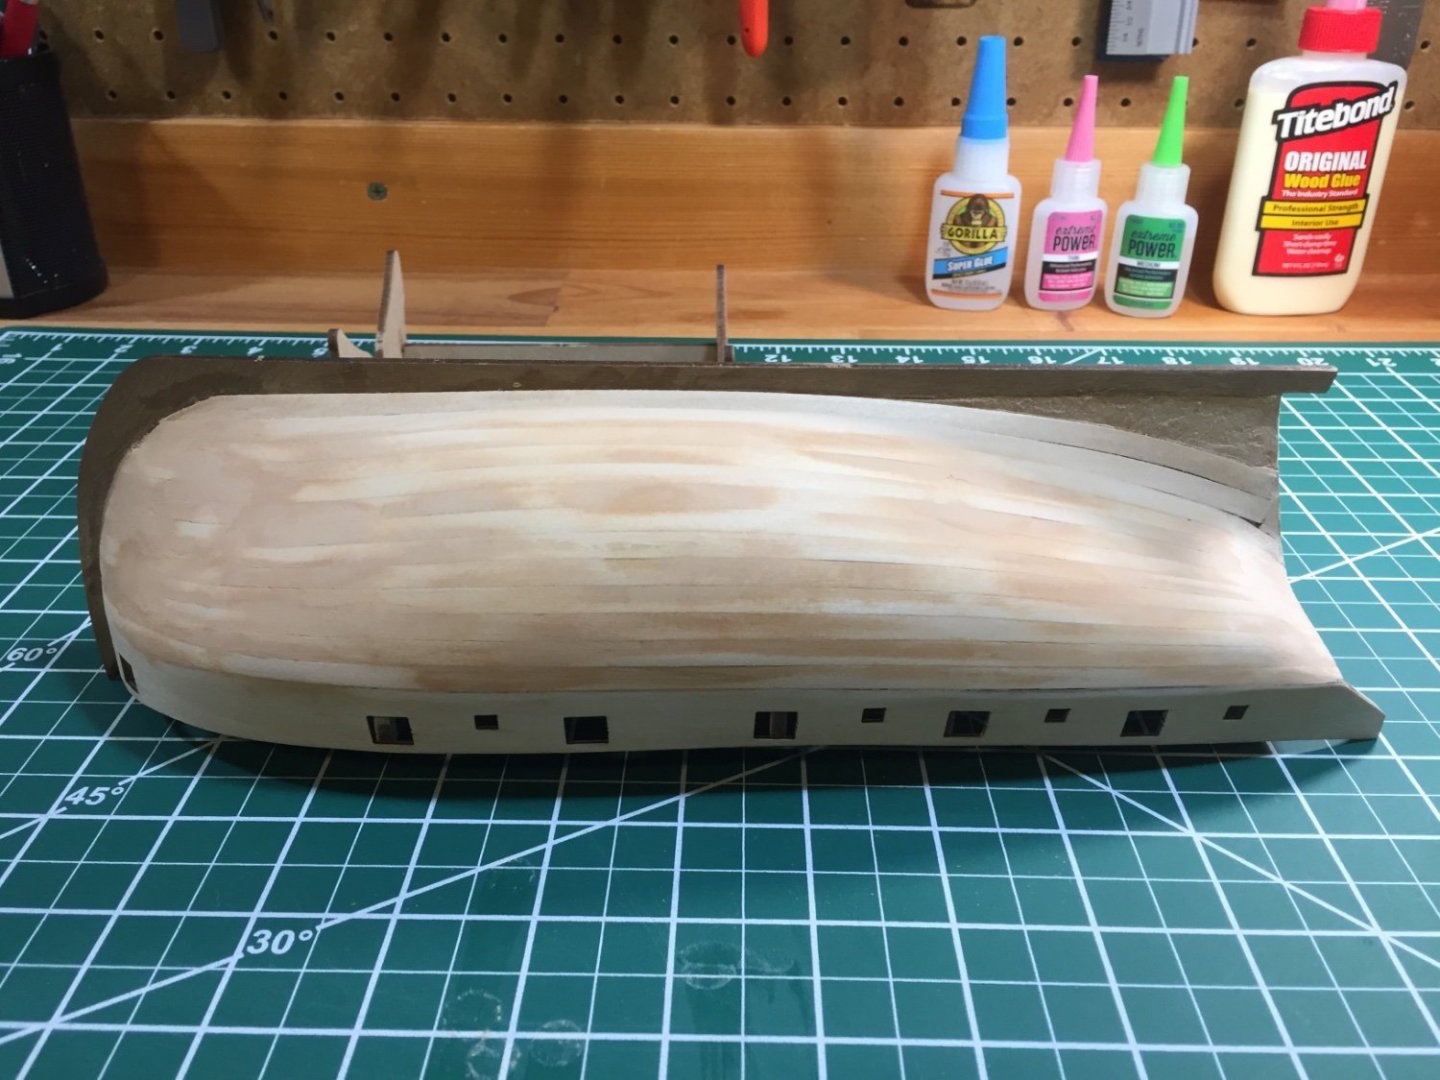
Ok… after getting a couple anchors about as scratch built as I can… time to do something else. 😀

-
-
-
I’ve said it before, I’ll say it again I’m sure. You are a planking master! 👍😀
- glbarlow, Ryland Craze and FrankWouts
-
 3
3
-
-
Hi John,
Very nice workstation my friend! At first glance that ship looks like it’s in distress. What ship is it?
-
Hey TJ, welcome. Go to the new member area and introduce yourself there and you will get the right start in this hobby as you meet the members. 👍😀
- Scottish Guy, Egilman and mtaylor
-
3
-
-
After looking at your build log… what I see is your first planking that you stained so your second planking would not show any white through any plank spaces, correct? My angle on the first planking is to get it as smooth as possible to include the use of wood filler as required to get a baby butt smooth finish. If the first planking has flaws, your second planking will have the same flaws. Make sense?
There are many tutorials about planking to learn from. Look at my Lady Nelson build log and see my use of wood filler and sanding prior to the start of my second planking. Looking good! 👍😀
- CPDDET, Oldsalt1950, modeller_masa and 2 others
-
5
-
Hi Mike, welcome aboard! 👍😀
- Keith Black, Edwardkenway and mtaylor
-
3
-
Hi Carlo, welcome to the forum, glad to have you aboard! 👍😀
- druxey, mtaylor and Keith Black
-
3
-
Thanks Kirby, glad your on board. How’s your Lady doing?
- Keith Black, CDW and Mr Whippy
-
3
-
-
Welcome to the forum! What do we call you? You’re at the right address for anything wooden ship (really anything else as well). 👍😀
- mtaylor and Keith Black
-
2
-
-
-
Hi All,
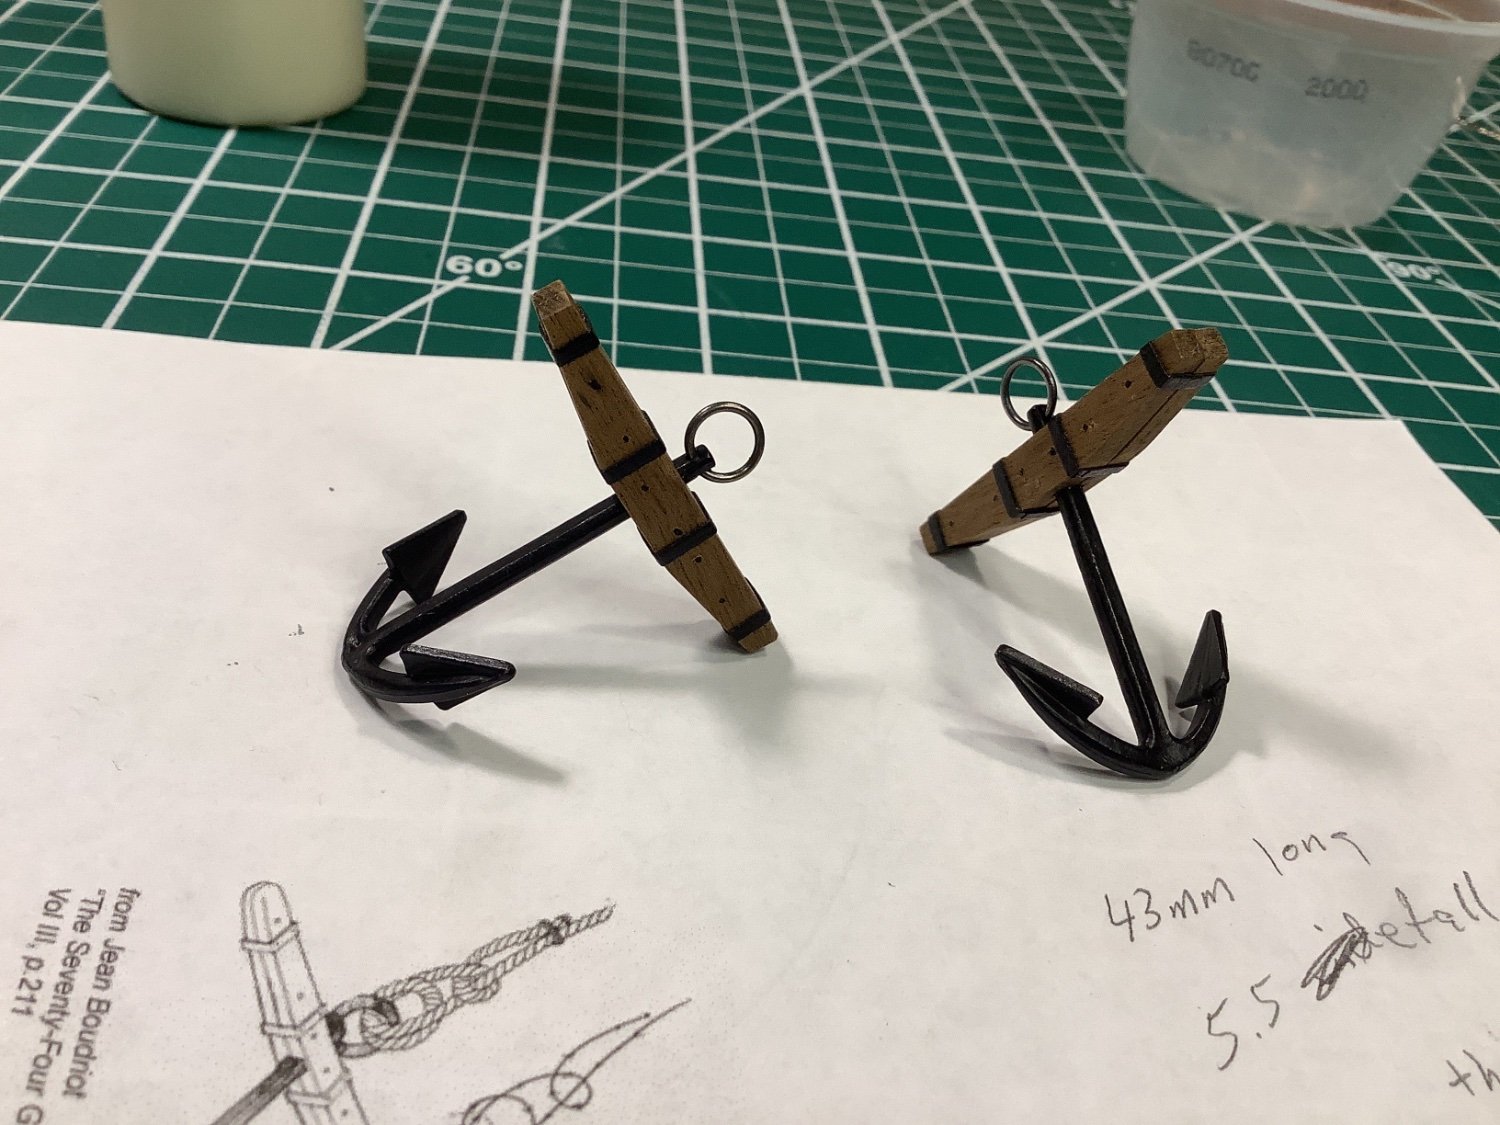
The anchors are complete. I see some completed ships that have their anchor rings “wrapped” with rope. HMS Victory for example (as she is now). What was the purpose? Was it a period thing (certain eras) of ship building? Trying to get the Rattlesnake as authentic as possible, but alas there are no pictures of it. Suggestions, comments? Thanks.
-
Hi All,
I think I’ve got them correct this time. I went so far as to build them like they did back when, (bending stock around the shank). I used wire through both halves of the stock (simulating fastening hardware). I see many models with the ring wrapped in rope. Was this a friction thing? Was it on all period anchors? My rings are brass blackened, but it buffs off and it’s not “black” and I think I should wrap them.
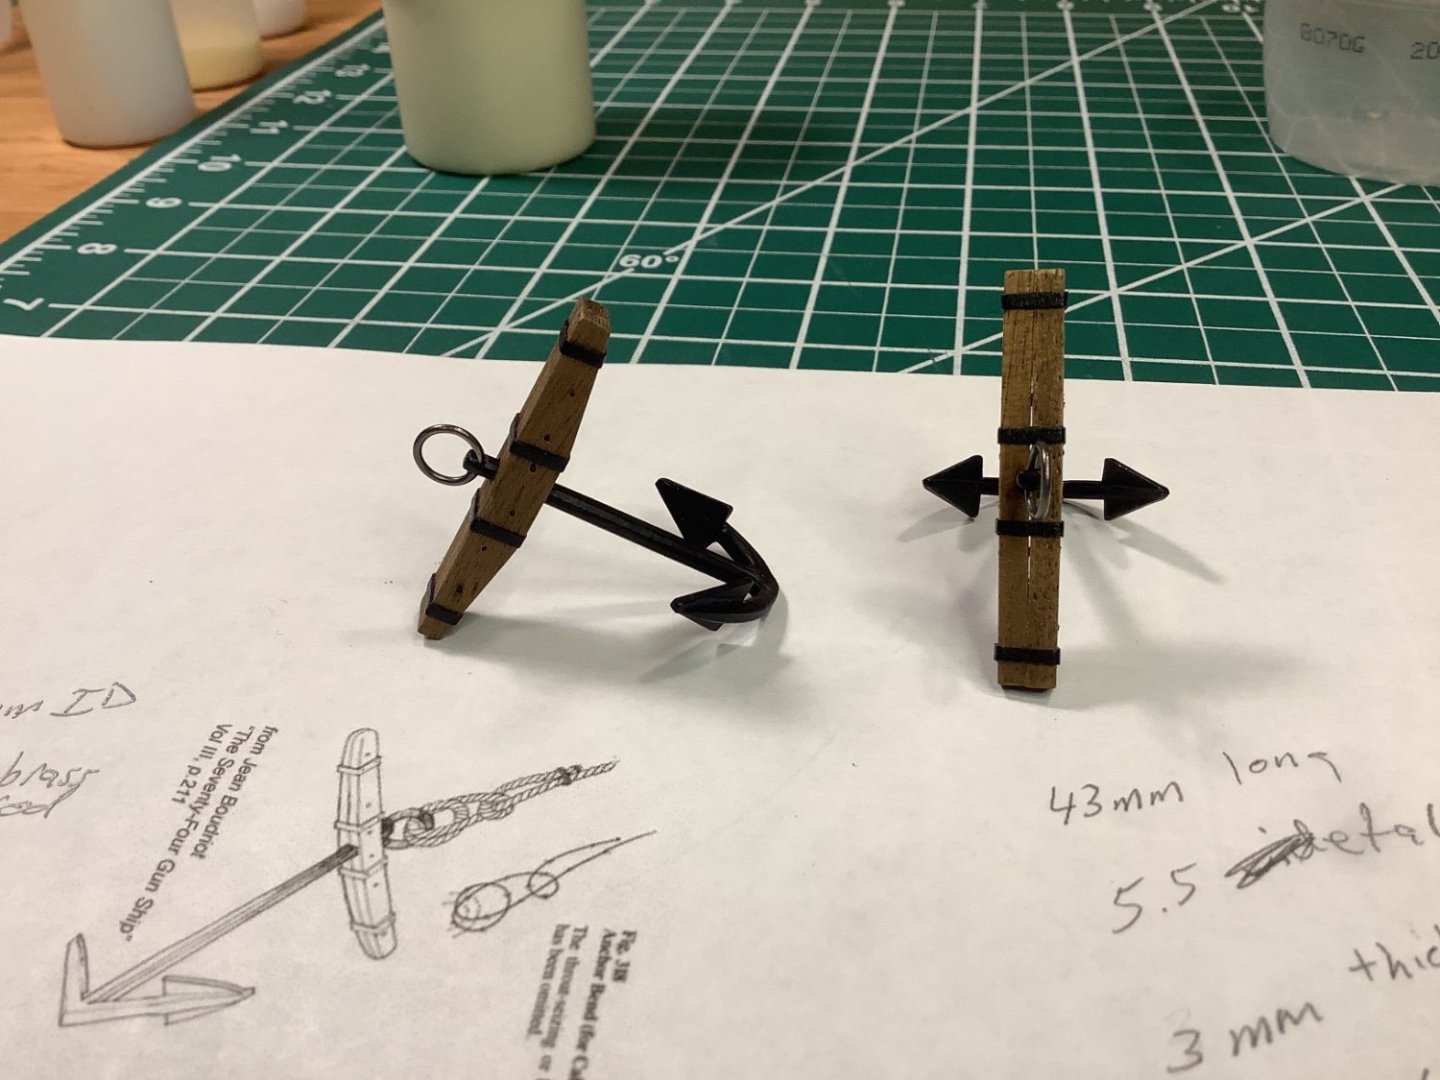
Amazing how real they look when done correctly… the kit supplied parts were…. 😝.
-
Hi Rich! Welcome to the forum. You’ve stumbled onto the the best source for wooden ship building knowledge and help on the planet (really)! Don’t be shy asking questions. Start a build log when you get going. 👍😀
- Keith Black and mtaylor
-
2
-
-
Hi Dave, might be asking the never ending, forever opinionated answers question. I have used absolute crap rope that came with a kit and some of the best aftermarket scale rope you can get. The good stuff needs nothing. That’s all I can say from my experience rigging my first ship. If you have quality scale rope, it is virtually ready to go to work. I’ve learned a lot from reading build logs and asking questions. I feel safe saying there is no one rule for preparing rope for rigging.
-
Hi Chris, welcome to the forum. This IS the place to learn everything boat building! Don’t be shy, jump in. 👍😀
- Knocklouder, Keith Black and mtaylor
-
3


Scratch Builders Reply
in Modeling tools and Workshop Equipment
Posted
Hey old timer, I’m 65, how old are you? 😆