


Rustyj
-
Posts
2,434 -
Joined
-
Last visited
Content Type
Profiles
Forums
Gallery
Events
Posts posted by Rustyj
-
-
That's some wonderful planking. So clean and tight!
- mtaylor and Stuntflyer
-
 2
2
-
Thank you Glenn and Chuck. Also, thanks for the likes!
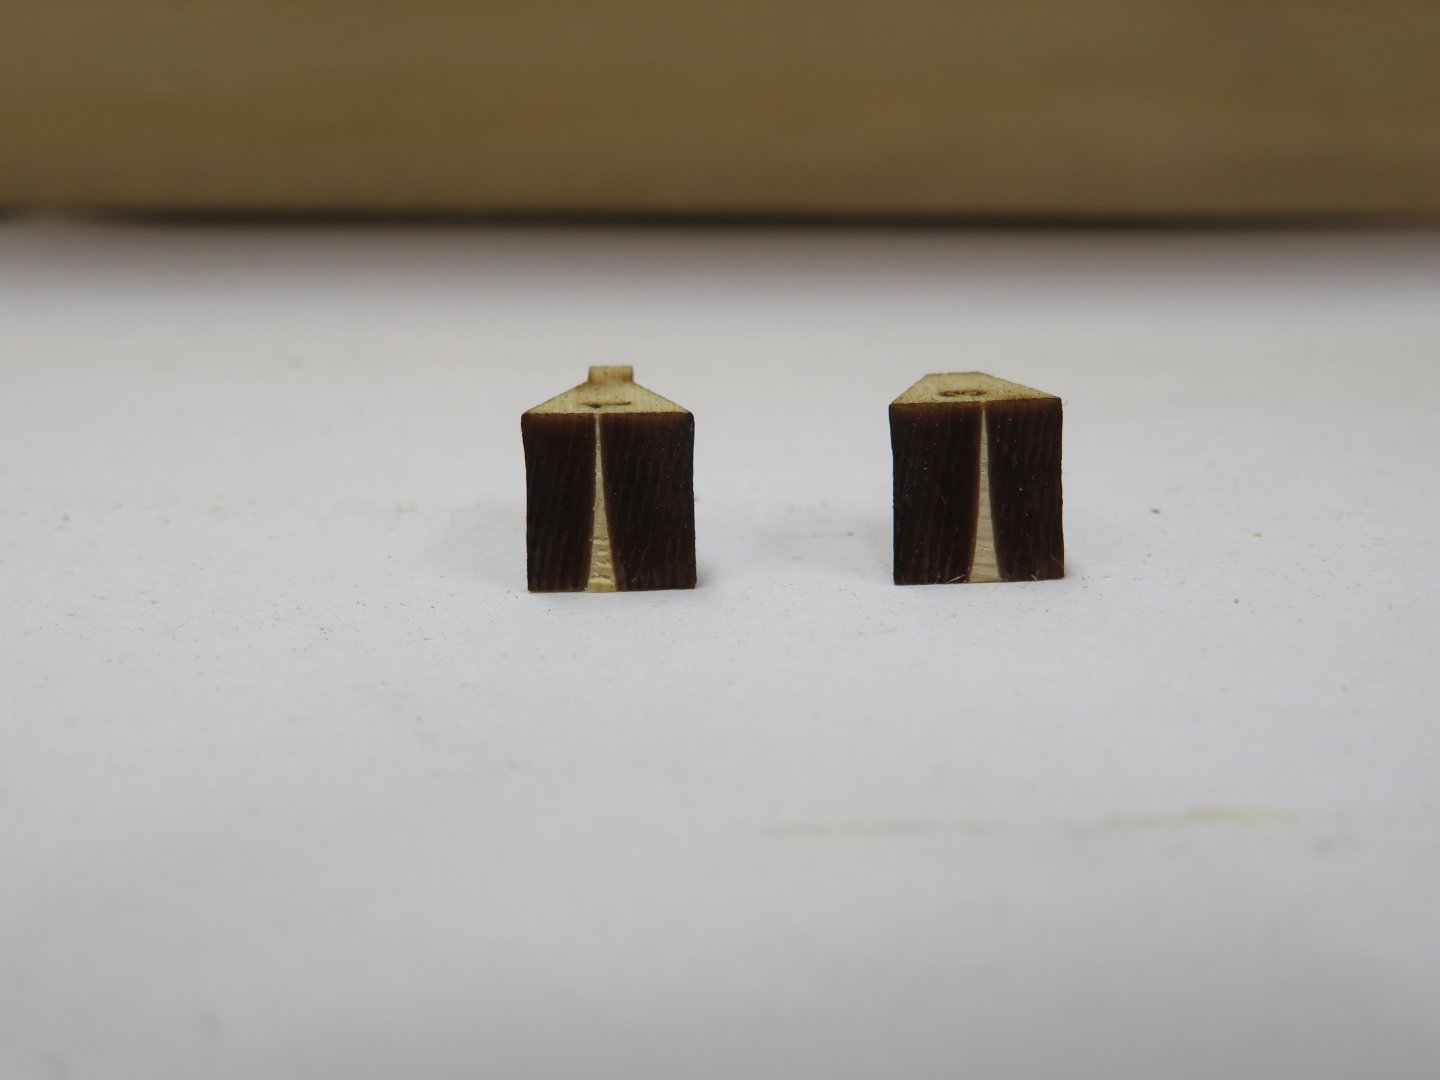
Sorry for the delay getting back but like a lot of us as we age, we start falling apart and have to be put back together. On the mend and all is good, but work will be slow for the next few weeks. Before I went down for repairs, I completed the deadwood and wedges as well as added all the simulated bolts on the keel.
Over time I will have a lot of sanding and cleaning char in my future.
- Seventynet, Stuntflyer, dvm27 and 12 others
-
14
-
 1
1
-
-
For me I will apply a coat of wipe on poly prior to assembling them on the keel. Excellent work on those frames.
- Freebird and Ryland Craze
-
2
-
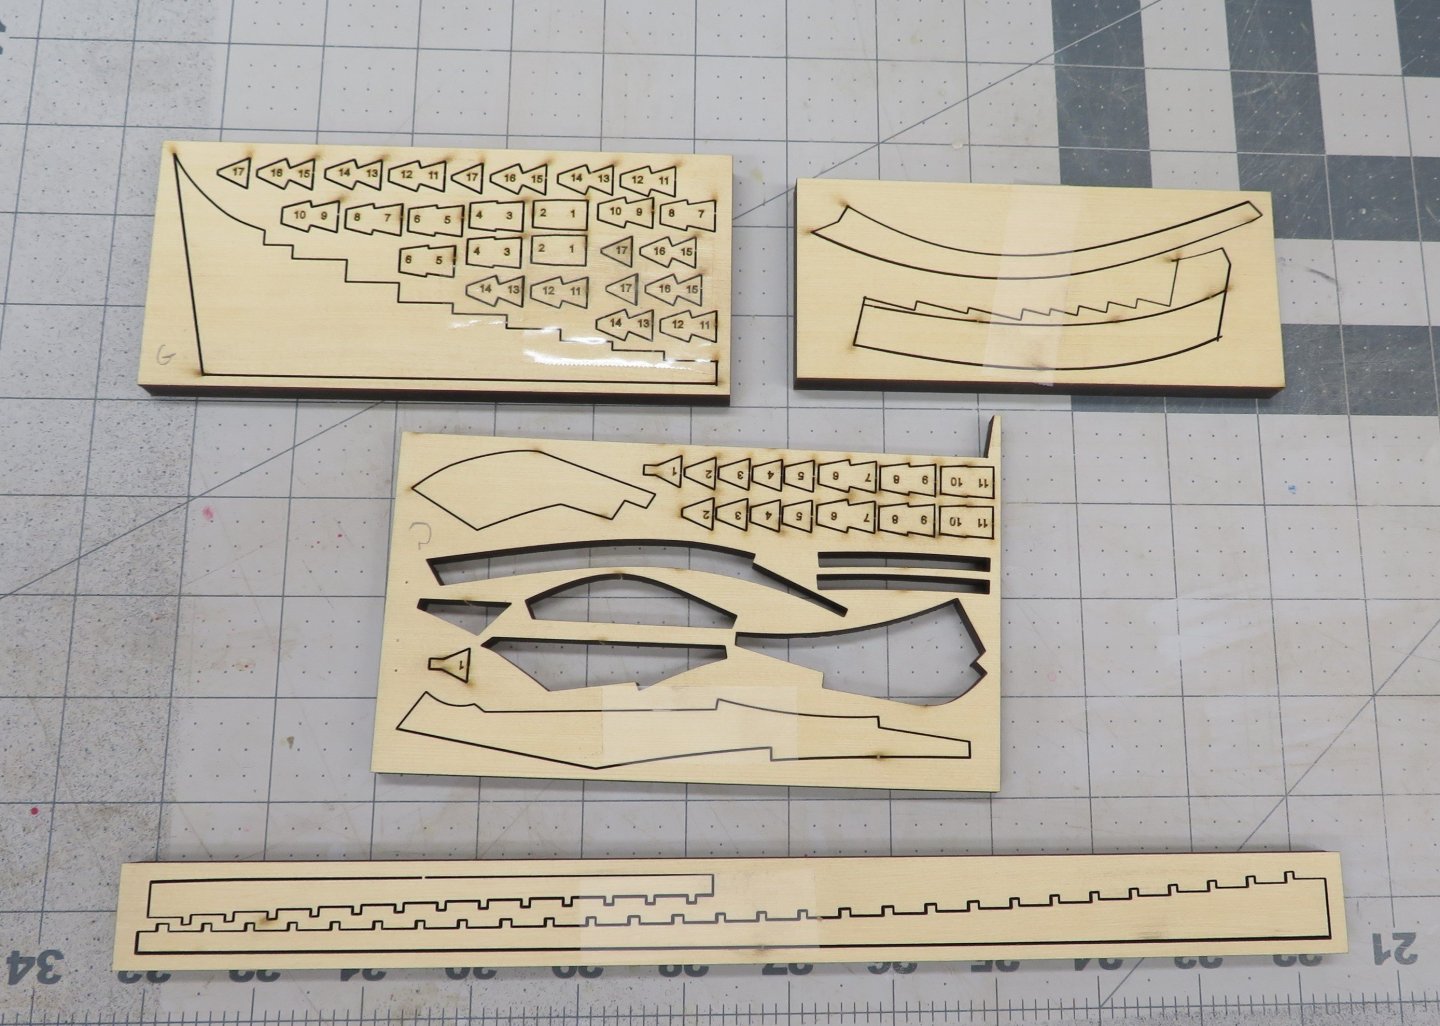
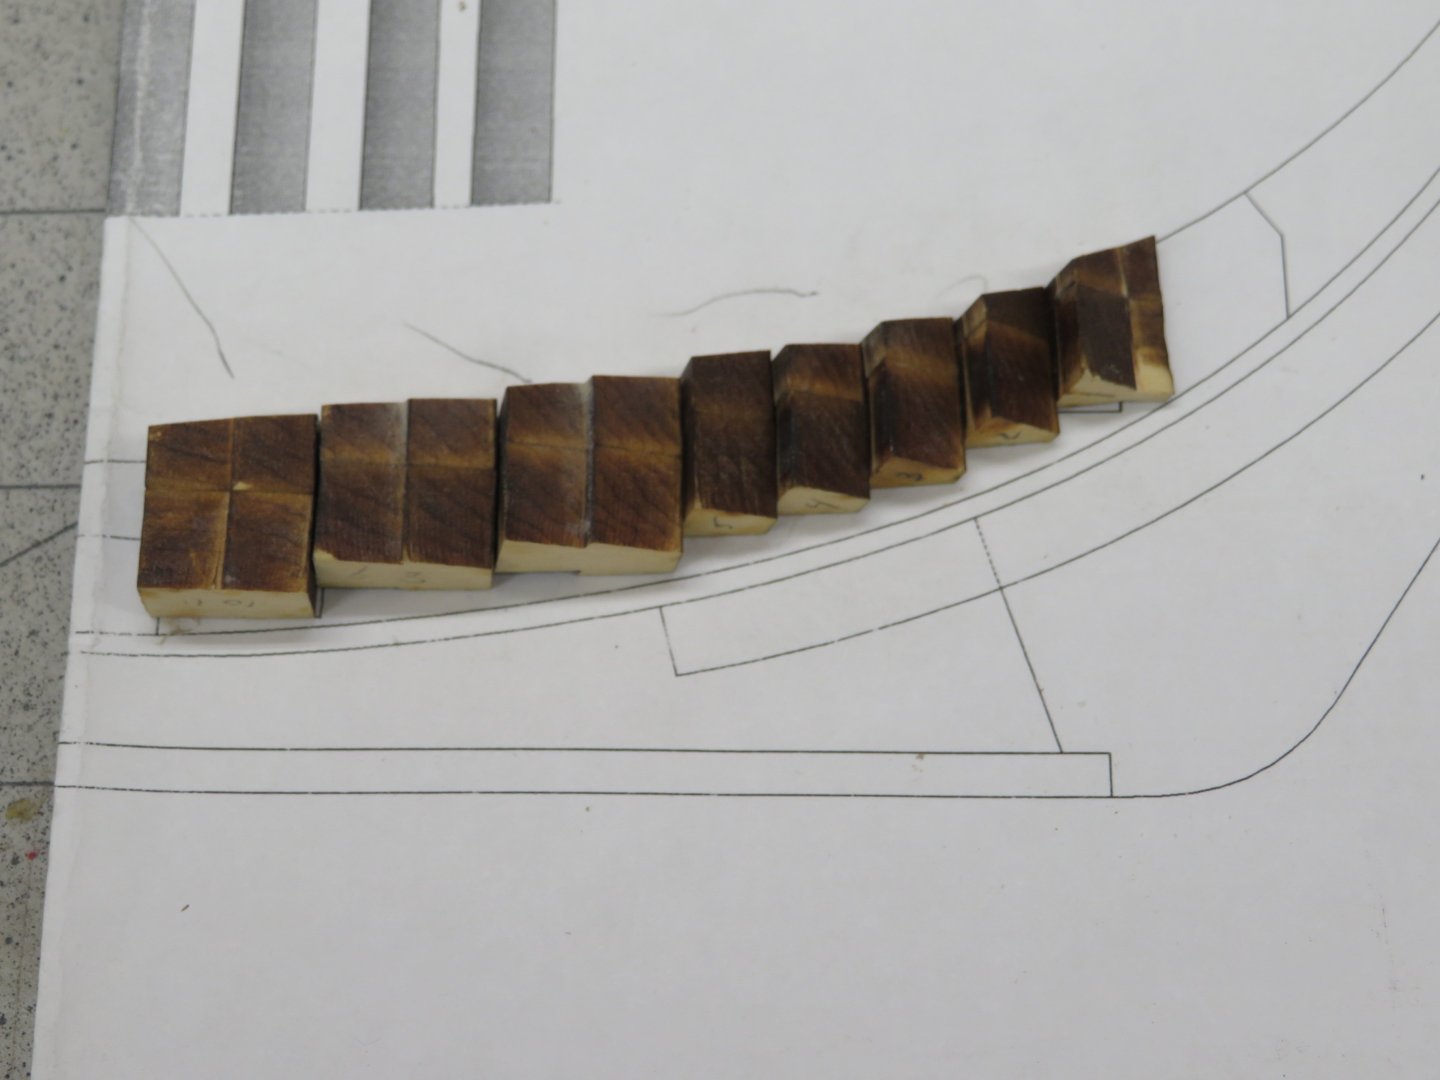
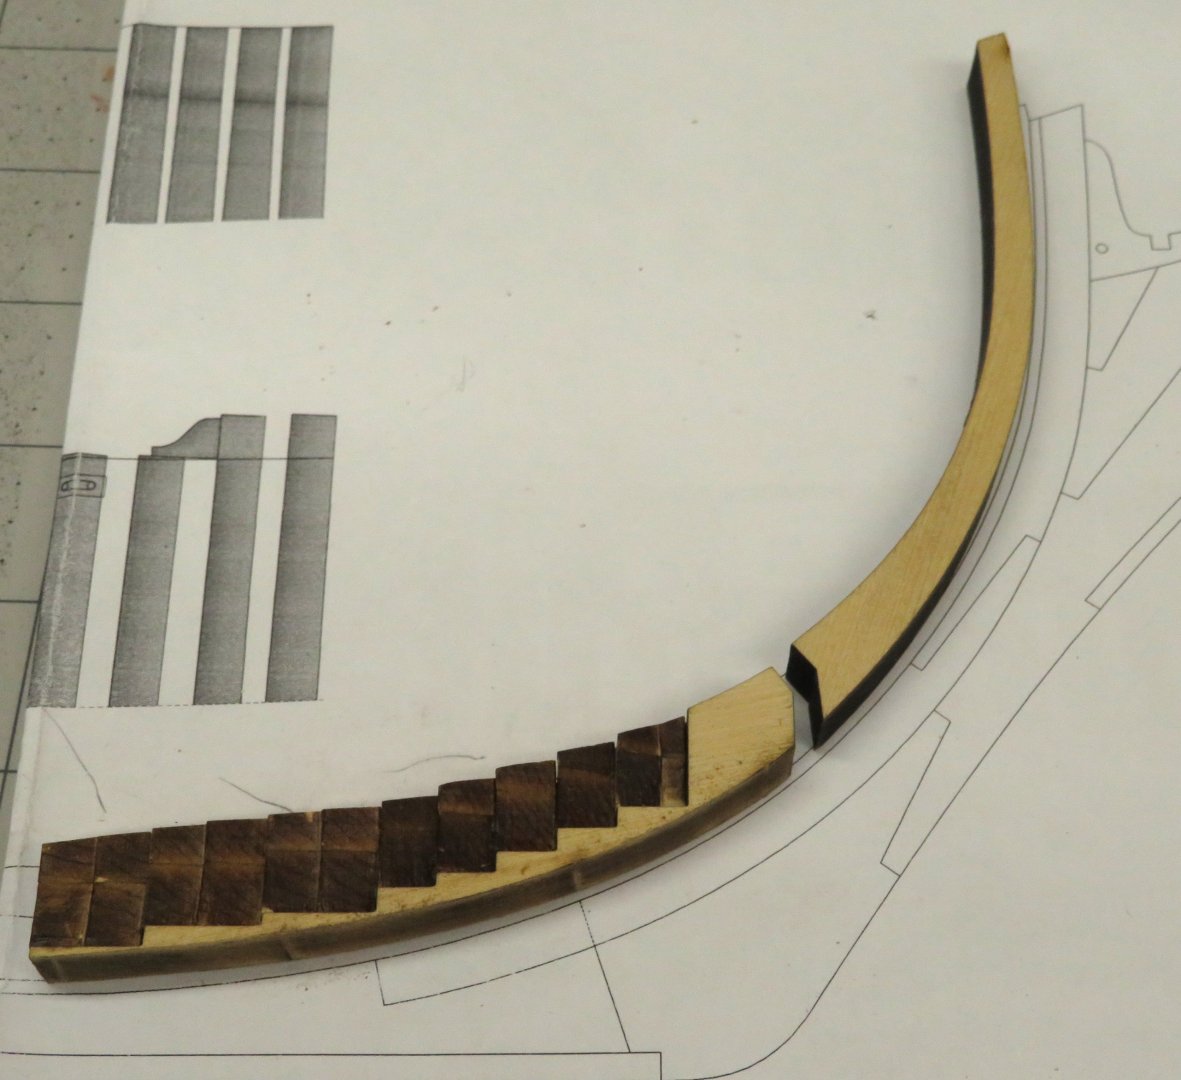
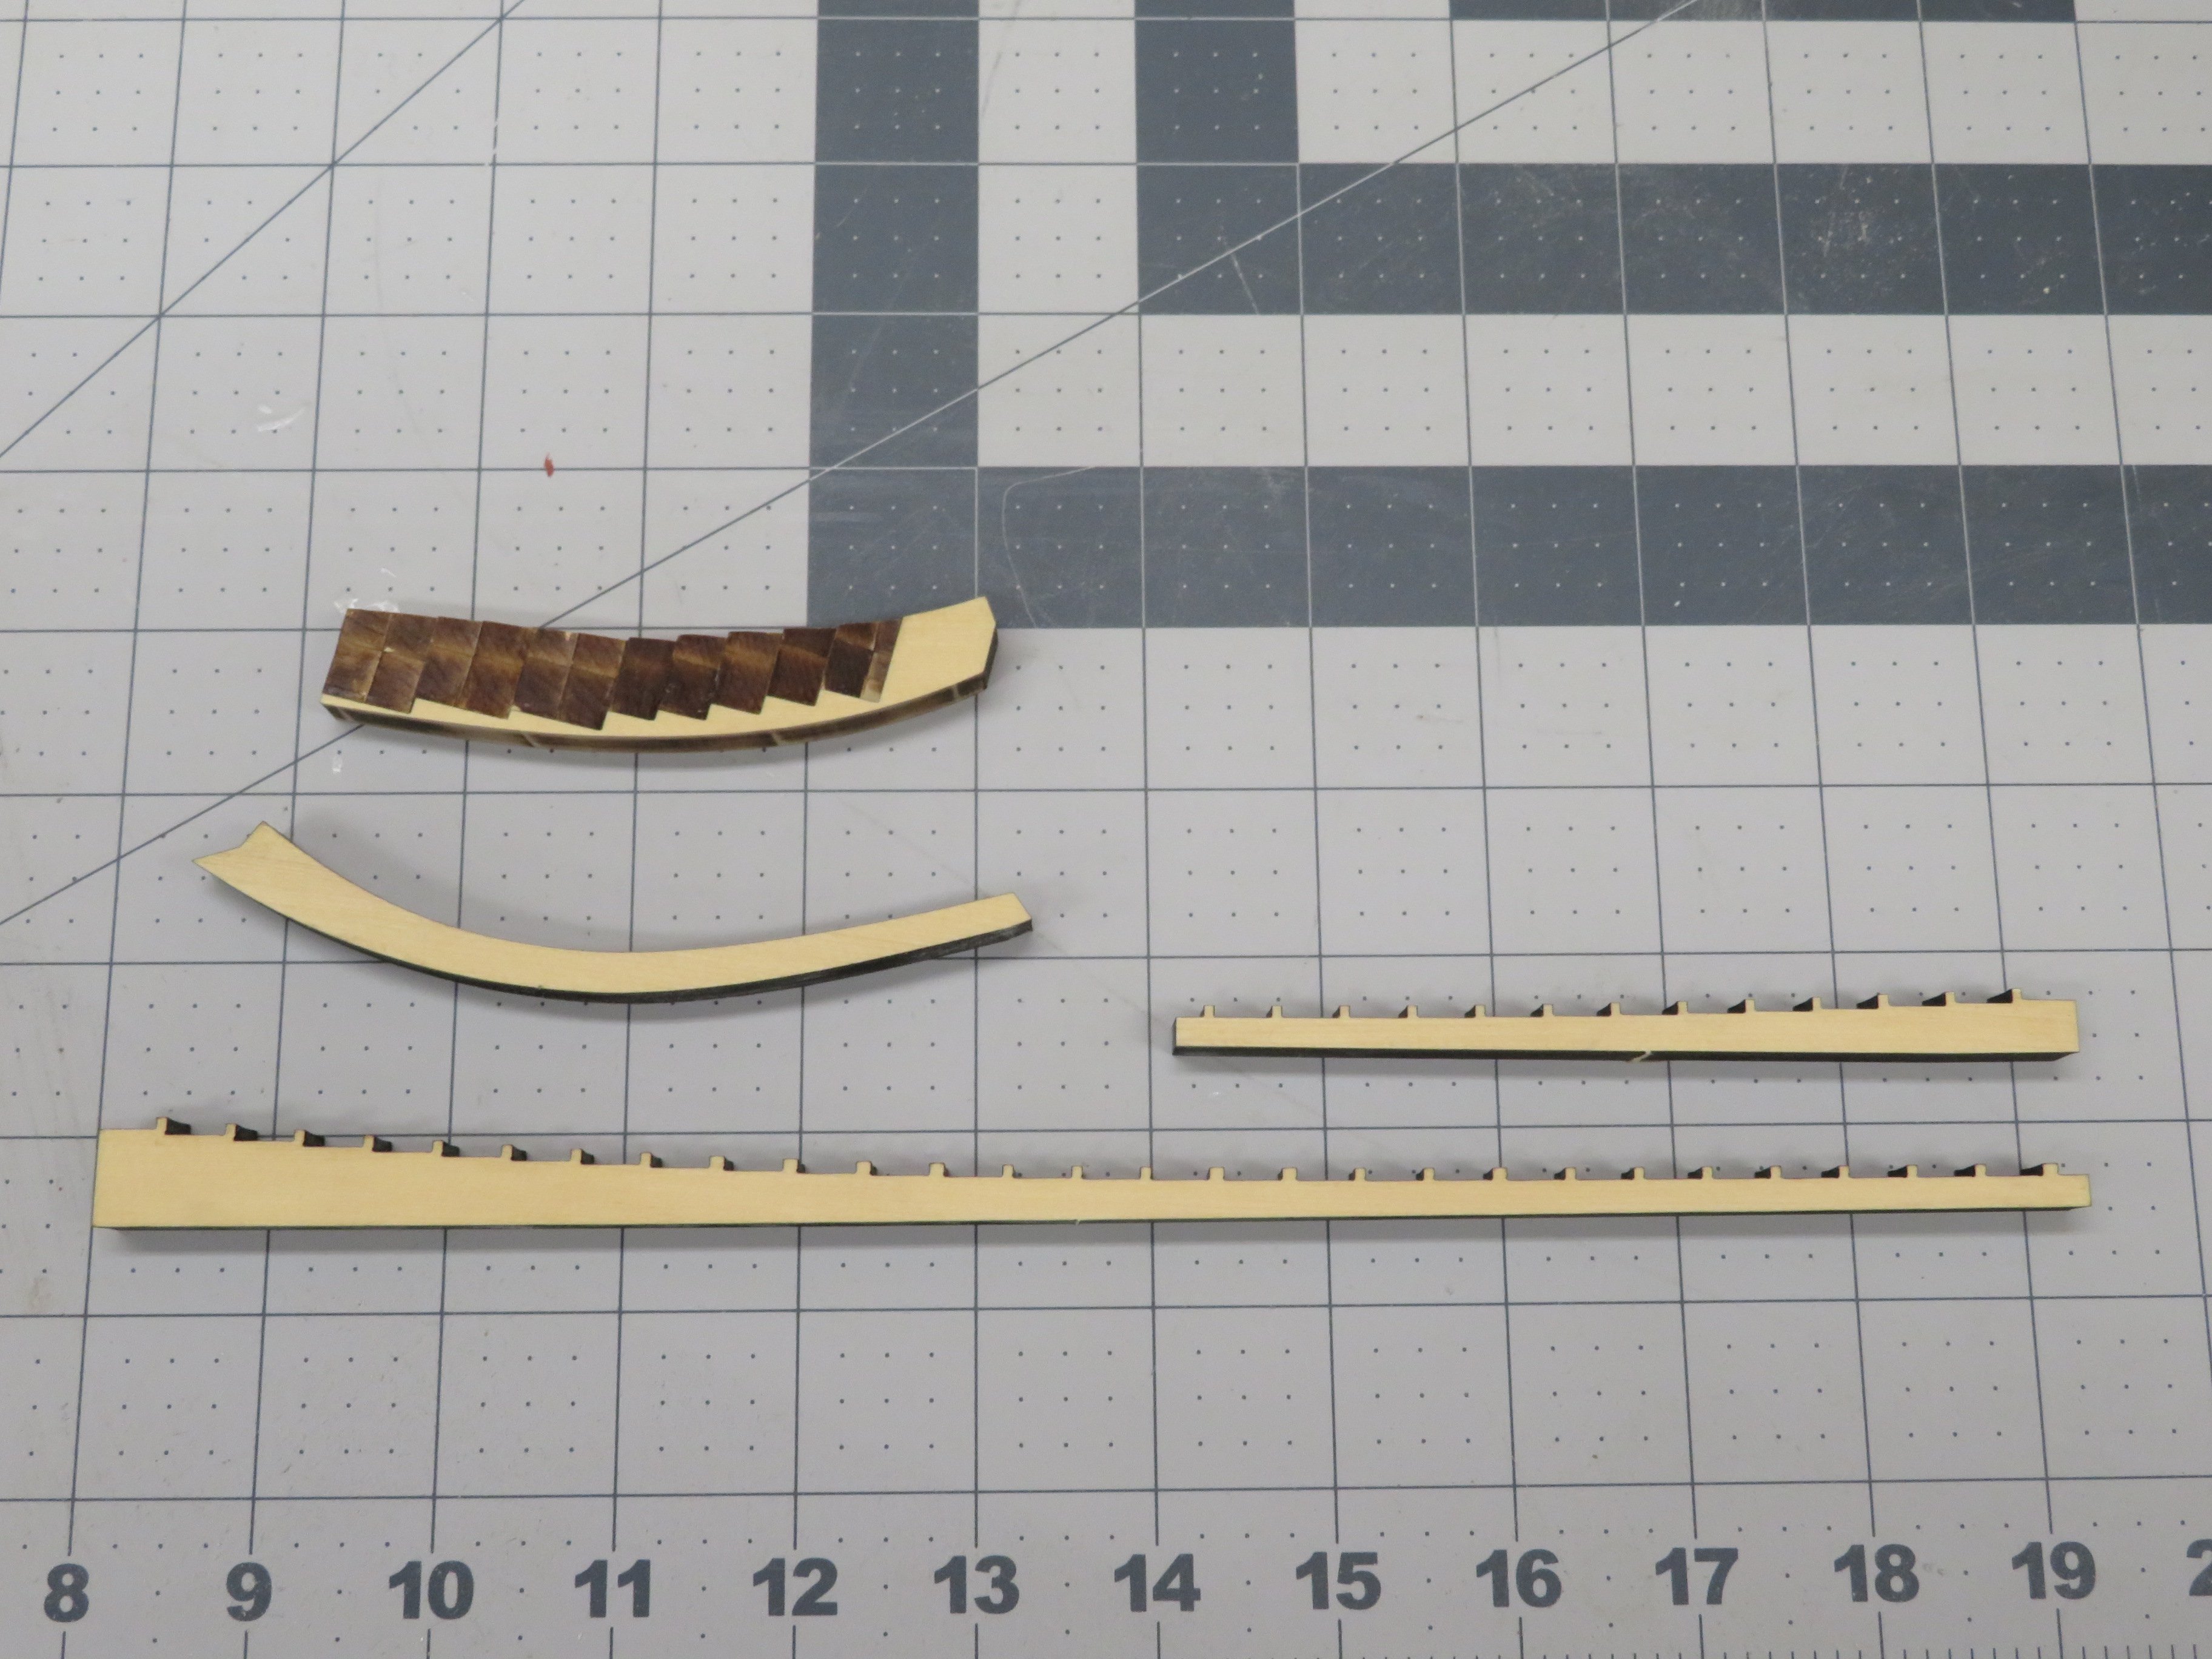
I've continued to work on the keel. I pulled the parts from the billets and prepped them. Chuck has mentioned that the wood is so thick it's pushing the laser cutting to the extreme. You can see the wedges and how the laser cut tapers. It doesn't cause any issues though. The wedges were assembled, cut to match the plans and added to the lower apron. Next I will be adding the rising wood and working on the deadwood and wedges that go on the deadwood.


- Seventynet, rcweir, Chuck and 16 others
-
19
-
-
-
Looks really nice Steve. I've put a coat of WOP on mine. I feel it helps keep it clean.
52 minutes ago, yvesvidal said:I wonder if the Wipe on Poly will make the wood darker.... Sometimes, it does that on very light wood, such as maple.
It does add a little depth to the wood but not a lot. I do put light a coat on and wipe it off right away. That seem to help retain the natural color.
- yvesvidal, Stuntflyer and CaptMorgan
-
3
-
4 hours ago, Chuck said:
I hope to see many of you this weekend at the New London show.
What fantastic workmanship. I can't to see all the work you've completed since last year's show!
- mtaylor, Chuck and FrankWouts
-
3
-
21 hours ago, glbarlow said:
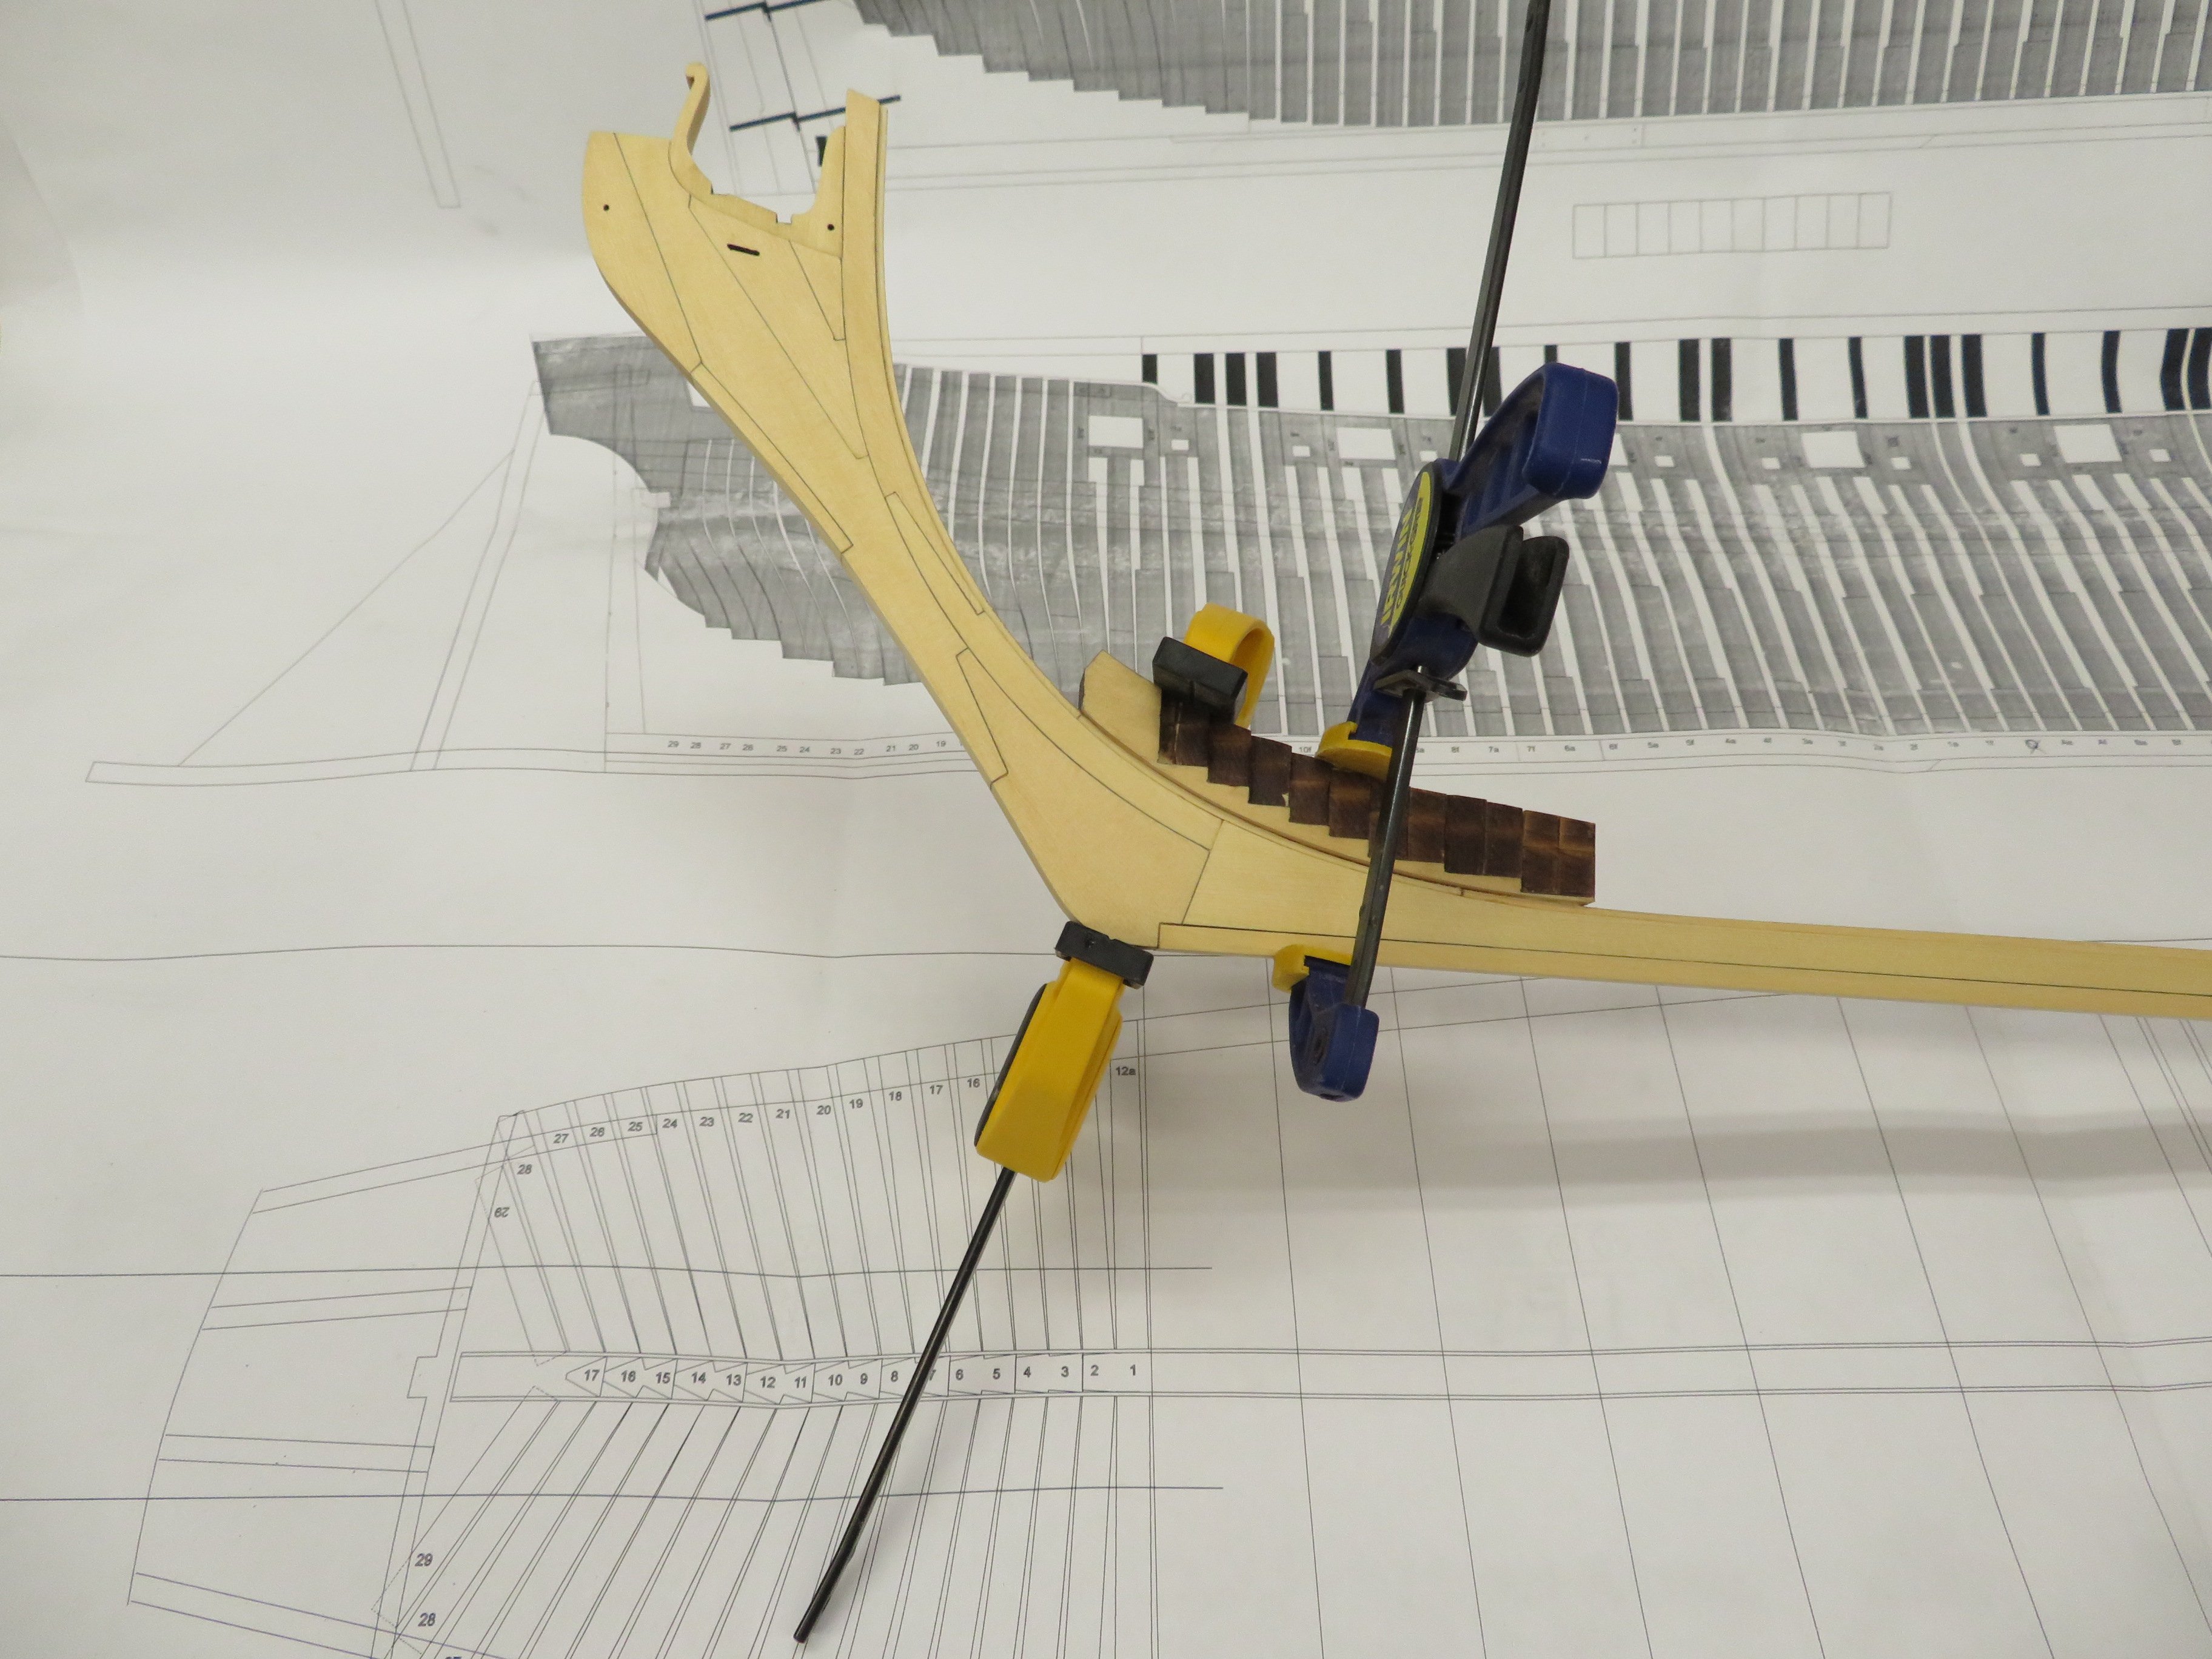
The stem looks so cool on Syren models.
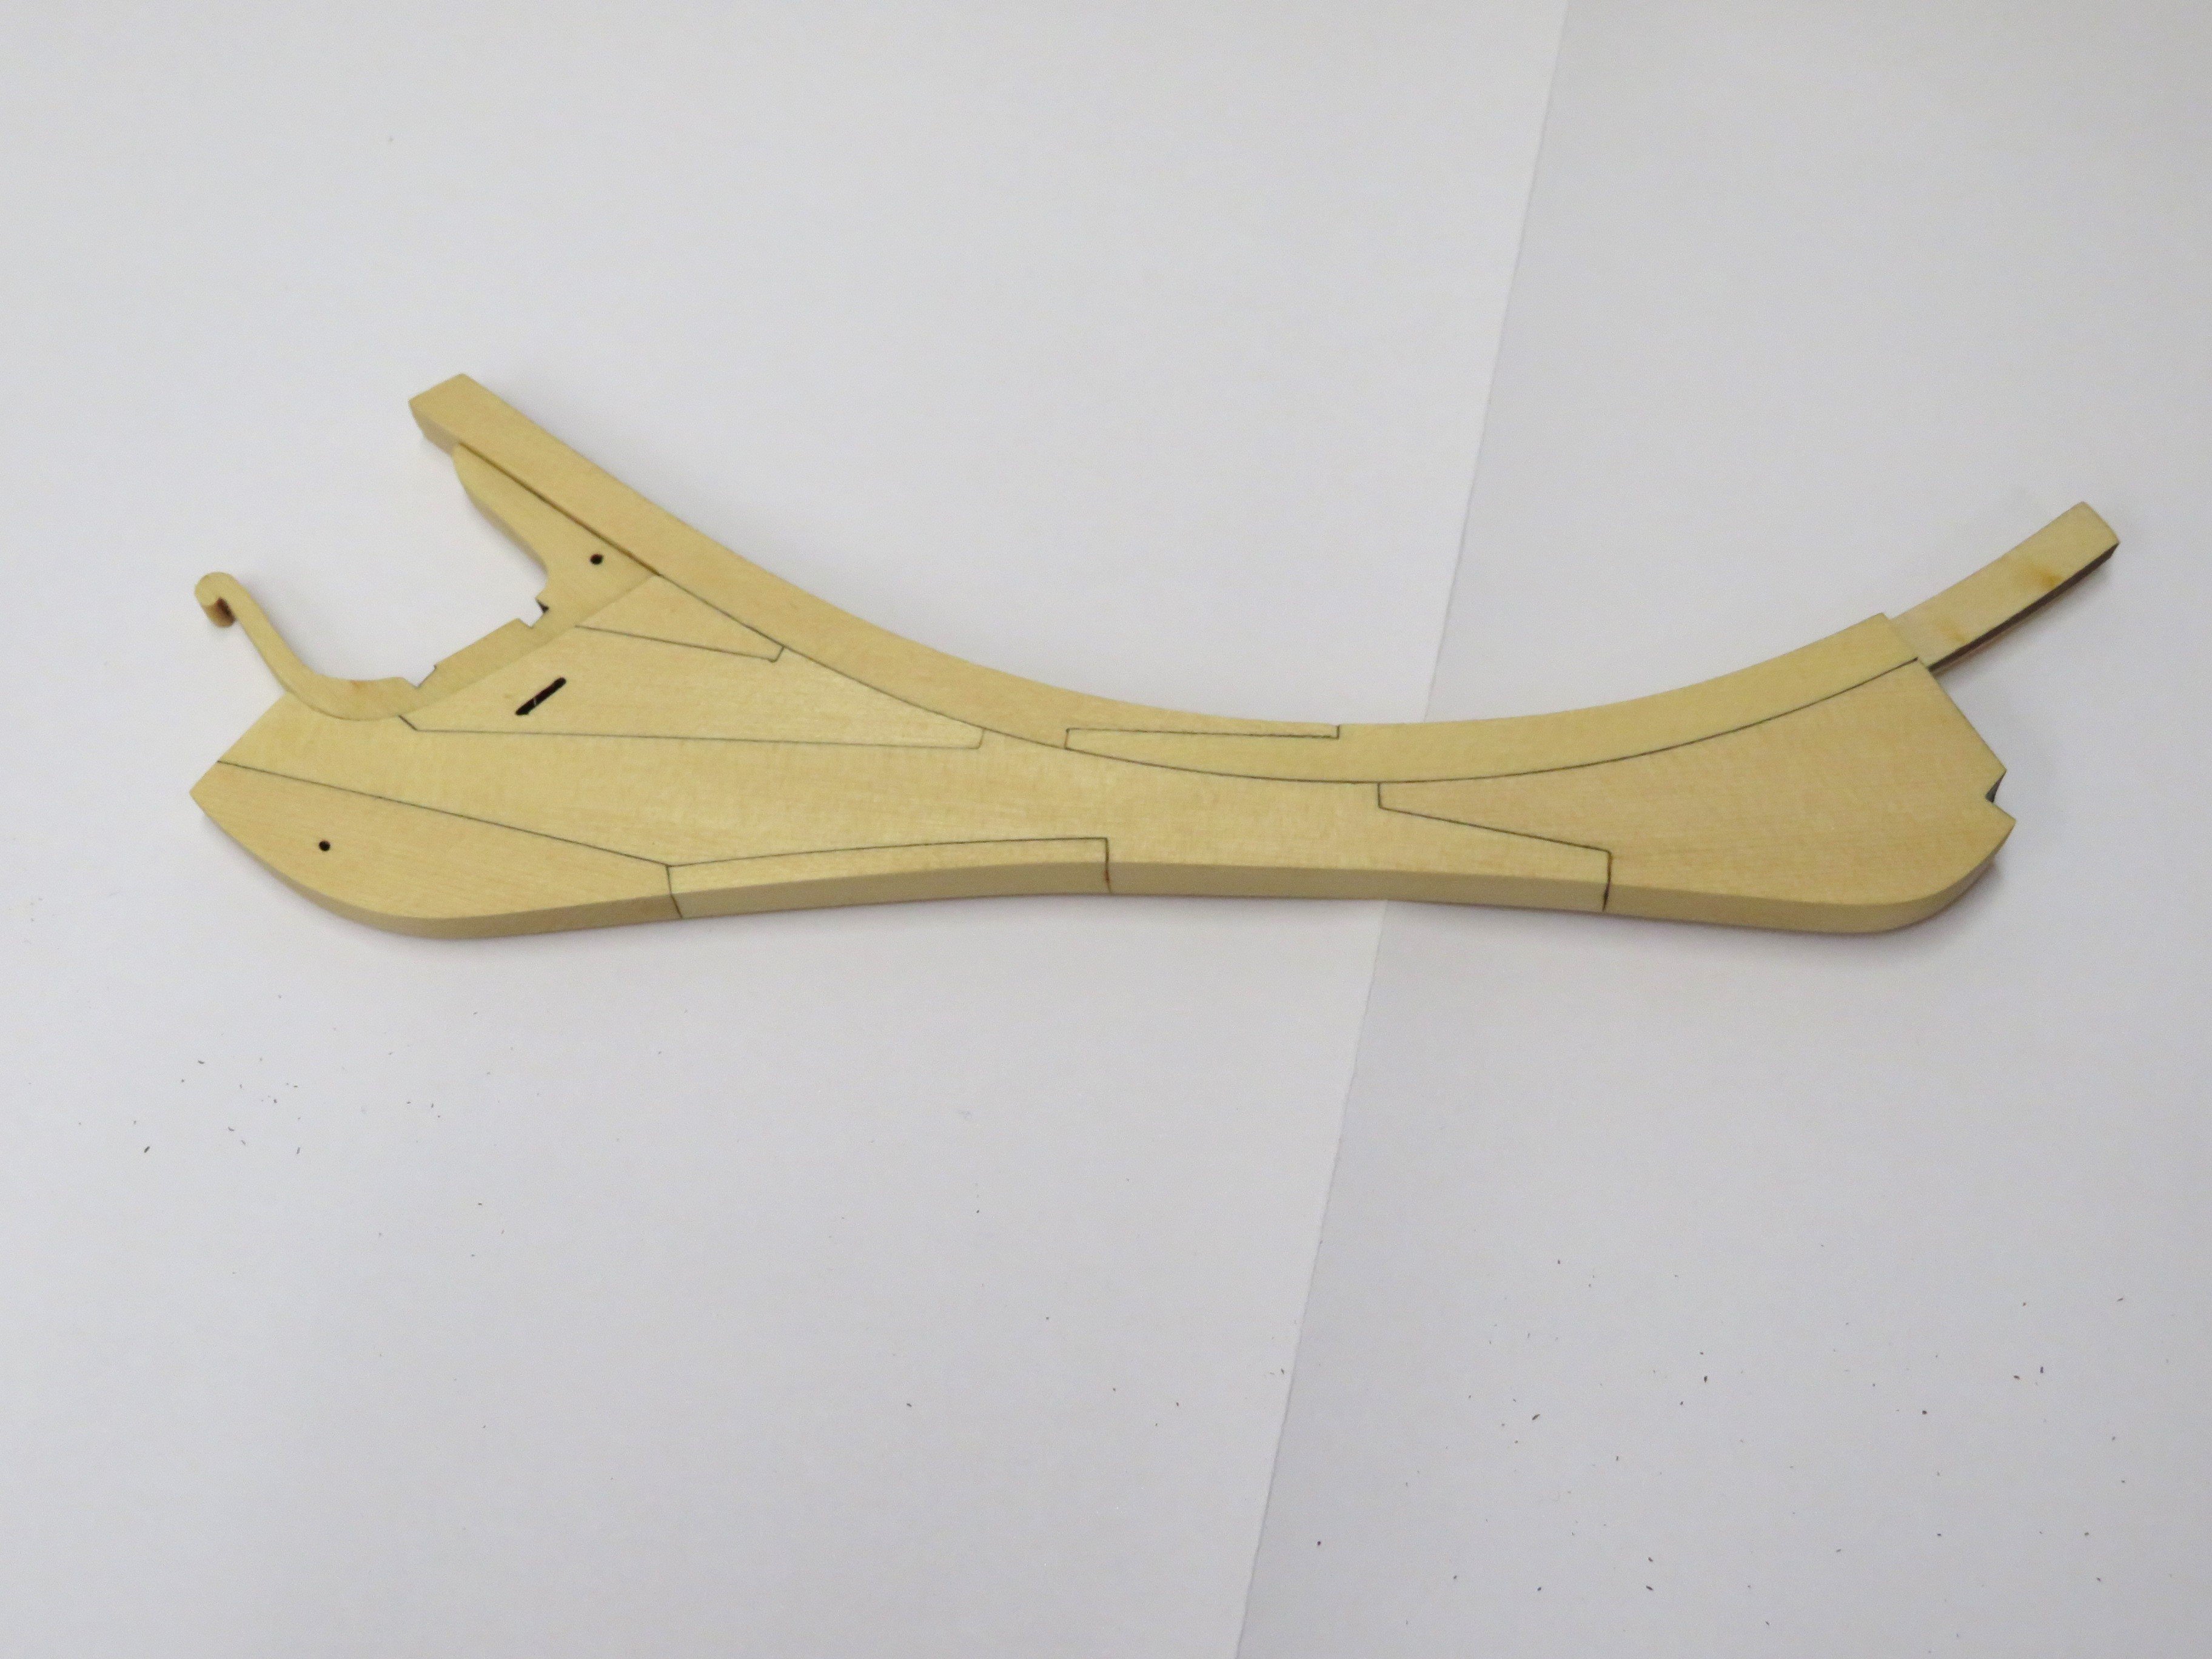
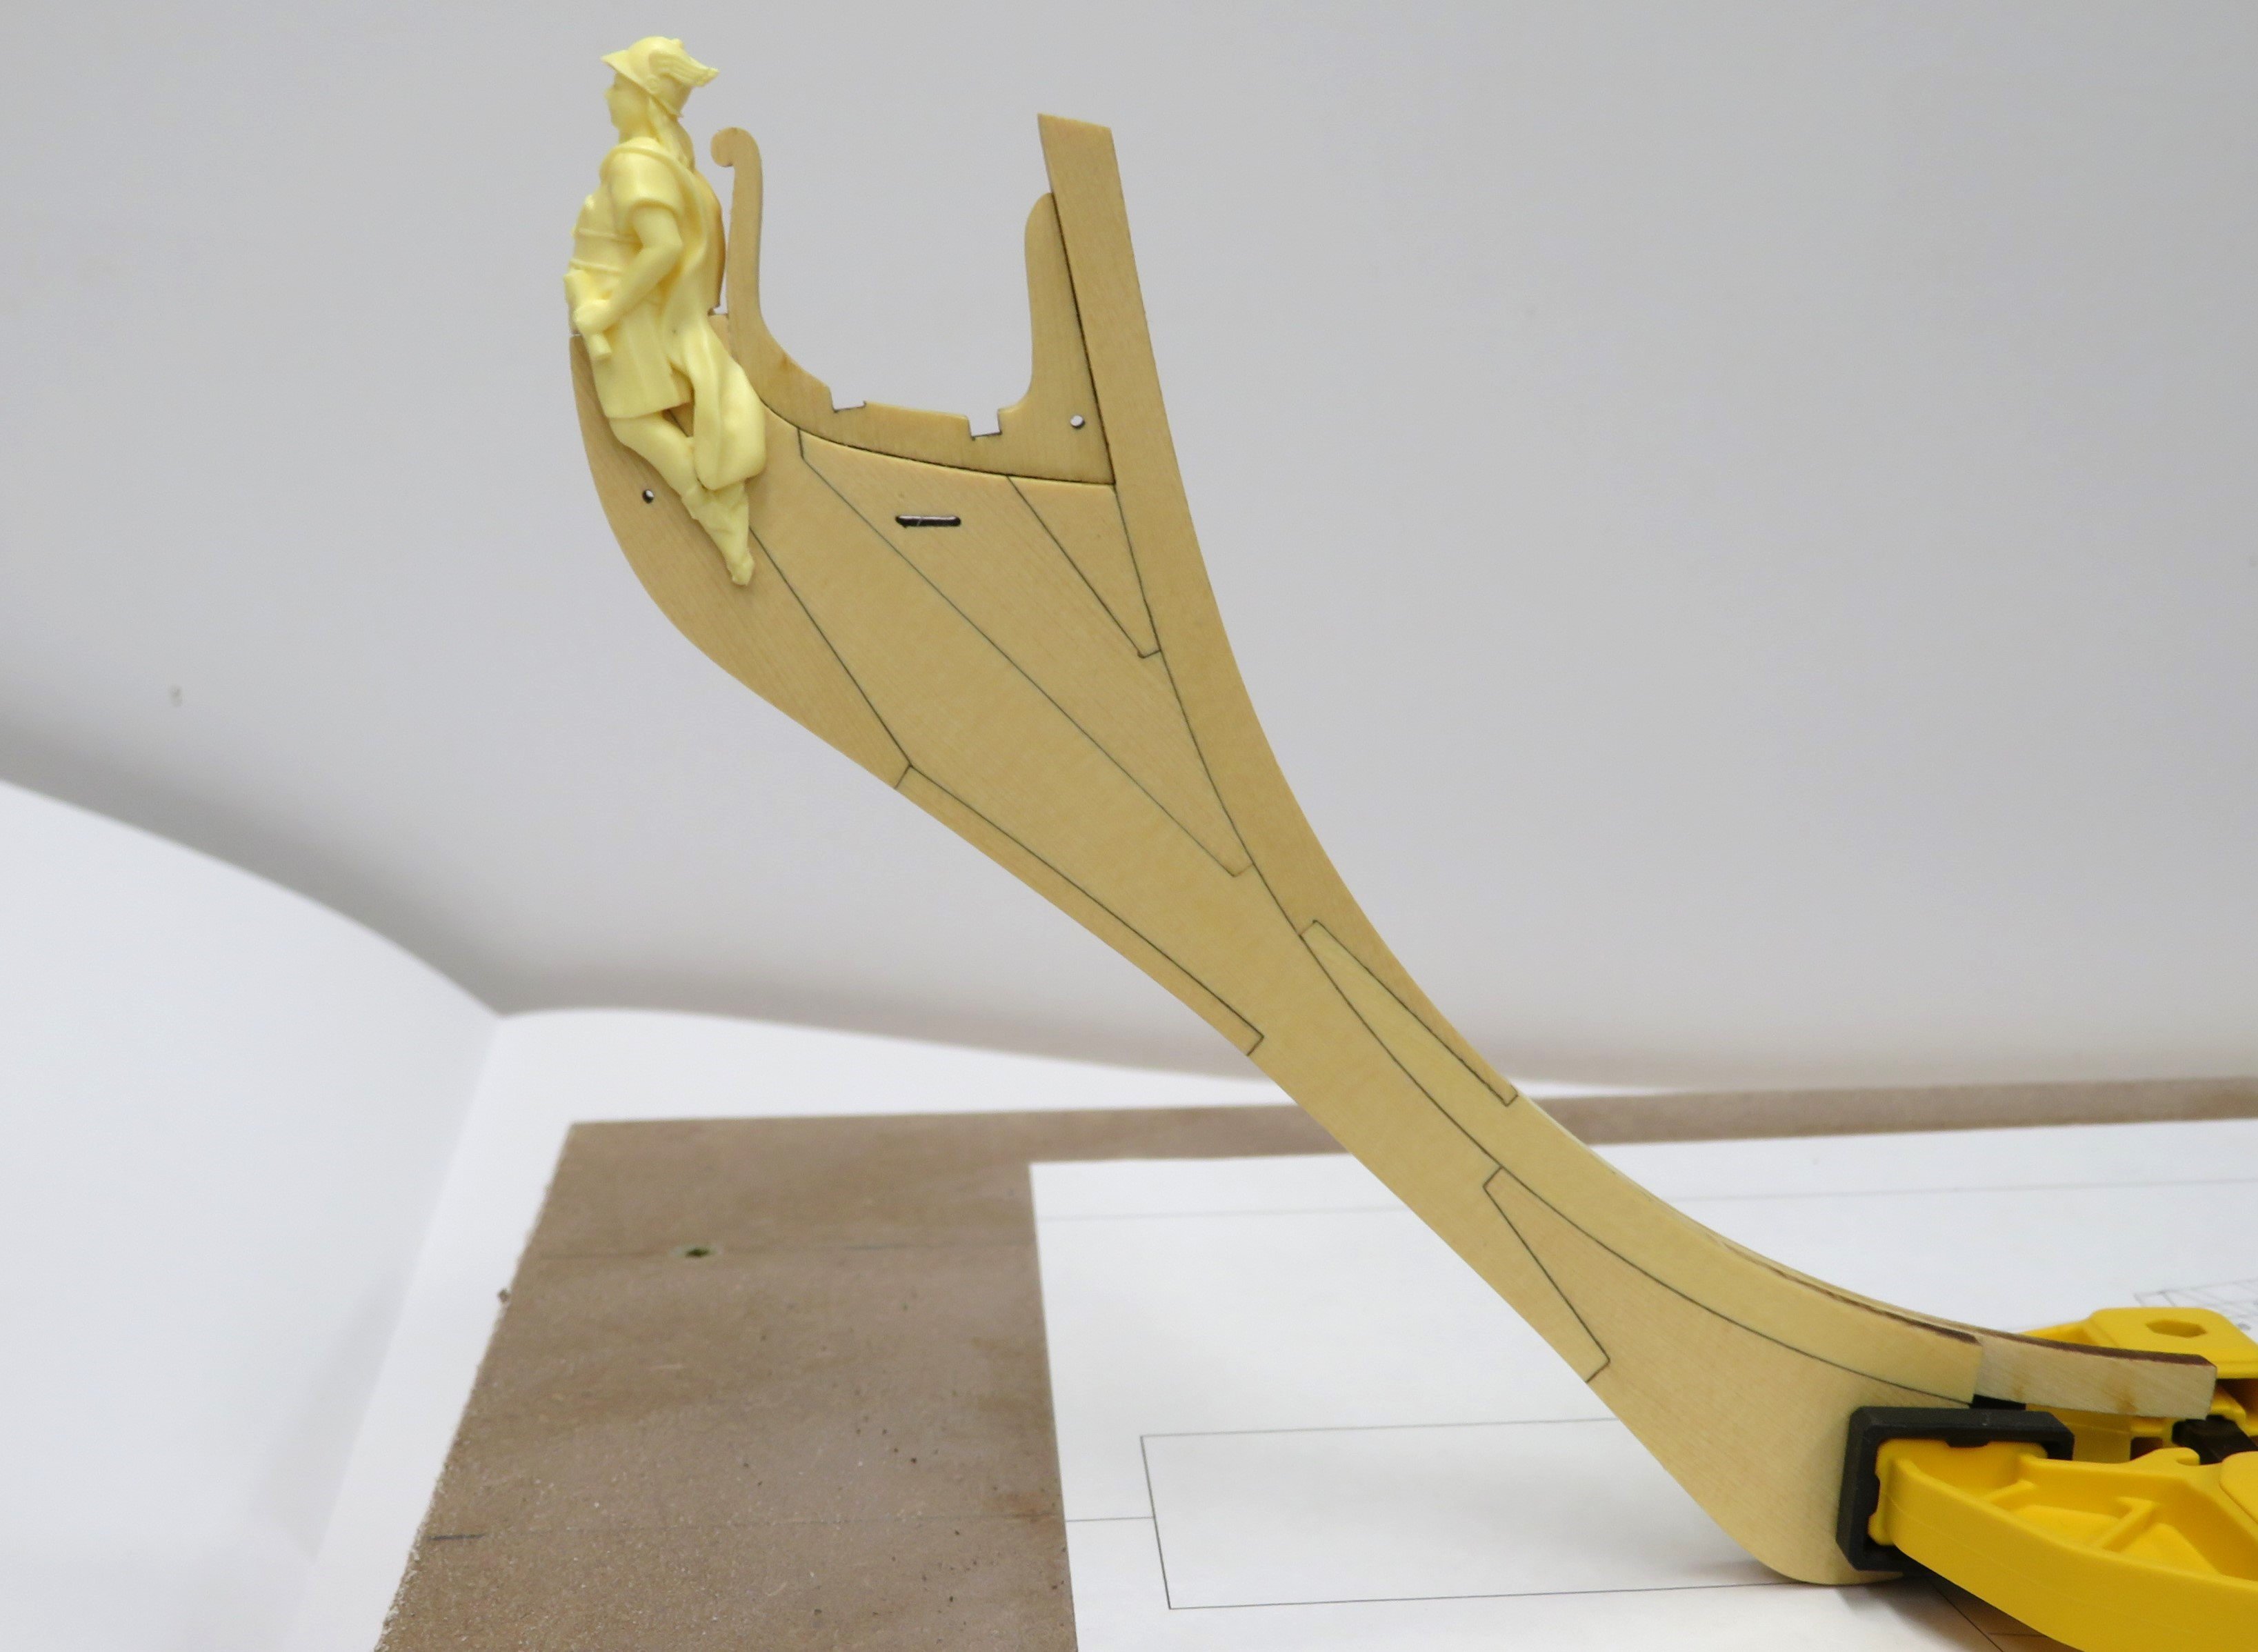
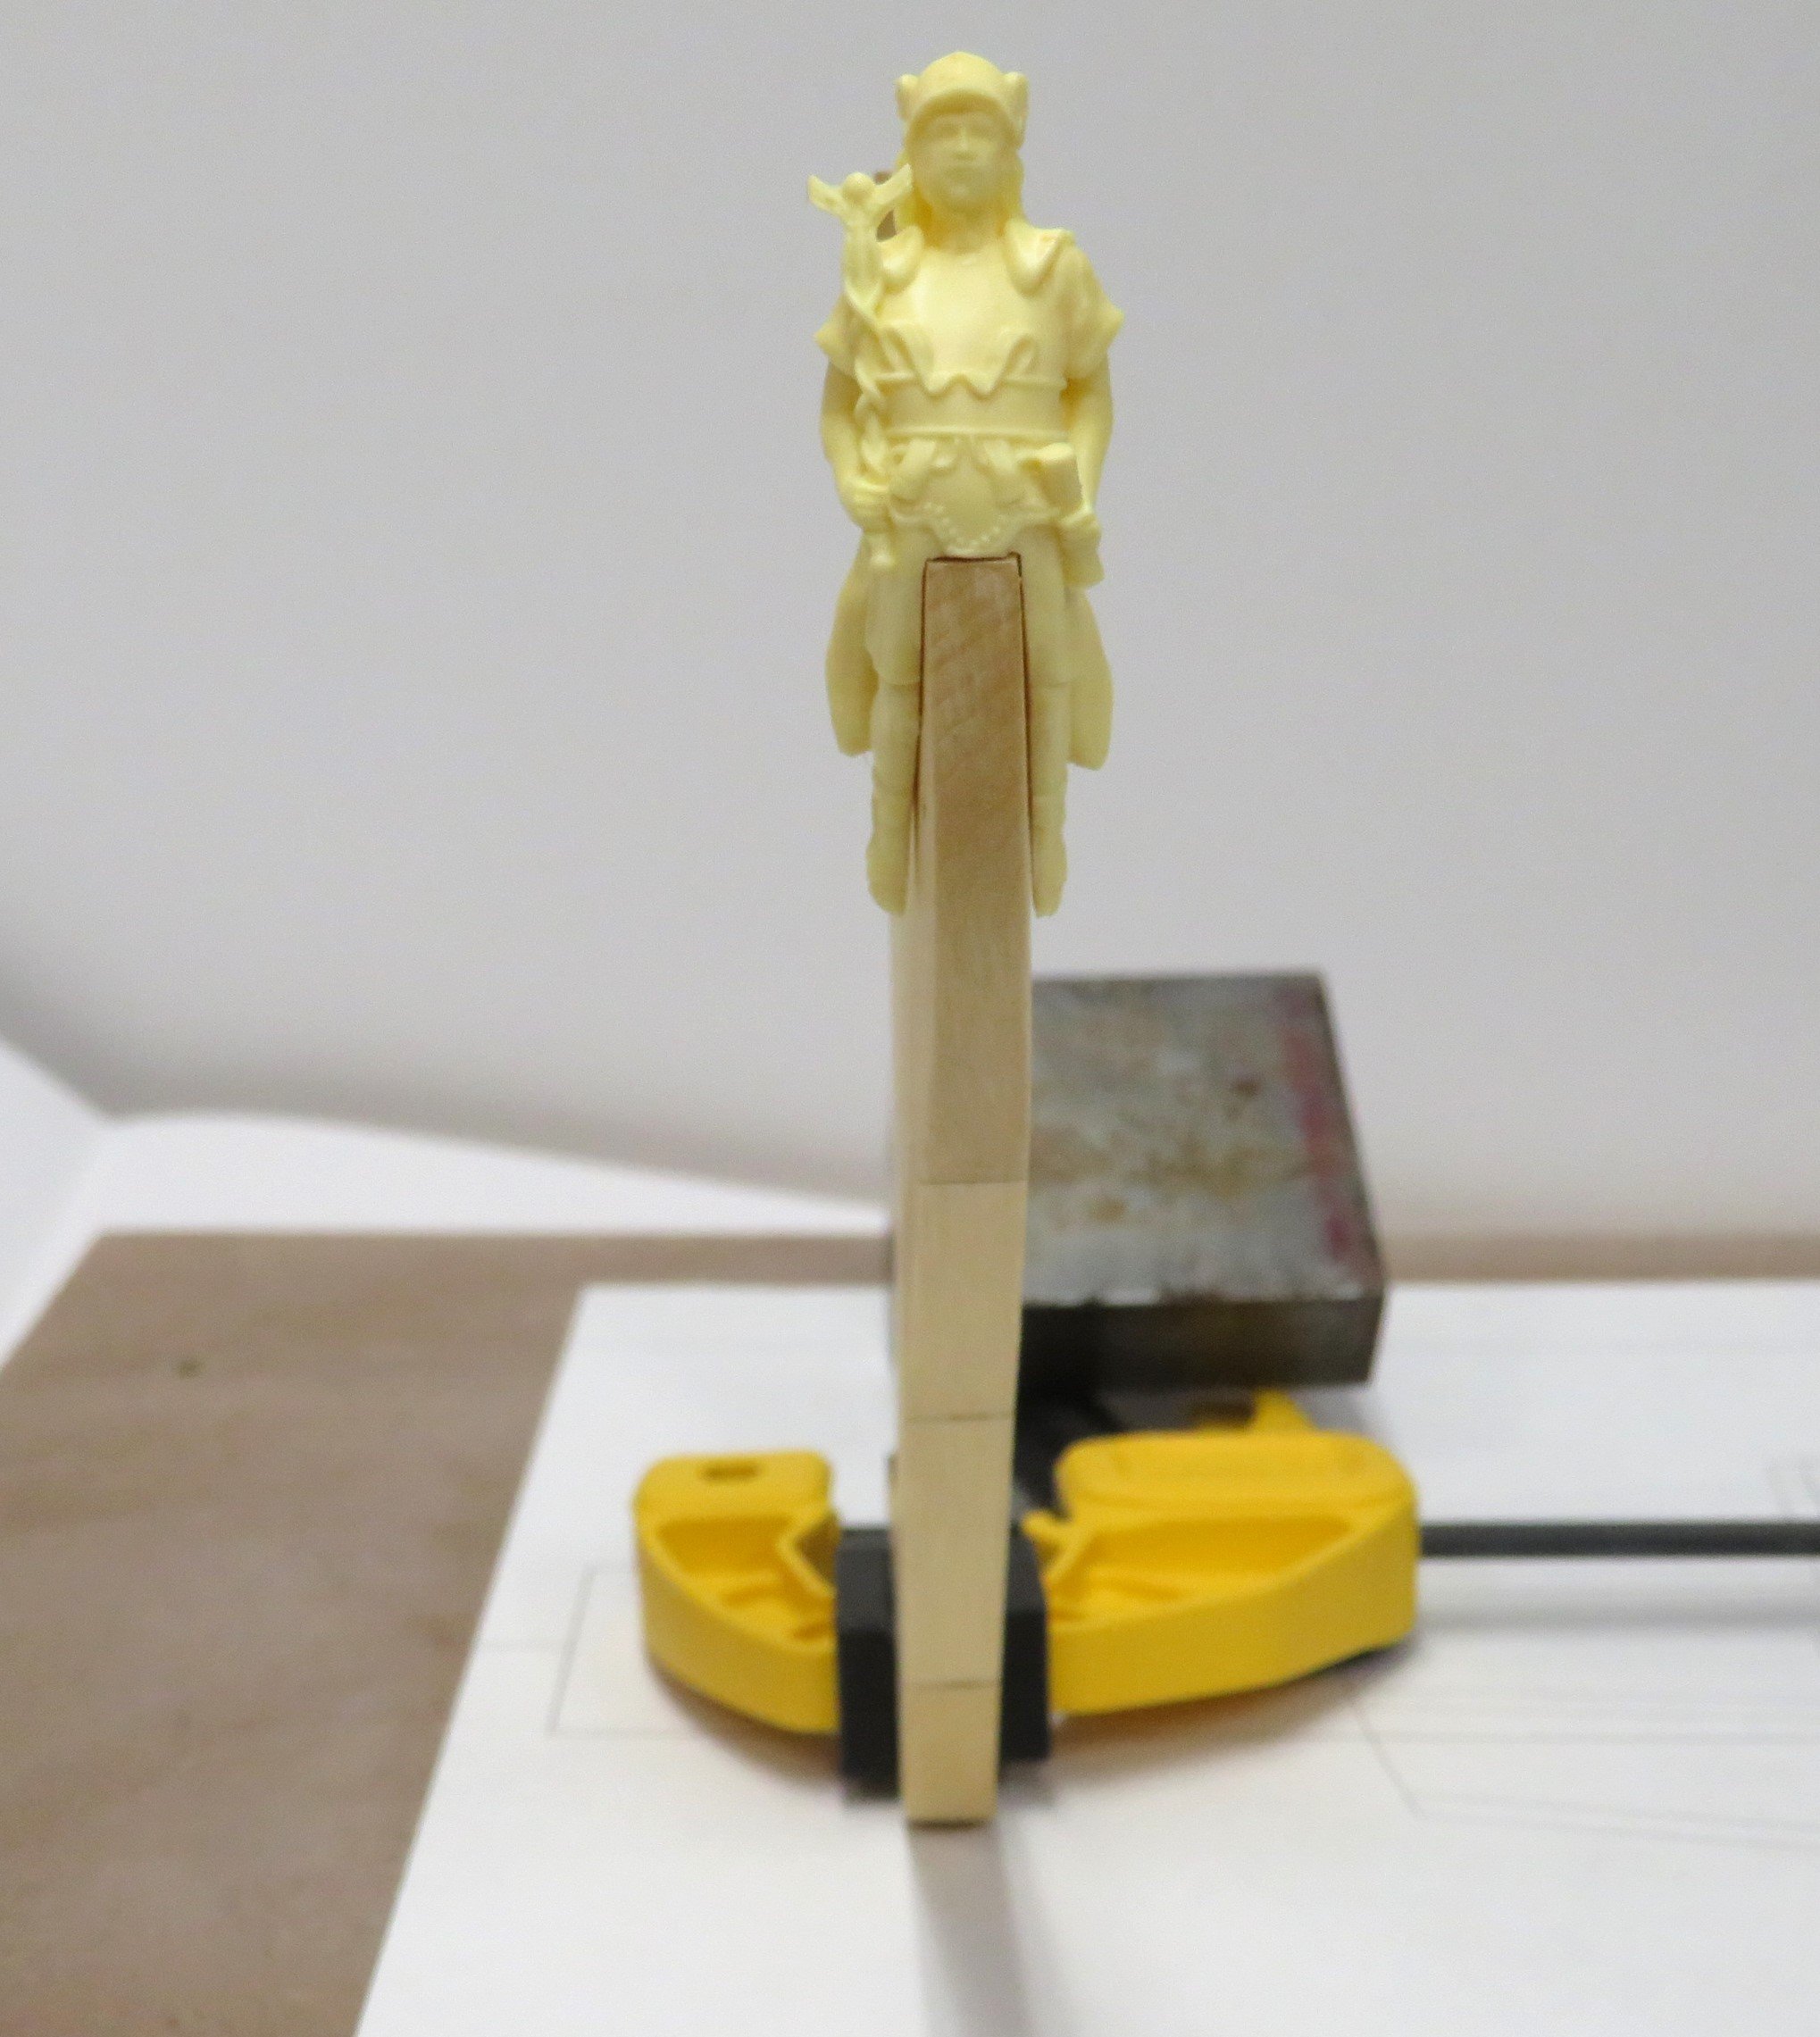
And a lot of fun to assemble.
- JeffT and Ryland Craze
-
2
-
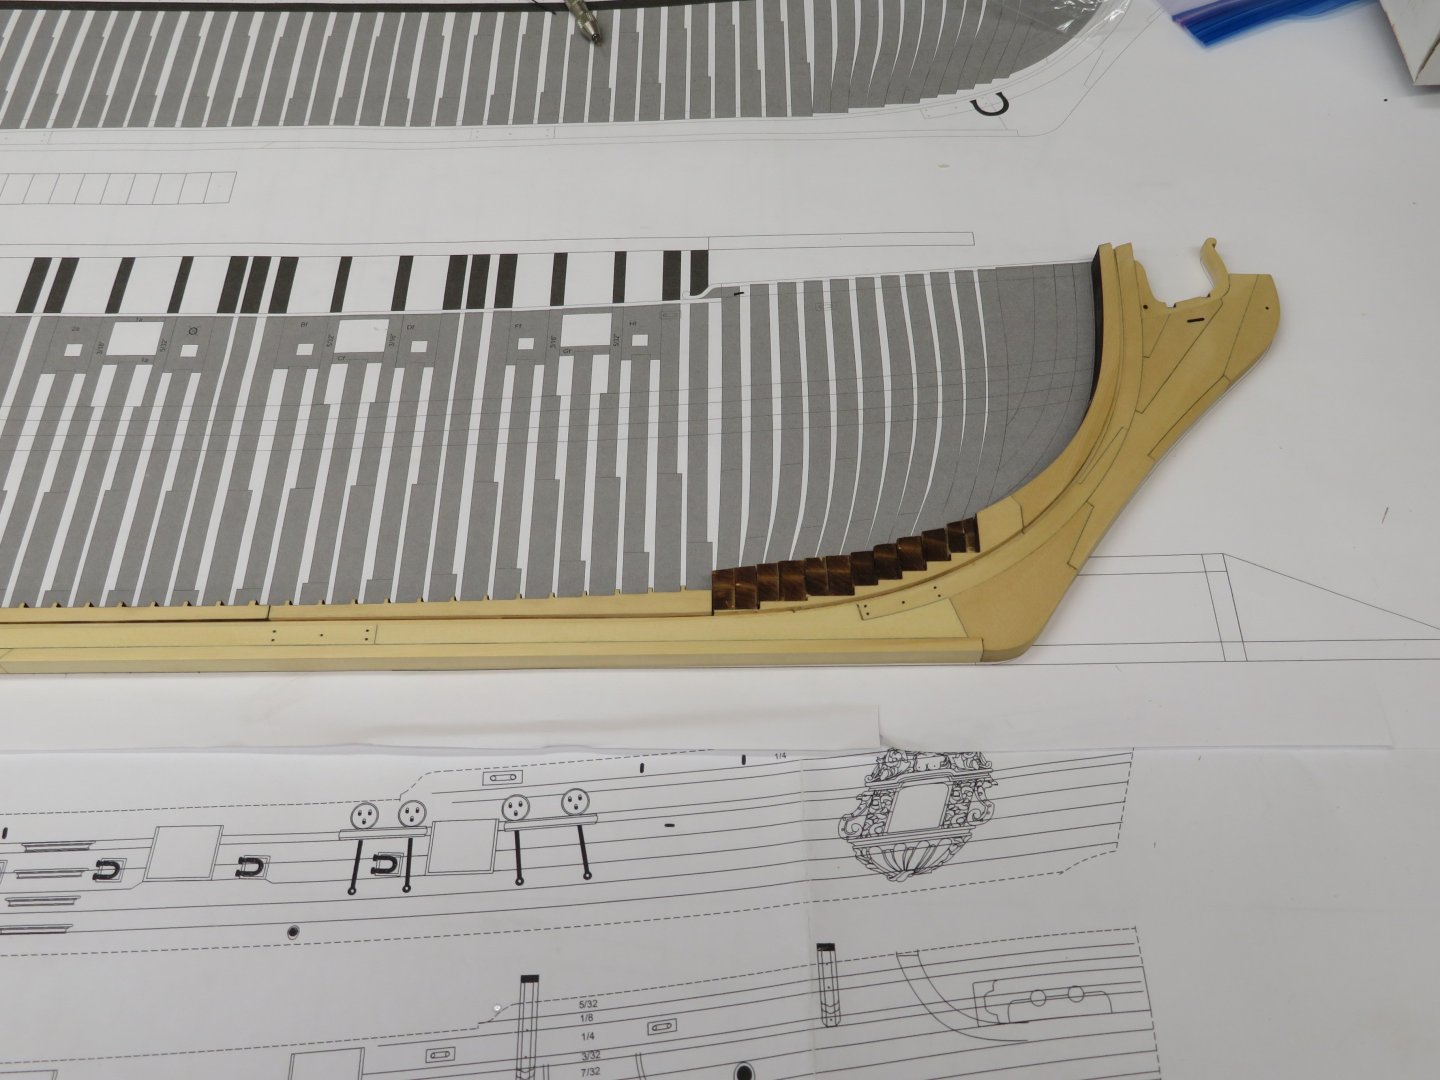
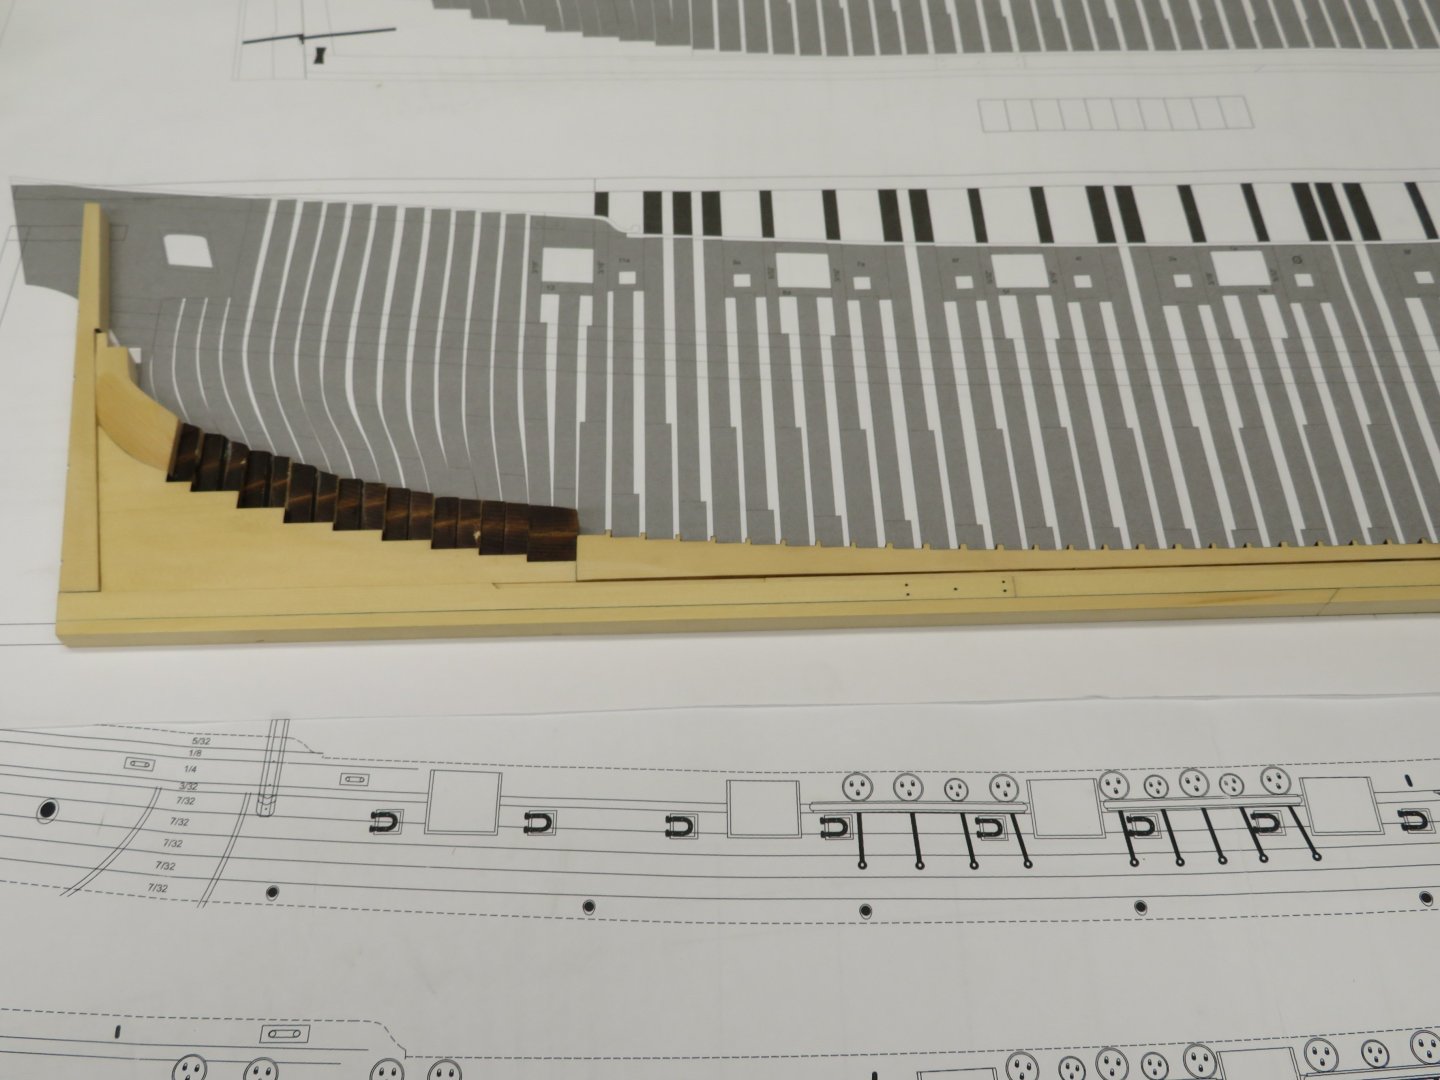
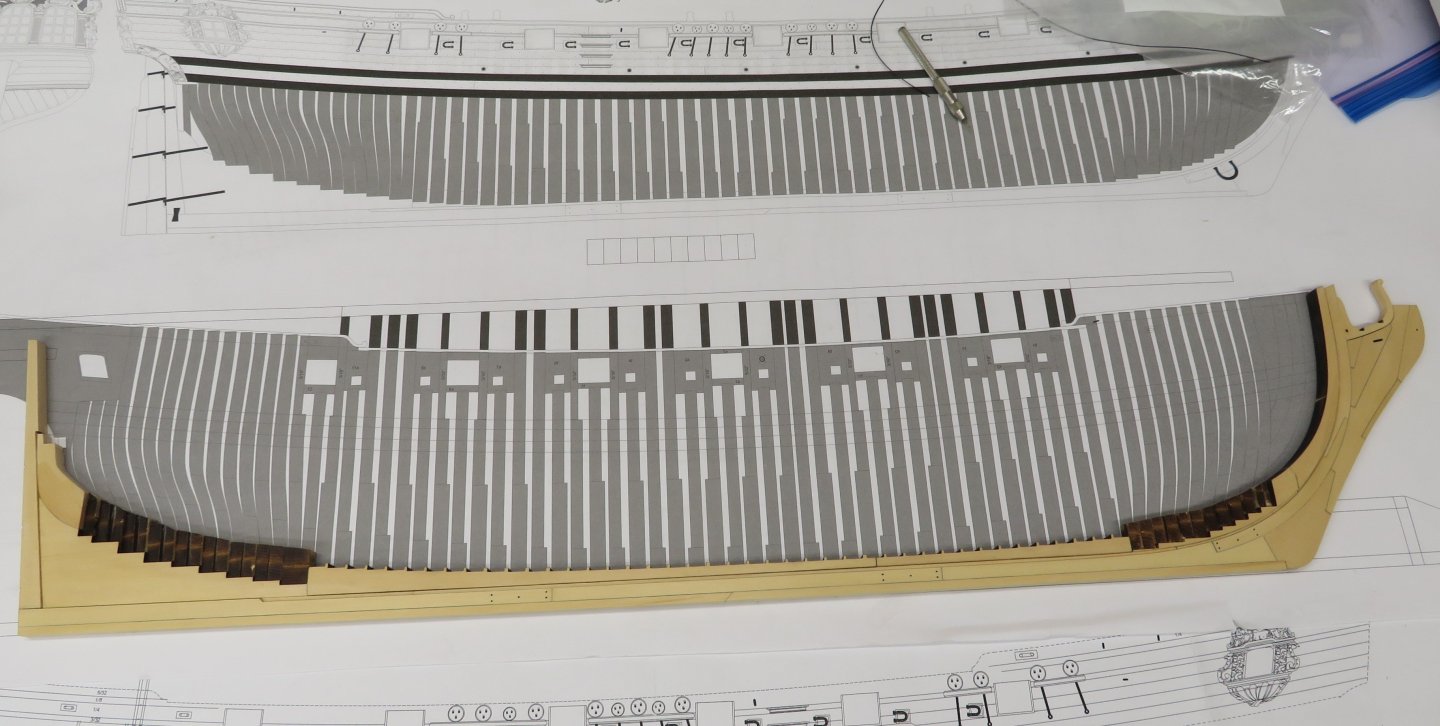
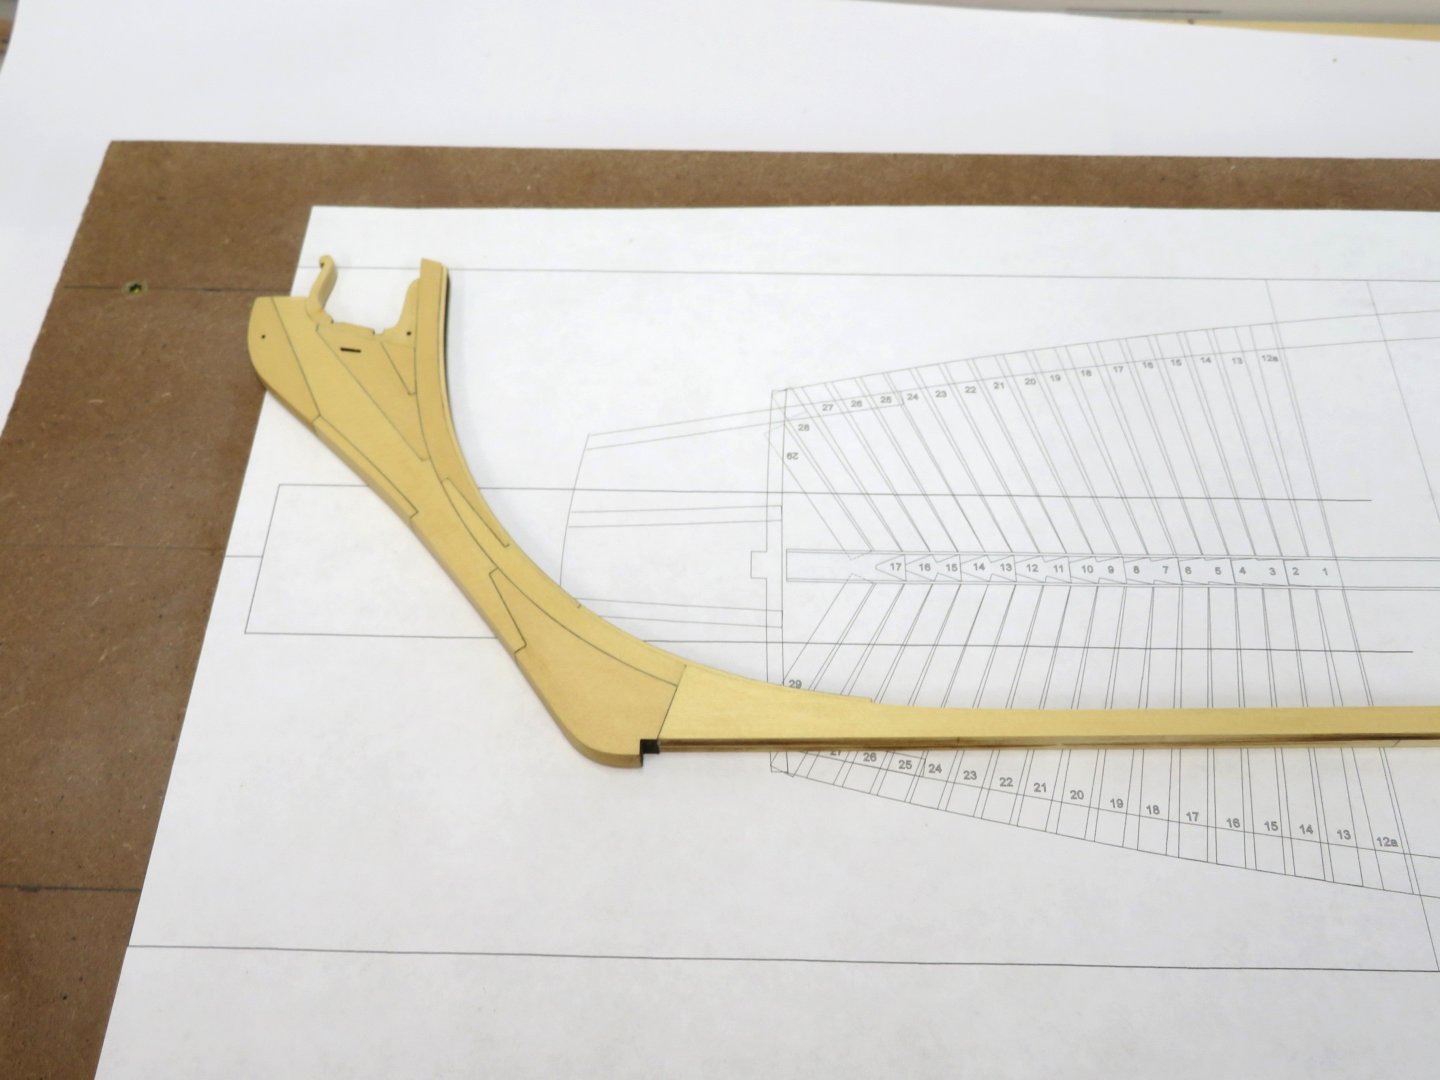
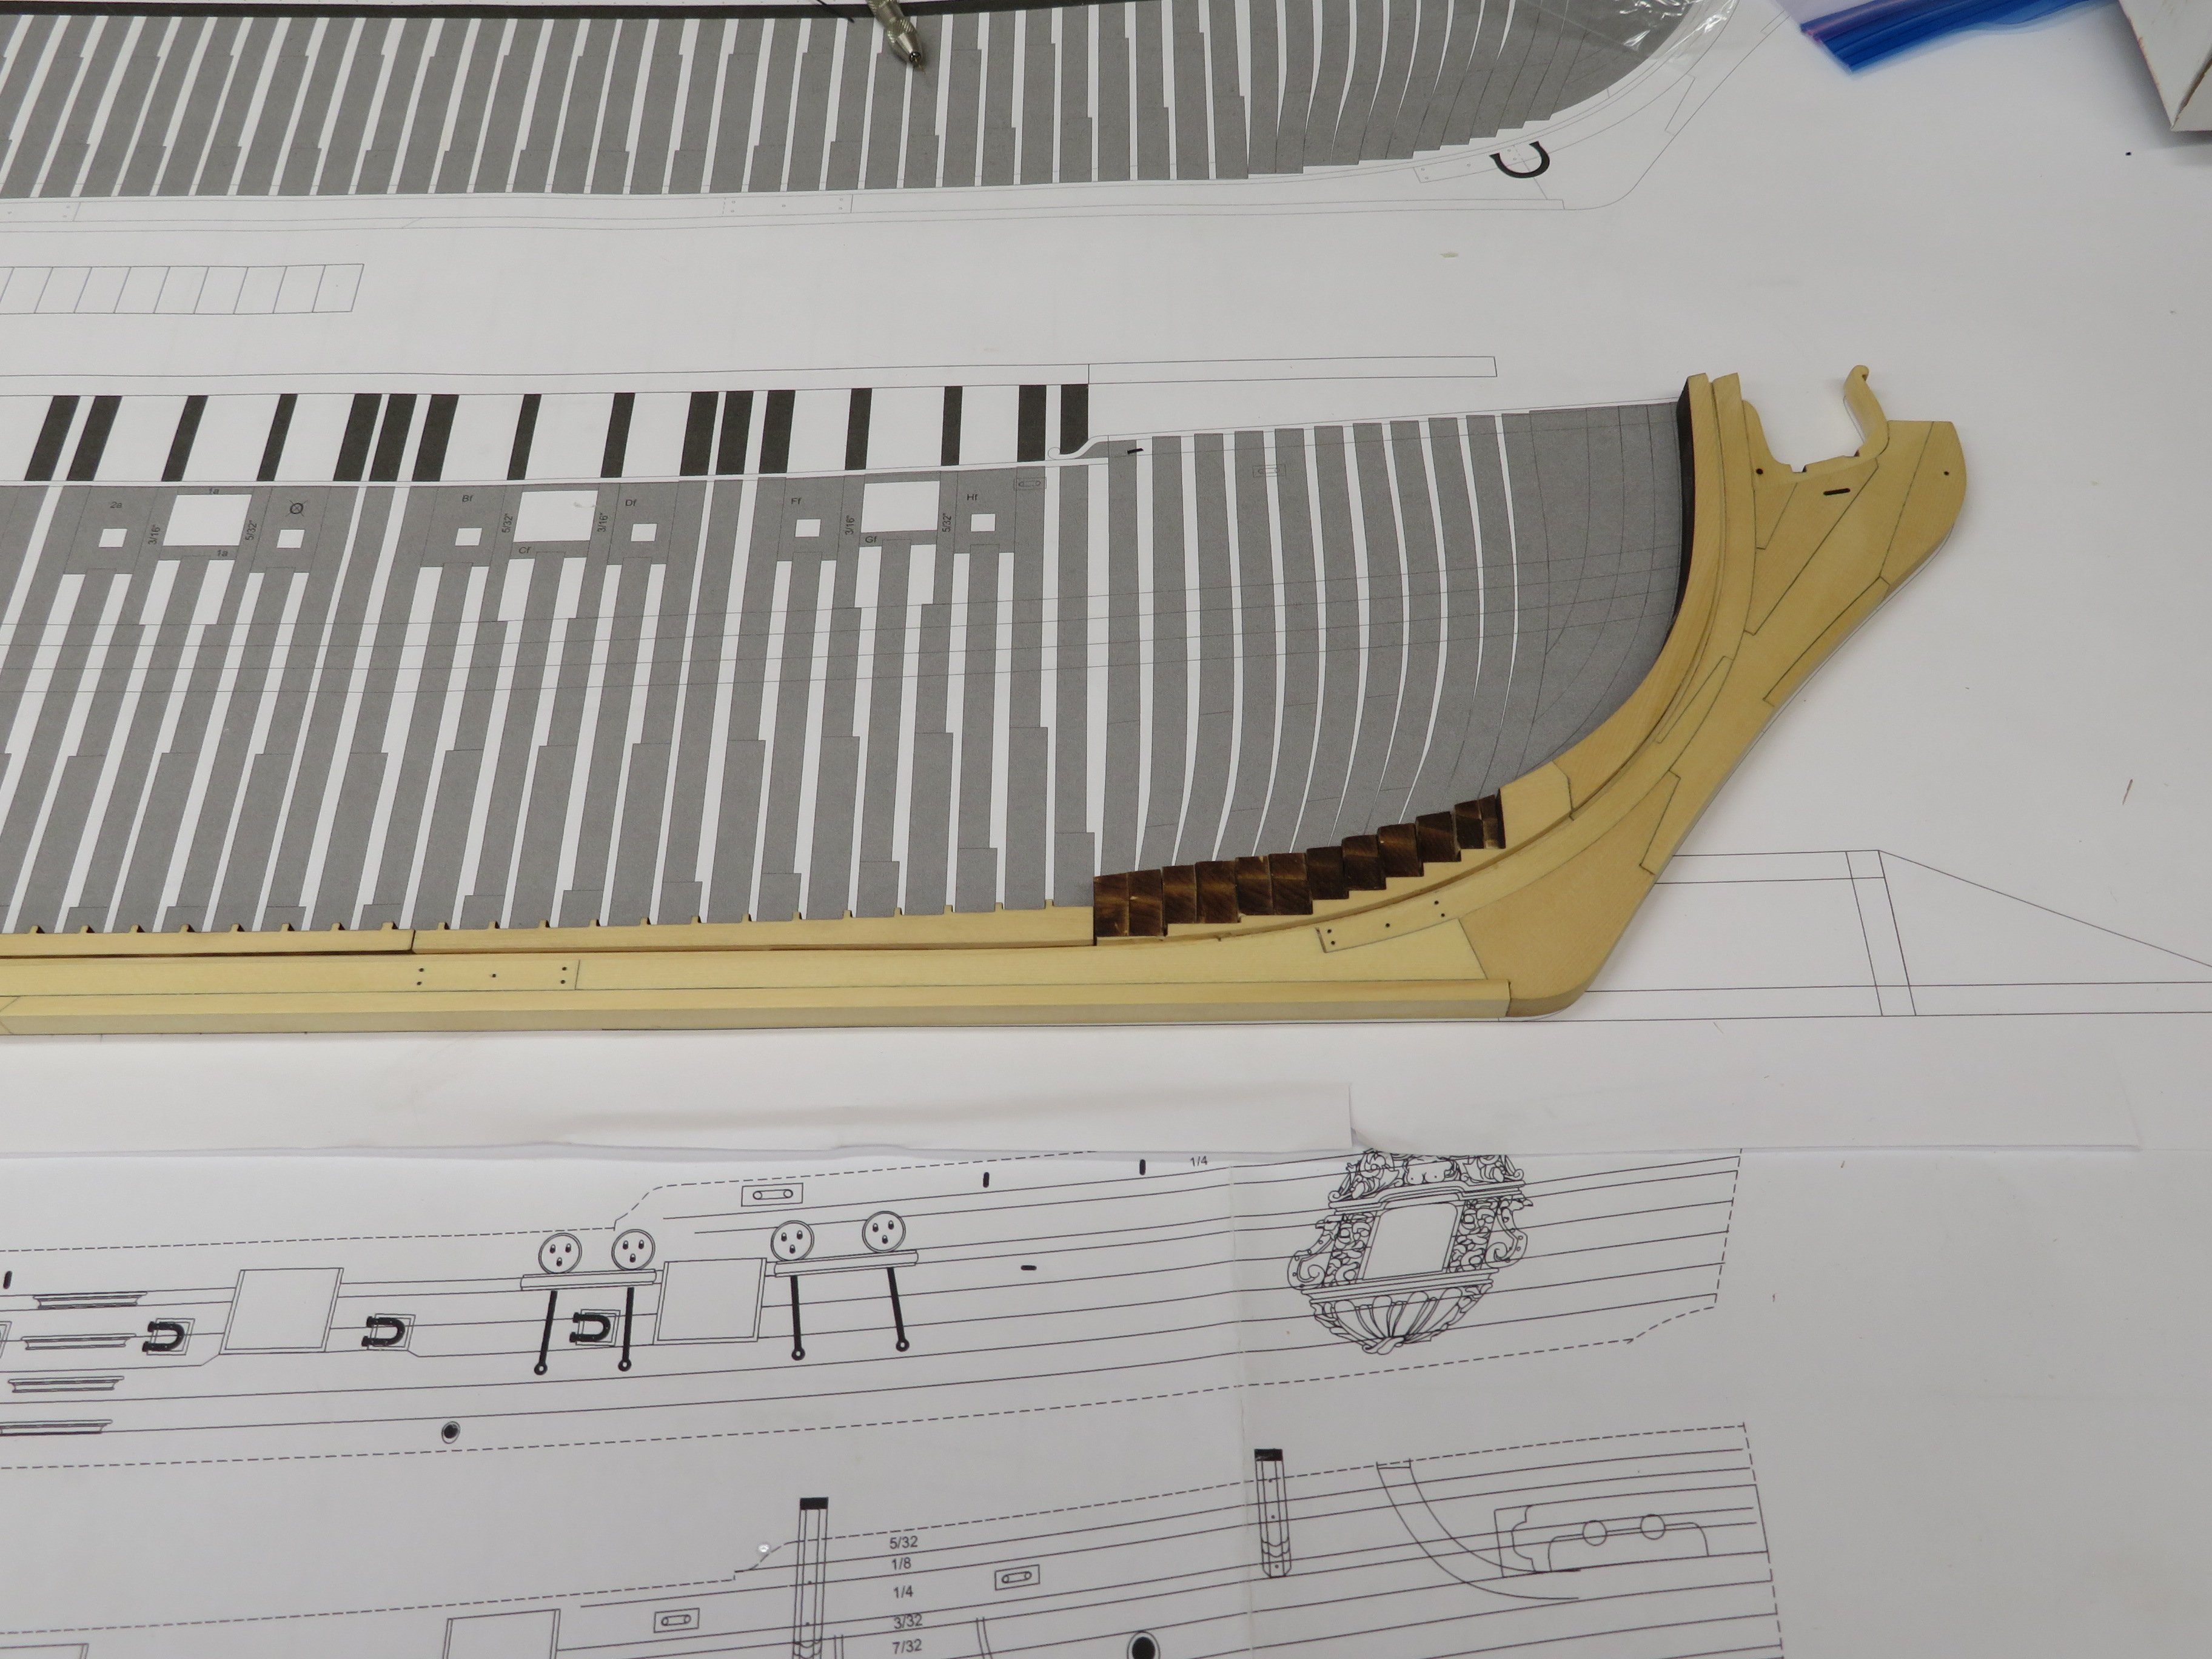
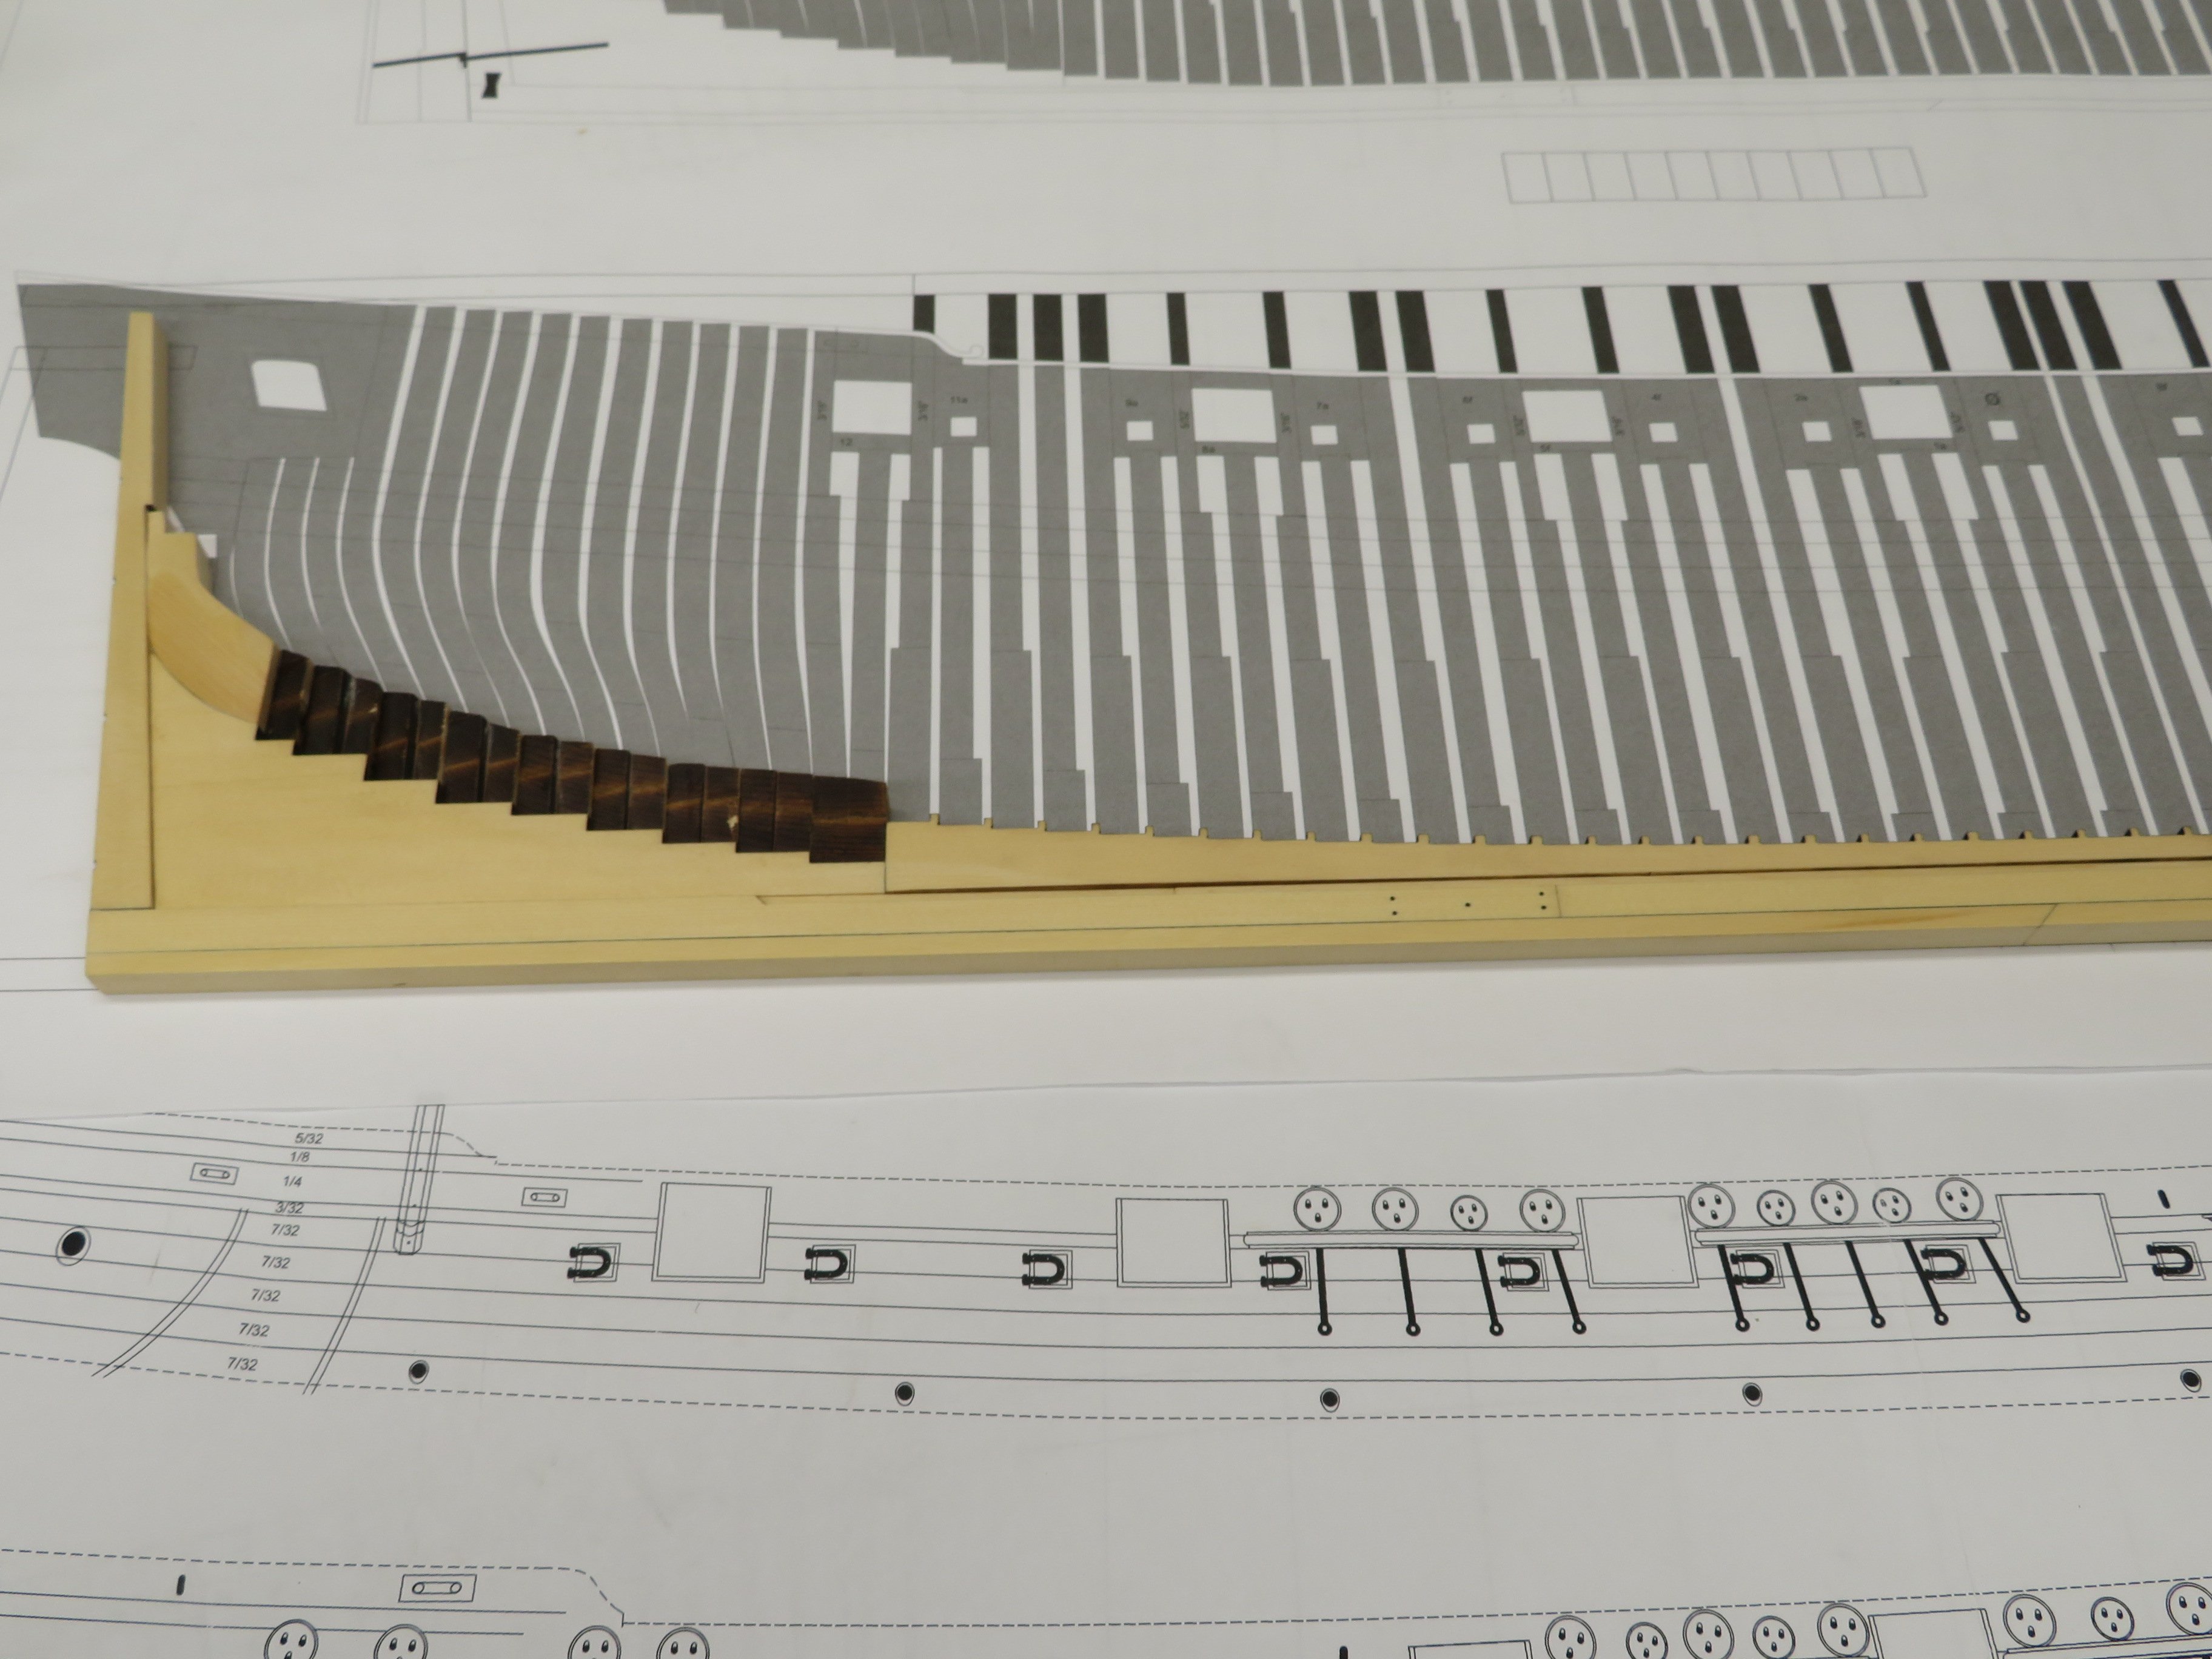
Moving along I've finished the boxing joint and the first parts of the keel.
Next I'll add the false keel and the pieces on top of the keel for the rabbet strip.

- Seventynet, VTHokiEE, Thukydides and 19 others
-
22
-
That looks sooooooo nice.
- mtaylor, Thukydides, Freebird and 3 others
-
6
-
Thank you Mike and Chuck.
10 hours ago, glbarlow said:Once again I’ll live vicariously through your work.
Thanks Glenn. And I get to relive Winnie by watching your fine work!
-
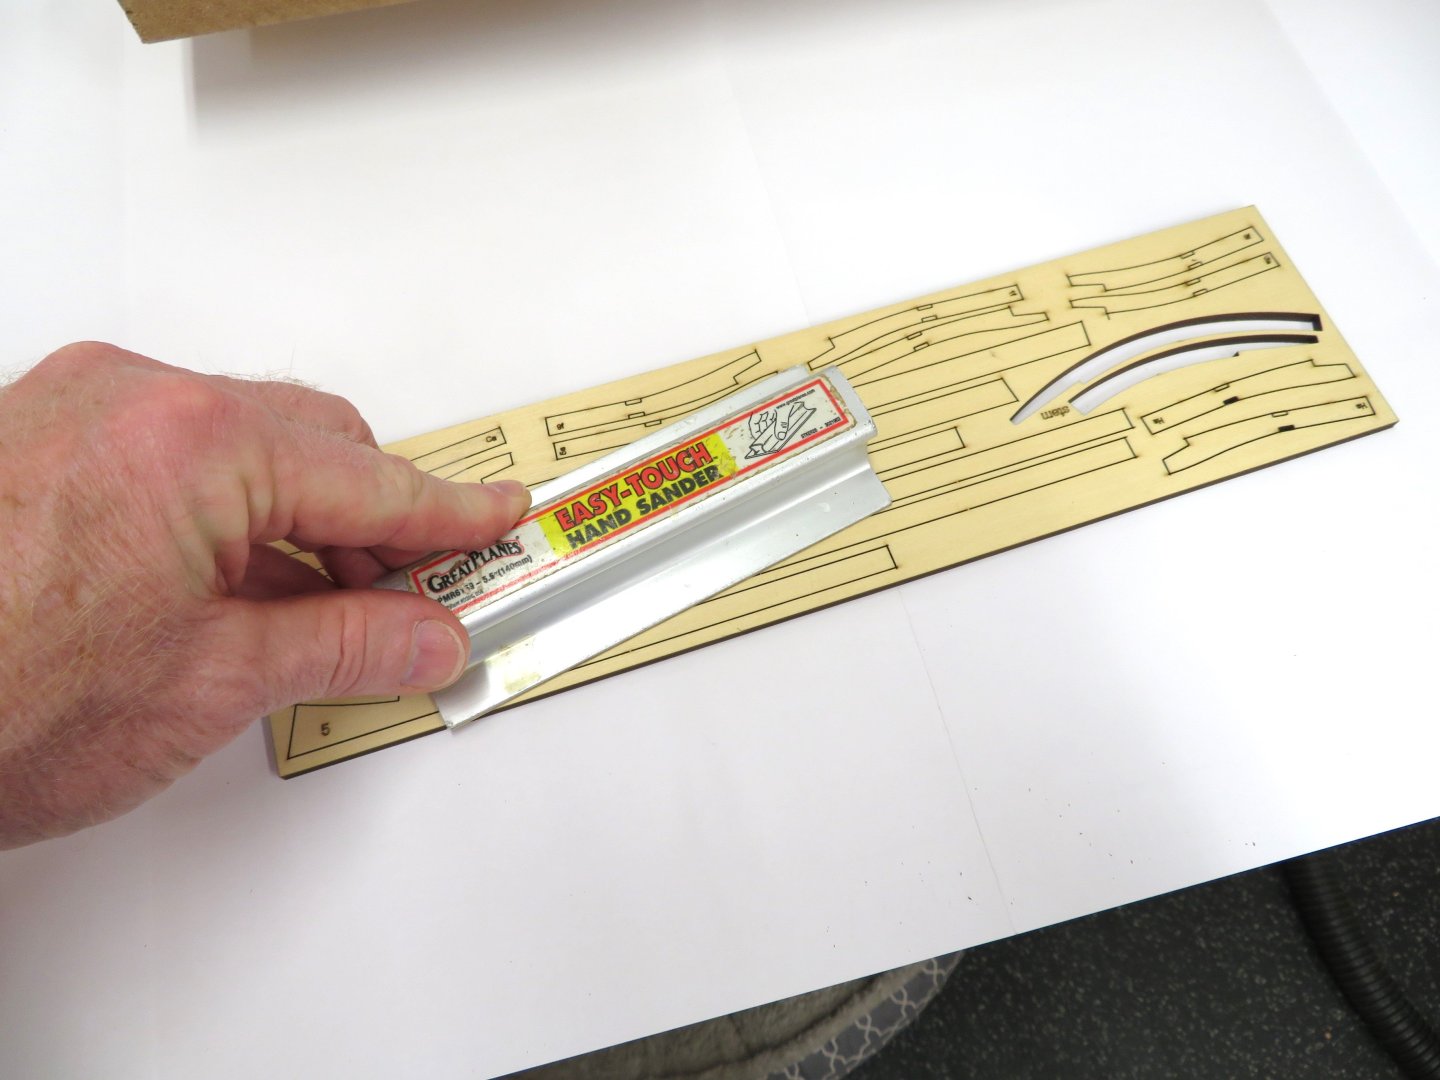
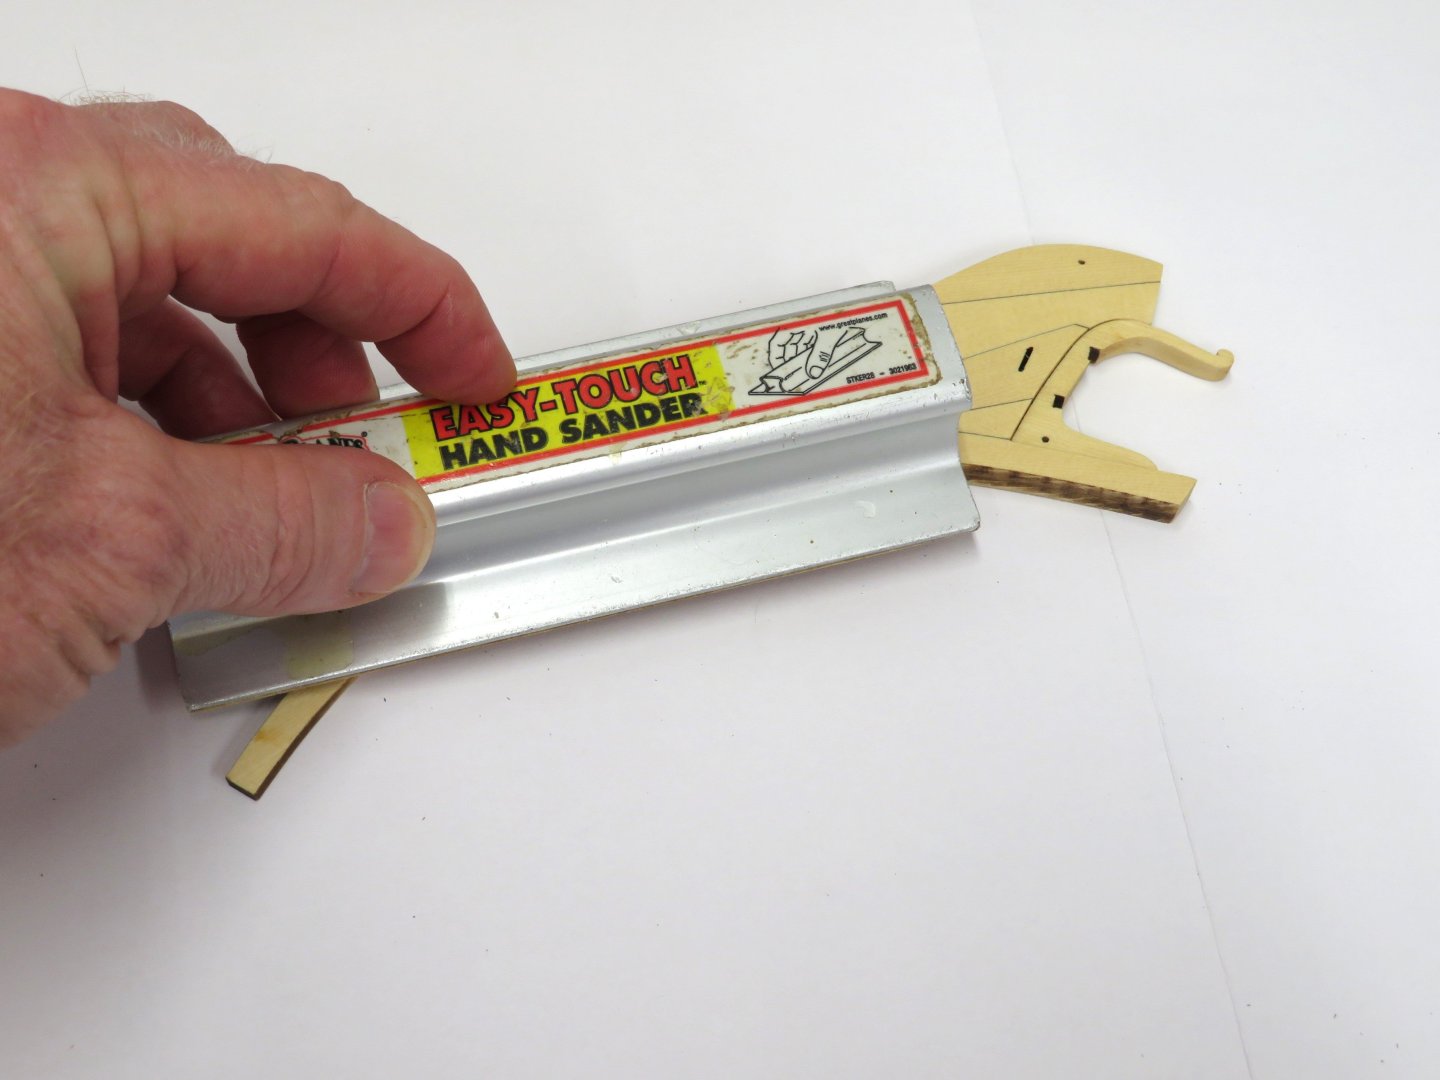
It was mentioned earlier that it's best to sand pieces prior to removing the from the billets. The way I do it is with a sanding block. I use 180 the 320 grit sandpaper. It's self-adhesive. It is also handy for finish sanding completed pieces like the stem. I usually use Minwax wipe on poly. My local store was out but they did have Watco satin wipe on poly. I've used other Watco products and liked them so I gave it a try. It's a little thicker than the Minwax but covers nice and looks the same.


Next I'll start working on the keel. Oh this is fun!
-
Yes I am planning on it. Hopefully nothing gets in the way.
- Freebird and Ryland Craze
-
2
-
54 minutes ago, Trussben said:
You can also get large plans printed and shipped to you online, on paper or mylar if needed.
I like the idea of having one mylar set. Thanks Ben.
-
Thanks Mike. I'm really looking forward to this build.
Rick Mike is correct on the two boards. The scrap pieces I had on hand were about 3" short so I put the one piece you saw across the end just to be safe. Thanks for checking in one me. I'll need all the extra eyes I can find.
I look forward to you starting your Speedwell!
- Ryland Craze and Freebird
-
2
-
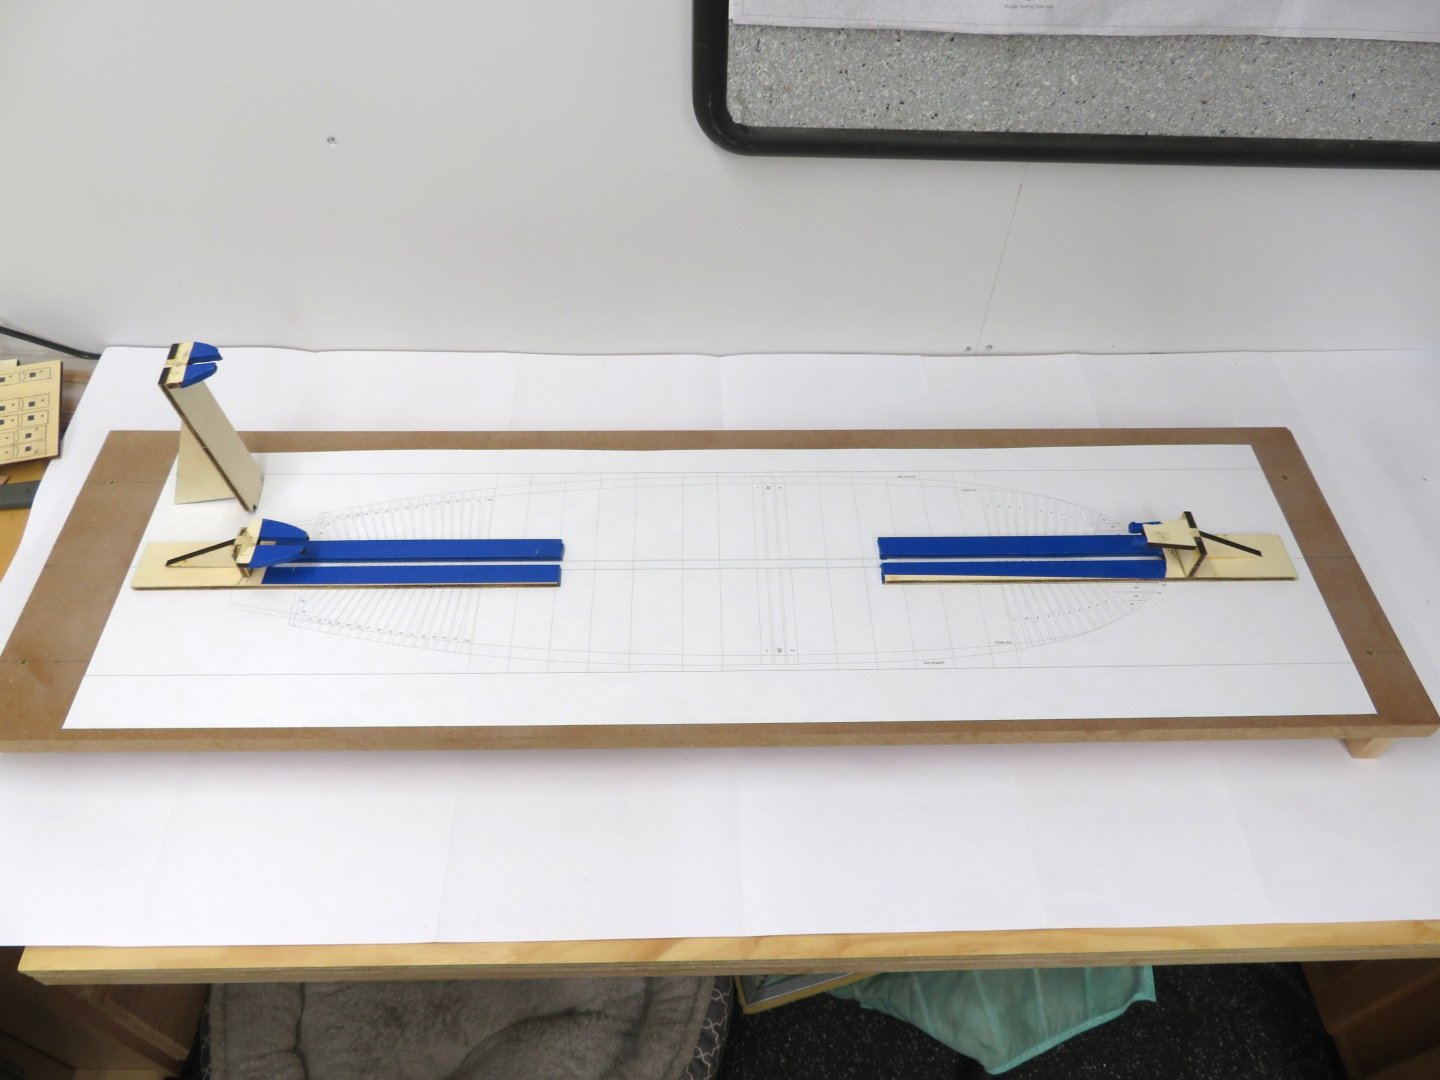
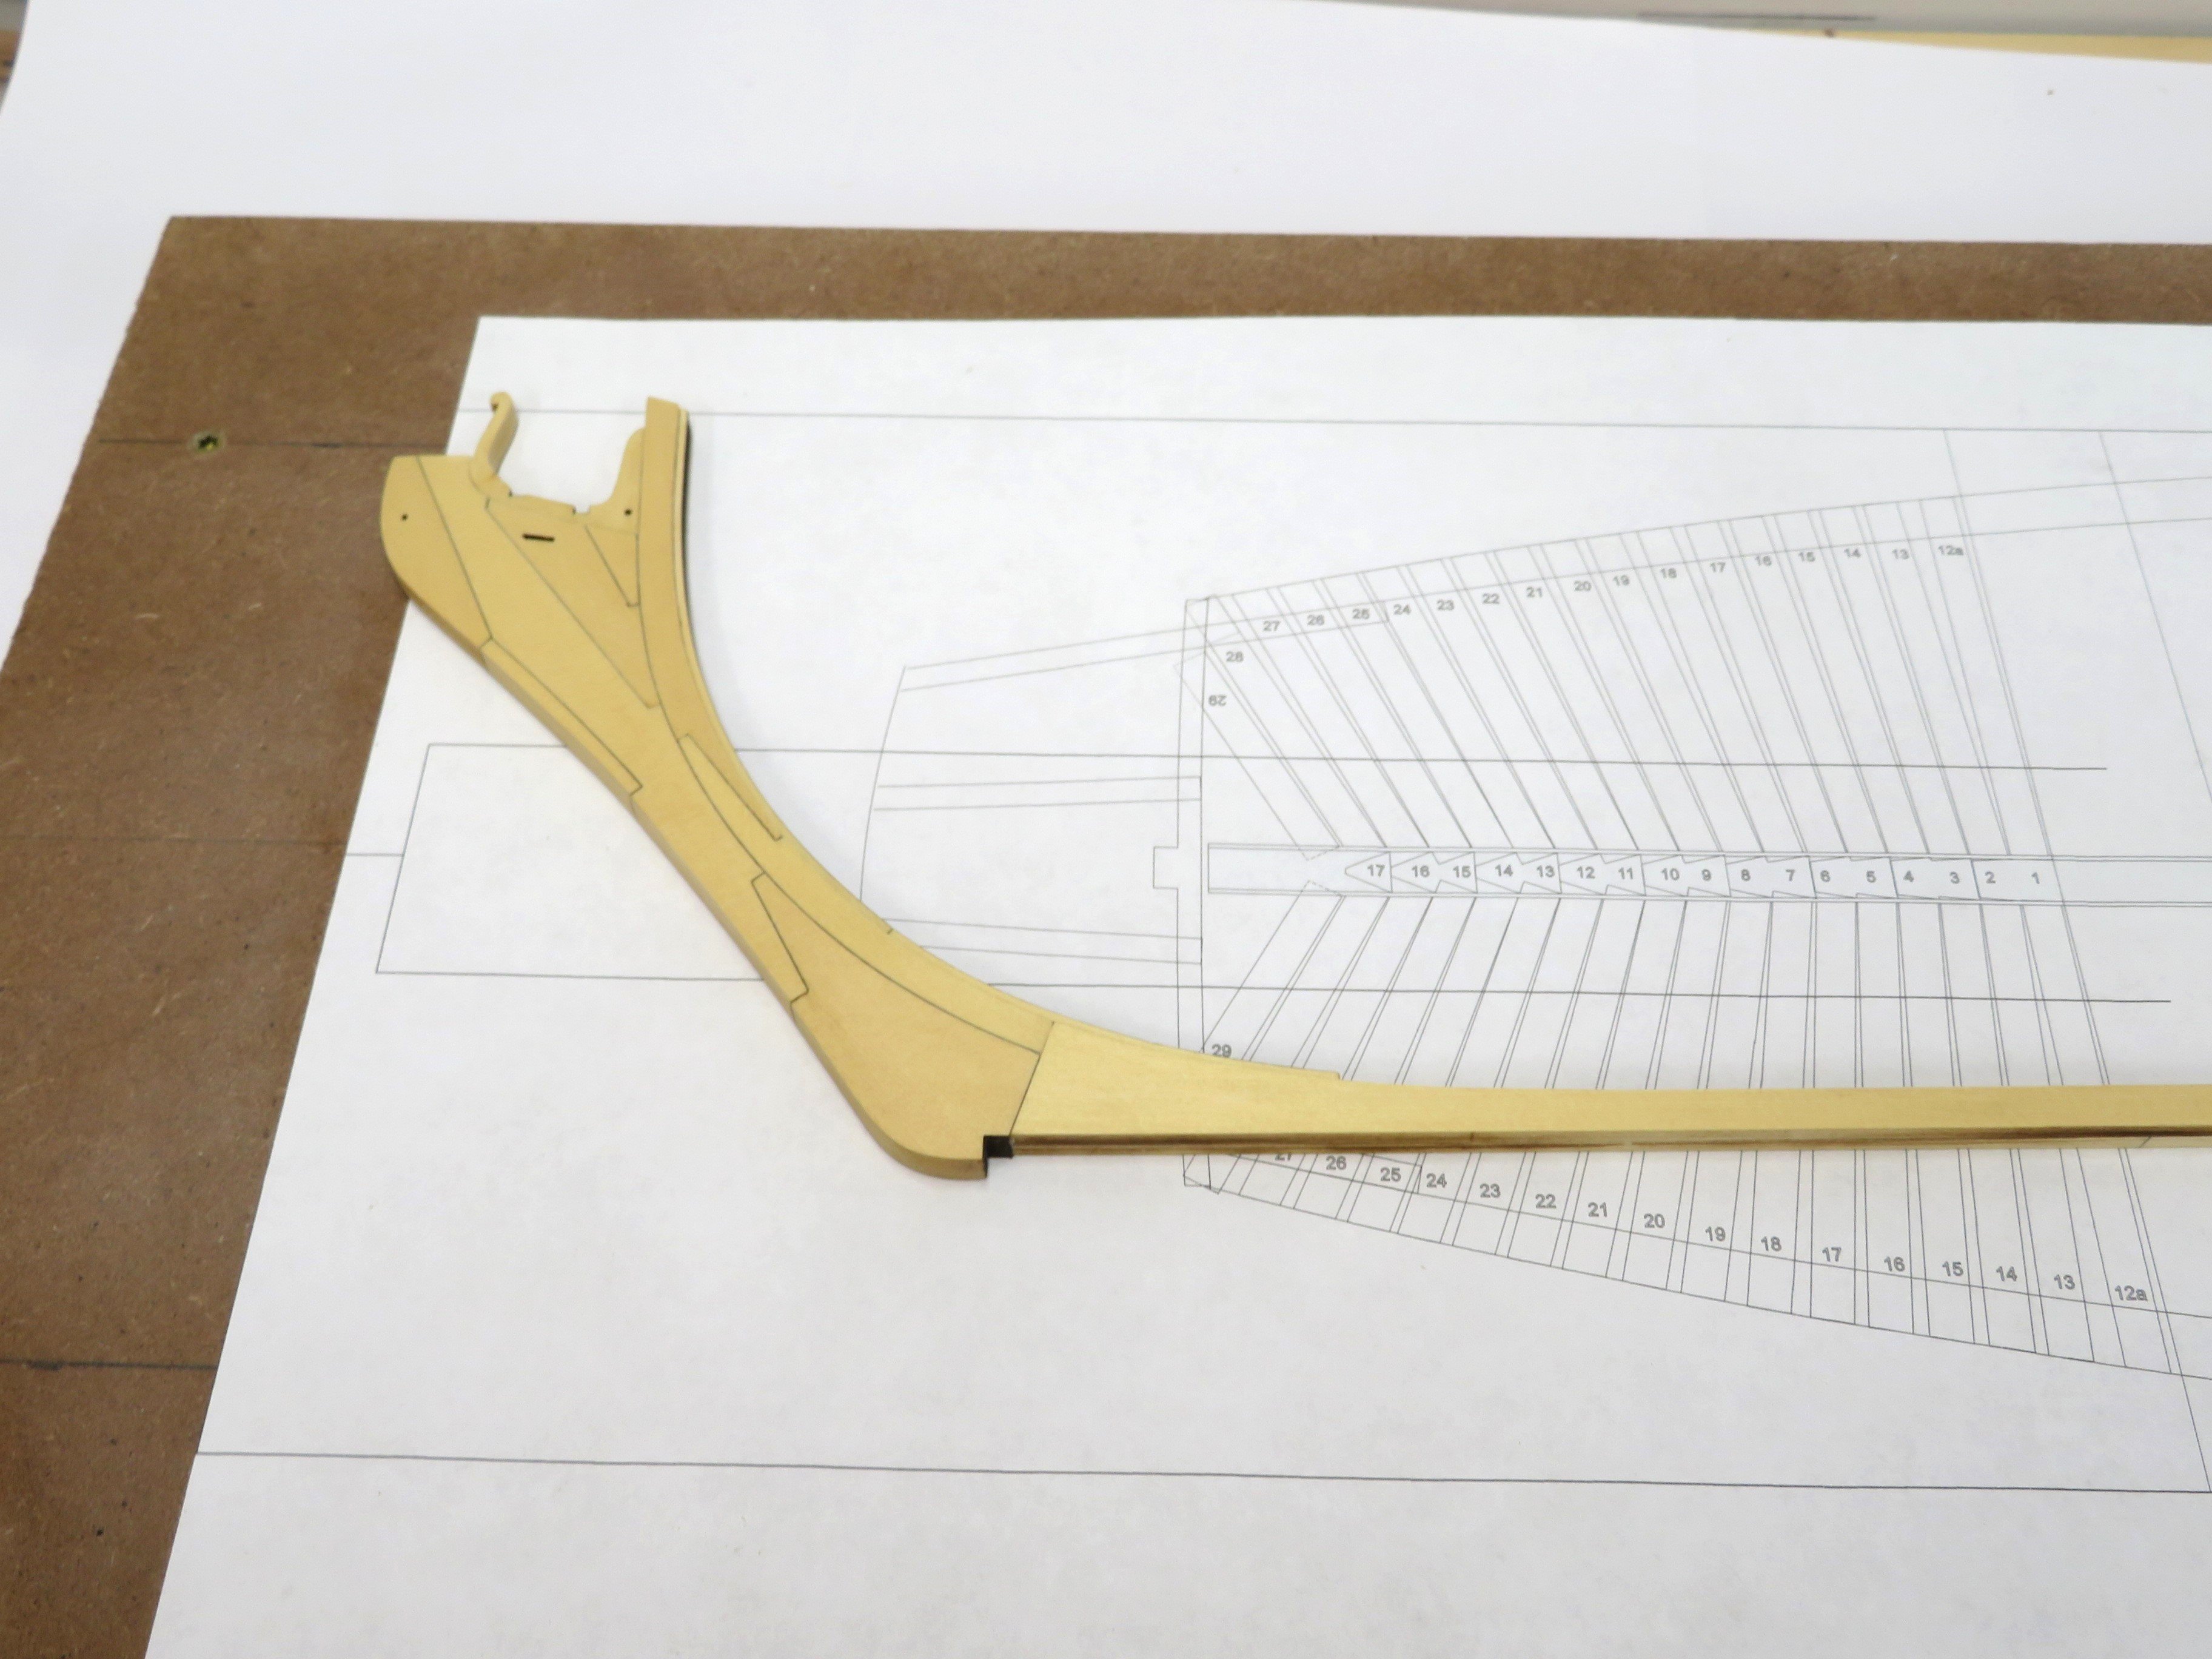
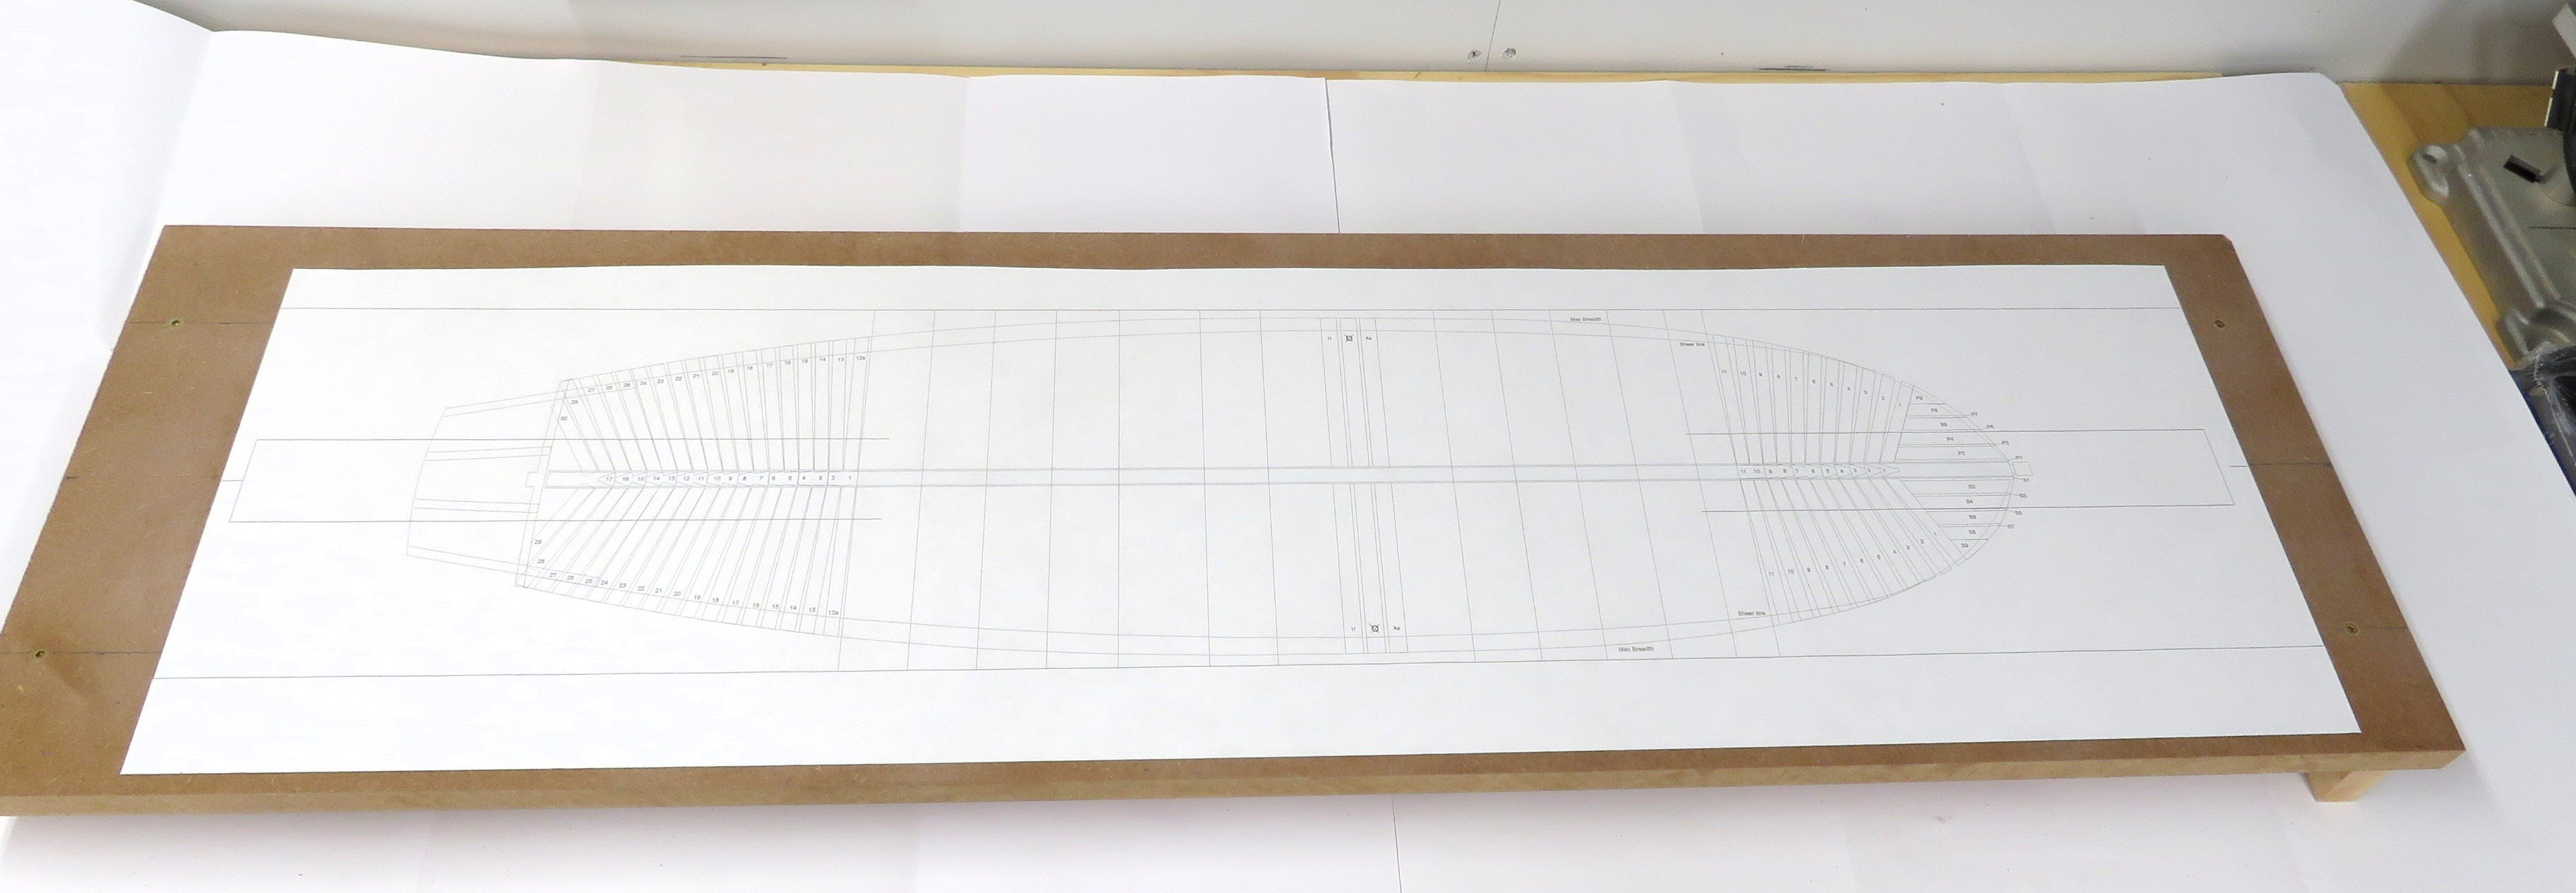
I got the extra printed plans back and have completed the build board. I got a 3/4" (19mm) thick MDF board for the base. I also put two 1"x2" boards length wise underneath to ensure the board does not go out of shape. It also elevates the base in case I want to use clamps for some insane reason. The plans were attached using a 3M spray mount adhesive. It worked really well.
I also put together the keel support jigs. On to the stem next.

-
Great work Glenn. It always freaked me out when we either had to cut or remove the molding. As aways you did a perfect job!
- FrankWouts and glbarlow
-
2
-
Another superb build! It was a pleasure to follow along with you and your log will be used by many who follow!
- Ryland Craze, mtaylor and Blue Ensign
-
2
-
 1
1
-
-
19 minutes ago, Ryland Craze said:
Looking forward to your Speedwell build log. I know it will be an excellent build.
Thanks Ryland. I hope to see you at the CT show.
- Jack12477 and Ryland Craze
-
2
-
I downloaded them to a thumb drive and went to Staples. They sent them to their print shop and will let me know when they are done.
-
Hi all.
Another Syren Speedwell starting here. I received mine a couple of days ago. I haven't done more than look the wood over, print chapter one of the monograph and order copies of the first three sheets of the plans. The first two sets of parts look fantastic. As you would expect the cutting is first rate and the AYC is so nice.
My first steps will be to read the monograph a couple of time plus review Chuck's and Mike's build's. Also, I'll get the wood for the build board and glue the plans to it. Once I've completed that I'll start in on the stem.
Let the adventure begin!
- glbarlow, JeffT, Ryland Craze and 12 others
-
15


Sloop Speedwell 1752 by Rustyj - Syren Ship Model Company - 1:32 Scale - POF Sloop
in - Kit build logs for subjects built from 1751 - 1800
Posted
That company would be very very rich! And I would a steady customer. 🤣