-
Posts
2,535 -
Joined
-
Last visited
Content Type
Profiles
Forums
Gallery
Events
Everything posted by Rustyj
-
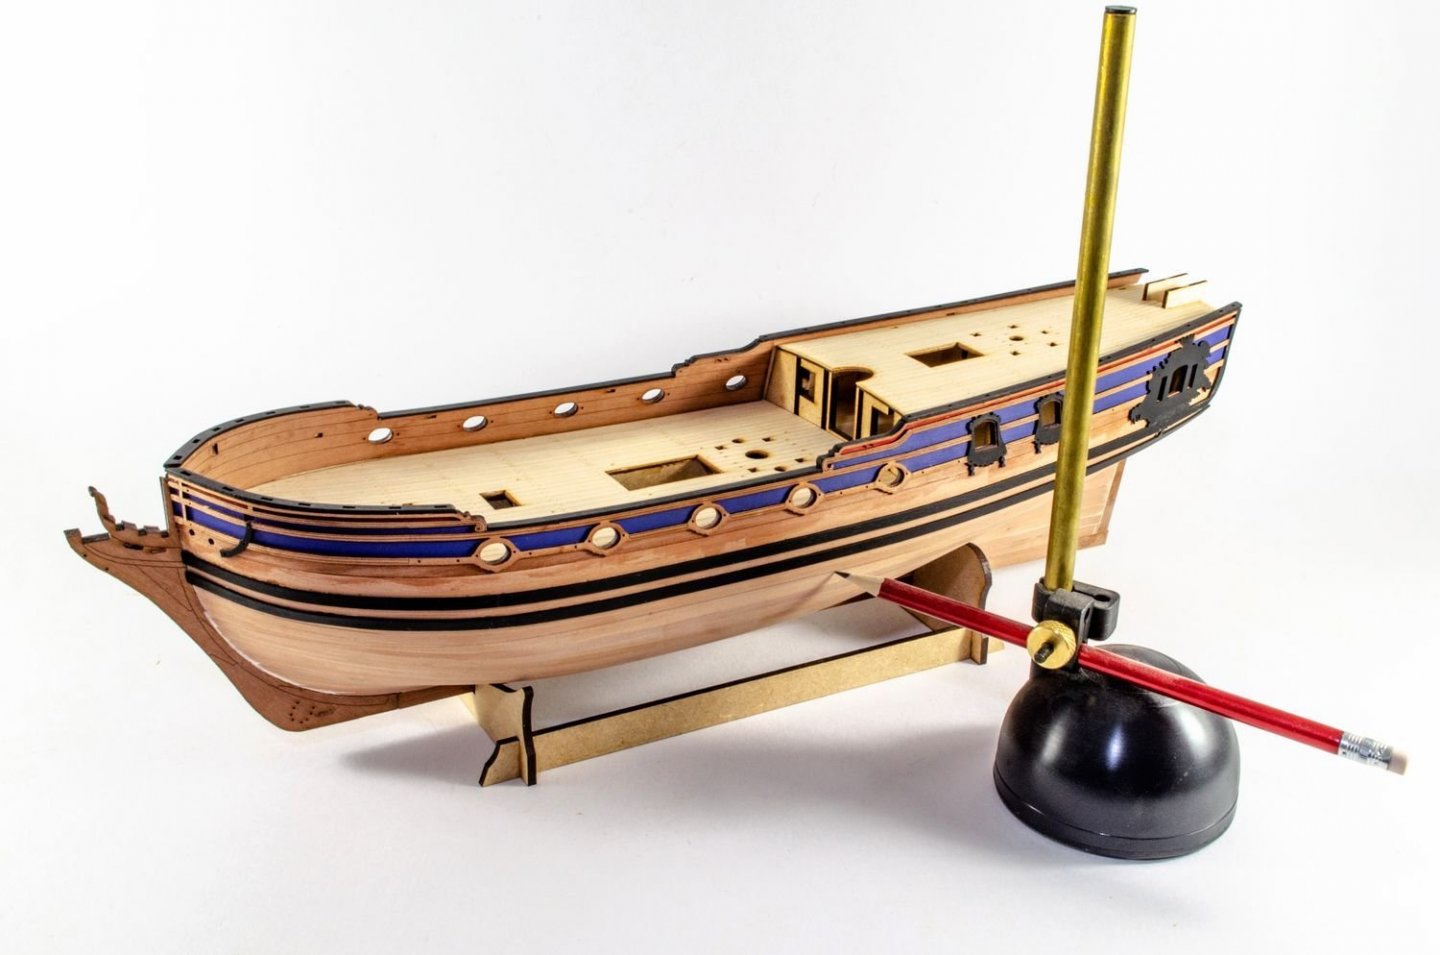
Thanks Matt, I used a marker similar to the one Jim used in the picture below. I took waterline height at mid ship from the plans, set the water line marker at that correct height and marked the hull. I then ran my tape to match the marked line. Checked the run from multiple angles and tweaked it as necessary to get a good looking flow.
- 201 replies
-
- Duchess of Kingston
- Vanguard Models
-
(and 1 more)
Tagged with:
-
Thanks Jim. I did a google search and it's now called Pledge Revive It Gloss Finish and you can get it at places like Walmart, Kmart etc. There are a couple of modeler related topics on how modelers use it. https://ilovewood001.tripod.com/modeling/future.html http://www.swannysmodels.com/TheCompleteFuture.html Also thanks for the tip on the Tesa Tape. When I use up the Tamiya. Looks like a visit to Walmart is in my future!
- 201 replies
-
- Duchess of Kingston
- Vanguard Models
-
(and 1 more)
Tagged with:
-
Thank you, Joe, Glenn, JJ and Wyz. Glenn by the time I get the ninth additional port lid done there will many many more in the bin!
- 642 replies
-
- winchelsea
- Syren Ship Model Company
-
(and 1 more)
Tagged with:
-
Sorry but I really don't know where you can find it now. I only have a little left from what I bought many years ago. Enjoy the Medway. It's a great choice. Thanks Don, You really can't go wrong choosing this model. It's great fun and a good learning experience!
- 310 replies
-
- cheerful
- Syren Ship Model Company
-
(and 1 more)
Tagged with:
-
😂. Thanks Jim. One question. When you attached the PE details to the out side of the hull what did you use? It's so clean and no glue marks. Thanks Glenn, Yes I used Tamiya tape and then regular painters tape over that. Thanks for all the likes too!
- 201 replies
-
- Duchess of Kingston
- Vanguard Models
-
(and 1 more)
Tagged with:
-
Thanks Bob! The hull was taped off at the water line and painted with a satin white spray paint. I also added the stern fascia and the PE stern window frames. Everything was a nice fit. I'm painting the stern decoration and panels and once dry I'll add them too.
- 201 replies
-
- Duchess of Kingston
- Vanguard Models
-
(and 1 more)
Tagged with:
-
Hi Rick and thanks for the kind words. The deck was planked with holly. The cheerful is a wonder model and you should really enjoy it.
- 310 replies
-
- cheerful
- Syren Ship Model Company
-
(and 1 more)
Tagged with:
-
Thanks Bob, The speed is a bit deceptive as I don't keep the log up to date as I should. Also I'm on vacation since before Christmas until the 4th so I've had a lot of time in the shop. Thanks B.E. You are absolutely correct about it making an excellent Admiralty style model. If you do succumb I don't think you'll be disappointed. Also thanks everyone for the continued likes.
- 201 replies
-
- Duchess of Kingston
- Vanguard Models
-
(and 1 more)
Tagged with:
-
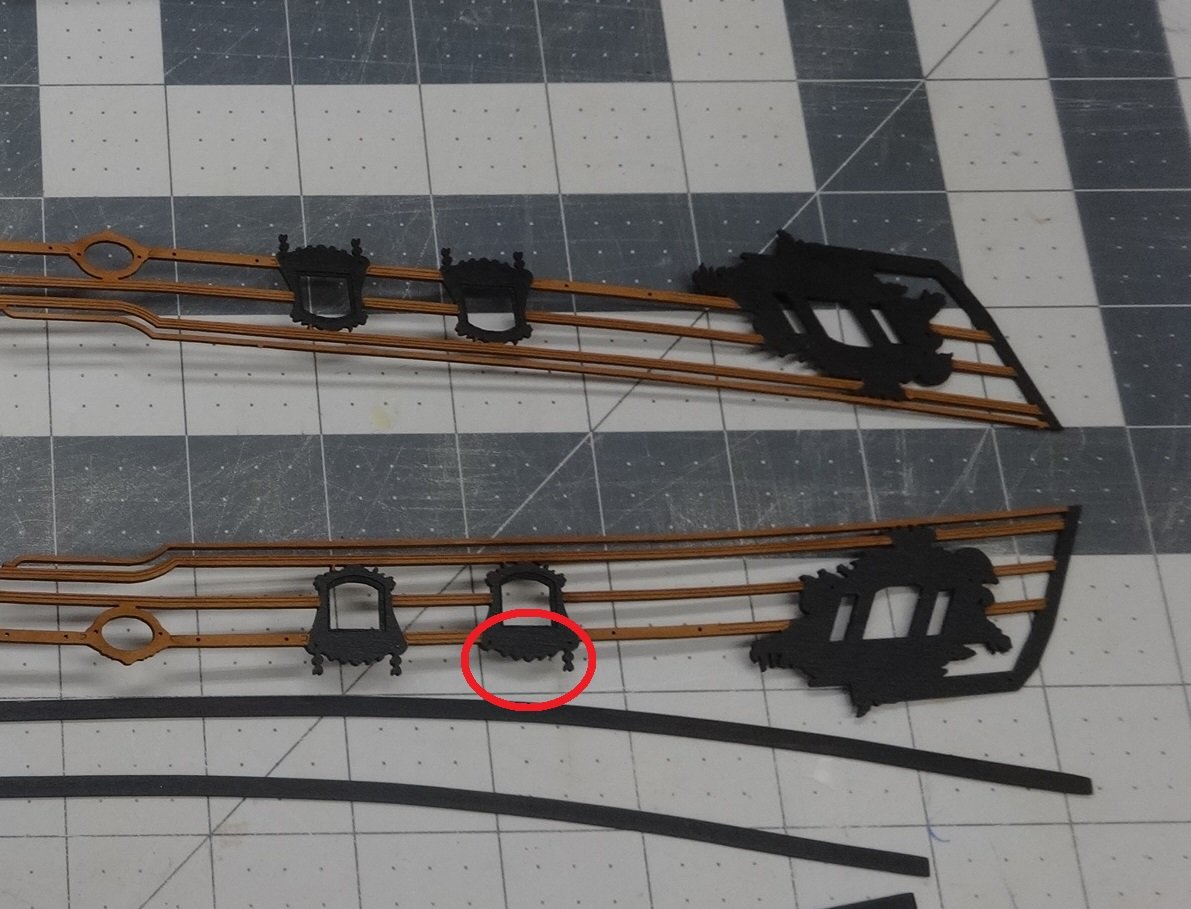
Now a word of warning. Chris has done some fantastic laser work but because of this some pieces are very fragile. Please use caution when handling some of the pieces. I knocked off a piece inside the red circle. Luckily I found the piece and was able to glue it back on. So let my meat hooks be an example of what not to do! 🤪
- 201 replies
-
- Duchess of Kingston
- Vanguard Models
-
(and 1 more)
Tagged with:
-
Thanks Glenn and Jean-Paul and all the likes too! Trying to catch up the build log. Here you'll see the inner bulwark patterns, the outer bulwarks painted blue and red, upper fore and main upper rail patterns clamped in place to dry. Now the fore mid and aft gunwales have been painted and glued in place. Here are the main upper rails and wales formed and painted and glued in place.
- 201 replies
-
- Duchess of Kingston
- Vanguard Models
-
(and 1 more)
Tagged with:
-
I've completed planking the deck. It was a fun project and I'm happy with how it came out. Here it is rough sanded with no finish. And here it is sanded with 320 and a coat of wipe on poly. I will lay Chris's laser cut deck back over my deck to mark off the various precut hole, hatches etc. to make sure they are in the correct location on my deck.
- 201 replies
-
- Duchess of Kingston
- Vanguard Models
-
(and 1 more)
Tagged with:
-
That is some great work Glenn, GRANT. Man I'm brain dead!
- 109 replies
-
- medway longboat
- Syren Ship Model Company
-
(and 1 more)
Tagged with:
-
I hope everyone had a safe and happy holiday! I've started making some of the gun port lids. I first set the two 1/4" wide pieces and shaped them to fit the opening. I then added the bottom piece and sanded it to fit. Then the top piece was added and sanded to fit. For me doing it this way was easier than making the whole lid and then trying to sand the whole thing to fit. It took about two hours from start to finish. One down nine more to go. Then it's on to making the hinges!
- 642 replies
-
- winchelsea
- Syren Ship Model Company
-
(and 1 more)
Tagged with:
-
Wonderful job on the planking and all the hatches too!
- 144 replies
-
- winchelsea
- Syren Ship Model Company
-
(and 1 more)
Tagged with:
-
Thanks Glenn and Glenn and also all the likes. It only took one 2" wide billet but the stash is getting small all the time....
- 201 replies
-
- Duchess of Kingston
- Vanguard Models
-
(and 1 more)
Tagged with:
-
Next I took out the temporary beams and the MDF bulkhead tabs. Everything was sanded smooth. Although Chris's laser cut deck is really nice I've always enjoyed planking the deck so I decided to plank the deck myself. I cut boxwood to the same width and thickness as the laser cut deck. I then cut the margin planks and marked the center line and commenced planking outwards from there.
- 201 replies
-
- Duchess of Kingston
- Vanguard Models
-
(and 1 more)
Tagged with:
-
Great job on the lids. I can't wait to try making them tonight!
- 1,784 replies
-
- winchelsea
- Syren Ship Model Company
-
(and 1 more)
Tagged with:
-
Thanks Glenn, James, Bob, Bob again and Glenn too. Also thanks for all the likes. I always start with 120 to knock down the high spots etc. Then 180 and finish with 320. Apply a coat of WOP. After it dries I steel wool it with 0000 and apply a second coat. So I still have some sanding work ahead of me.
- 201 replies
-
- Duchess of Kingston
- Vanguard Models
-
(and 1 more)
Tagged with:
About us
Modelshipworld - Advancing Ship Modeling through Research
SSL Secured
Your security is important for us so this Website is SSL-Secured
NRG Mailing Address
Nautical Research Guild
237 South Lincoln Street
Westmont IL, 60559-1917
Model Ship World ® and the MSW logo are Registered Trademarks, and belong to the Nautical Research Guild (United States Patent and Trademark Office: No. 6,929,264 & No. 6,929,274, registered Dec. 20, 2022)
Helpful Links
About the NRG
If you enjoy building ship models that are historically accurate as well as beautiful, then The Nautical Research Guild (NRG) is just right for you.
The Guild is a non-profit educational organization whose mission is to “Advance Ship Modeling Through Research”. We provide support to our members in their efforts to raise the quality of their model ships.
The Nautical Research Guild has published our world-renowned quarterly magazine, The Nautical Research Journal, since 1955. The pages of the Journal are full of articles by accomplished ship modelers who show you how they create those exquisite details on their models, and by maritime historians who show you the correct details to build. The Journal is available in both print and digital editions. Go to the NRG web site (www.thenrg.org) to download a complimentary digital copy of the Journal. The NRG also publishes plan sets, books and compilations of back issues of the Journal and the former Ships in Scale and Model Ship Builder magazines.


