HOLIDAY DONATION DRIVE - SUPPORT MSW - DO YOUR PART TO KEEP THIS GREAT FORUM GOING!
×


Rustyj
-
Posts
2,530 -
Joined
-
Last visited
Content Type
Profiles
Forums
Gallery
Events
Everything posted by Rustyj
-
 Oh yeah for me the red capstan is definitely the way to go.
- 1,784 replies
-
- 2
-

-
- winchelsea
- Syren Ship Model Company
- (and 1 more)
-
she's looking great Chuck. I think the red is a great look. It really makes the column stand out more. As far as questions go I'm sure we'll swamp you with them when we get to that point!
- 1,784 replies
-
- 6
-
-
- winchelsea
- Syren Ship Model Company
- (and 1 more)
-
Very nice work Glenn.
-
Thank you Glenn and Jean-Paul. Also for all the likes. With my expanded work schedule unfortunately rigging will go slowly. With one day off a week it leaves little time available. When rigging I don't like to jump in and out with a half hour here, forty five minutes there. I prefer to have a couple of hours at a time so I can "get in a grove".
-
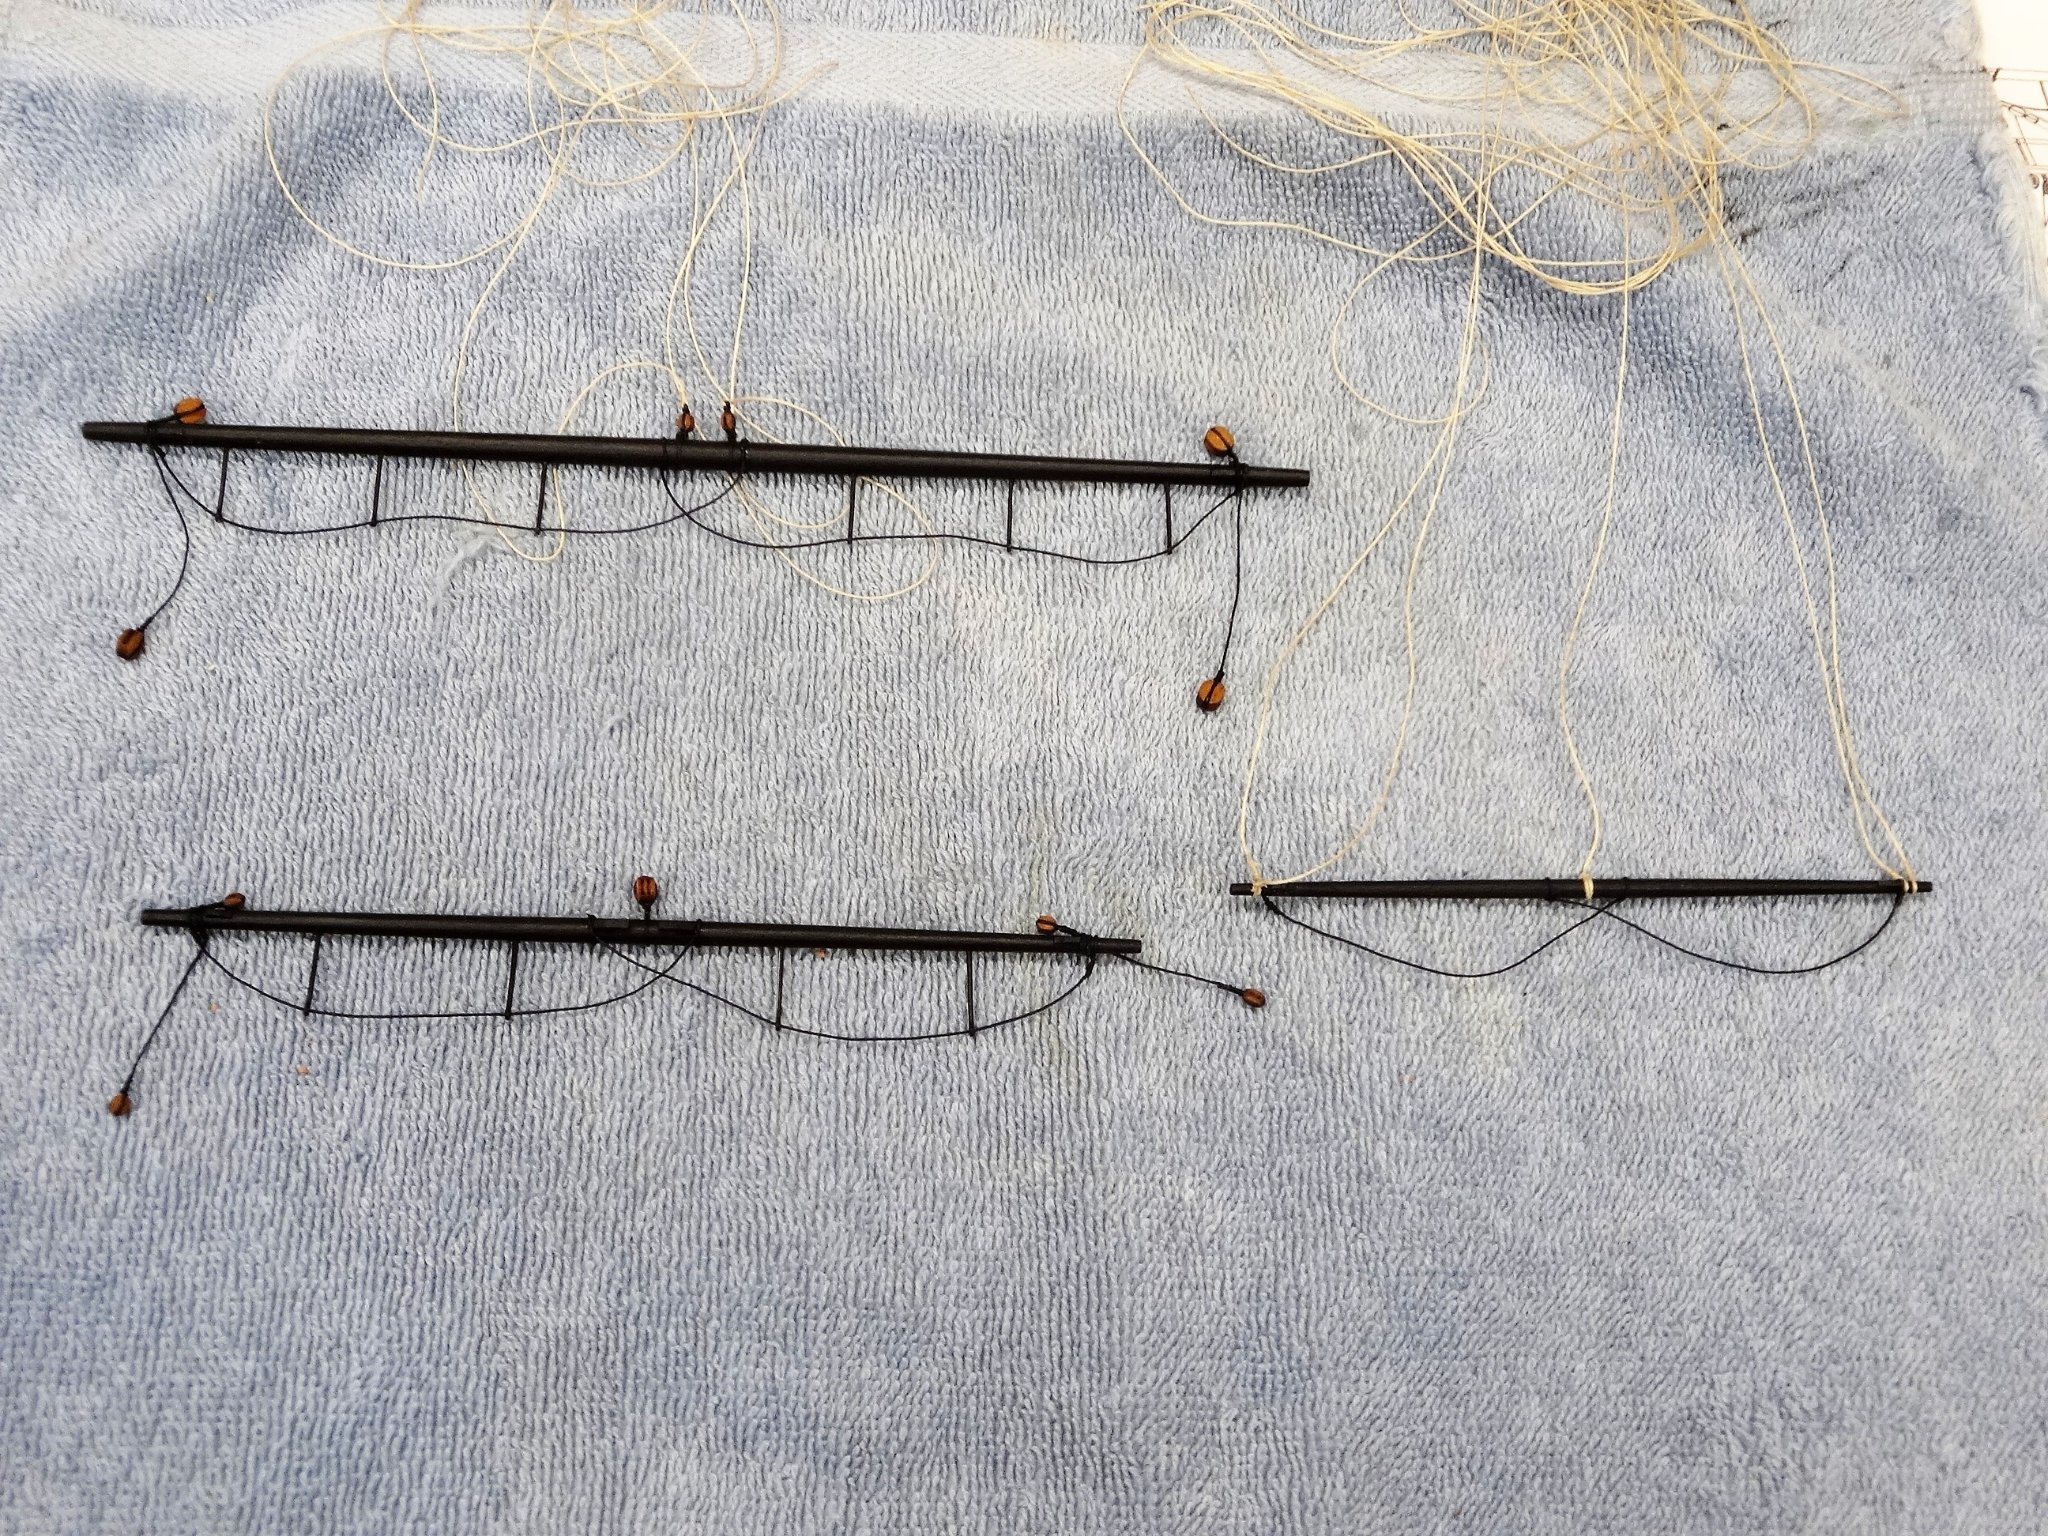
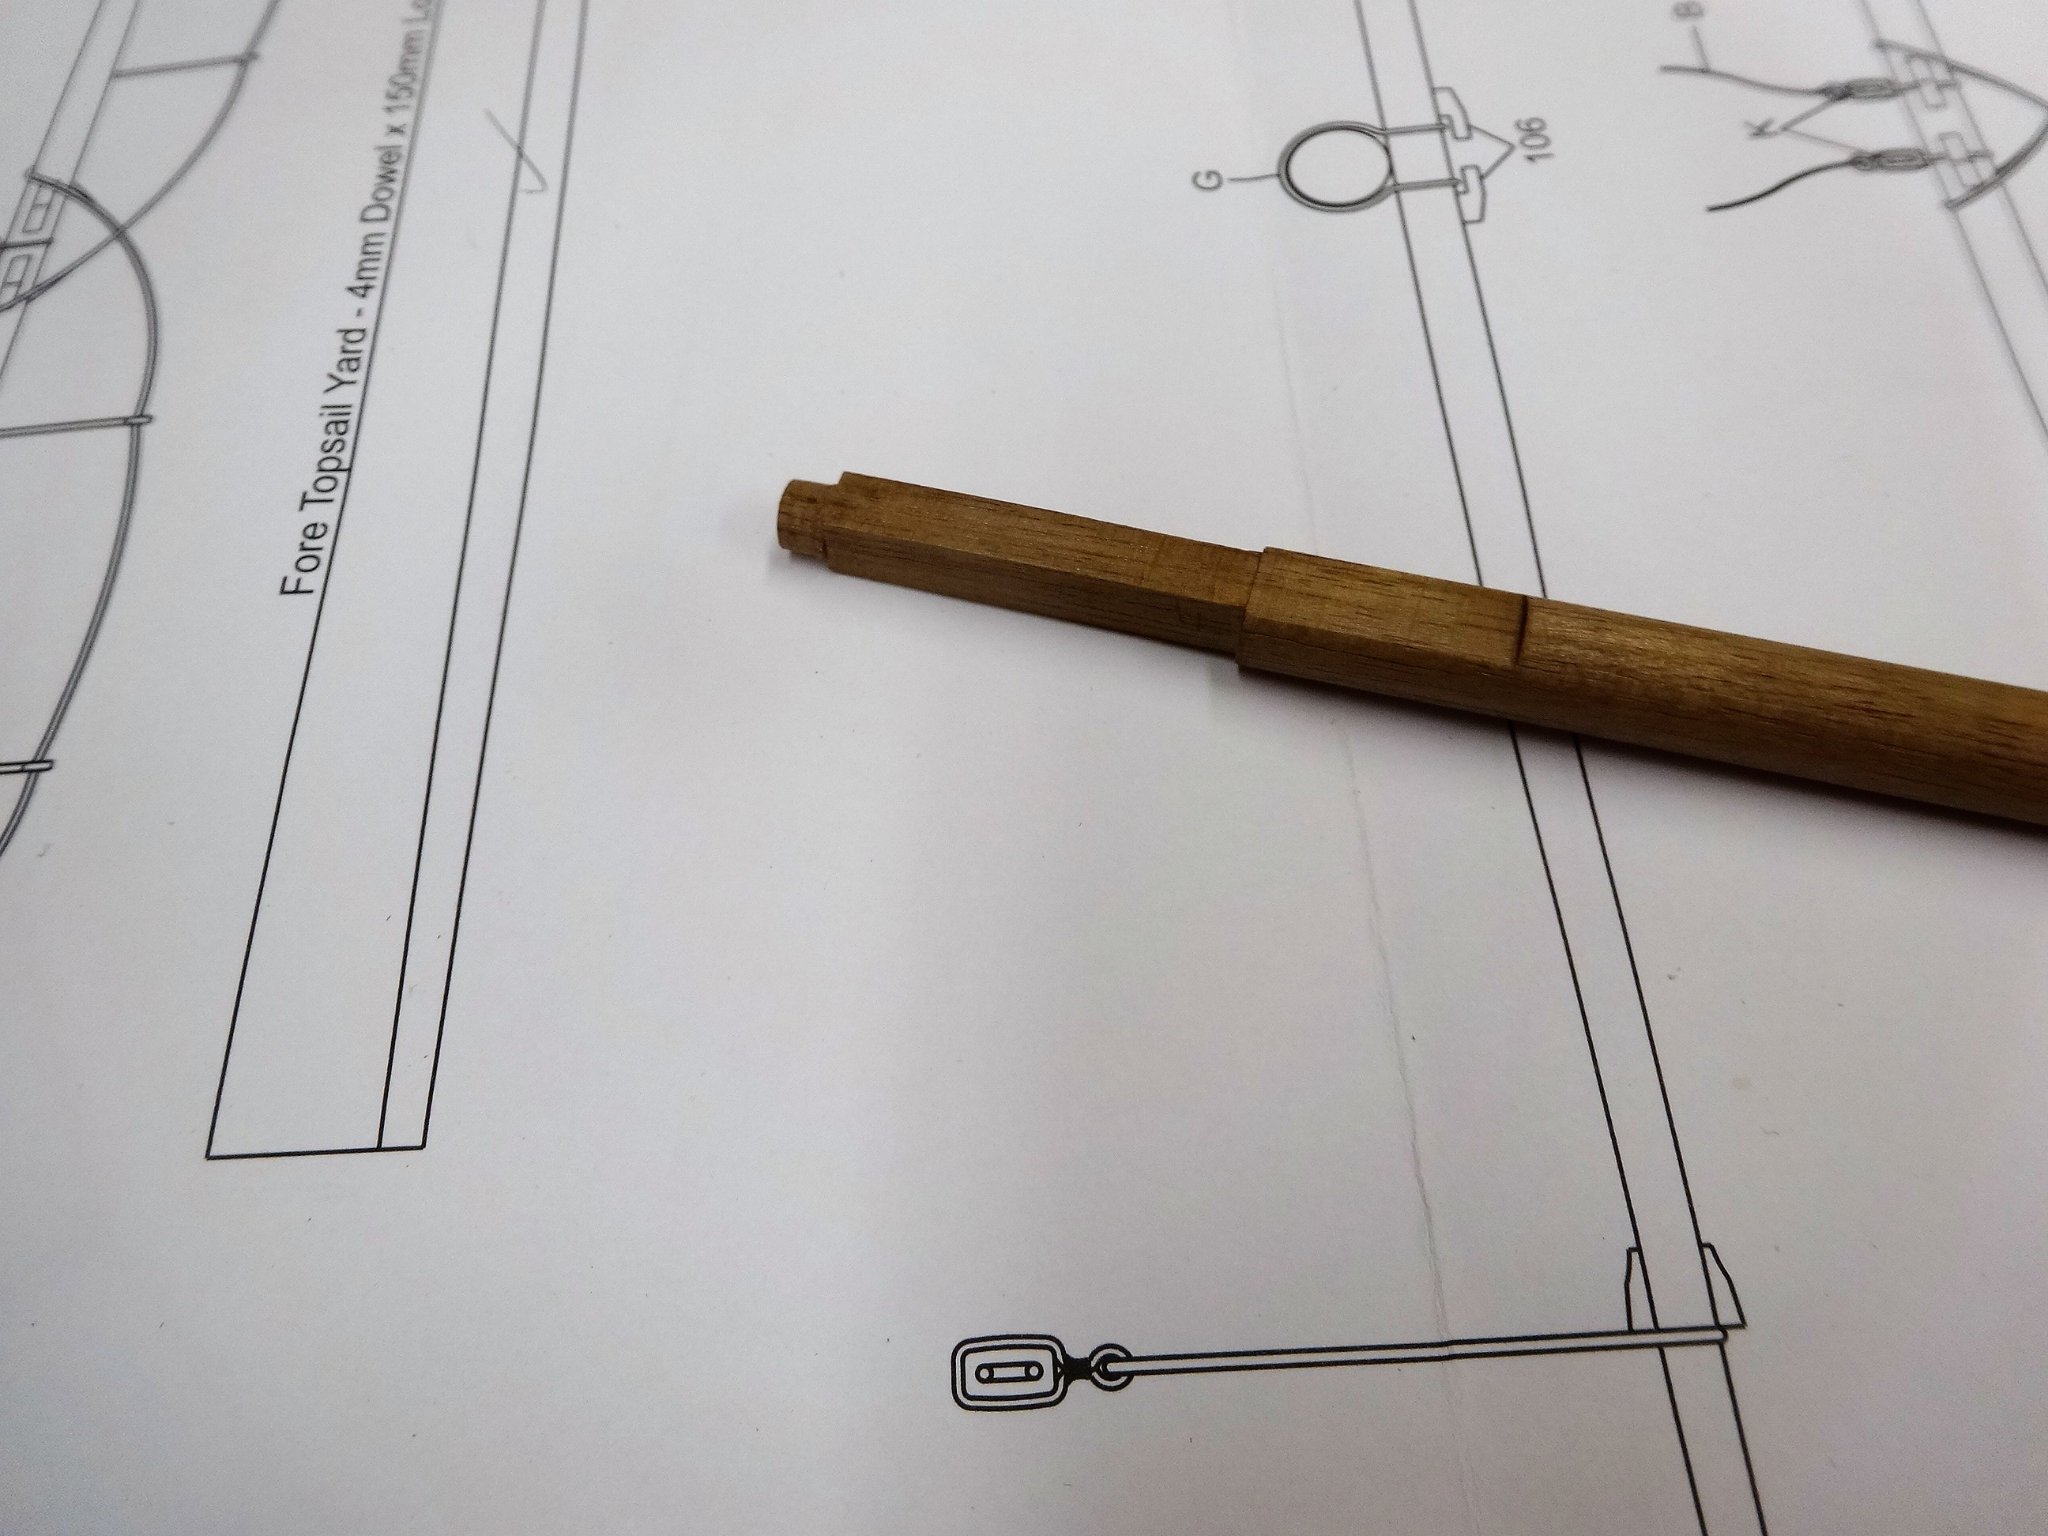
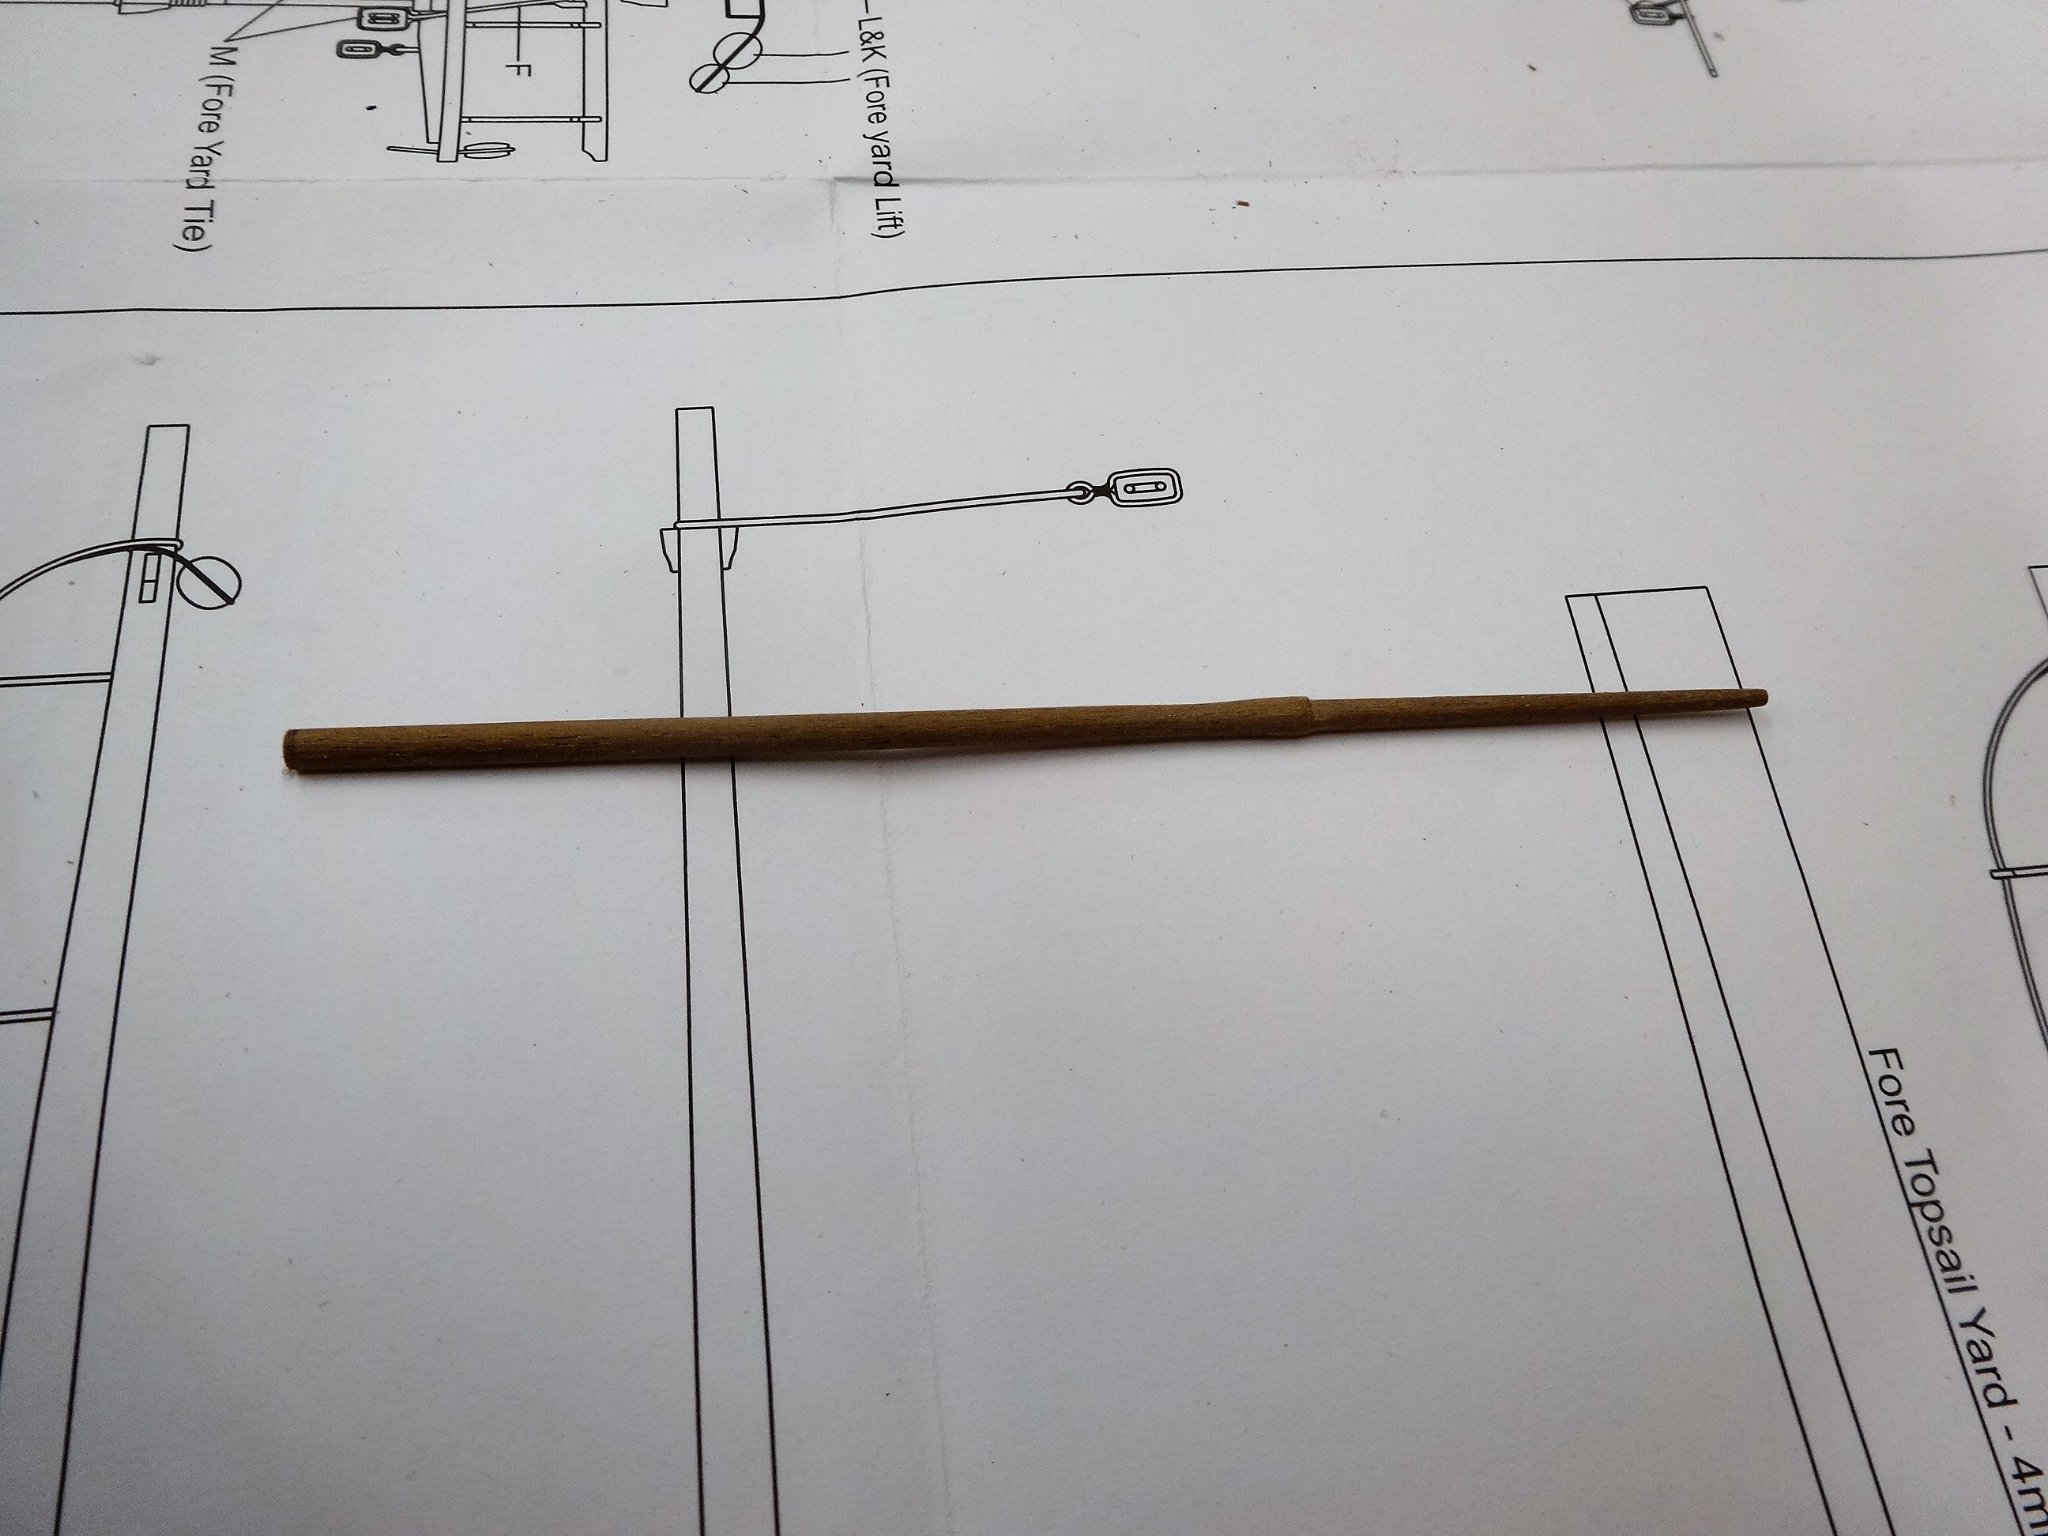
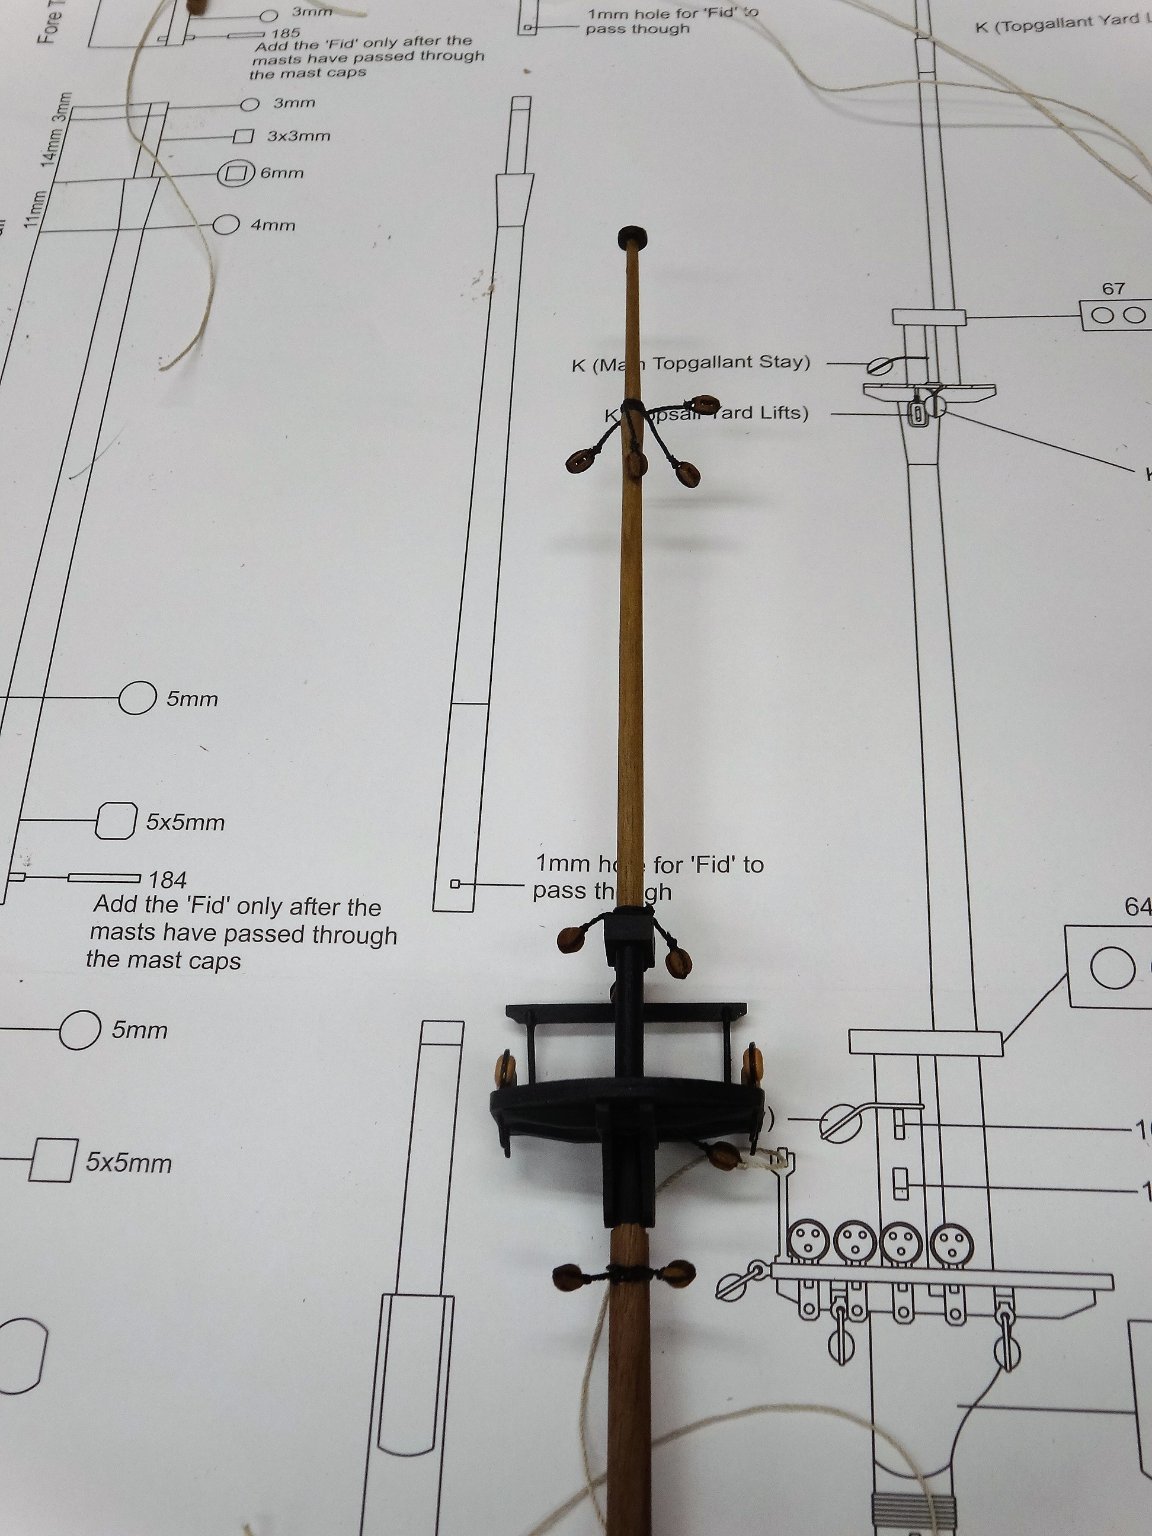
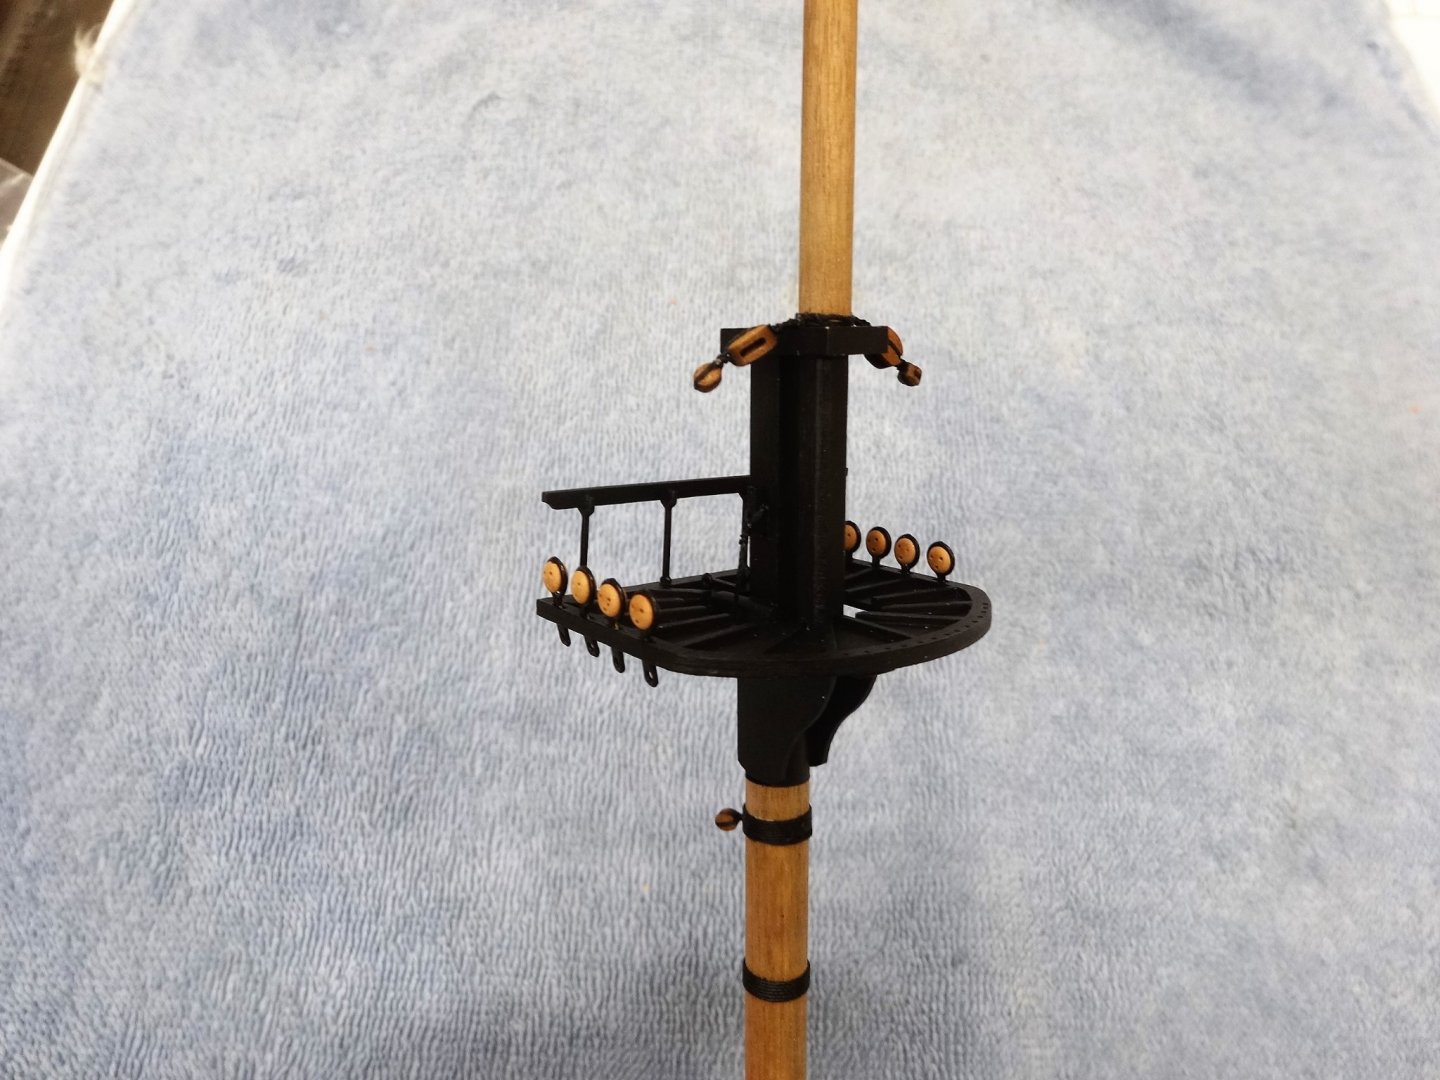
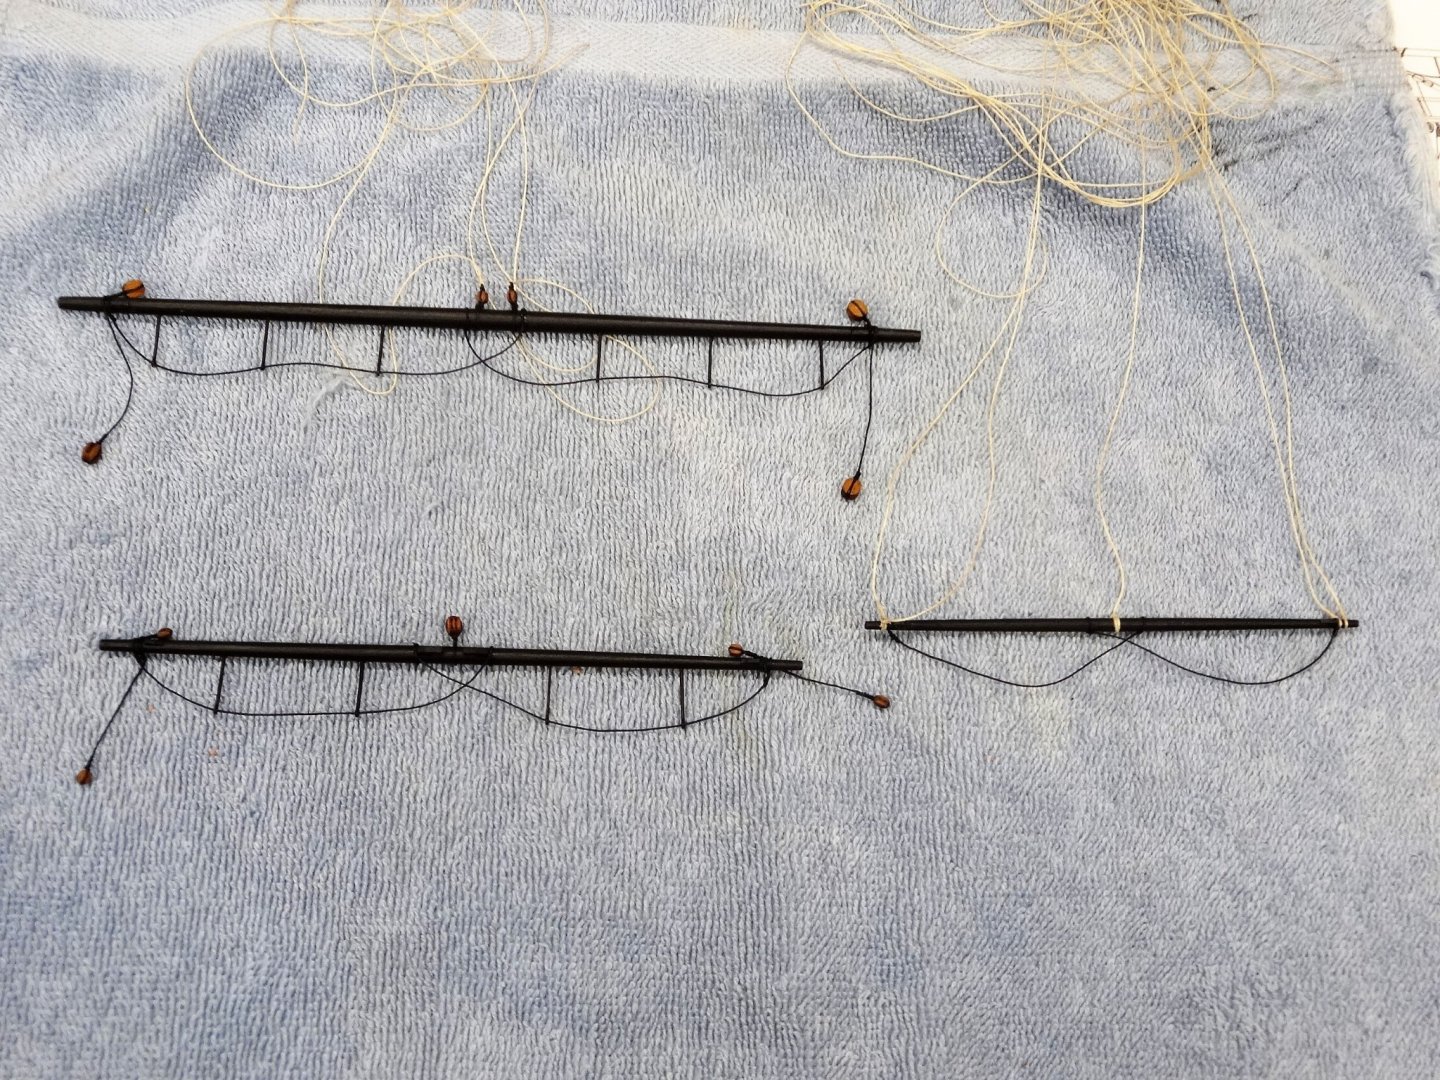
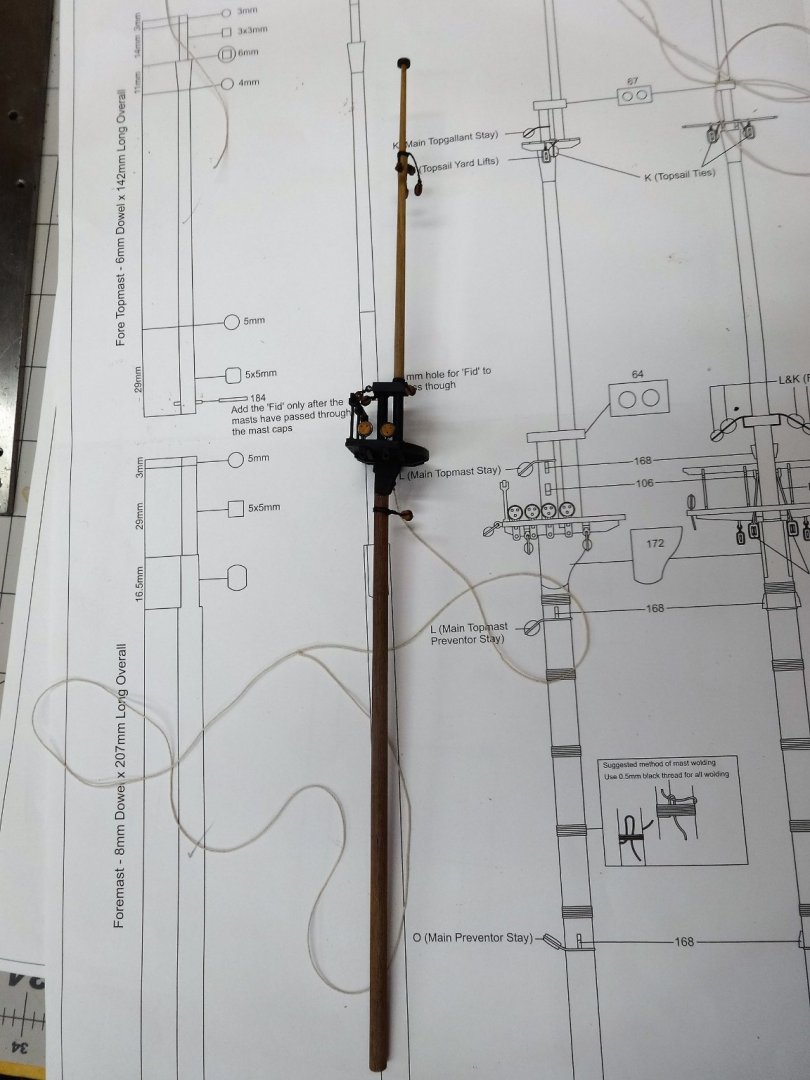
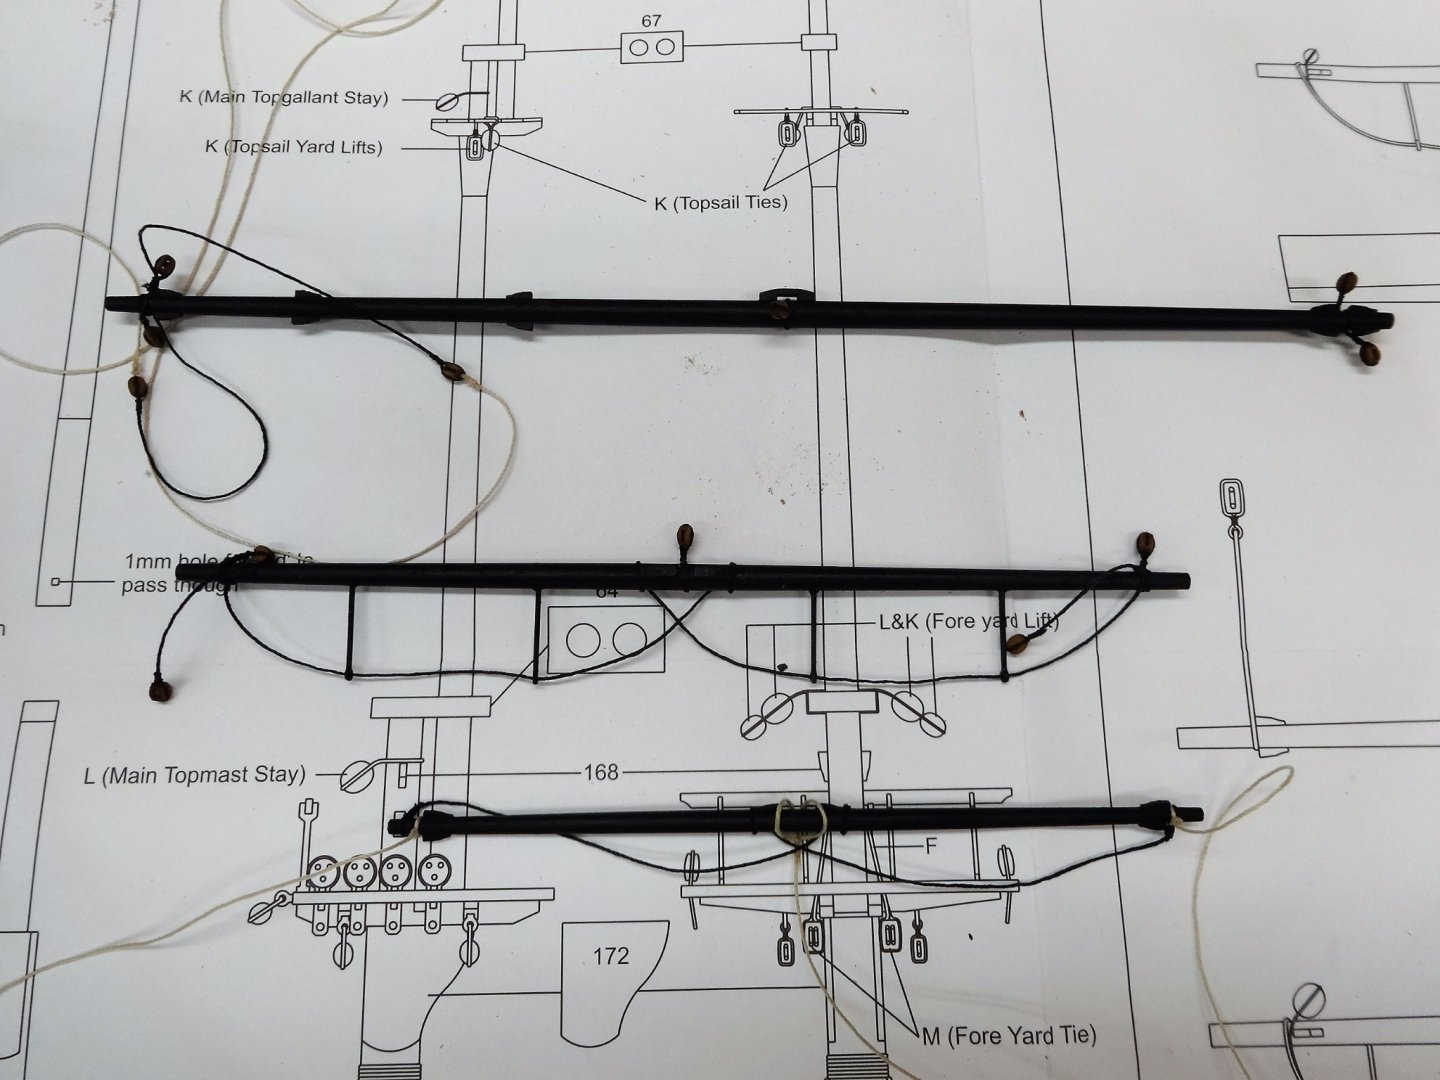
I've been able to grab a little shop time here and there. I've completed the main mast and yards now. I've attached the brace and lift lines to the Main Topgallant Yard as well the lines to the main yard. On to the foremast now.


- 201 replies
-
- 12
-
-
- Duchess of Kingston
- Vanguard Models
- (and 1 more)
-
This all looks fantastic. I can't wait to get back at her!
- 1,784 replies
-
- 3
-
-
- winchelsea
- Syren Ship Model Company
- (and 1 more)
-
Your rigging is coming along nicely!
-
Sorry for the late reply B.E. If I remember correctly it was a combination of both. I would sand horizontally at the rail and the first 7-10mm or so as of the frames as they were strong there. Then the as much as possible the lower portions of the frames were sanded vertically. Hope this helps!
- 185 replies
-
- 1
-
-
- queen anne barge
- Syren Ship Model Company
- (and 1 more)
-
Excellent job JJ!
-
Hi B.E. I just got a moment to catch up on your barge work and you've done a great job on her!
- 185 replies
-
- 1
-
-
- queen anne barge
- Syren Ship Model Company
- (and 1 more)
-
Very very nice workmanship Mike. You're an inspiration to us all!
- 607 replies
-
- 3
-
-
- winchelsea
- Syren Ship Model Company
- (and 1 more)
-
Still learning but I love it. Thanks for your help!
- 201 replies
-
- 1
-
-
- Duchess of Kingston
- Vanguard Models
- (and 1 more)
-
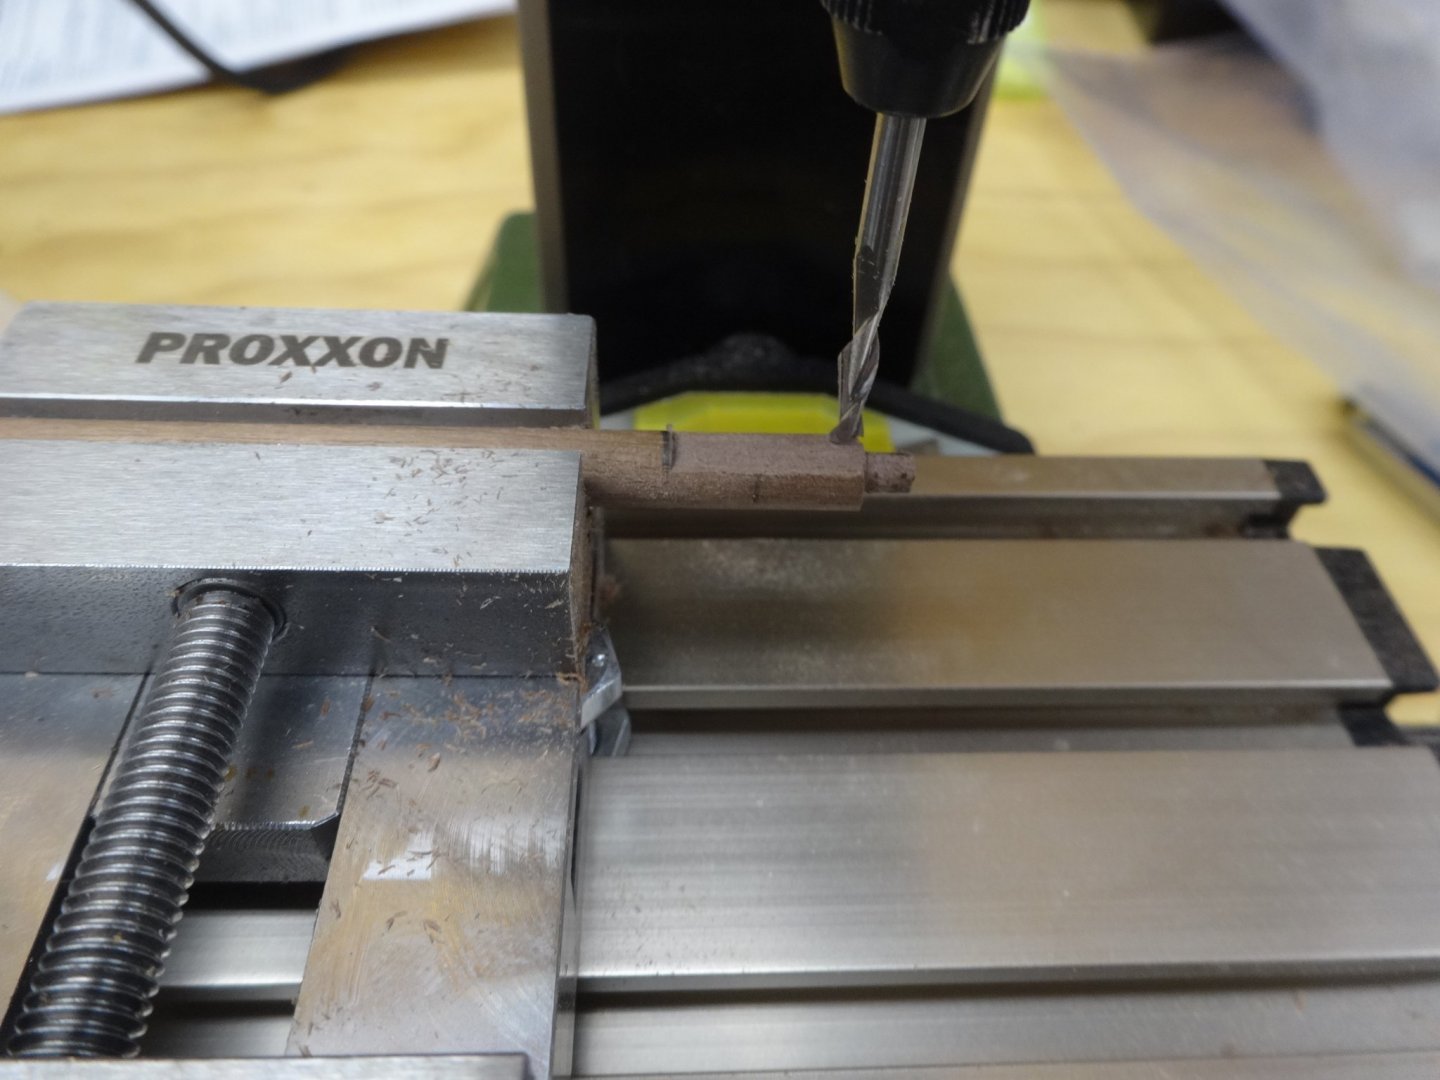
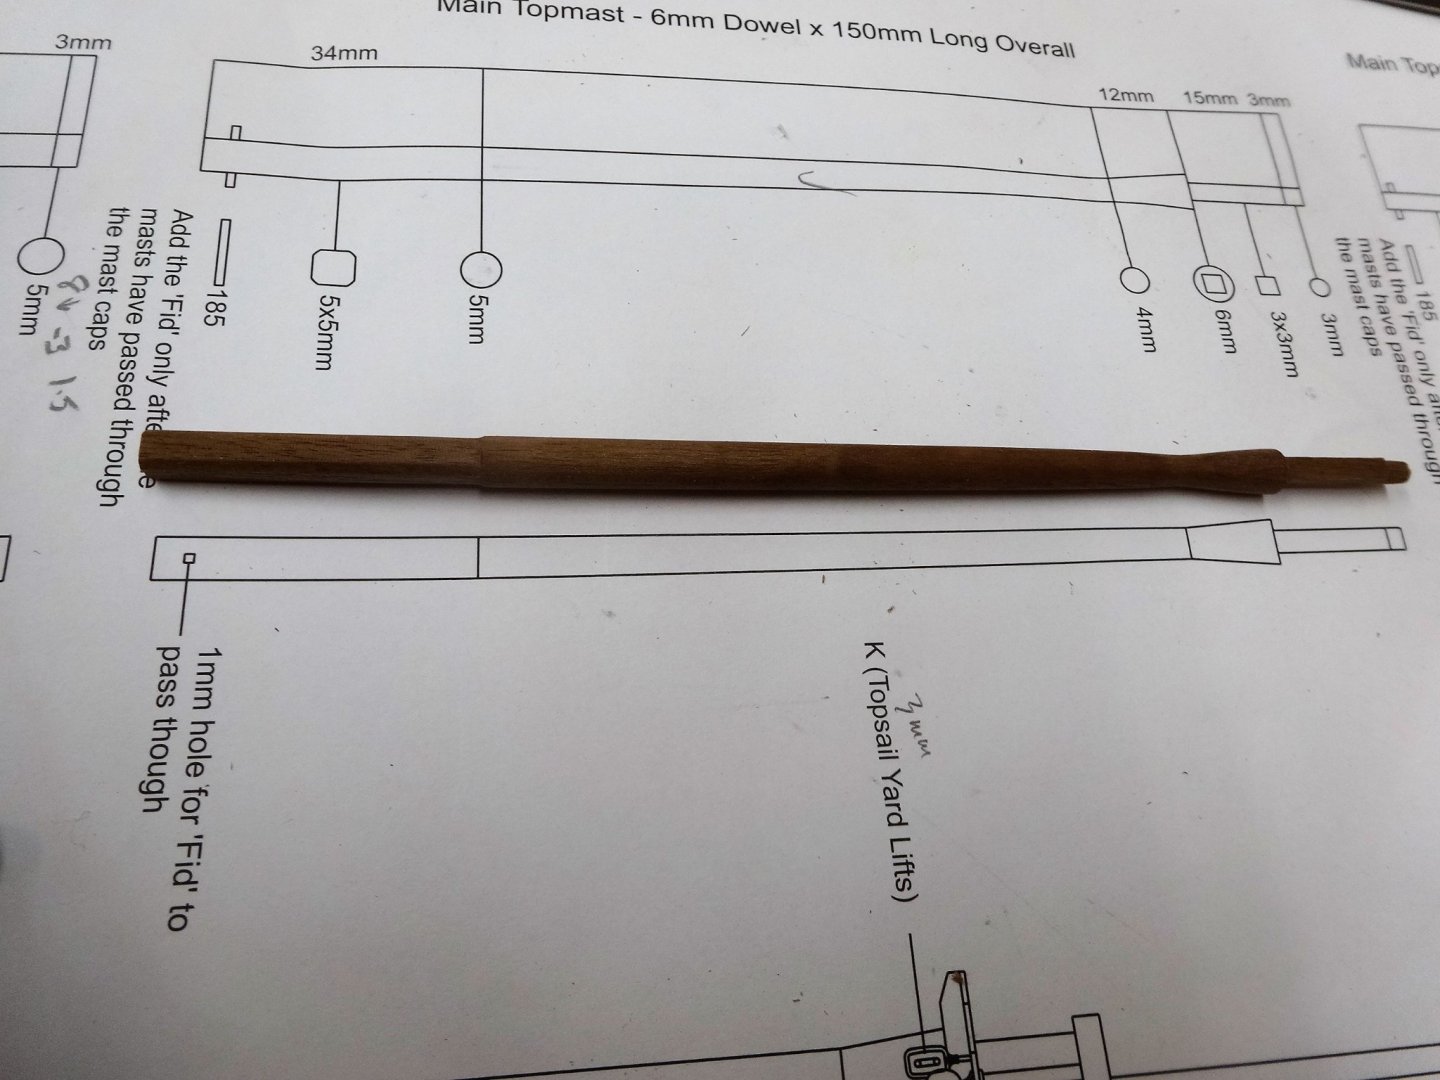
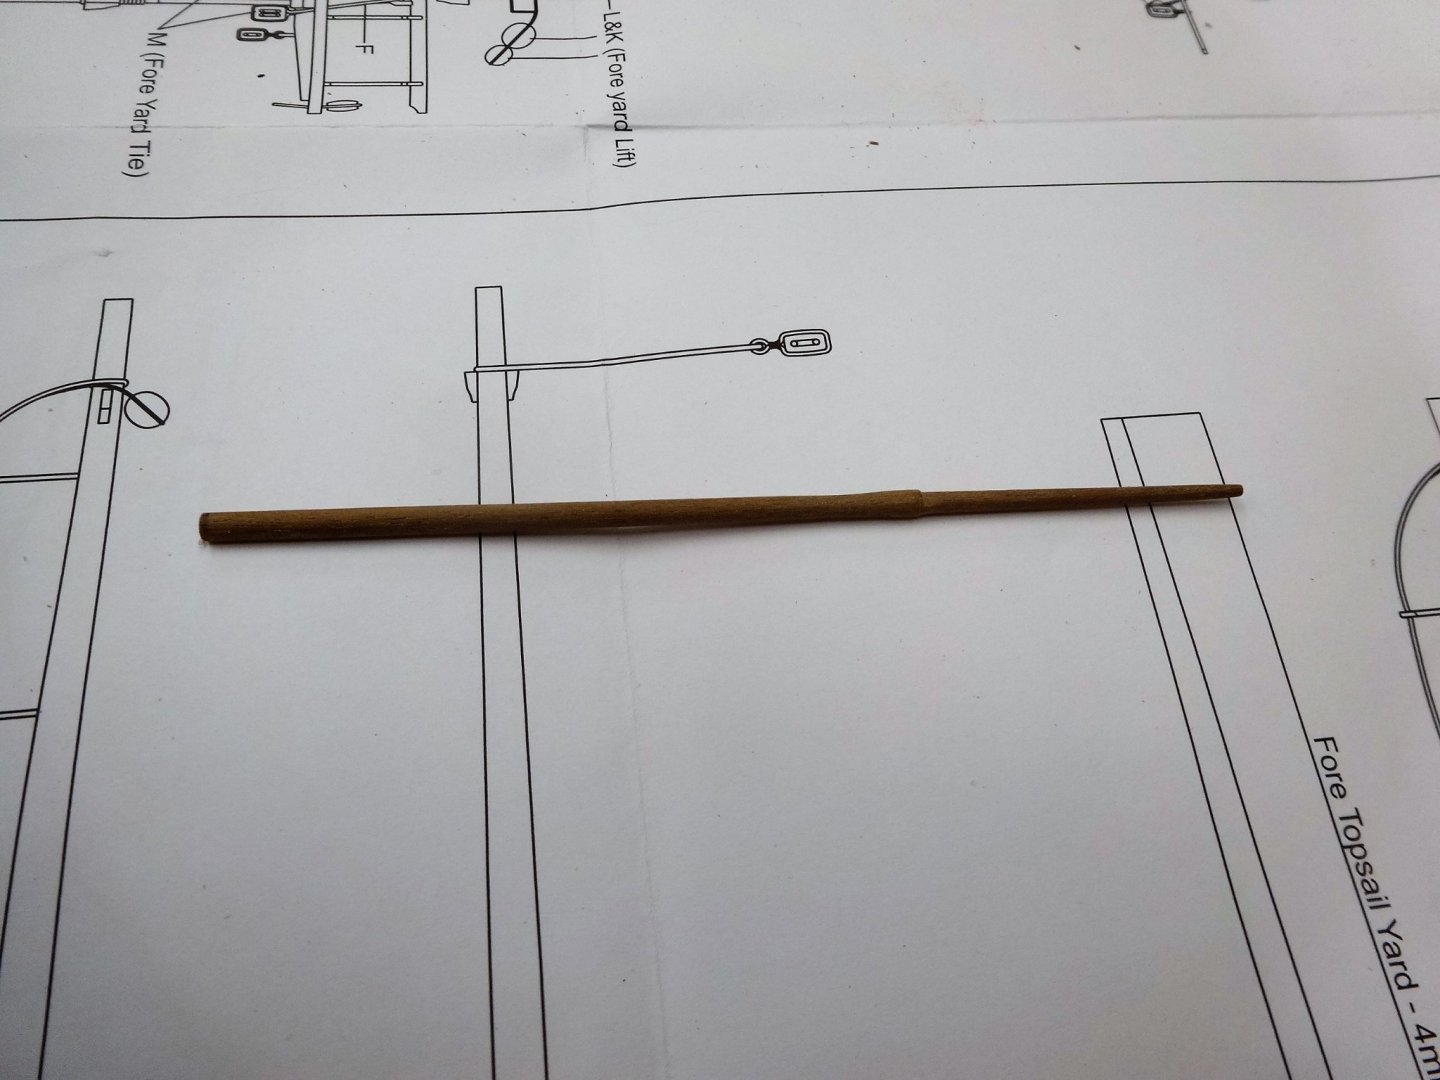
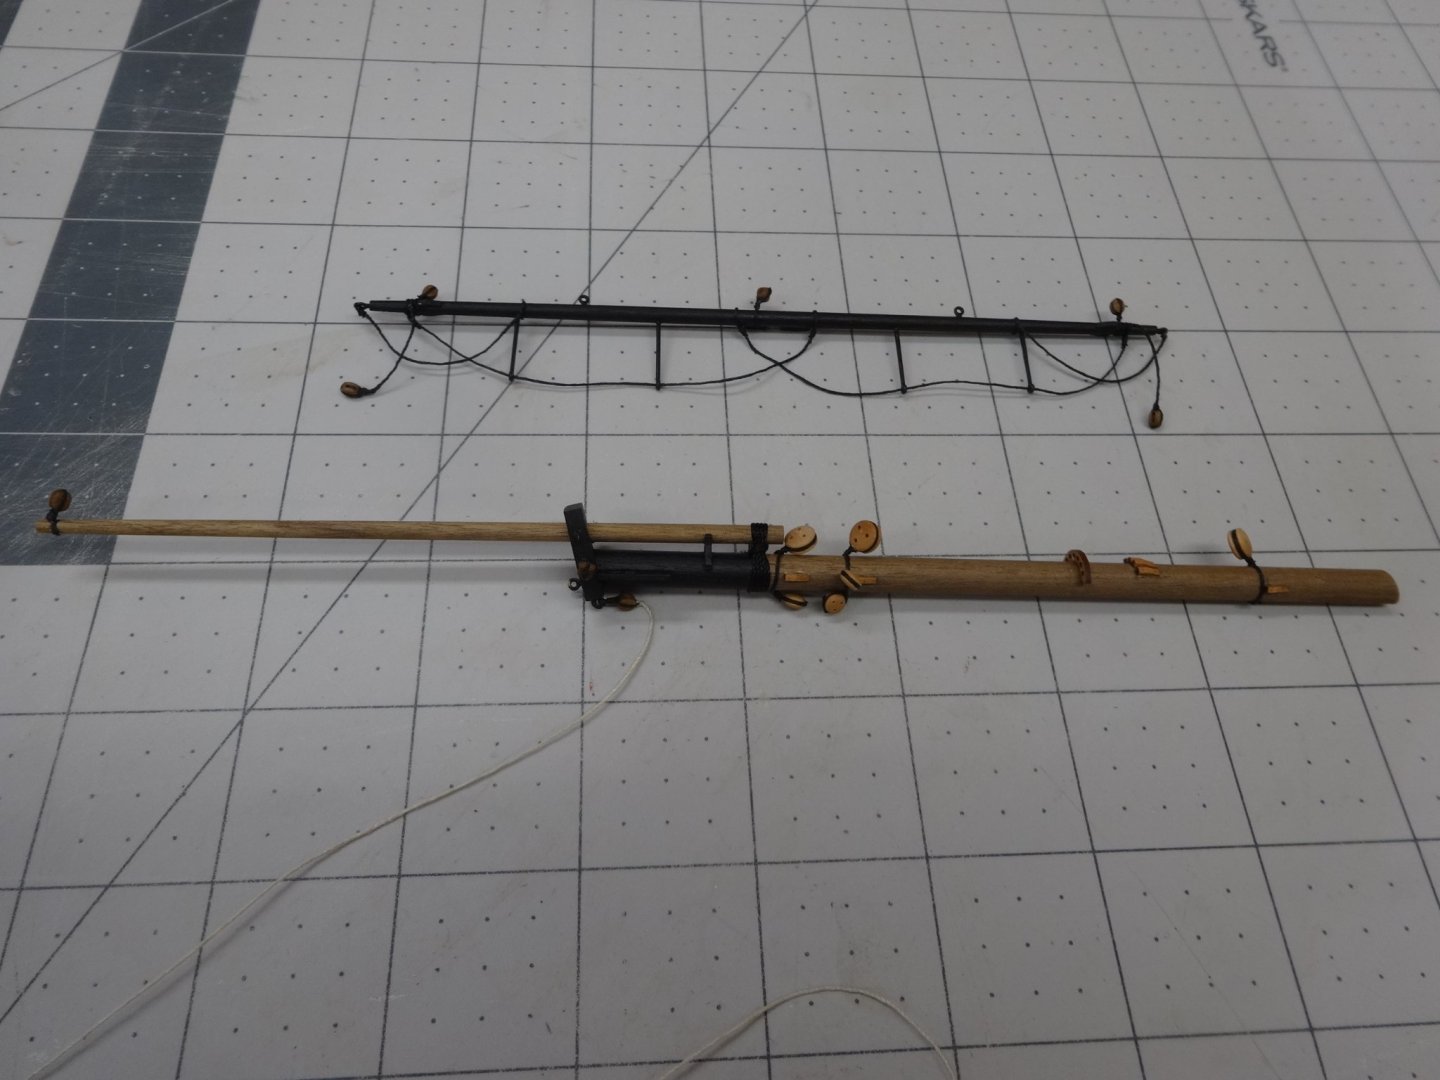
I've been grabbing a bit of shop time here and there and have been working on the masts. To work on the masts I obtained a new Proxxon MF 70 mill. Tools, gotta have tools! Anyways it came in very handy when shaping the square ends on the masts. Here are some of the various mast parts. And here is the Mizzen Mast and yards.


- 201 replies
-
- 19
-
-
- Duchess of Kingston
- Vanguard Models
- (and 1 more)
-
Very nice work Bob!
-
Looks like you've got a good handle on it! Nice work.
- 185 replies
-
- 1
-
-
- queen anne barge
- Syren Ship Model Company
- (and 1 more)
-
Everything is looking really nice JJ.
-
Same stuff I've also used for years and haven't had any rusting either.
- 1,784 replies
-
- 4
-
-
- winchelsea
- Syren Ship Model Company
- (and 1 more)
-
Hmmm. I am torn because both look so good. I am leaning more towards showing the knees though. For me seeing them looks special. Decisions, Decisions!
-
Just a little update. I was able to complete the bowsprit and spritsail this weekend. On to the Mizzen Mast next.
- 201 replies
-
- 12
-
-
- Duchess of Kingston
- Vanguard Models
- (and 1 more)
-
Thank you Theodosius! Thanks Glenn but not anywhere close to Jim's workmanship. Also thanks for all the likes. Finally a day off so hopefully I get sometime in the shop today!
- 201 replies
-
- 2
-
-
- Duchess of Kingston
- Vanguard Models
- (and 1 more)
-
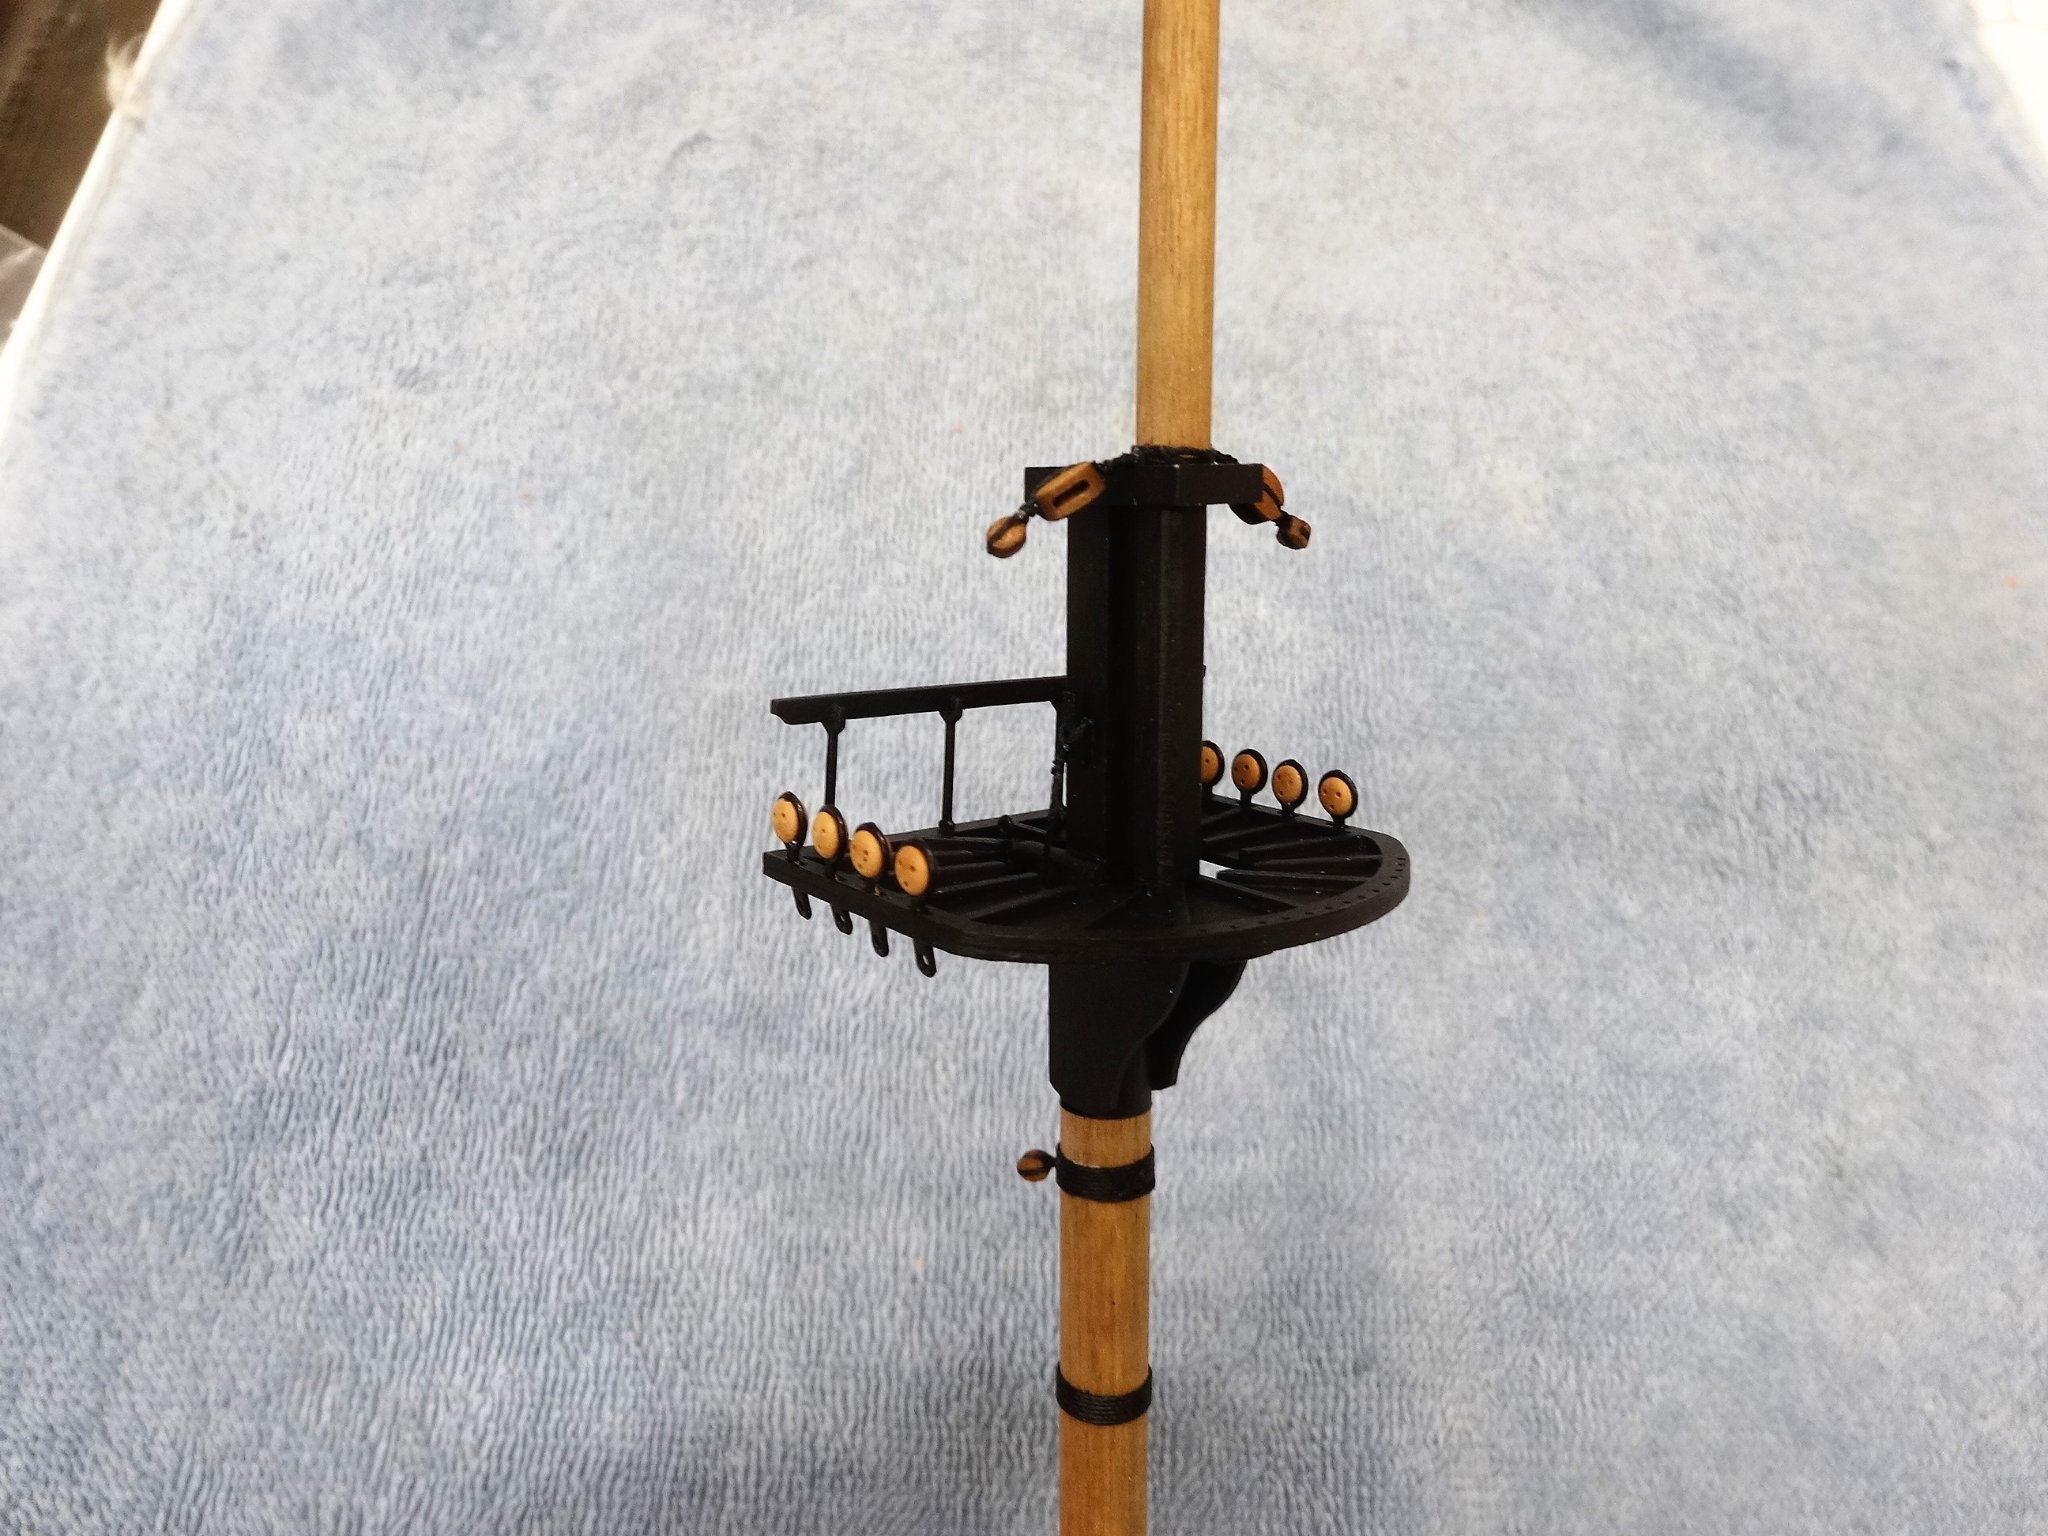
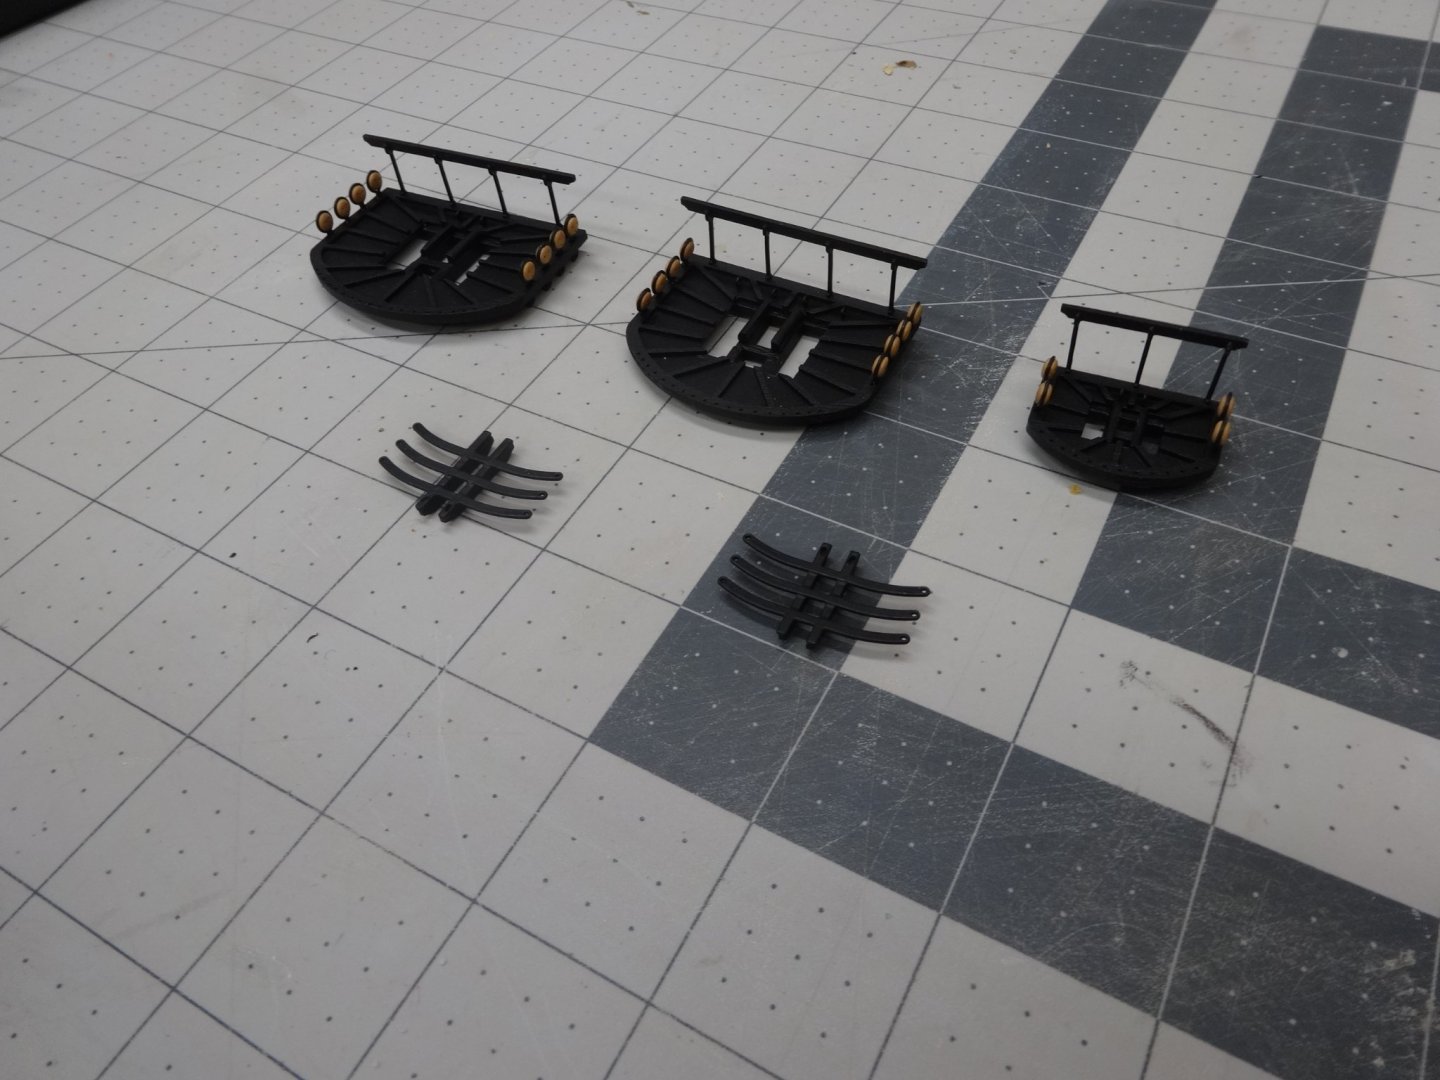
Time in the shipyard has been severally curtailed of late and not looking good for the future either. So far I've been able to add the deadeye/chain plate assembly as well as build the trestletrees and the fore, main and mizzen top platforms. Next I'll start working on the yards when I have some free time.
- 201 replies
-
- 21
-
-
- Duchess of Kingston
- Vanguard Models
- (and 1 more)