


Rustyj
-
Posts
2,540 -
Joined
-
Last visited
Content Type
Profiles
Forums
Gallery
Events
Everything posted by Rustyj
-
 Looking real nice B.E. That hull was fun to plank!
- 261 replies
-
- 1
-

-
- muirneag
- vanguard models
- (and 2 more)
-
Very nice work Glenn. You planning and execution will be rewarded in the long run!
- 778 replies
-
- 4
-
-
- cheerful
- Syren Ship Model Company
- (and 1 more)
-
You're on your way now!
-
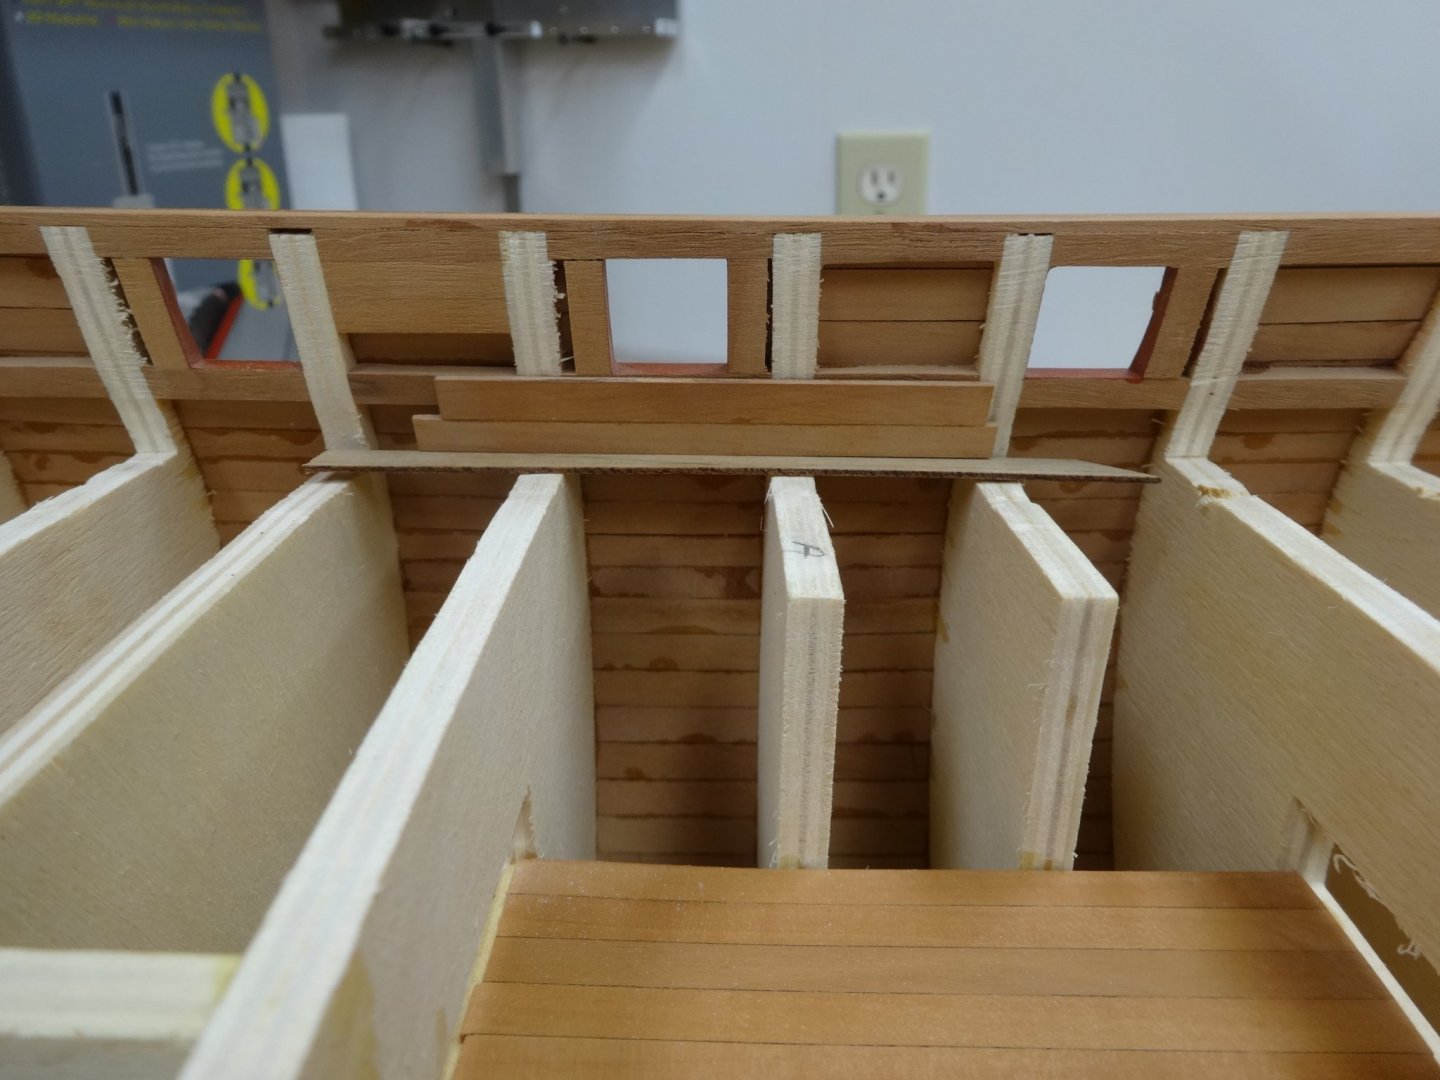
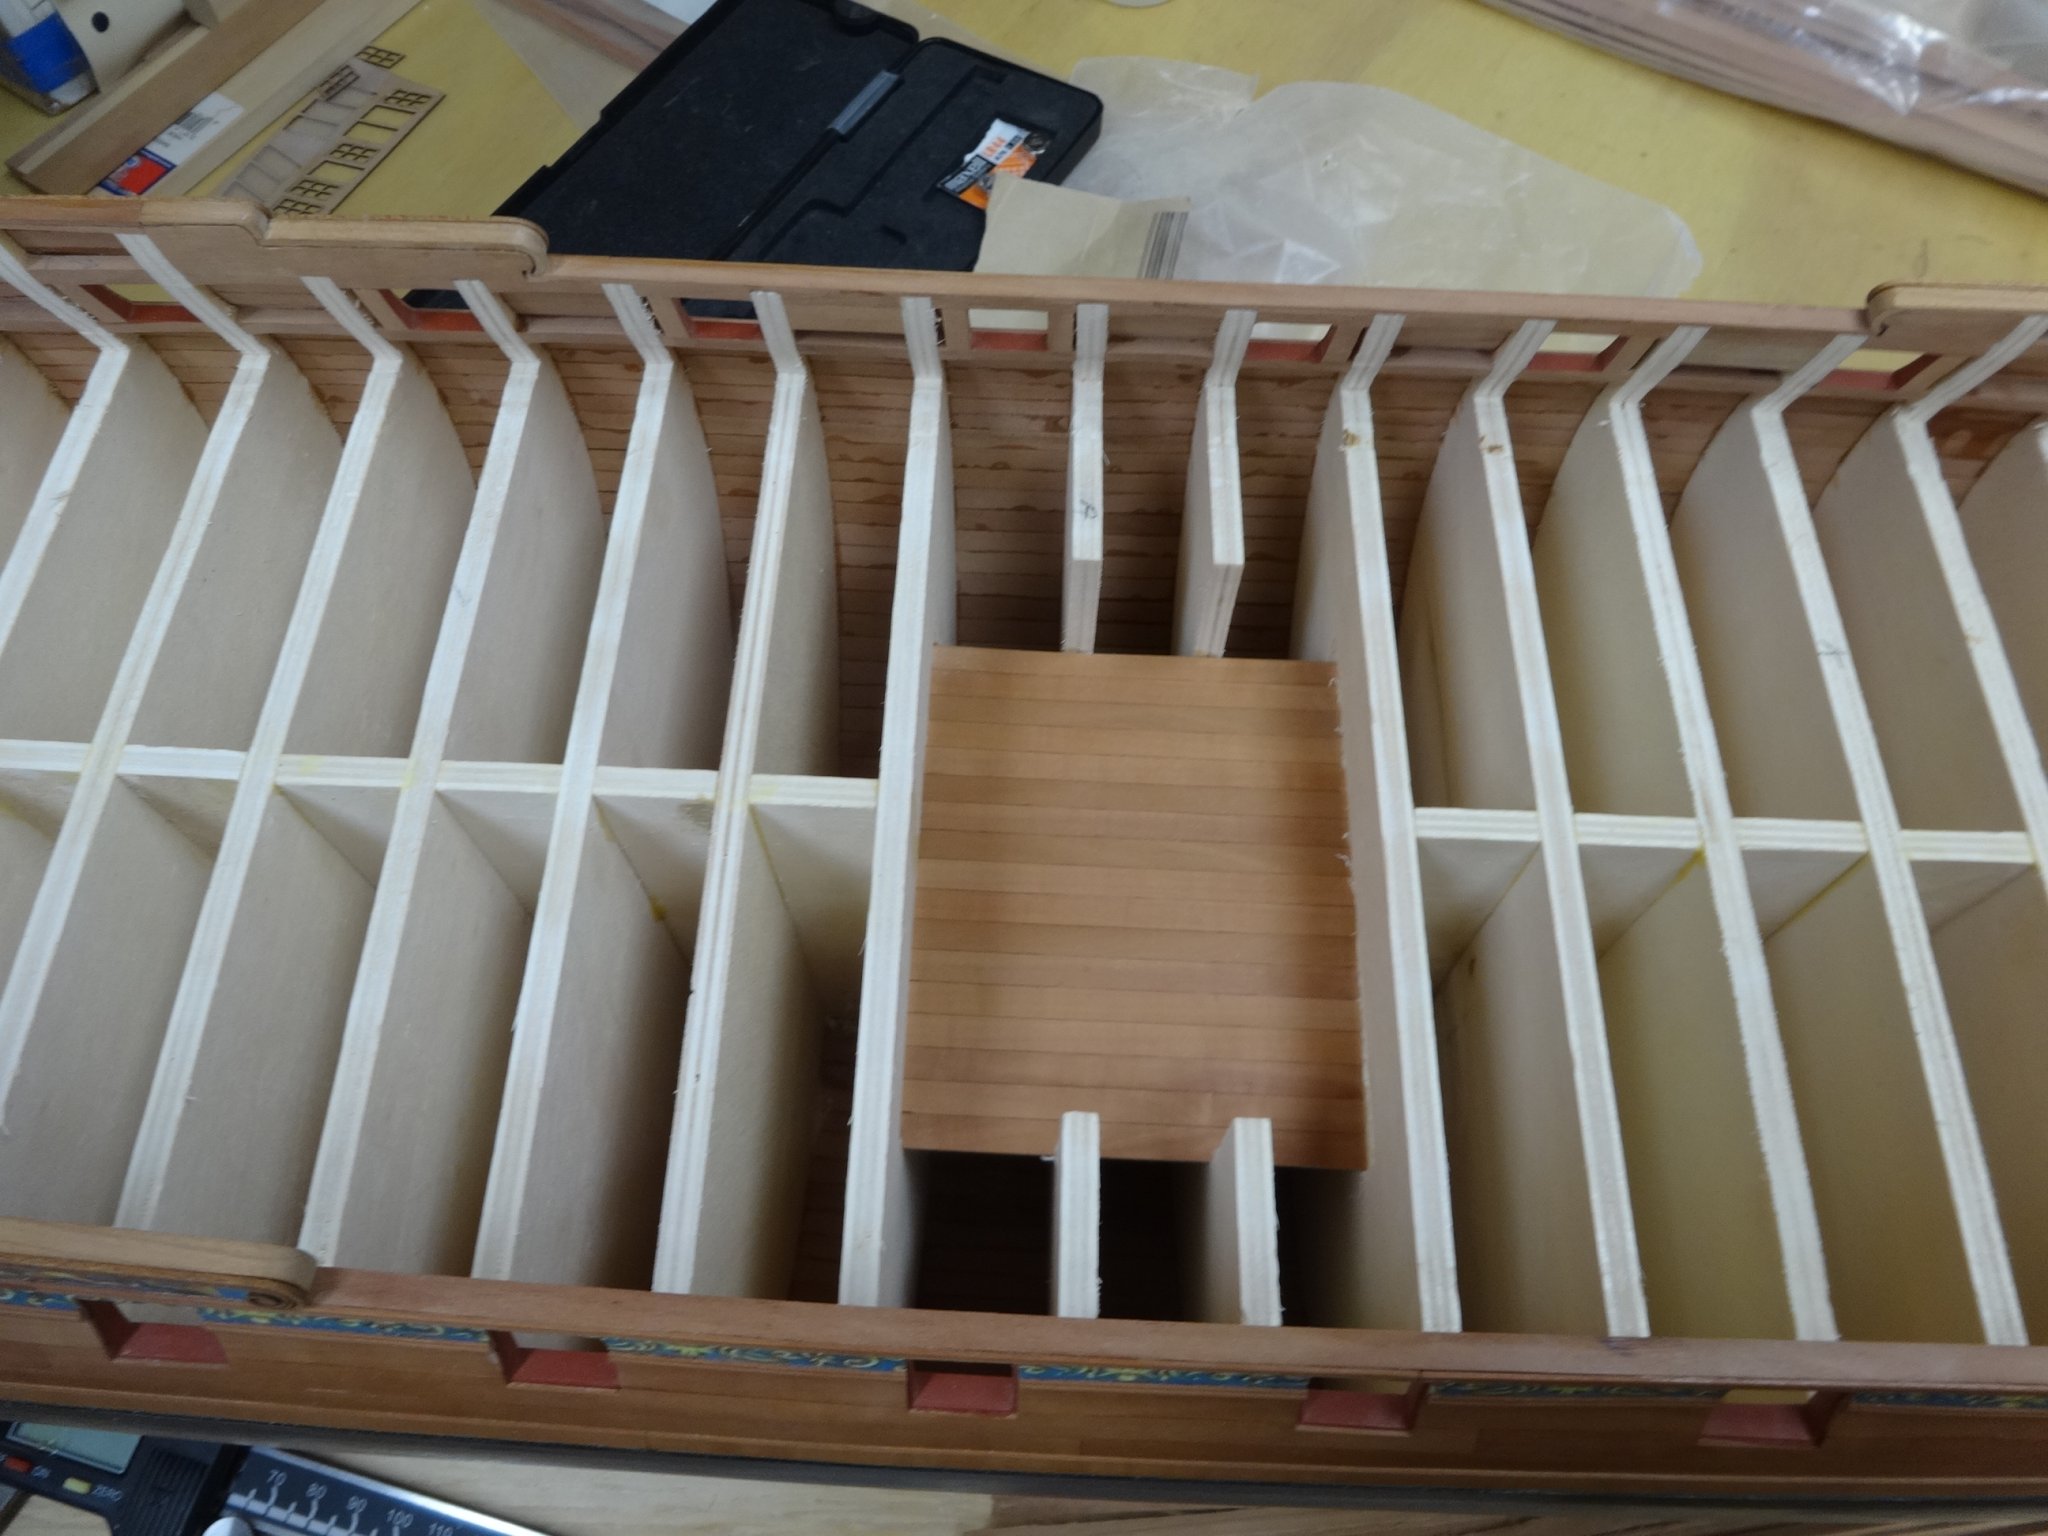
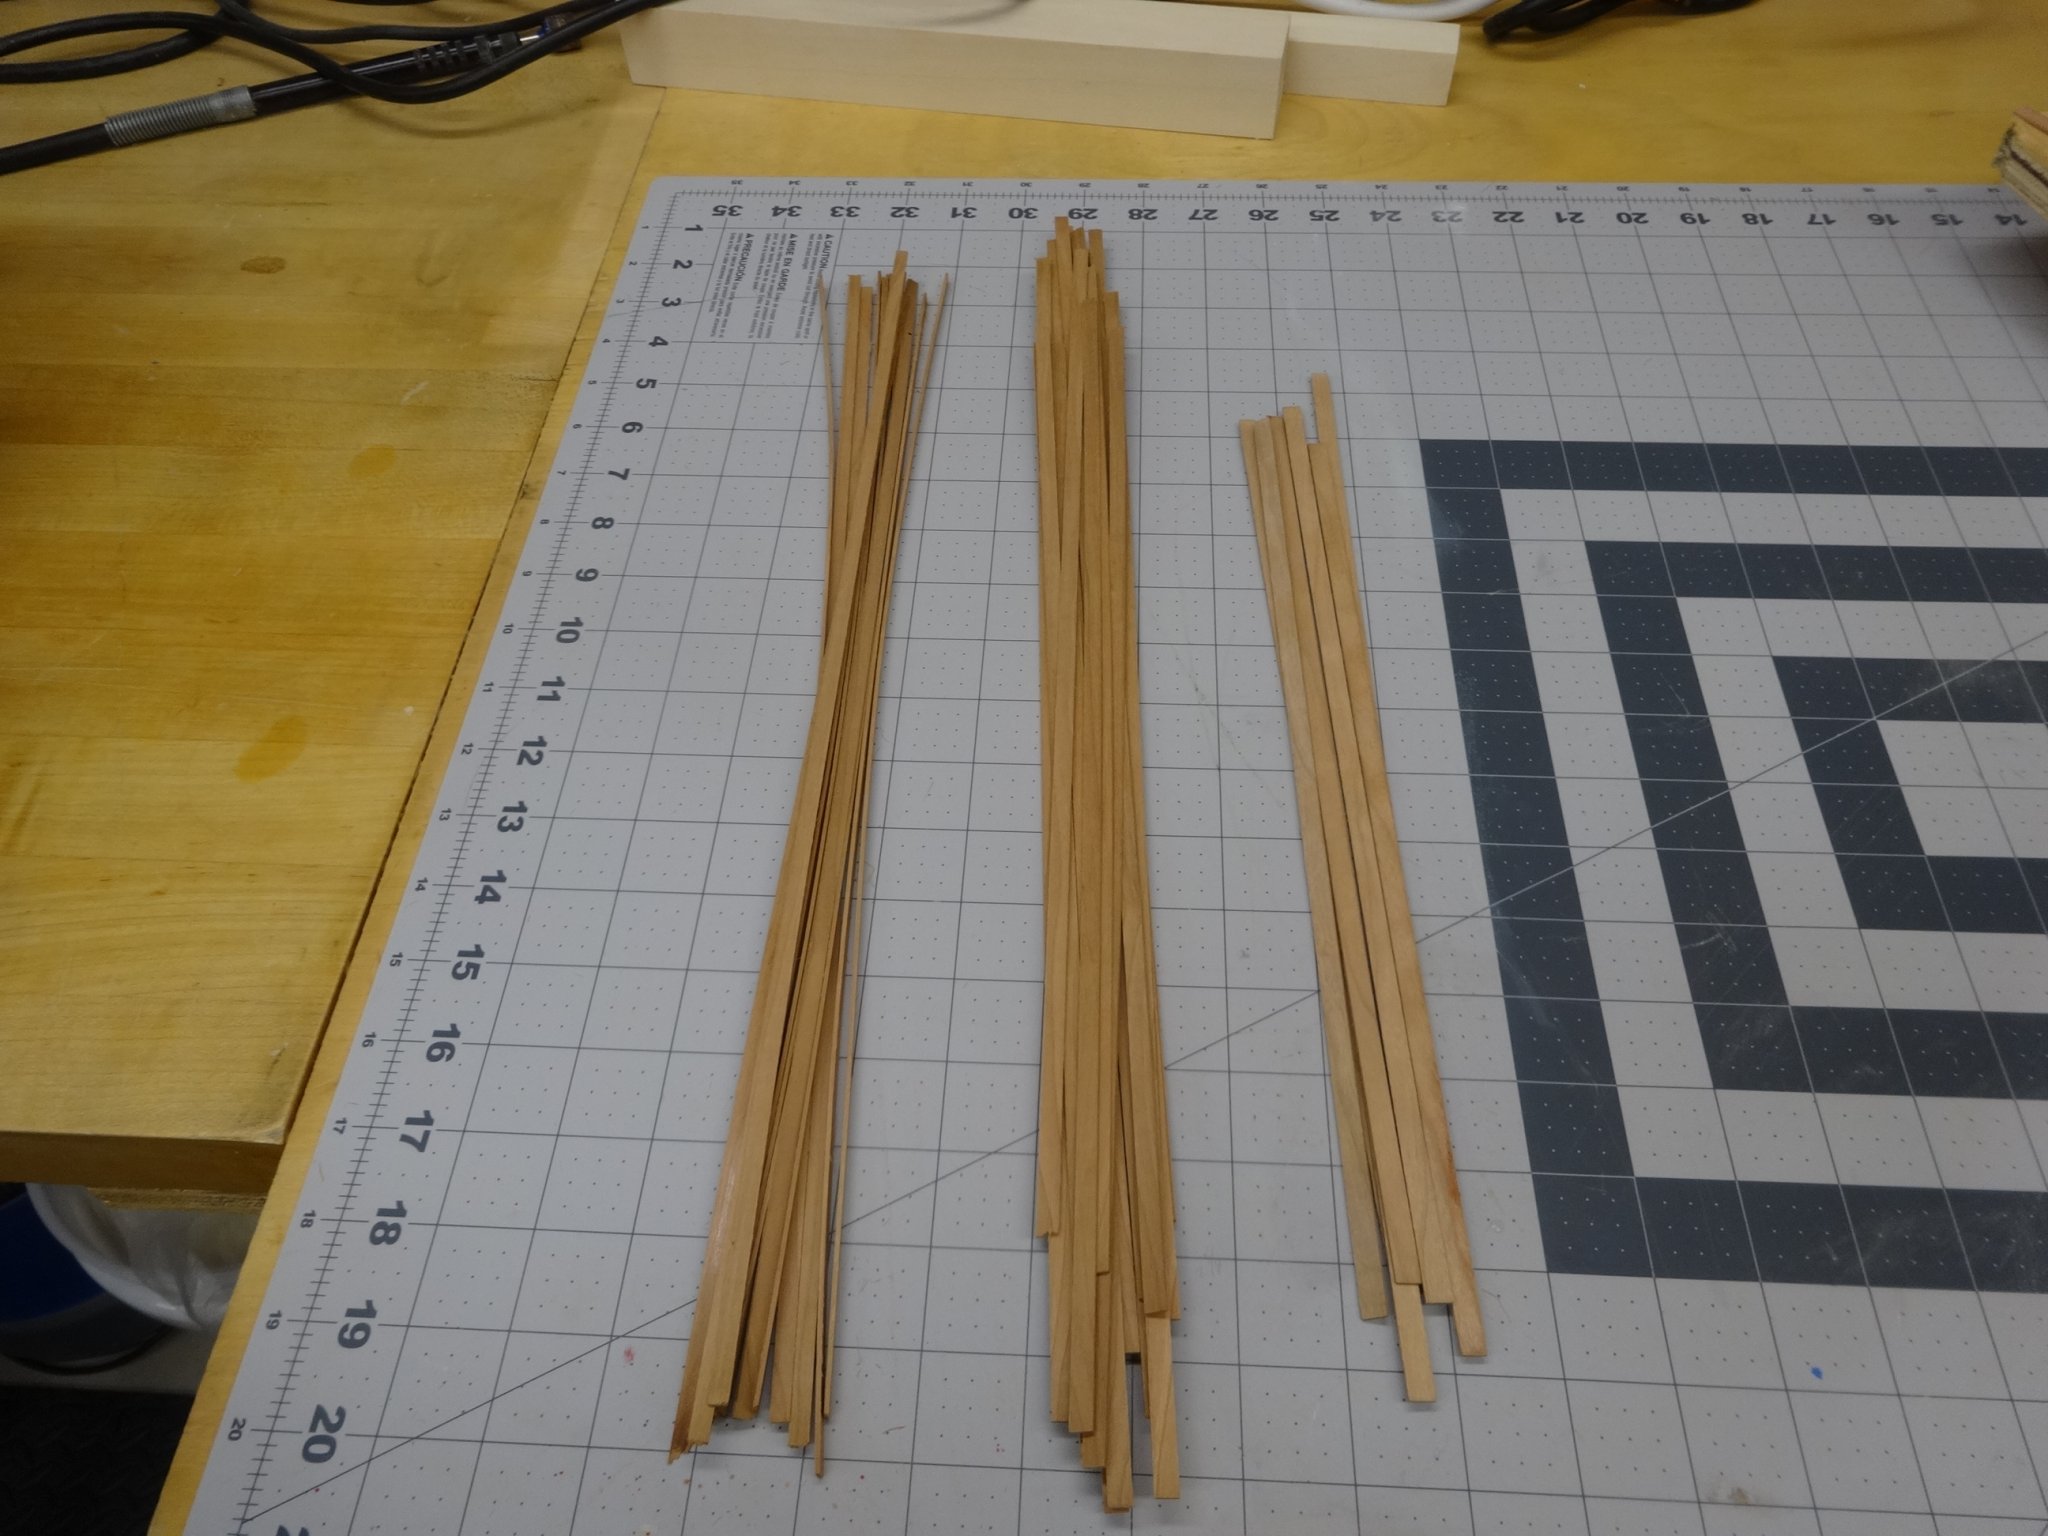
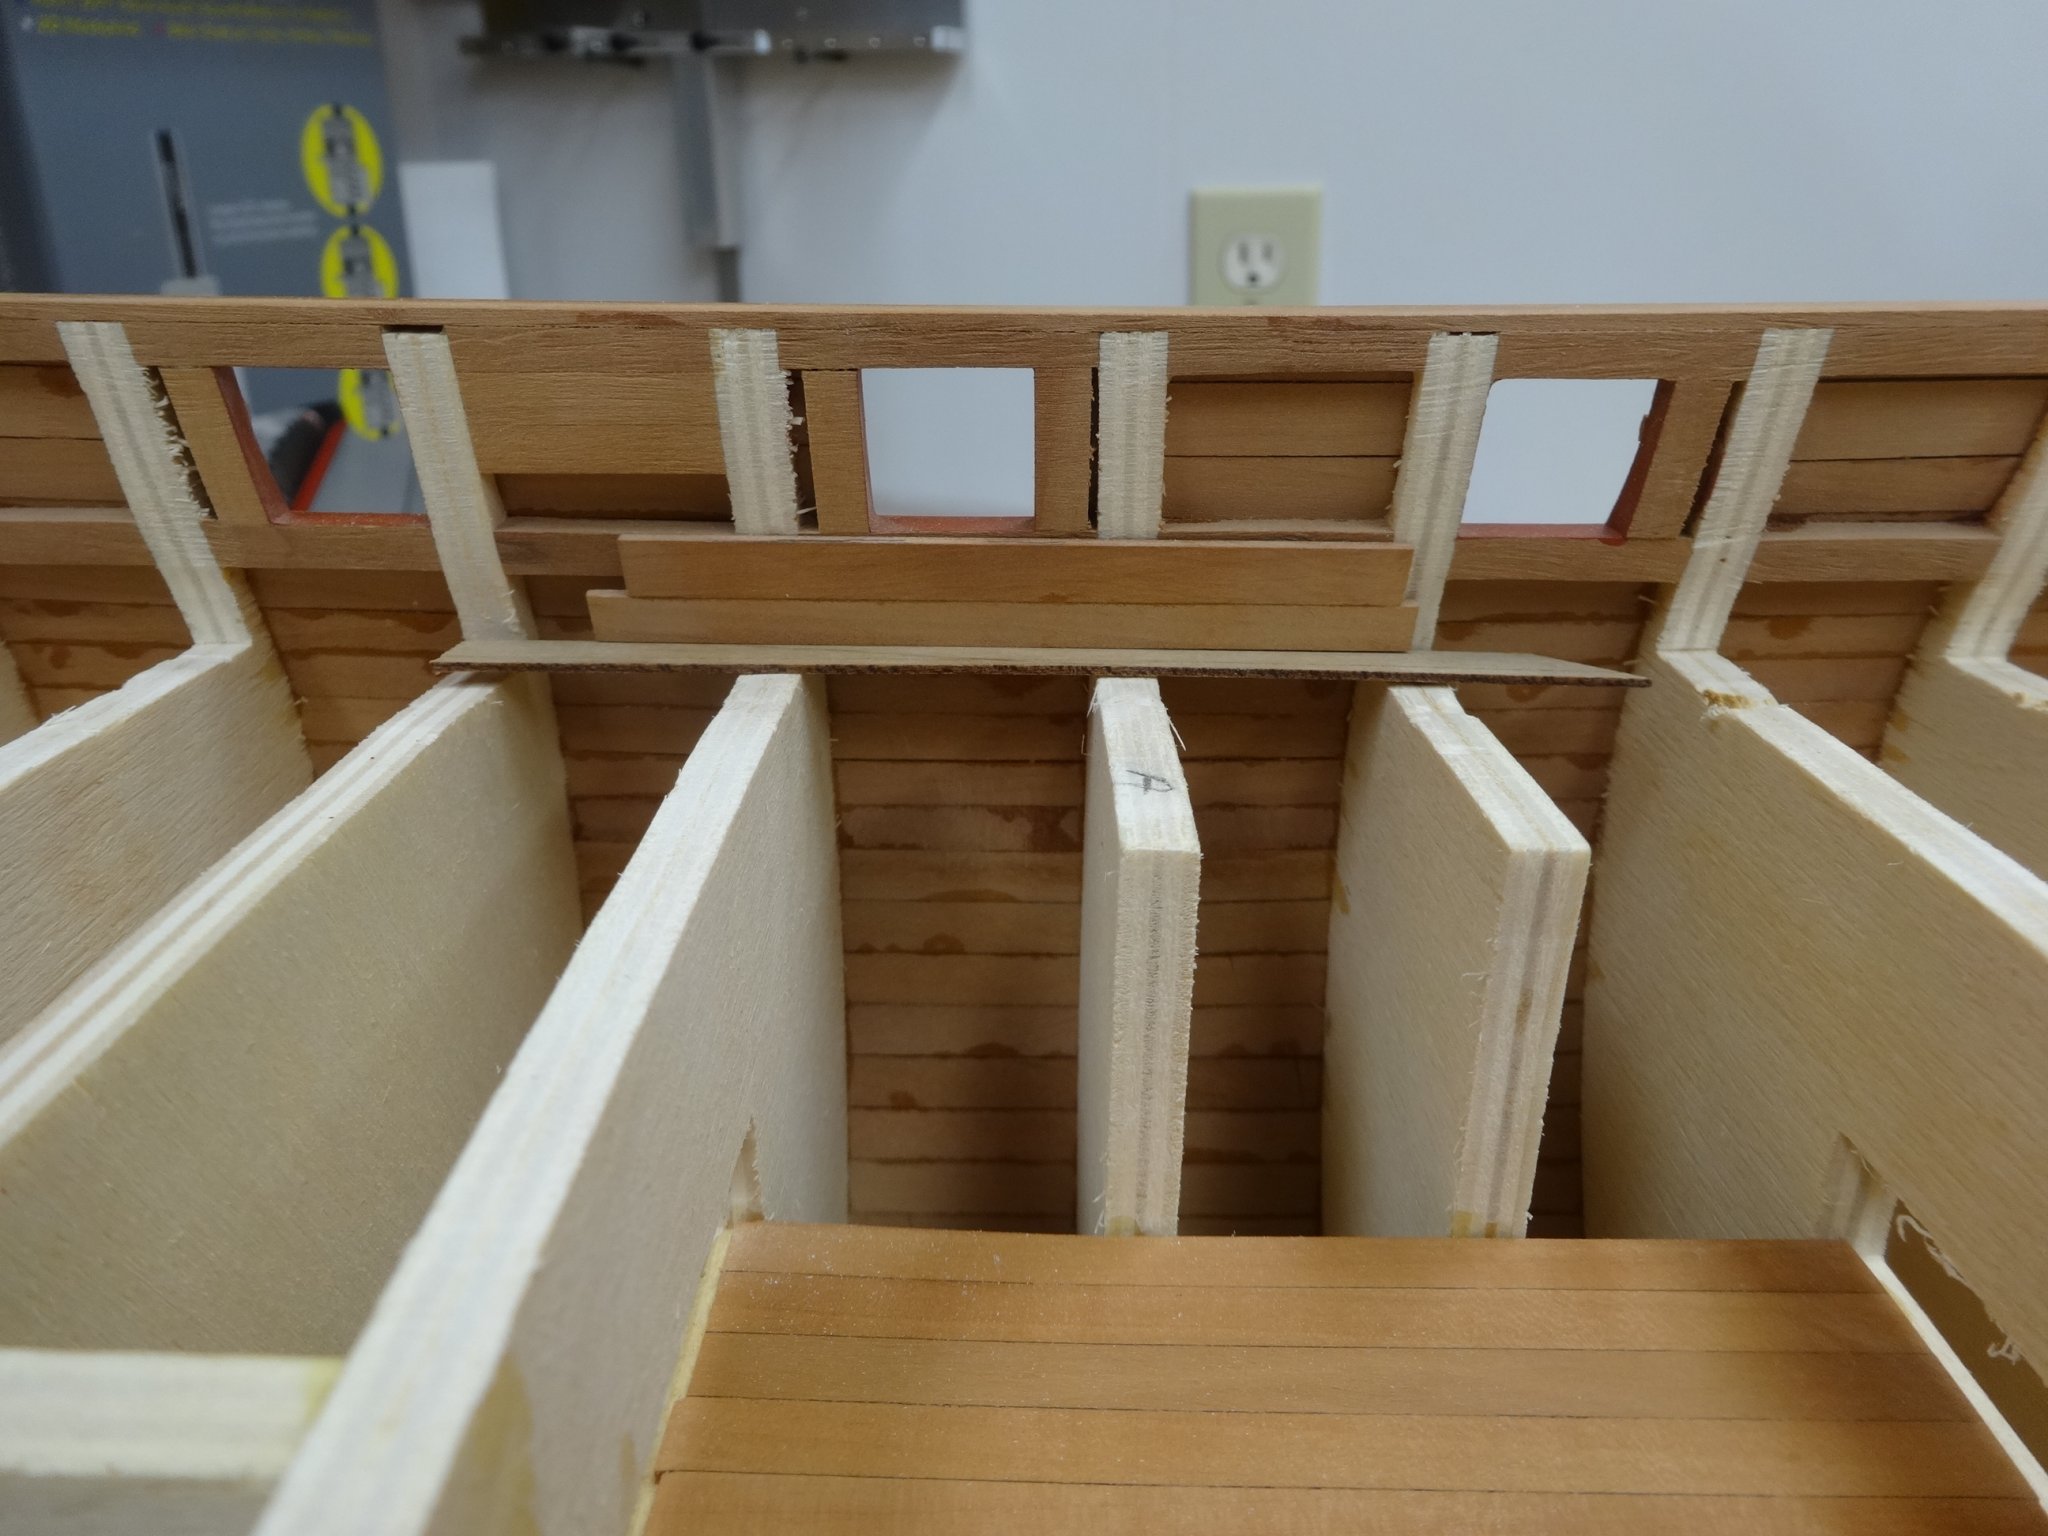
While waiting to start chapter 4 I've been doing some prep work. I've planked the fore and aft sub decks with pear. Then I sorted through the pear I'm using to plank the deck. I've tried to get pieces with the most consistent color. Even so you will notice that the color can change over the length of a strip so I'll have to pay attention! Spare planks are in the sleeve on the right. The inboard bulwark planking will consist of 3/16", 7/32, and 1/4" planks. They have been cut and seen below. After that I glued together 1/4" and a 7/32" pieces which represent the two rows under the gun ports. I placed them on a piece of 1/32" to simulate the thickness of the false deck. I then checked the gun ports and found that most were right on. Whew!


- 642 replies
-
- 13
-
-
- winchelsea
- Syren Ship Model Company
- (and 1 more)
-
Looking really good Fred!
-
Thanks Chris. Your opinion is always appreciated. Also thank you all for the likes.
- 642 replies
-
- 1
-
-
- winchelsea
- Syren Ship Model Company
- (and 1 more)
-
Great job JJ!
-
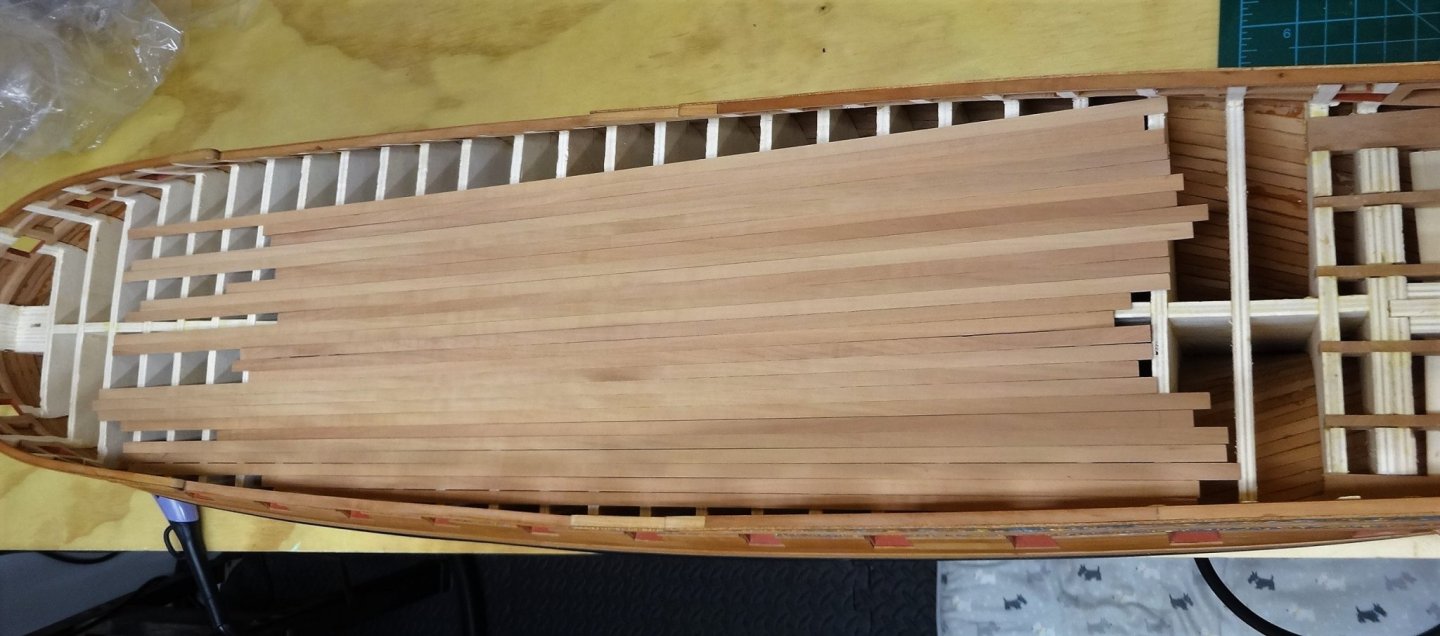
Yes it's nice to have a second shop assistant although the two almost never agree! 😉 Thank you all for your opinions. It's deeply appreciated. I have been cleaning and reorganizing the shop in anticipation of starting chapter 4. In doing this I remembered that I had overcut the 1/4" pear needed for the hull. So I pulled it out and there is more than enough pear already cut to plank all the decks and still have some left over. Can't let it go to waste so I'll be planking the decks in pear! It's like I subconsciously knew I was going to do it this way when I cut them. I'll go with that as opposed the the shop assistants who think I just screwed up. Oh and they both agree on this point! Here is some of the unfinished pear planks just laid on the deck.
- 642 replies
-
- 18
-
-
- winchelsea
- Syren Ship Model Company
- (and 1 more)
-
Oh I really get what you mean after looking at the picture of the contemporary model! Thanks Chuck.
- 642 replies
-
- 2
-
-
- winchelsea
- Syren Ship Model Company
- (and 1 more)
-
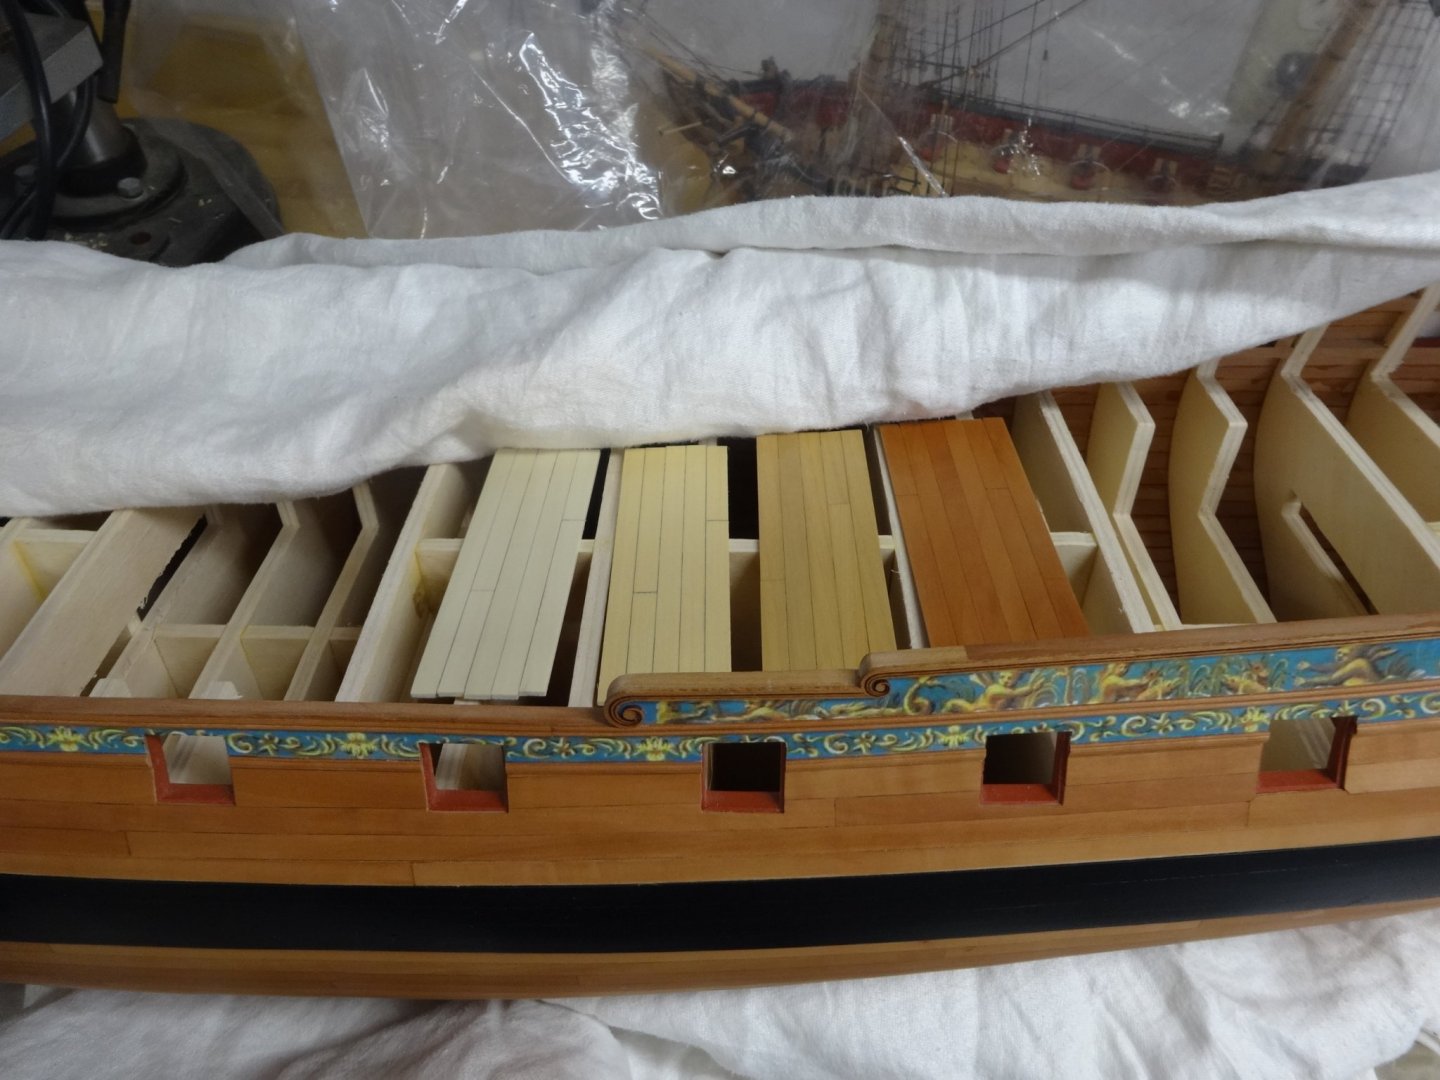
Yes it's boxwood. It was cut from an old scrap piece. I looks darker in the picture than it really is. I agree the Holly is too light so that's out. I was thinking that with the bulwarks painted red, hatch combings black as well as the stove using a different color from the hull wouldn't look as drastic. Will the bits, pumps, railings, binnacle be painted too? Here is a pic with the samples on the deck. Pear is on the far right now. Excuse the covering as she was all wrapped up for protection until I start on her again. Glenn, I too favor AYC but it may be too light too. I probably won't make a decision until the false deck is in and the bulwarks planked and painted, then I can get even more confused! Thanks for checking in!
- 642 replies
-
- 8
-
-
- winchelsea
- Syren Ship Model Company
- (and 1 more)
-
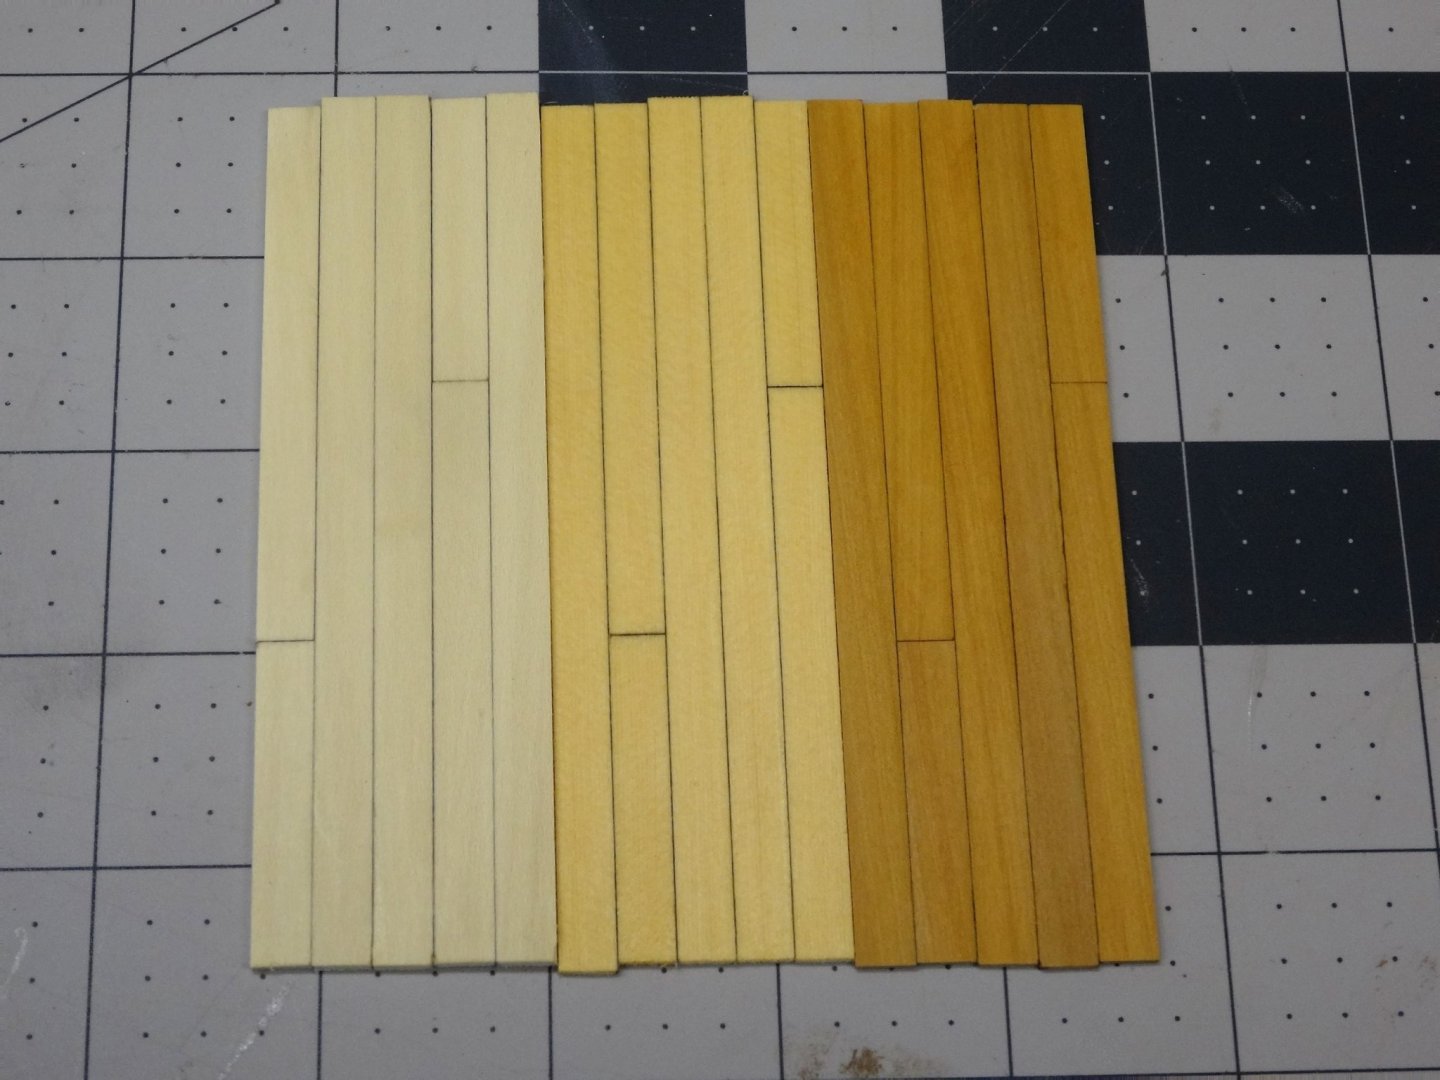
Here's the test planking. Each section has one coat of wipe on poly. Holly on the left. AYC in the middle. Boxwood on the right. I'll ponder for a little while as I won't be starting chapter 4 for awhile.
- 642 replies
-
- 2
-
-
- winchelsea
- Syren Ship Model Company
- (and 1 more)
-
Hi Glenn, Still working off a stash from Jeff. I dread the day I have to start looking for new wood. In the past I've done decks in all three woods and liked them all. Just have to decide what to do with this one.
- 642 replies
-
- 3
-
-
- winchelsea
- Syren Ship Model Company
- (and 1 more)
-
I'm puttering around in the workshop while waiting to start chapter 4. The biggest decision will be deciding what to plank the decks with. I'm contemplating AYC, Holly and Boxwood. I'm going to cut up some scale planks and see how each looks. Once I decide I can start milling what I need.
- 642 replies
-
- 3
-
-
- winchelsea
- Syren Ship Model Company
- (and 1 more)
-
Beautiful planking job! She's something to be proud of!
-
Glenn that is one hull to be proud of. A perfect example of taking your time, fixing what you're not happy with and persevering. Great explanation too! Well done.
- 778 replies
-
- 6
-
-
- cheerful
- Syren Ship Model Company
- (and 1 more)
-
Welcome to the group Greg. Take your time getting going as we'll be here for a couple more years! 😀
-
Looking really good. Can't wait to see some WOP on that Cherry!
-
Great to see an update Bob! Looking really good.
-
Thanks Reg. I had applied WOP prior to setting them in place. I think I'd have needed to soak them in epoxy for them to survive. The new ones are on their way and I'll stash them until it's time for the final installation. Also thanks for all the likes!
- 642 replies
-
- 1
-
-
- winchelsea
- Syren Ship Model Company
- (and 1 more)
-
Ok here's where I'm at now. This update is a good news bad news type of update. The good news is the quarter galleries, drops and figurines have been placed, although some paint touch is needed, chapter 3 is complete! Now the bad news portion is that you will notice that the window frames have been removed from the galleries. This was intentional as the acetate had not been placed on the inside. There will be a lot of sanding and dust would cover the widows and they couldn't be cleaned. Plus it protects from accidentally damaging them as they are fragile. Well having them in place while I glued some of the quarter galleries parts in place allowed me to get a good fit but also allowed me to unknowingly allow glue to creep onto the frames and gluing them partially in place. Of course as hard as I tried I broke some taking them out. Soooooo new frames have been ordered from Syren and they will be placed in the safe until needed later in the build! So please all of you don't follow my example!
.thumb.JPG.536eeff7ea251c463c08931a9edfe407.JPG)
.thumb.JPG.a75976cf61bd5f63ace296da53caf83a.JPG)
- 642 replies
-
- 22
-
-
- winchelsea
- Syren Ship Model Company
- (and 1 more)
-
Great job on the stern. Sorry to hear that the same gremlin that is in my shop inhabits yours too!
- 137 replies
-
- 4
-
-

-
- winchelsea
- Syren Ship Model Company
- (and 1 more)
-
I look forward to your building it. It was a lot of fun.
- 421 replies
-
- 2
-
-
- granado
- bomb ketch
- (and 2 more)


.JPG.f94a34f39acaa250915457a69f5bd00e.JPG)
.JPG.495062ae38aa832f9e3cf8579fe2f454.JPG)