


Rustyj
-
Posts
2,452 -
Joined
-
Last visited
Content Type
Profiles
Forums
Gallery
Events
Posts posted by Rustyj
-
-
It seems that everything I've posted is going backwards. Well the trend continues.
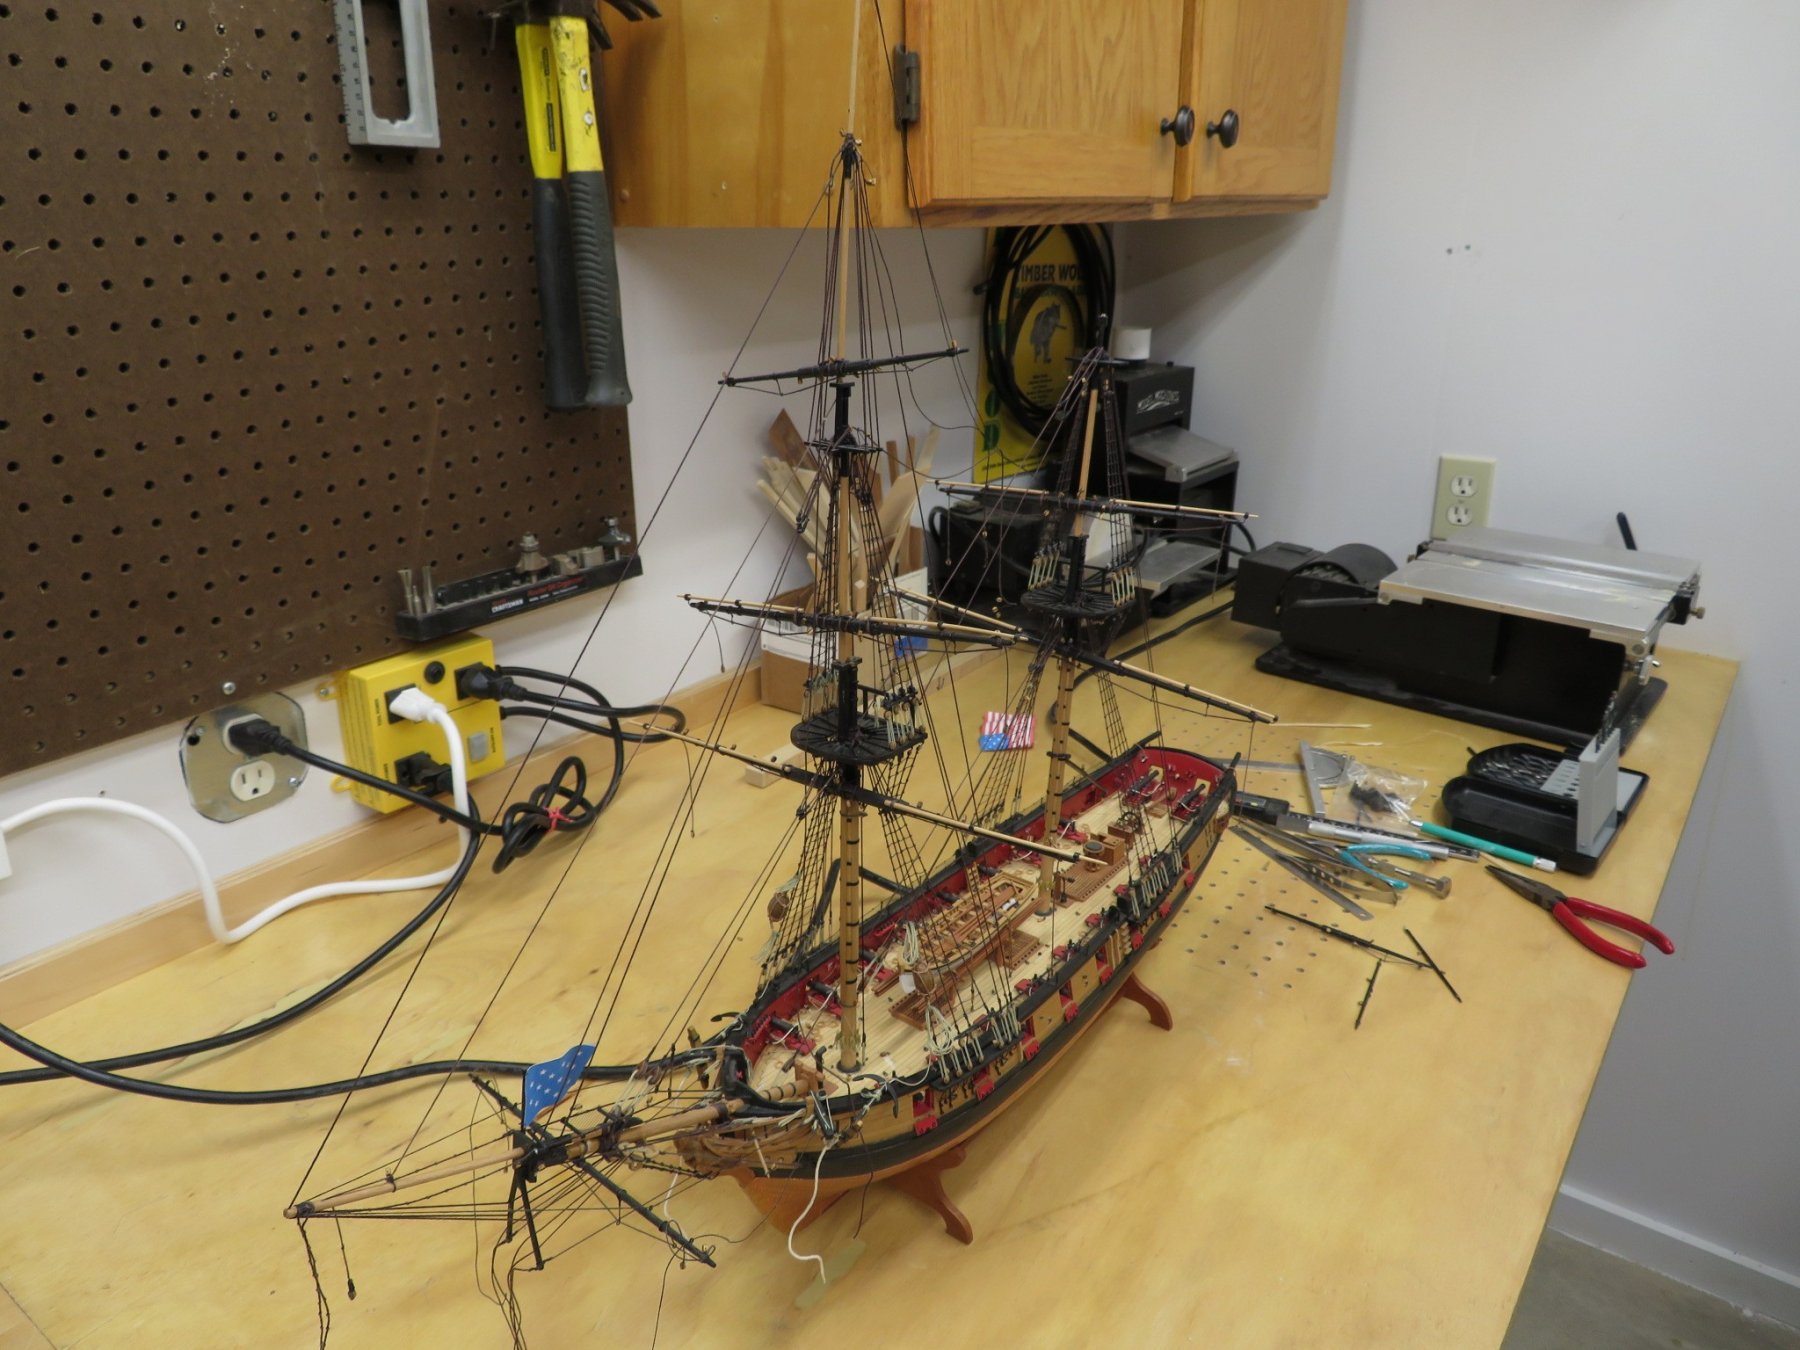
As I've continued on all of the running and standing rigging has been removed and just the
original shrouds and ratlines remain. Now hopefully I can start moving forward instead of reverse!

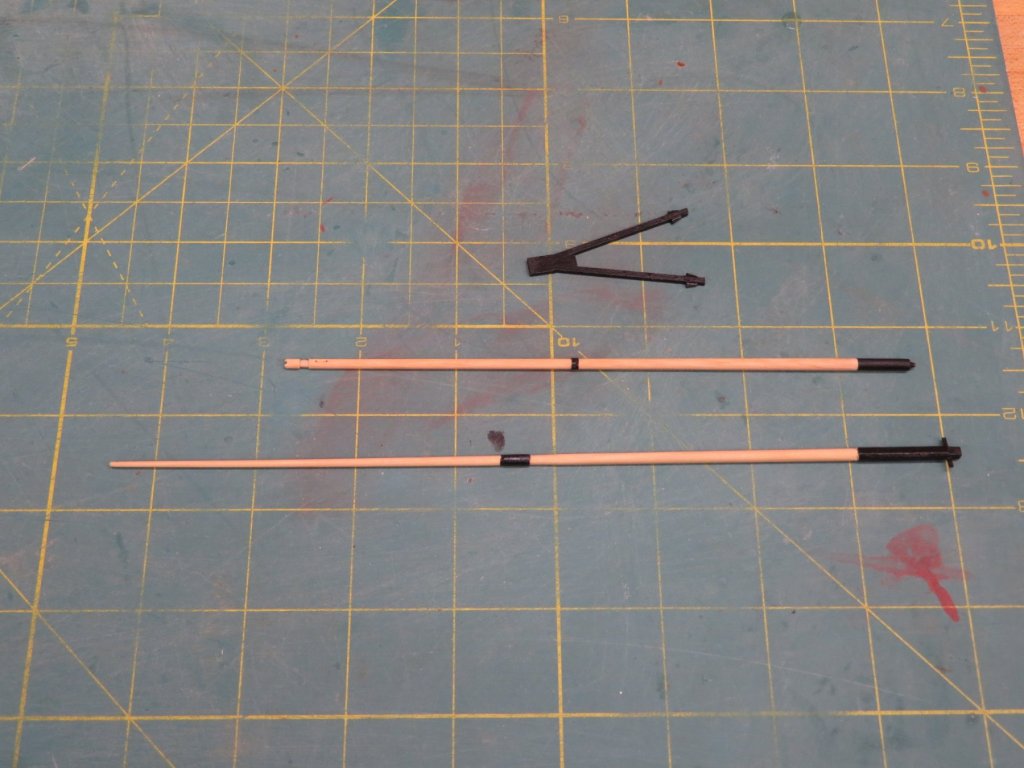
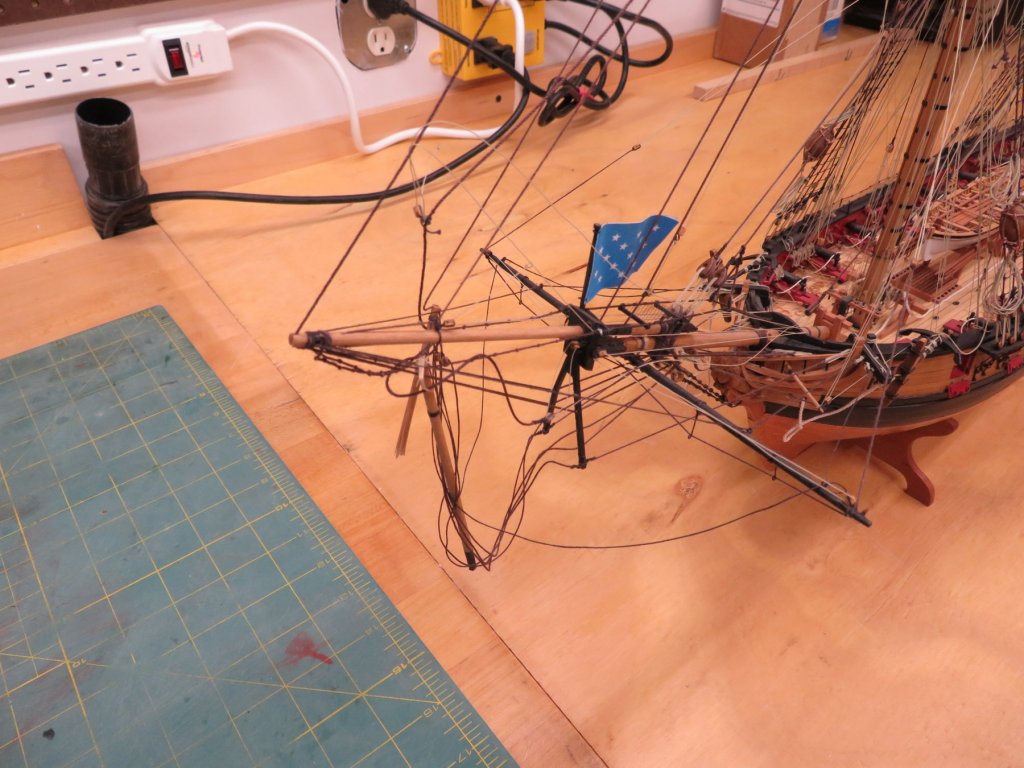
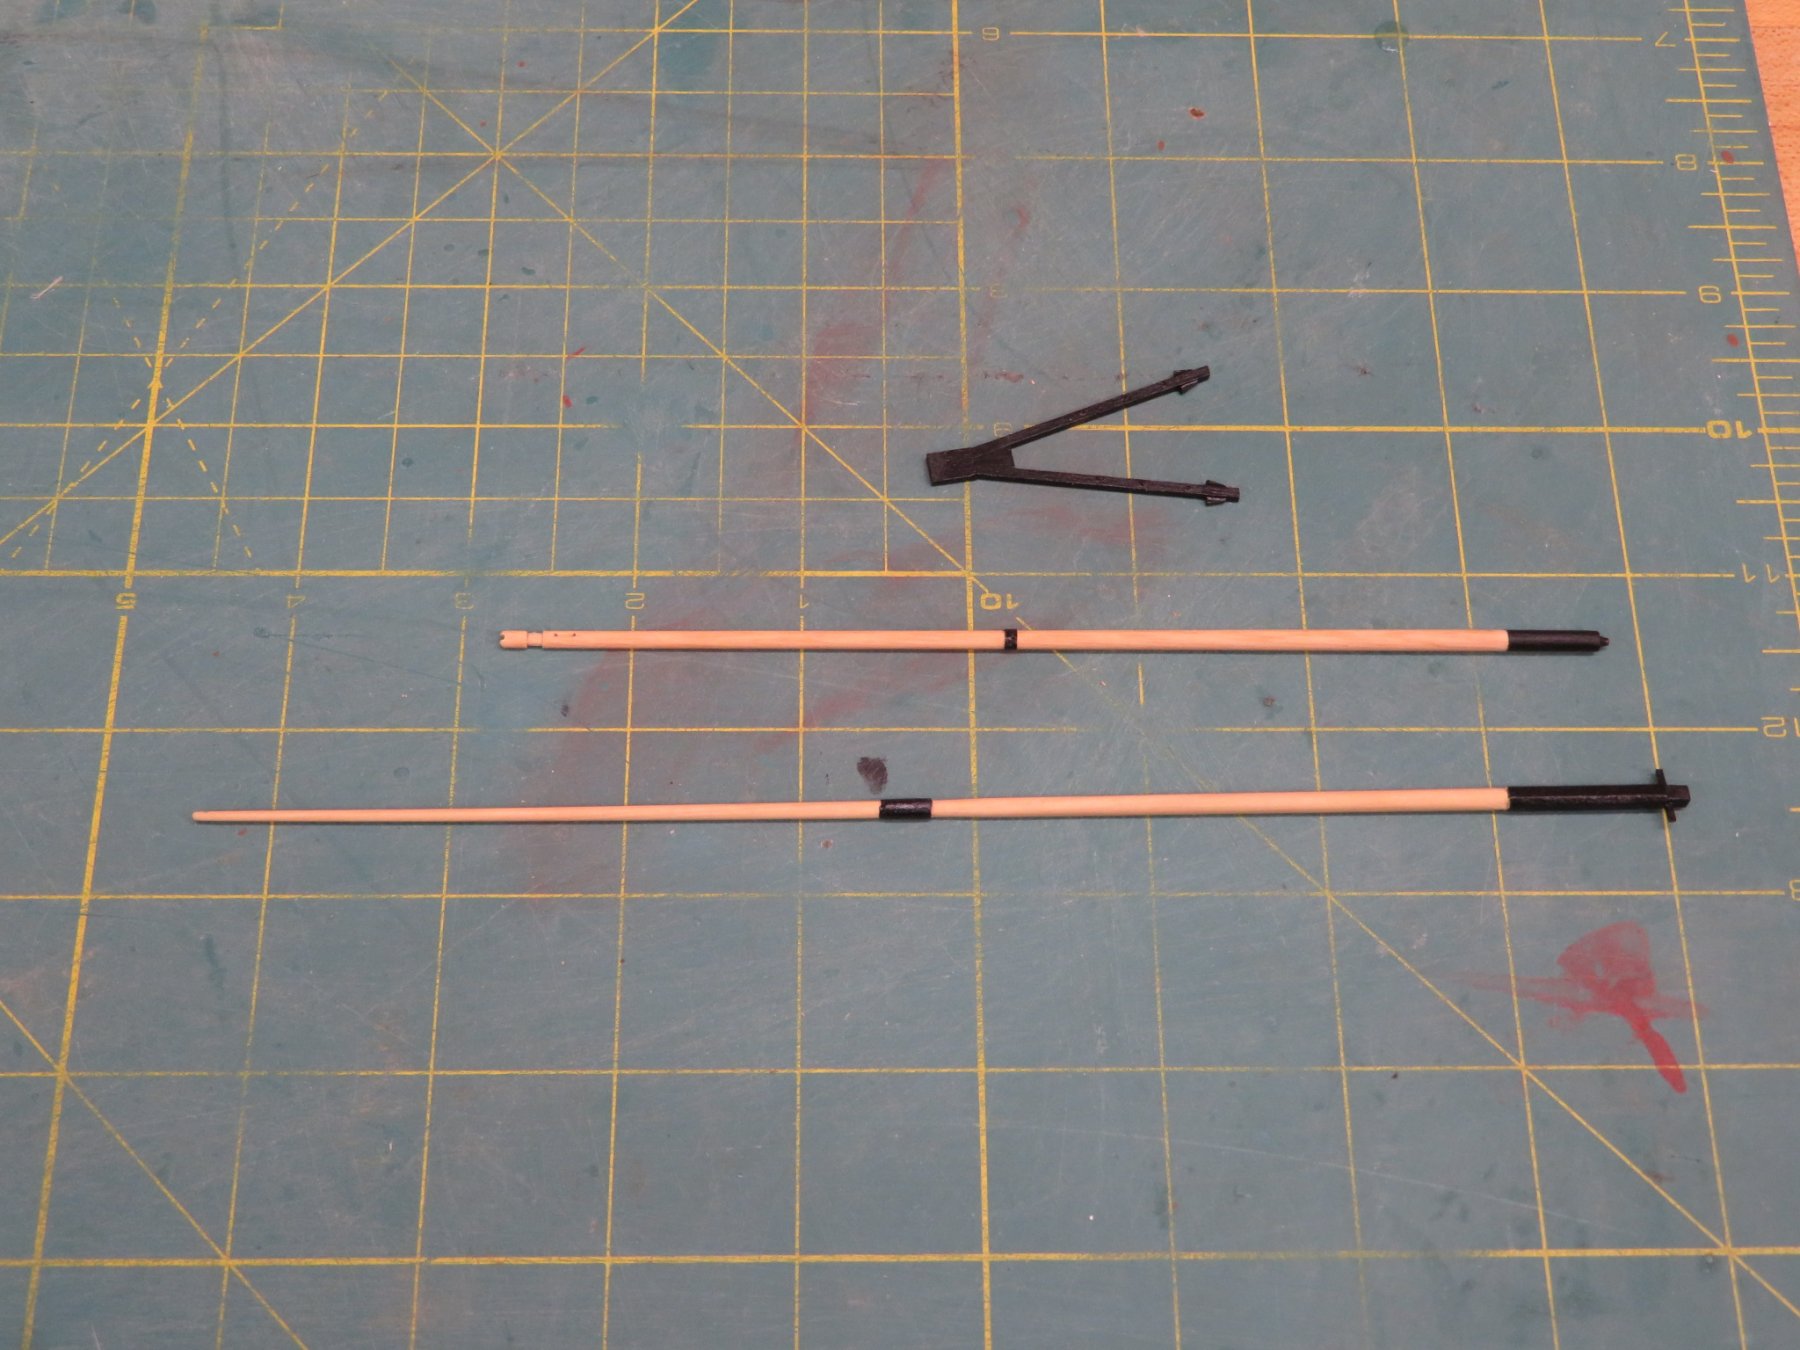
Ok here is some positive action. The Main Top Gallant, Flying Jibboom and Dolphin Striker have been remade.
Next I'll start on redoing the pin rails. bitts etc.
-
Hi Jim,
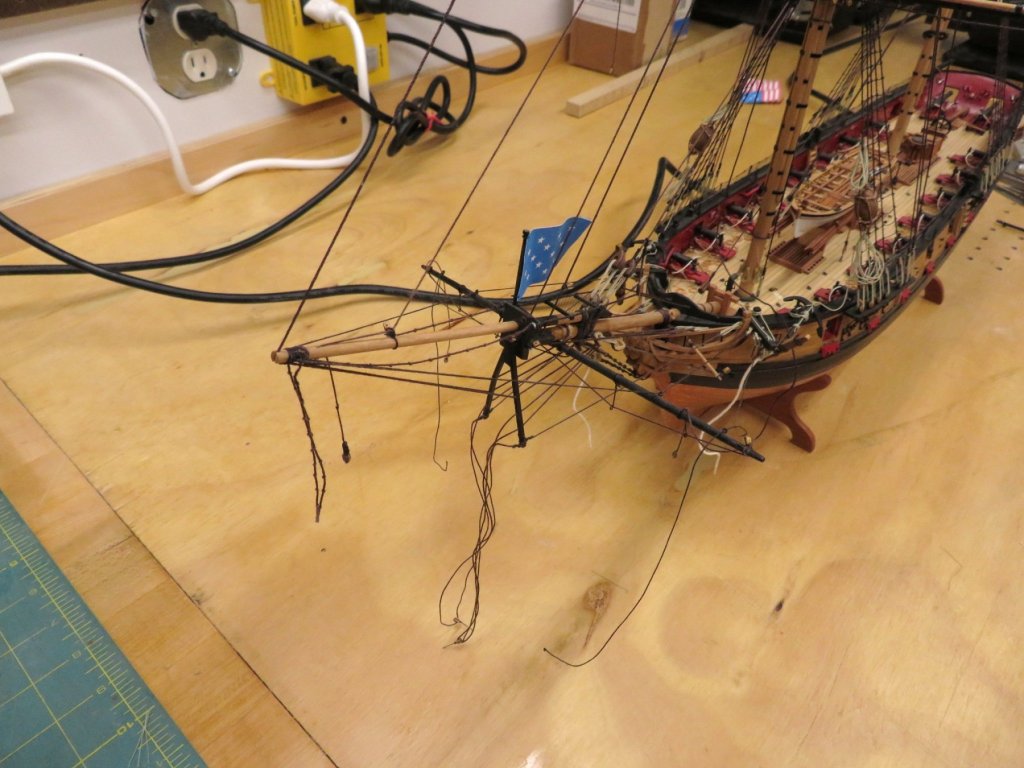
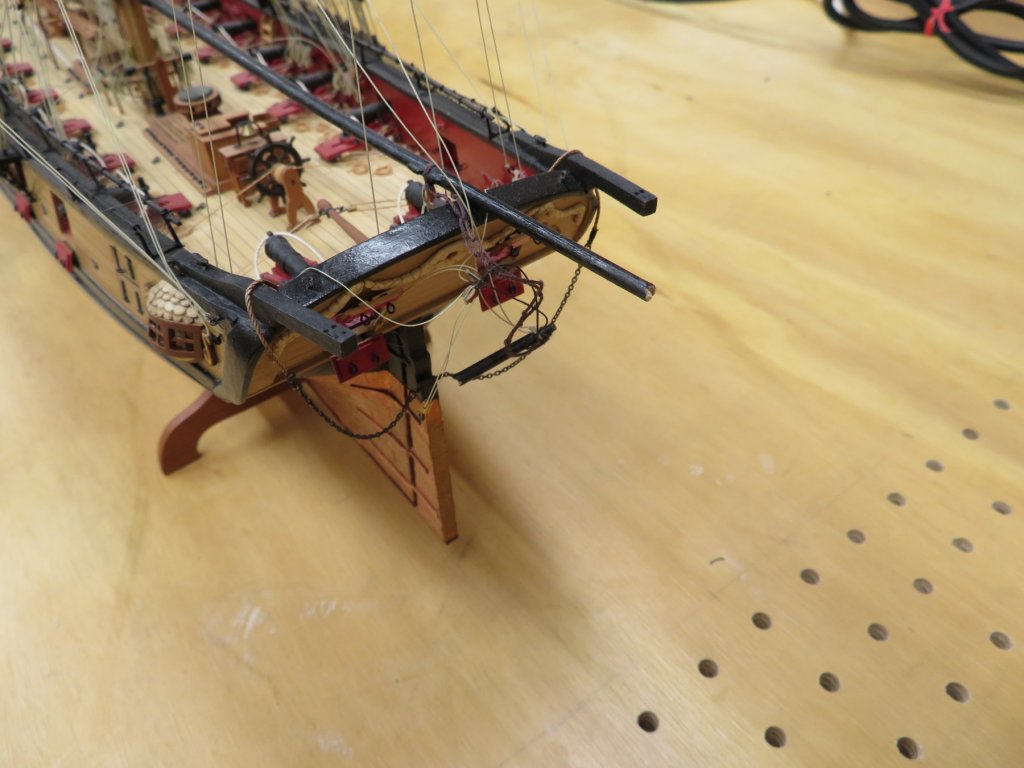
As I dig further and further into this I think you are right. I've now found that the dolphin striker was
cracked and an attempt to repair it was unsatisfactory so off it came and all the rigging on the bowsprite.
I'm getting closer and closer.
-
Hi Harley,
Now that I've finally started motivation and patience shouldn't be an issue. I look at it as a build that is just in the
rigging stage and not that I'm doing it for a second time. At least that's what I keep telling myself.
Hi Joe,
All of the running rigging was removed. I did it all because most of the main mast rigging needed replacement
and the rope I used 10 years ago doesn't match the Syren rope I'm using now. Because of this I decided to replace
all of the running rigging.
Most of the standing rigging is good but I will determine what needs replacement after I finish making the replacement parts.
- fnkershner and Ryland Craze
-
 2
2
-
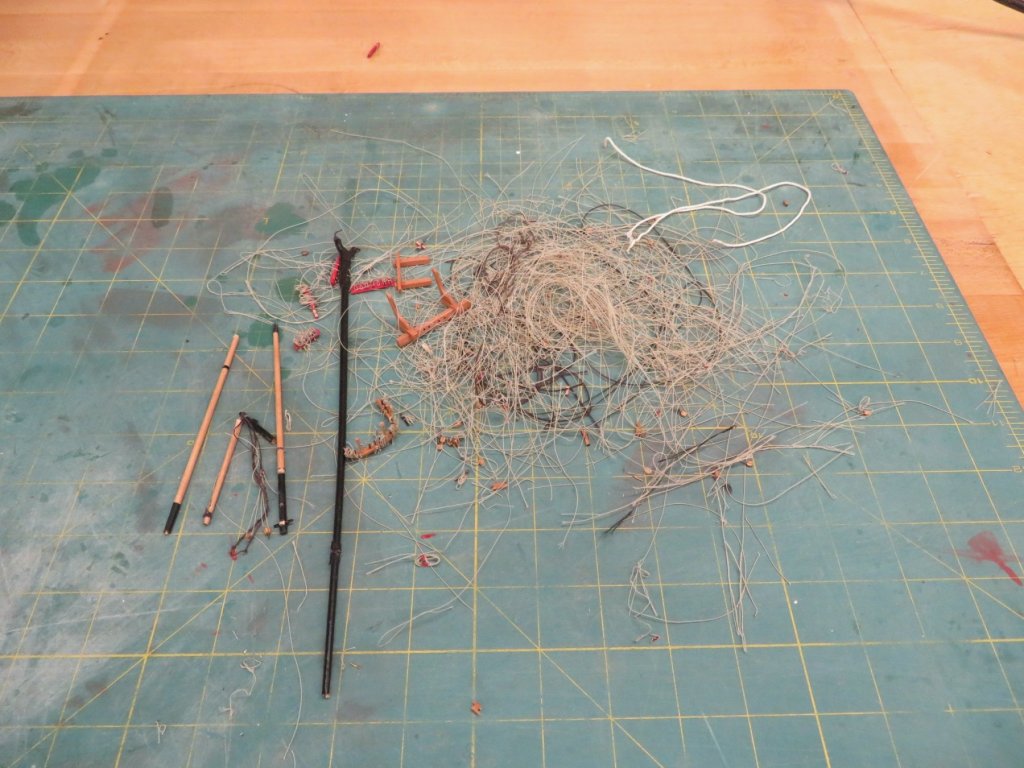
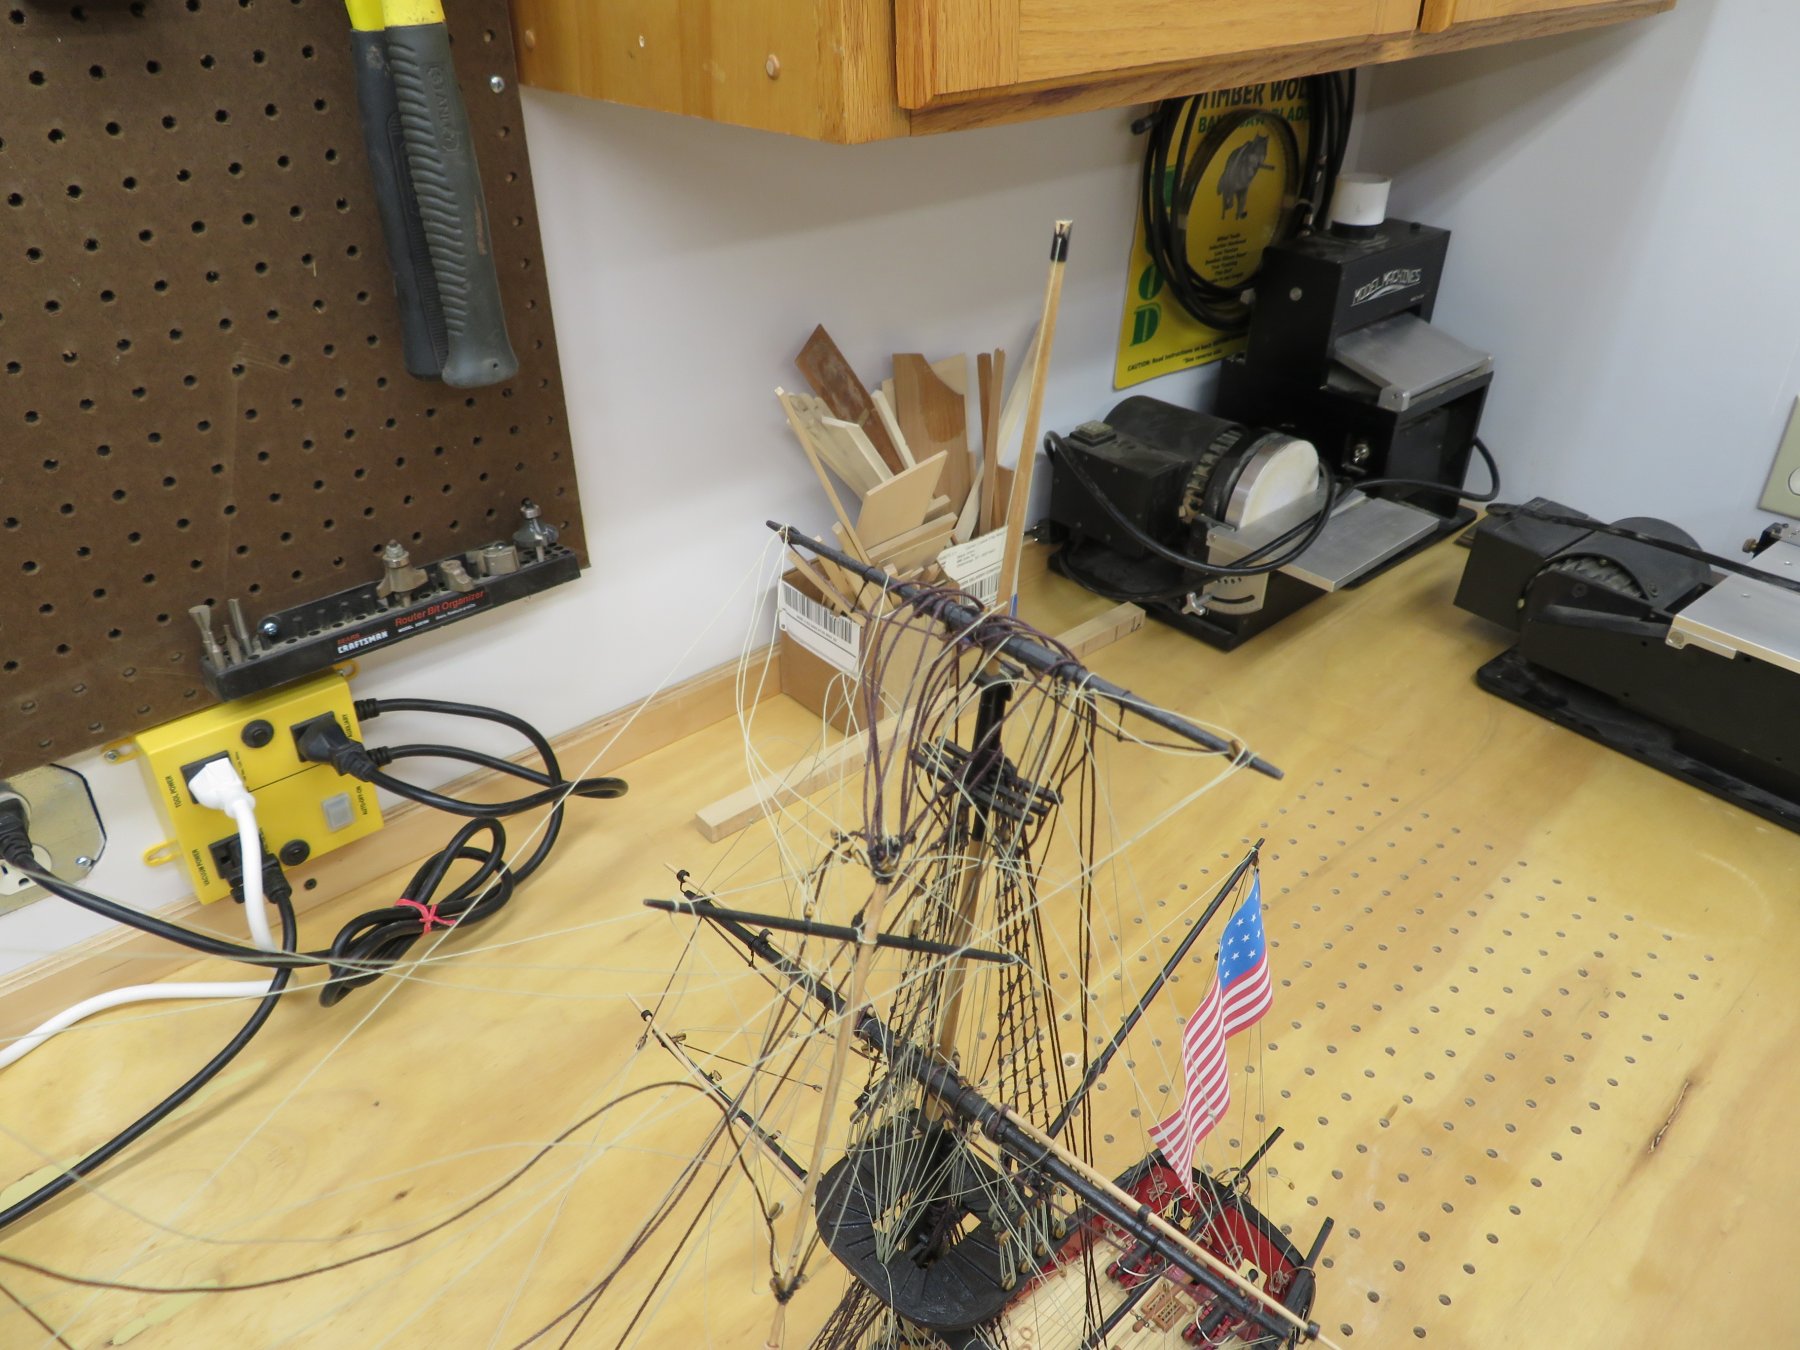
Ok I've jumped in with both feet now. All the running rigging has been removed as well as 8 pin rails,
fife rail, riding bitts and gallows bitts. The boom, main topgallant and the flying jibboom have all
been removed and I'll start remaking them.
The masts and yards are all in great shape and will be reused.

And here's the pile of debris.
-
Alright first confession of rookie/newbie mistakes on the original build. Not thinking ahead to future disasters I
thought why not a drop or two of CA to the belaying pins to make sure that the lines and rope coils didn't come
loose. Well they didn't come loose but I can't get the lines free. Thus I will be redoing numerous pin rails, removing
the Fife Rail, Riding Bits and Gallows Bits and most likely remaking them too.
If I'm not careful I may find myself all the way down to the keel!
- Tigersteve, mobbsie, Ryland Craze and 1 other
-
4
-
Great work Bob. I've often thought about rigging my Halifax.
Hope you're keeping good records!
- Old Collingwood, Elijah, MEDDO and 2 others
-
5
-
Jim explained it very well. I've used a razor blade with my glasses on and I also have a furniture scrapper for larger surfaces.
-
Hi Tim, Thanks for stopping by.
Right now I'm removing all of the running rigging. I will then inspect the standing rigging. Right now I feel
I'll need to replace portions of them too. Once I get further into it I'll make some more decisions but I think
the masts will stay in place and just the yards will come off. Can't say for sure at this moment.
-
-
-
-
Hi Floyd,
It's great to see you're continuing your Syren! Unfortunately Chuck wasn't producing blocks when I started this
build so I used Warner blocks. I did not keep track of the blocks I used so I pulled the Model Expo inventory sheet
for the Syren and they list the blocks as follows. 310-3/32" Single Blocks, 55 -1/8' Single Blocks, 15-13/32' Single
Blocks, 36-1/8" Double Blocks, 36-3.5 Diameter deadeyes and 55-2.5 Diameter deadeyes. The stern decoration was
carved. I love working with cherry and you could use it for any of the deck furniture, gun carriages and hatch combing etc.
Mike, It's a going to be a major re-rig. The boom was the only one that could possibly be put back together and I just
couldn't do it. So It's a total tear down of the running rigging. I've already ordered new rope from Syren. I'm afraid
some of the standing rigging will have to be done too!
Hi Steve, I'm glad someone is looking forward to it! LOL I'm dreading it!
Hi Joe, Oh I had to let her sit for a year and a half before I could get up the ambition to re-do the rigging. As far as my models
go I've only showed you a fraction. Got to hold something back for future meetings.
- Ryland Craze and Trussben
-
2
-
Floyd, Once the deck if fully planked I sand or scrape it and that will clean up the CA smudges.
-
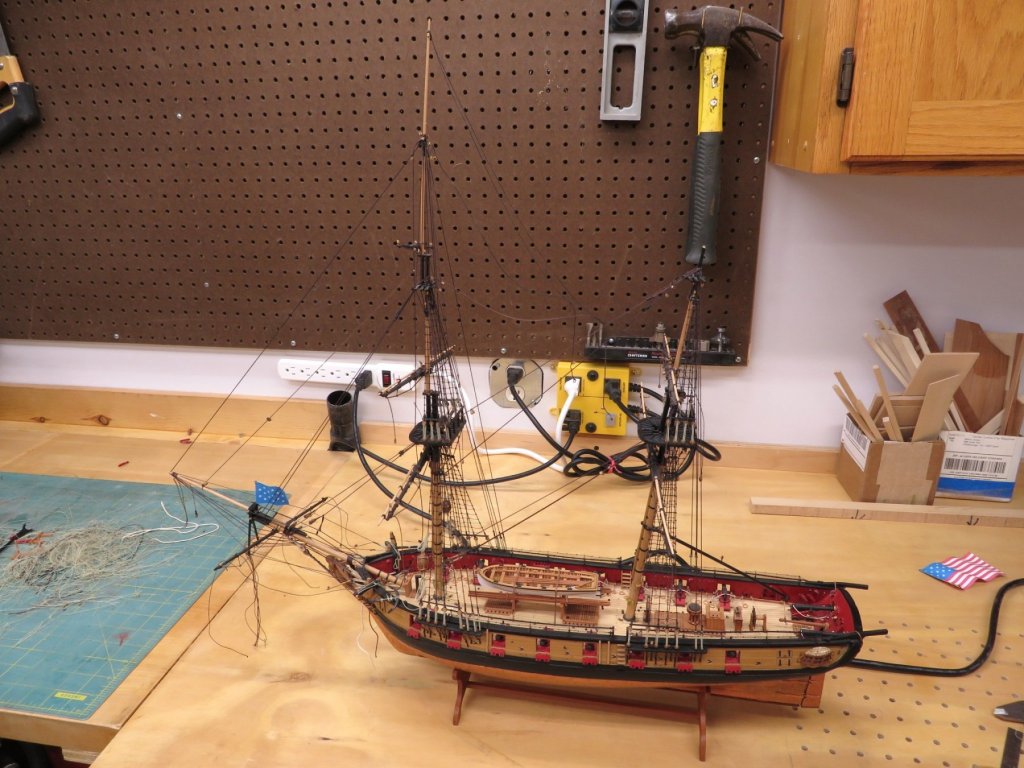
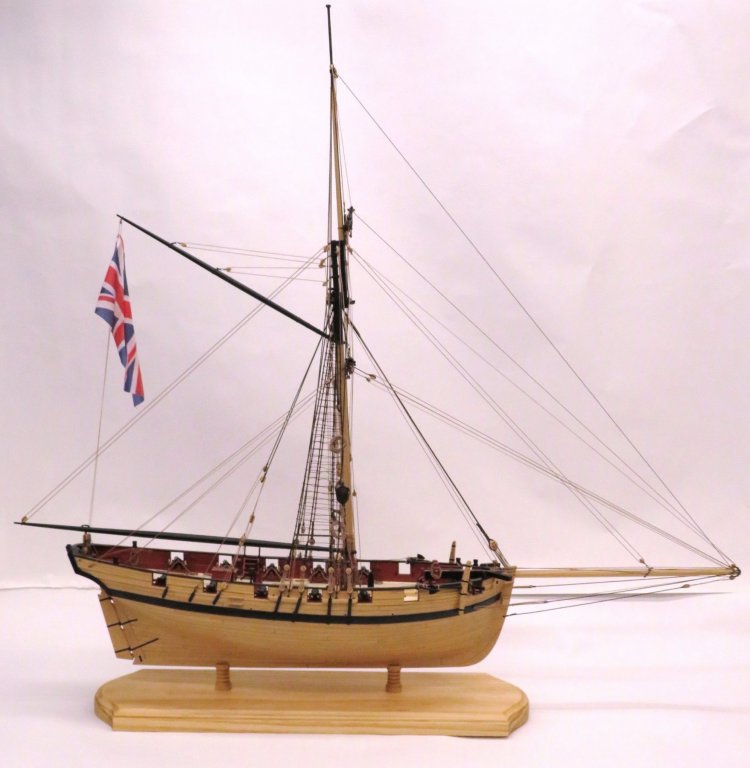
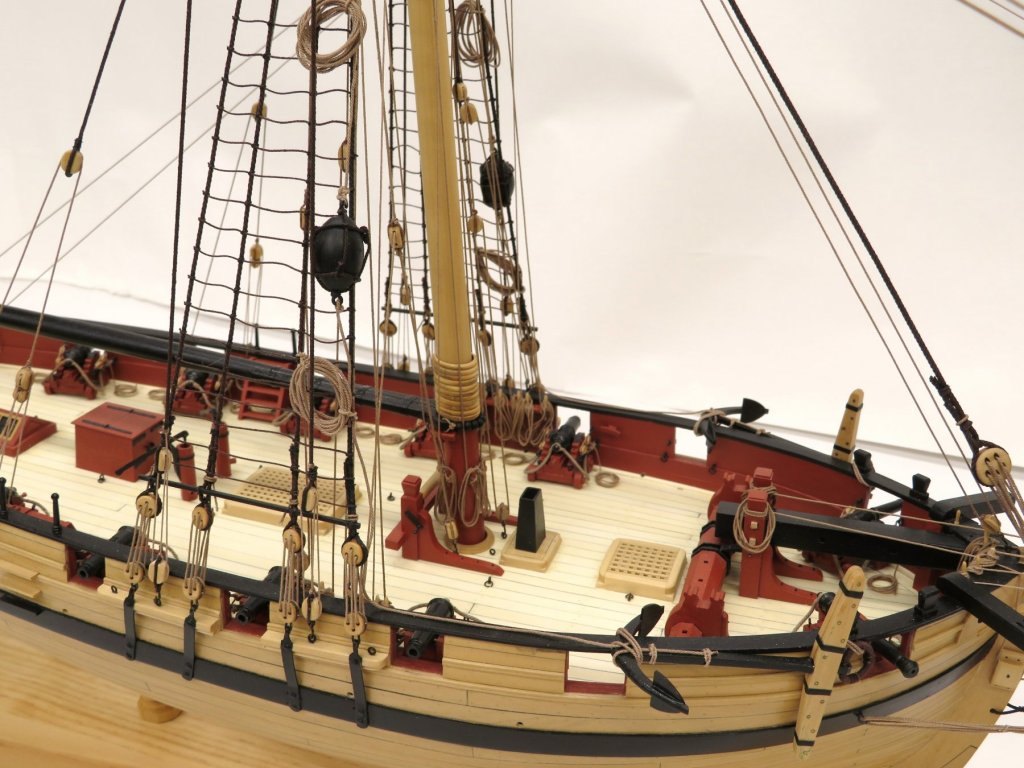
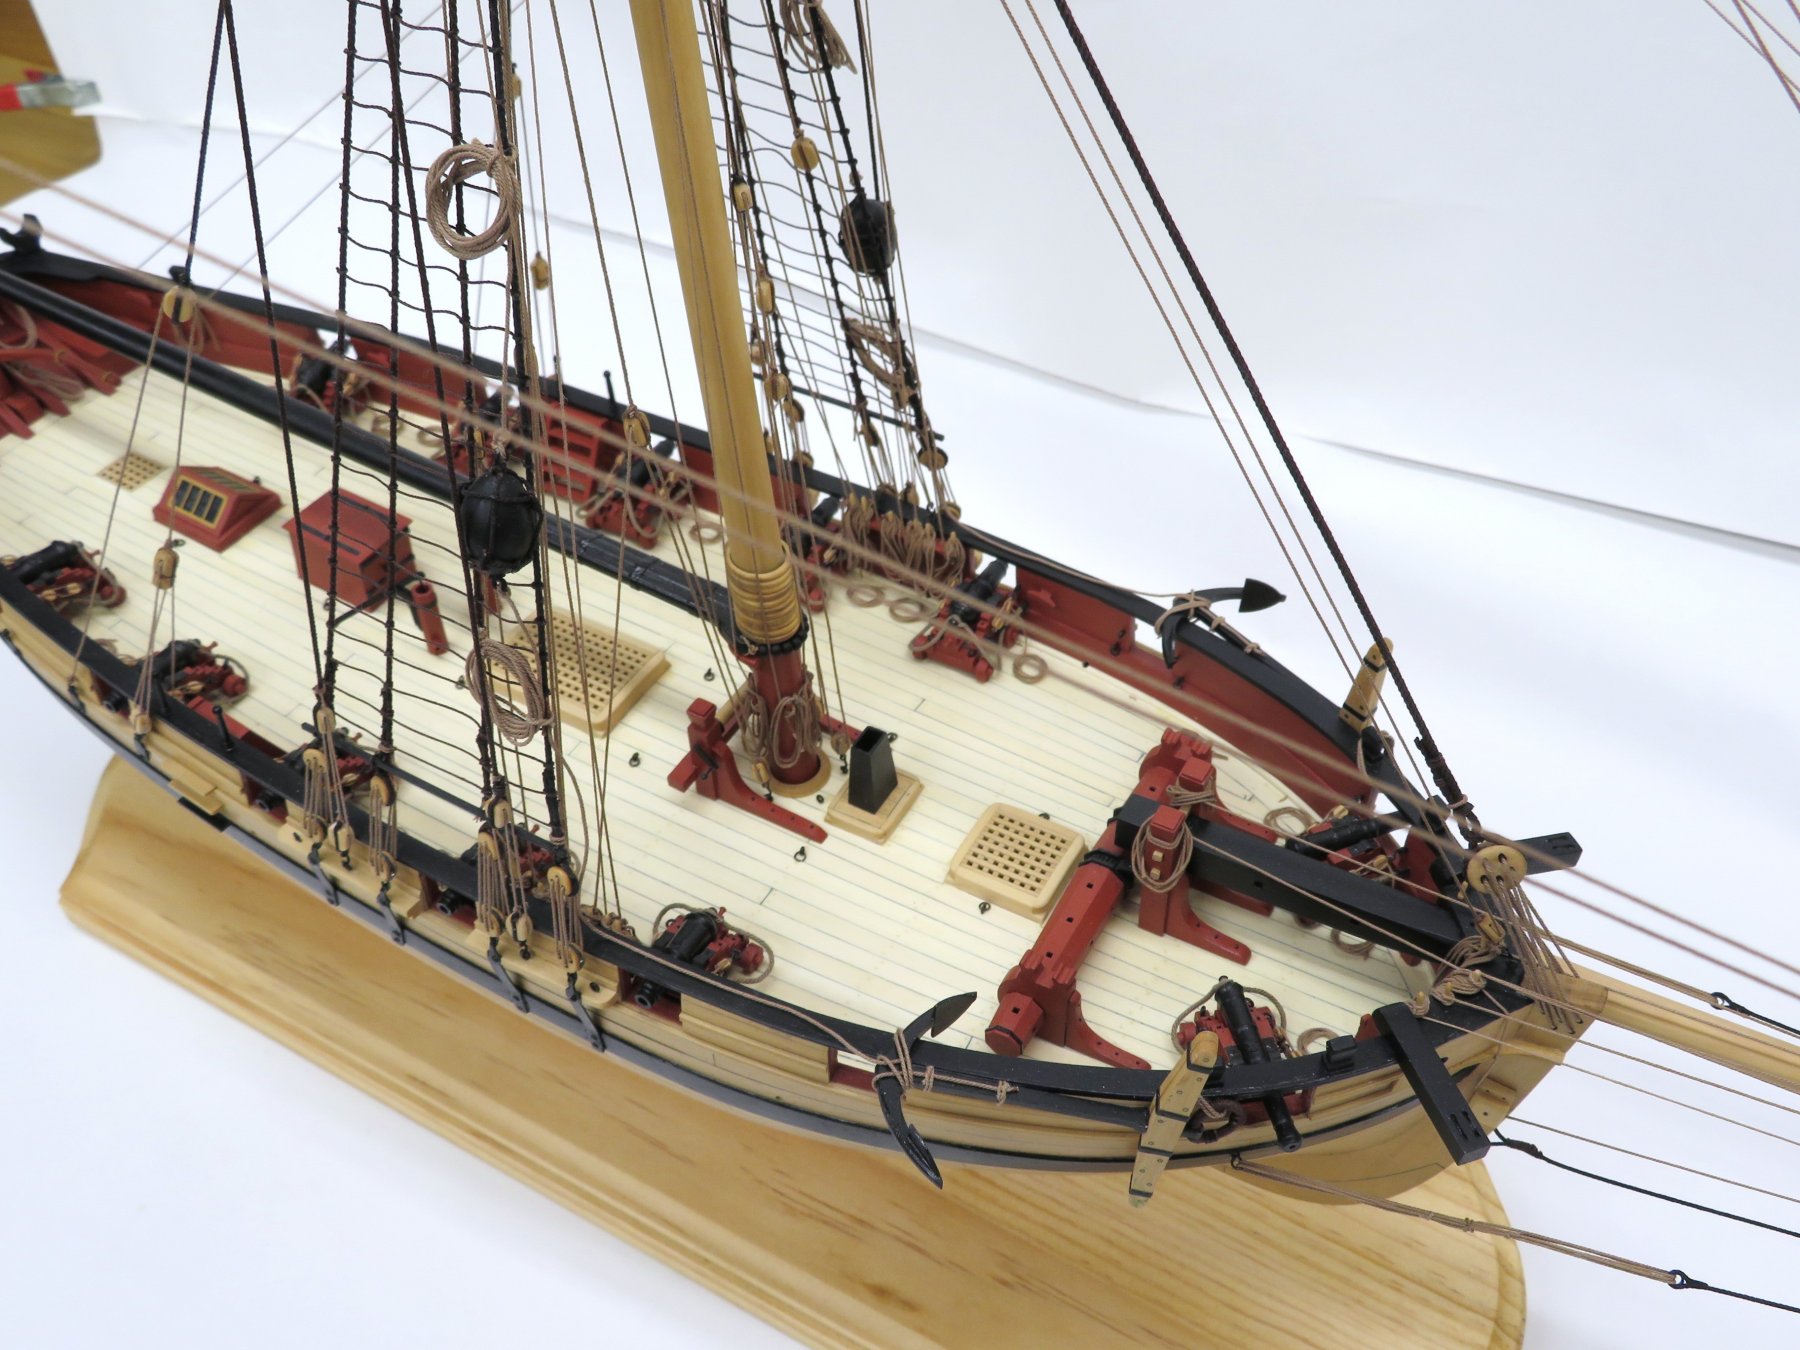
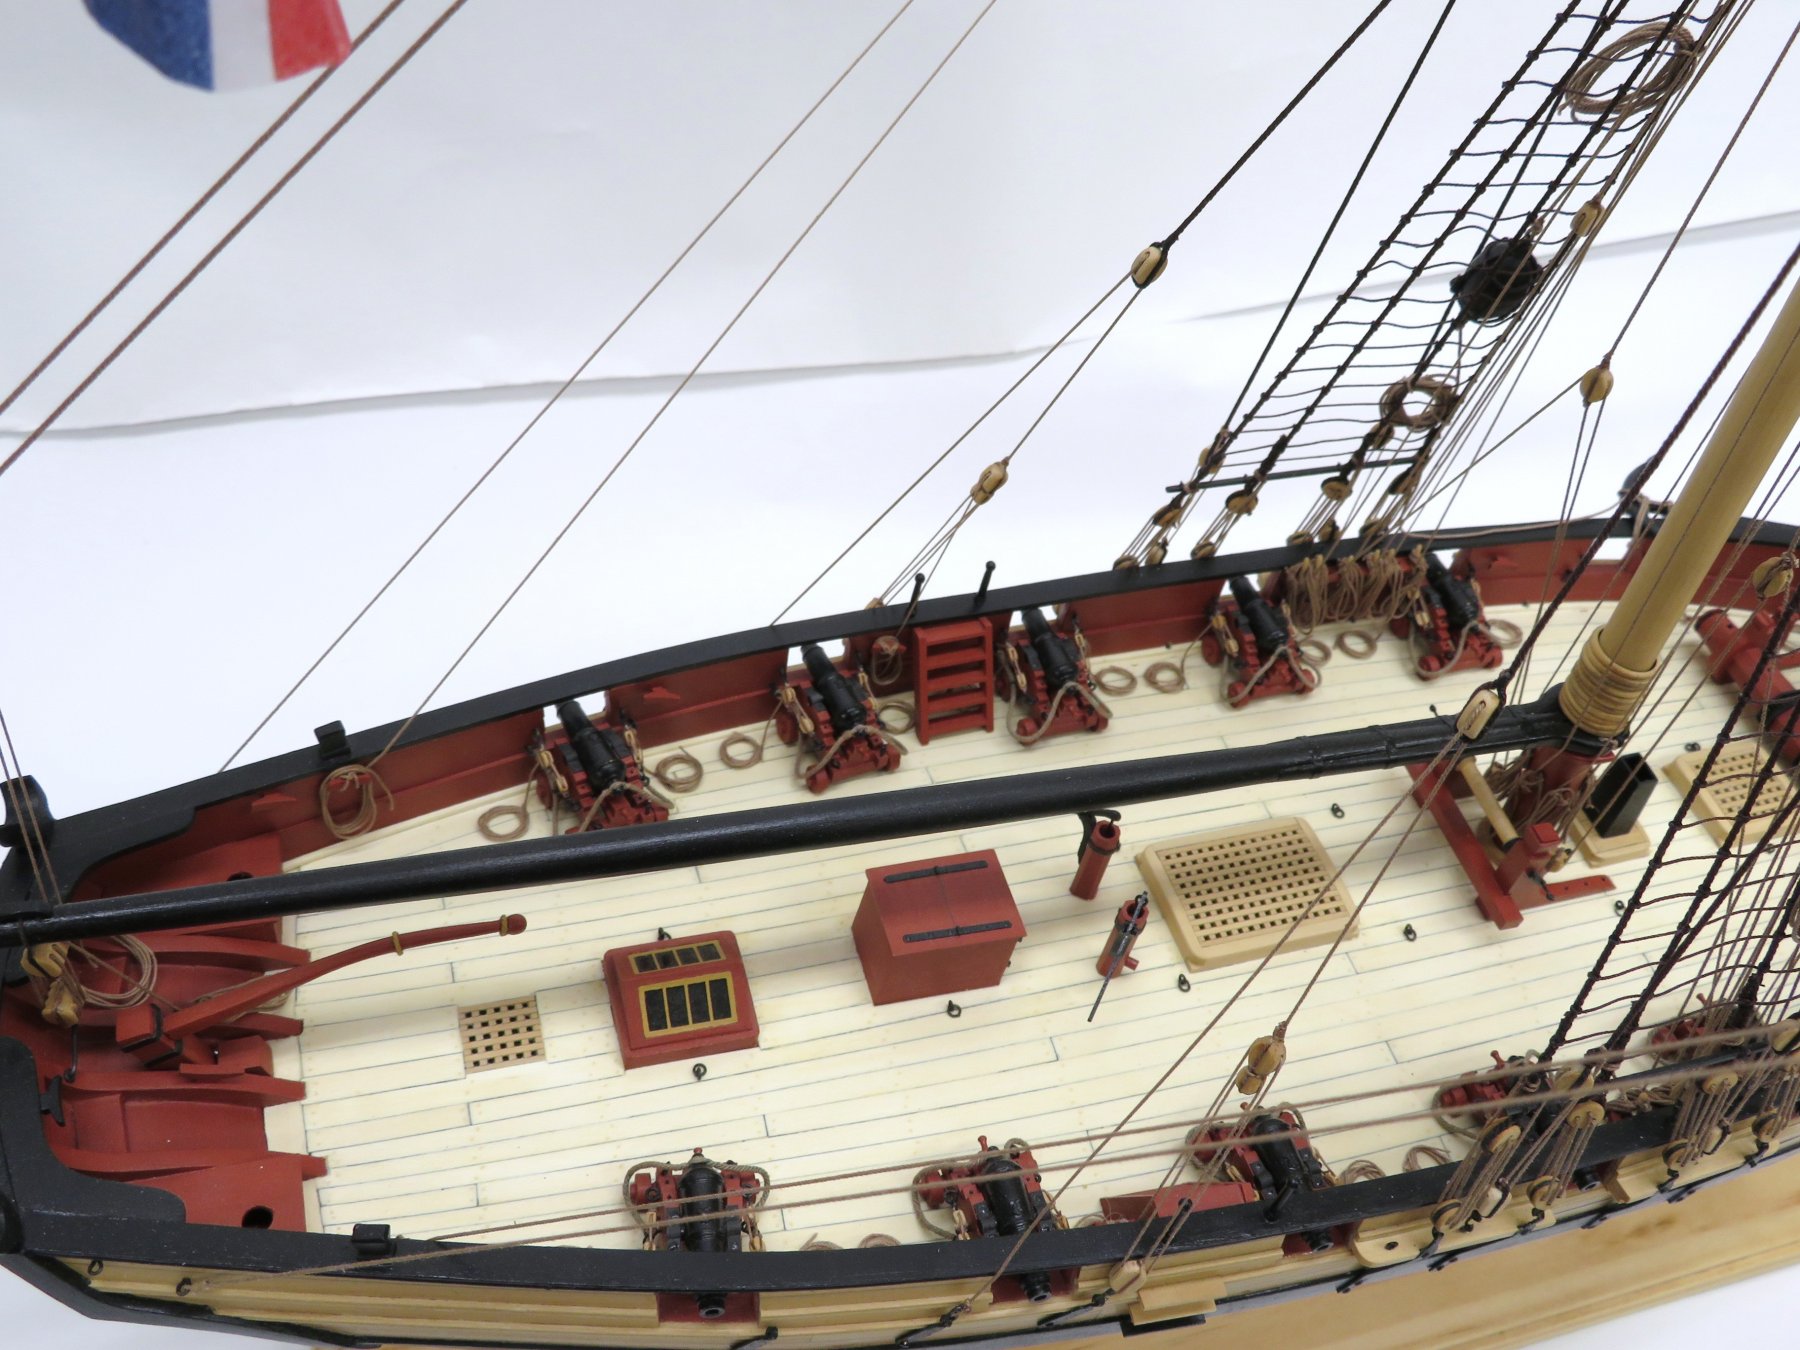
Hi All,
Way back in 2007-2008 there was a Syren scratch group build here on MSW that was
lost in the great crash. This build was prior to the release of the Model Expo Syren
designed by Chuck Passaro. I completed my Syren in 2008.
Unfortunately during our move to a new home she received some major battle damage
to the masting and rigging. Because of this I now have to redo the majority of the rigging.
As this was my first scratch build I have a certain affection for her and want to return her to her original condition.
As it’s been almost ten years since I last worked on the Syren I’m posting this here for help from
those of you that are either at this stage of your build or have more recently completed her.
Here’s a couple of pictures from long ago.
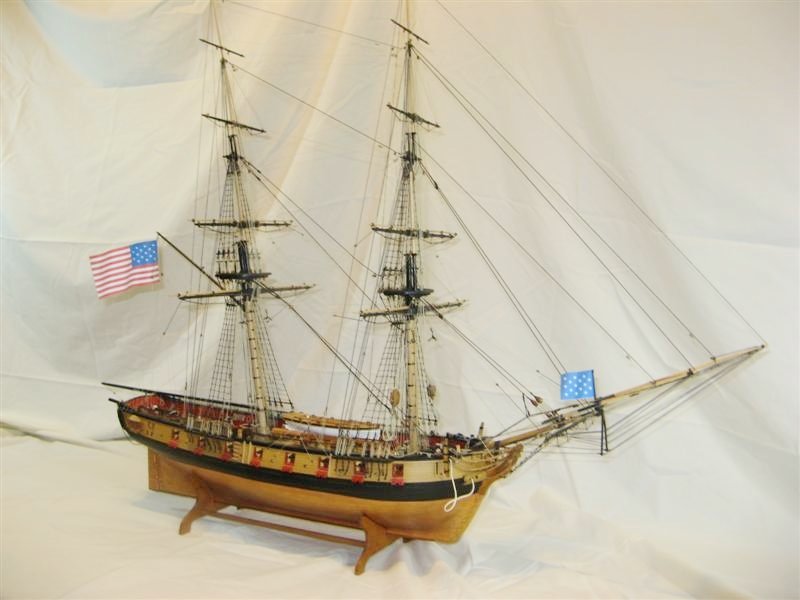
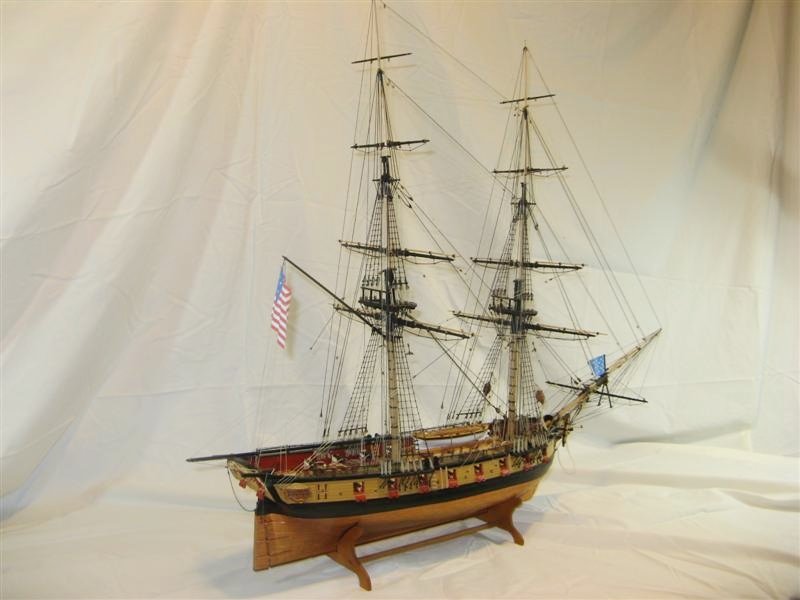
The Main topgallant mast was snapped.

The flying Jibboom was broken.
The boom also was damaged.
It appears that all of the yards are ok but I will inspect them as I disassemble the rigging.

She put up a valiant fight but just wasn't up to the ham fisted mover, ah me!
- mobbsie, Tigersteve, fnkershner and 2 others
-
5
-
-
Thank you druxey, Ben, Grant, Pat, OC and albert for the kind works.
Also thank you all for the "likes"
Thank you Mike, your build was an inspiration and a great help.
B.E. Thanks, The short version for the flag choice is it's what Chuck did.
I believe in his build log he explains why he chose it but I don't remember
the rational at this moment. Sorry.
Steve I'm glad you liked her and the pedestals. Wanted something a bit different.
- mtaylor, Canute and Old Collingwood
-
3
-
-
Thanks Dirk, Mark, Eric and OC. Also for all of the likes.
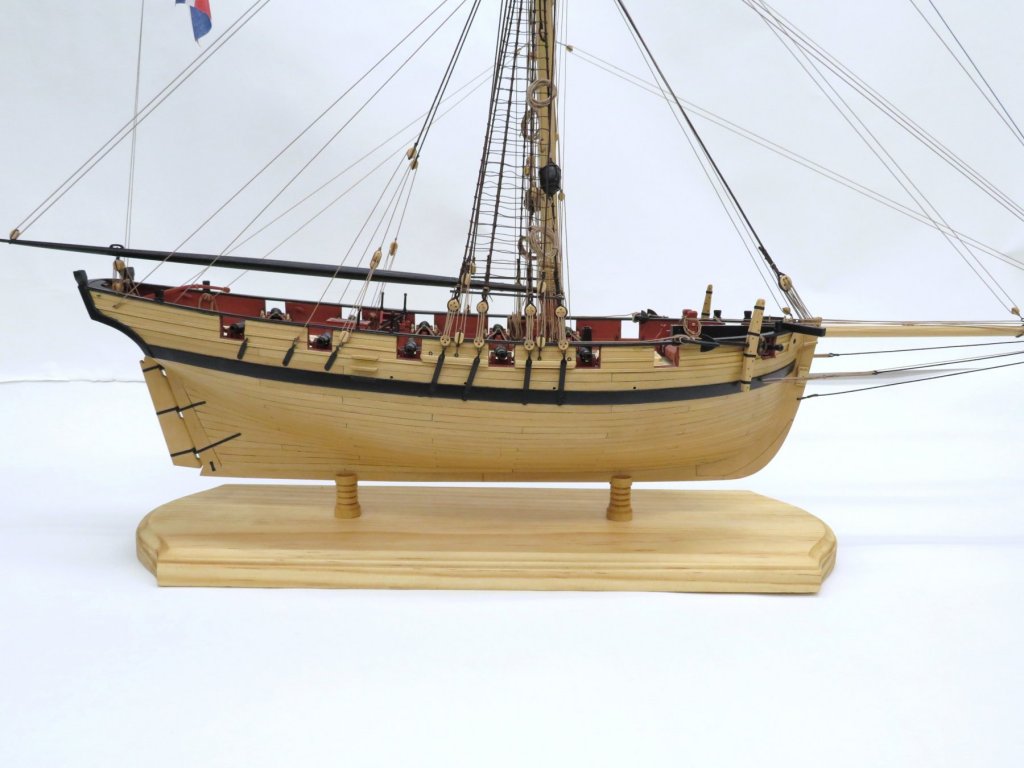
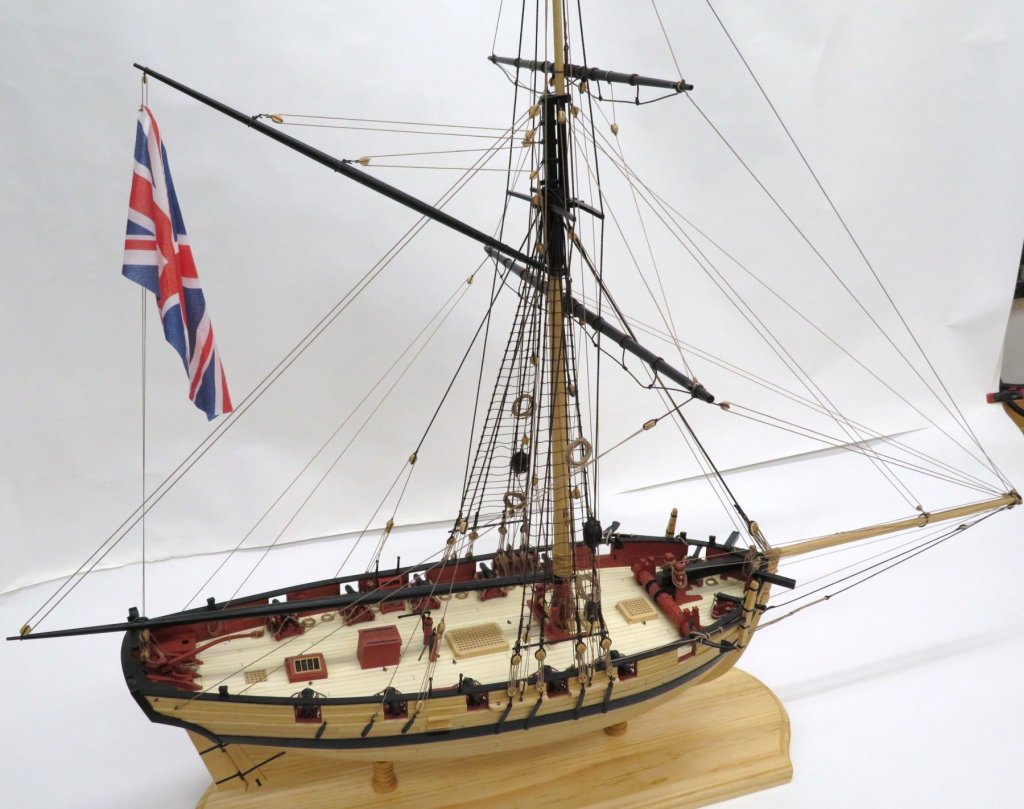
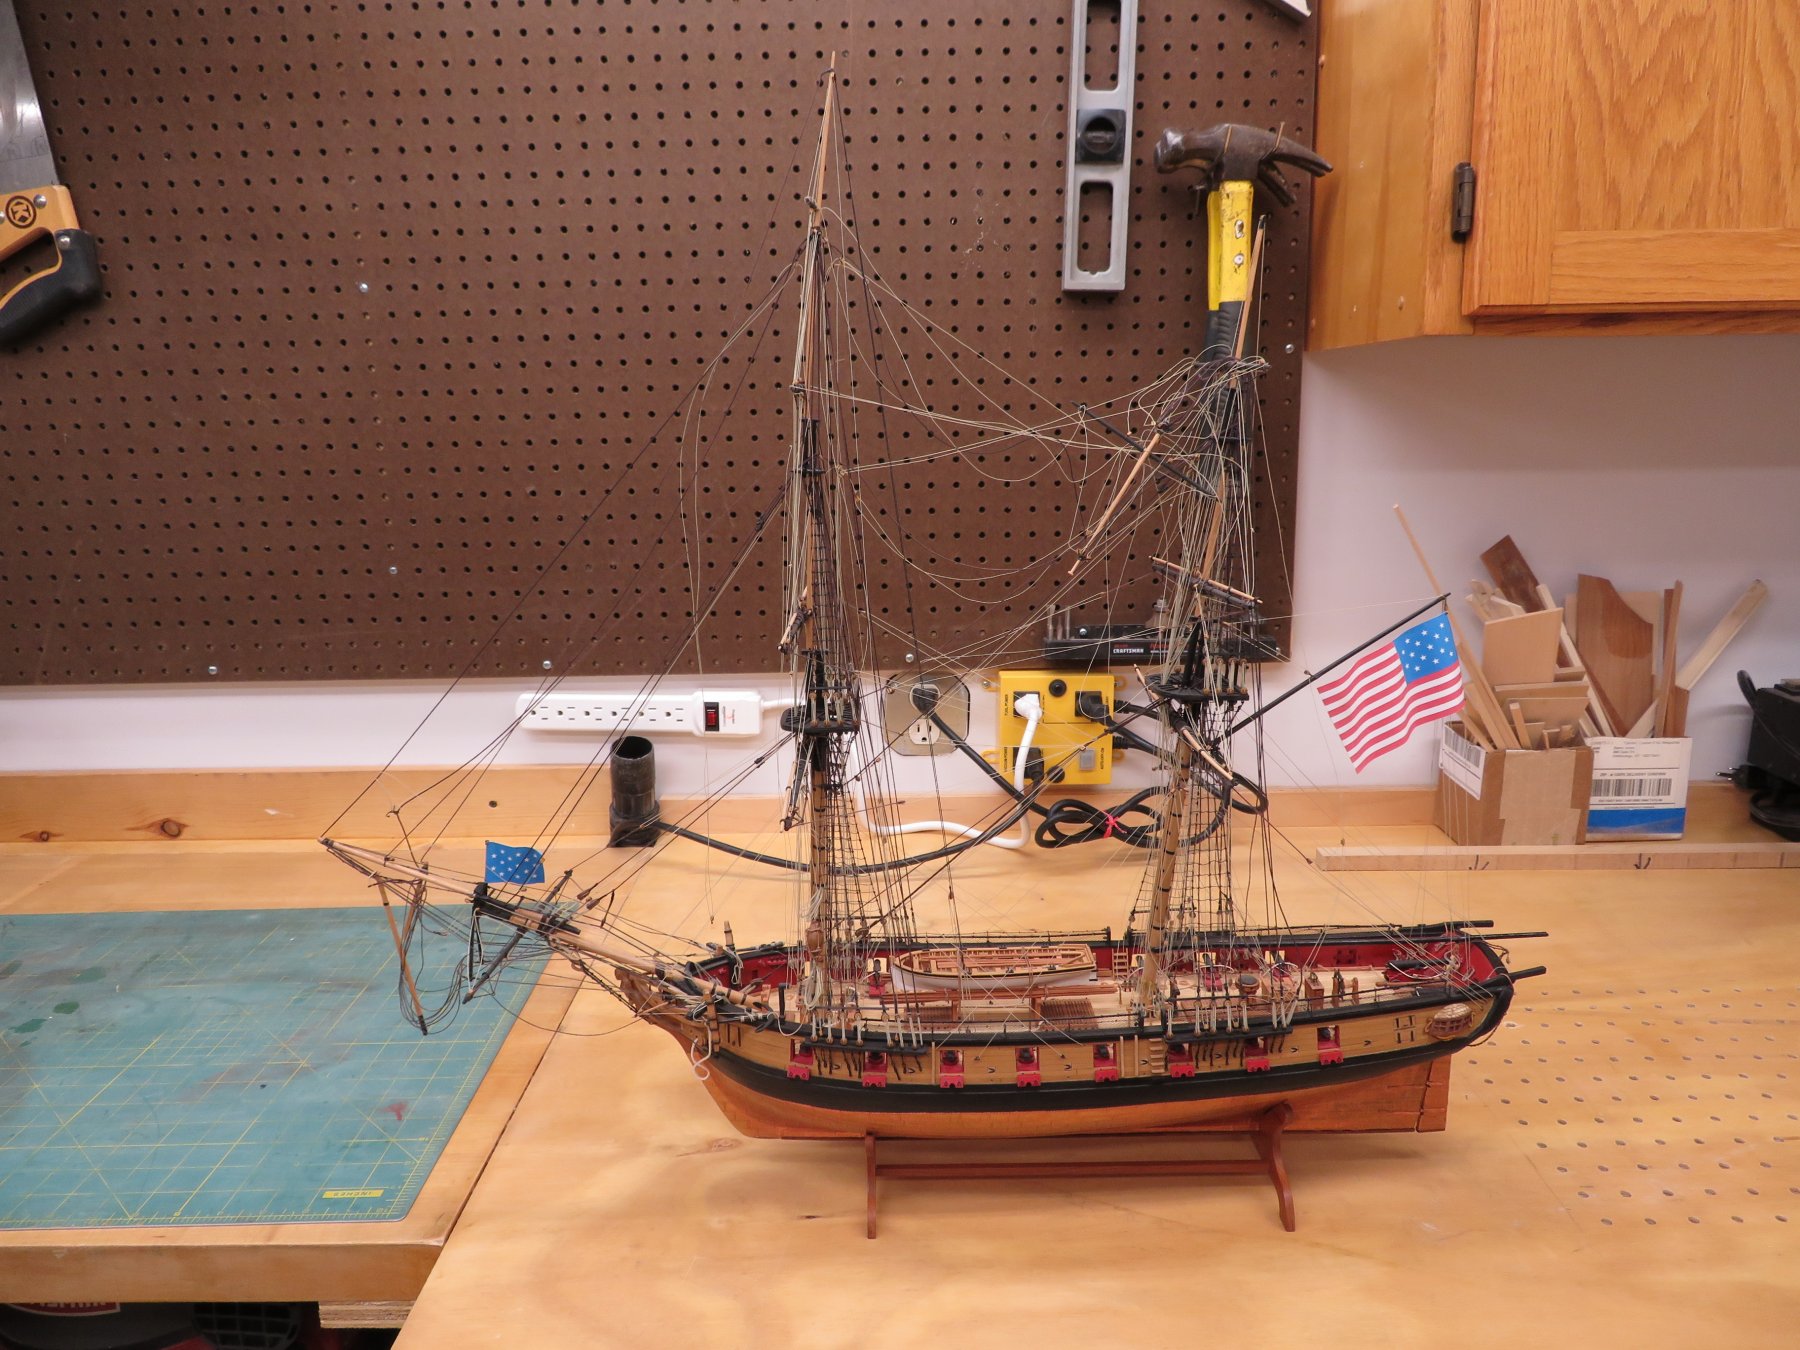
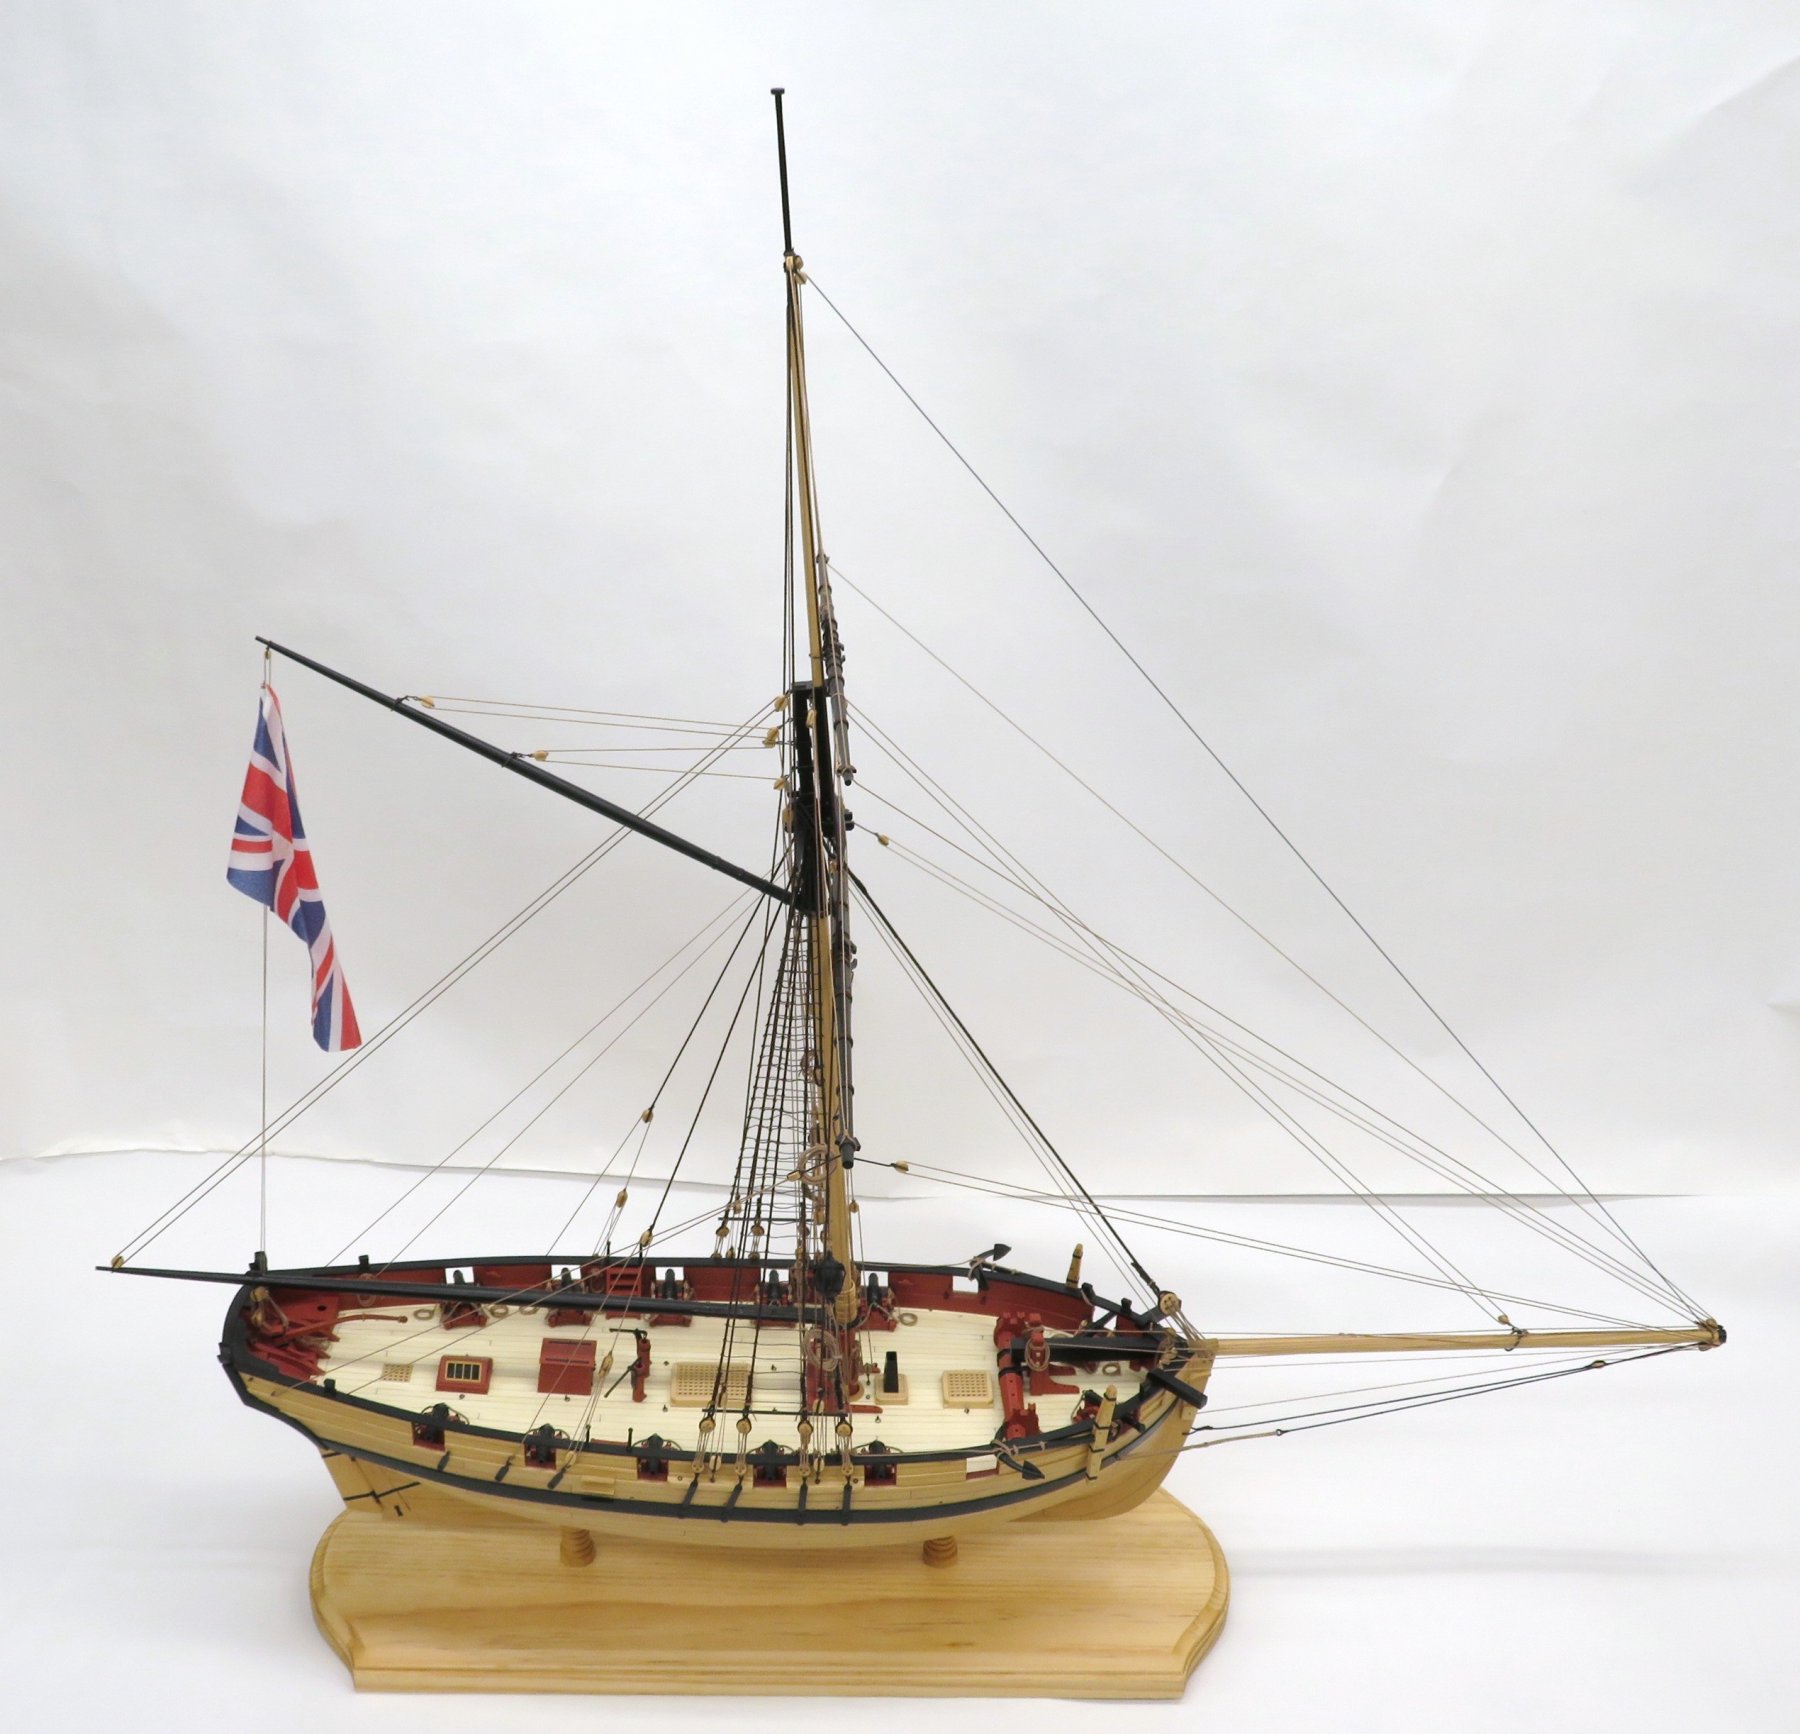
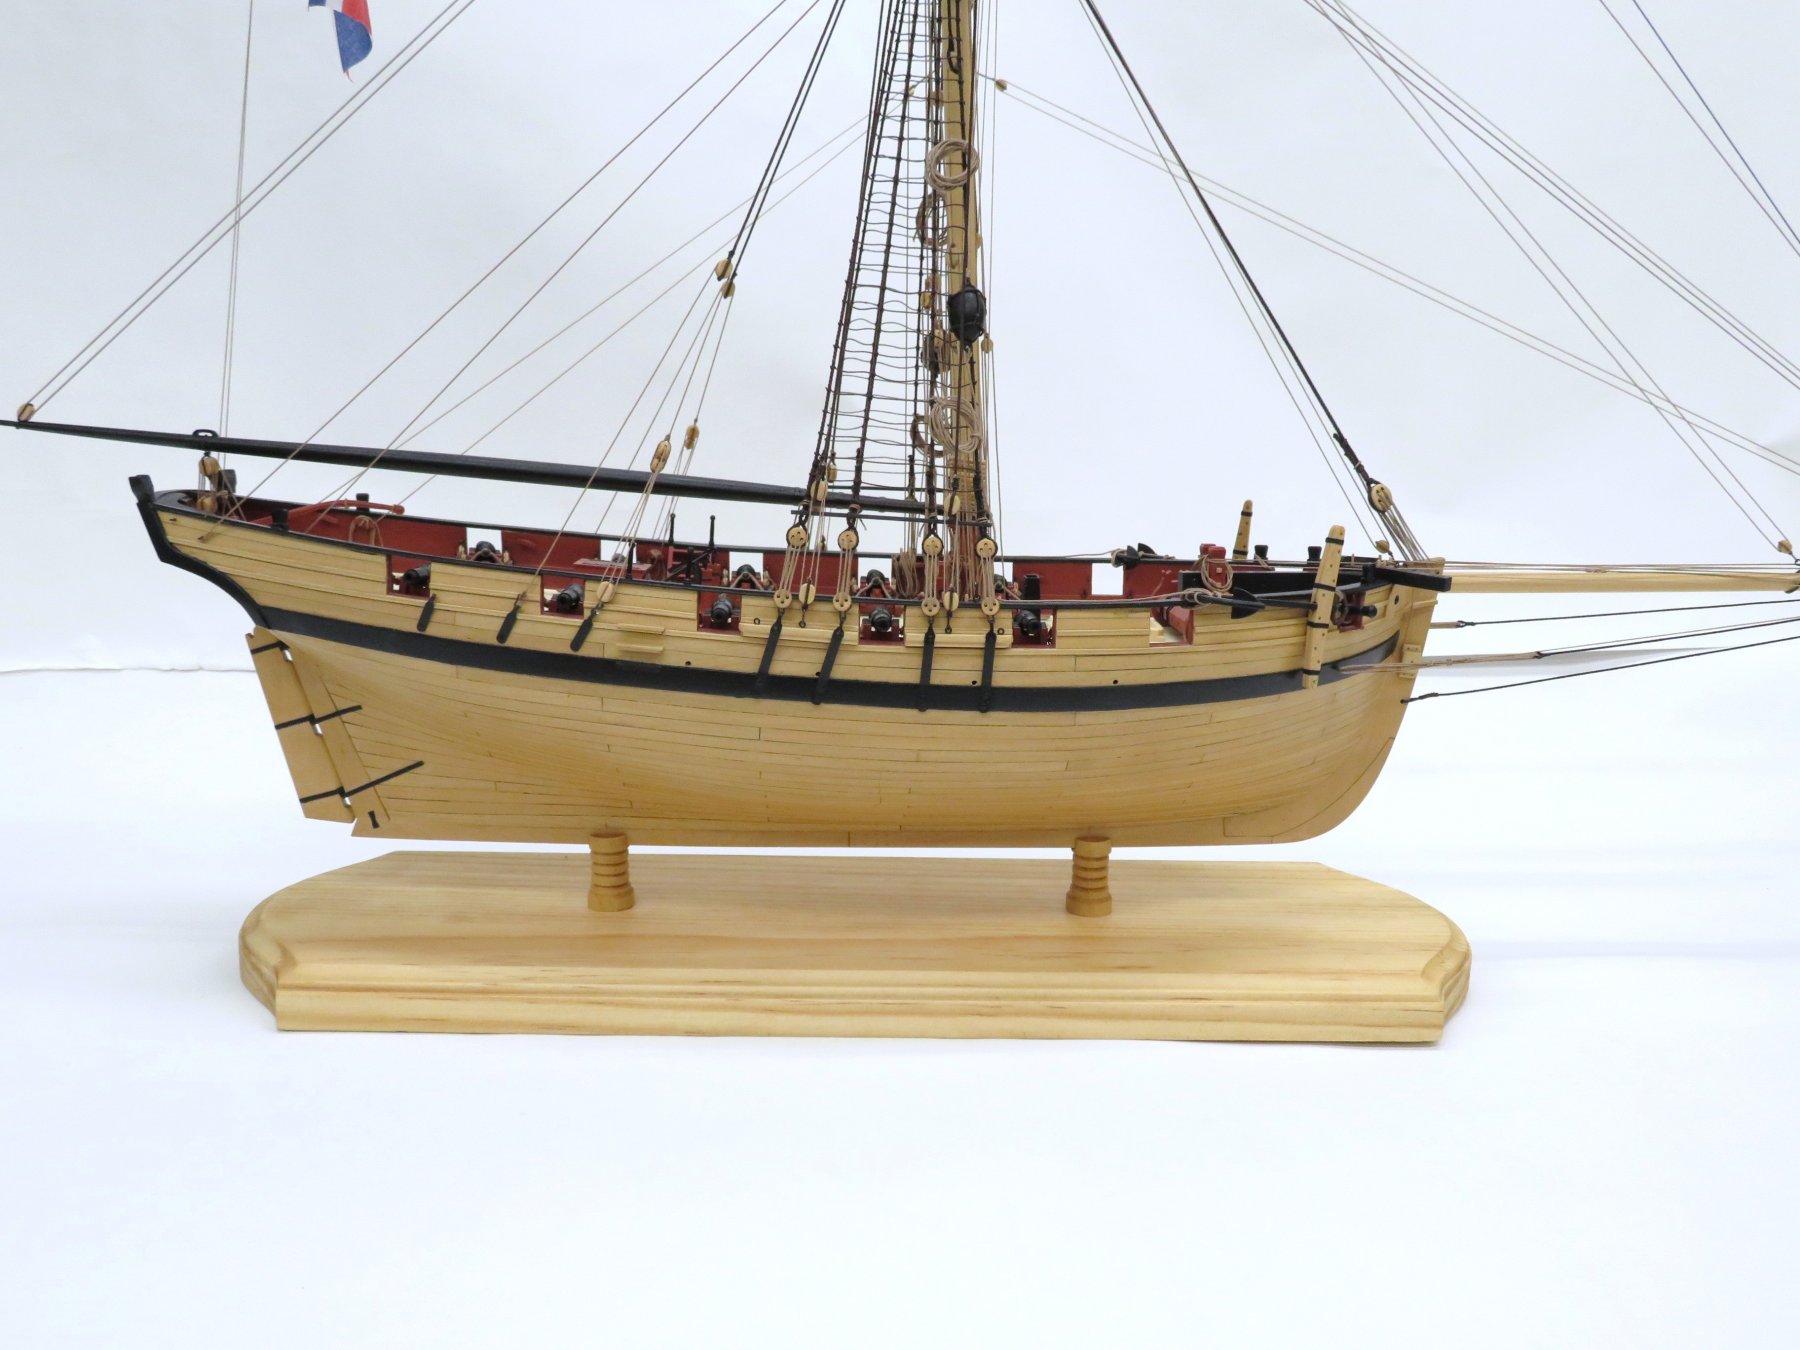
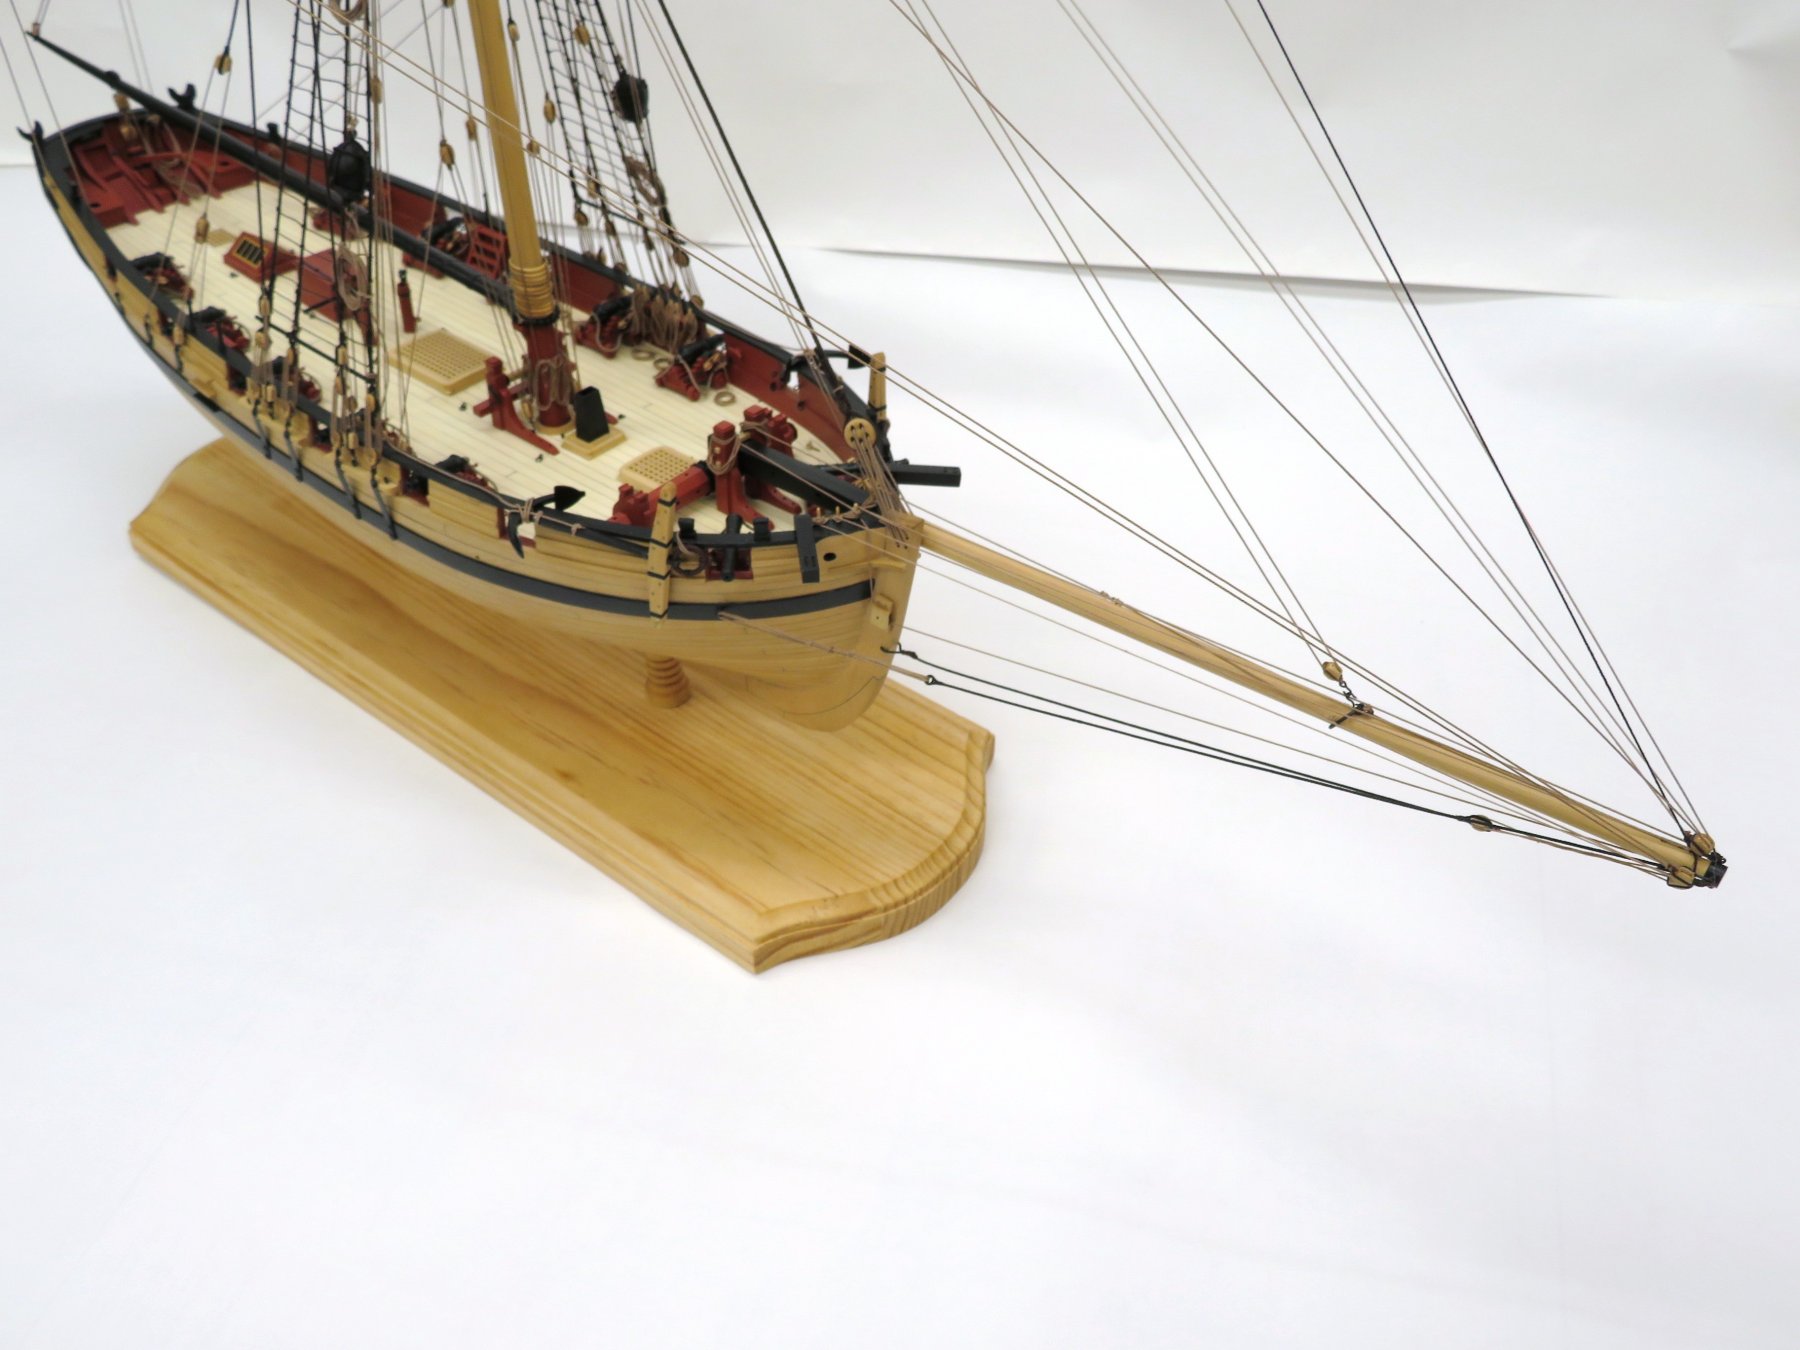
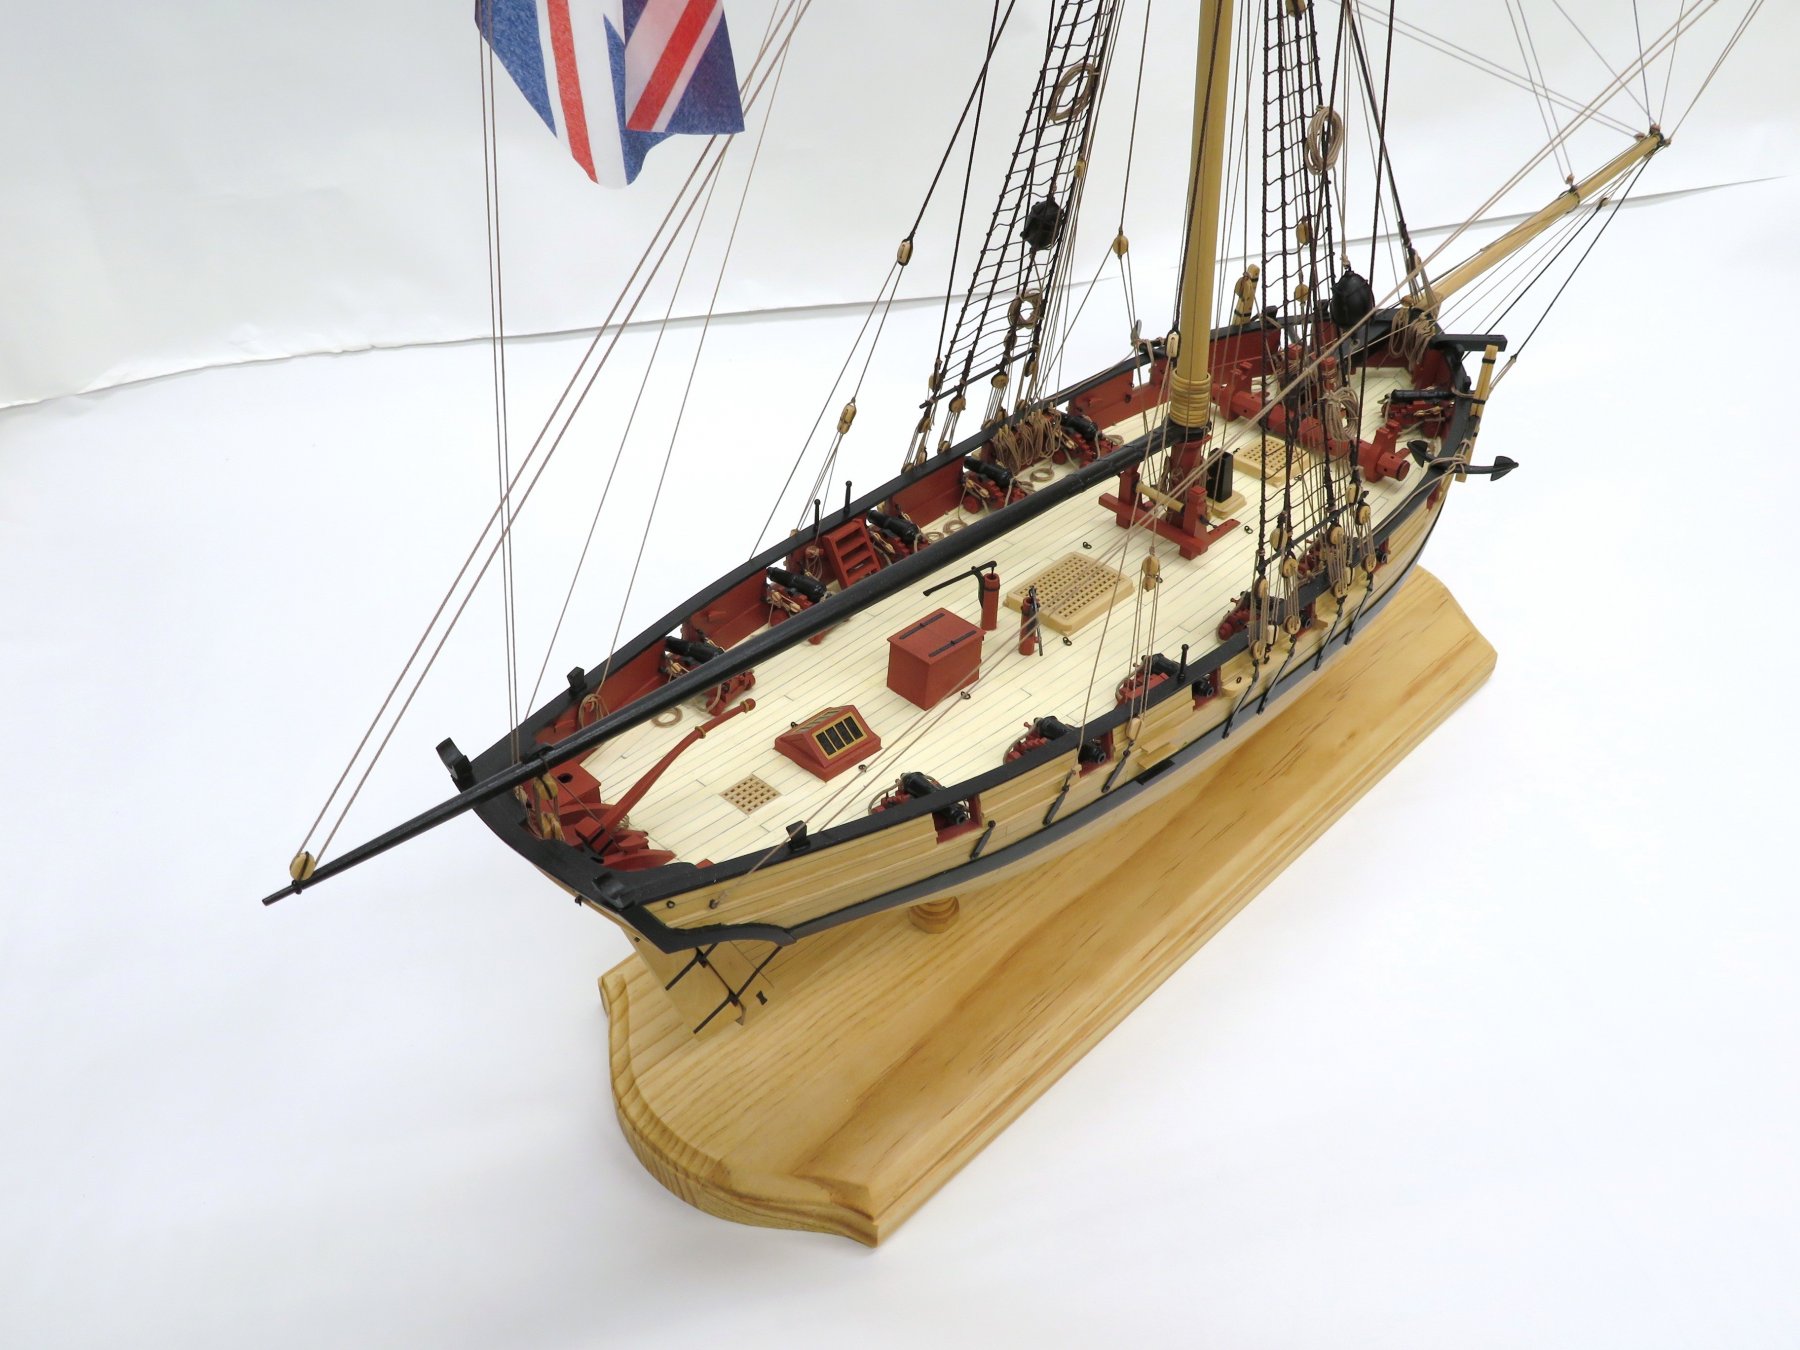
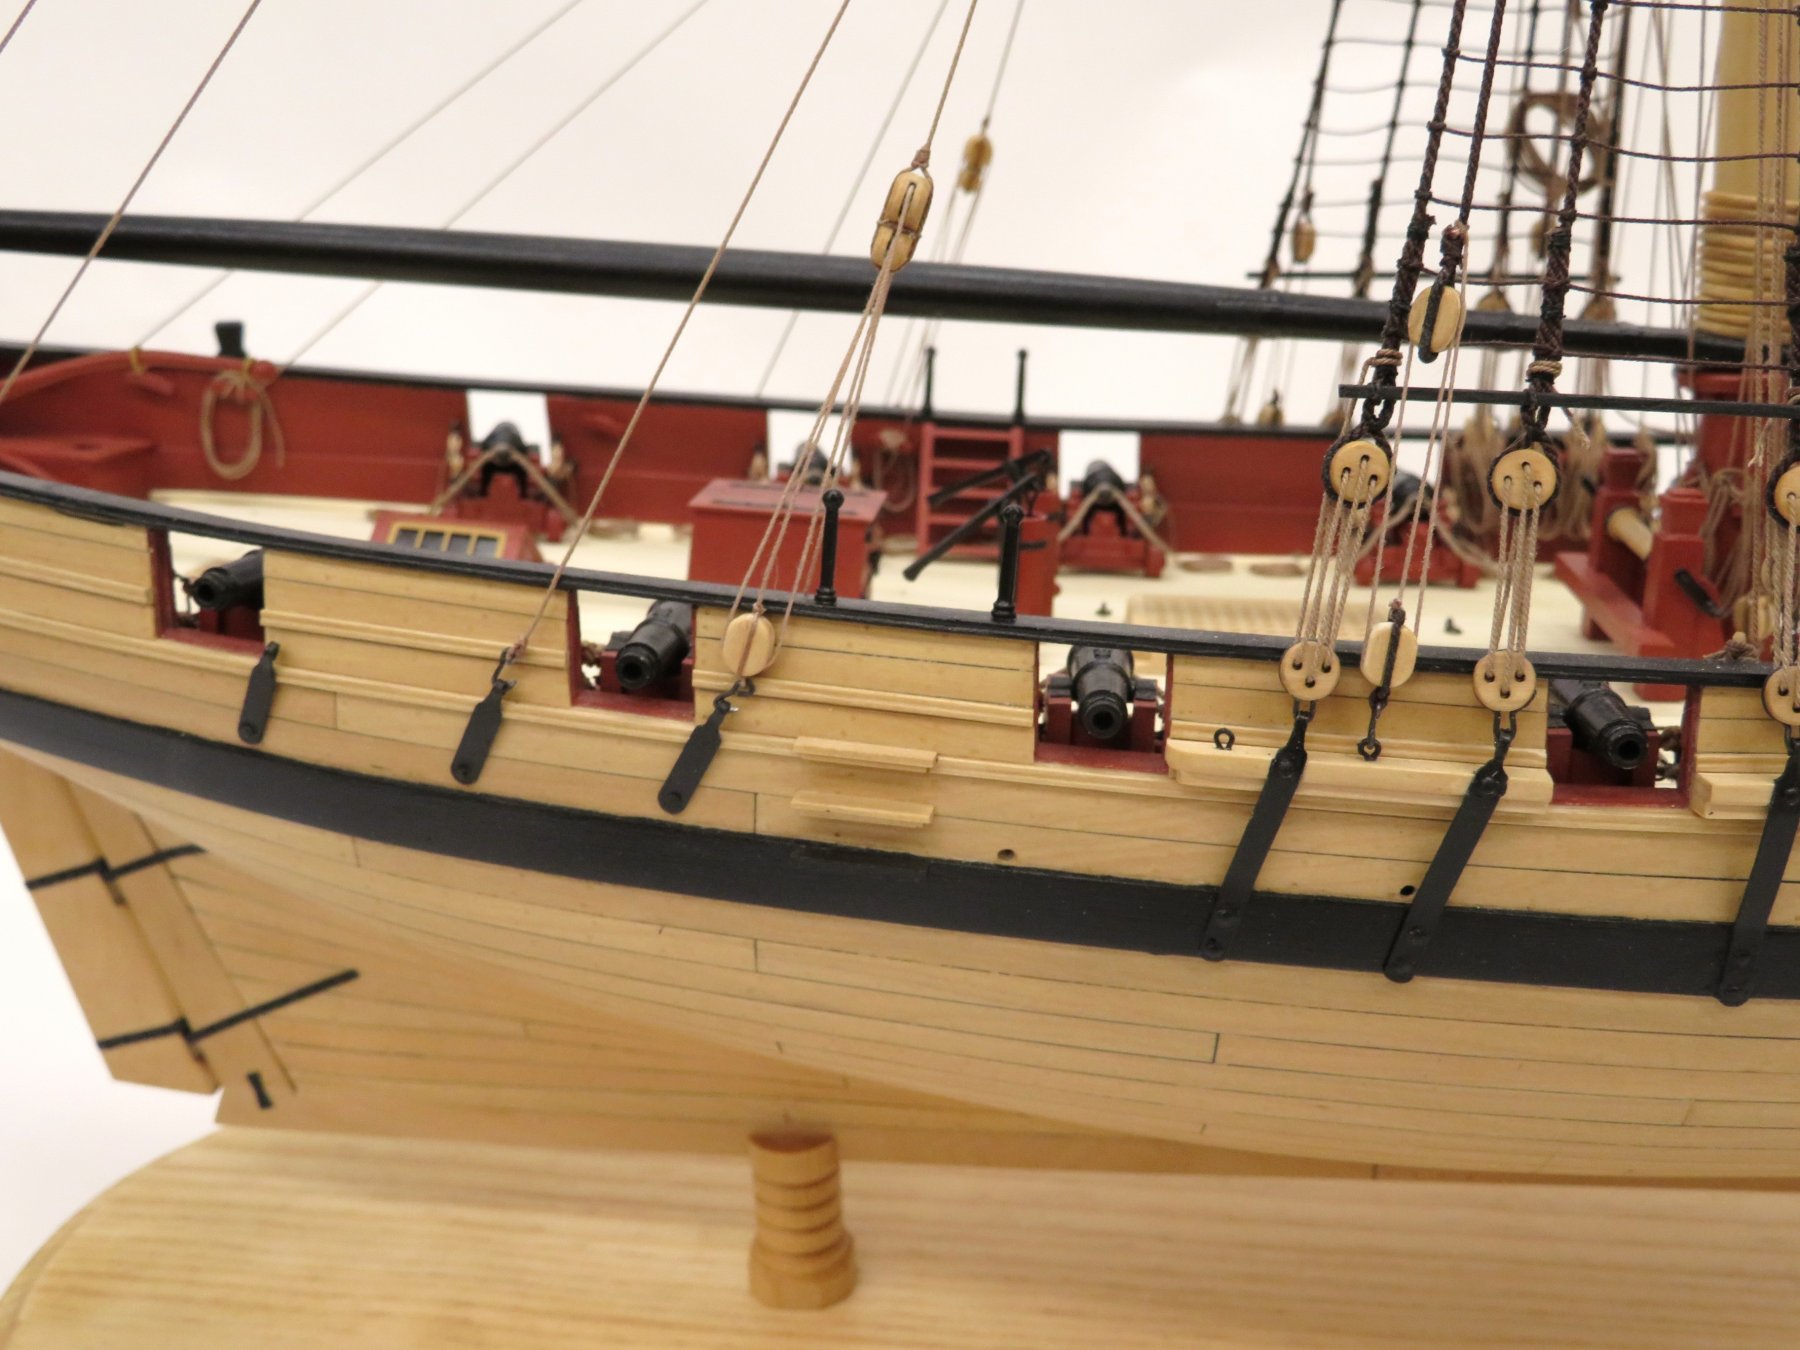
Well this project is now declared completed! It was a fantastic build and I had a lot of fun doing it.
I listed it as a scratch build but it was less scratch and more build. As this was a Syren Ship Models product
I wanted to try out as many of the laser cut products Chuck made available. From the bulkheads
to the windlass to the anchors and to all the rest of the "mini kits" I did not find fault with anyone of them.
They were very well made and each a pleasure to build. Of course the plans and instructions were
first rate too!
Well here are some pics of the finished model.


- albert, CaptMorgan, pitu and 33 others
-
36
-
-
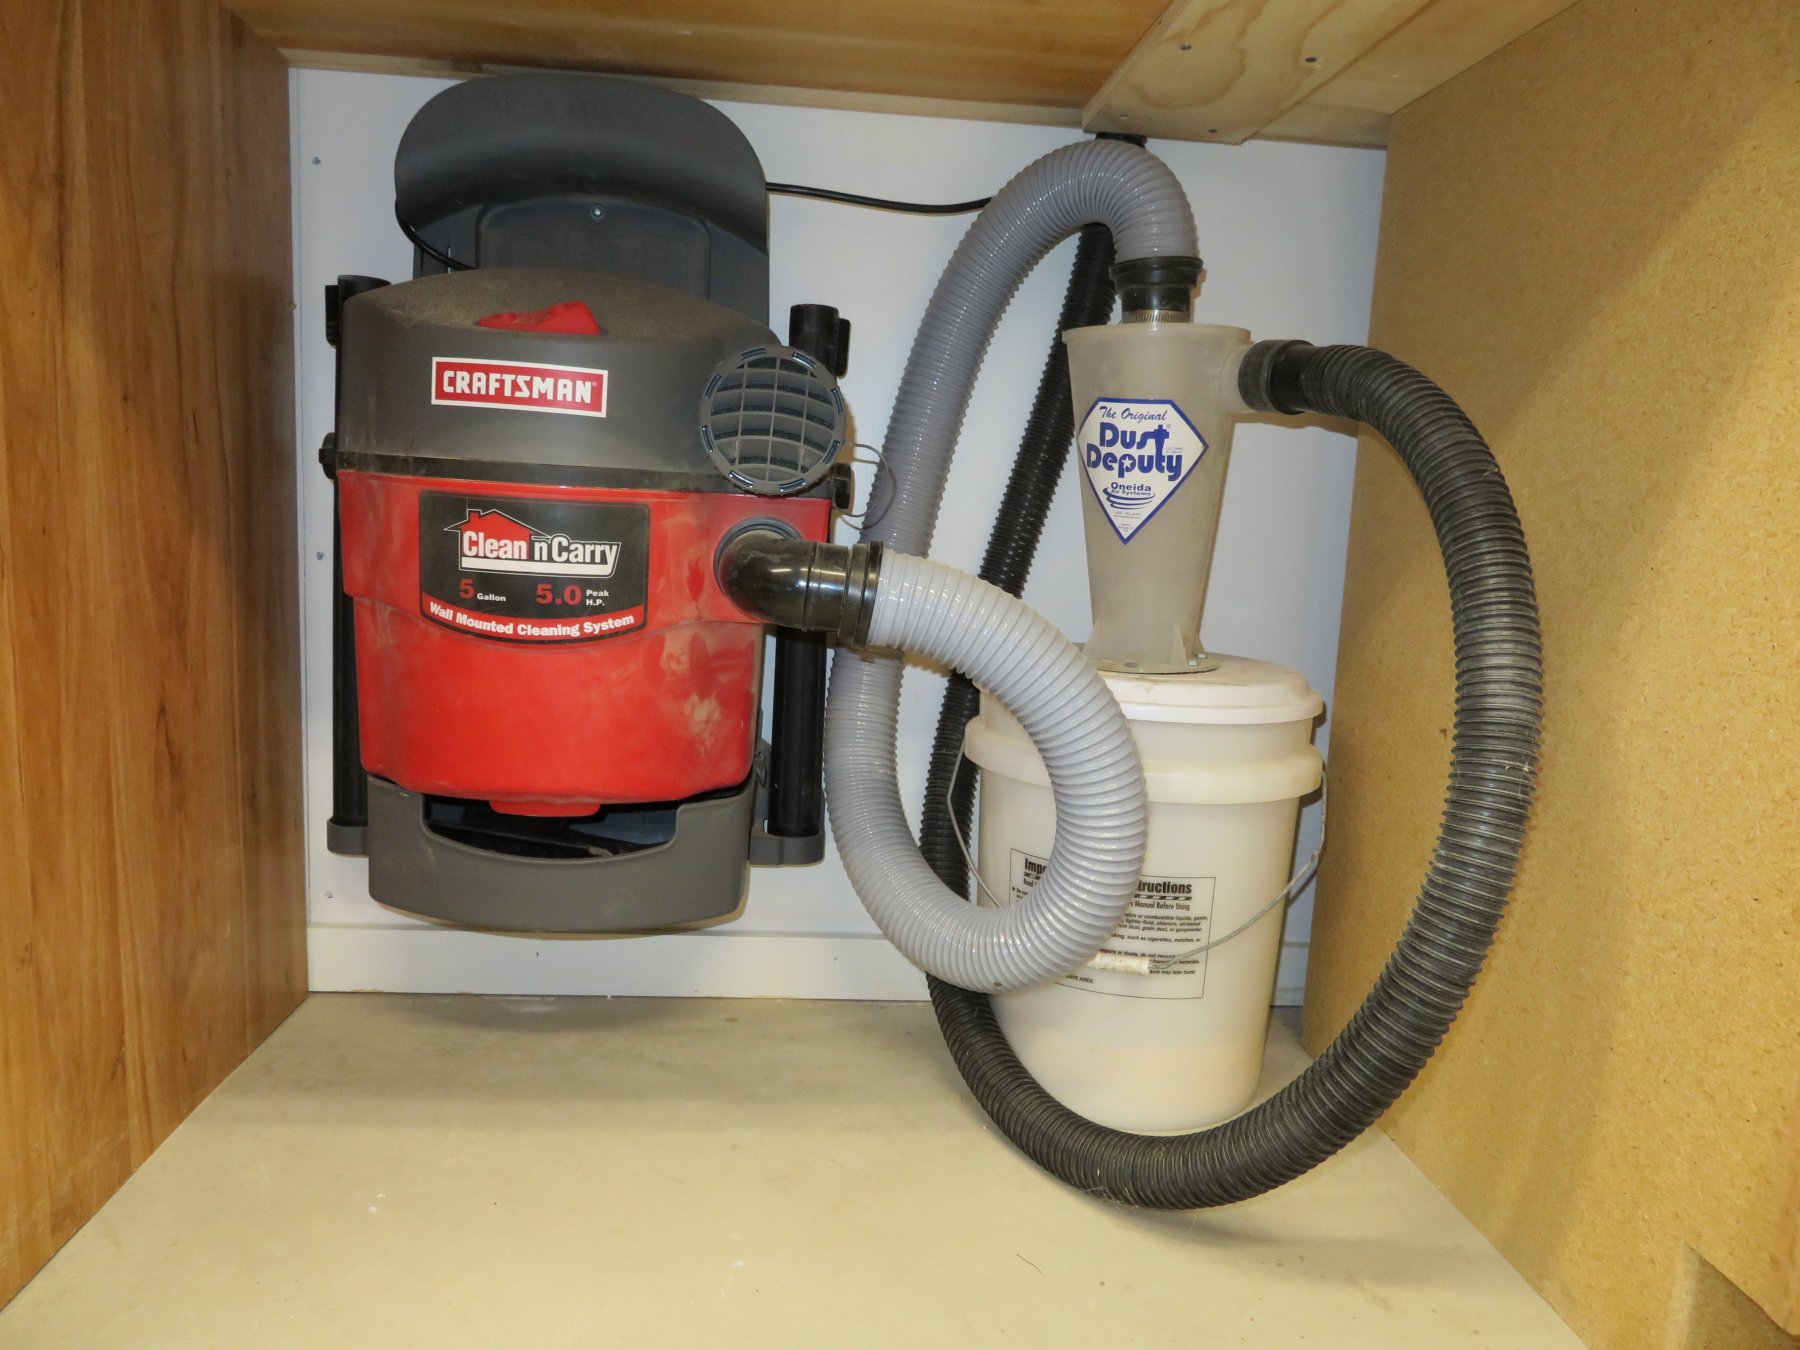
Dust collection is a very important part of our hobby. Take it as seriously as you can. Back when I started doing this hobby,
I was in my late forties , no mask, dust collection etc. The only dust collection was what was on my clothes, hair and nose.
After some very heavy periods of sawing and sanding I had two severe allergic reactions that required steroids, inhalers etc.
This is when I started to get more serious about dust collection.
I first added a Oneida Dust Deputy to my shop vac. I connected to a switch that turns the vacuum on and off when you turn on your tool.


I feed the hose through my work bench and attach it to whichever tool I will be using.
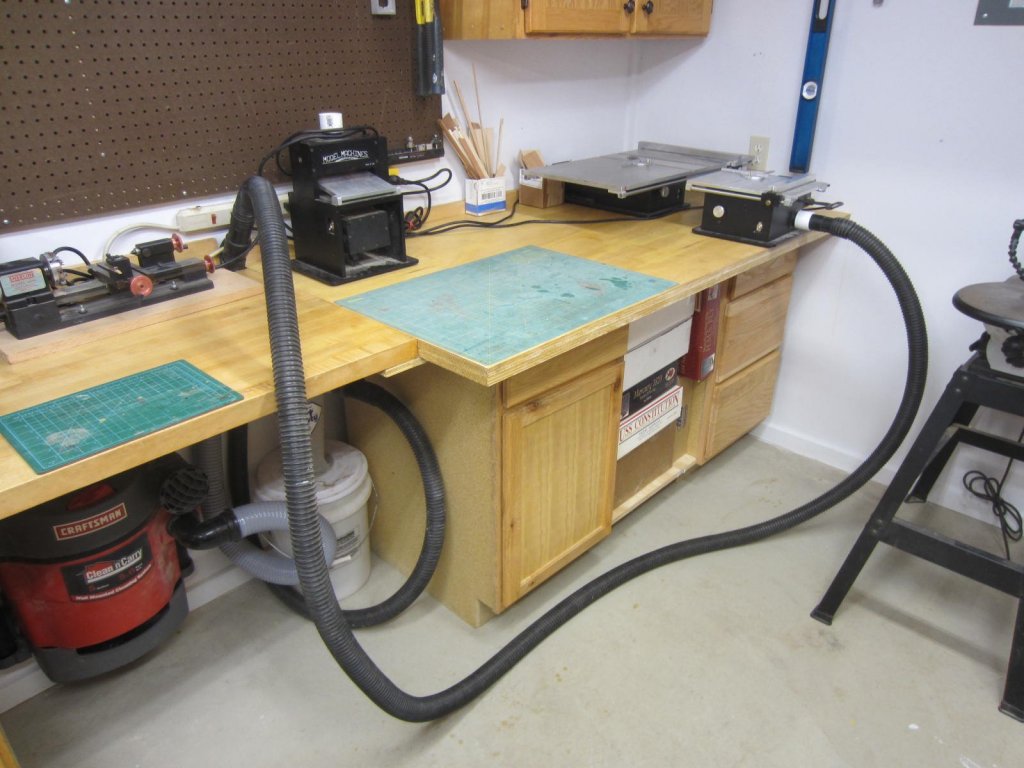
I also noticed that there were many times that despite the shop vac not all dust is collected.
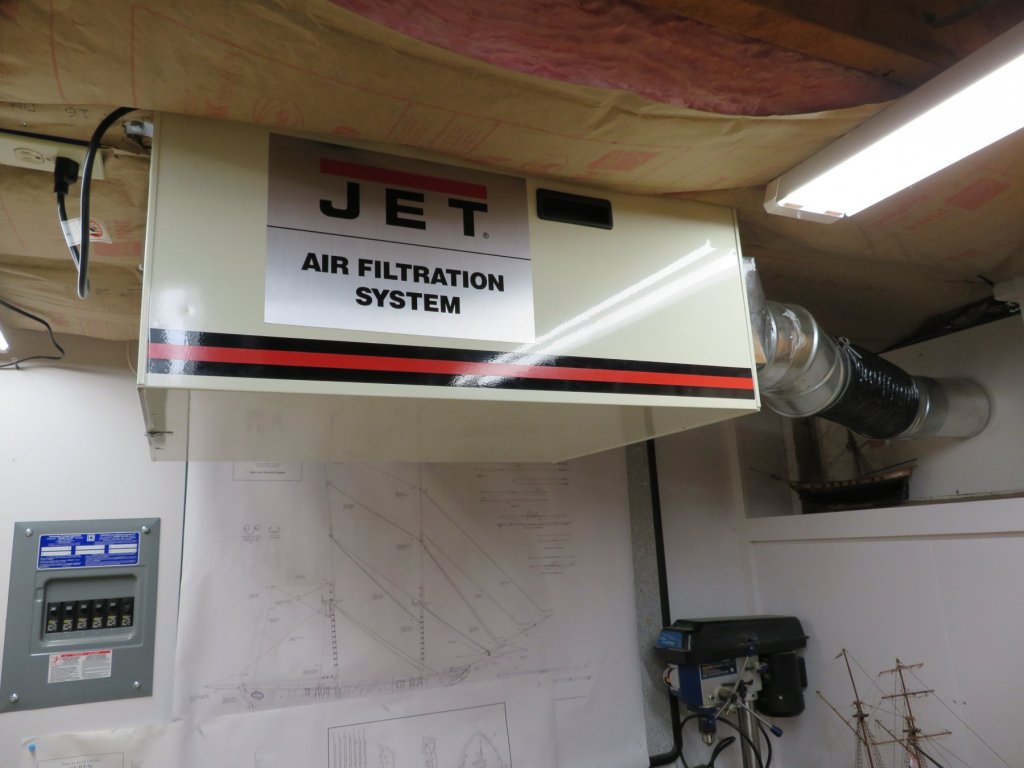
Seeing I have the room I added a ceiling mounted JET air filtration system. I hung it near the
basement window and direct vented it to the outside to ensure dust was not recycled back into the shop.
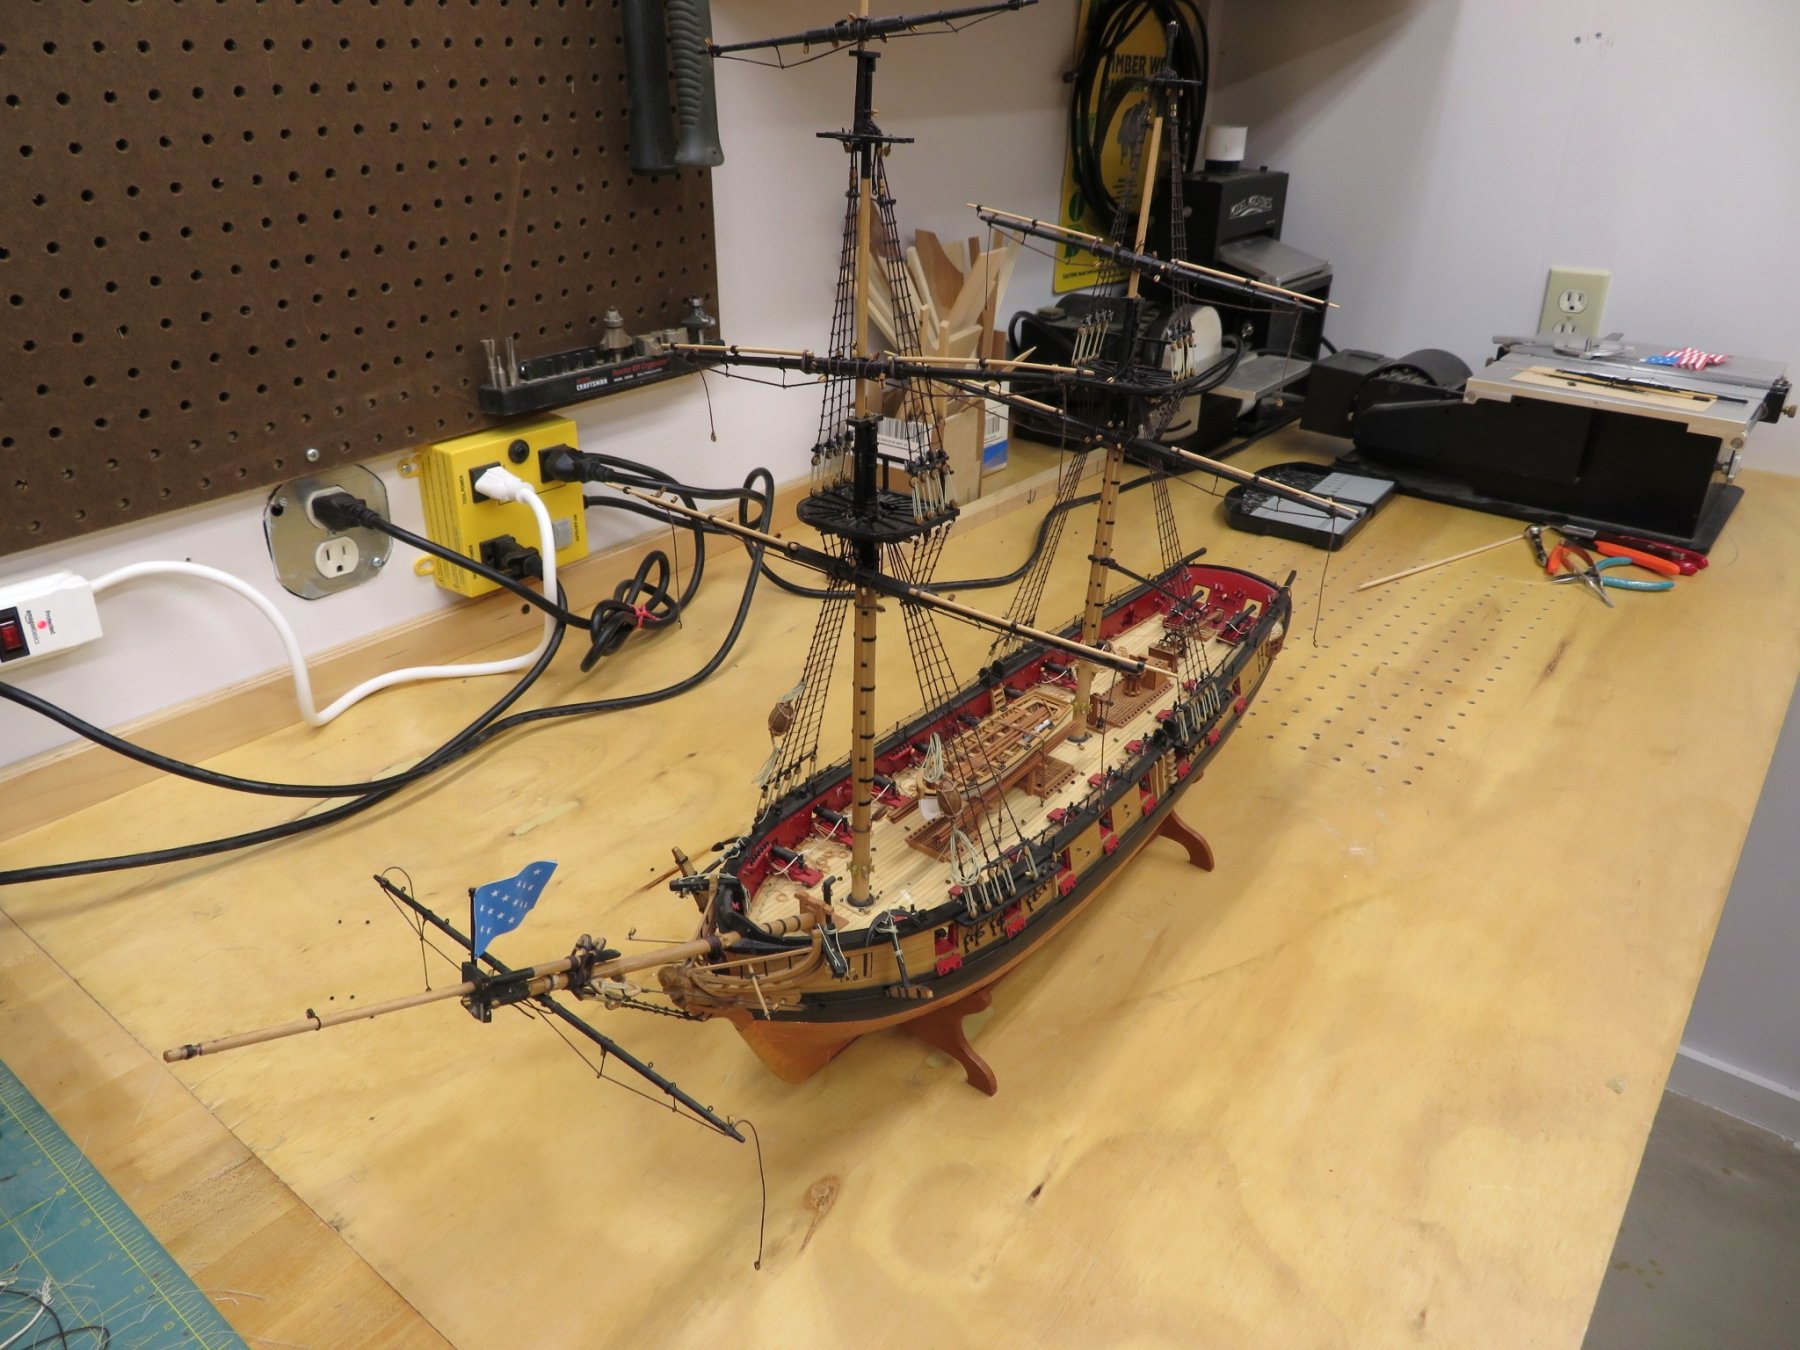
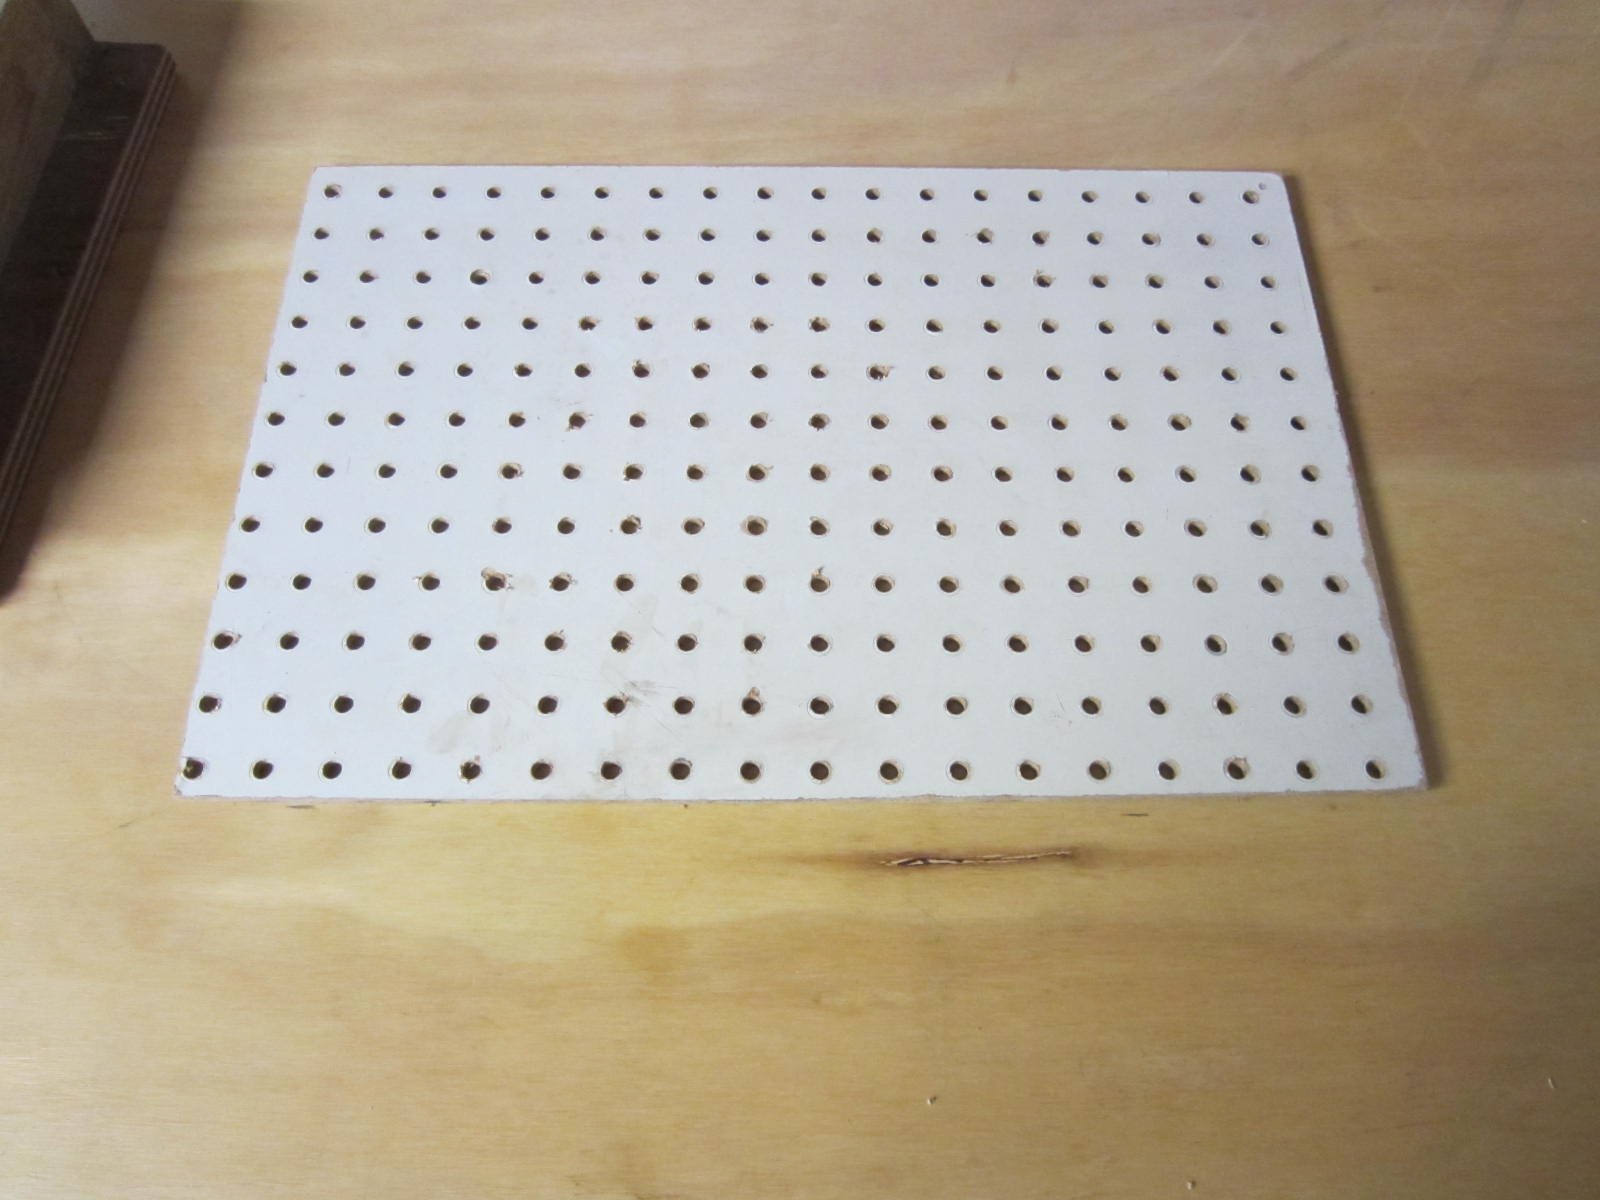
Now with all this in place I found one more area that I was failing in my efforts. While at the work bench when we're
fairing a hull or sanding the planking there was no tool hooked up so the shop vac captured very little of the dust.
The JET captured what was in the air but the dust was all around me on it's way to the JET. To help eliminate this I
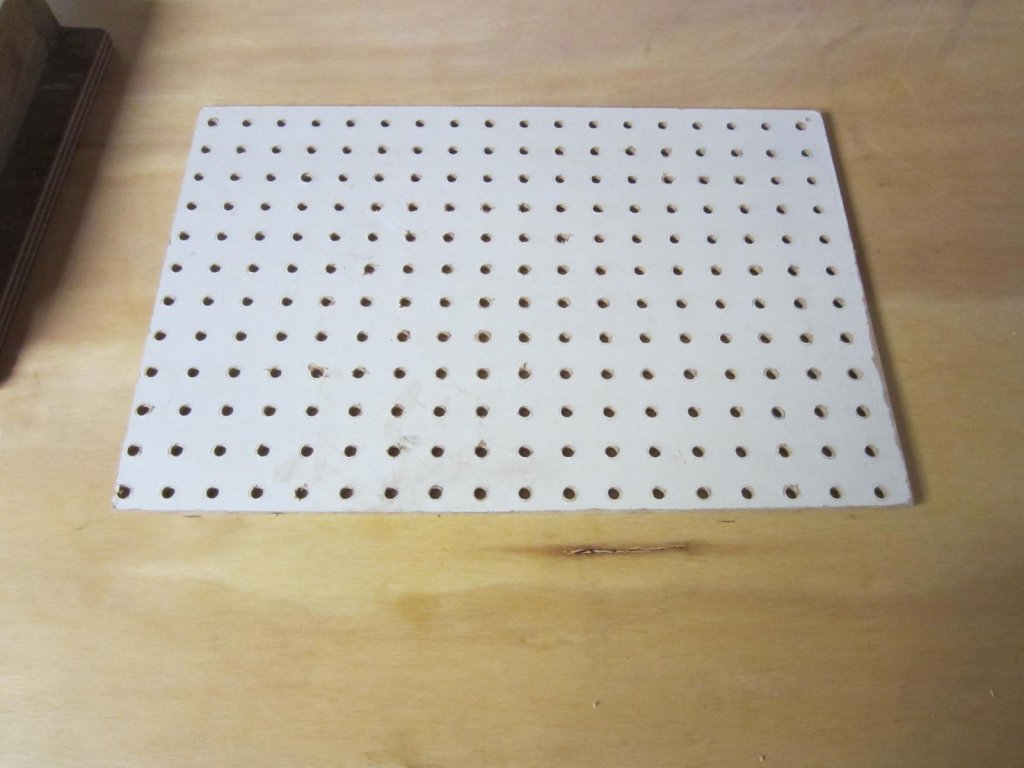
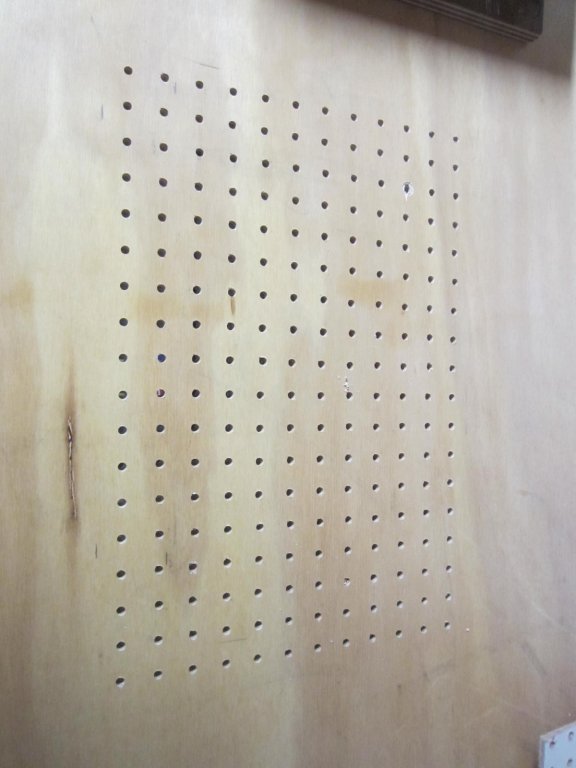
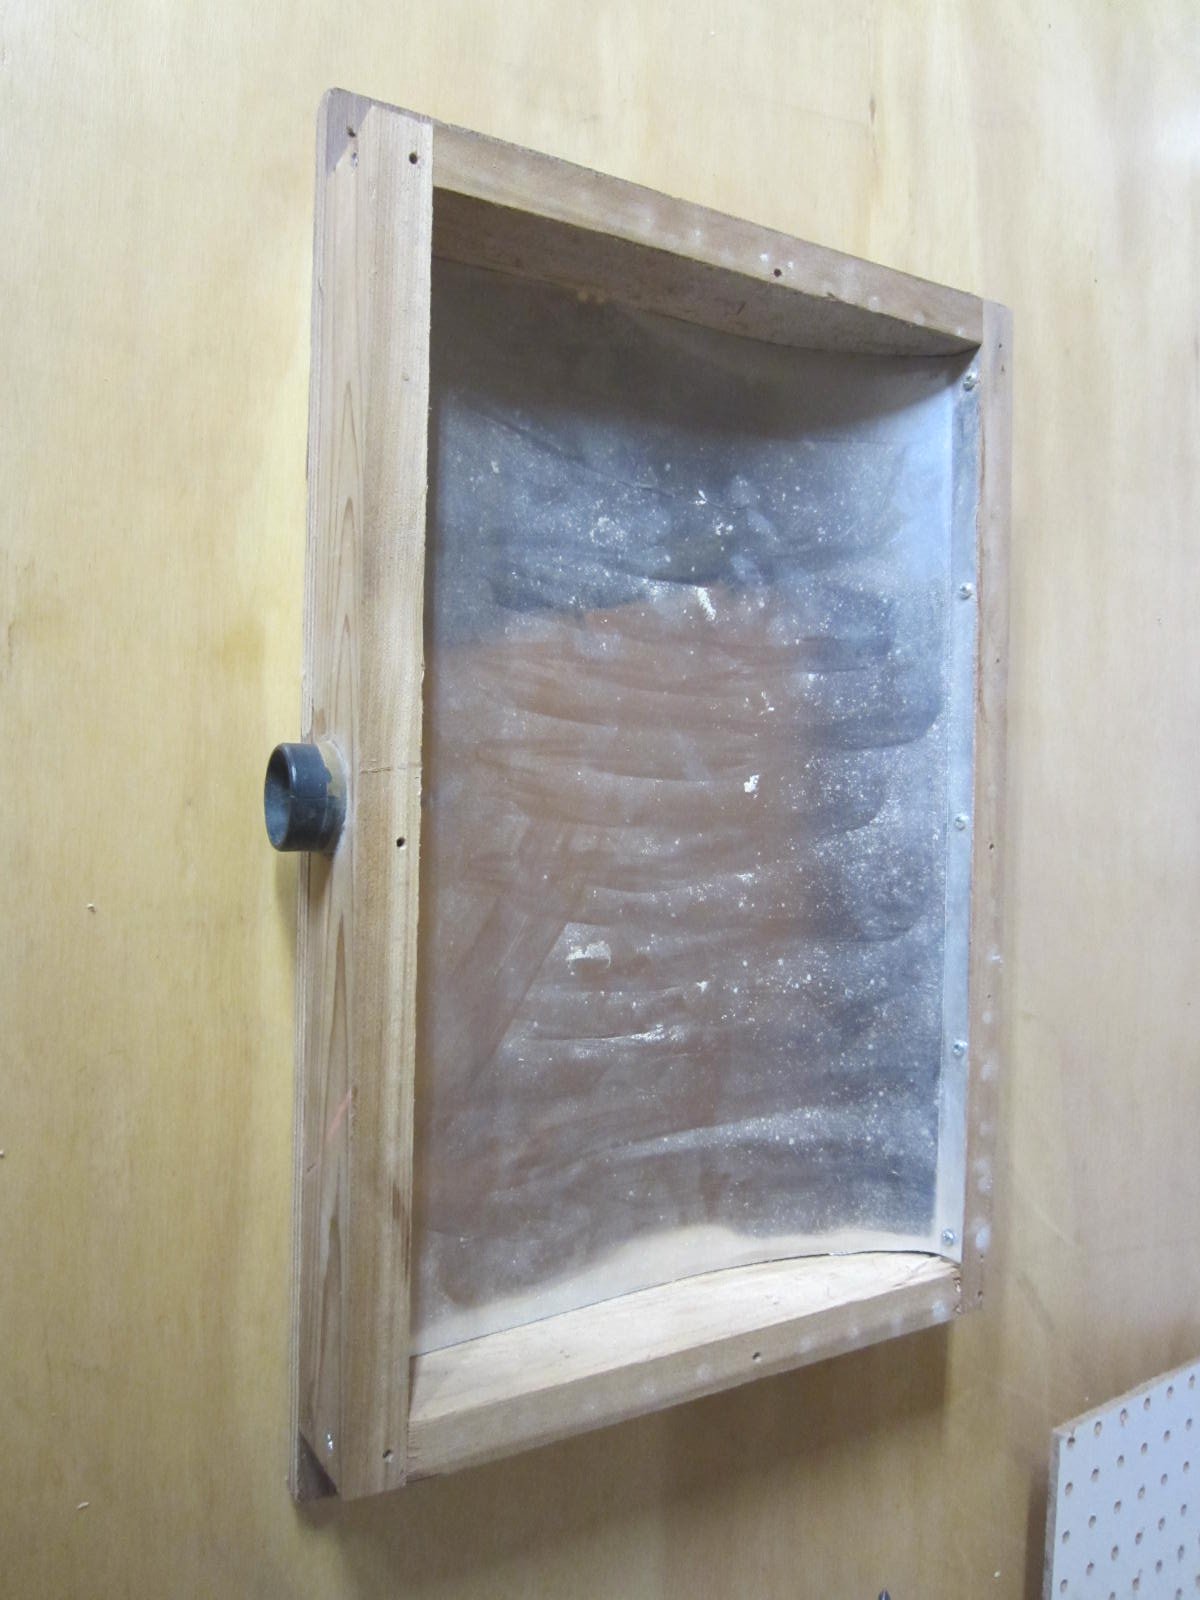
made one more collection method. I used to have a home made portable down draft box. I dissembled the top,
marked the hole pattern on a section of the workbench, drilled the holes and mounted the base under the workbench.
Now I can hook the shop vac to it and sand over the vents and most of the dust is sucked down and collected.
What little that gets airborne is taken care of by the JET.

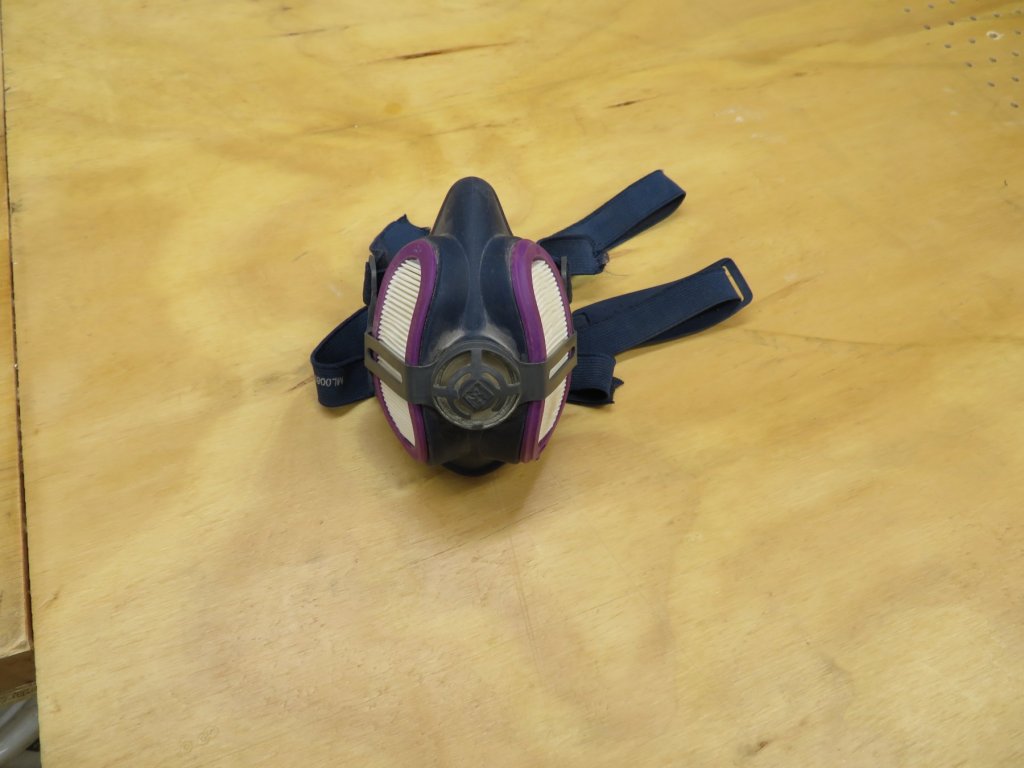
Of course I use a face mask with replaceable filters too.
Now that I've shown you how I handle dust collection I must add the disclaimer that I too am lazy sometimes and
don't use every dust capture item in my collection every time I cut one little piece or sand one little spot. I do try to use
them as much as possible especially when working on something that creates more than a minimal amount of dust.
I hope this helps!
- gjdale, PeteB, Ryland Craze and 6 others
-
9
-
Hi Chris,
Two pieces down and a whole lot more to go! Seriously its great to see you cutting wood again.
For my Confederacy, Winchelsea and Cheerful hulls I also used pencil. I applied it to
one side of the plank. If you want a bit of a thicker look you can apply pencil to both planks.
As Ben said give the different styles a try and chose the one you like best.The only time I used
black paper was on a 1/24 cross section. It seemed too thick for the others.
- mtaylor and Tigersteve
-
2
-
Thanks a lot Ben, much appreciated. Also thanks all for the likes!
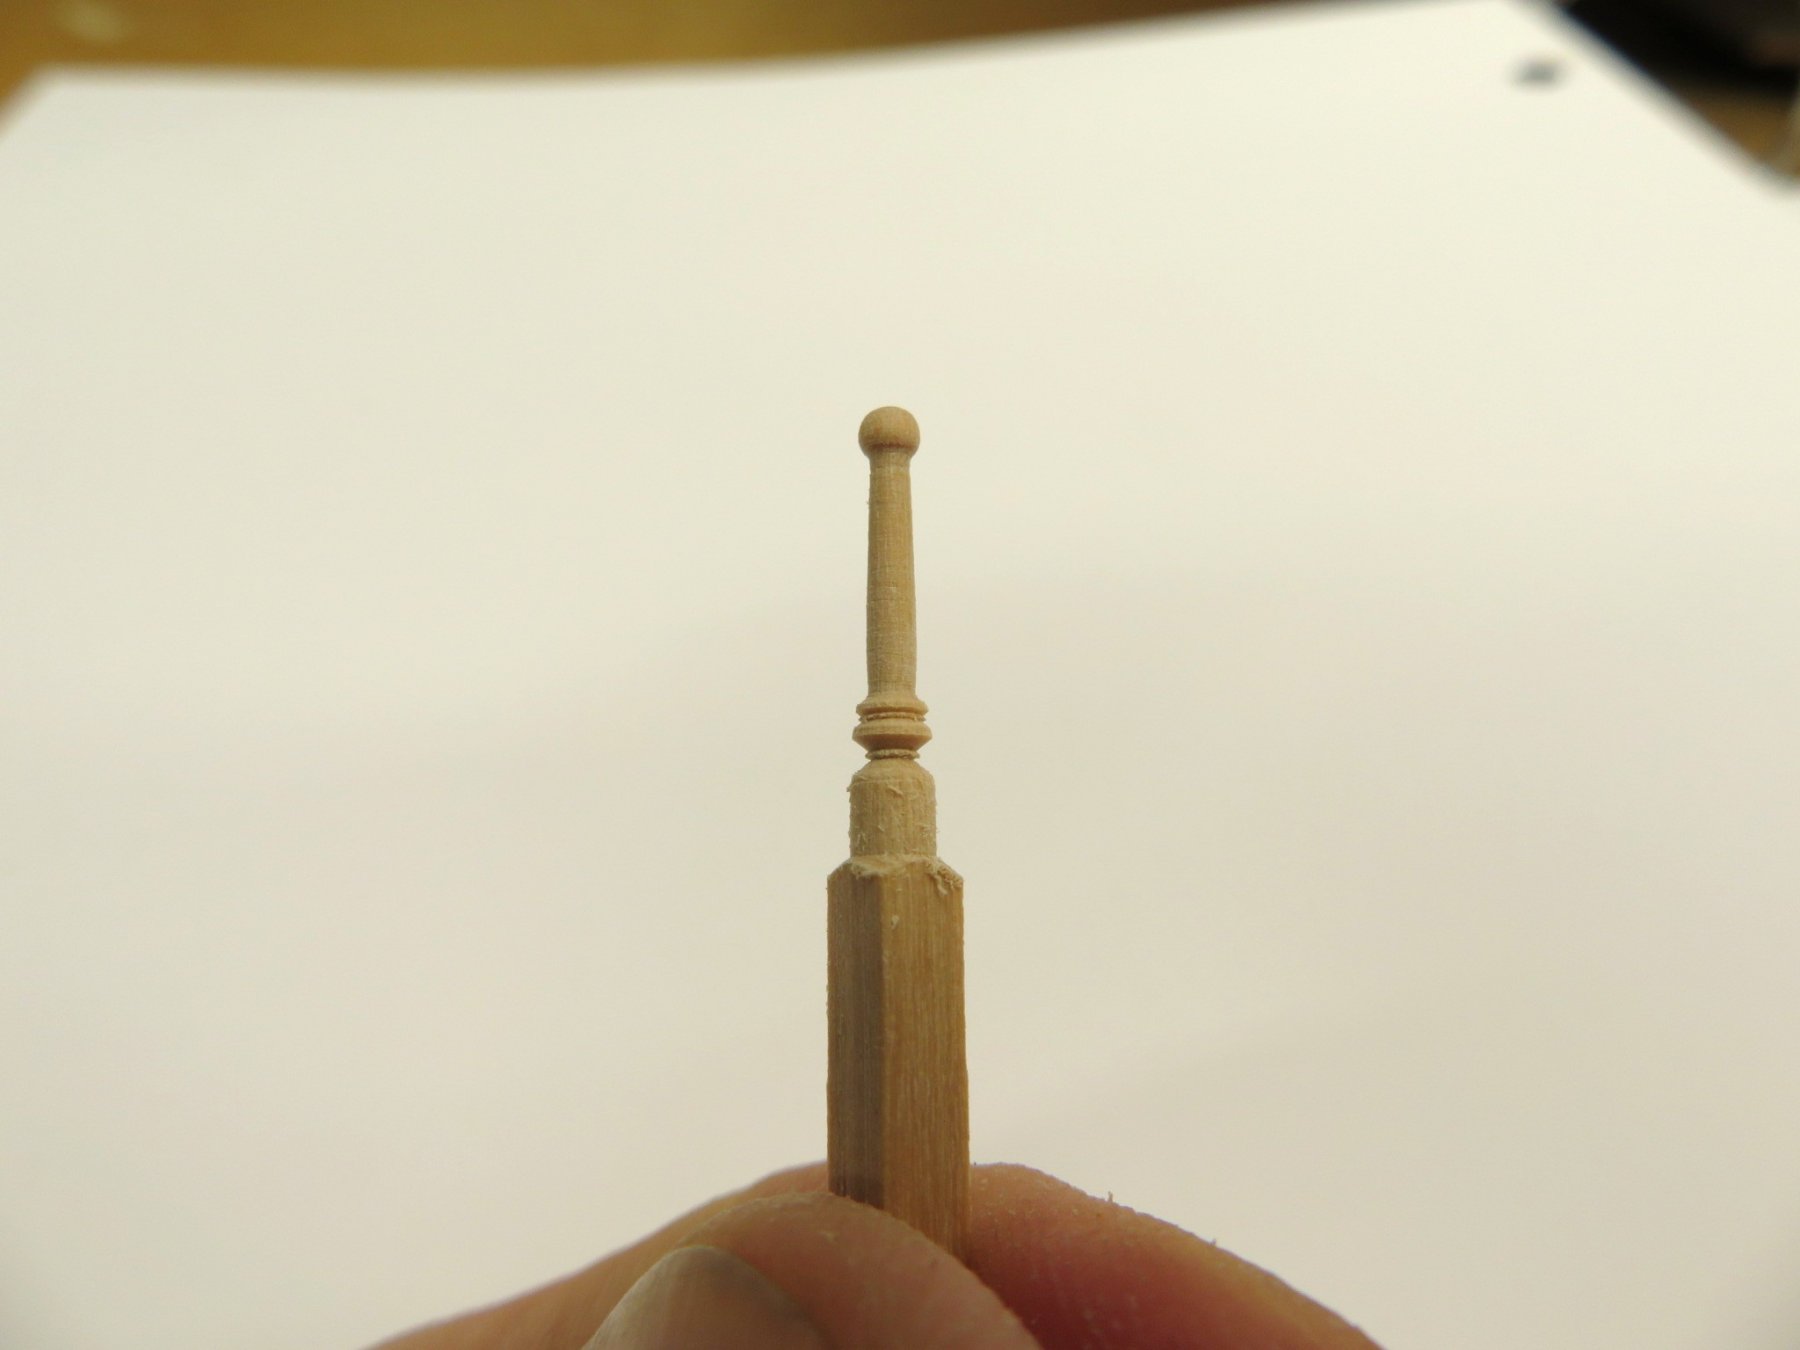
Ok I've make about ten stanchions to get four I liked. I took square stock and chucked it in the lathe.
I turned it to the desired dimension added a couple of forms and then fine tuned it with files and
sandpaper while spinning. Nothing to fancy but I'm satisfied.


Well shes just about done. Just a few touch ups and I'll call her finished.
- CaptMorgan, Canute, Ryland Craze and 14 others
-
17
-
-


US Brig Syren by Rustyj - 1:64 - Rigging Redo
in - Kit build logs for subjects built from 1801 - 1850
Posted
Even with the busy pre-holiday activities I've been able to continue on.
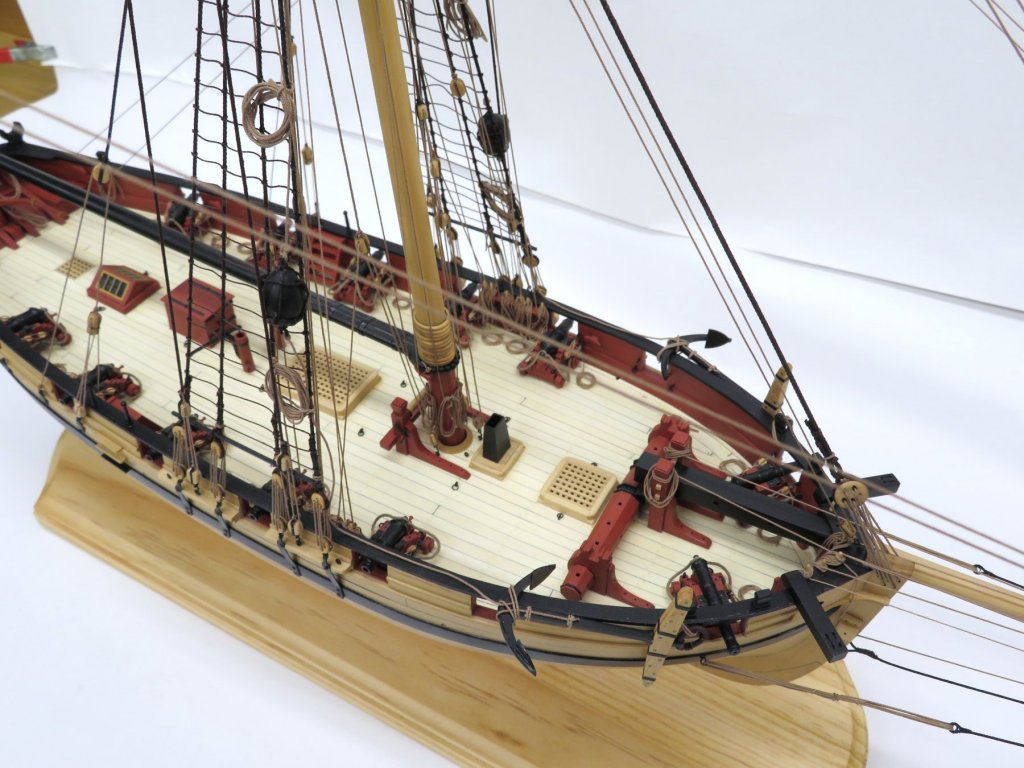
The Ridding and Gallows Bitts are done. There are made from pear.
The main fife rail was made from 1/16" thick boxwood. I also needed to make six stanchions. I cut some boxwood 1/16" strips.
I chucked them in the dremel just like making belaying pins. I sanded it round first, then using files I cut the profile on the stanchions.
Once done the stanchions were added and the entire piece was coated with wipe on poly.
On to the pin rails now.