


Rustyj
-
Posts
2,516 -
Joined
-
Last visited
Content Type
Profiles
Forums
Gallery
Events
Posts posted by Rustyj
-
-
-
Great work on the masts and the start of the rigging Bob. Always a joy to watch you rig a ship!
-
-
43 minutes ago, rjones726 said:
I've been reading Chucks build log and thinking about how I intend on assembling the keel. I am curious as to how you insure the keel has a 1/32" rabbit on each side (i.e. centering the four 3/32" pieces).
Hi rjones726, I feel like I'm writing to myself. LOL.
There are probably as many ways to do this as there are people building her. Seeing that the dimensions are all 1/32'" I'll try to explain how I will approach it. Seeing that there is a gap of 1/32" on each side I temporarily attach some 1/32" scrap to what would be the "bottom" side of the 3/32" piece when laid on its side. I use some temporary craft glue like rubber cement. The piece with the strip wood is now 4/32" (1/16") thick so when slid up to the keel you should have your 1/32" spacing on each side. I use a hard surface like a thick piece of glass or some such item that is perfectly flat to assemble the pieces on.
I hope this makes sense.
Rusty
-
Medway kit purchased Thursday AM, Shipped that same Thursday, Arrived Saturday, Priceless!!!!!
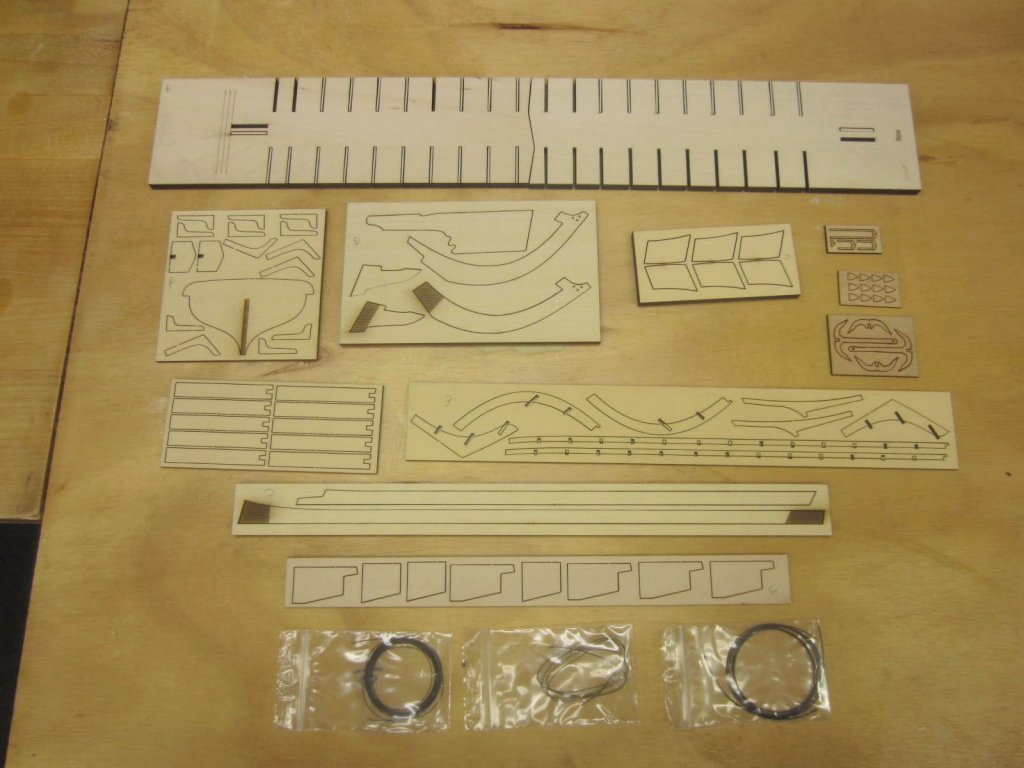
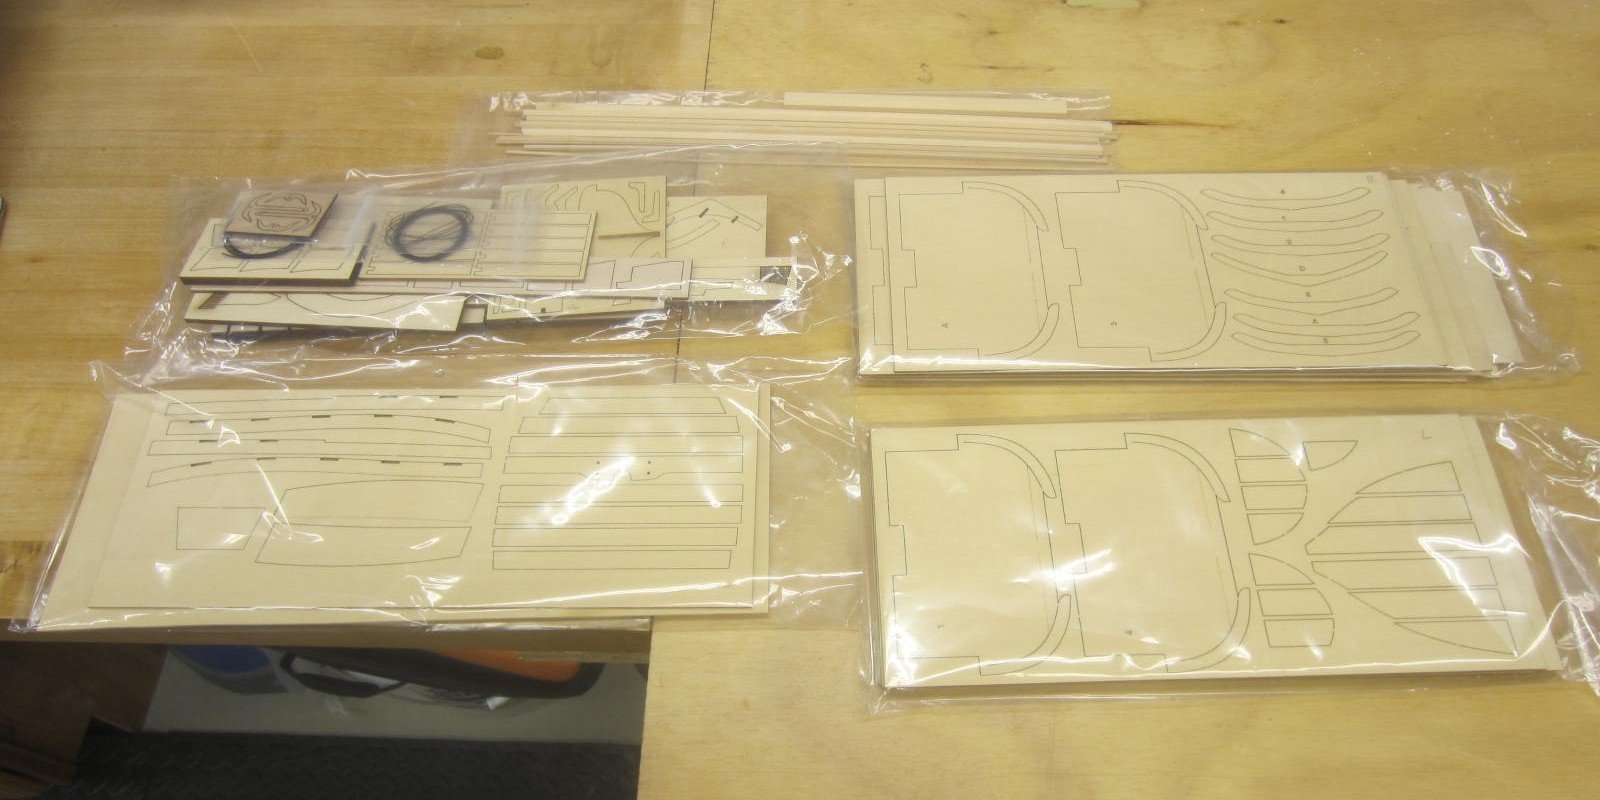
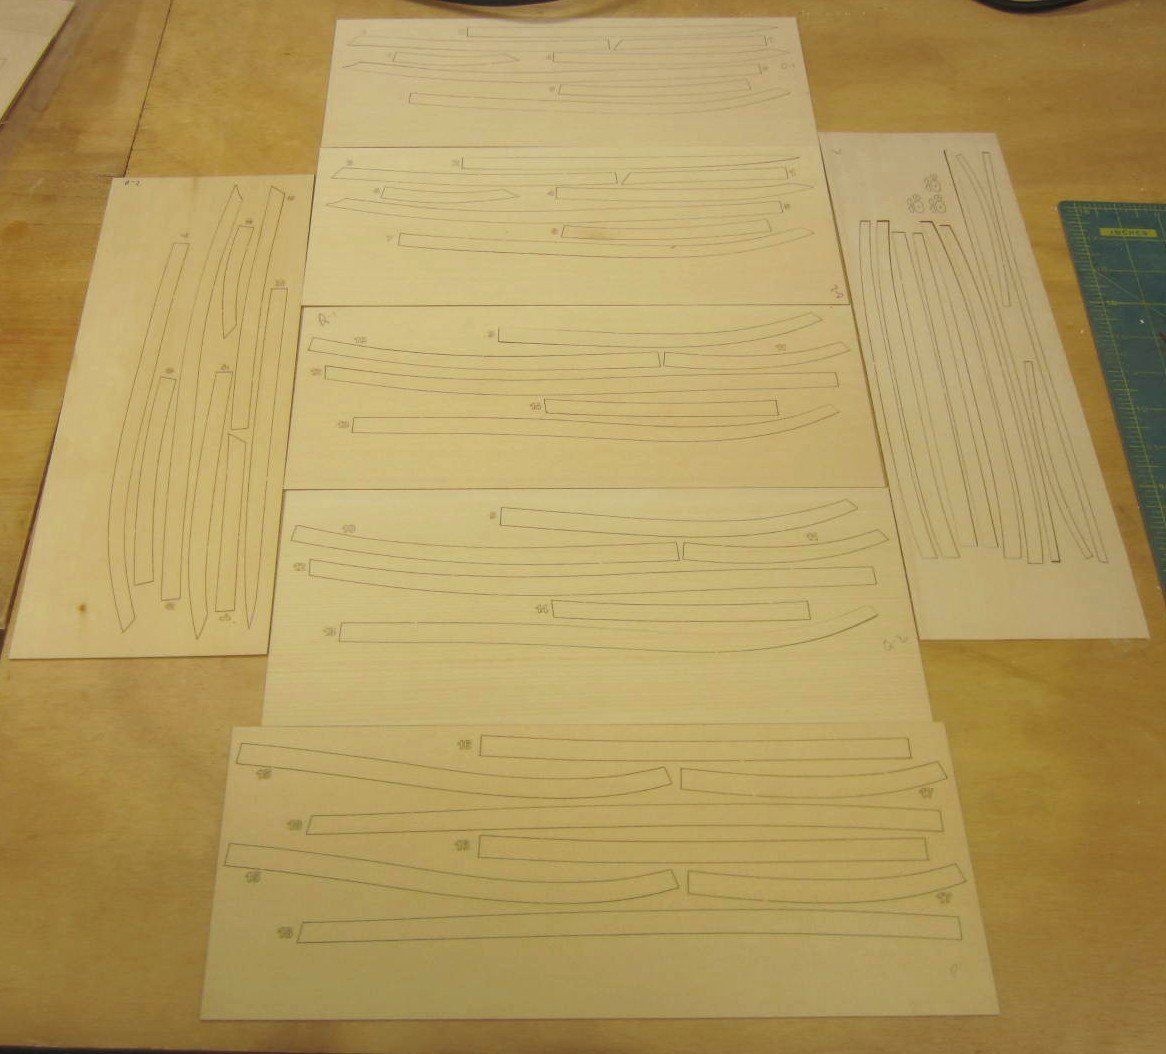
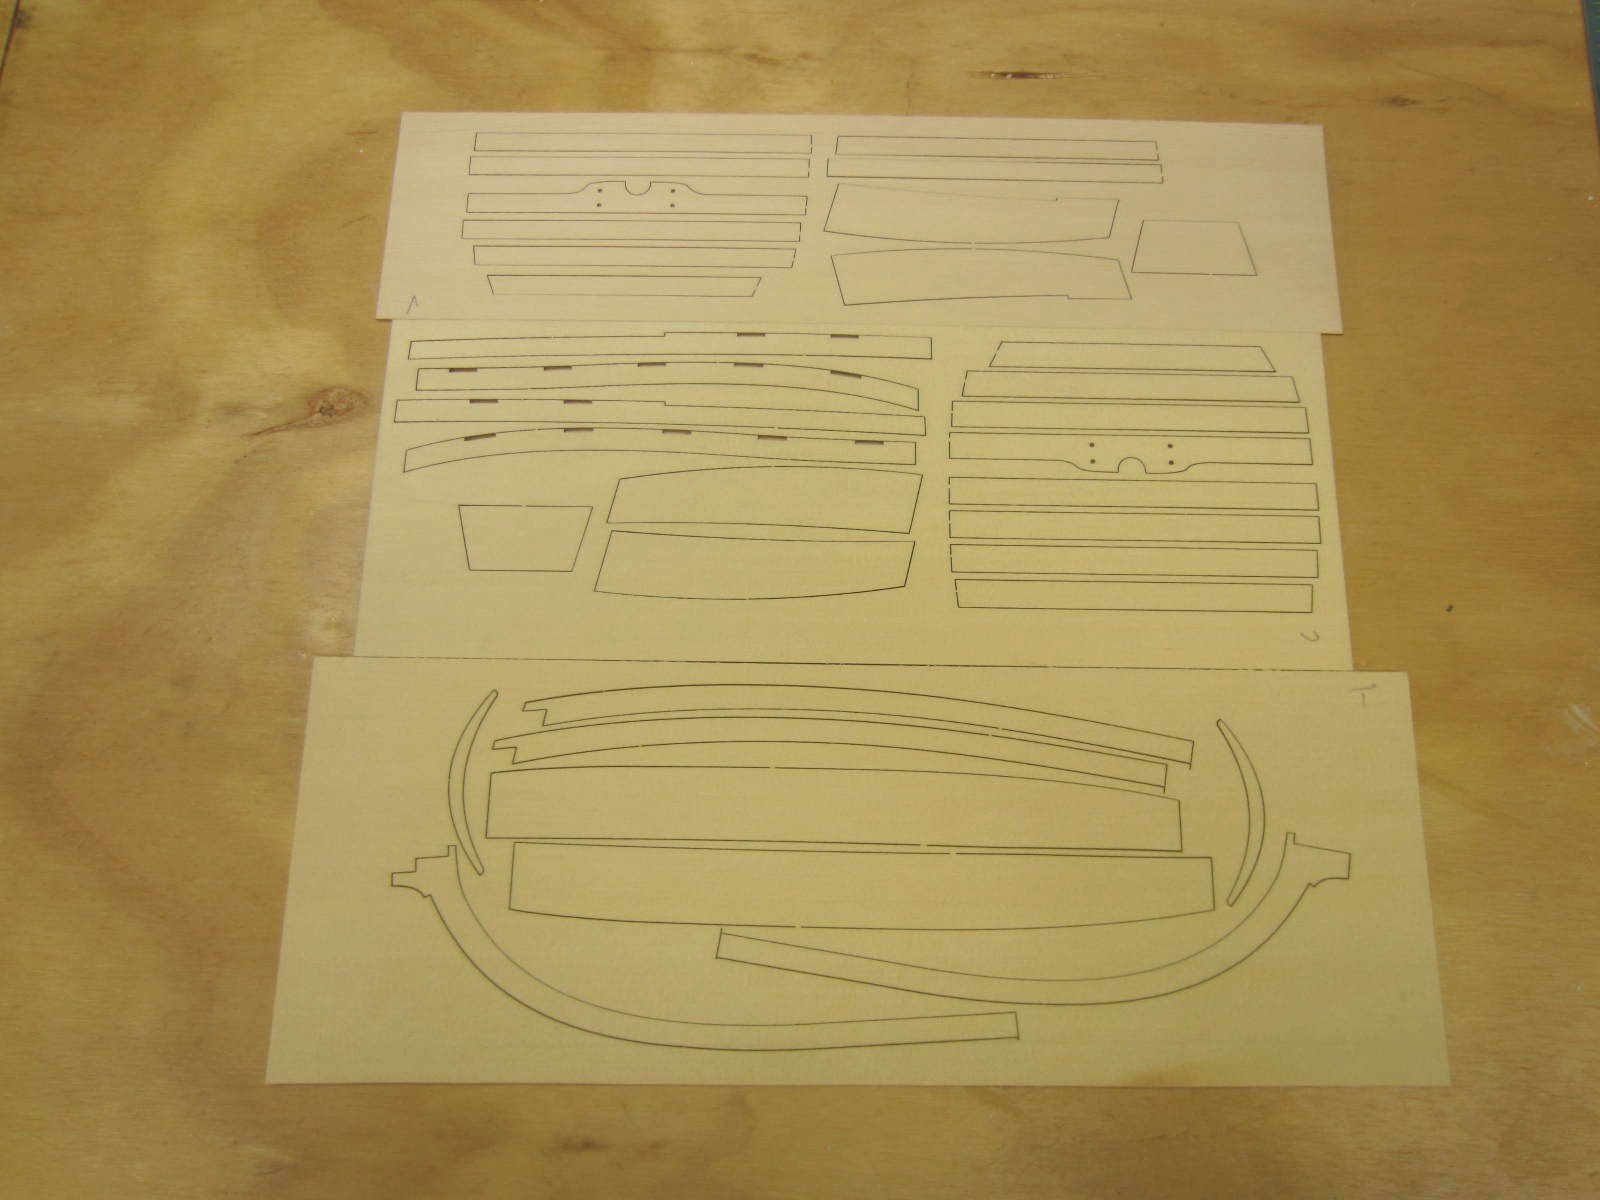
As expected the contents of the box were packed very well and nothing was damaged in transport.
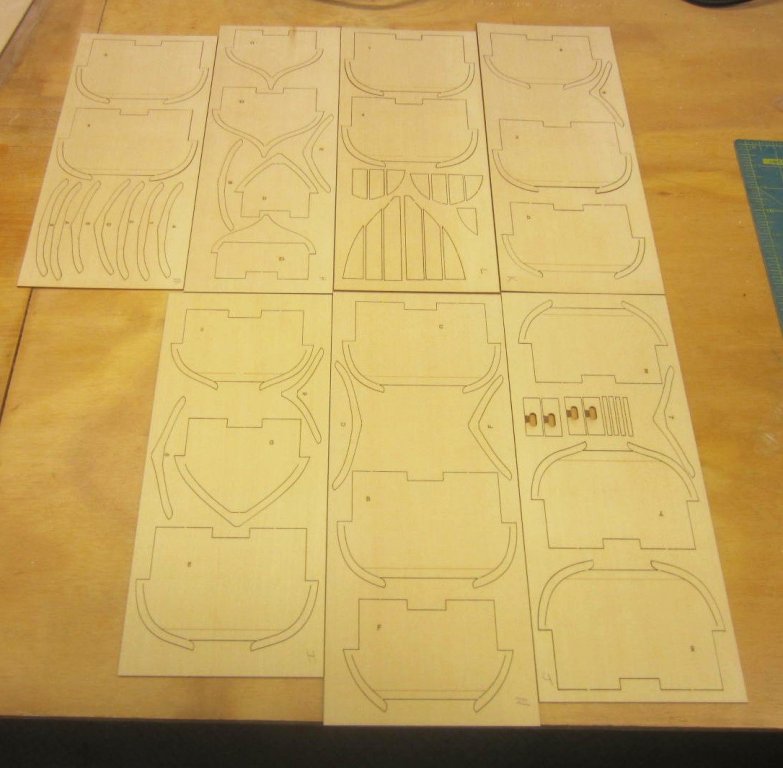
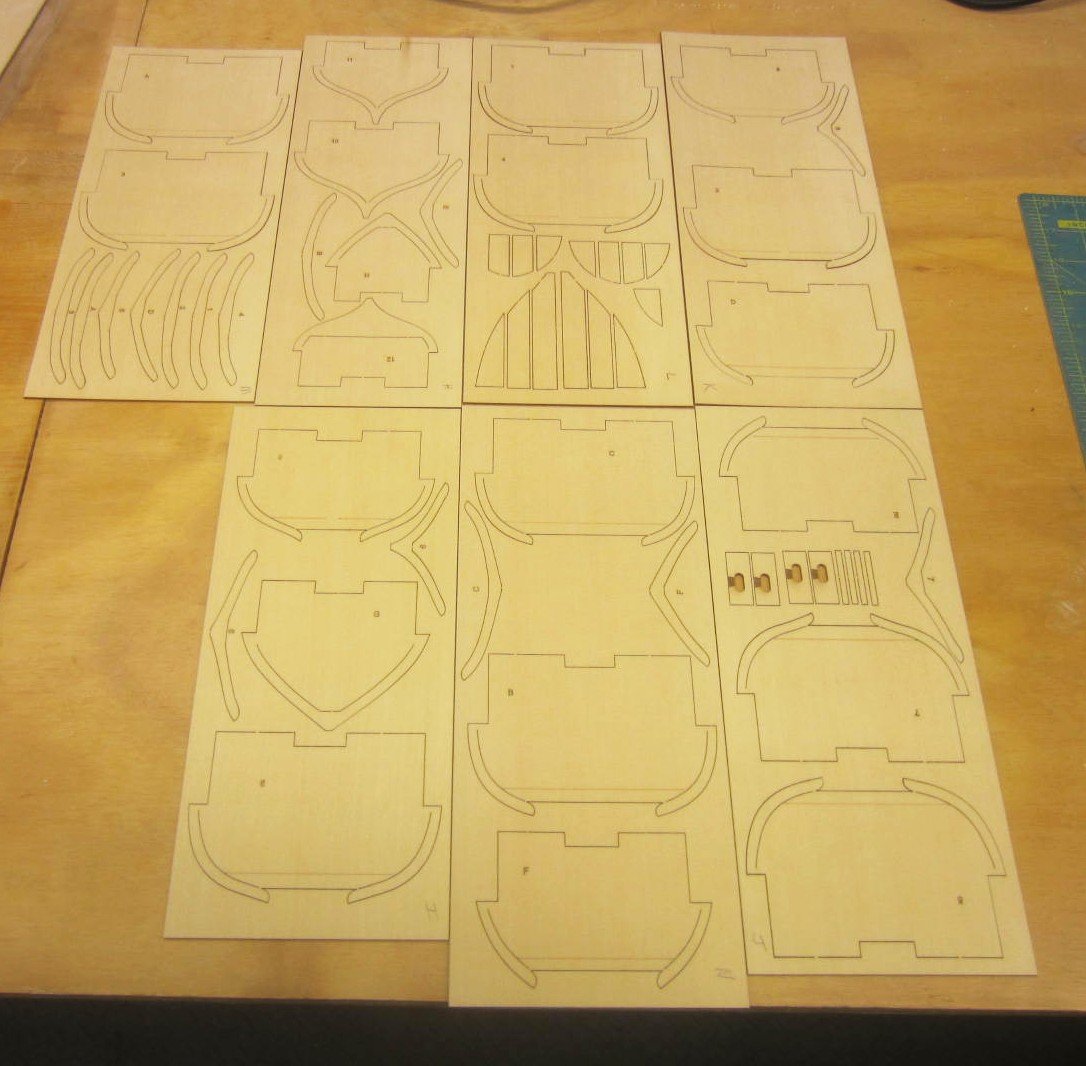
All of the sheets of wood were very nicely laser cut with reference numbering etched on the wood to assist in identification.
The yellow Alaskan cedar has a very nice look to it and the cedar aroma is an unexpected added treat.
As Greg said "This sets the bar for what ship model kits should look like!" and I couldn't agree more!
Ships Plans,

Packing List
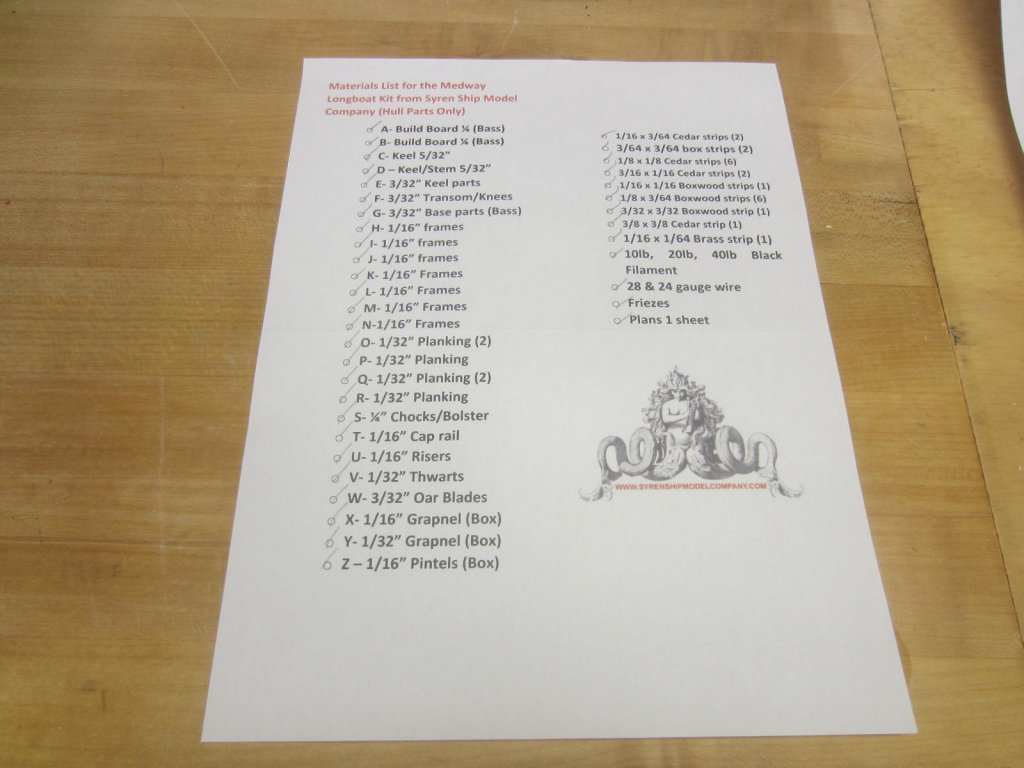
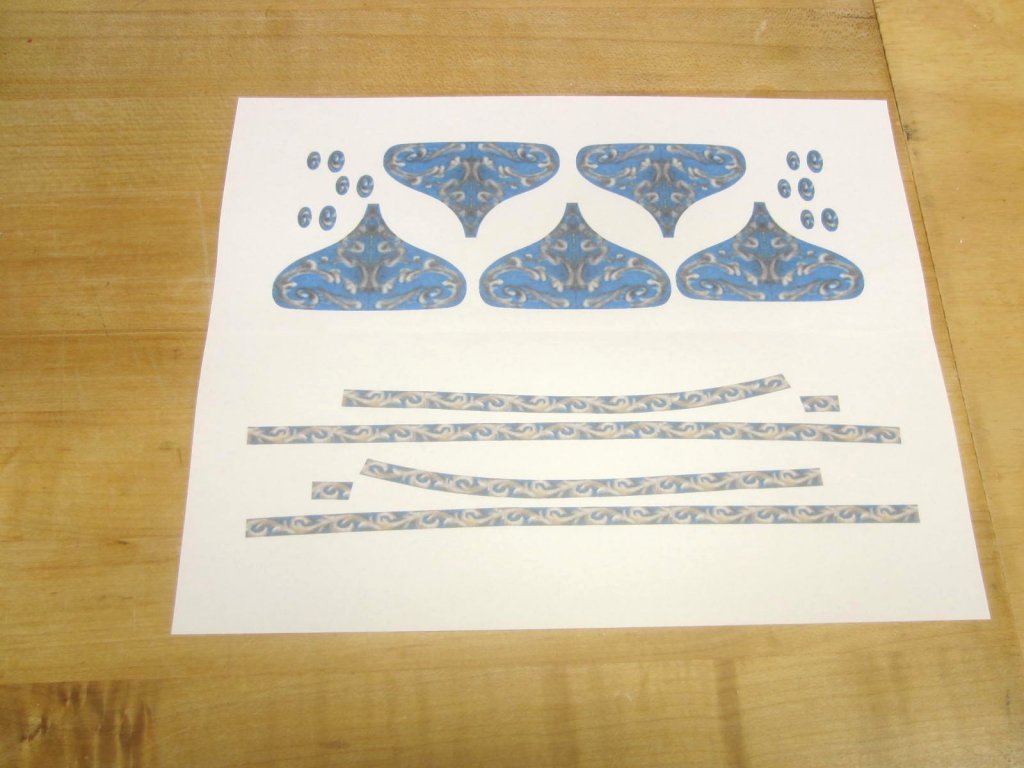
Friezes
Packaging

Various laser cut sheets


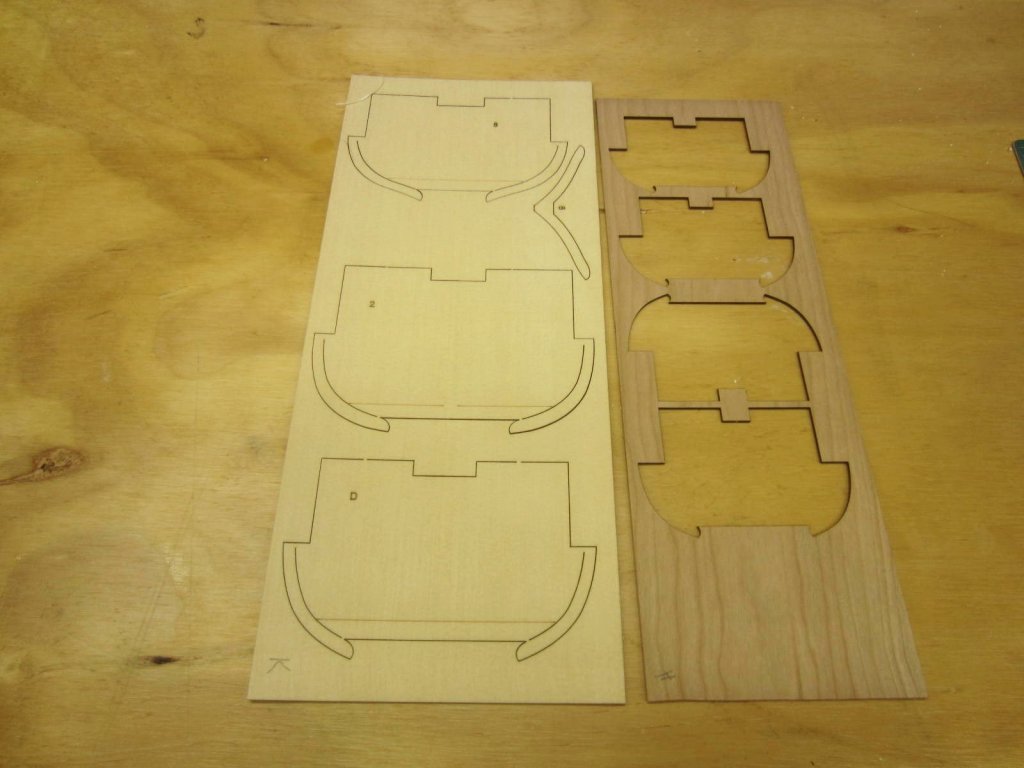
Comparing Queen Anne Barge Frame Size
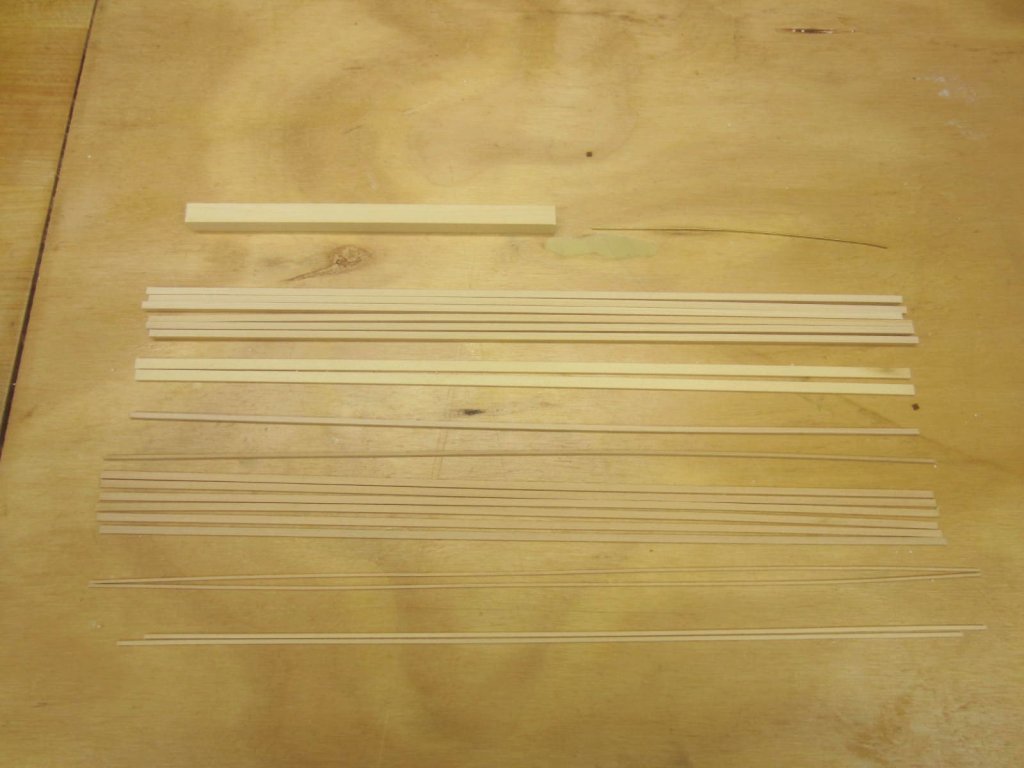
The rest of the kit parts and strip wood
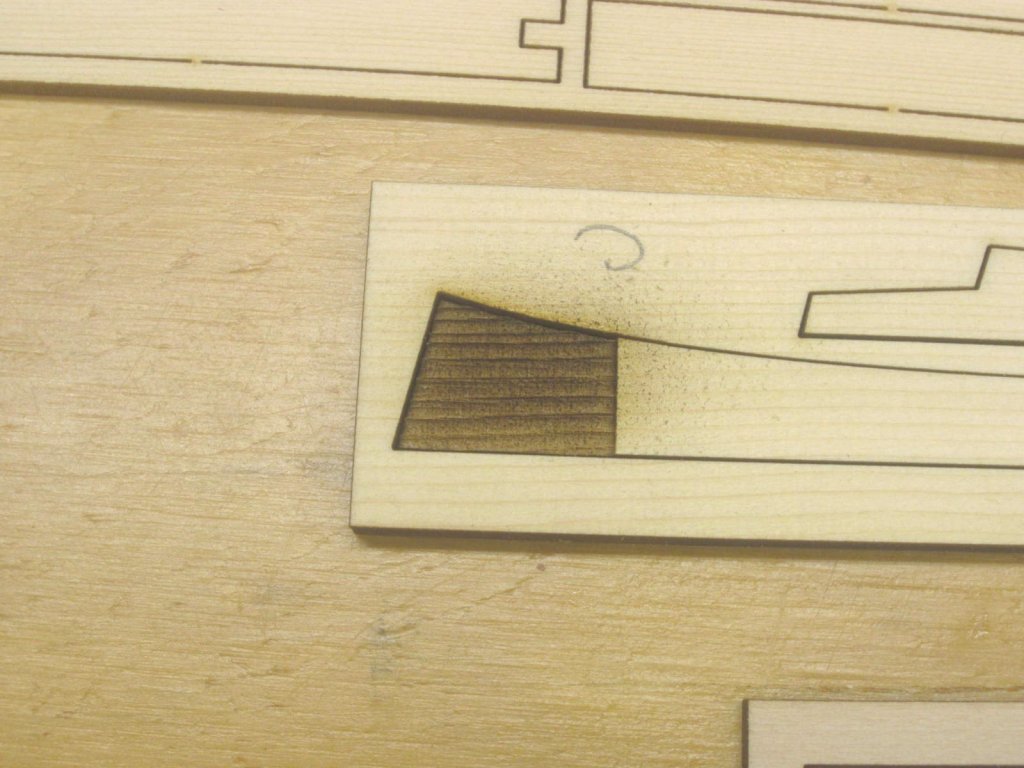
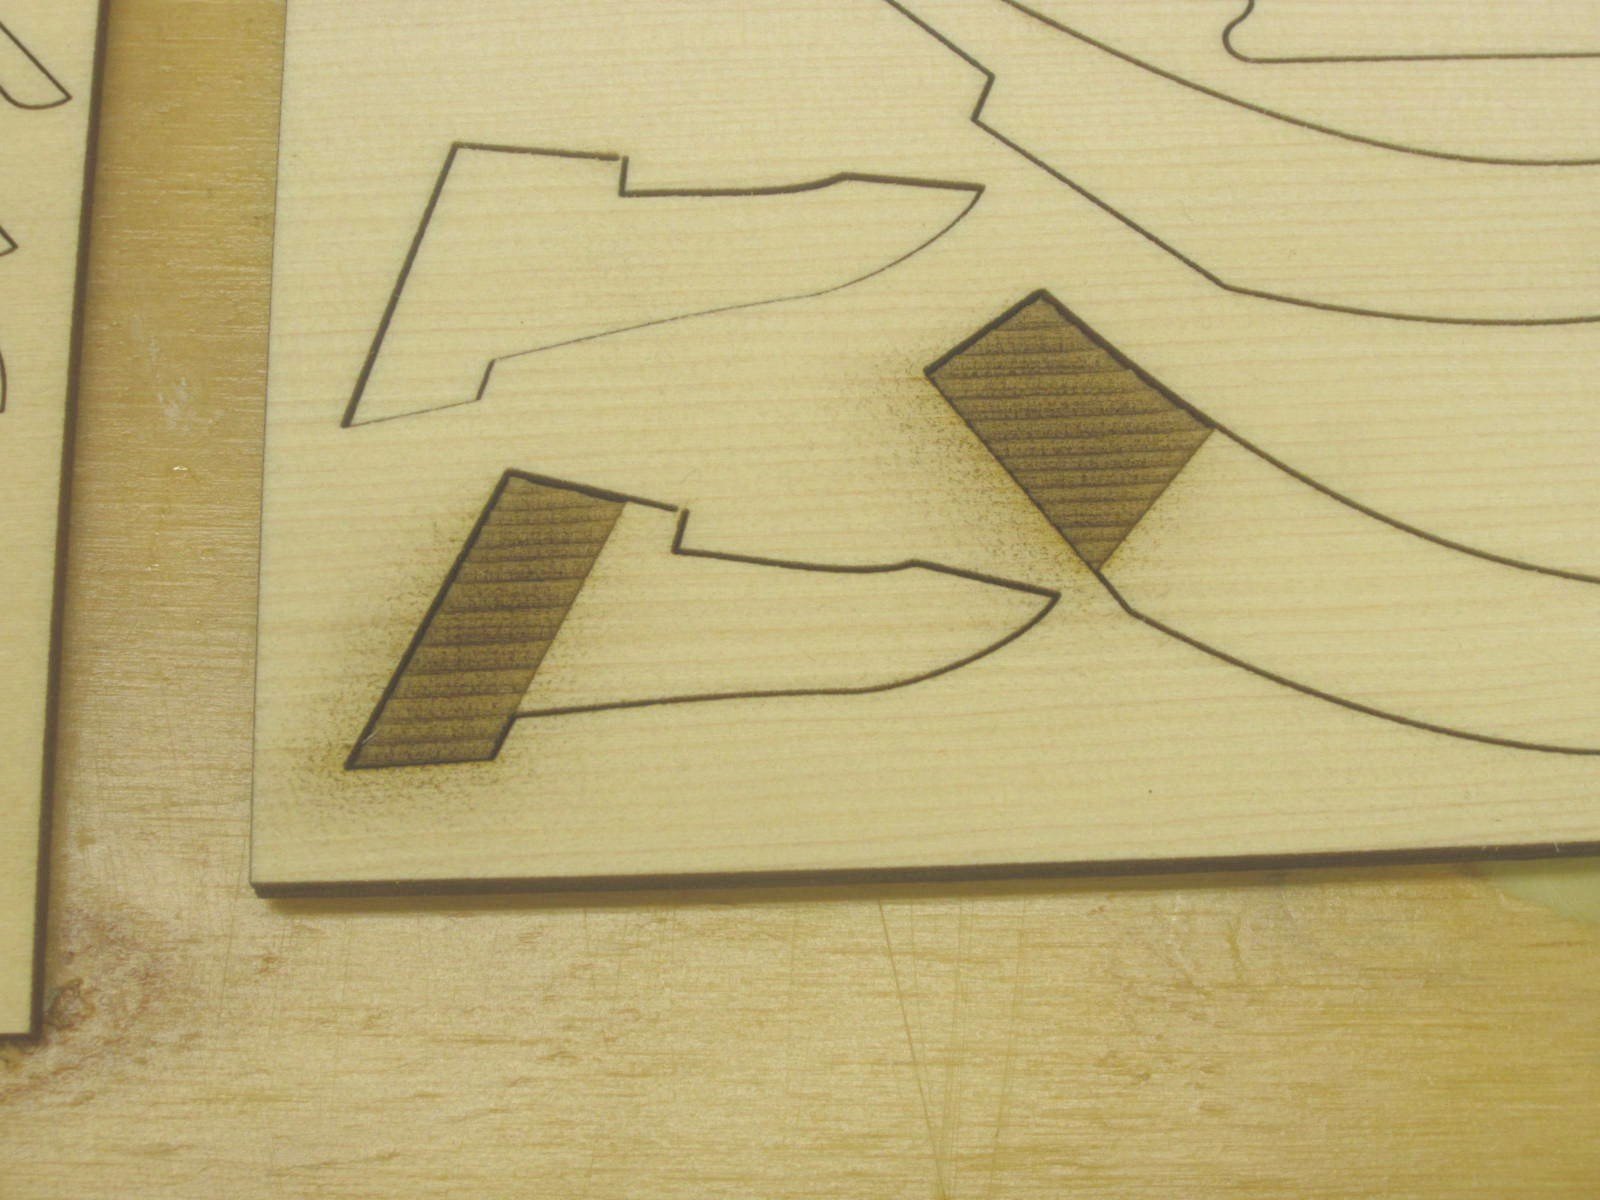
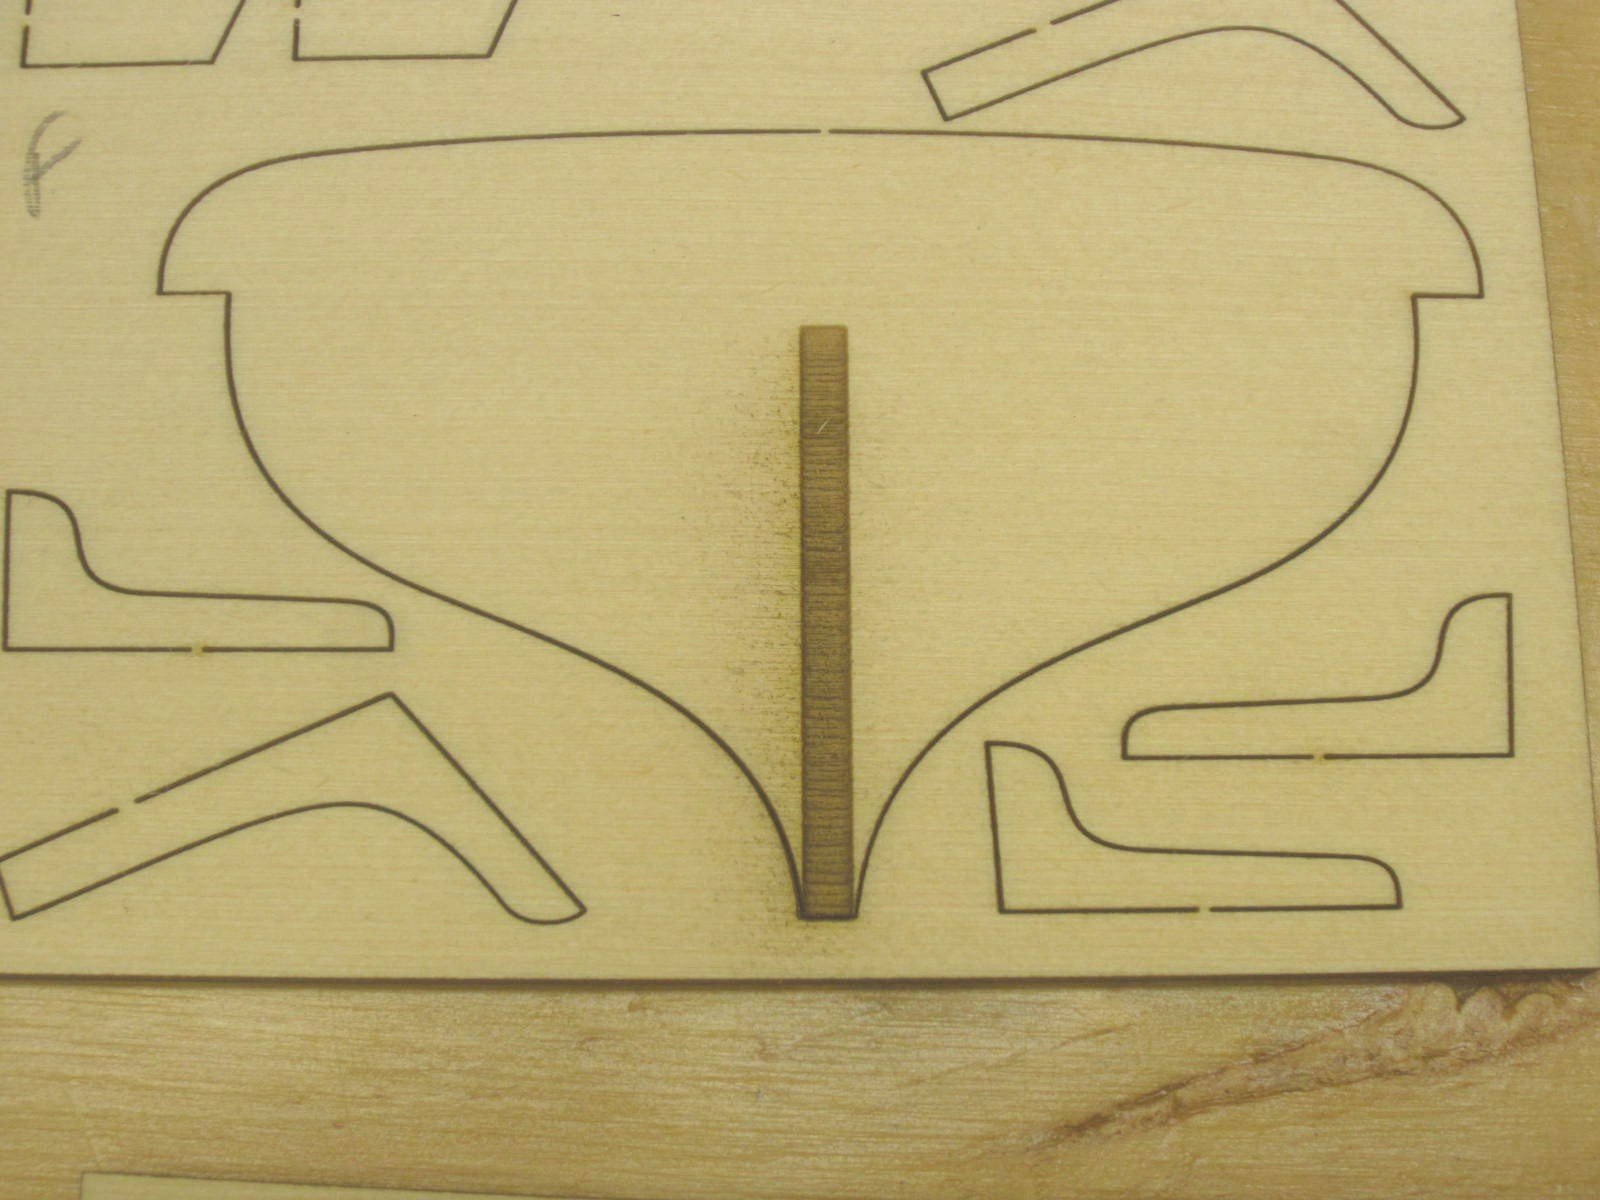
I marveled at how Chuck used the laser to cut joints and a channel to the correct depth for us!


I have a couple of minor projects to finish first but the temptation to start is like an itch that you can't reach to scratch!!!!!!
-
Hi Ryland,
Yep I'm gonna build her too. Mine also arrived in the mail yesterday but being a busy day I only had
time to open the box, caress the wood and give it all a cursory glance.
I'm looking forward to this group build. Lot of fun and learning!
12 hours ago, dvm27 said:This sets the bar for what ship model kits should look like!
Greg you took the words right out of my mind!
- Ryland Craze, Jim T, mtaylor and 2 others
-
 5
5
-
Nice start Doug. Hopefully we'll learn as much from you as you do from everyone else!
- Ryland Craze, mtaylor and Chuck Seiler
-
3
-
-
Well done Mike! I really like the look.
- mtaylor, Canute and Stuntflyer
-
3
-
-
Hi Ben,
Been real busy the last couple of months and haven't spent much time (almost none) in the work shop.
I'm thinking a of an acrylic box like this with a wooden base.
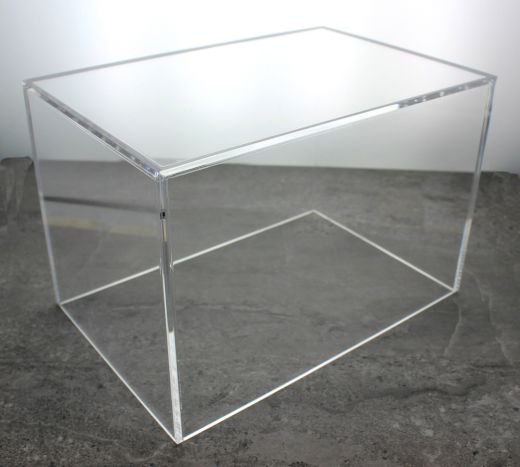
Oars on their stand in front and then on a shelf in my shop. Probably won't get to that for another
month or so. Building a game room in the other half of the basement next to my shop.
At least I'm getting to build something!

Thanks for stopping by!
- CaptainSteve, JpR62, Canute and 4 others
-
7
-
Beautiful workmanship Chuck. Anxiously awaiting the group build!
- thibaultron, EJ_L, JpR62 and 3 others
-
6
-
Hi Chuck,
Great work while I've been away. I love the workmanship and the size comparison was real nice to see.
The price point is very reasonable too. At that you better make a whole lot of kits!
- thibaultron, JpR62, Canute and 3 others
-
6
-
Hi B.E.
I've been away and it was a pleasure catching up on your work. Well done!
- Blue Ensign and Martin W
-
2
-
-
That is some beautiful planking Chuck. She is going to be a really fun build!
- thibaultron, mtaylor and Canute
-
3
-
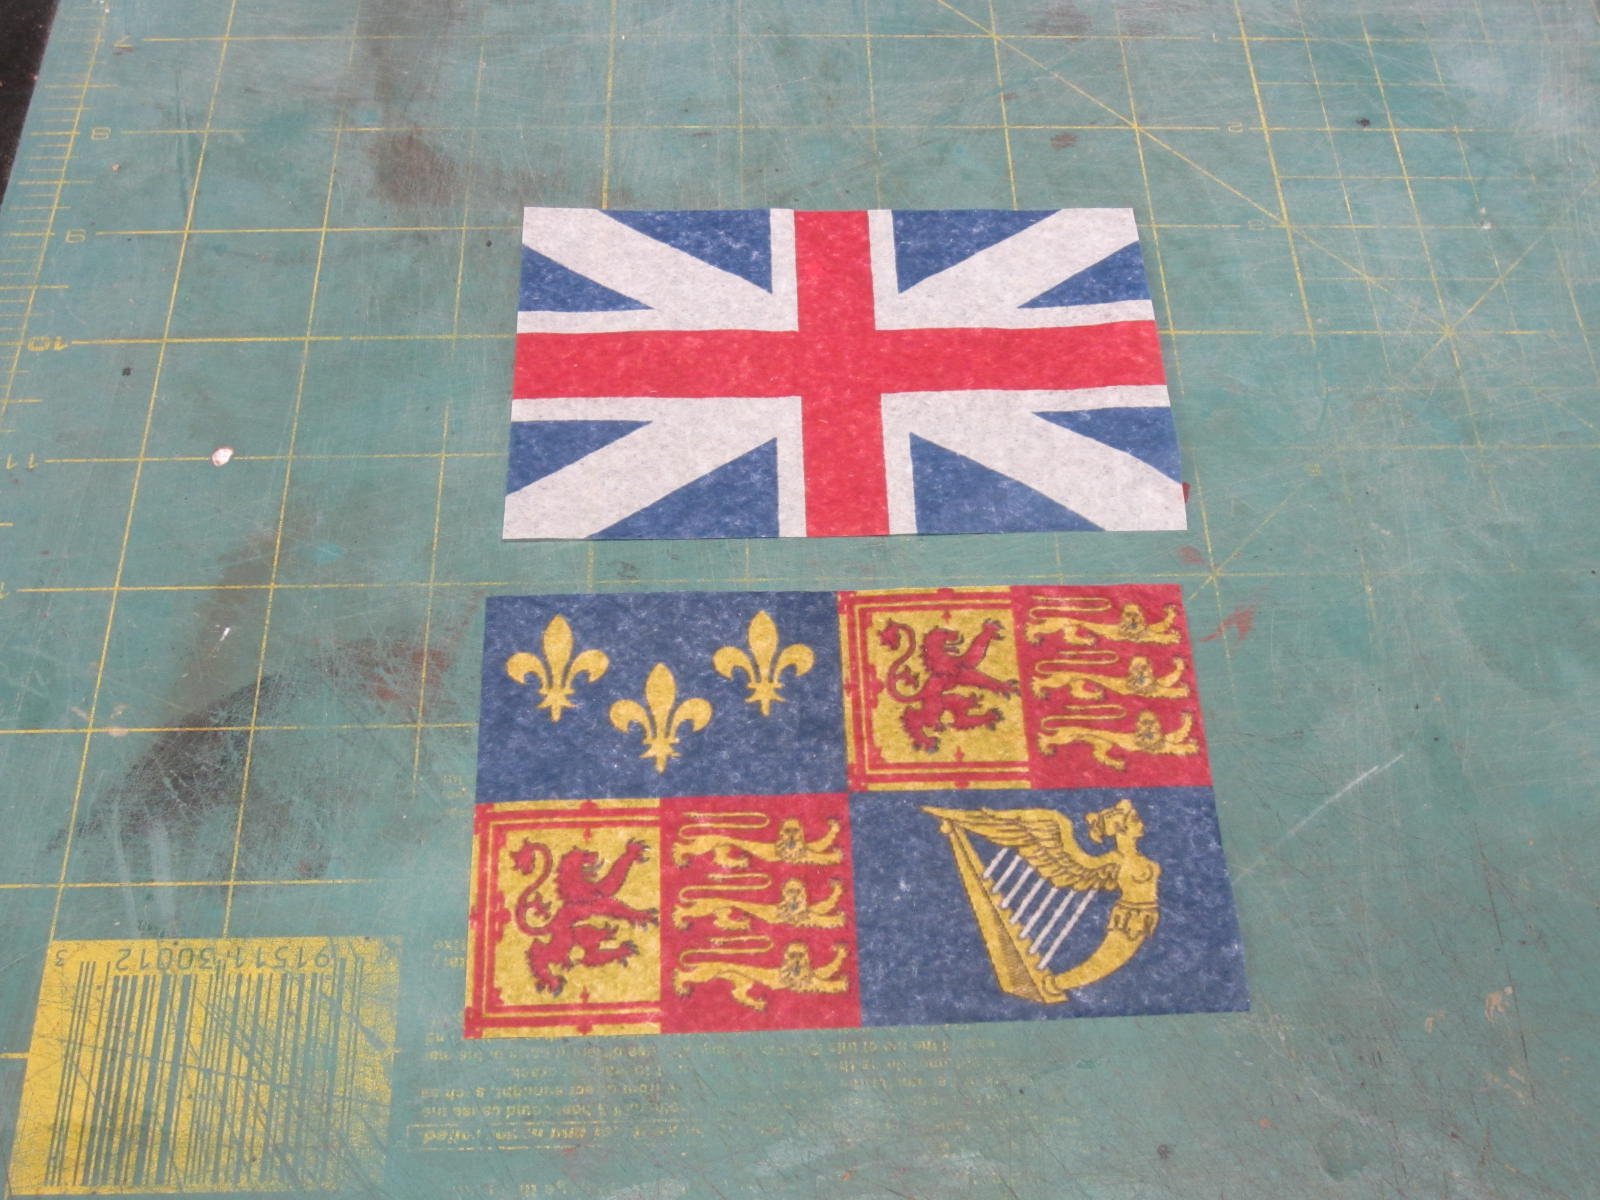
Ok I went back, stripped off the old decorations and followed Chucks suggestion.
I don't know why I didn't catch that when doing it the first time.
One down Four to go! Thanks Chuck
- Dubz, CaptainSteve, MEDDO and 6 others
-
9
-
Ok Chuck that's a head slapping moment for me. Think I just may have to strip those off and redo them.
Thanks all for the kind words and likes.
- Canute and Ryland Craze
-
2
-
Hi all,
I've been working in bits and pieces as I can find the time to get into the shop.
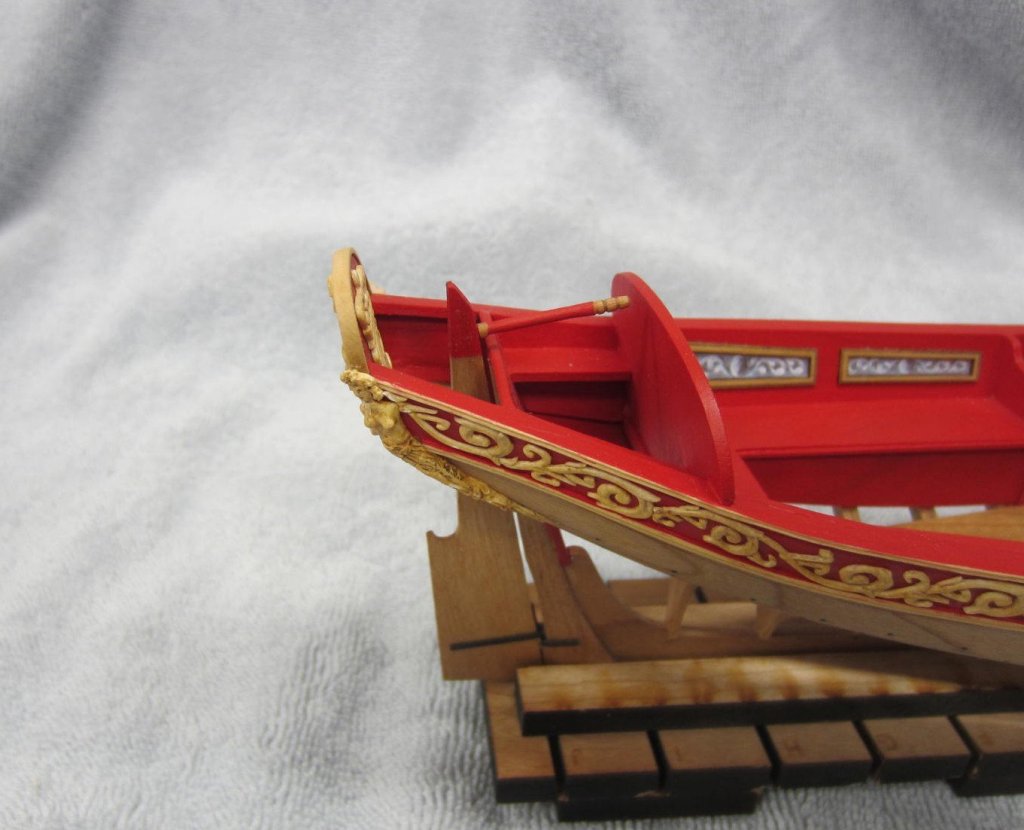
I've made the tiller and added the rudder.

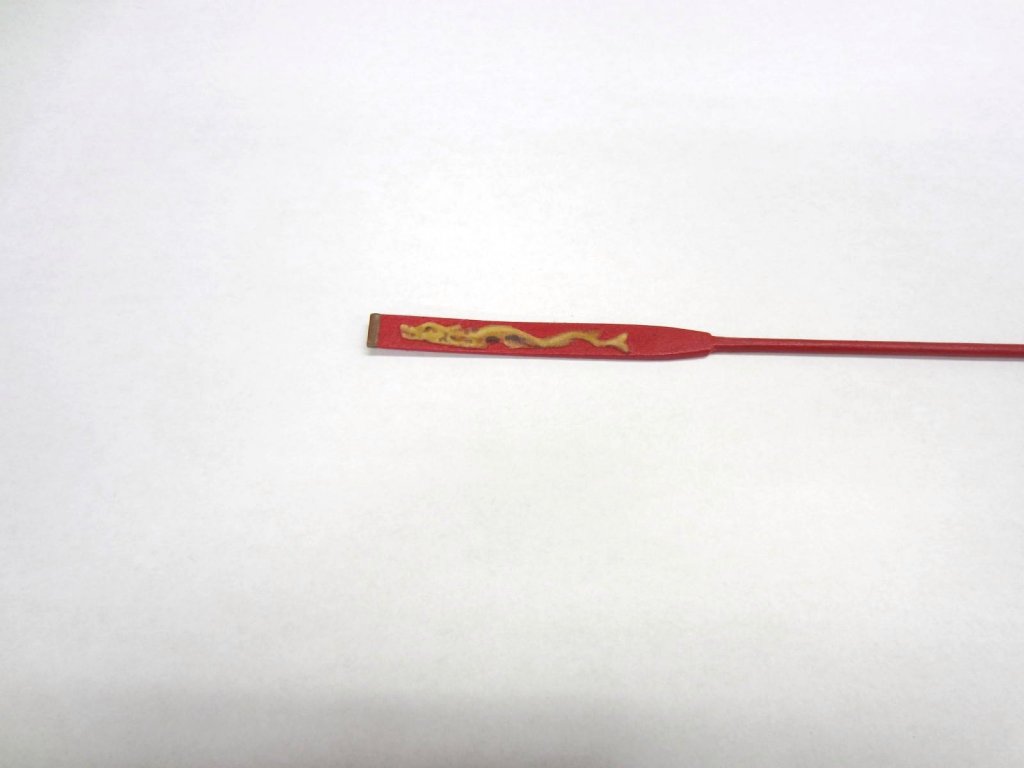
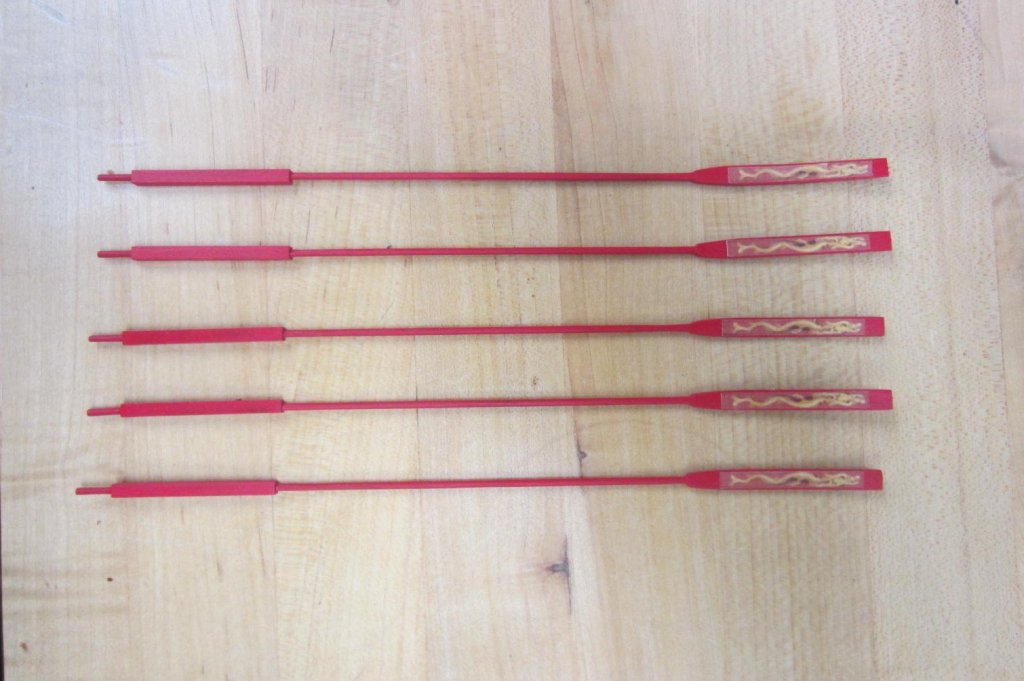
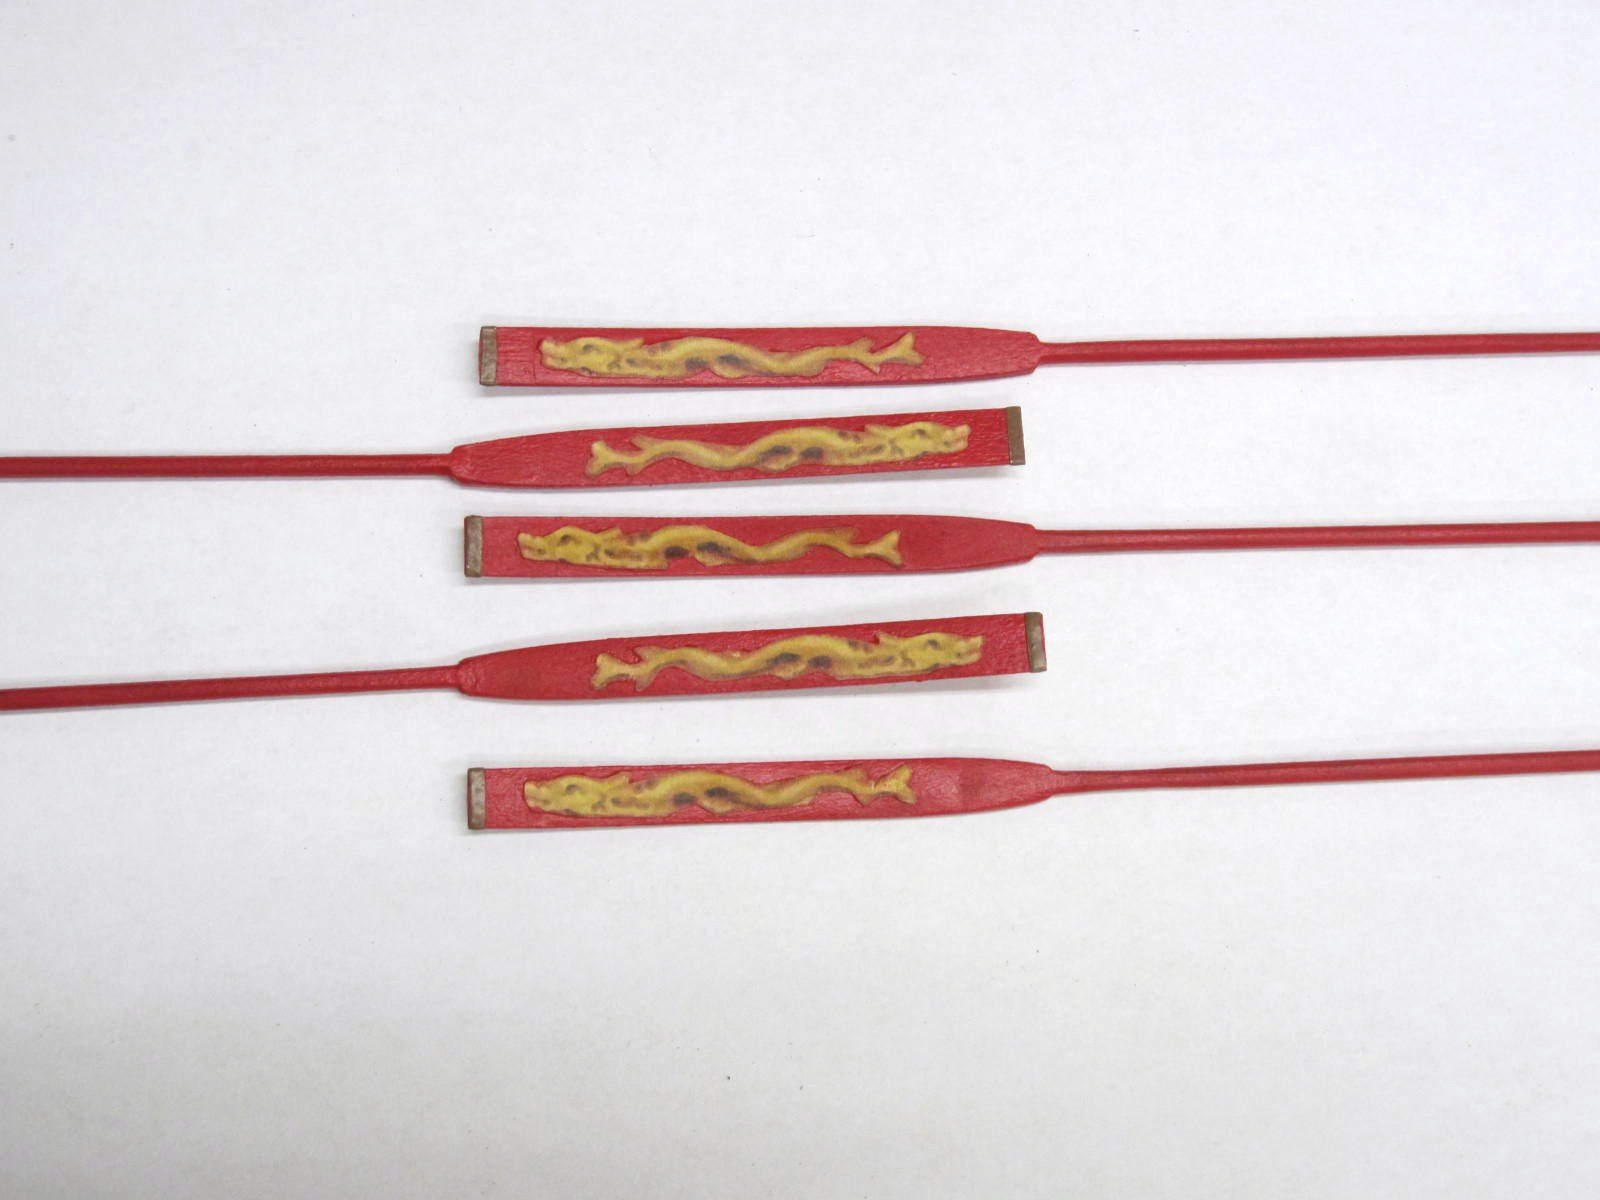
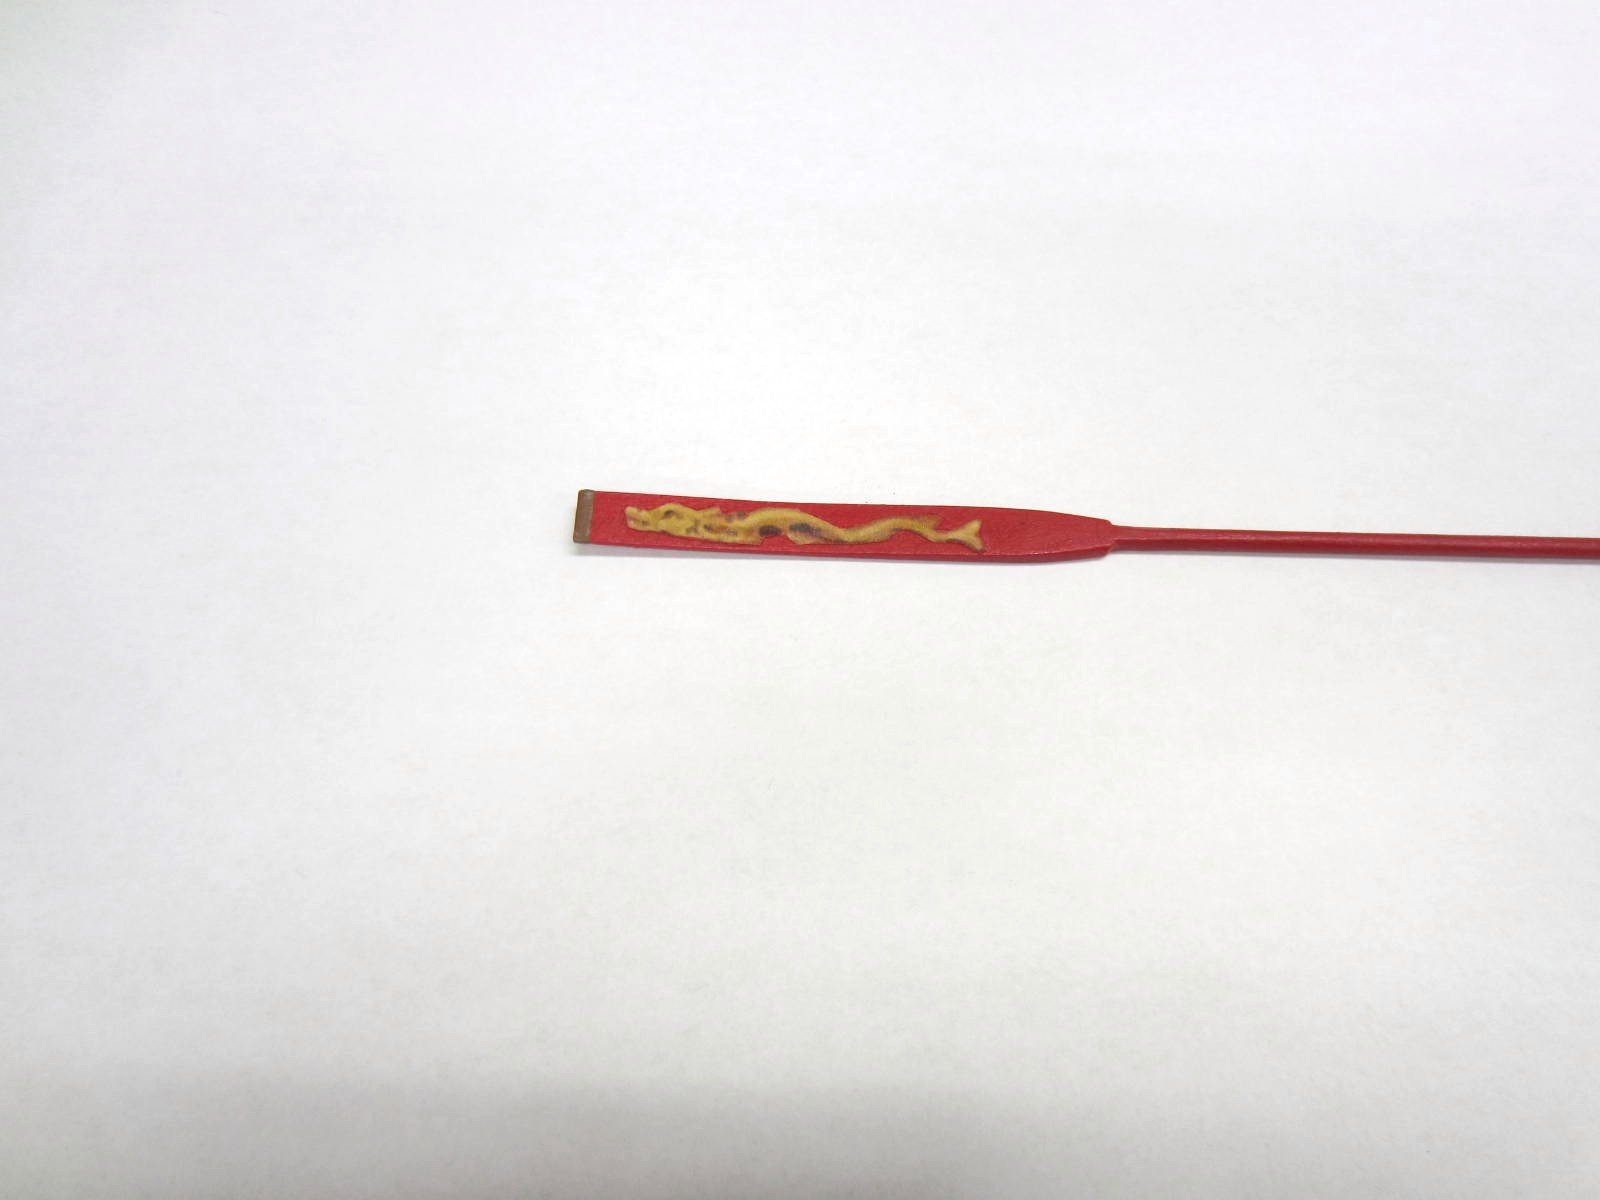
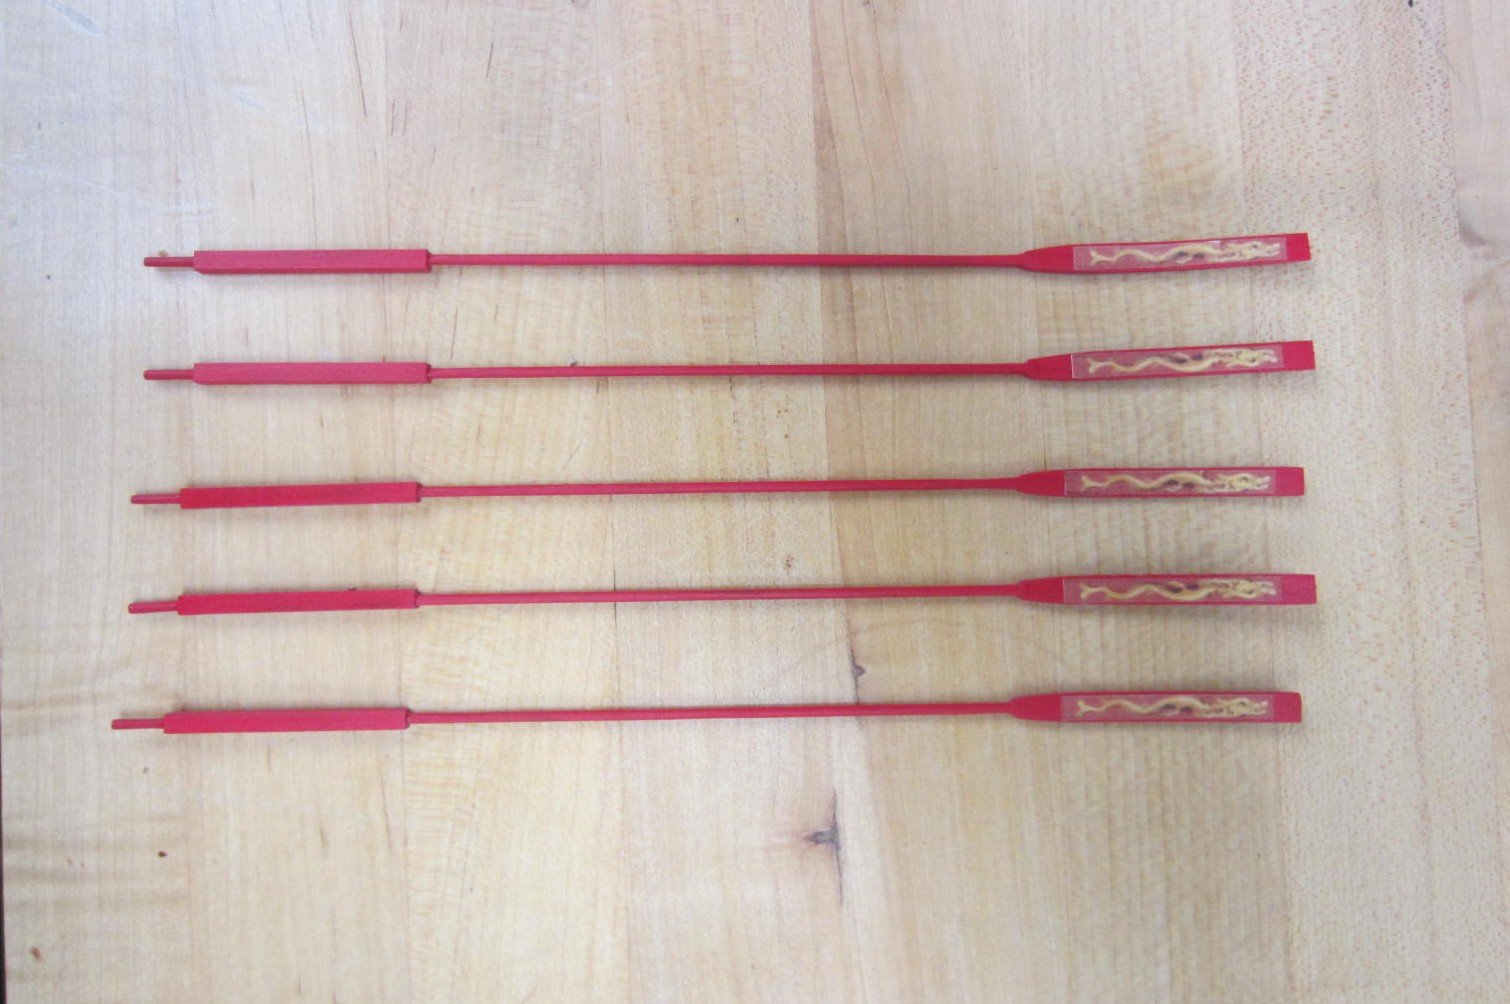
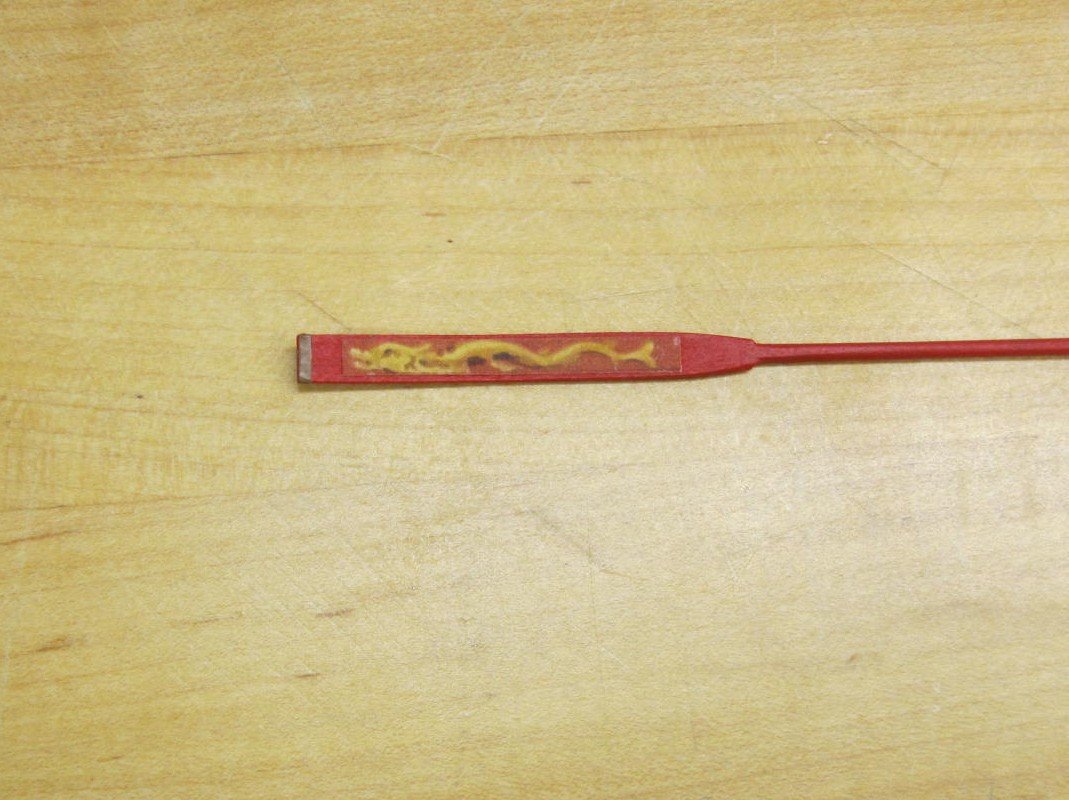
I then assembled the sweeps, sanded them to shape, painted them and added the printed dolphin as well as the simulated leather band on the tip.

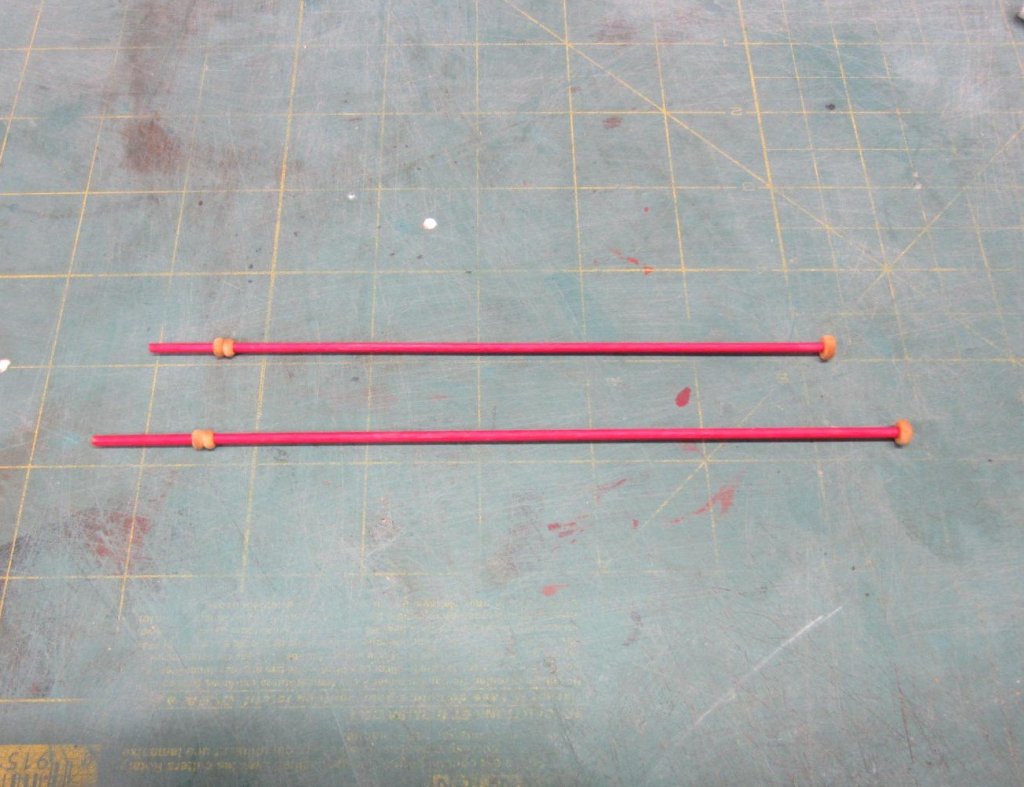
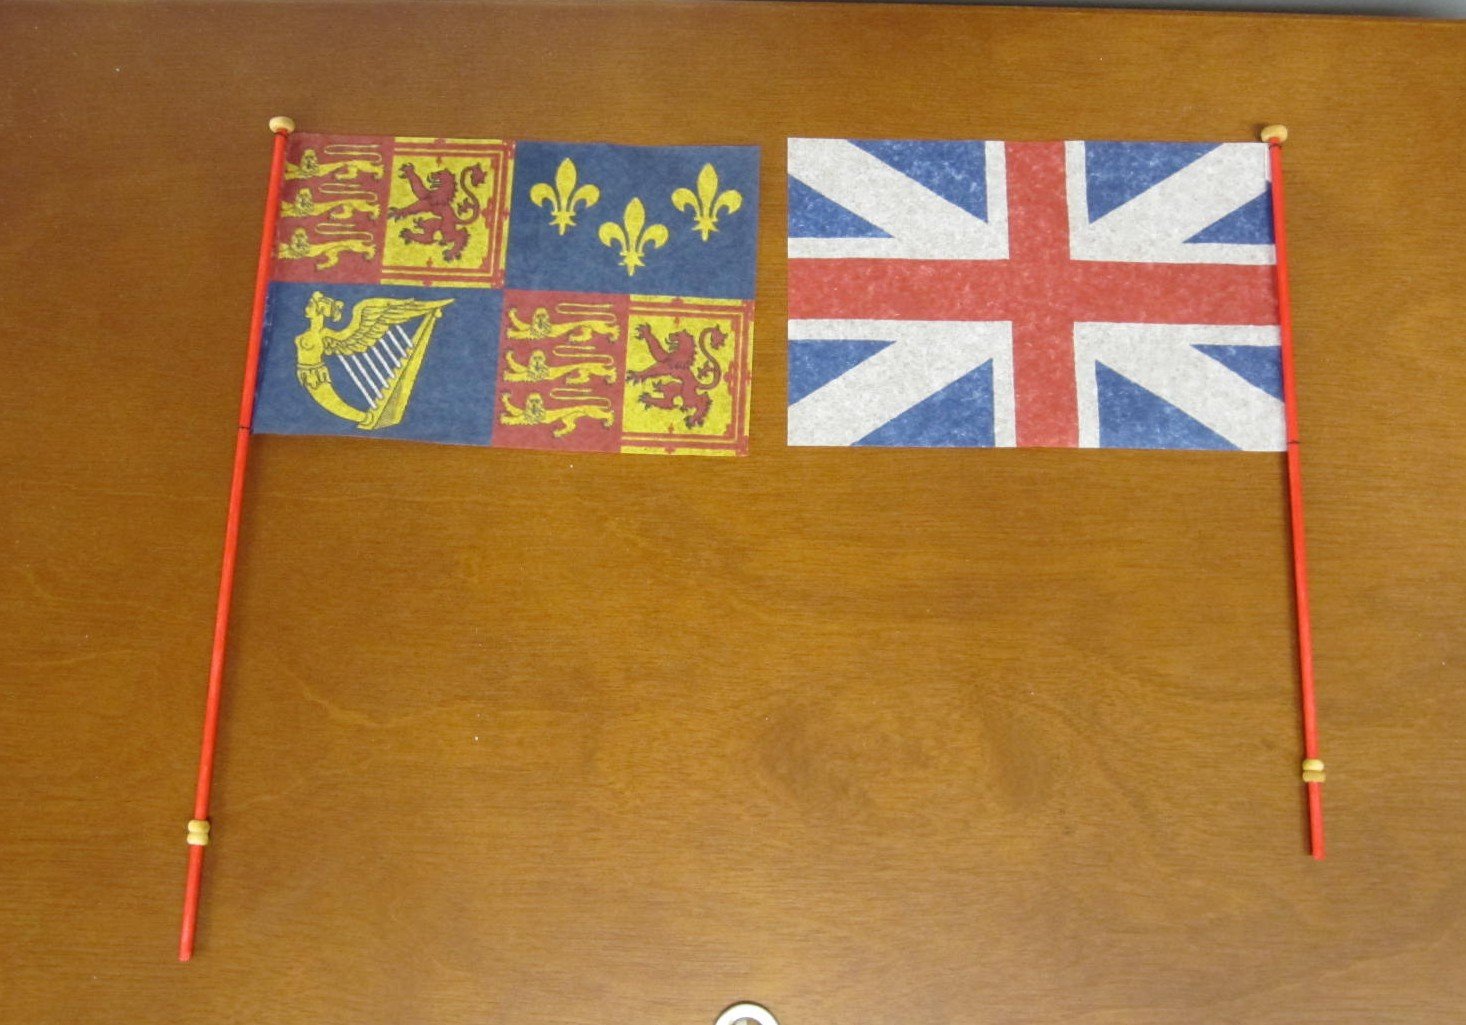
Here are the flags and flag staffs assembled and painted.

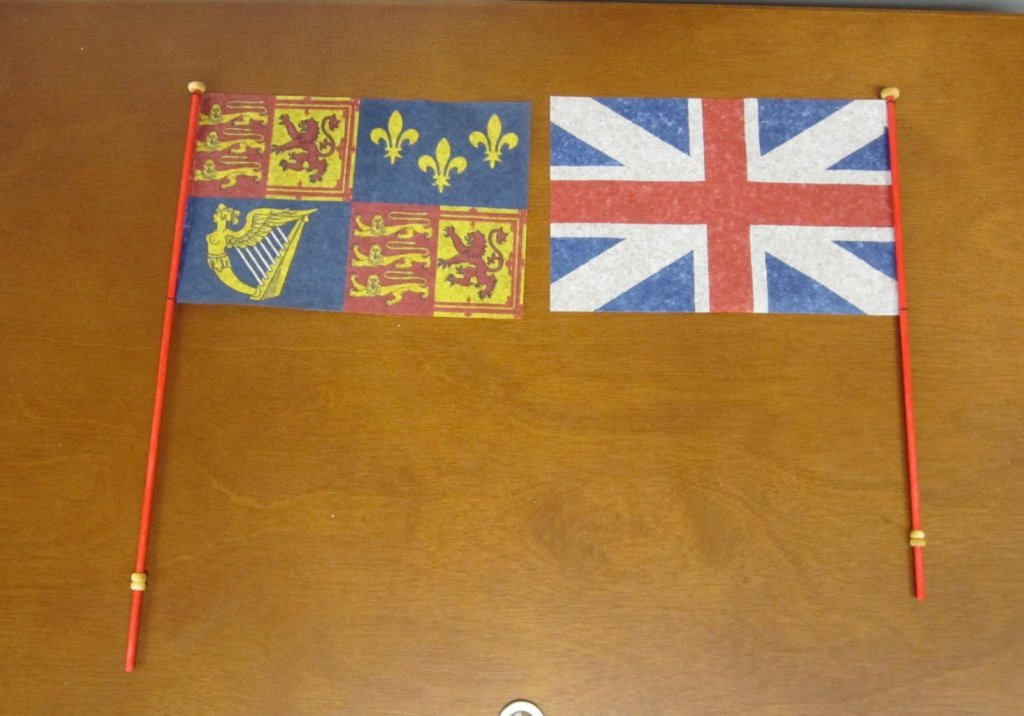
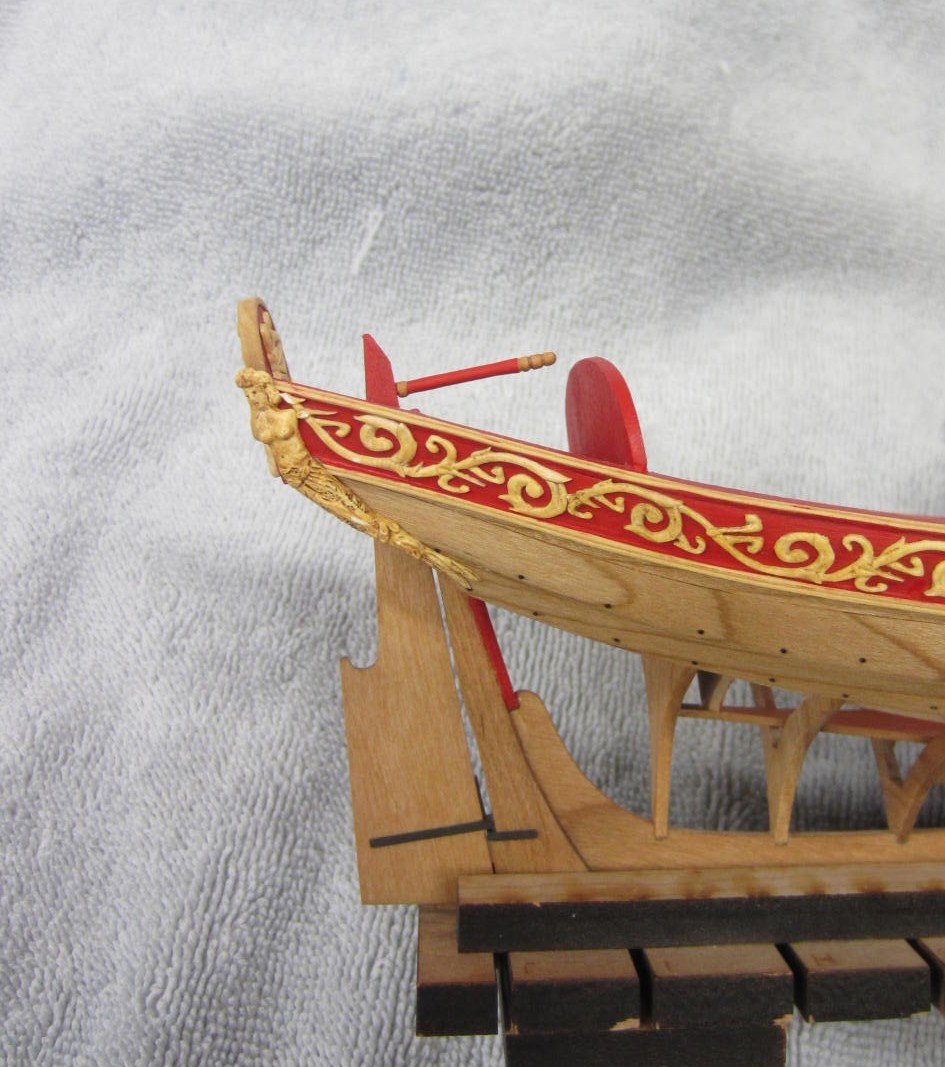
And here they are on the barge. The shaping isn't as good as Chucks (no surprise there) and I'll continue to tweek them.
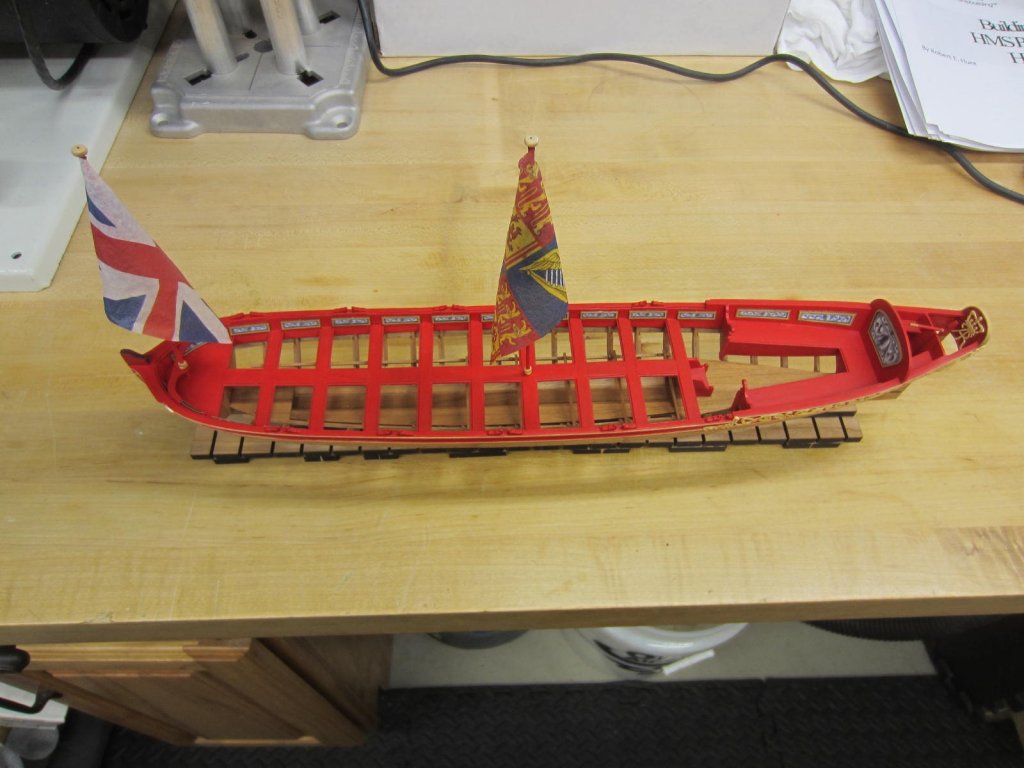
Basically I've completed her. Just some touching up here and there, figure out a display case and assemble the stands and take some finished pictures.
Chuck has again made an outstanding model that is fun to do, teaches you new things and of great quality.
-
-
Very nice work Mike. Yes that bend is tricky to visualize at first but it sure looks like you nailed it!
- Stuntflyer, FrankWouts, mtaylor and 2 others
-
5
-
Great discription and photographs. Much better than using proportional dividers.
- Ryland Craze, thibaultron, Canute and 2 others
-
5
-
Hi Jean-Paul
That's exactly what I did to get the frames sanded correctly. Well done!
-


Queen Anne Barge by Rustyj - FINISHED - Syren Ship Model Company - 1:24
in - Kit build logs for subjects built from 1501 - 1750
Posted
Thanks Chuck, Having a quality kit and great plans and instructions sure make it a lot easier!
Hi Joe, Thanks for the kind words. I might be persuaded to stop by with it.
Thanks everyone for the likes too! Very much appreciated.