


Rustyj
-
Posts
2,516 -
Joined
-
Last visited
Content Type
Profiles
Forums
Gallery
Events
Posts posted by Rustyj
-
-
-
Thanks Christian. I look forward to your building this too!
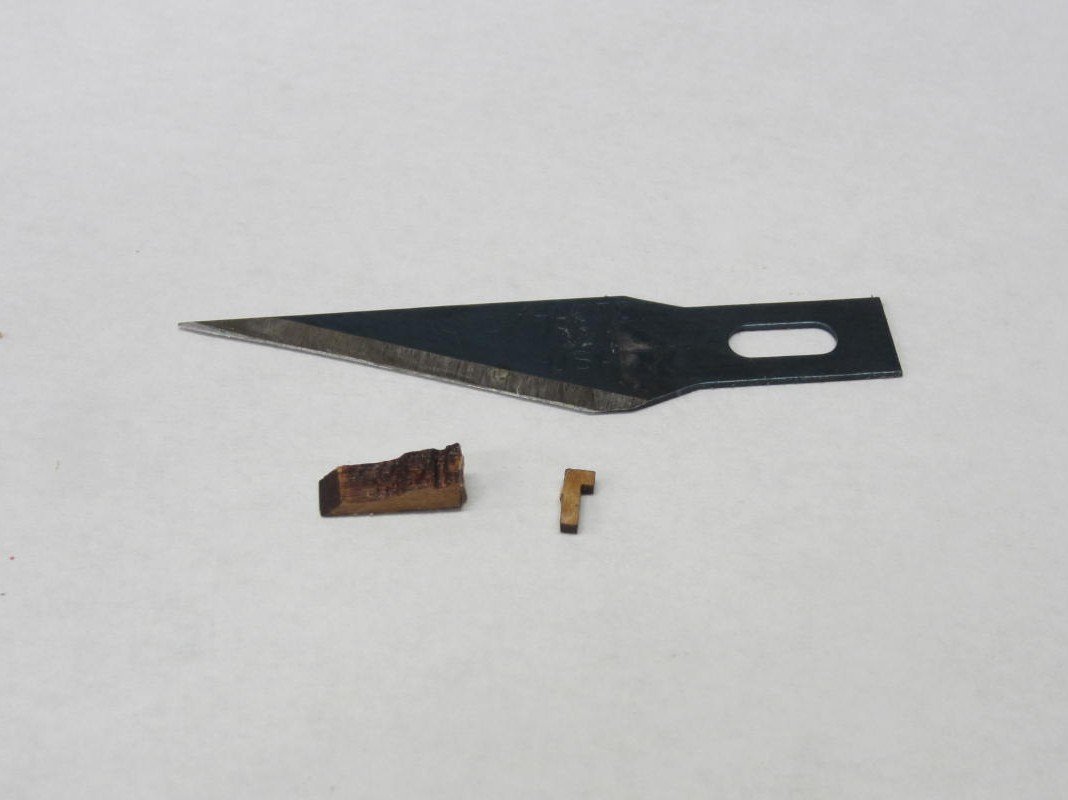
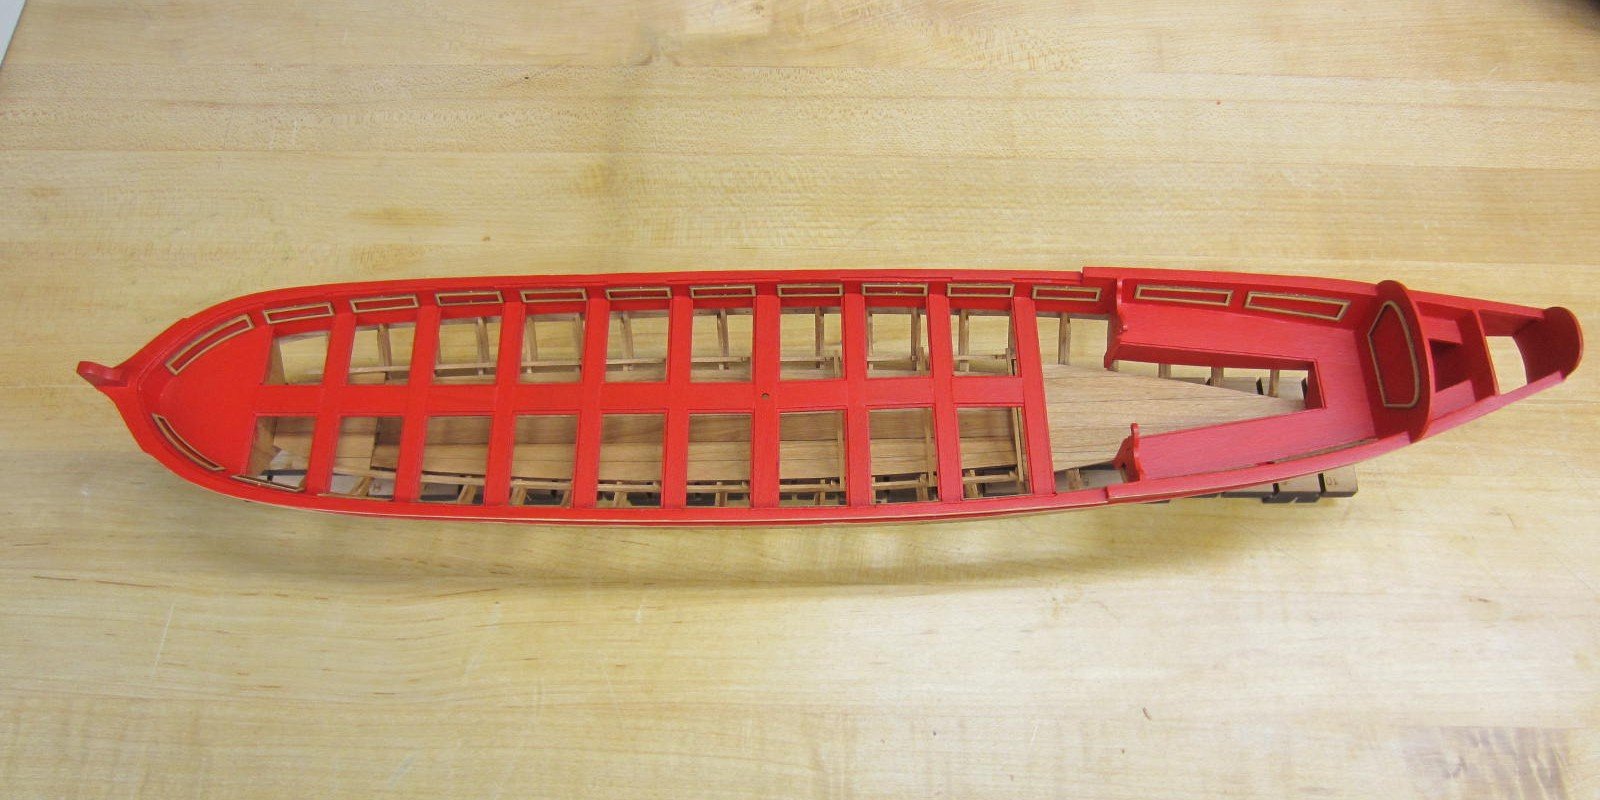
Next was to make the 20 thole pins or oar locks. These are tiny laser cut pieces and thankfully
Chuck supplies extra. A couple disappeared into the black hole of the shop floor.
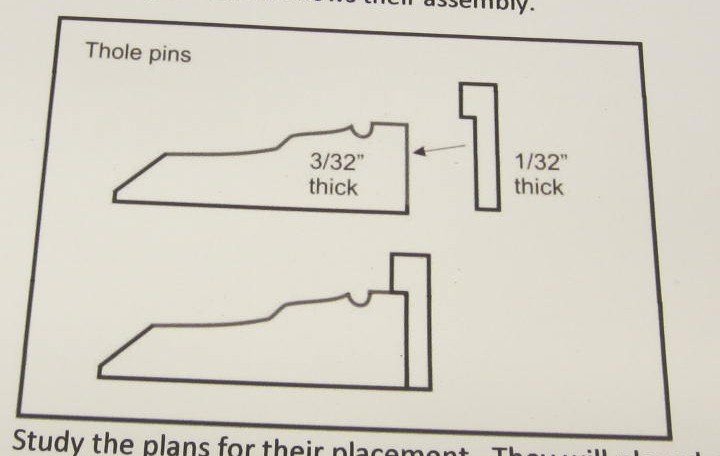
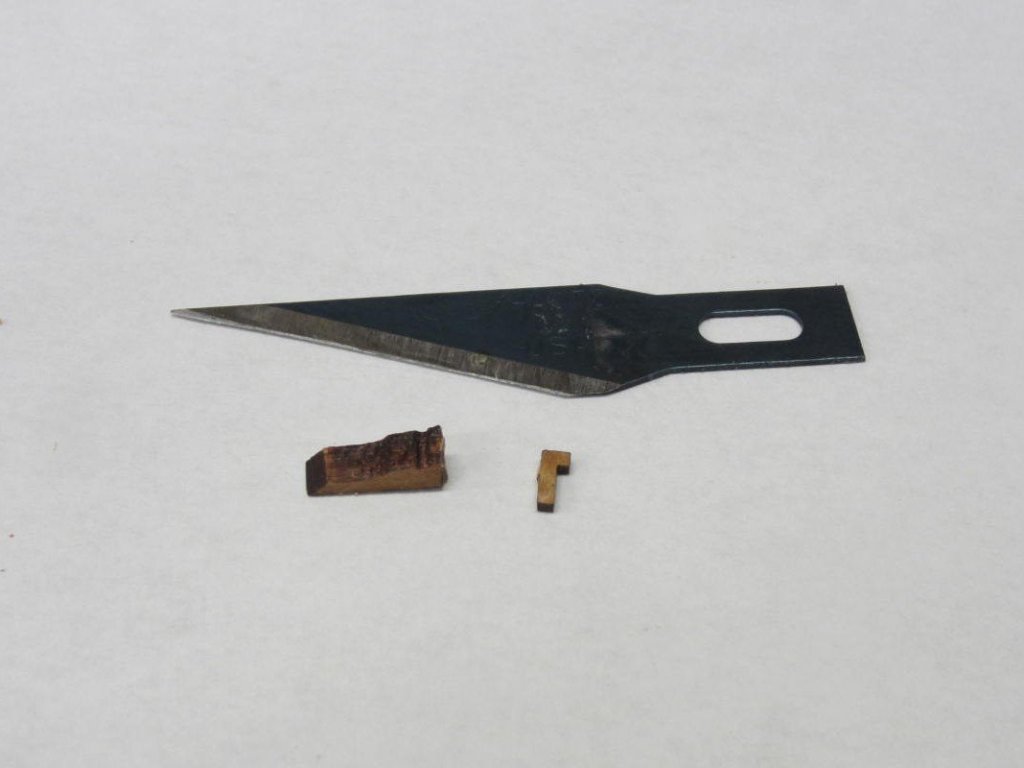
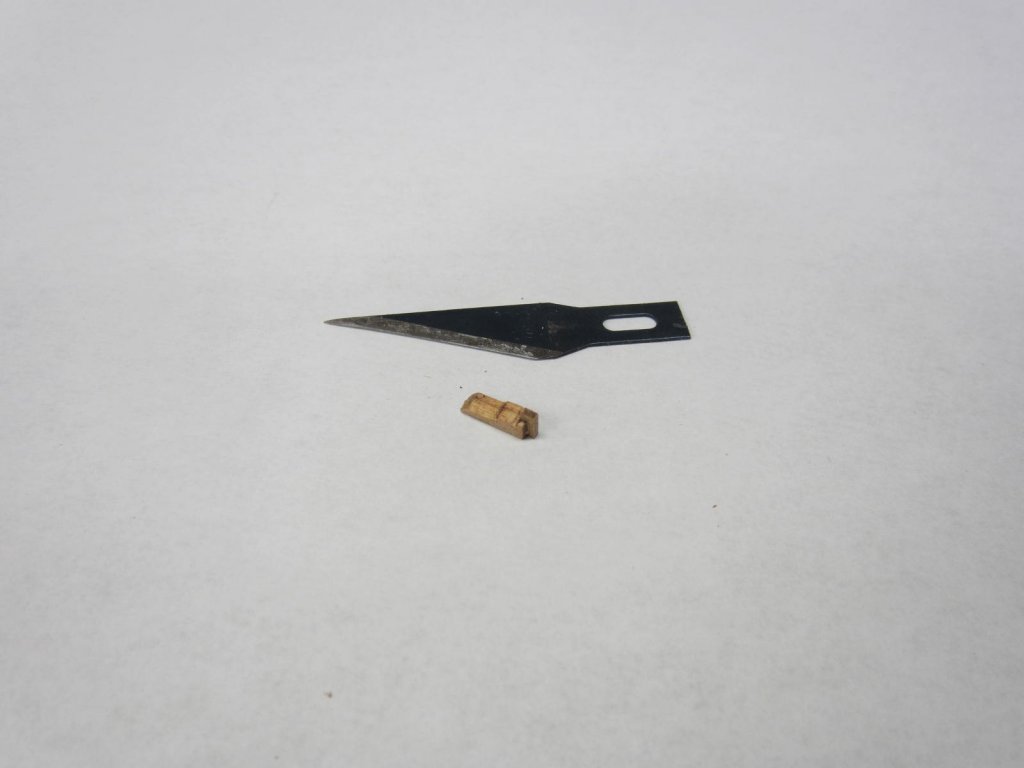
As you can see they are small. They were glued in place per the plans and then painted.
Next up is the rudder.

- Ryland Craze, Tigersteve, mtaylor and 19 others
-
 22
22
-
-
Thanks Mark. All goes to a great designed kit and instructions!
- Jim Rogers, mtaylor, Jack12477 and 2 others
-
5
-
Thank Grant and Kurt. Thanks for all the likes too!
I'm really liking the weathering powders. Adds a whole new look.
- Ryland Craze, mtaylor, Jack12477 and 1 other
-
4
-
Getting there but still a lot more to enjoy!
- Jack12477, Ryland Craze, Canute and 1 other
-
4
-
Excellent workmanship!
- Canute, mtaylor, Stuntflyer and 2 others
-
5
-
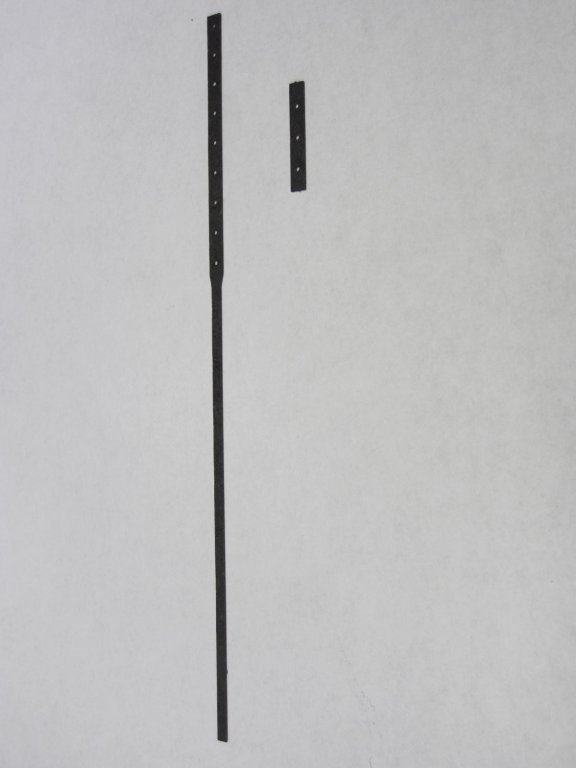
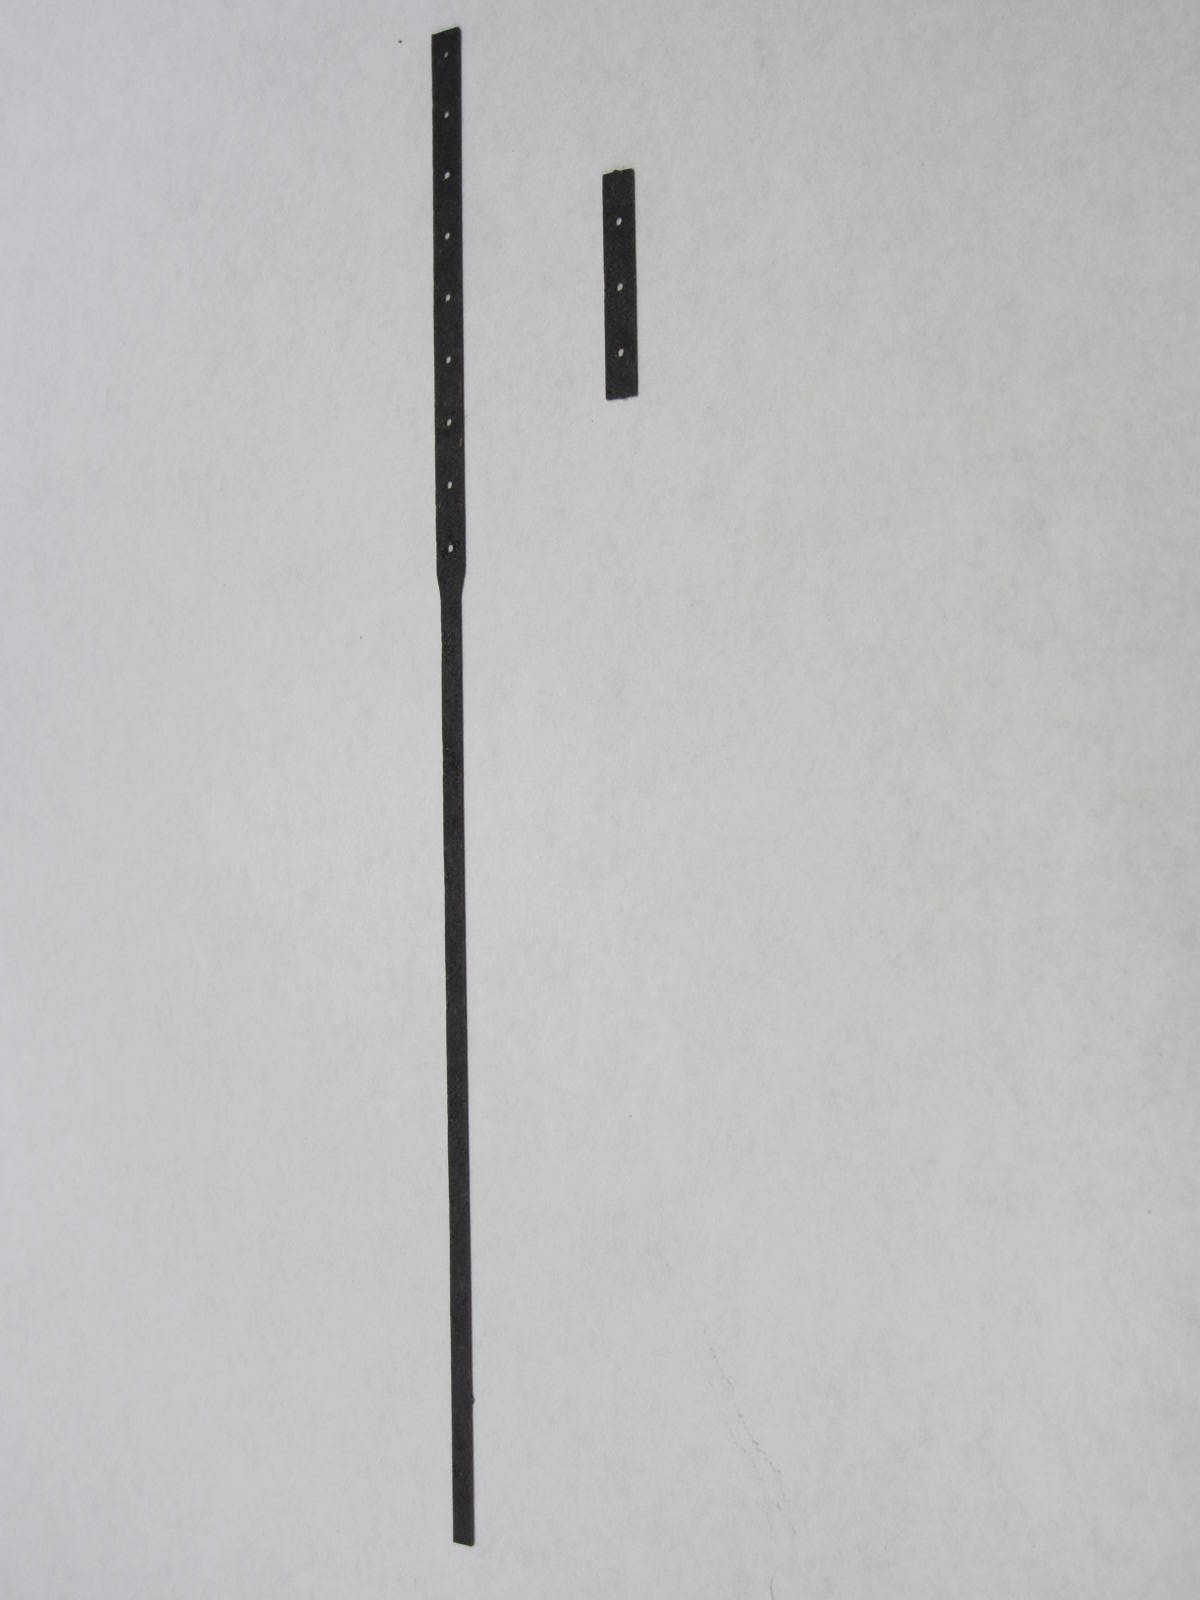
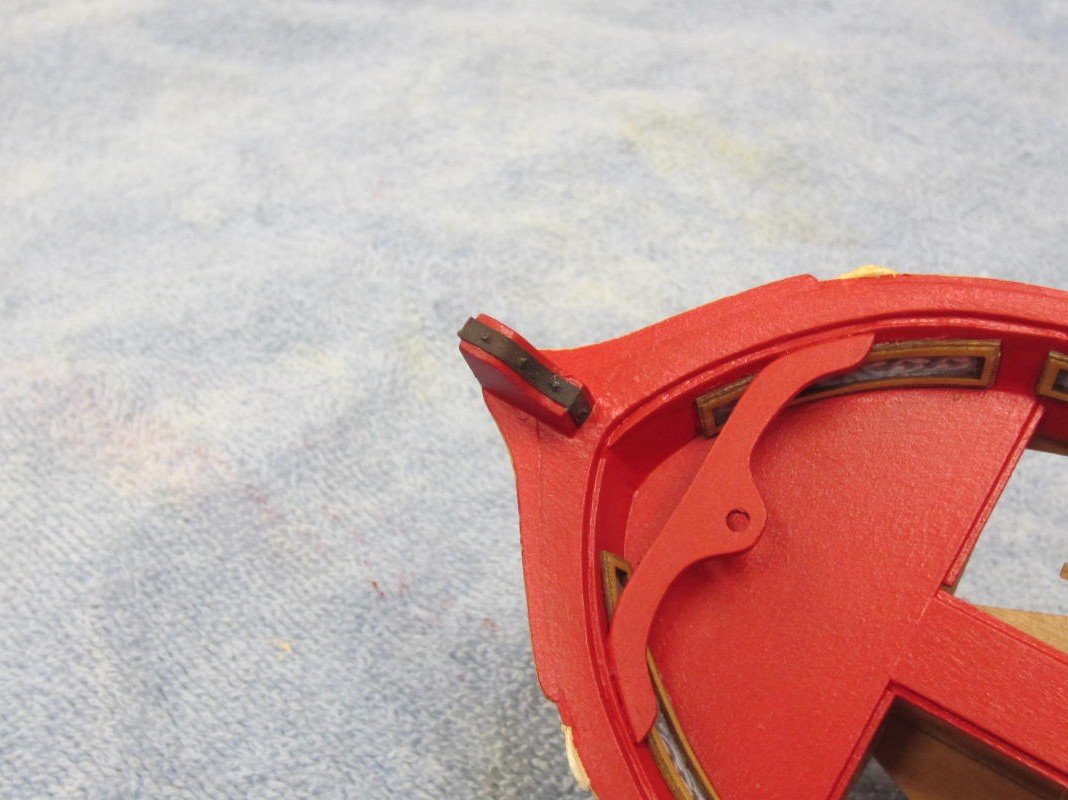
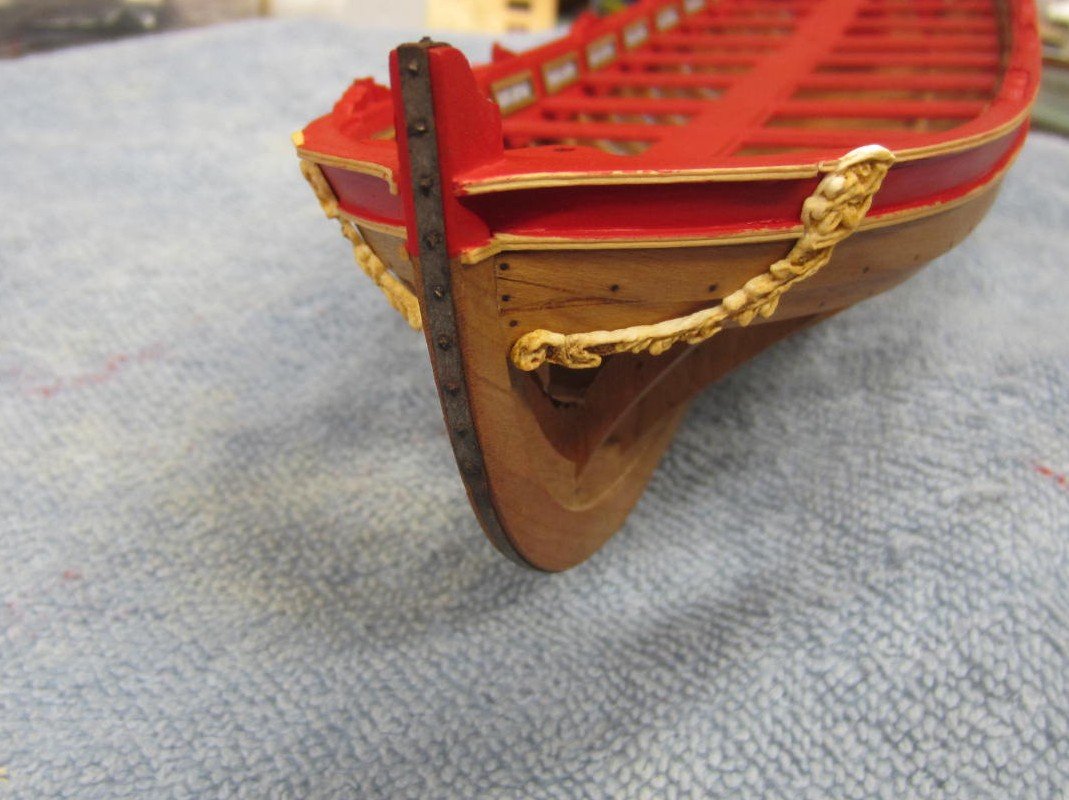
Next I worked on the iron strap along the outside edge of the stem. The strap is laser cut from laserboard
which is resin impregnated paper and already blackened.After the pieces were glued in place holes were
drilled to accept 22 gauge wire which simulated the bolts. After the wire was cut and sanded smooth
they were painted black and then some rusty brown weathering powder was applied to give it a more
metal look.


Next up it will be assembling the thole pins, placing them and then more painting!
- JeffT, Seventynet, russ and 18 others
-
21
-
-
Thank you all for your kind words and likes It's very much appreciated.
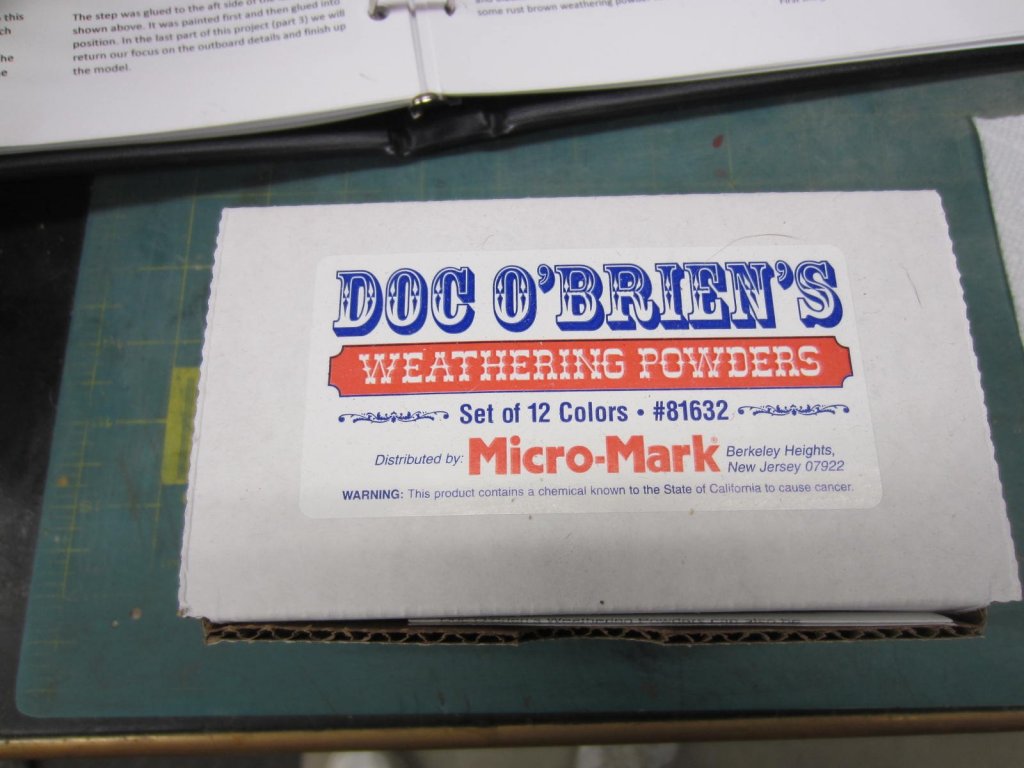
This is how I did it which fairly closely follows Chucks instructions.
After any flash was removed the resin pieces were washed in a mild dish soap and warm water.
The first power applied was "gritty yellow". Then "highlight white" followed by "dirty brown".
The powders are applied with a clean brush. Small amounts at a time.
If I had too much of one color I'd just alternate powders until I was satisfied with the look.
Once I was happy with the result the pieces were sprayed with two light coats of Krylon clear fixative.
Thanks for stopping by!
-
This will not come as any new revelation to anyone but Chuck is a great carver. Me not so much.

I've played with the boxwood laser cut carvings and though they are really great I slaughtered them.
Soooooo I am using Chucks optional resin castings. They required very little clean up.
Chucks used weathering powders and I did the same. You can see the results below.
You also can see there's still a lot of clean up and touching up needed.

- Tigersteve, JesseLee, Dubz and 16 others
-
19
-
Very good work Jean-Paul.
-
A larger Deja vu! Looks really nice Mike.
- Canute, mtaylor and FrankWouts
-
3
-
Hi All,
I've been MIA for a bit. Vacation, family and good weather have kept me away from the workshop and MSW.
Well I've made it back to the shop for a bit of an update.
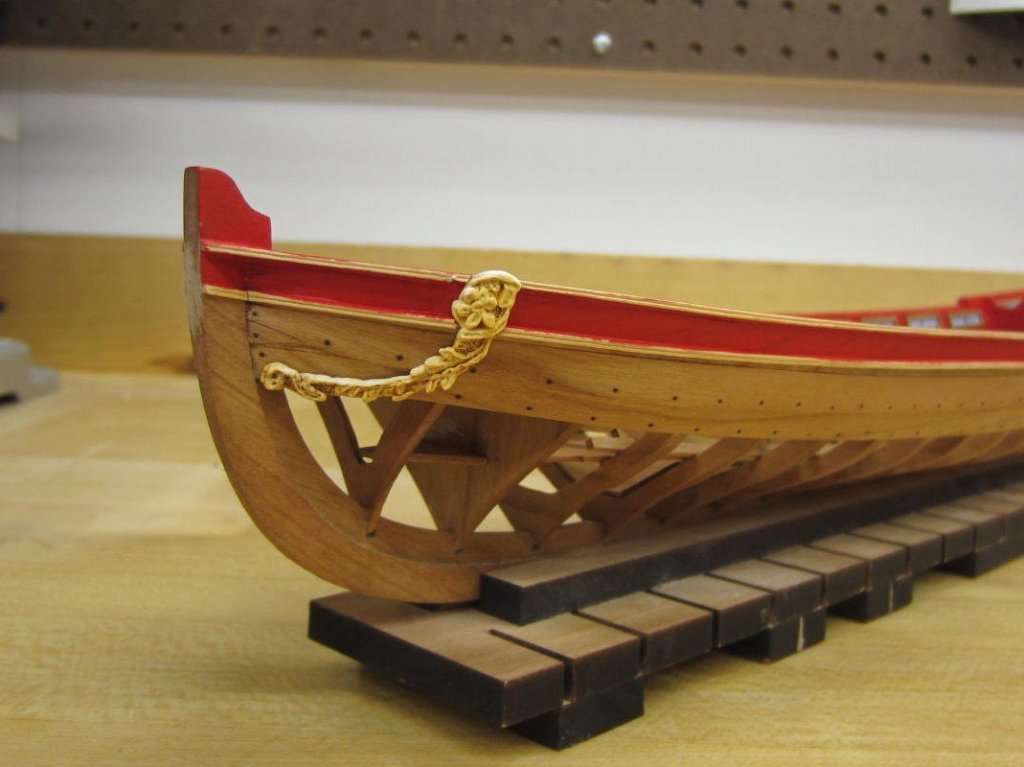
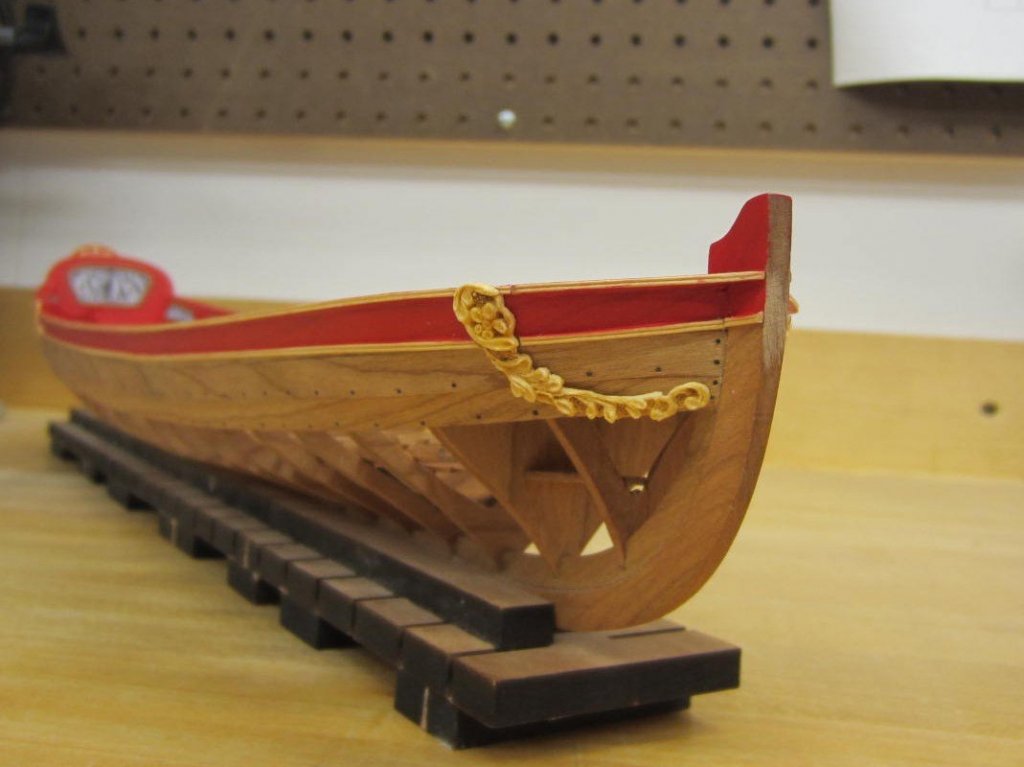
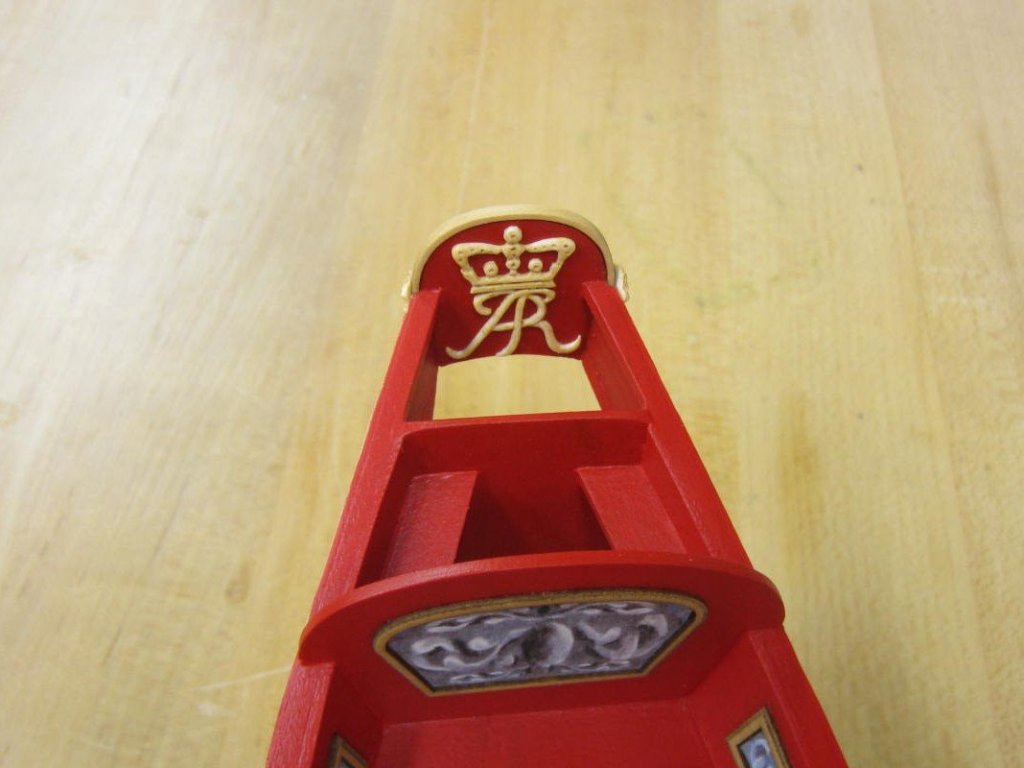
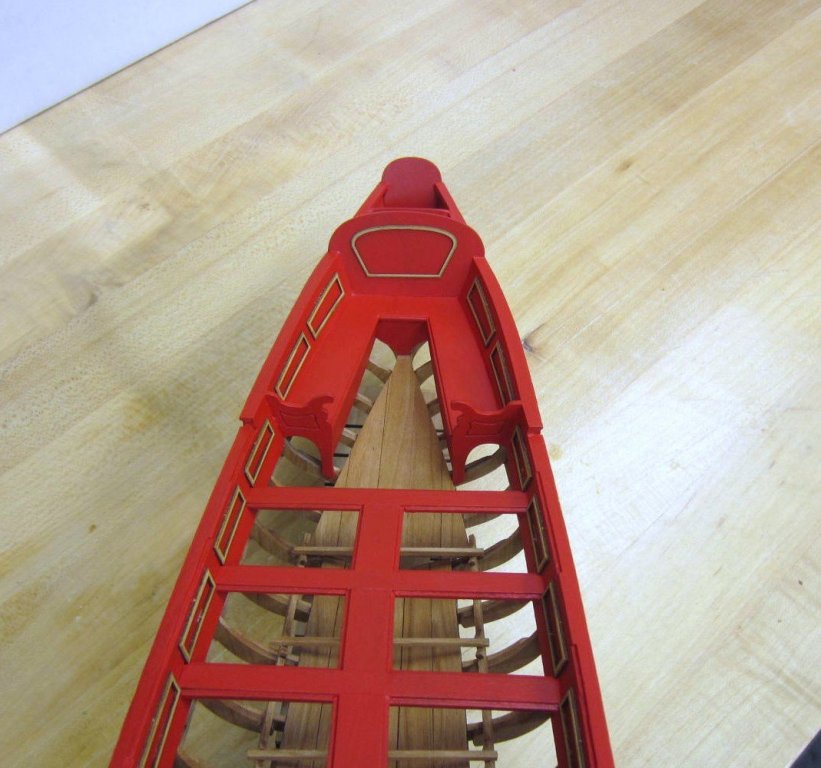
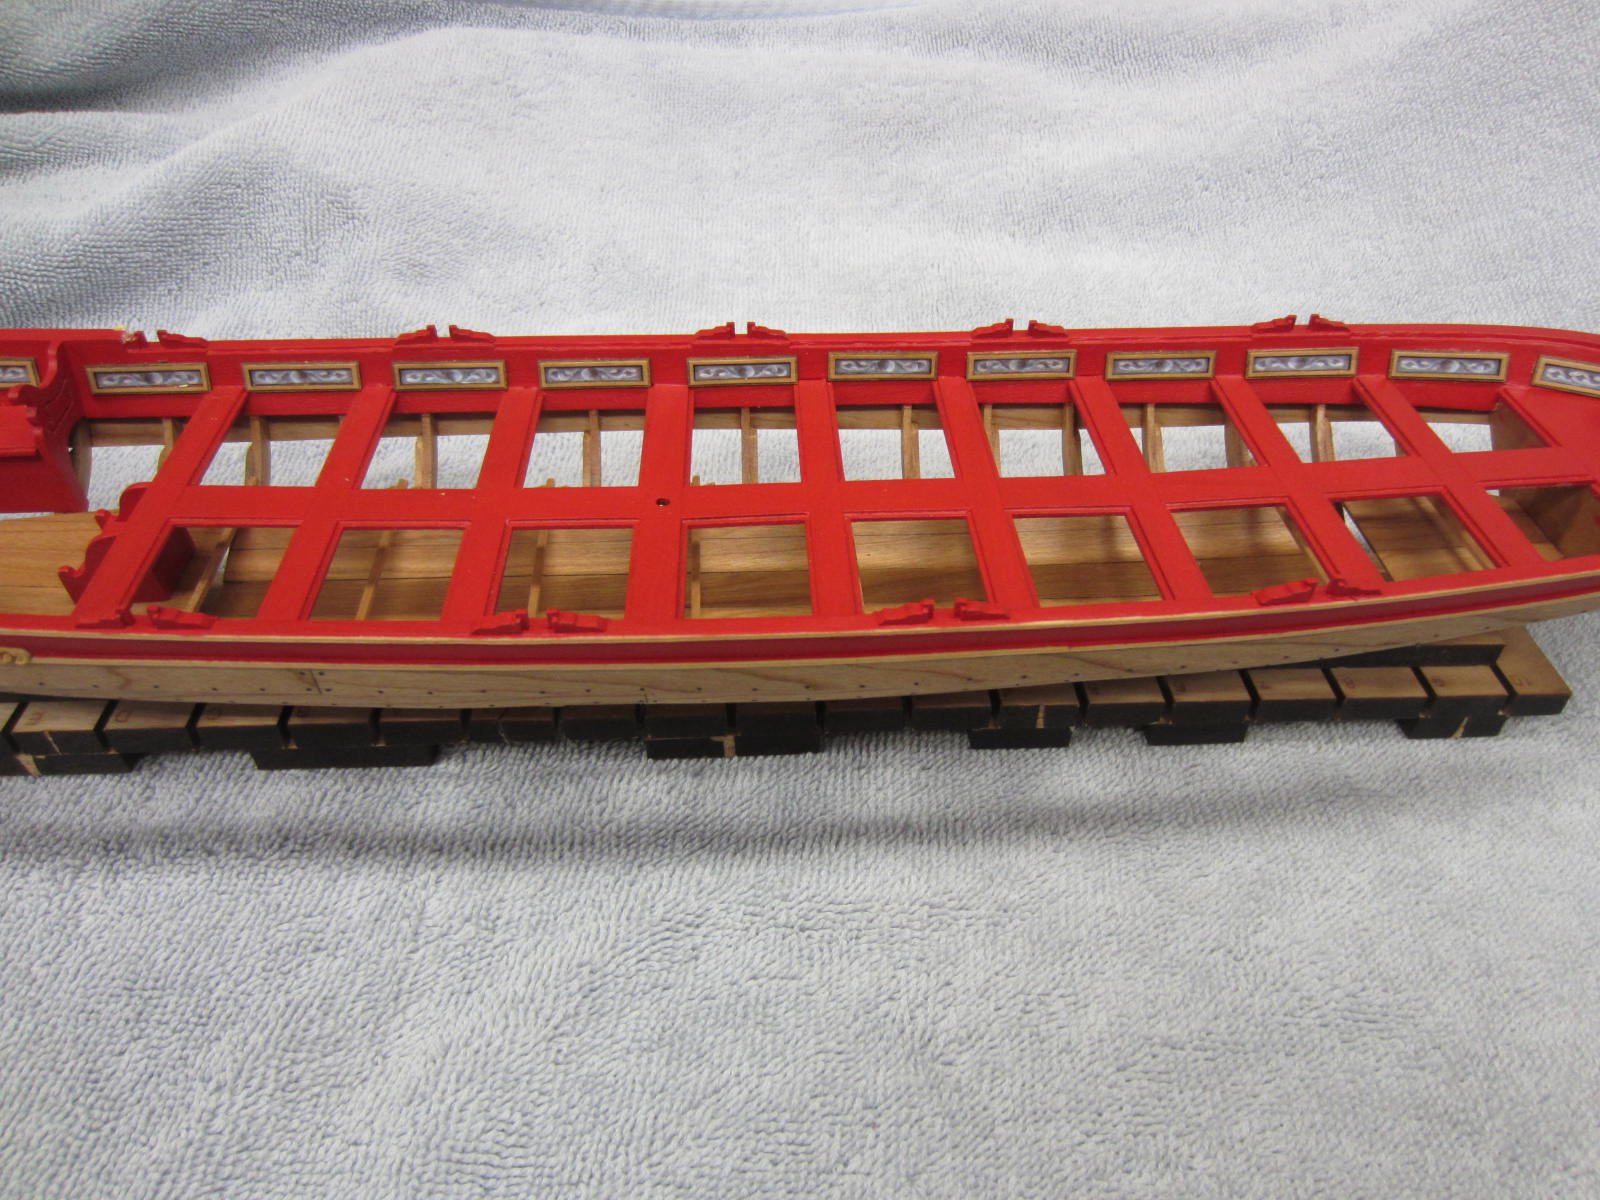
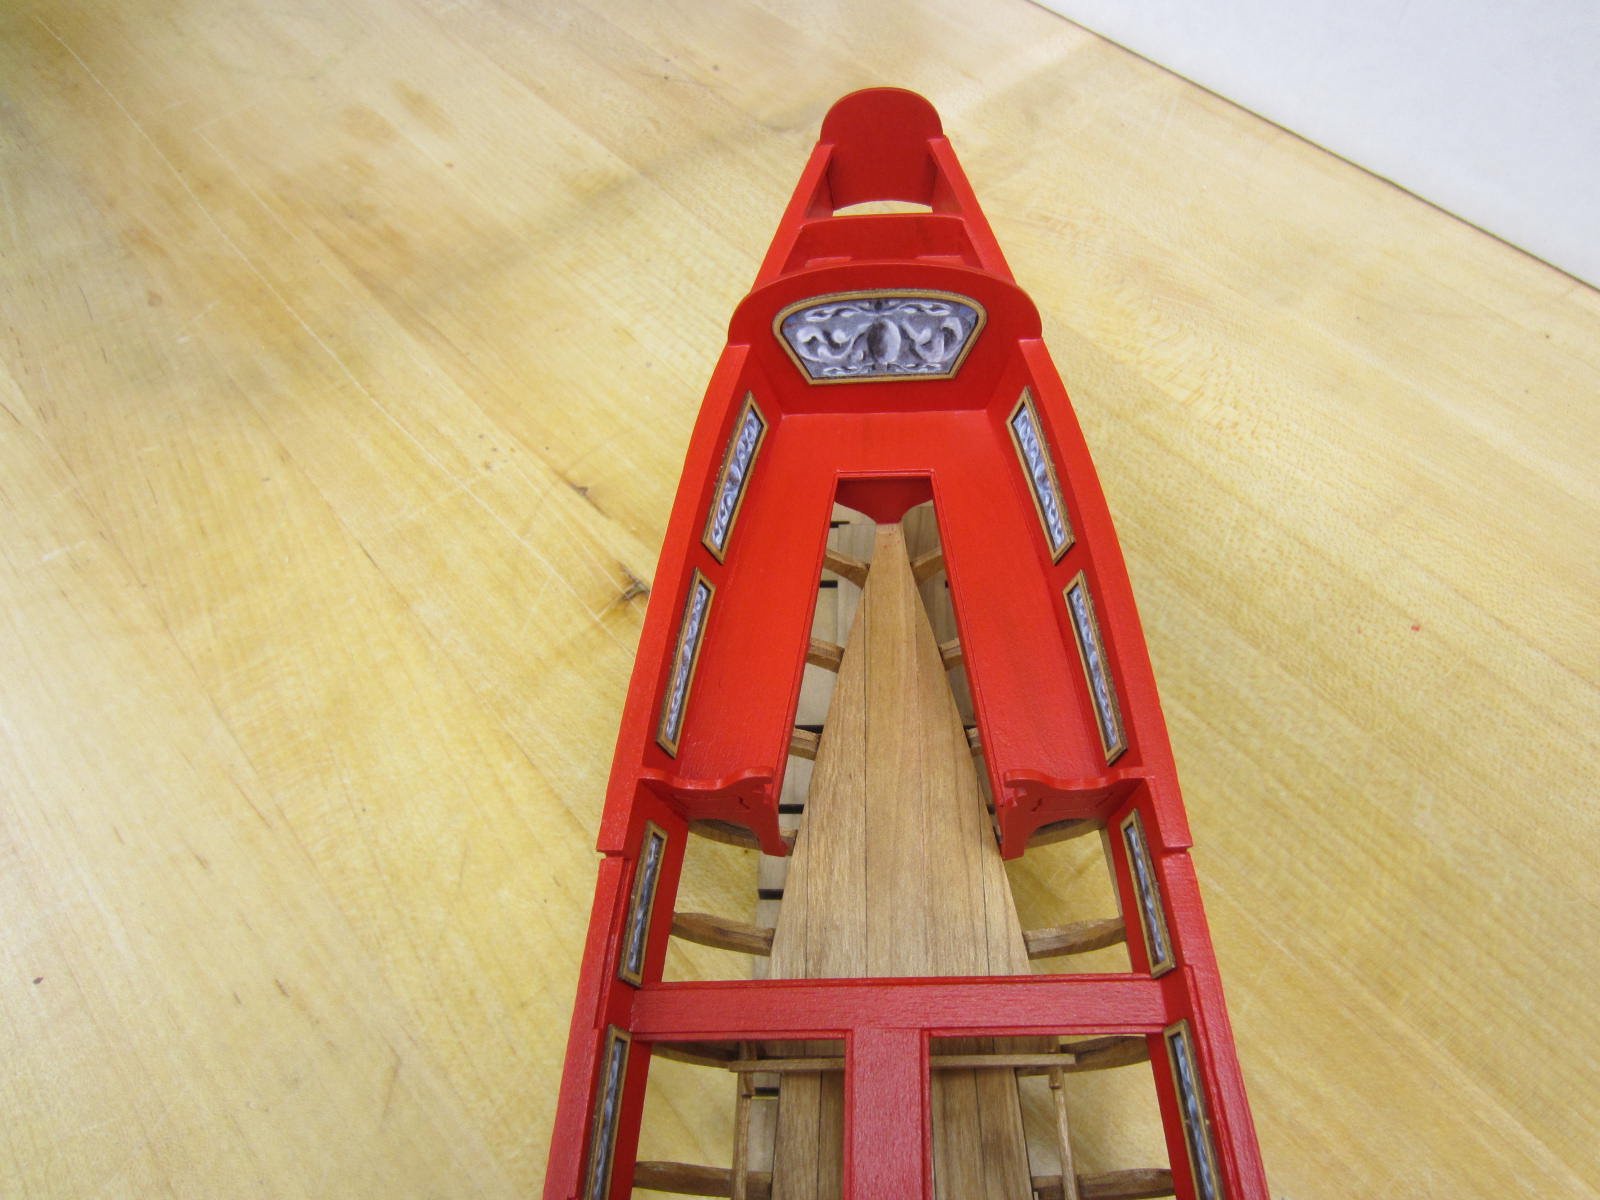
The forward flag support bracket has been added as well as the step.

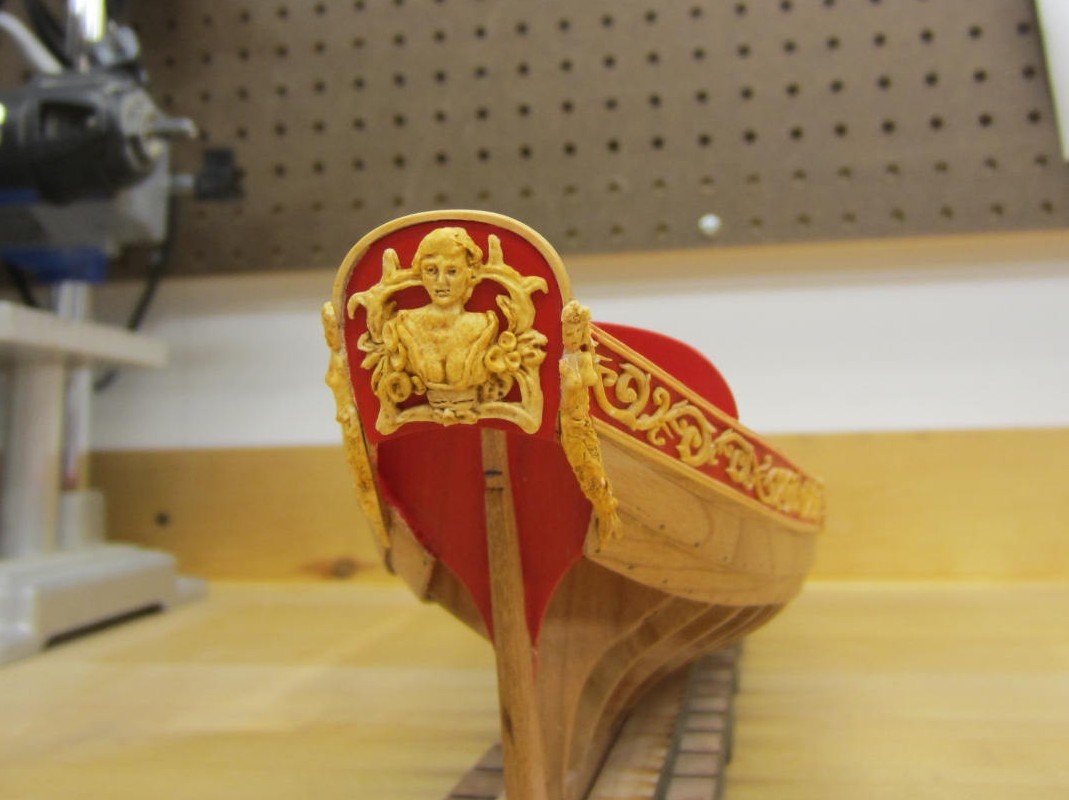
Here are the kit supplied laser wood carvings
and the kit supplied resin castings
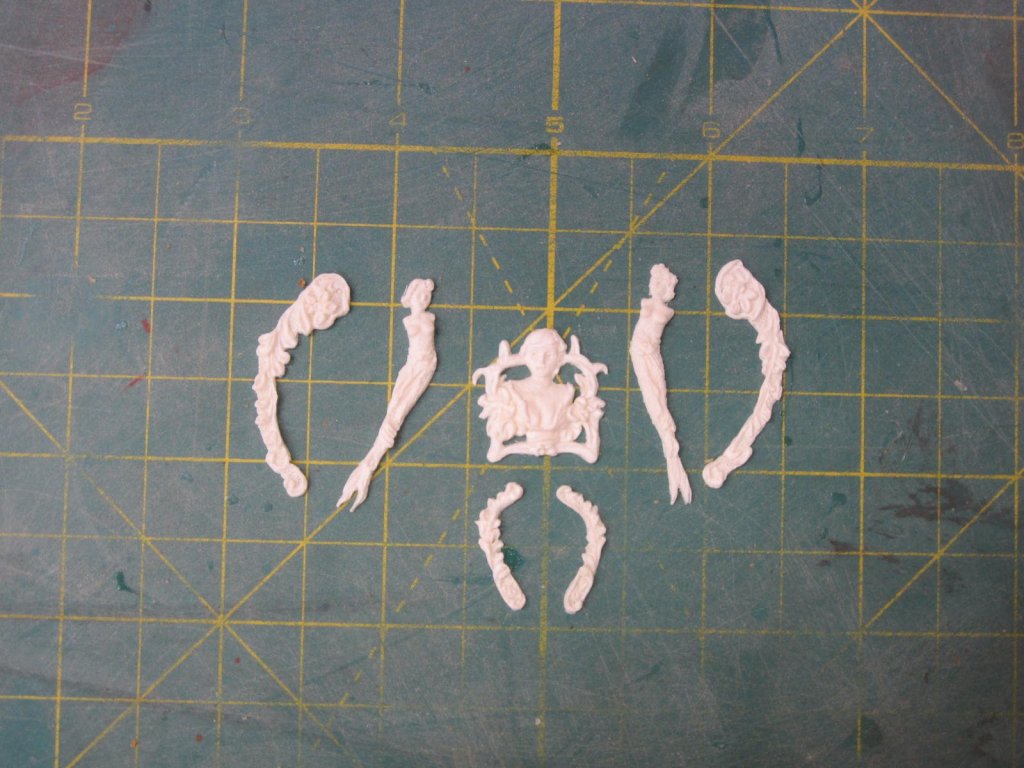
and the optional resin castings
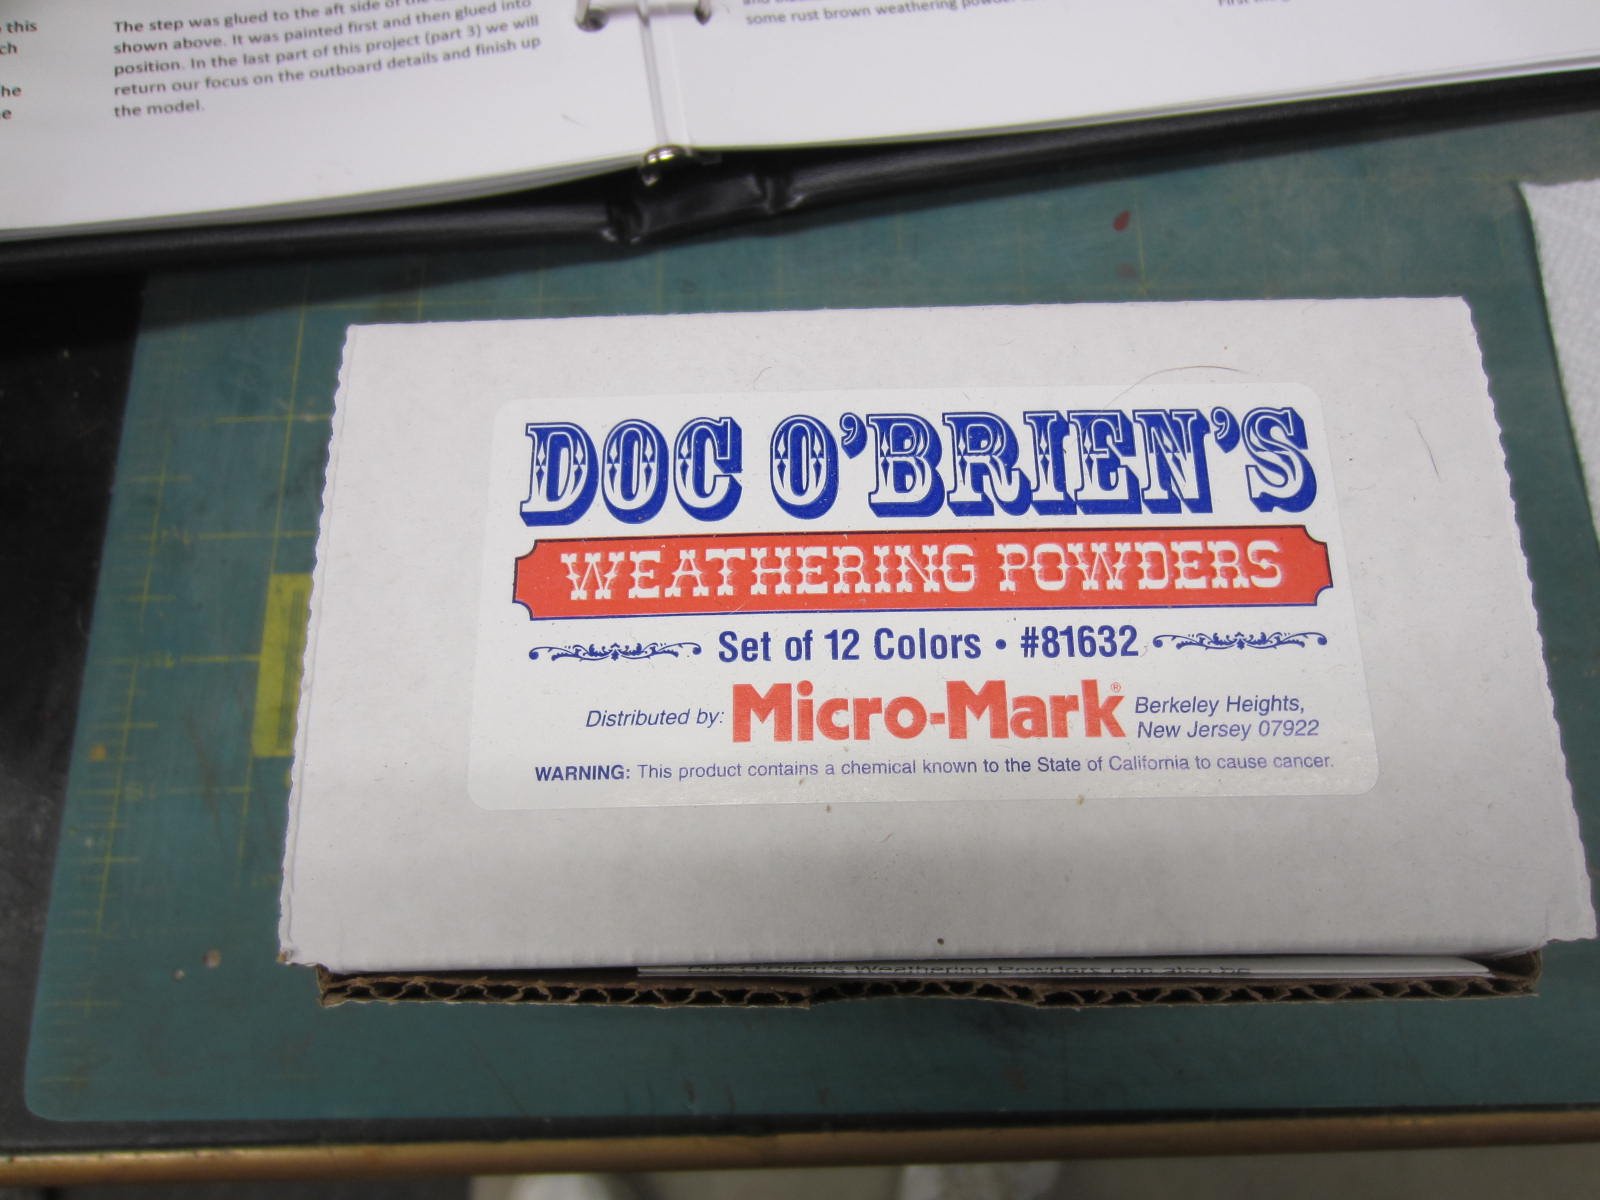
and the weathering powers to use on the resin castings.
Both the laser cut and resin pieces are great. I did get the additional resin casting just in case I either mess up the carving or get lazy!
They look so good it will be hard to duplicate.
- oneslim, Jim Rogers, CaptainSteve and 10 others
-
13
-
Thanks B.E.
I'm glad to hear that you've gotten the barge kit too. You'll really like it. By the way I love your work on the Cheerful!
- Ryland Craze, Canute and mtaylor
-
3
-
Hi Ben,
She's looking really nice. It's really something how well the printed friezes fit.
- mtaylor, Ryland Craze, Trussben and 1 other
-
4
-
Wow what a monster! And I mean that in a good way.
- Ryland Craze, FrankWouts, mtaylor and 2 others
-
5
-
Thanks Jim and Tim and also all the likes. It's really a nice kit and a lot of fun to do.
- Ryland Craze, mtaylor and Canute
-
3
-
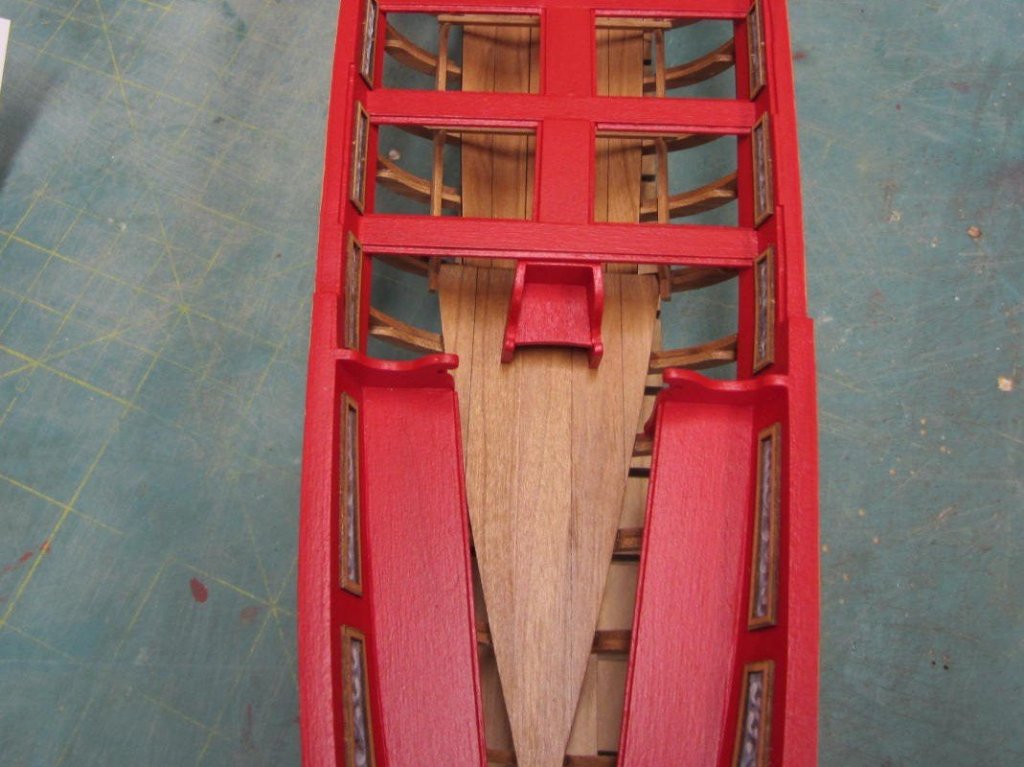
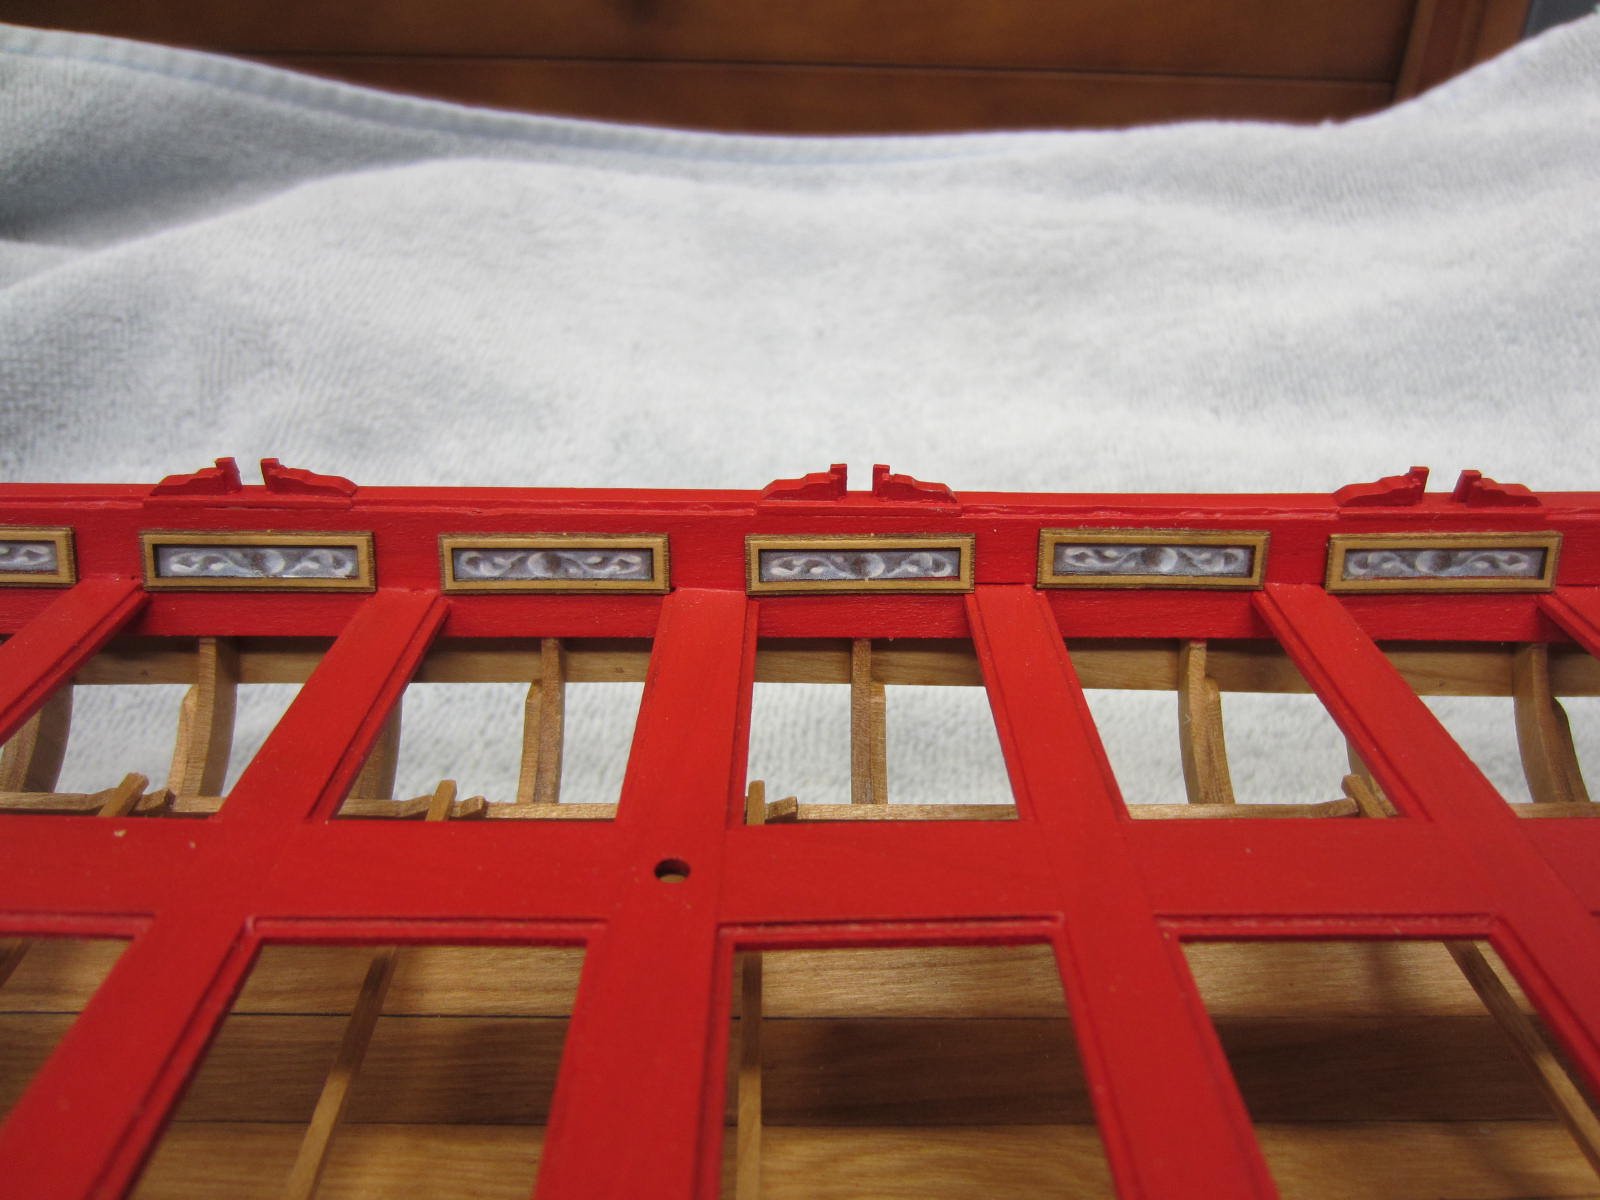
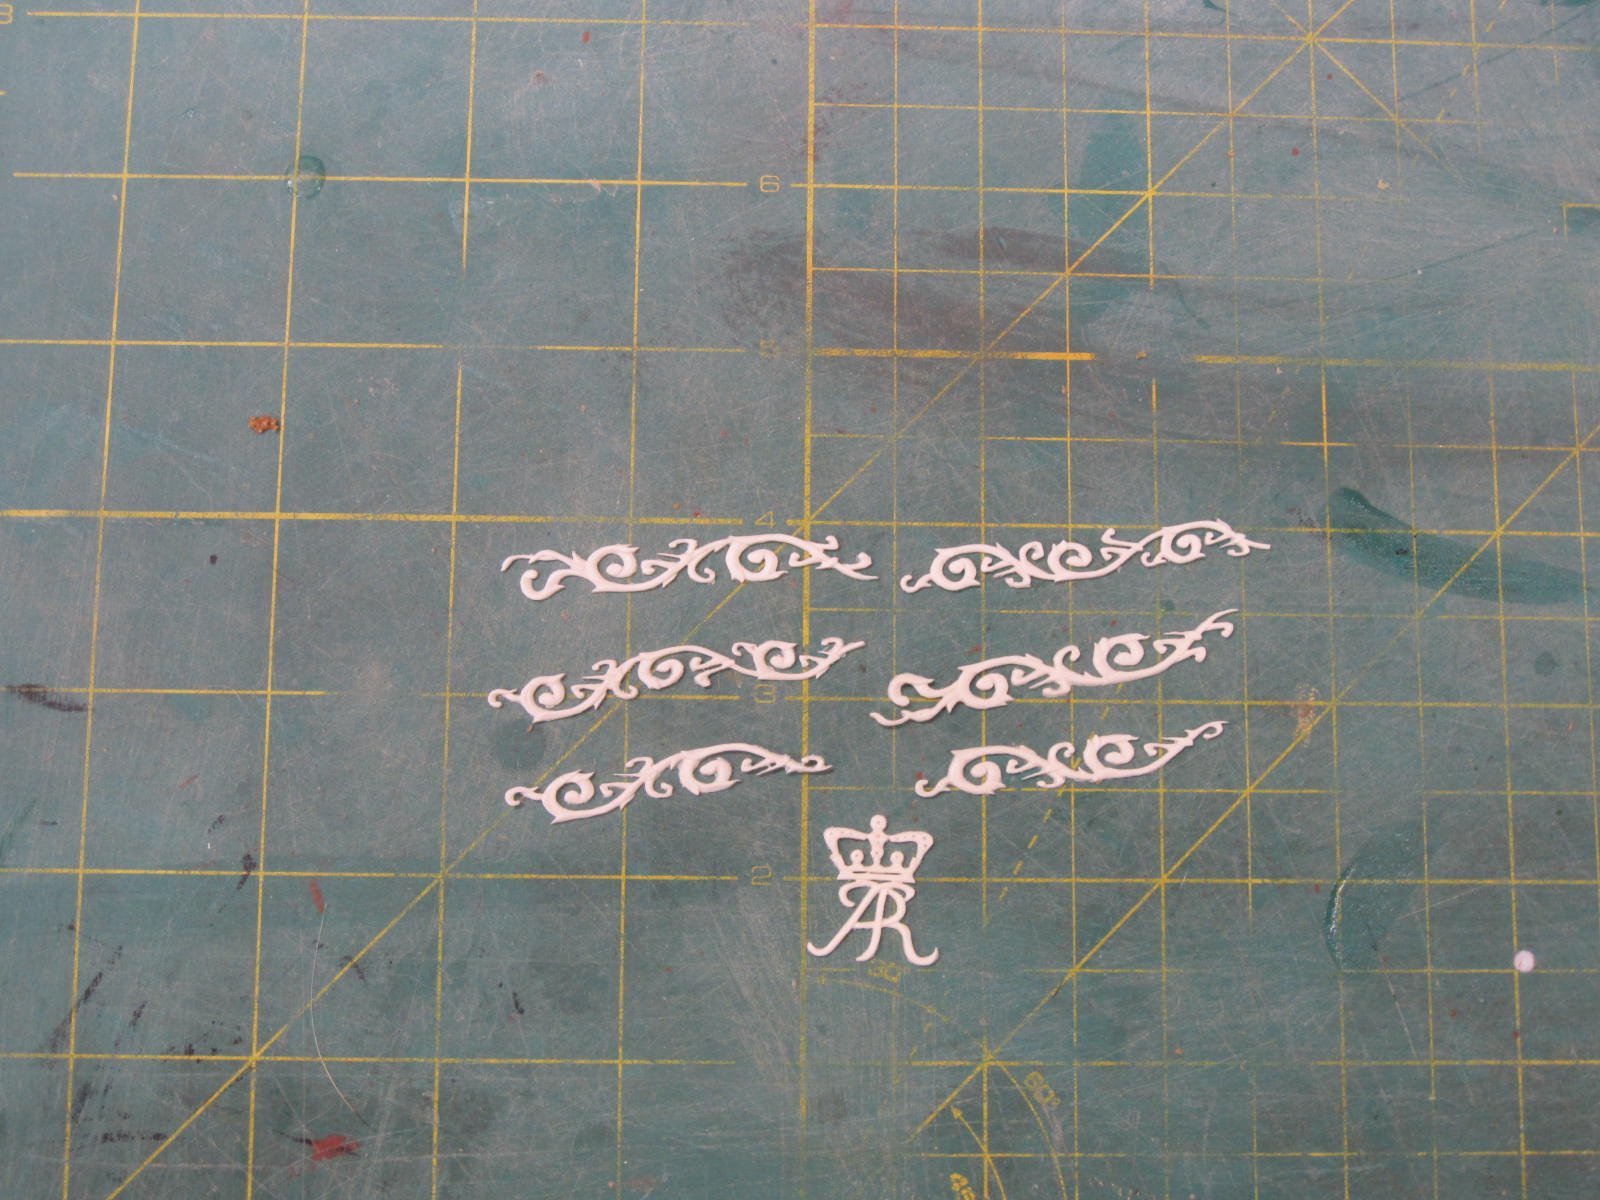
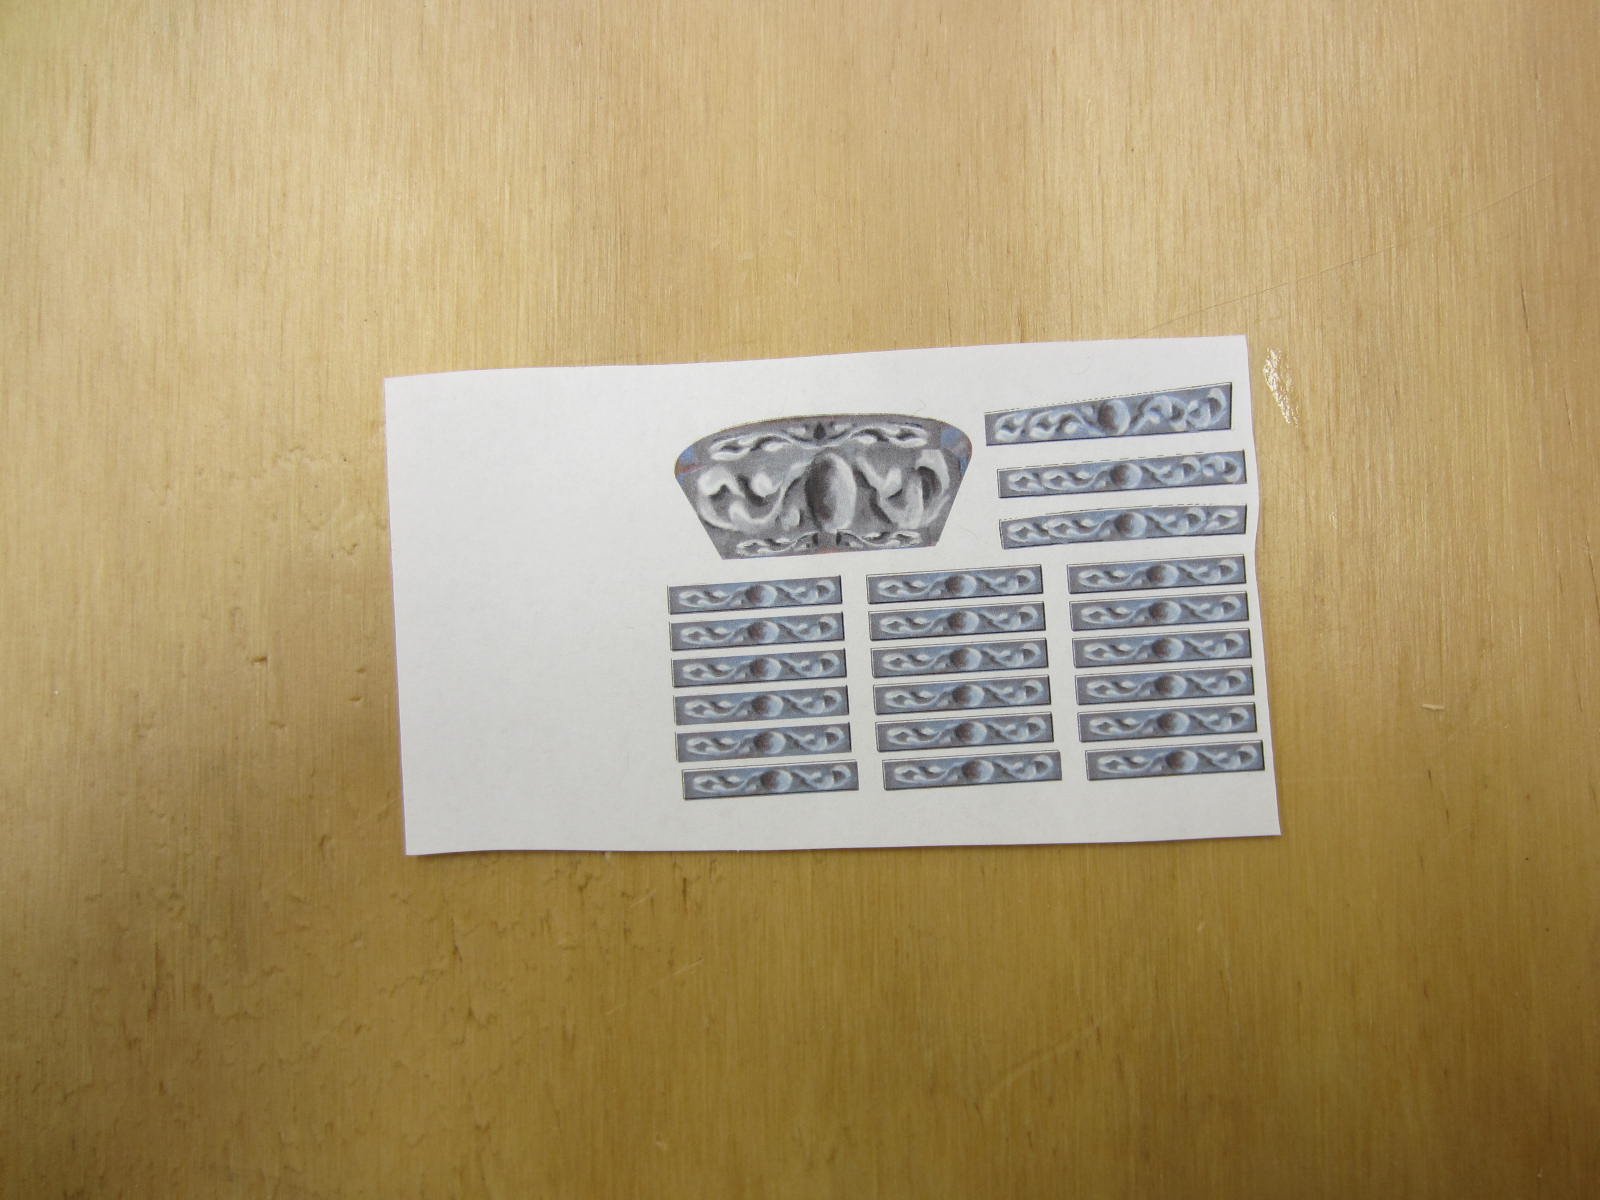
The kit provides the various friezes all sized and ready to be inserted into the panels.
Chuck describes using a glue stick to adhere the friezes. As I didn't have a glue stick I
diluted some white glue, used a paint brush to apply it to the area inside the panels
and then gently press the frieze in place.
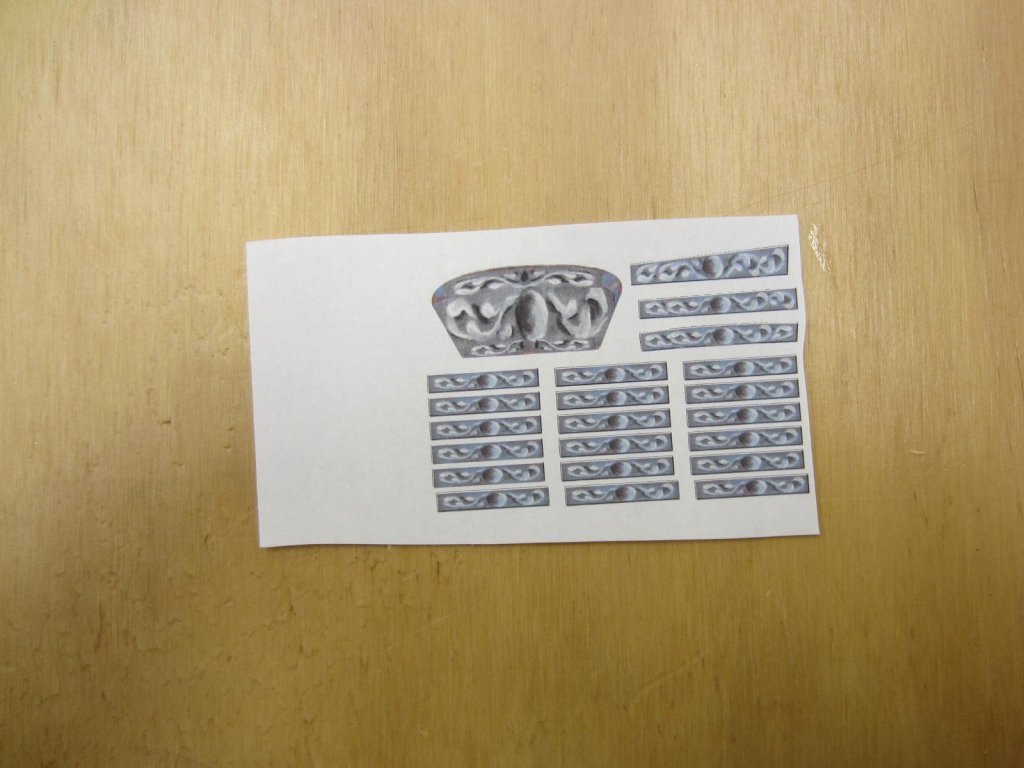

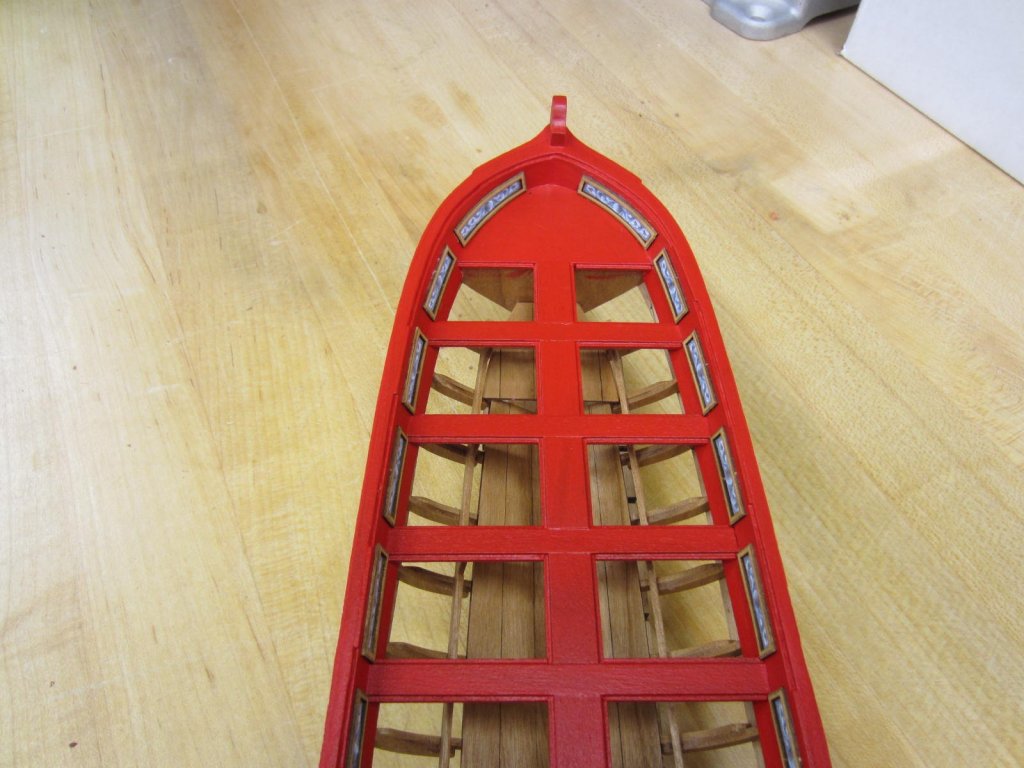
Next I will paint and install the bow flag support brace and the step.
-
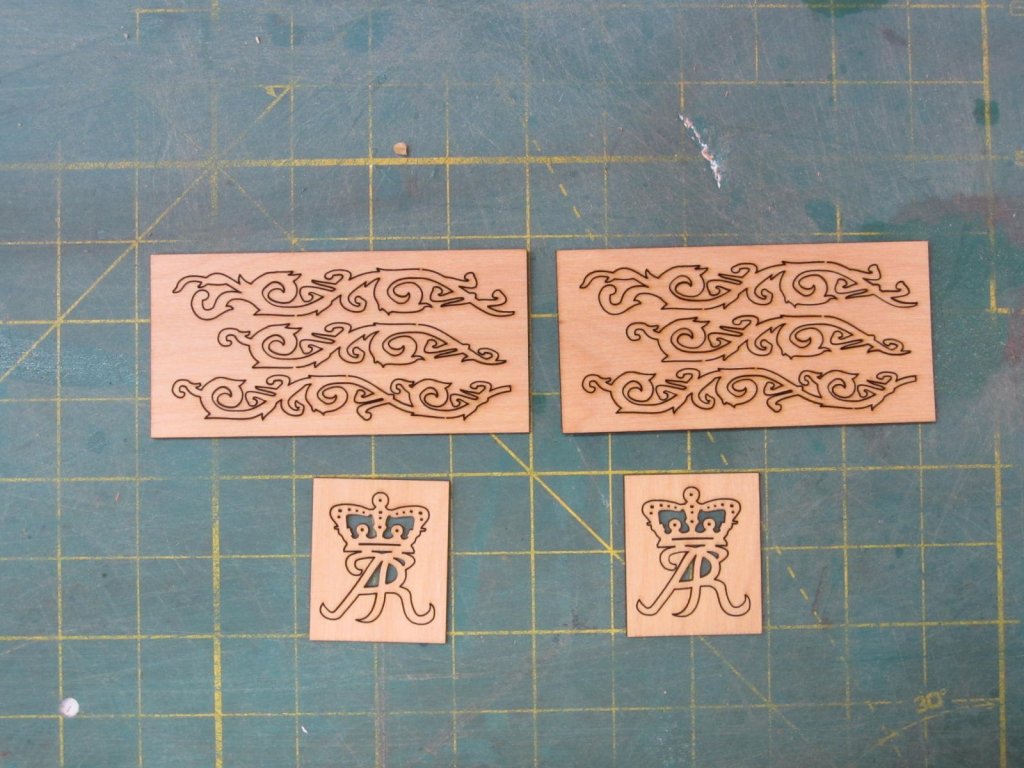
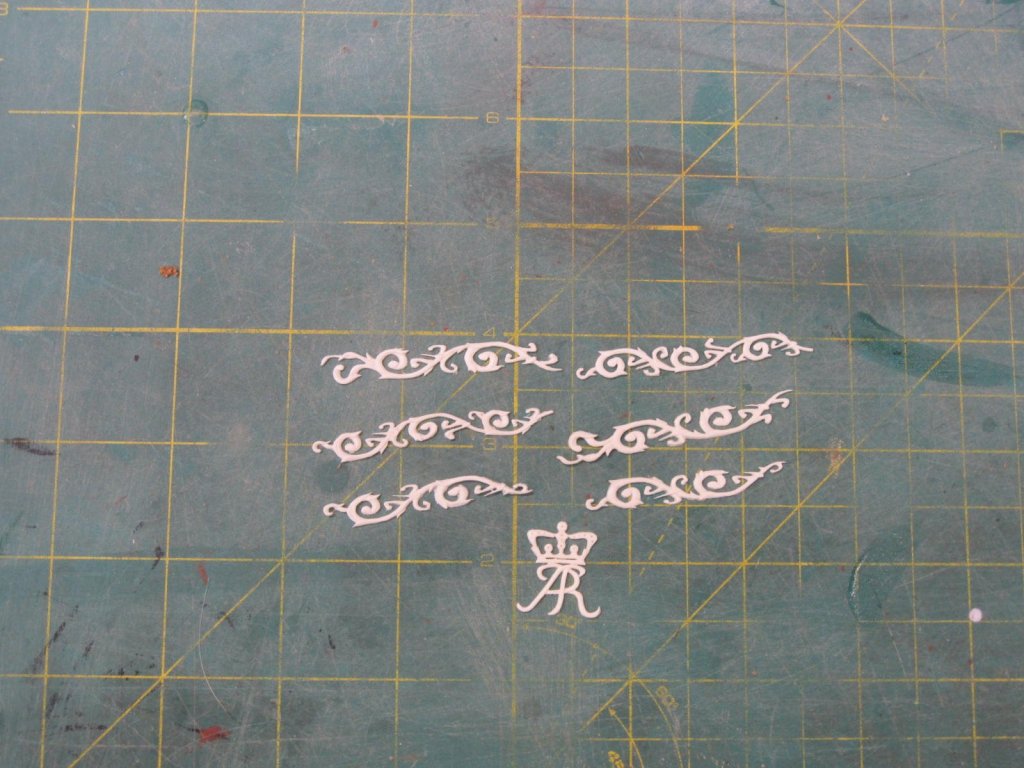
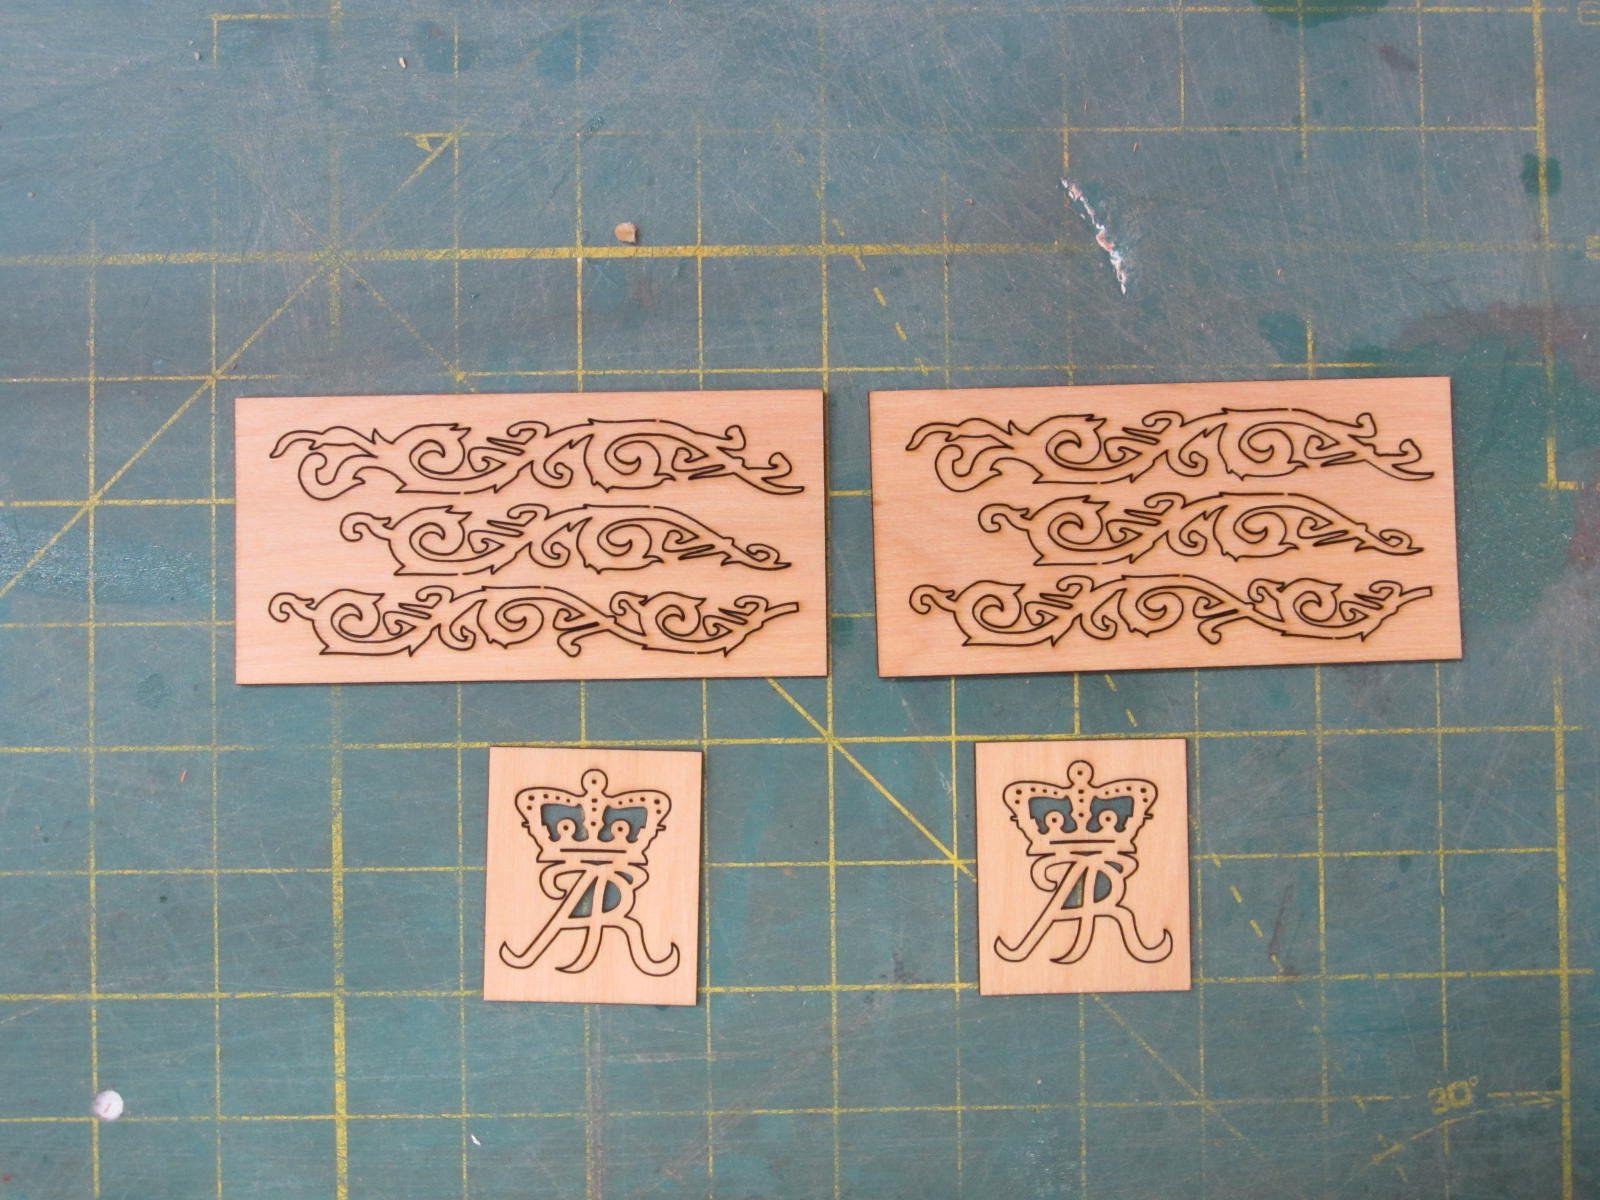
Here are laser cut boxwood panels that need adding.
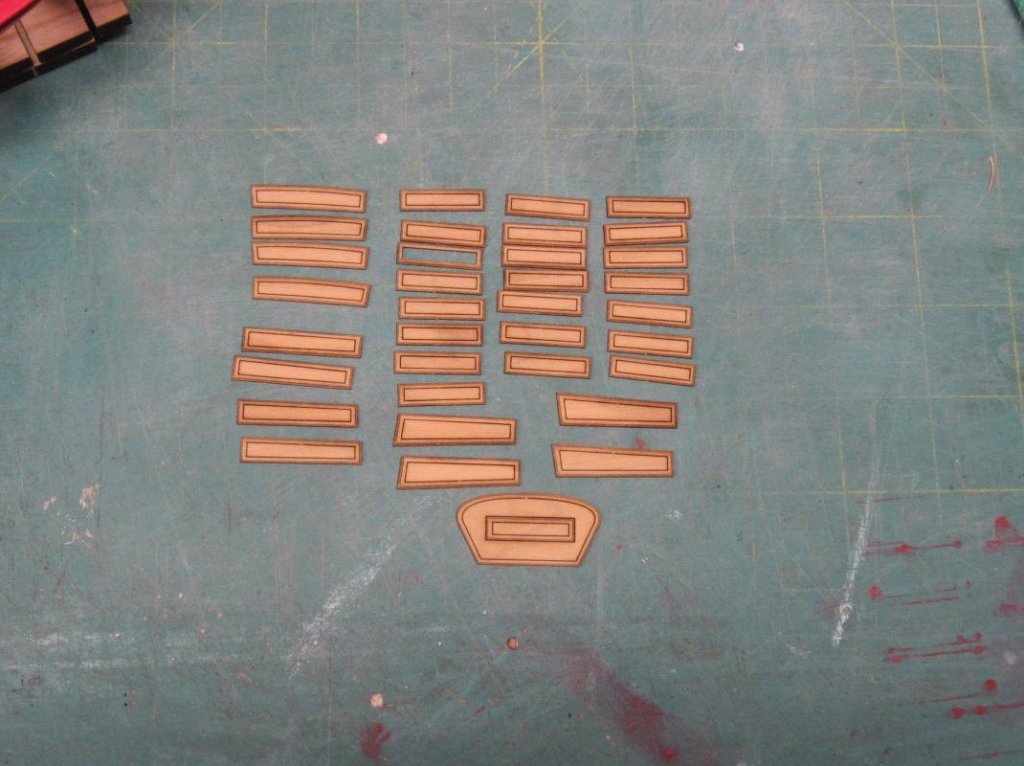
Again Chuck added extras because the are VERY DELICATE. Old hammer hands only broke
a couple but it was nice to know there were plenty of spares!

The inboard painting is done unless I make a boo boo. Next I'll be cutting out the printed friezes and inserting them in the panels.
- gjdale, CaptainSteve, rafine and 15 others
-
18
-
All I can say is you better stock these kits by the gross!
Looking very good!
-
-
56 minutes ago, Chuck said:
I see a Pegasus Cross Section Rusty beta test in the works for you!!!
That sounds great! I've had some time off so I was able to spend more time on the barge. Gotta go back to work tomorrow though.

- Old Collingwood, Canute, Chuck and 2 others
-
5
-
Thank you OrLiN. Welcome aboard.
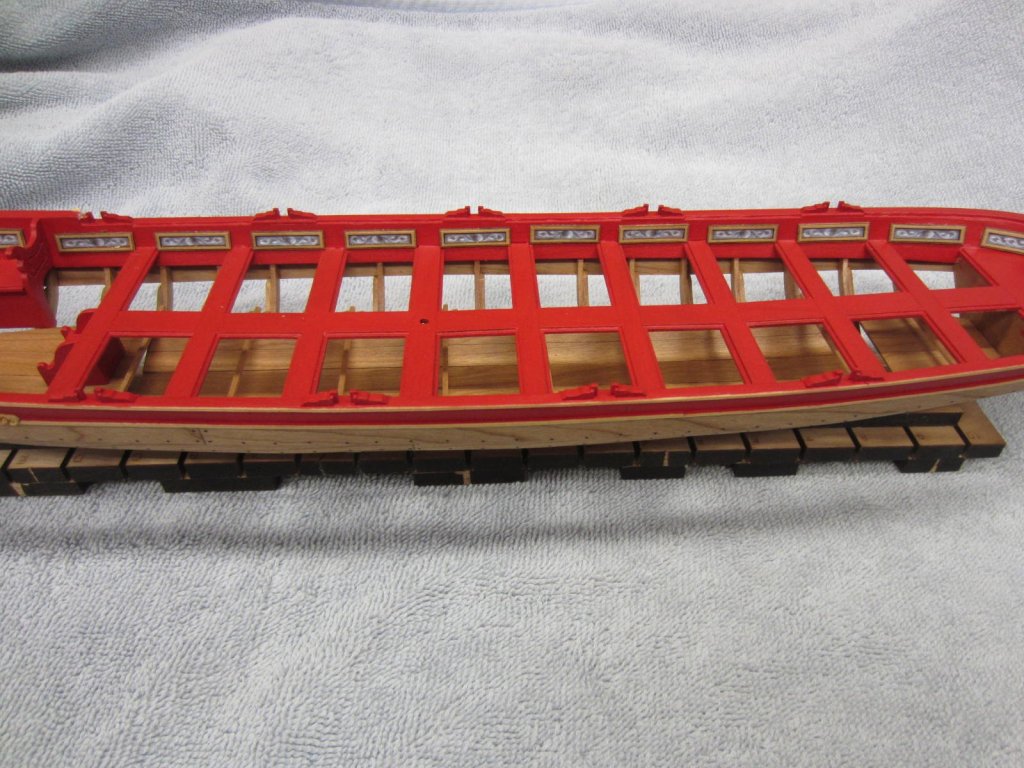
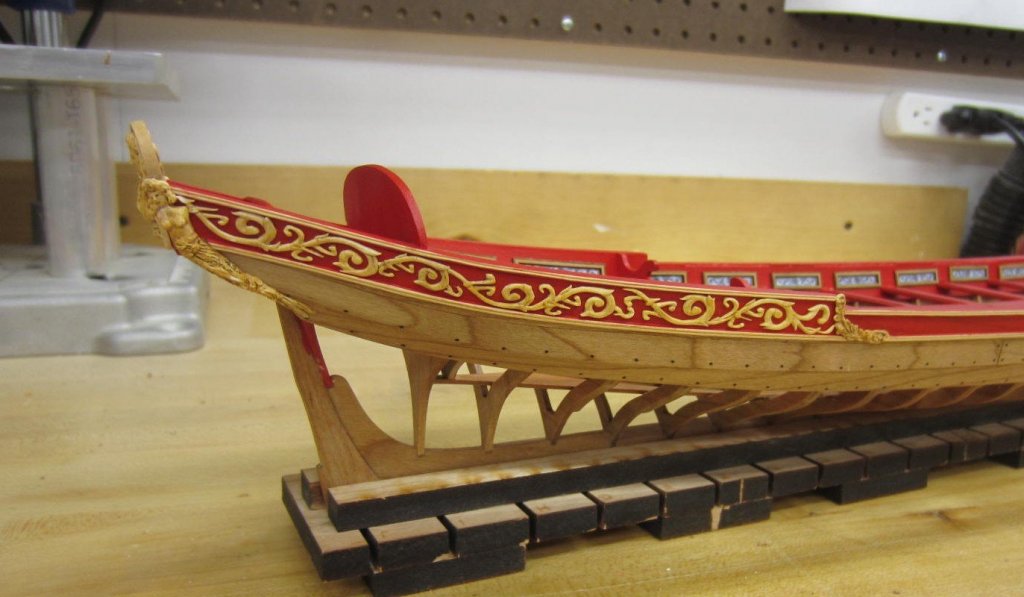
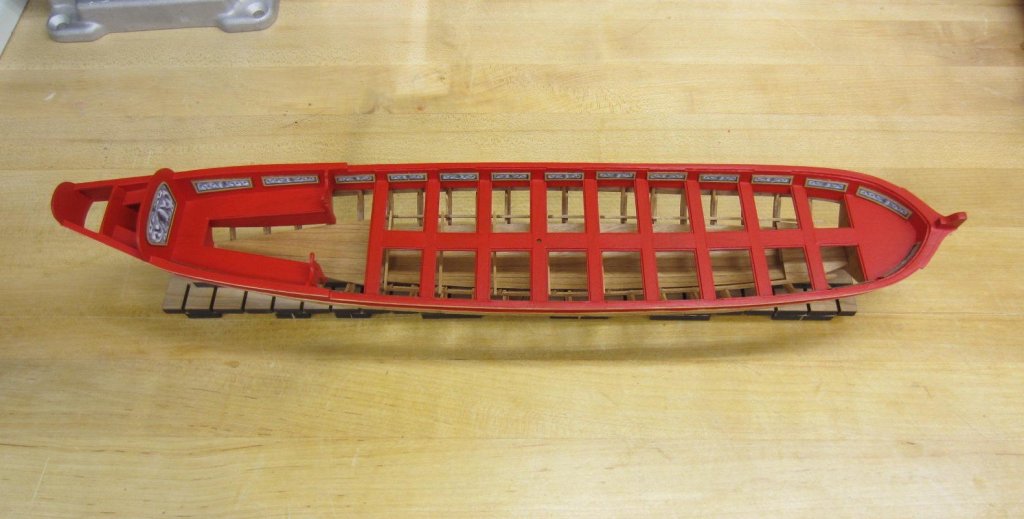
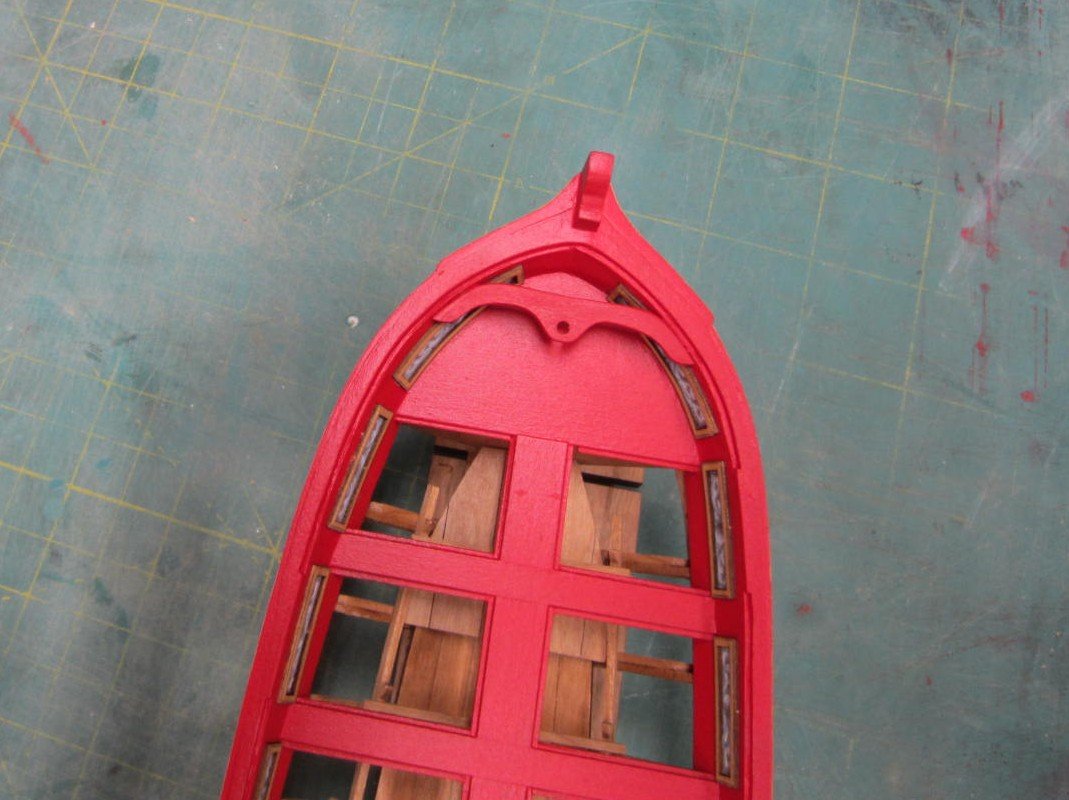
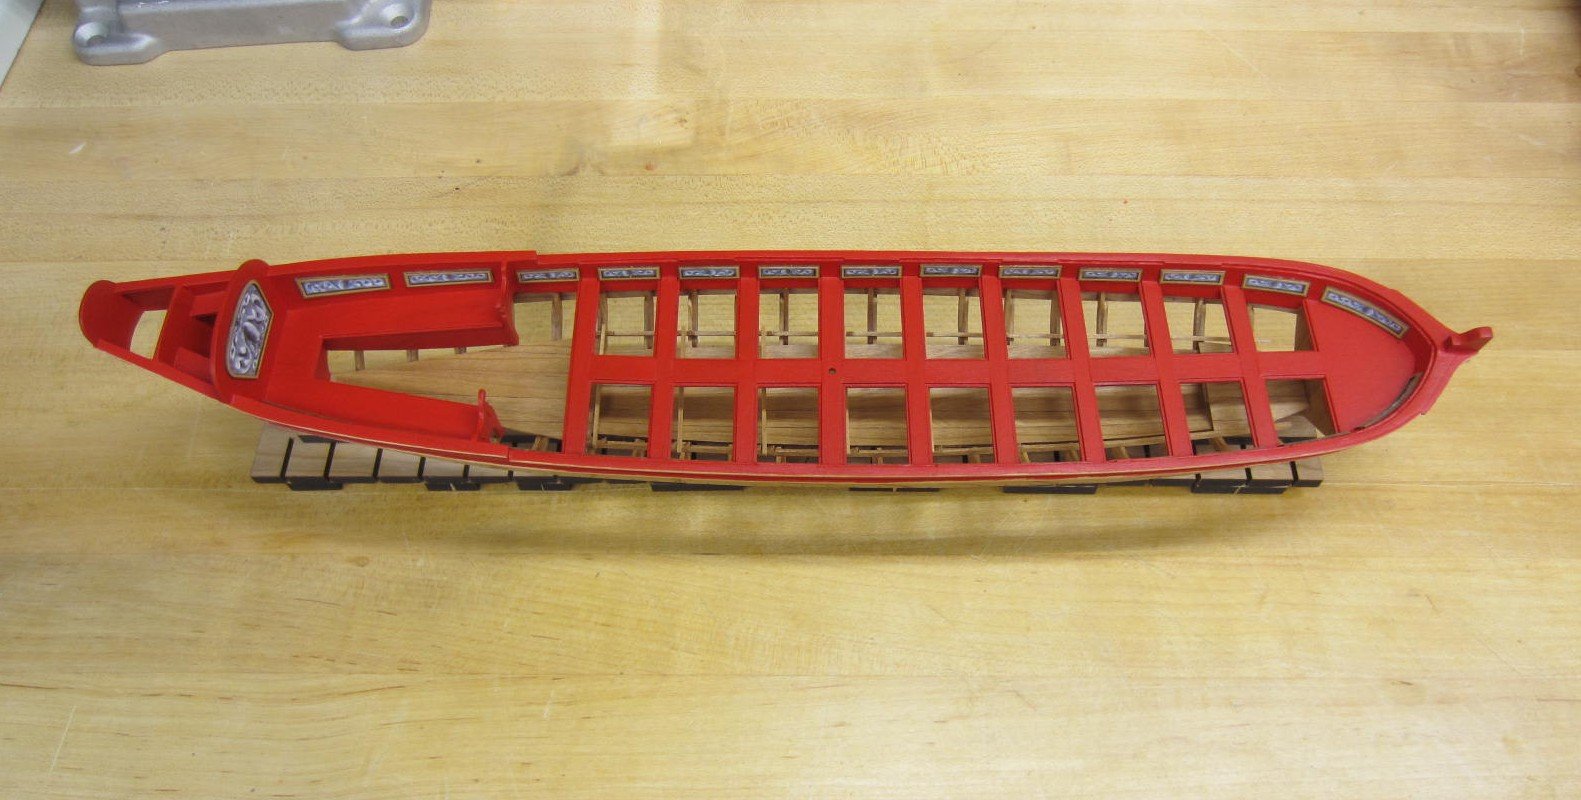
The inboard planking has been completed. Thankfully Chuck had the forethought to supply extra
planking pieces at the bow. It is a hefty bend and old hammer hands broke the first plank.
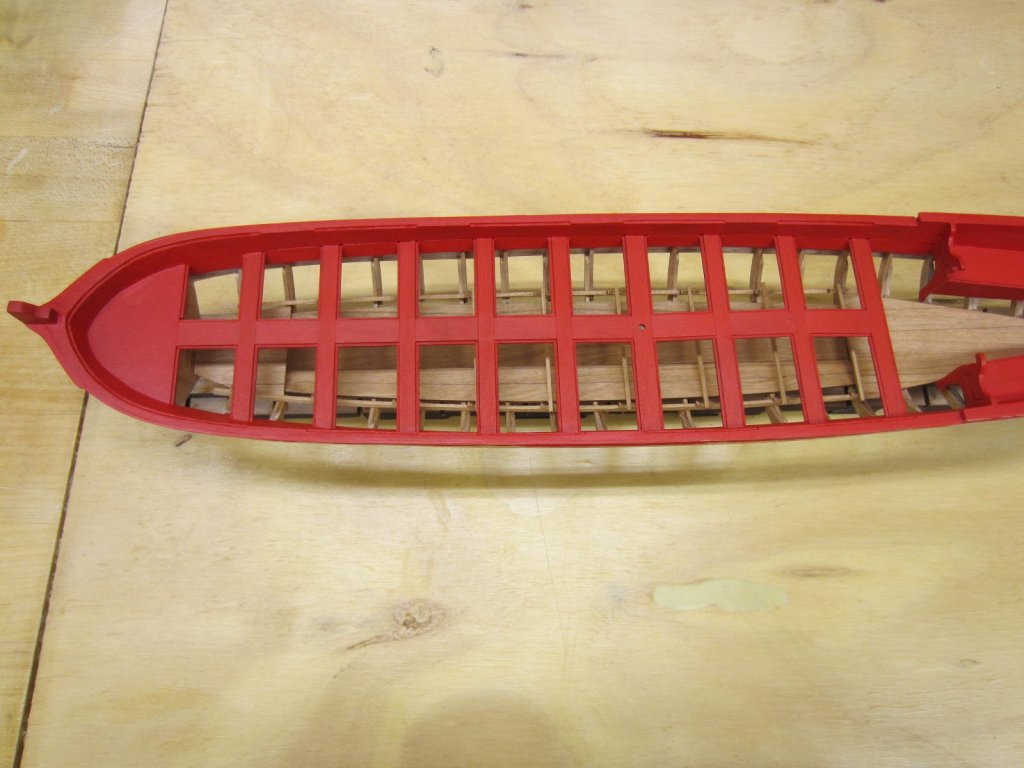
You can see the planking is not flush with the cap rail and forms a bit of a rabbet. You also can see pieces
added that do go all the way to the cap rail. These form a wider spot for the thole pins.
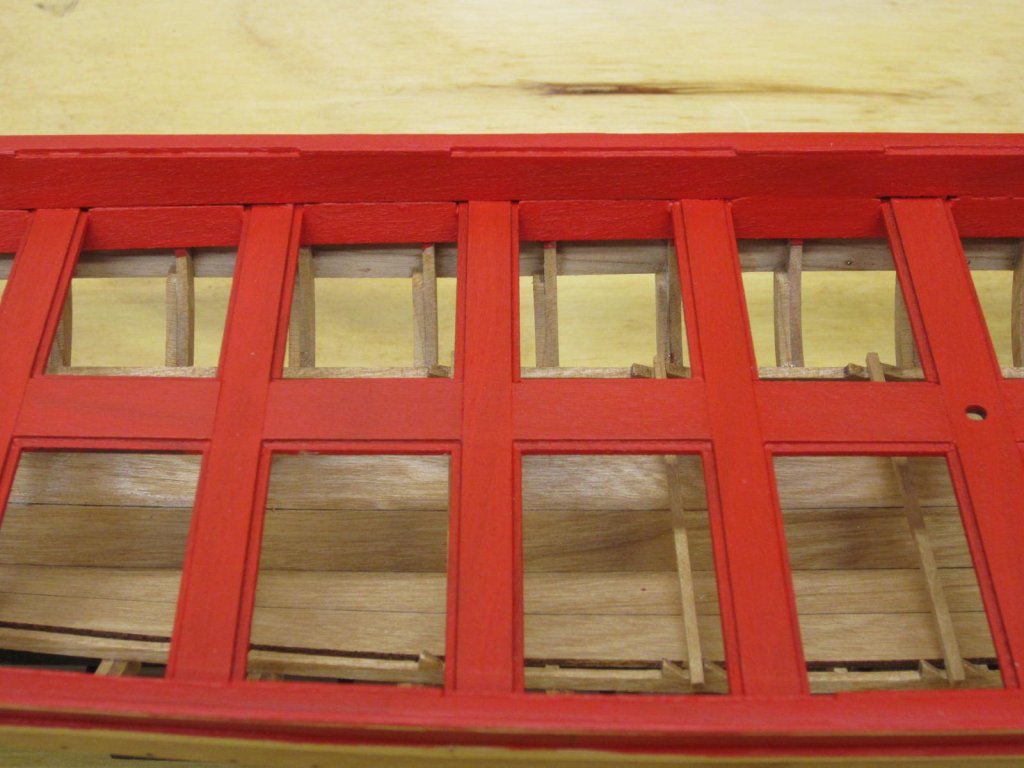
Well it's back to painting, painting, painting.
- Seventynet, Canute, fnkershner and 15 others
-
18


Queen Anne Barge by Rustyj - FINISHED - Syren Ship Model Company - 1:24
in - Kit build logs for subjects built from 1501 - 1750
Posted
Thanks Tim.