Rustyj
-
Posts
2,535 -
Joined
-
Last visited
Content Type
Profiles
Forums
Gallery
Events
Everything posted by Rustyj
-
 Thanks to all for stopping by and all the likes, Hi Chuck, I am enjoying it. It's a little different to cut out but they lay down sooooo nice! Thanks Jason. Hi Ben, It' s good old boxwood. I've got to stop by and see how you are doing on the Pegasus. Hi Pat, Good to be back, We'll see what kinda groove I get into here! Hi Grant. Time will tell. Hi Bob, I hope so and I've got to catch up with you as well as everyone else too!
 -
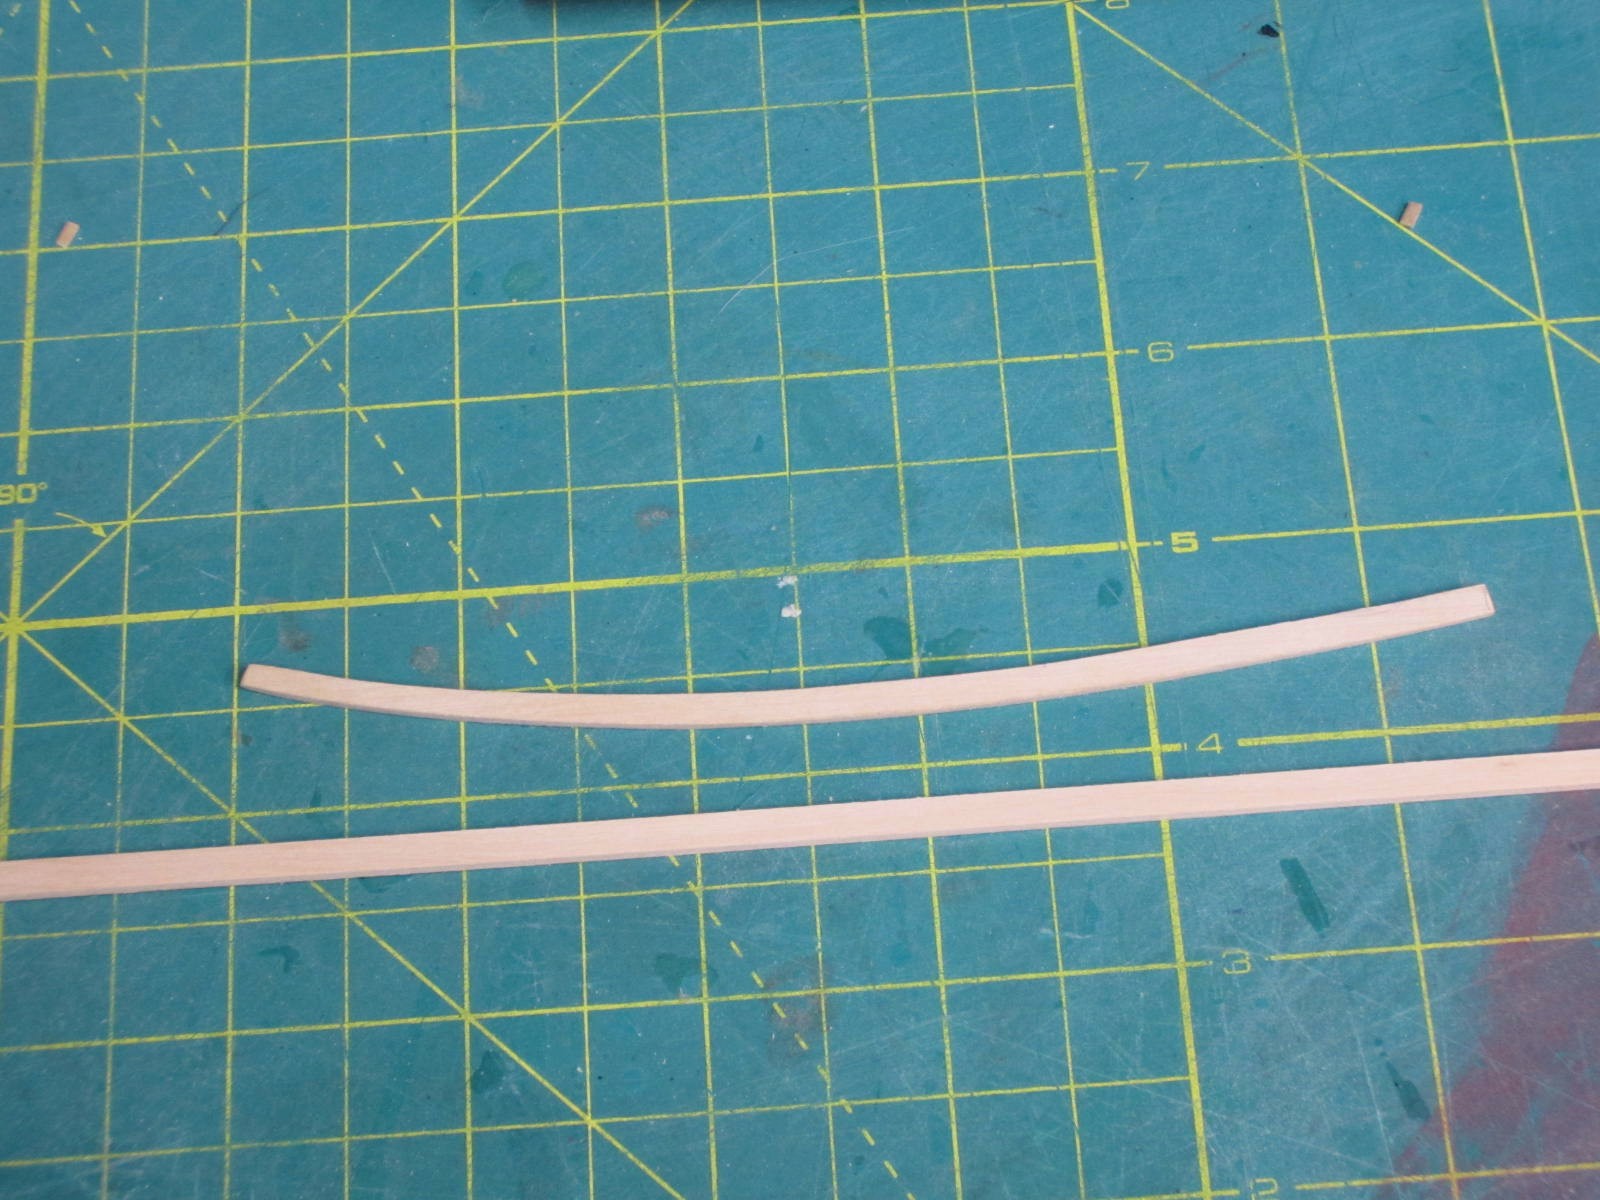
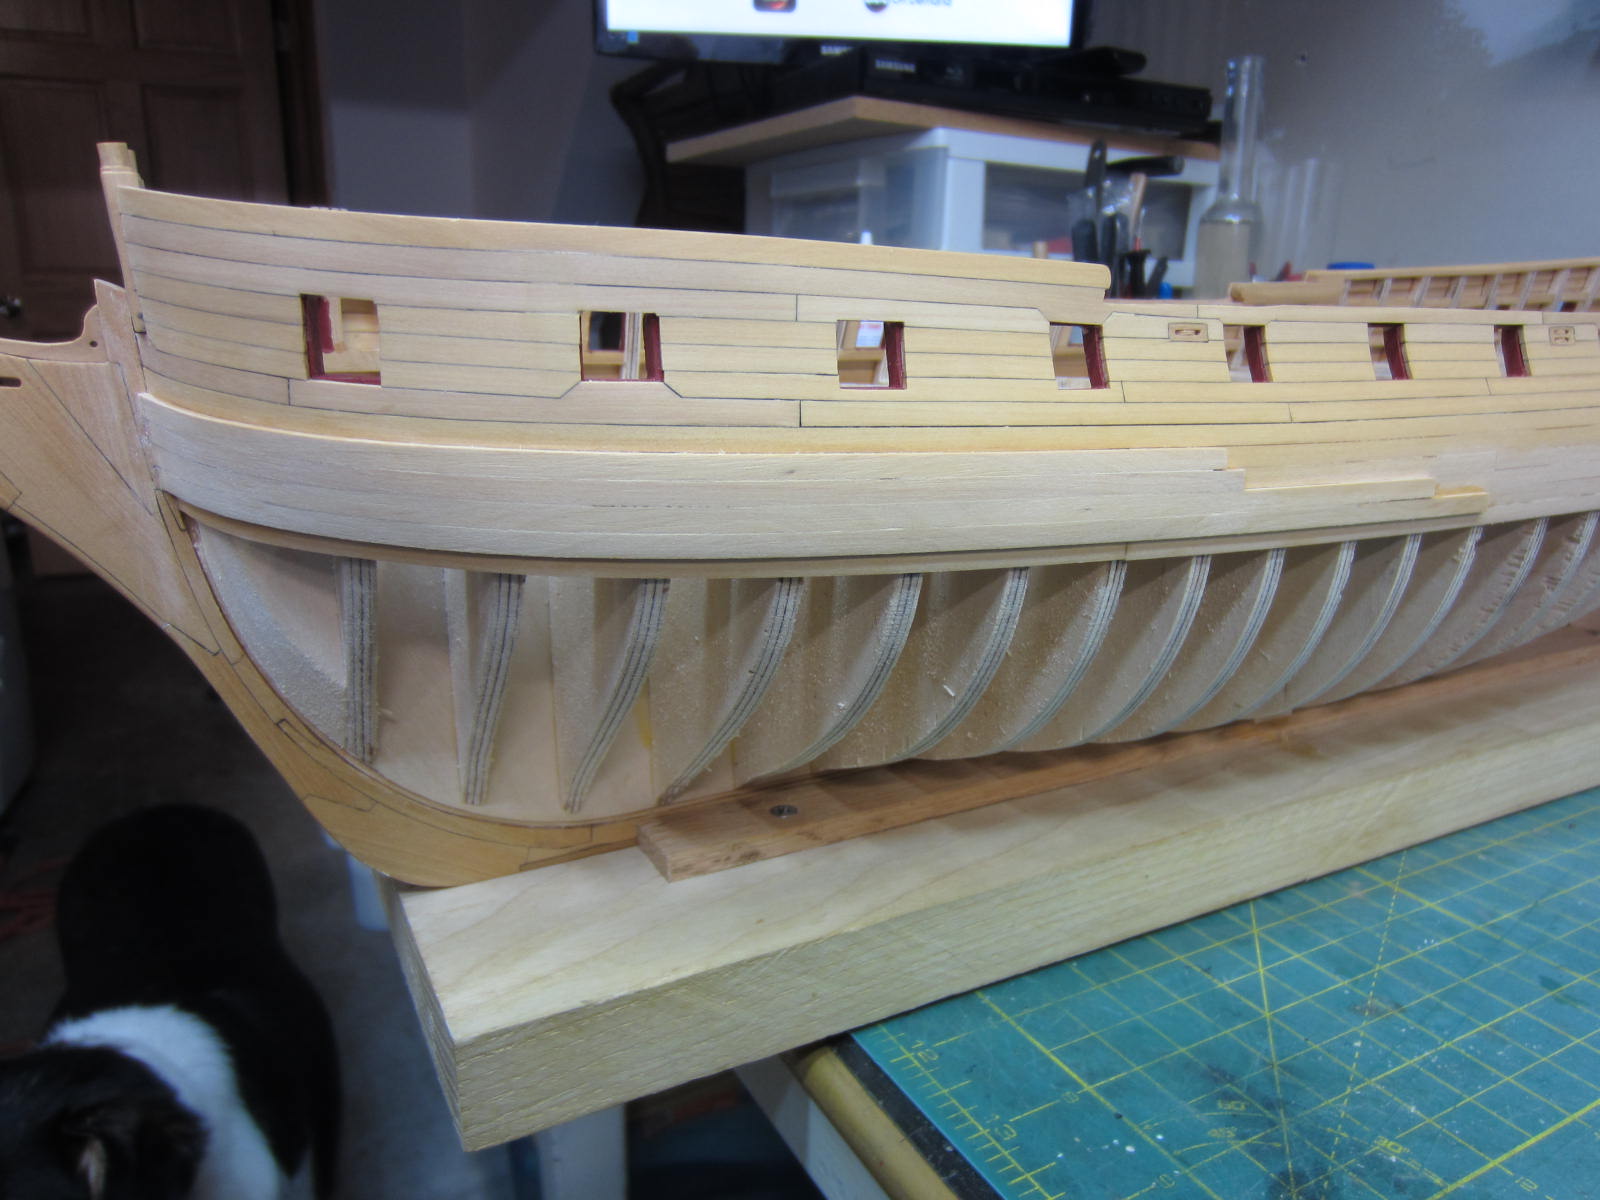
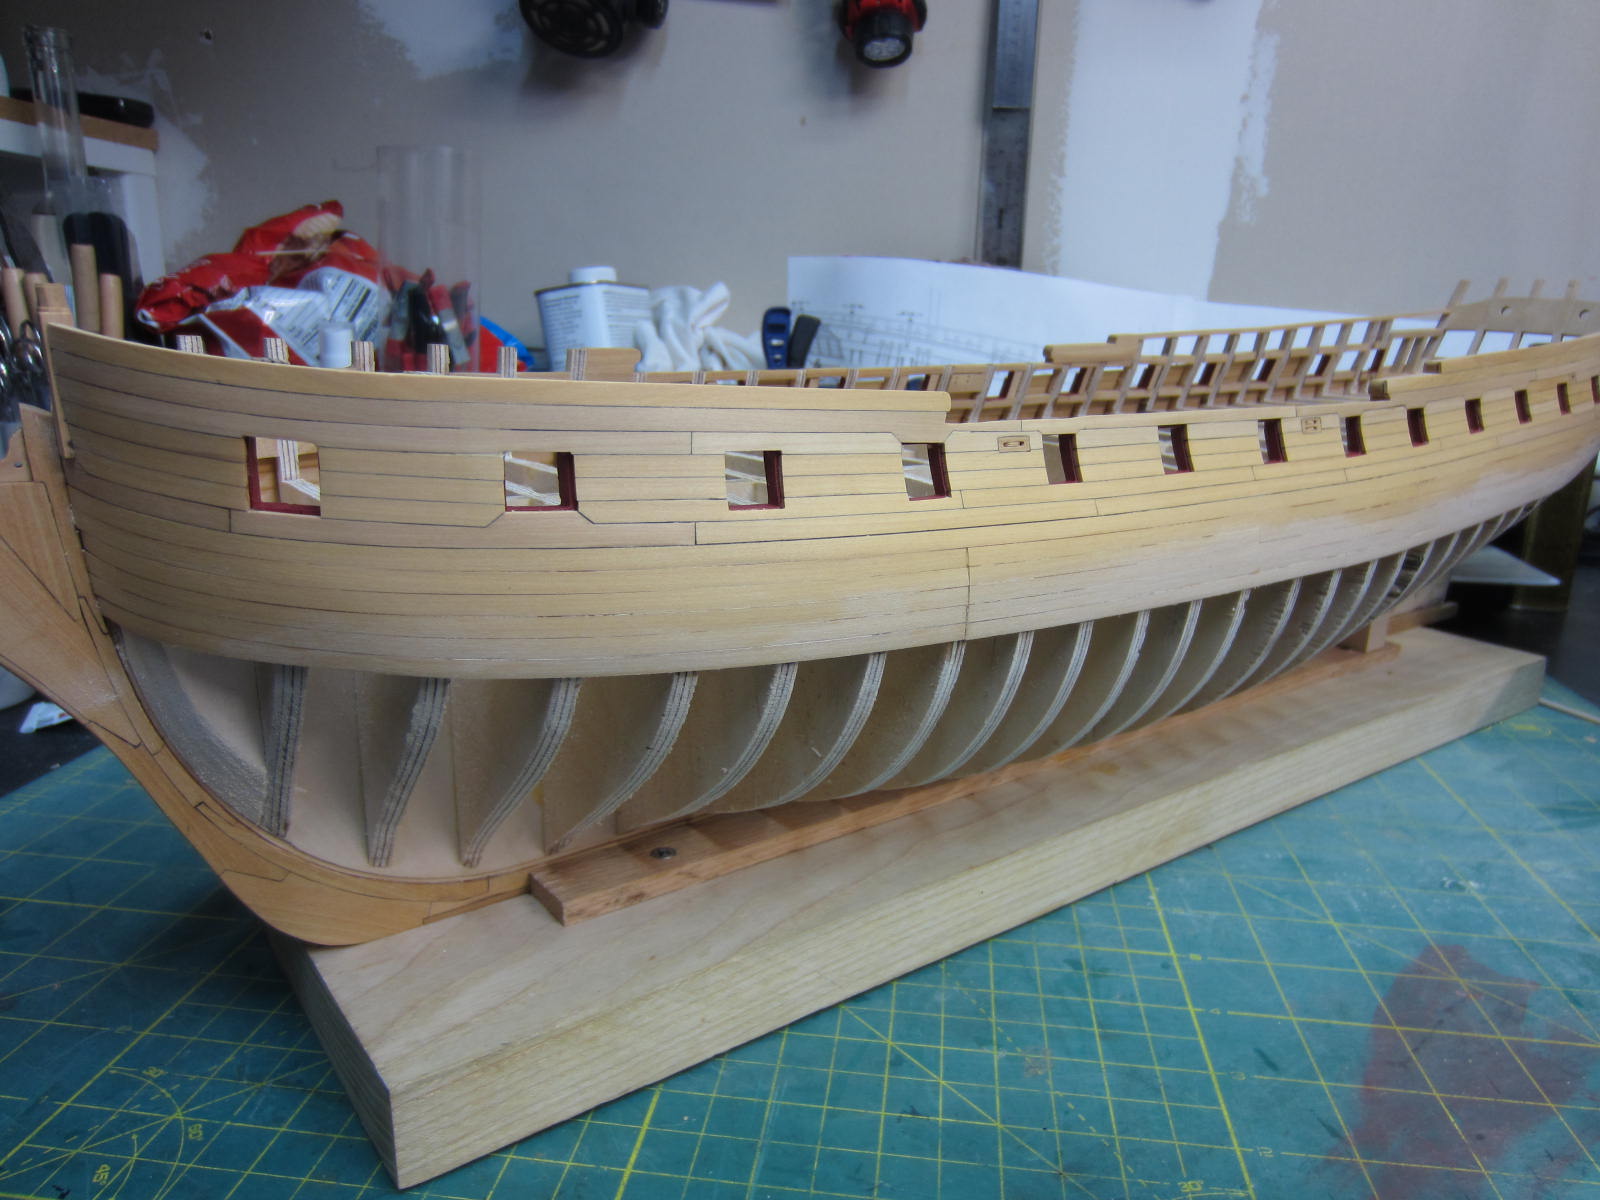
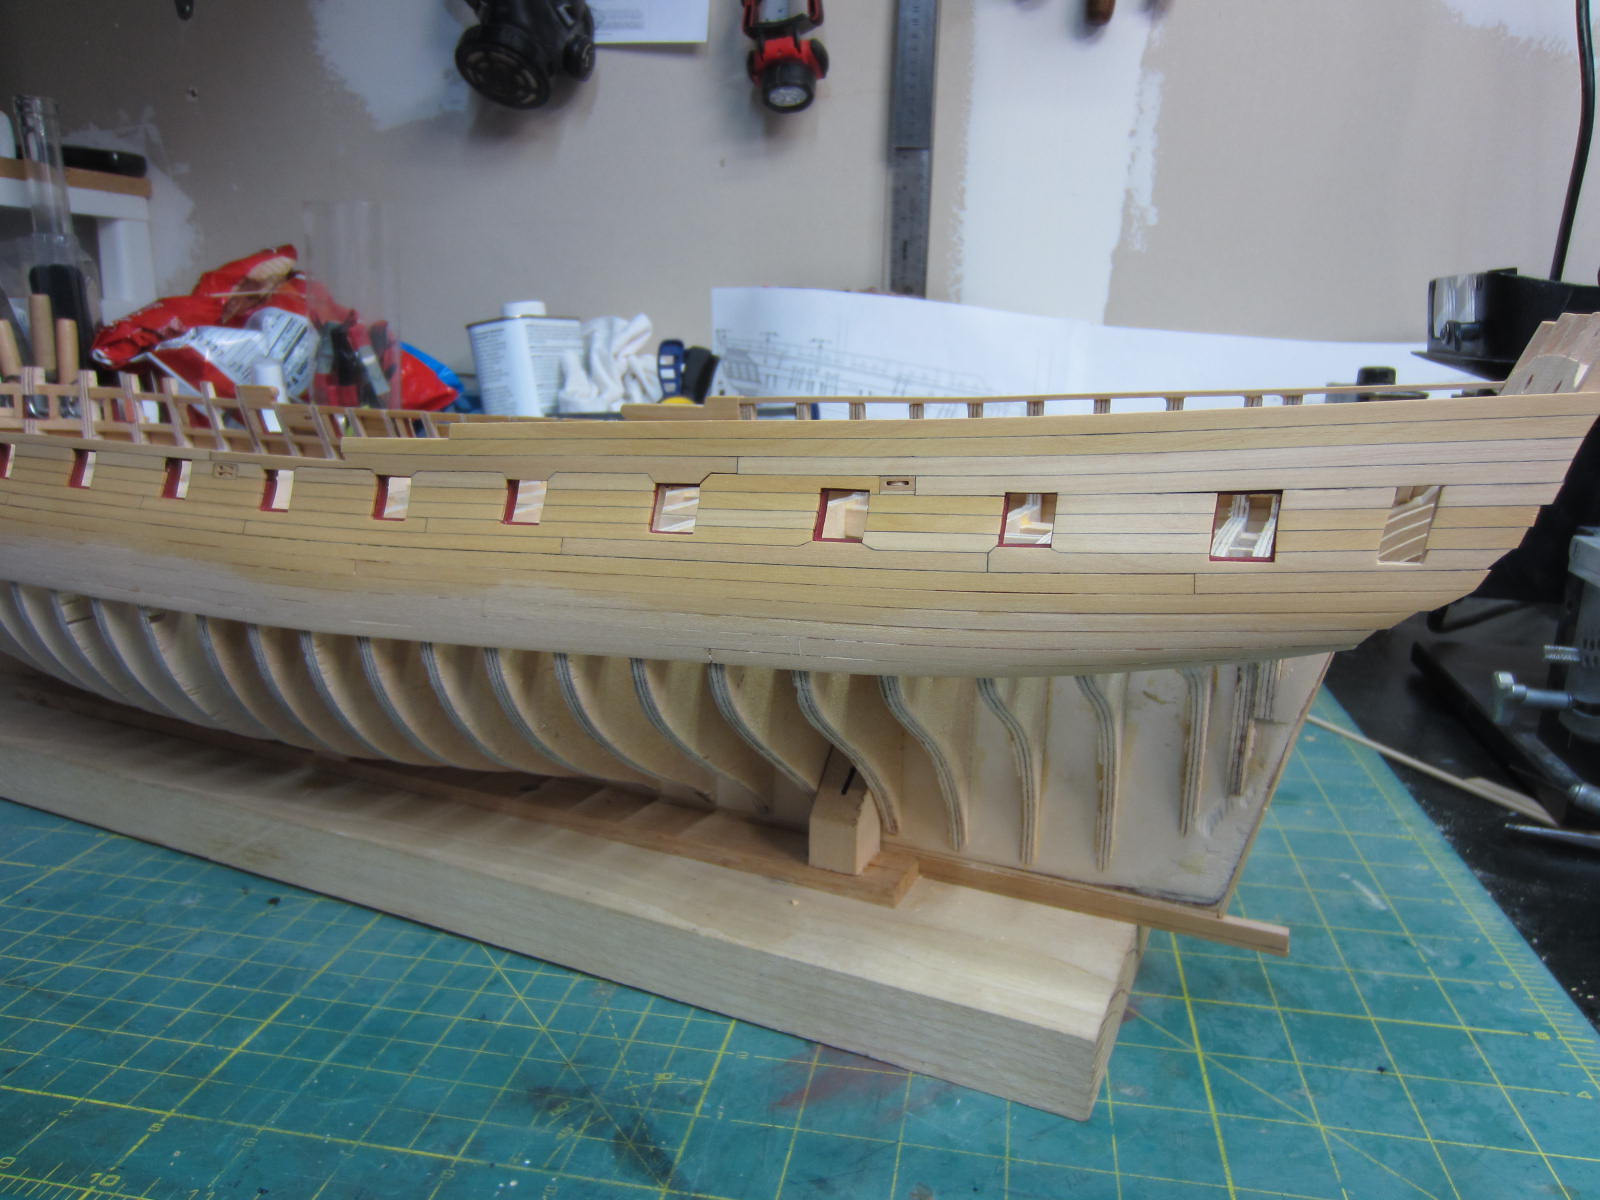
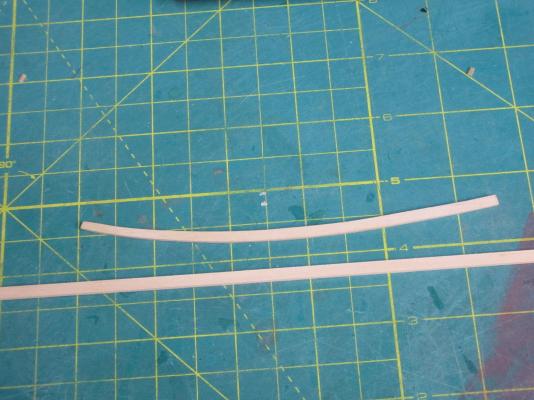
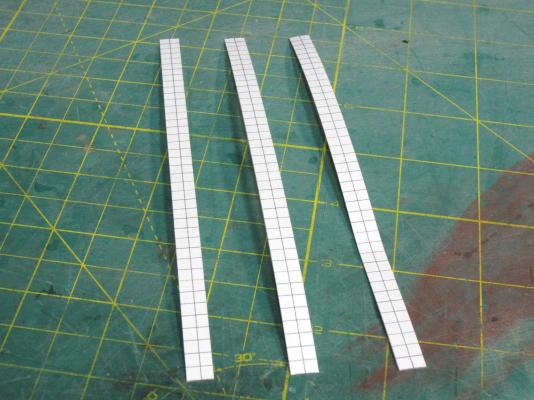
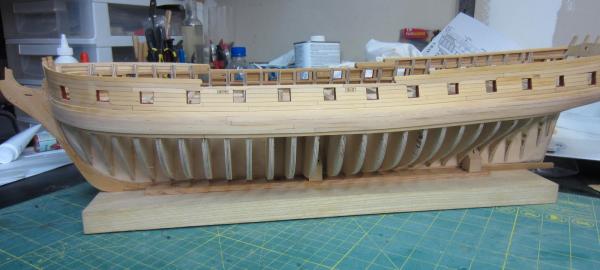
Hi All, Well in case you didn't notice I've been AWOL for a while now. August and the first week of September is really busy at work. 80 hours work weeks with no days off blah, blah blah. Boy that was no fun. I used to be able to do it no problem but now it kicks my butt. So it was work, sleep, dream of working on the Winnie and then back to work. Once that was over it was another week or so to catch up around the house with all the things that needed my attention. So I've now looked at MSW and found 11 unread pages in the Kit Build Logs and 4 pages in the Scratch Build Logs. Not to mention, oops I just did, all the other topics! So to all my friends out there I'm sorry I missed posting to your logs for the past 6 weeks and it may take another 6 weeks just to catch up. Now that I've got my whining out of the way here is where I'm at. I have not completed marking all of the bulkheads with the plank locations. That was over 1400 little pencil marks. I'm seeing little dashes in my sleep know. I've now started on the planking and here you see my first attempt at spiling a plank. You can see the curve compared to a piece of strip wood. Well I've now started the planking and will let you know how it goes.
-
Thanks all for stopping by. Yes Augie it's great to have access to Chuck and all his talents. Thanks Nils. Don't look too closely Sjors! Hey Ben good catch. Only thing worse then my math is my typing so I was in trouble no matter what!
-
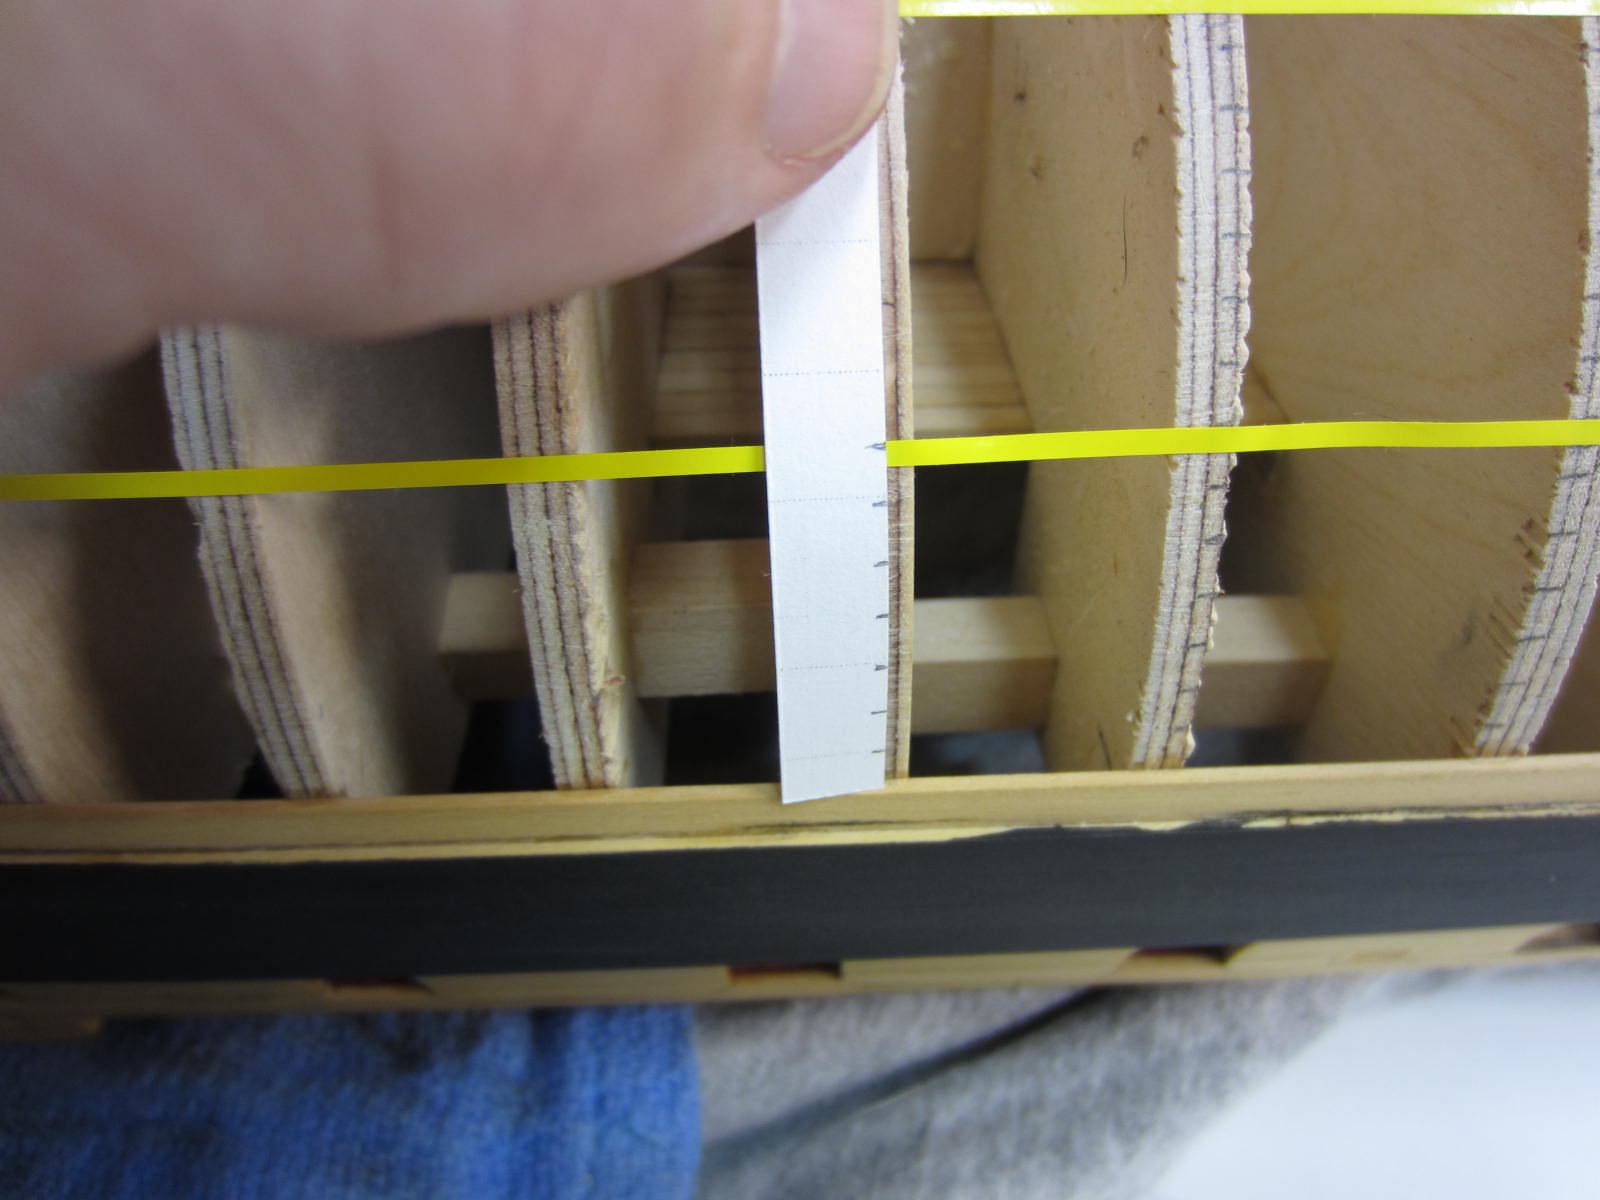
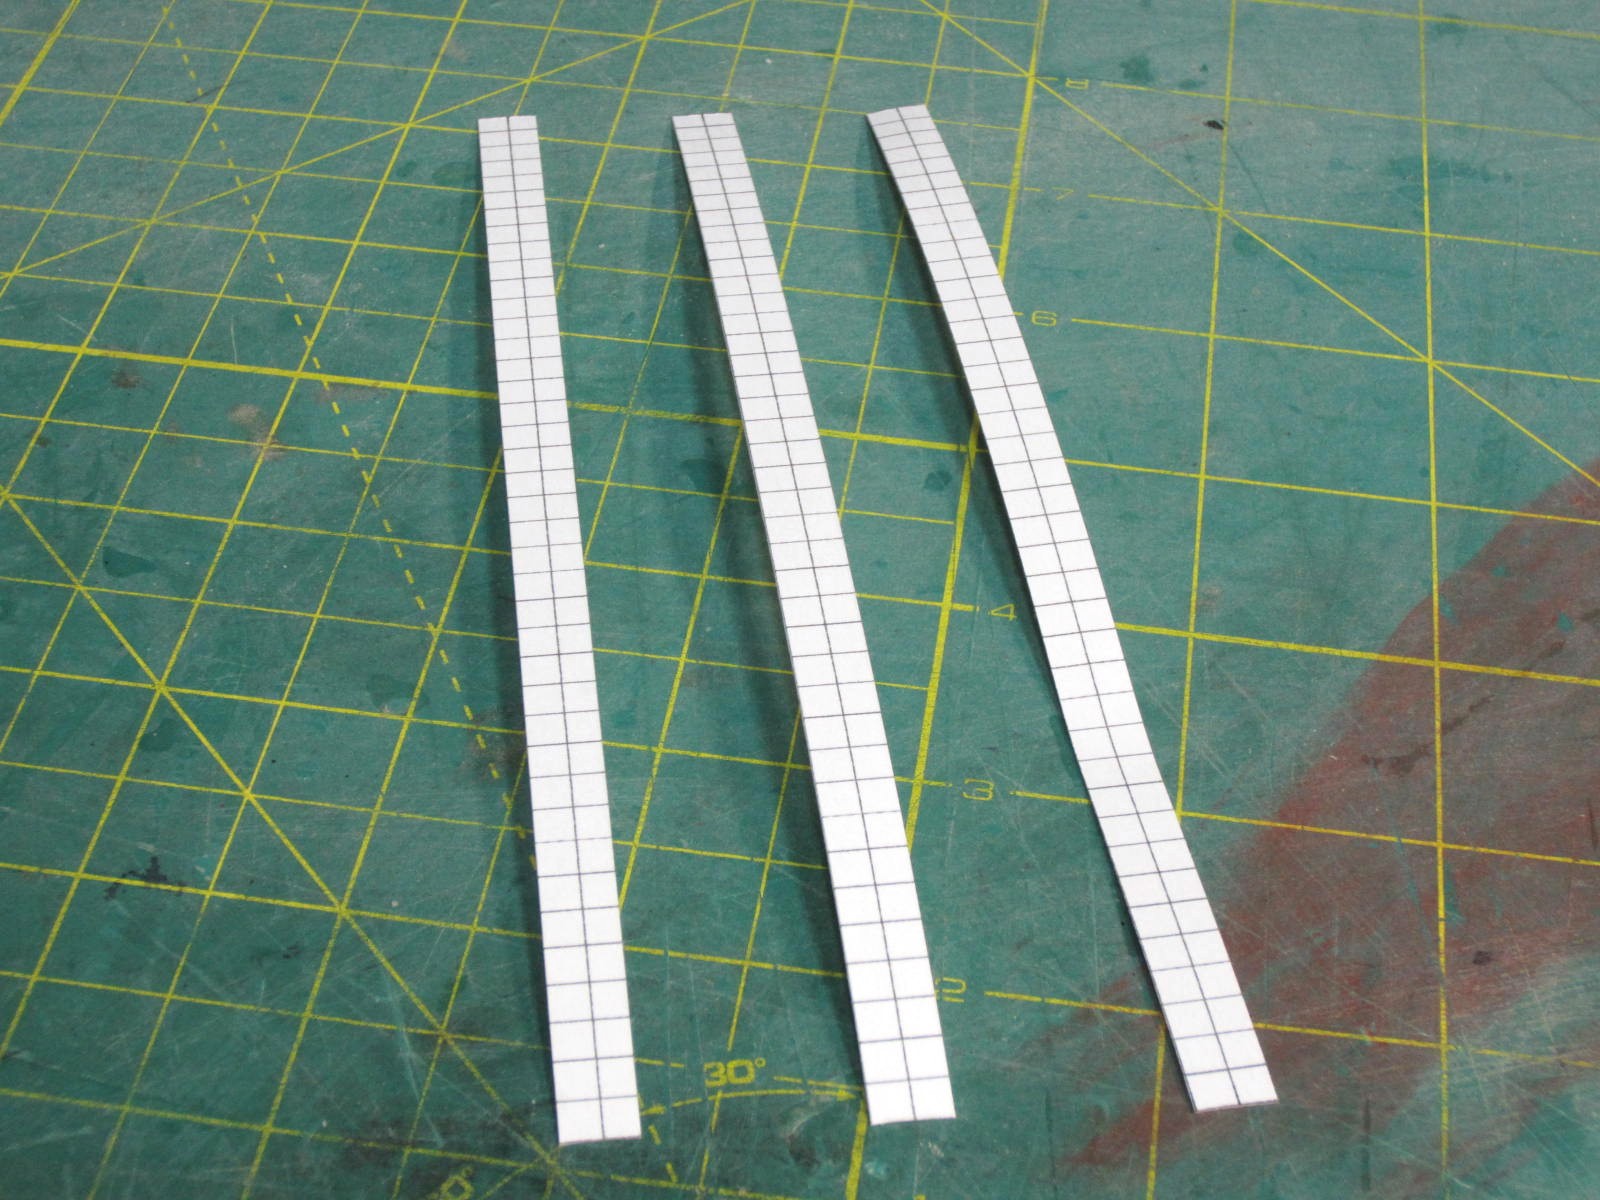
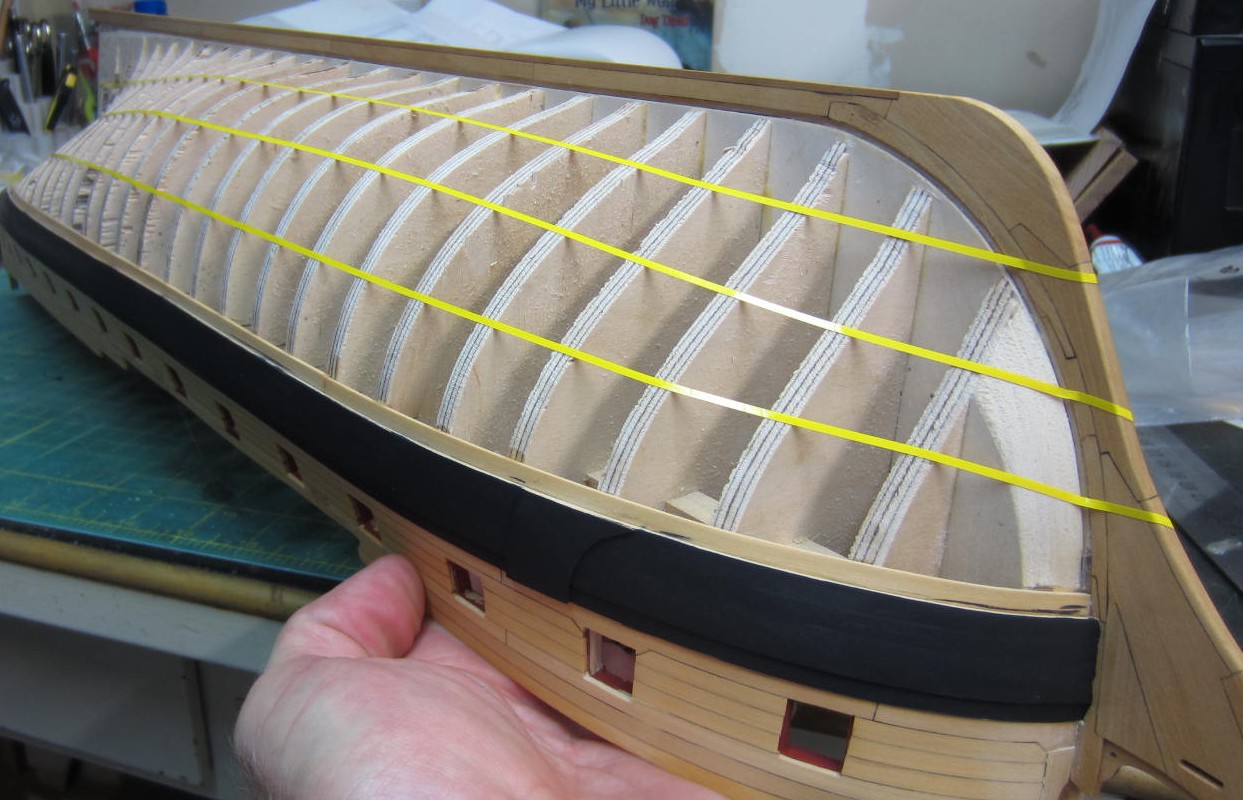
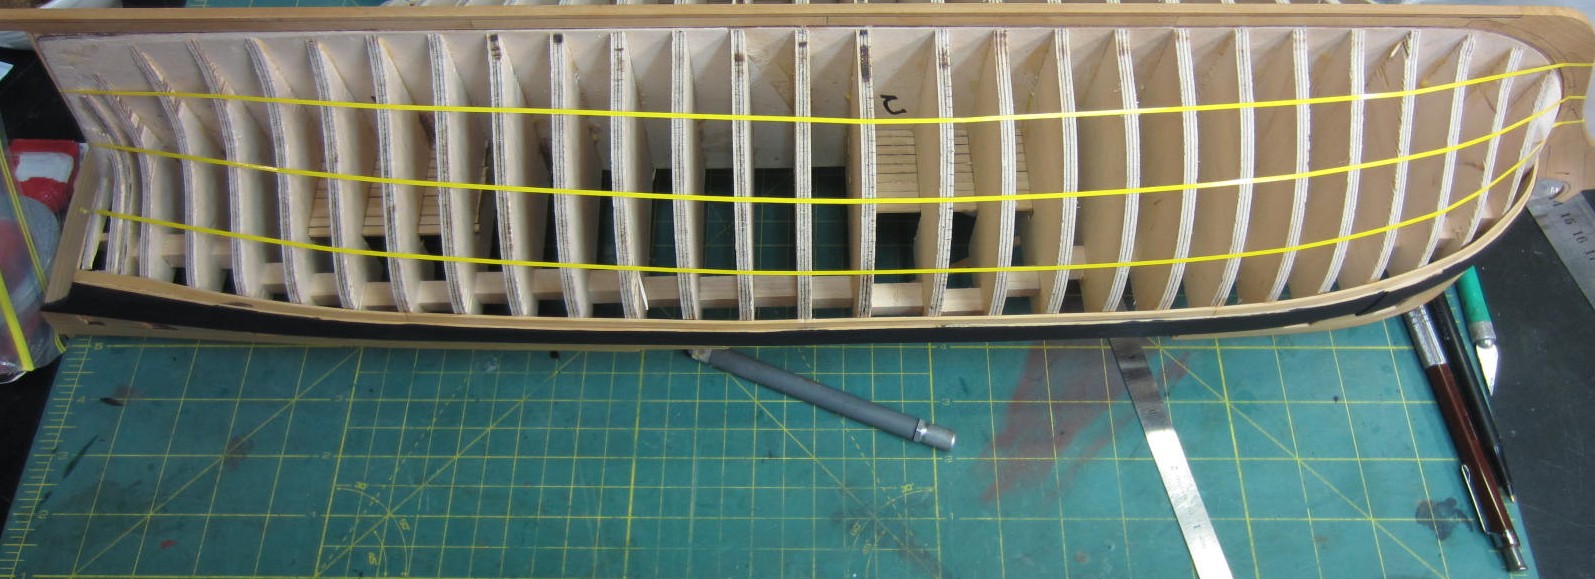
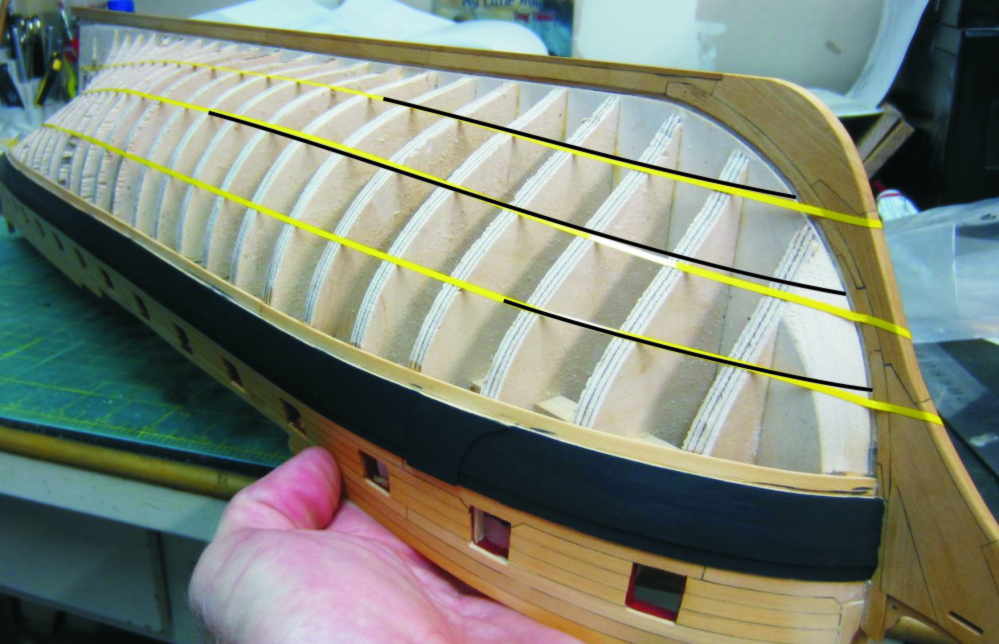
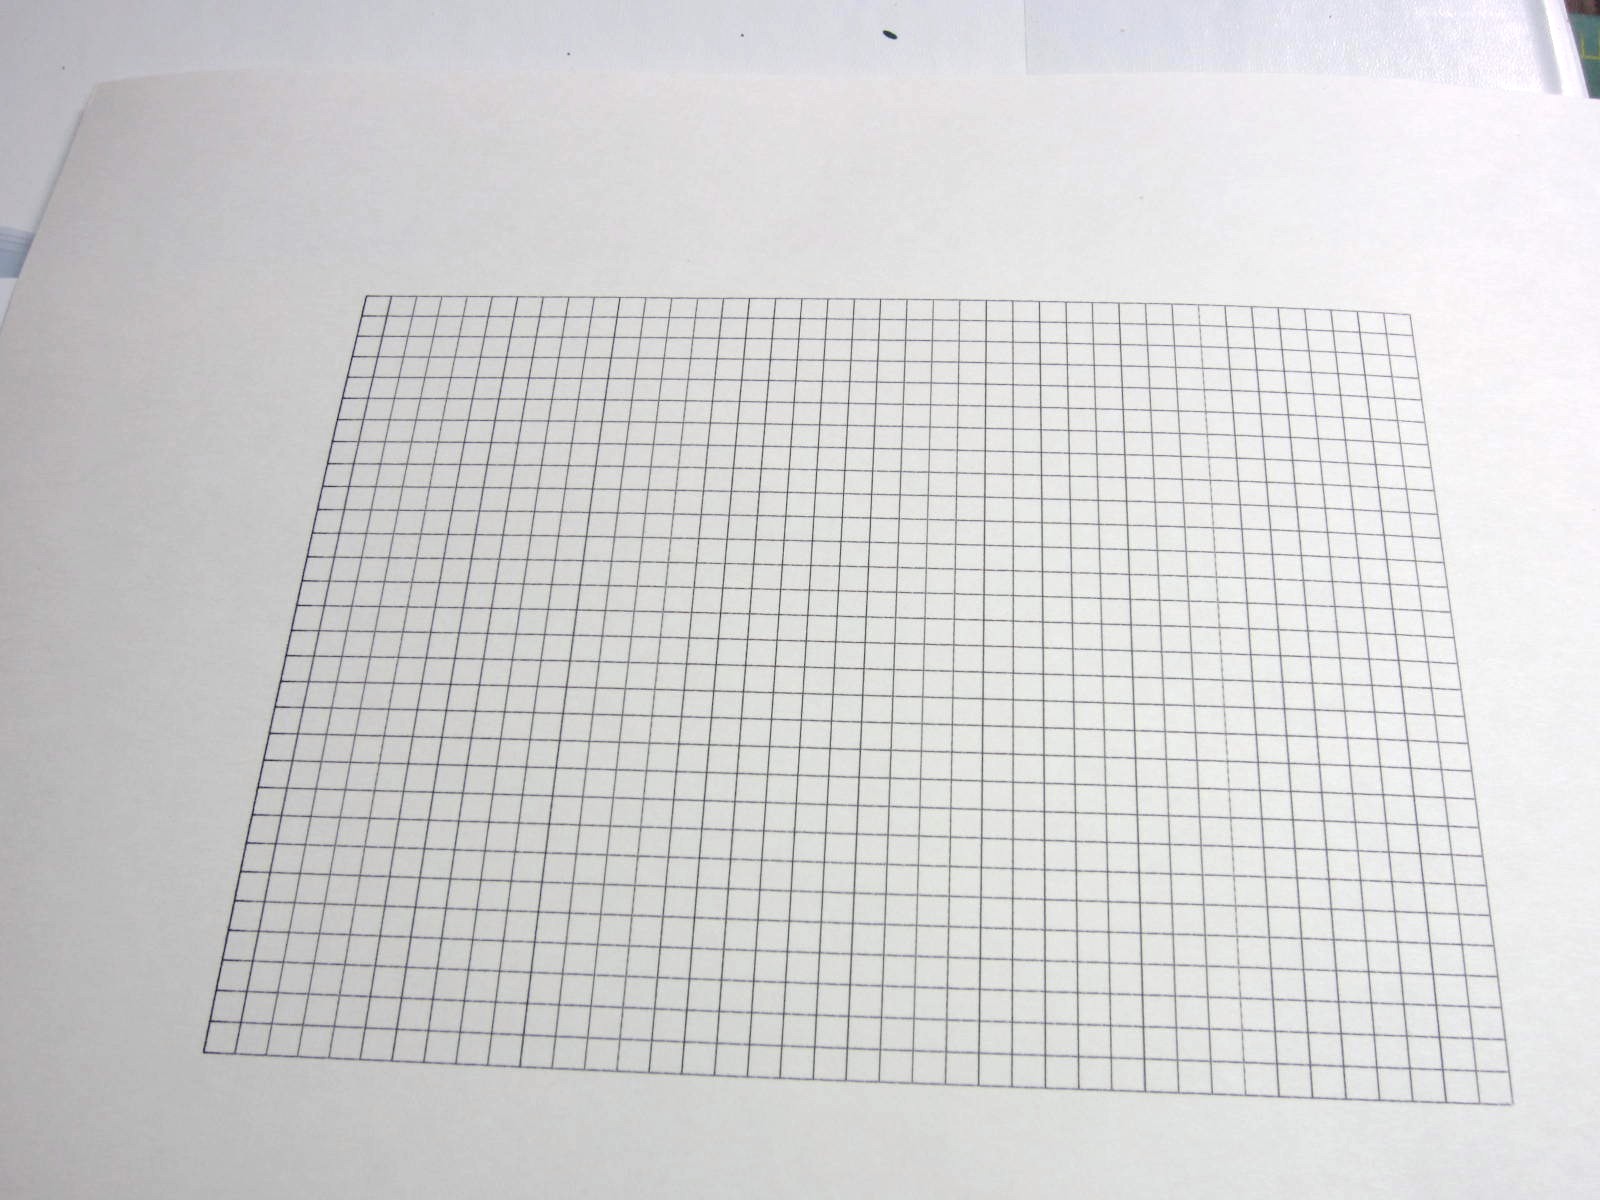
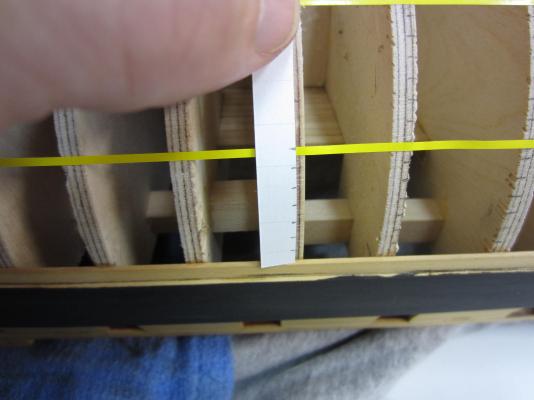
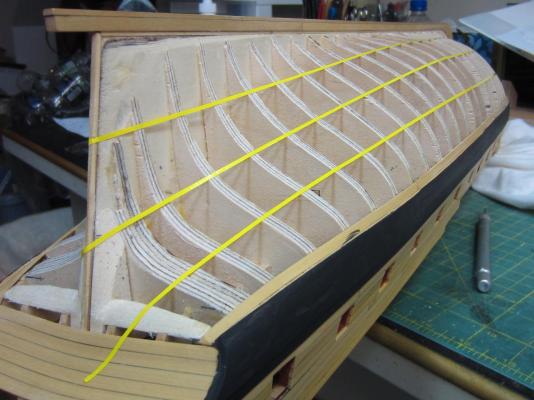
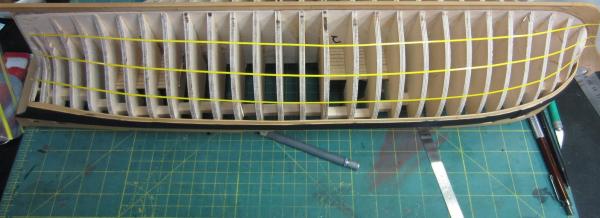
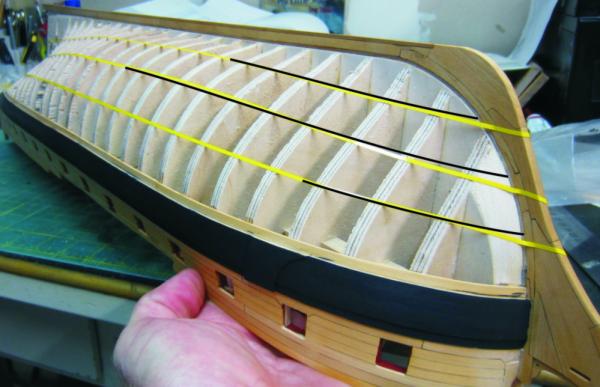
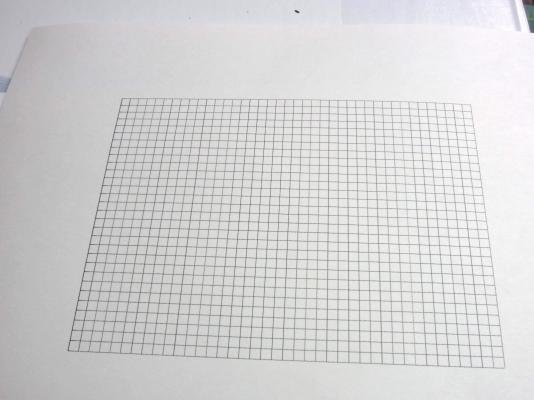
Thanks Ben and Sjors. Only two coats of paint and when viewed up close you can see the differences in the coverage. Several more will be needed. Well this is the start of Chapter 5, planking the hull below the wales. Chuck describes how to plank the hull with no drop planks at the bow and no stealers at the stern. This is something I have never been able to accomplish. The description is very detailed and I'm hoping to duplicate it. First a paper tick strip was to be made and divide it into 5/32” increments. To keep as many errors out of this process as possible I made my tick strip from 5/32" graph paper printed on card stock instead of using a ruler and pencil and transferring the marks to card stock. Next I positioned the strip along bulkheads “1” and “A” and marked the increments. There are a total of 24 planks so there will be 4 "belts" of 7 planks each. Chuck wrote; I had some yellow pinstripe tape so I used that to mark off the hull belts. After applying the tape and tweaking to get a smooth even run I sent these pictures to Chuck. His sharp eye caught some runs that weren't the best and sent this back which I used to adjust the belts run. Now I'm off to do the starboard side.

-
I'm also glad to see you're back at it. I see the time off hasn't hurt your work either. Very well done!
-
Thanks for all your help Chuck! Hi Bob, Thank you, you're too kind. Thank you Greg. Hi Augie, Still waiting for your address though they may be a bit stall by the time the post office gets them there. Thanks Dirk. Hi Floyd. So far just 2 coats though there will be many more before she's done. I use acrylic paint and thin it about 50/50 with water. I'll eventually switch to artists paints in the tube like Chuck uses but I still have this black paint left and I like it's matt finish. Also thank you all for all the likes. It's very much appreciated.
-
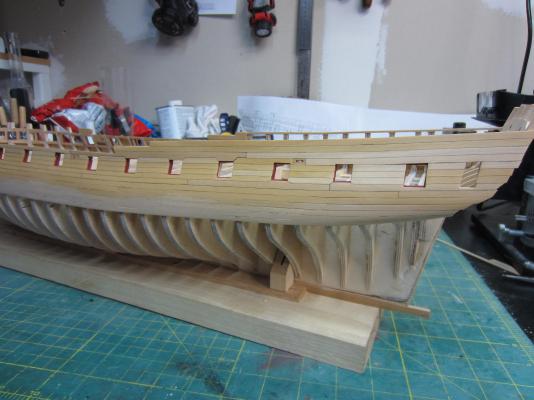
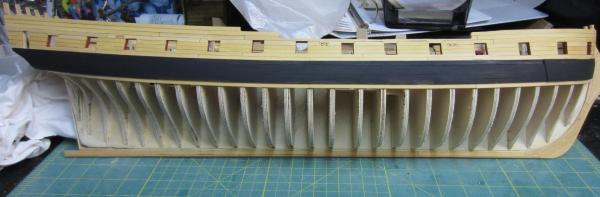
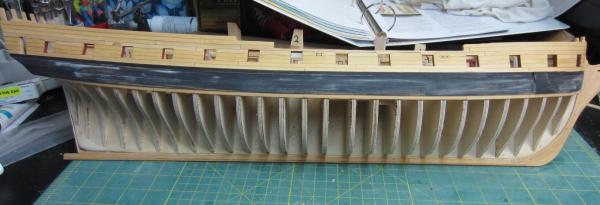
OK I've been continuing my work on the wales and black strake. The first picture you will see one coat of black paint applied. I then went over the wales sanding some and taking care of a couple of joints that weren't as tight as I thought they were. Just put a dab of glue on the crack and sanded it. And here you see it with a second "wafer thin" coat of paint. So far that is it! I'll be spending the next few days trying to lay out the run of the planks and not bugging Chuck to much while doing it.
-
Hi Chris, I'd really be interested in something like this too. It looks like a really nice mind clearer and as you said can produce a great looking model. If you do decide to do it I'll be glad to follow along!
-
Hi Chris, I'm asked why I have 2 or 3 builds going on at once. It helps me from getting "tired" of a build especially a long term (3+ years) scratch build like the Confederacy. Mix it up, get the plans, have fun with the kids, do what makes you happy! She'll be patient and wait until you are ready to finish her. Nothing worse than forcing yourself to finish a model. Especially one that you have done such great work on.
- 290 replies
-
- 1
-

-
- confederacy
- frigate
- (and 1 more)
-
Ah Bob it's so nice to stop by and view your work. Love It!
-
No way I can do 20. I'm not as patient as Chuck and others. 10 would be my maximum. I guess we'll have to figure the over under on this one!
-
Hey Augie and Mark:
-
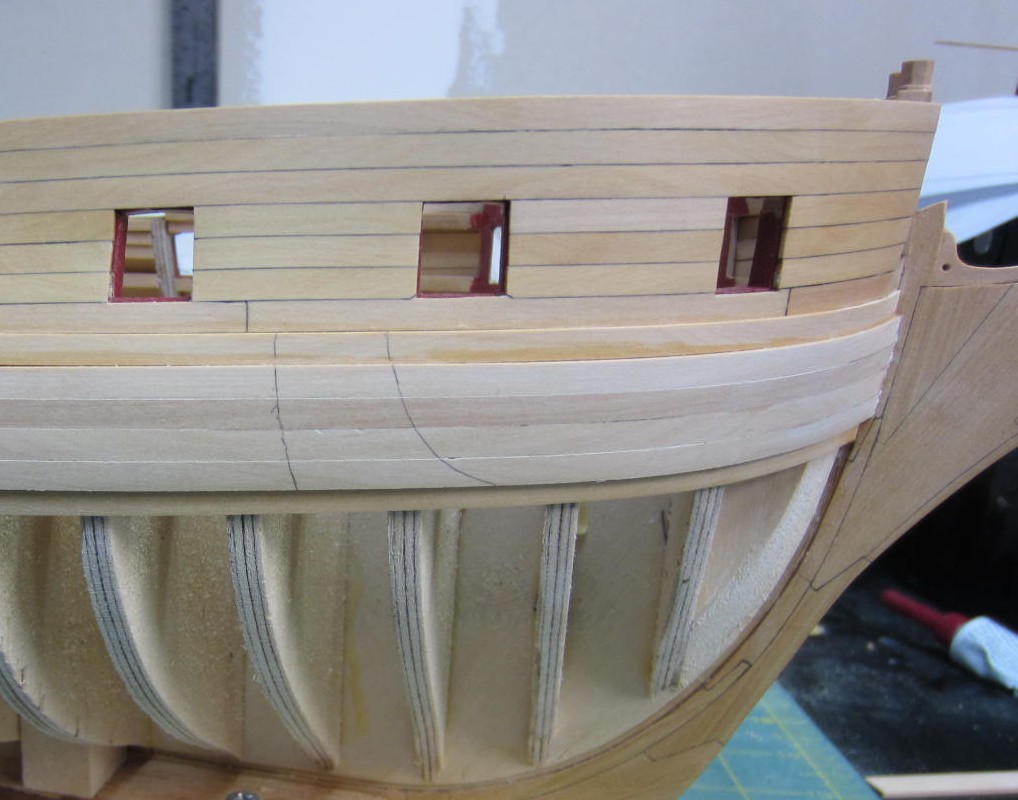
Thank you very much Joe, Bob, Ben and Jim and to everyone who posted a like too! Ben, I didn't mix up the wood types but I could have as it's going to be painted. All throughout the wales I used some old pieces I had left over and cut them up. The colors varied greatly from gray/brown to light brown and grainy looking. I figured it was a good place to use up some "scrap" boxwood up. Here is the anchor lining done. On this side you will noticed I took a lazy way out. The top piece over the black strake was about a 1/64" too narrow and seeing again that it's going to be painted I just left the gap and filled it. Now the directions call for painting the wales now prior to planking the hull. My thought is I'm a rough hull planker as I put in my lap, tip it upside down ect. I usually scratch the paint all up and have to repaint it. So I'm just going to apply one thin coat just to see if any imperfections show up and then fix them. Then it's on to laying out the planking belts for the hull, mill the wood and then plank it. That will be good for 2-3 months of cussing.

-
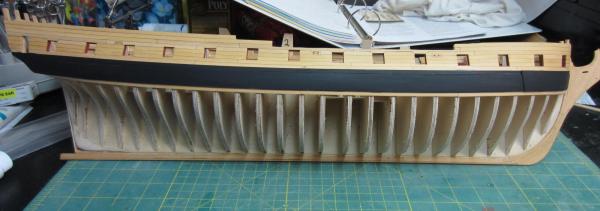
Thank you Bob and Mark. Much appreciated. Well I've commenced with adding the wales. The second layer is 1/16" x 5/32" just like the first layer of planking. The black strake is 1/32" x 5/32". At the bow the black strake is sanded down to 1/64" thick while the wales well be left slightly thicker than that. The anchor lining was traced onto the wales and black strake. The lining over the wales is 1/32" thick while the portion over the black strake is 1/16". Here all but the piece over the black strake have been added.


-
Hi Pete, Sorry I some how missed the finish of the Eagle. As always you have produced another wonderful model. I'm sure your friends are thrilled to have it.
-
USF Confederacy by Rustyj - FINISHED
Rustyj replied to Rustyj's topic in - Build logs for subjects built 1751 - 1800
Hi Harley, chizelguy and Dave, Thanks for stopping by and dusting off this old log. It brought some great memories. Anyone who is going to build her won't be disappointed. -
Hi Mark. That is some really nice work on that framing as well as the repair work. It's always fun making more frames once you thought you were done huh? I also like being able to use the framing jig upside down and right side up. Did it a couple of times and thought it was great.
-
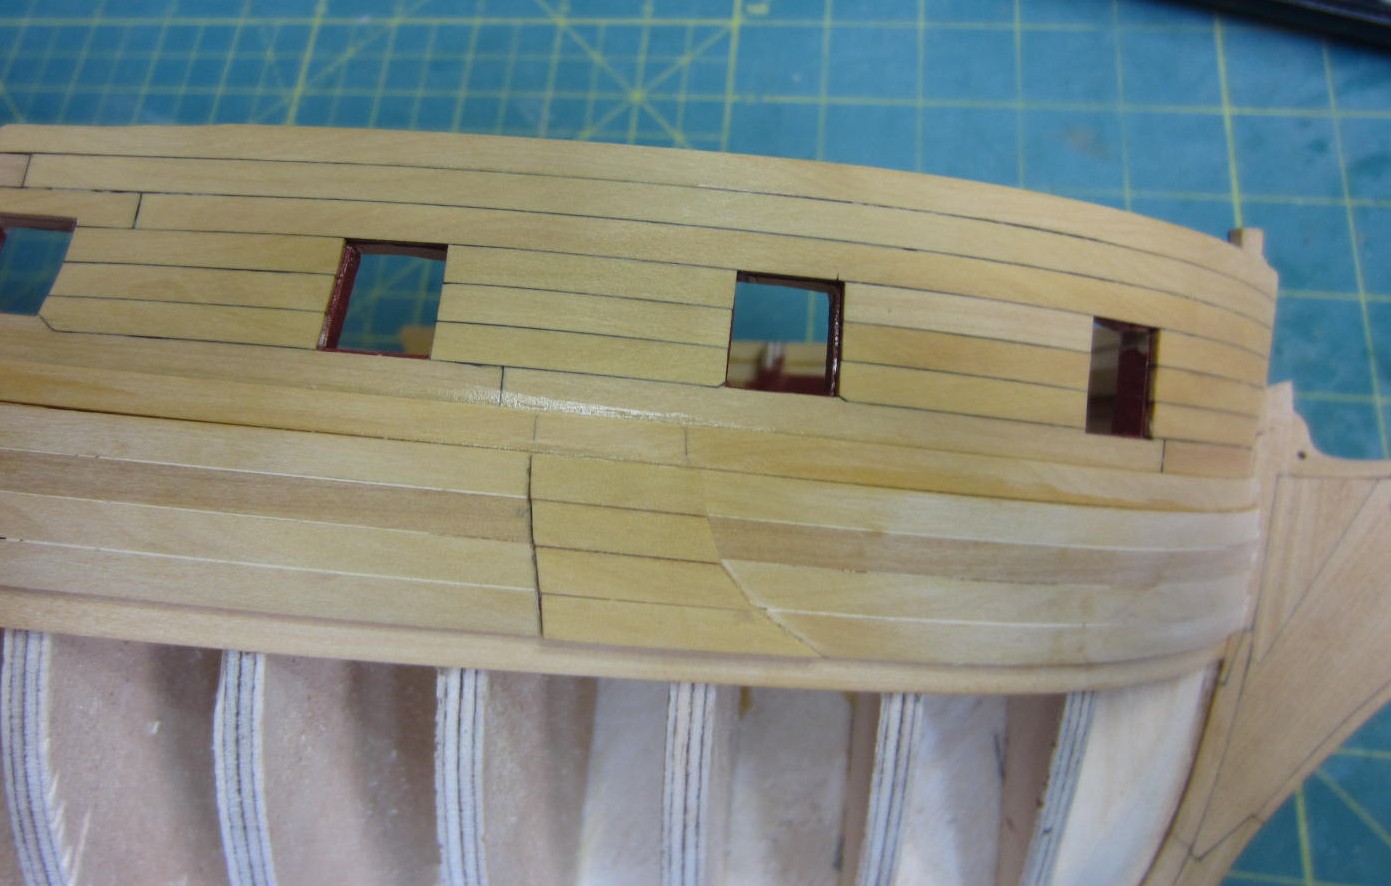
Hi Ben, I think it is a bit of both on my part where I didn't duplicate the run of the gun ports on both sides as close as I thought I did and then the laying of the planking may have had some minor creep to it too. We're talking 1/32" to 3/64". The good part is the run of the planks is uniform at the top of the frames. The planks all landing on the one frame were due to my error in laying the first few rows at the bow I mentioned awhile ago and instead of ripping off all the planks I only went back to the point that the run went astray. This part will be covered by the second layer of planking so I took the easiest route to correct it. Thanks Chuck. Having a lot of fun here when I can get some free time. Hi Augie, Thanks, imperceptible it's not, but acceptable it is . Once she's done 95% will be covered or blocked anyways! Thanks everyone for all the "likes" too it is appreciated.
-
Well the starboard side has the first layer of planking has been completed, rough sanded and a light coat of poly. The planking came out fairly well but I am disappointed both side do not mirror each other exactly. There are some slight variation in how the planking hits the gun ports. A little more sanding needed on both side and then I can start the wales planking.

-
Hi Bob, I just got caught up with your work and as always it is exceptional. I really like the way you planked the deck! It gives you the best of both worlds. I've always hated covering up all the work we do below decks.
-
Hi Augie, That is a very good job on the great cabin floor and doing it with hand tools to boot. I'm glad you did it! The hour counting is interesting too. People ask me how long it took to build and all I can say is years. Now once you are done I'll have a clue. Thanks!
- 2,191 replies
-
- 1
-
-
- confederacy
- Model Shipways
- (and 1 more)
-
As I sing Happy Birthday to youuuuuuuuuu dogs whine, kids cry and glass breaks. Good thing you can't hear it! Have a great Birthday Mark!
-
Hi Ben, I agree with Grant. It seems you are grasping the the difficult Hawse timbers very well. I also like how you are not rushing and not stettling for good enough. Nice job!
-
Thanks Dirk and Rich everyone for all the likes. Chuck S. The wipe on poly acts as a sealer so if you want to do any staining you would need to do that first. You also want to avoid applying poly to the area where the second layer for the wales go. That's another reason it will all get another round of sanding.
-
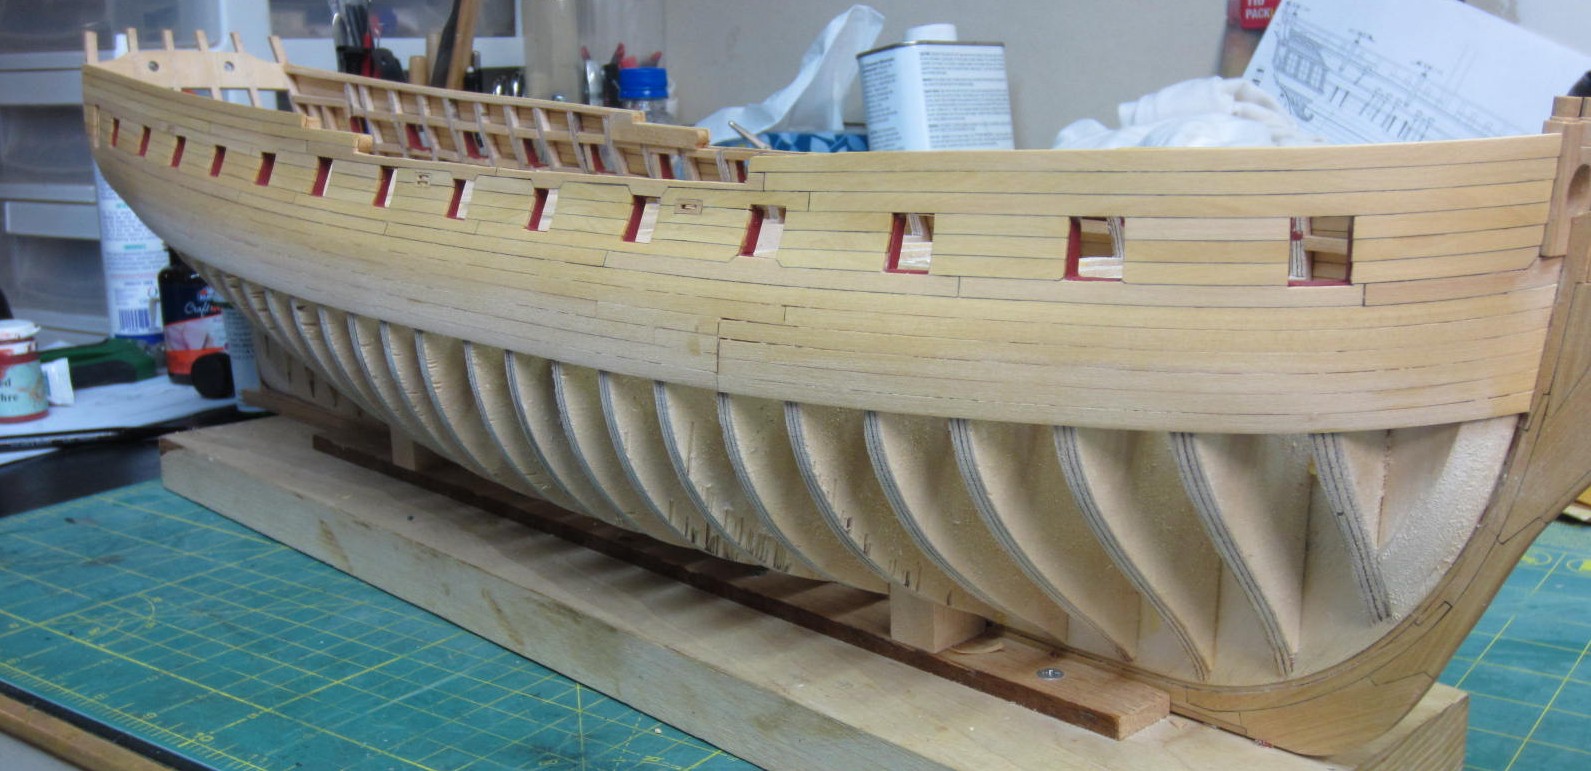
Hi Dave, Thanks and once released I'm sure you won't be disappointed. I had a little more time in the shop thanks to some thunder storms! I've applied a light coat of wipe on poly. This helps me determine high and low spots that need more sanding. I will now clean up the highs and lows and then apply a last coat of poly. After that I will finish the starboard side and then on to the second layer of planking for the wales.