Rustyj
-
Posts
2,535 -
Joined
-
Last visited
Content Type
Profiles
Forums
Gallery
Events
Everything posted by Rustyj
-
 Thanks Augie. She came out as straight as I'll ever get it. At least she's not looking like a crescent moon. Hi Chuck S. Yeah rubber cement it is. I have contact cement in the cupboard and have to make sure I never mix them up! That wouldn't be pretty.
 -
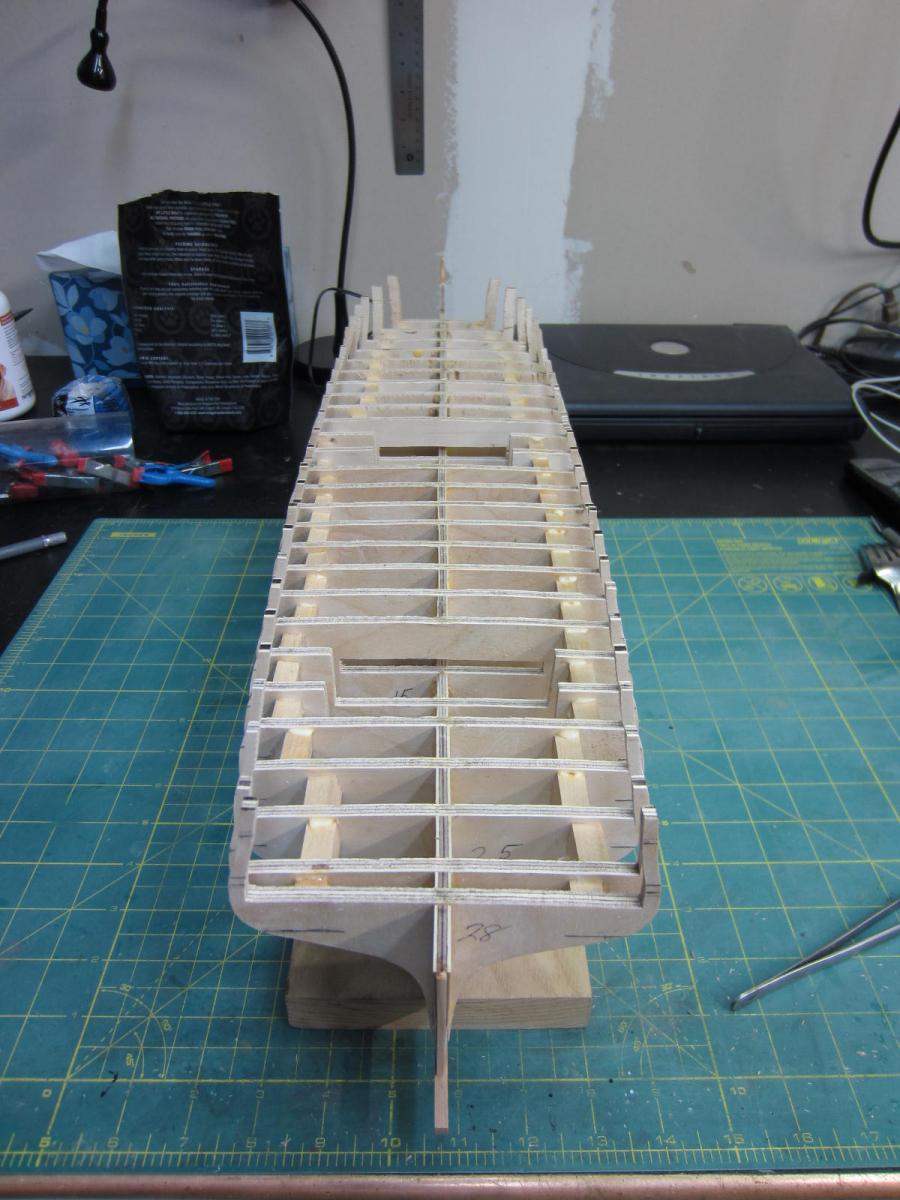
Hi Chuck S. I'm no chemist but I don't believe the stuff I use is water based. It's Elmer's Craft Bond Rubber Cement . It also has a warning that it is flammable and has a smell like contact cement. Like any liquid that you put on paper it could cause distortion. When I place the paper on the wood I try to lay it as gently as possible and not to pull or stretch it. If I have doubts I'll closely compare it to the plans. So far no issues for me doing it this way. Well all of the bulkheads and braces have been glued in place, and it is very solid. I won't have to worry while fairing the main part of the hull. As I move up to the tops of the bulkheads especially the longer ones I may use some bracing on them. I'll have to see what's what when I get there.

-
Hi Ben, I don't know how the bulkheads relate to the plans stations but there are 27 bulkheads on a 24" former. On the Confederacy there were 15 bulkheads on a former that was approximately 29" long. A lot more bulkheads in a shorter span. As far as building her, when you are done with your 5 year project, I know you would love her! Prior to seeing the plans and starting work on her I had thought about adding balsa between the bulkheads at the bow and stern as the twist and curve can be a bugger to maintain for us mere mortals. Don't think I'll need to do that now. Time will tell.
-
Very well done. That's a boring job but rewarding when finished! Also I my have a beverage and sing out as I look out the window and see the horizontal snow but you may not want to hear it!
- 2,191 replies
-
- 1
-

-
- confederacy
- Model Shipways
- (and 1 more)
-
Hi Ben, I am thinking along those lines. I didn't have to do it with the Confederacy because the extensions were thicker and the plywood was strong. With the Winnie the extensions are thinner so there is a possibility of breakage. So if I had to guess right now I'd say I'd do them. Thanks for the reminder.
-
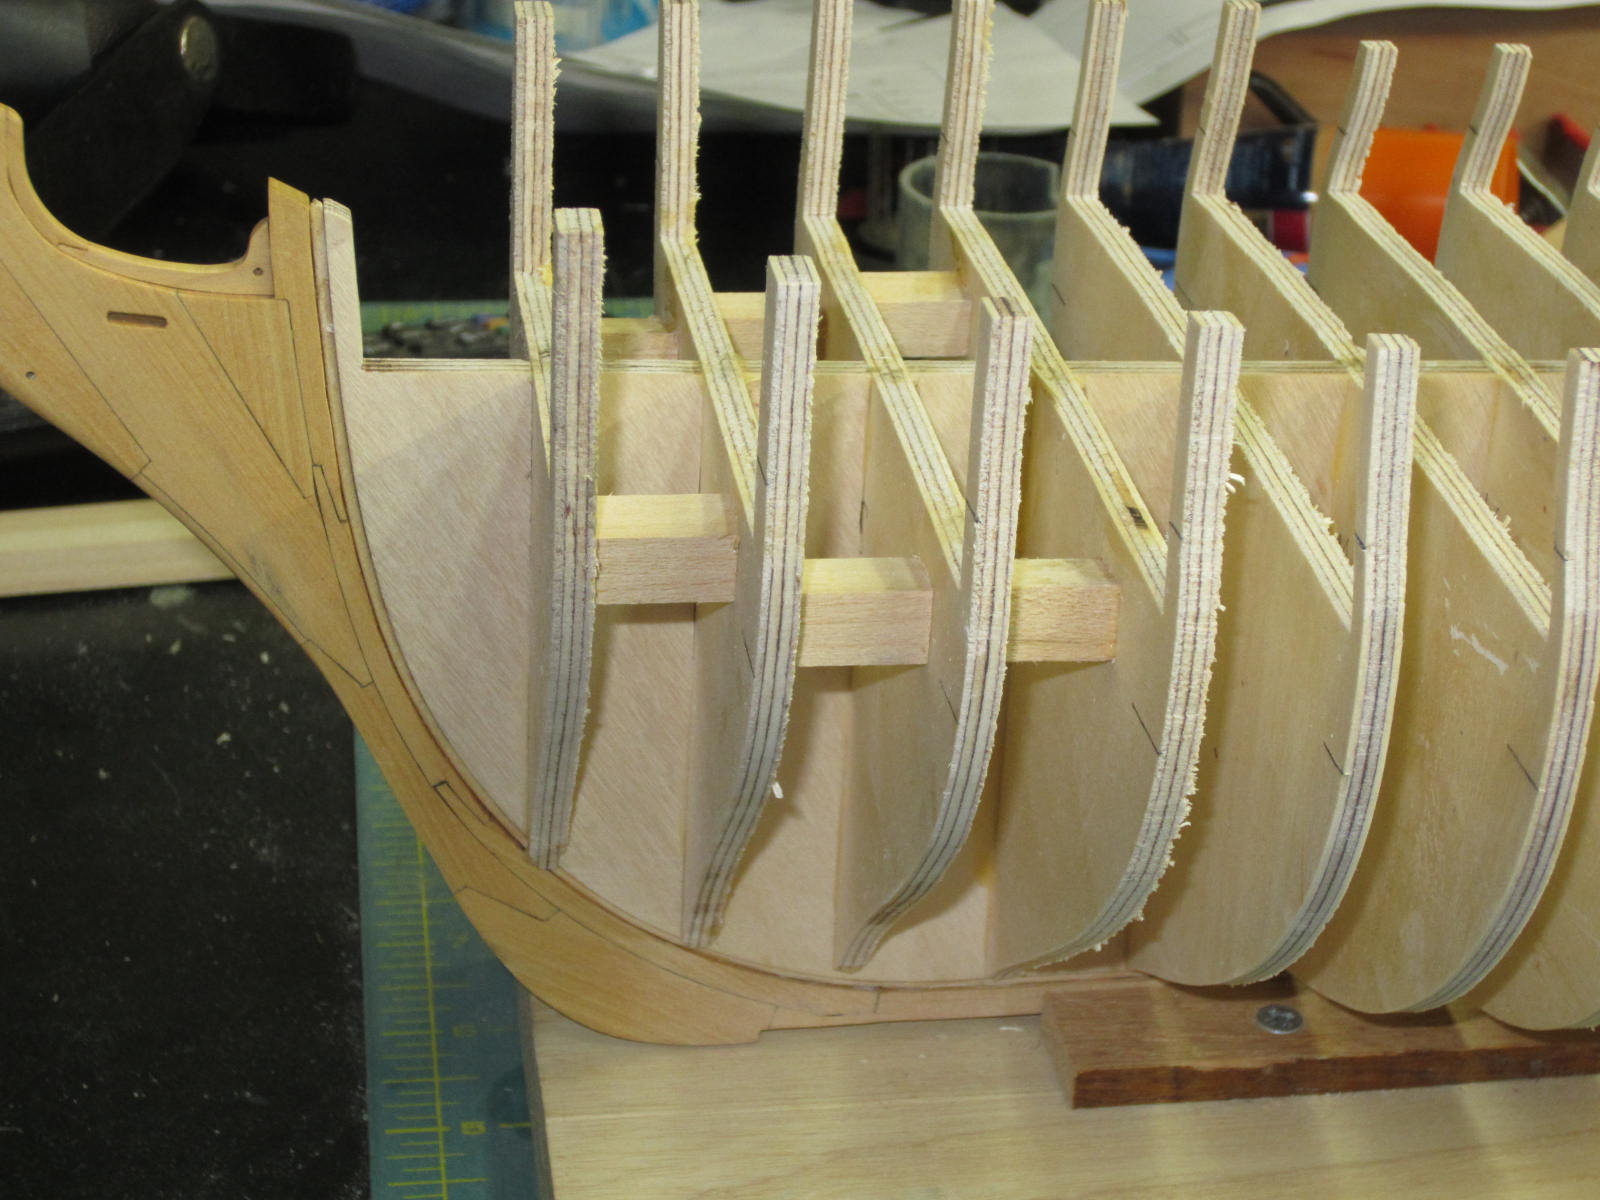
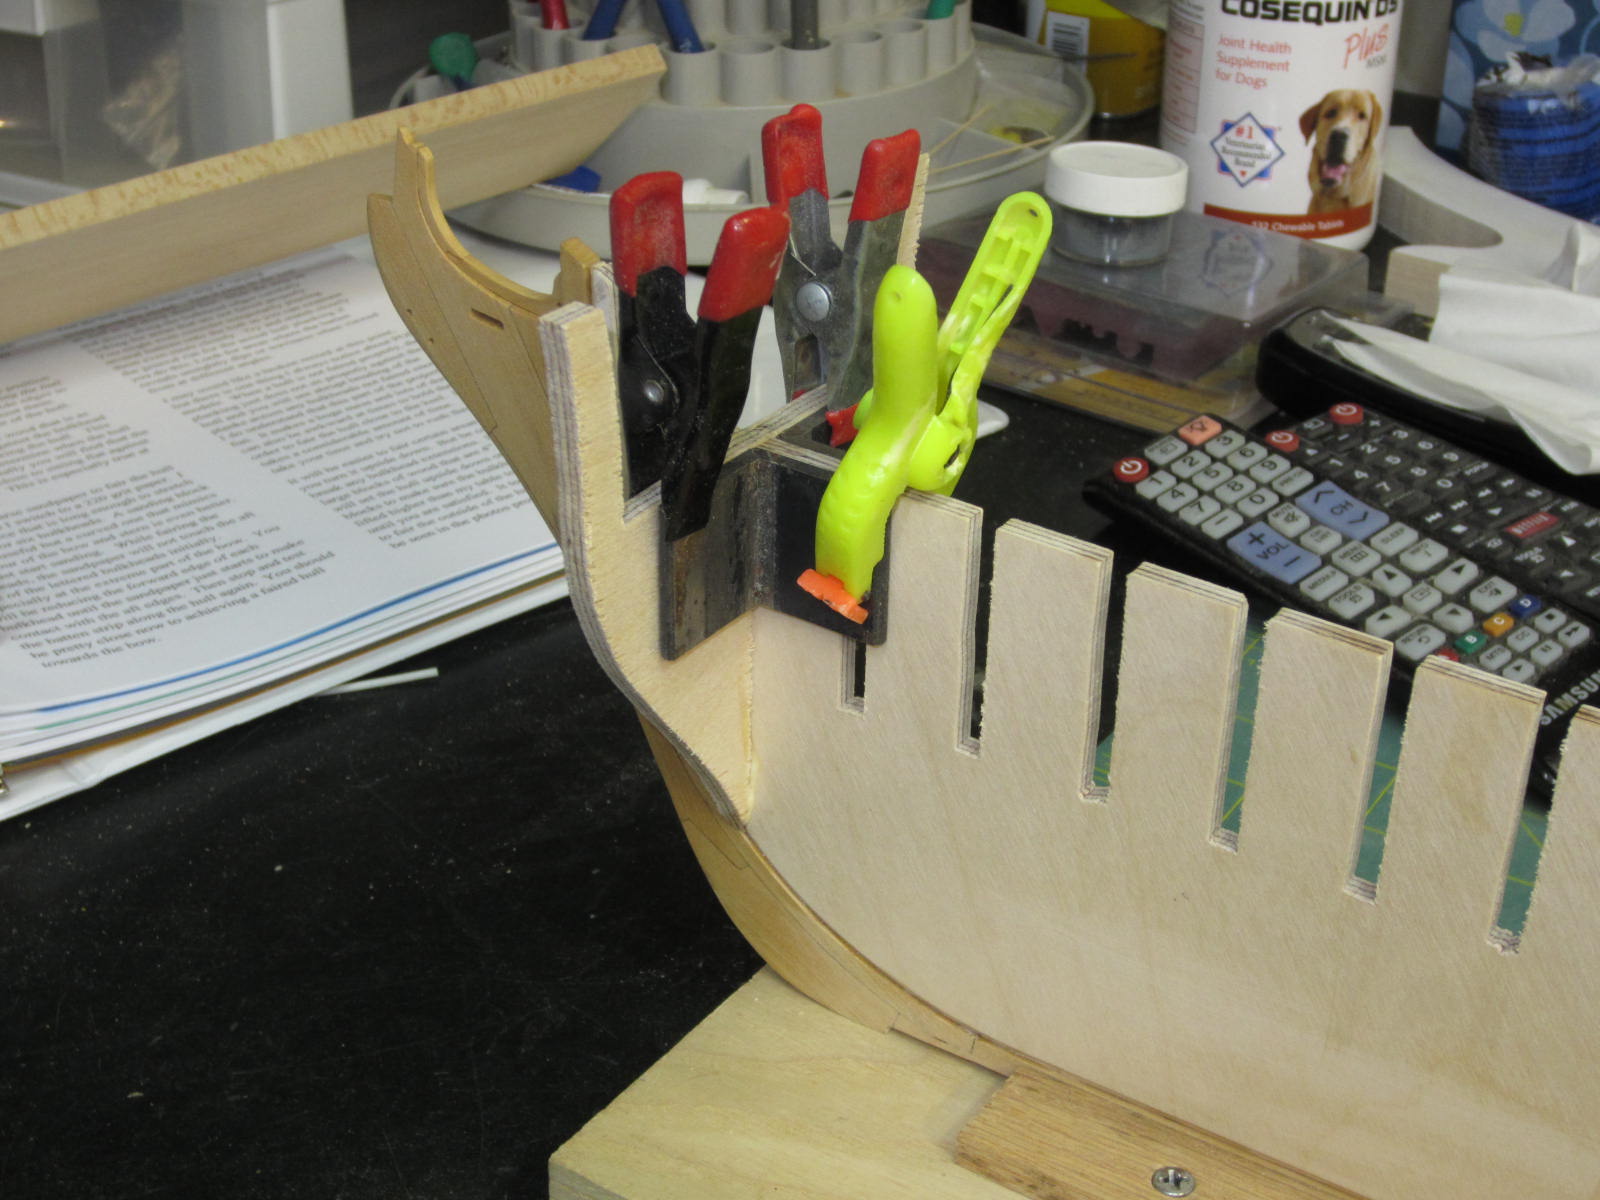
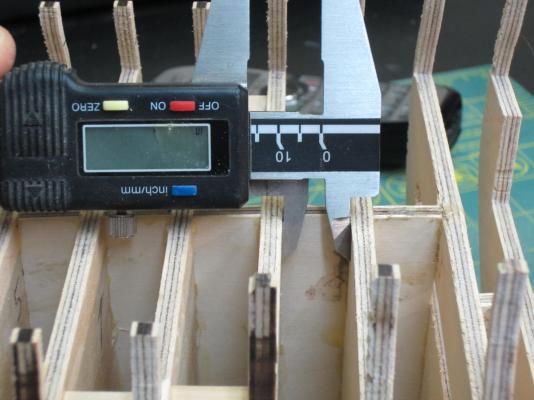
Hi druxey, I'm hoping that by measuring at the former where there is no movement and by paying close attention to the fit I should be able to keep a creeping error out of it. Fingers are crossed here. Hi Daniel, Oops I got talking about the bulkheads and filler blocks I forgot all about adding the stem and keel. Chuck uses a cleaver way to create the rabbet. He has you glue a 3/32" x 1/16" stripe on the edge of the bulkhead former. It extends down the stem and continues along the bottom edge of the bulkhead former. Once the keel and stem are added, this strip will form the rabbet. At the stern I had to trim the former to form the bearding line. Once this was completed the stem is test fitted against the rabbet strip and adjusted until a good snug fit is obtained. The stem is them glued to the rabbet strip. After that the keel and false keel were glued in place too. I did not need to pin or bolt any of this assembly in place as it was a snug fit and glued good and tight.
-
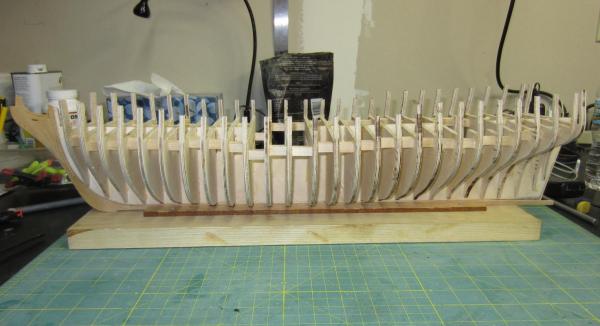
I've been working my way towards the center and this is how far I've gotten. While gluing them up I had a thought about putting some bracing between the bulkheads to help stiffen them some more for when I have to fair them. I also thought it may help eliminate any change of the hull twisting. I took and measured the distance between the bulkheads at the former and cut a piece of bracing and glued it towards the outer edge making sure not to displace the bulkheads. It seems to be working. I'll let you know when I finish with all of them.


-
Oh yeah Ben. I can mess things up on my own. I don't need a twist to make it worse!
-
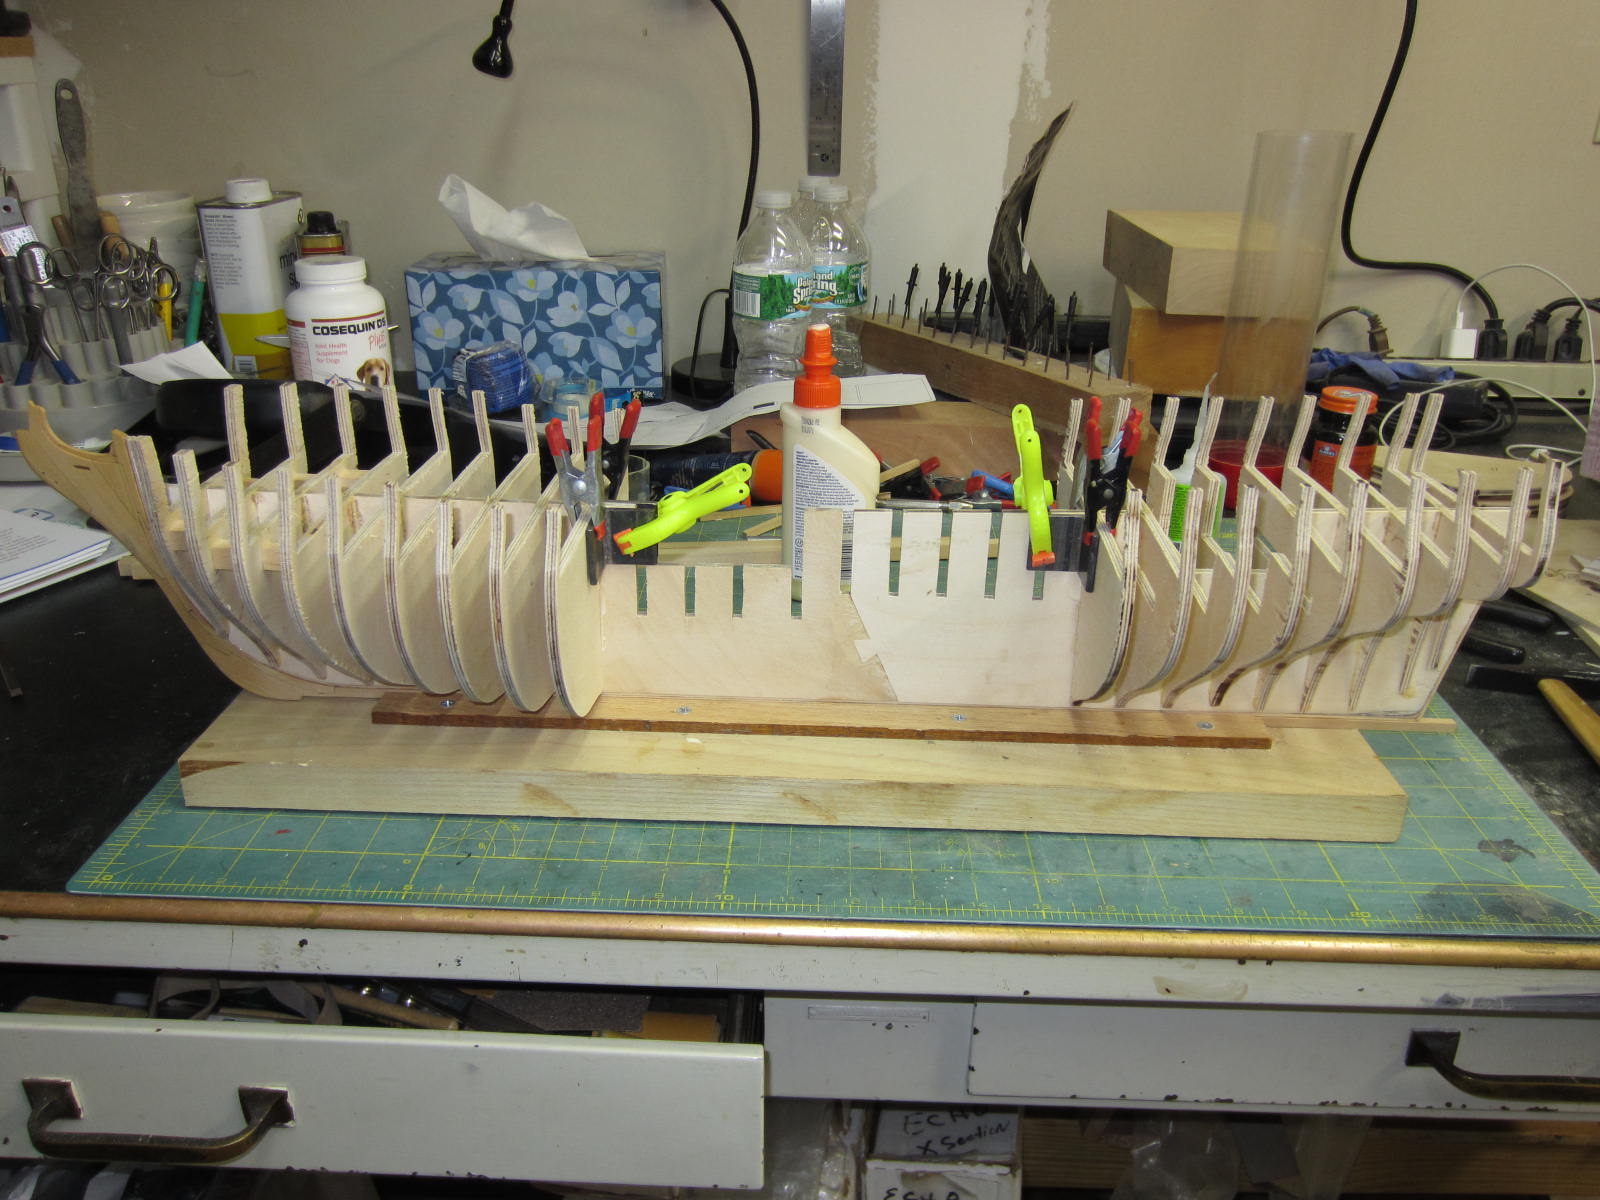
Thank you for the kind words Antony. Well I've pre fit all the bulkheads. Just some minor sanding of the slots was needed so it didn't take as long as anticipated. Here is the first bulkhead in place. I clamp the angle piece in place to hold the bulkhead square until the glue sets up. I do one bulkhead fore and one bulkhead aft at a time and work my way to the center.

-
First and foremost my prayers and best wishes to you and your mom. Also I hope when you get back to the Syren you get to enjoy it because it's a really fun build!
-
Hi Augie, Yeah there a lot of bulkheads and hopefully the former remains flat! Thanks Michael. Hi Remco. Yeah at 1/64 she is smaller but I guess my magnifier will get a workout! Plus if I need help on producing small details I know I can count on your help. Thanks Bob, Always a pleasure. Sounds great Jim.
-
Very nice indeed Remco. By the way did you ever think of becoming a micro surgeon?
- 1,215 replies
-
- 1
-
-
- sloop
- kingfisher
- (and 1 more)
-
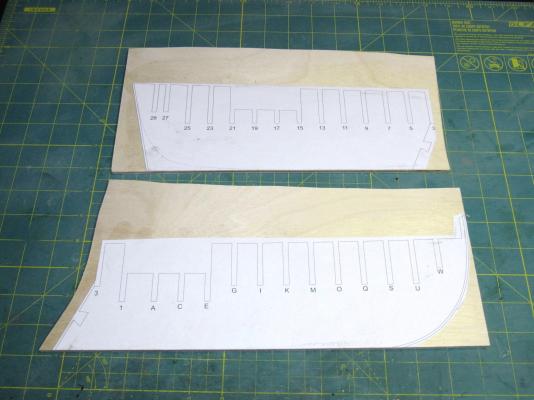
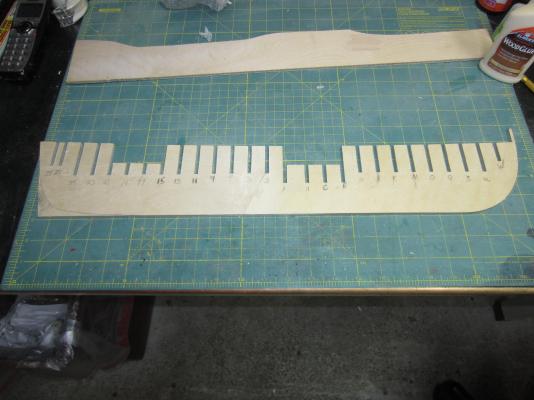
Thanks Greg, I think I started doing that on the Confederacy. Glad to have you here Jim. Are you going to make it up to CT for the show? Hi Dirk, I hope you do build her. I would love to see it. Also thanks everyone for stopping by and all the likes. I had a great weekend. The real world left me to my devices and I had a lot of shop time. Bulkheads are all cut out and stacked as previously mentioned and I then attacked the bulkhead former . It is laid out in two pieces and I thought of just cutting it out as one whole piece. But as Chuck pointed out to me that getting one piece of plywood that long that wouldn't twist would be extremely difficult. So after an unsuccessful search I relented and cut it from two pieces. I knew I shouldn't have wasted my time but then again I'm not known for my better judgment and decision making. Any way the former plans were cut out and glued up, then I cut it out on the scroll saw and fine tuned it with the disk sander and a sanding block. Once satisfied I applied glue to both pieces, put wax paper over and under the joint, placed a scrap board on it and some heavy weights and allowed it to dry over night. Now I will test fit all of the bulkheads and then start gluing them up.


-
Send along Ben. I can screw them up in a heart beat!
-
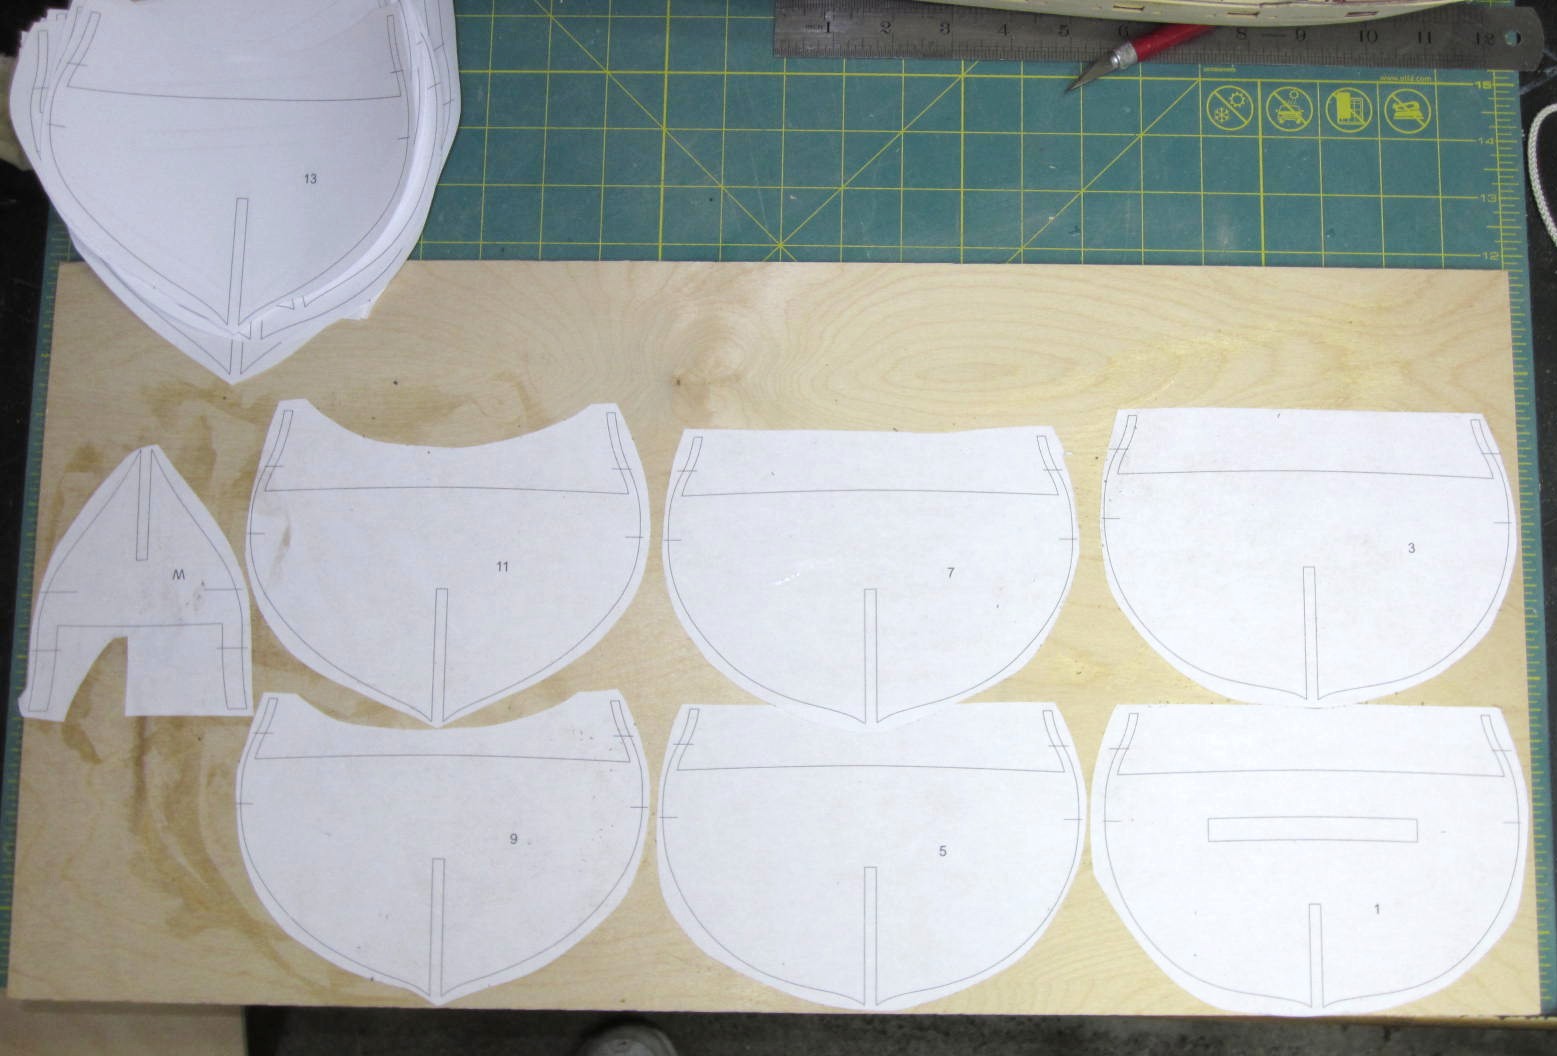
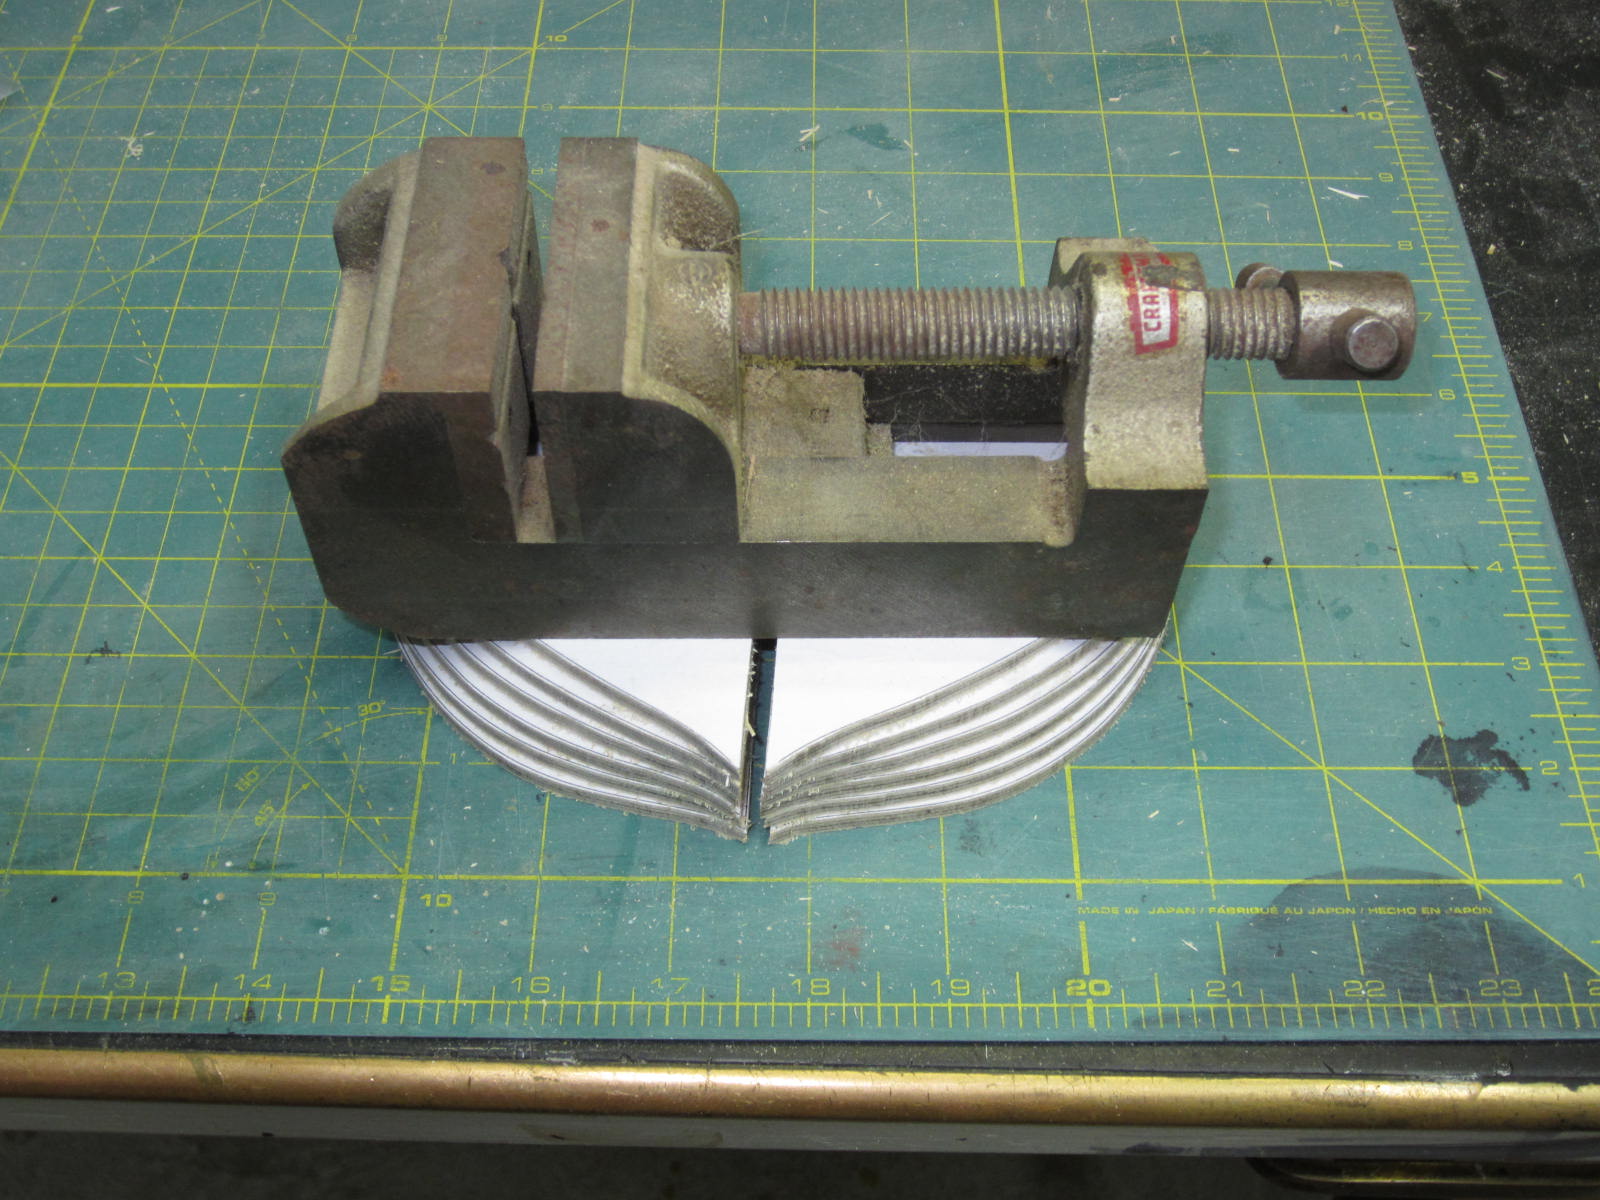
Thanks for stopping by Daniel. Well I'm back and I have got a start on cutting the bulkheads out. Care was used to ensure the plywood I have is free of warping. There are 27 bulkheads to cut out. I used my standard method of cutting the individual bulkheads from the plans and glued them one at a time to the plywood using a temporary paper craft glue. This allows for removal of the plans should I so desire. Once the bulkheads have been cut on the scroll saw I use my x-acto knife to score the various reference lines that will be needed later. This is done just in case the plans are removed from the bulkhead later. I then take the bulkheads and make stacks of about 6 bulkheads of similar size and shape and place a heavy weight on the to help ensure that they do not warp while I finish cutting the remaining bulkheads and the former. Well I'm off to cut more bulkheads out.


-
Very nice Bob. This is one of the parts of the build I enjoy the most. Looking forward to seeing more!
-
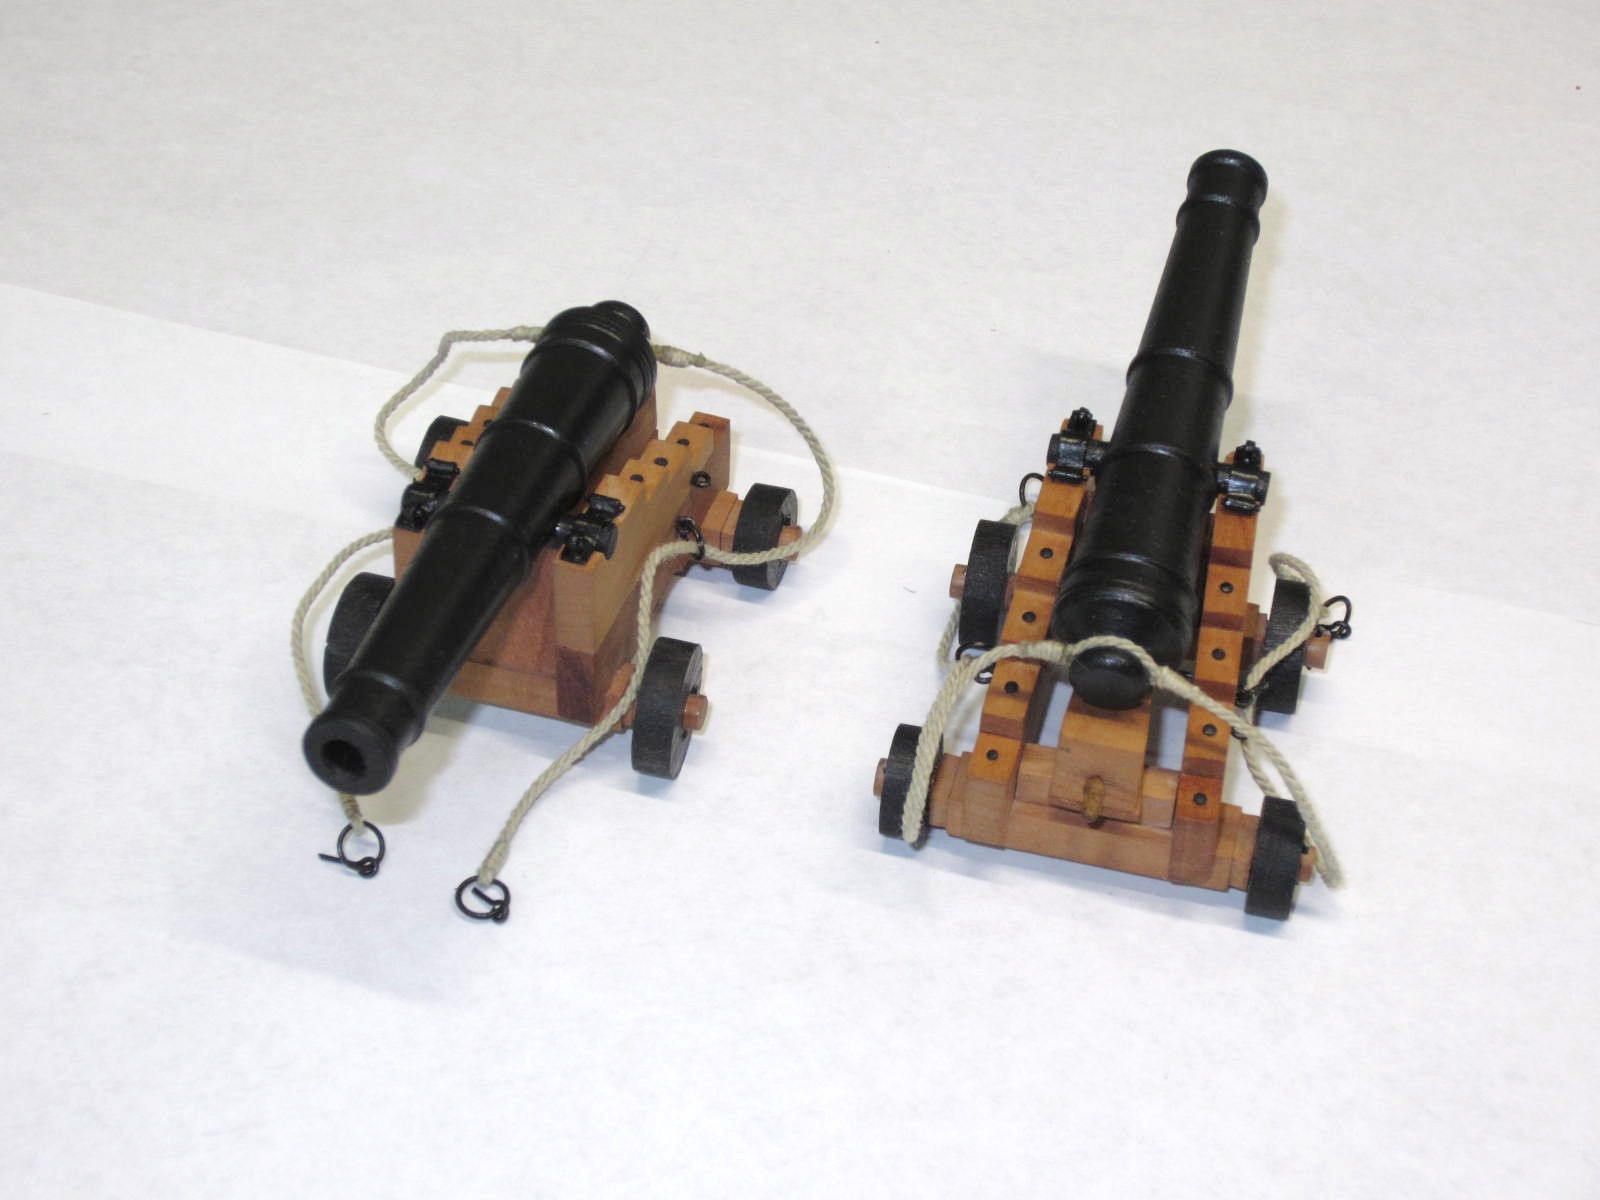
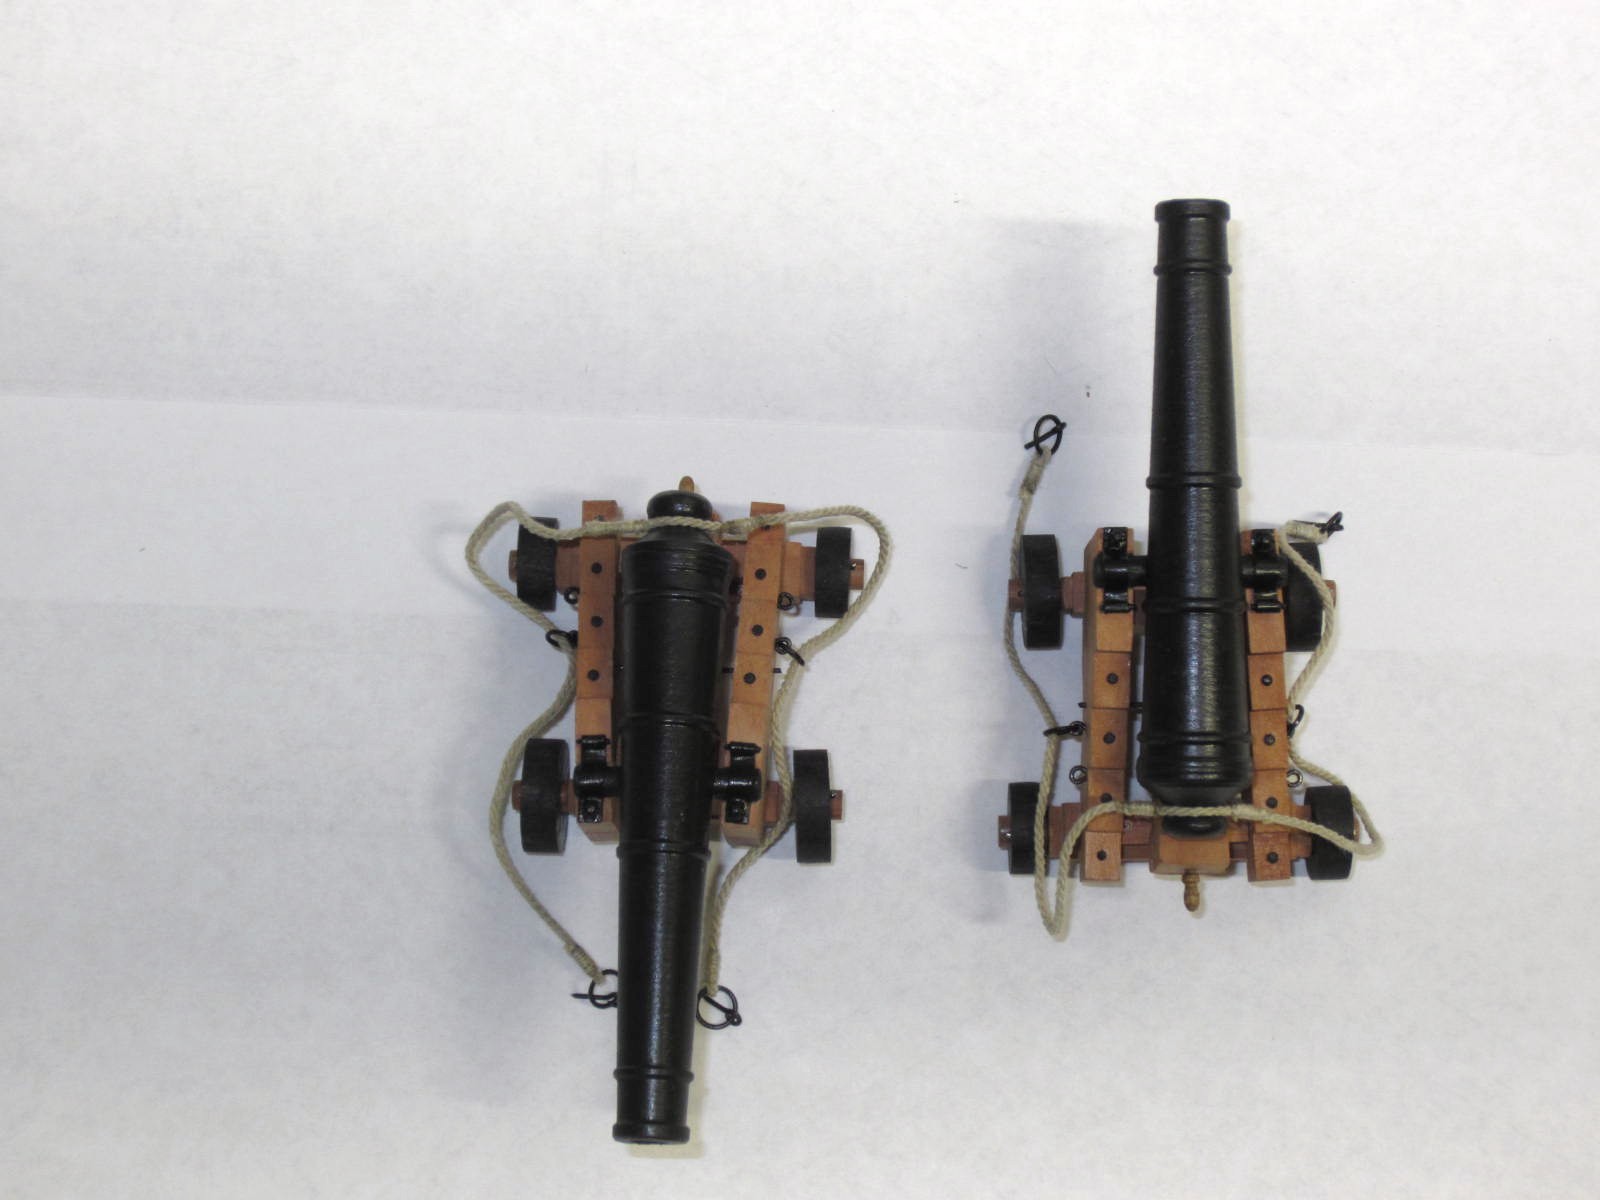
Thanks Augie, Ben and Paddy. Well I'm barreling down the home stretch and speaking of barreling I have mounted the barrels to their carriages and will be putting them in place once I'm back in town. Thanks for stopping by.


- 421 replies
-
- 22
-
-
- granado
- bomb ketch
- (and 2 more)
-
Very Nice Ben. Little bites of the cake are good.!
-
Thank you for all the likes and comments. It is very much appreciated! Joe that means I'd have to do design work and we know that isn't gonna happen! Thank you Remco. Your Kingfisher continues to inspire me. Thanks E&T. Hi Chris. Yeah we may have started around the same time but my little ones are into houses of their own so my distraction level is much lower! Thanks Ben. I can't begin to express how lucky I am to be involved in this. Hi Augie. You should see them spread out on a 40" x 40' sheet. Truly amazing! You know when you finish the Confederacy this would be a good project for you. Come to the dark side...come..... Hi Mark. Thanks for your continued support and encouragement. Thanks Floyd. Hi Greg. Tall order? Try impossible! I'll just do the best I can and have a whole lot of fun. Hi Alan and welcome aboard. Hi Alan from down under. Once this gets underway full steam there will only be two projects ongoing. Well maybe...... Hi Grant all seats are in the front row here! Hi Chuck. I don't know how much fun you'll have....but I'm planning on having a ball. Again thank you all for stopping by. I will be away for a couple of days so probably no new updates until the weekend.
-
Thanks Bob, The good news is that it will eventually be available through Seawatch Books!
-
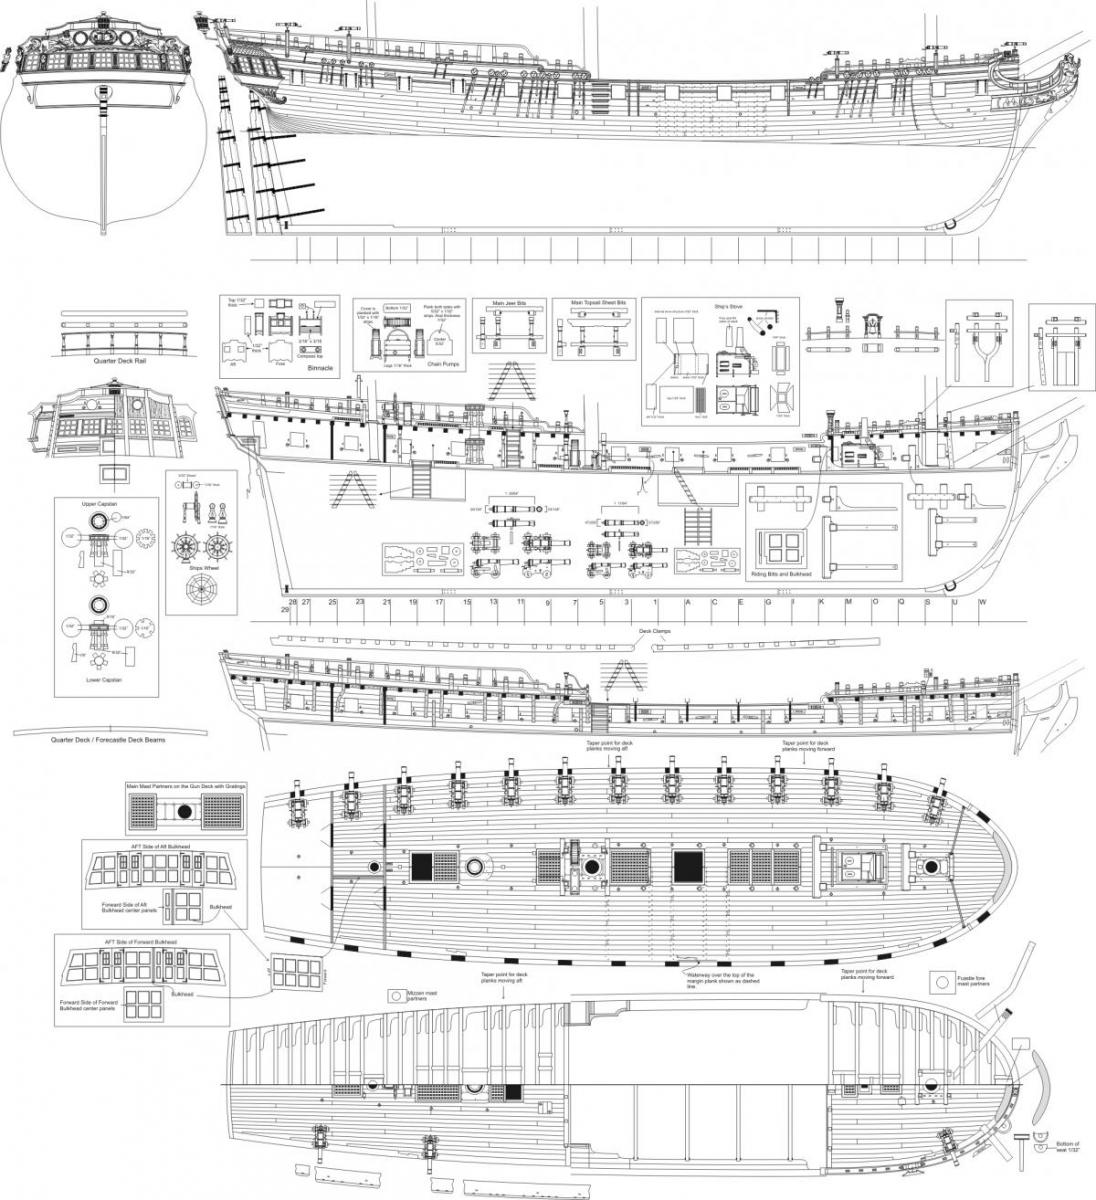
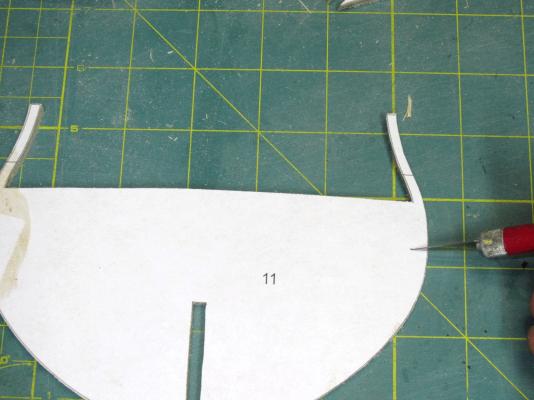
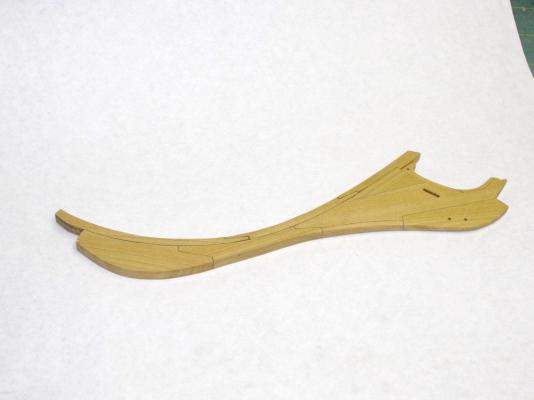
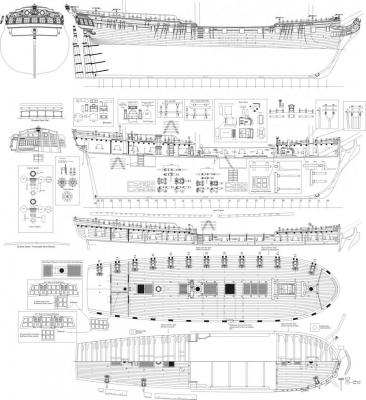
I have the distinct honor of being able to work with Chuck again on my next project, the HMS Winchelsea. This is the same ship that Chuck is designing and currently building. I cannot put into words my gratitude to Chuck for allowing me to participate in his project. I will make every effort to build her as described in the plans and practicum although I will never be able to reach the outstanding level of craftsmanship Chuck has set. The HMS Winchelsea was launched in 1764 and is a Niger class 32 gun frigate. This build will show how she appeared during the American Revolution. The model will be fully rigged at 3/16" scale. I will be using various woods throughout the build but the primary wood used will be Boxwood, Holly and Swiss Pear. All of these woods are from Jeff at Hobby Mill. As Chuck has very eloquently detailed his log and I could never reproduce that either. I will just show how I worked my way through the build. Here is a sample of some the plans that I will be using to build the Winchelsea. The first step in the build will be to cut out and assemble the knee of the head. There are eleven parts to the head knee assembly and they will all be cut from 3/16" Boxwood. The pieces were rough cut with the scroll saw and finished with files, sandpaper and chisels. To simulate the caulked joints. Once assembled Chuck states " The entire assembly must be tapered. This taper extends from the upper stem piece towards the bobstay piece. The aft edge of the upper stem should remain 3/16” thick. It should gradually be reduced to 3/32” thick along the forward edge of the bobstay piece. The taper is 3/32” at the top of the bobstay piece but it also gradually widens back to 3/16” as it works its way down towards the cutwater. " Hopefully you can see this taper in the photograph. Next it will be time to cut out the bulkheads and the bulkhead former. These will all cut from Birch 3/16" aircraft 4 ply plywood. As there are so many bulkheads, a total of 27, I anticipate it taking a least a week to cut them out and fit them prior to gluing. That is if my mind doesn't wander!
-
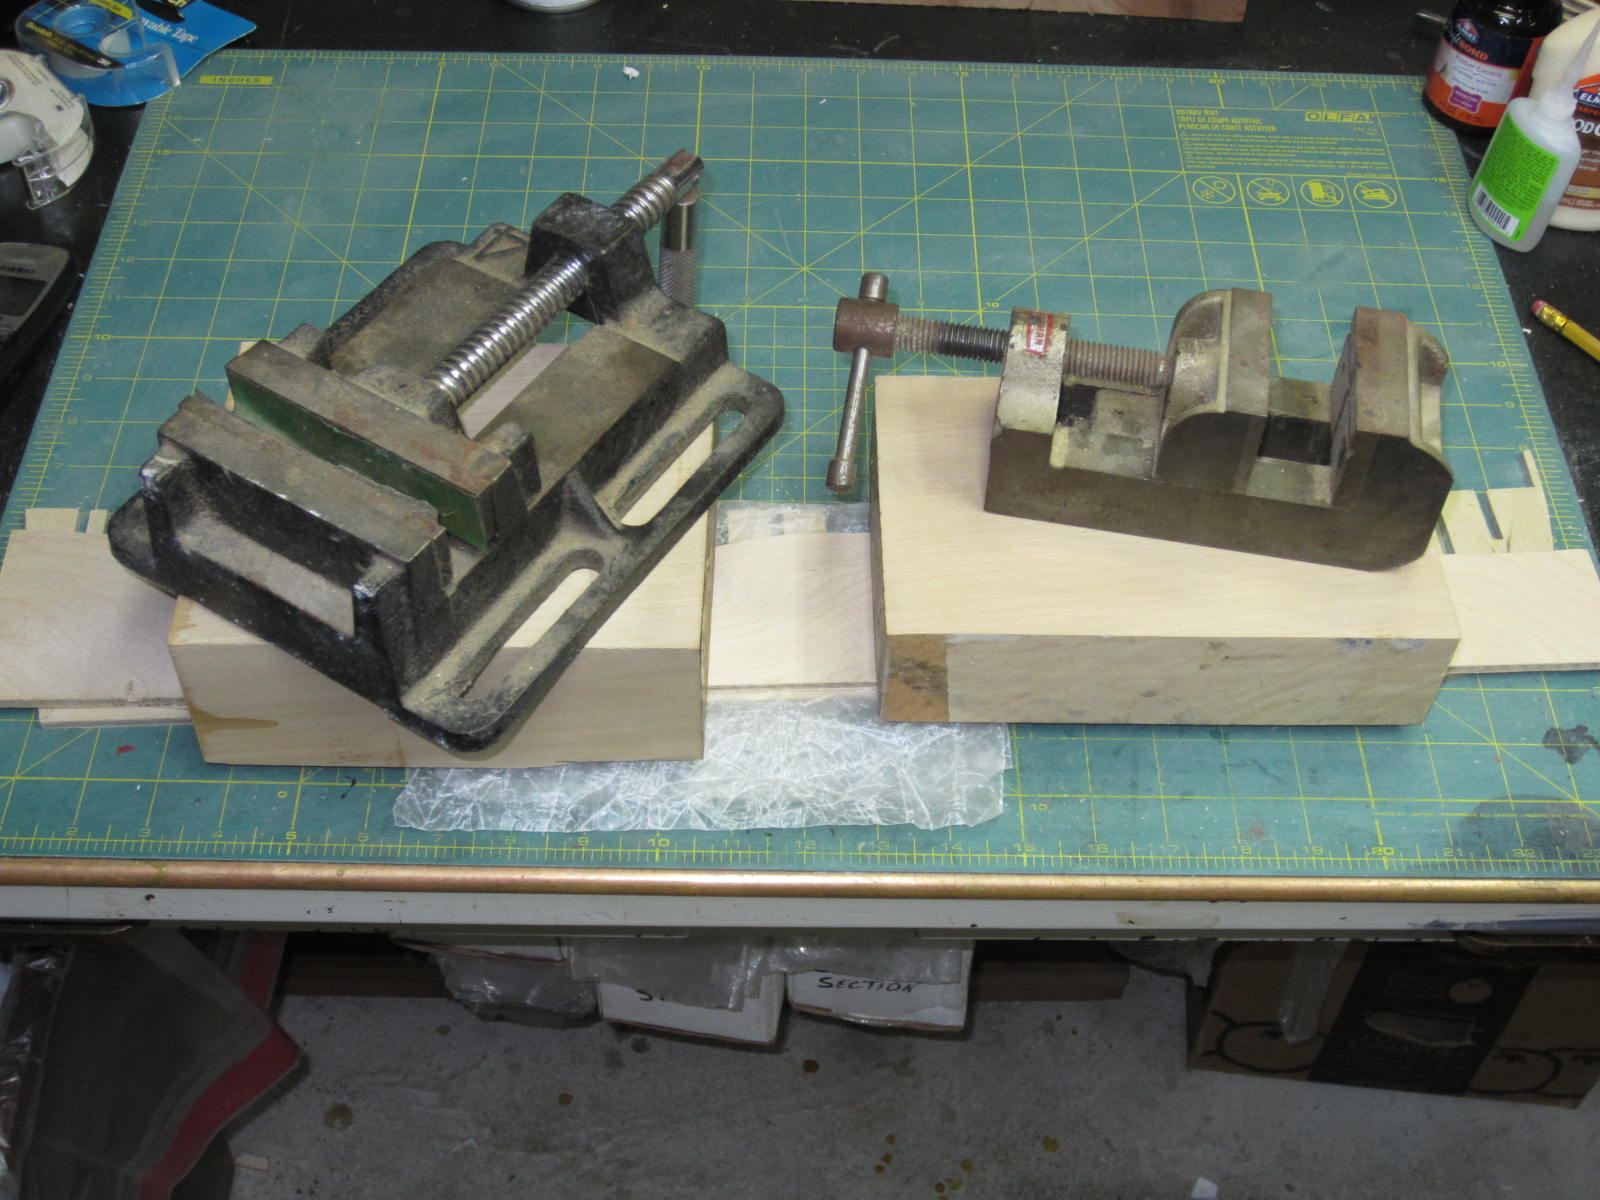
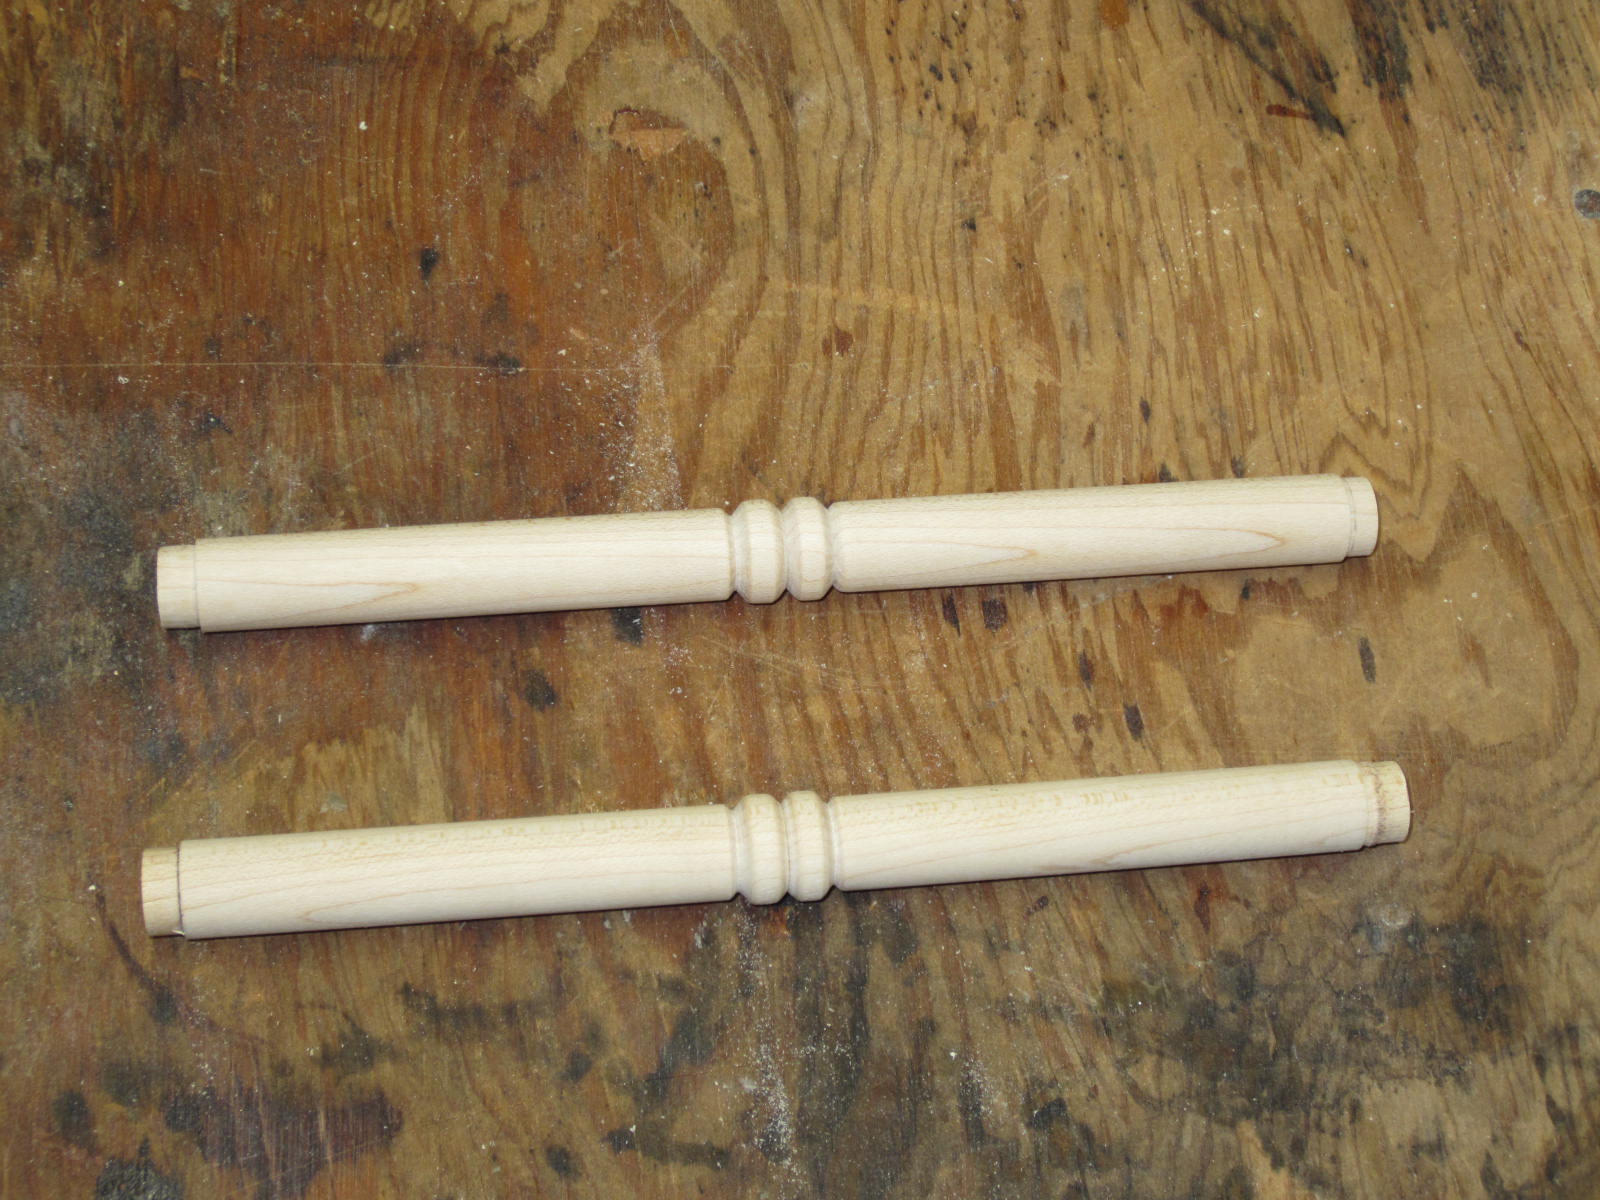
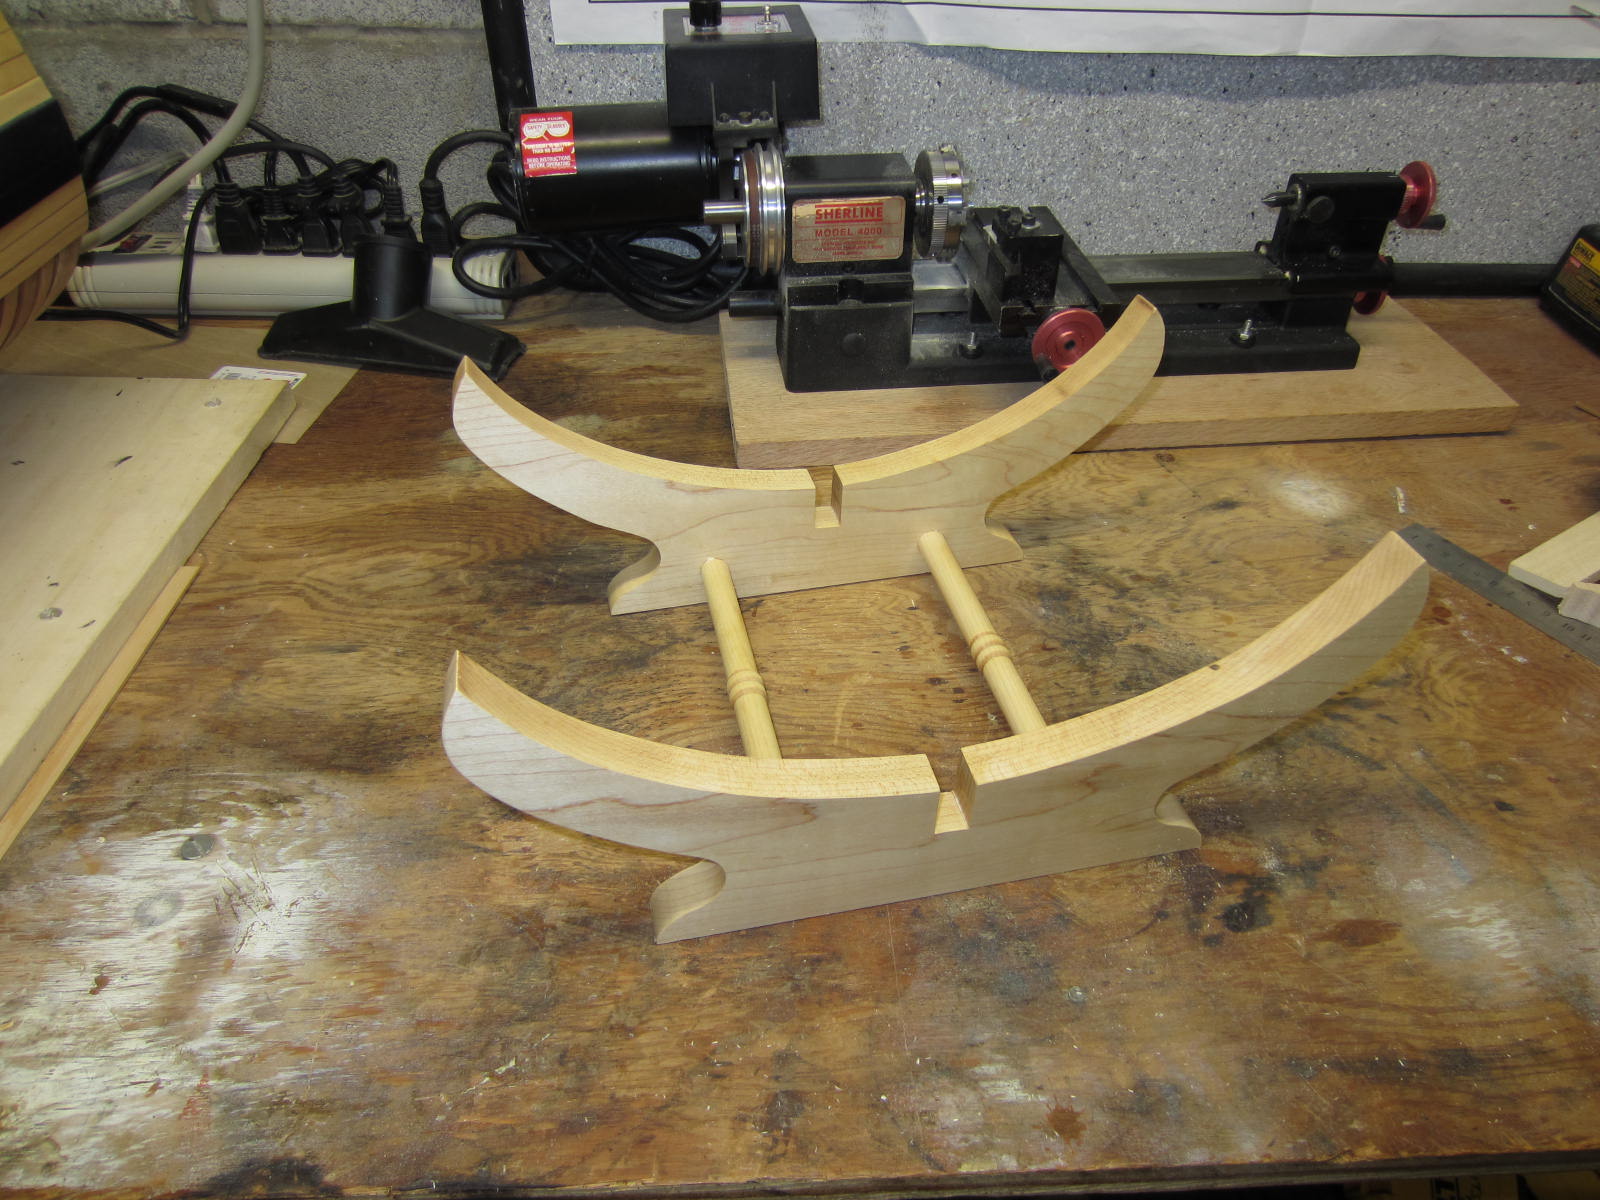
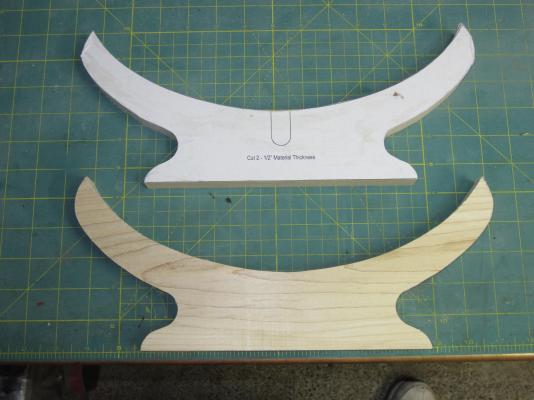
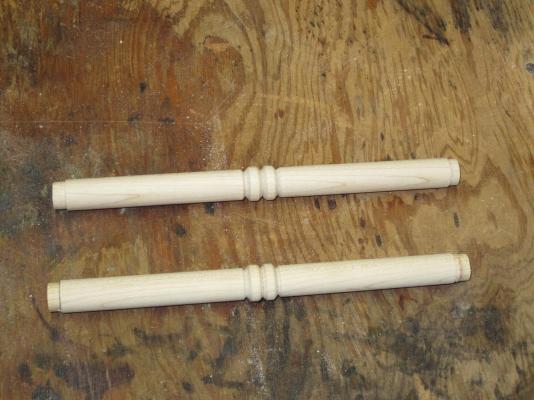
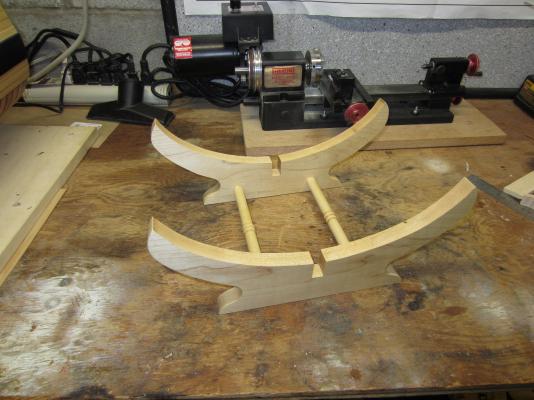
Thank you E&T. Ok Ben.... you should have excused yourself. You had insider information! Yes Chuck has graciously allowed me access to the Winnie and I will be starting her shortly. As this will be a long slow build while he continues to design her I will try to complete the Fly at the same time. Gotta keep the Grand kids happy you know! I have completed the stand. I made it out of some Maple I had available. I kept the dowels low on the stand so they wouldn't cover the frame work. Now I just have to put on a couple of coats of sealer and I can set the cross section in it.
- 421 replies
-
- 14
-
-
- granado
- bomb ketch
- (and 2 more)
-
Very Nice Ben! Nice clean work. And yes it is a piece of cake from here on out. Hopefully it's a kind of cake you like though!
-
Excellent Augie. Shaved rules or not that came out very nicely. I also agree that you shouldn't paint it, unless you want to of course.
- 2,191 replies
-
- 1
-
-
- confederacy
- Model Shipways
- (and 1 more)
-
Thanks Mark, Grant and Joe. It would be my luck to get stuck in a groundhogs day that was really horrid and have to live it over and over and over again! Now I have to get that accountant to figure out how to get all the cool accessories like a duplicator! No new news from the shop. I have to still mount the barrels and rig them and make the base. That and a good cleaning should just about finish her up. I also had started doing the base work on what was going to be my next build. I was going back to the light for a bit and build the FLY for my grandson. He saw it on the shelf and really liked it. So I have been doing a bit of work on that for him when I was presented with a Dark Side opportunity I just couldn't pass up. So now that I have been cruel and thrown out that teaser I am preparing to post the new build log here in the scratch build section by this weekend. Sorry gotta head of to work now.
- 421 replies
-
- 6
-
-
- granado
- bomb ketch
- (and 2 more)