Rustyj
-
Posts
2,535 -
Joined
-
Last visited
Content Type
Profiles
Forums
Gallery
Events
Everything posted by Rustyj
-
 Excellent job Bob! It's a pleasure watching you work!
 -
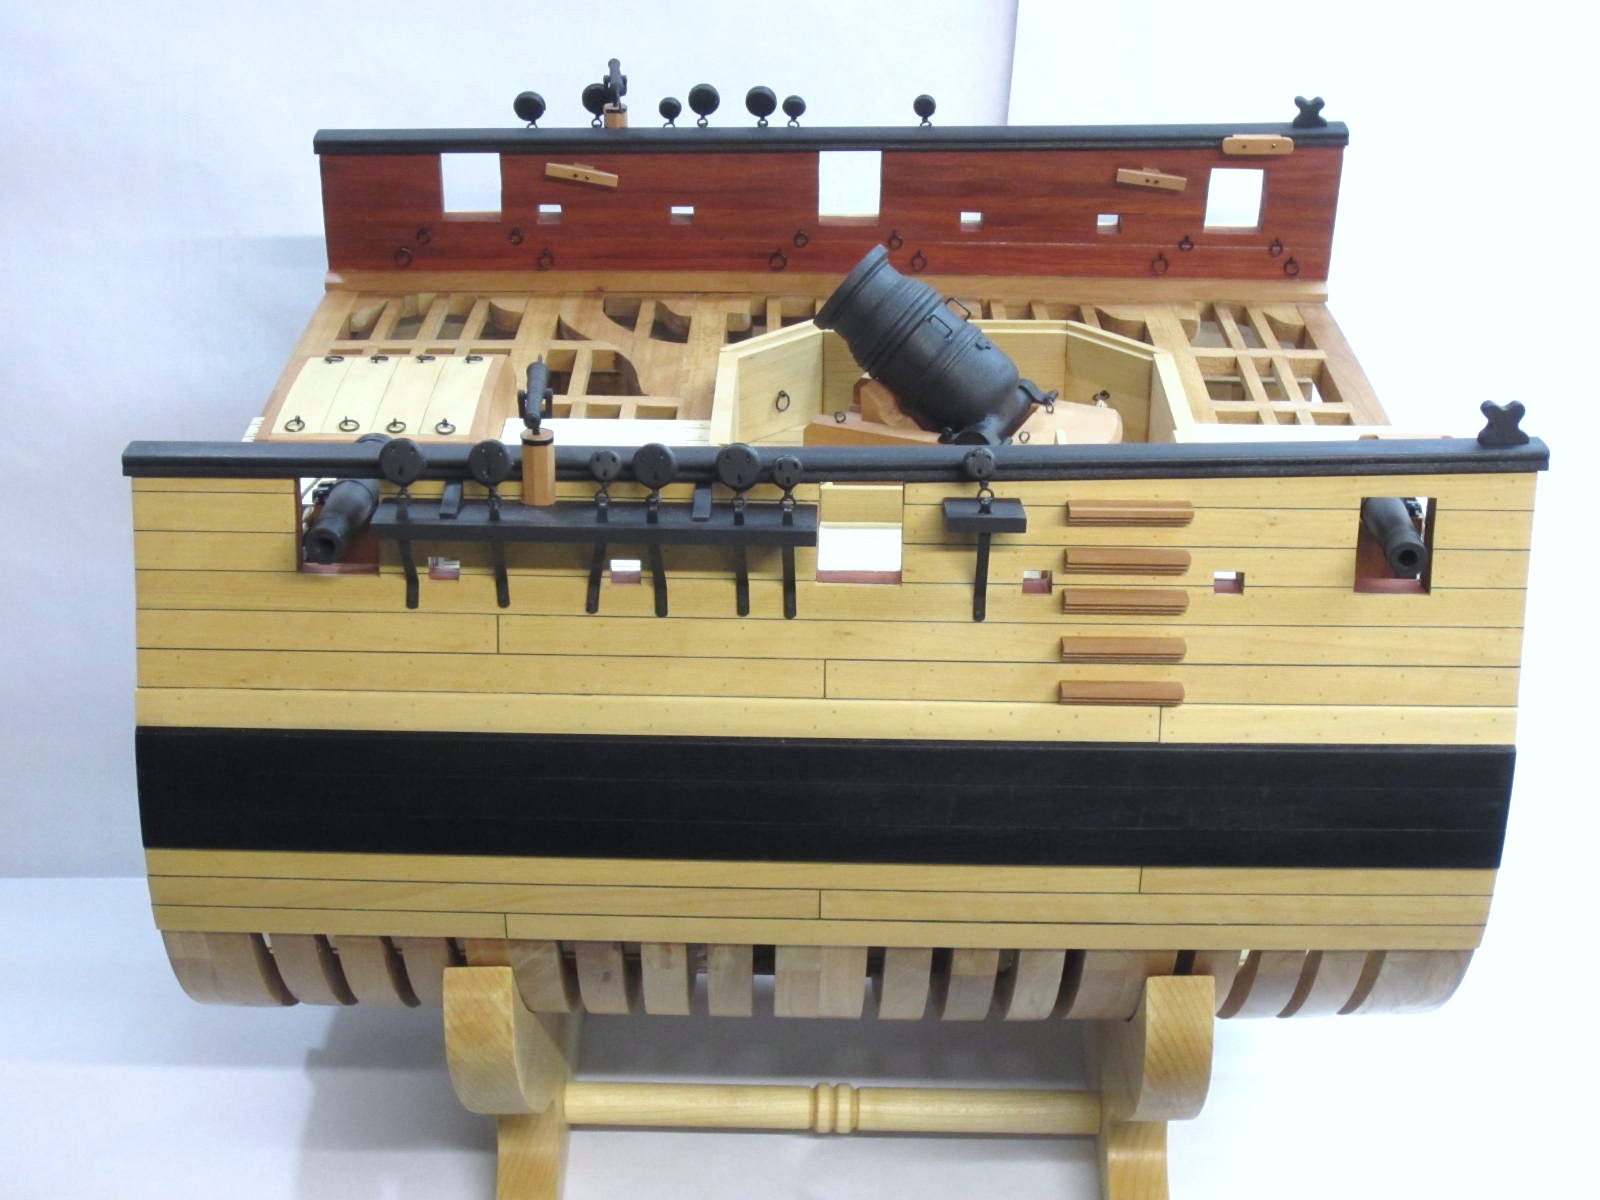
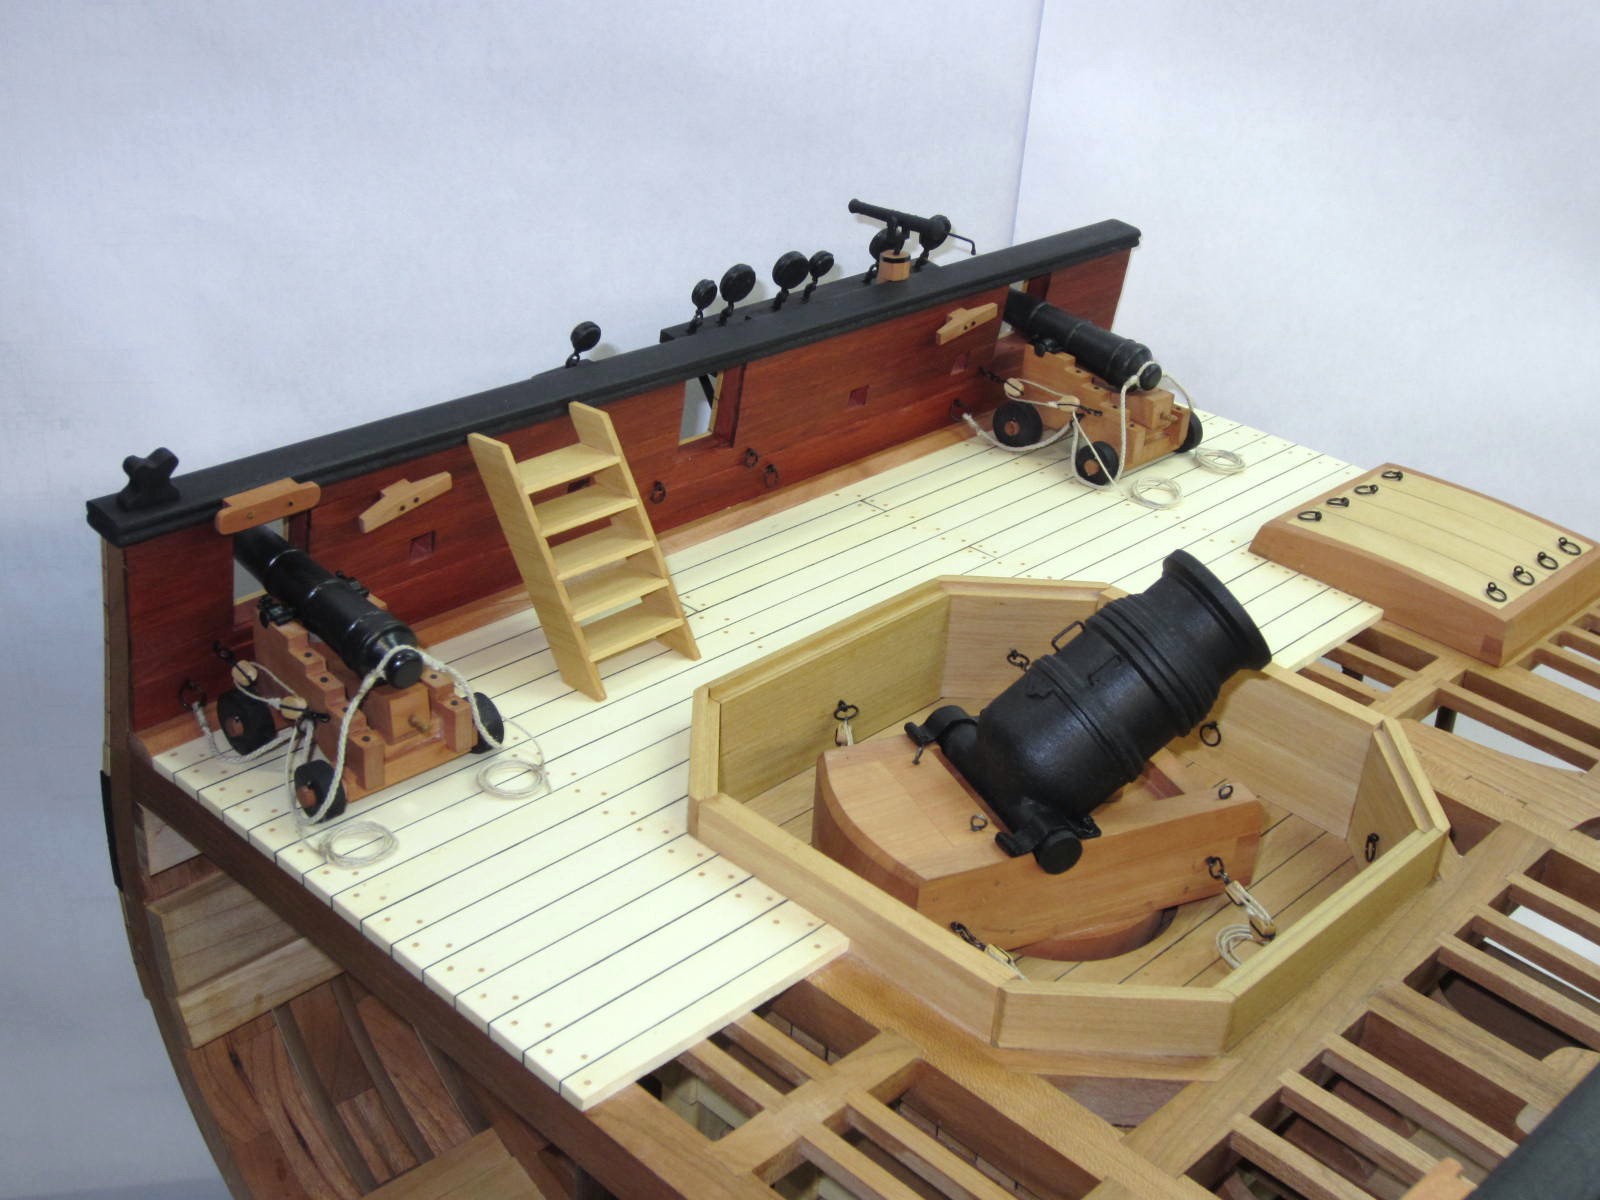
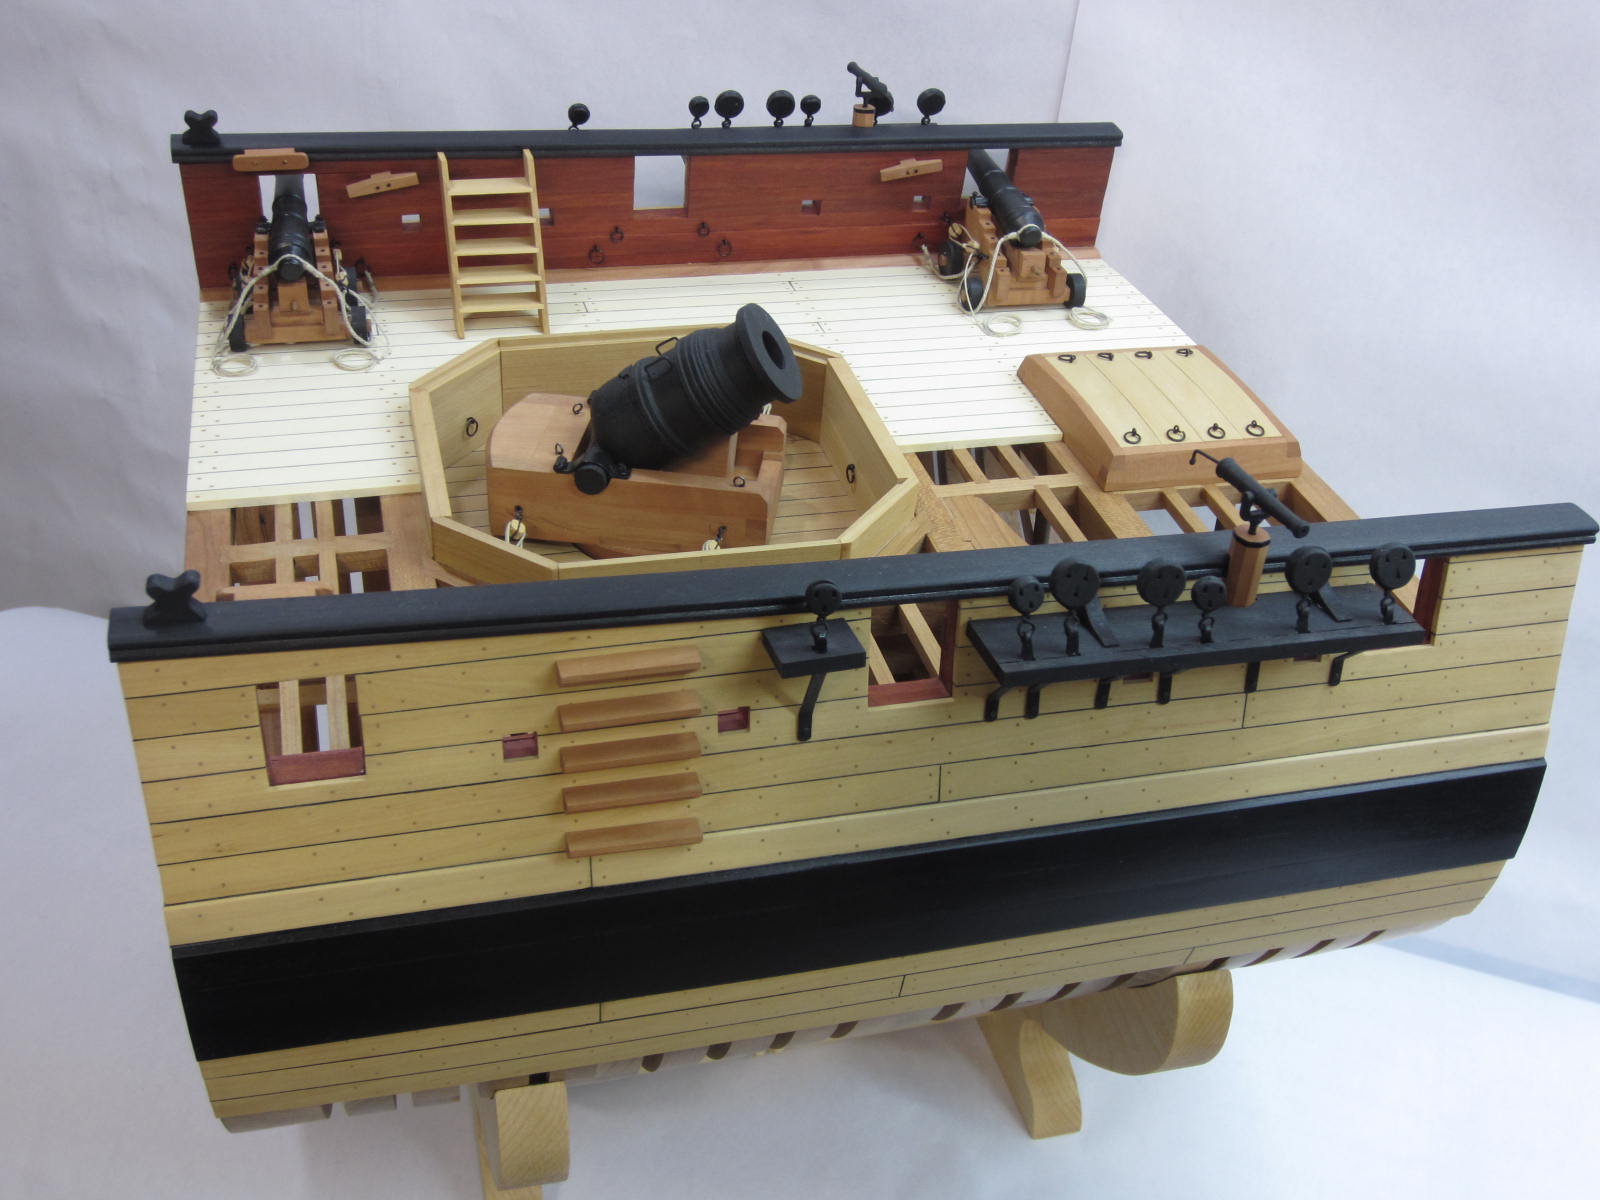
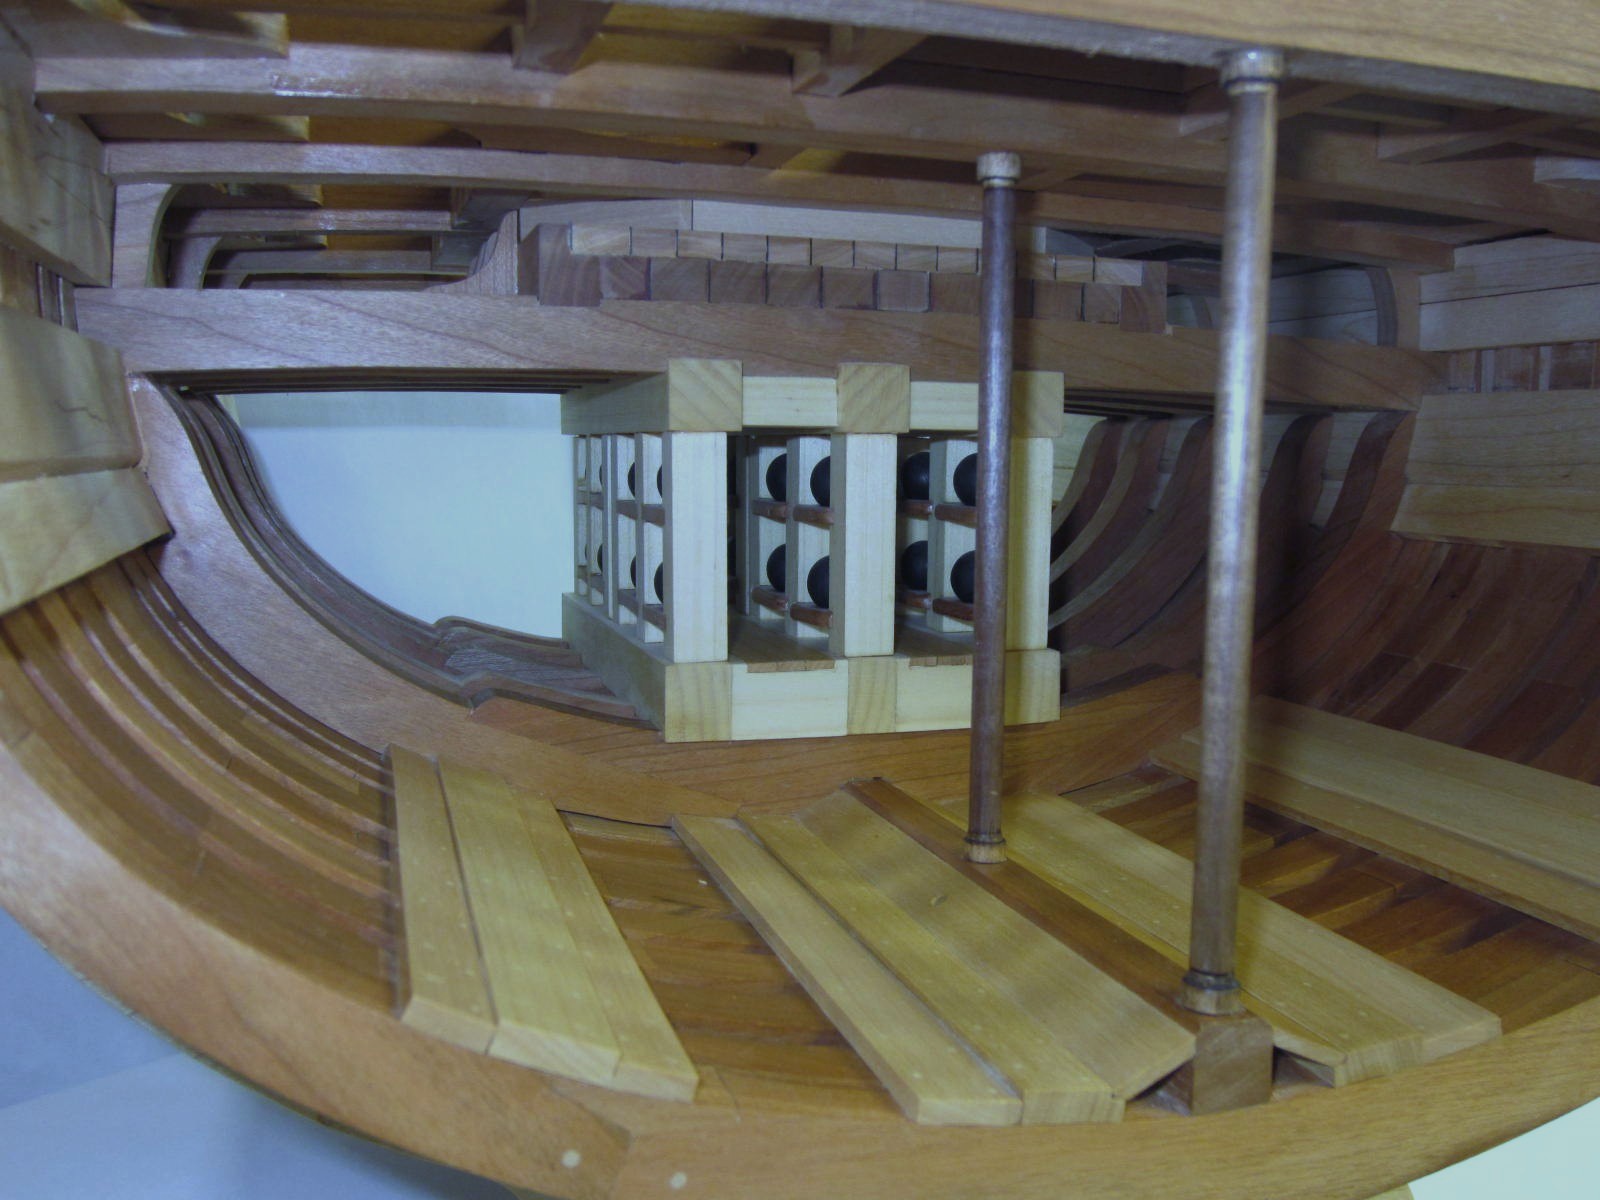
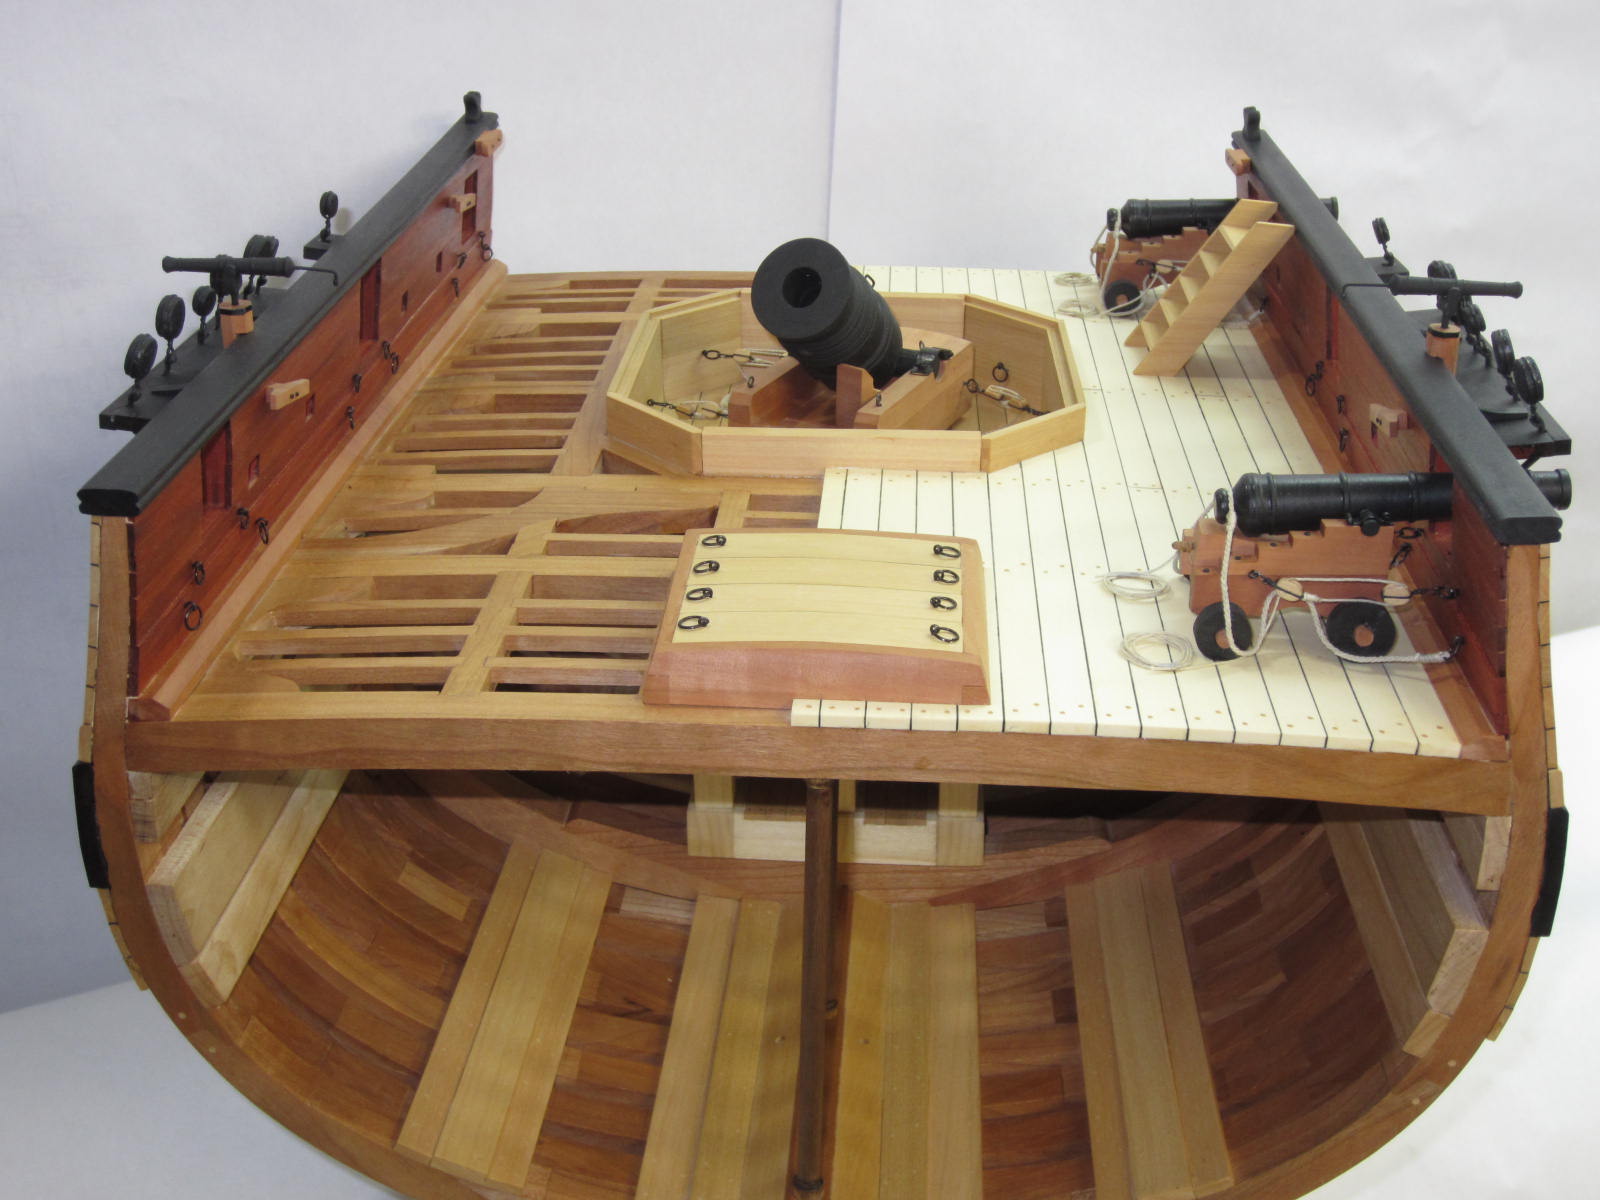
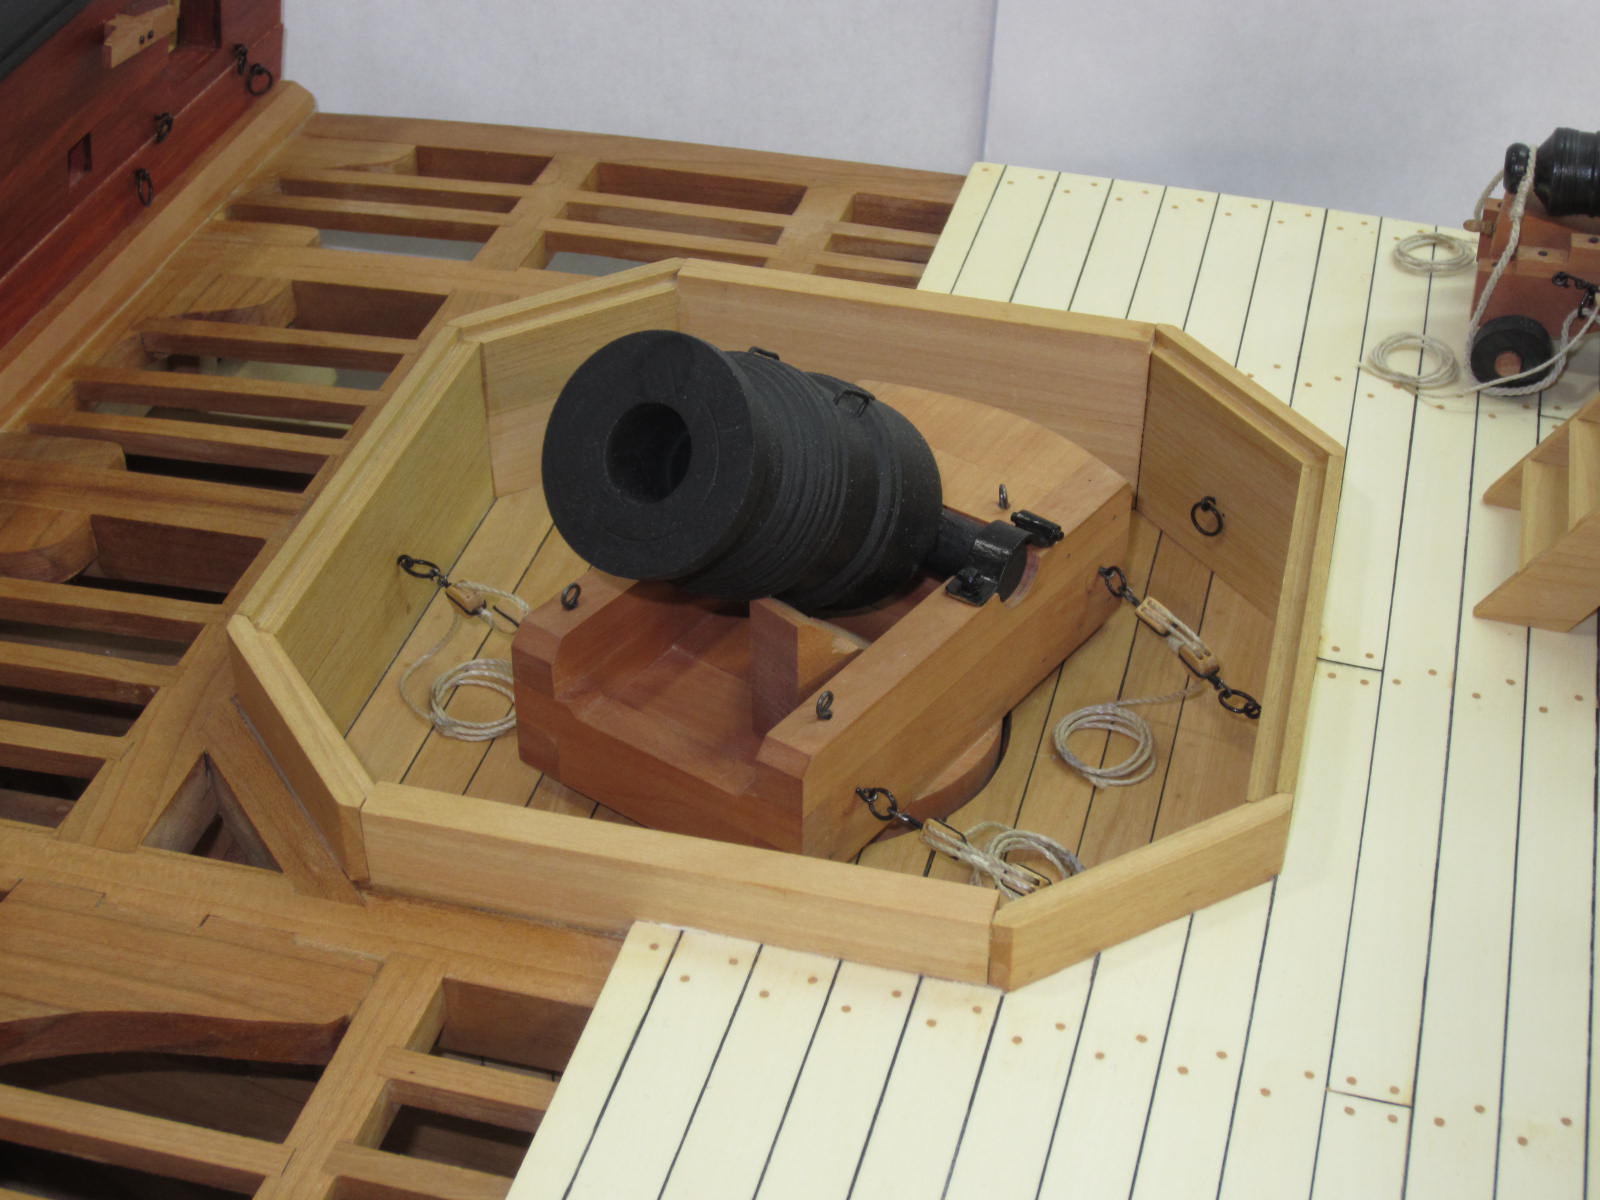
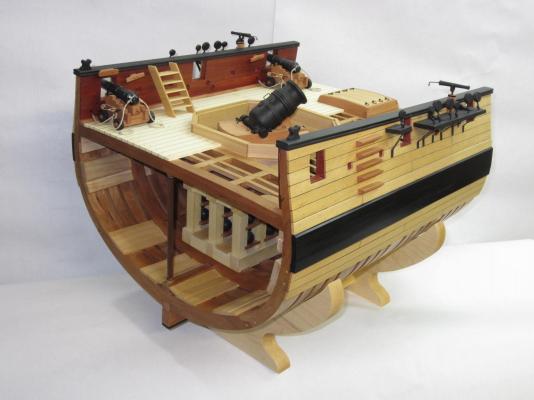
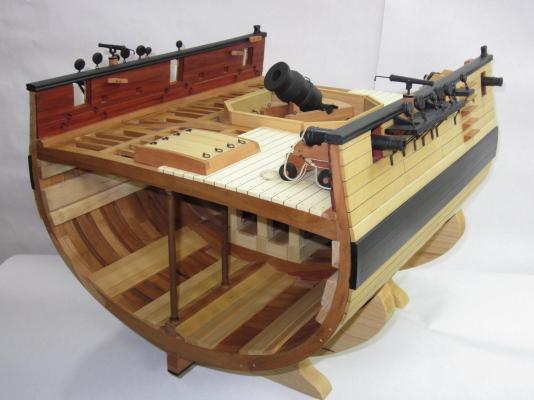
Hi All. Well the infamous "set up" has been completed and I finally got my lazy butt in gear and took some pictures of the finished bomb vessel. It has been a great "little" project that I had a lot of fun with. I hope you enjoyed it too. Thank you for all your comments and likes. It means more than I can express.


- 421 replies
-
- 34
-

-
- granado
- bomb ketch
- (and 2 more)
-
Hi Augie, I can't add anything more to what already has been said! Glad you are back at it and don't you hate those "summer" schedules?
- 2,191 replies
-
- 1
-
-
- confederacy
- Model Shipways
- (and 1 more)
-
Hey Ben, 260 miles vs 910 was the determining factor. If I could swing both I sure would!
-
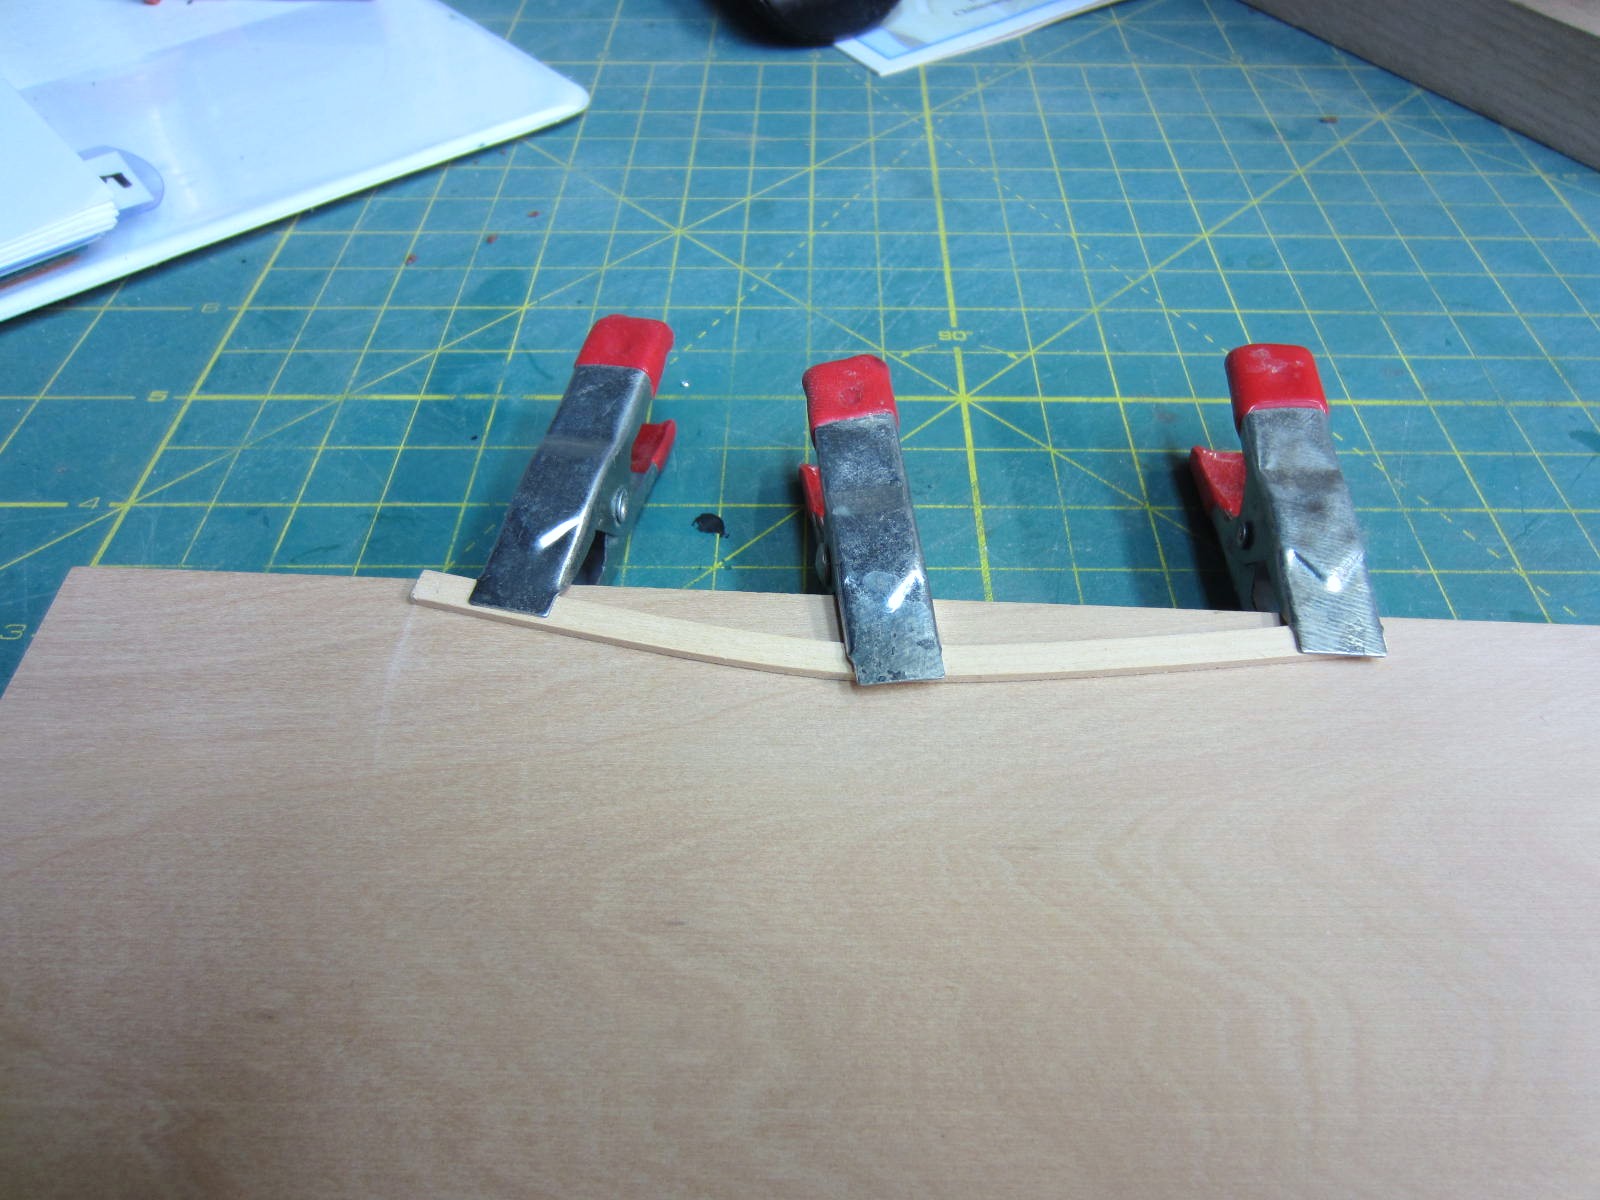
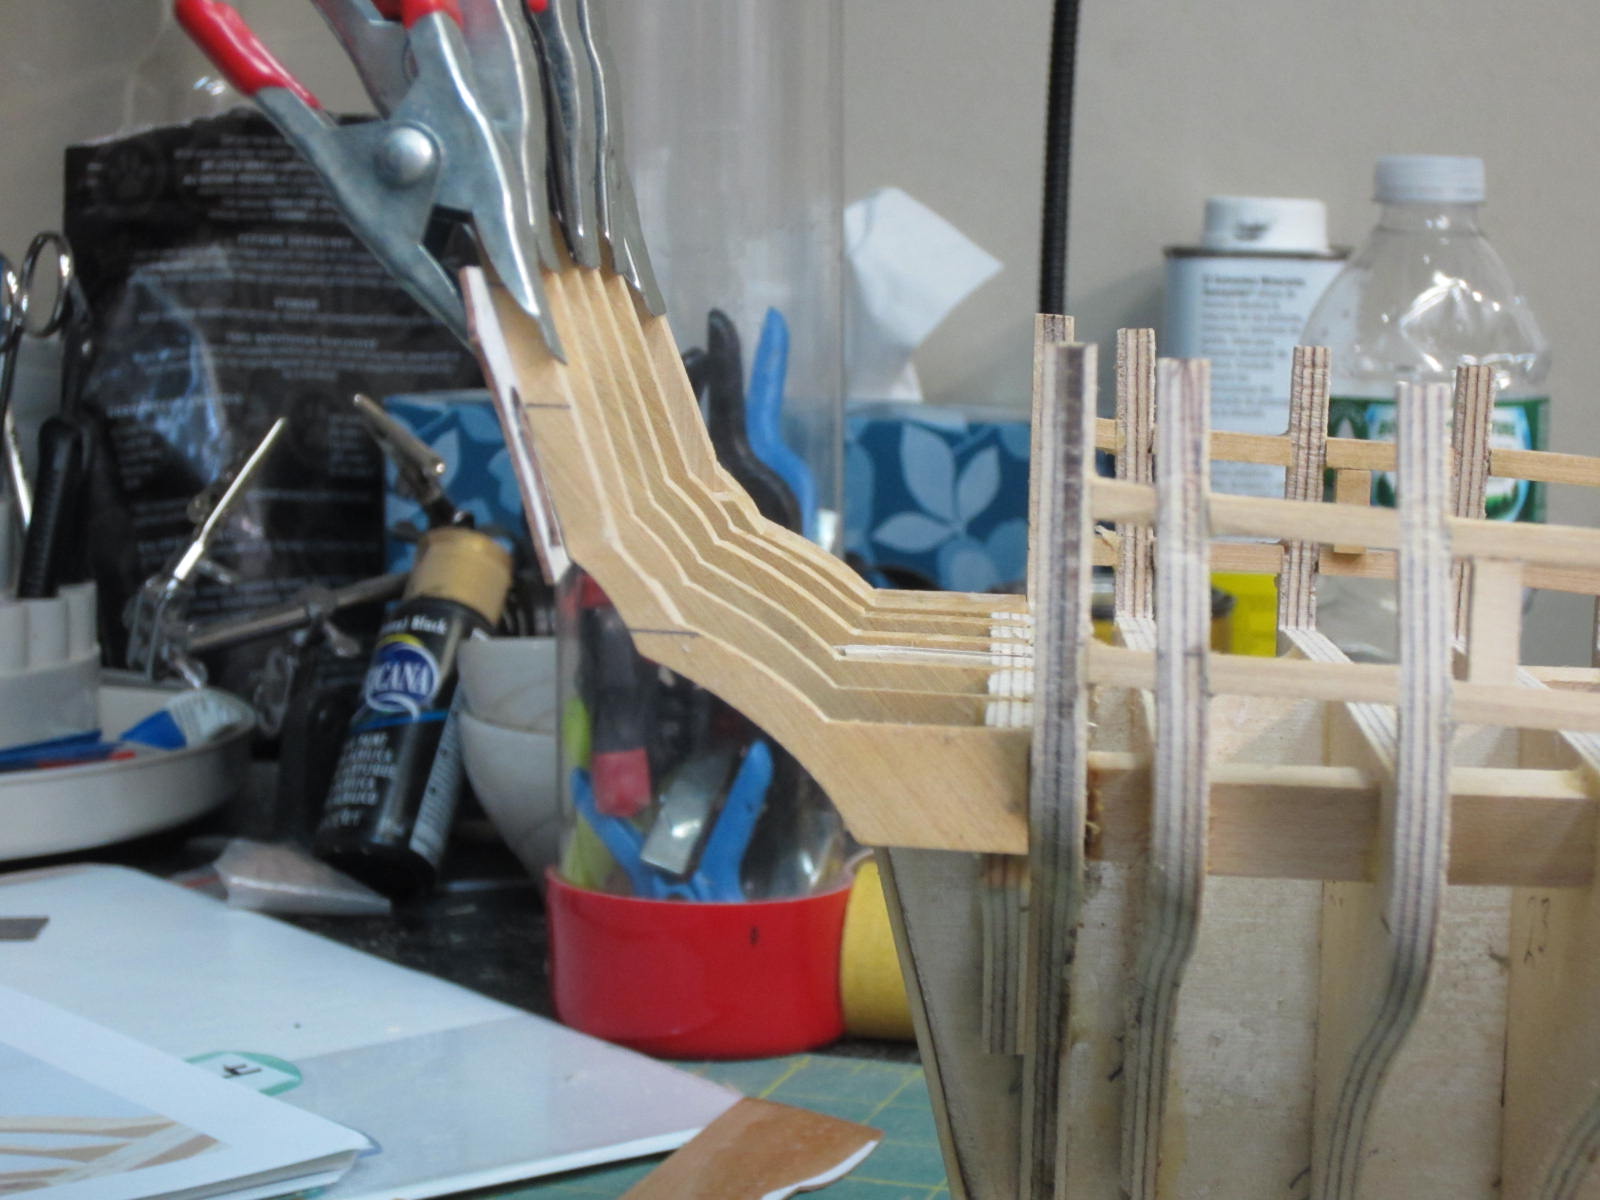
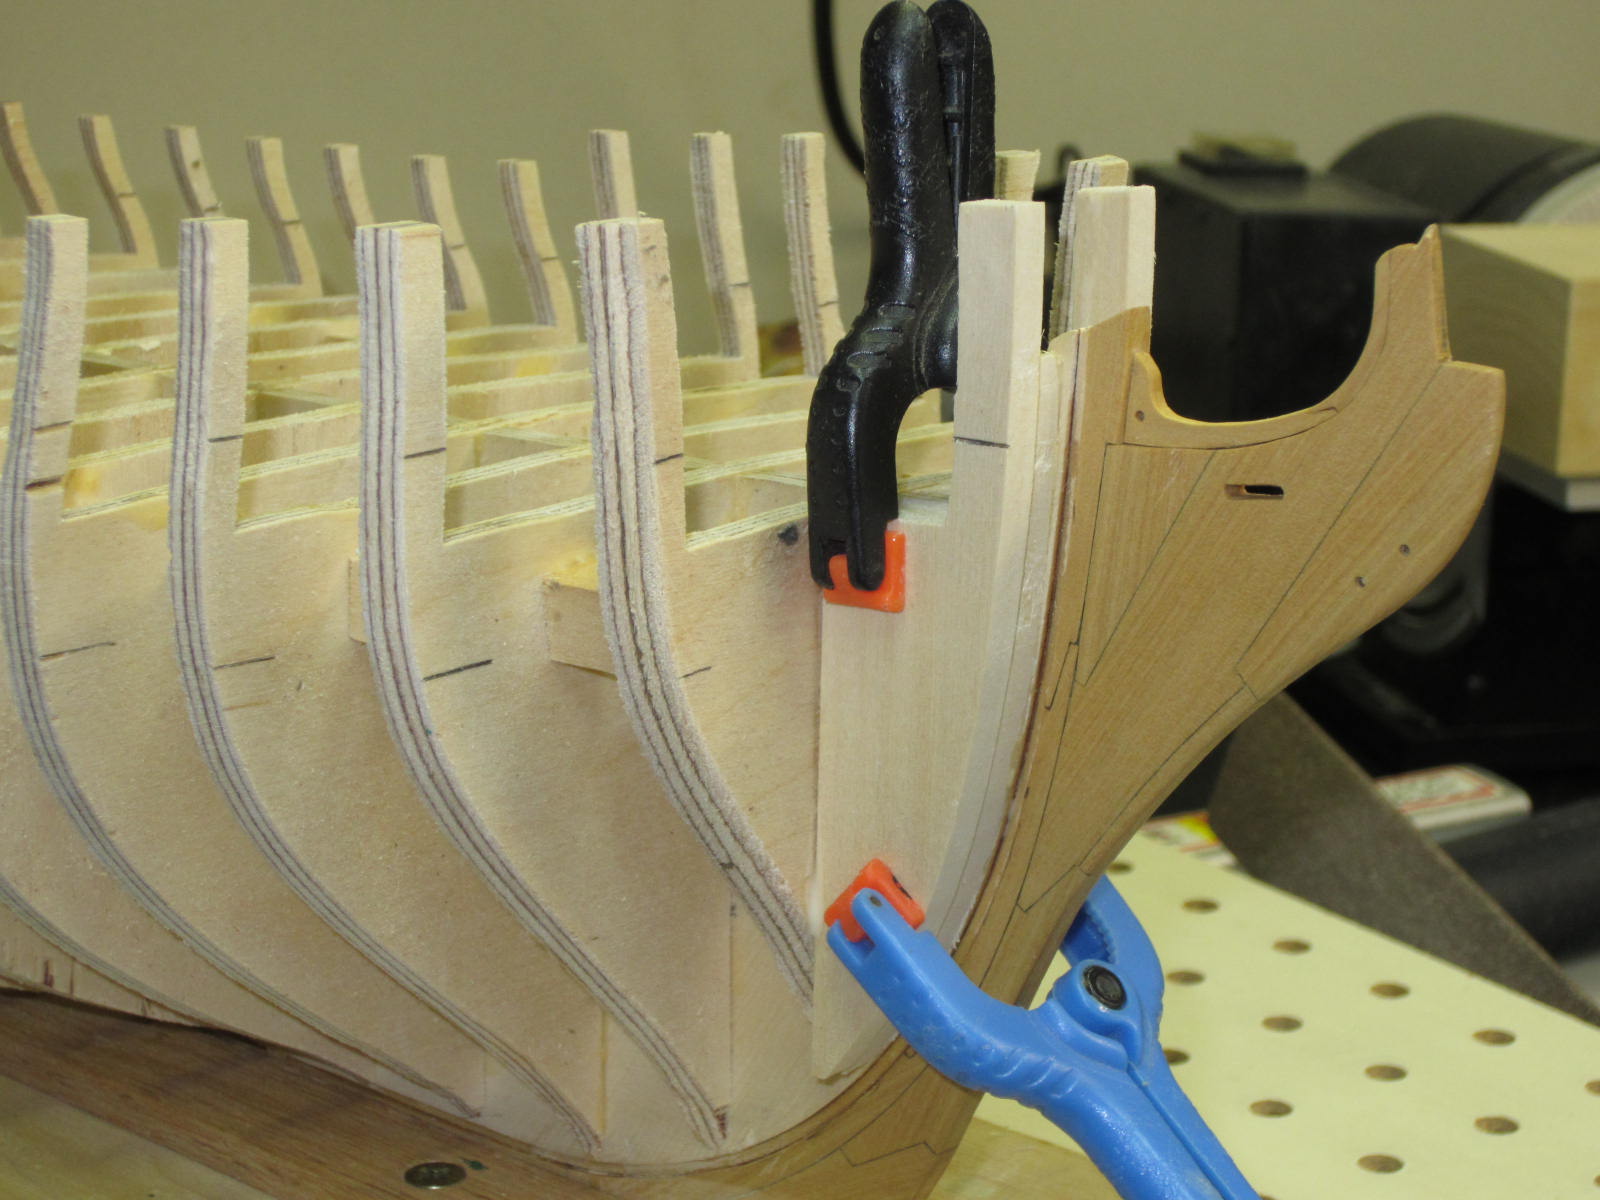
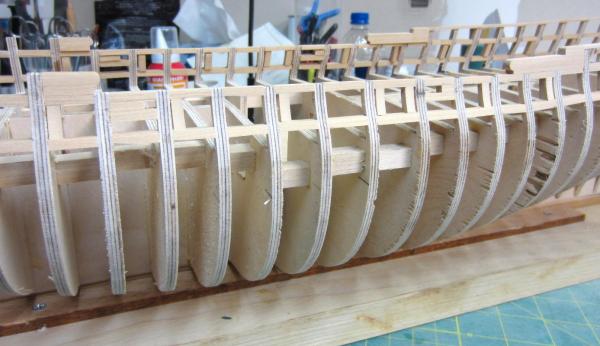
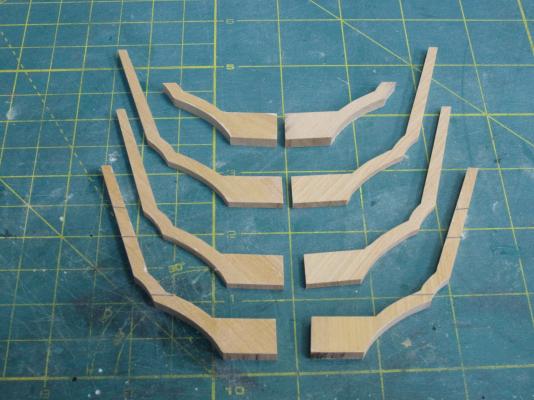
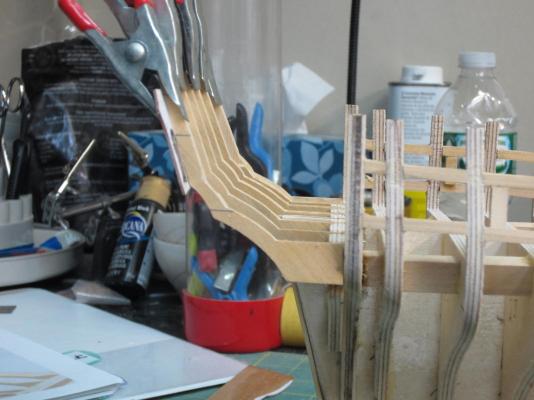
Thanks Augie, It will be fun to see everyone again. Yer scarin me Grant! Hi Pat. Although I haven't seen the South end of a North bound camel it brings images to mind that make me shudder. Hi Joe, The build and lathe are both a lot of fun. Hi Dirk, Please don't ever hesitate to add a comment critiquing or questioning my work. That's what this is all about. I believe you are commenting on the evenness of the curved pieces using the clamps. I failed to say a couple of pieces did not make the grade and were tossed. That was the only picture I took. Once the pieces were bent to their shape the first one was placed and matched the exact curve of the stern framing pieces. It had to be flexed about a 1/32" to match the curve. The rest of the pieces were then placed to follow that curve. When I do this again I will cut a template and bend to conform to it. It would sure save on the waste as well as being more even.
-
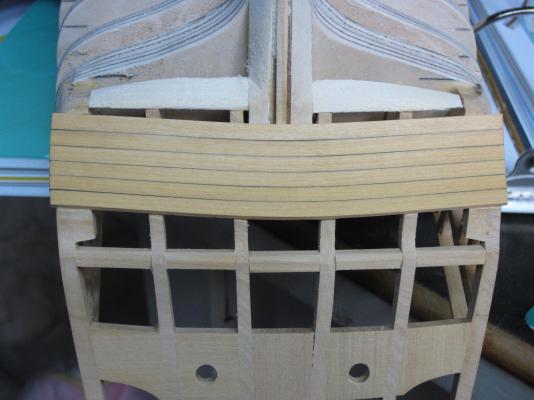
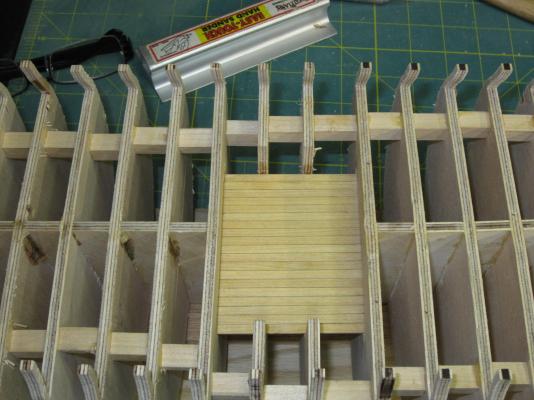
Thanks Dirk. Hi Ben, Yep I'll probably be able to start laying some planks after I get back from the CT conference. The first step in chapter 4 is to plank the lower counter. I used boxwood strips for this. The method Chuck describes has the planks wet in water for about 15-20 seconds and then edge bent and clamped. I probably soaked them for about 45 seconds. A hair dyer was purloined from the admiral and using the hottest setting the planks were dried. Once they cooled they were removed from the clamps and there was little spring back. Here is the counter planked. The outer edges still need to be faired.

-
Thank you all for the likes. I see that you are all "liking" it as much as I am! aliluke, It is a great adventure into scratch building. The Cheerful looks like a wonderful project too and that will be a build waaaaay down the road for me too. Hi Bob, and I always look forward to your posts my friend. Hi Grant yes it is such a shame that I have to toil away at this day after boring day. Alright then. On to the hance pieces. These were cut from boxwood and are oversized width wise. Once glued in place they were faired to match the hull lines. I have only faired the outboard portion of the hull at this point. To give you an idea of the length of the practicum this completes the third chapter. In the forth chapter I will be planking the hull from the wales upward.
-
Hi Chris. Nice work so far. Yes those "tabs" that keep the frames in alignment will be covered by the hull planking. Keep up the good work!
-
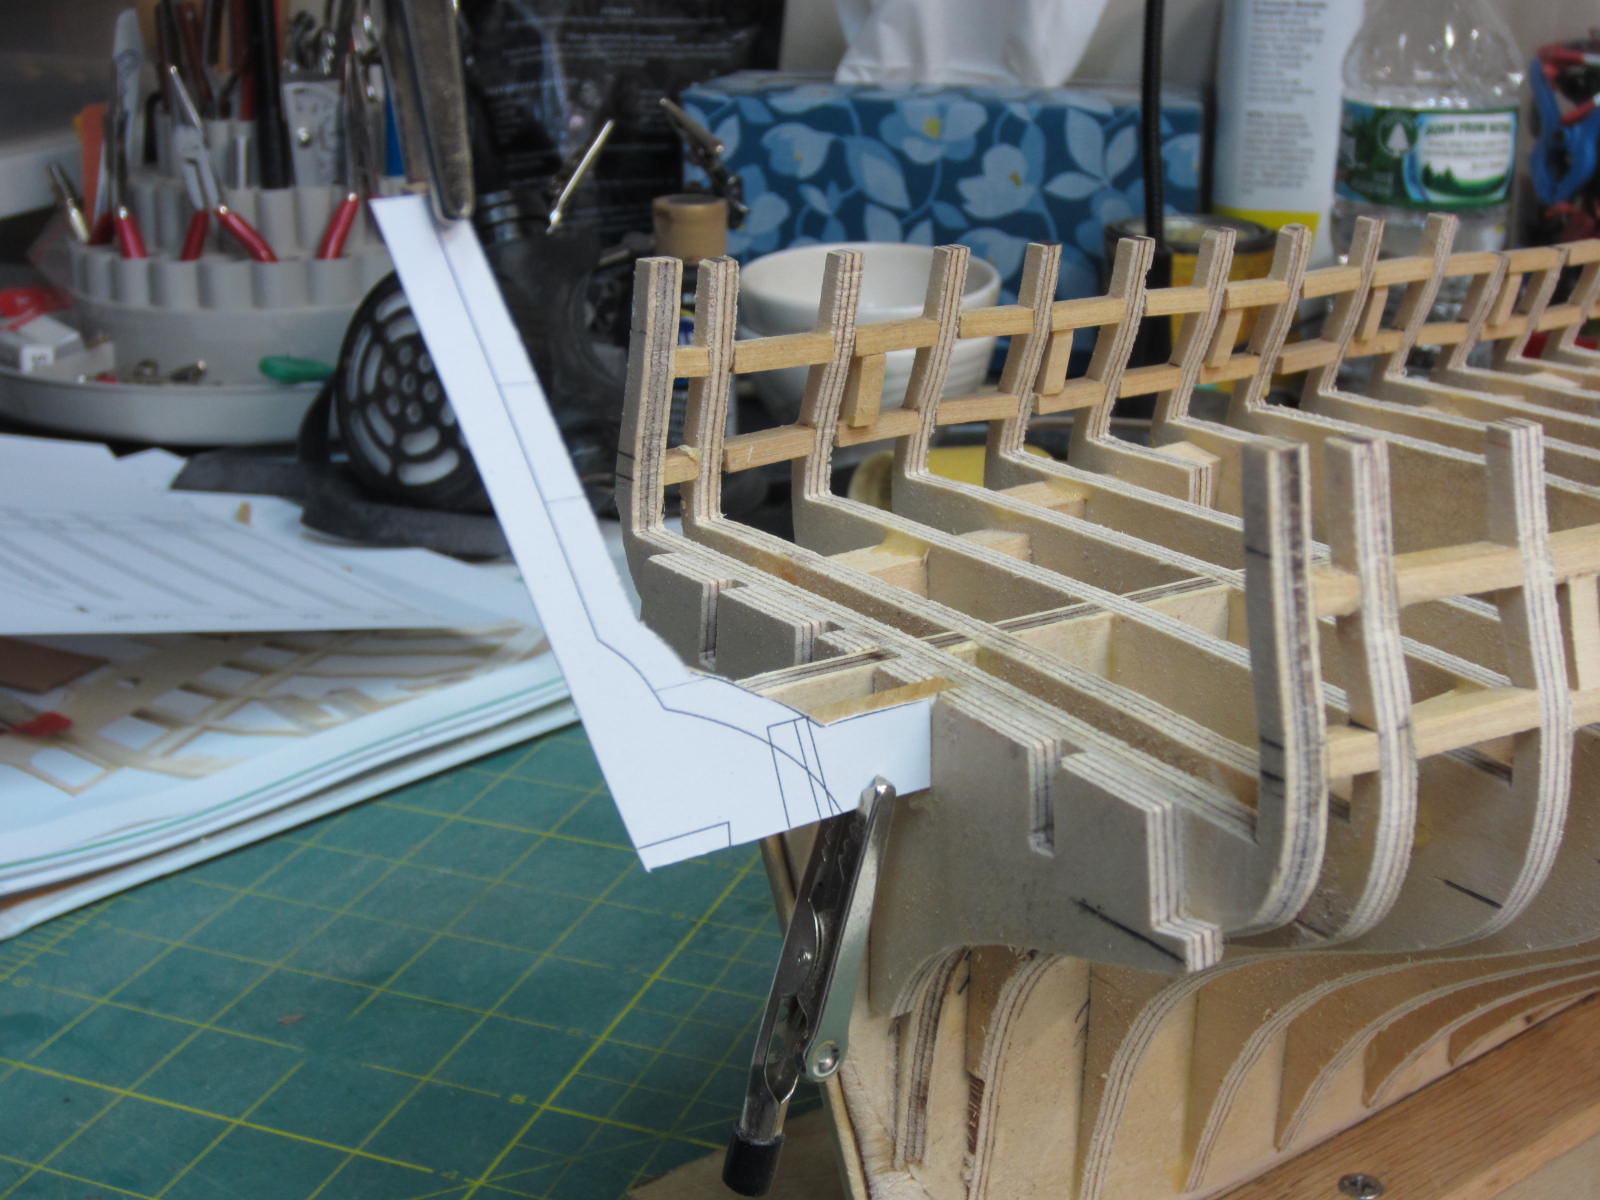
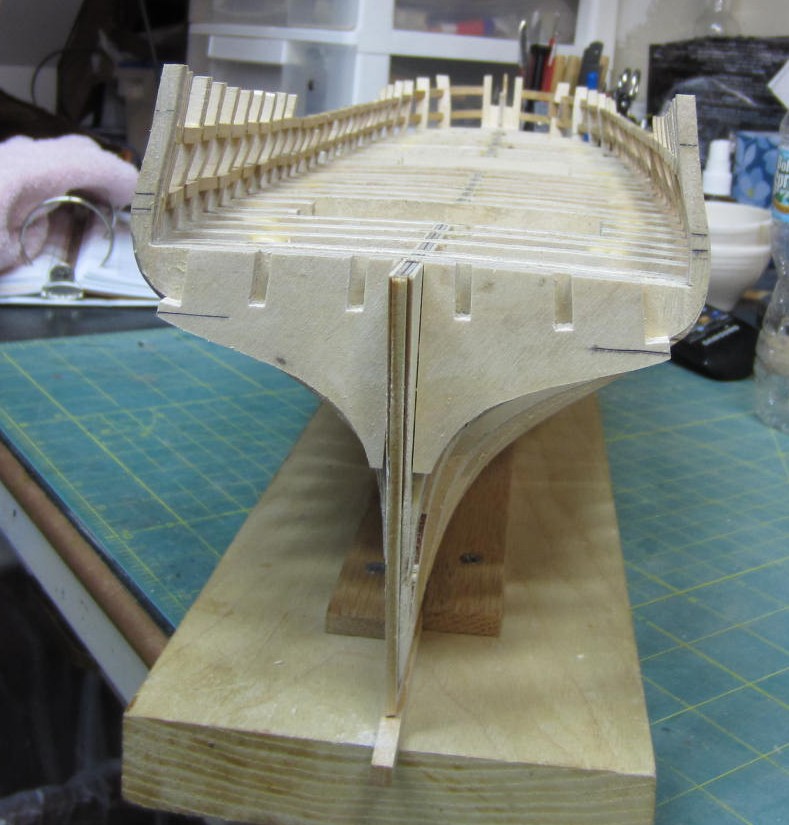
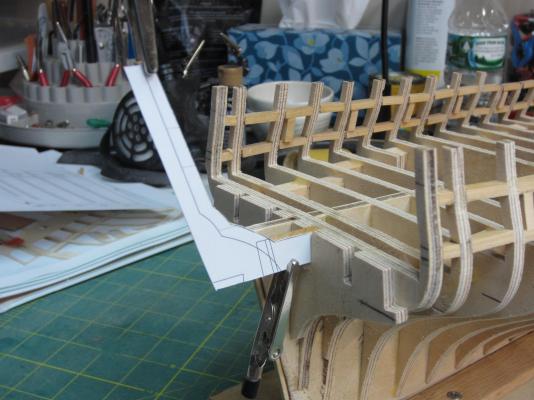
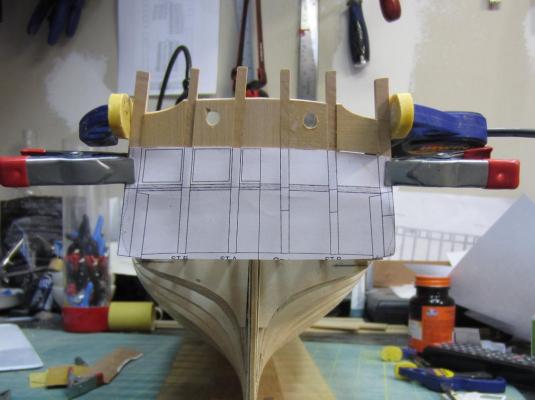
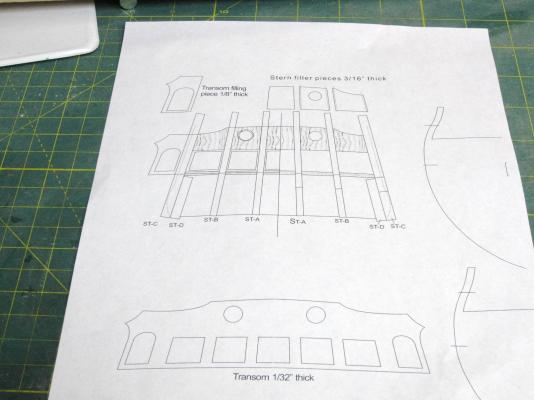
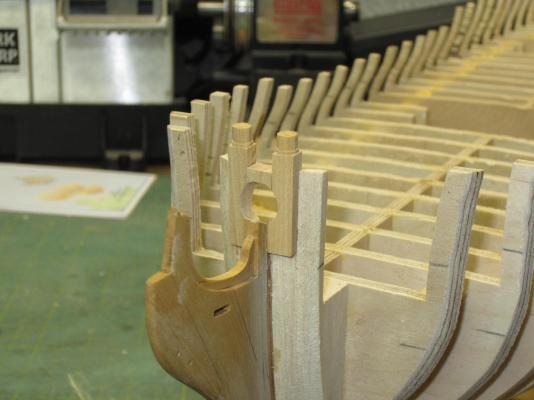
Hi Chuck, Not gonna happen. The planking of the hull will take a loooooong long time if I hope to come even close to your work.. Thanks Augie. They are so much fun aren't they! Thanks Mike and Ben. Thank you Al D. The practicum and plans are outstanding. You will love it. Hi Bob, The pleasure is all mine. Ok I've squirreled myself away most of the last few days and have made a good deal of progress. Here is a picture of the plans depicting the stern framing. There are eight stern frame sections that fit into the slotted bulkhead section. The next step was to add the sills for the stern lights and the lintel filler pieces above them. I used both the plans and the transom cut out to alien everything. In case you can't tell I'm having a ball here! Once it all dried the stern was sanded smooth. I then added framing the quarter gallery entrance and the aft-most gun port.
-
Hi Augie, That is some great work on the stern and rudder. You took a very complex area and did yourself proud!
- 2,191 replies
-
- 1
-
-
- confederacy
- Model Shipways
- (and 1 more)
-
Hi Bob. Great work as always!
-
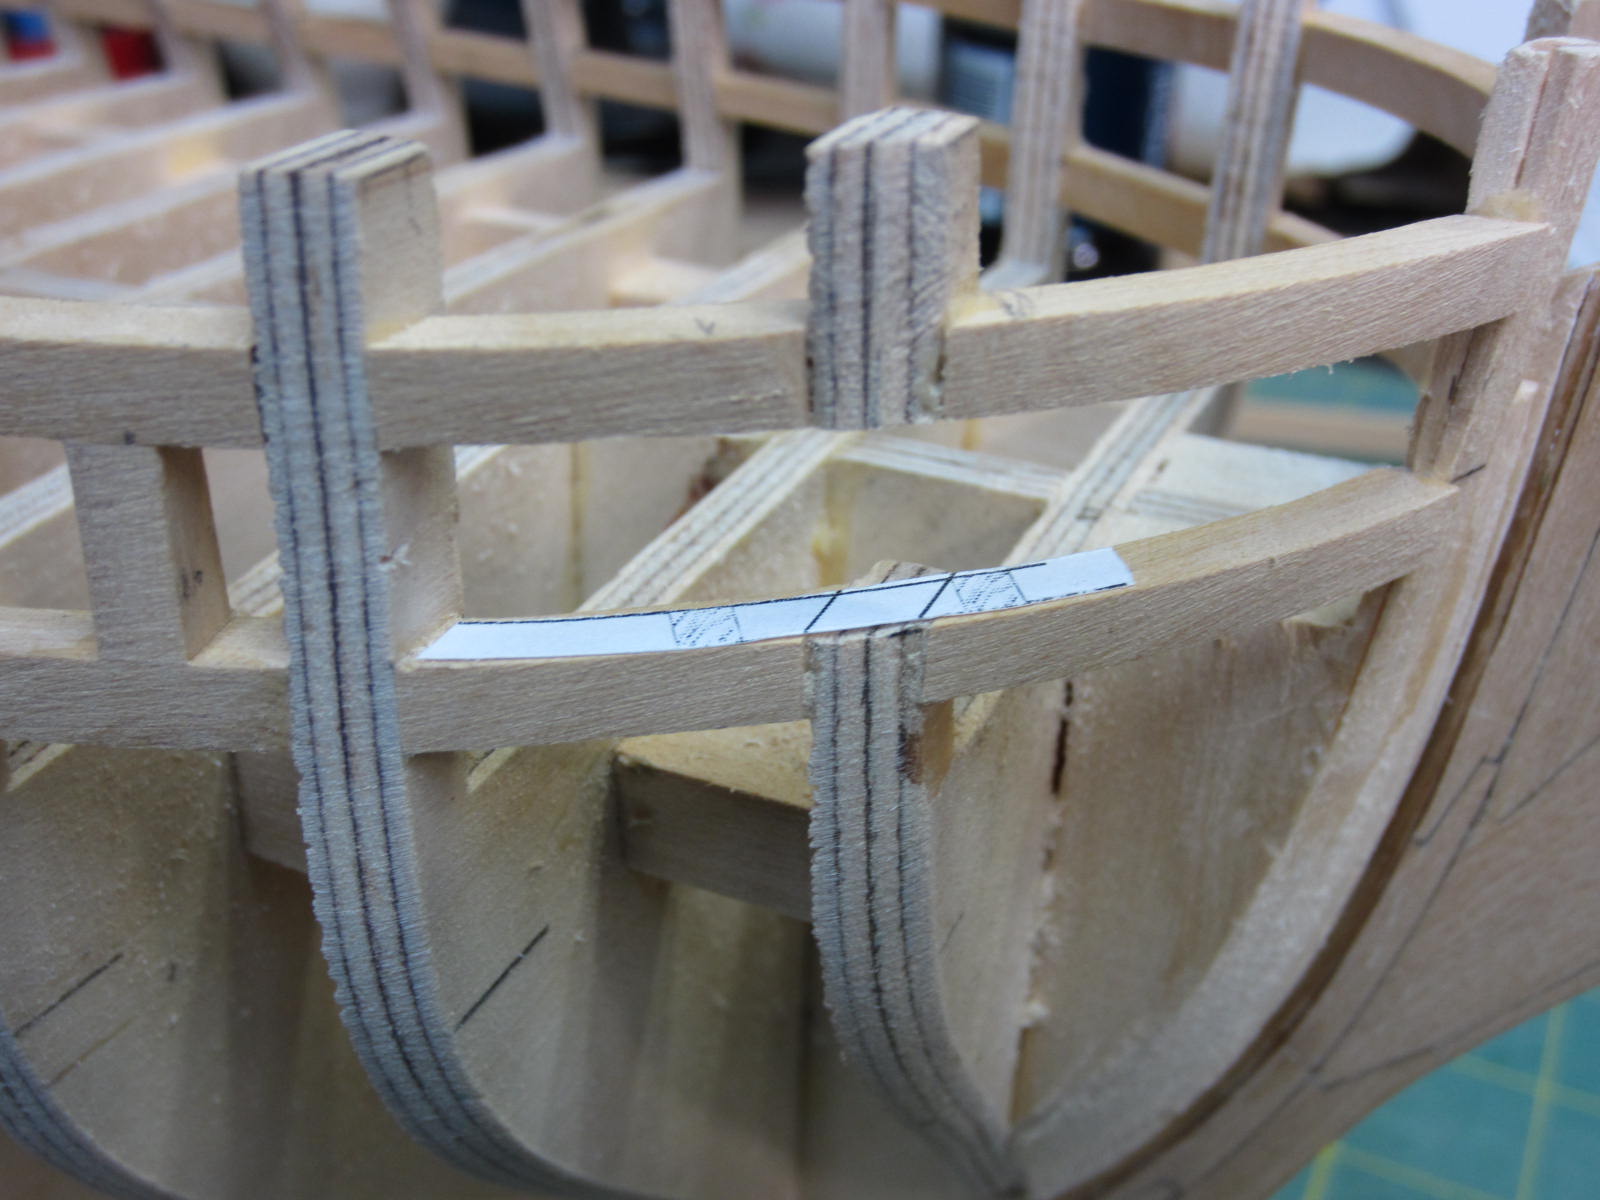
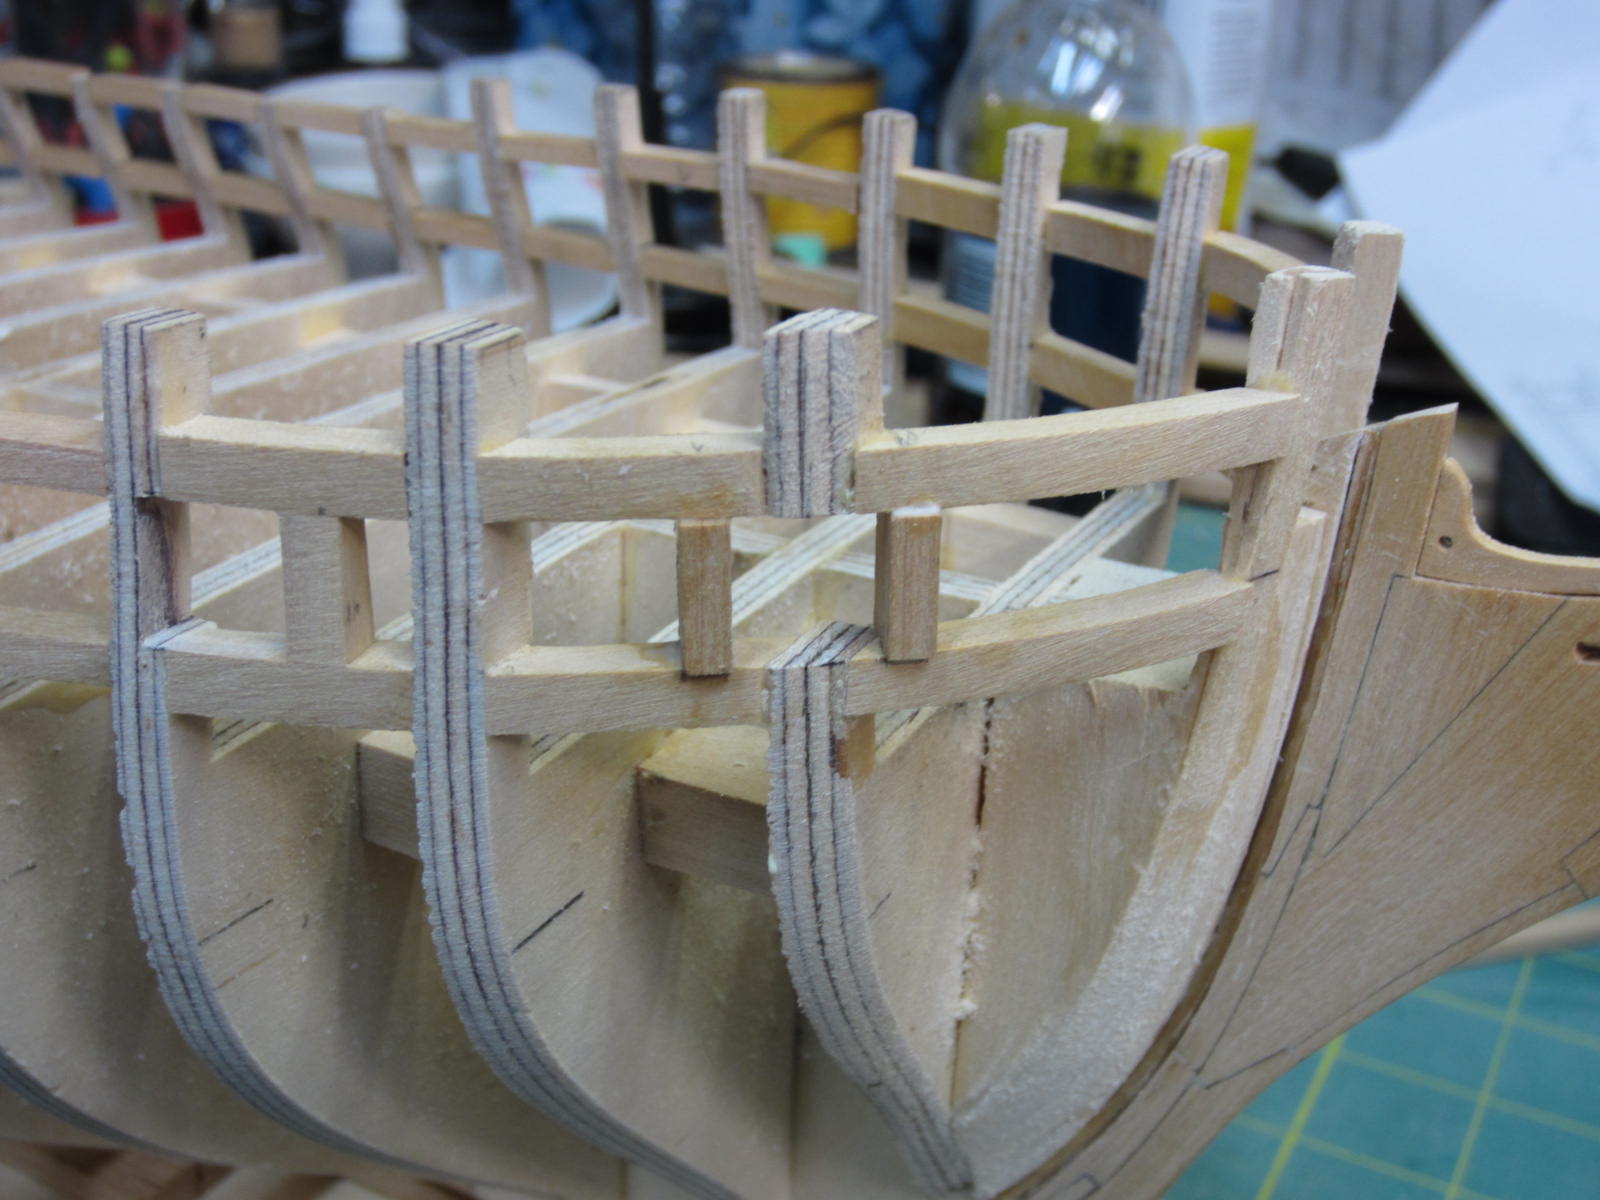
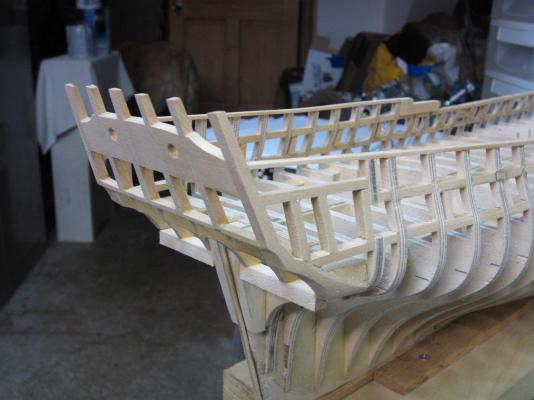
Hi All, The framing of the gun ports is moving along nicely and one pleasant thing I learned was that there are no sweep ports to worry about. A batten strip was pinned to the bulwarks at the previously marked reference lines and a smooth run was established. I then marked the bulkheads for the final placement of the sills. The sill and lintels were cut from boxwood. At the bow the bridle port fell over a bulkhead and the bulkhead had to be cut away prior to framing it. To add the lintels a piece was cut at the correct height and long enough to sit on both sills this gave a consistent height and eliminated the need to measure each one. I have done the preliminary sanding to the out board side. On to the transom soon!


-
Thanks Bob and Mark and everyone for all the likes!
-
Thanks Pat. Following Chucks instructions makes it much easier!
-
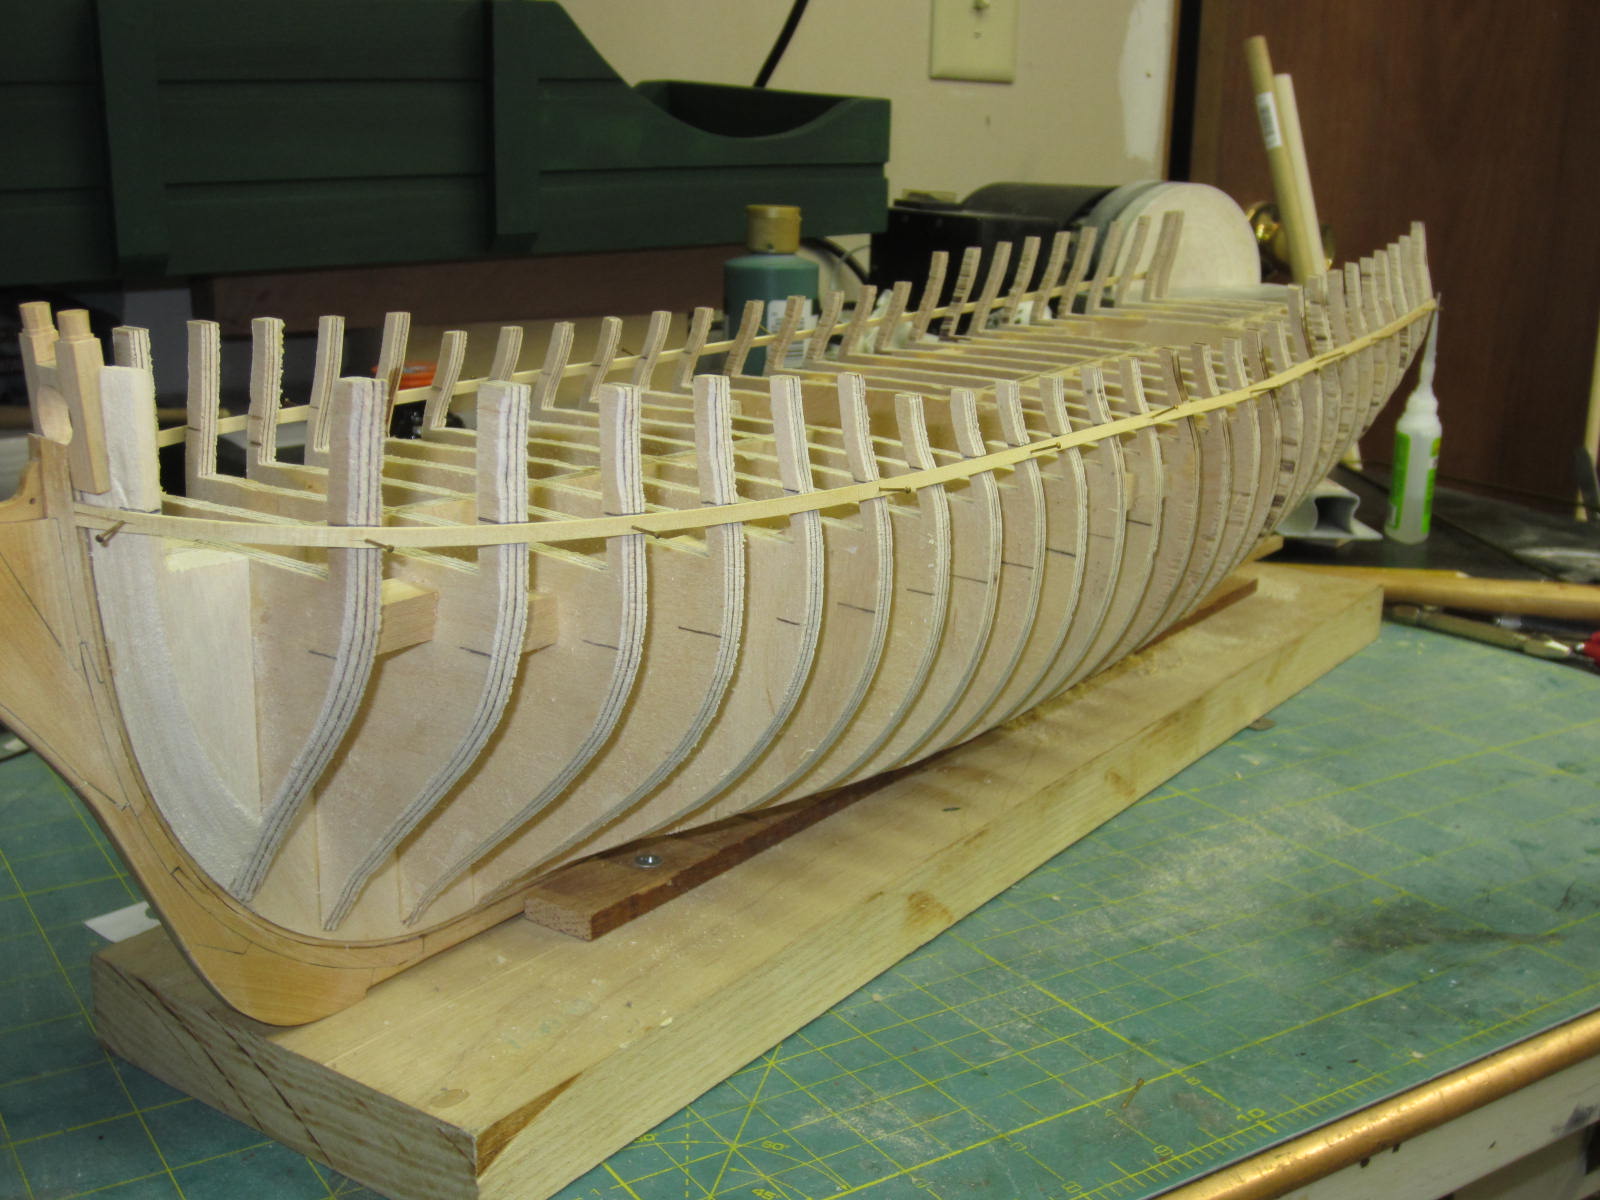
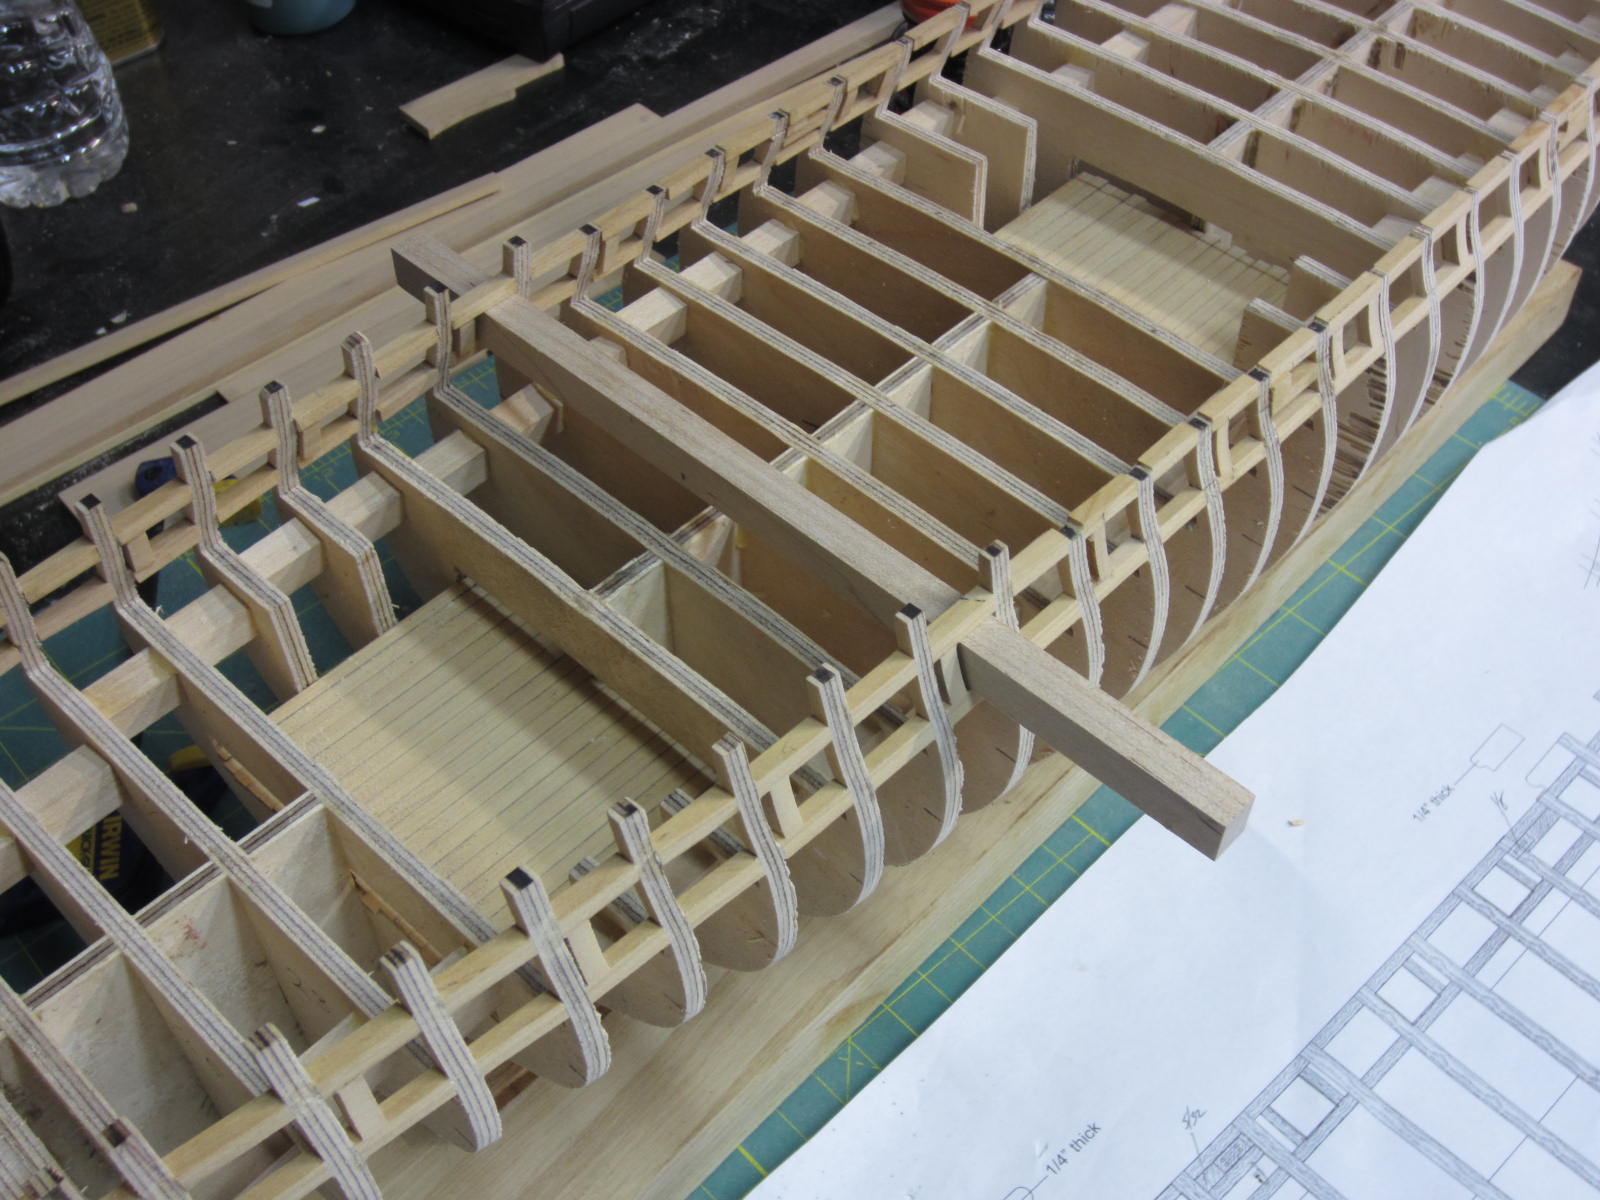
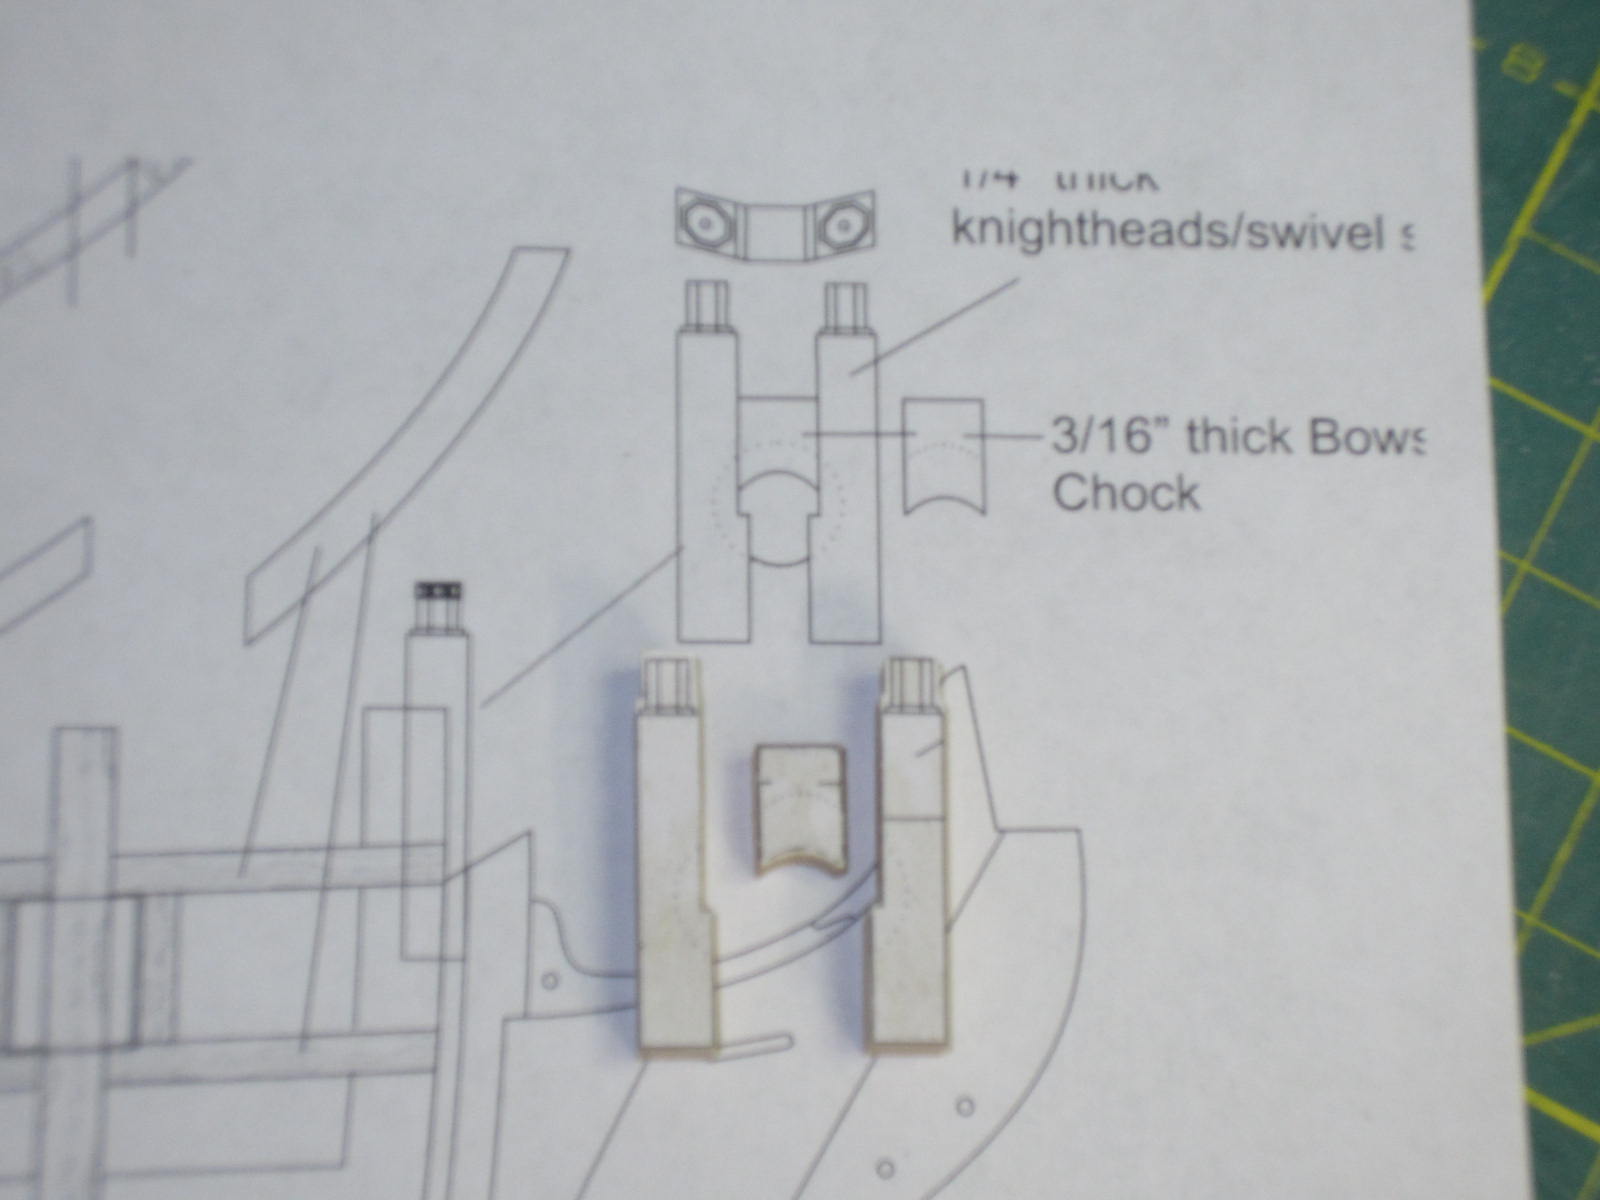
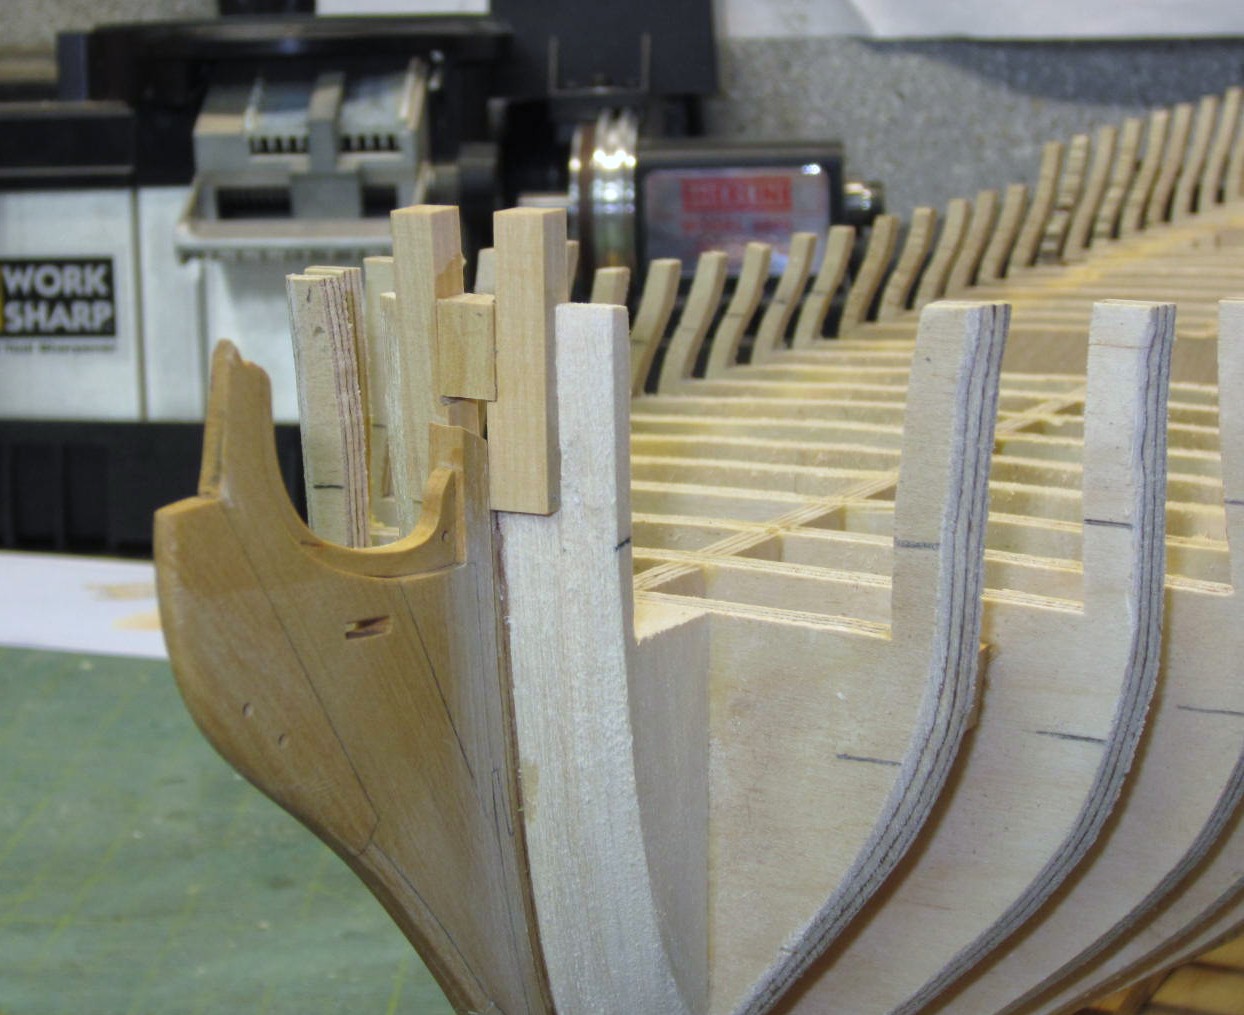
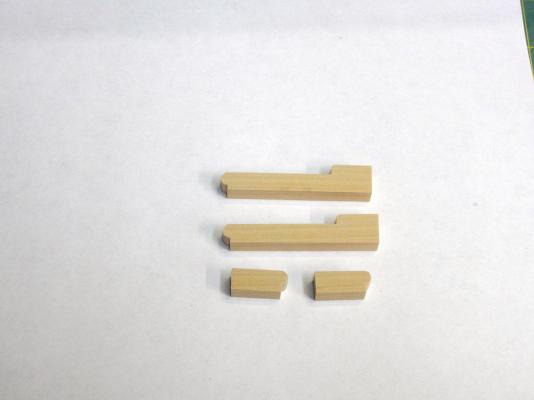
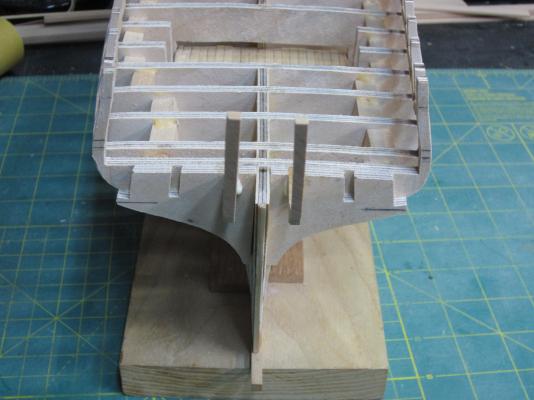
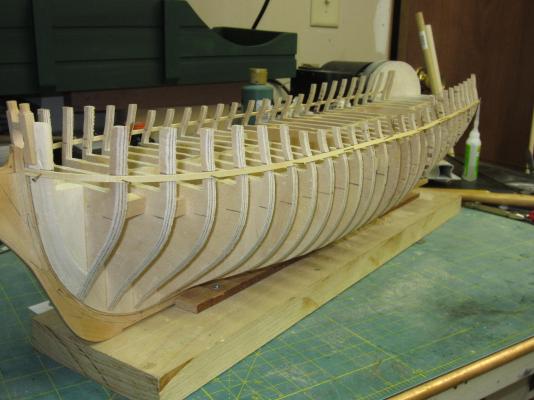
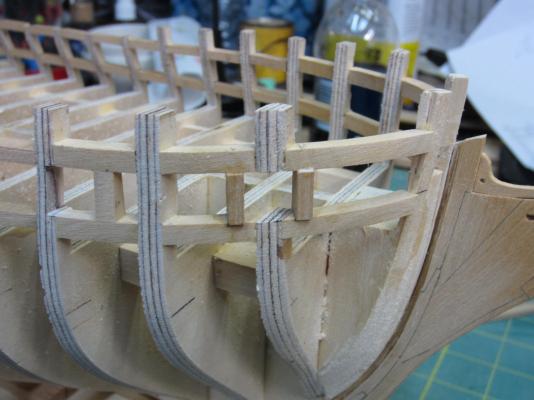
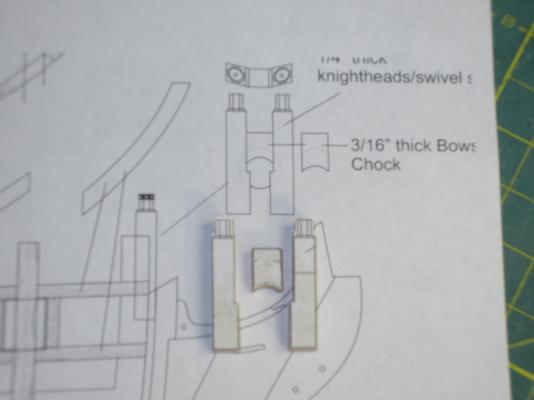
Hi Ben, Unfortunately it's a long haul for me and I won't be able to attend. Sorry it should be a great time. I hope you get to go. Ok I've been moving along just haven't been able to find time to post. The hull is faired fairly close to its final shape. I still have a little work to do on the tops of the bulkheads but I'll wait until I frame the gun ports to finish it up. I didn't need to use any cross bracing either. The plywood was good and solid and I was careful too. I next planked the two platforms of the lower deck with pau marfim. After that it was time to add the bow fillers and bollard timbers. Two of the fillers needed to be a total of 7/32" thick. While the third timber needed to be 3/16" thick. Chuck used two pieces to obtain the 7/32" thickness, (1 x 3/16" & 1 x 1/32"), I used my thickness sander to thin down a piece of 1/4" wood I had to the 7/16". Same result I just used one piece. After that it was time to make the bollard timbers. these are not the traditional way to make them but seeing there are bulkheads and not frames only the tops will be seen. As you can see from the plans there are different angles, thicknesses and a hole it was a bit of a challenge. At least every piece was made twice and some three time before an acceptable one was obtained. The bollard timbers are just set in place for now. Next up it is time to start framing in the gun ports.


-
Hi Ben, Very well thought out an executed! Looking really nice too.
-
Hi Augie. Just got caught up and you've done a great job on a difficult area. I really like the window "glass" too. It does add a really nice look to it. Well done and don't get distracted by outdoor work. In the shop I say!
- 2,191 replies
-
- 1
-
-
- confederacy
- Model Shipways
- (and 1 more)
-
Thanks Ben! Mark, Keeping the admiral happy is why I made it all those years ago. Thanks Grant. I mainly use it for big dirty jobs like fairing and sanding the hull planking. Then it gets tucked away for long periods of time until needed again.
-
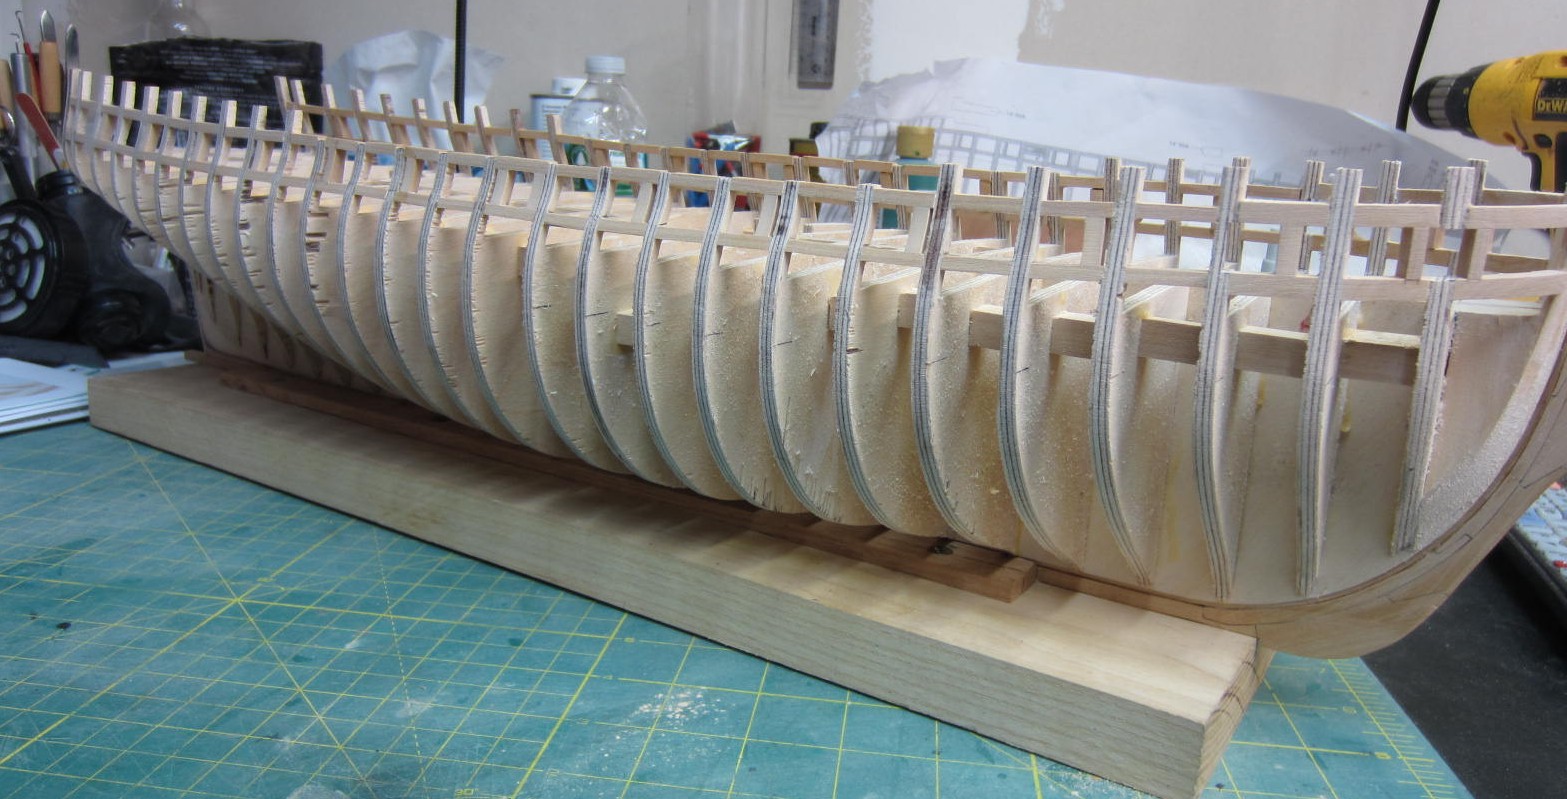
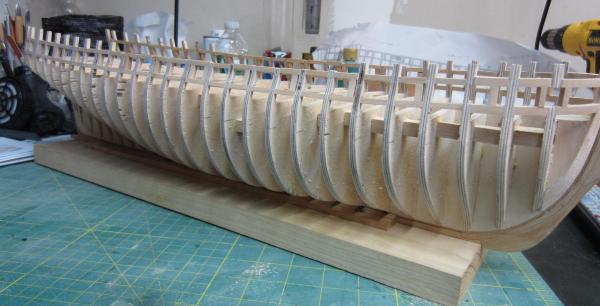
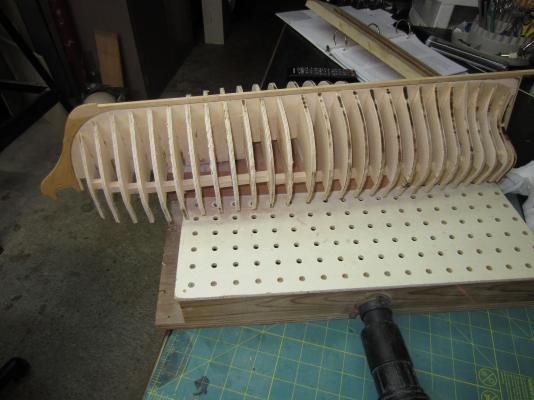
Hi All, Not much to report on. I have started sanding/fairing the lower portion of the hull. When I do that I set the hull upside down on a small homemade down draft table to help contain the dust. I place some wood blocks on the table that are thick enough to keep the tops of the bulwarks from hitting the table and hopefully protecting them. Then it's just a matter of sanding, checking with some planking strips, sand some more, etc etc etc.
-
Wonderful workmanship Bob. I'm so impressed with how you can build the deck off the model and make it fit so nicely.
-
Just got caught up Augie and you have done a wonderful job on a shall we say challenging area. I agree with Sjors that it is "voortreffelijk"! voortreffelijk {adj} excellent exquisite superior Couldn't have said it any better myself. That is if I could pronounce it!
- 2,191 replies
-
- 2
-
-
- confederacy
- Model Shipways
- (and 1 more)
-
Remco I just sit here looking at your work with a huge smile and a sigh of admiration!
- 1,215 replies
-
- 1
-
-
- sloop
- kingfisher
- (and 1 more)
-
Hi Len, First and foremost my best wishes to you and hope you get it all sorted out for the better. If we get to see you again this year great, if not there is always next year. I also understand you wanting to move on for a new project. She looks great as is and if you decide to come back and do the rigging when you feel like it I'm sure it will be outstanding too. Well done my friend!
- 122 replies
-
- 1
-
-
- bellerophon
- victory models
- (and 1 more)