-
Posts
2,530 -
Joined
-
Last visited
Content Type
Profiles
Forums
Gallery
Events
Everything posted by Rustyj
-
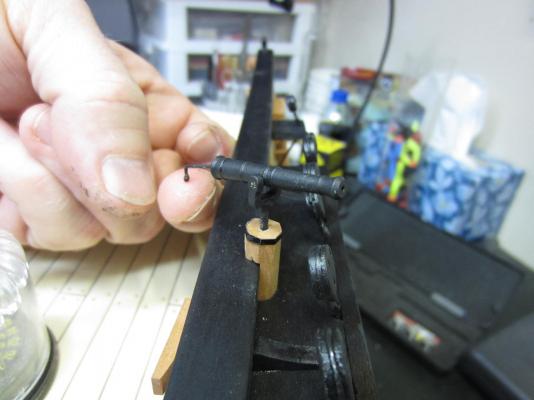
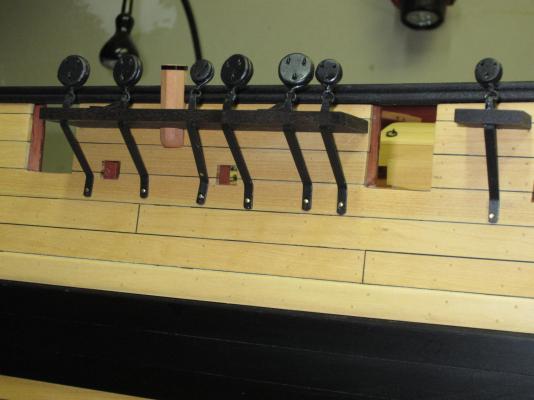
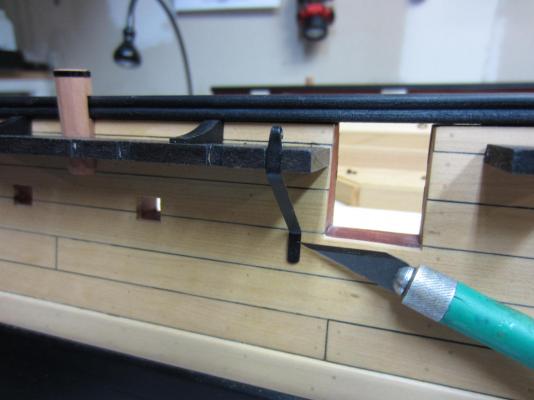
OK as I said I have a beta version of the swivel guns. What I'm wondering is if the mounting bracket looks in proper proportion to everything else? Thanks
- 421 replies
-
- granado
- bomb ketch
-
(and 2 more)
Tagged with:
-
Hi Bob, Yeah you are right about the cannon and mortar. I did cheat on the swivel guns though. Chuck’s 12 pounders were an almost exact match so I ordered them up and they will do just fine. Plus they are way nicer then anything I will ever make! I will be posting pics of the brackets that hold the swivel guns in a bit to see what people think about the look. Thanks all.
- 421 replies
-
- granado
- bomb ketch
-
(and 2 more)
Tagged with:
-
Thank you for the kind words Paddy. Also thanks to everyone for stopping in and all the likes. The deadeyes and chain plates have been completed on the port side. I left the pin head unpainted in this picture so you could see how it simulates the bolt head. I just have to touch them up a bit, adjust the deadeyes position and then it’s on to the starboard side.
- 421 replies
-
- granado
- bomb ketch
-
(and 2 more)
Tagged with:
-
Thanks Tim. I had some nice beech dowels so it made it easier. Some of the the dowels out there wouldn't be any good and I would have had to make them from my regular wood stock.
- 421 replies
-
- granado
- bomb ketch
-
(and 2 more)
Tagged with:
-
I started from the bottom up to a designated point where you see the plates merge. Then a second belt up to the water line area and a third belt to finish it off. At least that's what I remember. When I get home tonight I'll look and see if I have more information.
- 101 replies
-
- victory models
- amati
-
(and 2 more)
Tagged with:
-
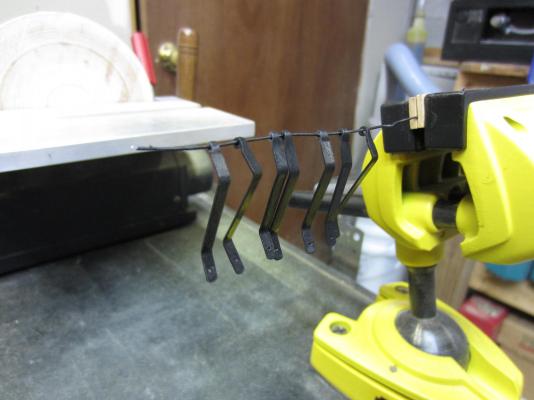
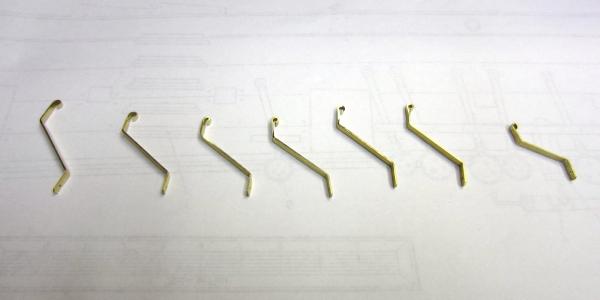
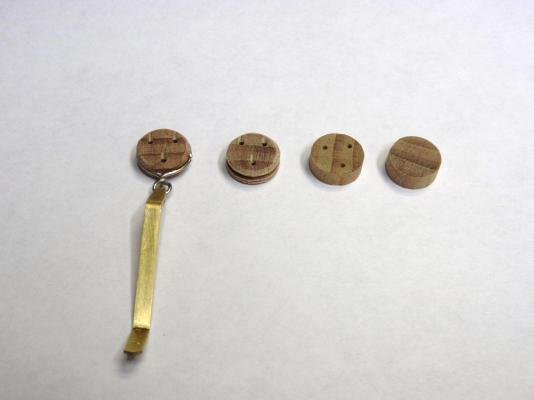
I’ve been working on the chain plates. I used a brass sheet and old 90 TPI blade on the Byrnes table saw and cut strips for the chain plates. I roughly bent them to shape and will fit them to each individual location as each one will be unique. I chose to paint the assemblies too. For the deadeyes I cut some correct sized dowel to and then using files and sandpaper shaped them.
- 421 replies
-
- granado
- bomb ketch
-
(and 2 more)
Tagged with:
-
Hi Glenn, I don't know if these help but here are a couple of pics of my coppering the Constitution. If you need more let me know and I will get it out of the cabinet and take more.
- 101 replies
-
- victory models
- amati
-
(and 2 more)
Tagged with:
-
Well done Glenn. I find the stern can be even more challenging then the coppering of the hull. You did a great job of adjusting to make it look really fantastic and the pictures will help tremendously when I eventually crack the box open and start on her. I look forward to seeing the hull completed whenever you finally succumb.
- 101 replies
-
- victory models
- amati
-
(and 2 more)
Tagged with:
-
- 421 replies
-
- granado
- bomb ketch
-
(and 2 more)
Tagged with:
-
I wish I could say I’m stunned at the realism but you’ve spoiled us and now we expect, and receive, such fine work it would be more stunning if you did not produce your awe inspiring work. Verrrryyyyy well done!
- 1,214 replies
-
- sloop
- kingfisher
-
(and 1 more)
Tagged with:
-
Hi Bob, That’s a unique way of doing the copper. It looks really good and if you find it easier then all is good. Now if we got 13” of rain up here everything on the hills would wash into the valleys and the water wouldn’t recede for months! I hope all is well with you and extra model time was the only “issue”.
- 1,477 replies
-
- essex
- model shipways
-
(and 1 more)
Tagged with:
-
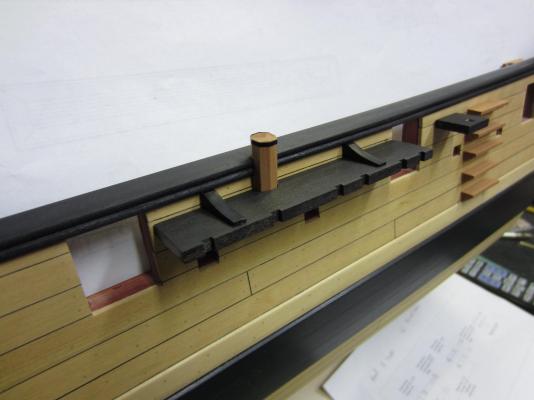
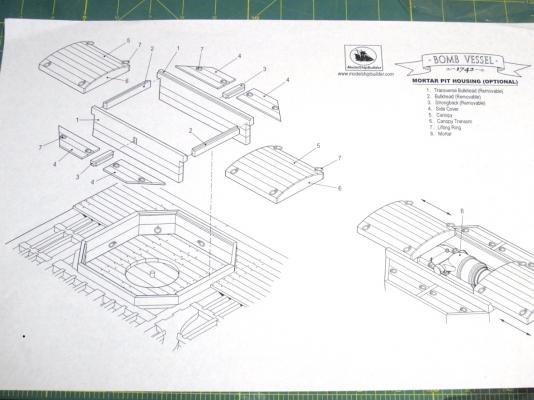
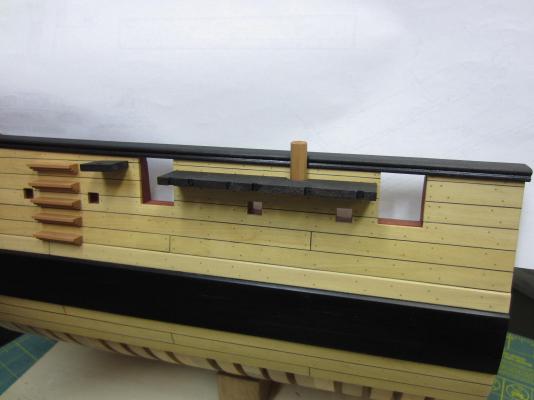
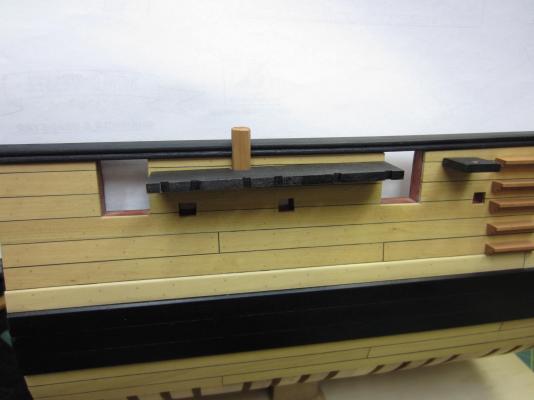
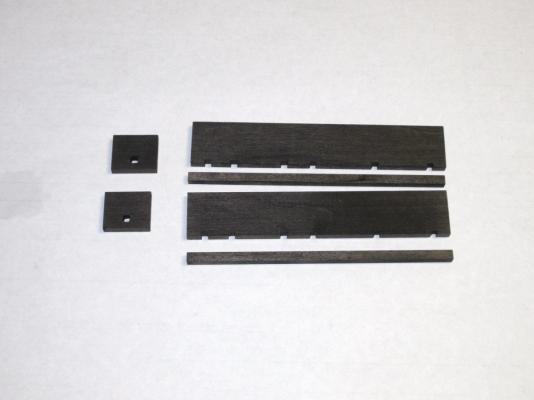
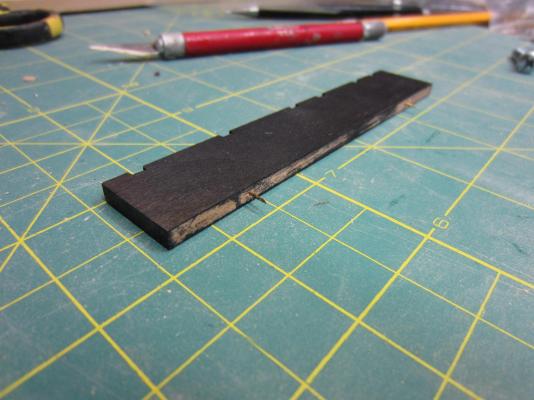
Hello all, Thank for the Birthday wishes and the likes. That was very nice. Had a good day and a nice dinner. No work either! So far doesn’t seem any worse than any other. Hey Joe when you get there let me know how it is. I may have to stop counting. Hi Michael, Yes with your projects I would see it not being an eye opener. Hi Grant and thanks for the info. Well I have cut the pedestals for the swivel guns and then notched the channels to fit around the pedestals. Glued them in place and took the pictures……….. Crap the port channel (1st pic) is *$#@ backwards! The notches for the chain plates are reversed! Oh well I guess I needed some more practice making them. Just another head slapping duh moment. Next up while I wait for my brass for the channels to arrive I will be playing around making the optional storage cover for the mortar. It has to be removable so I can show it in either state. Should be fun.
- 421 replies
-
- granado
- bomb ketch
-
(and 2 more)
Tagged with:
-

Echo by Maury S - FINISHED - Cross-Section
Rustyj replied to Maury S's topic in - Build logs for subjects built 1751 - 1800
Beautiful work Maury. Well done.- 324 replies
-
Thank you all for you stopping by and the likes. Nothing much to report. I took some cherry and make the channels for the dead eyes. They are also colored using the Fiebings dye. Though there is no tension on these I did insert a pin in them so when tacked and glued to the hull they will be stronger. Heavens knows they will need it as I bump into things a lot!
- 421 replies
-
- granado
- bomb ketch
-
(and 2 more)
Tagged with:
-
Nice job on the scuppers and sheaves. I think they really add to the look. If you hadn’t fessed up on the scuppers no one would have known!
- 1,477 replies
-
- essex
- model shipways
-
(and 1 more)
Tagged with:
-
Hi Augie, Very nice pattern. It’s not too busy and trying do all of those treenails can lead to pattern errors. Not that I would know about that nope no way. Oh and about downward facing bumkins you mentioned in B.E.’s Pegasus log, in case you didn’t know you will be making them too.
- 2,191 replies
-
- confederacy
- Model Shipways
-
(and 1 more)
Tagged with:
-
Hi Floyd, List sent to Chuck. Also you can direct people to me for the list too.
- 162 replies
-
- 18th century longboat
- model shipways
-
(and 1 more)
Tagged with:
-
Thanks Augie, That’s one of the pleasures of a Jim Saw. It allows me to do things I could never do before!
- 421 replies
-
- granado
- bomb ketch
-
(and 2 more)
Tagged with:
-
Hi Bob, Very well done on the model, stand and display case. I love them all.
- 100 replies
-
- model shipways
- 18th century longboat
-
(and 1 more)
Tagged with:
-
Hi Floyd, The material list in the kit calls for the following; Strip wood 6 @ 1/32” x 1/32” x 12” 10 @ 1/32” x 3/16” x 12” 1 @ 1/32”x 3/32” x 12” 40 @ 1/32” x 1/8” x 12” 10 @ 1/32” x 5/32” x 12” 3 @ 1/16” x 1/16” x 12” 1 @ 1/16” x 3/16” x 12” 1 @ 5/32” x 5/32” x 12” The keel, false keel, stem and rudder are cut from 3/32” sheet. The transom is cut from 1/16” sheet. I hope this helps.
- 162 replies
-
- 18th century longboat
- model shipways
-
(and 1 more)
Tagged with:
-
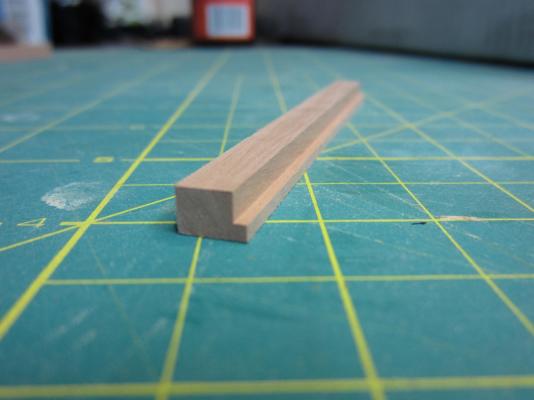
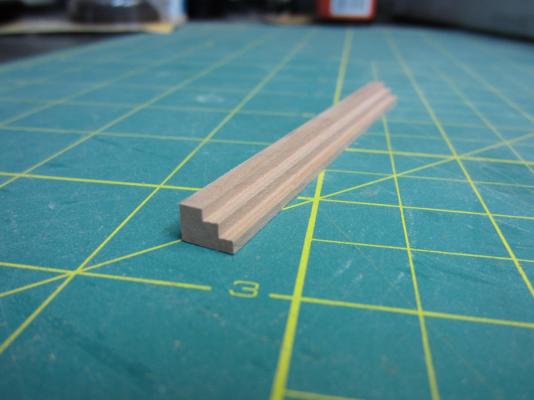
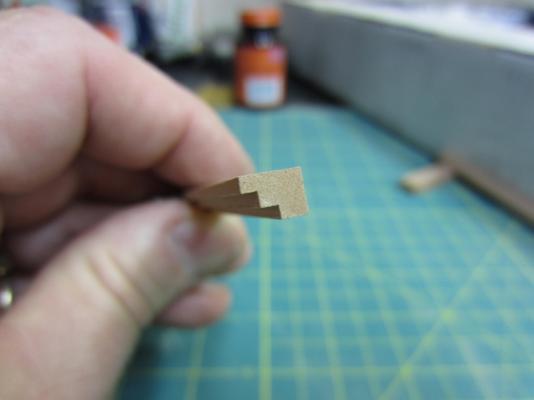
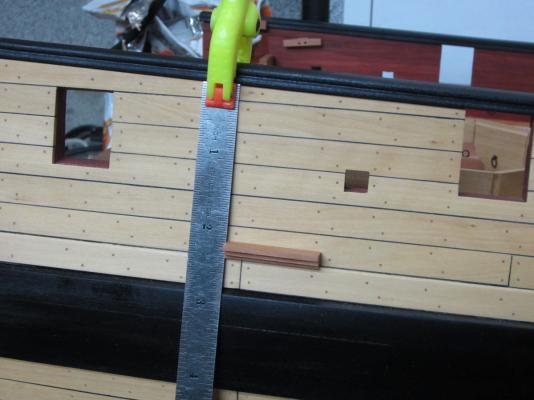
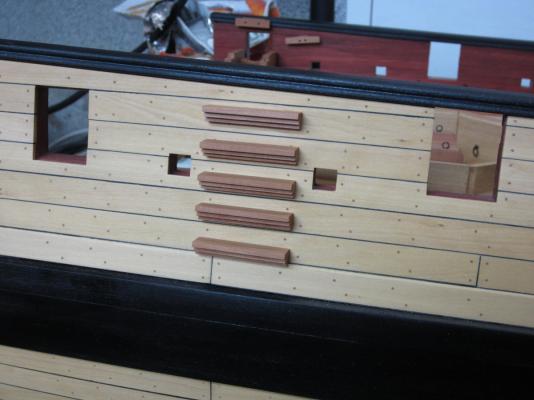
I kinda shifted gears and decided to make the entry steps. They are cut from swiss pear using the Byrne’s table saw. I clamped a ruler to the hull where they were located to keep a straight line and assist with the spacing.
- 421 replies
-
- granado
- bomb ketch
-
(and 2 more)
Tagged with:
About us
Modelshipworld - Advancing Ship Modeling through Research
SSL Secured
Your security is important for us so this Website is SSL-Secured
NRG Mailing Address
Nautical Research Guild
237 South Lincoln Street
Westmont IL, 60559-1917
Model Ship World ® and the MSW logo are Registered Trademarks, and belong to the Nautical Research Guild (United States Patent and Trademark Office: No. 6,929,264 & No. 6,929,274, registered Dec. 20, 2022)
Helpful Links
About the NRG
If you enjoy building ship models that are historically accurate as well as beautiful, then The Nautical Research Guild (NRG) is just right for you.
The Guild is a non-profit educational organization whose mission is to “Advance Ship Modeling Through Research”. We provide support to our members in their efforts to raise the quality of their model ships.
The Nautical Research Guild has published our world-renowned quarterly magazine, The Nautical Research Journal, since 1955. The pages of the Journal are full of articles by accomplished ship modelers who show you how they create those exquisite details on their models, and by maritime historians who show you the correct details to build. The Journal is available in both print and digital editions. Go to the NRG web site (www.thenrg.org) to download a complimentary digital copy of the Journal. The NRG also publishes plan sets, books and compilations of back issues of the Journal and the former Ships in Scale and Model Ship Builder magazines.


