
HOLIDAY DONATION DRIVE - SUPPORT MSW - DO YOUR PART TO KEEP THIS GREAT FORUM GOING! (Only 36 donations so far out of 49,000 members - C'mon guys!)
×


marktiedens
-
Posts
1,737 -
Joined
-
Last visited
Content Type
Profiles
Forums
Gallery
Events
Everything posted by marktiedens
-
Problem fixed - I had my local Staples enlarge the plan sheet & it came out spot on. Thanks everyone for your replies! All the other plan sheets are sized correctly,so hopefully no more issues. Mark
-
Thanks for your reply - the only large hull profile drawing in my plans (other than the hull cutaway & deck layout) is on plan sheet 1 & it measures 720mm from figurehead to lanterns. to add to that,the bow & stern views on the same sheet are also the same proportion smaller. I wonder if Model Shipways altered the drawing ,although the sheet measures 1065 x 755mm - plenty of space for a full size drawing. Anyway,I will figure it out one way or another. I may just take it to a copy center & have it enlarged - no big deal. I just have to find a copy place with a large enough copier. I thought maybe I didn`t have all the plans,but I re-checked & I do have all 20 sheets. Mark
-
Well,I have a slight dilemma - the instructions say to mark the position of the main wale using the full scale hull profile view on the drawings. The problem is the hull profile view is not at full scale. The only full scale drawings of the hull only show the hull cutaway & deck layouts. I see a few options - 1)measure from the drawing & add a mm or two 2)take the plan sheet to a copy center & have it enlarged 3)"eyeball"it. Any other suggestions are welcome. Mark
-
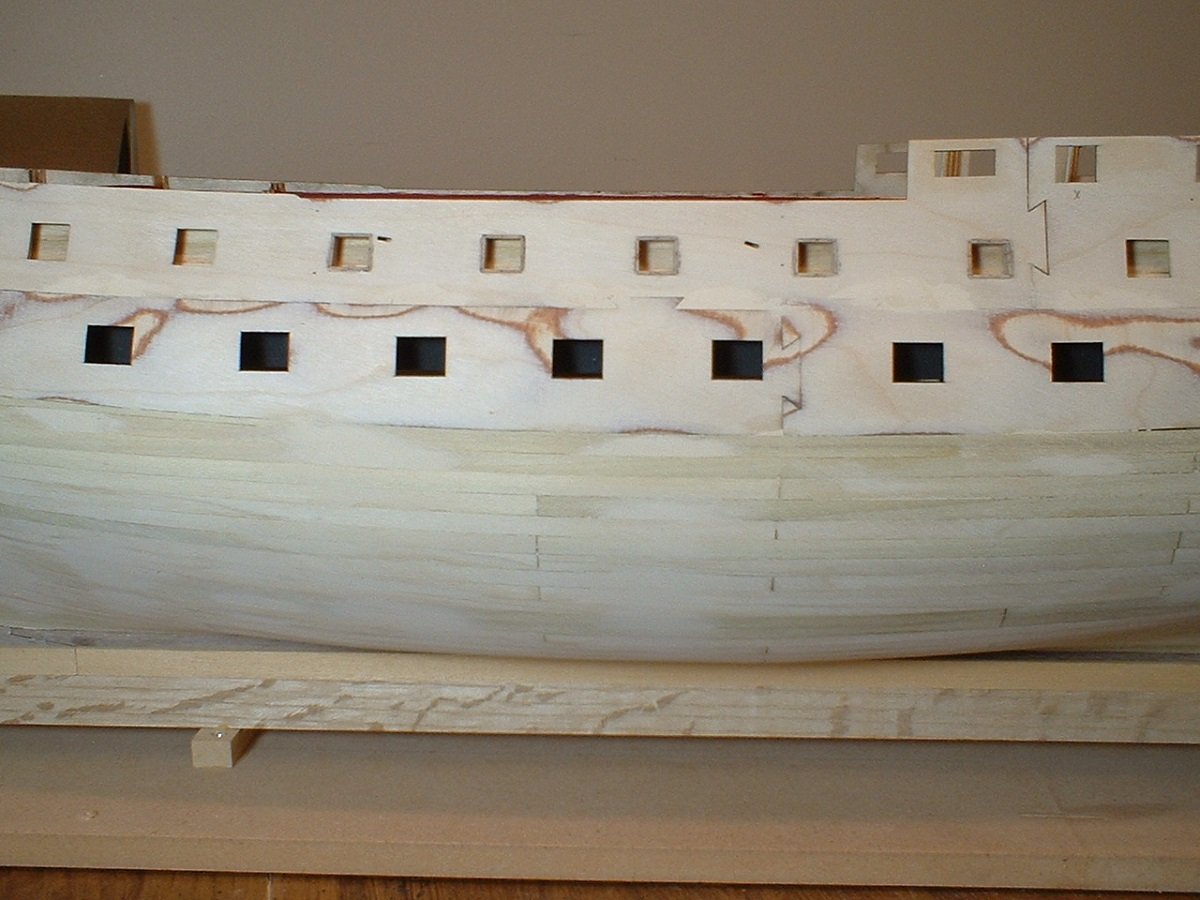
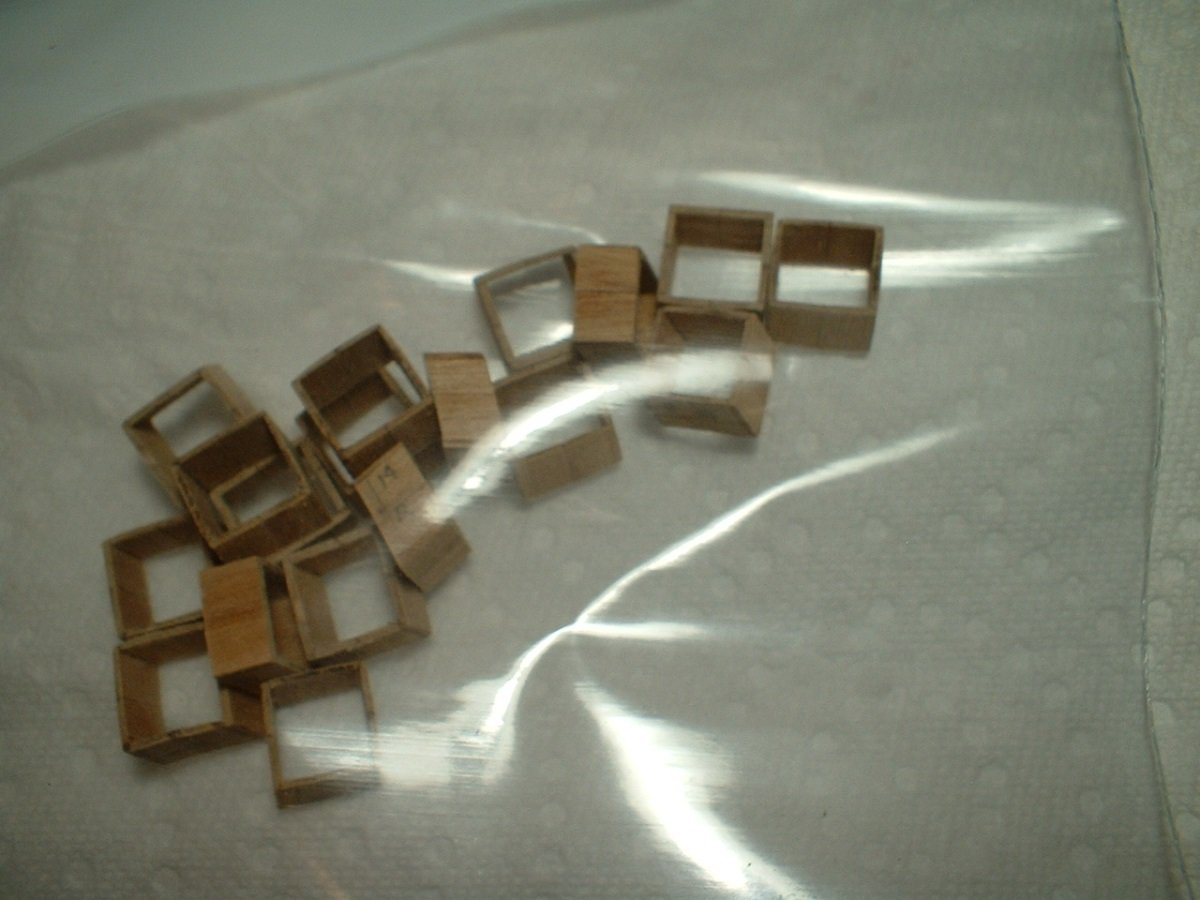
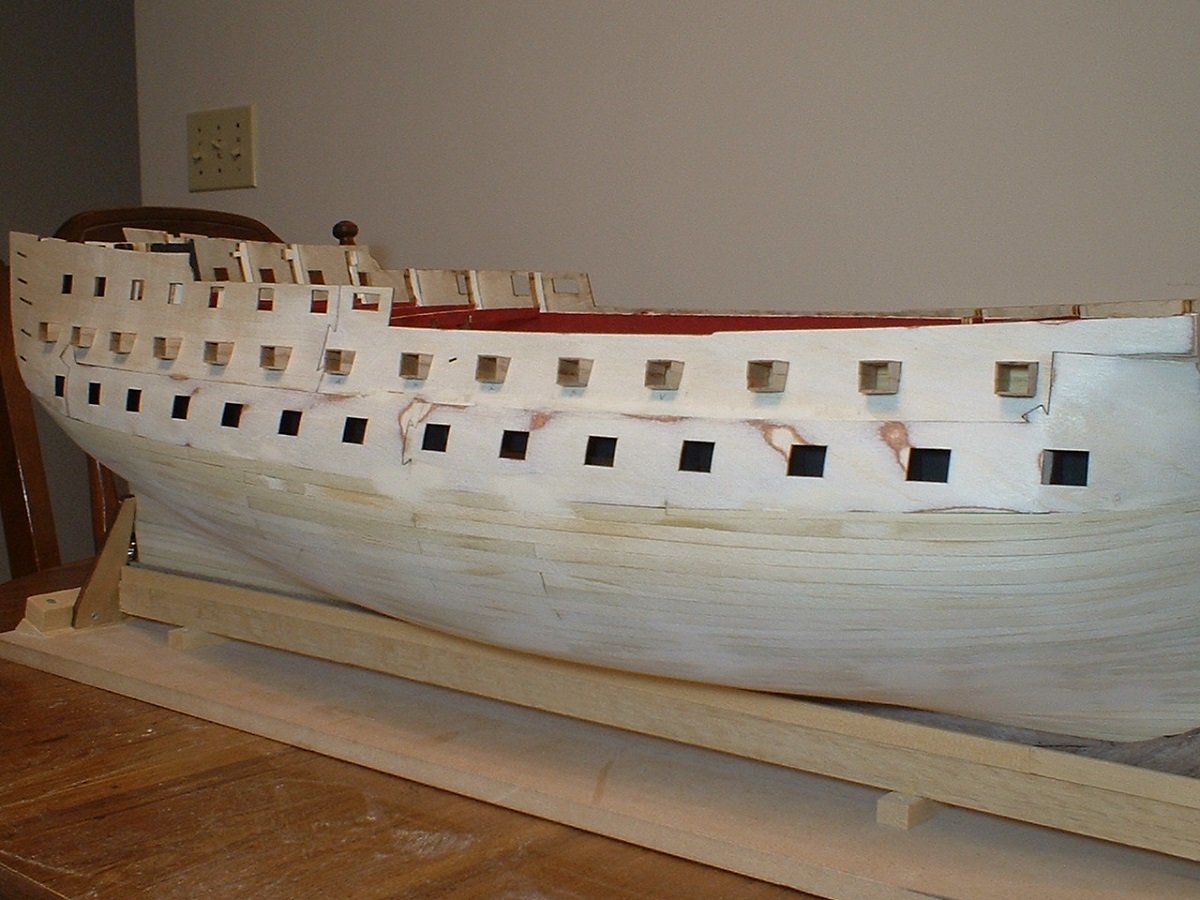
Thanks Peter. All the upper gun deck linings are now done & the 10 (5 each side) without lids were glued in place. The rest of the linings were put in a plastic bag for safe keeping until the second planking is done. All those linings are just edge glued & very fragile - I had to re-make a few that broke while sanding them. While waiting for glue to dry I also got the lower stern counter pattern glued on. I think I will wait until the second planking is done before opening the gun ports in the inner bulwarks. Mark
-
Next thing to do is the upper gunport linings. I glued a number of "boxes" together to serve as gunport linings from the supplied strips. The insides will be cut at an angle to fit against the inner bulwark & glued in place. Then the openings in the bulwarks will be opened up - hopefully they won`t splinter too much. Then the outer part will be trimmed off flush with the planking. Only the linings without lids will be actually glued in place for now - the others will be glued in place after the second planking in order to form the rabbet for the lids. Mark
-
Belay Pins
marktiedens replied to shipman's topic in Discussion for a Ship's Deck Furniture, Guns, boats and other Fittings
Maybe we could talk Chuck into making some true scale pins to compliment his other fine products. Mark -
Hi Frank. The cannons don`t look that bad to me - maybe just a tad big,but with this kit being 1/60 scale I don`t think they are that far off. But,as they say,my opinions are usually worth what you paid for them. Go with whatever you like better & no one would ever know the difference after seeing the great hull work you are doing! Mark
- 510 replies
-
- 2
-

-
- reale de france
- corel
- (and 1 more)
-
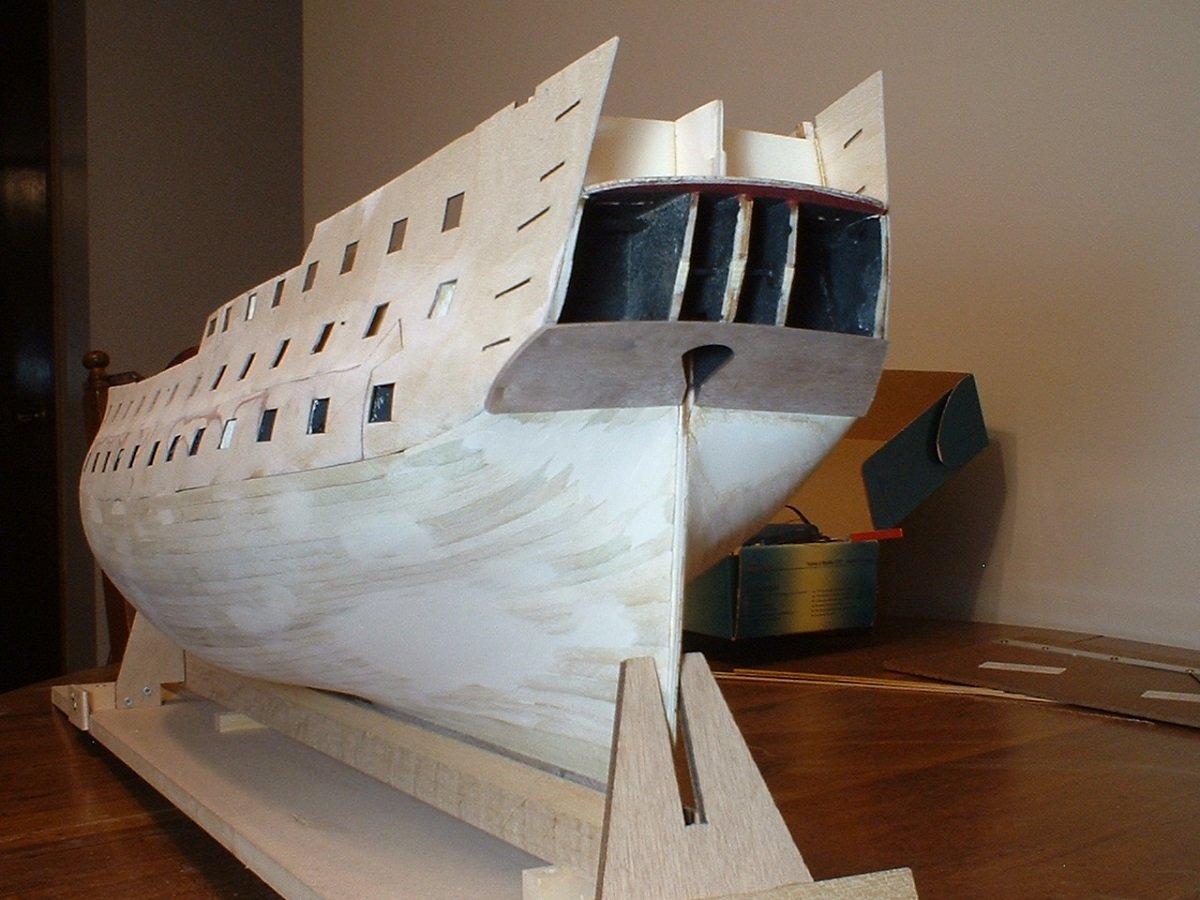
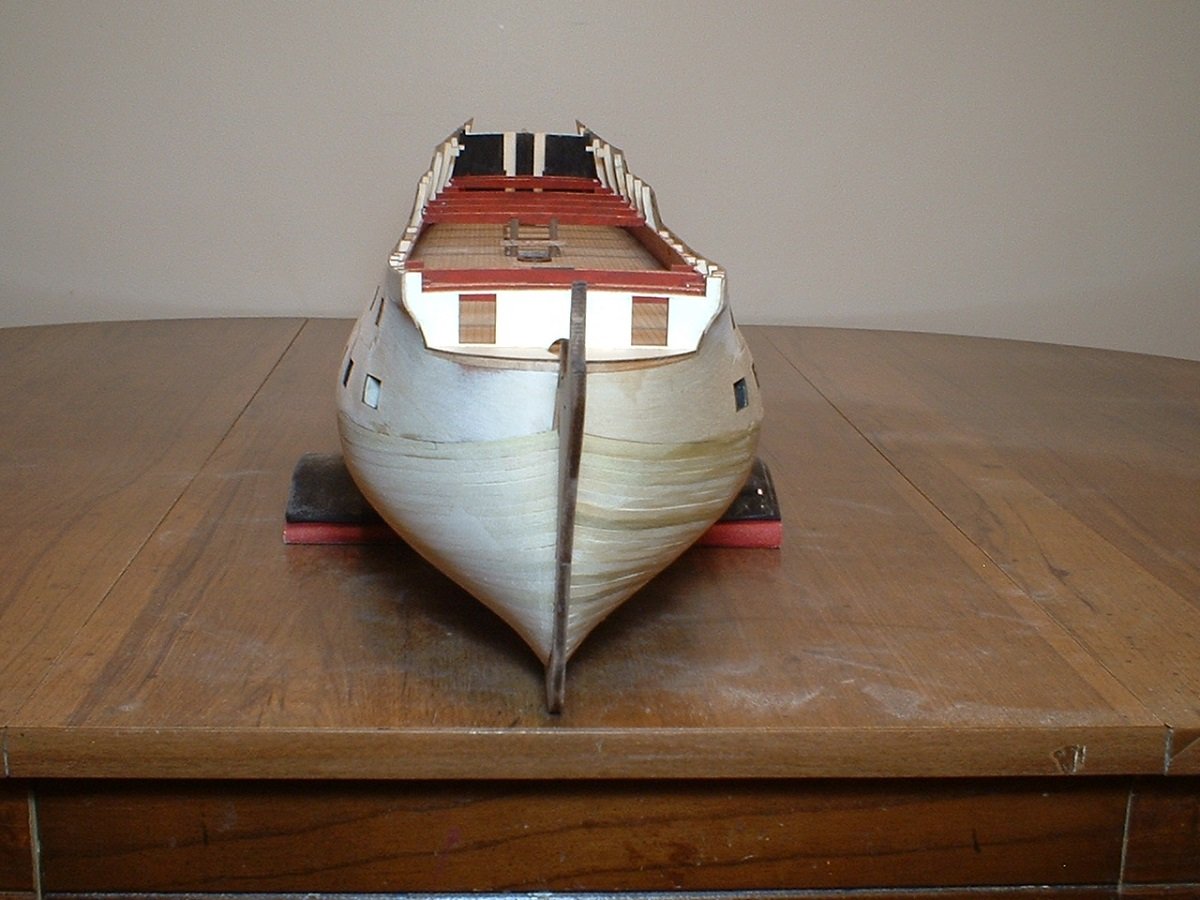
Thanks O.C. - yes,I really like the heart shape from the bow view. The whole hull will look much better after the second planking & copper is done. Mark
-
Thanks Mike! I think this is the hardest part of the entire build. The upper strips were no problem since they are applied to the concave area of the bulkheads - the only issue with them is they have to be in the correct position or the stern components won`t fit. The lower ones are the hard ones since they are on the convex part of the bulkheads - I had to use a bit of "creative" clamping on them. Mark
-
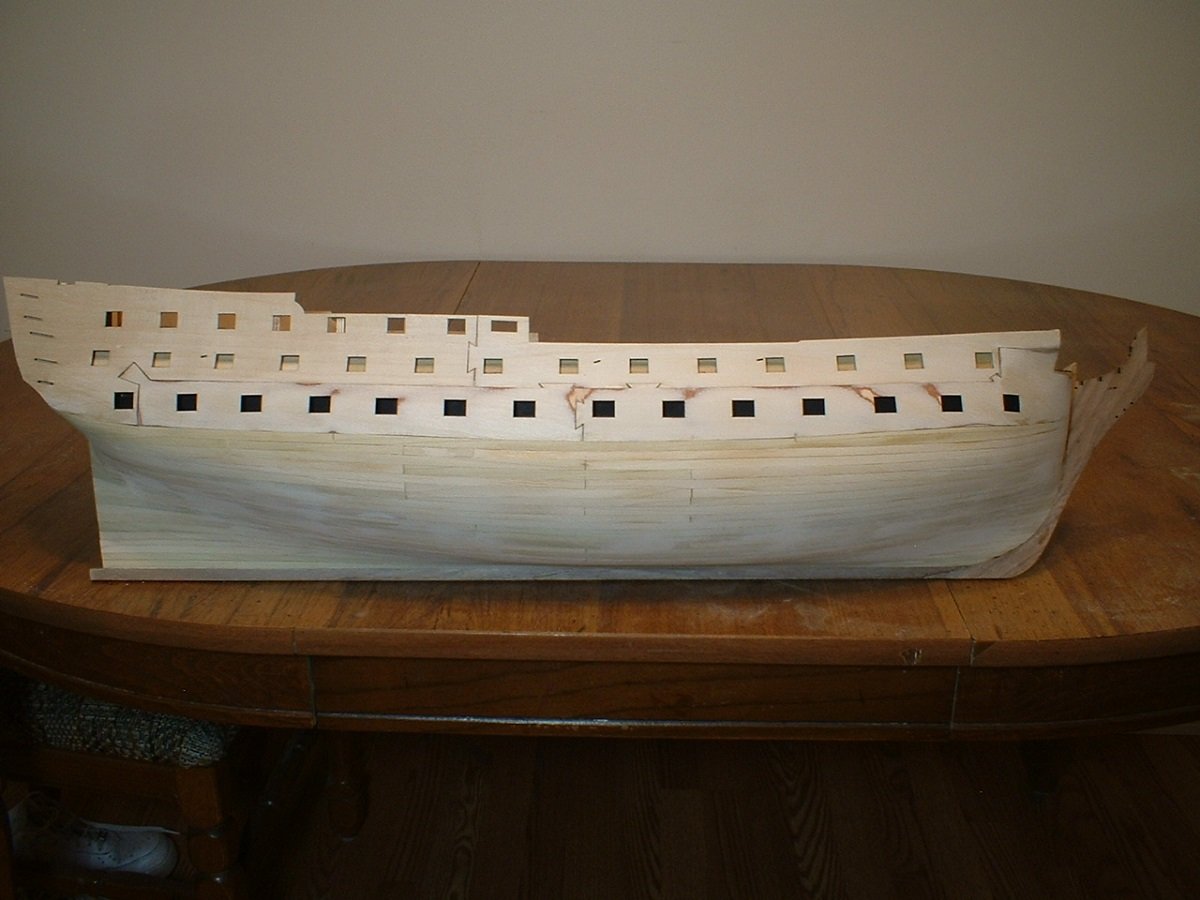
Thanks O.C.. The port side is now sanded,sanded,sanded some more, a little filler here & there,sanded,& sanded some more. I think this is the first kit I`ve done that did NOT need any shims on at least some of the bulkheads - kudos to the designer & the laser cutter! It`s a bit scruffy looking right now,but as I said before,it is a smooth base for the second planking now. Mark
-
Thanks Frank - The blending wasn`t too bad - mostly lots & lots of sanding. For some reason,the port side strips are not quite as even,so a lot more sanding is being needed. The strips needed to be soaked for 20 to 30 minutes in order to make them pliable enough to conform to the bulkhead curves & although I clamped them to the bulkheads & let them dry in place before glueing them, there was still a little spring-back which made a couple of slight waves in the strips after being glued, but not enough that I can`t sand out. I kind of rushed through the planking(some planks were still damp),so I am having to fill a few low spots. Since it will all be covered,I am only concerned with getting a smooth surface. Also,some of the planks were a little warped,along with slight variations in thickness caused some of the low spots(maybe a little bit of installer error also). Mark
-
Blackening revisited
marktiedens replied to dvm27's topic in Metal Work, Soldering and Metal Fittings
A stainless steel sieve works well also - it will not blacken. I got one from the kitchen utensil area of a department store & have used it many times - still looks like new. Mark -
Thanks Richard - being basswood,the planks were very easy to spile(bend sideways in this case)after just a couple of minutes in water. I don`t much care to do drop planks or stealers if I can help it. Mark
-
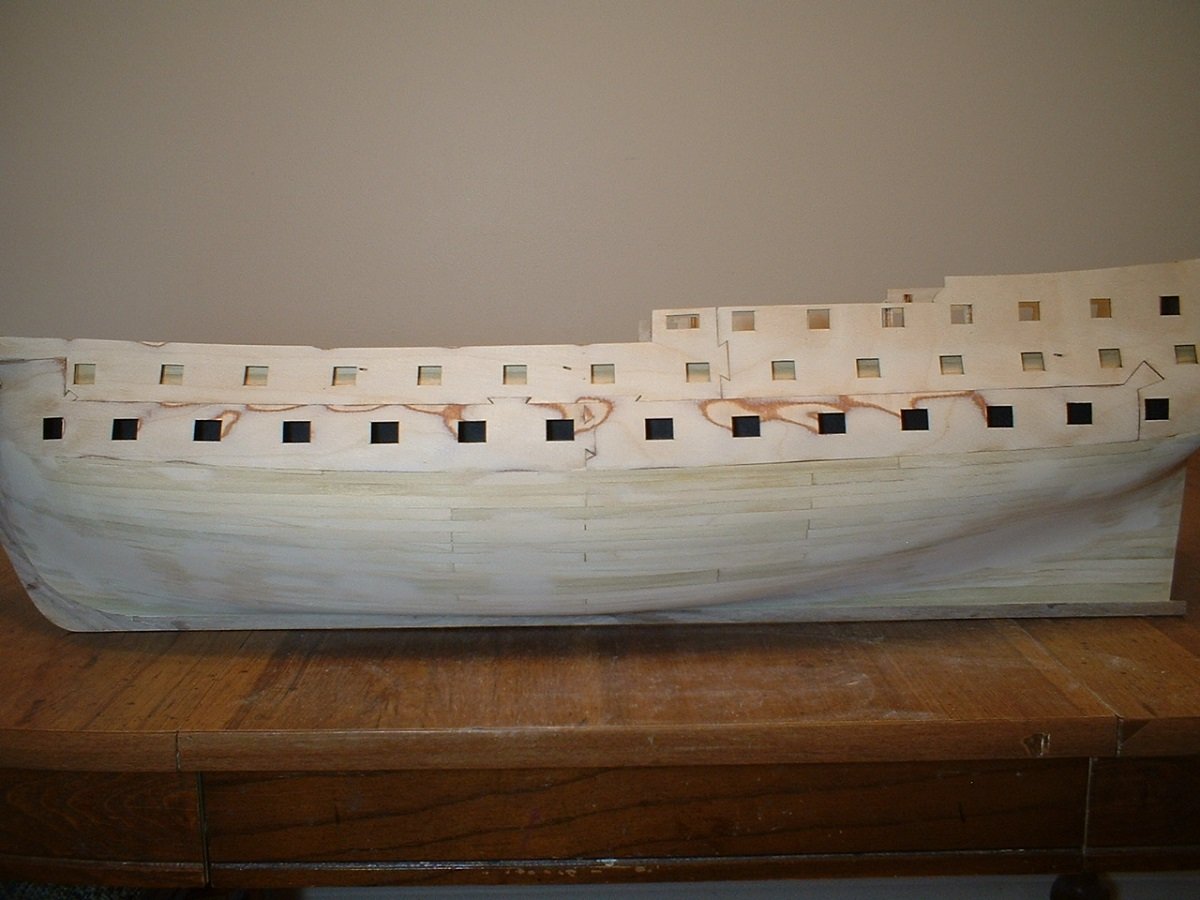
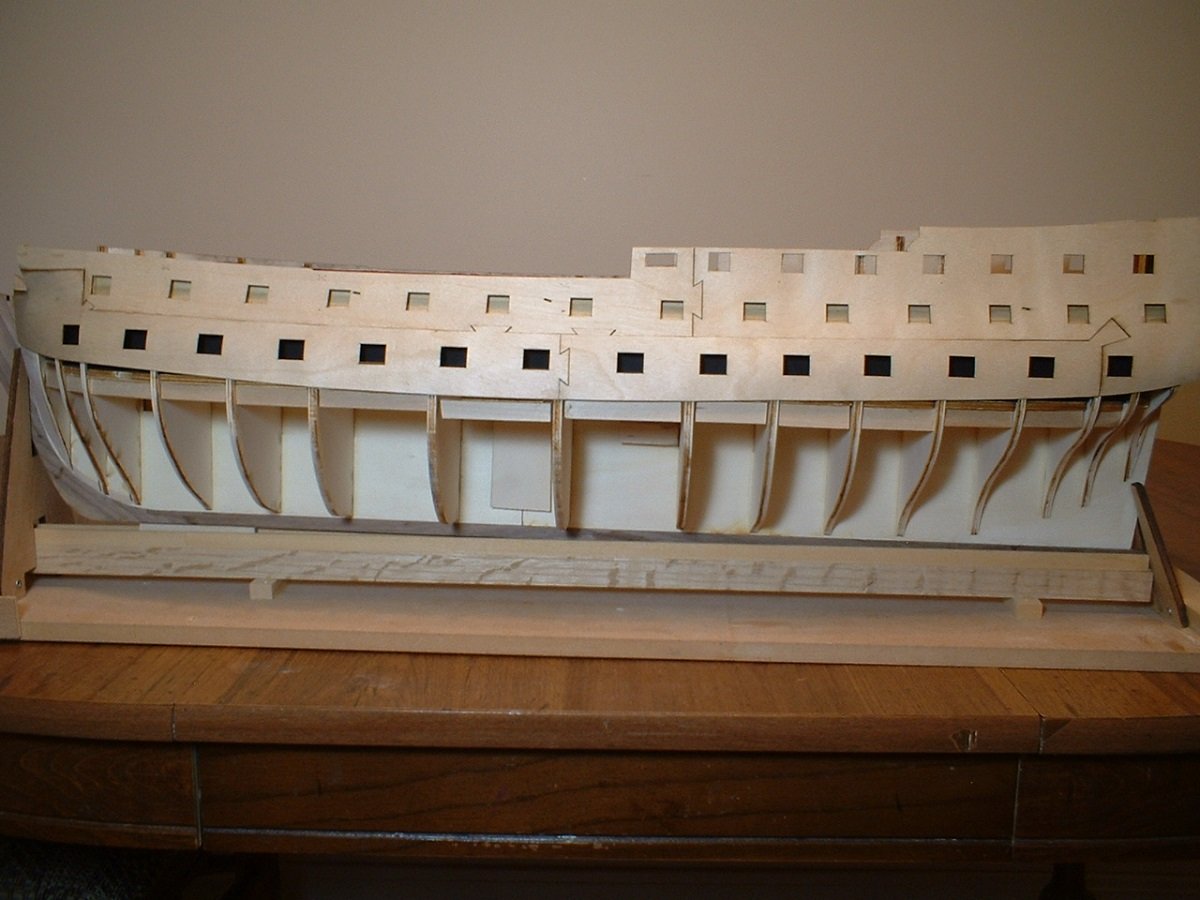
Hi all - first planking below the gunport strips is done. No stealers or drop planks were needed,although a little filler was needed in a couple of low spots. Only the starboard side is sanded so far - took me all day to get it sanded to my liking. Need to rest my weary arm for a while before I tackle the other side. It looks a little splotchy in the pictures due to a variation of color of the planks,but it IS smooth. Happy holidays to everyone at MSW! Mark
-
Mighty fine work,Michael! A quick question - did the parrel beads come in the kit,or did you buy them aftermarket? I`ve been to the craft stores & haven`t been able to find small light colored wood beads like yours - they are always too big or too dark. I`ve been using some bronze colored metal ones,but they still look like metal up close. Mark
-
I see your point - maybe some different views of the stern area on the plans or more photos of a finished model would have shown this a bit better. I still like your solution & will probably do something similar when I get to that point. Mark
- 366 replies
-
- 3
-
-
- bellerophon
- victory models
- (and 2 more)
-
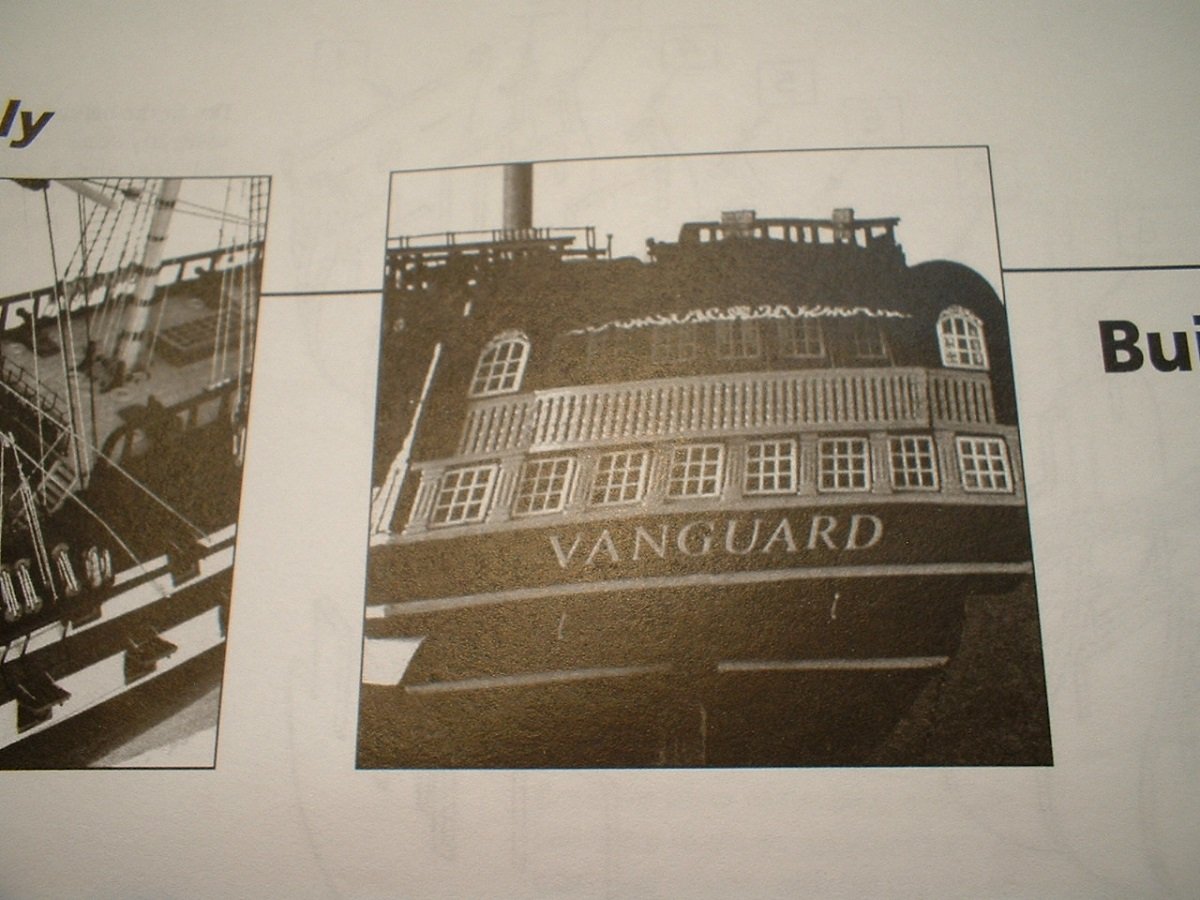
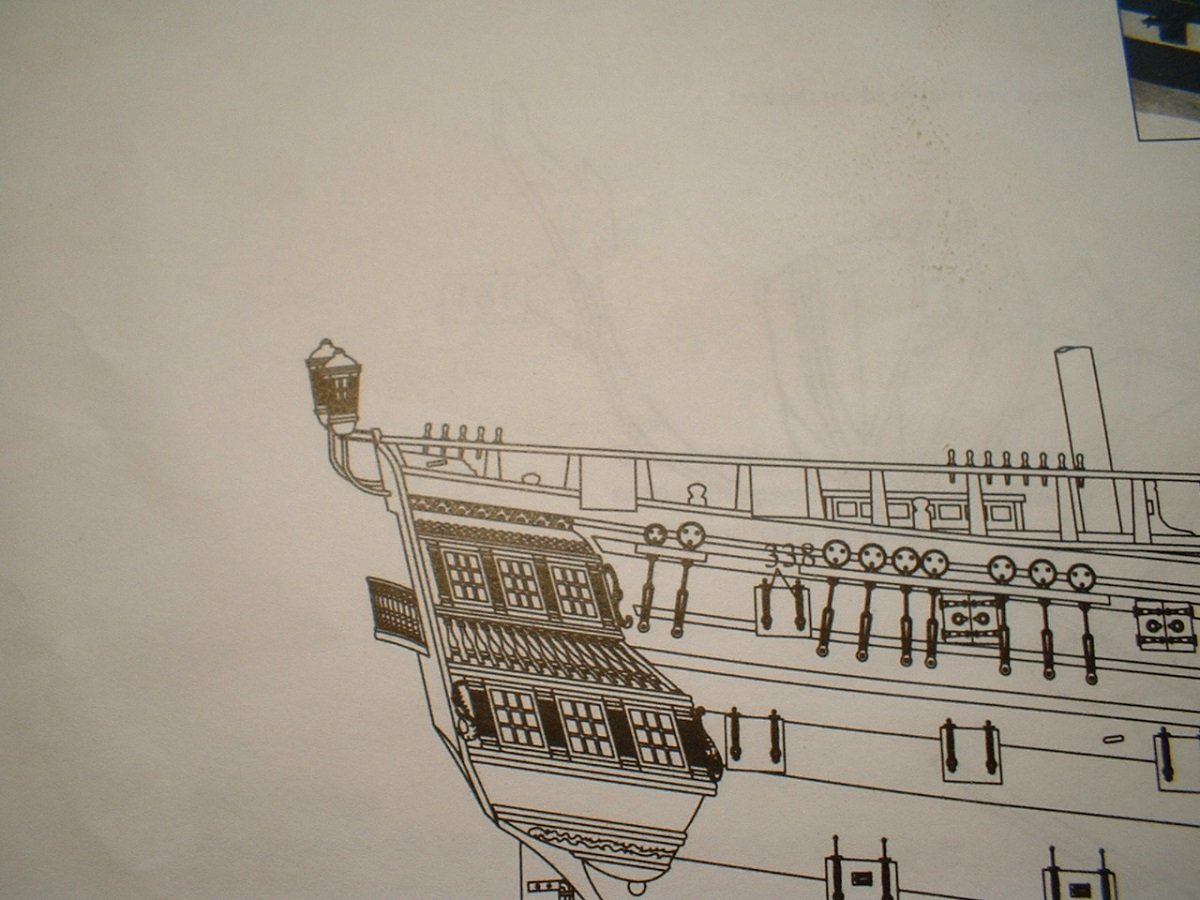
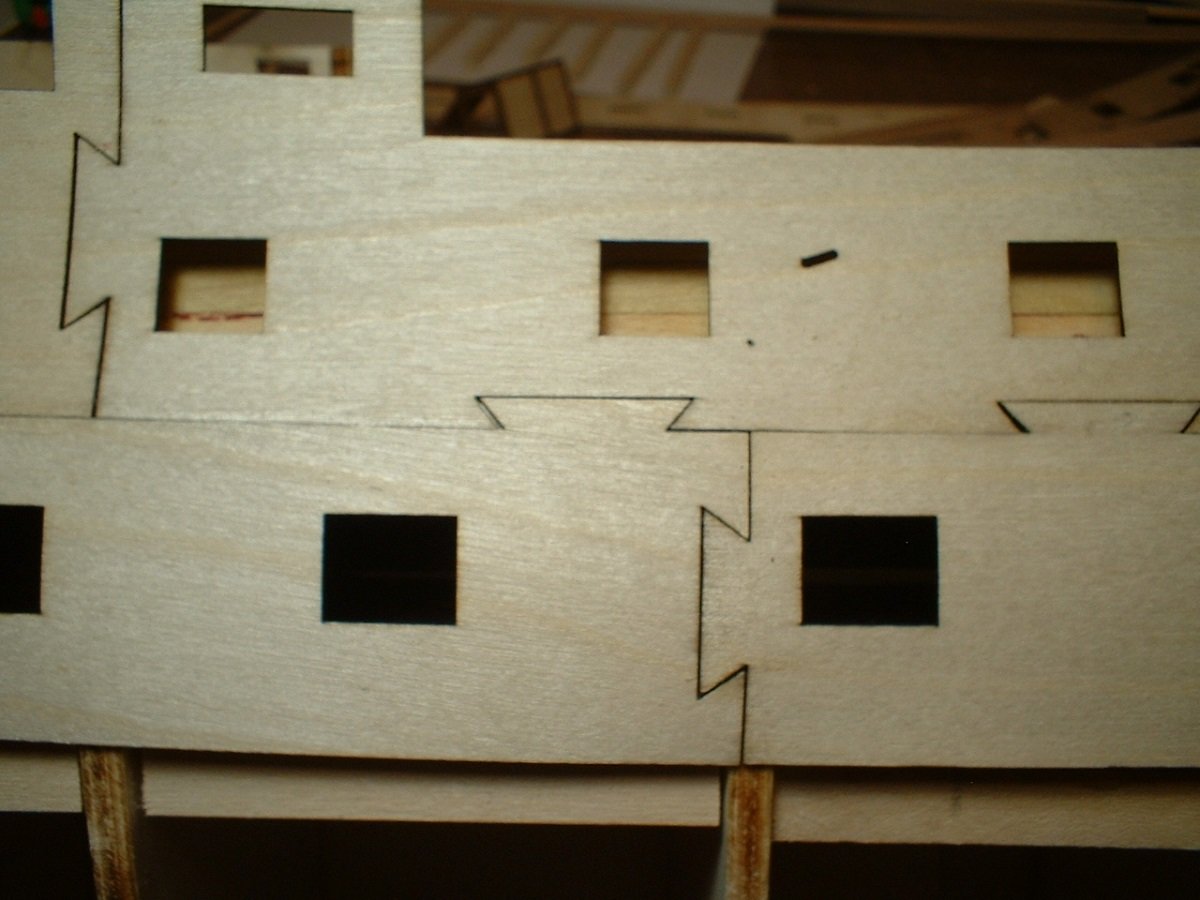
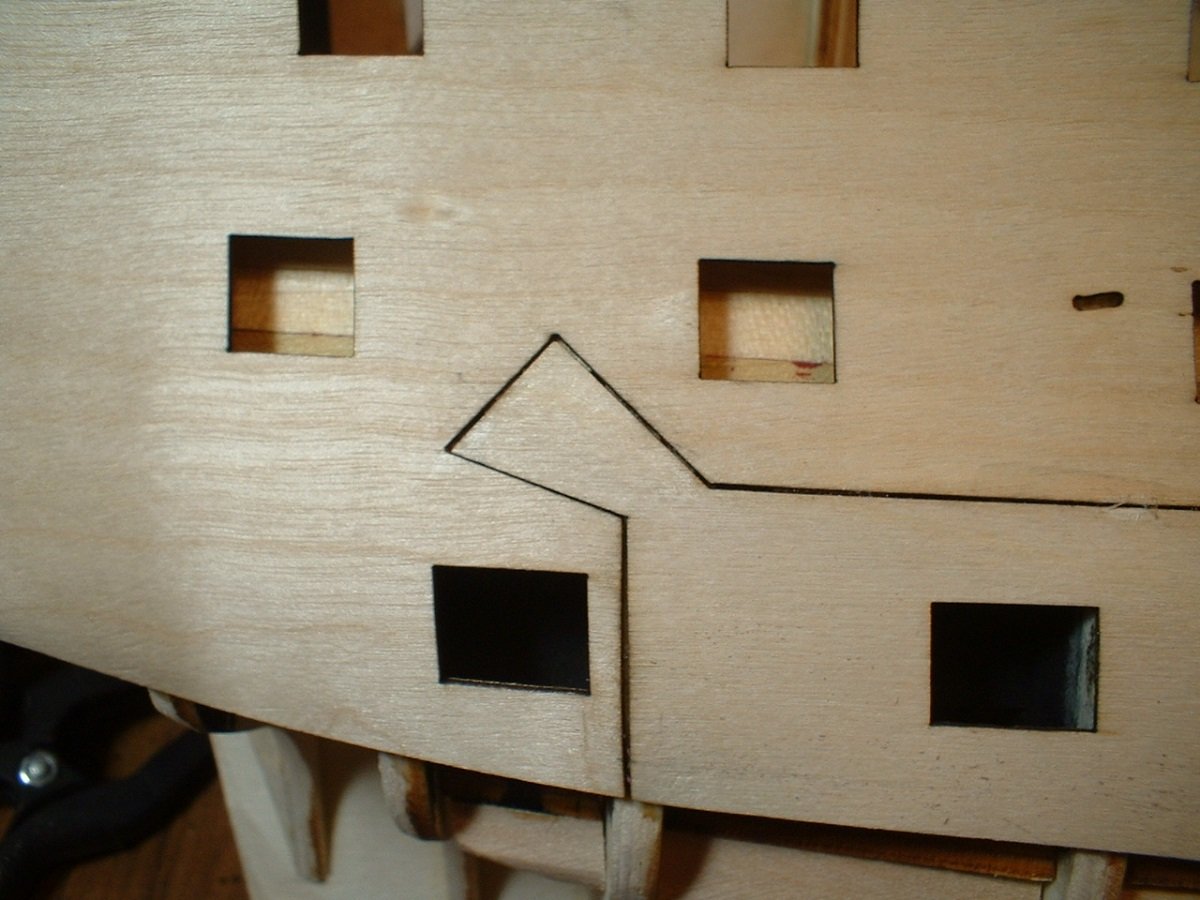
Hi Peter - As that railing isn`t shown on the plans,I thought I would do a little checking...... After looking at the plans & building instructions,There seems to be an error in the drawings (or the parts). I took a couple of pictures to show this - in the first one it clearly shows the railing much higher than the transom. In the second one it shows the railing even with the transom. It looks like the way the parts are made that the railing has to be higher as in the first picture. I thought about cutting down the sides & lowering the deck,but that wouldn`t work because then the quarter galleries would not fit. Another solution might be to add an extension to the top of the transom,but then the decorations would not look right. It appears that the transom is simply too short. In the end, I like your solution & will file it away in the old memory bank. Mark
- 366 replies
-
- 4
-
-
- bellerophon
- victory models
- (and 2 more)
-
Yes,great job Model Shipways AND Chris Watton - the kit designer. Mark
-
Yes,after looking closer,there`s not that much of a difference. A bit of filler & sanding should do the trick. I`m not too concerned about how the first planking looks since it will all be covered up. Mark
-
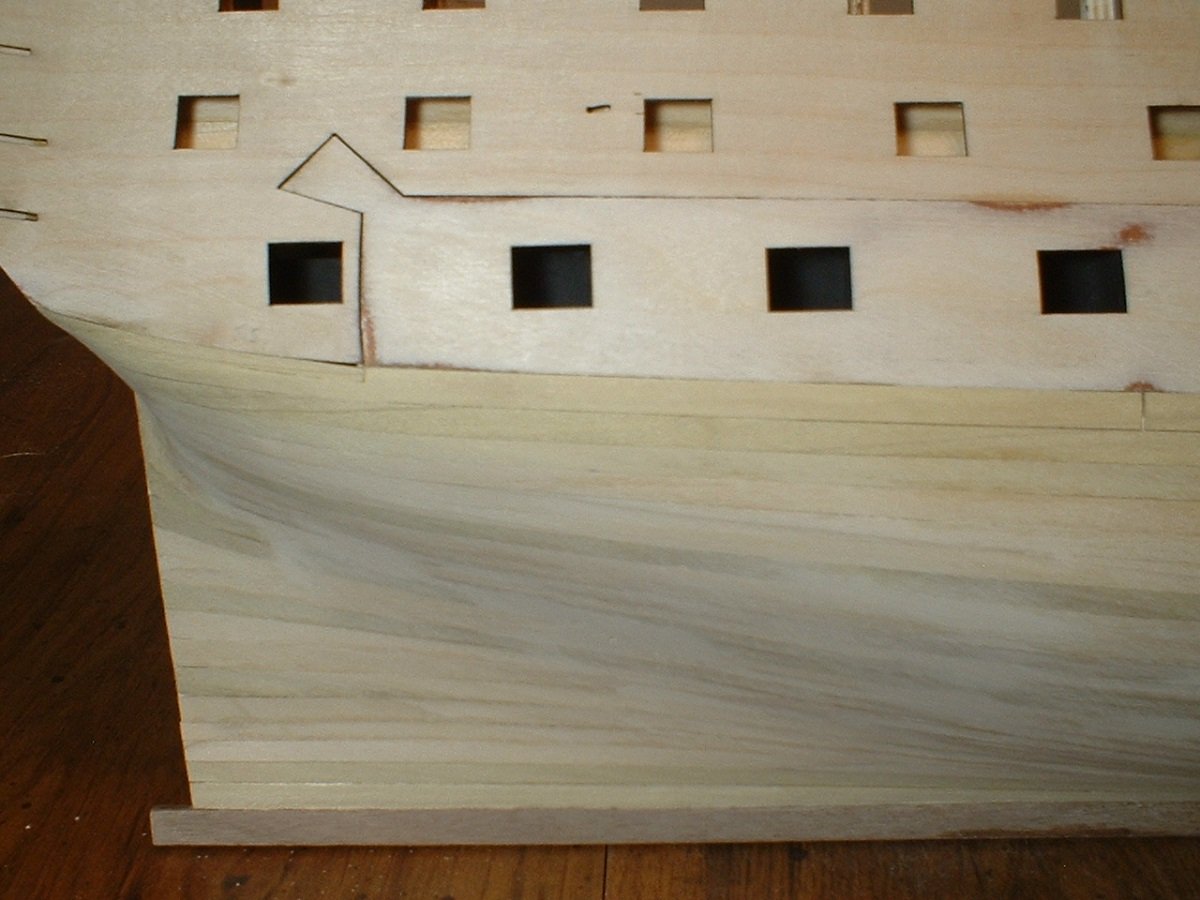
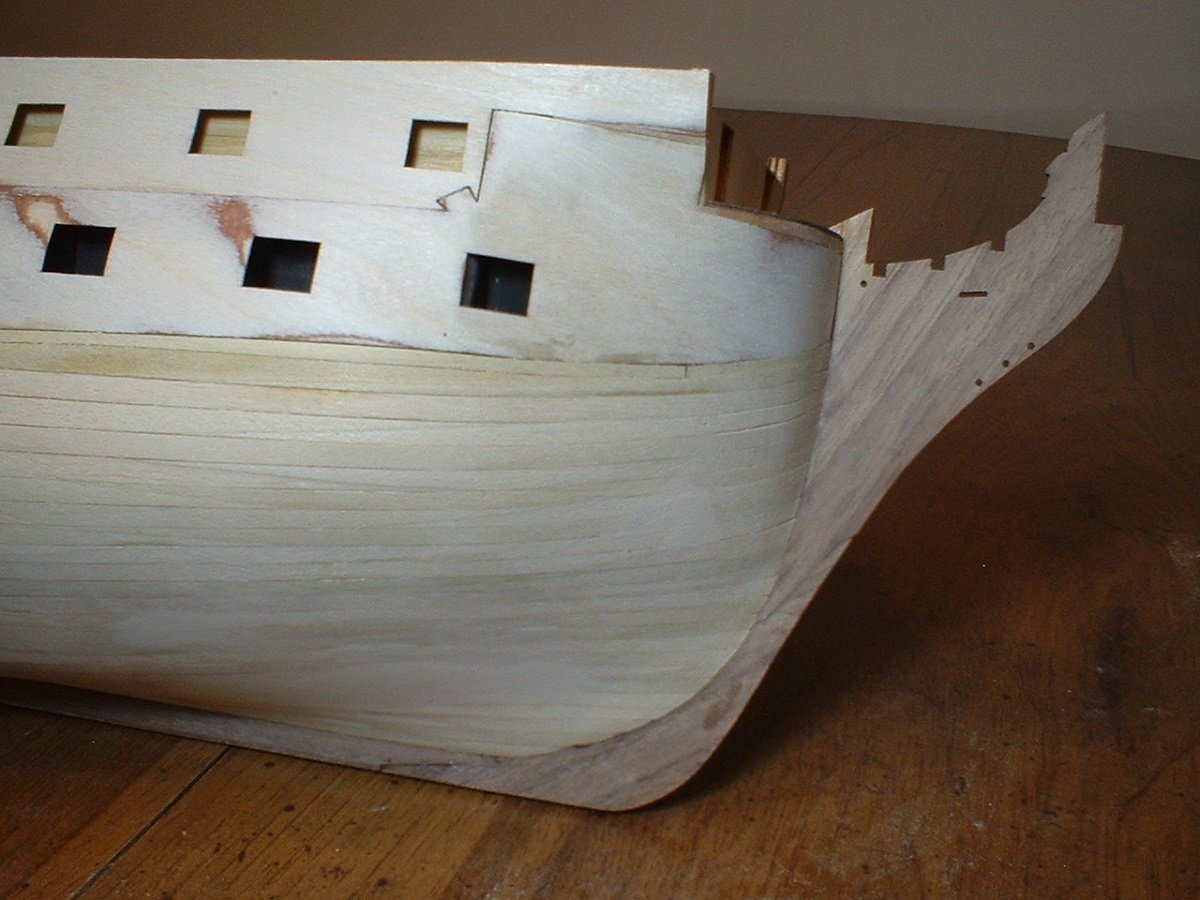
Whew! - port side patterns on. While trying to clamp those patterns I kept thinking it might have been easier to just use planks & cut the ports out as on most other kits, but I got it done. The next thing to do is the first planking from the patterns down to the keel. Having said that,I mentioned in an earlier post that the patterns are 1mm thick. The first planking is 1.5mm thick,so I will need to either add some .5mm strips to the patterns or sand .5mm off the planking. Since there is some unevenness to the patterns & sanding them smooth would leave some areas paper thin, I think it will be better to add some thin strips to the patterns & sand them back to the level of the planks. That`s the plan anyway. Mark
-
Actually,it looks like a good Lego ship. Seriously,nice work you are doing . Mark
-
Thanks Richard. I kind of like the "instant" gunports, although getting them in the right position is a bit fiddly - took 2 days just to get the first 2 on. The position is critical for the correct alignment of the stern parts. Mark
-
Hi all - starboard jigsaw puzzle,er,I mean gunport strips done. It was really puzzling(pun intended) figuring out how to clamp these in place. The strips are 1mm thick ply,so I had to soak them in some water for about 30 minutes to make them pliable enough to fit the curves. Not perfect,but a little bit of filler in spots & a lot of sanding should make a decent surface for the second planking. Still have to finish the port side. Mark
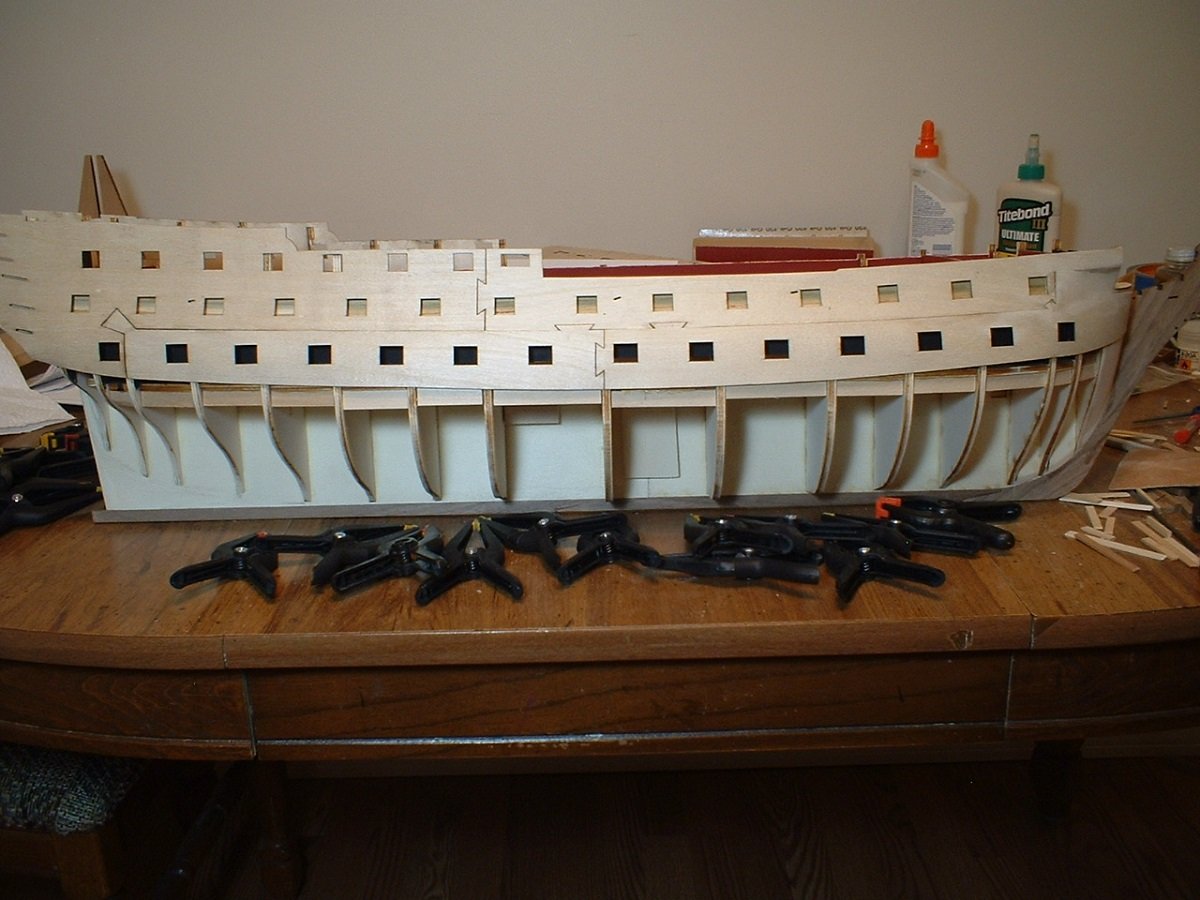
-
Display pedestals with different heights?
marktiedens replied to RPaul's topic in Wood ship model kits
You might check with Model Expo - they used to sell 2 different sizes of brass pedestals to mount ships with an angled keel. I don`t know if they still have them or not. Mark