


marktiedens
-
Posts
1,737 -
Joined
-
Last visited
Content Type
Profiles
Forums
Gallery
Events
Posts posted by marktiedens
-
-
-
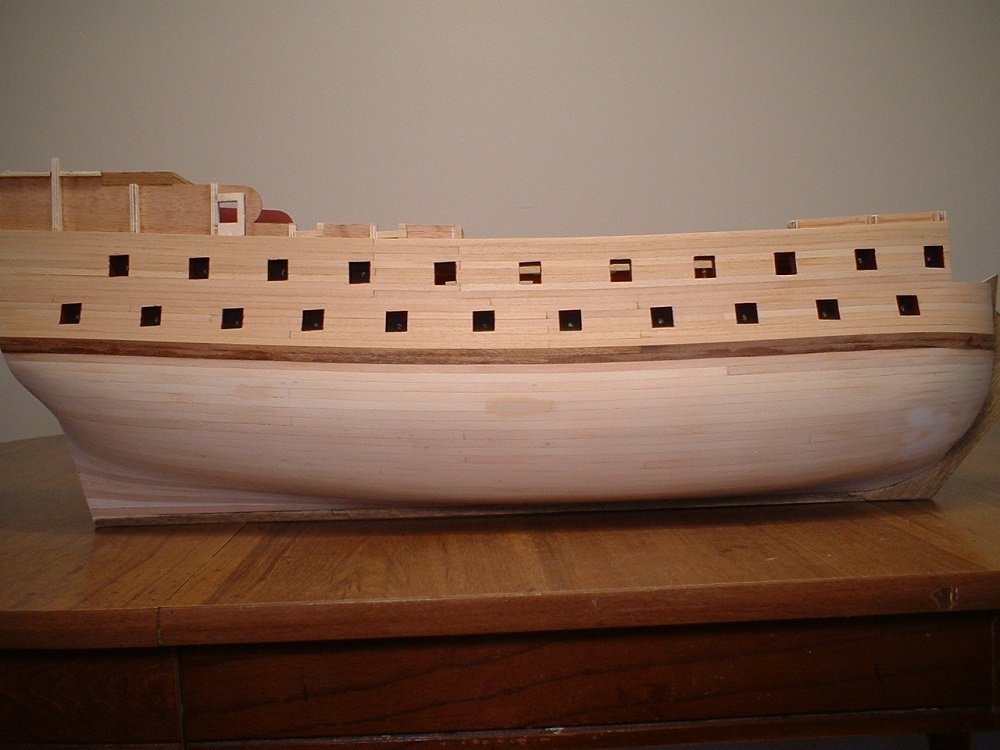
 Laminating the stem & keel is still a possibility - I will have to see if the extra thickness will be a problem. On my Royal William the keel,stem,stern post,& rudder are darker than the hull planking - laminating them would have made them way too thick & cause other problems,so I left them as is.
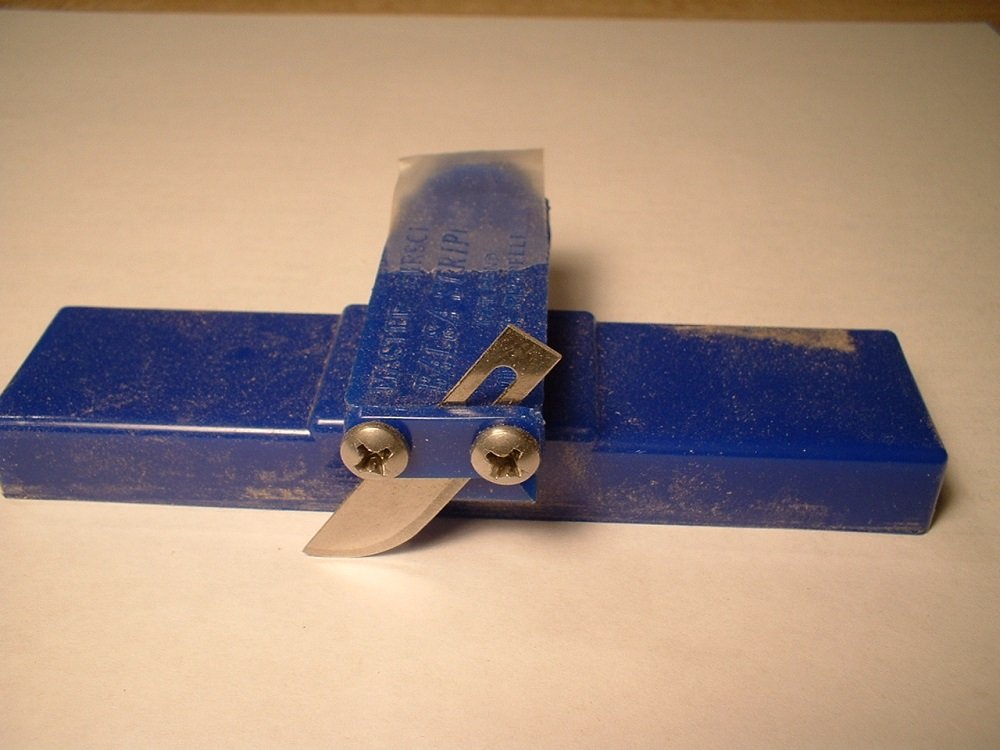
It`s not really hard to cut,just hard to cut straight strips off of. I found a strip cutter at Micro Mark that worked pretty good once I got the hang of it. The tool instructions say to use a #2 or 11 blade,but I found that a curved blade worked much better - the straight blade wanted to follow the wood grain,but the curved blade didn`t. As far as cutting the spiled planks,I would cut templates from card stock to fit the curves & cut the veneer freehand with the curved blade in my exacto handle. After a bit of sanding on the edges,I got them to fit pretty good. Needless to say,I broke numerous pieces while cutting & sanding - I lost count of how many times I had a piece almost fitted & then -oops,I pressed a little too hard on the sandpaper & broke the piece! I don`t have a small table saw,so I don`t know if that would work any better or not - it might work if you had an extremely fine blade & zero clearance insert for the saw plus a way to keep the veneer very flat on the saw. My veneer had a curl in one area too,but I just worked around it Also,I cut the strips about 7mm wide which made them a little easier to work with.
Mark
- Landlubber Mike and NMBROOK
-
 2
2
-
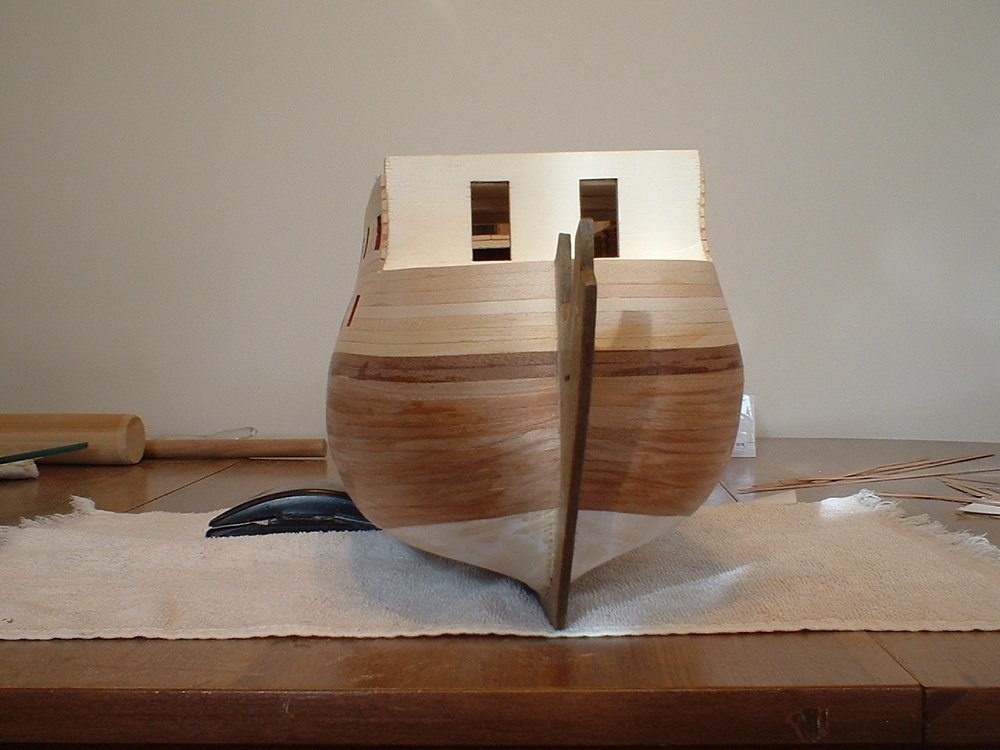
Thanks Mike! Now that I look at it some more,maybe I should have used walnut veneer instead of cherry to better match the pre-stained keel & stem. I tried to sand off the pre-stained keel, but it had penetrated too deep to sand off. I wish OcCre had not pre-stained it
 .
.
Mark
-
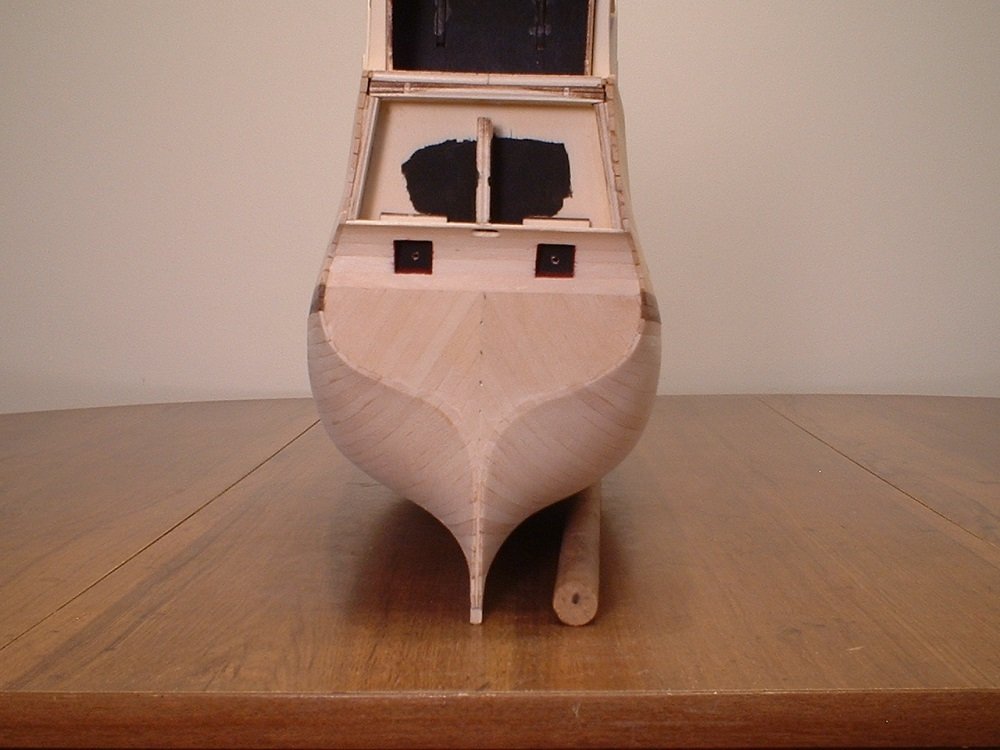
Update - the second planking with cherry veneer is now done! Not perfect,but I am pleased with it. Now for a little sanding - not too much as it would be easy to sand clear through the veneer. No drop planks or stealers were necessary.
Mark
-
Thanks Nigel - planking is already well underway. Not going too bad - just takes some time to shape the spiled planks.
Mark
- rafine, Altduck, Mirabell61 and 11 others
-
14
-
Thank you Nils - your comment is greatly appreciated!
Mark
- Mirabell61 and Zapto
-
2
-
-
Mike - the veneer is .019" thick.
Pete - never thought of that
 ,although I don`t think I will need the tape now. What I would like is to find some wide(2 inches or more) low tack tape to help with the spiling - all the art & craft stores in my area only have the one inch wide tape.
Mark
- Zapto and Landlubber Mike
-
2
-
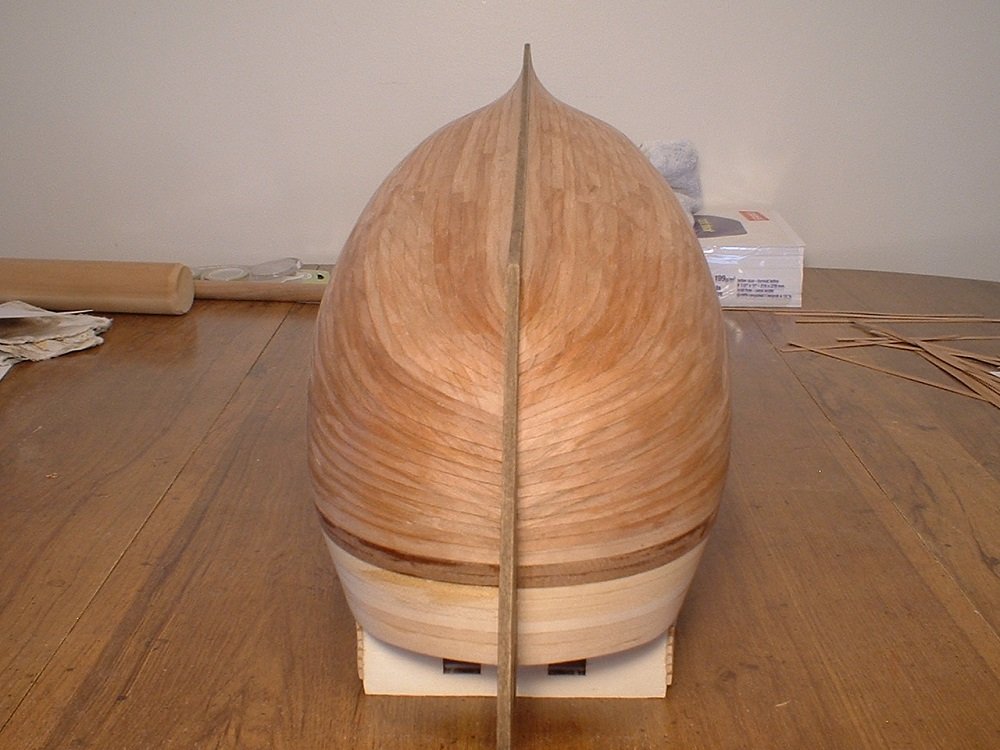
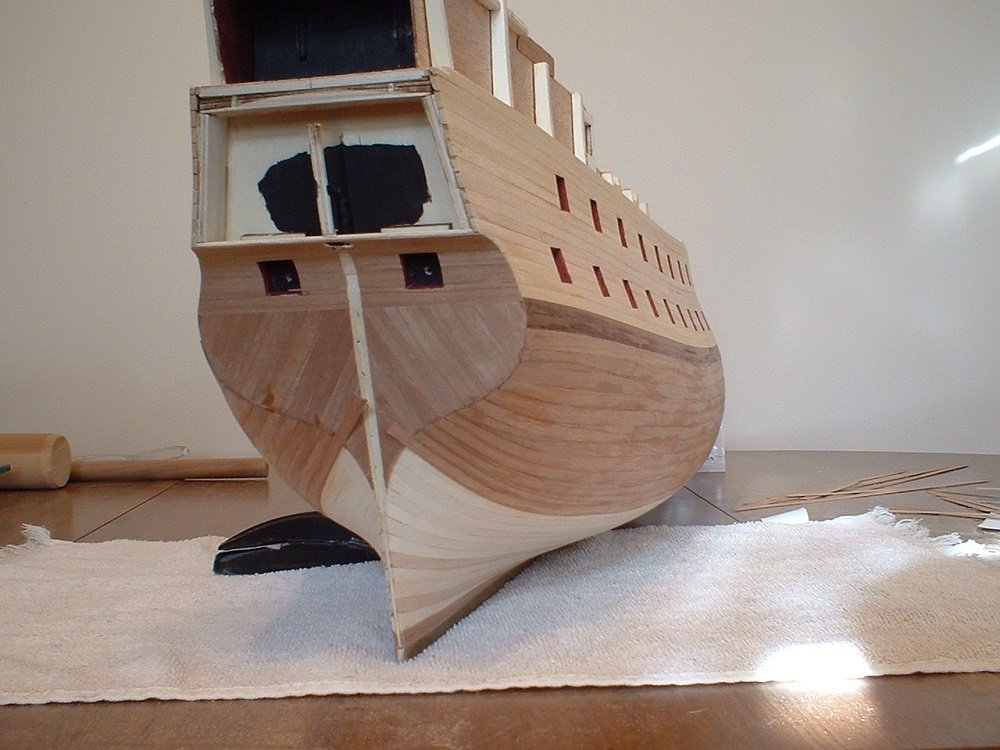
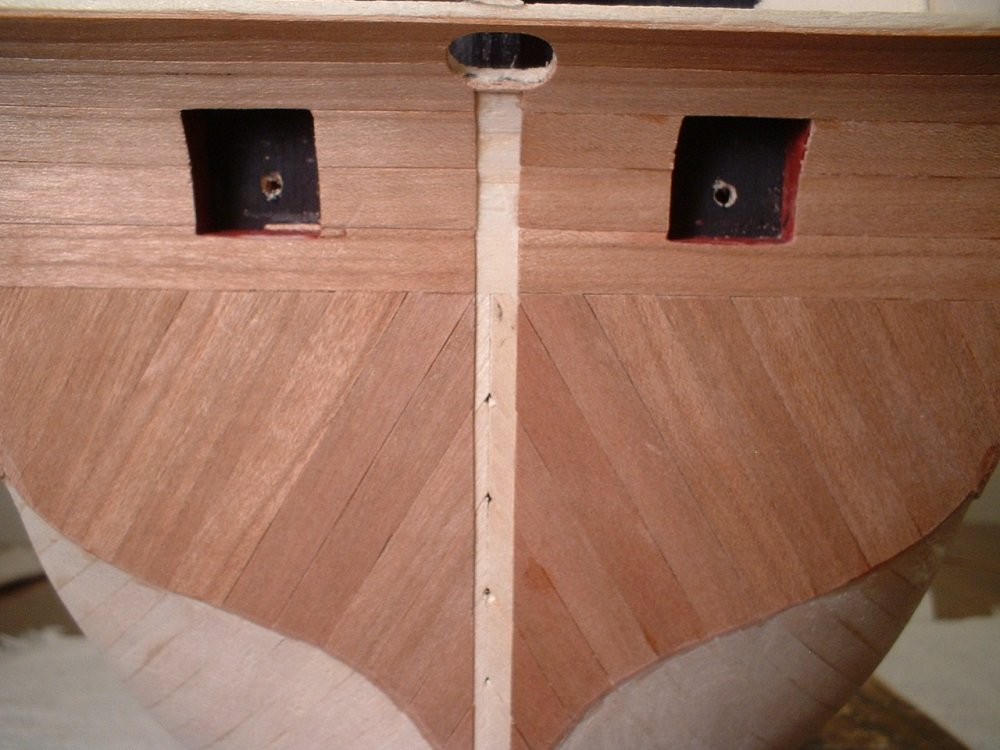
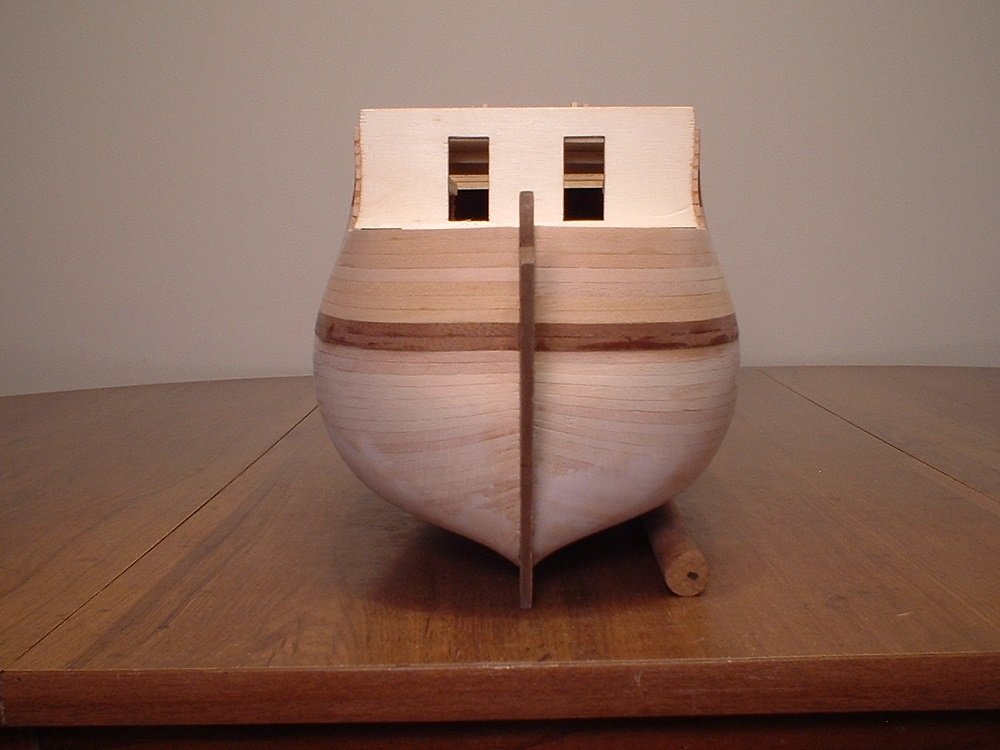
Just a little update on my experiment to use cherry veneer. The transom was planked first leaving a gap for the rudder post. The lower hull planking was then started. This veneer has to be spiled around the bow - there`s no edge bending this stuff! With the scale of this ship at 1:46,I am cutting the planks from the veneer sheet at 7mm wide,tapered down to 4mm where it`s spiled at the bow. The veneer is a bit fiddly to work with but so far,so good. This is gonna take a while...............................
Mark
- maggsl_01, Mirabell61, coxswain and 5 others
-
8
-
I agree - that looks like the thing to do. If that is a metal casting across the bottom of the counter,it can be tweaked to match the curve if it is the same soft metal that is used on the Royal William - I had to "tweak" many of those castings.
Mark
-
Hi Mike - I understand what you are saying. From the position of the 2 outer supports I would be tempted to maybe add some 3mm basswood strips to the bottom edge & fair them at an angle to match the run of the planking. How does it look when laying a plank across the bulkheads forward of the transom? With the forward bulkheads faired the planks should show a smooth curve up to the transom. Just speculation on my part since I don`t have this kit to compare. Any thoughts from Pete? With this being a double planked hull, I think the first planking should be done before planking the transom.
Mark
-
Thanks Vivian & welcome aboard! Yes,a nice looking ship - I hope to do it justice.
Mark
-
Thanks Peter - the easy part is done. The hard part is trying to get the second planking right. Right now I am trying to line off the hull,but have 2 problems. 1 - I can`t find any narrow tape that will stick to the hull. 2 - this is a really bluff bow,so no matter how I lay the tape it just doesn`t look right. I might just end up drawing lines on the hull with a pencil instead of tape.
Mark
-
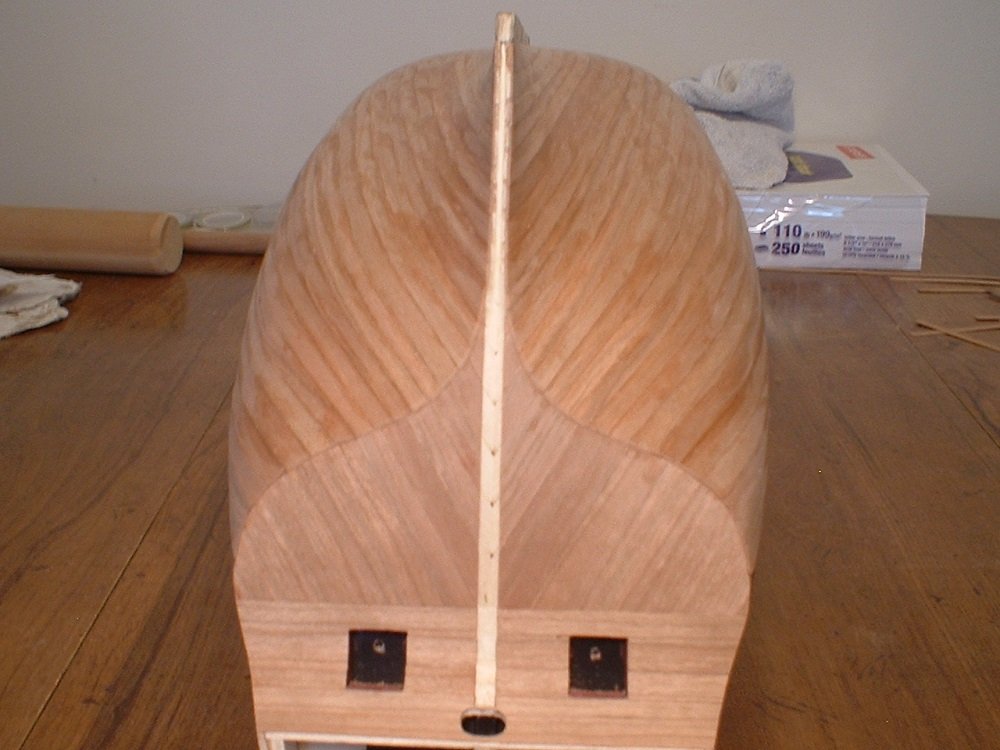
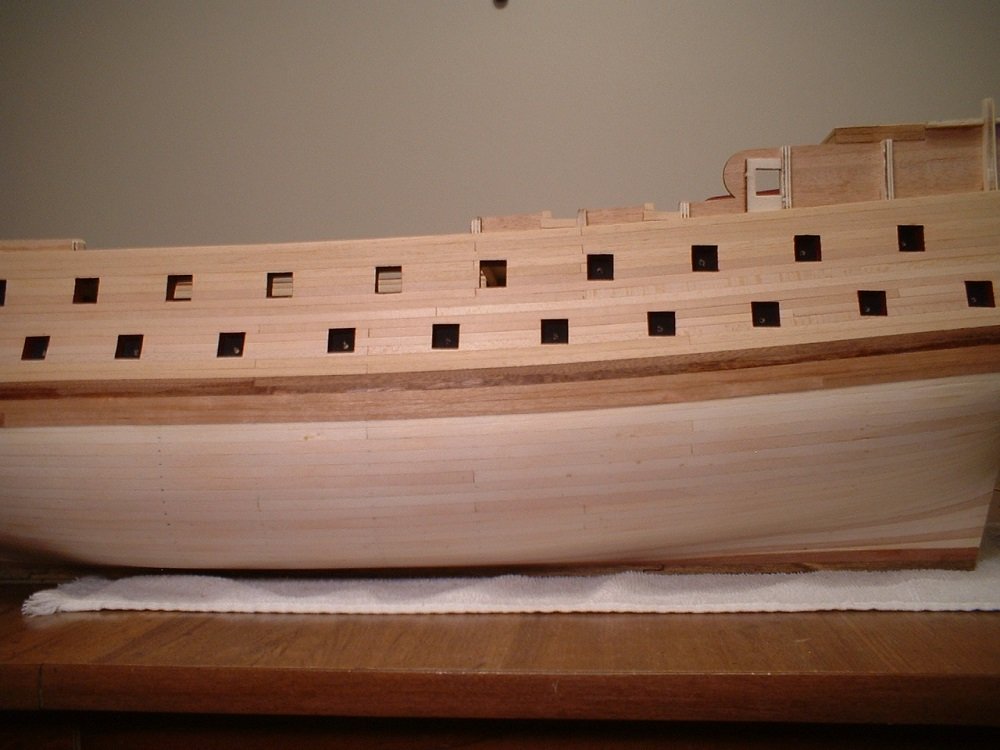
Hi everyone - a little update. The first planking is now sanded nice & smooth. I had to add a little filler due to not using filler blocks at the bow
 .
.
Mark
- UdoK, Jim Rogers, rafine and 10 others
-
13
-
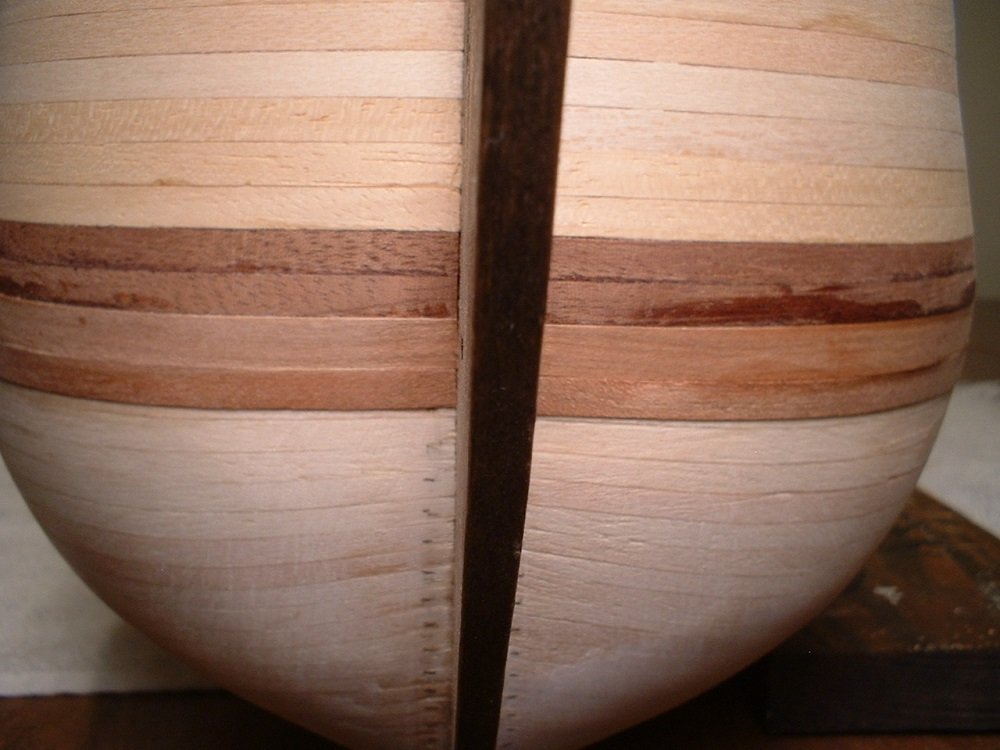
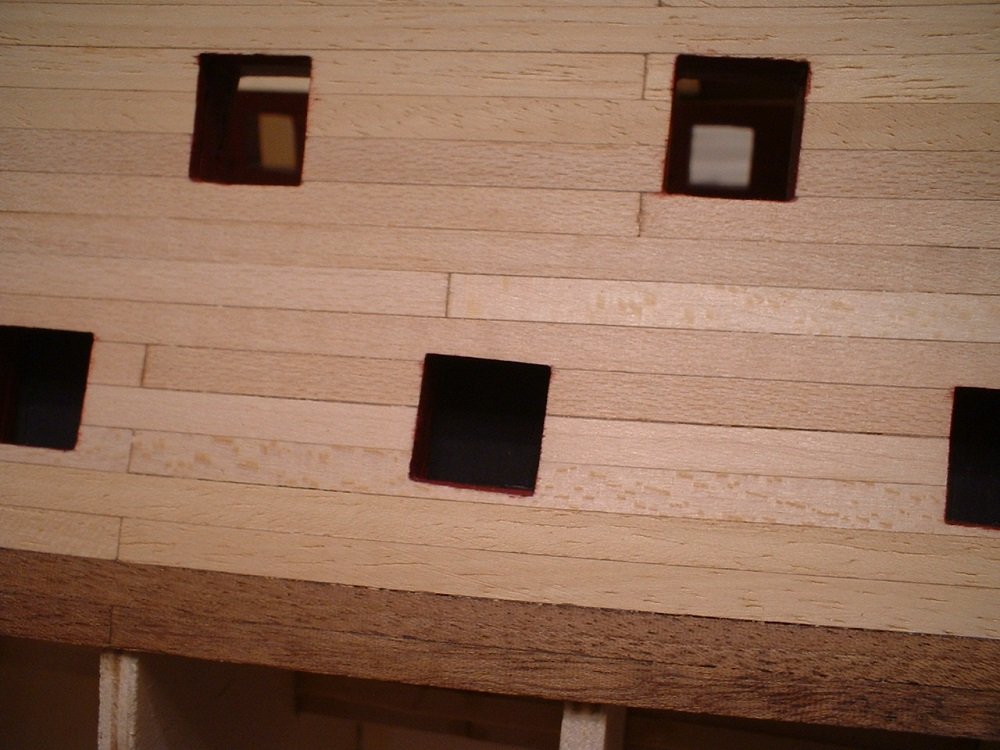
Hi Zapto - the planks were thinned at the front using a small plane & sandpaper. Then they were edge bent after soaking in water for about 15 minutes. The limewood is pretty soft,so it was not too difficult to bend. The dark brown planks will be covered by the wales - I put them there so I would know where to attach the wales.
.JPG.74137e3afb2b05b71e9243e69c4f5d32.JPG)
Mark
- Zapto and Landlubber Mike
-
2
-
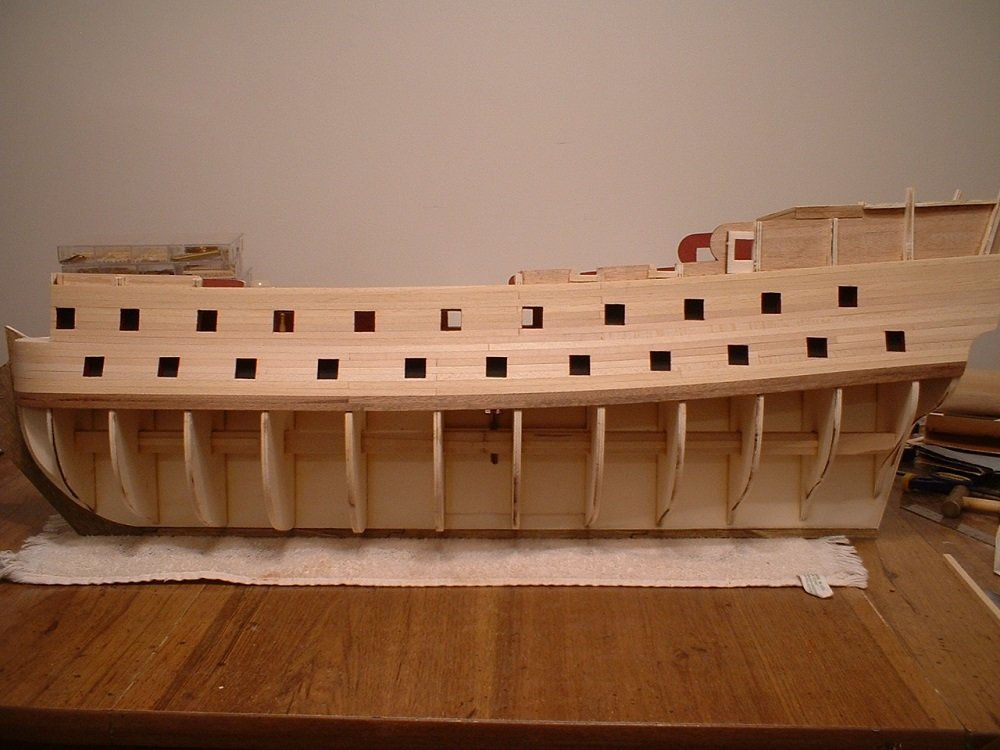
Hi everyone - another update. The first planking is now done below the level of the lower wale. I used 1.5 by 6mm strips of limewood for this. Now i`ve got a lot of sanding to do - may need to add a little filler at the bow area to some low spots.
Mark
- glennreader, Zapto, JLuebbert and 11 others
-
14
-
Great job! She`s a real beauty
 .
.
Mark
-
Thanks Michael
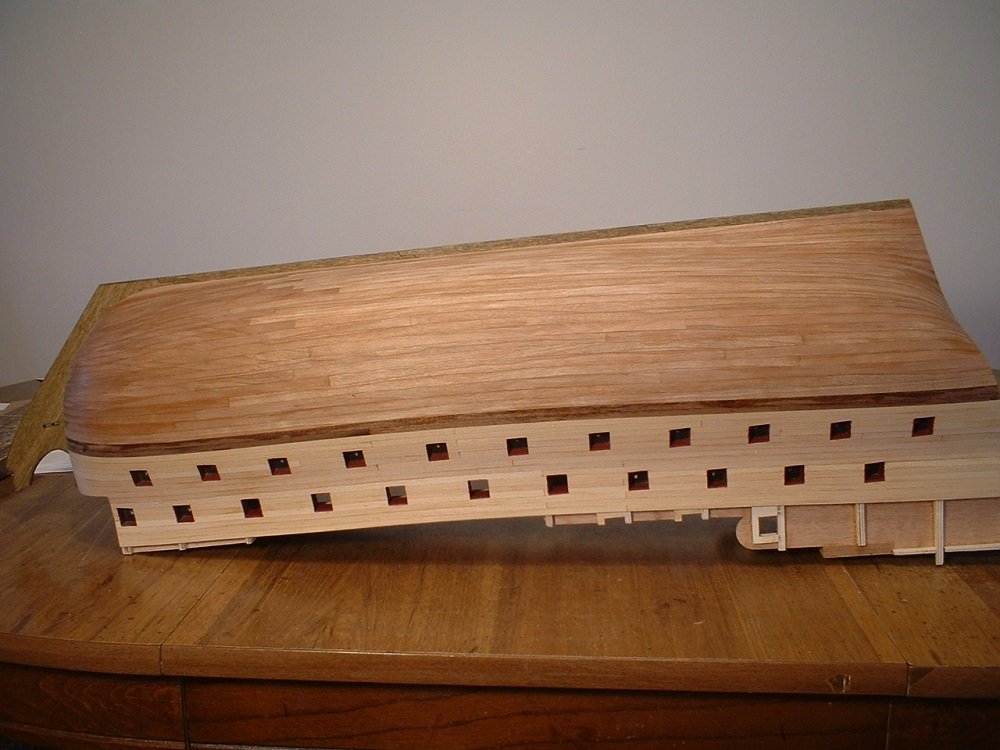
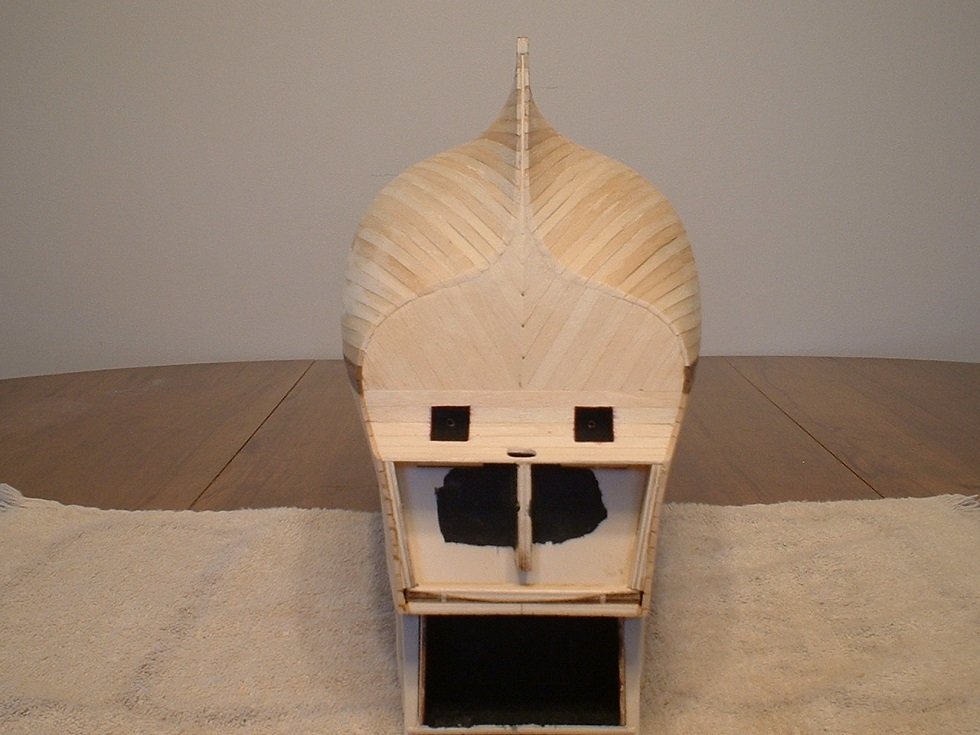
 . As you can see,the planking on the upper half of the hull is something called ramin(maybe another term for basswood?) & has very inconsistent color & grain. I intend to paint the upper part with black & yellow ochre as shown in the pictures in my first post,so it doesn`t really matter.
Mark
-
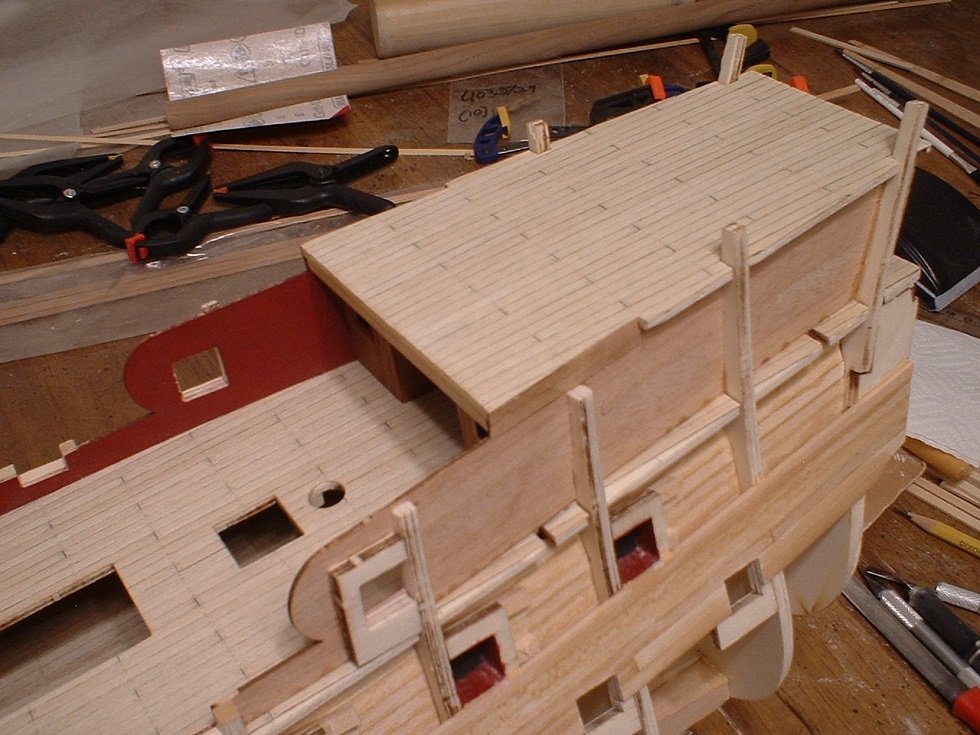
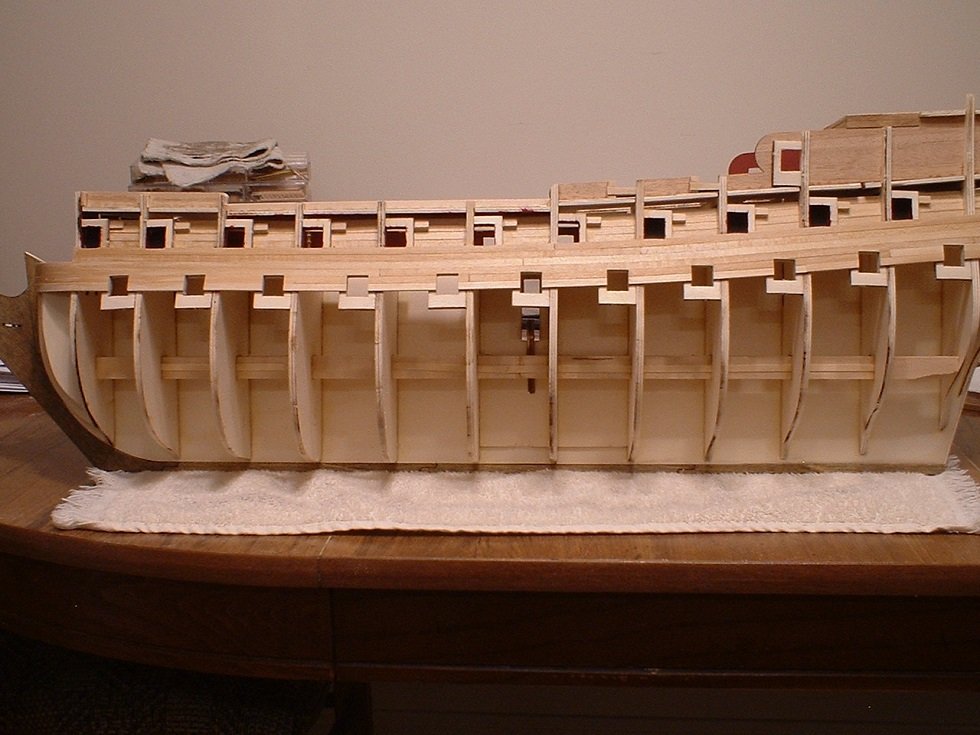
A small update - planking is done & sanded smooth from the waist to the level of the lower wales. The blanks for the dummy cannon barrels of the lower gun deck were glued in place & painted flat black,along with painting the inside of the gunports red. This is a single planked hull,so I needed to get it nice & smooth. Below the lower wale I am going to double plank the hull with some cherry veneer(I hope). The planking on the upper part of the hull is 2mm thick,so I`m using some 1.5mm thick lime to do the first layer of planking below the wale,which after adding the second planking should come out very close to the same thickness as the upper planking. Any slight variation will not be noticeable due to the wale separating the upper & lower halves of the hull. I`ve never tried using veneer for planking,so if it doesn`t seem to be working ok I can always sand it down & use some of the usual .5mm thick strips.
Mark
- Jim Rogers, rafine, vossy and 11 others
-
14
-
Don`t know how I missed this one - I built this kit "out of the box" many moons ago. You`re doing a great job
.
Mark
- popeye the sailor, Piet, Canute and 1 other
-
4
-
Thanks zappto - I like your work also
") .
.
Mark
-
Thanks Michael
. So far this is a much easier build than the Royal William despite the much lesser quality of wood. I am experimenting a little to see if I can cut some strips of cherry veneer to use on the lower part of the hull instead of the kit wood - it`s difficult to cut consistently even.
Mark
-
-
What a beauty - looks perfect!
Mark
.JPG.64da0dbb00168675705f493d601e1f55.JPG)
 ,pre-stained,so I lined the edges with a veneer stained to match. Also,the planking has begun.
Nuestra Senora del Pilar de Zaragoza by marktiedens - FINISHED - OcCre - scale 1:46
in - Kit build logs for subjects built from 1501 - 1750
Posted
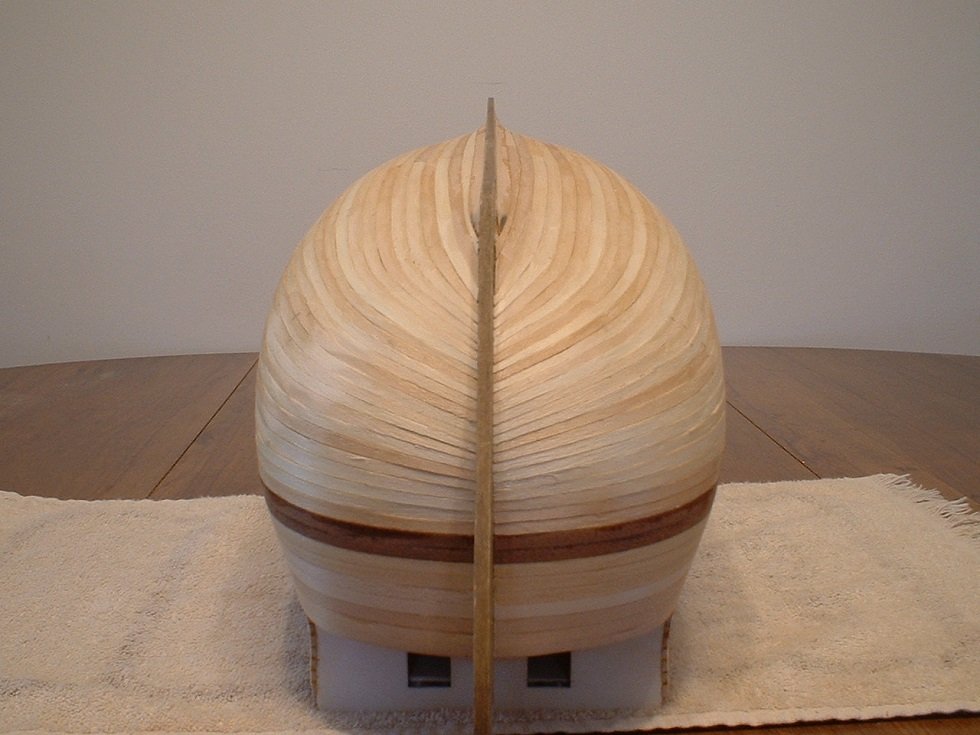
Well, that keel & stem just kept getting uglier & uglier the more I looked at it,so I used what I had left of the larger scraps of the cherry veneer to laminate them - much better!
Still a little final sanding to do.
Mark