Richard Griffith
-
Posts
423 -
Joined
-
Last visited
Content Type
Profiles
Forums
Gallery
Events
Everything posted by Richard Griffith
-
Barryww, thank you for the picture of the damaged rudder - very interesting. WEDJ, I too have been to Bluejacket and they are great people! Duff
-
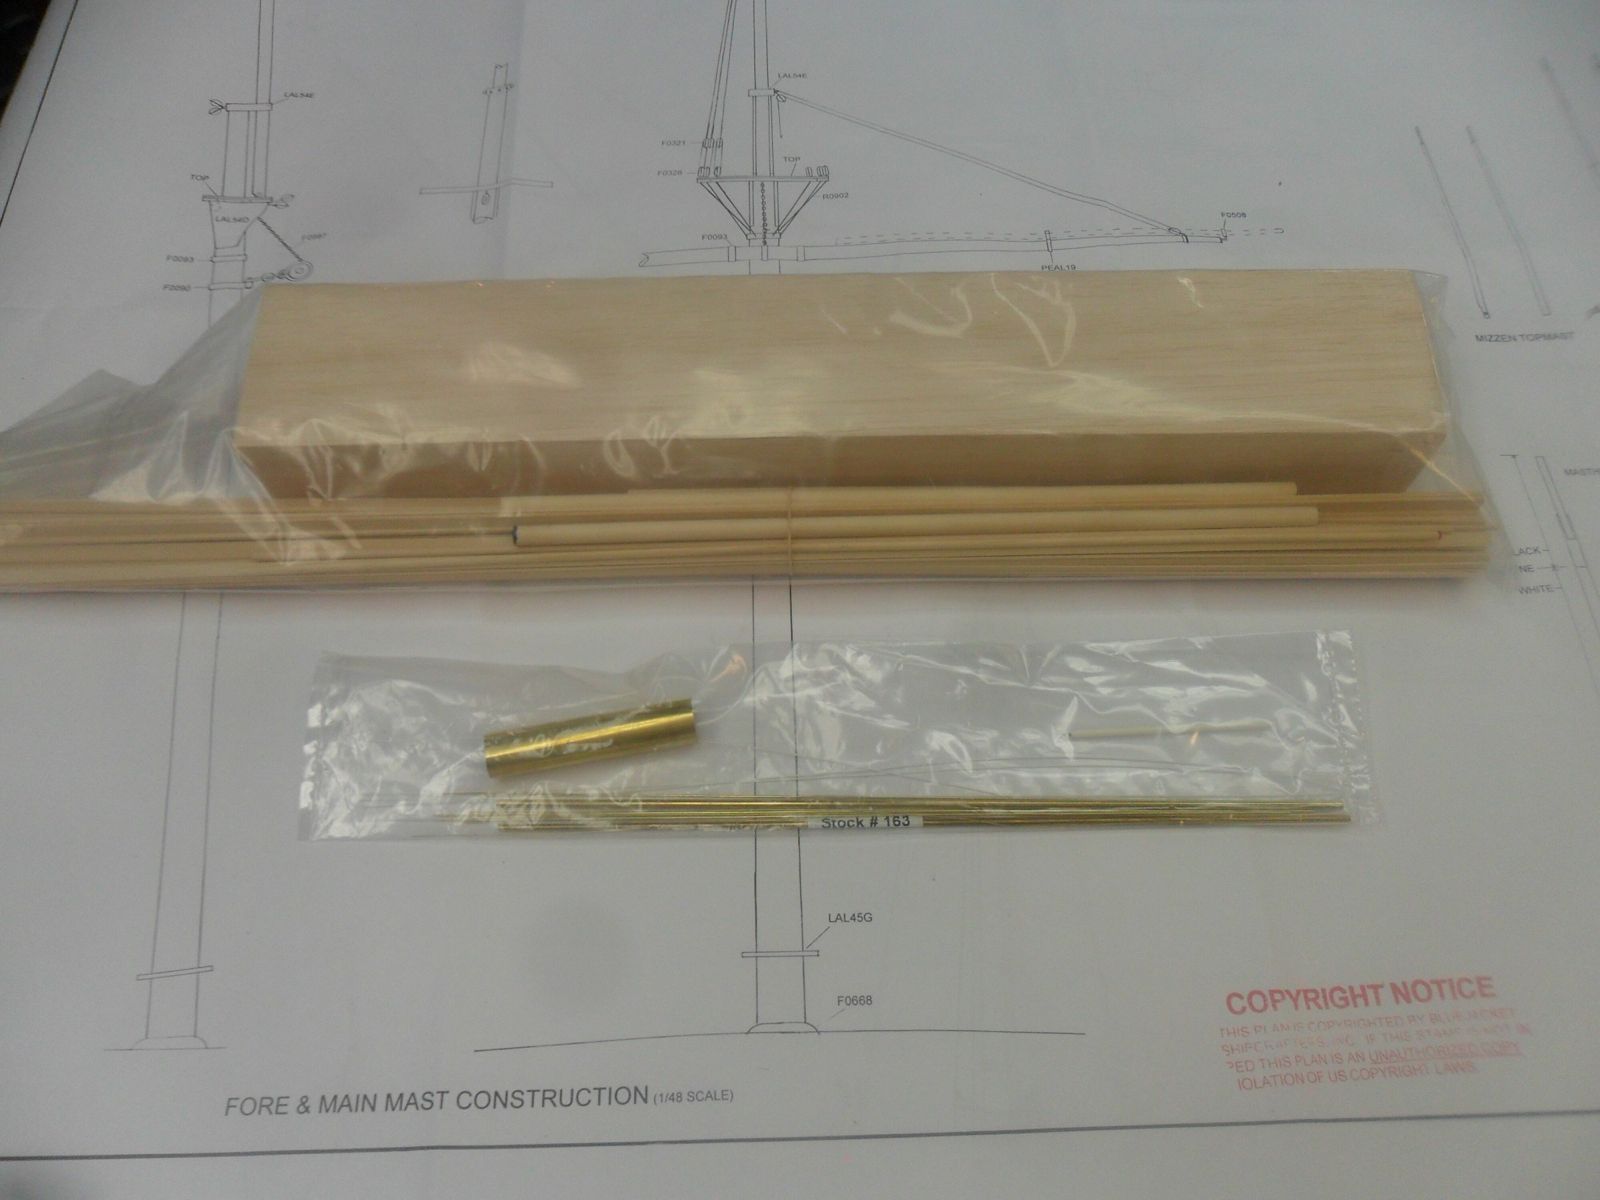
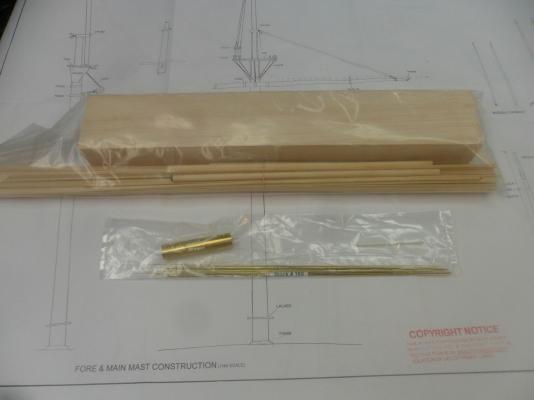
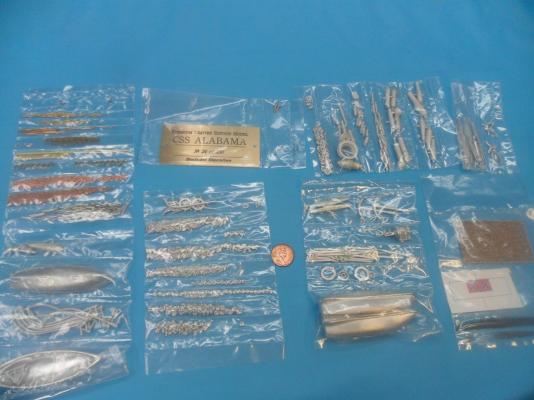
Hi Barryww, the planking wood appears to be basswood (I haven't opened the bag yet). Bluejacket kits usually supplies basswood. Nice picture Crackers......... She is a beautiful ship and she caused an enormous amount of damage to Union shipping. Duff
-
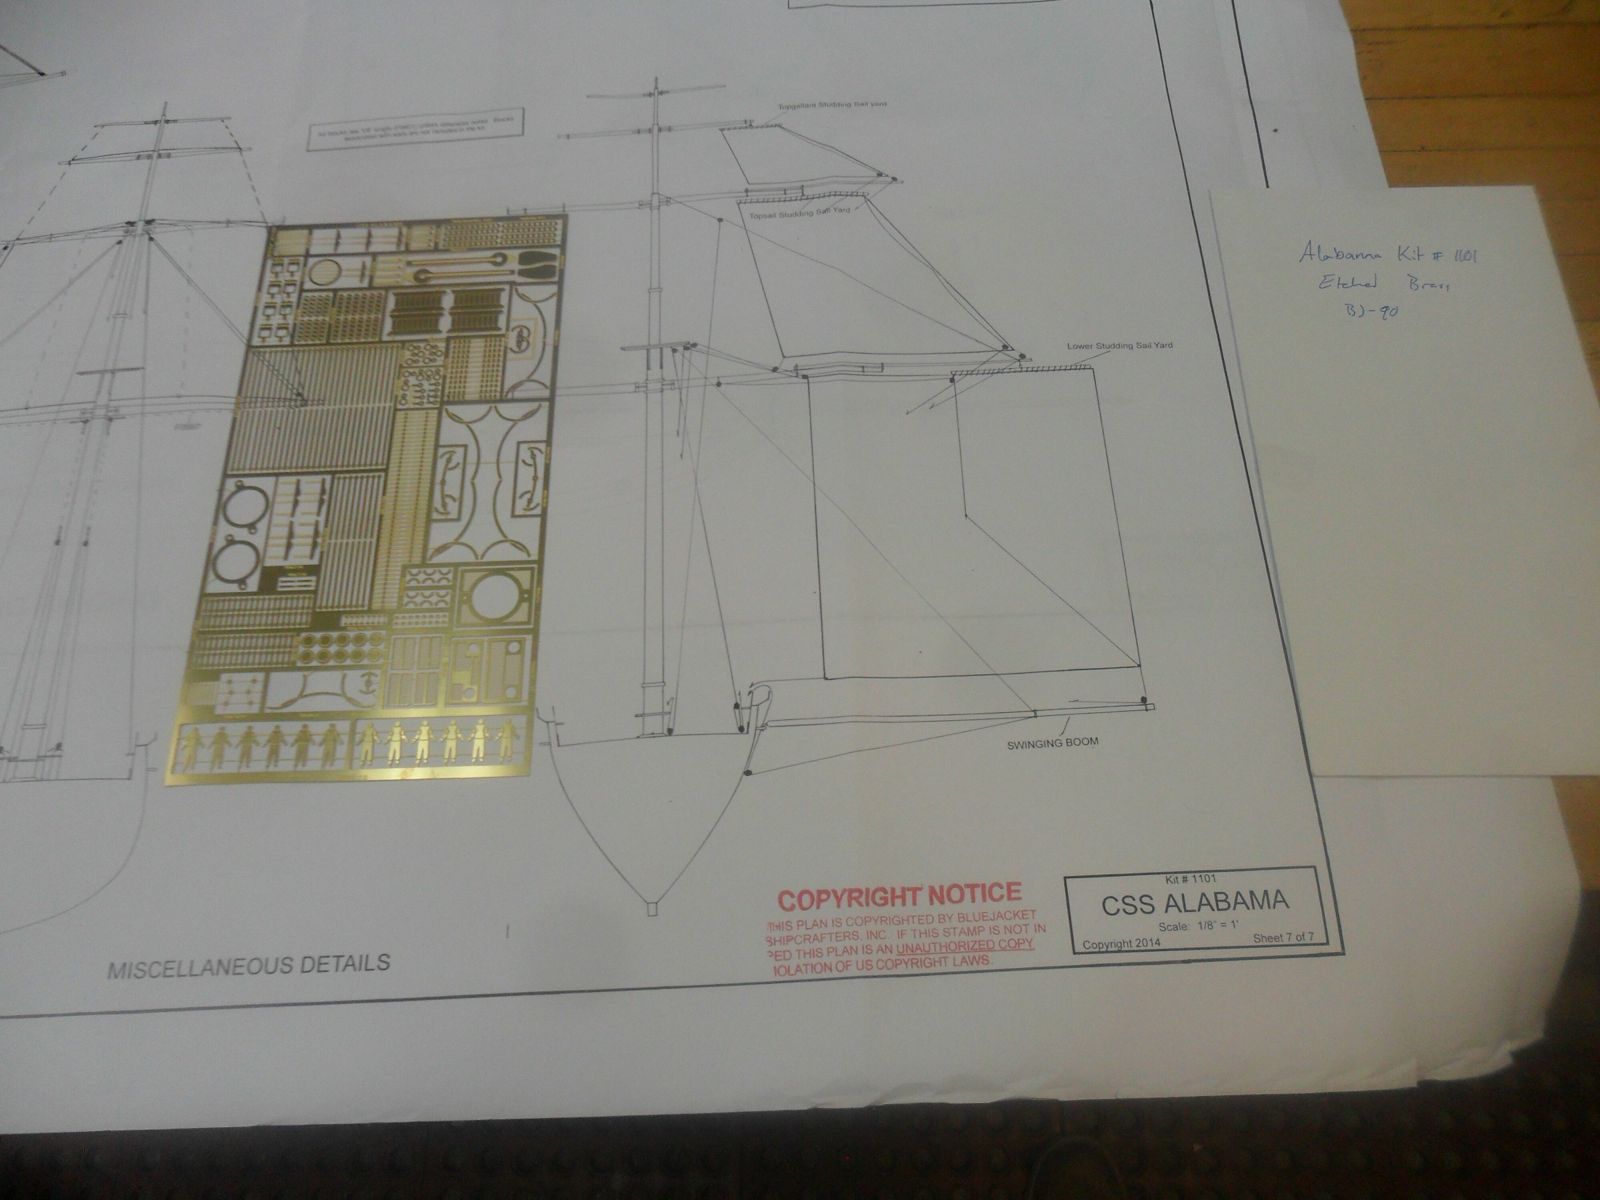
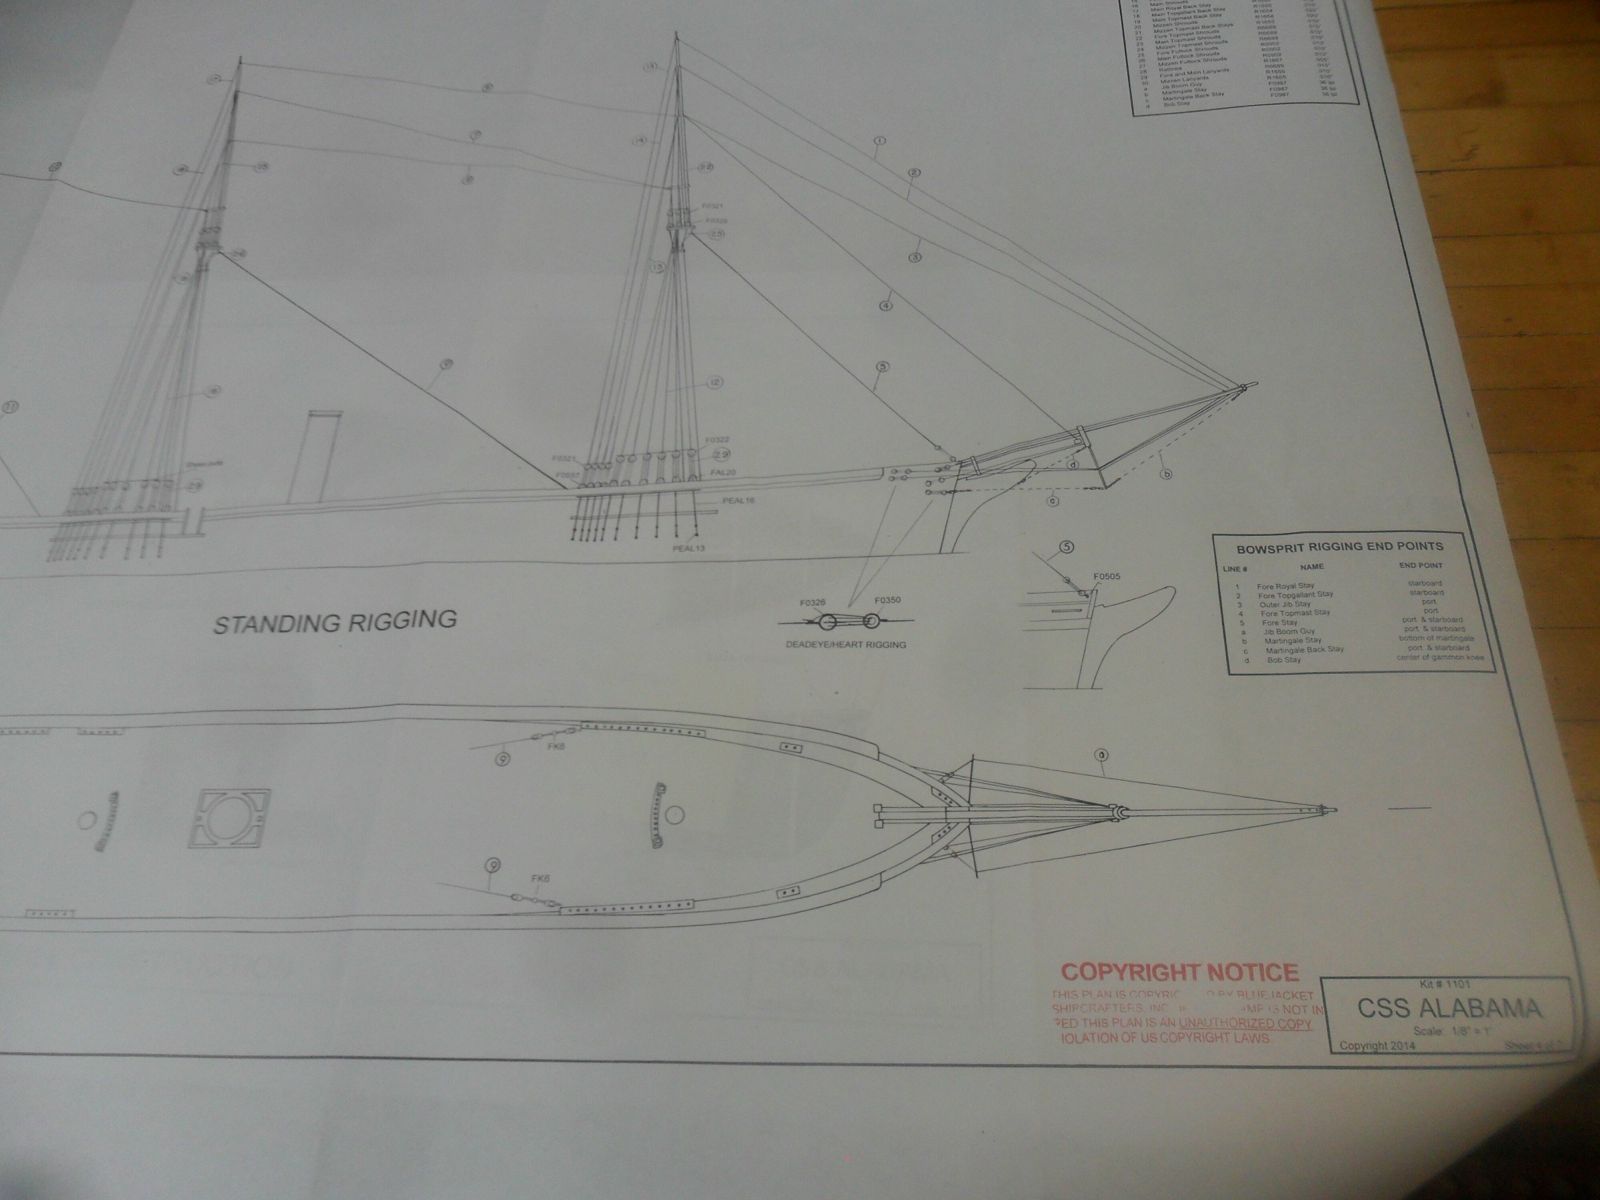
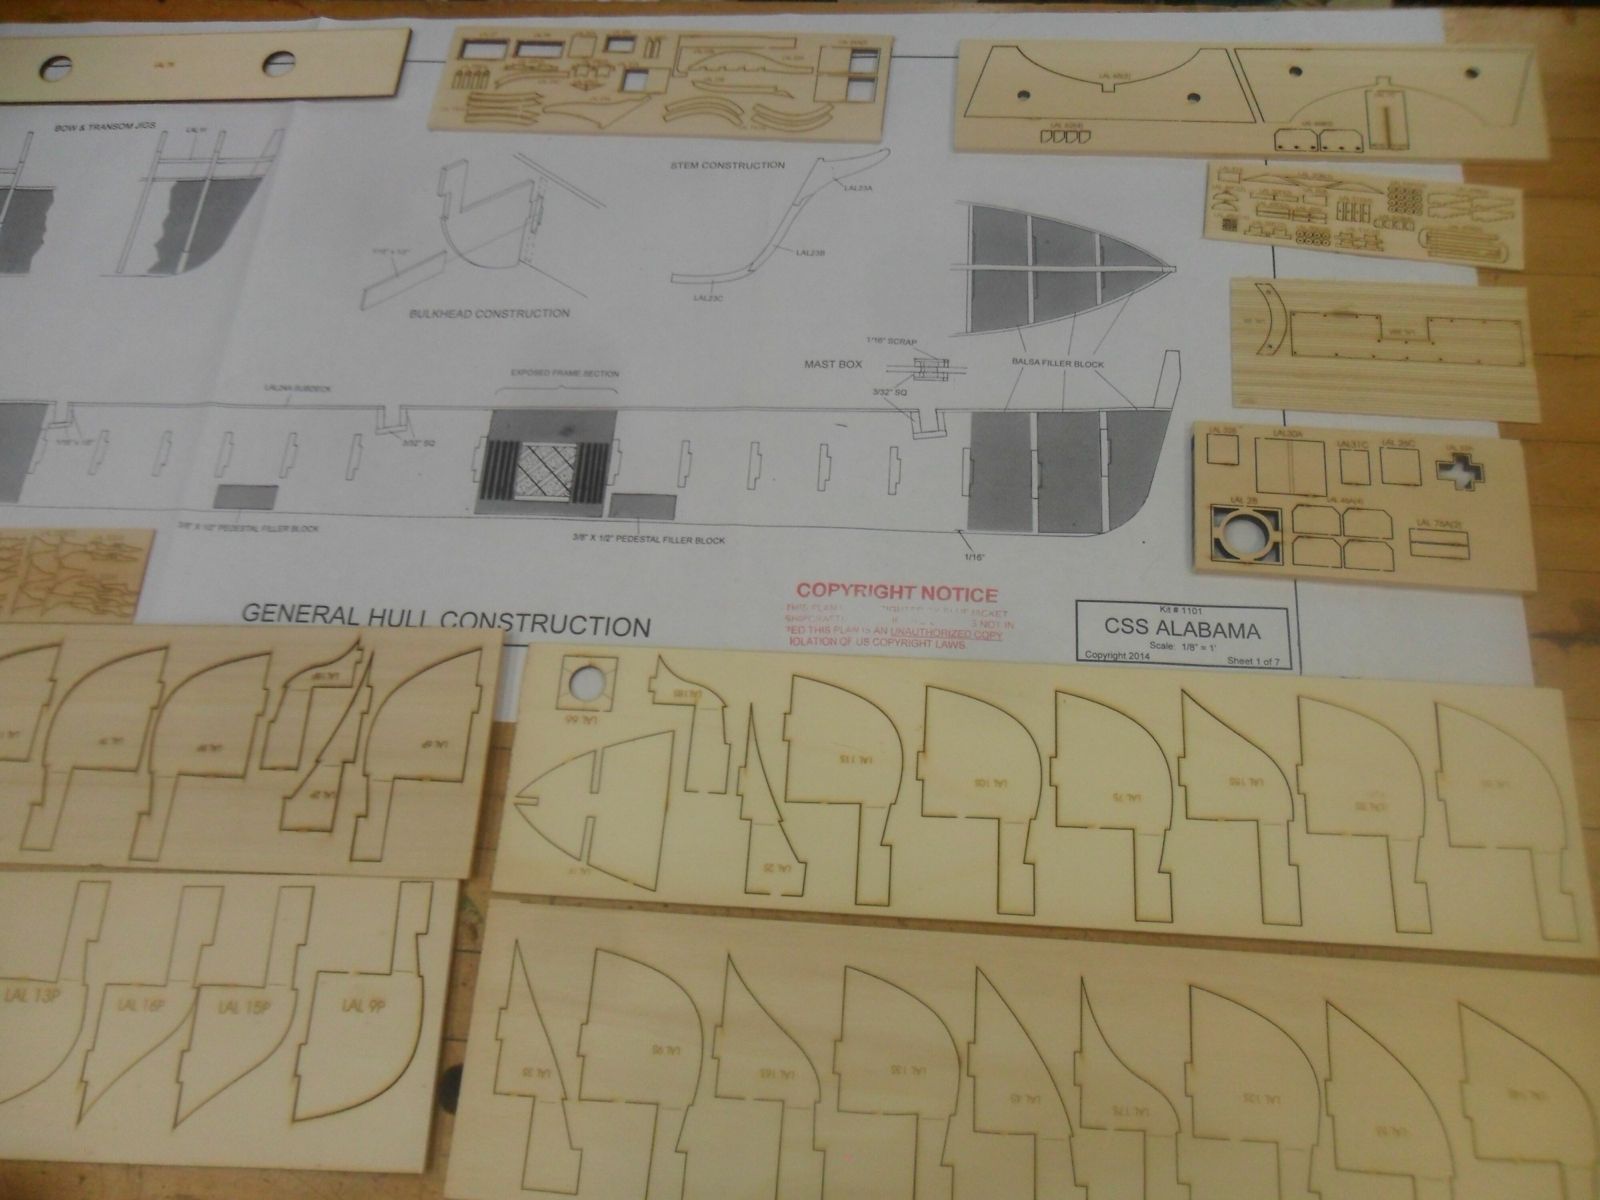
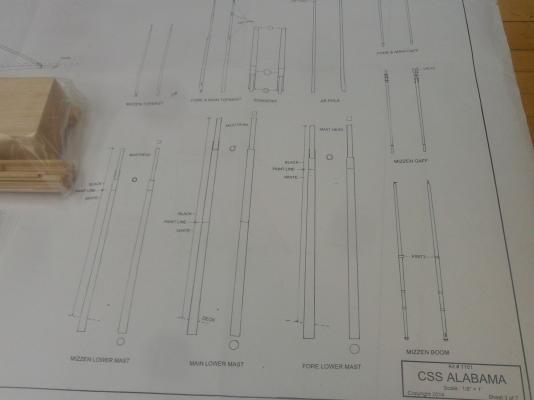
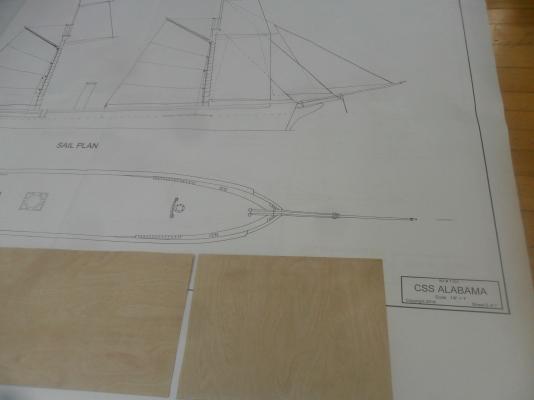
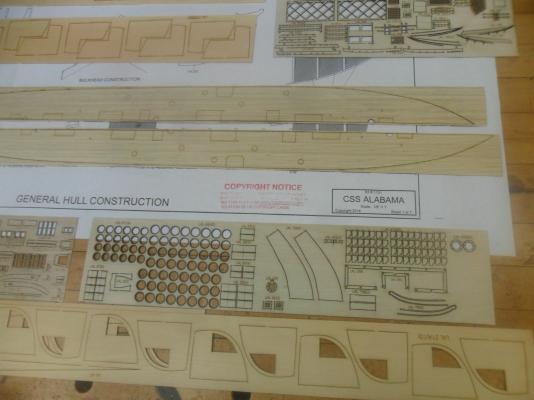
Welcome aboard every one~! The scale is 1:96. Her actual dimensions: length 210 ft width 32 ft depth 17 ft 3 inches tonnage 1024 empty but with cannons; 1421 fully operational draft when fully operational: 15 ft estimated speed when in fair trim: 12 knots Built by John Laird and Sons of Birkenhead, launched 14 May 1862 Thus, the model length is about 26" sans bowsprit. I started the build with the 8 cannons: one 7" Blackley rifle, 100 lb shot one 8" smooth bore pivot, 68 lb shot & shell six 32 pounders, smooth bore, in broadside I will post pictures and comments in the near future. Next up are the bulkheads for the hull construction. Duff
-
Hi Martin, very nice build, she is looking great~! English built galleons have always fascinated me, especially the Golden Hinde....... And interesting uses of the curling iron and metal cribbage board. I will have to keep a weather eye out for the iron, and perhaps make my own metal board . Duff
-
Are bolt ropes/earrings served?
Richard Griffith replied to keelhauled's topic in Masting, rigging and sails
Good morning Marc and Jerseycity, according to Underhill in his book Masting and Rigging the Clipper Ship & Ocean Carrier, reprint 1969, page 119, he states in part: The leech rope and foot rope are spliced round the thimbles on the spectacle iron, with the eyes leathered in way of the thimbles and the rest of the splice tapered, parcelled and served. The bolt ropes are then marled to the sail over the parcelling and serving. There are several illustrations that are useful. If you are building your Cutty Sark at a larger scale, this kind of detail could be shown to good affect; otherwise, just show the serving of the bolt ropes (foot ropes and leach ropes) to about a foot (actual - full sized) from the spectacle iron. Duff -
Dr. Per~! I echo Bob's questions, plus any photos available yet? Will National Geographic (or similar) cover this one like they did for Wasa in the early 1960's ? Duff
- 10 replies
-
- 1
-

-
- 17th century
- 66 cannons
- (and 1 more)
-
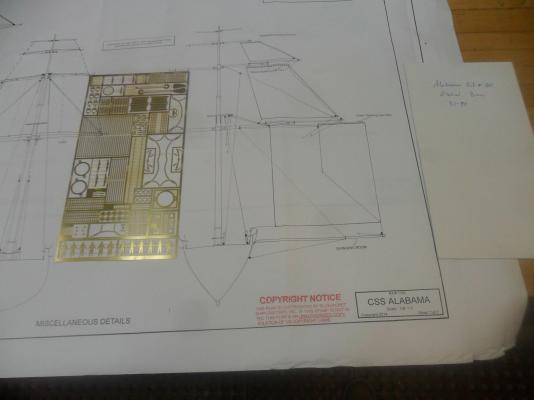
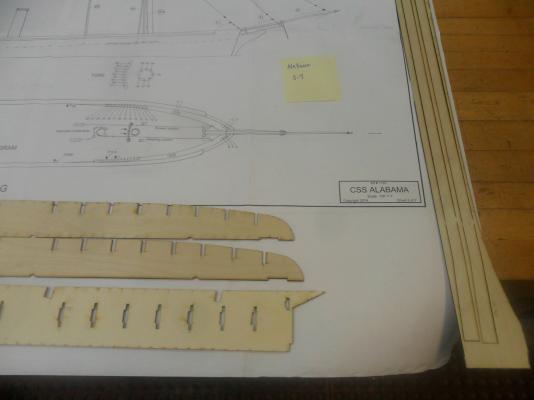
Hi All, here is my first build log, of the excellent kit from Bluejacket Shipcrafters. My goal is to build this OOB (out of the box), no scratch building, evaluate the instruction booklet, the plans and the materials and post my comments as I progress. There may be some typos in the booklet, some areas that may be confusing and some construction issues. However, as you can see from the pictures of the contents , this is a quality kit in all aspects. Thank you for viewing and I hope you will enjoy this journey with me. Duff


-
Stowing anchor rode in 18th C.
Richard Griffith replied to Captain Al's topic in Nautical/Naval History
Good discussions. I double checked some of McCay's dimensions in his table (pages 108 to 112). His table looks good and his rope dimensions appear to be correct for circumferences, EXCEPT for the anchor cables~!?? He also discusses anchors, page 10. I quote in part: "Bounty carried six anchor cables, each 100 fathoms long." It is believed she carried 2 bowers, each 13 plus CWT (CWT in English usage is 112 lbs) . Per Bligh's log, one was lost while weighing due to worm damage (these bowers had wood stocks) and is now displayed at Pitcairn Island. The smaller anchors had iron stocks. Duff -
Hello Jazzchip and all other members who contributed excellent comments and well considered thoughts. I would like to add and strengthen a couple points but first, please allow me to go back a few years (like 50) to my teenage period to set the stage. My 'shop' at that time consisted of a few basic hand tools, a few micro drill bits, an old electric hand drill, a gig saw (called a scroll saw now) from Sears, a used 8" table saw and some maple, pine and white cedar woods. Having built 3 or 4 plastic ships, a few airplanes and a couple of basic wooden ships from kits (they were crude and thrown away), I decide to scratch build my next ship. I liked and still like English galleons so I built Drake's Golden Hinde (x Pelican). It is out of scale, rigged, no sails. but is attractive. My parents proudly displayed it for 30 years, and it is back with me. Point 1: you do NOT need a boat load of tools to scratch build. You do need perseverance (non builders call this patience). Point 2: you have to like, and be emotionally involved, in the subject. Point 3: you have to think, to use your creativity, to get the results you want with the tools you do have . Then there was little model making due to college, chasing women, settling down, earning a living, raising kids. Some found moments to make toys and models. Kids grown, having their own kids, retired now so much more time for building. My shop is large, lots of tools both hand and power, lots of wood on hand, plus brass, bronze, steel and aluminum on the shelf, and many skills learned (by doing, reading and talking with others who had the skills). My ships are admired and some are sold to others. Point 4: the large shop allows me to build faster and more accurately. Point 5: I still enjoy and take great pride in my creations, and my wife and fellow modelers enjoy them too. You might say, wow, this guy must have loads of skills. Well, yes and no. Wood speaks to me so that is my favorite medium. I also learned to machine various metals, and to handle acrylics and ABS plastics. But, I am a newby at sculpting in wood, at frieze painting, at making mortise and tenons in transom pieces, at drawing free hand, at handling textiles (read sails) and at jewelry work (the metal work, not gems). My formal education is not in the fine arts, so I learned by doing and lots of reading. Point 6: do not fear going beyond you comfort zone; push yourself so that you can grow. Point 7: take inspiration, be inspired, by others from the masters of every century and every country. And not just those who build model ships..... Point 8: talk with others: be a mentor (or a mentee) . Teaching pays it forward, and keeps this fantastic activity alive. I might be able to approach the exquisite level of the masters, but I will never know unless I try. You decide how far to go. I have much to learn, to make. Keep building , and above all, have fun~! Duff
-
Daves makes the critical point: harvesting one's own wood does not mean one is a better builder or carver. It does increase one's control of the medium, and increases one's option by getting non commercial wood. I harvest dogwood here in Connecticut because it is a very good wood for model ships and other objects, it is common here, non woodworkers use it for firewood or throw it away so it is free for the asking, and it is very difficult to buy from the usual suppliers. Since some else already cut it, I do not need a chain saw. I hand saw the logs into 18" pieces, coat the ends with parafin, stack them in my shop for 3 or 4 years, then saw them into billets with my 14" band saw. I like doing this. Some day my building skill may increase to the level of Hahn, Ronnberg, Froelich, Anrscherl/Herbert, Tossti, McArdle, Hoving, Napier and many others. I doubt I will attain the level of McNarry or McCafery. But all these Gentlemen have taken the time to share their knowledge by writing books that outline what and how they created their beautiful works of art. They and others have given me inspiration, hope and a drive to at least try. The point is not how we get our wood, but how we create our master pieces. There are many paths to this and as artists we choose the paths. Keep building, and above all, have fun~! Duff
-
Stowing anchor rode in 18th C.
Richard Griffith replied to Captain Al's topic in Nautical/Naval History
jbshan, after double checking the dimensions, you are correct, the cable would have been close to 12" circumference. McCay labled his table as such, but it should have read 'diameter'. Lever gives 85 fathoms (page 67, 1938 ed.) but 100 fathoms is reasonable, especially for a long voyage as you stated. We do not know exactly what she had (unless stated in her log book), so Bligh would have accepted whatever was available yet serviceable. For our newer members, 'Keckling' is old rope wrapped around the cable at short distances to protect it from chaffing. BTW, where in Western NH are you? Duff in Middletown, CT -
Stowing anchor rode in 18th C.
Richard Griffith replied to Captain Al's topic in Nautical/Naval History
Hello Capt Al, you are right that the rope would not be stored in bilge water. Preventing rot was a major effort on sailing ships. so the bosun had to do all he could to protect cables, sails and lines. The Bounty had a ceiling (the planking that covered the frames on the inside of the hull) so nothing could be stored between the frames. She was 230 tons burthen, 70' length of keel, 24' 4" breadth and 11' 4" depth of hold. She did not have an orlop deck but she did have platforms fore and aft and the midships was the hold. Ships of this size were assigned 4 anchors: a bower, a sheet, a stream and a kedge. The bower and sheet anchors for Bounty had 4" (circumference) cables, at least 2 maybe 3, of about 85 fathoms each which could be spliced together as needed. Smaller cables were supplied for the other 2 anchors. The Bounty as outlined by John McCay in his AOS book does not show a cable tier or a manger which suggests to me that the cable would have been coiled on top of the barrels in the hold. (Larger ships would have had cable tiers.........) Hope this helps. Duff -
Vielen Dank fuer die Bilder! Bitte schreiben Sie auf Englisch, als meisten Personnen nicht Deutsch verstehen. Thank you for the pictures. Please write in English as most people do not understand German. The carvings are extraordinary, almost beyond belief. WOW~! Duff
-
Favorite new hand tool discovery
Richard Griffith replied to Senior ole salt's topic in Modeling tools and Workshop Equipment
SOS, looks like you are building the Providence, with a dental mirror. One of my favorite tools is a simple CA applicator I made with orthodontil wire (.010) twisted into a tiny loop and glued into a short dowel. I can place minute amounts of CA exactly where I want them. Duff -
Appropriate thread for rigging
Richard Griffith replied to Captain Al's topic in Masting, rigging and sails
Captn Al, there are many excellent references for rigging ships for the age of sail, such as but not limited to Lever, Biddlecombe, Steel (there are several iterations), Lees, Boudriot, Petrejus, Longridge, Underhill, and Marquardt, plus more recent monographs by top modelers/authors. I have all of these except Marquardt, but there are others. Brian is right, go smaller if you have to choose, plus what will look right. You might consider using wire on the small blocks. Good luck with your build and have fun. Duff -
Hi Keith, this is a tough one to answer, and perhaps another member with more reference materials can be more precise. According to Brian Lavery in his book of 1987 "The Arming and Fitting of English Ships of War 1600-1815", page 143, lead aprons were in use. This suggests that such aprons could have been in use on board Mary Rose. Since sailors were and are very practical, I think some form of material (tarred canvas?) could have predated the use of lead because some form of protection was essential to prevent accidental firing, and to keep the powder dry. Richard Endsor in his 2009 book " The Restoration Warship" discusses in great detail the building and arming HMS Lennox, launched 1678 at Deptford. Lennox was a third rate of about 978 tons. BTW, Lennox had lead sheeting on her bottom. He has a very extensive list of stores (and other lists). The gunner's stores does not list lead aprons or any lead. However, the carpenter's stores lists 100 CWT lead sheets plus some scupper material. He would have used these sheets for repairs. Would the gunner have asked him to make lead aprons? I realize these sources are 30 and 60 years later than Mary Rose but shipwrights and sailors were conservative and very practical. You might correspond to the Mary Rose Foundation in Portsmouth, unless another member of this august group has more contemporary information. Duff in Middletown, CT
- 1 reply
-
- 3
-
-
Model workshop layouts
Richard Griffith replied to StebbinsTim's topic in Modeling tools and Workshop Equipment
Hi Tim, you have lots of options for 200 square feet. There are many photos of workshops already posted to this forum. My second suggestion is to get a copy of Antonio Mendez' book "William Frederick's Scale Journey' in which he has very good photos of his workshop and how he crammed many tools and storage ideas into smaller spaces. (I have a new one for sale on ebay for under $9 - William Frederick's Scale Journey (321834853112) ) His book is also full of great ideas and techniques for building models. Anyway, best wishes in setting up a new shop. Duff -
Fantastic~! Thank you Dan for posting the build log and for making such a beautiful model ship. Take care. Duff
-
A mill is very handy for all of the tips above plus many others. For example, you can mount your work between centers and mill it round or hex or octogonal. A dividing head is useful here but you can divide the work by mounting various gears. I seldom use mine for drilling holes unless I need accuracy, such as making wheels. (The drill press is faster and easier to use for holes.) Milling slots is the main strength, and indexing those slots is a snap with the mill. The more you use it, the more you learn and the more useful it becomes. Duff
-
One can never have too much. Unless the supply crowds you out of the shop. Ships, toys, and projects for the admiral use up wood. I also salvage wood, when others throw away furniture and old shelving. Winter storms will sometimes damage trees which I will grab if the wood is valuable, such as flowering dog wood. Estate sales will sometimes have wood for very little money as they want to clear the home. So, I like to keep more wood than I can use in the next 5 years. Keep building, and above all, have fun. Duff
-
HI Mike, good comments above. I use a Delta contractor saw which runs a 10" blade for all my rough work. By rough I mean cutting frame stock from 3/4" and thicker stock. Most of my framing stock is 3/16" or 1/4" thick. You could just buy sheet stock that is already sized to these thicknesses. When I need to cut thin stock, either from thin sheet stock from suppliers, or from thin stock that I cut, then I switch the blade to an 8" veneer blade or an 8" hollow ground combination blade. I also use a no clearance blade insert so the small parts stay on top of the machine. I also use sleds of various combinations (see other posts in this forum}. If your budget only allows for one machine, then go with a full sized machine. You could just buy thin stock, and then cut with a Proxxon or similar. These smaller saws are ideal for the many small items we make for our models. I did make a small TS which runs a 3" blade so I can saw strips to .025. I cannot use this small saw for any wood thicker than 1/8" so having both is ideal for my needs, BTW, my budget does not allow me to buy the Byrnes saw which is why I made my own. Good luck with your decision. Hope this helps. Duff in Middletown, CT
-
Titebond is my go-to wood glue. For hard woods, such as box, cherry, costella, and similar, one should always use a mechanical join, such as a trunnel of wood or brass because even great glue joints have a tendency to fail apart after many years. If one is not concerned with longevity, then ignore the trunnel. You may be giving a repair job to someone in the future. CA glues are also very useful as they bond dissimilar materials, are fast setting and easy to apply. One should have a fan to move fresh air across the work area. I know as they are an irritant to me. Many experts advise against using these on rigging due to the exothermic reactions, failure of the lines, and oxidation of the glue. I think the jury is still out on this one as others have had no joint failures after 10 to 20 years. Is the jury still deliberating? Elmers Glue All is also a favorite as it is almost as strong as Titebond, and dries clear. Conservationists avoid this because the joints are too strong and makes future repairs very difficult. Again, you decide what's best for you. If, however, your are doing work for a museum, then you must follow their requirements on glue and all other materials. If the model is for a grandchild or other family and friends, then use what you are comfortable. Epoxy glues are very useful for bonding metal to metal or to wood, plastic, glass. Solder is not a glue but it is the best method for bonding metal to metal. Both soft and hard soldering have important roles in our modeling. For securing knots, the better materials (other than CA) include matt varnish, dull coat and similar, Dave's Flexament (used in making flies for fishing), and diluted white glue. There must be others, such as glues for jig saw puzzles and fabric glues but I prefer the matt varnishes and Dave's. BTW, Dave's has a strong odor, contains toxic solvents and must be used carefully. Again, I prefer the varnish, I think hide and fish glues could be used here, too. Hide glue is a very good glue, has been around since man and woman first figured out how to join wood and attach fletches to arrows. It is available from Amazon, Ebay and woodworking stores. One no longer has to heat it. Fish glue is one glue I intend to try out. Urethane glues have some very limited use for our work, never for the details or fine fittings. Glues and cements for plastics would take another page. So, there are hundreds of glues, which makes me think we need to consult a chemical engineer but instead Wikipedia is very useful as is this forum. I have about 30 different glues in my shop and have had to rely on others before me to understand them. I hope my ramblings will help you in your efforts to improve your model ships. Keep building and above all, have fun. Duff in Middletown, CT
-
Your best sail cloth and technique
Richard Griffith replied to steven sturgis's topic in Masting, rigging and sails
Bluejacket Shipcrafters ran out of silkspan recently but they substituted model span which to me is the same material. I used it to added furled sails to Le Superbe. I am a very happy customer of BJ, not an employee. Duff -
Hi Richard, definitely grab this stuff and try it. You have to air dry it first. Label the ends with 'Peach' and the date it was cut. Get some parafin and dip the ends of the logs, then put the logs in a dry warm place for a couple of years. Generally figure about one year per inch. (One log was too big so I cut in in half lengthwise then dipped the ends.) I did this for my dogwood and am very happy with the results. I have NOT used peach but do use pear, apple and cherry, all very good woods for building model ships, toys and anything else that needs a hard wood for strength and durability. I also use flowering dogwood, Costella, box wood, basswood, soft maple, redheart, yellowheart, pauduk, clear pine and poplar. I seldom use open p;ore woods because those pores make the model lumber look like the toredo got into them. Keep building and above all, have fun. Duff in Middletown, CT