yvesvidal
-
Posts
3,644 -
Joined
-
Last visited
Content Type
Profiles
Forums
Gallery
Events
Everything posted by yvesvidal
-
 It is always nice to compare models at the same scale. Yves
 -
Yes, it will not be an easy task. But the sentimental value will give you dedication and fuel to restore these models. Yves
- 6 replies
-
- 2
-

-
- Statenjacht
- Billing Boats
- (and 1 more)
-
Fantastic subject. What a beautiful yacht. Yves
-
Another Contest winner in the making..... 🙂 Yves
-
Personally, I like the lighter blue better, similar to what the artist Romain Hugault used for his superb Bandes Dessinees: Yves

- 62 replies
-
- 10
-
-

-
Great choice for a fantastic plane. Yves
-
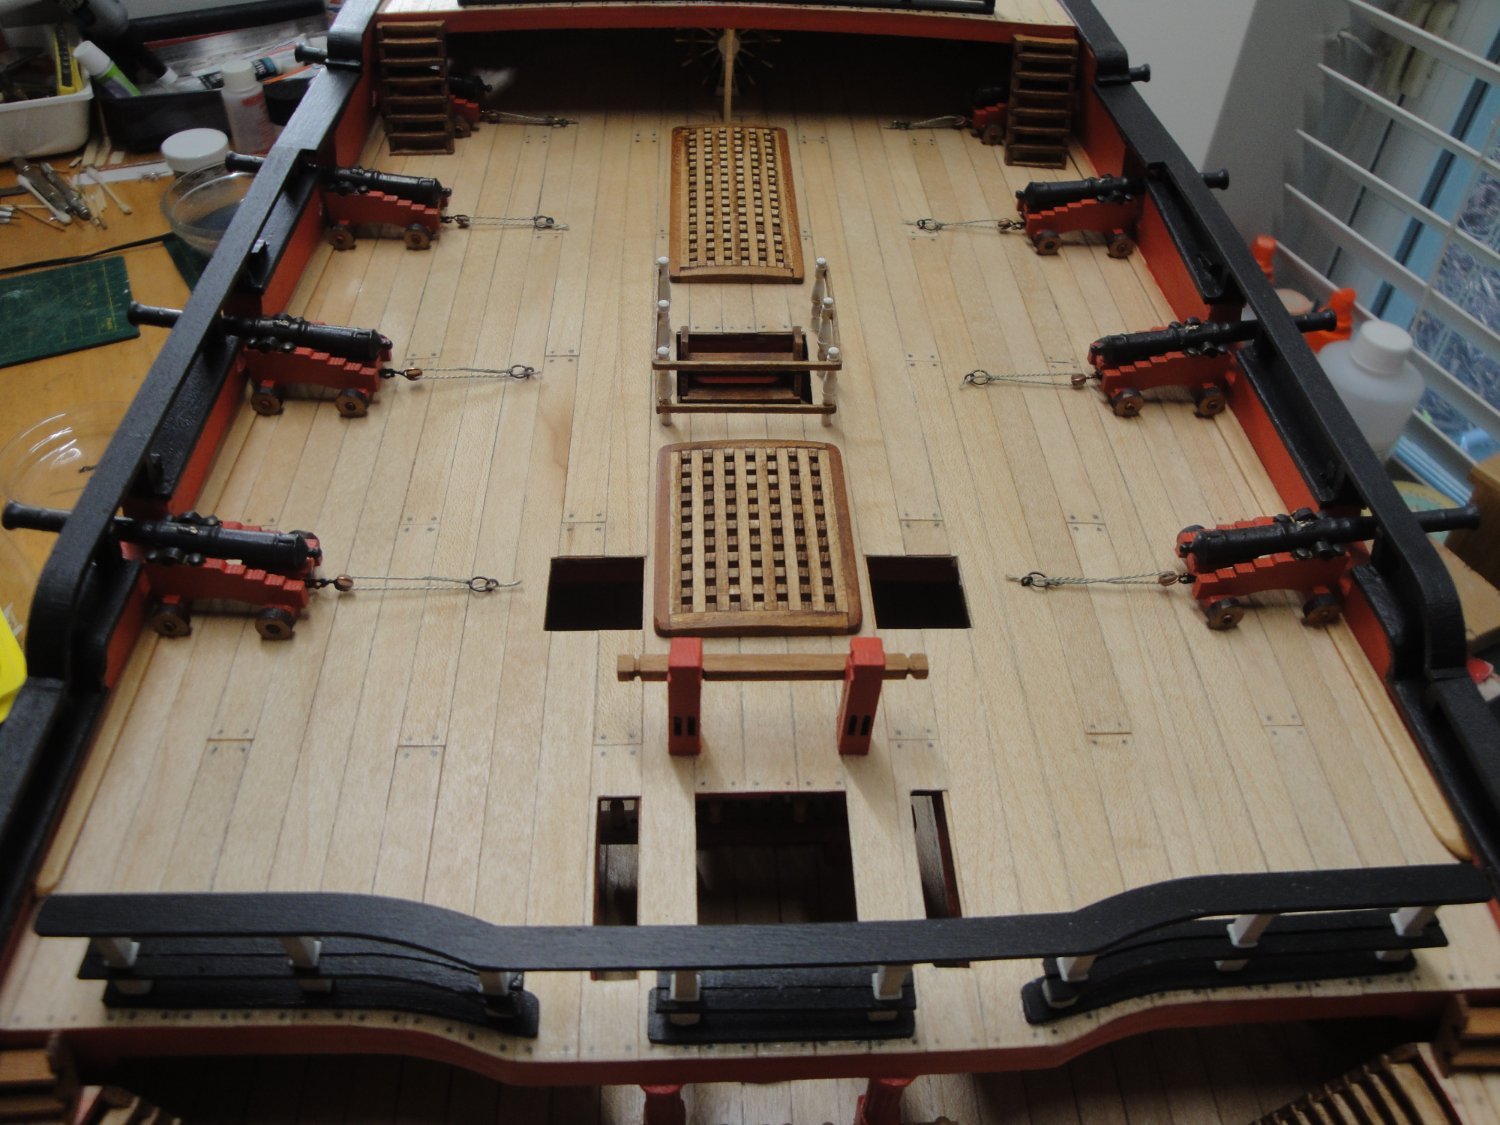
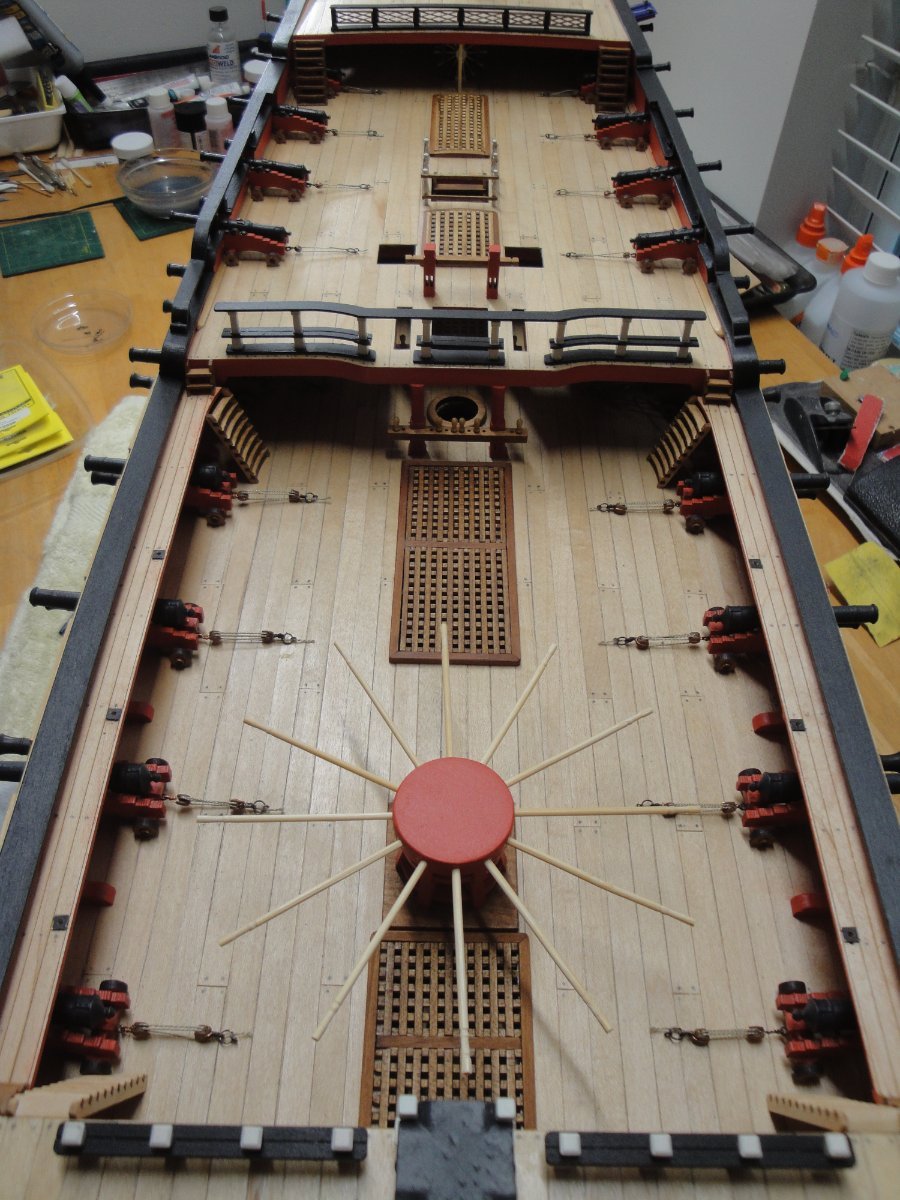
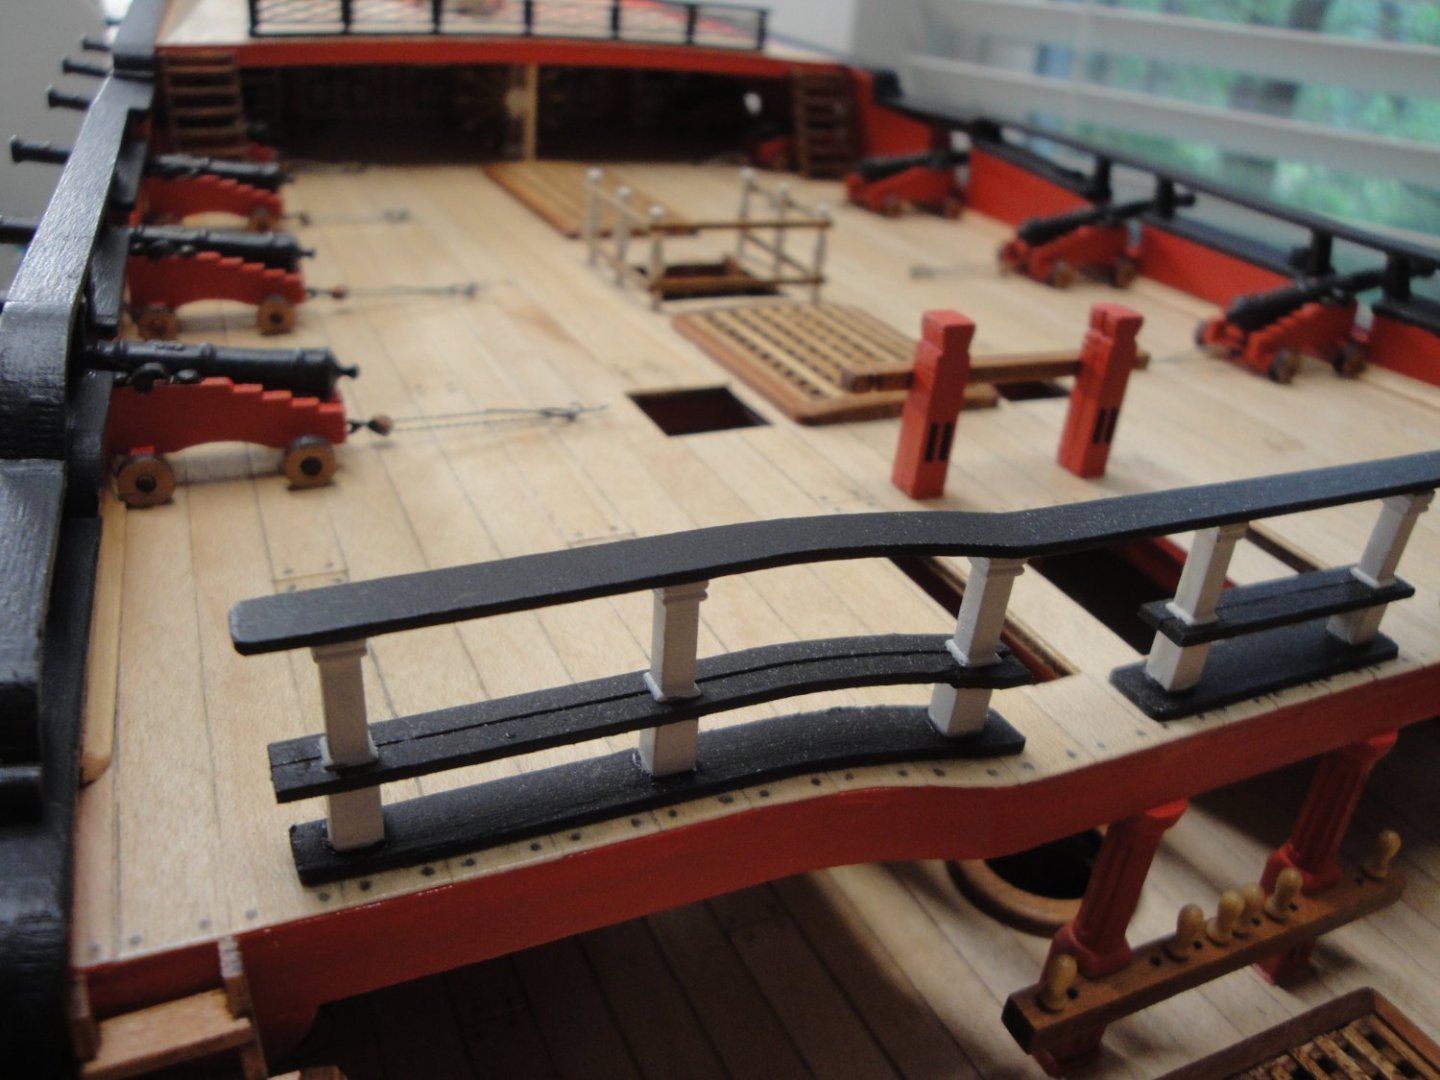
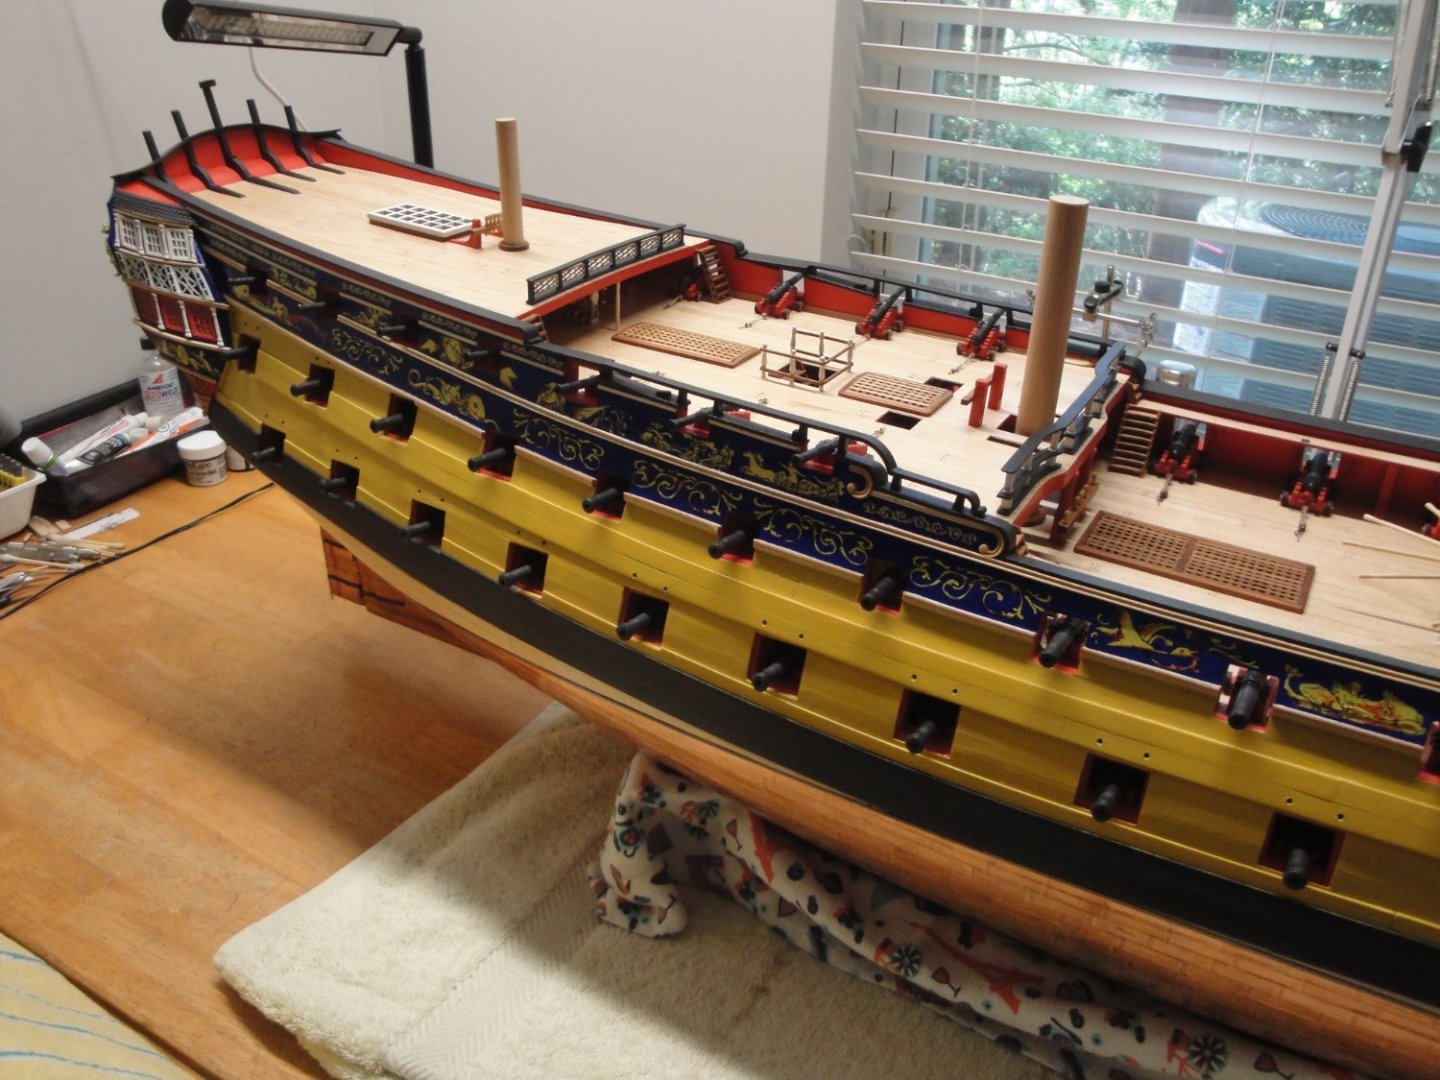
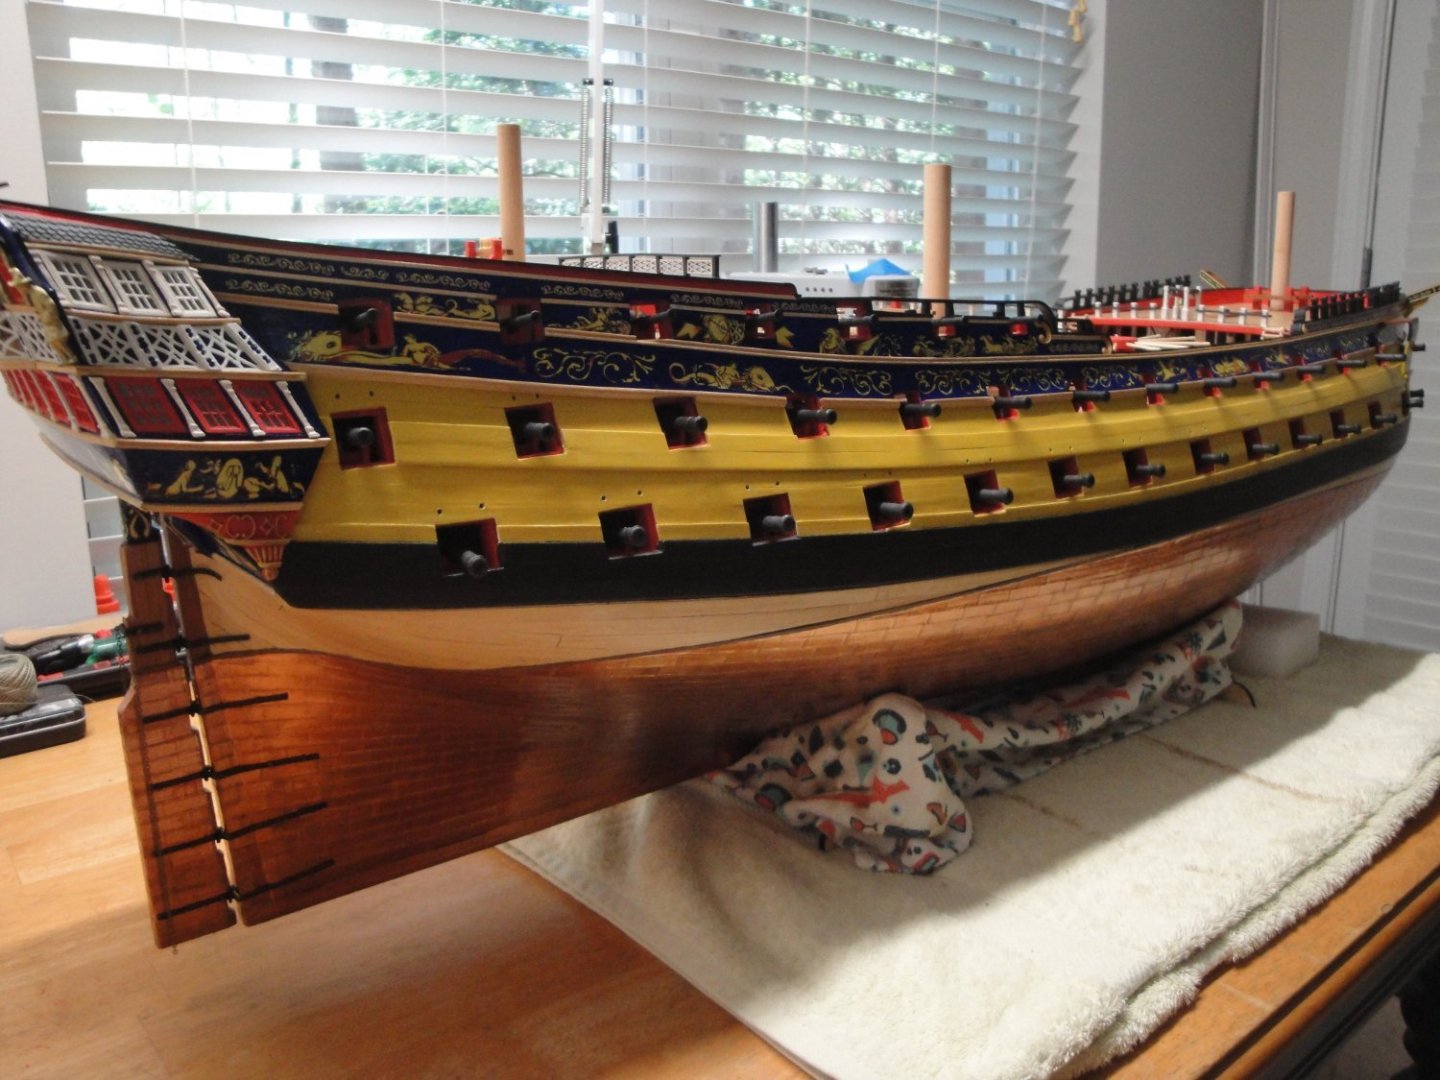
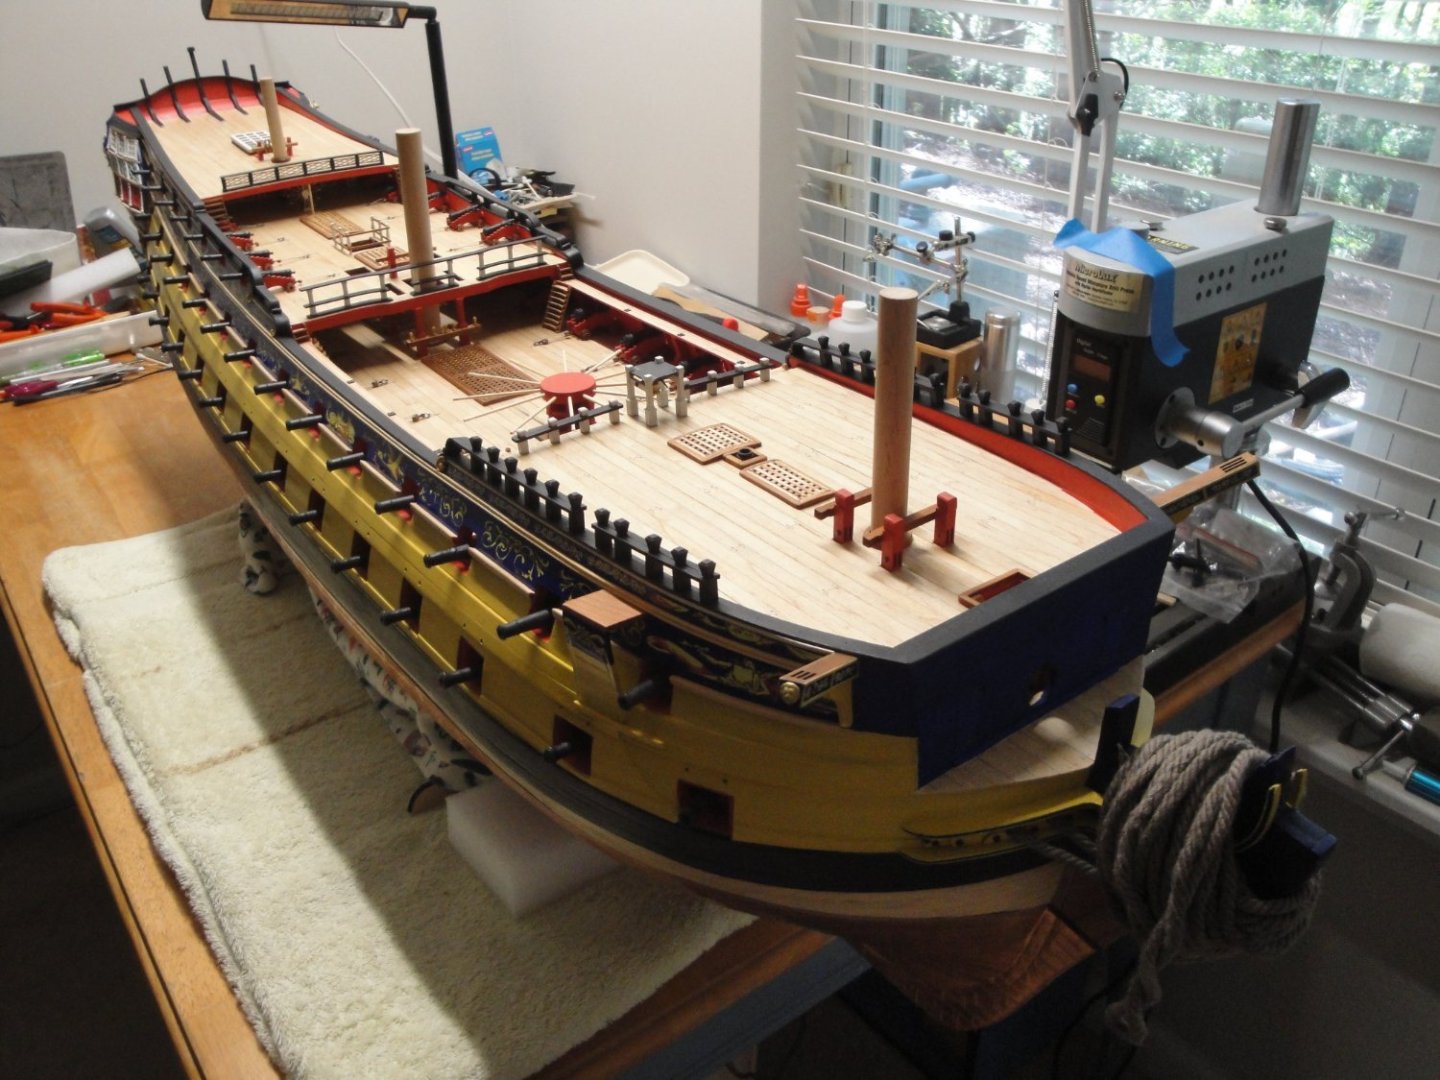
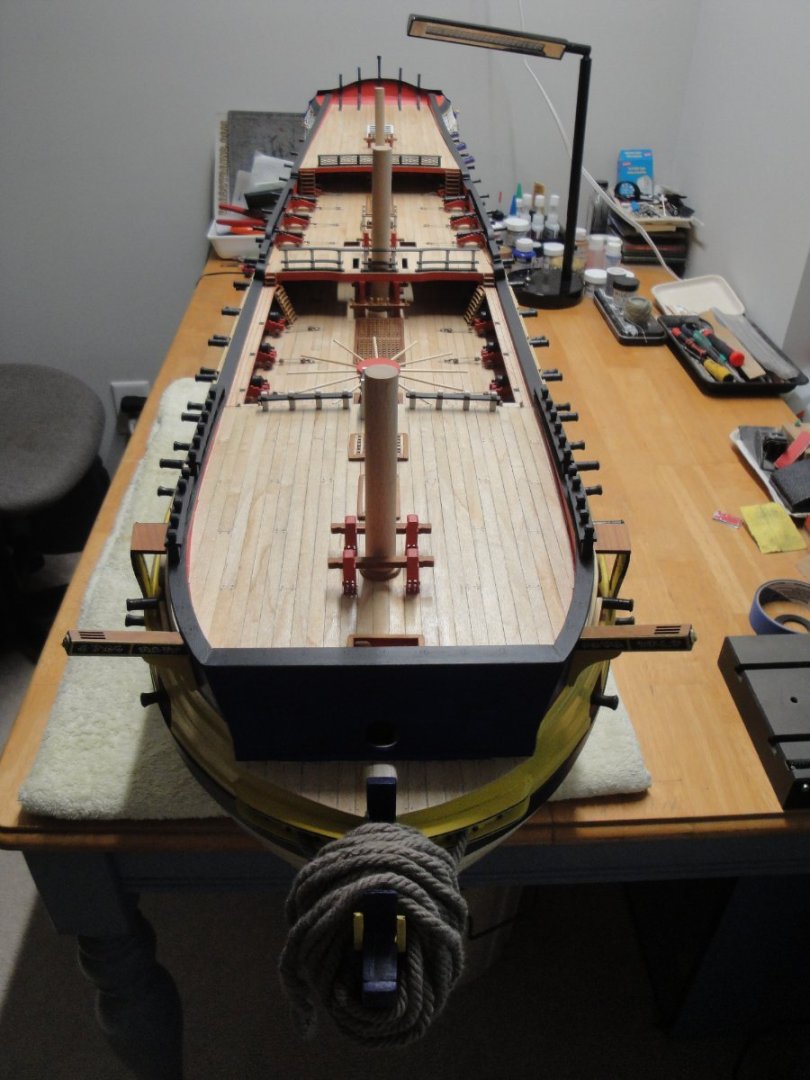
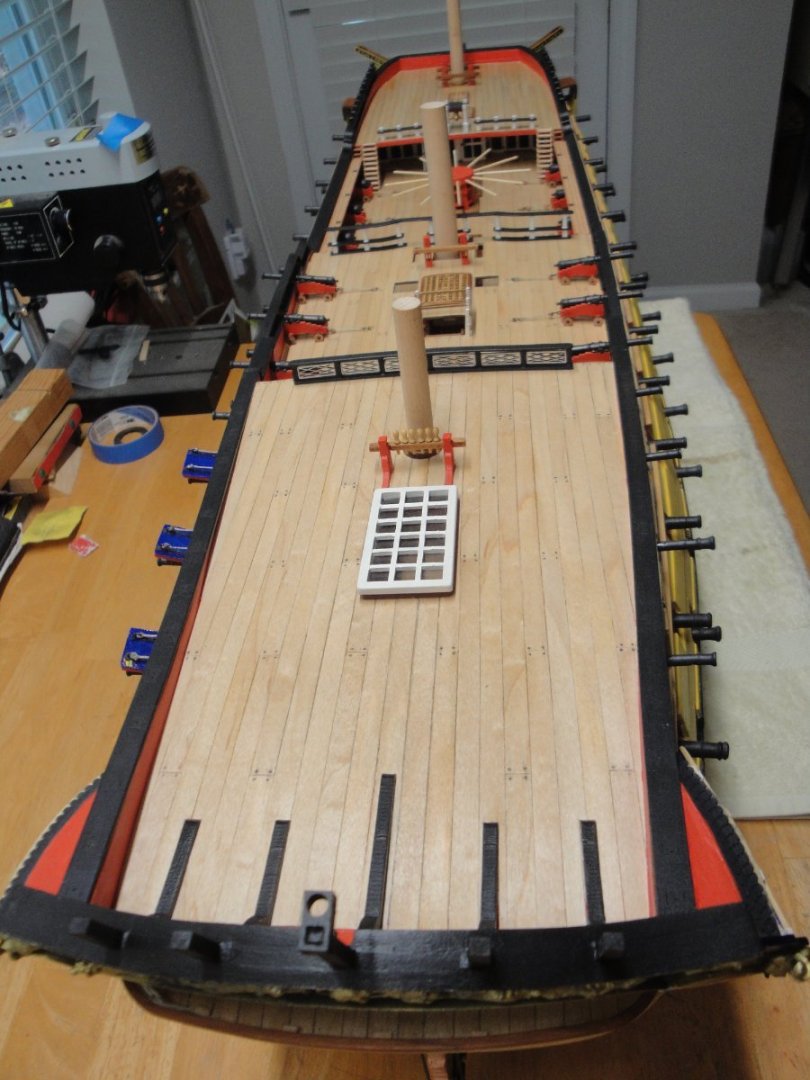
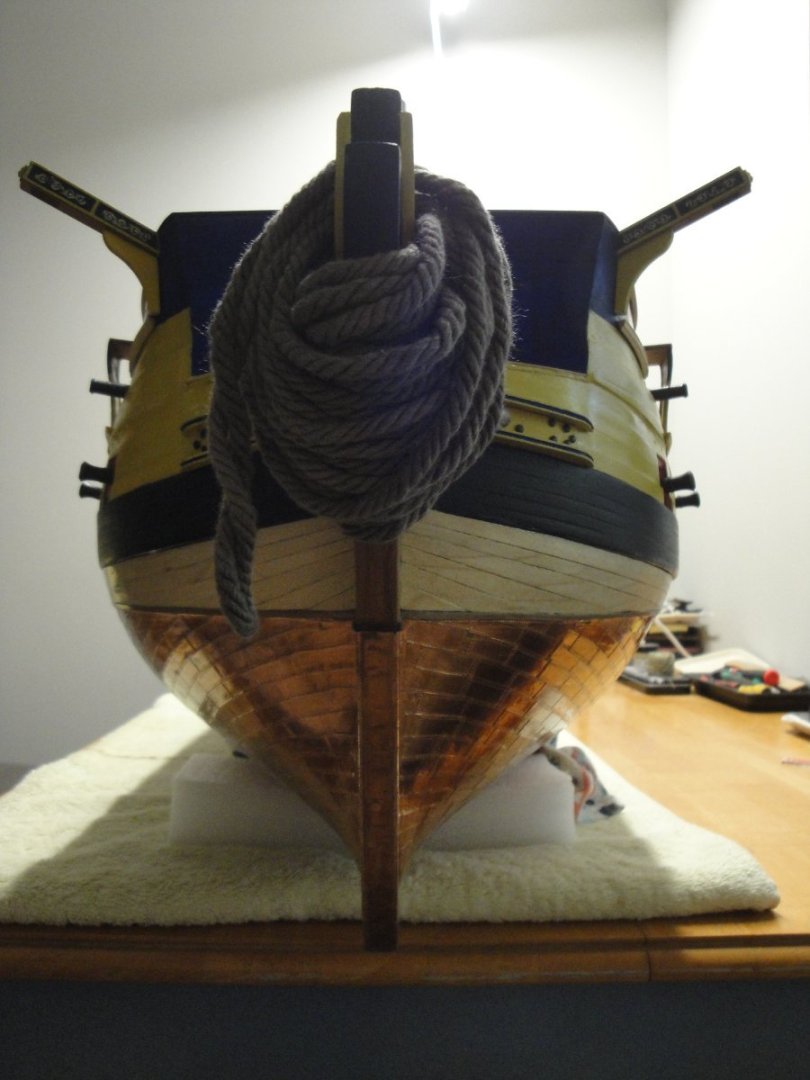
I realized that I have not provided an update in a long time. Most of the time has been spent doing non-related model building activities and trying to replicate on the starboard side, what was done on the port side, during a previous post: Overall, a lot of the same thing.... The quarterdeck is now complete with all the guns in place: Decals are delicately set along the side of the hull: As usual the hull is prepared with multiple coats of Future Floor Gloss. Then the decals are installed with SOL (by Micro-scale), followed by one or more applications of SET (also by Micro-scale) ...or is it the other way around....SET and then SOL....and finally sealed with multiple coats of Future Floor Gloss. I like the glossy results but if I get tired of it, a coat of mate clearcoat can always be added, to tone down the numerous paintings done on the hull. A few more pictures.... With the exception of the railing on each side and rear of the poop deck, the stern is pretty much complete. At that stage, I need to now shift my focus and work, on the bow: Yves


- 507 replies
-
- 19
-
-

-
-
Beautiful hull and gorgeous scenery from your deck. Yves
-
Absolutely stunning model. Congratulations. Knowing the predisposition of Japanese sailors to absolute and immaculate cleanliness of their ships, I doubt that Mikasa was ever so weathered. Your model is incredible and the weathering is superb. Yves
-
Beautiful carvings in Sculpey. It is looking very majestic. By the way, why do they call it a 74 guns ship? Mine only has 72.... I must be missing some carronades on the forecastle. Yves
-
I love your Emma C Berry with full sails. It truly changes the look of that little fishing boat. Yves
-
Another impressive project. Yves
-
I pity the other modelers, entering this contest..... They stand no chance. Yves
- 225 replies
-
- 2
-
-
- I Love Kit
- Hood
- (and 2 more)
-
Now, you need another display case, just for the medals... 🙂 Yves
- 174 replies
-
- 3
-
-
- prinz eugen
- trumpeter
- (and 2 more)
-
Another beautiful diorama in perspective. Yves
-
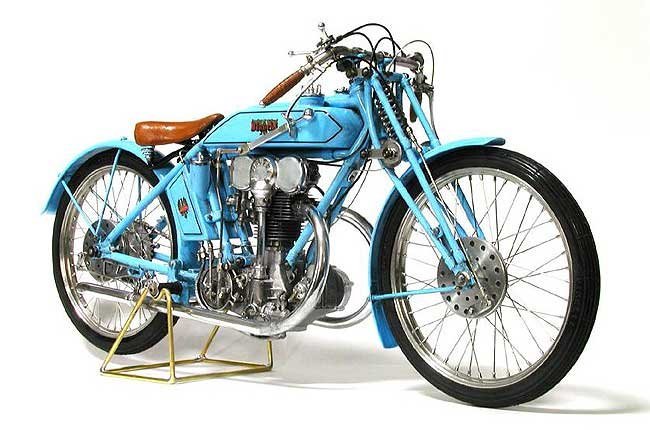
Ras, do not feel bad about some mistakes. We all do them. Now, for the ultimate perfection in building these difficult kits, a Japanese modeler Kim, is in my humble opinion the BEST motorcycle modeler on the planet. Take a look at his web site: http://kimshouse7015.com/ In Garage 2, near the bottom of the page, the Freccia Celeste kit is built and presented: I have drooled over Kim's pictures so many times.... Ras, I am presenting this work as a reference of what can be achieved with these kits and a lot of extra parts. I still admire your work and sympathize with your struggles in trying to put together these very old Protar kits. Yves
-
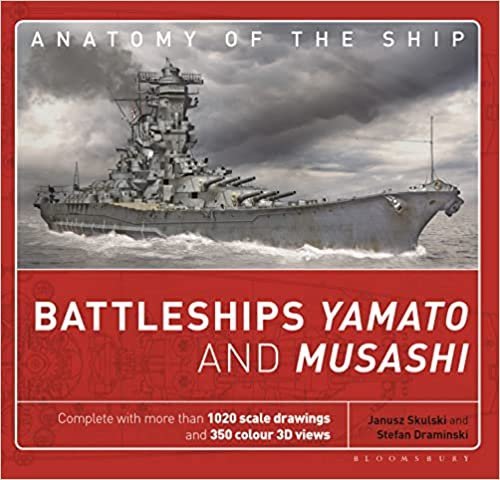
Shipgeezer, you should consider investing into this book: It clearly describes the large modifications that took place between the 1941 version and the 1945 version of the ship. Your question about the number of secondary turrets will be answered. Yves
-
You need to move (or restart...) your thread to the following location : https://modelshipworld.com/forum/137-kit-build-logs-for-subjects-built-from-1901-present-day/ Yves
-
Impressive show. Motorcycles seem a rarity in these shows, as usual.... Yves
-
I found that the cannon black acrylic paint sold by Model Shipways is very close to the black obtained by the chemical reaction. It is almost impossible to distinguish them from one another. I have used the acrylic paint, in some places where the chemical reaction with the brass did not take place and I am very happy with the result. Yves
-
Excellent book to have. Absolutely indispensable for building the Bellona. On my CAF Model (1/48), the planks were 3 mm thick x 8 mm wide. It took about 25 planks to cover one side of the hull (below the wales). Yves