SJSoane
-
Posts
1,650 -
Joined
-
Last visited
Content Type
Profiles
Forums
Gallery
Events
Everything posted by SJSoane
-
 Michael, you are a master of metal--as well as wood, of course! Beautiful engine, exquisitely detailed and crafted. Mark
 -
Gary, very clever way to make the hawse liner. I never thought of that. I was struggling with how to carve it in relief. Thanks so much for the idea, I continue to learn from you! I was kind of guessing at how thick the liner should be, looking at photos from different directions. Did you ever find a specification regarding the thickness? Best wishes, Mark
-
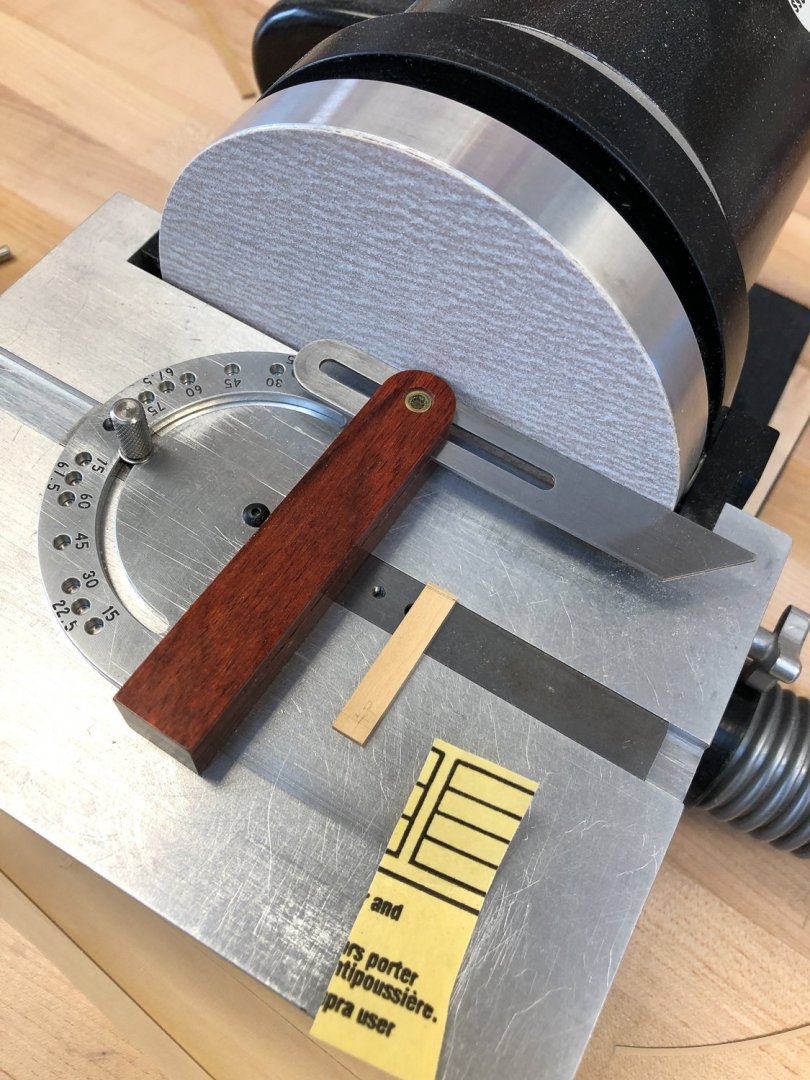
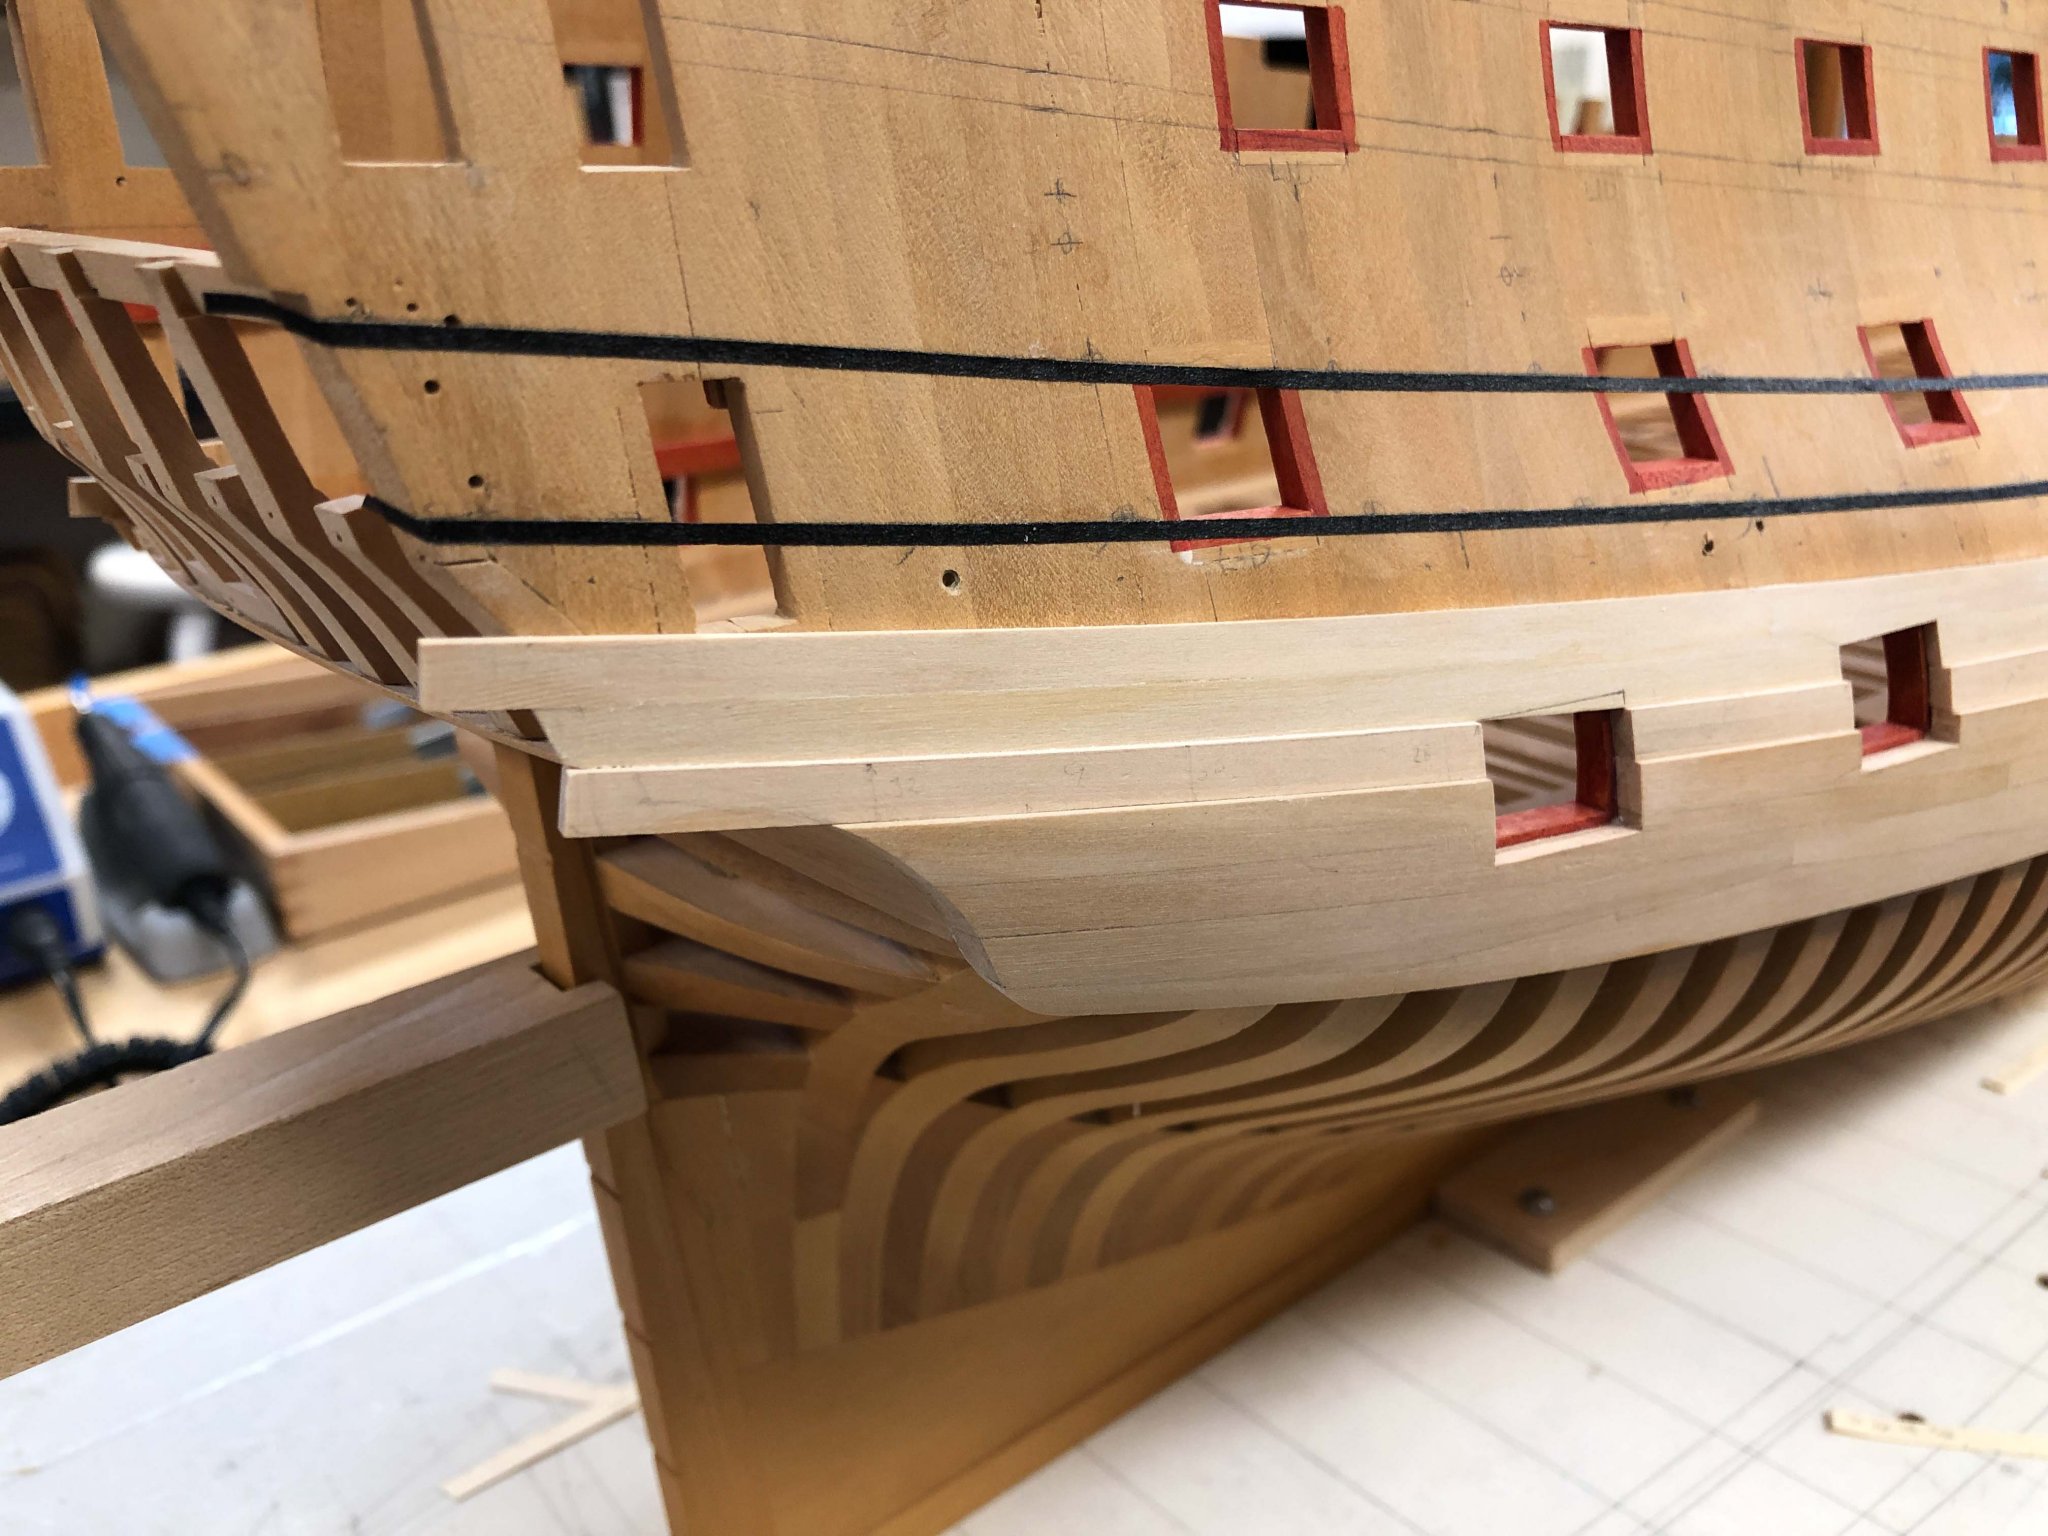
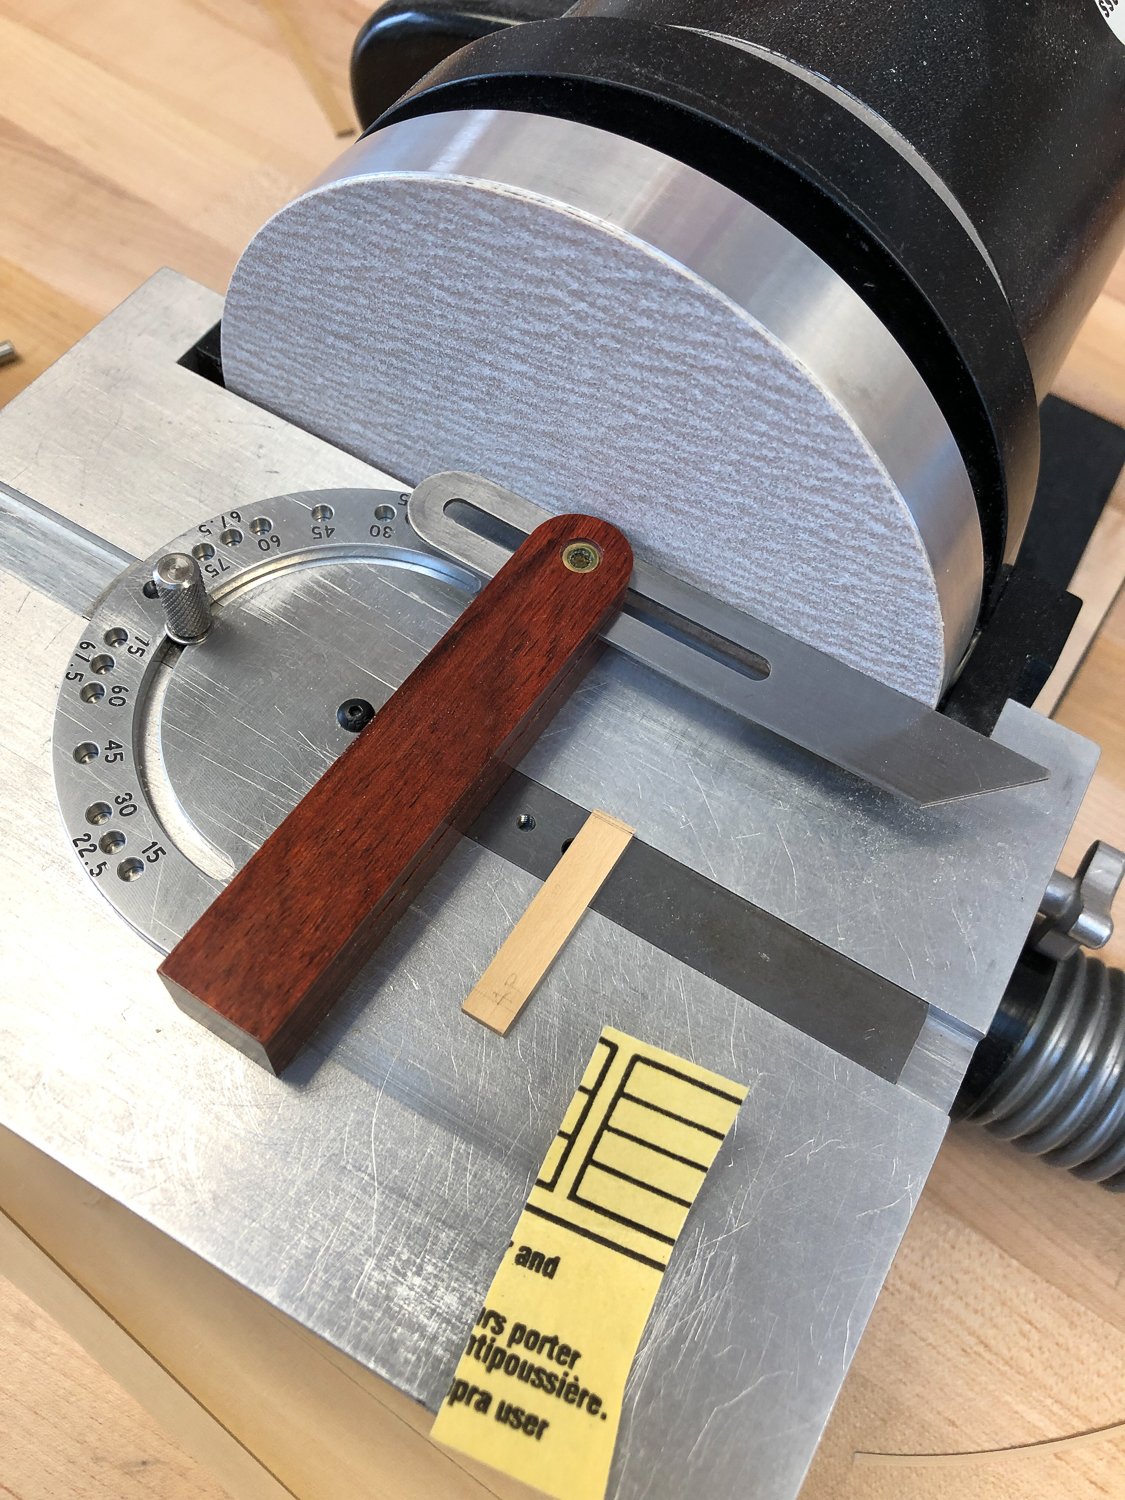
I agree with everything said above about the value of the thickness sander and the disk sander. The first is essential for getting a consistent thickness for things like planking. The second I use all the time for cutting very precise angles on the end of the piece. For example, in my planking seen here, I need to fit short planking between gunports, where the angle at each end must match exactly the angles of the gunport sides. I draw a line parallel to the port on the plank, set my angle finder to that, and then use the angle finder to set the angle of the miter gauge on the disk sander. If it is slightly off, I adjust the miter gauge a bit, then sand again. I can creep up to a perfect angle, much more reliably than with a freehand file or a chisel cut. Mark


-
Thanks, Michael, Grant, Harvey and druxey for continuing good advice on this challenging fabrication issue. In the end, clamping them in the existing steaming caul worked all right for the pieces I had already started on. They are now glued in place. For the next strakes, particularly the thicker ones above my lower black line, I will make a caul as Grant has suggested. It really helps to have them firmly gripped while working the edges, whether with rifflers and files, or planes. And then, except for the spirketting inboard, I am done with curves at the bow! Moving on to the next 4" strake, I see that I have a particularly wide plank towards the stern, due to the drop down to the two ports. this one should be fun! I found it was very important ahead of time to plot out the planks on the ship itself, because the drawing did not exactly match where the planks hit the ports, and so drop downs and plank runs had to be looked at individually on the actual ship. Mark

-
Marc, it is almost as much fun to work out an elegant fabricating method as it is to make the piece. This helps me guard against my natural tendency to "bodge" my way through. Grant, you are right, and I also realized that my curves are pretty constant at the bow above the wales. Indeed, I am steaming all these pieces on the same caul. So I tried clamping the piece to the steaming caul itself, as below. If I could figure out a way to get the clamp out of the way, this does afford a pretty stable base for filing, planing etc. Or, just make a two sided caul. I will play around with this. Michael, I think I understand your curved bench pin idea, but I look forward to seeing one you make. That could indeed be very handy. Especially if there were a way to clamp the piece. Holding firmly onto a thin edge when sawing gets pretty tiring, and fingers are always in the way of the saw. Mark
-
Hi Gary, I see you made a very nice job of the hawse liners at the bow, including the sculpted U-shaped feathered edge that I see in my original drawings as well. I have been pondering how to make that cut myself. Do you recall how thick you made the hawse liner, measured from the face of the planking behind? And how you made that nice sculpted edge? Best wishes, Mark
-
Michael, Beautiful work! Curious, what was the coil of rope used for, so readily available to the helmsman? Mark
-
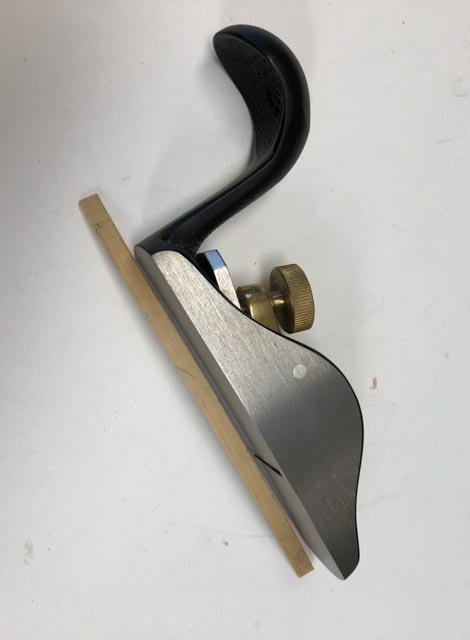
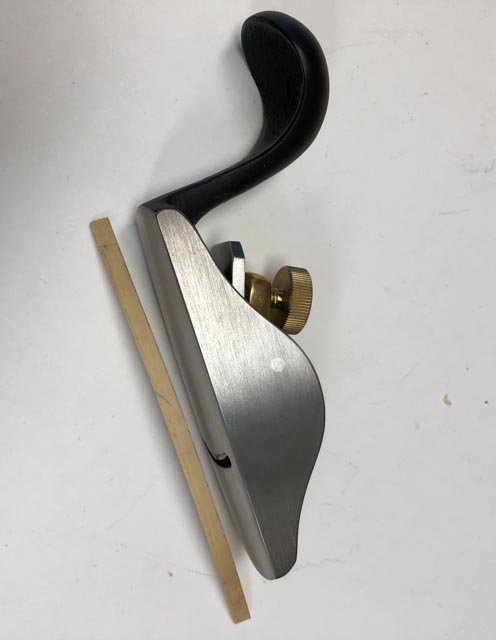
hmm, interesting challenge. Grant, you are right, for a major piece needing accurate shaping, a custom made caul would do the trick. I hate to have to do that for every individual plank, if there is a simpler method. Gaetan, I don't have a sanding belt, but I do an oscillating drum. Although this would require me drawing the edge on the concave side, so I could put the plank on the sanding table convex side down. I will try that. druxey, you did get me thinking, about those small planes I bought many years ago but never really used. I sharpened them up today, and I was able to freehand hold the piece while using the planes. I have them set very fine for final cleanup, and it is fiddly to keep adjusting them; so I will probably still want to saw down to a manageable planing distance.
-
Swan class 3D model in progress
SJSoane replied to dvm27's topic in CAD and 3D Modelling/Drafting Plans with Software
Astonishing work. It brings the ship alive like nothing I have ever seen. It somehow seems more realistic than photos of an actual ship. Mark- 141 replies
-
- 2
-

-
- pof swan series
- swan
- (and 1 more)
-
Hi druxey, The challenge I haven't figured out is how to clamp this curved piece with its edge available to a plane. After I saw close to the line, I clamp the piece on the diagonal at the corner of a small vise, and work the edge with a riffler. But the further away from where it is clamped, the more the piece slips within the vise. I need a curved face vise! Mark
-
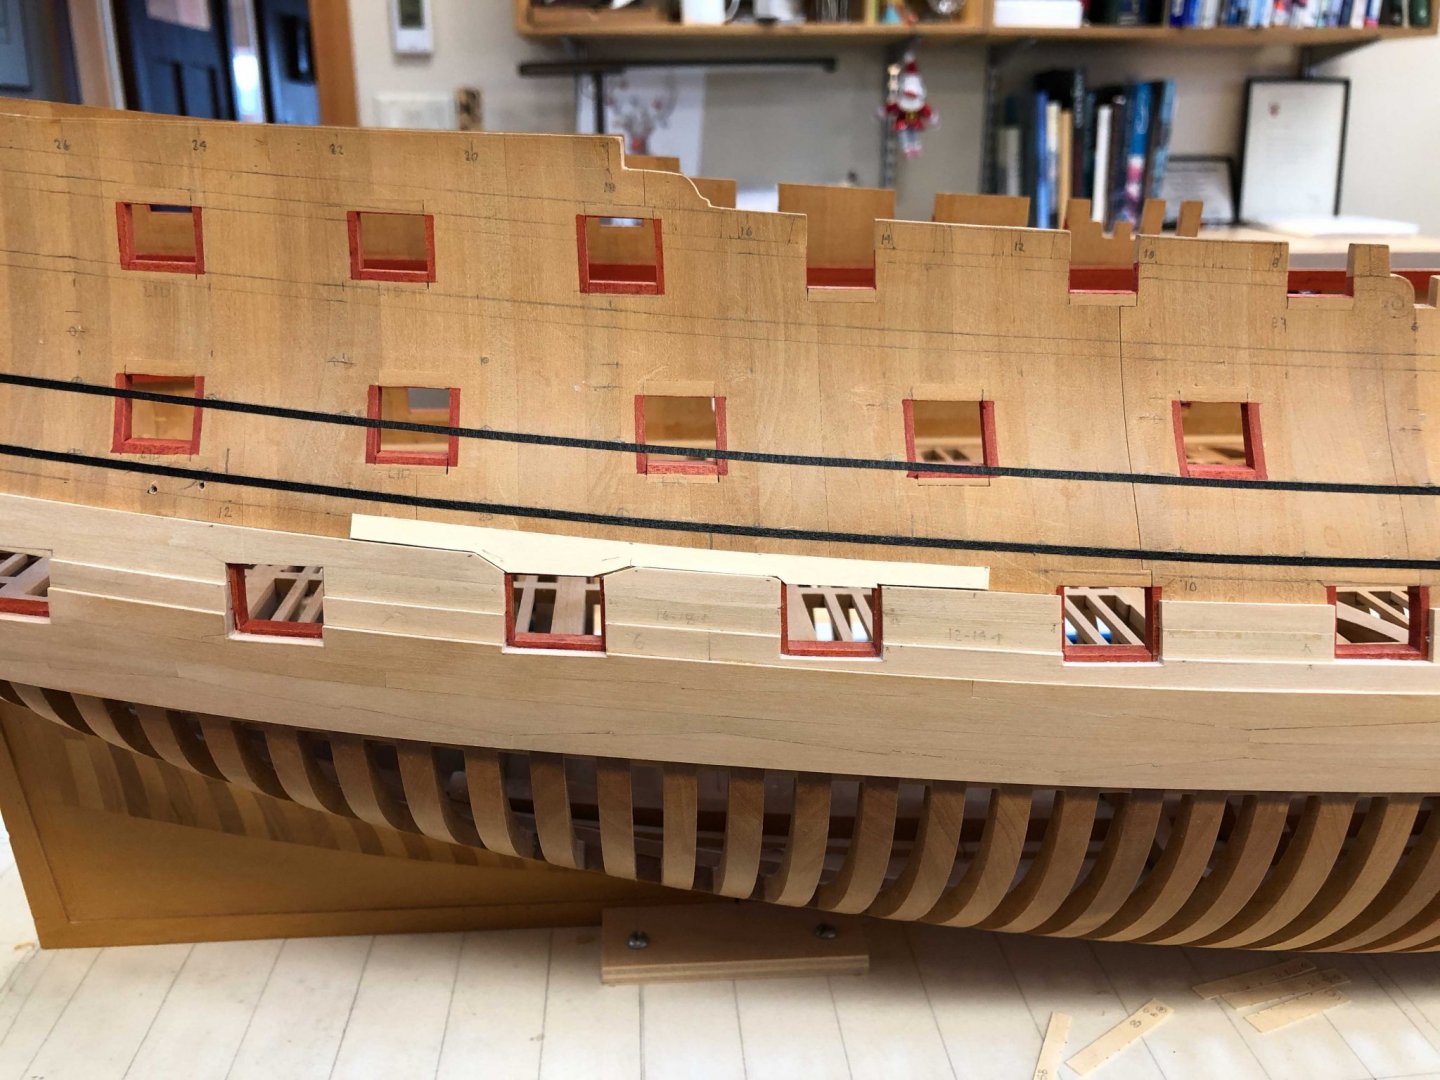
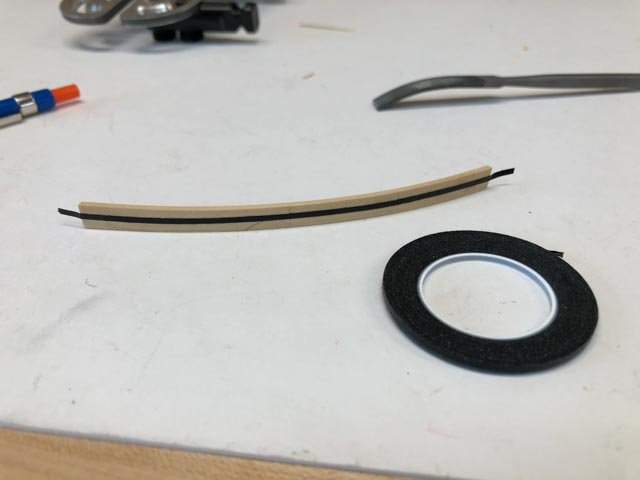
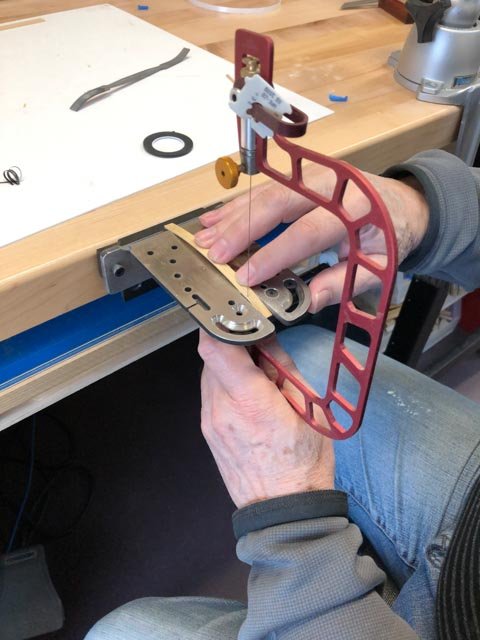
Hi druxey, Johann and Paul, thanks so much for your kind comments. New Year's Eve is a good time to reflect on the year past and the year yet to come. I am reminded just how special this website community really is. Starting on the next strake at the bow, I rethought some construction issues. I decided to steam the plank before cutting to shape, since I have found that my card patterns just never seems to match the reality once the plank is curved onto a twisting, bending surface. So bend first, then trim to fit. But that then creates some issues. How to draw the curving upper edge, which is an S curve on a curved surface? After plotting the various points, I used the artist's tape to construct a fair edge, then drew a pencil along the upper edge of the tape. Way better than fiddling with a flexible curve, or cutting a card template. Next, how to cut the piece to width, when the piece cannot be easily clamped or held onto a flat surface for sawing? I found that the Knew Concepts saw and sawing plate worked perfectly for this, by fitting the curved piece down into the wide slot at the front. As long as I carefully pulled down for a cut and feathered the pressure when pulling the saw back up, it cut very nicely the full length of the piece without binding or vibrating.
-
Hi Johann, I finally had a chance to look at some of your videos of your projects. You are definitely a world-class craftsman! Happy new year, Mark
-
Hi Gary, The shop looks great! You can spend many happy hours in that space. A little armchair in the library area and you are good to go! Happy new year, Mark
-
Hi Siggi, I am glad to hear you are feeling better. We will all look forward to more ship building in the new year! Mark
-
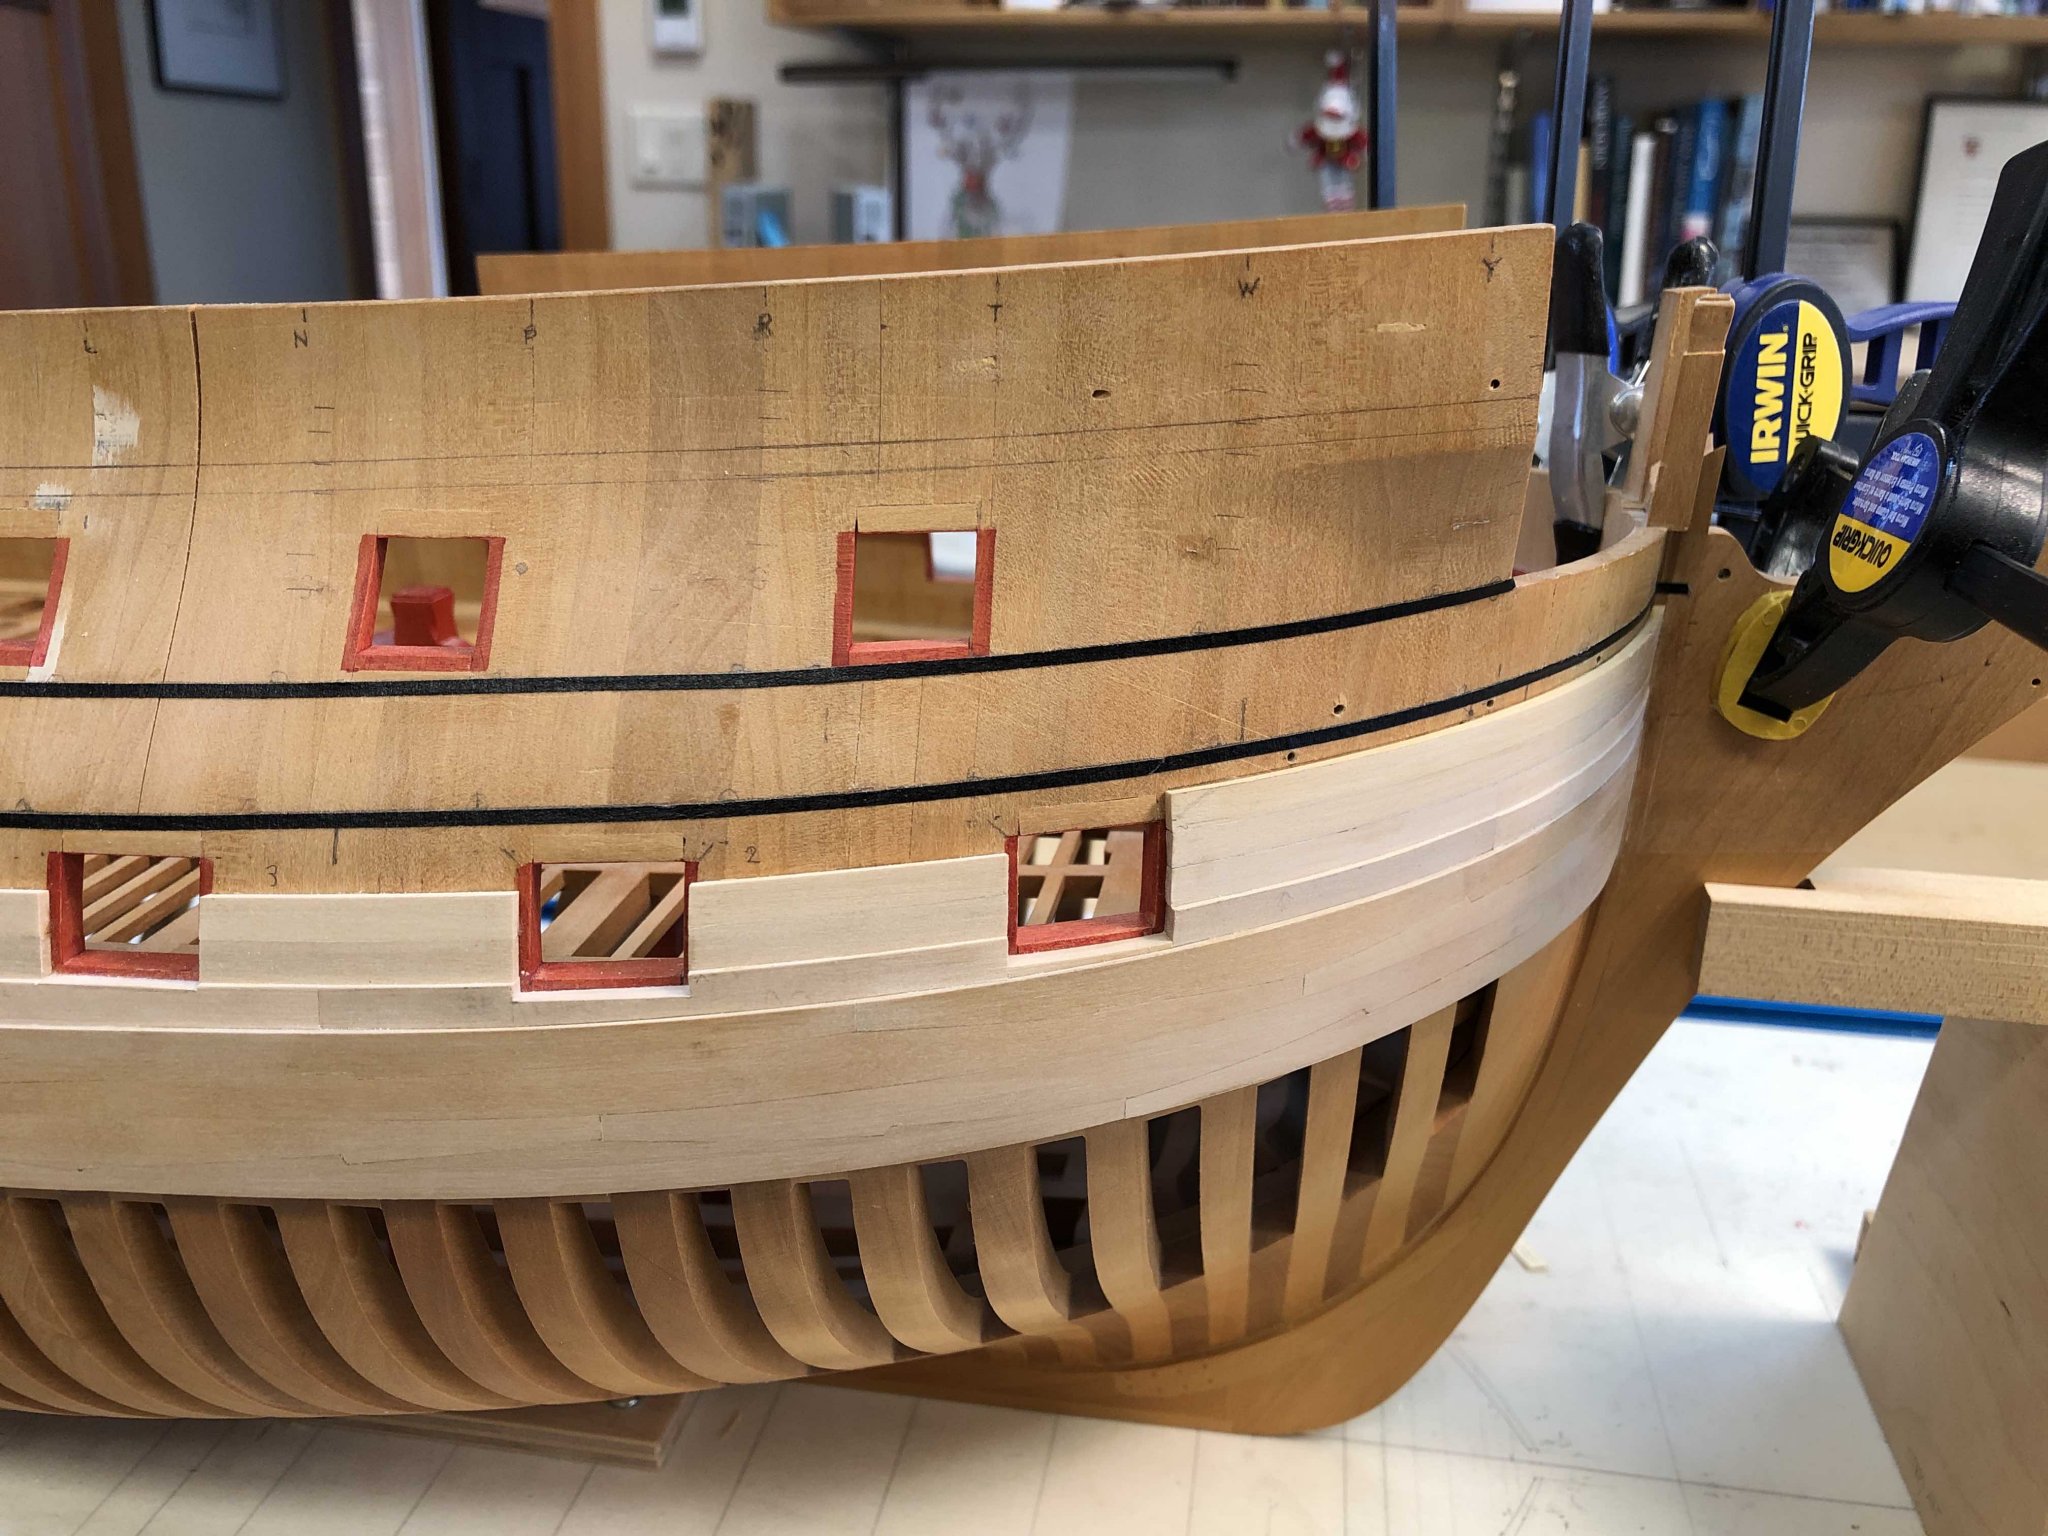
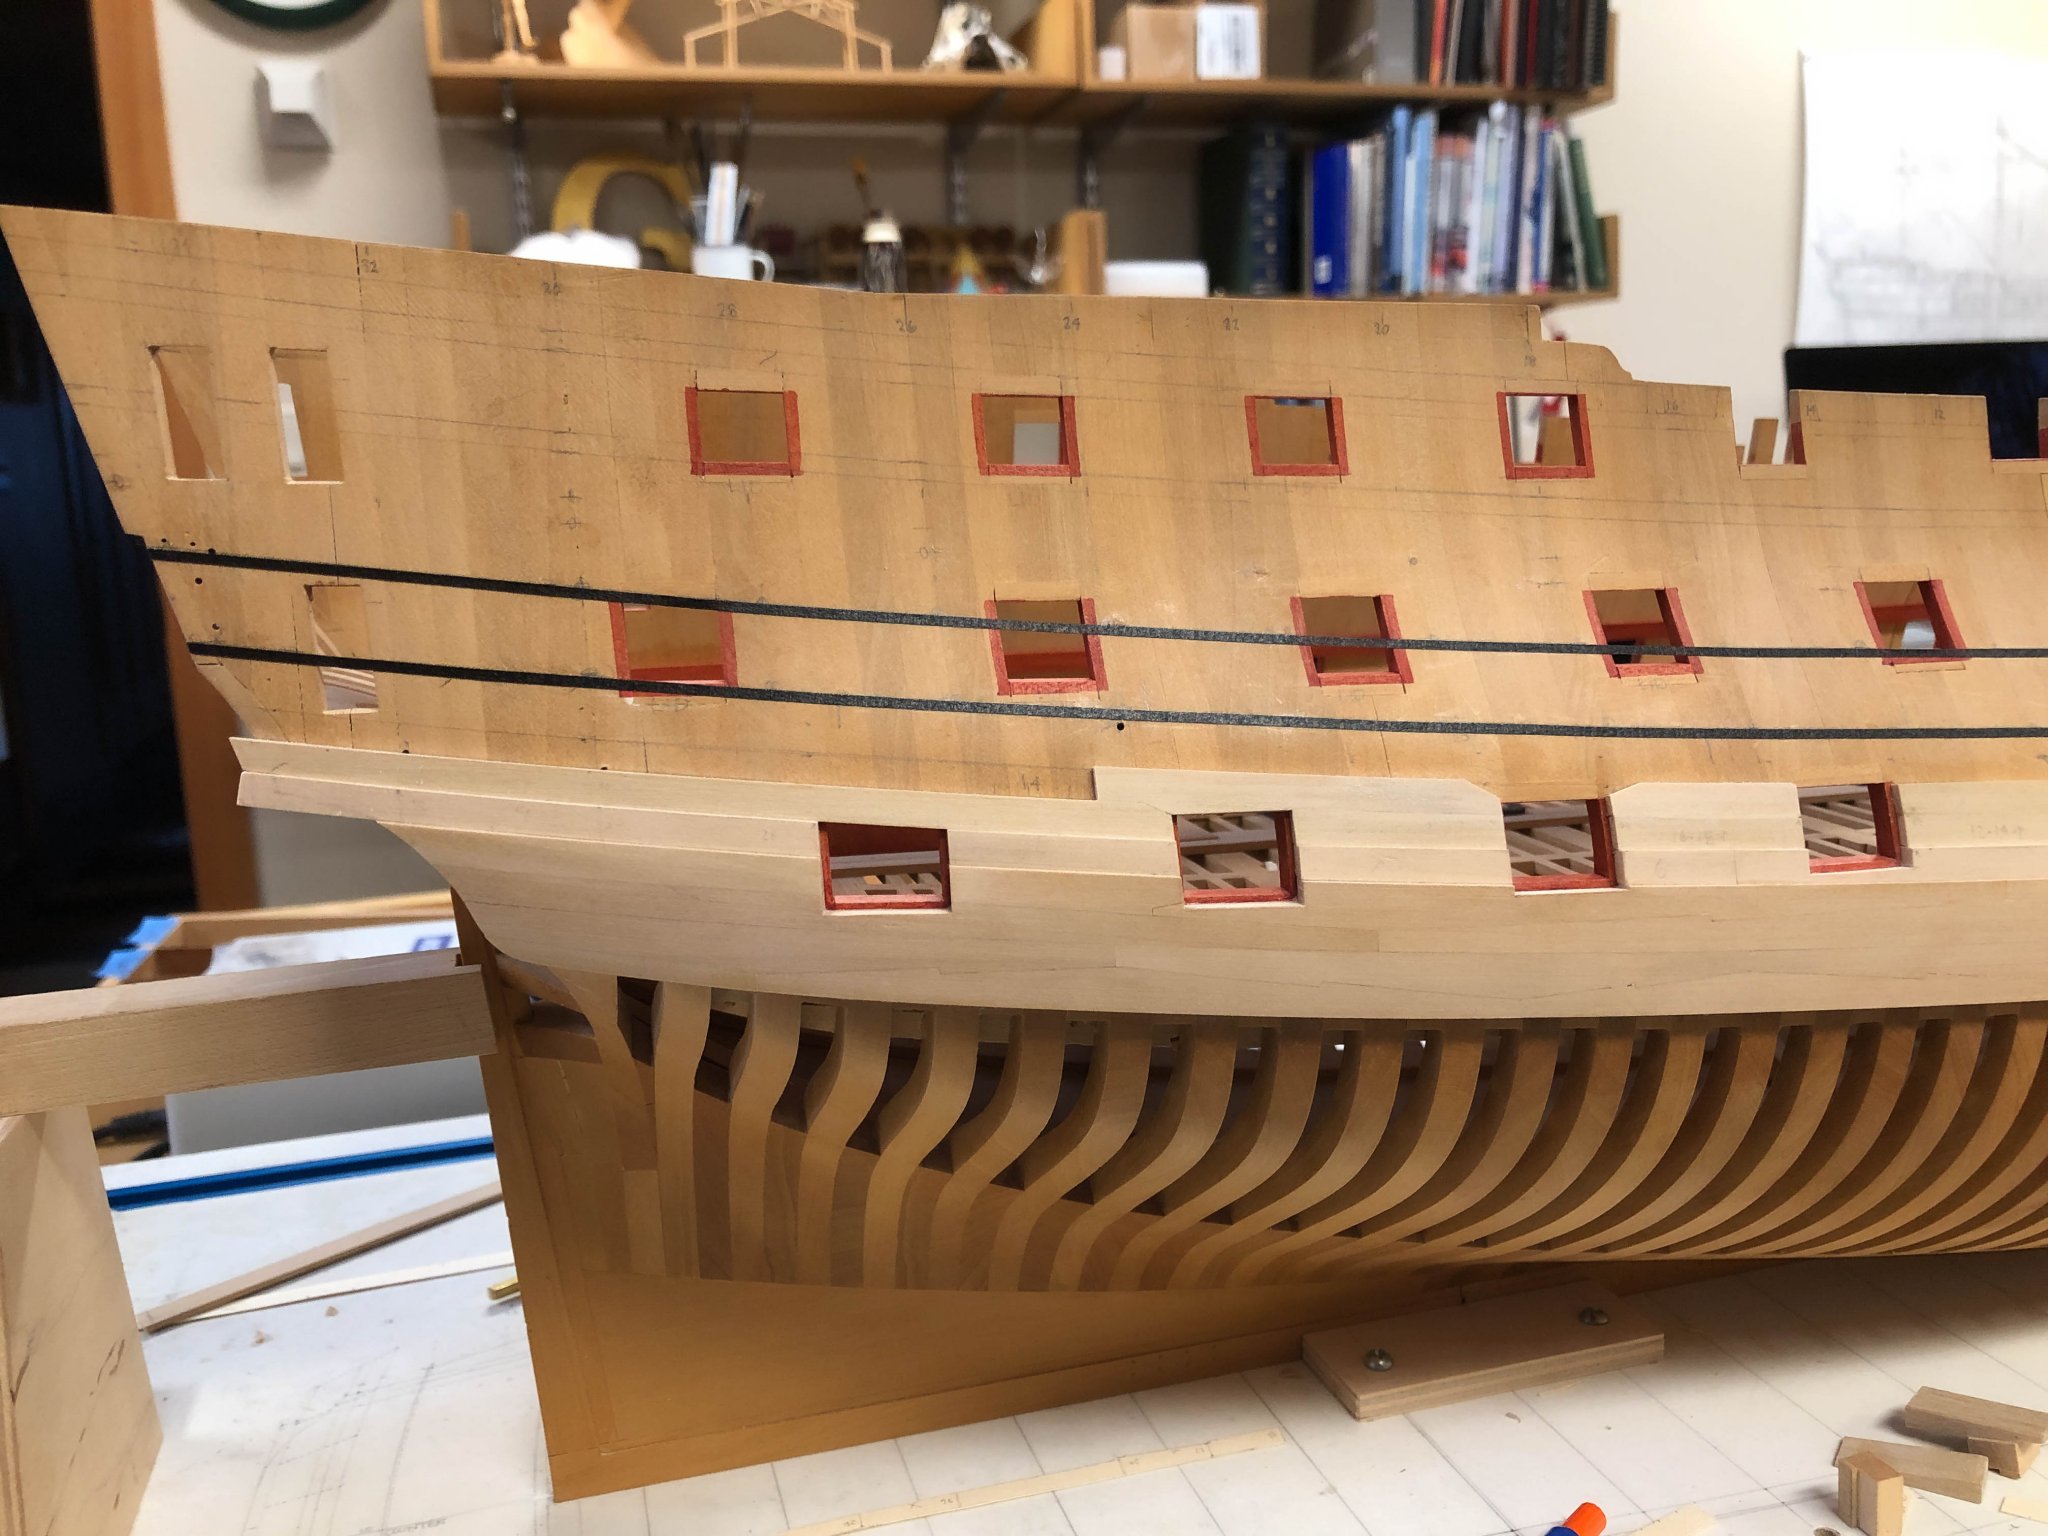
The holiday season sure takes a toll on getting ship work done! Back in the shop, I have finished the 2nd strake of 4" planking above the black strake. I did not realize that the planking hollows in just forward of the side galley doors, and then straightens out a bit right at the stern edge. It forms a slight S curve. In hindsight this makes sense, because the curved tumblehome further forward eventually needs to fair into a flat side counter. I never could visualize this when studying the drawings, now it is very clear when the planking highlights to shape in a horizontal direction. These ships are endlessly fascinating! On to the third strake... Mark


-
Hi Michael, Nice! Glad to see your project underway again. We learn so much watching you work! Mark
-
Hi Gary Great to see you back to work on the Alfred! Welcome to retirement. Still can't get enough hours in a day to get everything done I want! Mark
-
Marc, I just had a chance to catch up with your build. As usual, exceptional historical research and reasoning; not to mention, terrific craftsmanship! Best wishes, Mark
- 2,699 replies
-
- 6
-
-
- heller
- soleil royal
- (and 9 more)
-
Can't wait to see how you make Fusion work. You clearly have considerable expertise in this matter! Mark
-
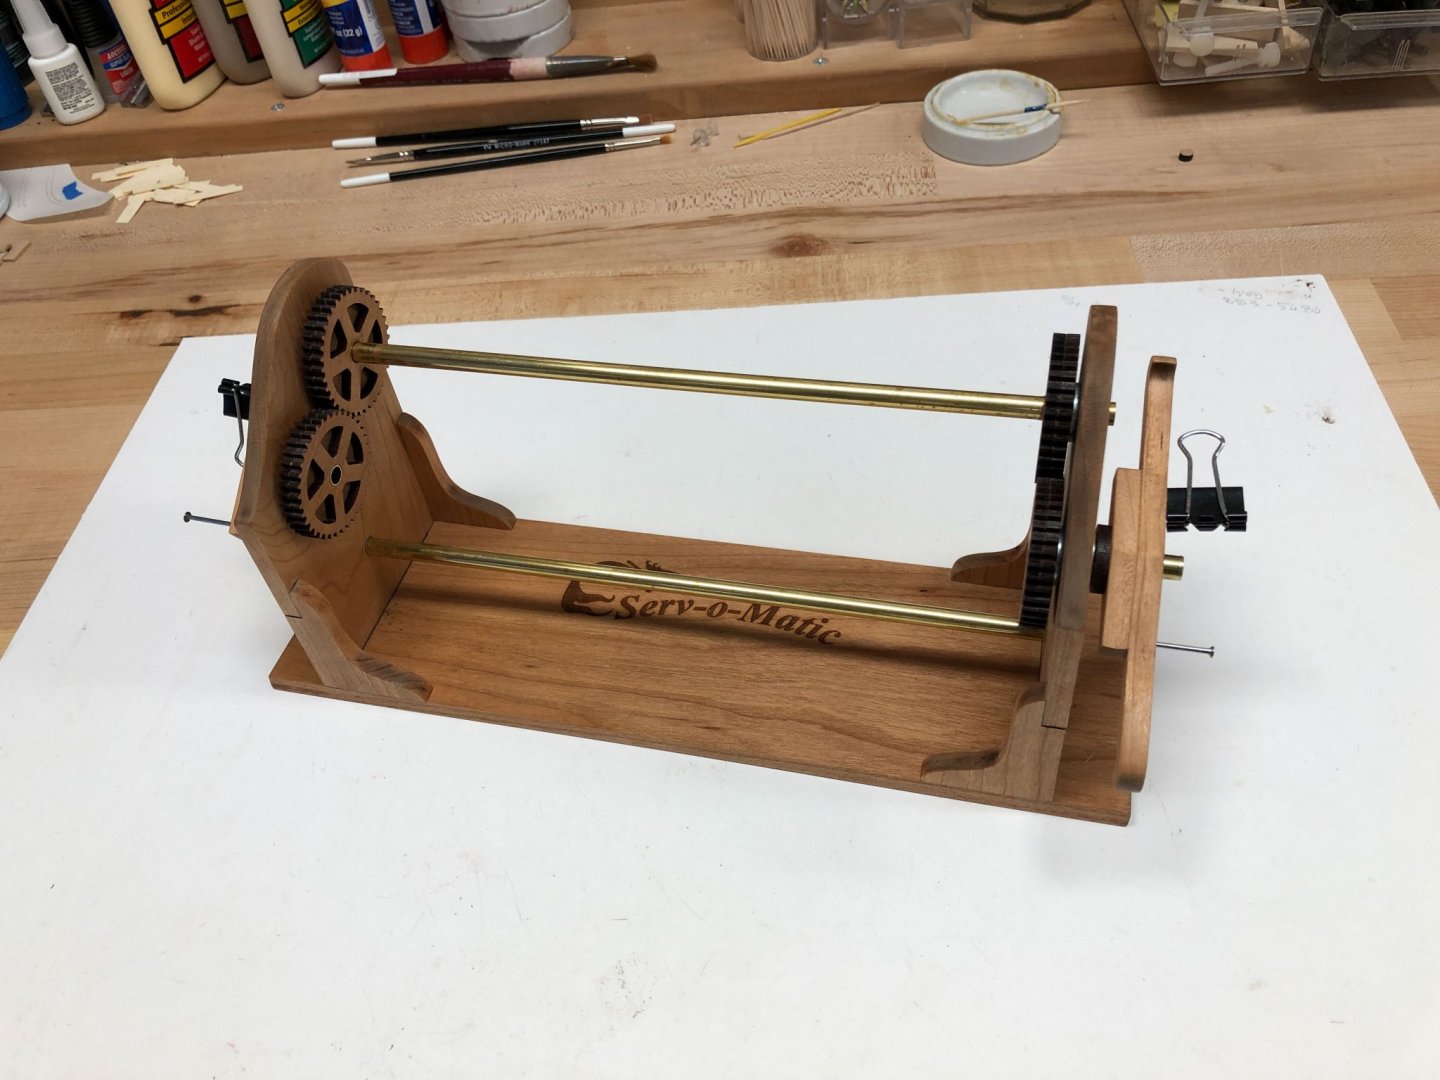
Thanks, Beckmann, Marc and druxey for your kind comments. I thought a lot about darkening the joints in the planking, and tried a few experiments with different techniques. In the end decided that I liked best the look of the original Admiralty models, which did not seem to have blackening other than the slightly darker line of the glue. For me, this helps with the atmospheric effect of scale. That is, if you imagine standing far enough away from the real ship to see it like you see the model, you would not see joints in the planking. I know I am going against the grain of current model making practices, but I like the look. You can see here how the joints in the main wales are showing, due only to the variations in wood color, and the glue line. Although the wales will be painted black, the planking above will receive only the clear finish and will look like the wales do right now. You can also see how my wood darkens quite a bit over time, which tends to show more wood variation. The final color will be like the hull frames below the wales, which have darkened over many years, and are also finished with the clear polyurethane. I mentioned that I needed a little project to take my mind off the test and fit, test and fit tedium of a complex plank. My project was building Chuck's Syren Serv-o-Matic. I haven't had a chance to put it to the test yet, but it sure looks pretty! Thanks, Chuck. Goes well with the ropewalk.

-
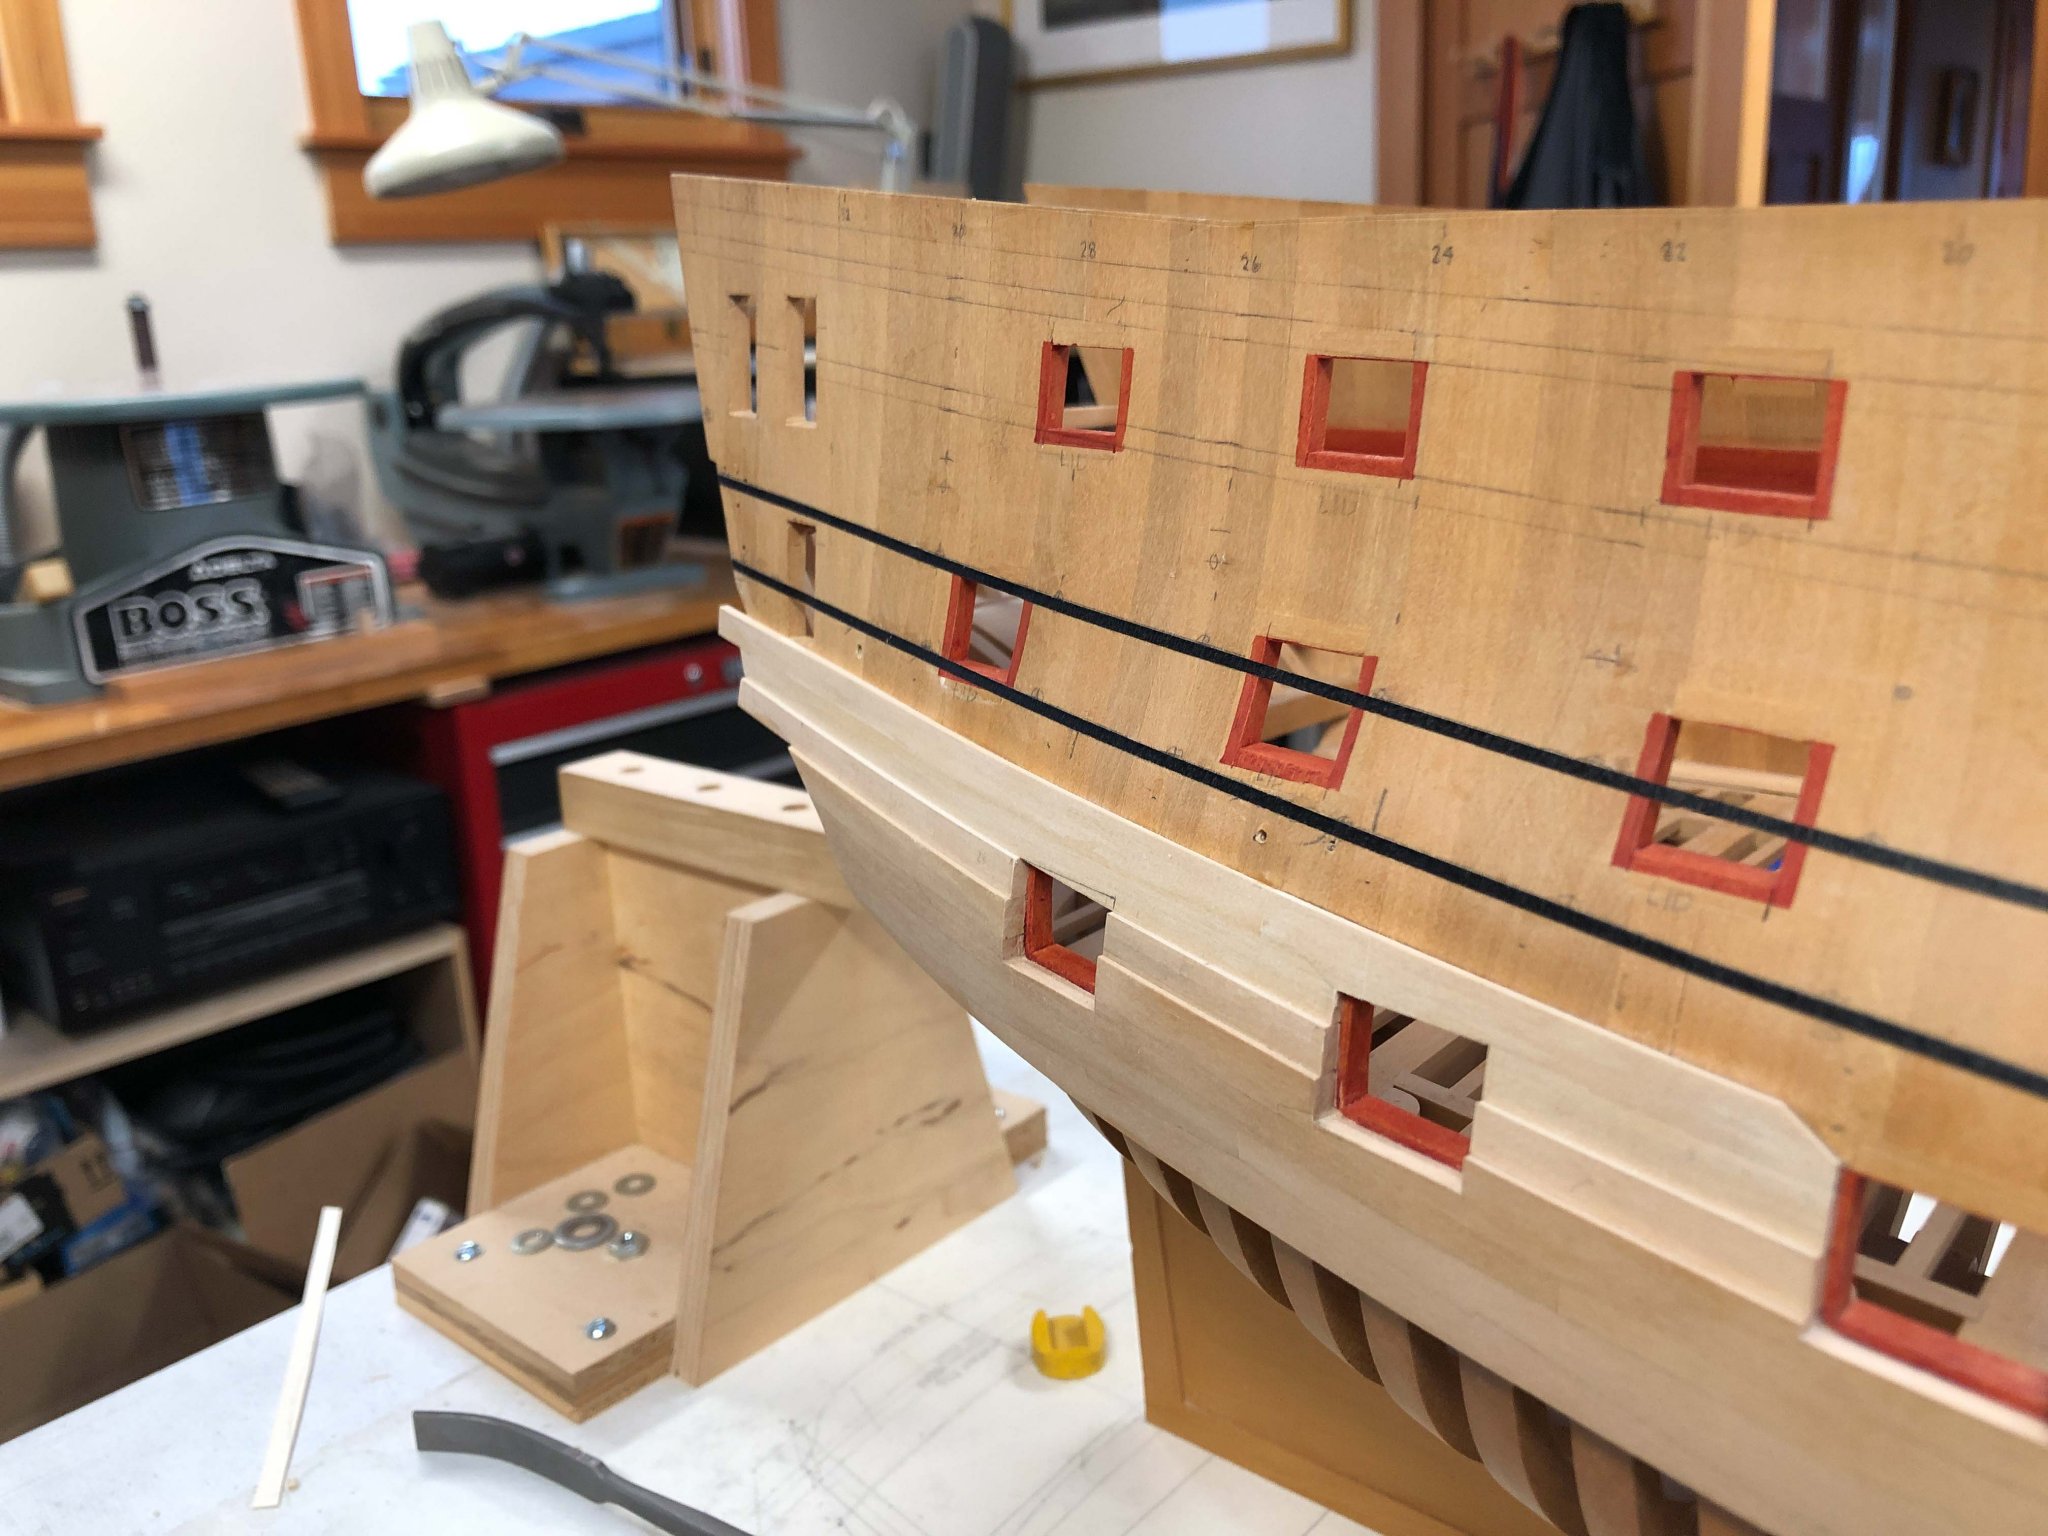
Almost to the stern with the second strake of 4" planking. Here was my first drop down to a port head, creating a pretty complicated piece to shape. Lots of transfer marking of high spots, and then filing, marking and filing. With patience, just about any piece can be made. But I do need other little projects to turn to when I lose my patience, then I can come back to finish with a little better mental attitude. Mark
-
Alan, I will be interested to see you you get on with Fusion 360. I played around with it for a while, but did not have much success making actual ship hull parts. Mark
-
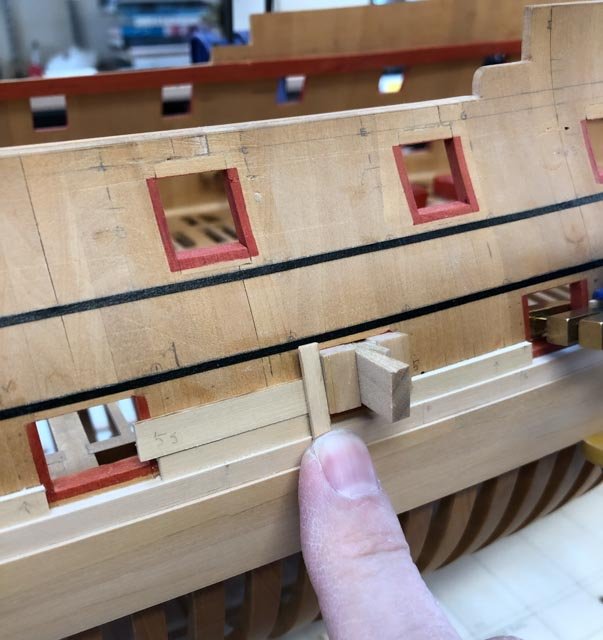
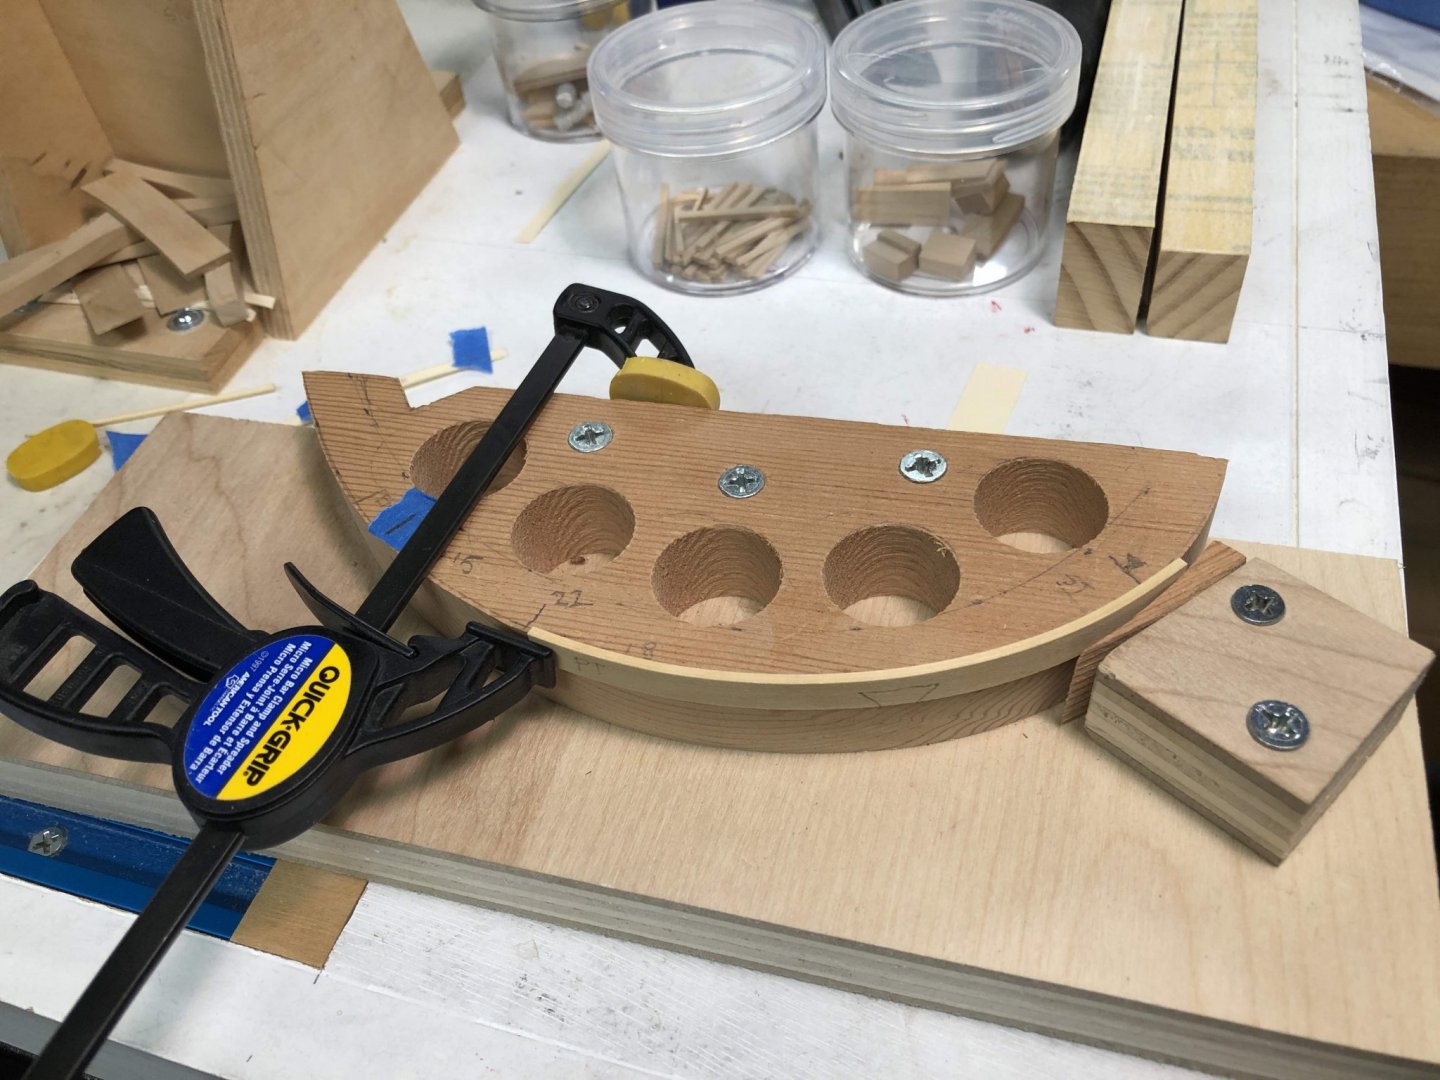
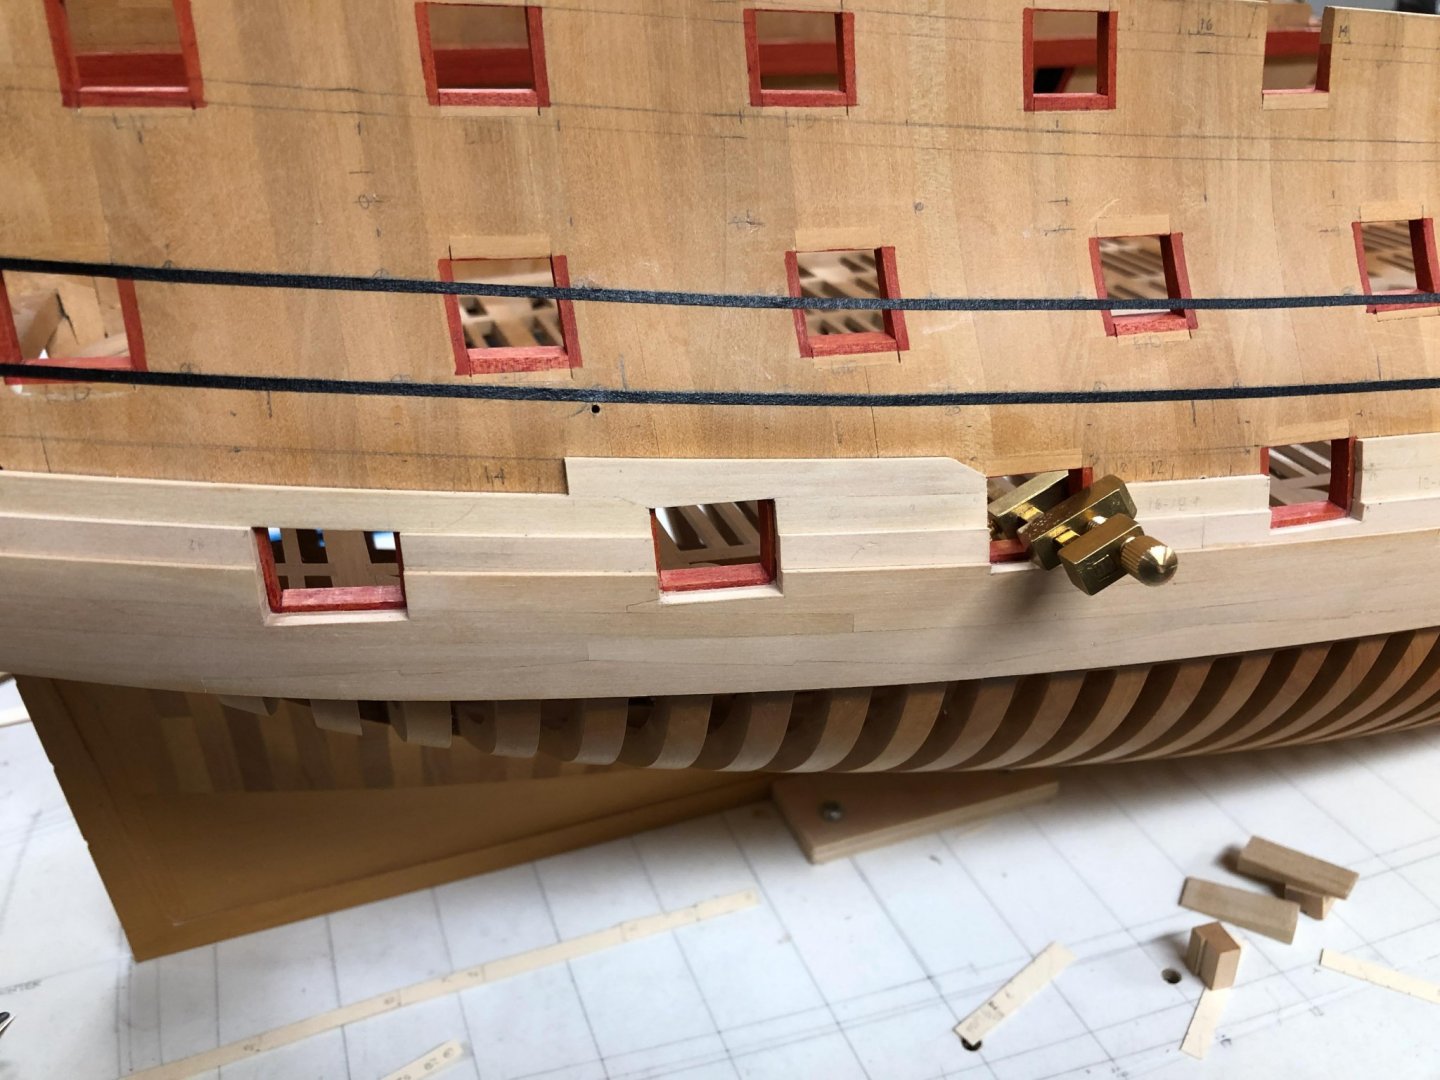
Slow work, I have started the second strake of the 4" planking (this is a photo 1500 pixels high, and 240 ppi resolution). My jig in the port hole helps me find the exact angle for the adjacent plank. I hold up a small spacer against the jig and on top of the plank, then draw a line. I use this line to set an angle gauge, which I then use to set the angle of the miter gauge on the disk sander. The sanding paper on the disk sander is used to hold the small wood piece against the miter gauge. This allows me to control light presses of the wood into the disk sander.