SJSoane
-
Posts
1,652 -
Joined
-
Last visited
Content Type
Profiles
Forums
Gallery
Events
Everything posted by SJSoane
-
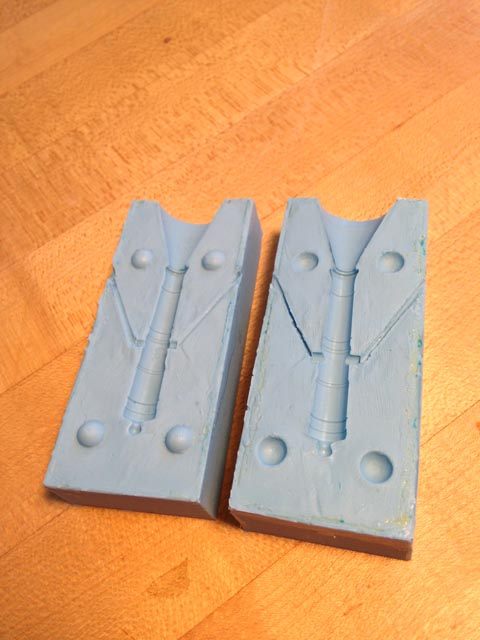
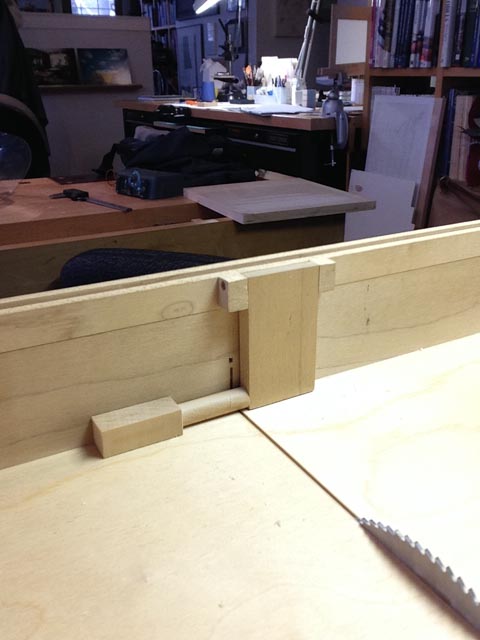
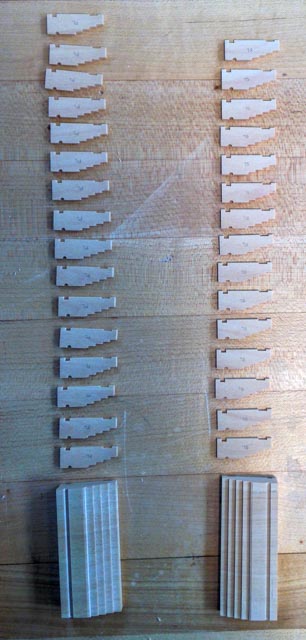
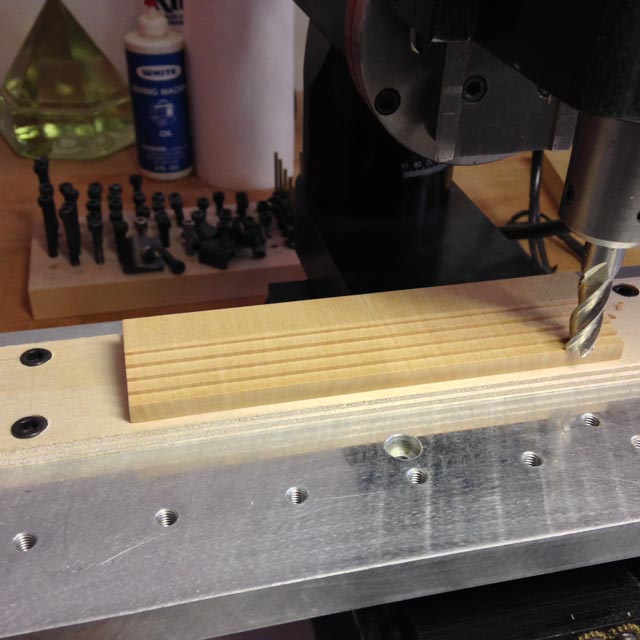
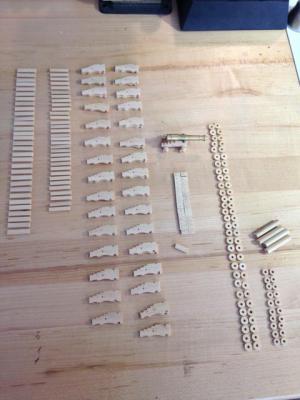
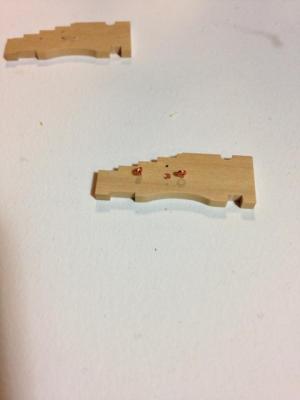
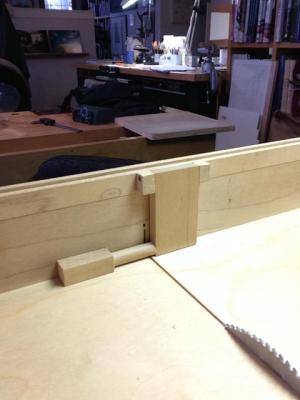
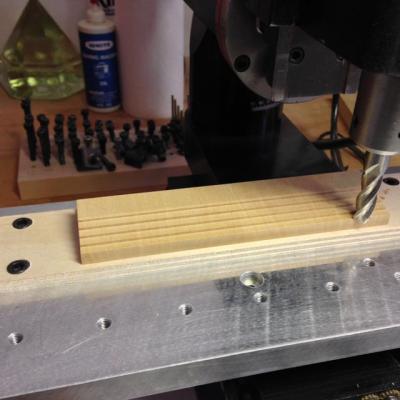
 Hi everyone, I have been working away slowly at the cannon and carriages. I successfully made the mould for the cannon, but have failed so far in my efforts to melt the pewter. I tried melting it on a hot plate, with no success, and am now looking at lead melting furnaces (having a propane torch is not an option for me). Does anyone have experience with a melting furnace? So in the meantime, I continue to make parts for the carriages. 28 guns on the gundeck has an entirely new meaning, as I make all of the parts. One construction method of note: I was not able to cut off trucks from the blank by using the parting tool on the lathe, because it was too flexible. So I moved to the tablesaw with the sliding table and a flip-down stop, which allows me to cut each on at the exact same width. I had to stick the blank to a square extension with double sided tape, so I could cut trucks off all the way to the end of the blank. Mark
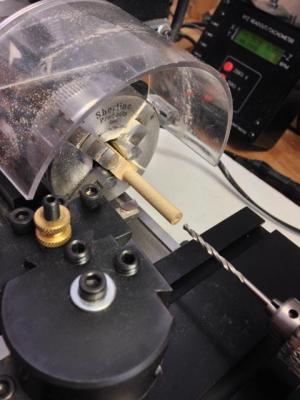

-
hi Siggi, That model of the Royal George convinces me. I will follow you and paint carriage and wheels the same. Thanks! Mark
-
Gaetan, the carving are magnificent! Mark
-
Hi Gary, Thanks for re-posting those images. They are invaluable! Can you remember how you did the pins holding the trucks on the axles? And how you did the caplocks holding down the cannon to the carriage? These details are beginning to attract my attention, and yours look great! Best wishes, Mark
-
Yes, Mark P, I would also like to see a build log as you develop your 74! Mine is a little earlier than both your's and Alan's, and it is always fun to see the similarities and differences. Mark
-
Hi Siggi, I am starting to think about how to paint my gun carriages, and thinking about whether I should paint the wheels or leave them natural. I see you painted both the carriage and the wheels, and it looks quite good. Did you see some contemporary models with the wheels colored, or did you just decide to do this because it looks good? Best wishes, Mark
-
Hi Gary, I was also looking back at your section on your gun carriages for good advice around page 10, and the images are not showing up. Does a moderator need to look at this? Mark
-
Hi Ed, That staircase is downright architectural! Looks great. Mark
- 3,618 replies
-
- 1
-

-
- young america
- clipper
- (and 1 more)
-
Siggi, Your study shows without a doubt that the men lived very, very closely with the guns, the main purpose of their activities! Have you made a paper layout of the table and benches in the center? It would be interesting to see how much space is between the back of the benches and the guns. Mark
-
Siggi, You are certainly finding the complications many steps ahead of me! My first thought is that the cabin panels would be removed during a battle, so the clearance when the guns are run inboard would not matter, assuming the pantry panels would have been removed. So then there is the problem of when the guns are stowed as druxey described, and the third gun from the stern is mostly blocking the door to the cabin. I seem to recall that the Bellona/Dragon drawings show the doors swinging forward, not astern, and so the outer door of each pair would indeed hit the gun. Could it be that only the inner door of the two would be used, leaving the outer door for decoration (like many french doors on houses, one uses one while leaving the other closed)? And then the final puzzle is the short distance between the two sternmost guns. It does not look like a lot of room for recoil if they had to fire both broadsides at once! I think I read somewhere that the shorter guns were used one deck up, but druxey's question is worth looking into. Something does not quite fit here! Best wishes, Mark
-
Here is another online version. It is clumsy to click on the main menu to move around, but everything seems to be there, including the scanned images of the pages listing all rigging for different ship sizes. http://www.maritime.org/doc/steel/index.htm Mark
-
HI Ed, I don't know the ins and outs of the historical evolution of paint, so I defer to other's insights on this. Having said that, the gloss look is very striking, and helps convey the feeling of a sleek greyhound of a hull. Nicely done! Mark
- 3,618 replies
-
- 5
-
-
- young america
- clipper
- (and 1 more)
-
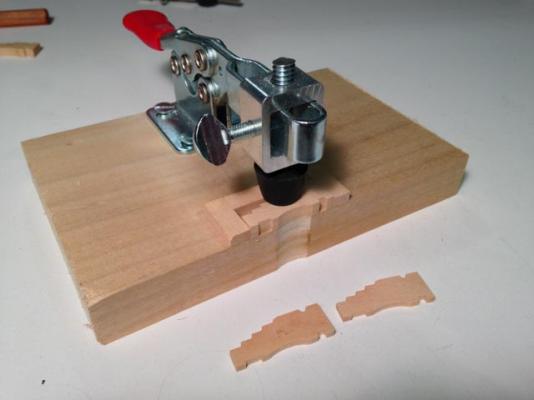
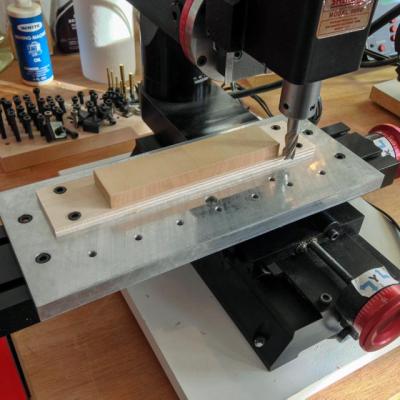
Hi everyone, While waiting for my newer MicroMark RTV rubber, I started on the carriages. I used double sided tape to hold the blanks onto the mill table, and milled them to shape including the rabbets for the axles. I then cut the individual blanks on the table saw, with the mitre set to 2 degrees on each side for the correct convergence of the carriage. I am also showing a jig for cutting the curved lower edge, using a piloted bit on my router table. Best wishes, Mark

-
Beautiful work, Remco. That is a very fine partner. Mark
-
Siggi, Very nice! good progress. Mark
-
Beautiful craftsmanship! Mark
-
Hi Ed, When you post about the jig for the copper plates, can you also explain how you keep all of the fine pins at exactly the same height? I once tried making a jig for something unrelated, and had a difficult time fastening pins closely together at the same height. I look forward to how you did this. Mark
- 3,618 replies
-
- 5
-
-
- young america
- clipper
- (and 1 more)
-
Siggi Well spotted, I never noticed the pawls in that photo before! Mark
-
Very nice, Alex! Mark
-
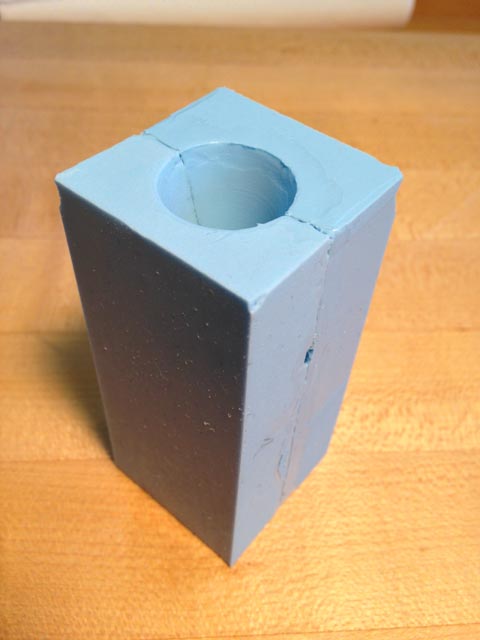
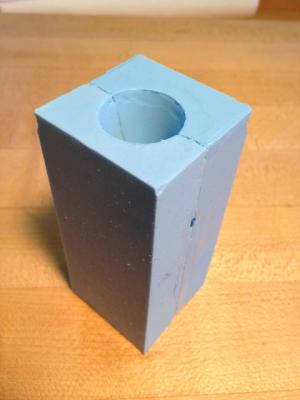
Siggi, I think I will need the plaster outer form. The first cast definitely squeezed the barrel into an oblong rather than a circle, even though I clamped the mould between two pieces of plywood. I thank you so much for your advice and guidance. Mark
-
Ed, Wow, I had a hint from various comments you have made over time that you crafted miniature soldiers. It is really nice to see them! I will try the hot plate first before investing in an electric melting pot. I have already sneaked the hot plate out of the kitchen for boiling wood; it will never be missed! Best wishes, Mark
-
Hi Siggi, I don't have any more information than the photo of the Bellona. You make a good point that the pawls cannot work at the same time on two decks, because they cannot hit the whelp at the same time, with 5 on one deck and 6 on the other. If they were fitted on both decks, it could only be for the convenience of working the capstan on one deck or the other at a given time. Can you imagine one team yelling up the other deck, "don't worry, we will kick in the pawls if necessary".... Mark
-
Hi Ed, Thanks very much for this help. I have 28 castings to do at this gun size, plus a few spares. I had originally ordered the 1 to 1 four hour set, which exceeded its shelf life by a long time, and I think I need to throw away at this point. I was just about to order some new RTV, and saw that MicroMark has a one to one one hour set; in light of your comments, can I assume that this would be too fragile for my intended run? And do you think I should go ahead and order the 10 to 1? I see what druxey is saying about floppiness with the rubber I tried so far, and perhaps the 10 to 1 would not have that problem. I will try the measuring by weight rather than by volume in a measured cup; it seemed fairly hit and miss by volume. Do you mean a regular kitchen hot plate and metal dish? I somehow assumed I would need more intense heat as in a propane torch. Thanks again, it is always comforting to be walking in the footsteps of great craftsmen who have been down this road before! Mark
-
Sherry, The comparison between the two is remarkable. That is an impressive piece of workmanship! Mark