DONATION DRIVE - SUPPORT MSW - DO YOUR PART TO KEEP THIS GREAT FORUM GOING!
×


SJSoane
-
Posts
1,649 -
Joined
-
Last visited
Content Type
Profiles
Forums
Gallery
Events
Everything posted by SJSoane
-

Deck clamp notches
SJSoane replied to Dziadeczek's topic in Building, Framing, Planking and plating a ships hull and deck
My own experience with the Bellona is that the clamps are so fiddly to install, they would not easily have been removed to notch and then reinstall. They change their lengths slightly as they are conformed to the hull sides (particularly the upper deck clamps on a British 74), and any notching when they are not fully bedded down would result in inaccuracies fore and aft. So I opted for installing the clamps first, focusing on keeping their tops at the precise line marked on the bulwarks (deck height at bottom of planking minus thickness of beam, plus 1" as Druxey notes). Fully glued and pinned in, they form a solid foundation for everything else to follow. I then located each beam very accurately in its fore and aft location, temporarily clamping it in place with a small C-clamp. I then marked each side of the beam on the top of the deck clamp with a very sharp knife, and scribed down from this line 1" in scale from the top to mark the sides of the mortise. I used a small jig to scribe a line 1" down and parallel to the top of the clamp, to locate the bottom of the mortise. With the mortise accurately marked out on top, side and bottom, I then used a variety of small chisels and hobby knifes/scalpels to cut each mortise. One inch down at 3/16" scale is easily done by this method. Following full size practice, firmly press down vertically with a knife on each scribed line on the top, then take a slice from the top center of the mortise to each side you just cut, forming an inverted V. Cut from the middle so you are always cutting down on the grain into the stopping cut, thereby avoiding unexpected splits. Cutting this way also means that a knife can be brought to bear from the side, rather than the top where the tumblehome can get in the way. Do the vertical cut and then V cut on each side several times until you cut down to the 1" line. Then pare off the remaining inverted V with shallow horizontal cuts until the V is gone and the mortise is 1" deep. Easier to do than to explain. One key is to take a number of very shallow cuts, so the wood is easily pared, rather than forcing deeper cuts. The other key is to scribe the lines marking the mortises, from the beams themselves and from a jig for the bottom. The scribed lines give a very accurate register for the chisels/knives that you can feel in cramped quarters even when you cannot see the line. Even if you cut the mortises first, you will likely still have to make some adjustments to them once installed, to ensure that the beams are all exactly at the height of the deck minus the decking. I used long templates to sit on beams at the middle and at both ends of the deck, so all intermediate beams could be brought level to the template. So if you are going to adjust the mortises slightly in place anyway, why not cut them in place to start? Once cut this way, the mortises provide very precise beds for the beams fore and aft, and vertically. I drilled through the tops of the beams into the clamp where possible, more often into the bulwarks, for pins. I cannot begin to count the number of times I had to locate and remove the beams for further work, like marking and cutting the mortises in the beams themselves for the carlings. The precisely located mortises were my friend. For those who are anxious about hand cutting mortises, I took inspiration myself from Gaetan Bordeleau, who pointed out to me that the more you cut by hand, the more comfortable you become with cutting by hand. It was like training on the job. And if you follow the advice of shallow paring cuts into stop cuts, you can't go drastically wrong in any given slip of the knife. Mark -
Beautiful work!
-
Siggi, I like the panelling very much, and the color is consistent with house interiors of the same period. I know you always look for a good original source for your decisions; did you see this color in one of the models you have inspected? In your photo of Kensington Palace paneling, I believe the wooden dowels were used to pin the tenons of the cross pieces into the mortises of the vertical pieces. The holes in each piece were drilled a little offset, so driving in the dowel would help pull the joint together. It is still not clear to me how the frames and panels were actually attached to the bulwarks. I have some old early 20th century traditional architectural construction books; I will see if they offer any clues. Best wishes, Mark
-
ROYAL CAROLINE 1749 by Doris - 1:40 - CARD
SJSoane replied to DORIS's topic in - Build logs for subjects built 1501 - 1750
Doris, I will add to the chorus of compliments. It is a spectacular build, worthy of a place in a prominent museum. Mark- 883 replies
-
- 4
-

-
- royal caroline
- ship of the line
- (and 1 more)
-
Siggi, Beautiful floor cloths. Did you see an example of this pattern, or is this your own historical reconstruction? The compass roses are particularly effective. Mark
-
Siggi, You are making great progress! It looks very good. Mark
-
Siggi, the deadlights are a great touch. It is interesting to speculate on their use. They would not have slowed down a cannonball, and they would not be needed to shut out light that would disturb the captain's sleep. So would they have been used to protect the cabin in severe storms? Mark
-
Siggi, It is looking truly spectacular! Your color choices are making this very special. I do hope the captain will pay for the extra quality in his cabin... Mark
-
Thanks, Mark, Grant, Ed, druxey and David. I still can't quite believe it took so many hours to get here. They look so simple in the drawings.... Mark
-
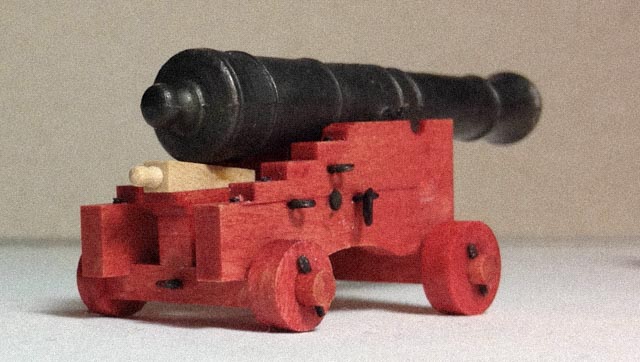
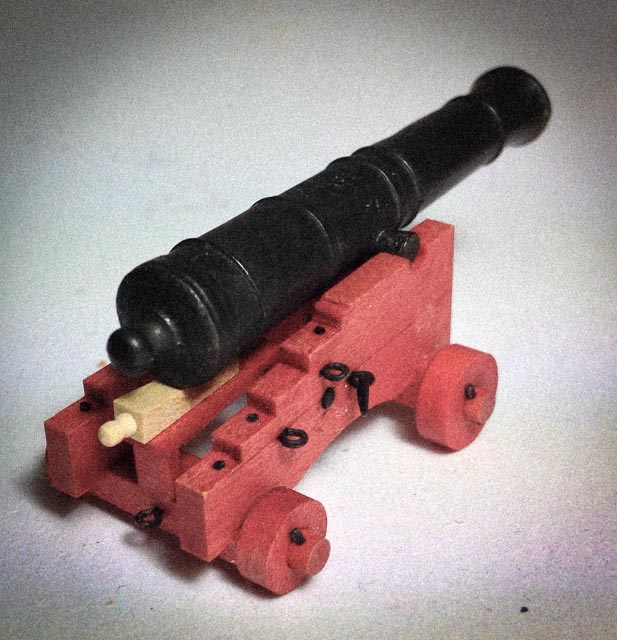
Hi everyone, At last, the woodwork is done on the carriages. I am showing all 28, fully assembled and together for the first time. I still have to glue the quoins to the beds, but I realized that I will need to do that individually to ensure that all muzzles are neatly aligned for height. I have to think about a helpful jig. I now have to start all of the metalwork, following my prototype in the last two photos. In the second photo, I am showing how I used my beam measuring tool to set a distance for cutting wooden pins to a constant length. I had to pin the axles and the transom to the carriage sides, and this helped enormously to cut out a large number to the right length as opposed to measuring each one. Getting closer, still a long way to go. Mark


-
THE 74-GUN SHIP by Jeronimo
SJSoane replied to Jeronimo's topic in - Build logs for subjects built 1751 - 1800
Karl, I look forward to this! Mark -
Gaetan, I love that last photo, with parts lying on the deck ready for installation once the builders comes back from their break! Mark
-
Hi iMack, I tried quoting your question, but it failed to show up in my post. So here we go again. Yes, I used the 1:1 RTV rubber from MicroMark, although Ed Tosti has suggested using the 10:1 for greater durability. I may try that on my next deck of cannon. I followed closely the advice on casting cannon in David Antscherl's Fully Framed Model volume 2, including building a plaster cast around the RTV mould. I failed to follow this advice the first time, and the entire thing failed. Lesson learned. I could not use an open flame propane torch to melt the propane because of restrictions in my workspace; so I found the Lee bottom pouring furnace which worked quite well. I found the pewter online, and if you are interested I will look up the website. Mark
-
Hi Greg, Funny you should say that. I just disassembled the duplicator this morning, and then spent a long time setting up the lathe again! Mark
-
Karl, It really is a masterpiece. Besides the exceptional craftsmanship, the overall effect of how you presented it becomes a work of art. Mark
- 662 replies
-
- 2
-
-
- bonhomme richard
- frigate
- (and 1 more)
-
druxey, you are right. I wonder if I would have taken on building a 74 all those many years ago, if I had fully thought through just how many guns need to be constructed. As I was patiently making 28 parts of something the other day, I began thinking about the gun carriage craftsmen in Chatham who might have made the same parts over and over for their entire lives. Now that would drive someone to drink, meade I presume! Mark
-
Thank you iMack, for your comments. I started the cannon in December, and I probably get to work on the project about 10 hours a week. So I am maybe 160 hours into the 28 cannon, and I still have a great deal of work to do. I had no idea at all when I started that this would be so time consuming. They look so simple! One of these days, I will put together an account of how many separate fabricating, machining and assembly steps there are for all of the pieces in one cannon. I should note that the cannon involved learning brand new skills for me, with all of the delays and mistakes that entails. I had never cast metal, or silver soldered, or formed rings and eyebolts. Nor had I used the duplicator. It has been fun to learn new skills, but then tedious at times applying those to 28 cannon. For example, 28 cannon equals 112 wheels, 56 axles with 112 separately turned ends, 56 sides, 28 transoms; 196 eybolts, 112 tie rod washers, 56 rings, 28 tie rods, 112 wheel pins, 168 bolt heads, 56 stool parts, 28 quoins and 28 turned handles. And I haven't even thought yet about the hardware fastening the cannon to the carriages. And then I have an additional 28 cannon to think about when I get to the upper deck, and 18 more for the quarterdeck and forecastle. By then, I should be really fast at this.... Mark
-
Ed, These are very complex forms bending in three dimensions, and you make it all flow so smoothy. Beautiful work. Mark
- 3,618 replies
-
- 2
-
-
- young america
- clipper
- (and 1 more)
-
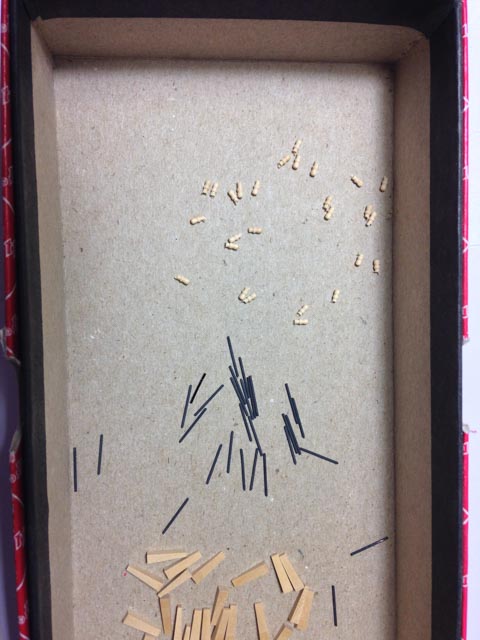
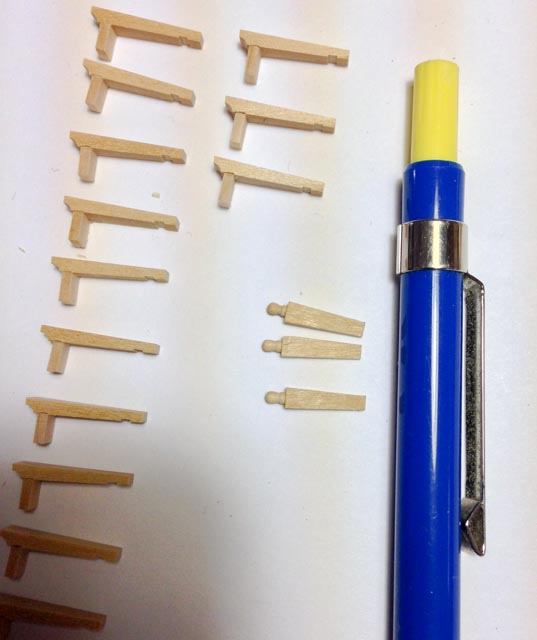
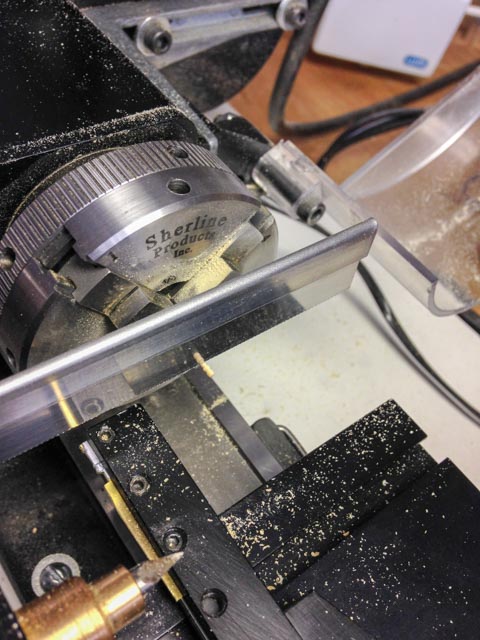
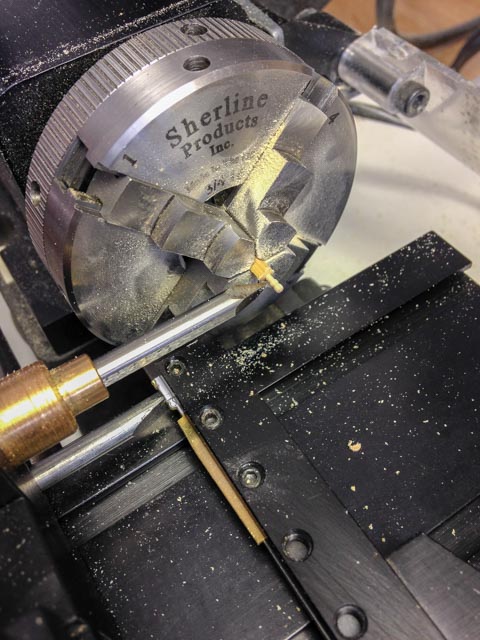
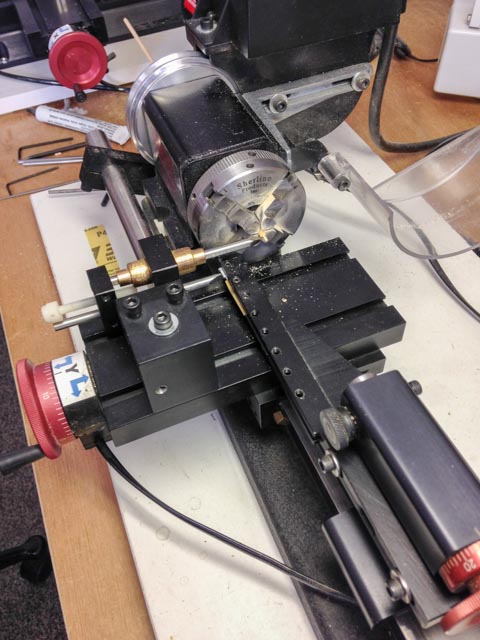
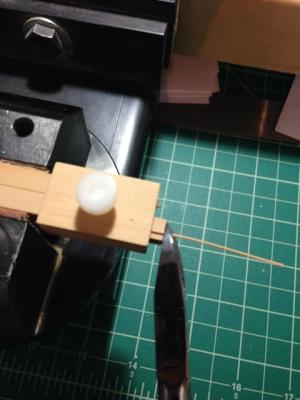
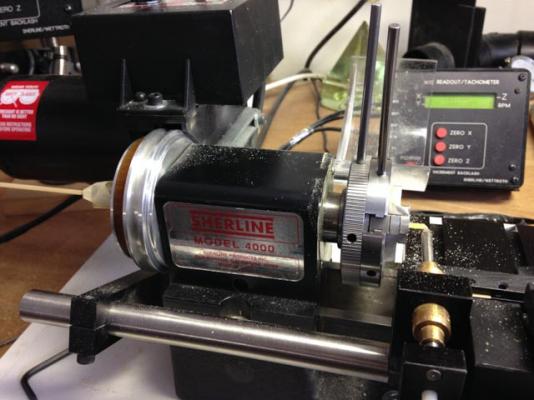
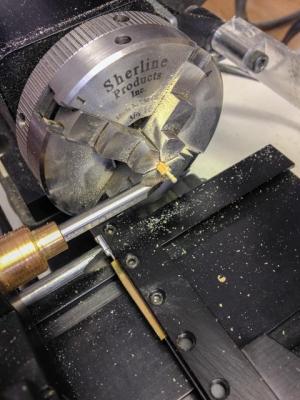
Hi everyone, Here are some images of cutting the quoin handle with the Vanda-Lay duplicator. As you can see in the last photo, a template holder clamps onto the tailstock, and the cutting head and follower is bolted onto the Sherline Y table. You have to unbolt the brass nut on the X axis lead screw, so the bed can move freely without using the handwheel. The idea is to slide the table in the X direction with your right hand, and push in the follower with your left hand, trying to trace the template as smoothly as possible. After a few tries, I got very reliable duplicates every time. Now, I did learn that I had to loosen the gib on the X axis, so the table would move very smoothly. I also used silicon grease on the ways, and graphite powder for the follower and cutter. Things really do need to move smoothly without any binding. Also, the cutter does need to be aligned precisely at or just below the centerline of the lathe. It took a little fiddling to get the cutter at the right height and at the right distance in. I fed a long strip of wood through the lathe, and simply moved it forward each time once I had cut off the previous handle. The masking tape at the end keeps the wood from bouncing around when the lathe is turned on. I have had this duplicator for years, but I had never used it until now; I believe there is an updated version from Vanda Lay. I can confirm that it works very well, once everything is tuned. The other photos show using a razor saw to cut off the handles when the lathe is turned off; these would fly for sure if using a cut-off tool. And one more photo shows the jig for drilling the handle hole in the ends of the quoins. Mark


-
Gaetan, this is a very fine slab of wood in the last photo. Is that the same wood that you are using for the ship? Mark
-
druxey, knever a knegative thought....