HOLIDAY DONATION DRIVE - SUPPORT MSW - DO YOUR PART TO KEEP THIS GREAT FORUM GOING! (Only 13 donations so far - C'mon guys!)
×


Ponto
-
Posts
333 -
Joined
-
Last visited
Content Type
Profiles
Forums
Gallery
Events
Everything posted by Ponto
-
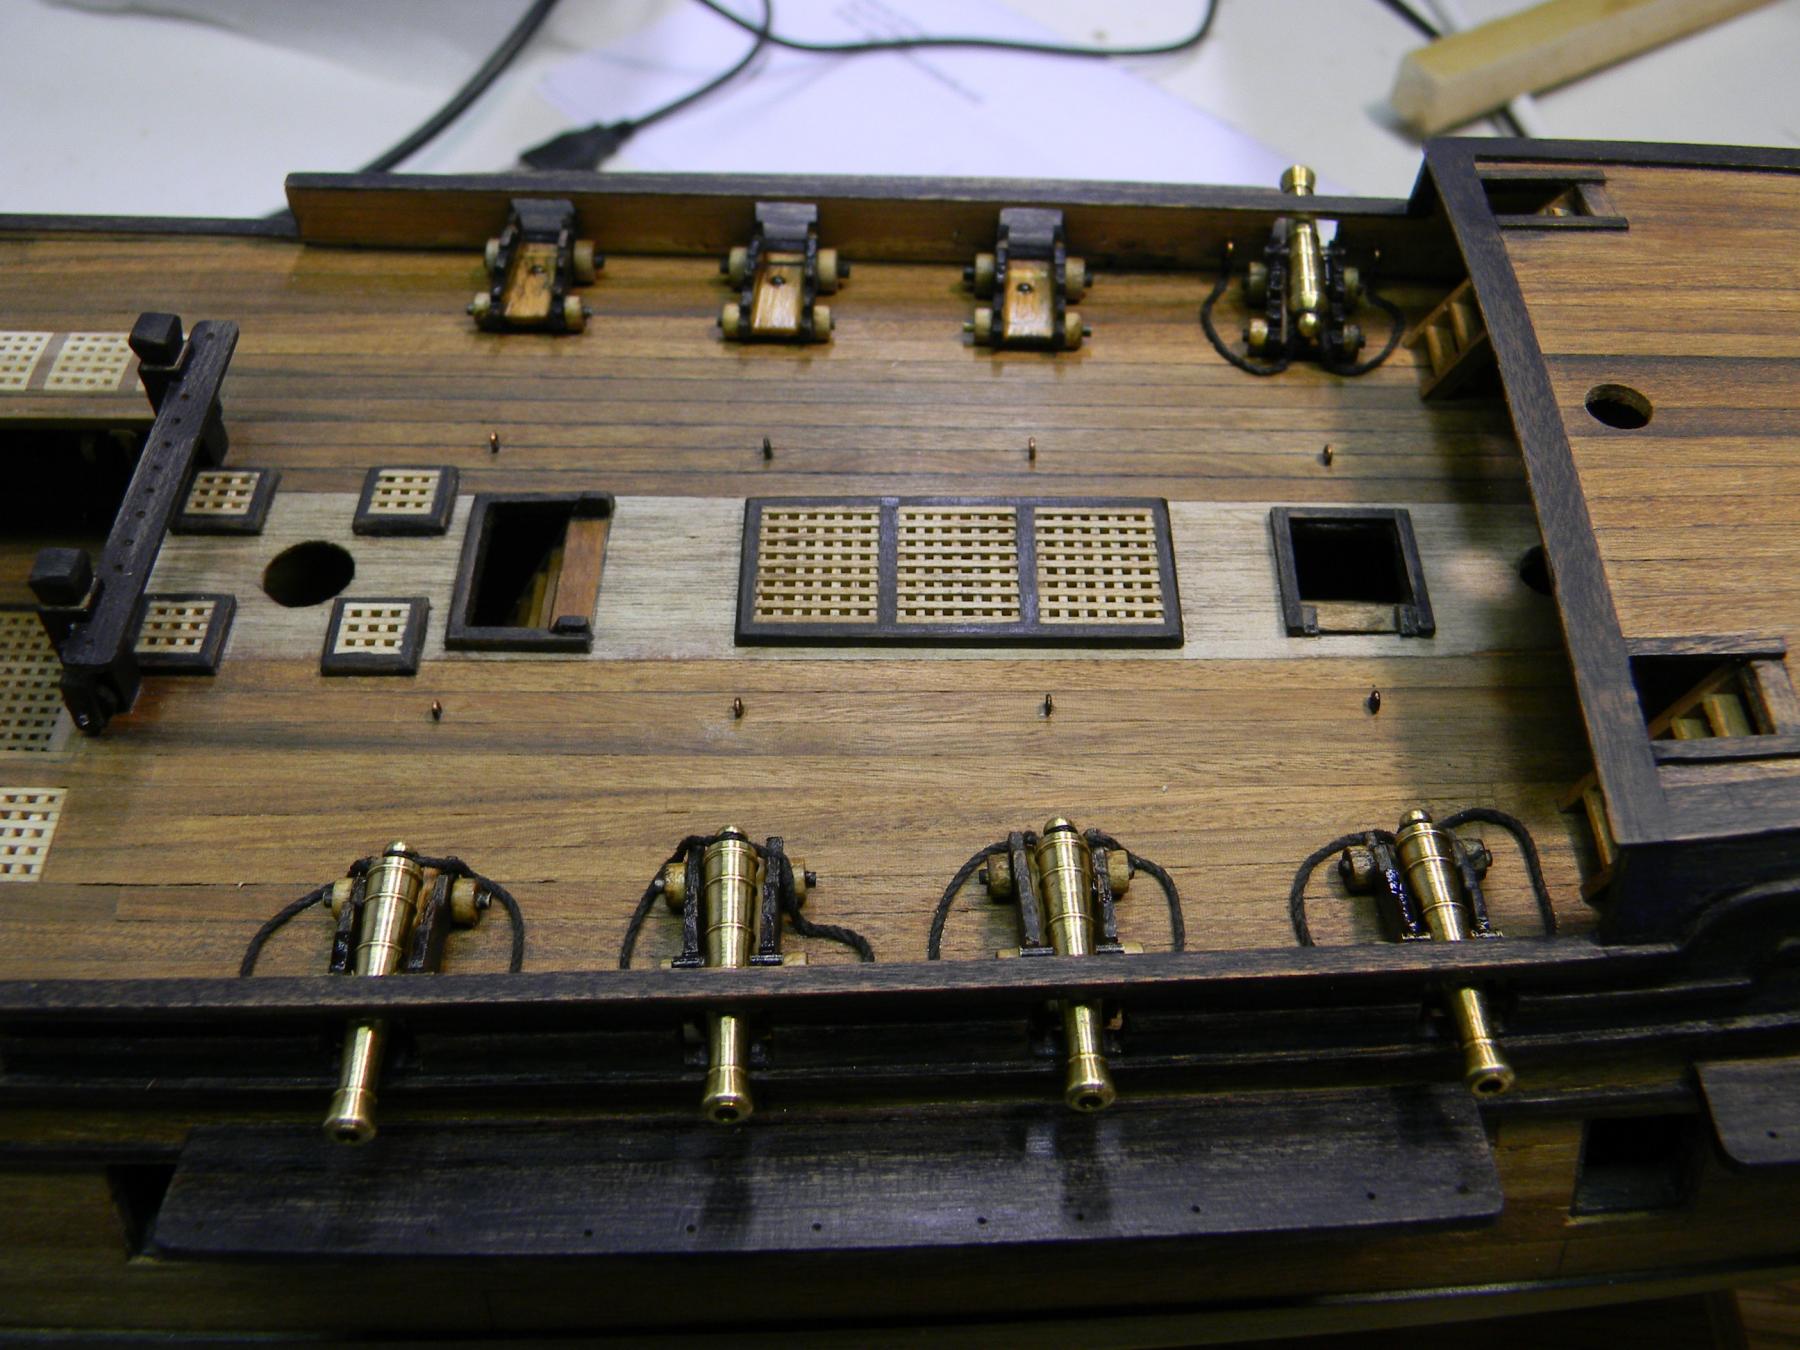
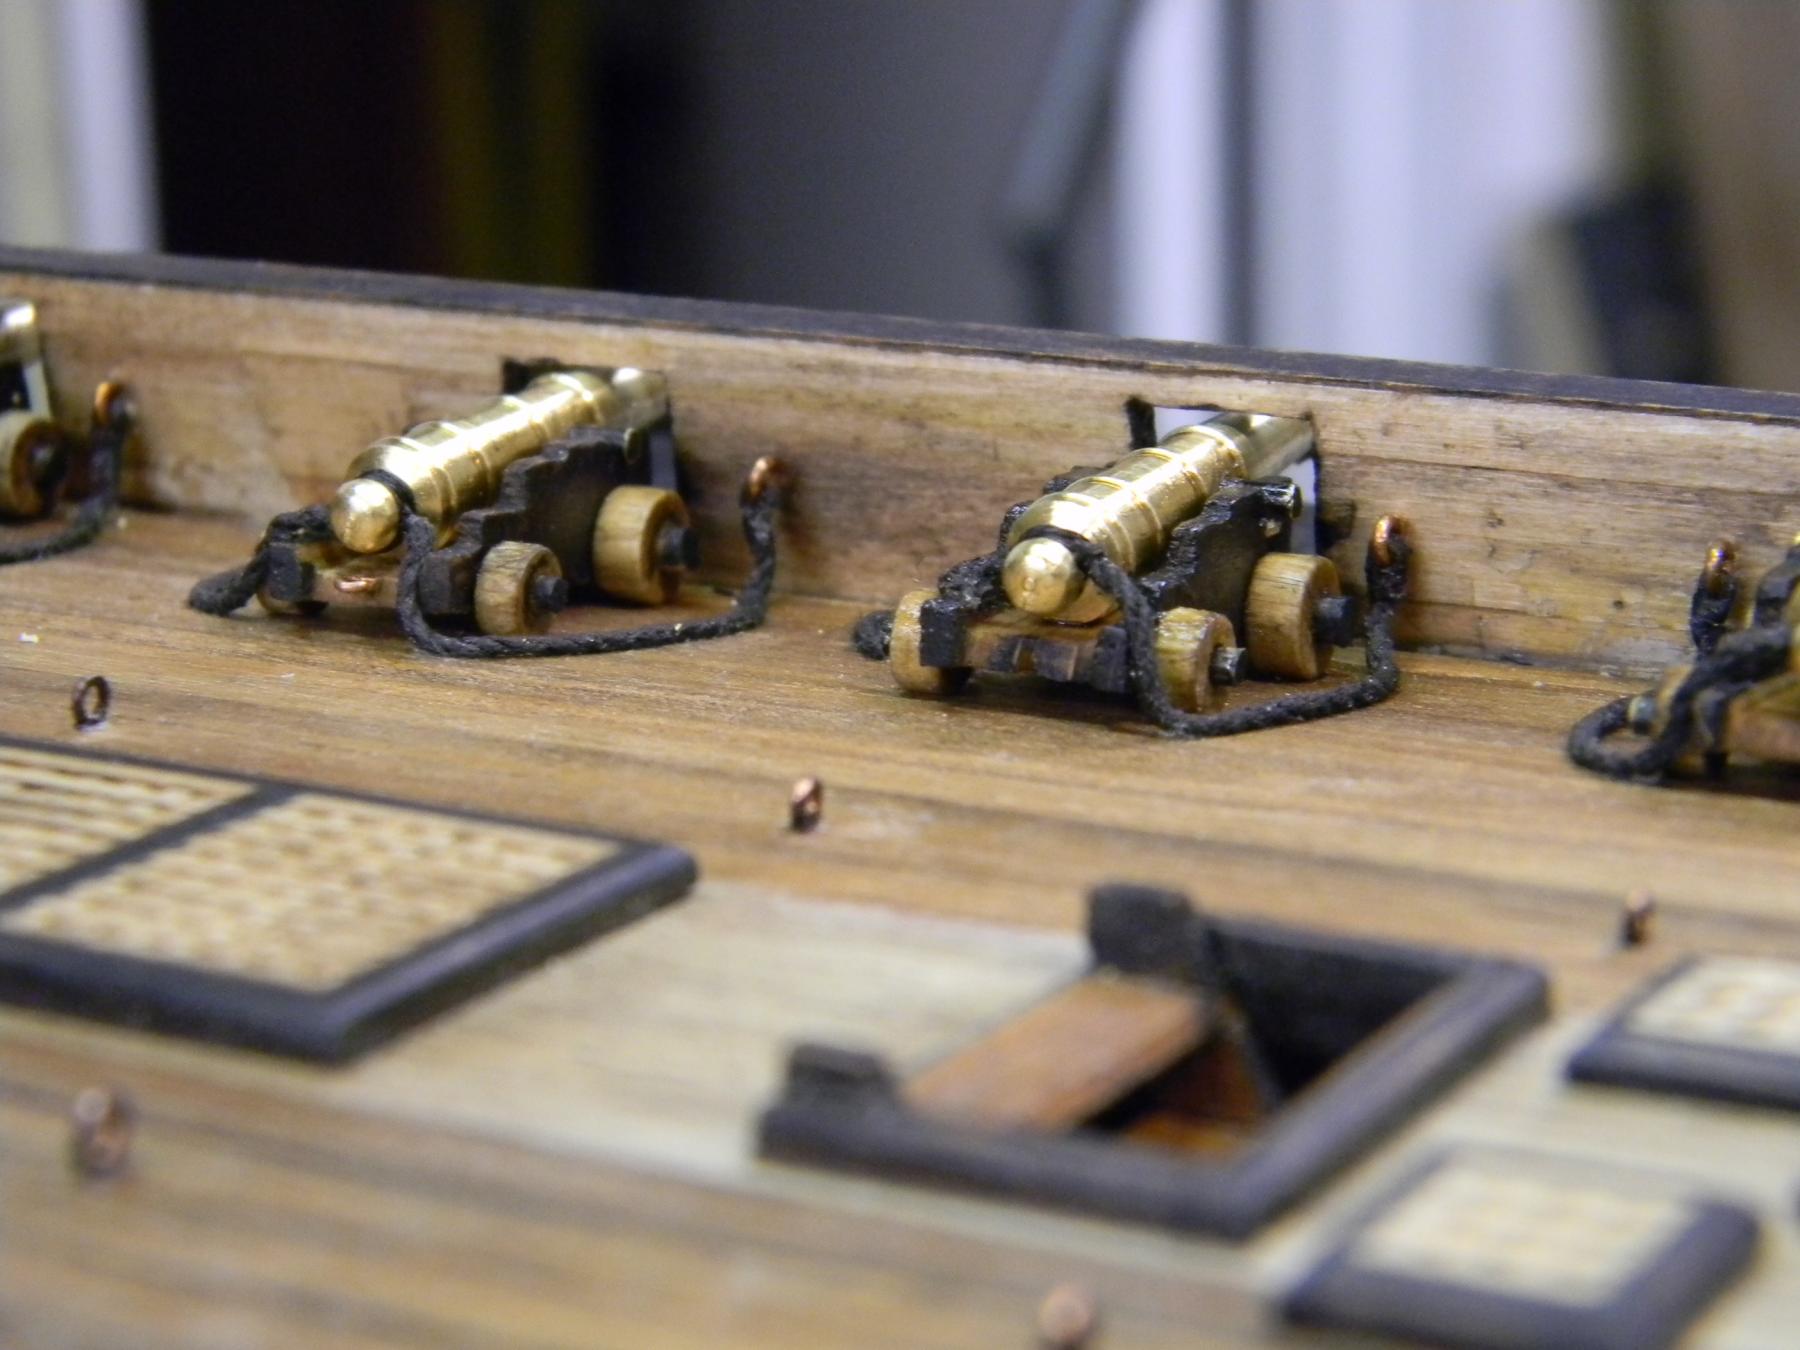
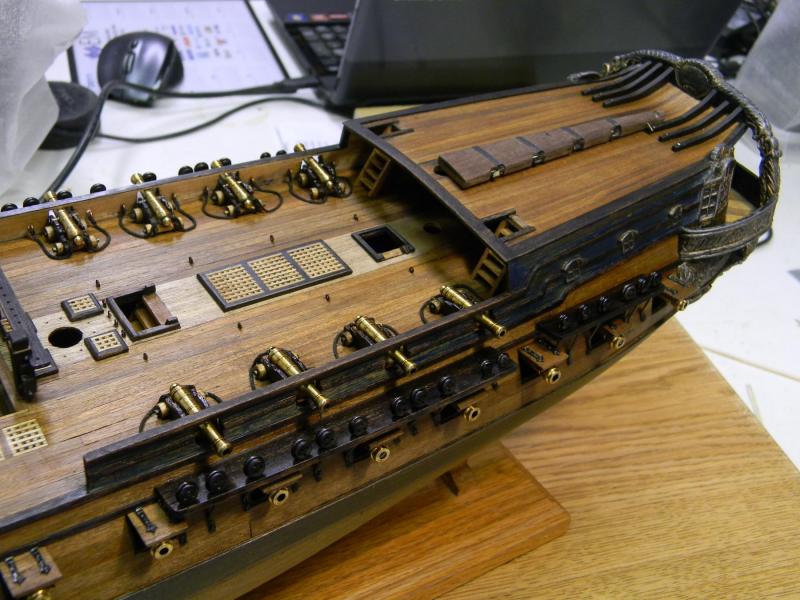
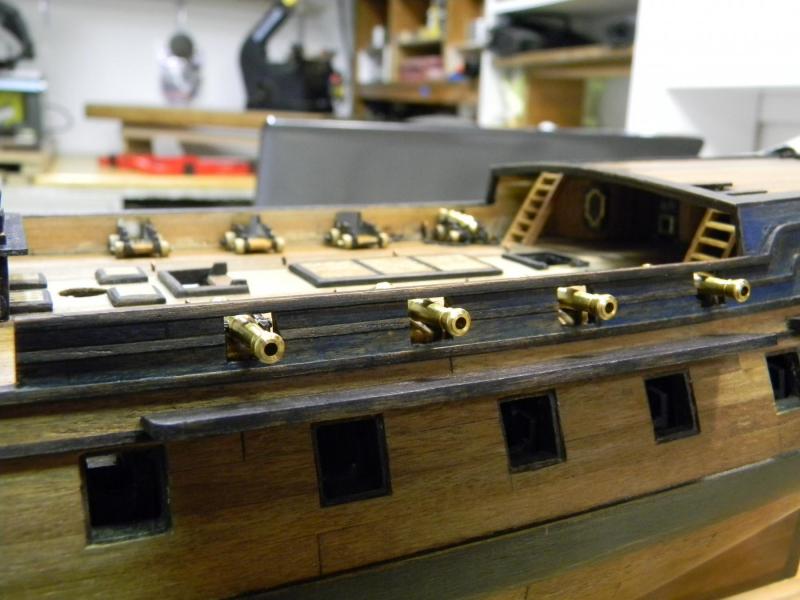
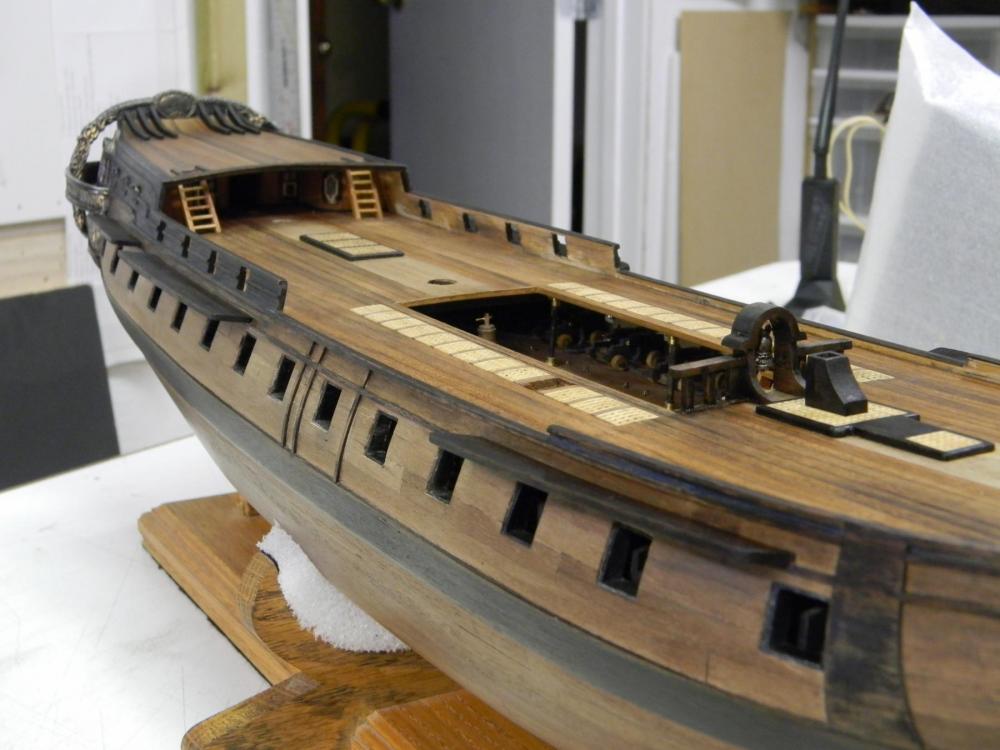
Progress continues with my rendition of Le Renommee... my intention from the beginning was to leave the cannons as is but i am knocking back the "sheen" with repeated applications of a dark walnut stain. (similar to repeated washes) The contrast with the dark wood tones and the cannons is close to what I'd hoped for... hope you enjoy and thanks for looking in! JP


-
Pandora by marsalv - FINISHED - 1:52
Ponto replied to marsalv's topic in - Build logs for subjects built 1751 - 1800
I felt compelled to comment,... your efforts and craftsmanship are truly exceptional ! JP -
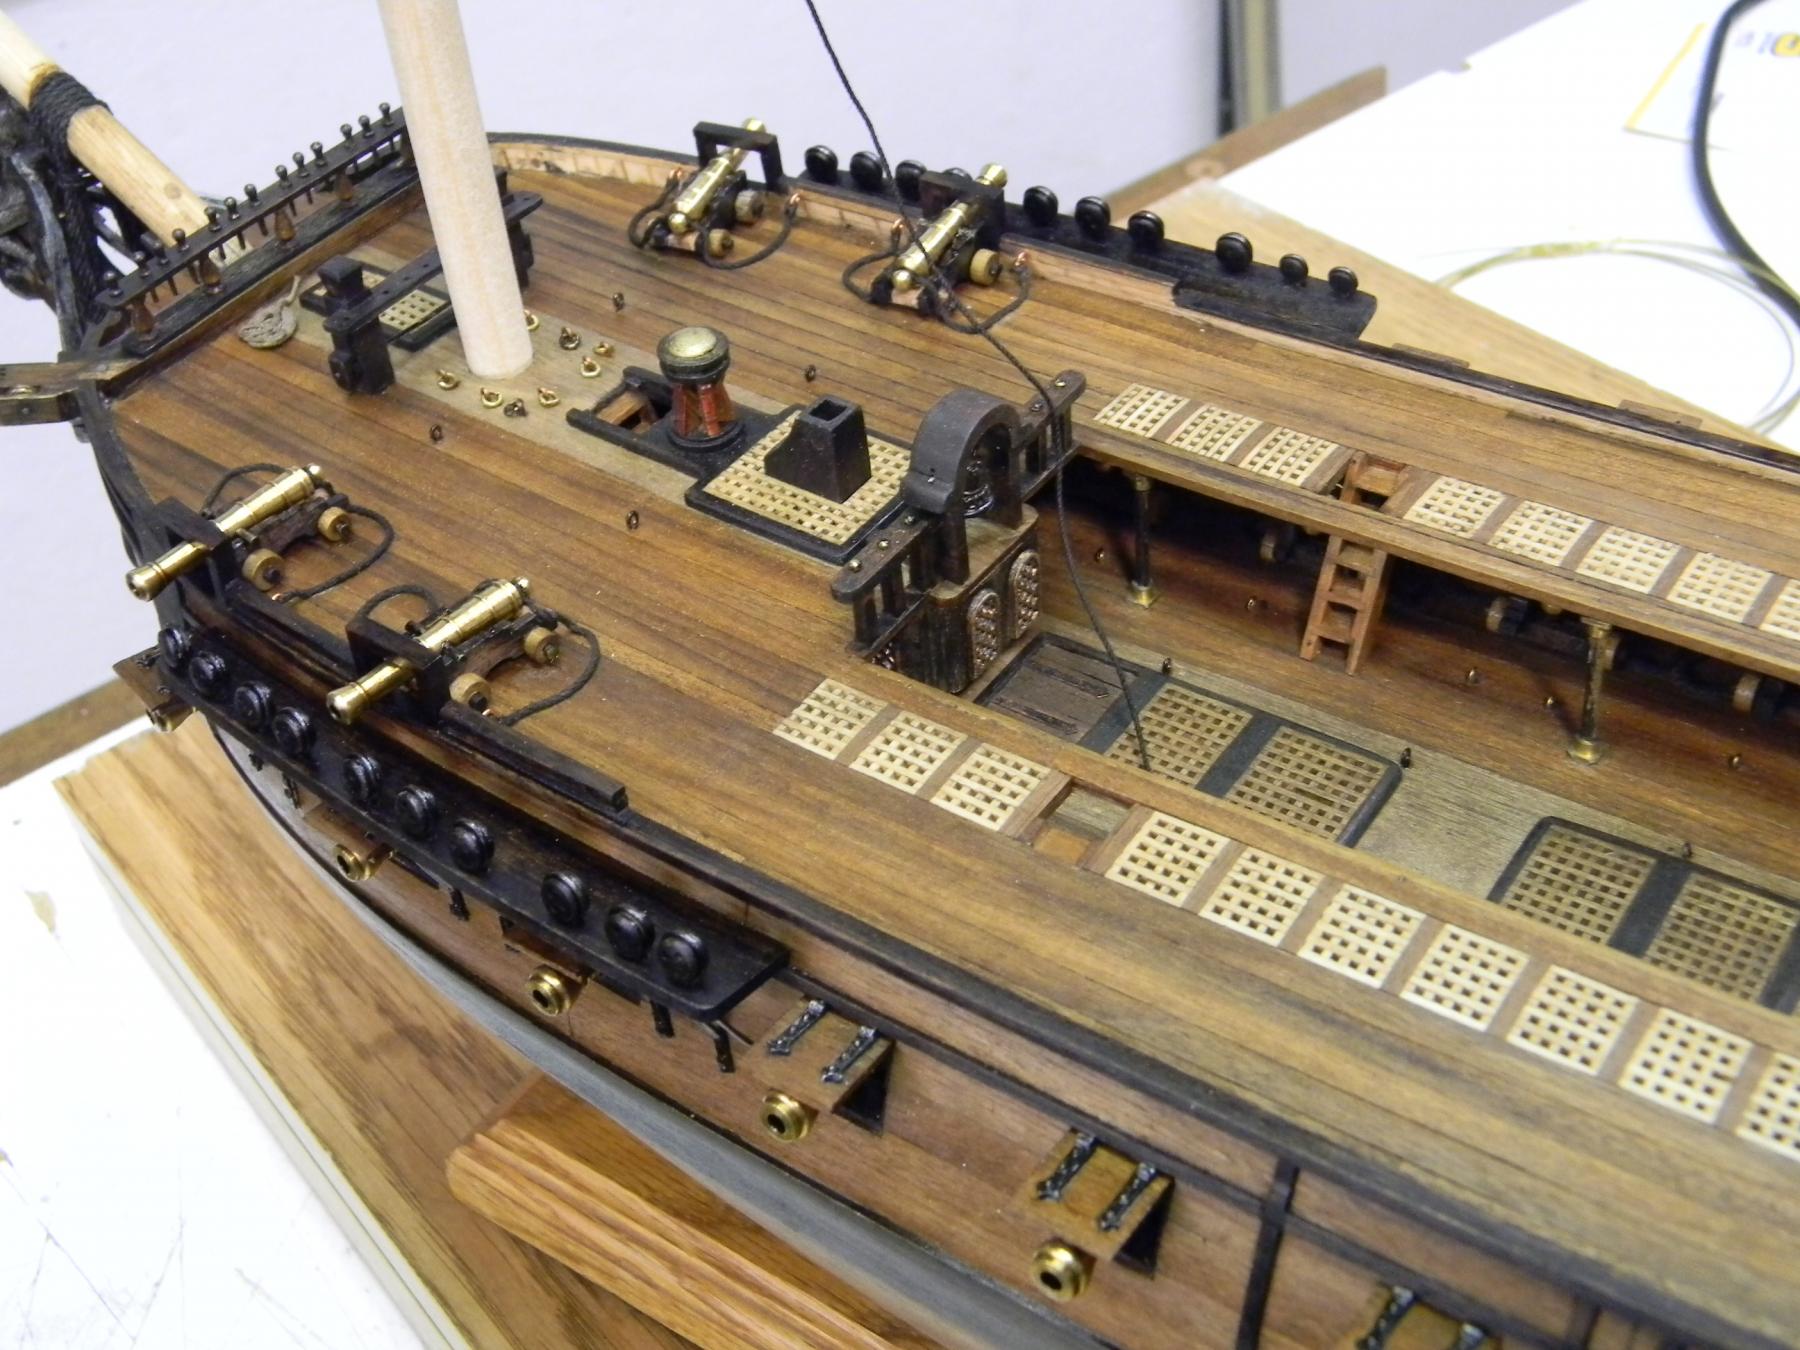
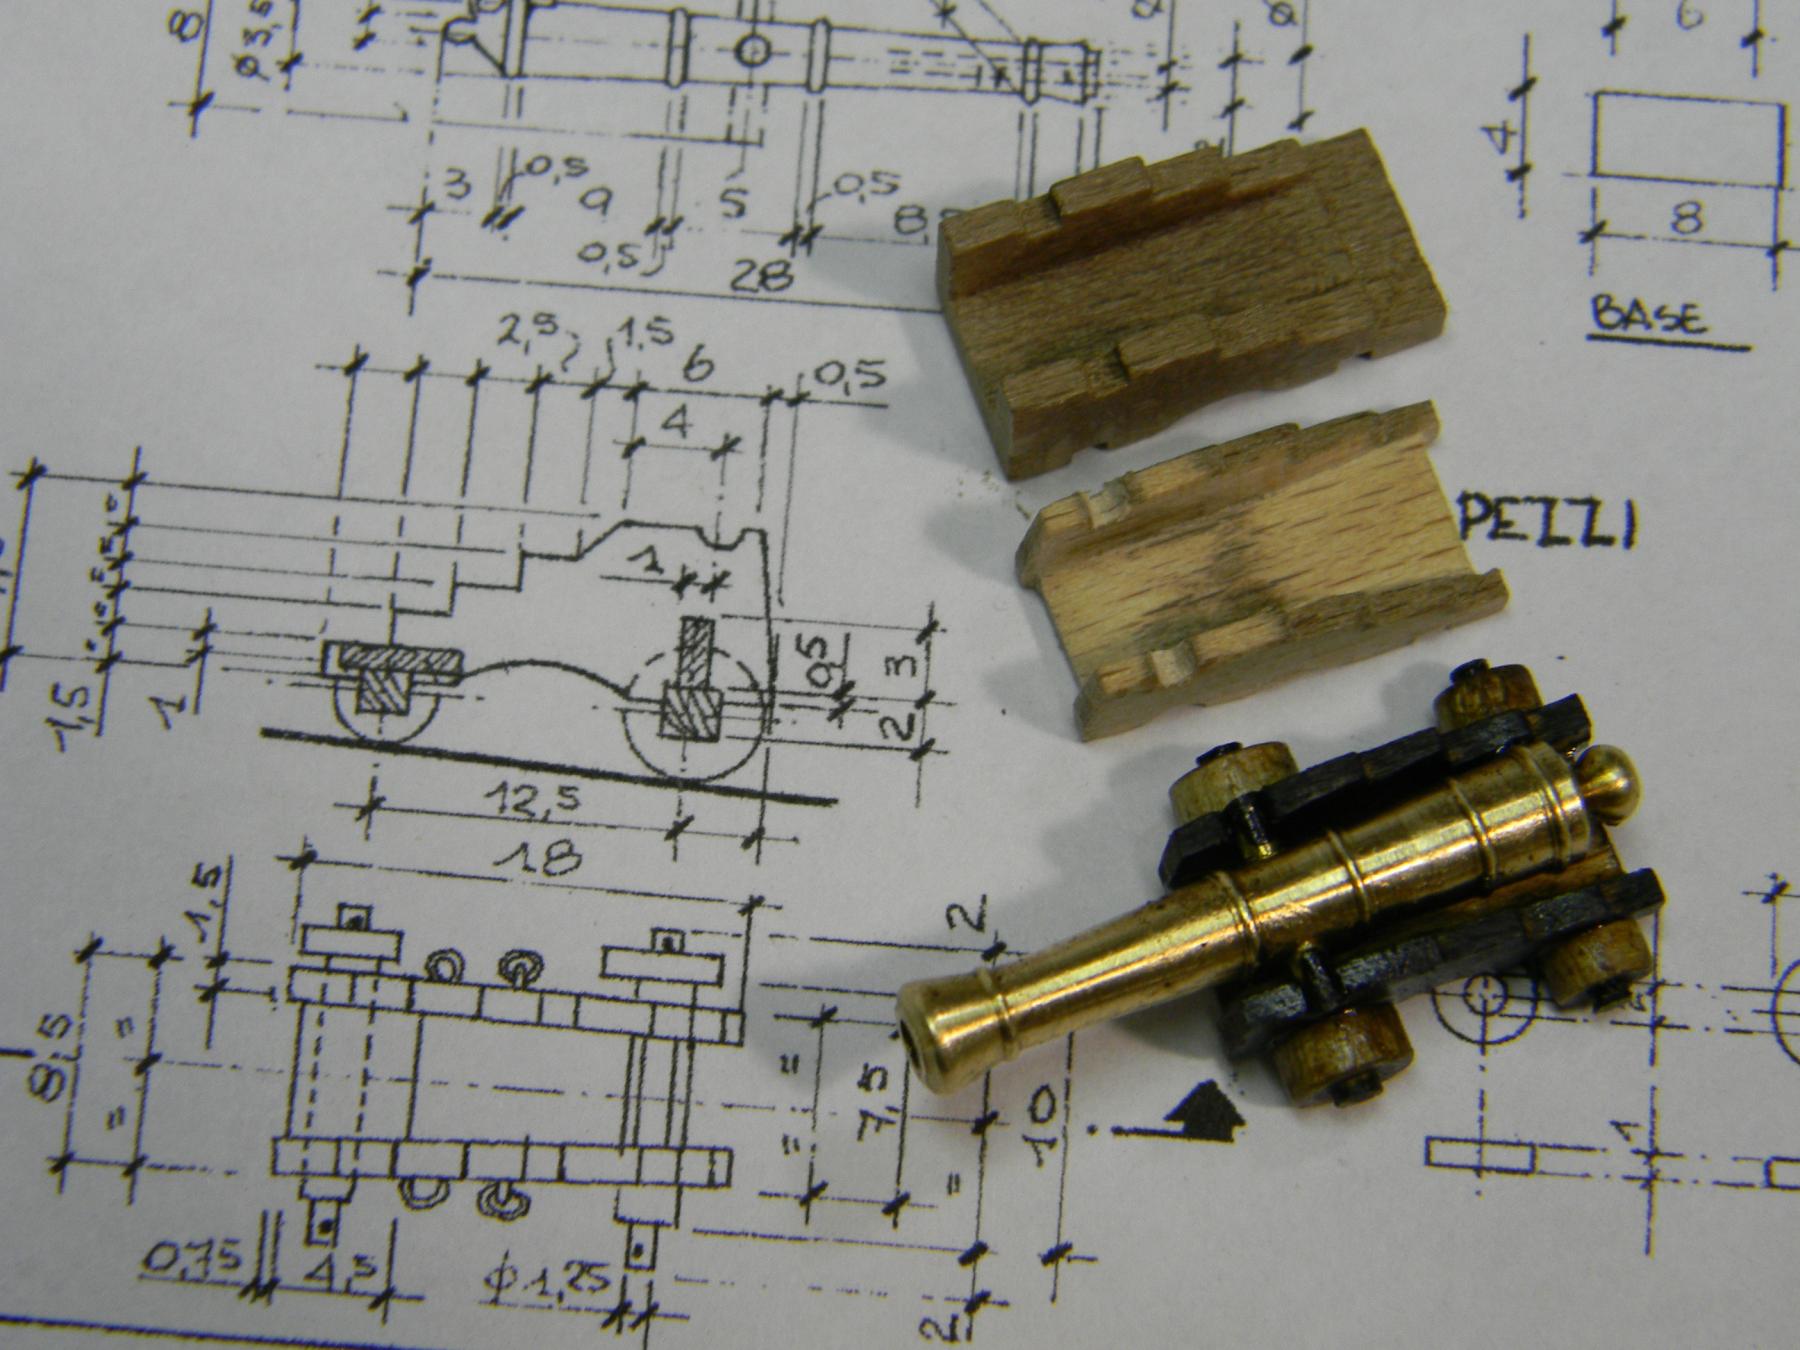
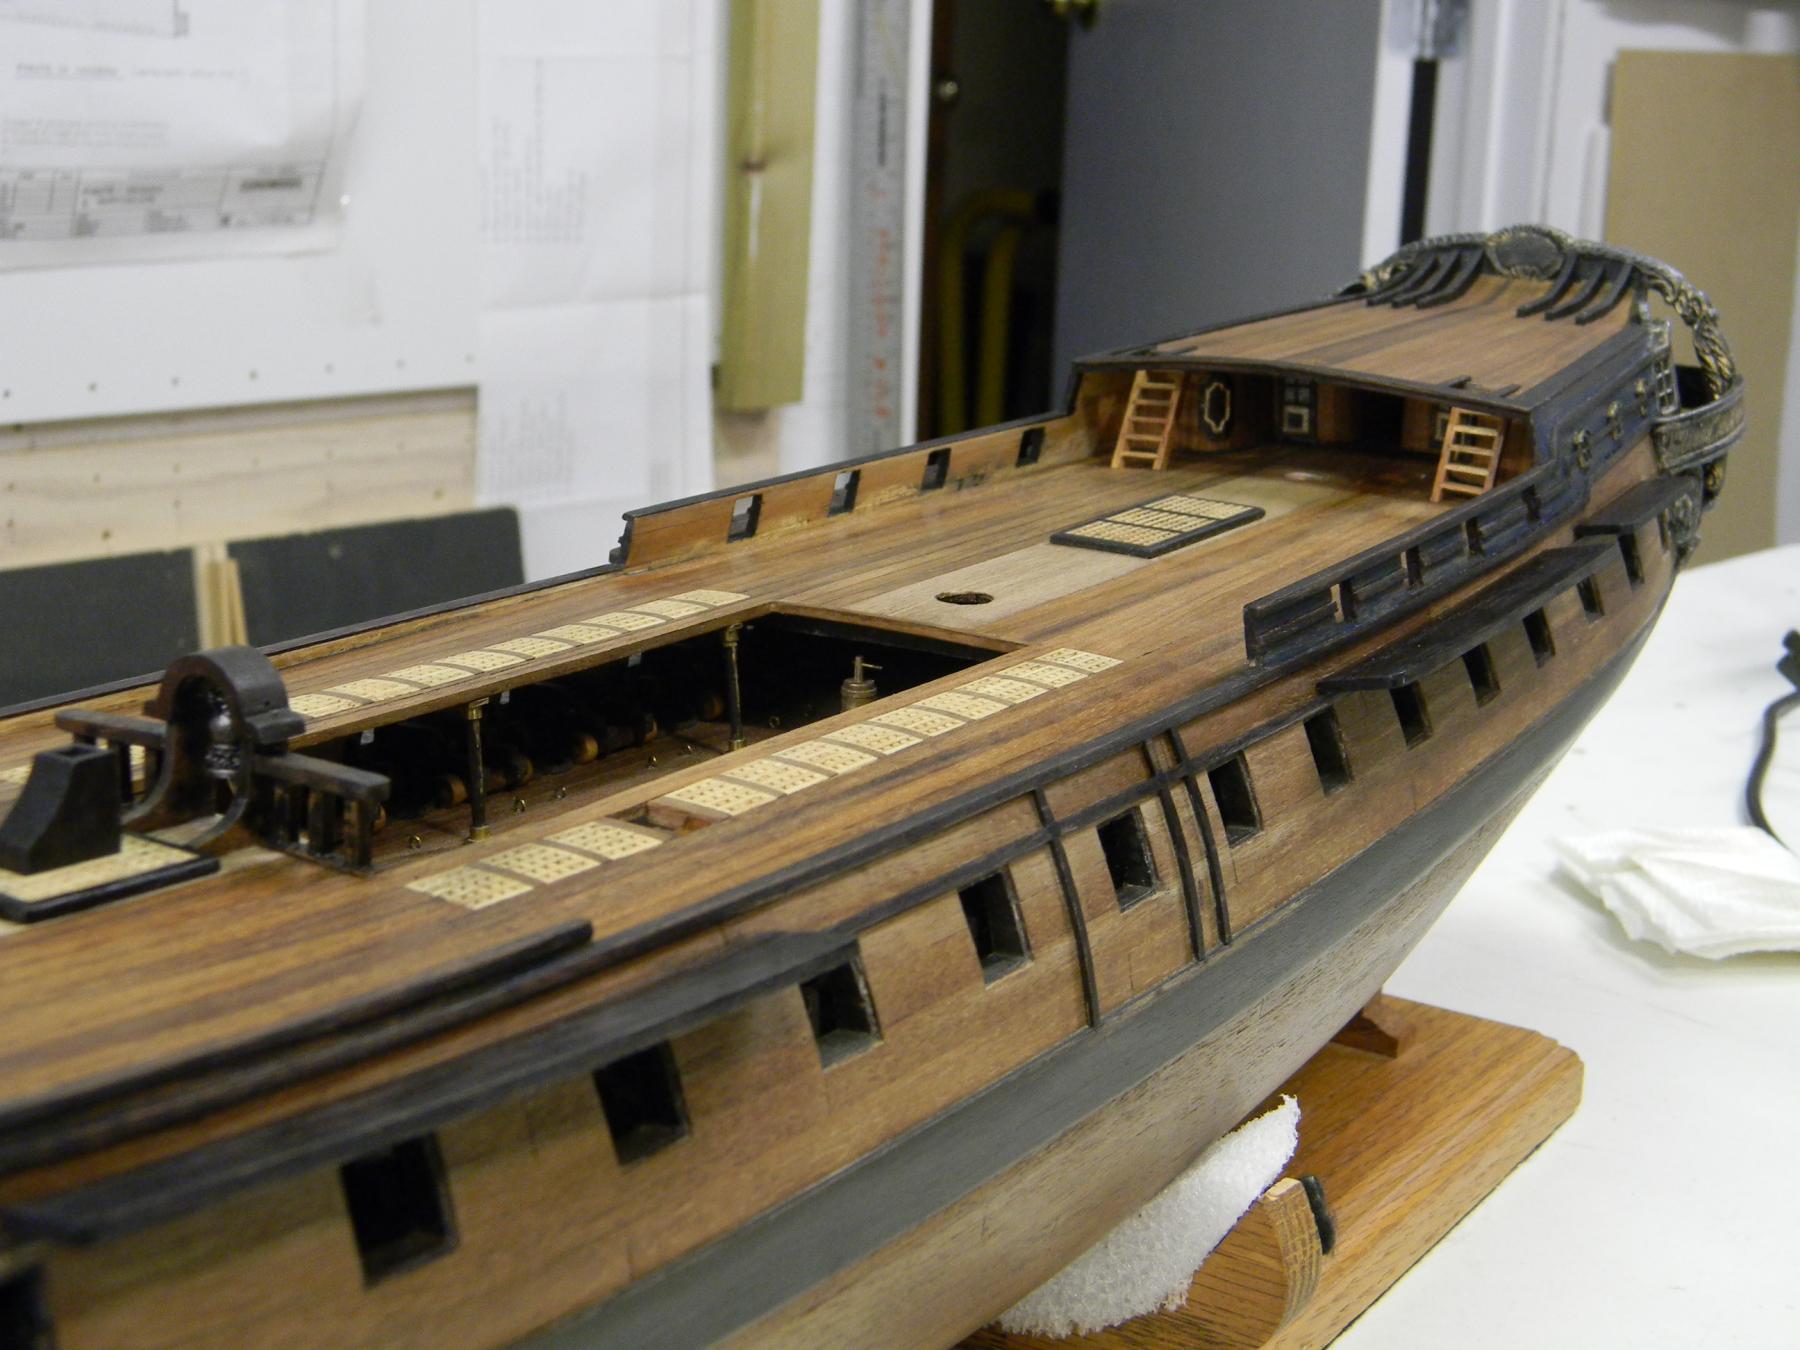
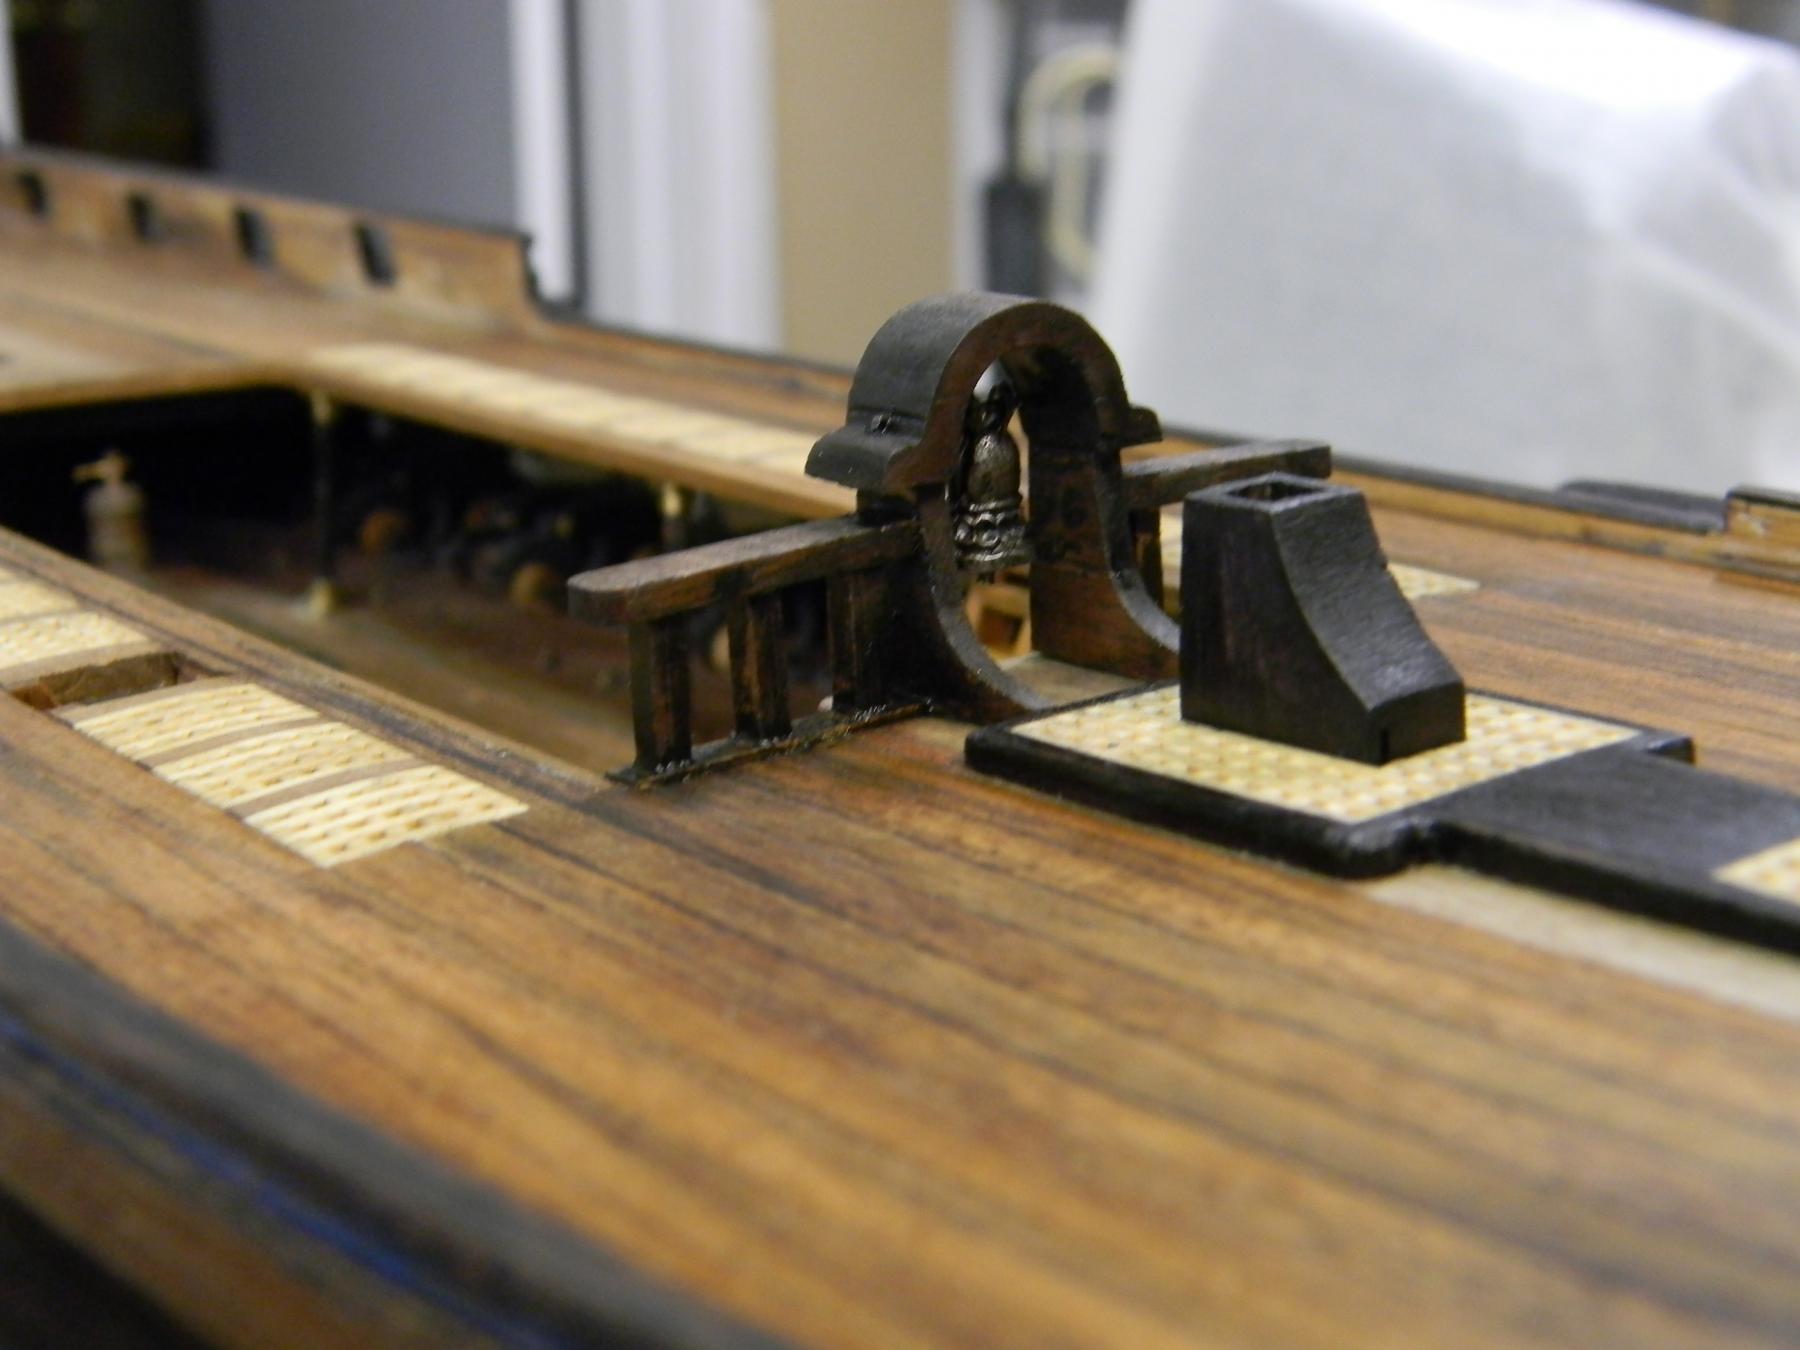
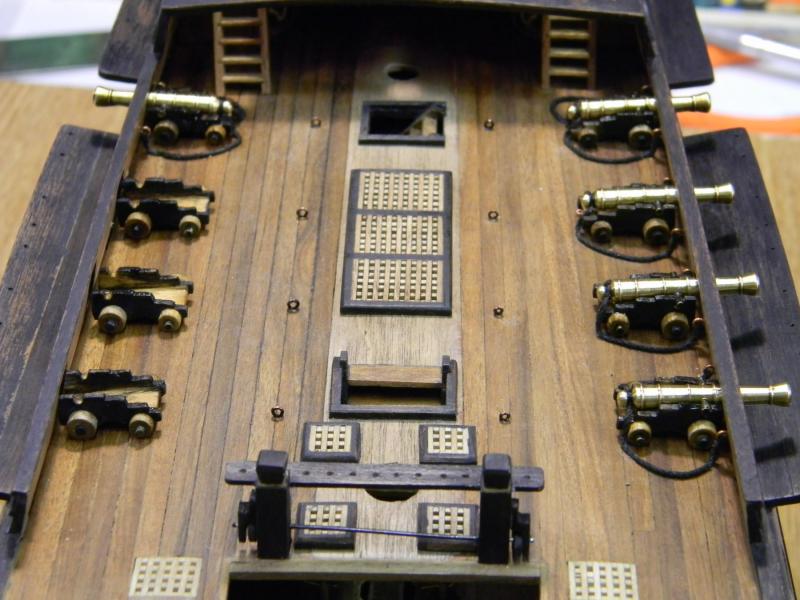
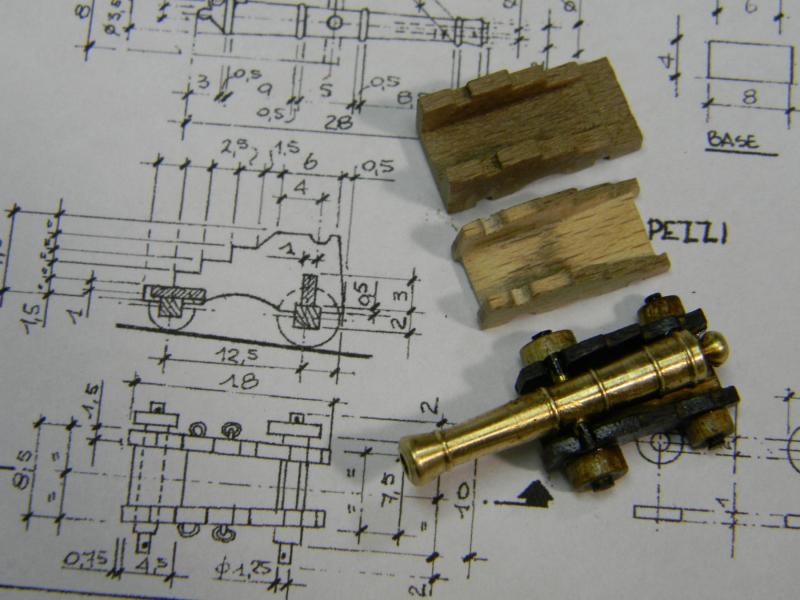
My Le Renommee adventure continues... the upper deck is filling in and I can see mast work just around the corner. My efforts on the cannons displayed below... I was able to modify the supplied trucks with a lot of manipulation using assorted files and trimming. The dimensions for the trucks on the plans, though very detailed, would end up being too high in my openings so I suggest double checking always.... JP


-
Little Machine Shop 2" Quick Vise Review
Ponto replied to jhearl's topic in Modeling tools and Workshop Equipment
Thanks for the review,....I despise getting burned on a purchase and feel your pain..... jp -
Does anyone know if the MicroMark brand saw and the Proxxon FET models are comparable ... ie. I opted for the Proxxon awhile back and wonder if the accessories offered for the MicroMark would work with the Proxxon model?? JP
-
Some very fine skills and exacting workmanship are being demonstrated here! JP
- 652 replies
-
- 2
-

-
- royal william
- euromodel
- (and 1 more)
-
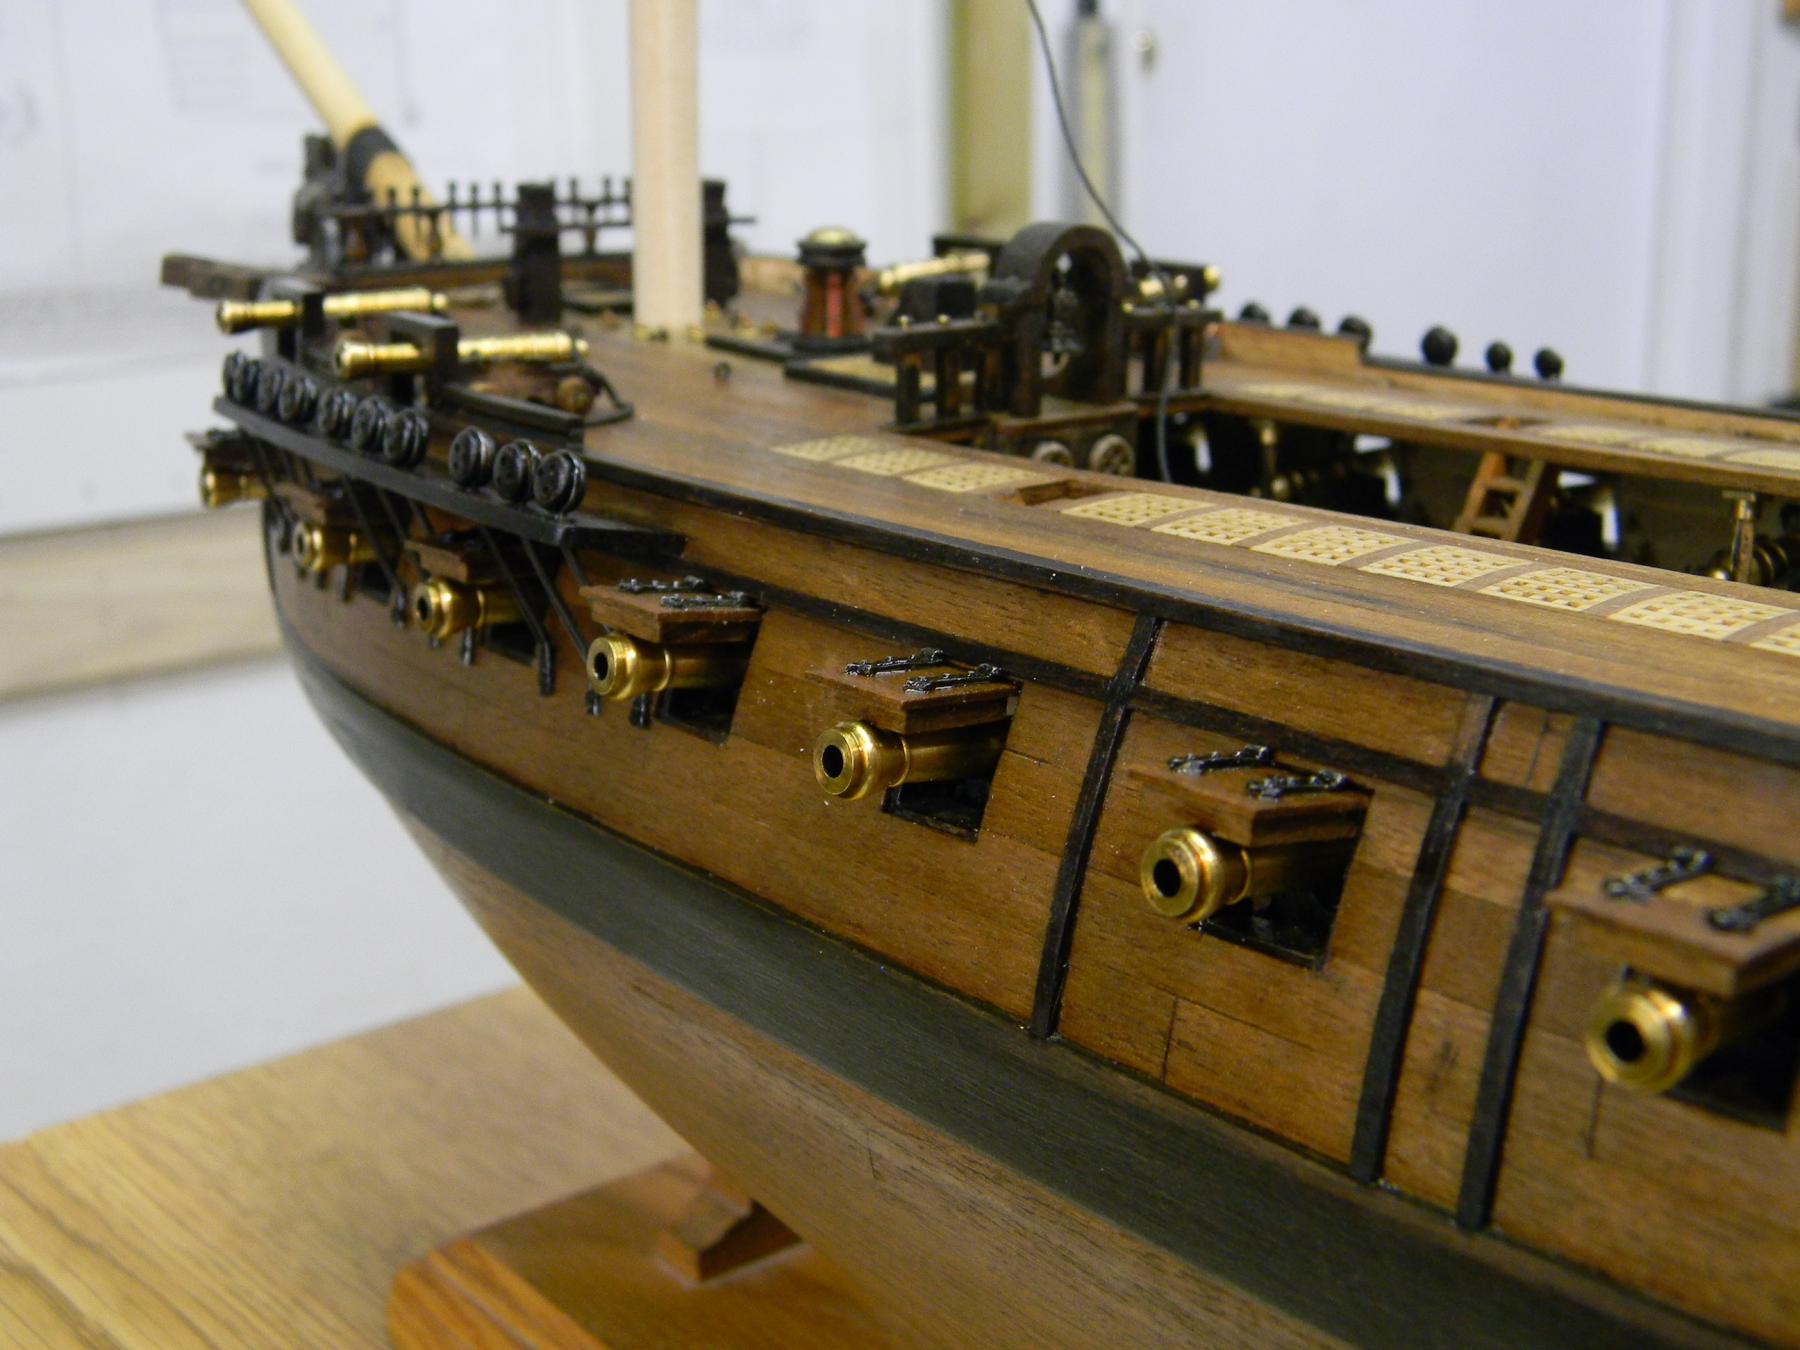
Thanks guys,... believe me when I say that my results are far from projecting any sort of quality. While we all typically attempt to shoot for the best results in each and every little step during construction, I'm learning to accept minor build "anomalies" along the way. I used to focus on the imperfections at each step but have come to realize that those little anomalies disappear when the build progresses and the "whole" is the focus. I should have some additional images on the bow available soon.......thank for looking in. jp
-
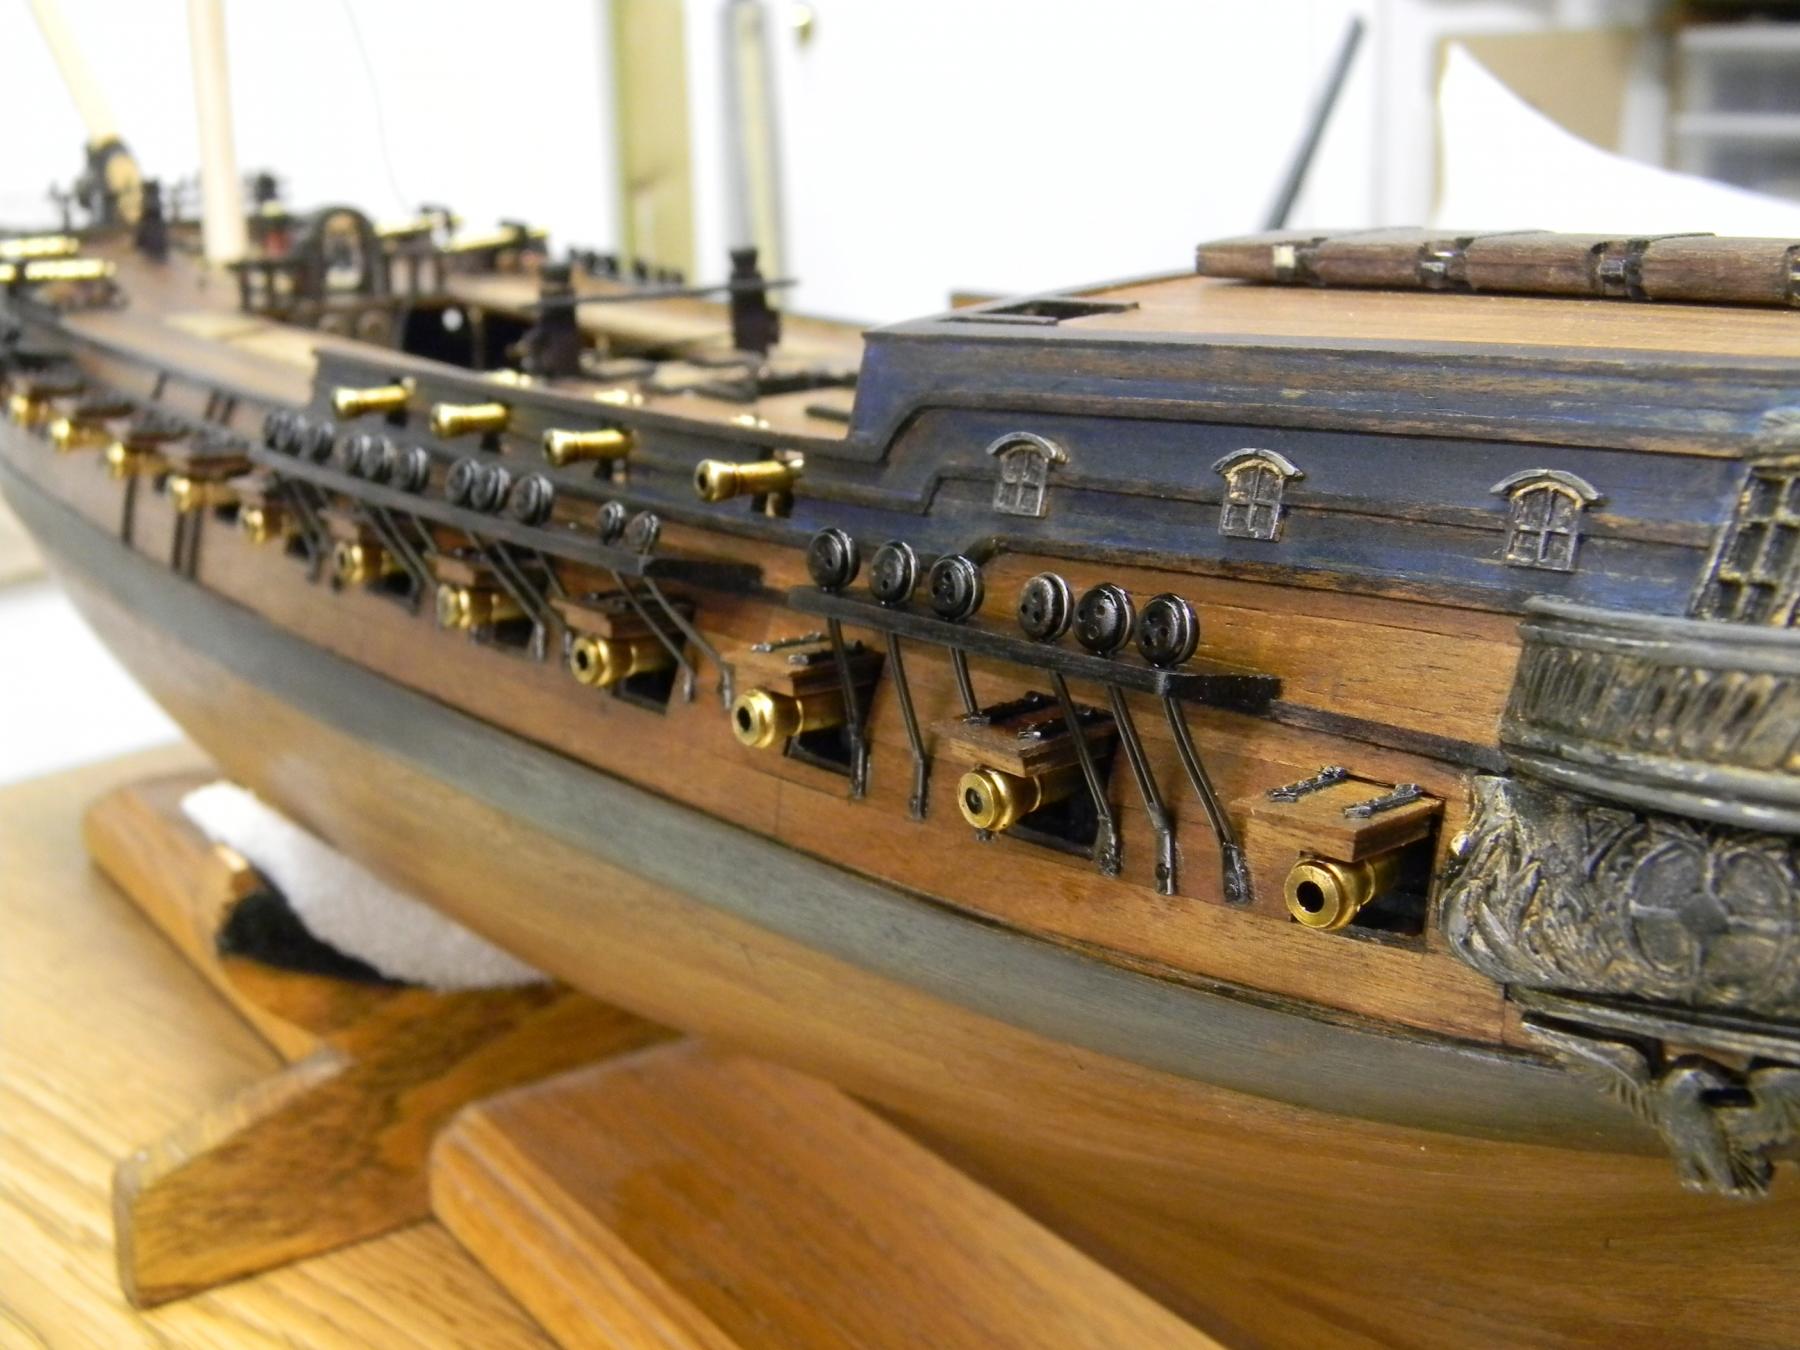
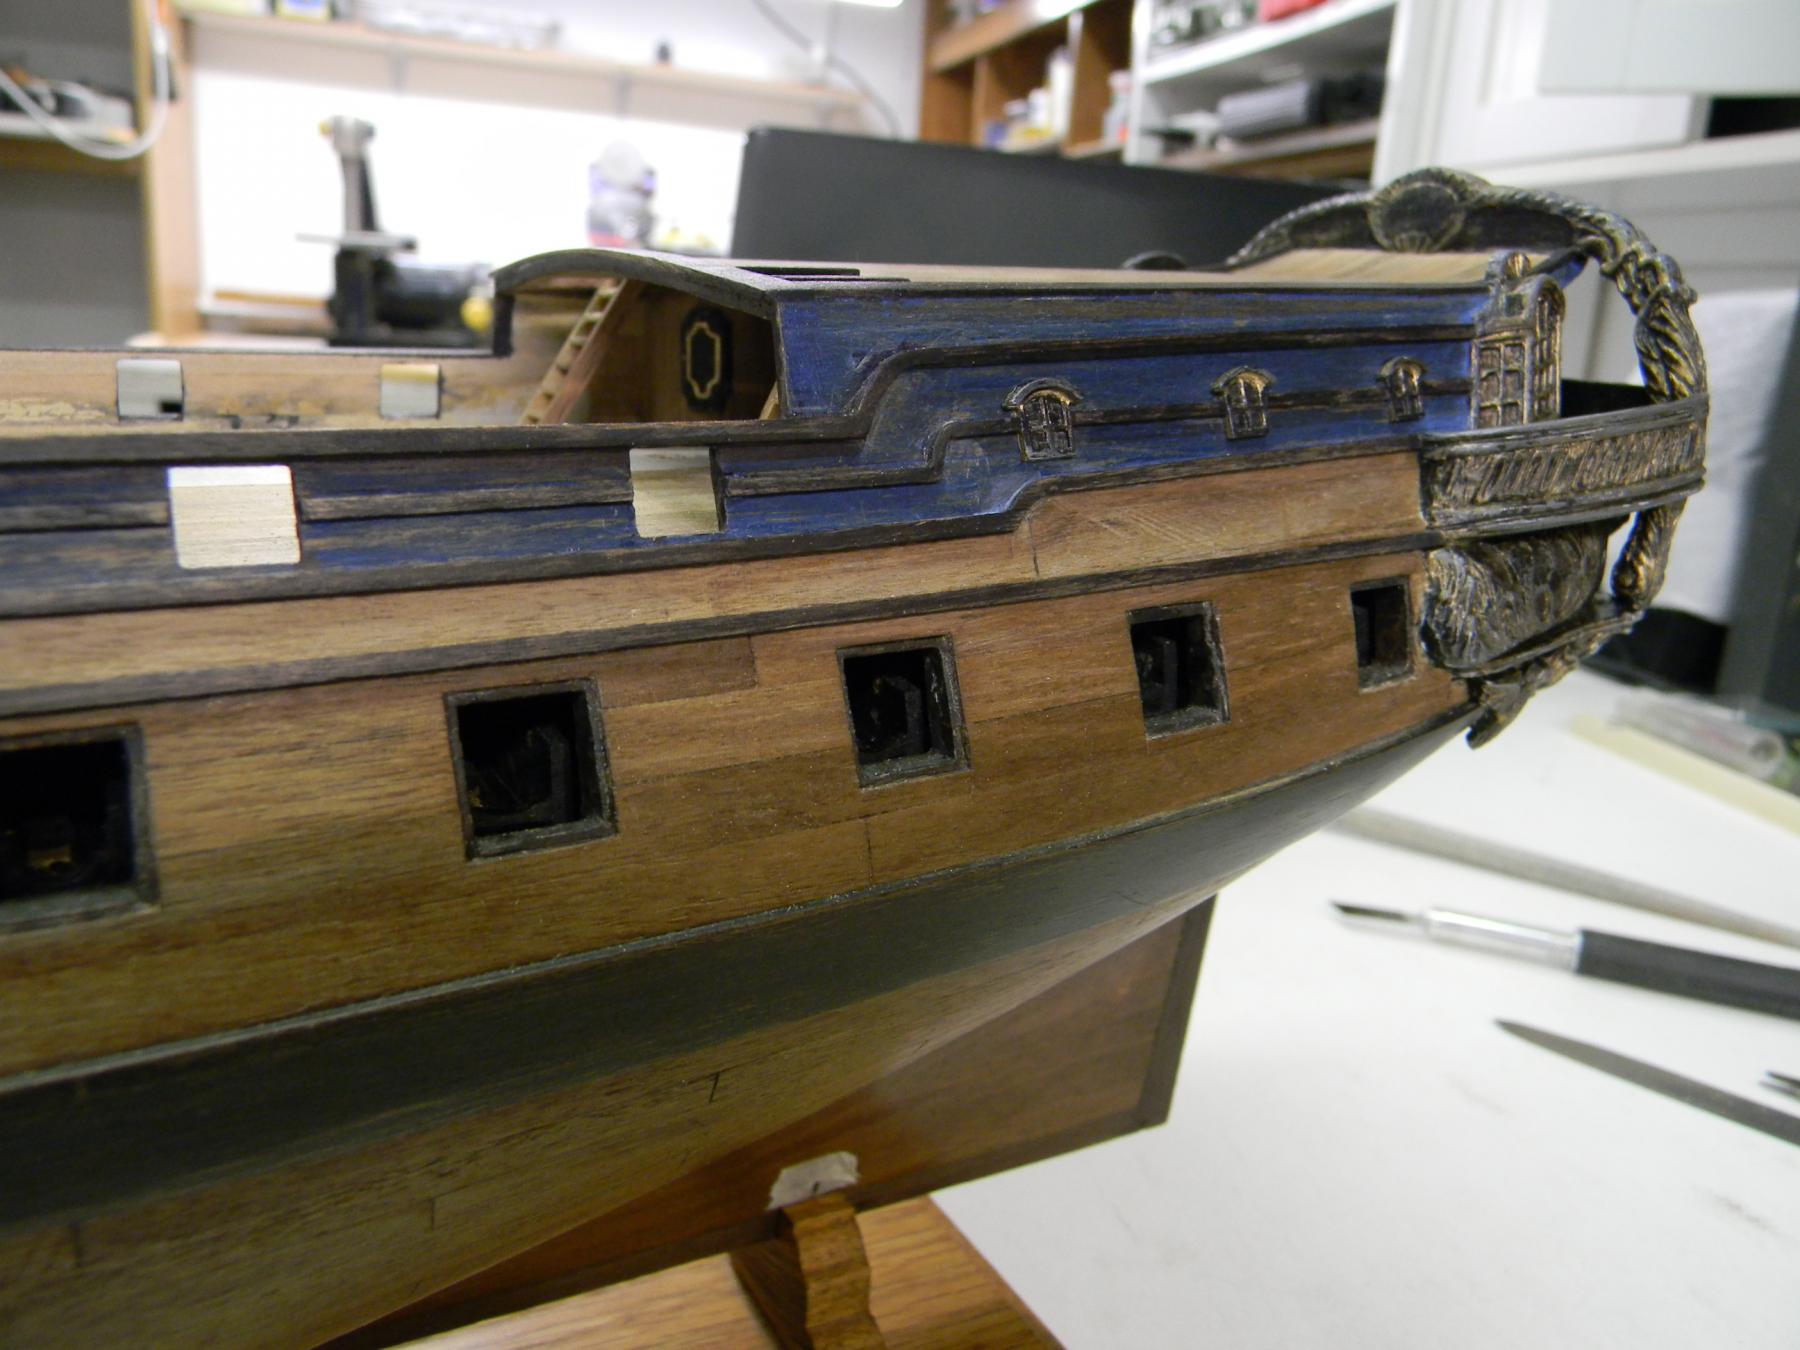
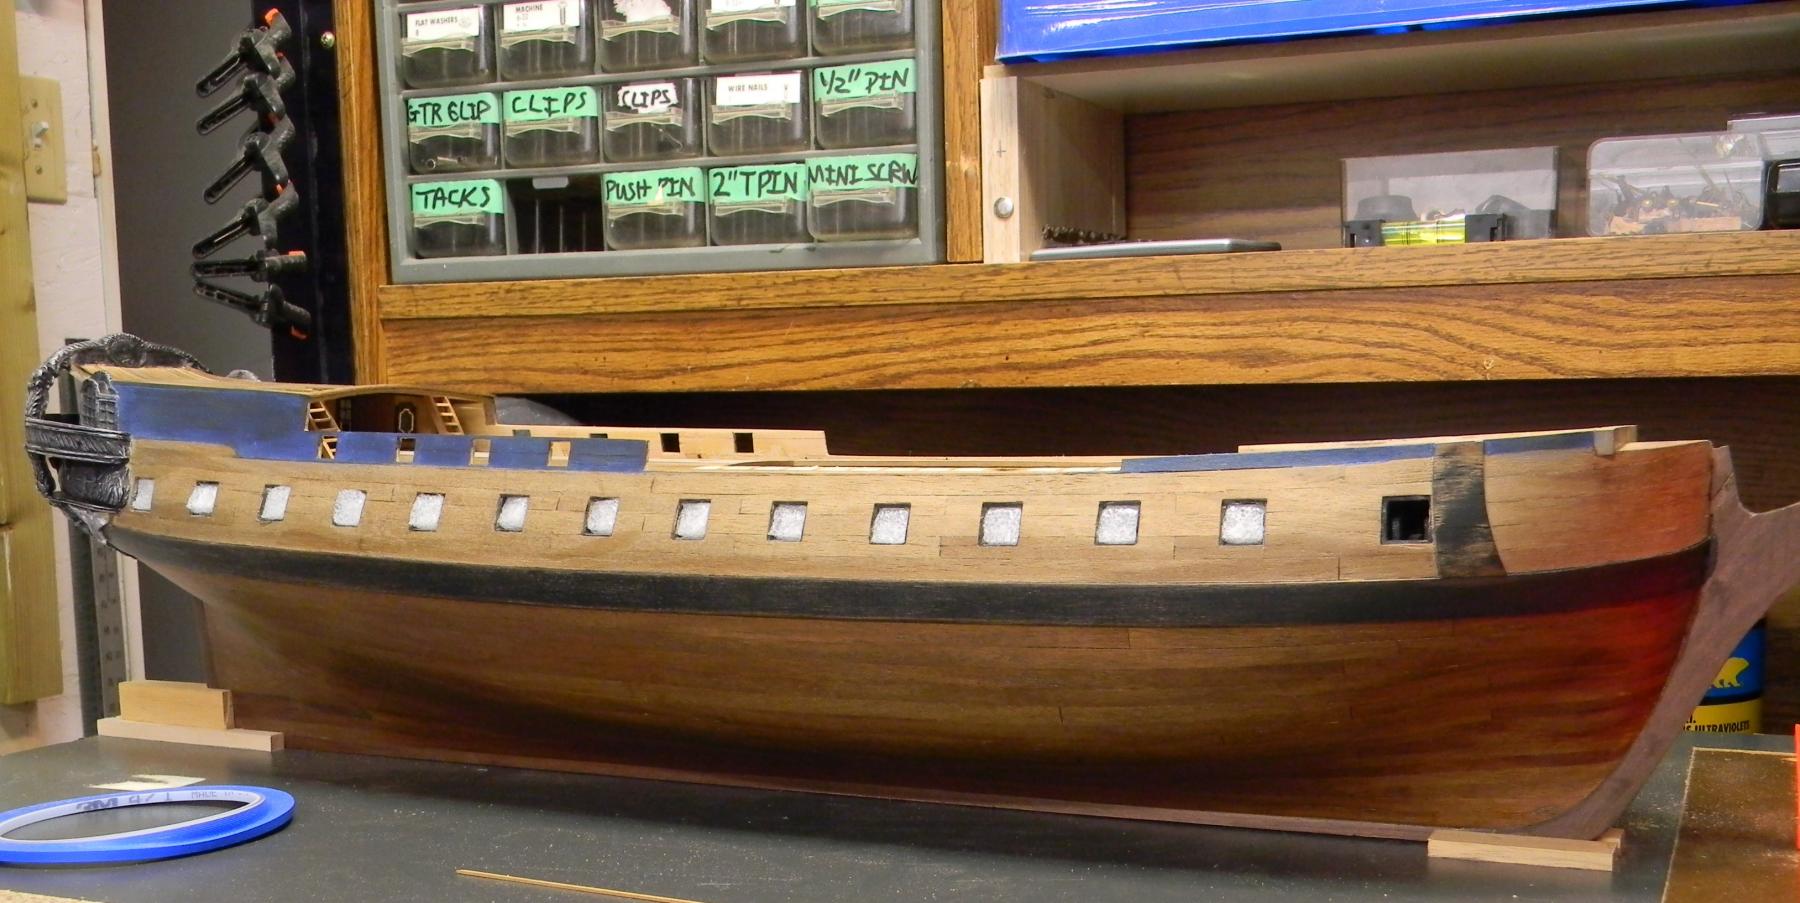
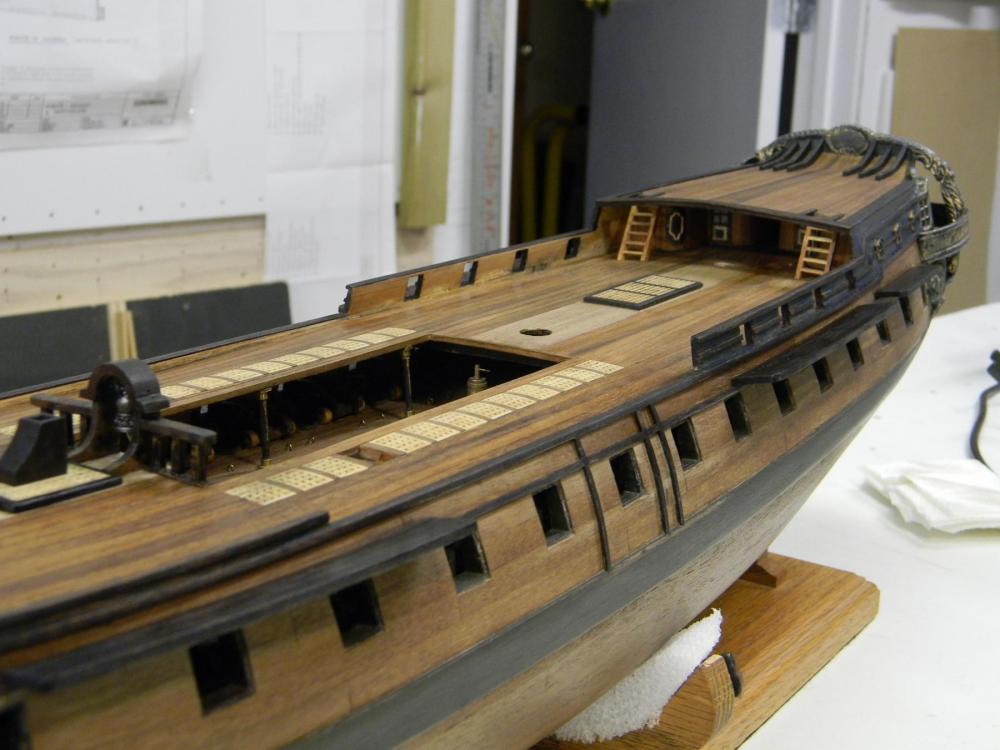
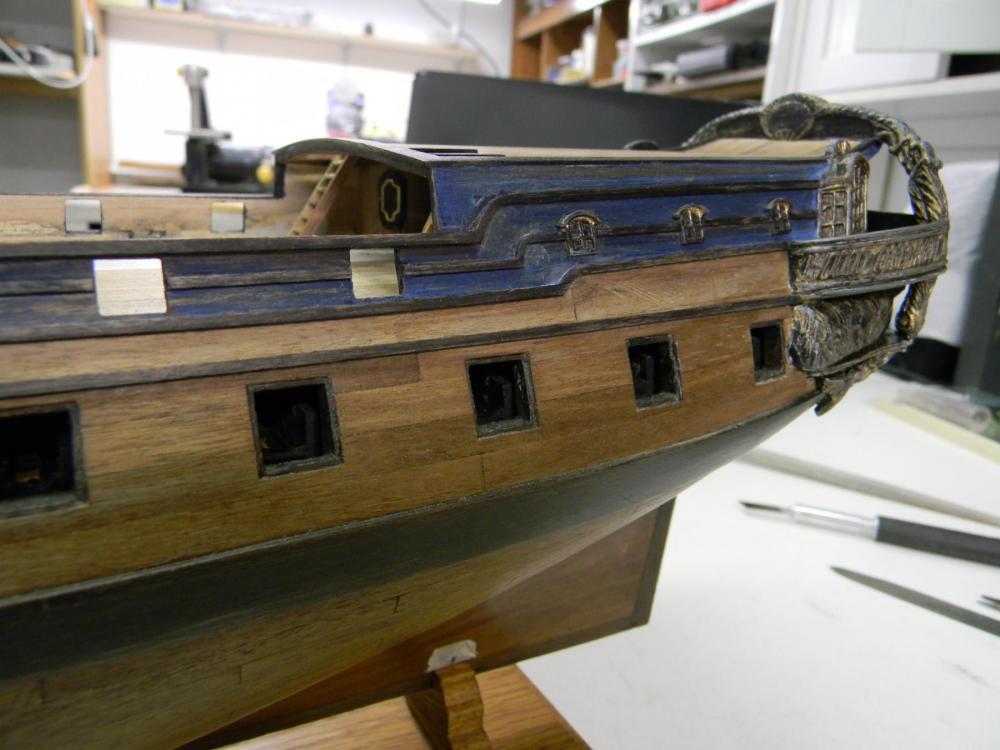
Thanks Mike,... the images never quite seem to duplicate what I see when looking at the model. My camera skills are likely to blame but that is a whole other learning curve and a road I'm unwilling to go down. The wood is all stock walnut supplied (for the most part) by Euromodel as well as bits and pieces from my stash. The darker "black" values are either a black stain or simply a black Sharpie pen. The blue value is a water based powder pigment that I had on hand. Once applied to the wood, and after some drying time, I always "knock back" the painted surface with a fine sanding stick to remove excess paint and to reveal the wood beneath. When I'm happy with that, I apply an old walnut stain that has aged to the point where the pigments seemed to have separated, to a degree, from the solvent base. This application blends in the bare walnut surface with the painted areas and the results are more or less what you see.......I would describe the finish as an "aged" one as opposed to the pristine newly minted ship ready for her first voyage. Thanks again for your comments and hope this helps a bit. JP
-
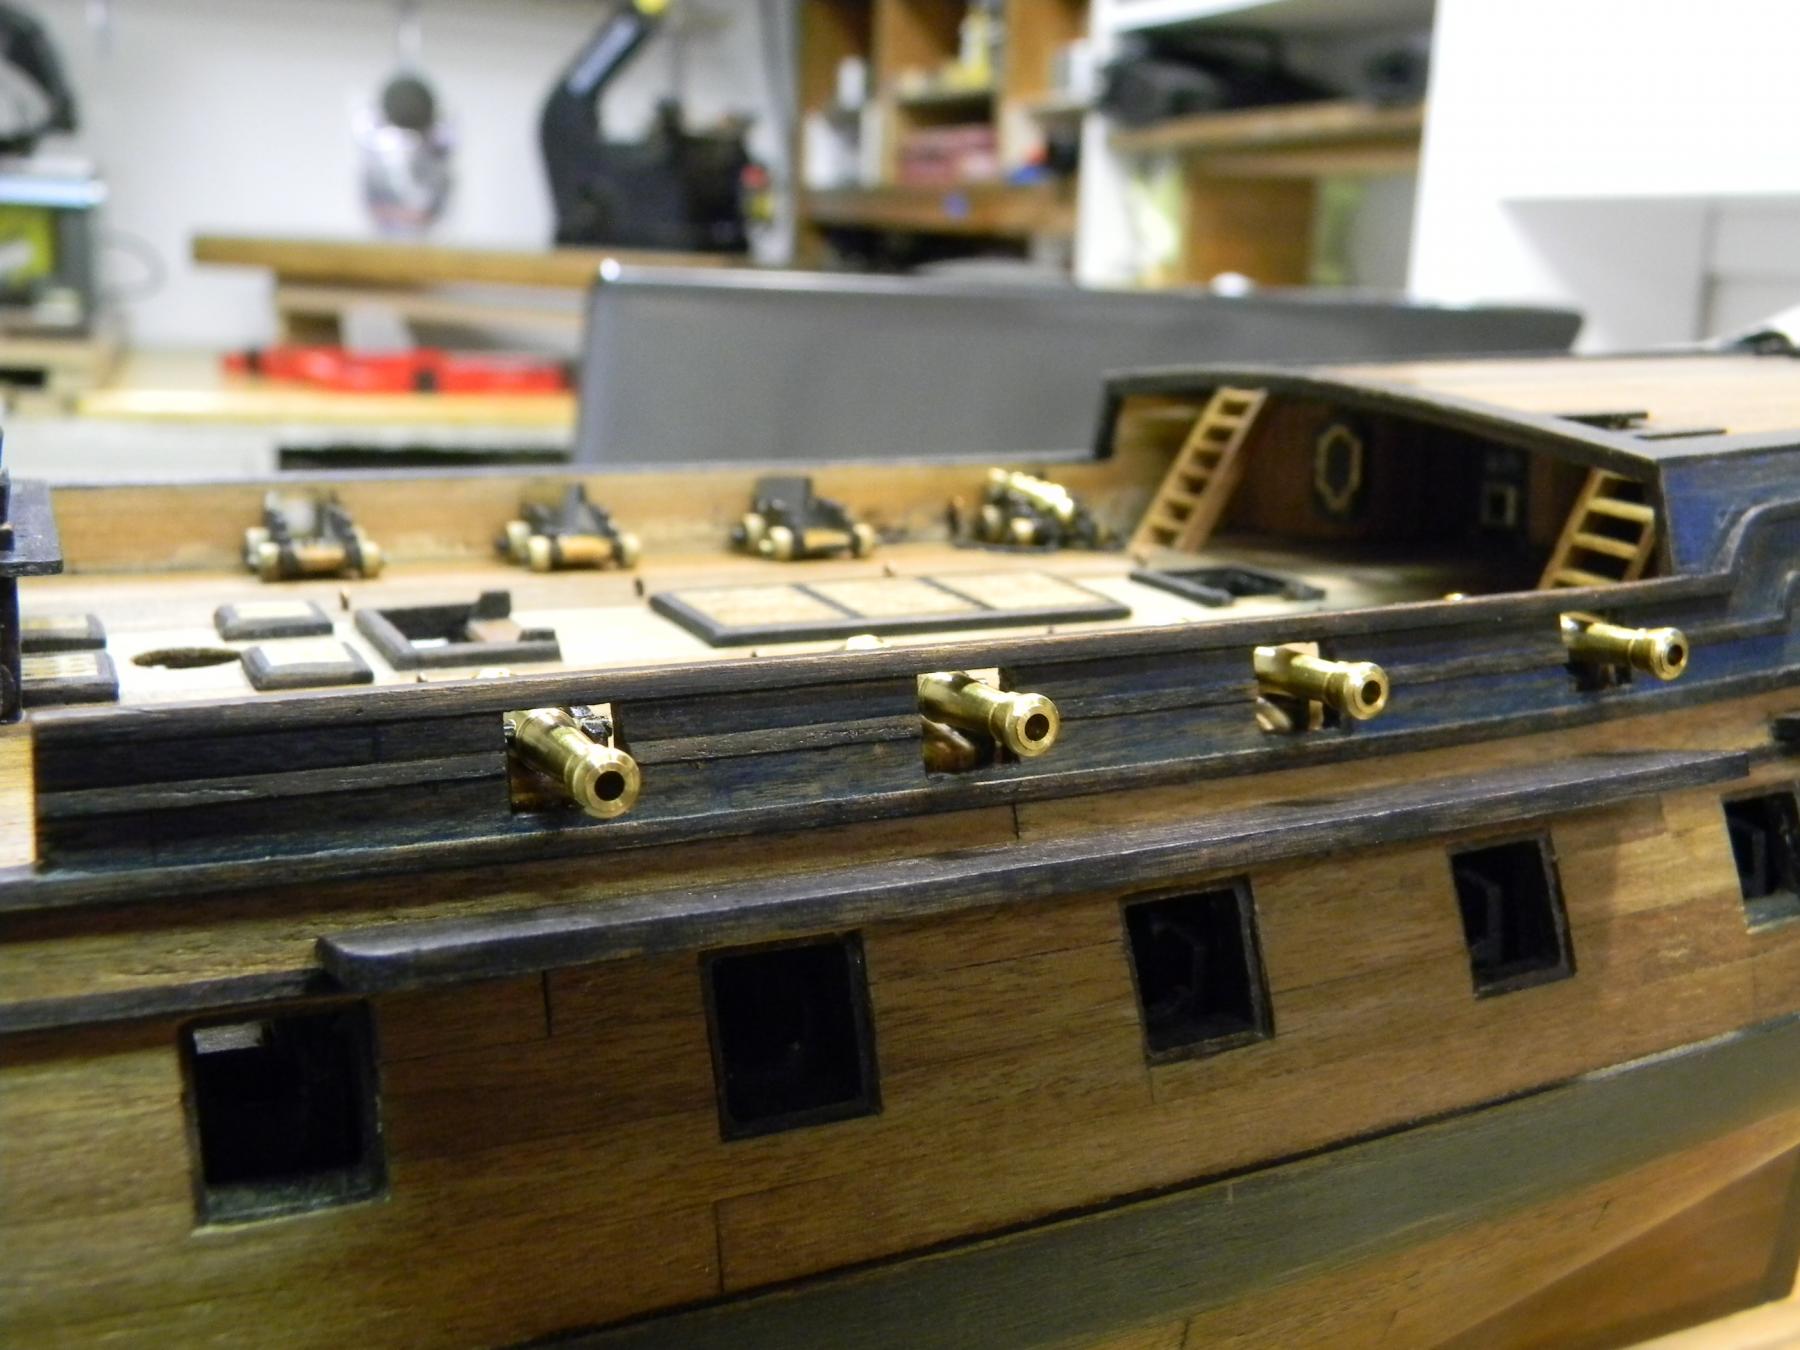
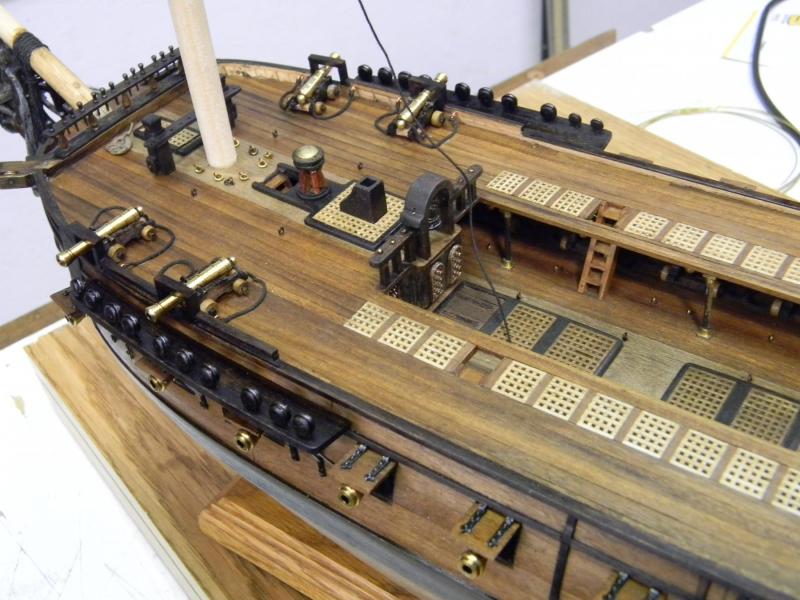
Thanks for the likes and looking in....my rendition of the French frigate continues. I'm liking the way the dark rich tones are coming together and is what I set out to do from the beginning. It's a work in progress and will likely take another year (??) at my current pace. JP


-
I will give that a try... thanks for your help and I'll let you know. JP
-
The collet drops out of the spindle with ease after loosening with the wrenches but the cutting bit seems stuck inside the collet..... just don't know if I'm missing something when it comes to releasing the bit from the collet??... which always seems to be difficult ........grease the collet perhaps???? JP
-
Is there a tip available on releasing the cutting bits from the collets? I have the Proxxon MF70 Micro Mill and am still learning with it...........the bits are difficult to remove and change out once a task has been completed. JP
-
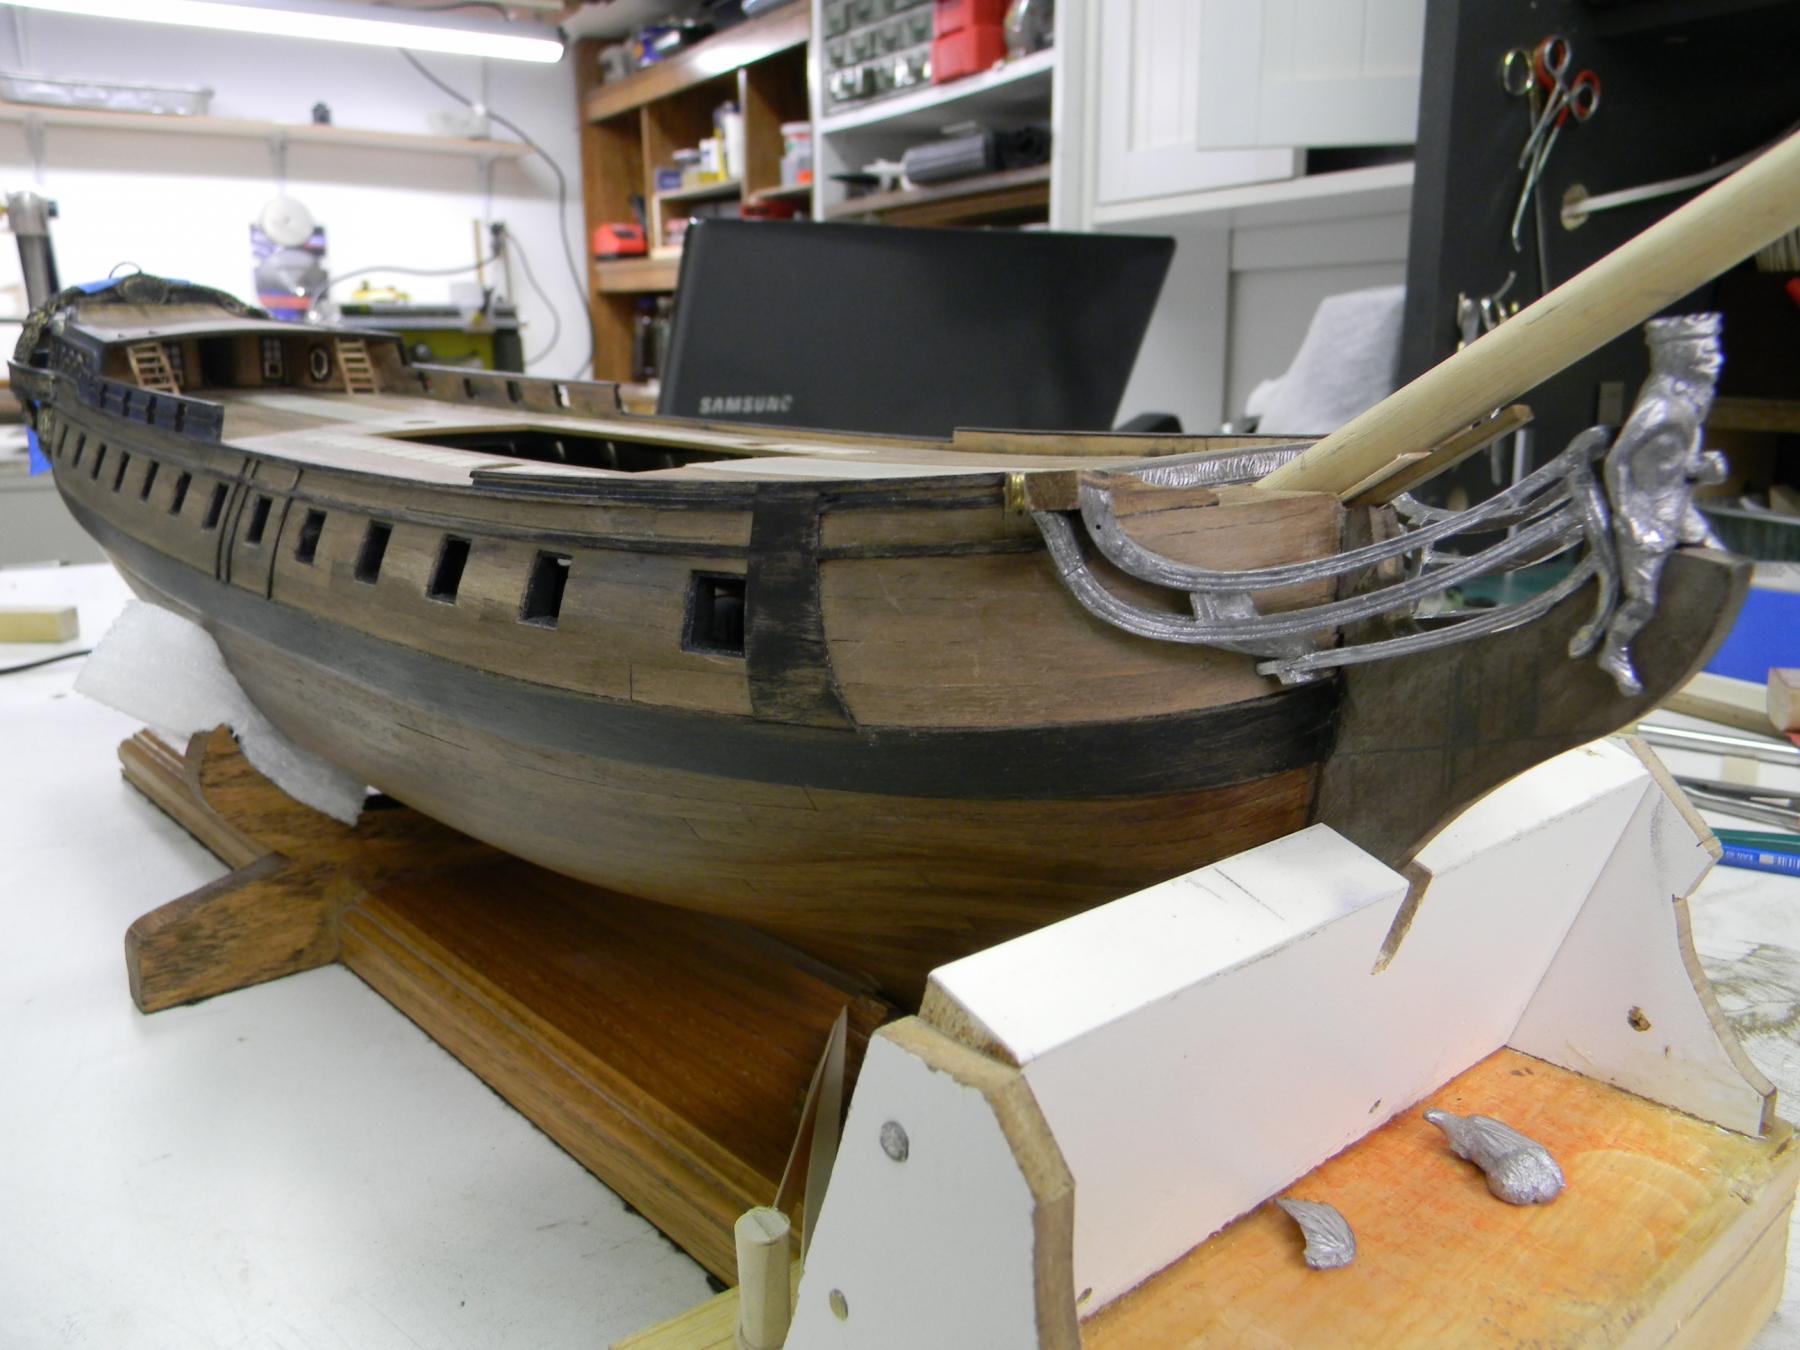
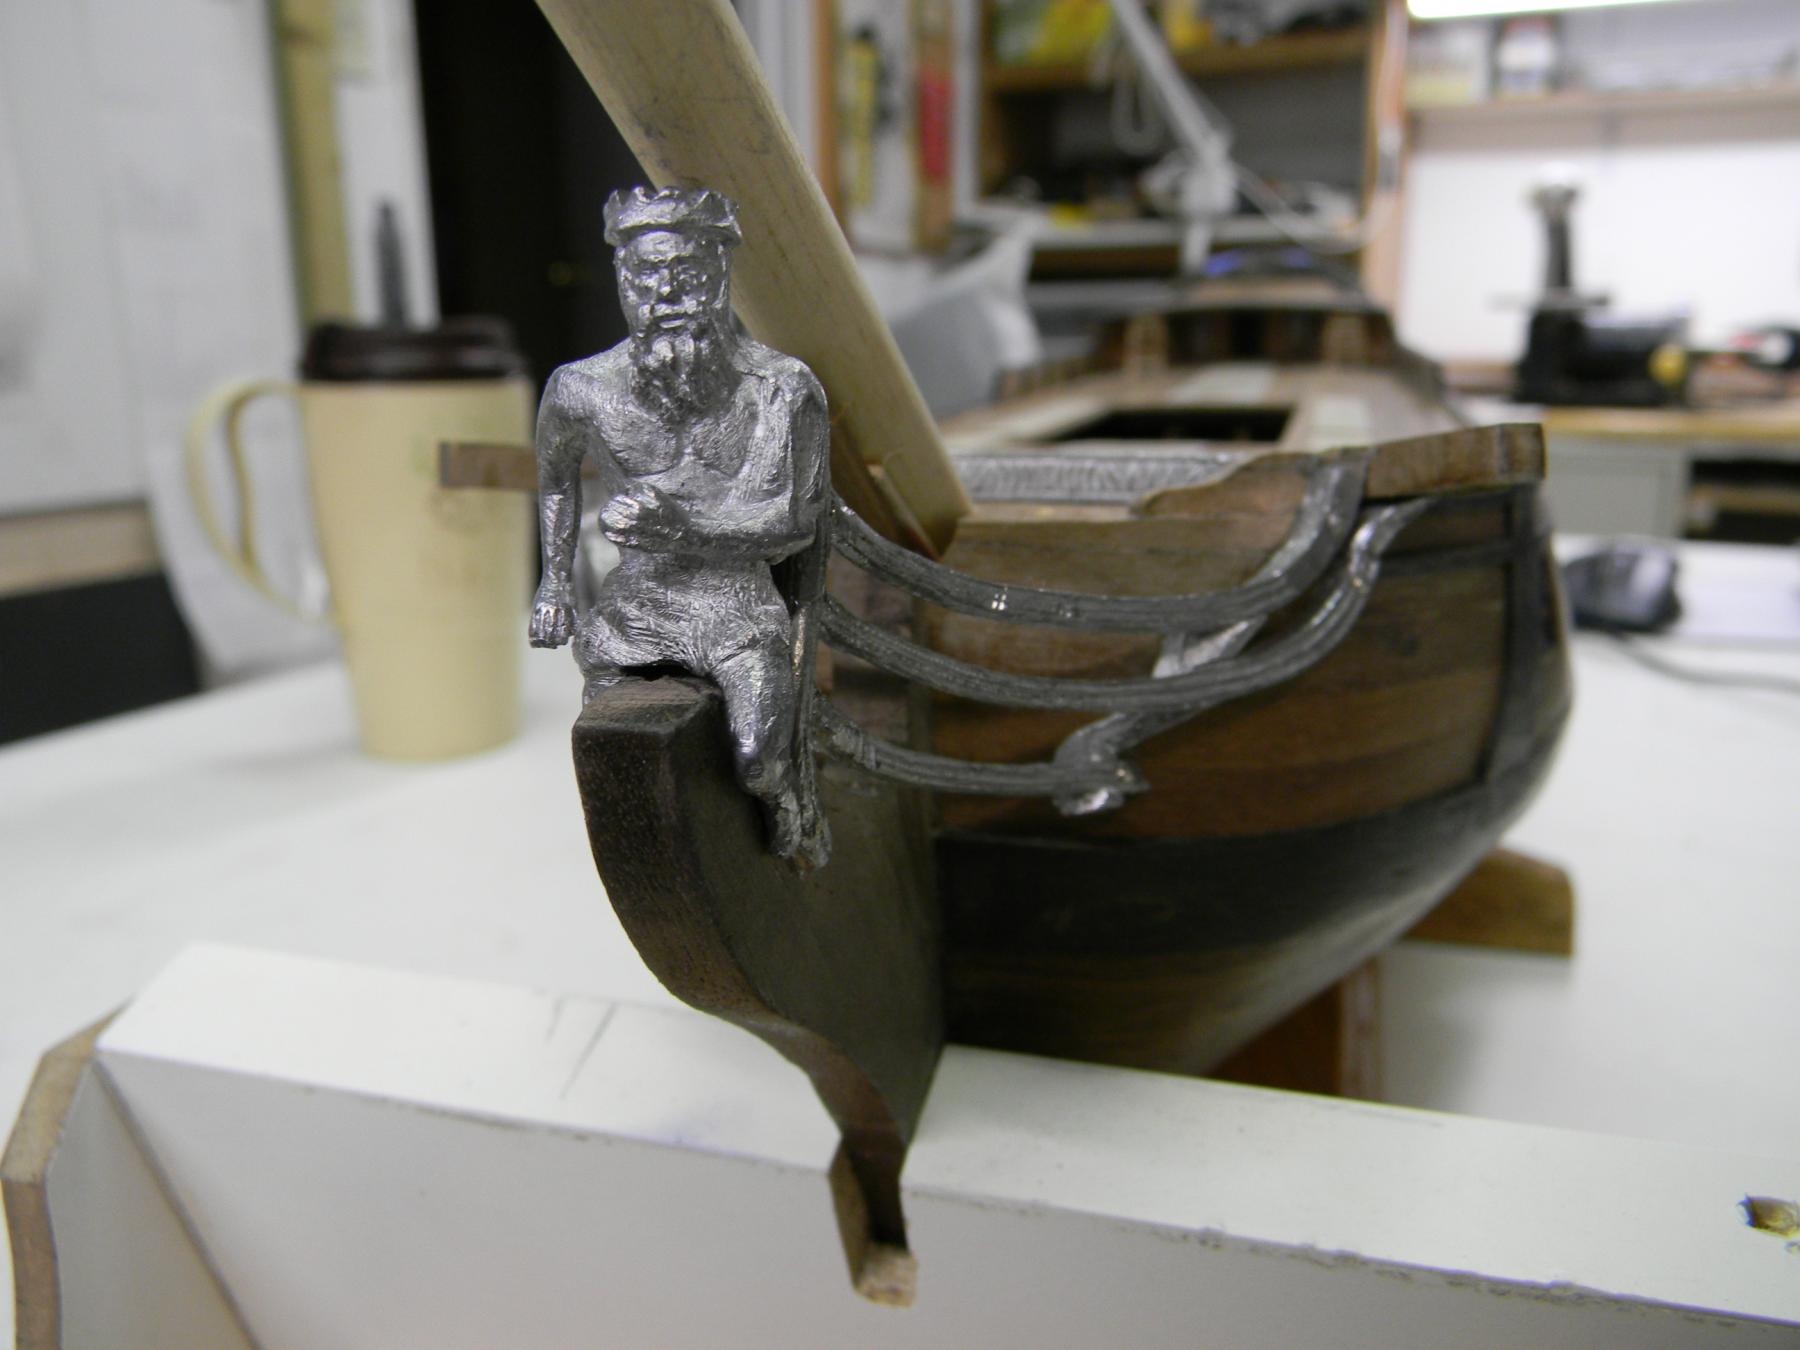
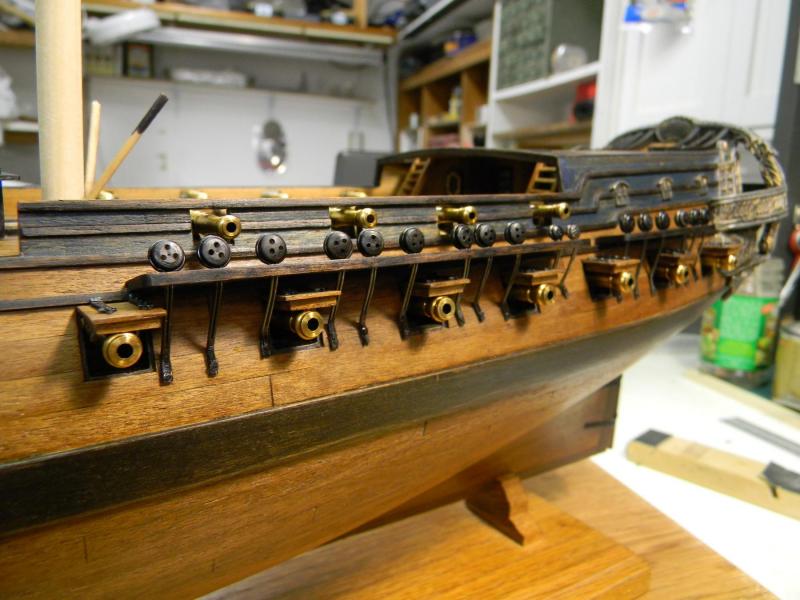
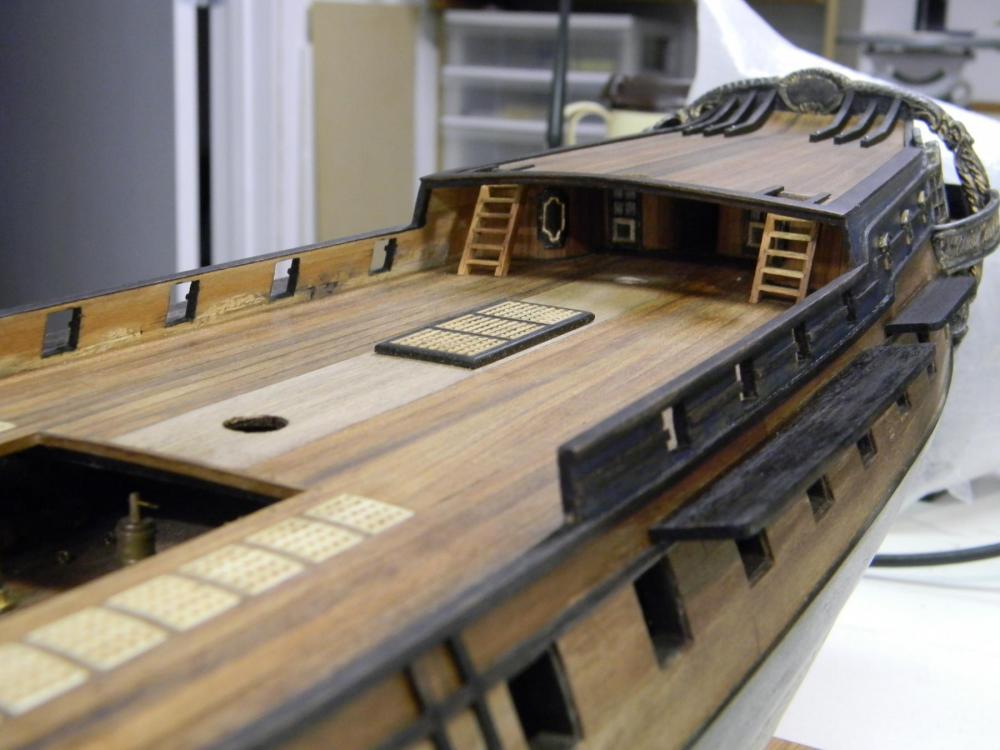
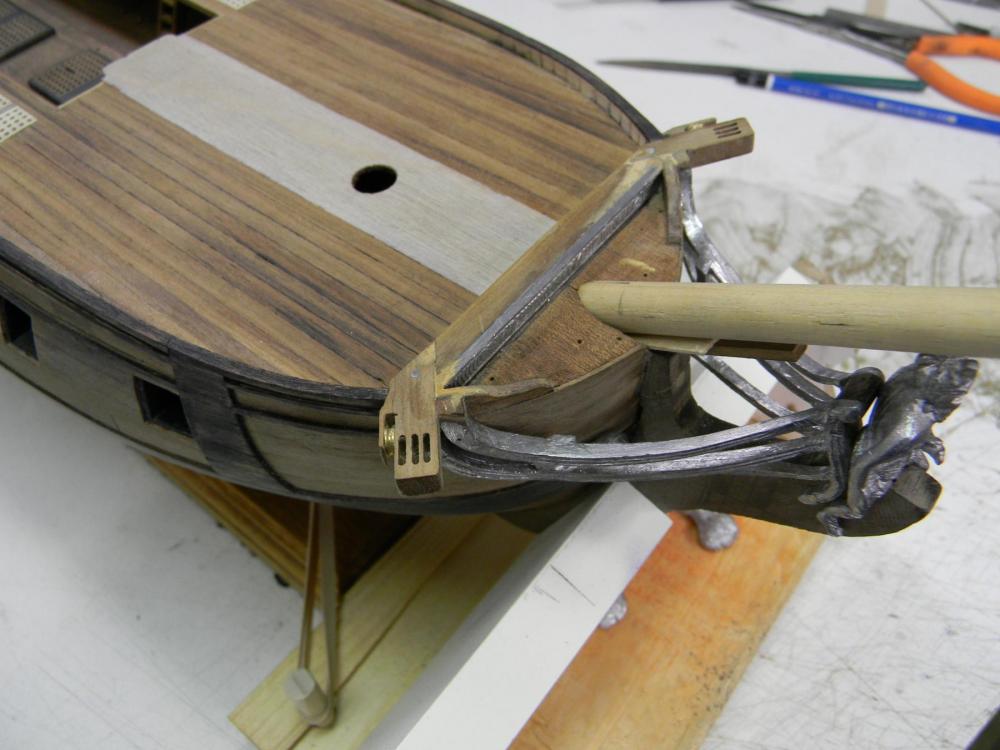
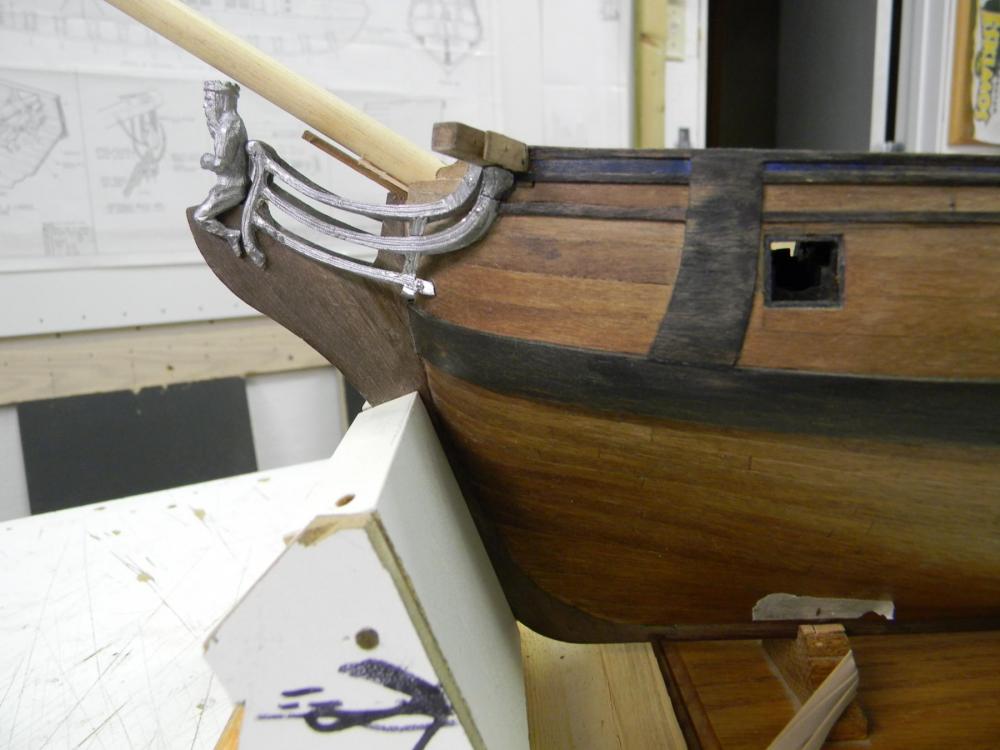
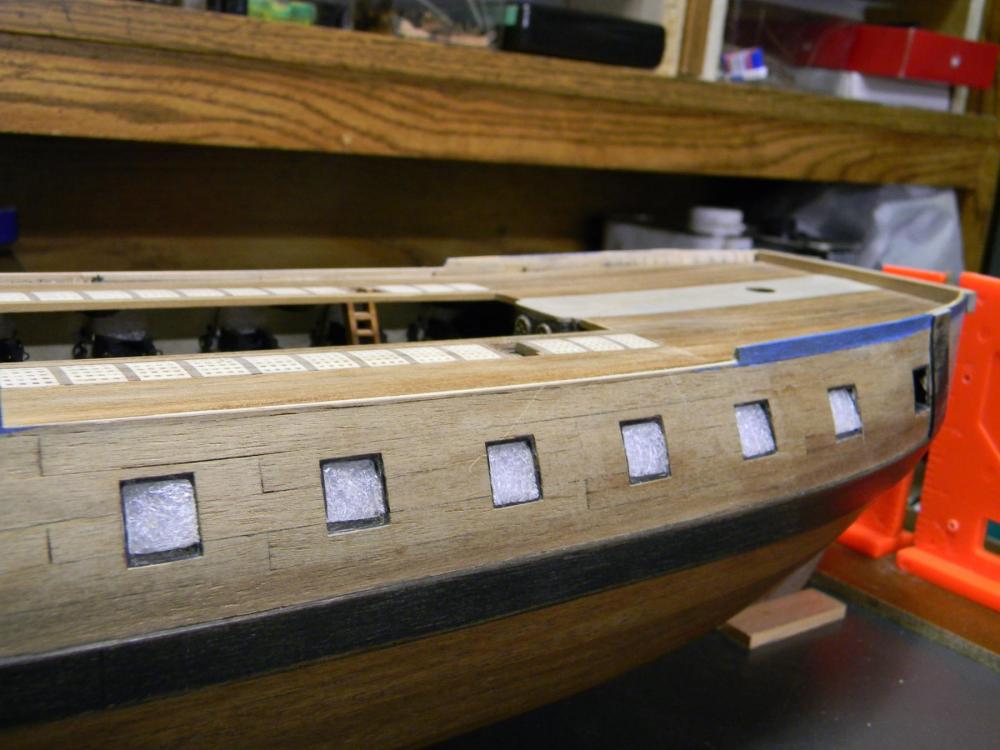
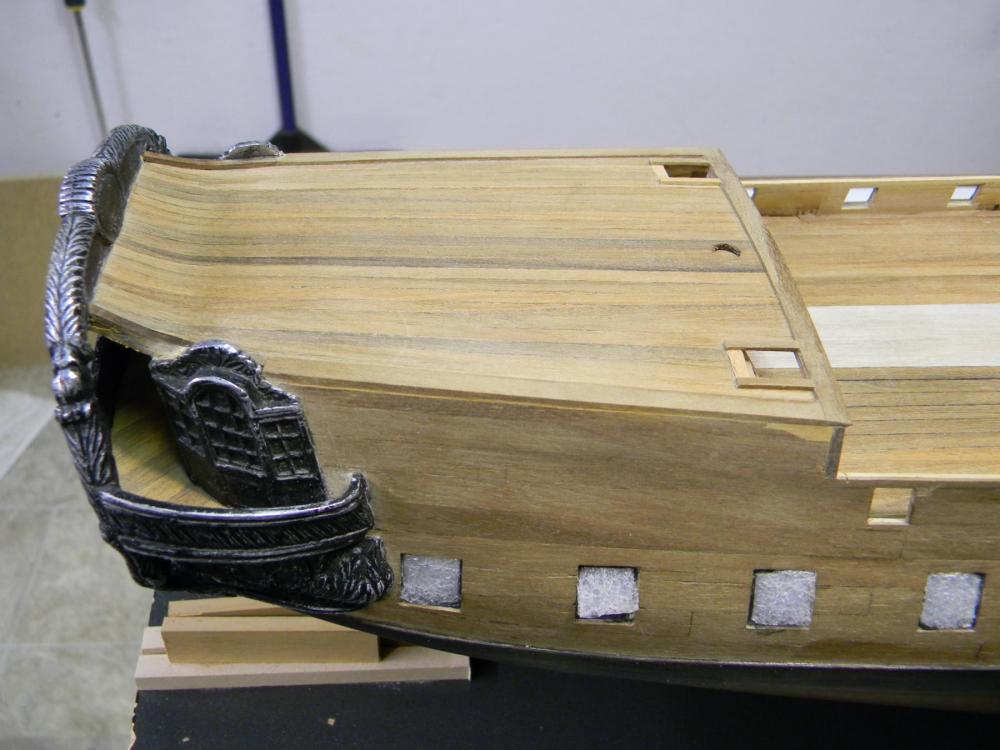
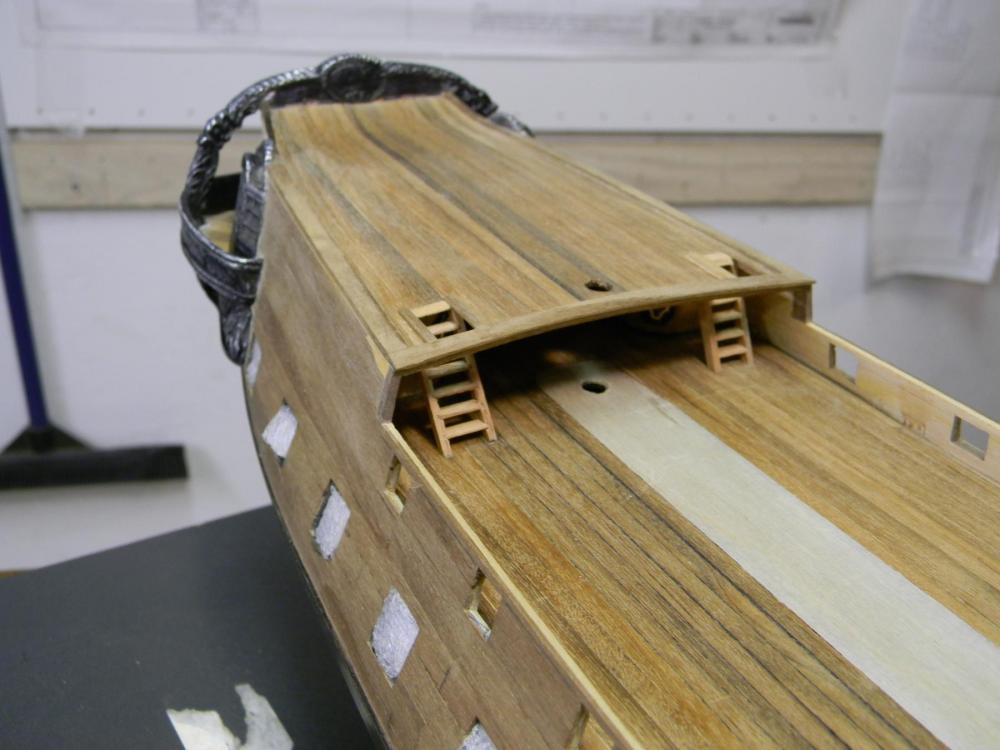
Head rails and Bow underway......the supplied head rails take some manipulation before they fit over the stem and they readily get nicked up as the metal is quite soft! However, Euromodel has supplied rails that are infinitely better than I would have been able to come up with. The images show stages in progress and I'm constantly revising my thoughts on just how final finishes will look. As additional components are added my thoughts change........... JP


-
US Brig Syren by Gahm - Model Shipways
Ponto replied to Gahm's topic in - Kit build logs for subjects built from 1801 - 1850
Sent a like but felt compelled to compliment you on the very high level of ability you show with this build....well done!!! JP -
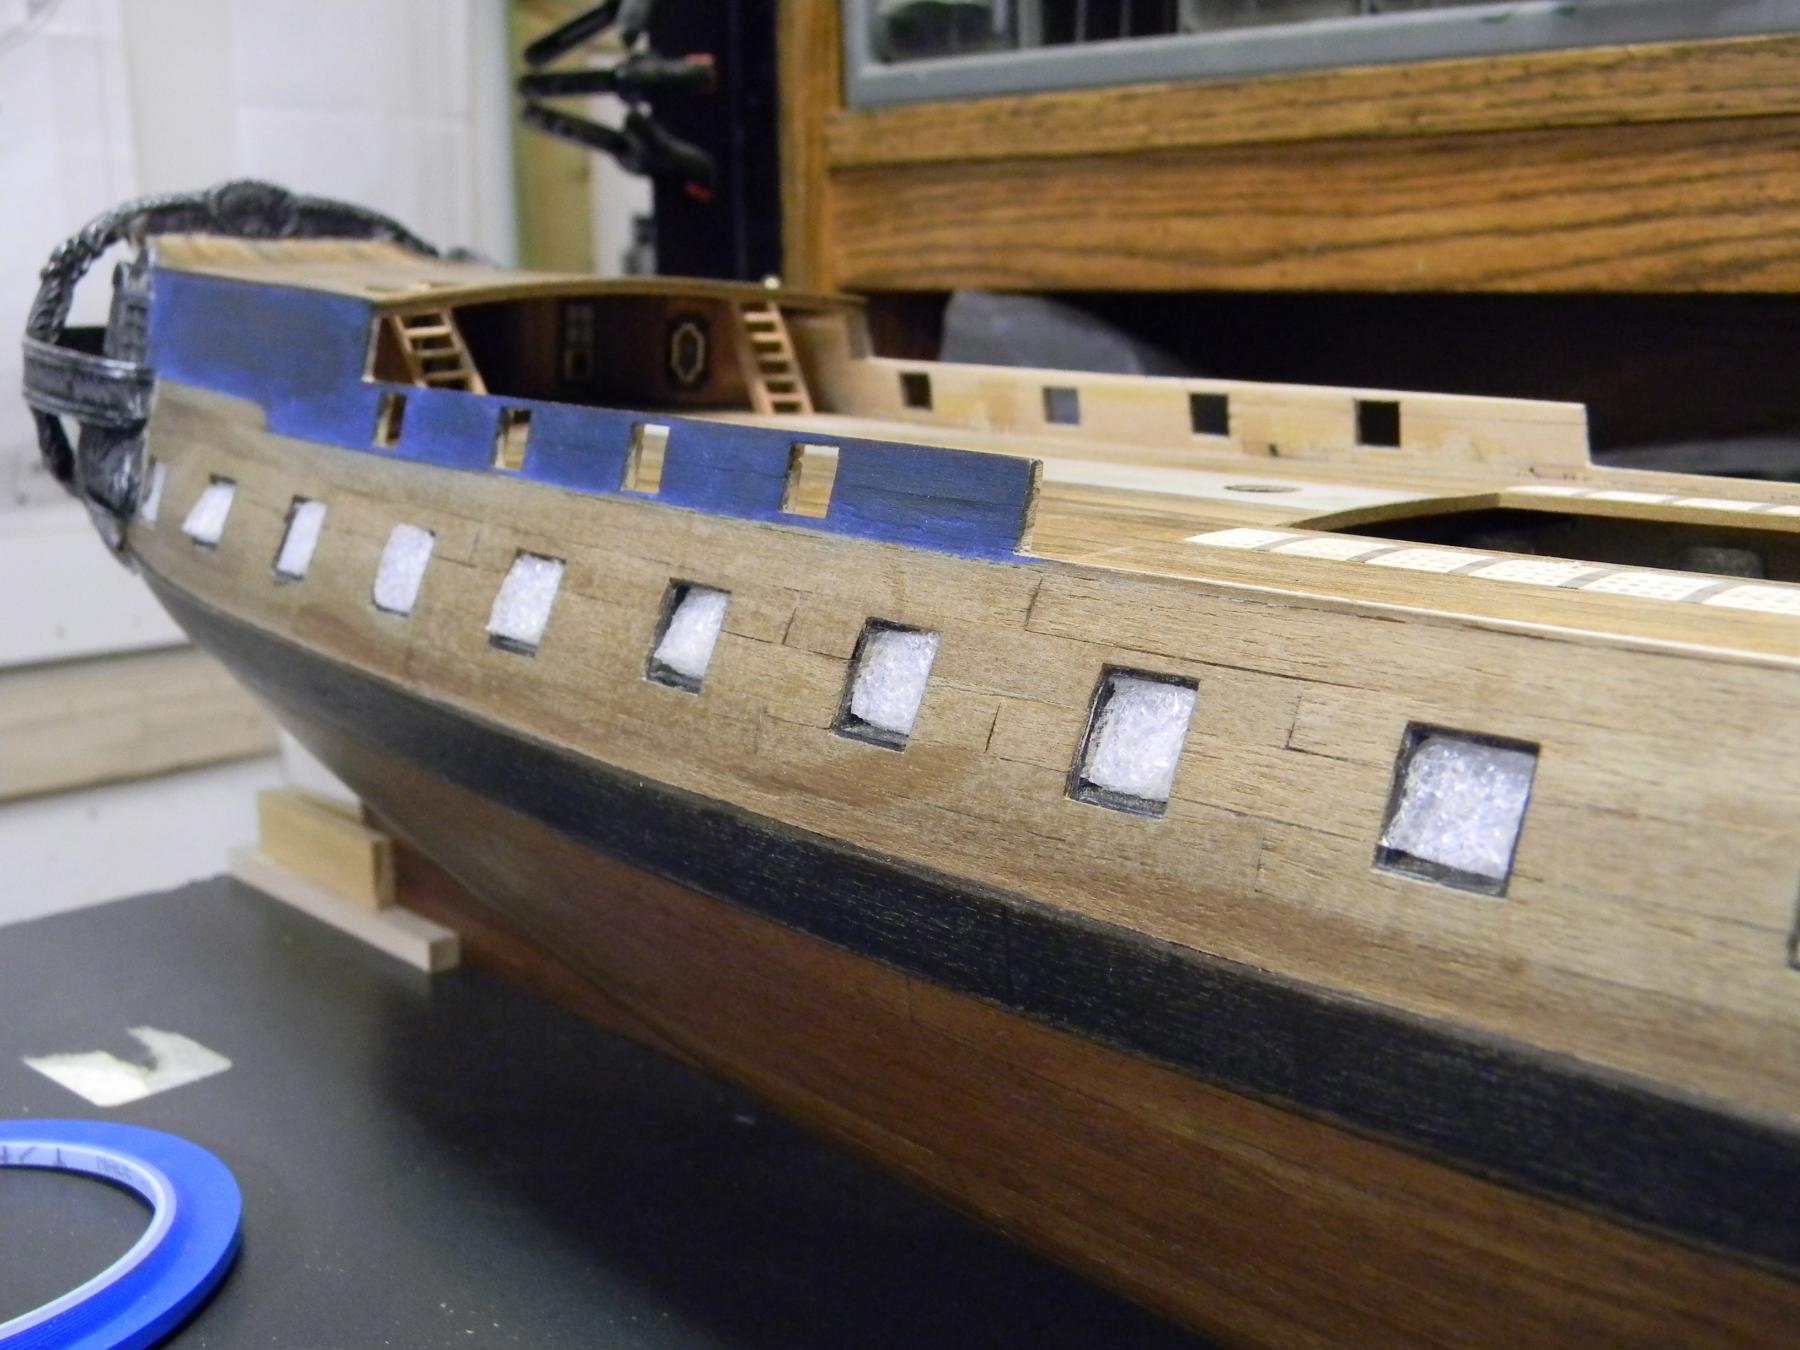
Nice to hear Mike,....the blue is simply a water based paint I had on hand (nothing fancy) -- it is a hardened puck of pigment that needs a wet brush to activate (just like back in preschool). I applied directly to the surface and sealed with a walnut stain after it had dried. I prefer a "dyed" look to the painted surface at this scale and I like the results. Some thin trim (wales) will form the edges of the painted area. I used l be in the complete natural wood look before but have grown to accept some color in my builds. JP
-
Thanks again for the link,......the work is superb! I'm wondering if Euromodel took some liberties with the stern castings as all the links seem to show varying version(s) .....? JP
-
Just caught up with and looked in on this log.....some very impressive skills being displayed here!!! JP
-
.... which "picture" are you referring to...? JP
-
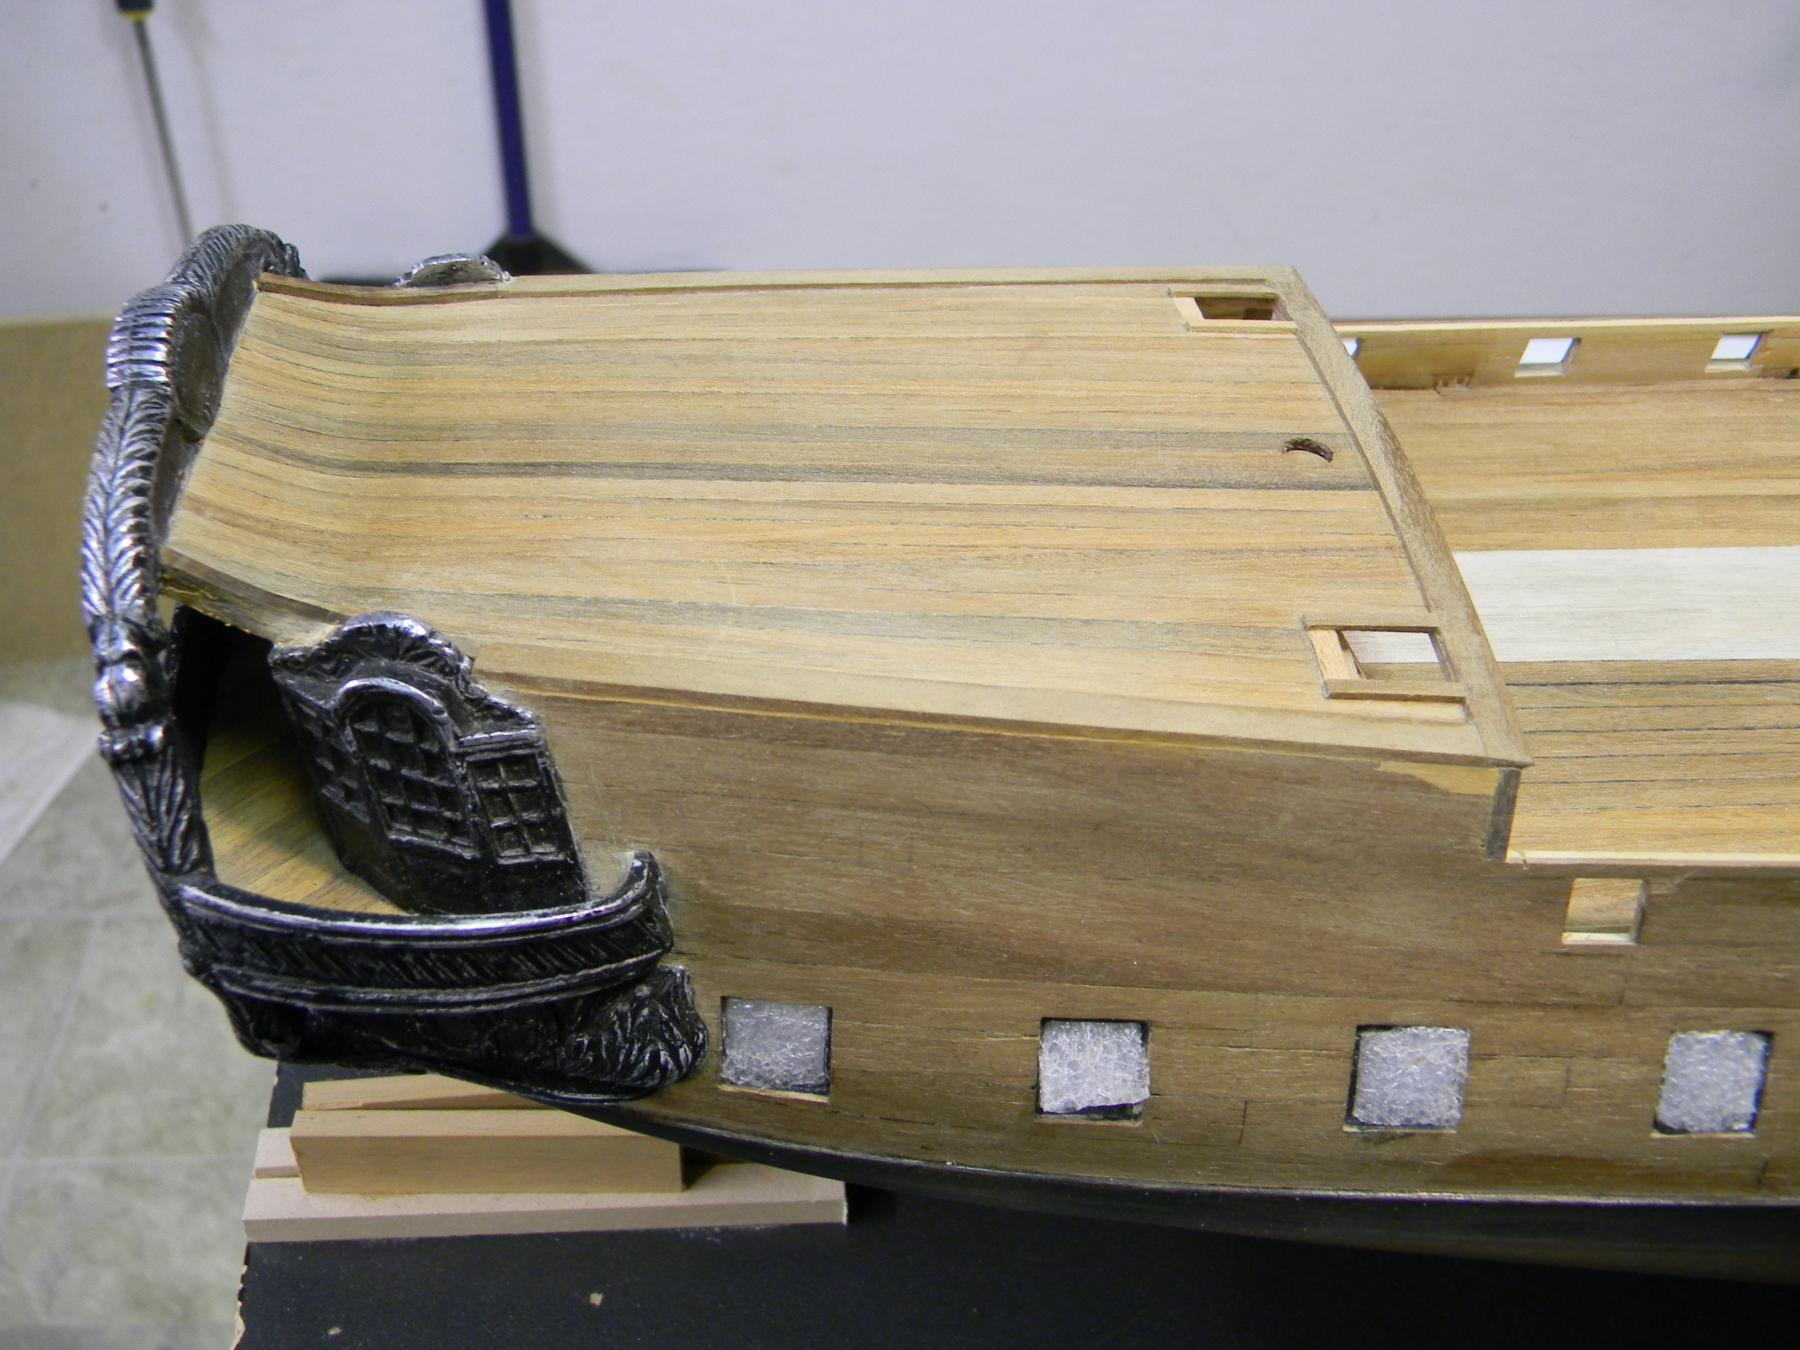
Hi Kieth,... the castings are secured and will have the black as a base. A gold value will be dry brushed over the high points later. I may pick out the window frame details in a white if I feel steady enough....LOL. JP
-
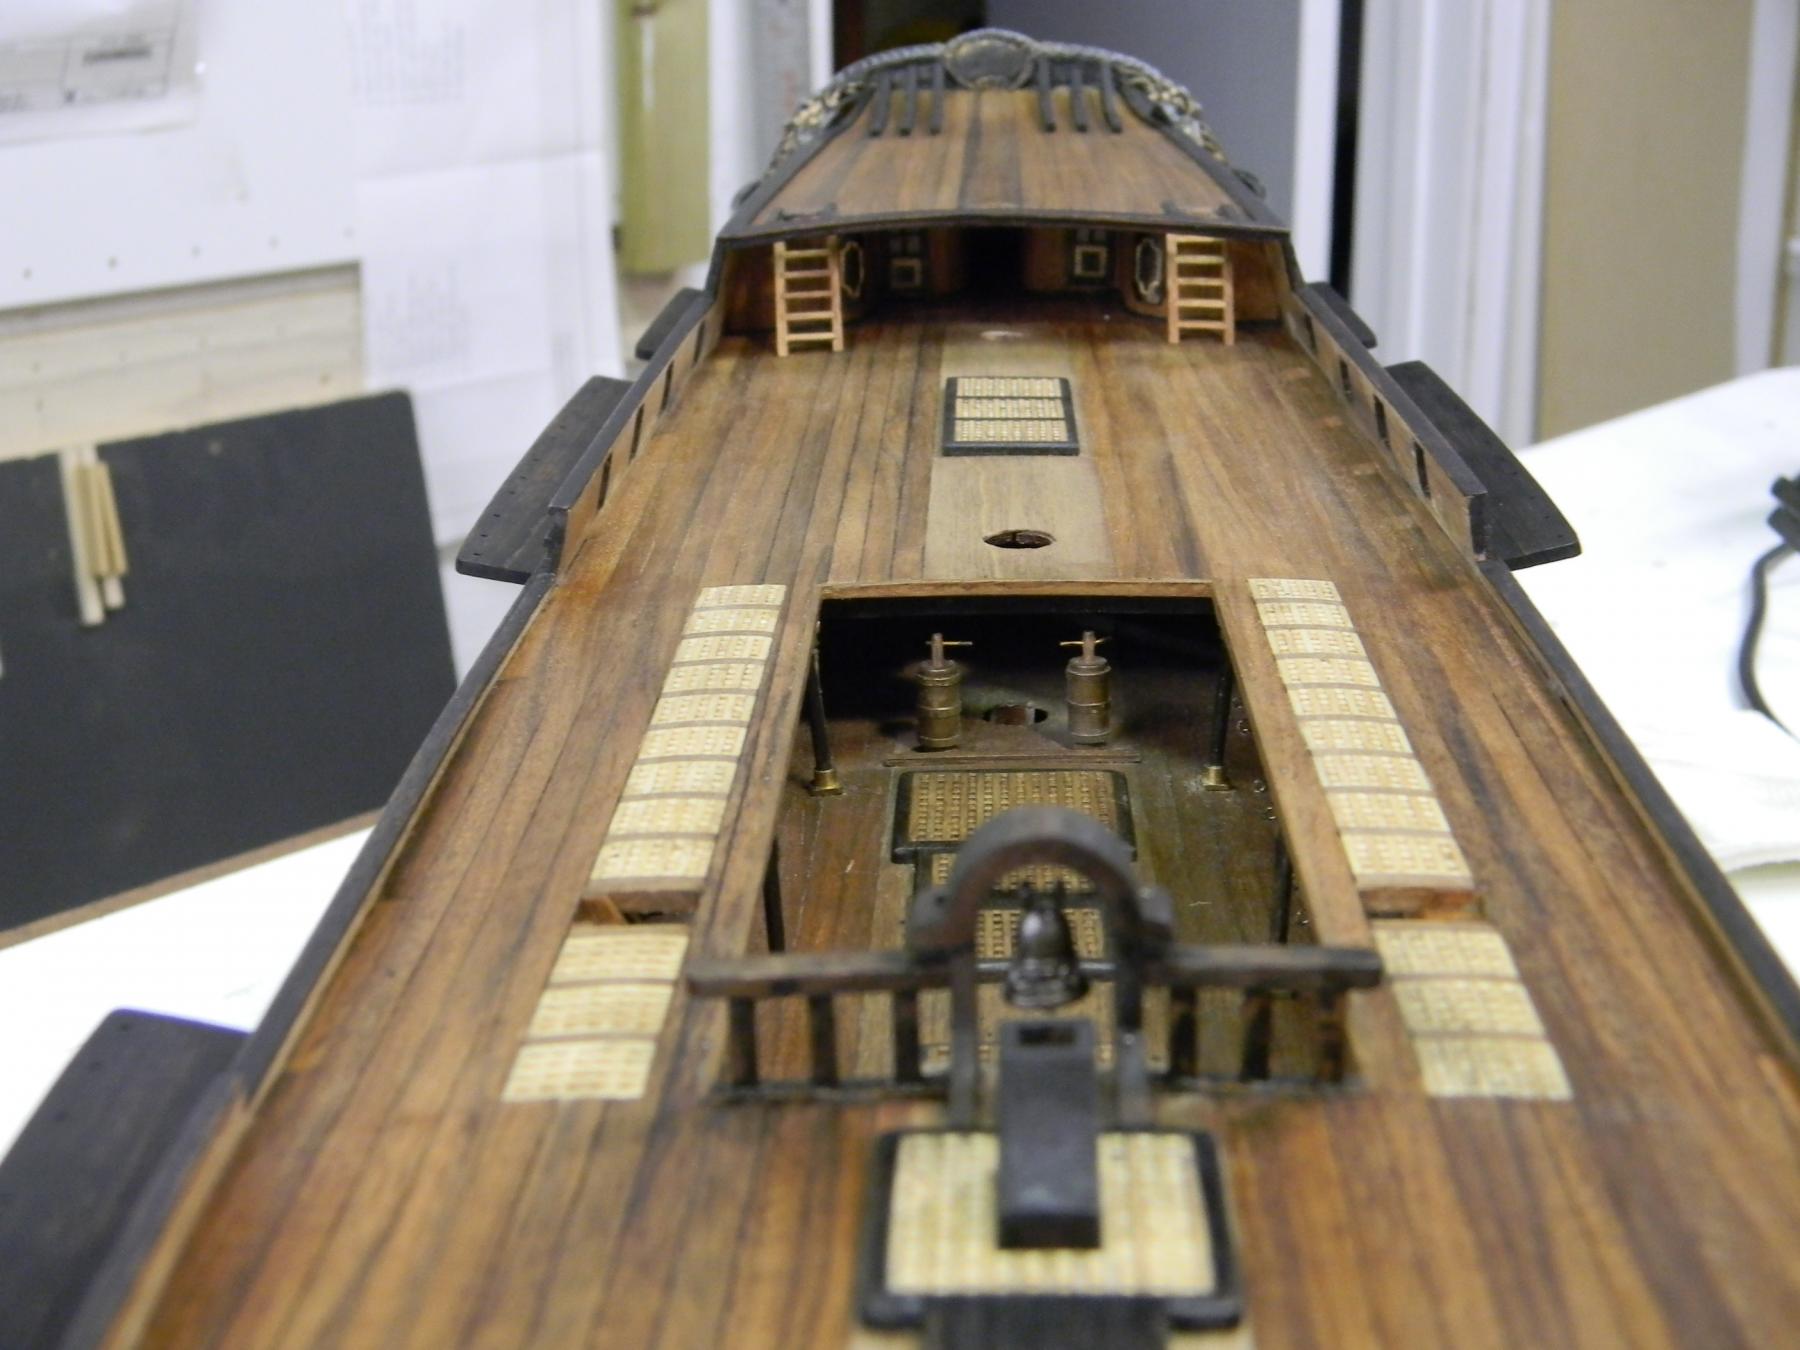
Le Renommee update,... slow but steady progress. I'm more or less happy with the build as a whole but unhappy if I focus on specifics (if you know what I mean....). For example, I constantly struggle to maintain perfect symmetry when port and starboard are compared. The minor differences tend to disappear as I step back and appreciate my efforts...... JP


-
Making Shackles my way…
Ponto replied to Thanasis's topic in Metal Work, Soldering and Metal Fittings
Thanasis....Thanks for taking the time on a wonderful tutorial.......and I'm guessing mere coincidence on technique duplication from days gone by.... JP -
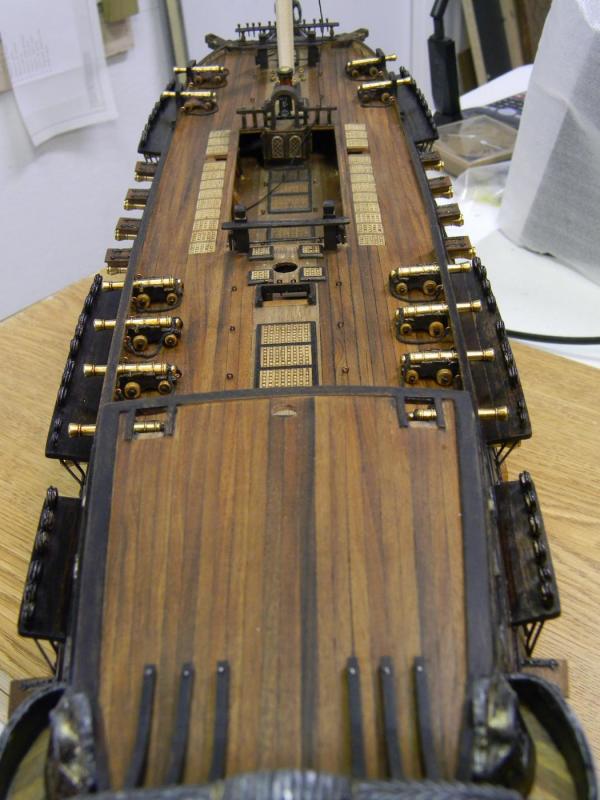
Those are the segments for the gratings, indeed.........I chose to use the pressed wood gratings on my build long ago as I felt the scale was more indicative and accurate as opposed to the supplied wood gratings. JP
-
Superb efforts on the stern,... looks like you've overcome some hurdles that seem to be inherent with the kit !! jp
-
"...learning curve"....... you got that right---- usually one step forward and two back in my case.........LOL j