HOLIDAY DONATION DRIVE - SUPPORT MSW - DO YOUR PART TO KEEP THIS GREAT FORUM GOING! (Only 13 donations so far - C'mon guys!)
×


Ponto
-
Posts
333 -
Joined
-
Last visited
Content Type
Profiles
Forums
Gallery
Events
Everything posted by Ponto
-
First time rigging - being organized
Ponto replied to RichardG's topic in Masting, rigging and sails
-
Well done,... a stellar effort on both the build and log --- JP
-
Well gents, it looks like I need to retract my comments related to the thickness of the walnut stock that the rudder was supplied on. It was indeed adjacent to the supplied stem on stock that was 7mm thick....sorry to have misled any prospective Le Renommee or Euromodel builders. The task of tapering the these pieces on multiple axis has turned out to be quite challenging and my struggles will continue, I'm sure........ JP JP
-
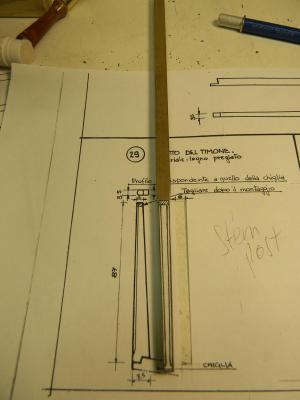
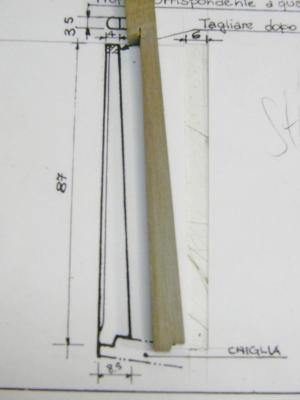
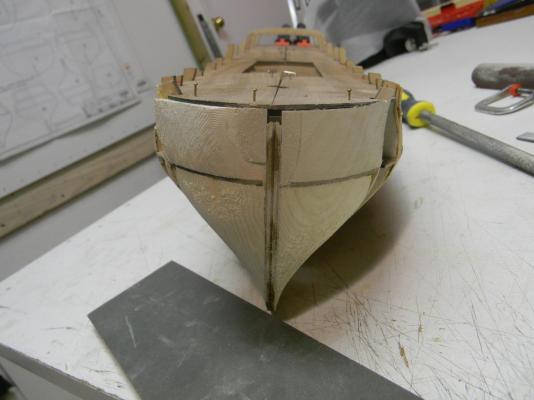
Thanks for sharing Keith,... I think.... lol... The stern post is pretty much done (see images) and the keel will follow. I came across another "anomaly" on the plans so my advice with this kit ( all kits?) is to triple check everything before something is considered done. I was happy with the stern post until I found a discrepancy between the actual scale of the plan and the noted vertical dimension shown --- 87mm --- the actual measurement on the plan is just over 83mm. I thought the scaling snafu may have come form the photocopy but it accurately copied the supplied plans...... I haven't cut the post from the blank just yet so it is salvageable......builders beware............ and thanks for looking in. JP
-
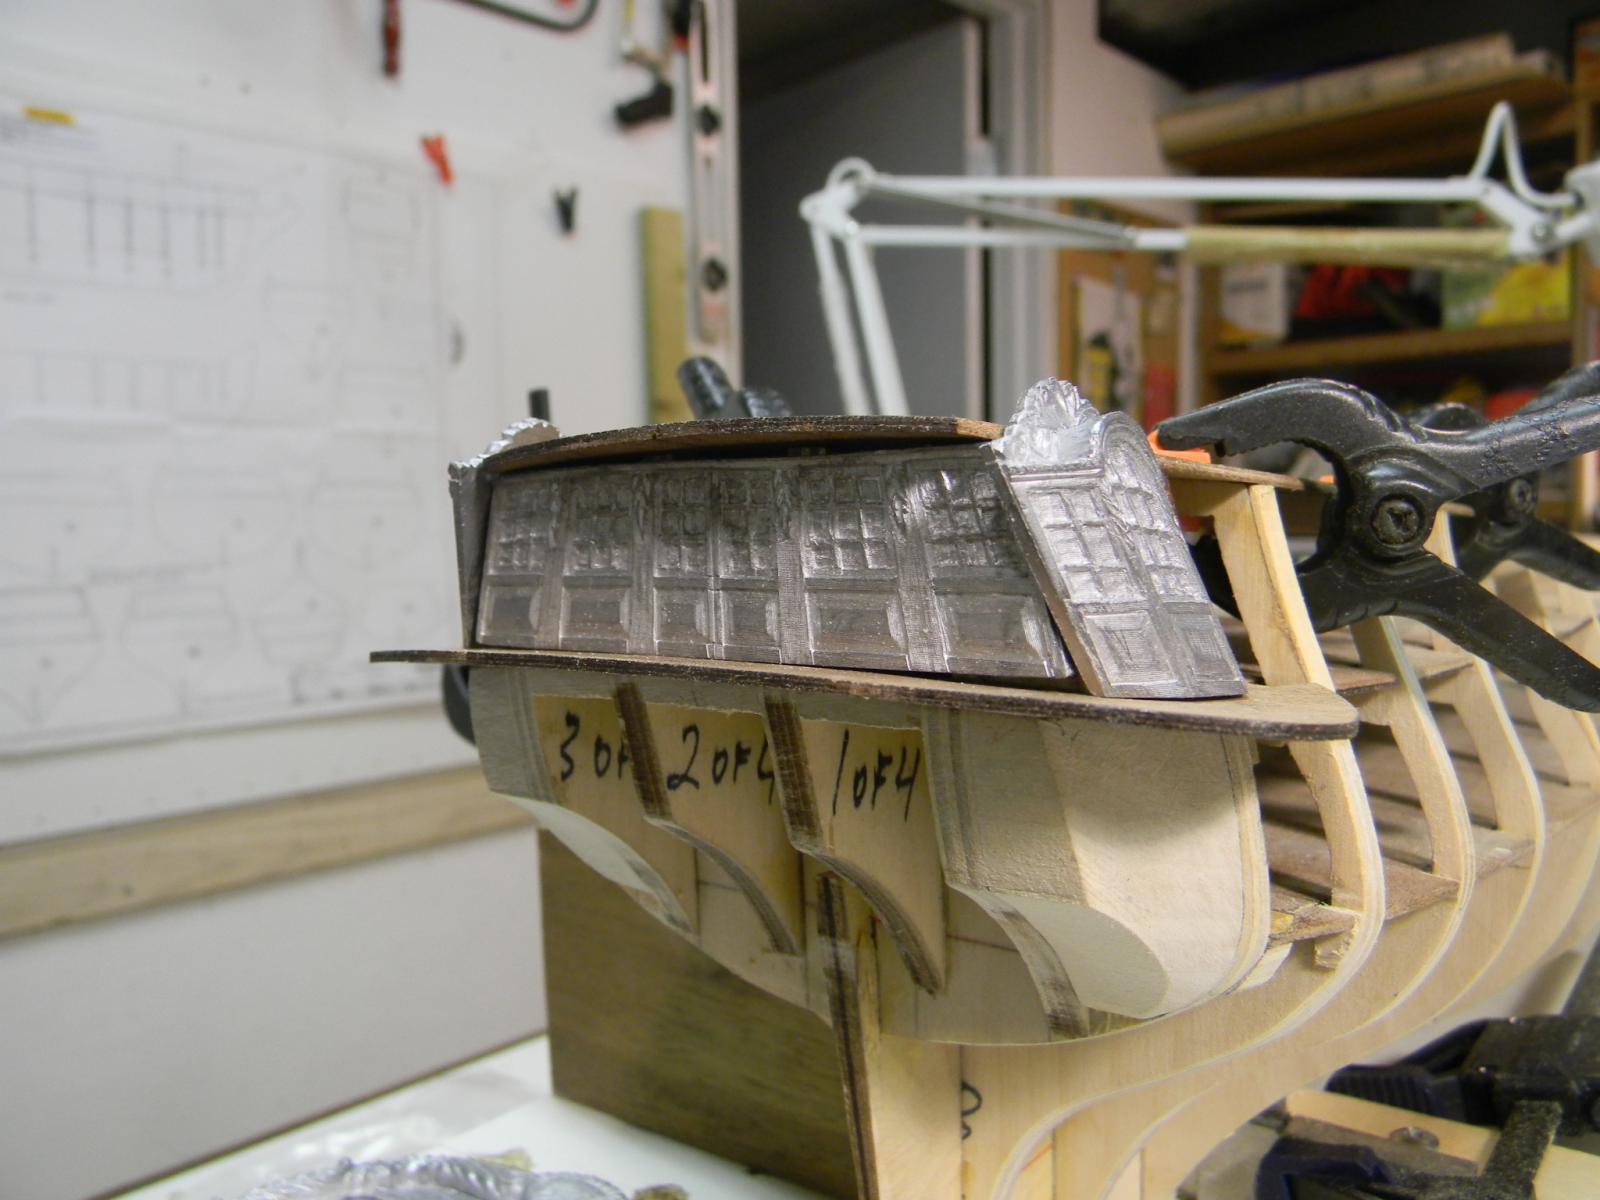
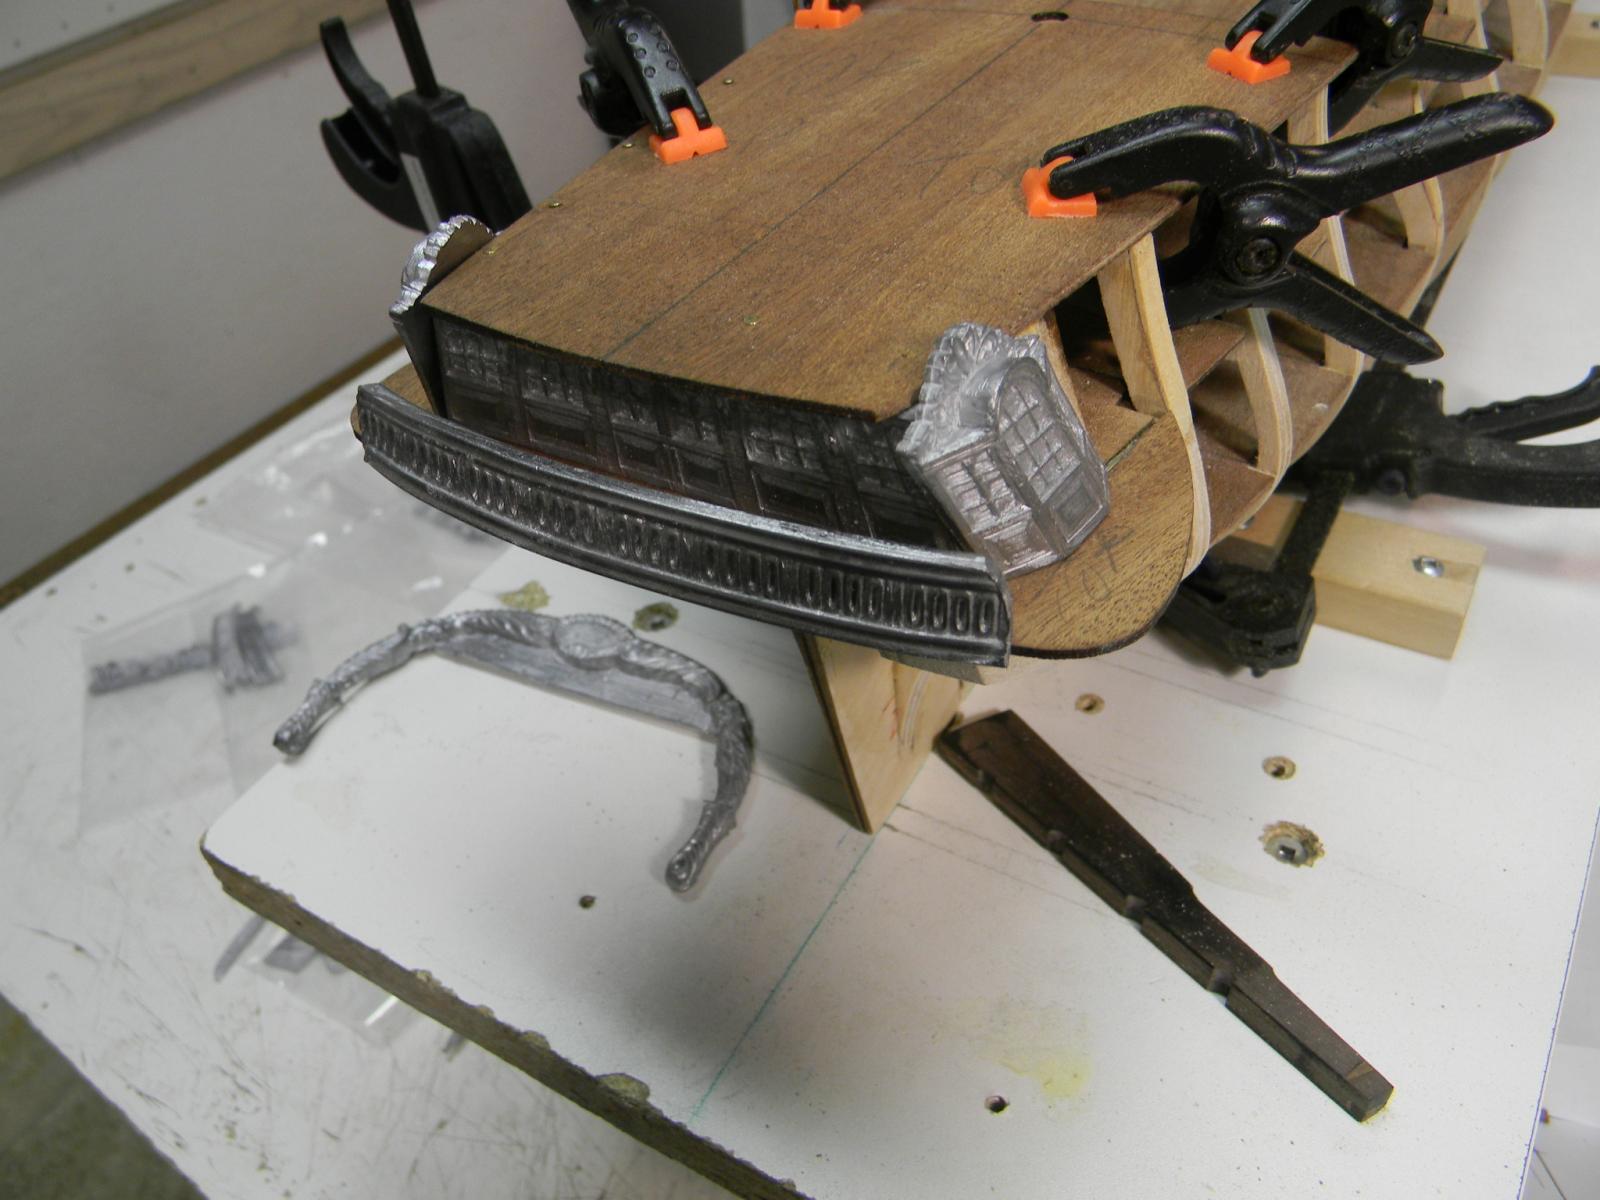
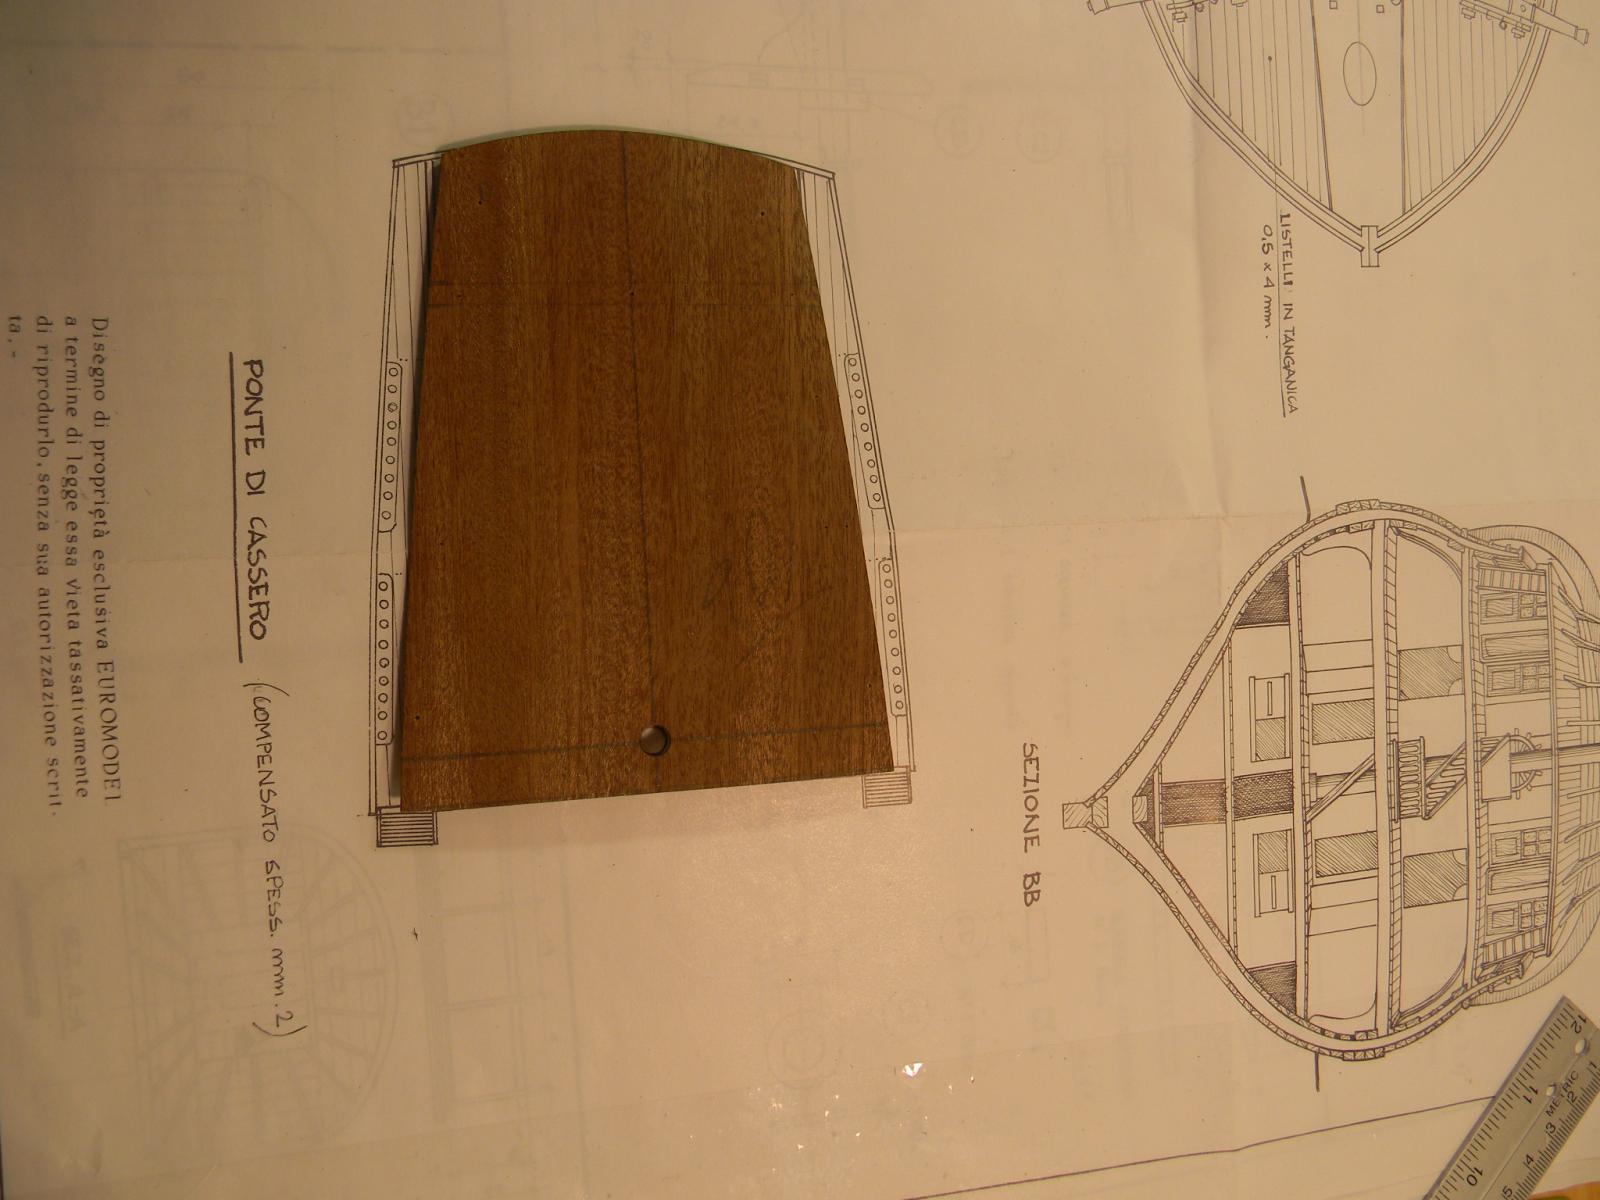
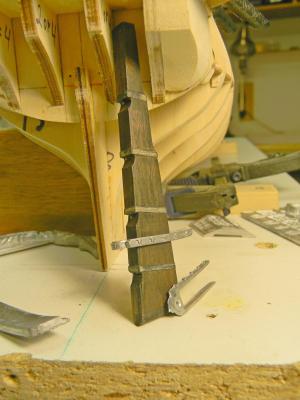
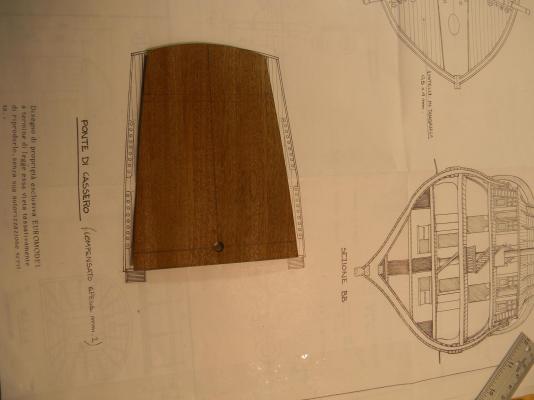
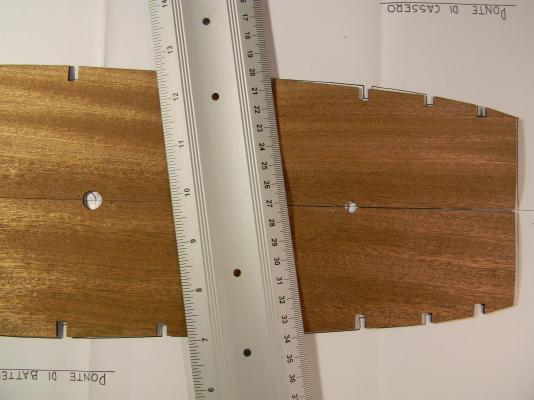
A quick update to my slow progress. I'm concentrating on the stern these days and trying to plan for the eventual placement of the various castings. I think you can back yourself into a corner very easily without some forethought. A note should also be added with regard to the rudder. It needs to be tapered from top to bottom and front to back at the same time.... quite tricky I found, but necessary since the shape of the rudder and stern post will dictate the shape of the hull toward the stern. Related to the rudder is the questionable casting supplied the kit.... you can tell from the image that they are grossly over scale and I wonder why they would be supplied in the kit to begin with. Also, the plans call for the upper portion of the rudder to be 7mm but the supplied piece was only 5mm. It needs to be modified.........this is a kit that simply can't be built straight out of the box. JP


-
...everything looks shipshape,... I've yet to tackle anything of this magnitude for I fear it is something beyond my skill set. It looks like you're a natural. JP
-
Microlux Tilt Arbor Saw Problems
Ponto replied to capnharv2's topic in Modeling tools and Workshop Equipment
This is an oldie but a goodie as I'm experiencing "all of the above" with my Proxxon FET......alas, I can no longer access the article ---- is it still available please----- JP -
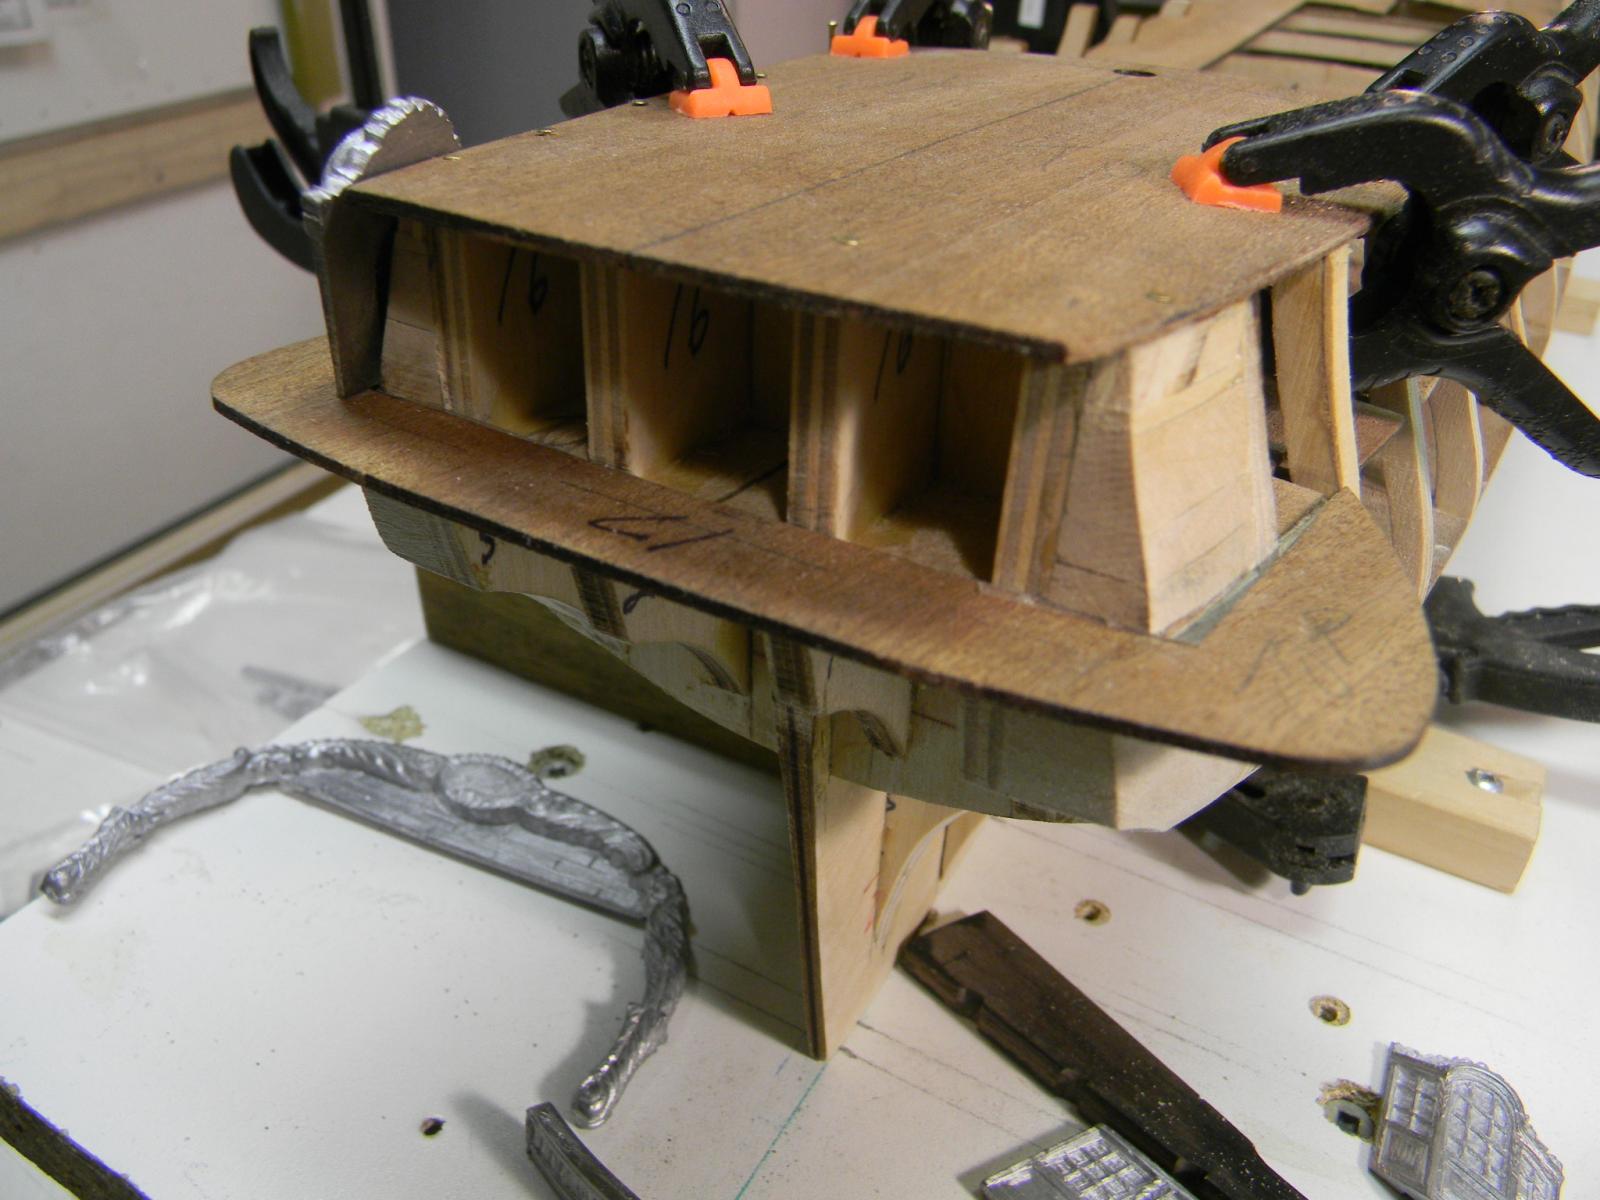
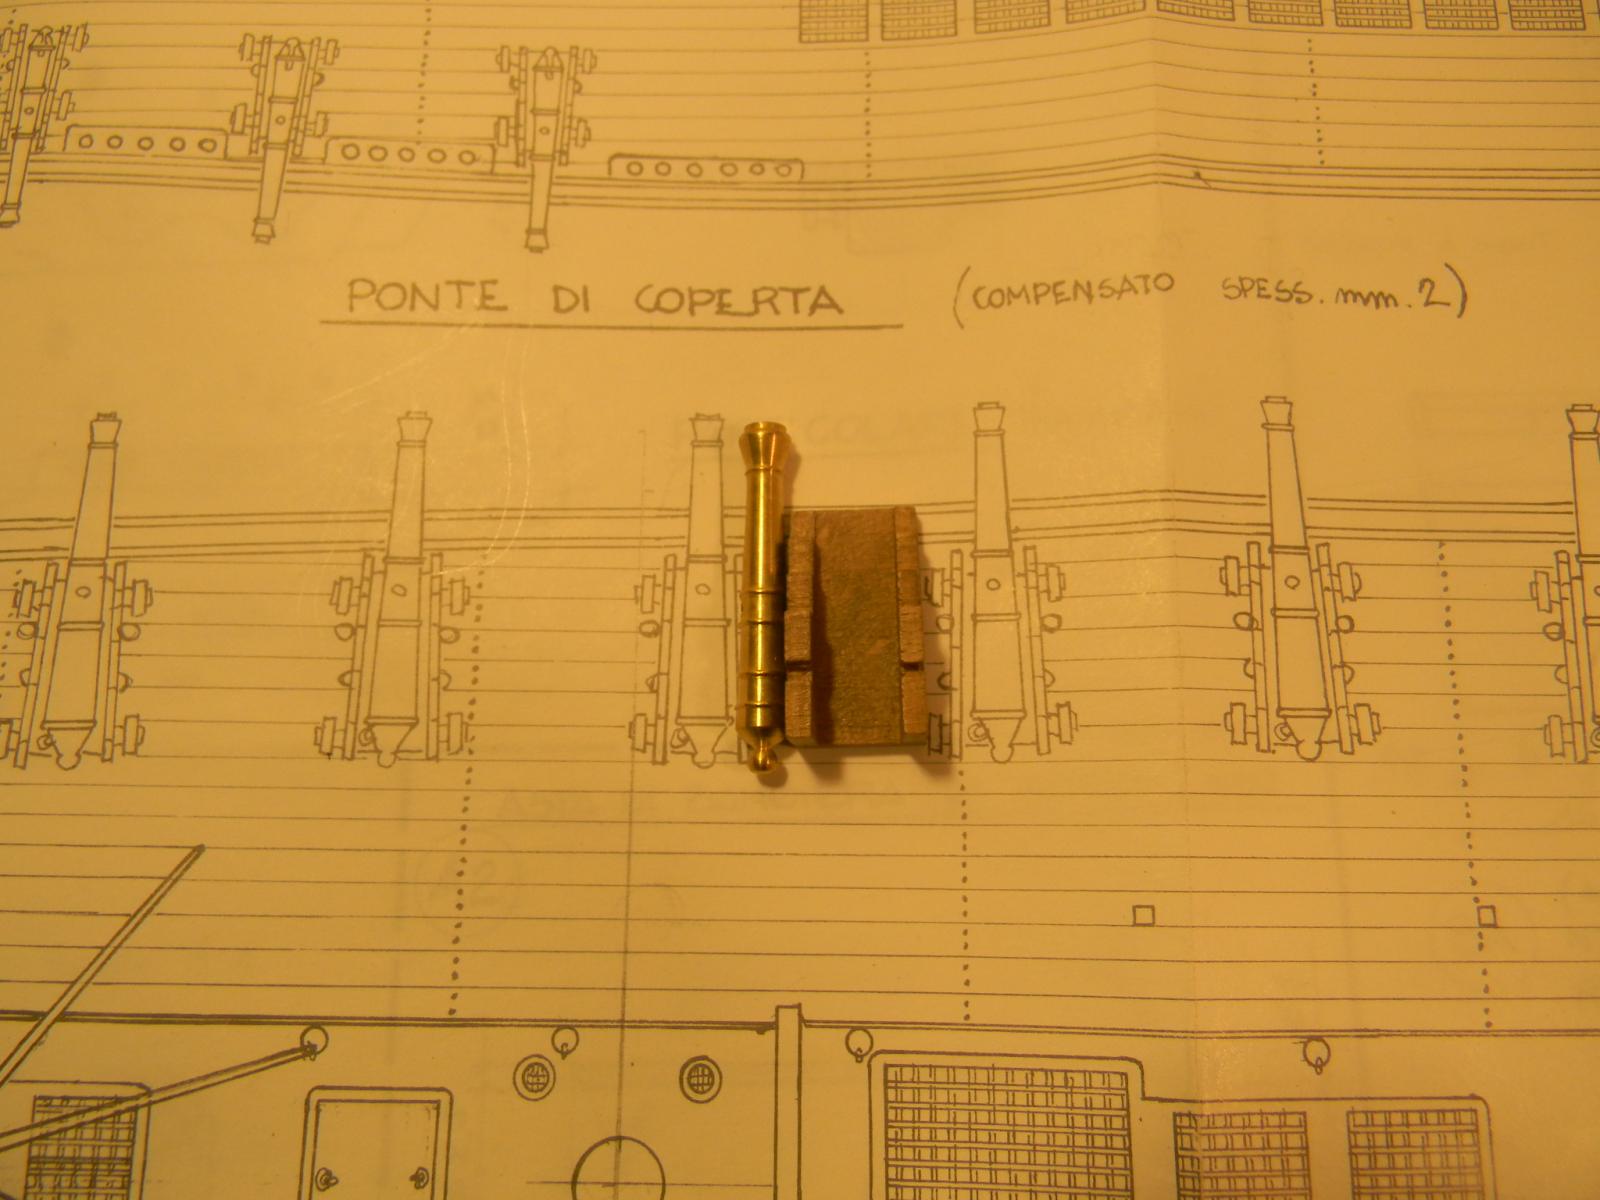
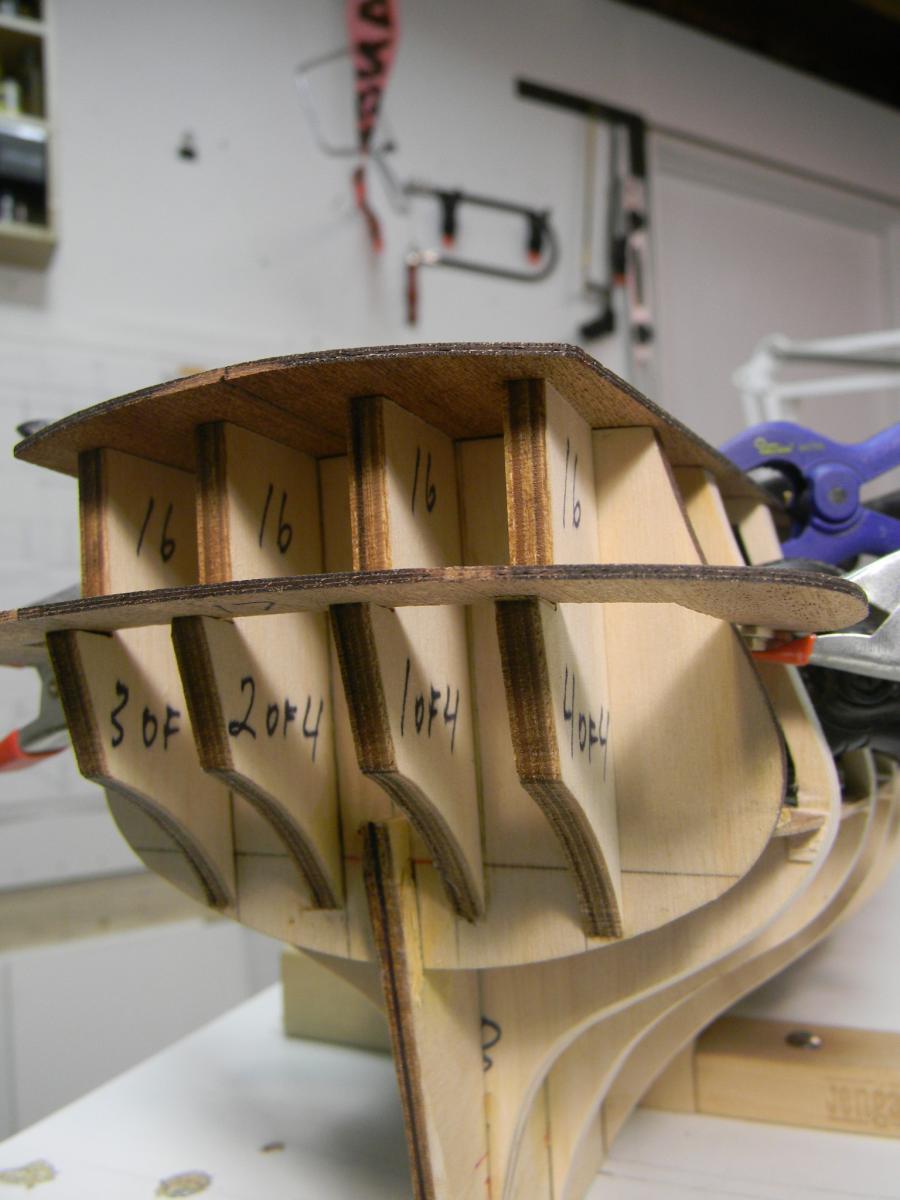
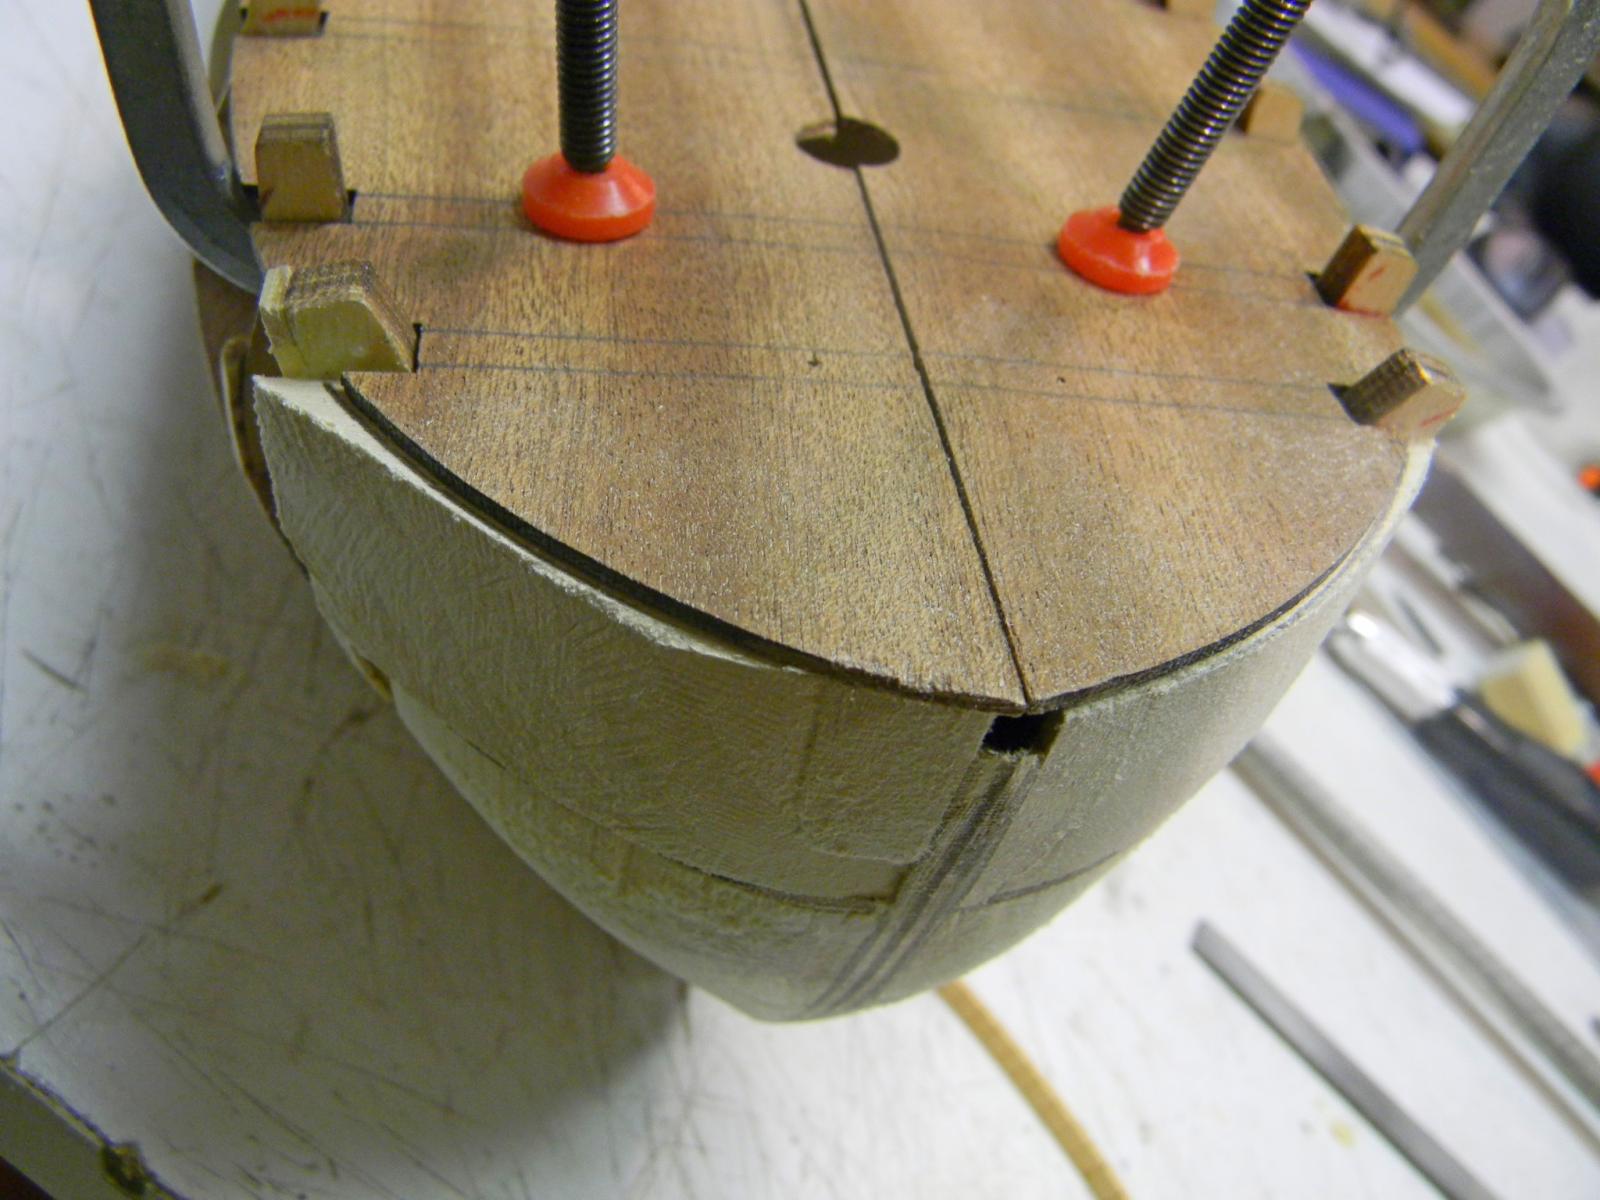
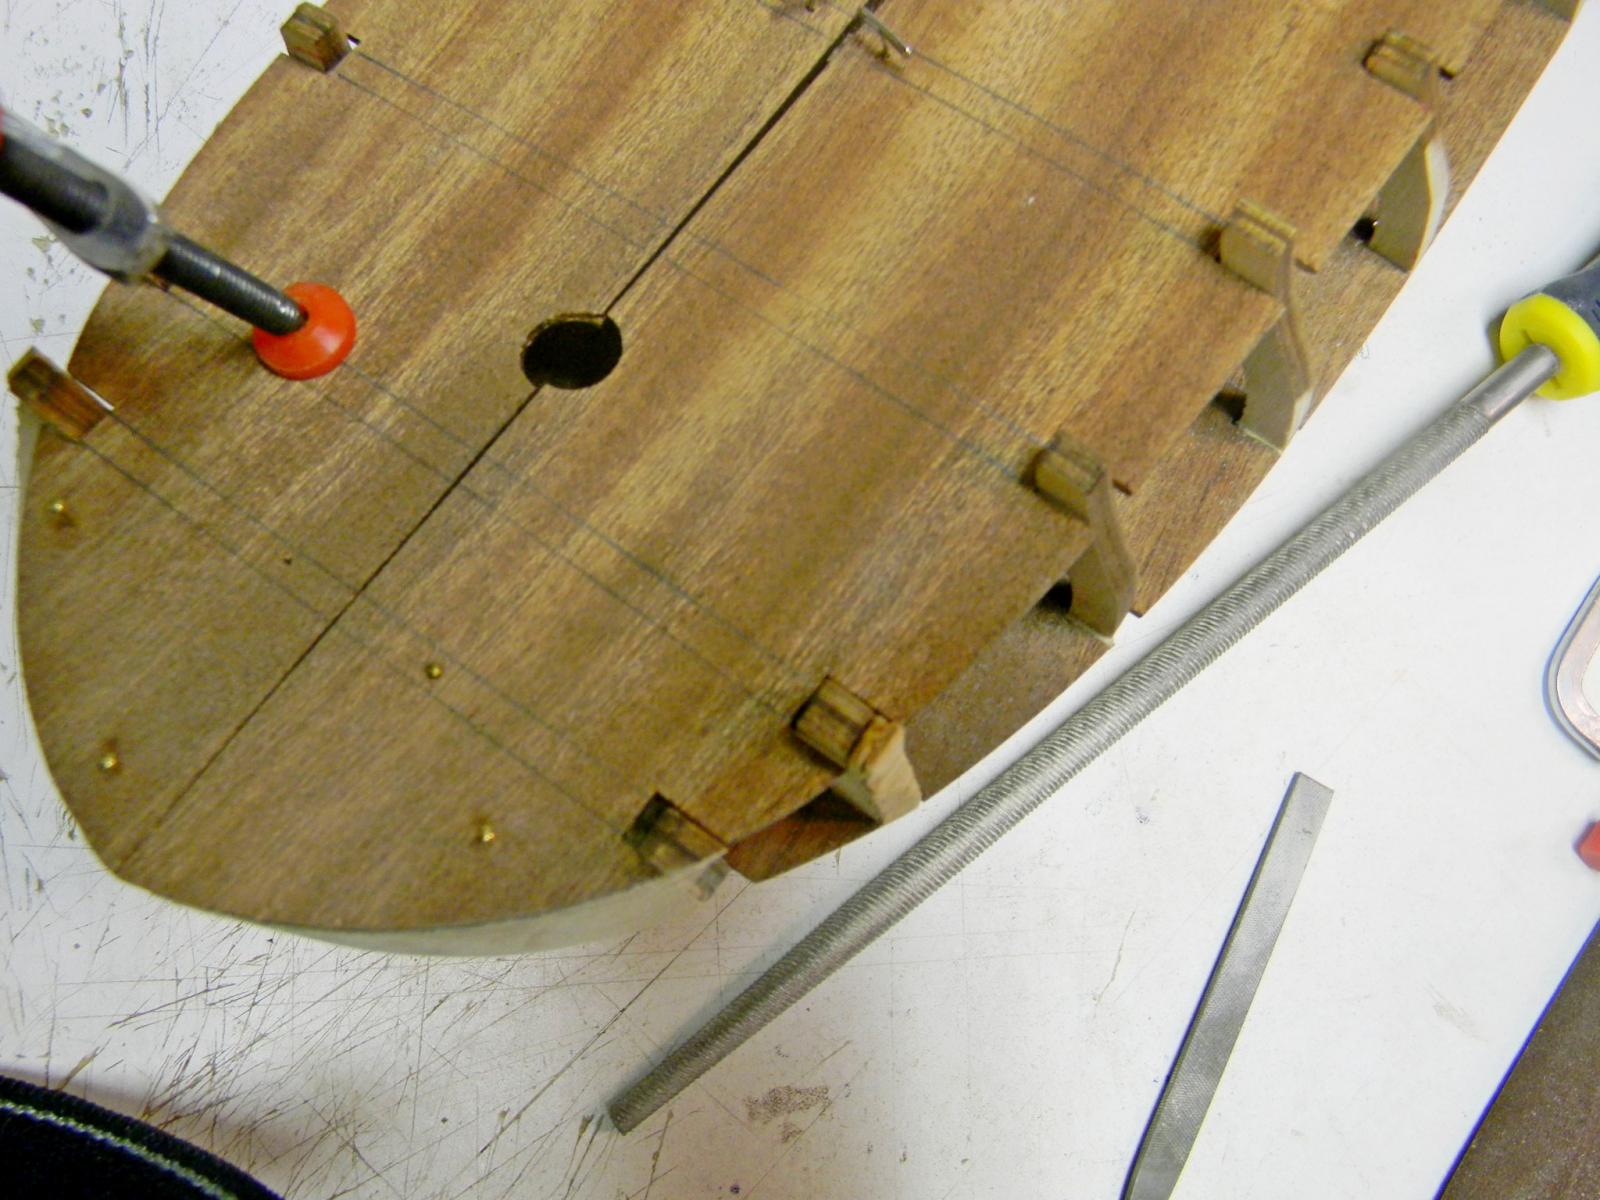
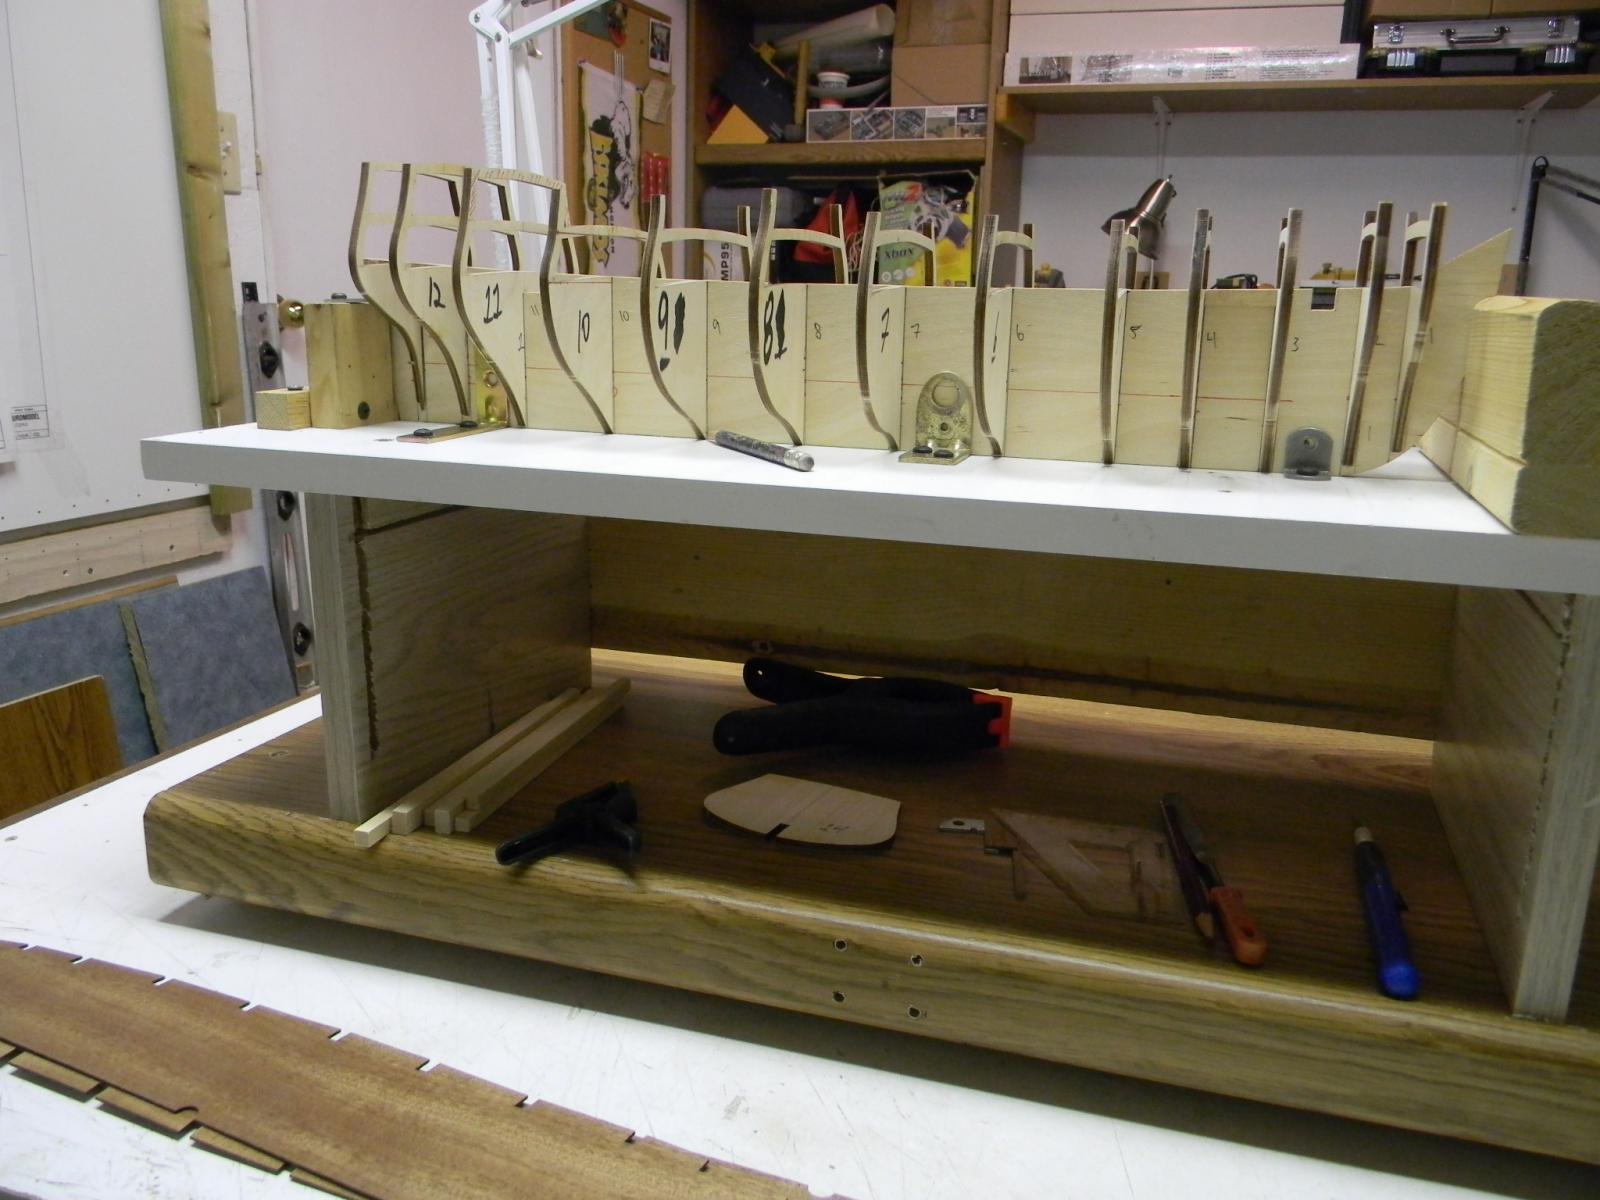
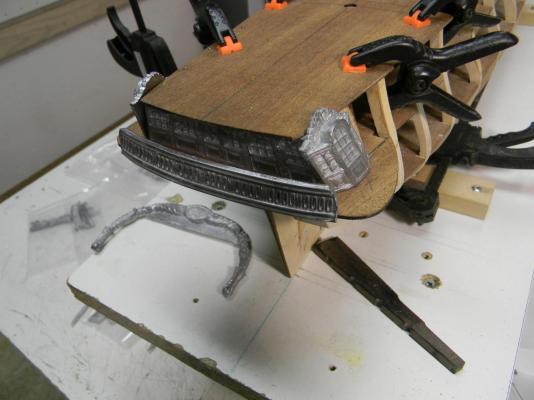
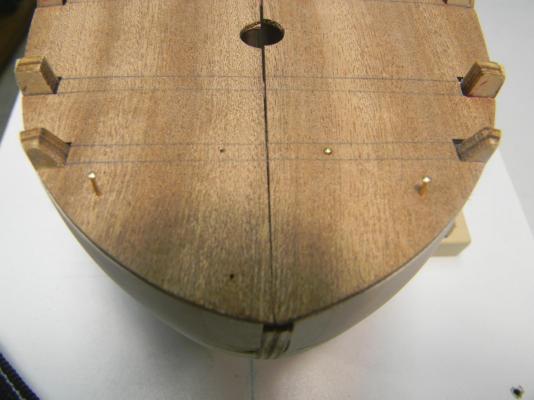
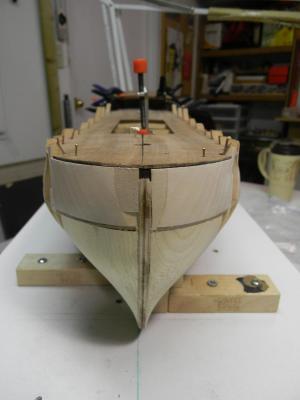
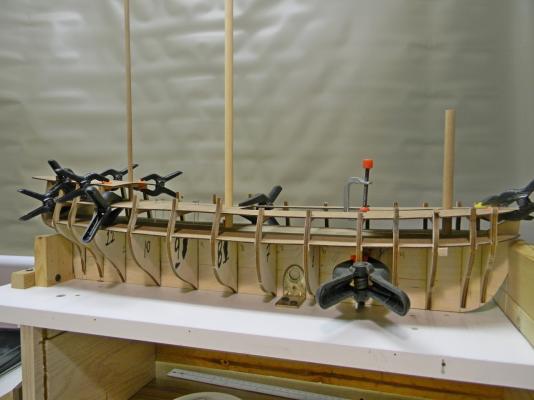
Thanks for all the likes and comments everyone,...work continues (weekends mainly) and the skeleton is taking shape. The bow filler is complete and I'm preparing the stern now for fillers. The uppermost deck is pinned in place over the frames after substantial shaping... it is seated securely now but you'll note that the deck extends a fair ways over the edges of the rear frames. The plans are somewhat confusing when used as a reference but I'll push forward and trim back the uppermost stern deck to match the frames in place. I'd also suggest using the placement of part 17 (temporarily held in place) to guide the eventual shaping of the stern block fillers. ***I'm trying to figure out whether it would be more advantageous to scratch build new gun carriages or revise the supplied ...see the photos for explanation......this quandary is mentioned in both the Period Ship Handbook and the reference notes found on the Euromodel website. I suppose these are eventual skills acquired and needed when the dark side comes a calling............. JP

-
Essex - Process and corrections to the new Model Expo Kit
Ponto replied to samueljr's topic in Wood ship model kits
Yikes,.... is this typical of most or all of the Model Shipway kits?.... a lot left to be desired there I'm thinking...... JP -
I would maintain that it is a personal endeavour and one should be able to respectfully choose to take "things" as far as one is comfortable,... and your last comment relates to this sentiment. Strangely enough, it also might be directly related to how OCD one is at any given moment. Personally I would never completely rig and hardware that is to be covered but enjoy the efforts of those that do...to each their own. JP
-
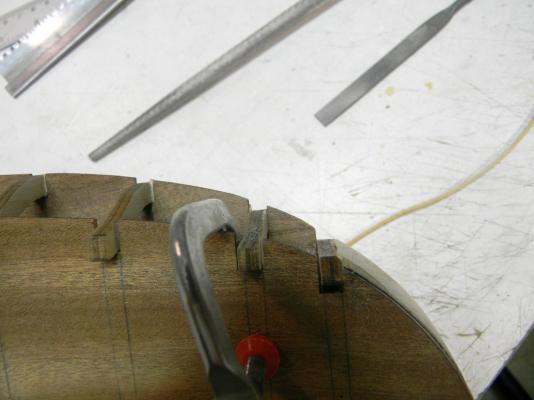
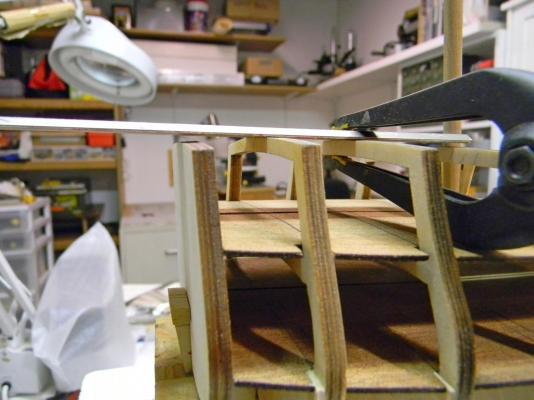
Preliminary tasks continue with the skeleton,... and for those checking in,.. sorry, not much eye candy in these initial stages. I need to stress for those considering this kit, much attention needs to be addressed to the frame fairing. The upper deck is only held in place with temporary pins at this point and I'm using the alignment with the gun deck to sight the angels of the frames . As one can tell from the images, some frames need packing to bring them closer to where they should be. The bow fillers will simplify matters when it comes time to start the first of two layers of planking. There is still plenty frame fairing and adjustments to do before the first plank is laid down. JP


-
This is brilliant... and I'll follow suit when the time comes. JP
-
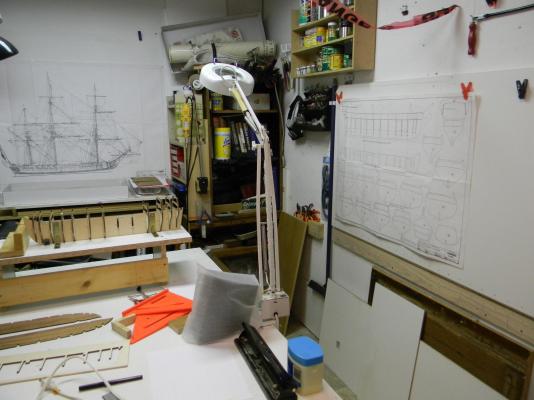
Wow,... is that a workshop or a laboratory?....why would you ever need to leave such confines...a modelers paradise to be sure... JP
- 728 replies
-
- 2
-

-
- le fleuron
- 64 gun
- (and 1 more)
-
I agree Pete,... a firm base at the bow helps matters significantly. I look for as much symmetry from port to starboard as possible and only proceed when I'm happy. I think this type of kit prepares one for some form of future scratch building as one is forced to pour over the plans continually. Many more comments and accompanying photos to follow......... JP
-
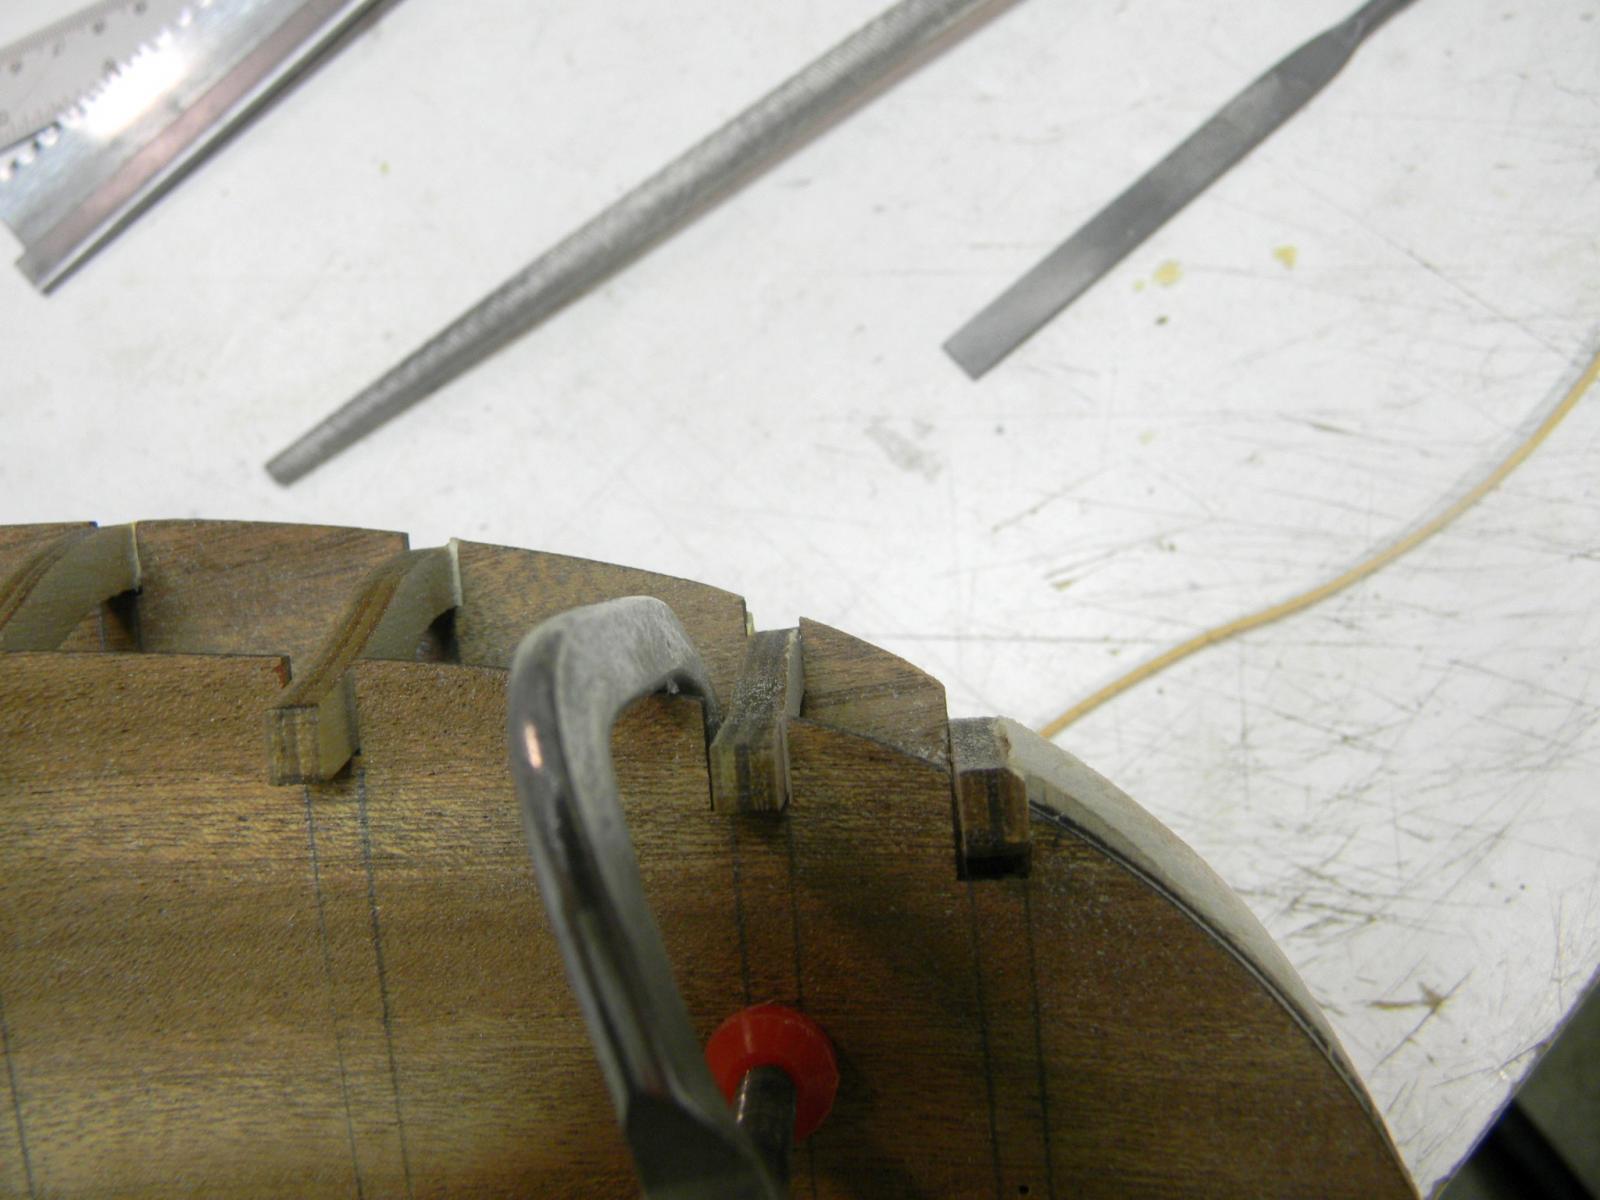
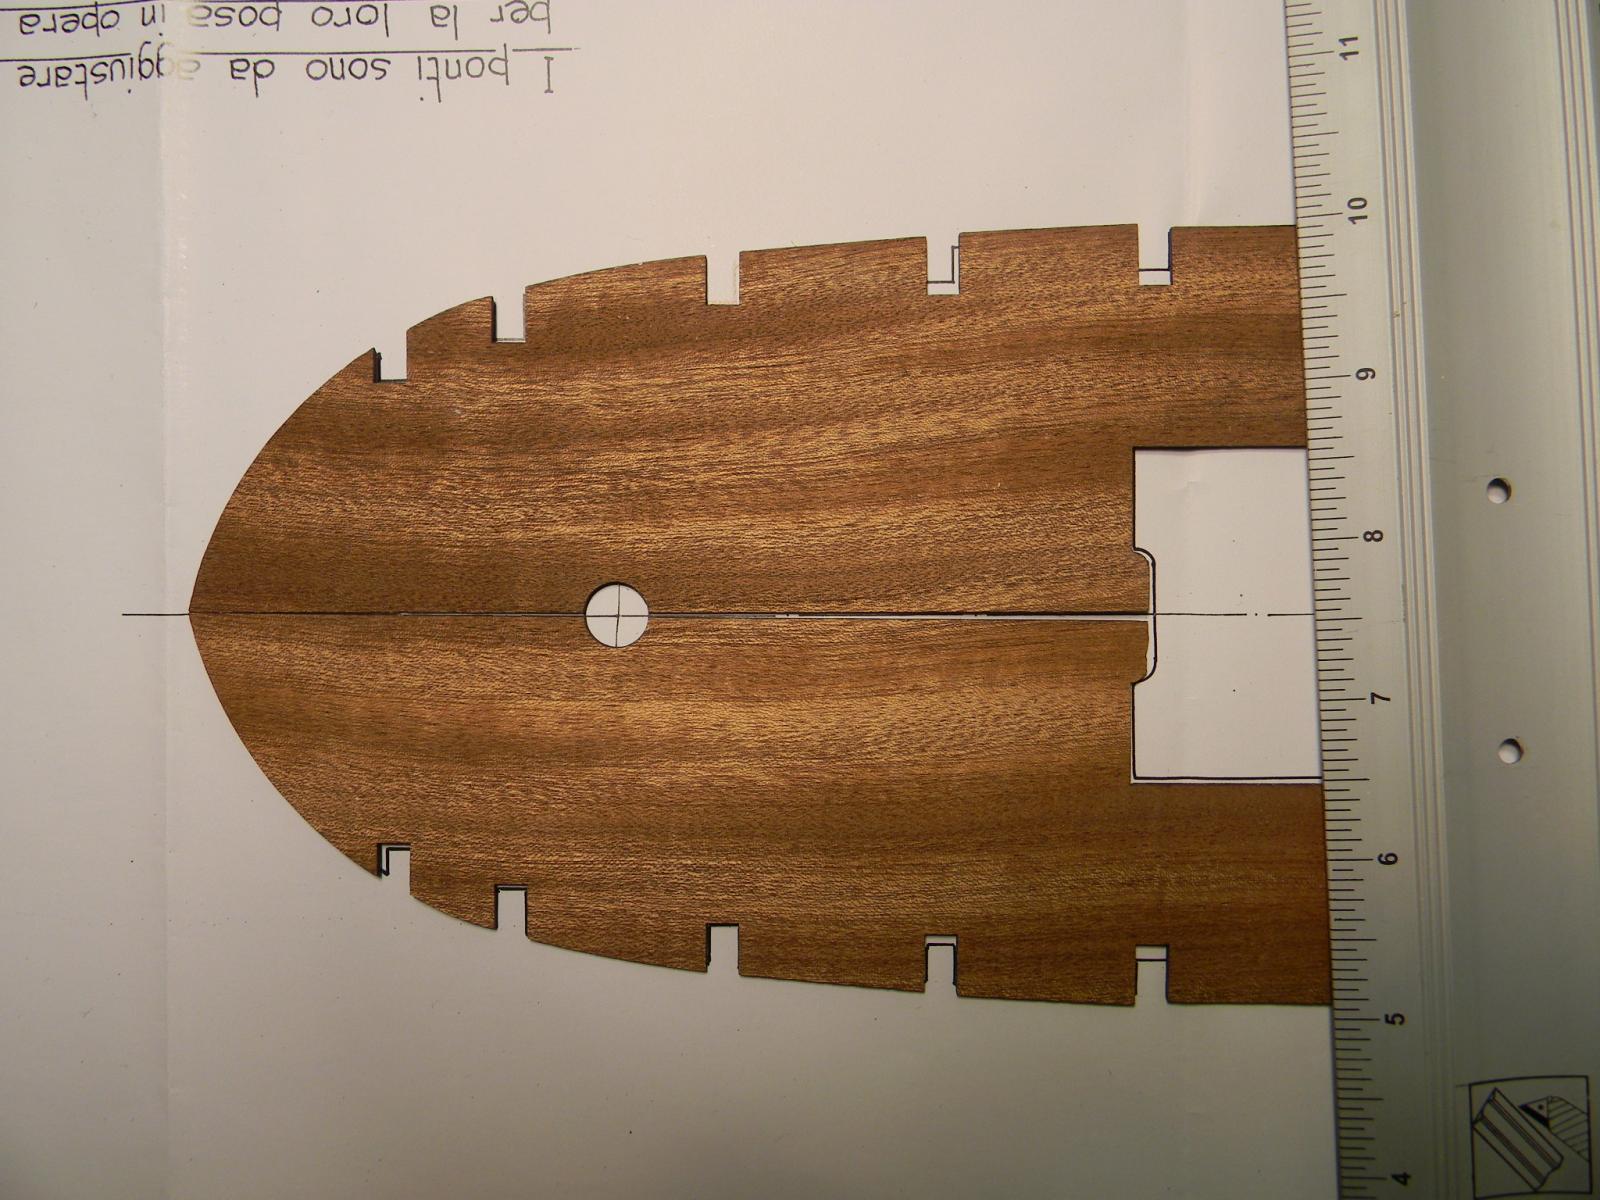
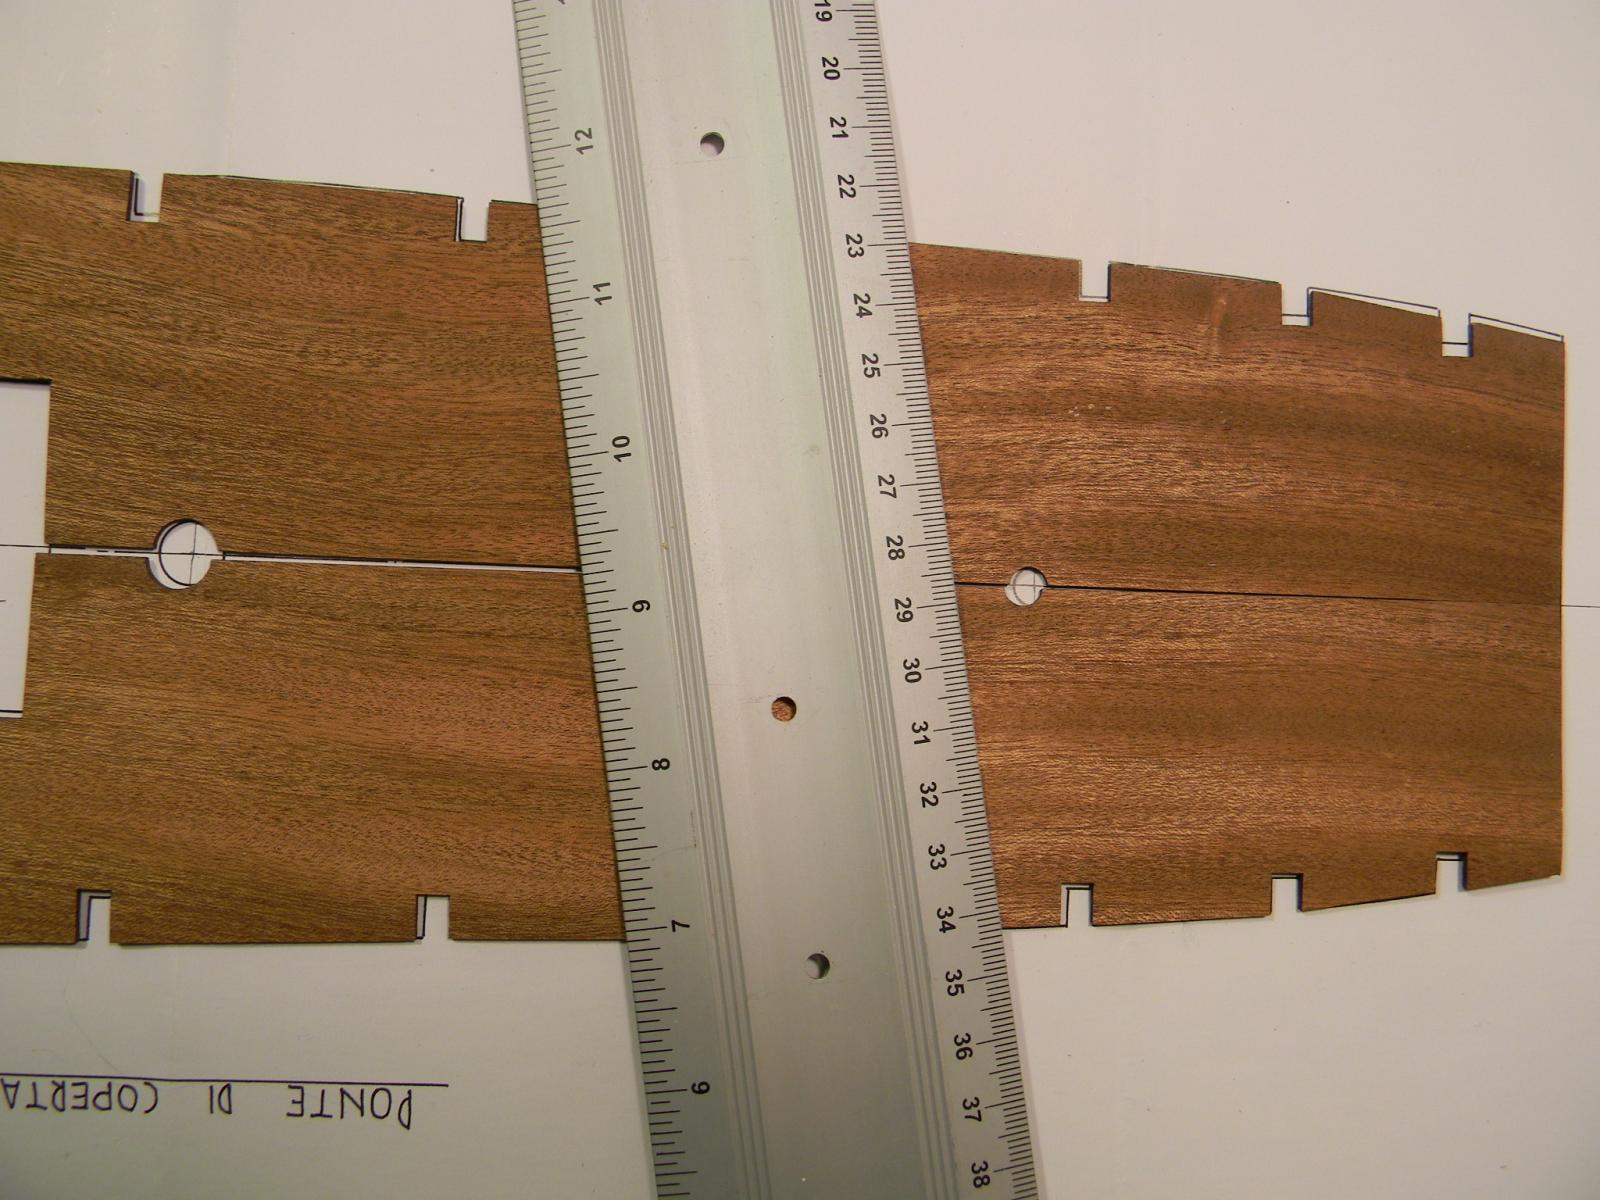
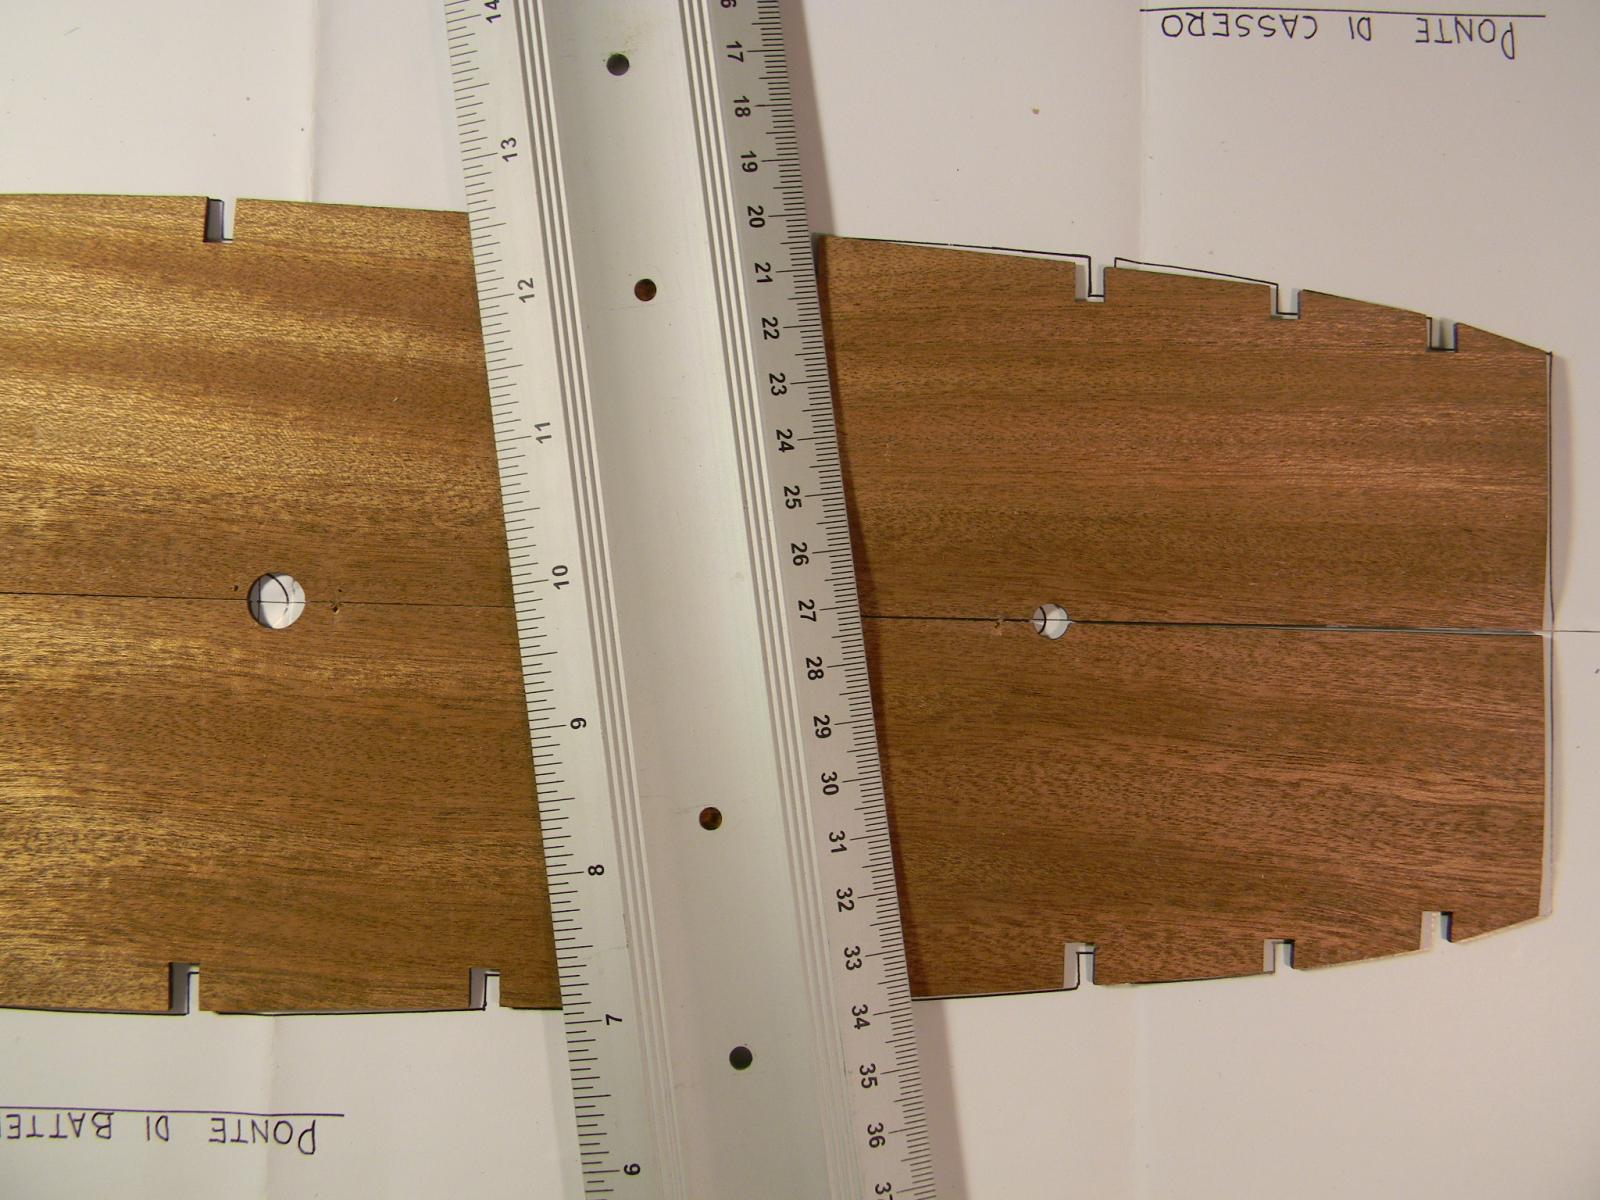
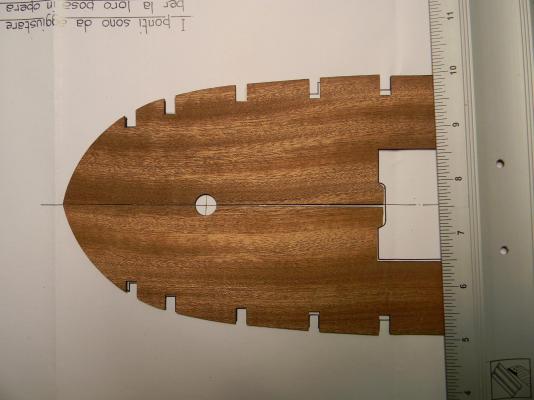
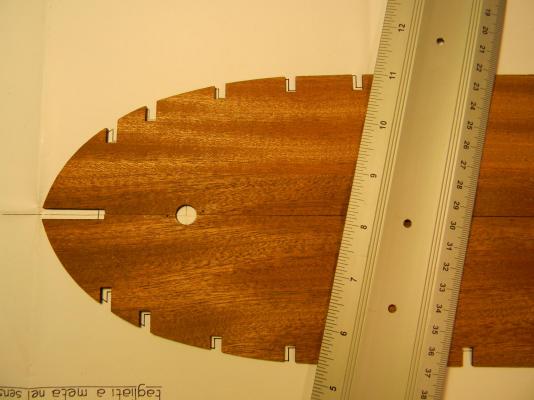
After some head scratching, I think the alignment "issues" with the false decks have been overcome. The cuts on the supplied decks are mismatched with both the plans as well as with each opposing side... nothing that can't be overcome and there is a mention of this in the Euromodel reference notes. The gun deck is secured with glue at this point and and the initial planking will be initiated after the plank runs have been established. JP

-
Spectacular work as well as spectacular images.......would it be too forward of me to ask how these wonderful stills are captured? JP
-
This is a very impressive build....well done!!! JP
-
I've used the Chopper for some time now and it is handy for it's intended purpose. A self healing matt is used as the cutting base and it can be rotated or replaced over time. When cutting thicker stock, I usually rotate the piece and cut each side gradually rather than cutting through in one attempt. It is well put together and should last for some time --- mine has.......and my Sand-It gizmo is always nearby to square up any imperfect cuts....... JP
-
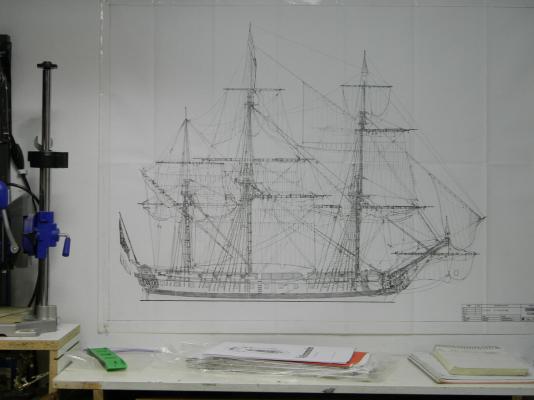
Well, it looks like the waters are a little muddy when it comes to the French frigates and aside from the Swedish link, we all have the same references to help us along. I've a fair bit invested in the Euromodel kit so I'll use it as a foundation for this build log. I'm also partial to the color scheme used by the builder found at The Rope link I supplied and hope to capture that "feel". JP
-
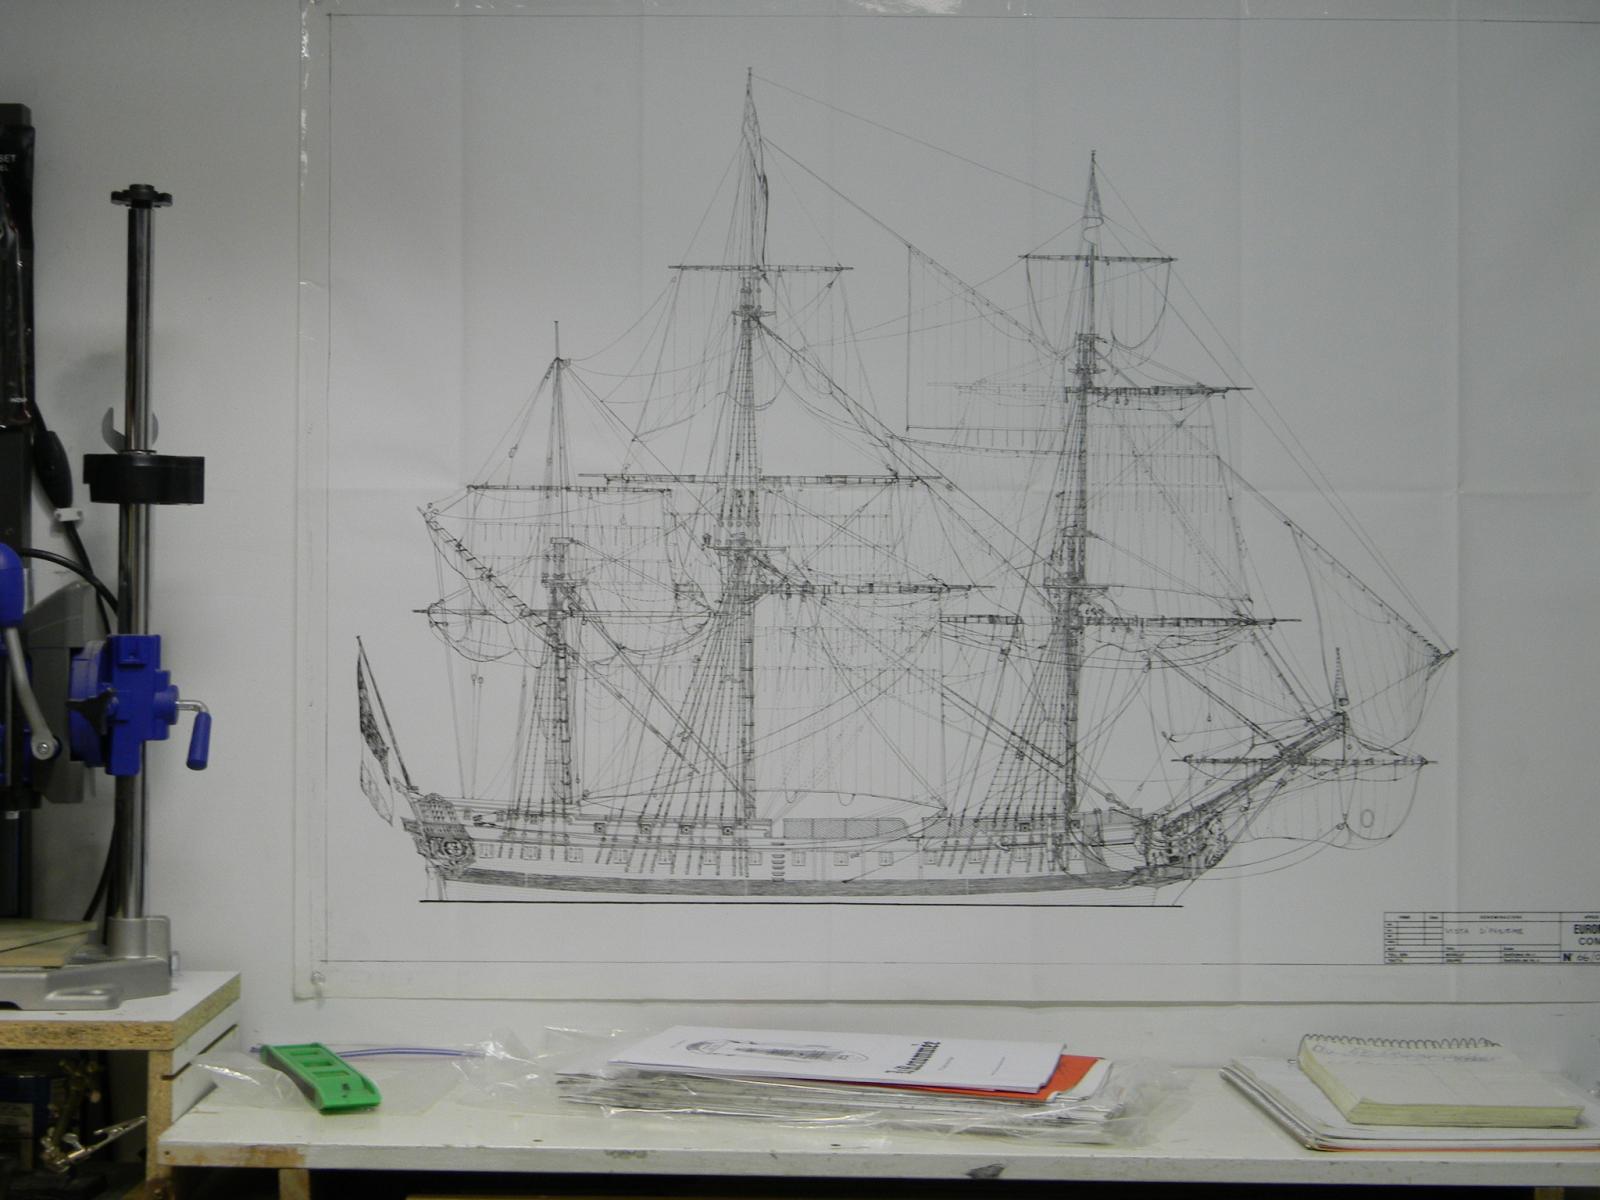
Simon,... follow this link to the images that more closely resemble the ship that the Euromodel kit is based on........it is virtually identical and I'll refer to it often ... (the site is excellent for reference and I used it often during my WVH build) http://www.modelships.de/French_Frigate_Chapman_31/French_Frigate.htm There are references to more than one Le Renommee ships being built , both of which were captured by the English. The link supplied earlier by Mark, points to the earlier version and is notably different. Hope this helps. JP
-
...well this revelation deserves some more reading... very interesting......and thanks for putting that out there J
-
Thanks for the link Mark,...I did encounter the site thru my earlier googling and struggle with purchasing the book daily. Day to day expenses seem to take precedence,... for now,.... anyway. I'll be using images from the following link as a basis for my build. It was what prompted me to purchase the kit and is a gorgeous build by a member from across the seas. He is a member of The Rope Club. http://translate.google.ca/translate?hl=en&prev=search&sl=ja&u=http://homepage3.nifty.com/modelshipbuilder/renommee.htm&sandbox=0&usg=ALkJrhgE9tui5ZZeww17Nd6ZHyMxSV4PZg As another aid, The Period Ship Handbook Two discusses the build and has some good pointers. Reference is made to the fact that the kit represents the later second build of the ship. I need to get my ducks in a row and organize my photos, posting, and editing regimen...logs found on this forum are incredible. JP
-
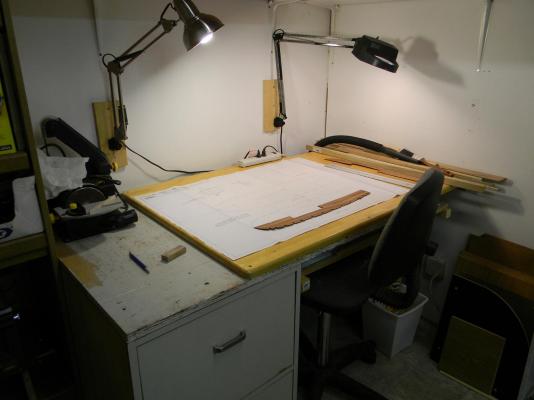
I'm off and running with my first Euromodel kit, Le Renommee after a marathon WVH build. I hope I can keep pace with the increasingly beautiful and detailed logs submitted by such talented builders found on this forum. The kit was expensive by my standards, but what isn't these days...and I've been impressed and dismayed by the kit contents in these early stages. Eighteen sheets of detailed plans accompany the kit but a comparison of the plans with supplied bulkheads and decks reveal some inconsistencies. Blocks and gratings are, however, the best I've encountered in any kit. I will work with what is supplied, and tweak and bash as I progress. I've learned and continue to learn through this forum and hope I can contribute in some small way....thanks for looking in. JP

-
Just a quick heads up to EuromodeI fanboys...I found an Easter greetings email from the manufacturer this weekend. Nice gesture, I thought and a sneaky way to direct you to the website which is offering another discounted sale. I started my Le Renommee so someone kick my behind to kickstart my build log...LOL..... JP