HOLIDAY DONATION DRIVE - SUPPORT MSW - DO YOUR PART TO KEEP THIS GREAT FORUM GOING! (Only 13 donations so far - C'mon guys!)
×


Mike Y
-
Posts
1,552 -
Joined
-
Last visited
Content Type
Profiles
Forums
Gallery
Events
Everything posted by Mike Y
-
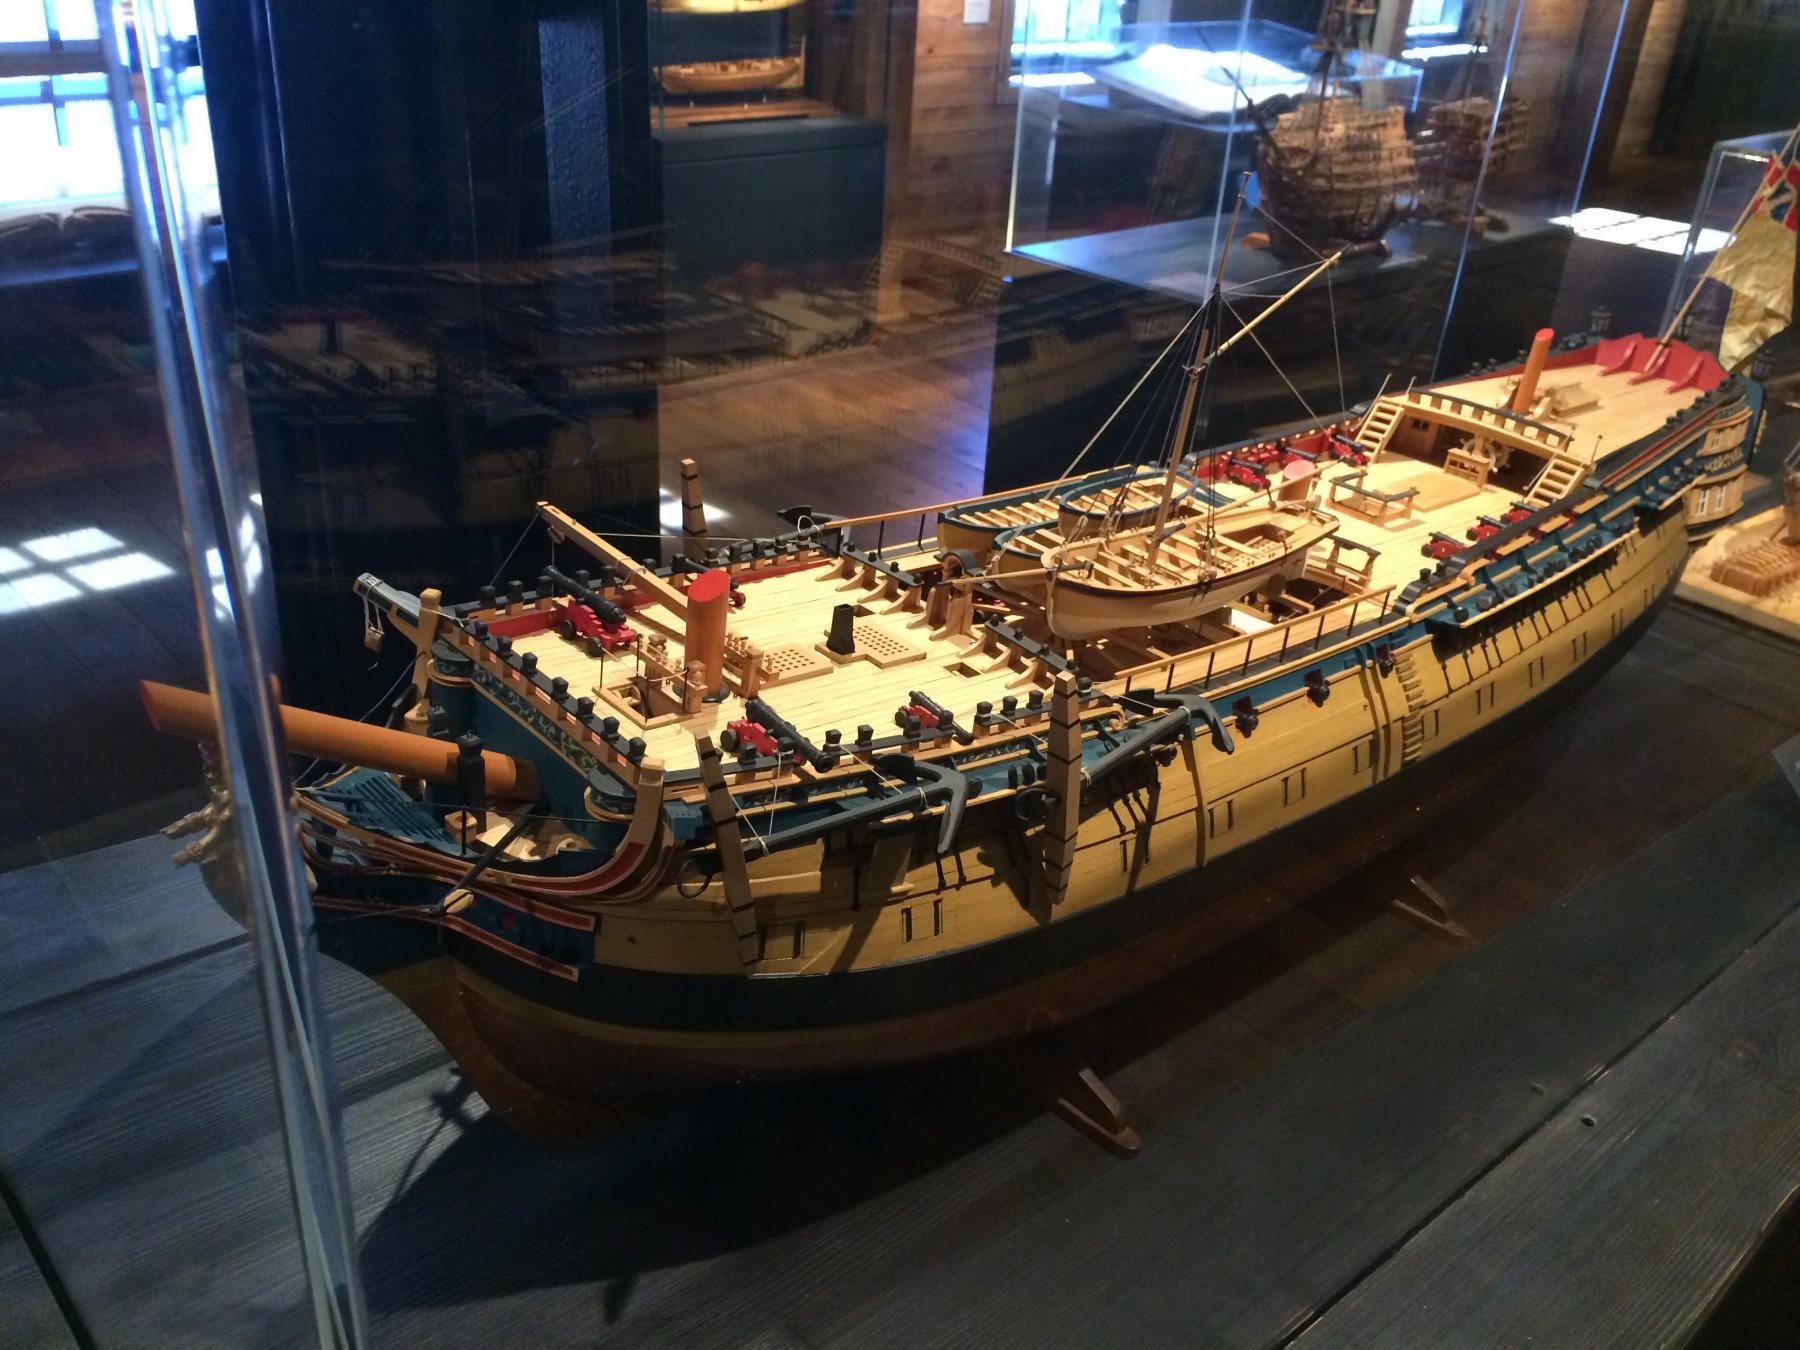
 Sorry for bad photo quality, but it illustrates same style - dark blue and black colours. From the Maritime Museum of Hamburg.
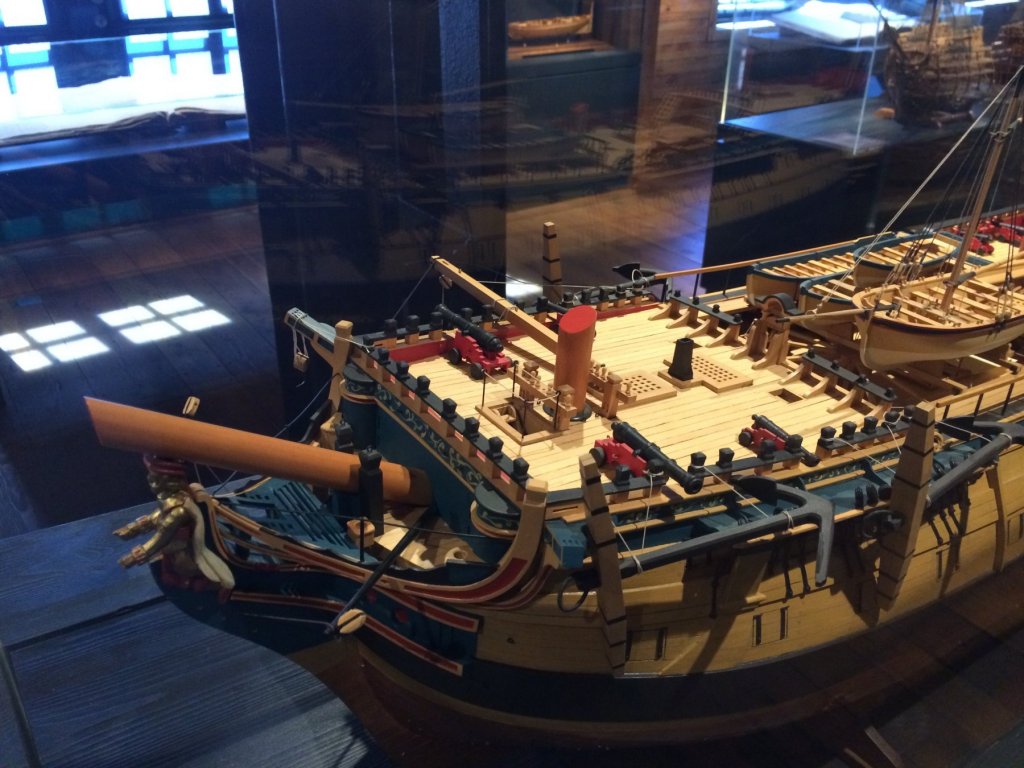

-
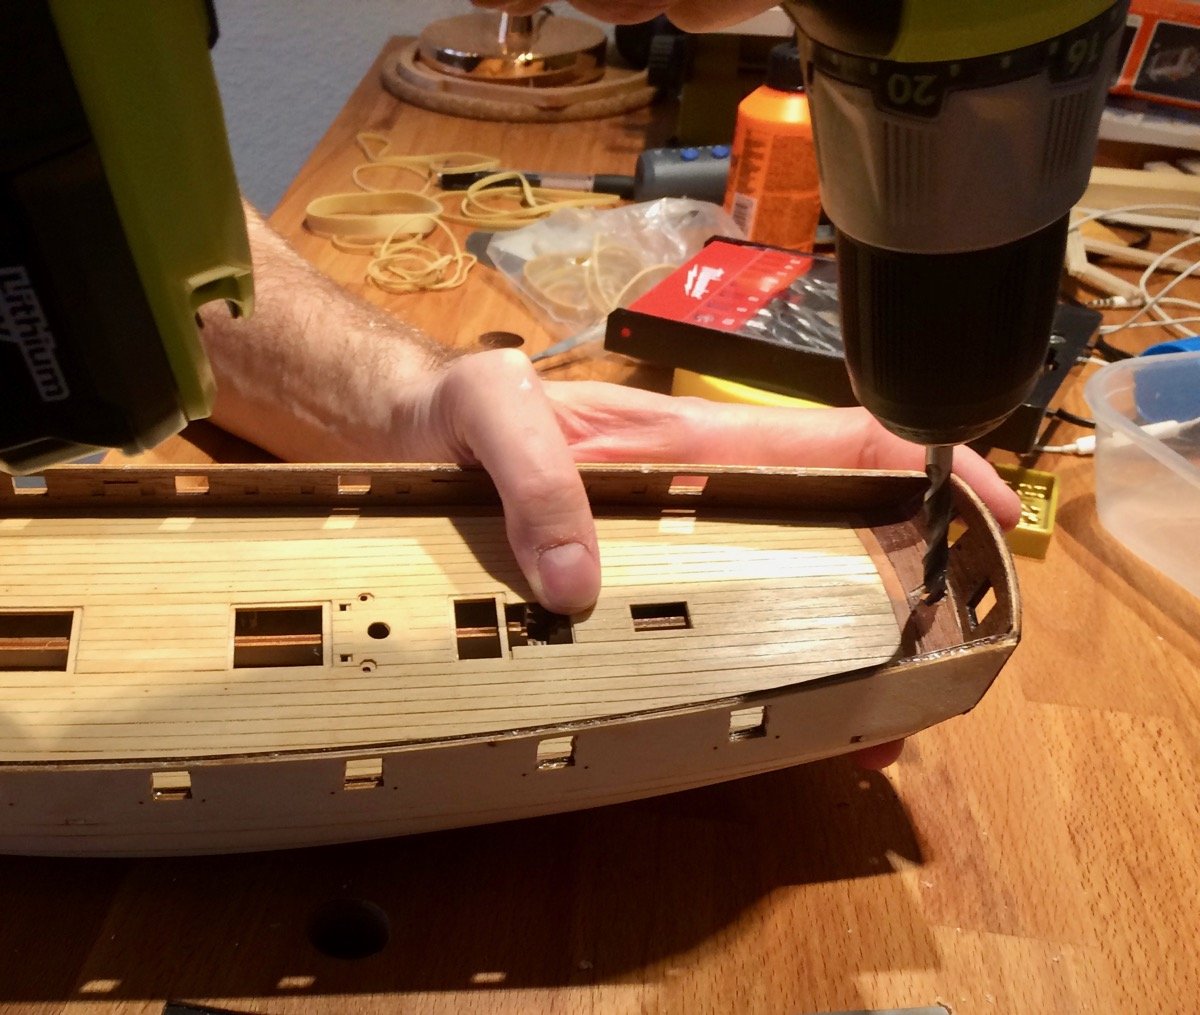
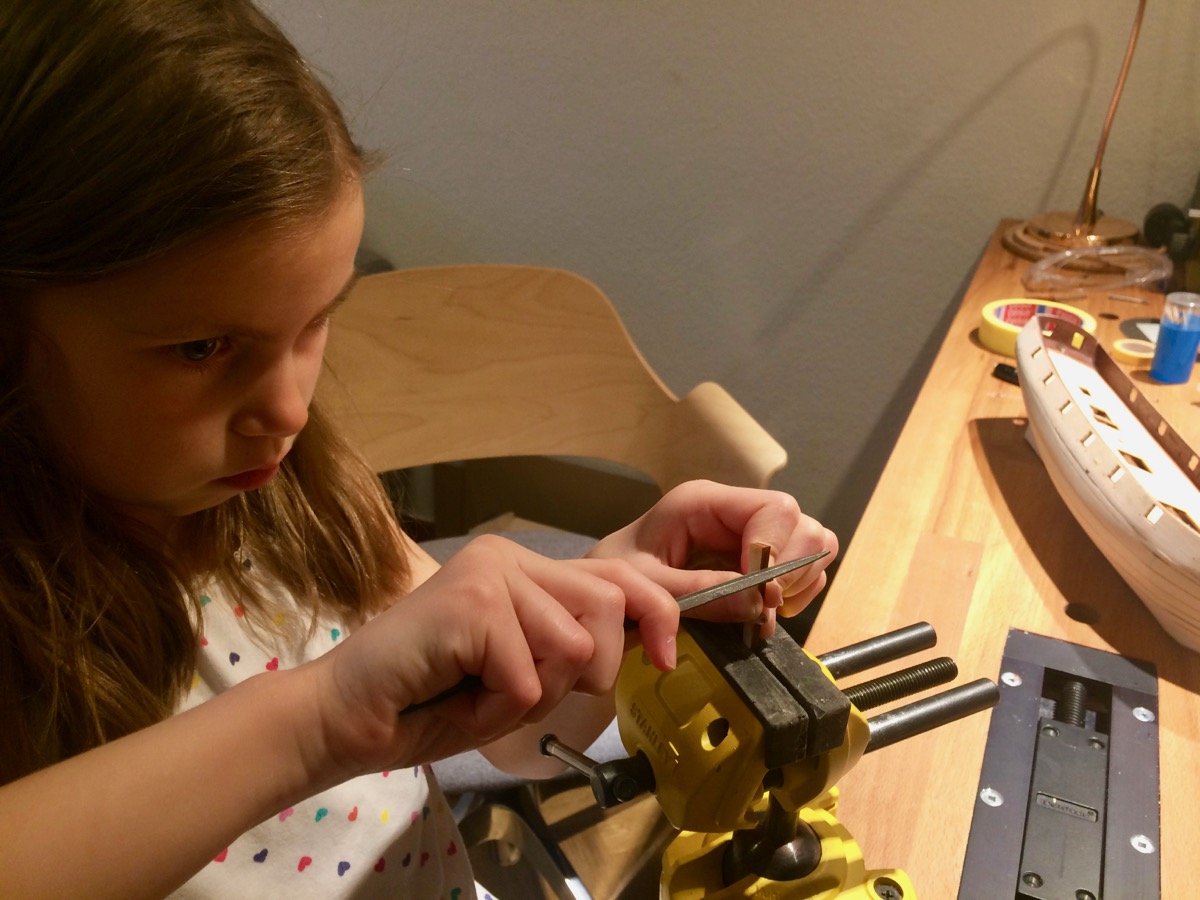
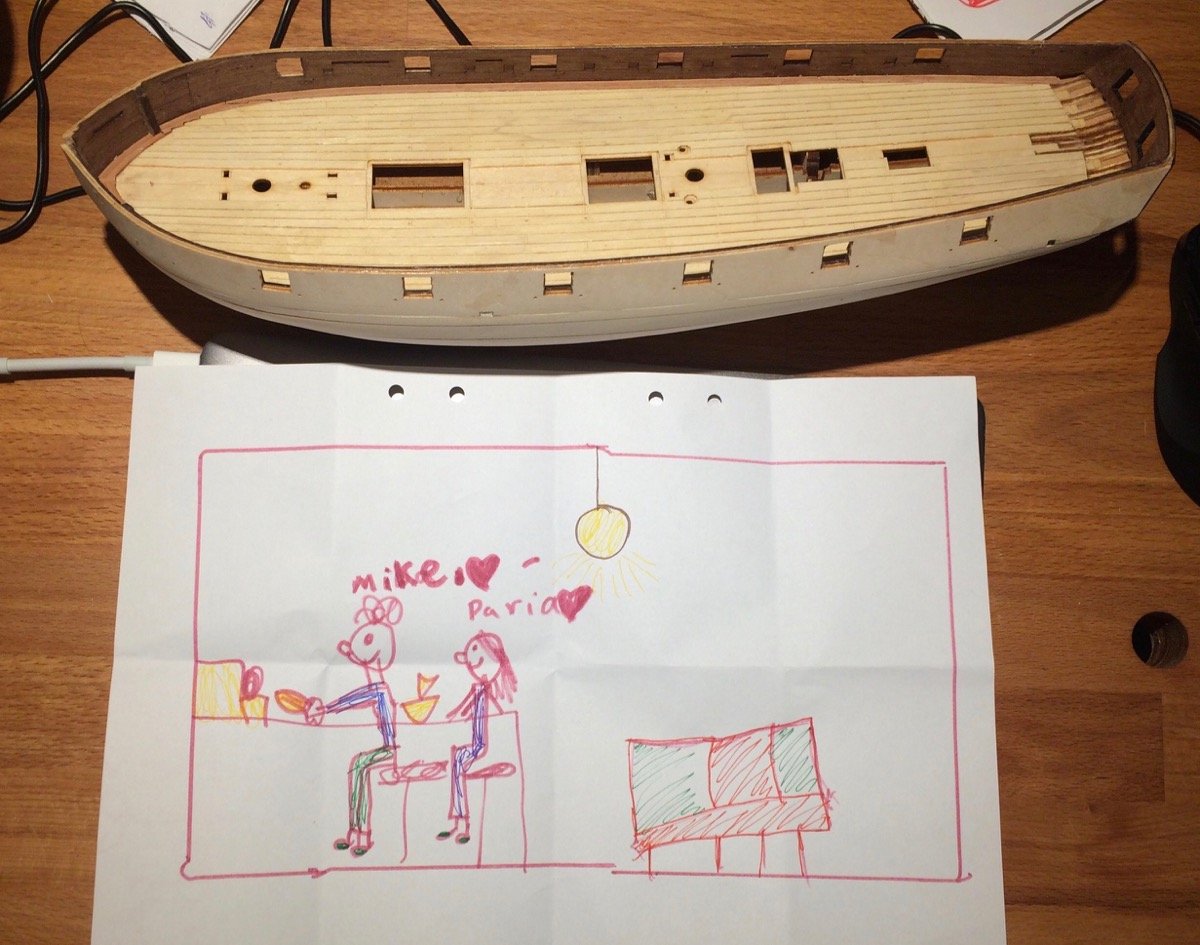
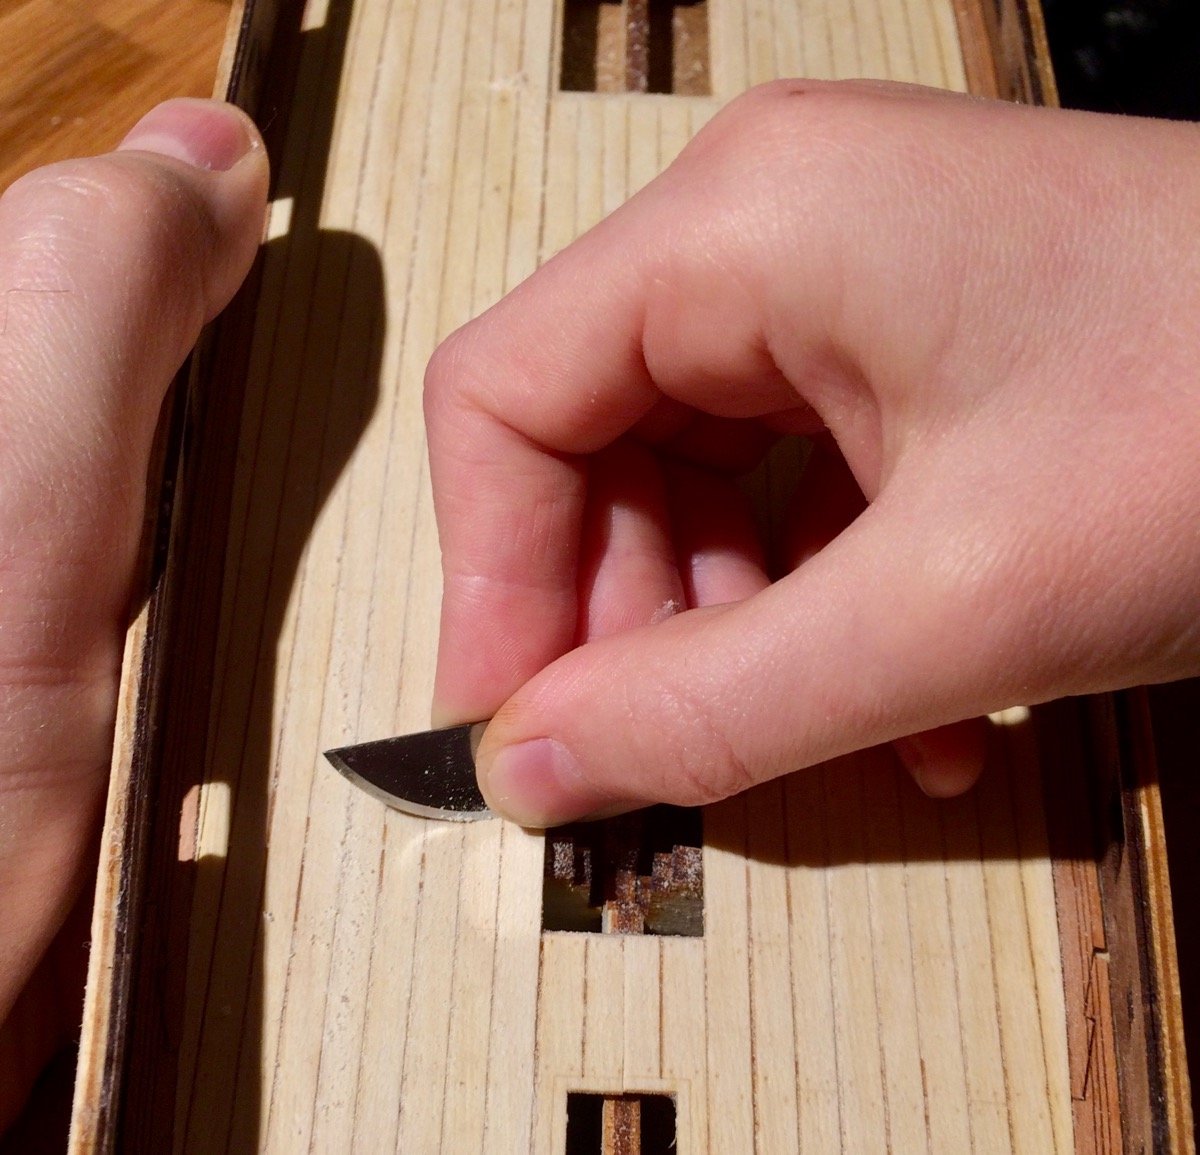
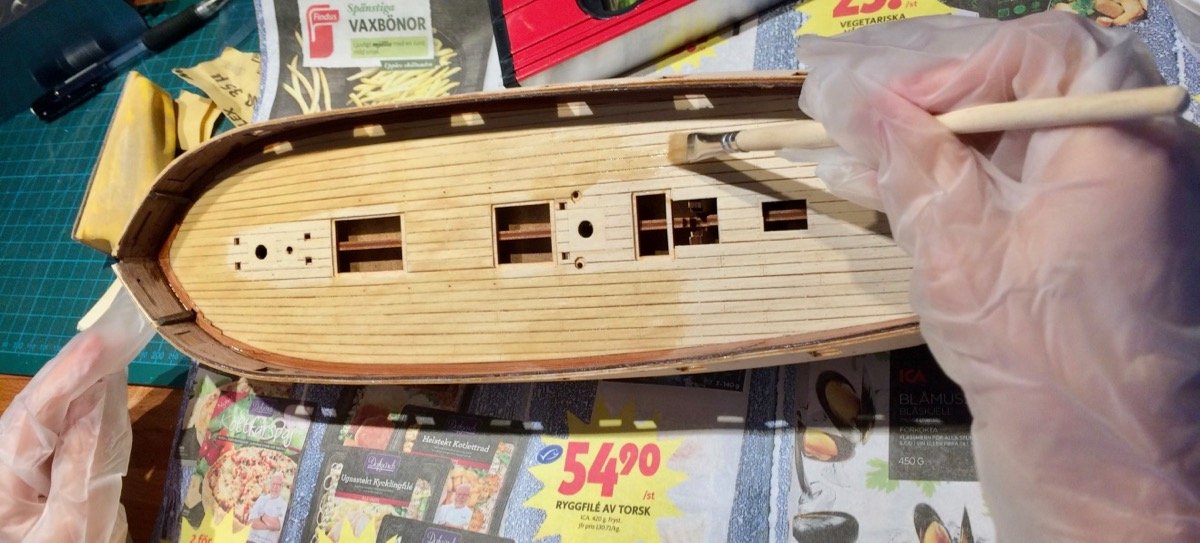
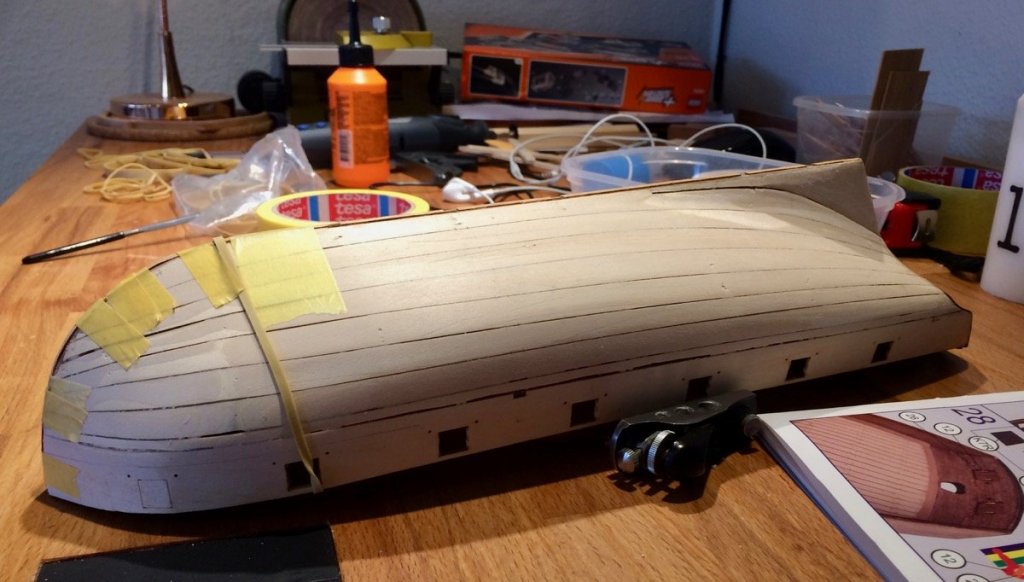
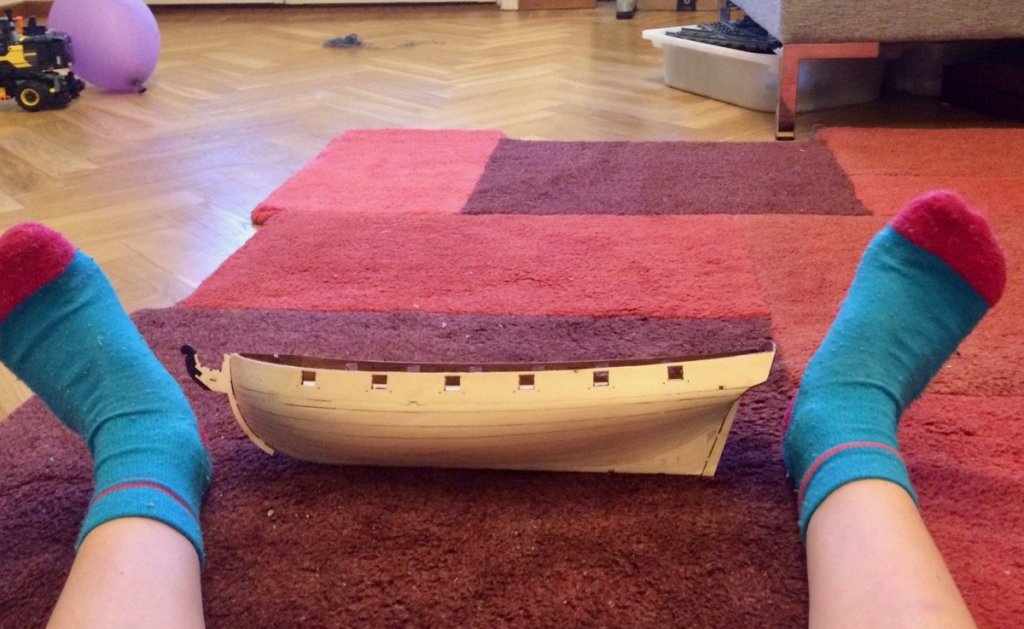
Installed decorative keel "tabs", that was easy: Drilled the rudder hole (this was too scary to give to Daria), but she filed that hole to shape: And she made an "eye" Previously I was filing all tabs for her (they are oversized in the kit), but now she is doing it herself. Though I am keeping an eye on a file angle, this is quite tricky for her, so far. But improving slowly. This is also the only photo in this update done by me Stem and stern dry fitted. Note the ebony piece, fantastic quality! And she is proud of the composition of this photo Will go pretty far on Instagram! Quote from the author: "I wanted to make a fun photo for you , to have a photo with more colours. Other photos have very few colours - brown, black, that's it. This one has more!"


-
The model is even better than she was before (at least for a casual observer ), and there is something improved in the way you make the photos - it is lighter and clearer now!
-
ancre Chebece 1750 by Jeronimo - FINISHED
Mike Y replied to Jeronimo's topic in - Build logs for subjects built 1501 - 1750
Very unusual vessel, real eye candy! -
Thanks Pat & Carl! Milled the rest of the flooring. Dry-fit confirmed that I have enough wood (phew!), but just enough - no room for whoopsies: There are some synergies between our hobbies, knitting weights are handy First planks are in! Now it is quite mechanical, planning to install one pair every evening:


- 968 replies
-
- 24
-

-
- hahn
- oliver cromwell
- (and 1 more)
-
Milled joints have one problem - they are nearly invisible if not highlighted with a darker colour Welcome to the "how did I managed to survive without a mill" club!
-
Proxxon Micro MBS 240/E Band Saw Review
Mike Y replied to Blue Ensign's topic in Modeling tools and Workshop Equipment
Hej Jörgen, Actually never heard about Biltema's one. Checked their website, it looks like one of those OEM saws that are sold under a dozen different brands. Unsure about the quality and haven't saw it in person. And for the price of 3200 kr there are plenty of better options, for sure! Especially considering shipping from Germany. No problem with cutting planking, though I would not trust it to cut super straight lines. It would be similar to cutting planks with a scroll saw, just faster. Andi, thanks for the info! Hope that Proxxon will work just fine for you. -
Impressive amount of details in that document! Looking forward to see some build logs based on it
-
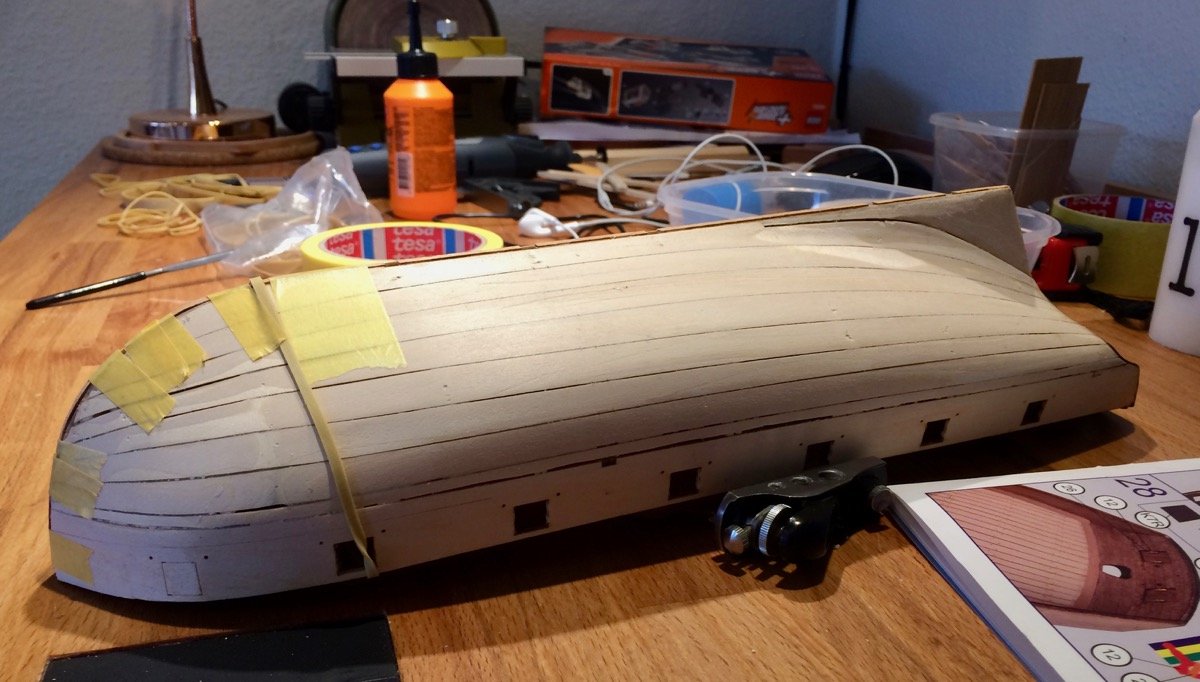
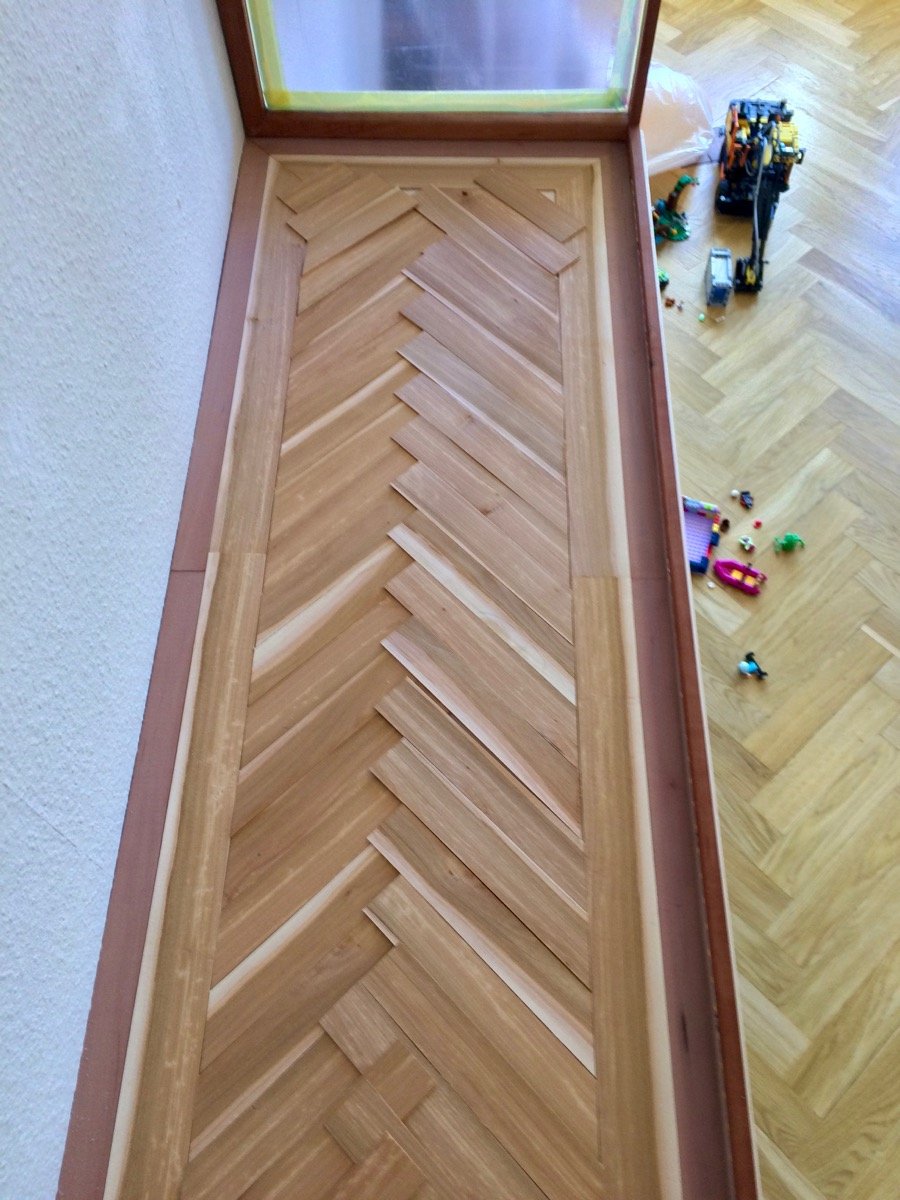
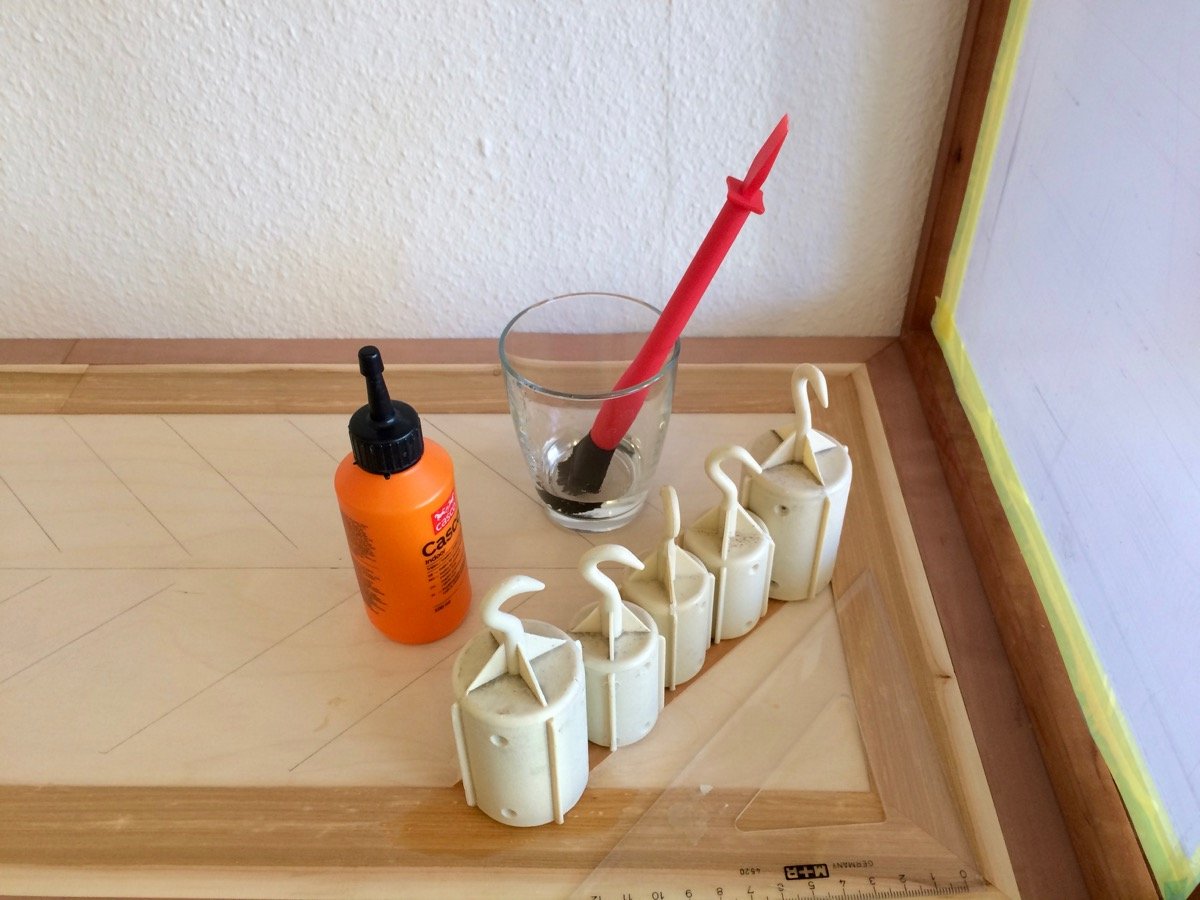
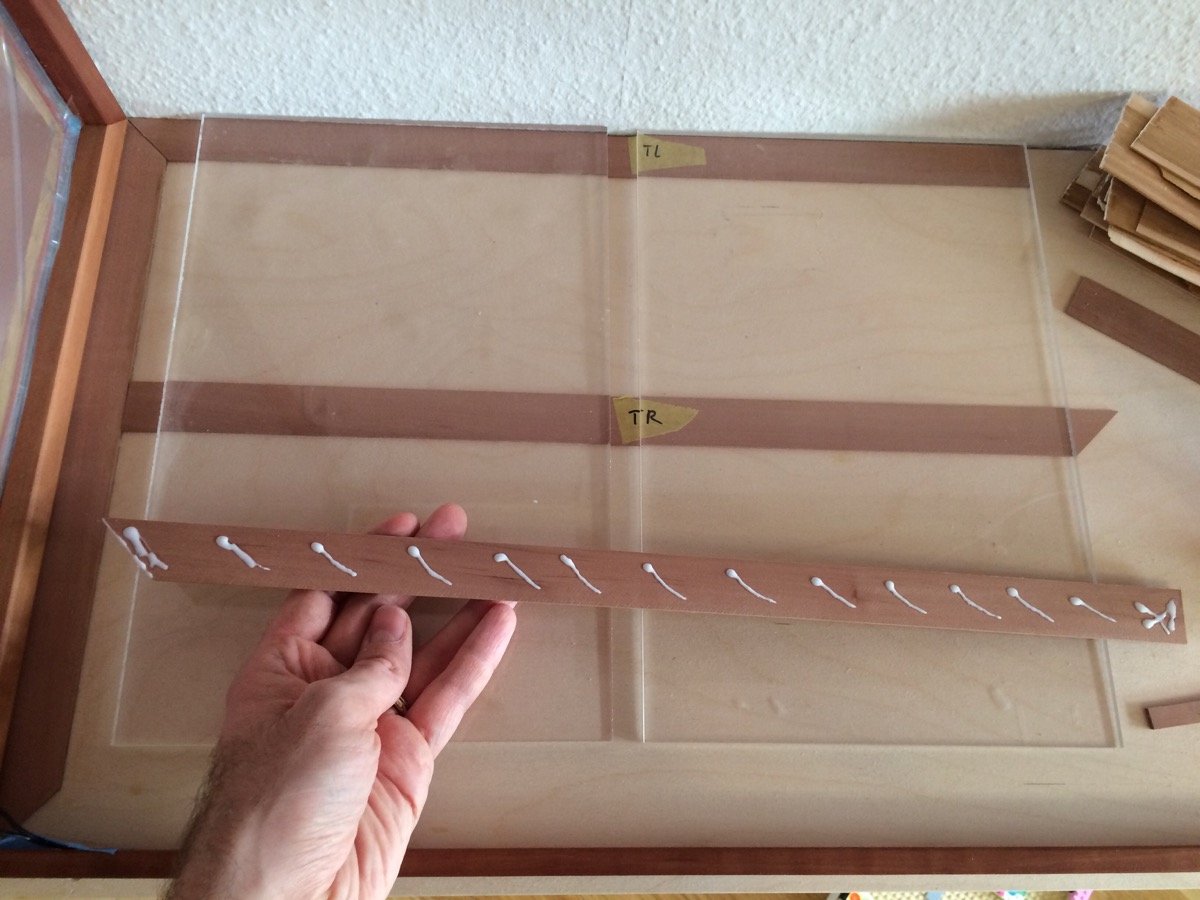
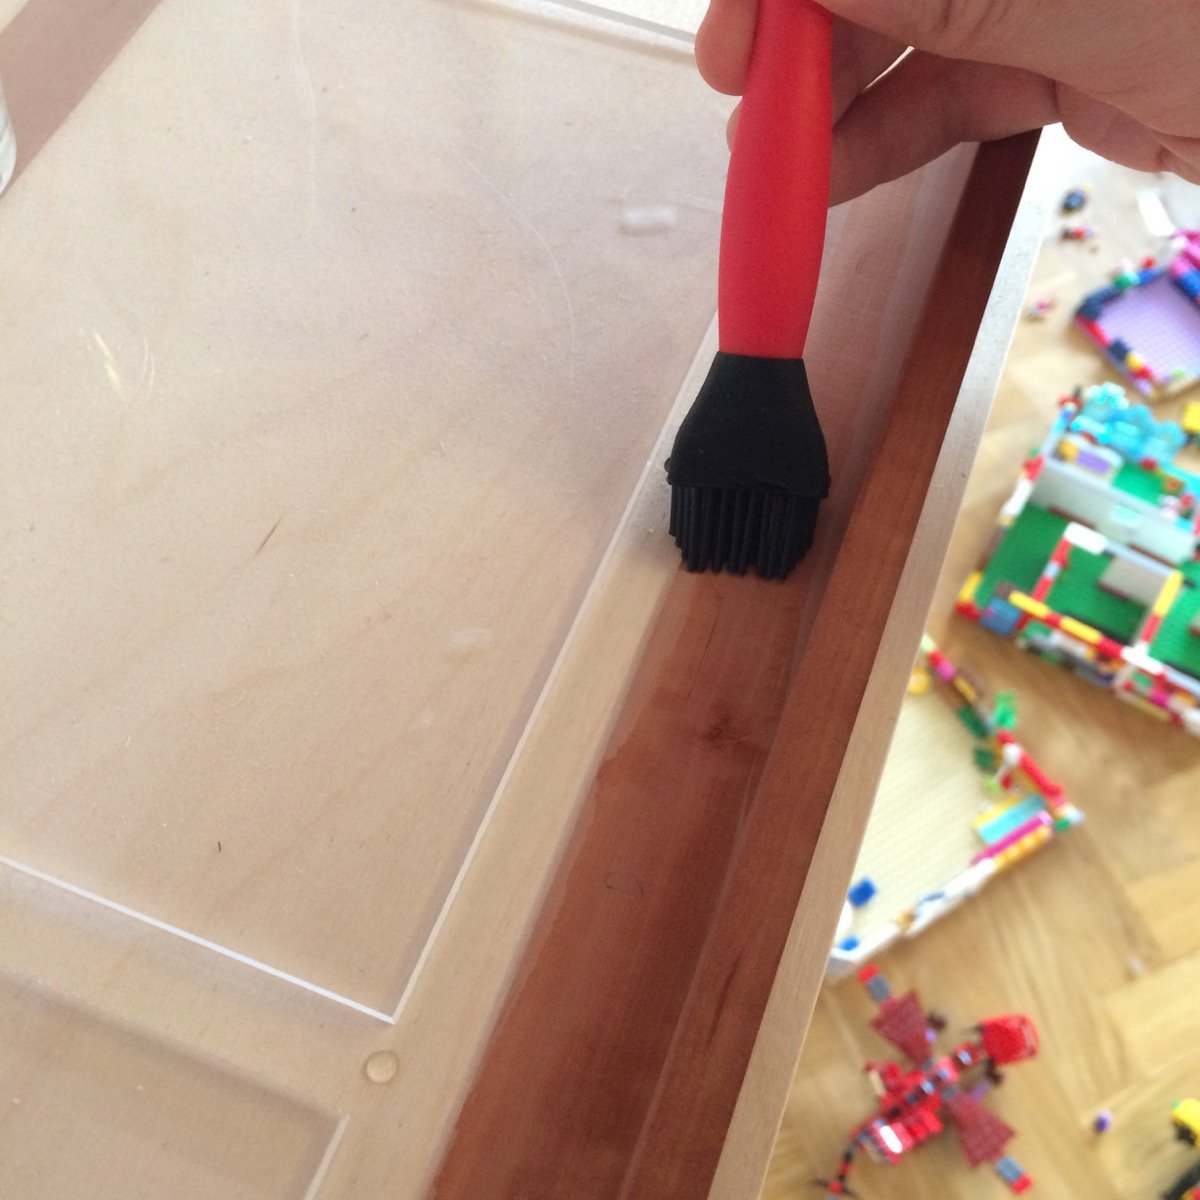
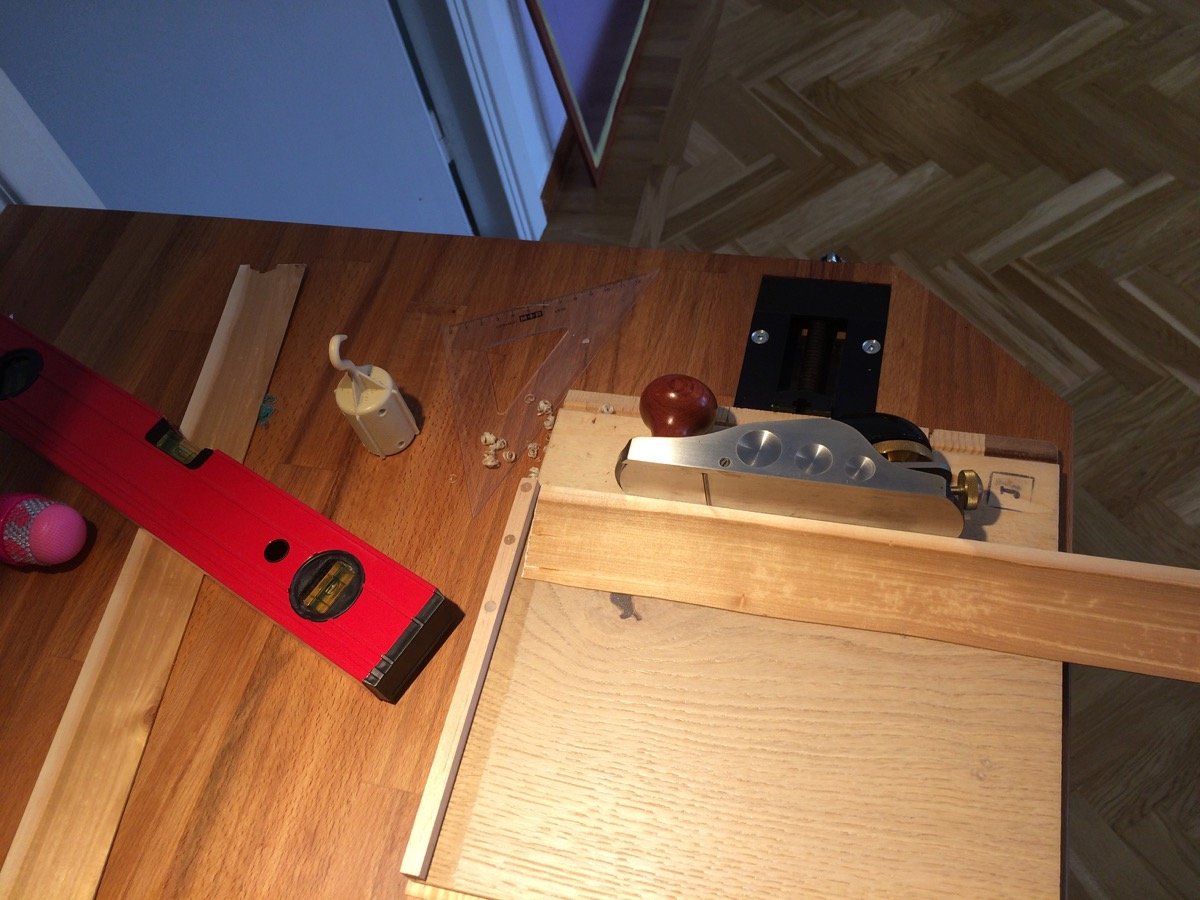
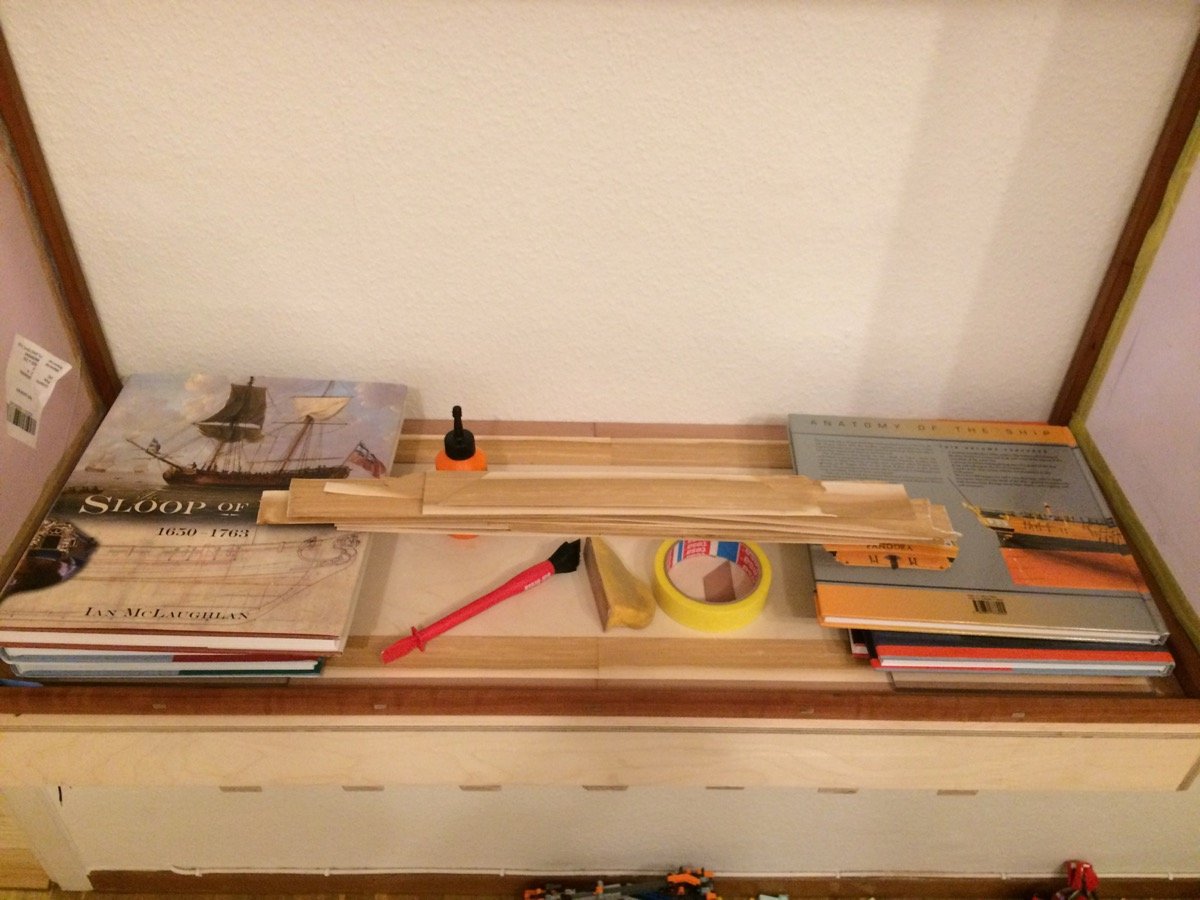
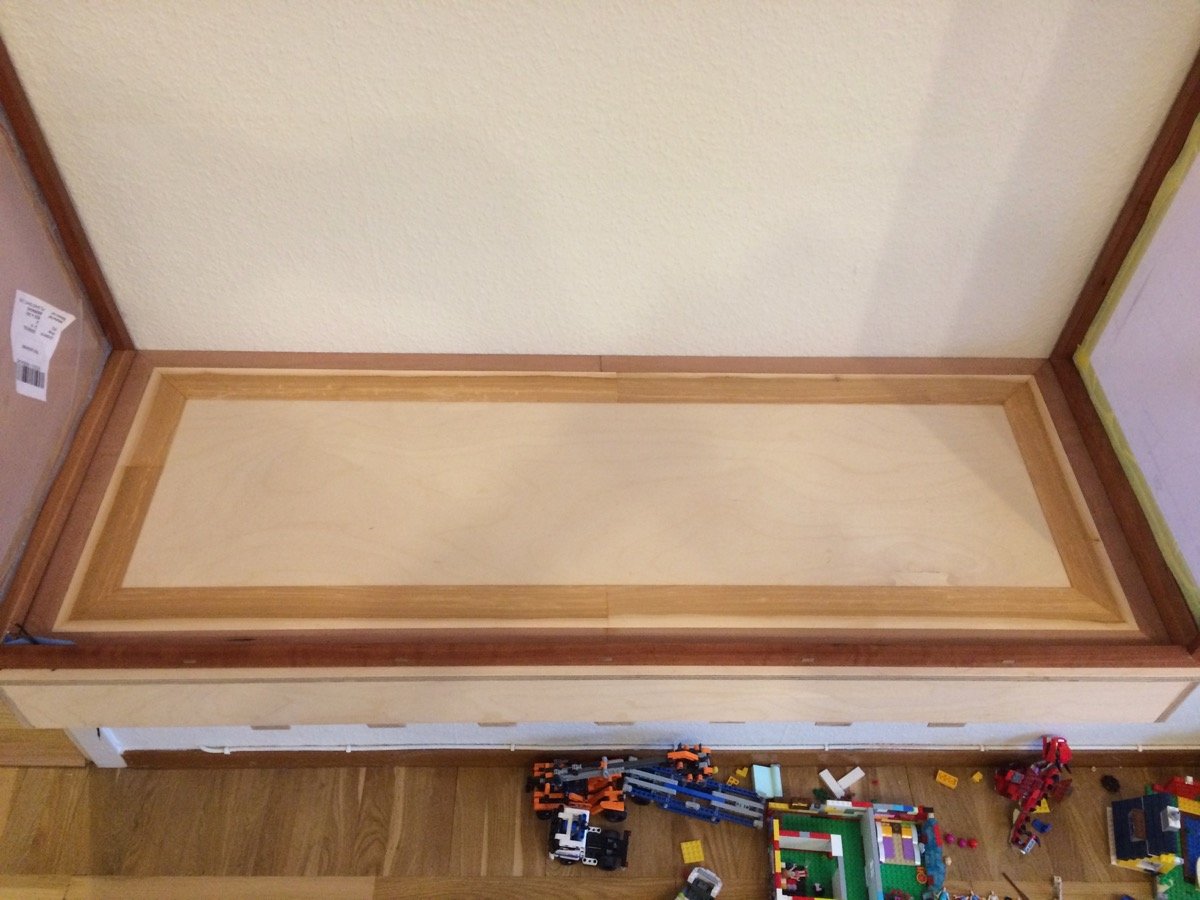
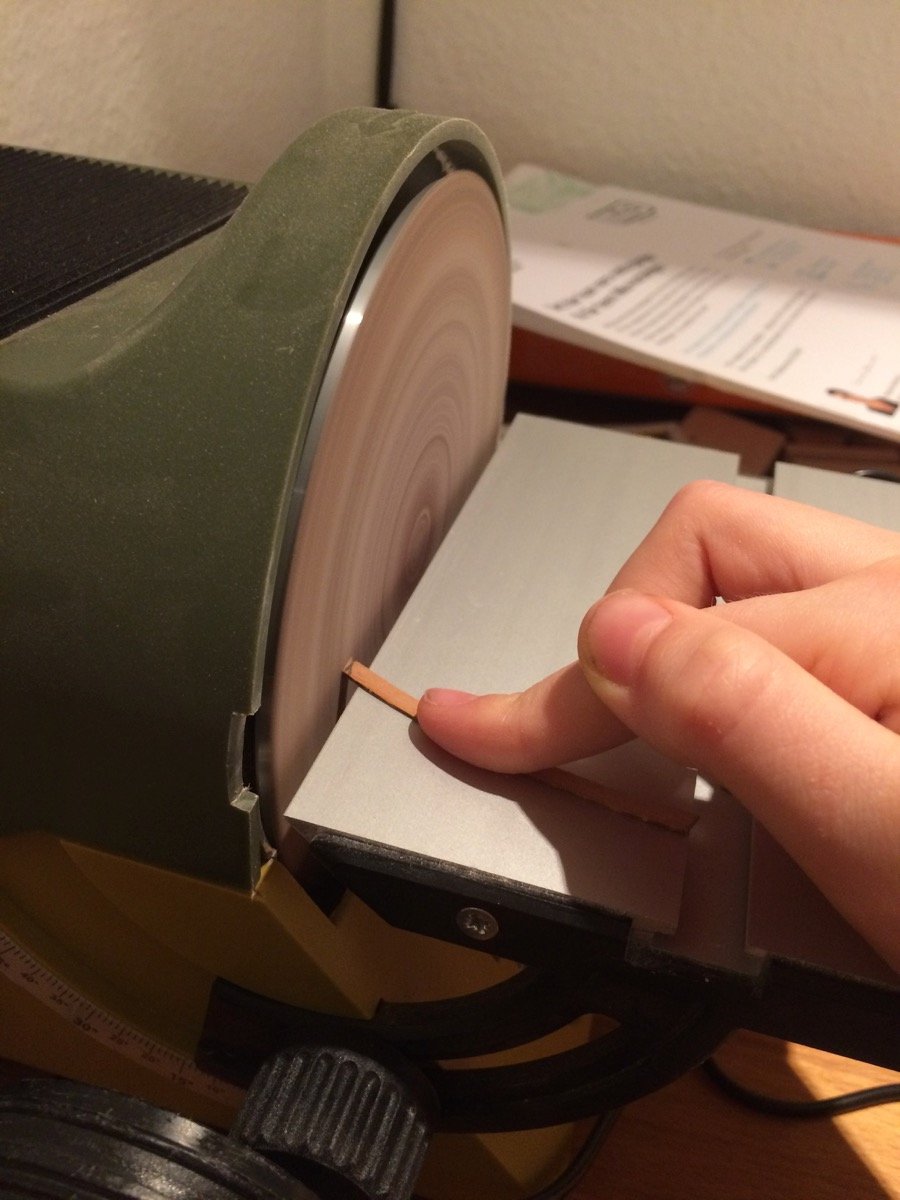
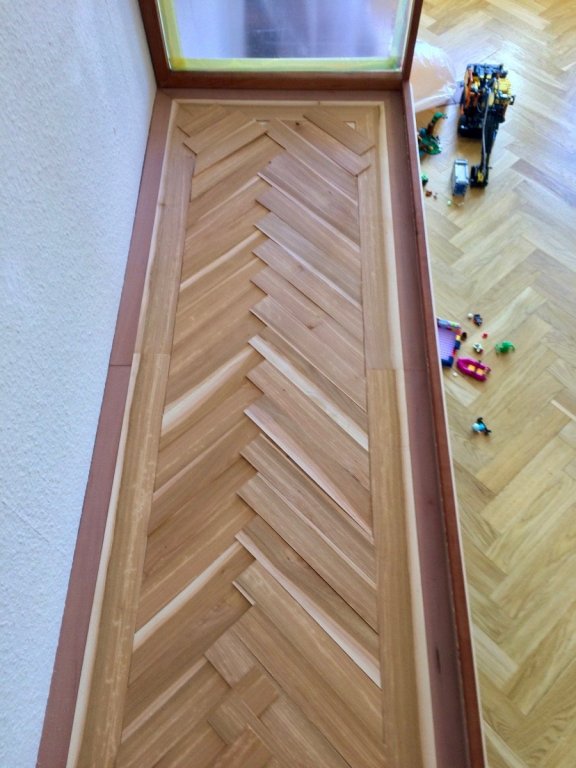
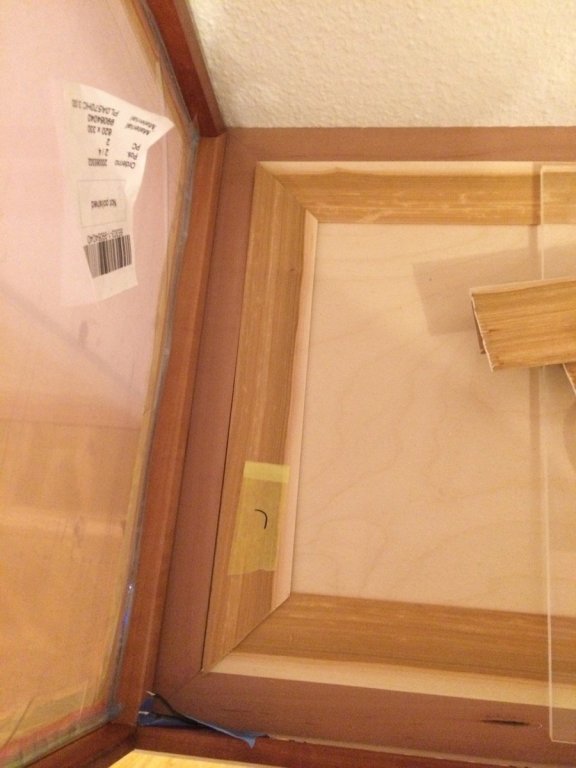
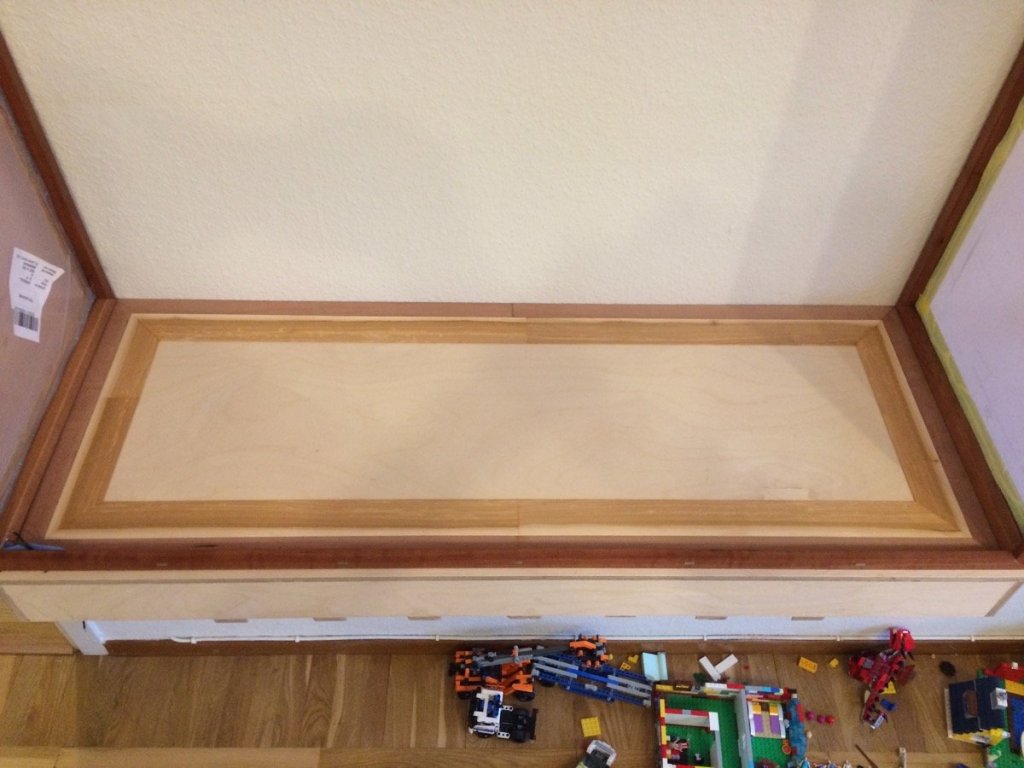
The display case progresses. Sloooowly (live gets in a way, in a good way). Only get 1-2hrs of hobby per week, assuming no trips. Everything is milled up, and miters are cut using miter jig on a table saw and fine tuned with a disk sander + miniature block plane. First series of strips buckled up significantly, because of a moisture in the glue. But I quickly realised that I do not really need to spread a glue over the entire plank - few spots is enough for it to be in place. So I apply the glue in lines: And brush some water on tope of the plank before putting a weight on it - that helps to neutralise moisture on both sides of the plank, or even force it to bow in another direction. After that, plexiglass plates + Books help to clamp it down: That process worked well, all planks are now flat and there is no buckling. Next strake was made of willow, 4cm wide. It was carefully straightened with a plane and straightedge before passing it through table saw: The idea was good, until I screwed up. I was trying to carefully align the grain pattern, so the sapwood strip will be on the outside... Except one plank where I made a mistake: With very little material to spare, I will reuse this plank for the central part of the floor. So the left plank was made out of two cutoff pieces. Not ideal, but not super bad: Nothing is sanded or finished, so pardon for some glue lines.


- 968 replies
-
- 21
-
-
- hahn
- oliver cromwell
- (and 1 more)
-
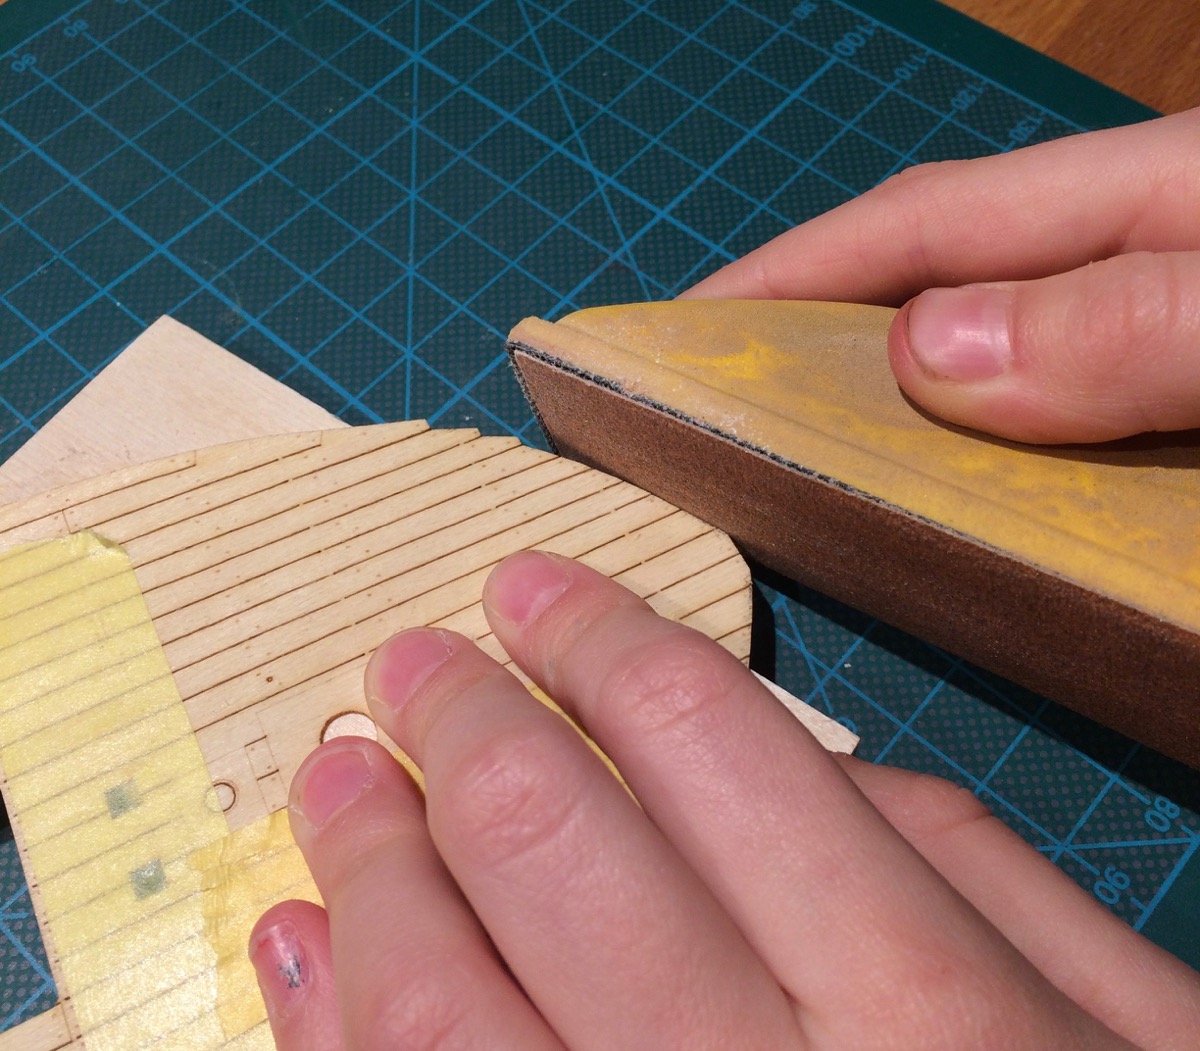
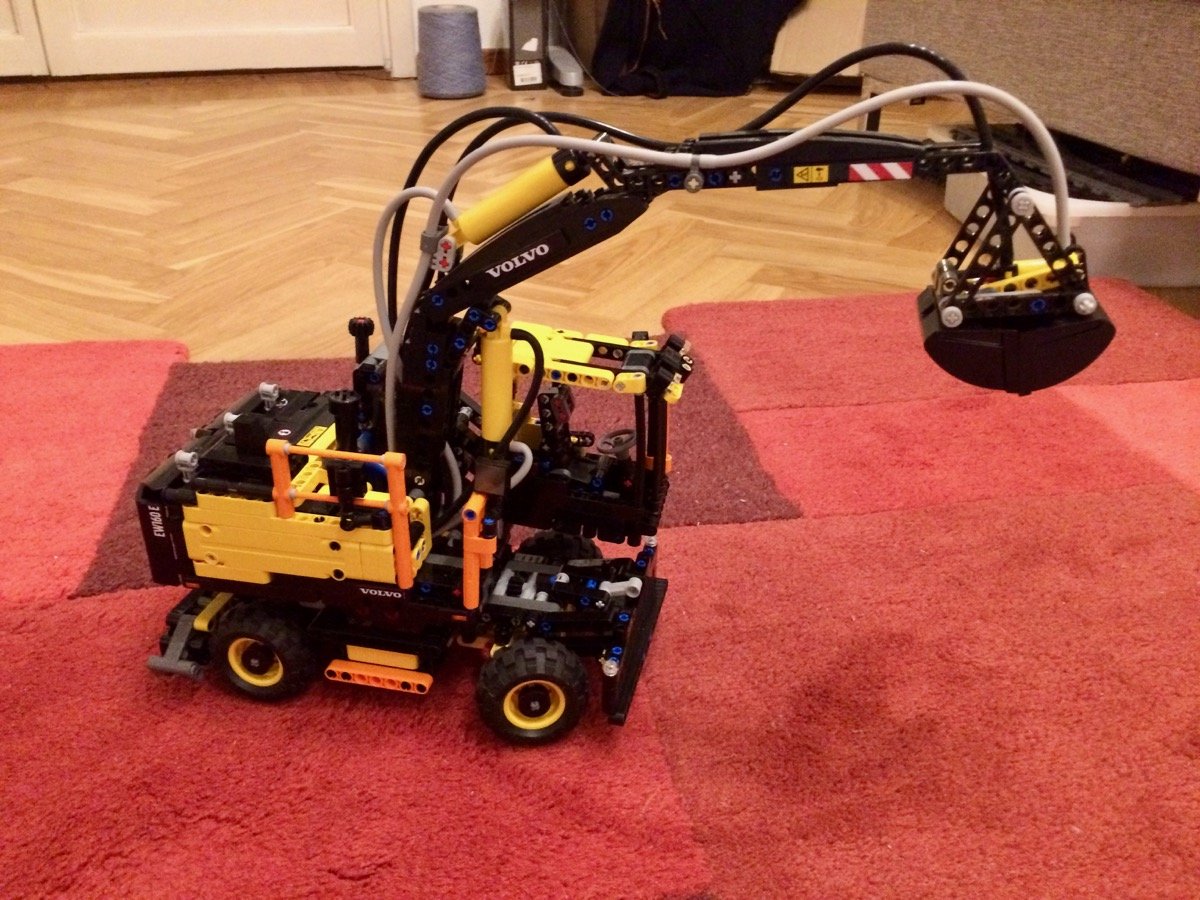
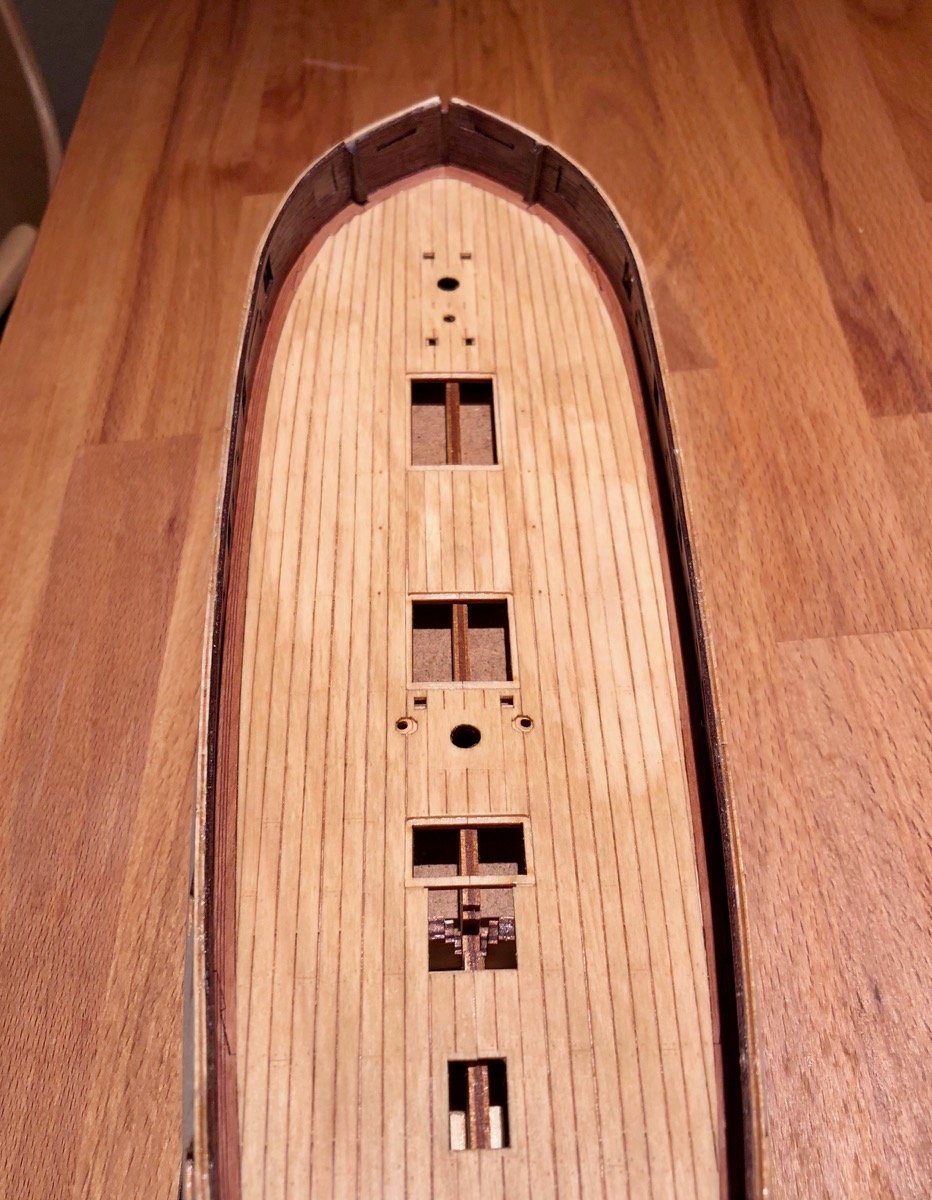
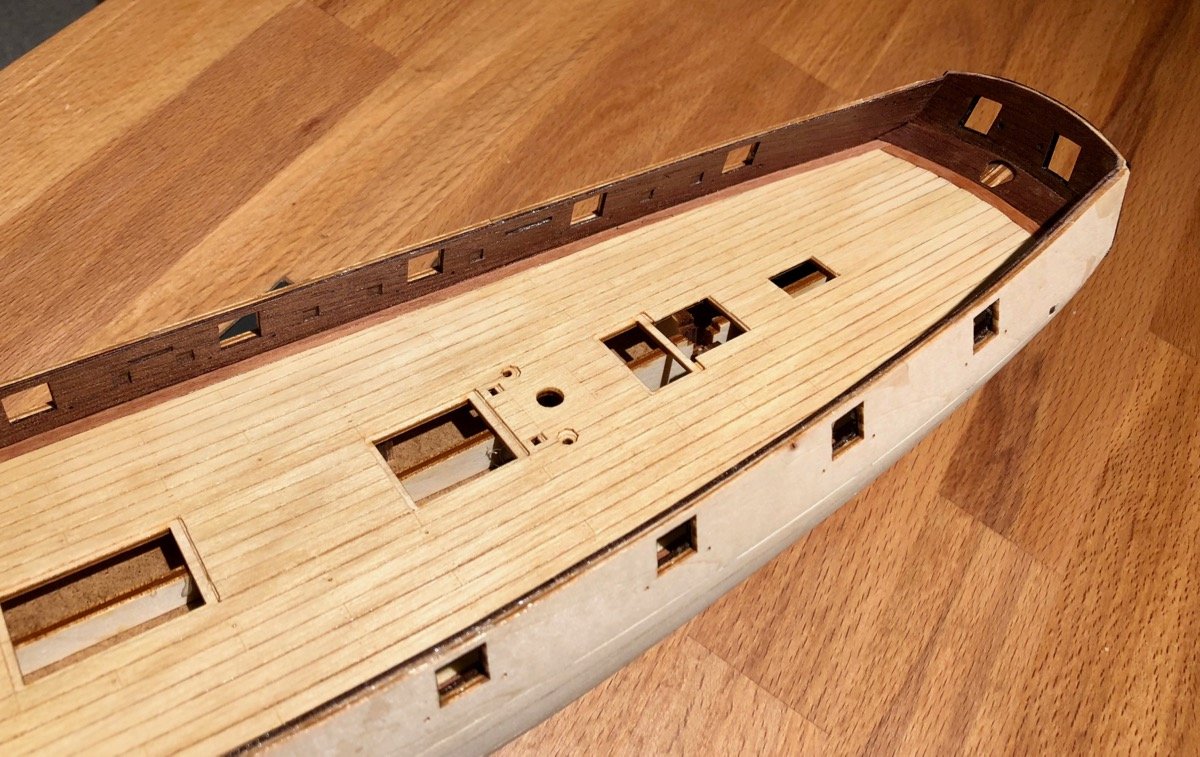
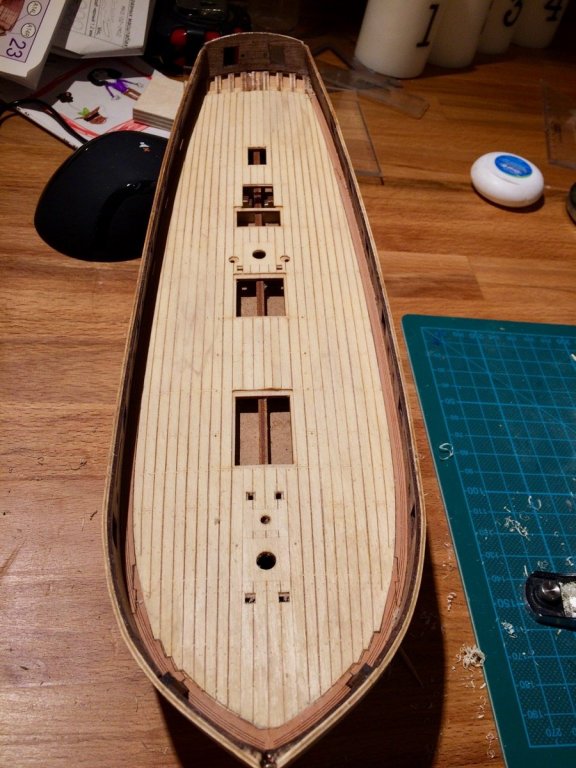
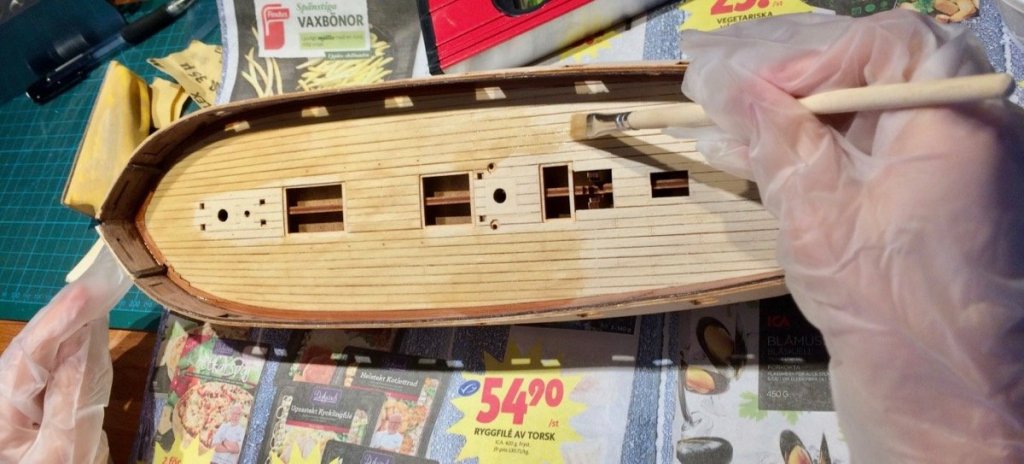
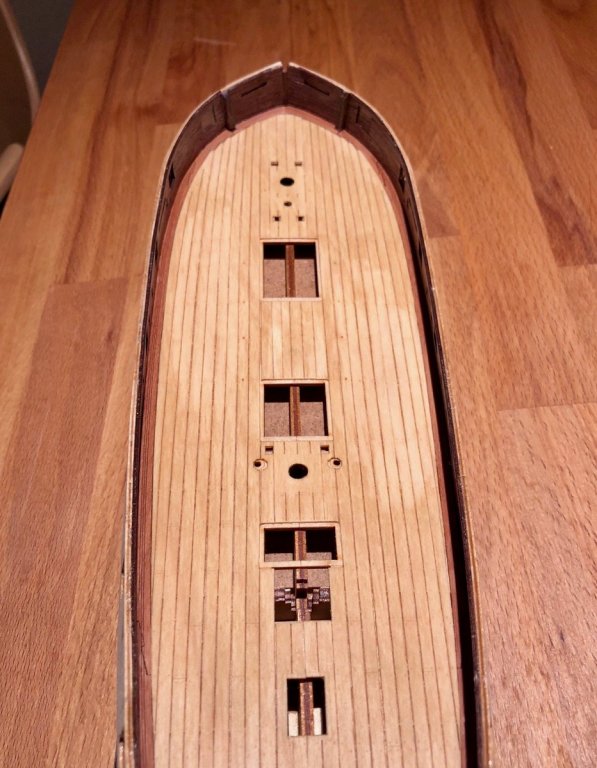
Thanks, greenstone! In a meanwhile, we had a bit of delay because of another project: this took a bit longer than expected - the manual is 400 steps long, but the result is amazing - pneumatic cylinders work, fantastic! Back to ship modelling - we started fitting the deck. It was an exercise in an endless cycle of "sand a bit - try again - make some pencil marks - sand a bit more". The deck is laser cut to separate planks that are tied together by a few tabs. They are probably supposed to be installed separately, but we decided to cut some corners and install the deck as a single piece. Daria had no problems sanding thin veneer, but I helped a bit every now and then - the process is too repetitive for a child. The glue-up was simple in the beginning, but turned into a nightmare quite soon - planks swelled because of the moisture in the glue, became wider and started to push each other out. I ended up cutting off some planks in the middle to leave the room for expansion. It was a mess and the glue dried to quick, so no photos. While I was loosing a battle against the glue and moisture and swelling planks - Daria decided to cheer me up and made a cute drawing of us working on a model That helped! Resulting deck: Fitting few parts around transom to close it off, I let her use the disk sander, which made her super happy - using some real adult tools, yay! Then we did a bit of scraping: A lot of sanding: And - finally - finishing! Used some Danish oil. Might be a bit too shiny, but it is the easiest finish to apply and dries relatively quick: Final result. Kind of blotchy, unfortunately. Maybe we should have sanded the deck more. The wood is not monotonous and have a bit different texture in different places. But it's good enough for the purpose!


-
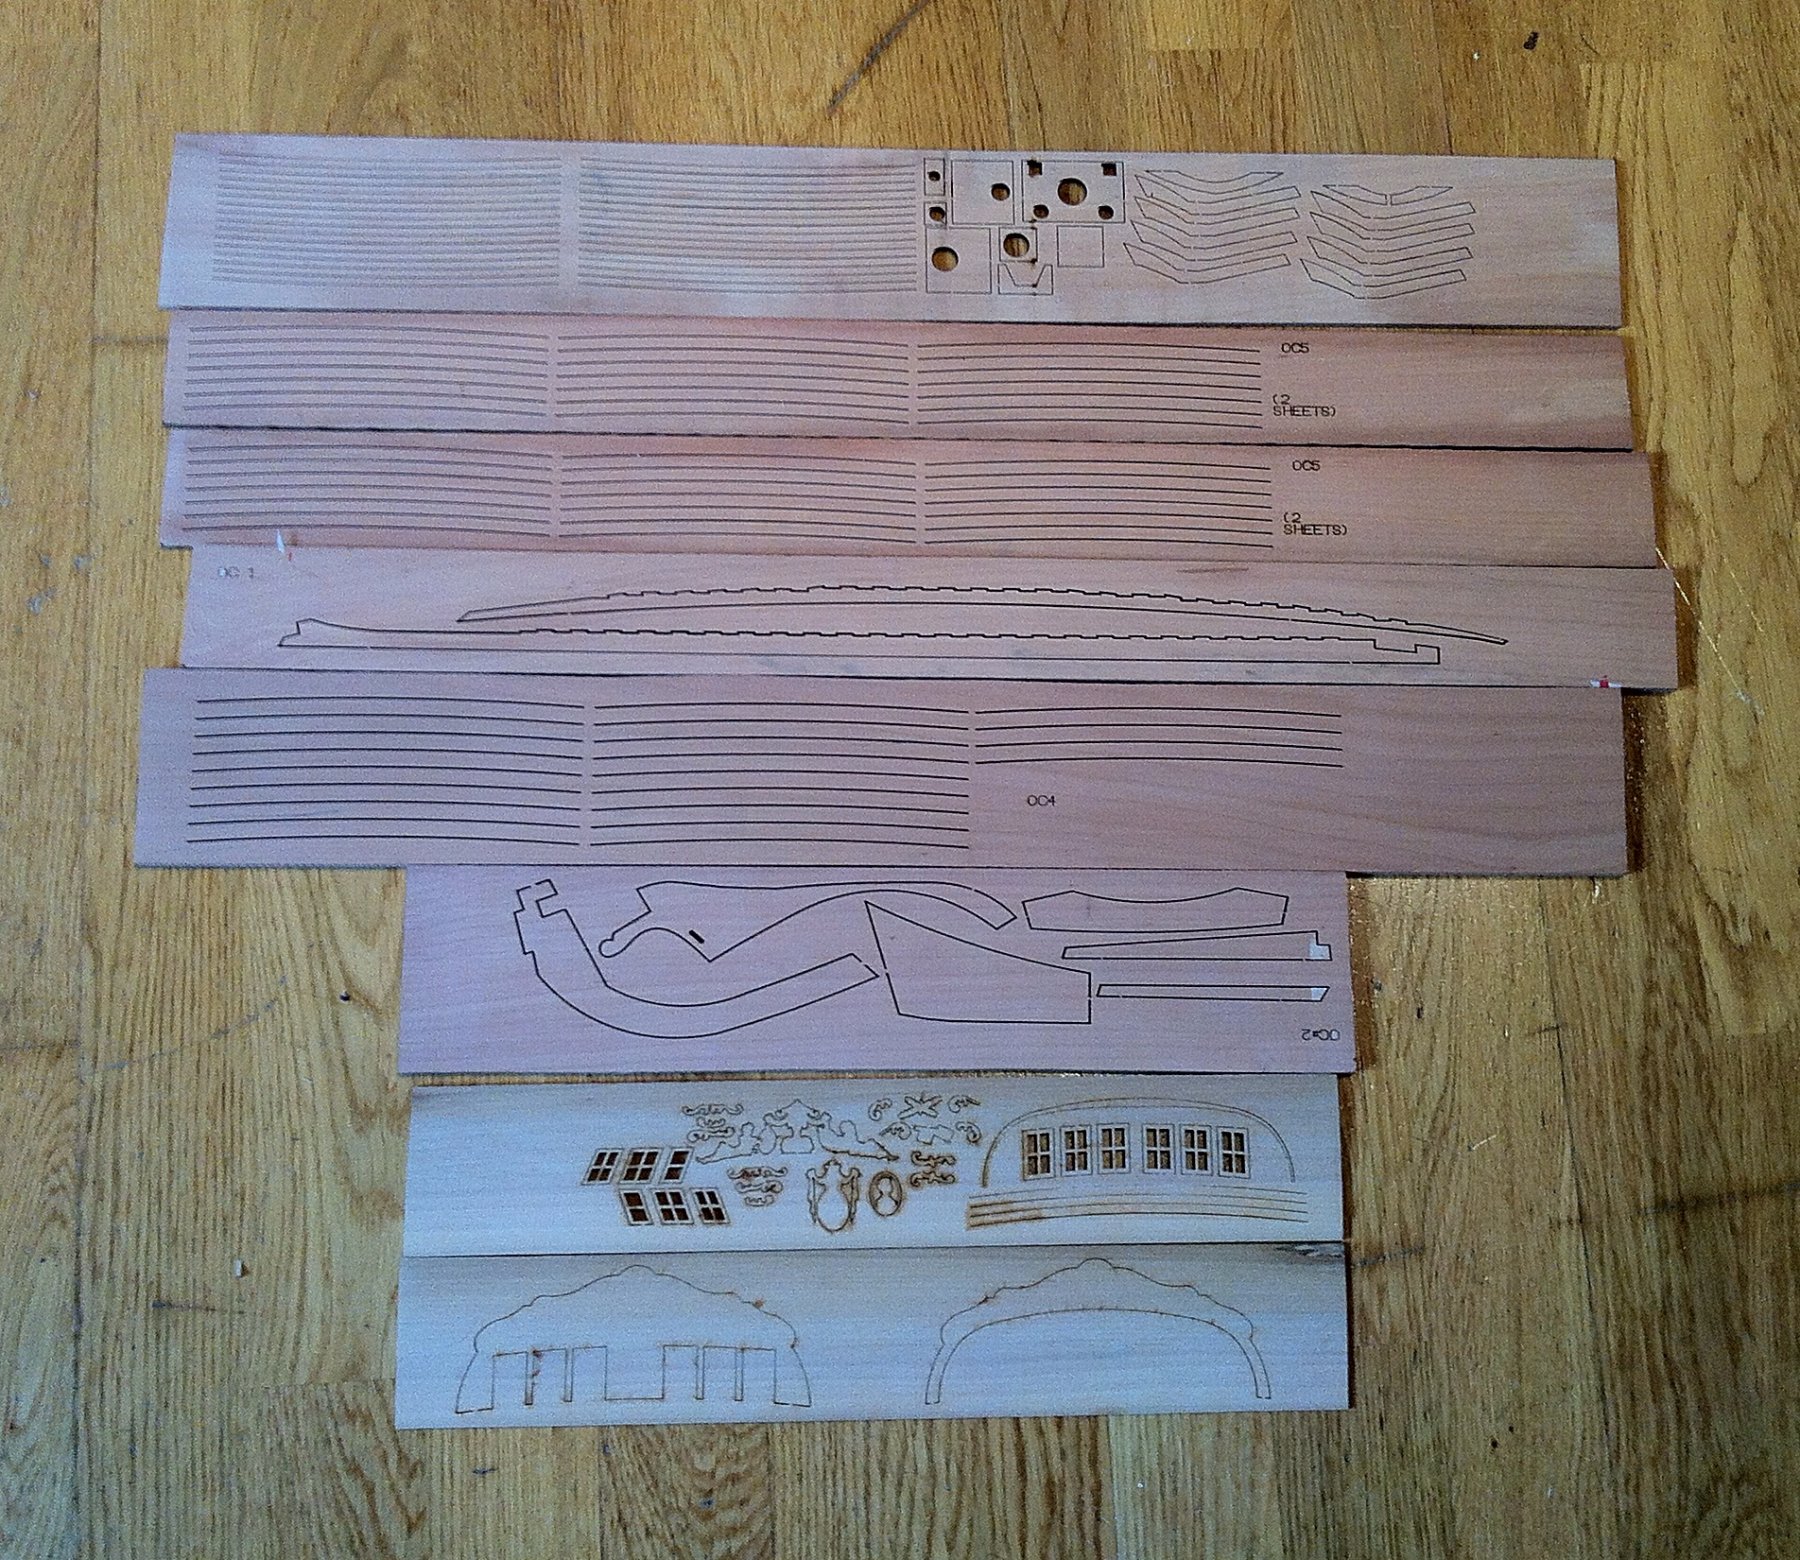
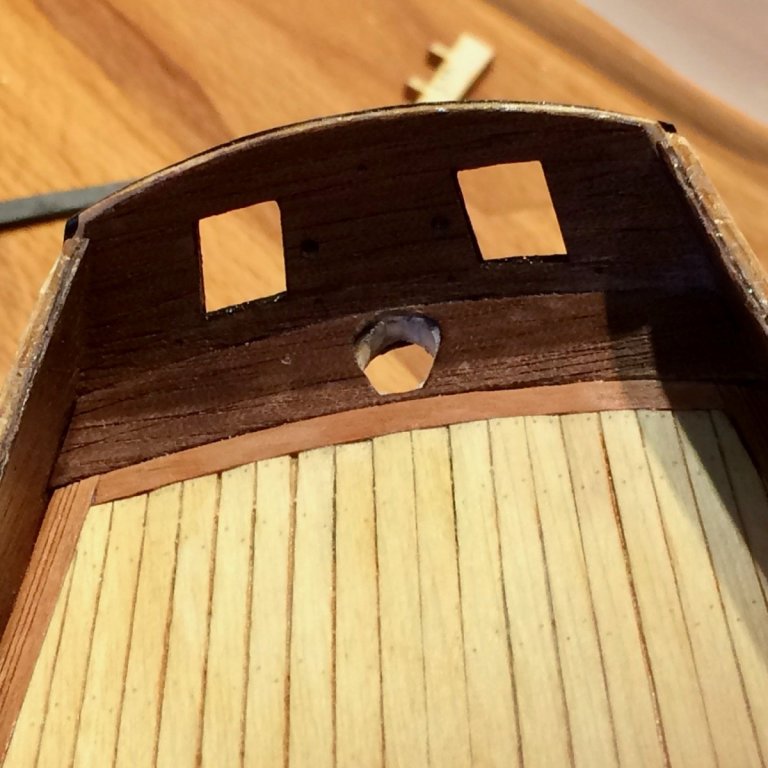
Hi Lawrence, Yes, the decorations and windows are good quality, two bottom sheets on this photo: Though you need to be really careful when building a transom area to make sure that windows will fit, there is no room for error. I was not so accurate in this area, so my windows would be made to fit instead... Also, note the grain direction. I would try to make those out of multiple pieces - more realistic and less chance to snap off a flimsy piece that has a grain running across its width. Though it is boxwood, so it might survive. But trying to clean off the char while trying not to break it - is a big challenge, probably more difficult than just cutting the piece from scratch (the plans have all the necessary patterns). So there is no clear answer, just imagine yourself making those from scratch or using laser cut pieces. What would you prefer?

- 968 replies
-
- 4
-
-
- hahn
- oliver cromwell
- (and 1 more)
-
Hope to start reading your build log soon! Please send me a message if you need a wood list or a detailed photo of some parts to know what you will get in a box.
- 968 replies
-
- 3
-
-
- hahn
- oliver cromwell
- (and 1 more)
-
Not planning any rigging (not my cup of tea at the moment, but never say never). Haven't heard about rigging plans of Cromwell, but it is a very typical ship of that period, and there are plenty of other frigates with a rigging diagrams. Pandora or a Swan class as an example - you can buy rigging plans for them (and an Anatomy Of The Ship book for Pandora) and easily use this for an Oliver Cromwell. Of course, it is a stretch - but probably not very far fetched.
- 968 replies
-
- 4
-
-
- hahn
- oliver cromwell
- (and 1 more)
-
Hi Lawrence, Thanks for the compliments! The "timbering set" I bought from the Lumberyard does not contain frames, but instead it has lots of "framing stock" (strips that are laminated together to be used as a blank for framing). The process should be quite clear from the first 10 pages of this build log. The process is quite simple, once you get the hang of it (for example, how to join the pieces together on a proper angle without gaps, or how to laminate two layers without wood cupping because of a moisture in a glue). I haven't planned to replace the wood, but was kind of forced to, because of a number of reasons: 1) Included framing stock was a bit different kind of pear that I expected - it is a golden colour pear, instead of pink-brown swiss pear I was looking for. I did not know that the term "swiss pear" has different meanings, so I was just expecting a different wood. The golden pear is not bad, in fact some modellers even value it more than the pink one, but it is purely a matter of taste. Most swiss pear you see on this forum is a pink-brown variety. 2) The stock was very rough with a deep sanding marks. I had no planer or sander back then, and sanding it by hand was a major time waste and it was not fun at all. Also, they had an inconsistent thickness, which leads to even more sanding 3) High colour variation and lots of defects (grey areas in that wood) The laser cut parts were also made out of golden pear, but a higher quality one. Though some joints were too wide, and the laser char was thick - cleaning it was worse than just cutting a new part out of a pear sheet. Also, they were a bit too simplified (stem was made out of one single piece, etc). This specific point is not a lumberyards fault, this is the way how Hahn did it, simplifying it on purpose to make it a bit more beginner-friendly. All that together lead to a decision to just buy the wood I like (pink-brown swiss pear) and do it from scratch. I haven't regretted that decision, and I have nobody to blame if smth does not fit together Lumberyard do not have any photos of the package contents, so hope my log helps a bit. Now you know how the "swiss pear timber set" looks like in reality. I posted a lot of photos and whining texts in the first part of that log, if you need more details. If I would do it again - I would do it like this: 1) Buy the full set of plans (from Hahn family directly or from Lumberyard, not sure what is easier nowadays). Maybe a framing jig as well, Lumberyard have it laser cut. If you cut the jig yourself using the paper template that is a part of the plans - paper distortion might be a problem - it is a really big object, and if it is skewed - the resulting ship would be skewed as well. 2) Once you have the plans - order the wood separately from a source you like and trust, using photos or sample pieces to make sure you get what you expect. That is easier than I though - you need lots of framing stock (dimensions and amount is easy to calculate from the plans, I can share the numbers for Cromwell if you need), and a number of sheets of various thicknesses for all other parts. That is also easy to do once you have plans - just pick up the wood type for different pieces, check their thickness, ballpark the quantity you need, buy 50% more just in case. Luckily, you do not need a lot of different thicknesses (think about oaks that the real ship was made of - they can only be so thick). So I bought a number of pear sheets of various increments - from 2mm (planking and such) all the way up to 10mm for a thicker parts. Add a 1-2mm reserve for sanding - if you need a 6mm thick part, you need a thicker sheet for it (8mm or so), otherwise you will end up with a 5mm part In hindsight, I am not sure what is the point of a timbering package. Framing stock - any wood supplier will mill you a custom sized planks. Parts that are laser cut - it is easy to cut them on a bandsaw/scroll saw, and finish with a disk sander. You can't build that model without these tools anyway, and making them out of a clean sheet is maybe even easier and more pleasant than trying to scrape away or sand away that nasty char, that ends up screwing dimensions here and there. Either you sell a kit where everything is pre-cut and a scroll saw is not needed, or you sell plans + jigs. Please send me a message if you need more details, would be happy to help!
- 968 replies
-
- 5
-
-
- hahn
- oliver cromwell
- (and 1 more)
-
Håkan, glad to see you! Hope there would be more updates this year when I will finally get back to the actual modelling... The room is actually good enough, forces me to keep everything in order. The workshop will just allow to increase the scale (larger bandsaw, larger planer, larger mill, etc) - which means I will get sucked into making furniture, tables, etc etc etc. And there are only so many hours I can spend on a hobby. And it is nice when I can be close with my family, at the same time doing some tedious task that does not occupy a lot of brain (some random glue-up, sanding, etc etc).
- 968 replies
-
- 6
-
-
- hahn
- oliver cromwell
- (and 1 more)
-
Your lion looks great! This is a surprisingly difficult figurehead to model - lots of other carved lions have trouble with a face expression, it is frequently something like "please, no more sour bread, I need meet! bleh". While your lion looks healthy and strong! Can't recognise the wood you are using for the stem, what is it?
-
size of people
Mike Y replied to Snow's topic in Discussion for a Ship's Deck Furniture, Guns, boats and other Fittings
And there is also a handy app that helps to reduce errors when converting back and forth: https://itunes.apple.com/us/app/model-scaler/id528641484?mt=8 -
Nice! Guess it took some time to translate it. Glad to meet the kit designer!
-
Chuck, thanks for the interesting perspective! Even if you split the pump into two pieces - it will still take a while to mill them (too many operations, multiplied by number of pumps). The only ideas that come to mind are about tablesaw jigs, but hard to see how that will work on that tiny scale Would be too inaccurate, not good enough for the Syren brand.
-
What is your view on the approach used by Master Korabel - offer two versions of the kit, regular and "plus", with the "plus" version having a bit better quality of blocks and fittings, but being a bit more expensive? In your case - something in 250-275 range, but with a PE set included? So it does not involve having two sets of parts, the "plus" version is "regular version plus extra parts".
-
Wait for it - the satisfaction you are going to get once the fairing is complete - is priceless!
-
... and please do not worry about repetitive postings about wales, few recent pages of this log yielded an unexpectedly interesting discussion and lots of photos of a pretty top-notch models. Please do not stop!
-
Are you sure you want to blacken that beauty? Nice machining, makes me want to dive into a metalworking lathe.
-
Nice and so quick!
-
Small desktop mill for modelling
Mike Y replied to Roks82's topic in Modeling tools and Workshop Equipment
Sidenote: Sherline is available in EU, and last time I checked - the prices were very reasonable, not far off from the US prices: http://sherline.com/sherline-worldwide-dealers/