


Mike Y
-
Posts
1,513 -
Joined
-
Last visited
Content Type
Profiles
Forums
Gallery
Events
Posts posted by Mike Y
-
-
Contacted European service center, they helped quickly - just "send it to this address with this mail coverstion printed inside the box, so we will know what to do". Got a new dremel in a few weeks, so now I have a double set of accessories and a spare charger

John, thanks again for the heads up. I haven't received any malls from Amazon where dremel qas initiallu purchased..
-
-
Druxey, thanks for the note. Hahn framing is quite different in that area, he do not show hawse timbers. It is quite different from a real framing, descibed in TFFM. Simplified for aesthetics
Adding just two hawse timbers will look weird, so will try to follow the same style - probably will add one skewed frame, like the most forward frame on the hull right now.
-
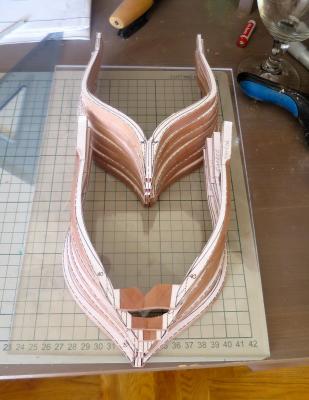
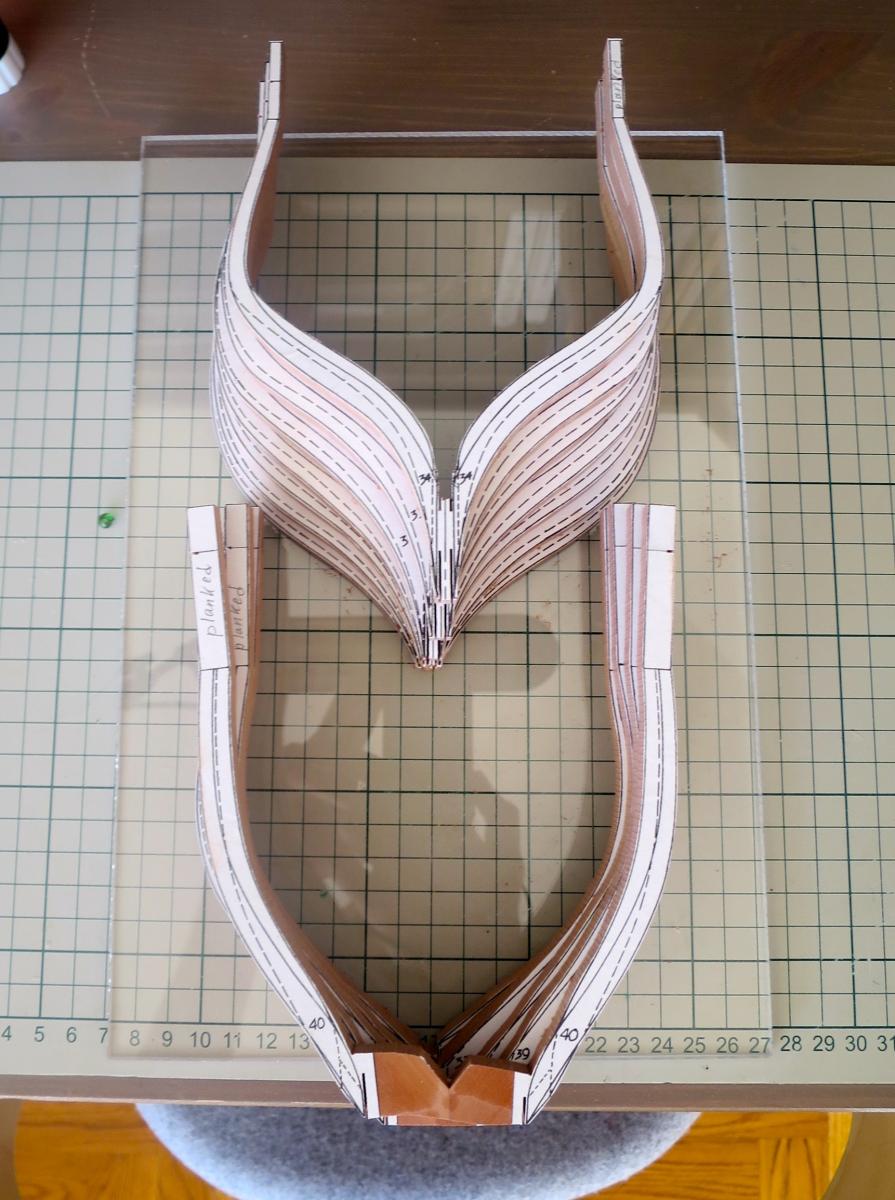
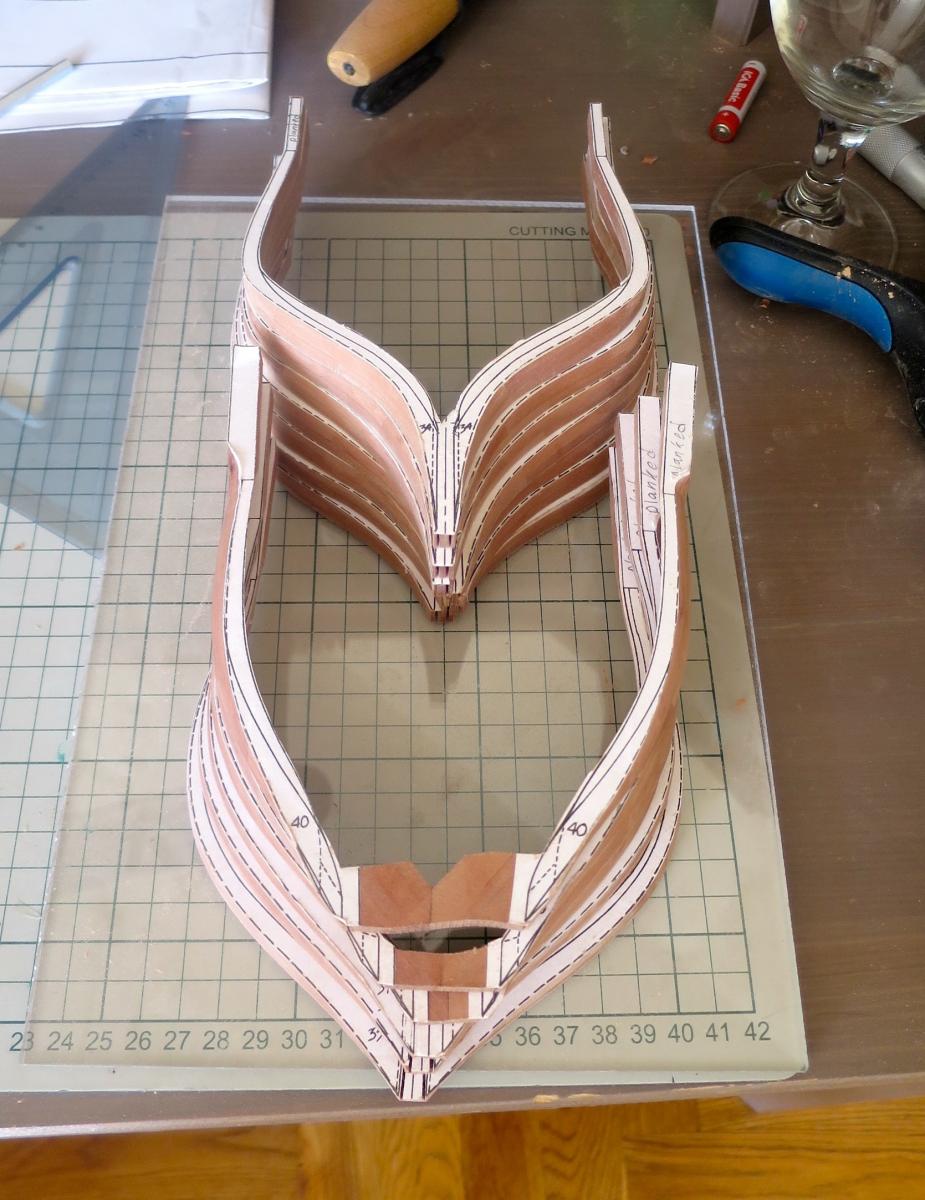
Surprised myself and installed all that weirdly shaped bow frames in just 4 hours.
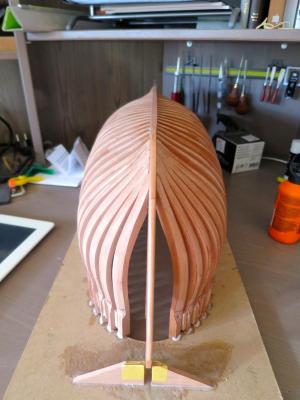
Pretty weird looking gap between the last frame and the stem, looks like a broken tooth. But it is not a mistake, there are only 40 frames in the jig. Need few more to cover the gap.
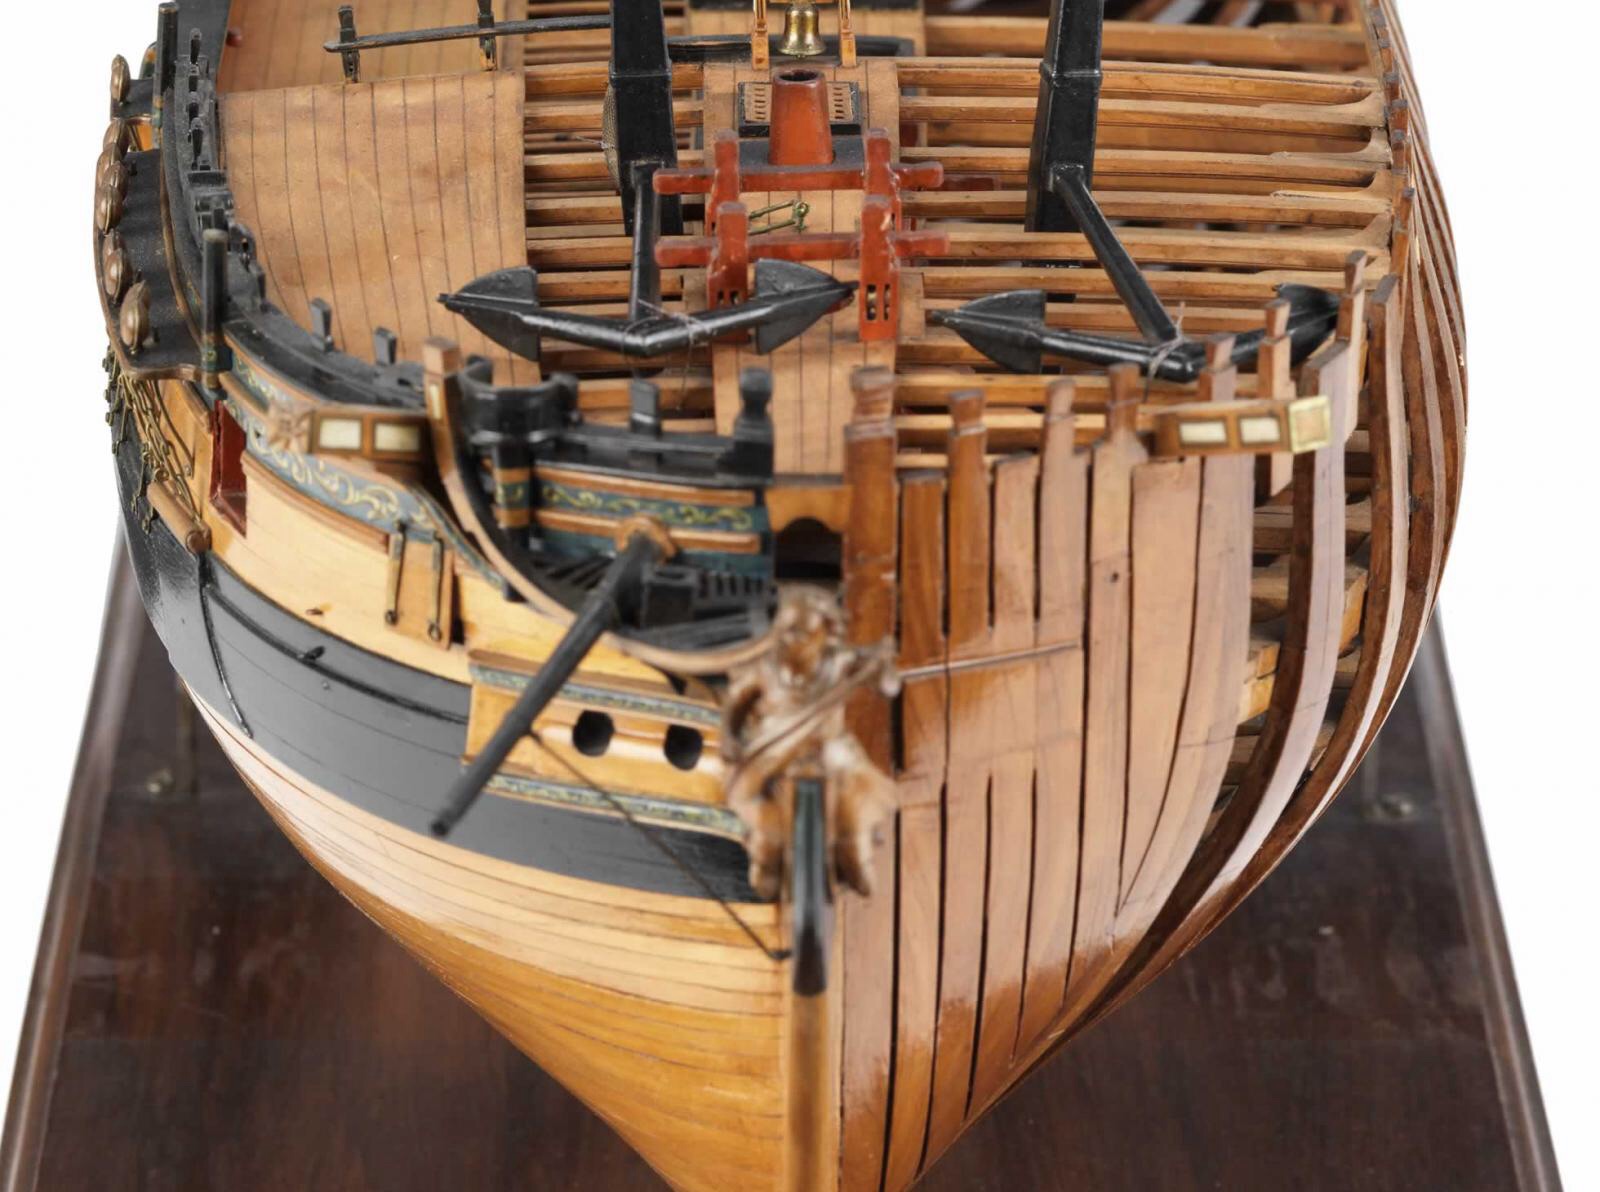
This is how Peter (Mr. Hollom) solved that problem in his build:
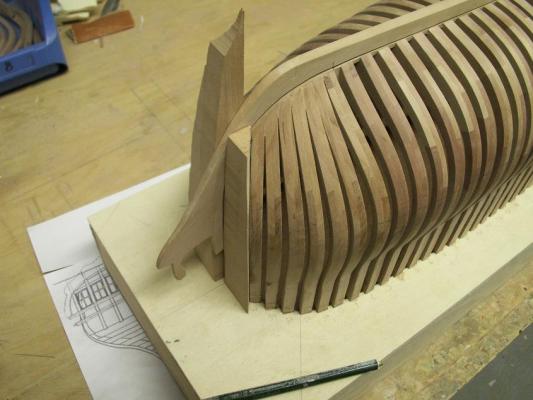
But I am not sure if it will look good (especially since I will have no wales or planks on one side), and will try to insert one more frame in the middle of that gap or maybe glue it directly to the stem.
One of the Hahn's drawings actually show two extra frames, that are not present on a framing plan / jig plan / frame plans. That extra frames are glued to the stem and to each other. Hmmm....
Will try different options to end up with the most even spacing.
I truly wonder why Hahn omitted one (or two) extra frames, would make life so much easier.

-
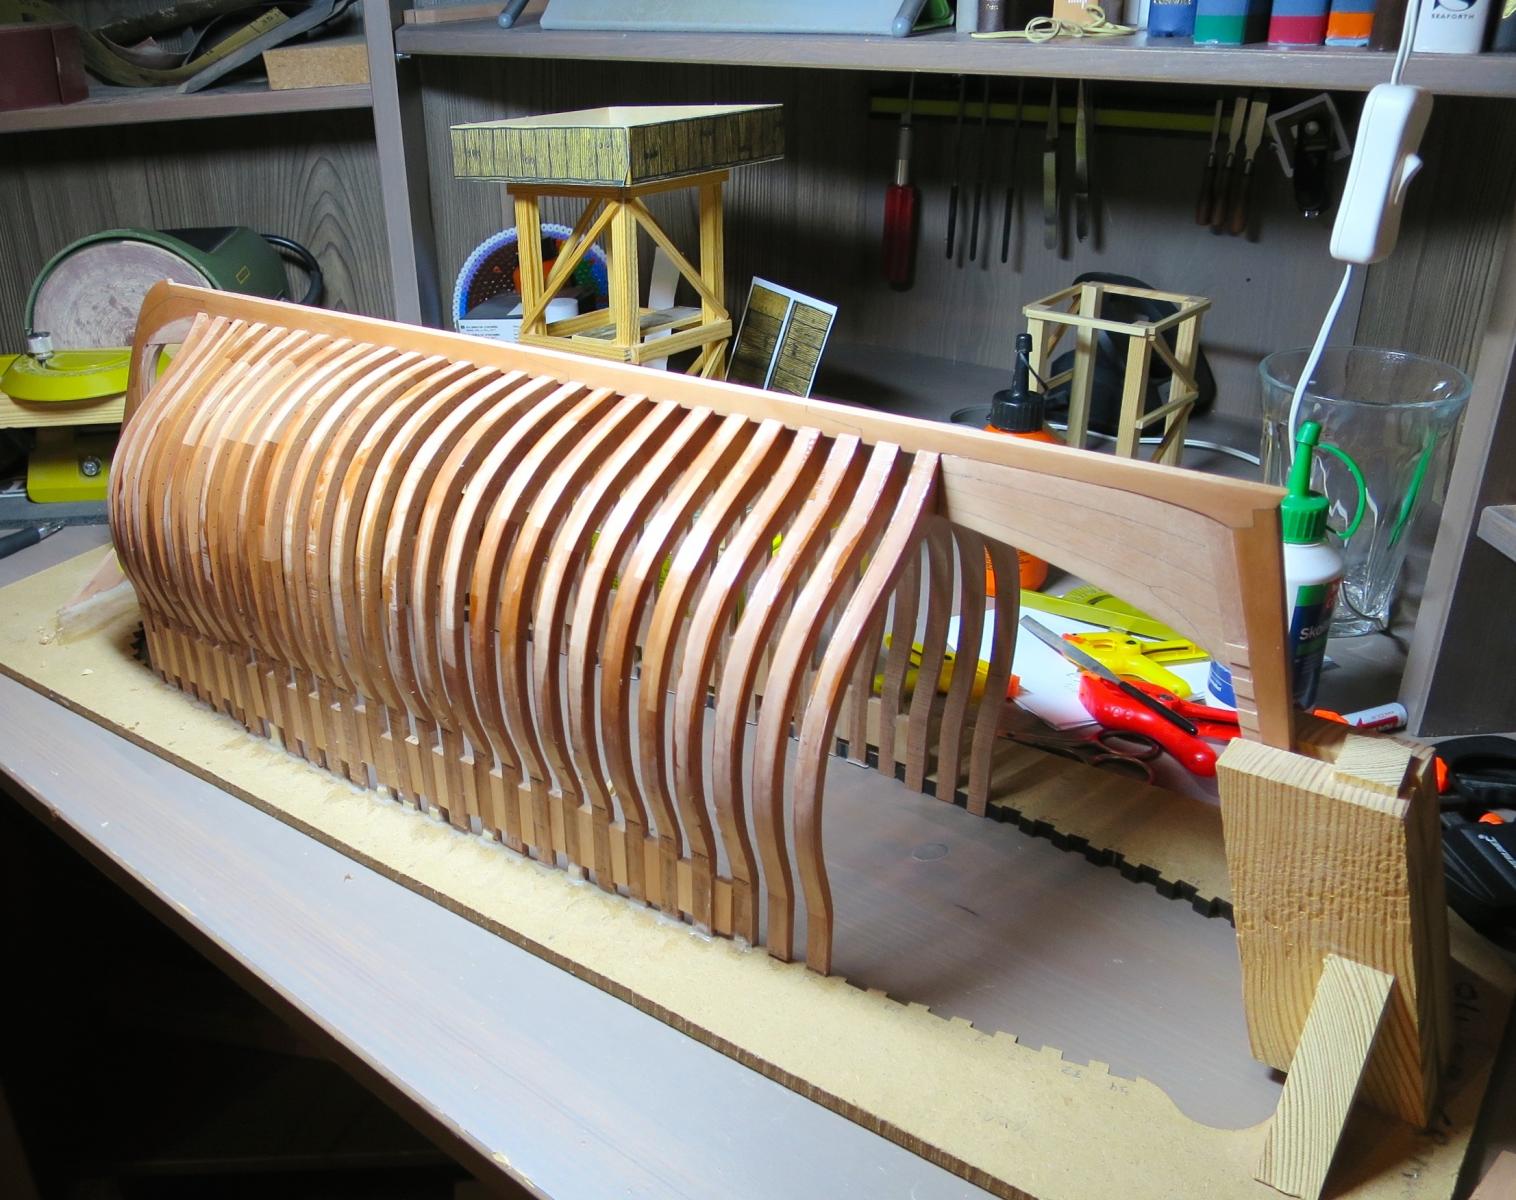
Looks great!
But I am slightly worried about the way it is clamped into the vice - one accidental bump - and the keel will crack

It is very handy to clamp it upside down, just glue some scrap wood to the "rails" that you already have, the one that hold the frames together
-
-
-
-
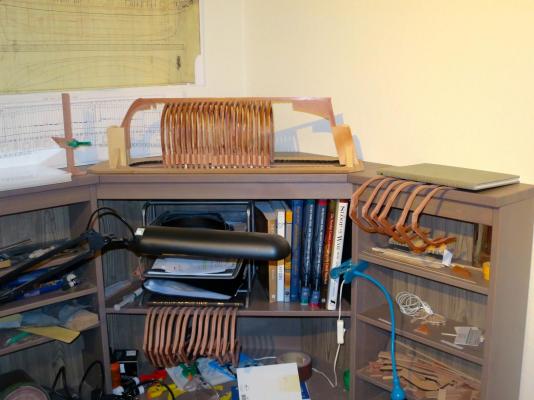
Small status update - frame installation is slowly progressing. Also marked the cutoff points and gun ports.
Decided to skip the sweep ports on this model - they really do not look good with Hahn frame spacing - sweep port is narrower than the distance between frames.
But I will definitely do them on a next model, that have a correct framing (as in TFFM), not a simplified one.

P.S.: careful viewer can mention a magnetic bar in the background, holding some hand tools. Really handy thing! Very happy with it.
- Cap'n Rat Fink, gjdale, dvm27 and 13 others
-
 16
16
-
-
-
-
-
-
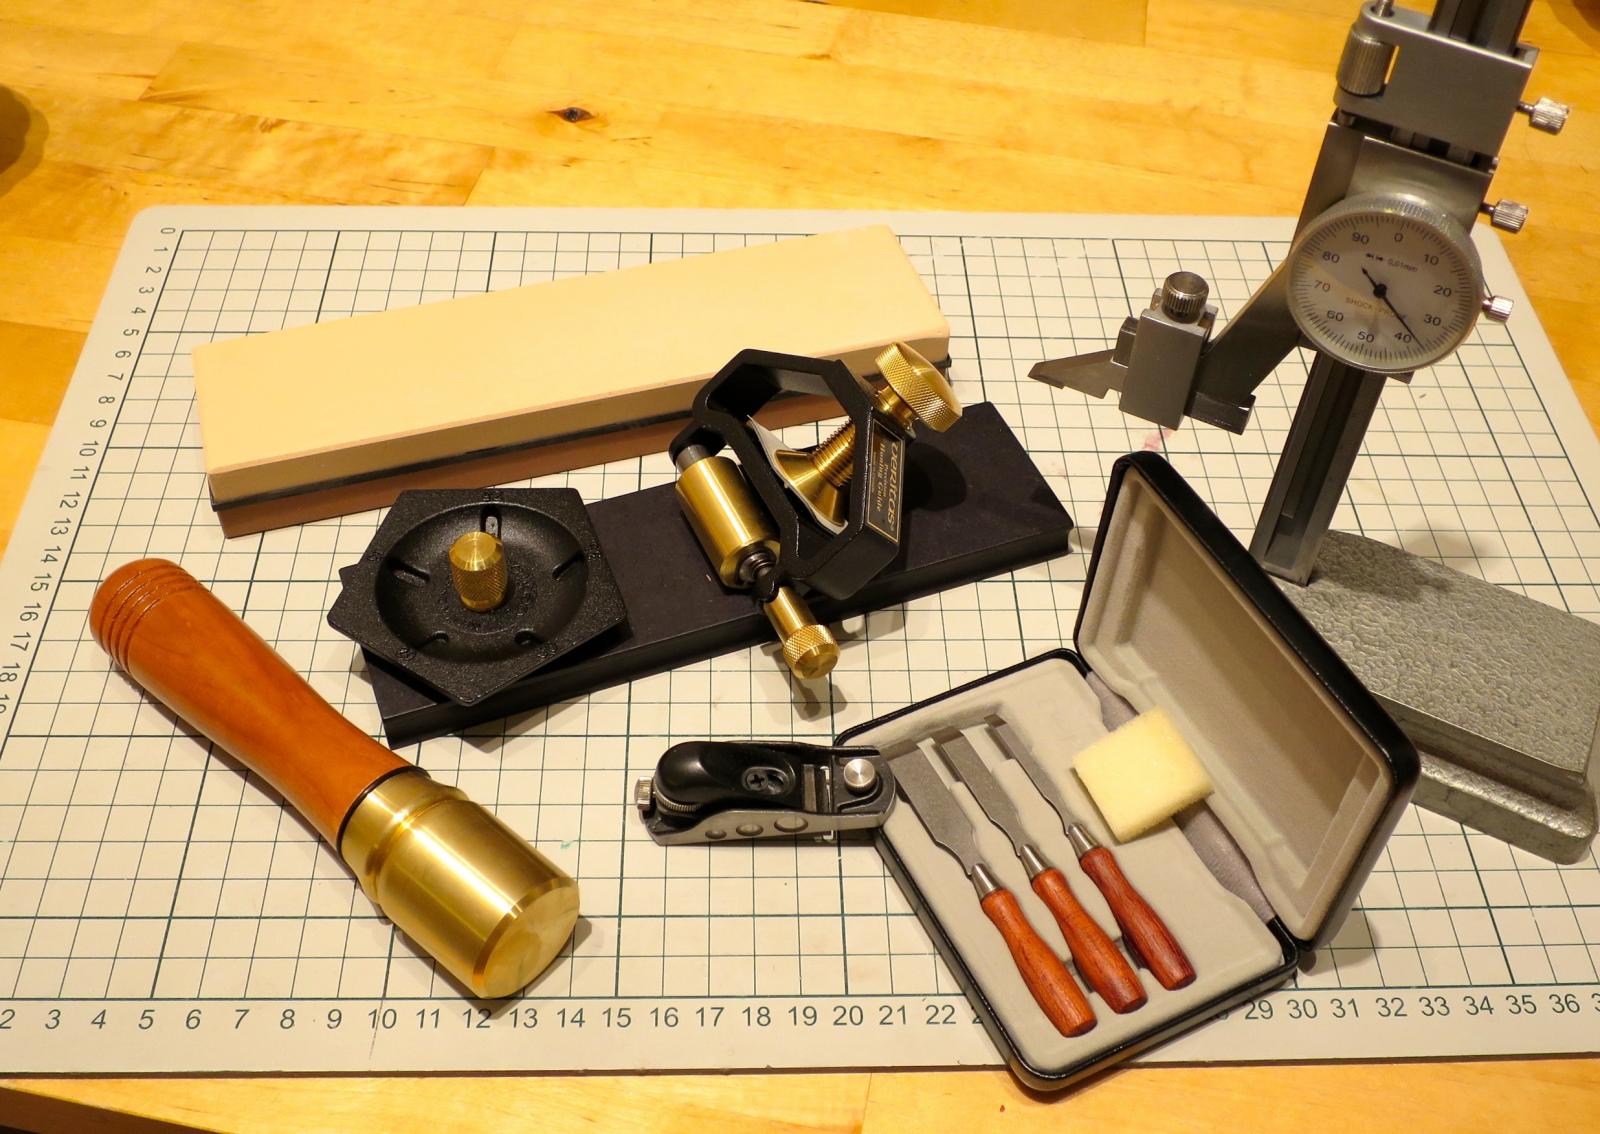
Christmas arrived early this time!
Was on a business trip to US, bought a lot of stuff from Lee Valley - miniature chisels, miniature block plane, sharpening system, wetstones, etc. Also grabbed a nice height gauge on ebay, it is more precise than my handmade wooden one.
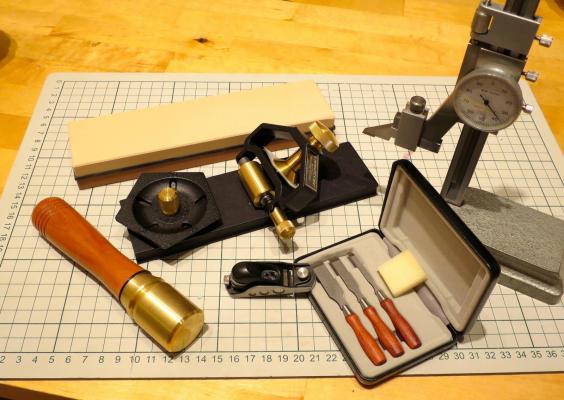
The TSA officers in the airport were quite confused with all that set in my cabin luggage. Especially the height gage and a sharpening system looked really scary on the xray. Spent around 30min explaining that all that things are pretty secure, pff.
Already tried chisels and plane with a factory sharpening - wow, they are sharp! Cutting pear like butter. Nice!
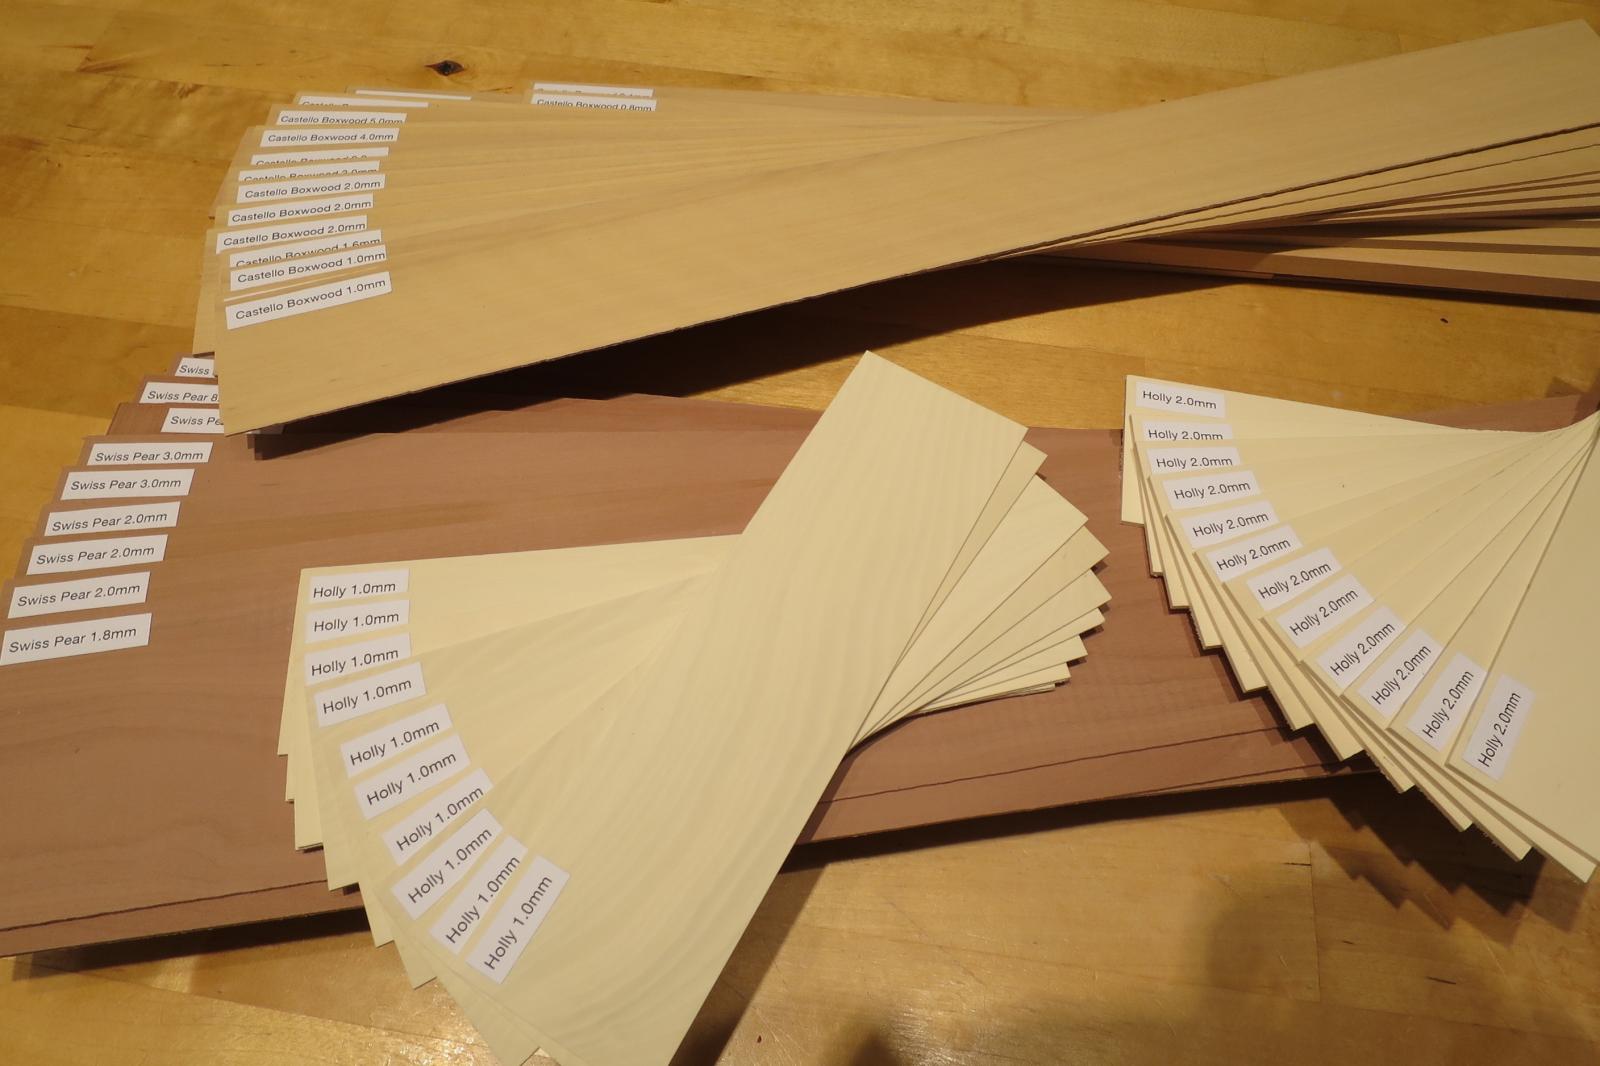
Wood stash was also refilled - fresh batch of boxwood and pear from Arkowood, and Holly from Crown Timberyard. All of these are perfect! Interesting that box from Arkowood and Hobbymill perfectly match in color, while being produced on a different continents.

-
Instead of using chisel, it might be easier and safer to cut rough slots using scroll/band saw and finish them with a file.
P.S.: yes, my chiseling skills are really bad (so far), but just pointing that there are other easy options too.
- thibaultron, mtaylor and Canute
-
3
-
Jeff, thanks for stepping in!
All clear, the last question: do you recommend to store sheets in a plastic sleeve (like the one you ship the wood orders in), or it is better to store it without plastic? Gut feeling is that plastic wrap can cause some condensation and bad ventilation, which might lead to rot or grey spots, but just want to confirm
-
Thanks a lot, John! Turns out mine is affected... Contacted local service center, hope they will replace it
-
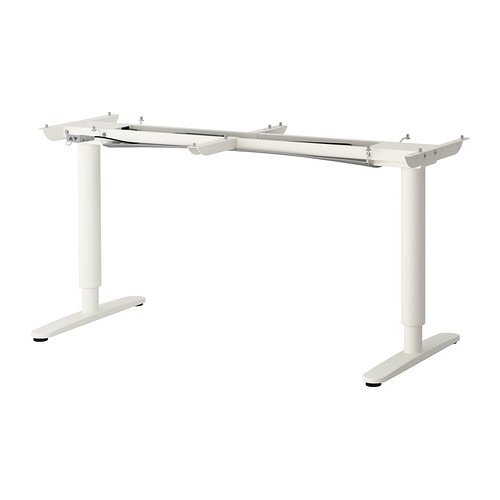
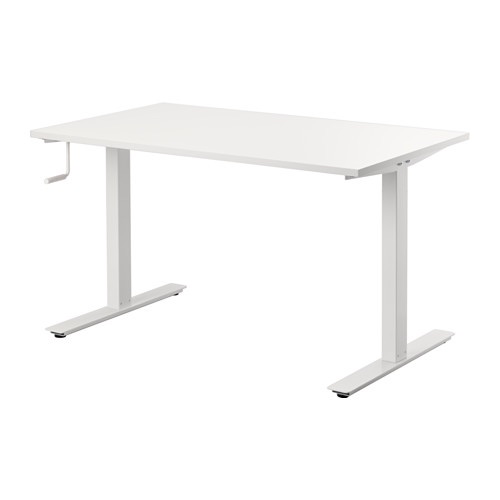
Interesting news about a lifting tables.
IKEA lowered the price bar, they offer electrical lifting table mechanism (frame, legs, motors, everything, just add a tabletop) for just $400: http://www.ikea.com/us/en/catalog/products/50263225/
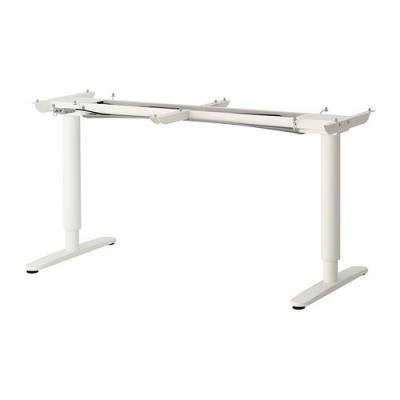
And they also offer a hand-cranked table, same thing but not electrical - $229! http://www.ikea.com/us/en/catalog/products/S49084965/
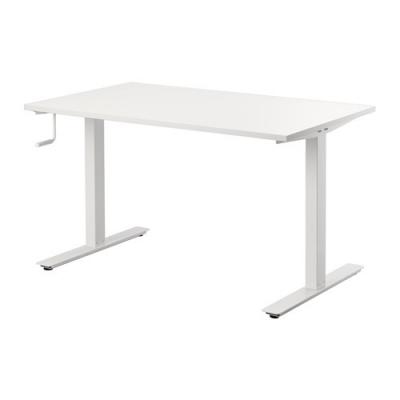
Looks like it is the cheapest way to have a height-adjusted table in your workshop

-
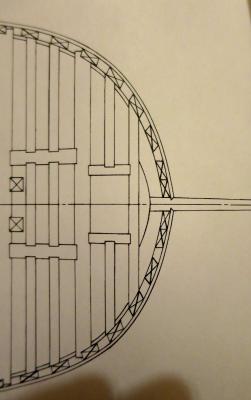
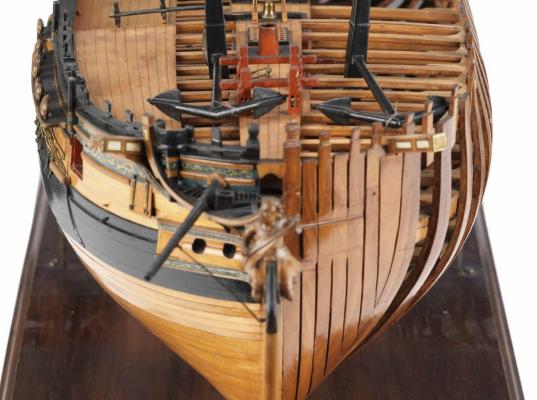
Mark, it would be fully planked from one side (no poly there) and fully opened from another side (even no wales).
This is the model that I used as a reference:
- robin b, Elmer Cornish, Canute and 7 others
-
10
-
I know I am an overthinker...
What things to keep in mind when storing some milled wood (mostly sheets) indoors, room temperature? To avoid rot, insects infection, turning grey, etc? The wood in question is a standard shipmodelling hardwood - pear, castello boxwood, holly, ebony.
Obviously, it is good to keep a semi-constant humidity and temperature, and I found a place matching that criterias.
1) What about insects?
2) Maybe it would be good to put some silica gel to absorb extra moisture if the humidity level will go up? Or it will suck moisture from the wood, making it too dry?
3) Better keep it sealed in plastic bags or without plastic?
4) Anything special that I should know about storage of holly? To make sure it will not change its colour and will remain bright white?
I know it sounds like paranoia, but really do not want to find that my wood stash is eaten, rotten and holly turned grey. brrr. Nightmare!
-
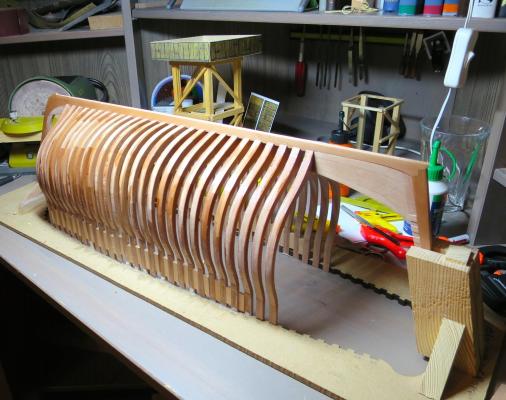
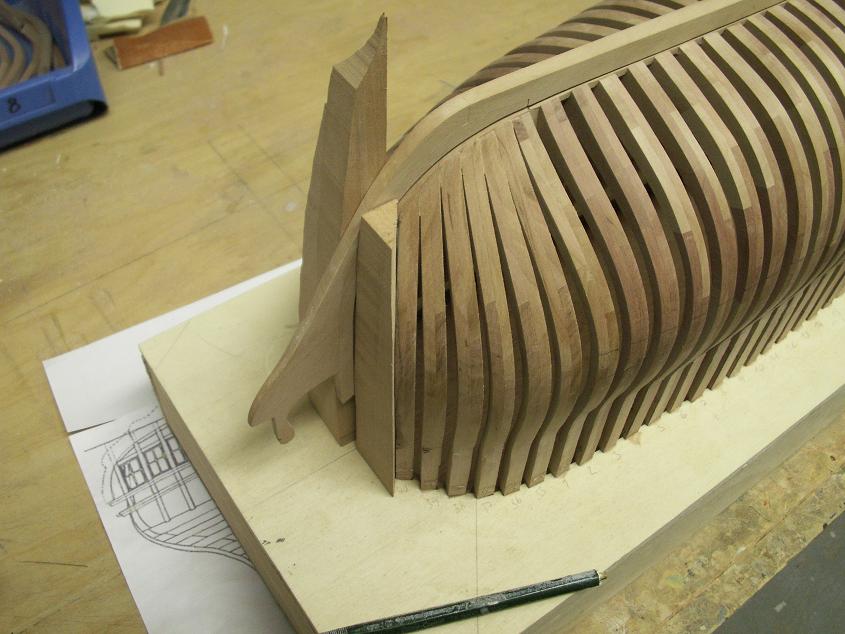
Midship frames were easy, now I am in the area of extreme bevels:

Thanks to Mr. Hollom, who built his Oliver Cromwell from Hahn's plans and confirmed that these bevels are correct and could be trusted. If you missed his build log and fantastic model - it is here: http://modelshipworld.com/index.php/topic/1883-oliver-cromwellbeavers-prize-by-peter-mr-hollom-148/
After pre-beveling frames already look neat!
Current status: 20 frames installed, 20 frames produced and drying from the wipe-on-poly right now.
Oh, Oliver Cromell have just 40 frames, so I do not need to produce any more, whoo-hoo!
- AON, Wishmaster, Beef Wellington and 10 others
-
13
-
Congratulations! It is not just an exceptional model, but also a great build log - thanks for all the time you spent sharing your experience, methods, ups and downs with us.
Small rant: such a model, and such a small and blurry pictures! If you will ever get a good camera, so we can look on that piece of art in a high definition, in details... Ah
- CaptainSteve, paulsutcliffe, GLakie and 1 other
-
4
-
Keith, frankly - never tried. Guess that thin brass does not really count as "metal".
But I read a number of reviews by modellers who cut aluminum, etc - they say it works fine, especially with a metal blade
Proxxon advertises it as capable or cutting metals and offers blade for it - doubt that it is a lie.
Saw is powerful enough, so it is only a question of picking the right blade.
There is also an optional watercooling kit


General / organisation of wood
in Wood discussion...Where to use it? Where to get it? What types are best? How to Finish it?
Posted
Because you do need hell lot of big, expensive and otherwise useless tools (big bandsaw, big tablesaw, thickness sander). Not everybody have a workshop
What is the use for that tools after you finally cut your very local tree into pieces? They will just collect dust.
While a perfect quality wood is just a few clicks away. It is smooth, has no defects and do not require any tools to start using it. You only need a small tools that you need for actual modelling.
Actual wood selection is frequently done by reading others build logs, and thinking "wow, I also want a wood like that".
So instead of saying "swiss pear" or "holly" one can say "that white crisp wood I saw in Remco's buildlog", but it will cause some confusion, isn't it?
If a lot of people are willing to pay for "pear,box and holly" instead of buying big tools to cut the wood themselves - that only means that they are not smart enough, and not making a rational choices, of course. And not a real builders, obviously. It is just like building a lego bricks, if you do not cut your own wood out of the log.