


Mike Y
-
Posts
1,437 -
Joined
-
Last visited
Content Type
Profiles
Forums
Gallery
Events
Posts posted by Mike Y
-
-
Hooray! Received my new wood for frames.
- The colour variation is much smaller.
- Arkowood one is creamy and pink. Same colour as on Lumberyard laser cut parts, where the "prime grade" pear is used.
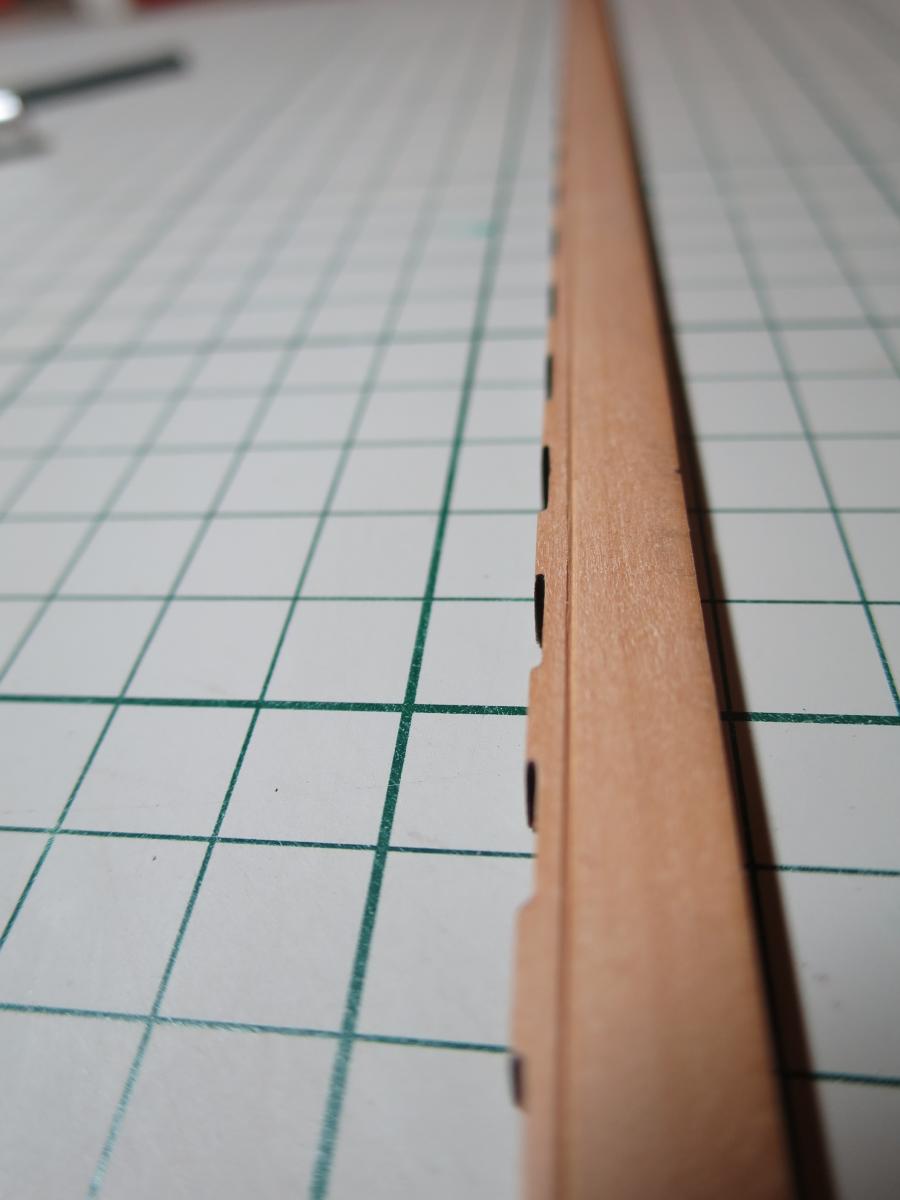
- Maximum thickness deviation is around 0.05mm (0.002 inches). My micrometer have a 0.05mm precision, so it is basically as correct as I can measure..
- Number of planks with defects (grey spots, etc) - 5 planks out of 60 (just 8%), which is quite ok
- Wood is already sanded with a fine grit
- Small wood deviation together with fine finish means a lot of time saved on sanding the frame to the uniform thickness and smooth surface.
- Planks are perfectly straight and not curved - saves some efforts when trying to cut the frame blanks on a proper angles.
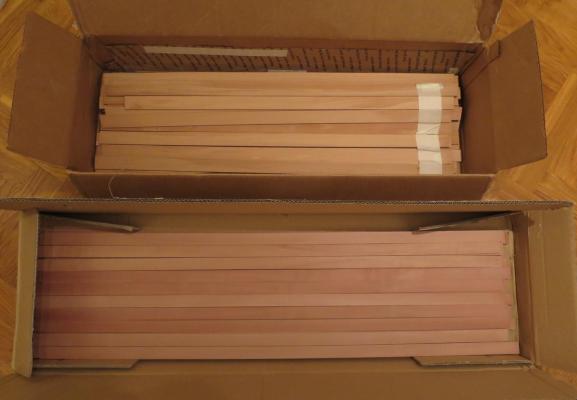
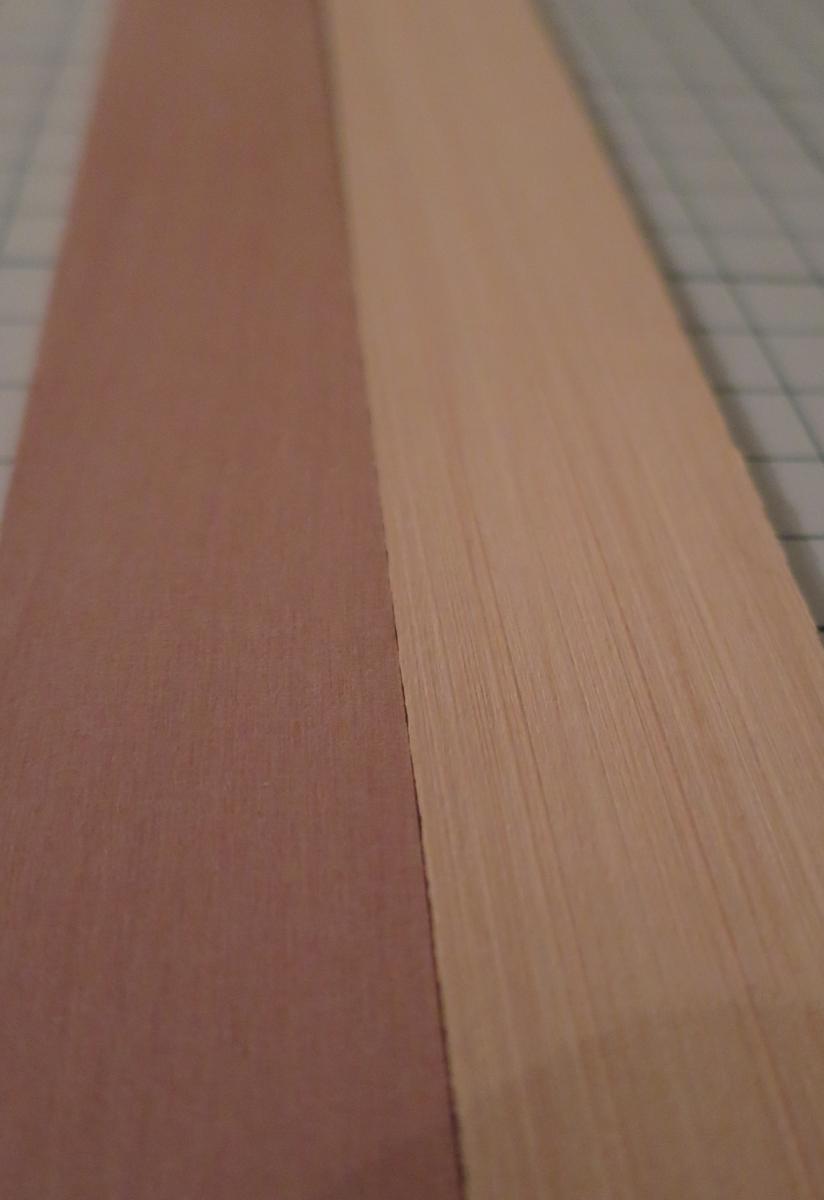
But better look on pictures. Both woods are called the same, it is swiss pear aka steamed pear.
Box on top - Lumberyard, box in the bottom - Arkowood.
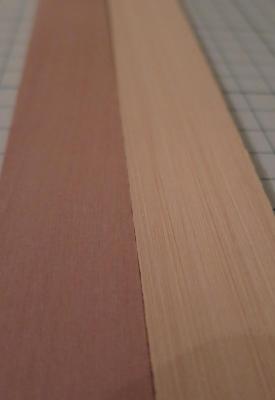
Left - Arkowood, right - Lumberyard. Notice the finish difference, Lumberyard wood is very rough, looks like sanded with 60 or 80 grit. Arkowood looks like sanded with 300-400 grit, or maybe even higher. It is very smooth!
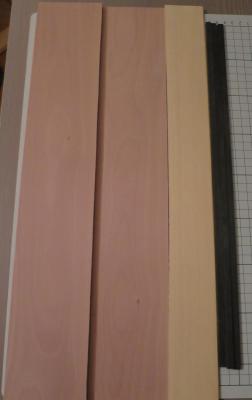
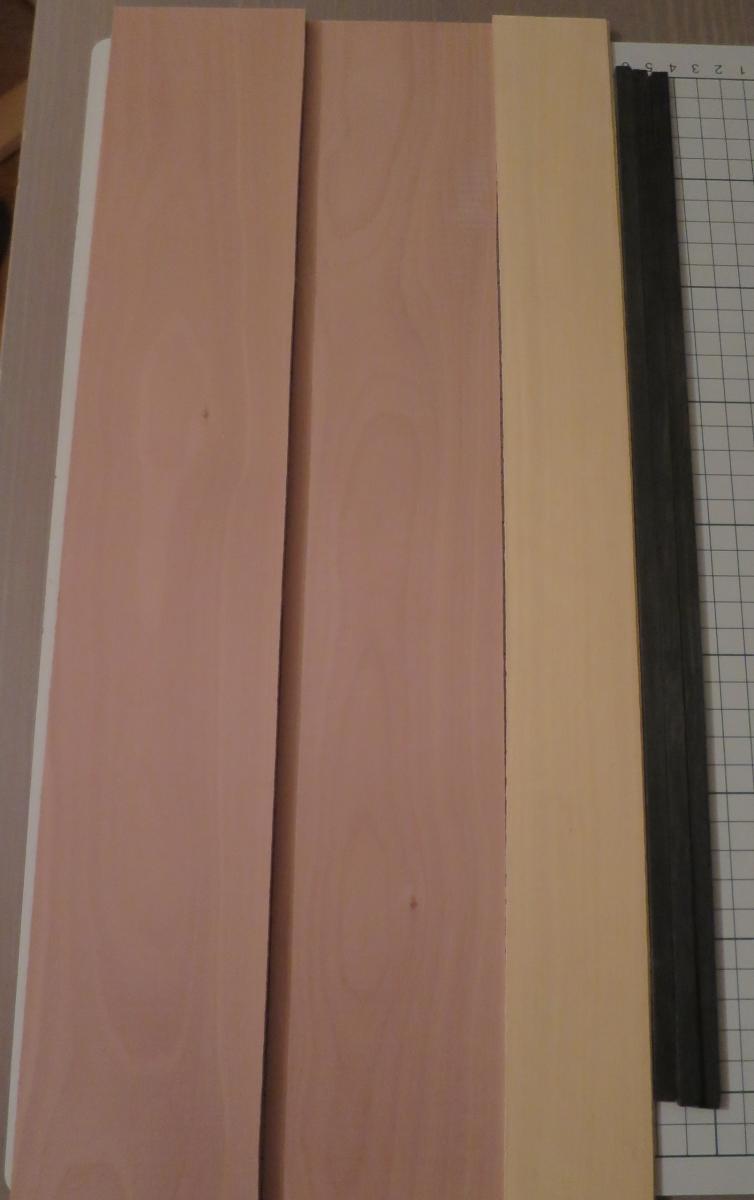
Also ordered some sheets, just to try.
Left - pear, center - Castello boxwood, right - ebony
Ok, now I am finally happy with the wood I have, time to redo 9 frames that I already assembled

- Cap'n Rat Fink, gjdale, butch and 3 others
-
 6
6
-
Great carving!
And an interesting wood color, soft and creamy.
Can you tell more about other projects that you have? Looks like you are making three fully framed models in parallel! Wow!
-
Looks like I am becoming a hand tools fetishist.. There is something nice about working with a high quality chisels and knifes - no noise, no sawdust, and you feel like making a pinocchio
Especially surprised with the knife - it is the sharpest knife I ever held, it make a clean cut without any pressure, and it is heavy and sharp enough to ignore the grain direction!
But it reminds that as with any hand tool - you need to practice and learn a lot to use it nicely...
The shape of a rabbet was asymmetrical to meet the planks on a proper angle:

Result is not perfect, there are a few ooopsies, luckily most of them are on the inner side, which would be invisible.
I will not cut a rabbet on a side that would be fully opened. Not able to cut it smooth enough to make it fully exposed.
- Mfelinger, jdbradford, Wishmaster and 14 others
-
17
-
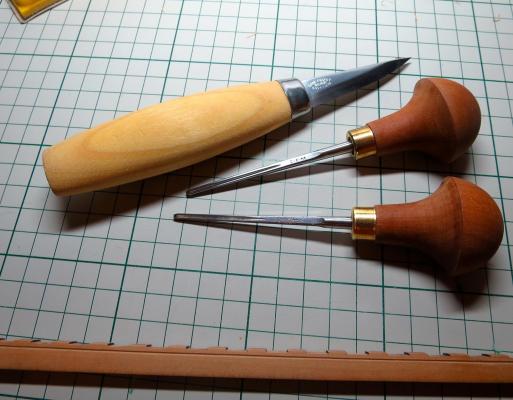
Discovered an amazing tool shop that also sells a high quality Swiss made chisels
(Followers from Stockholm - it worth to visit Slöjdetaljer, but you probably already know about that place)
Got two tiny chisels - one V shaped, one U shaped, and a carving knife. Pricey, but a good quality.
Now practicing a lot to be able to hand-cut a smooth curved rabbet, and maybe even draught marks
-
Nenseth, if they are shipped from Russia - 2 weeks is ok, it might take more. Russian post is mega slow, we are talking about weeks and weeks.
-
Mike on the Nautical Research Guild's web site two of the models I mentioned Polyphemus and Resolution feature in the member gallery. For Comet colour pics feature in David's book. It is worth buying for the pics alone.
Alan
Thanks for the info. It is just a bit, hmm, strange to have a model recently built, but with no pictures on the internet!
Planning to have TFFM and the Comet book as a Christmas present for myself.
-
Does anybody know where to buy Holly in EU/UK? Or it might be sold under different name?
It is also hard to google it, because all search engines are sure that I just did a typo in a word "Hollywood". Facepalm!

-
-
Hah, there is actually an IKEA assembly guide for the Viking ship:

-
Alan, with your level of planning, I am sure you will end up with an ultra detailed IKEA-style assembly sequence before the construction actually started
Thanks for encouragement.
I think I will just use brute force - no jigs, just a very slow and gentle carving. No coffee, no beer, steady hand and a lot of practice before.
Hate that things, it is no longer a technological process, but more of an art.. You do not need an art if the process is good!
-
Mark, you are totally right - rabbet follows the shape of the keel, I should have carved it before gluing the stem. You see on a photo that rabbet pencil marks are parallel to the glue line bonding keel and stem.
But now it is too late, I did a classic mistake of gluing parts too early

Will try to make it with a template.
-
You will sand it anyway, which will also remove the glue stains. Also, try applyin less glue, and remove excess with some stick as fast as possible.
What glue are you using? Realy recommend to try an orange Cascol for indoor use, it should be available in all Nordics.
Bonds pretty fast, very strong. Do not leave colored stains, could be easily dissolved with water if needed. It is just perfect
-
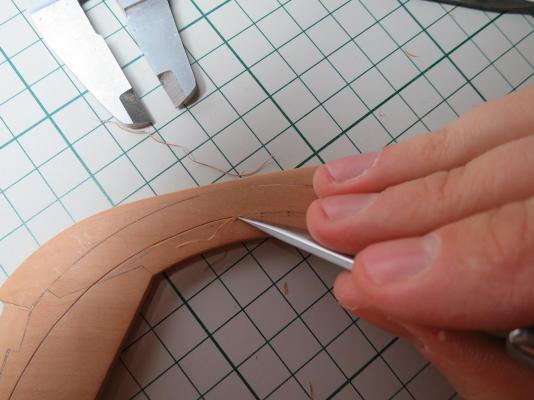
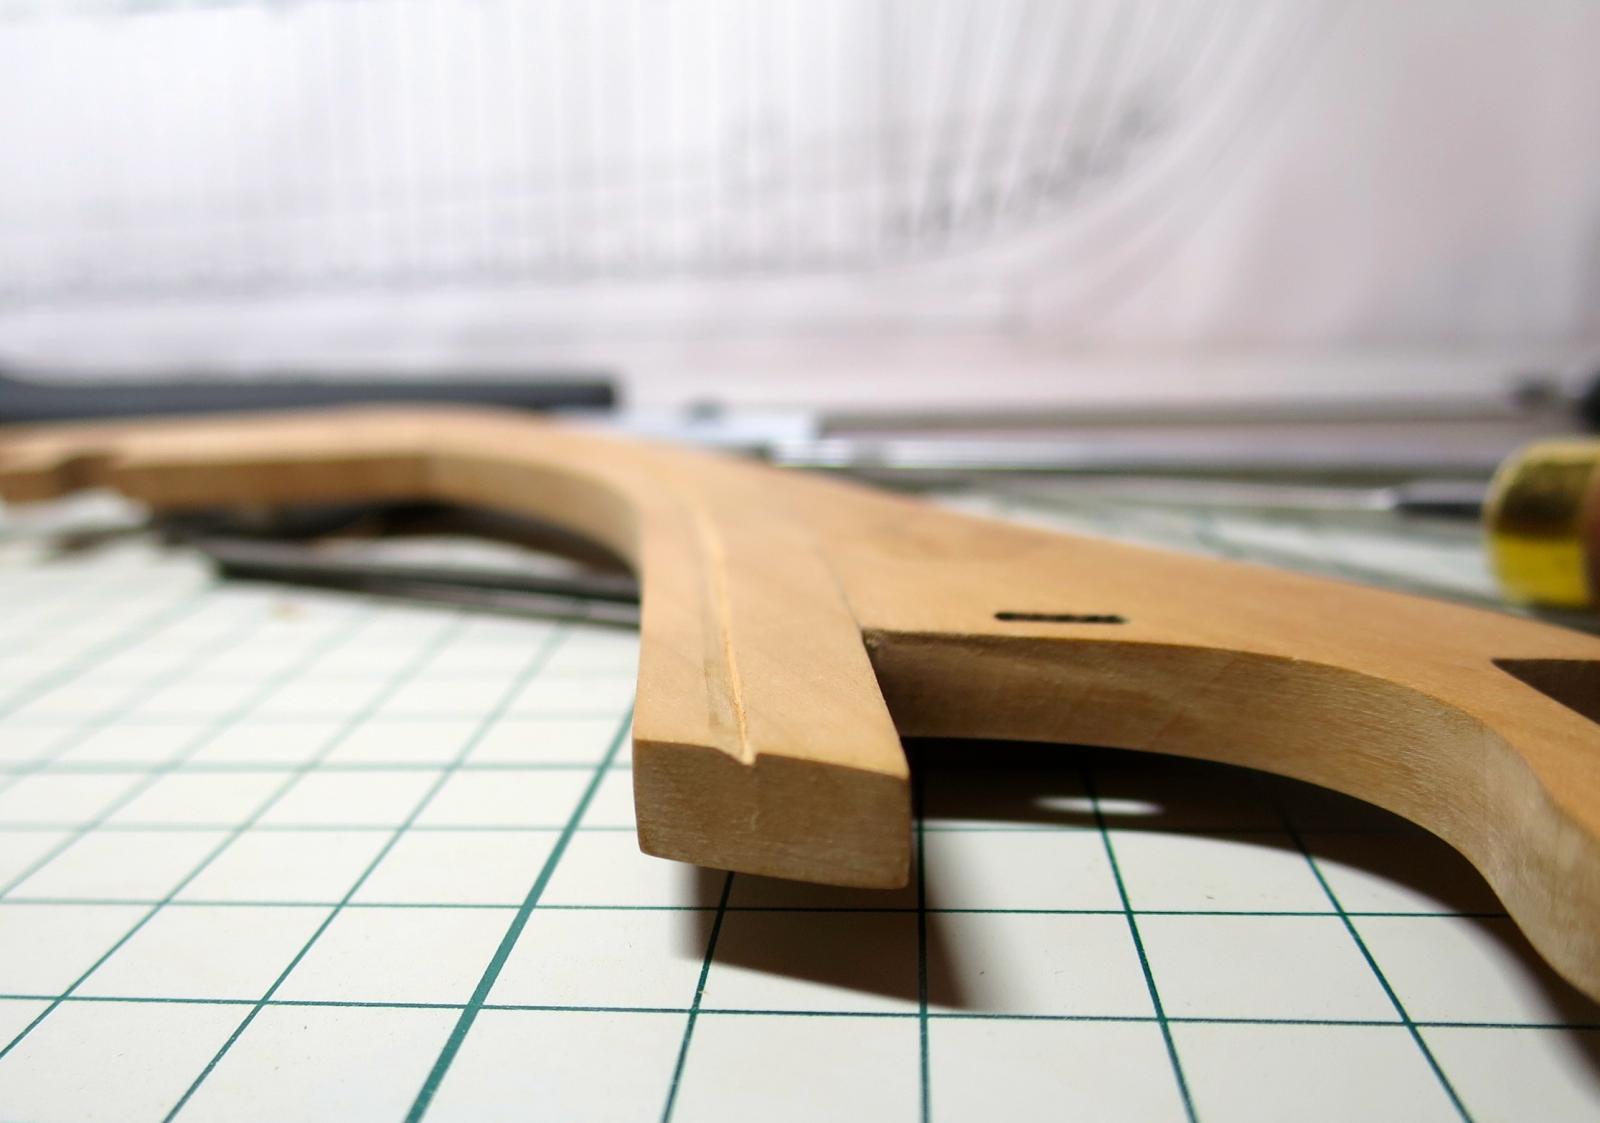
Finally got in the right mood to make a rabbet. Was pretty scared, one mistake - and need to replace a section of a keel (which would be a good reason to add some joints though
However, so far it works out pretty well.
Started with a slow and gentle cutting of a straight line, using inner line of a keel as a base:

That give a straight and parallel lines. Another proof that good jig means a lot.

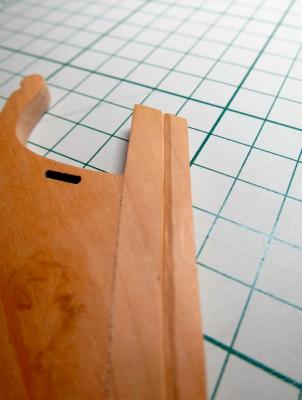
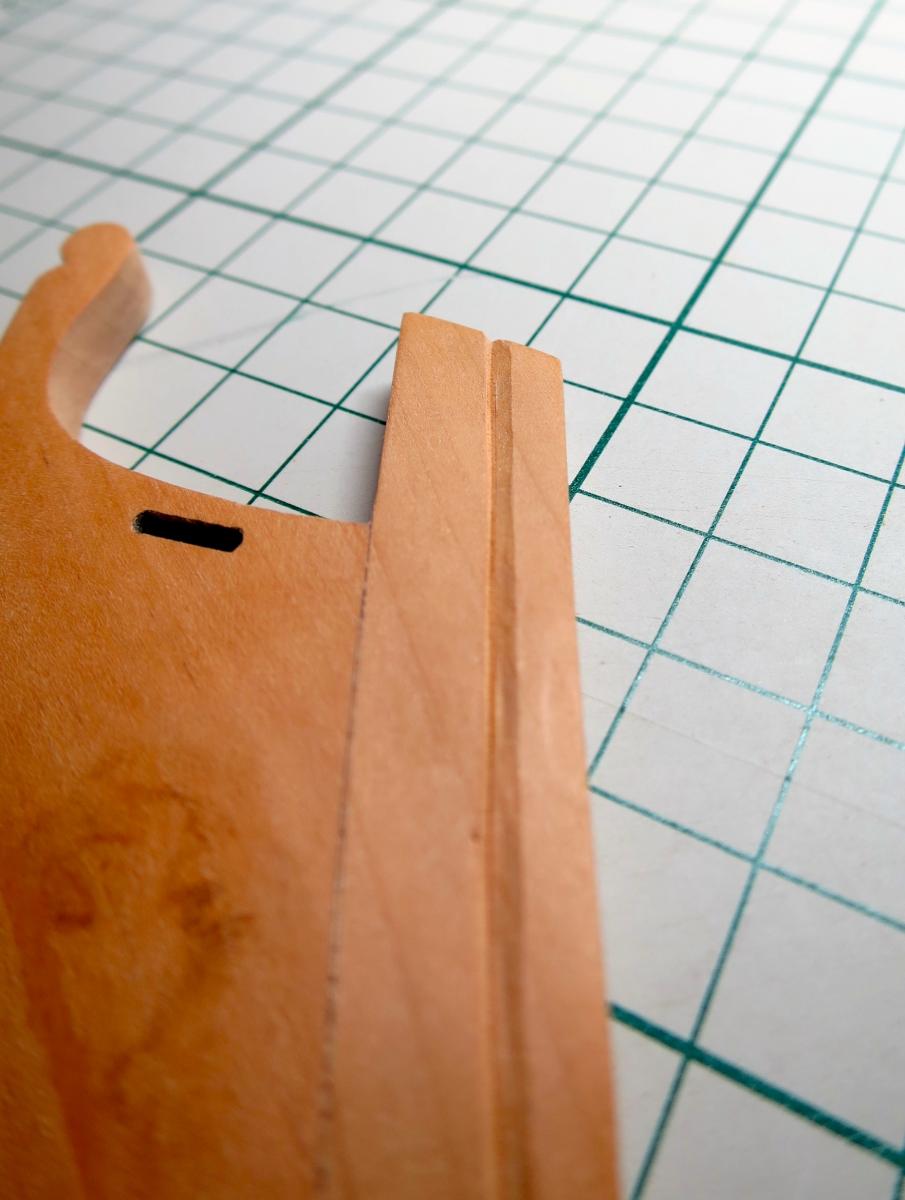
Then cutting away a strip in between, and smoothening it with a triangle-shaped file:
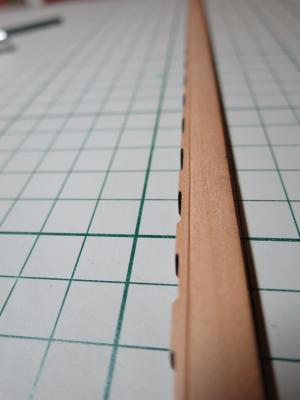
Decided not to make a big fat rabbet, will either widen it later, or shape the edge of a gardboard plank, so it will tightly fit into the rabbet. It is anyway better than an ugly gap between gardboard and keel, if rabbet is too wide.
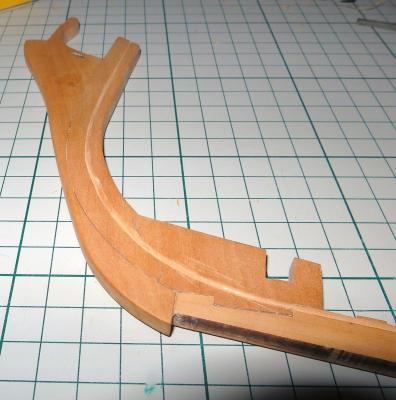
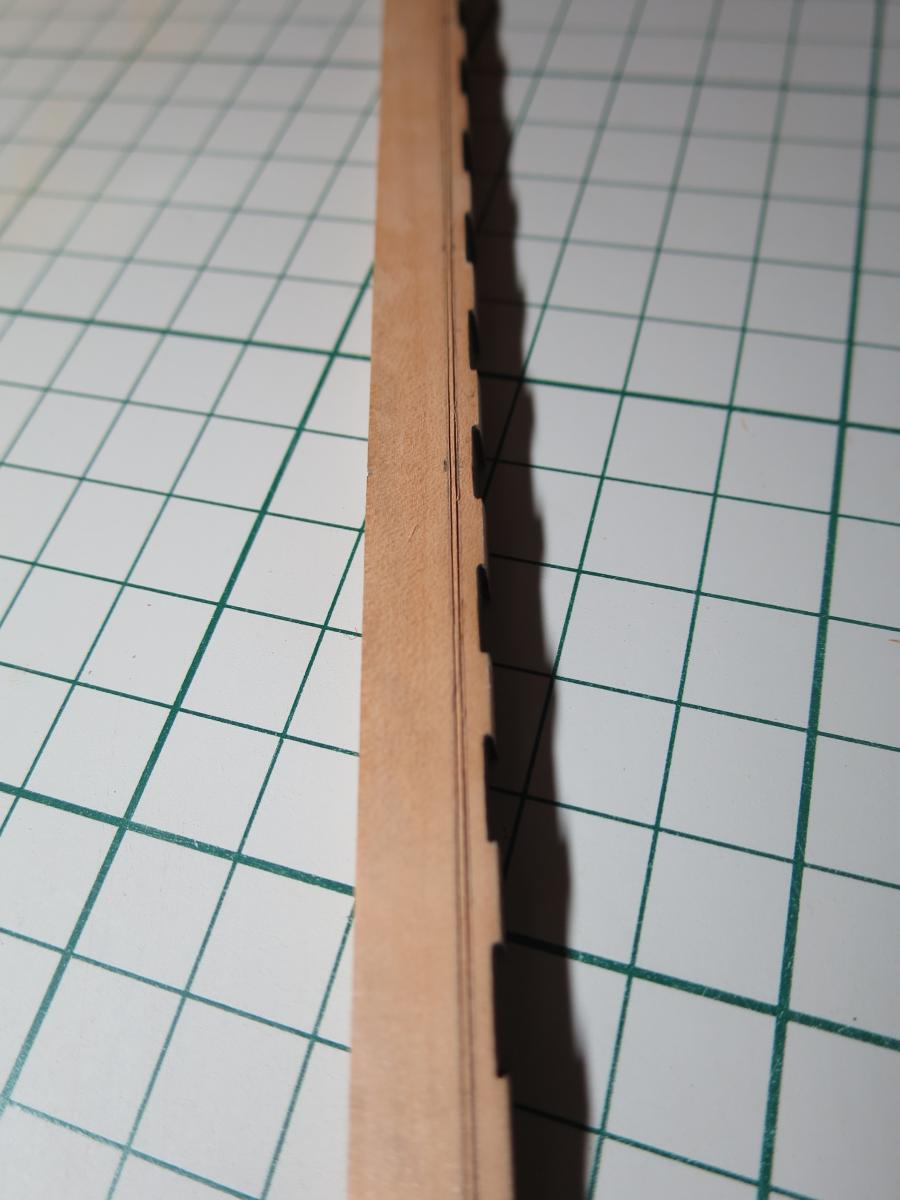
Position against the frames is ok, just a minor adjustments required for some frames:
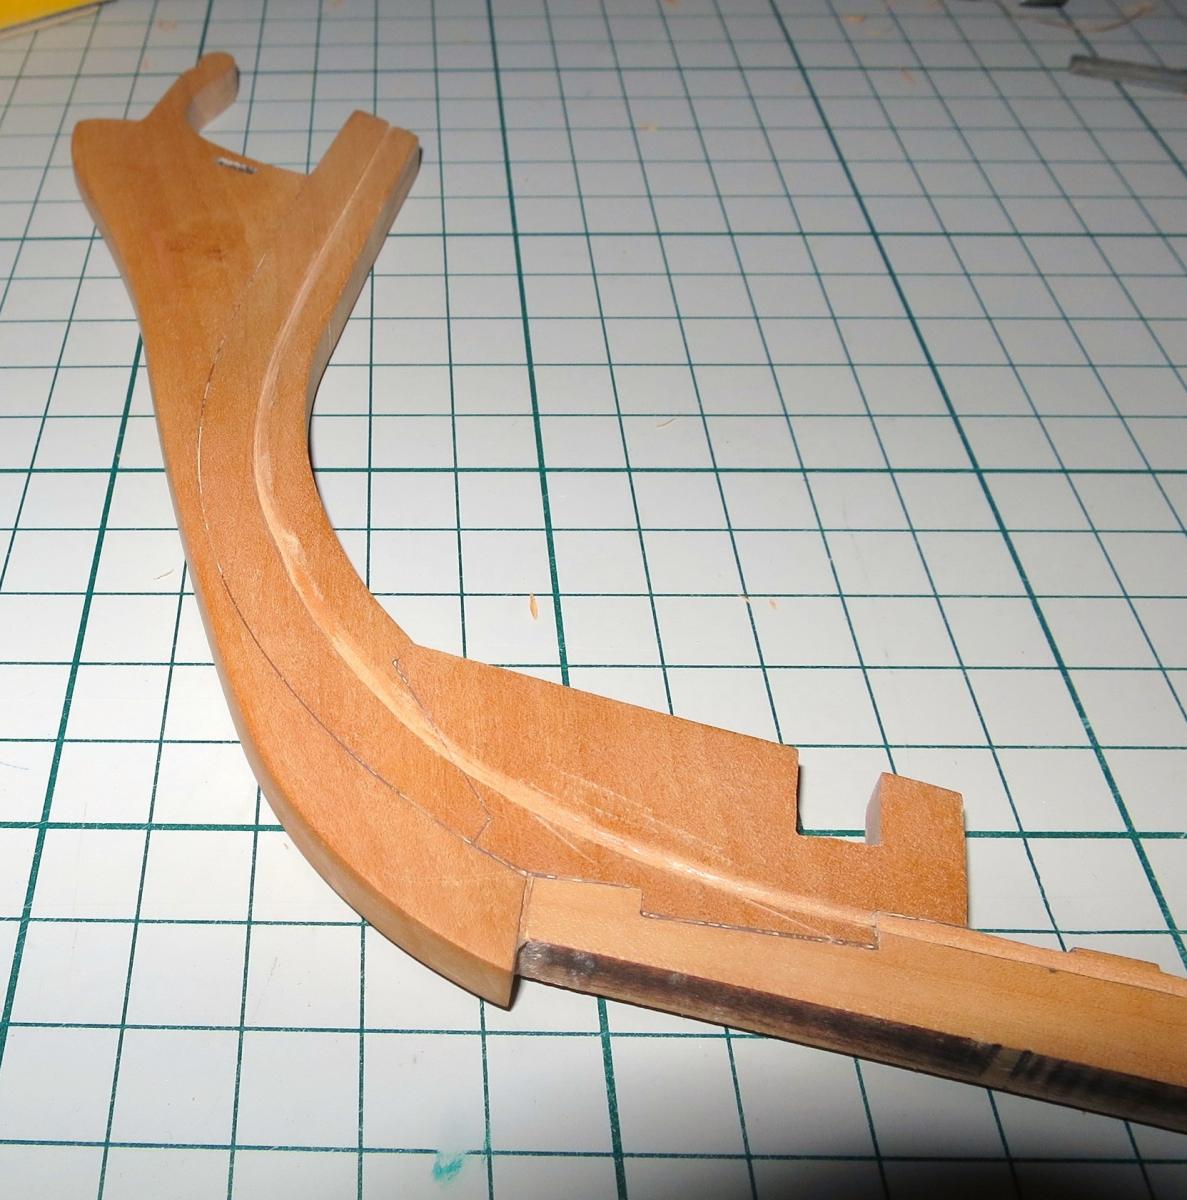
But that was all games, now need to continue the rabbet on the stem:
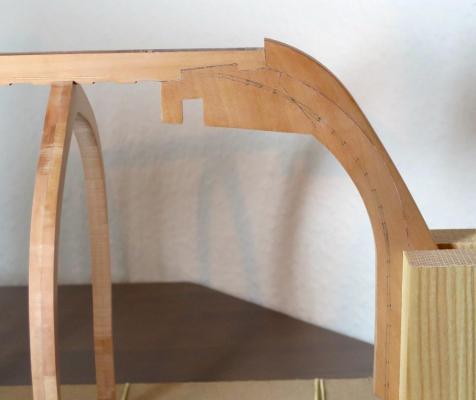
How to make a nice curve - no idea. Can't come up with any jig idea, because there is no base line to attach to.
There is no chisel to make such curve. Trying to scratch it by hand will fail due to a wood grain.
Thinking of making an acrylic template, and scratching the line using that template.
Or there are some better tricks? Would appreciate your advices!
- Mirabell61, Mfelinger, KORTES and 6 others
-
9
-
-
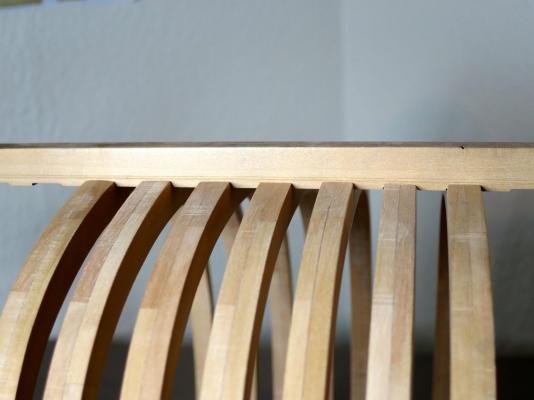
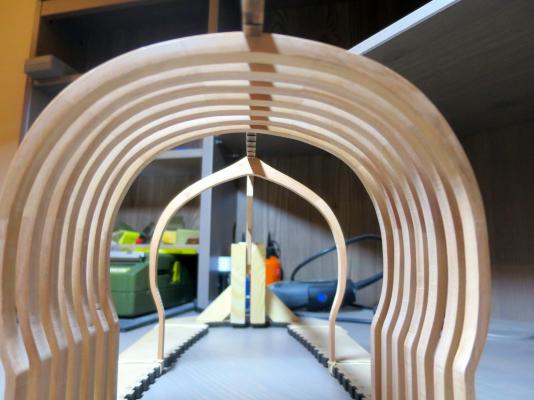
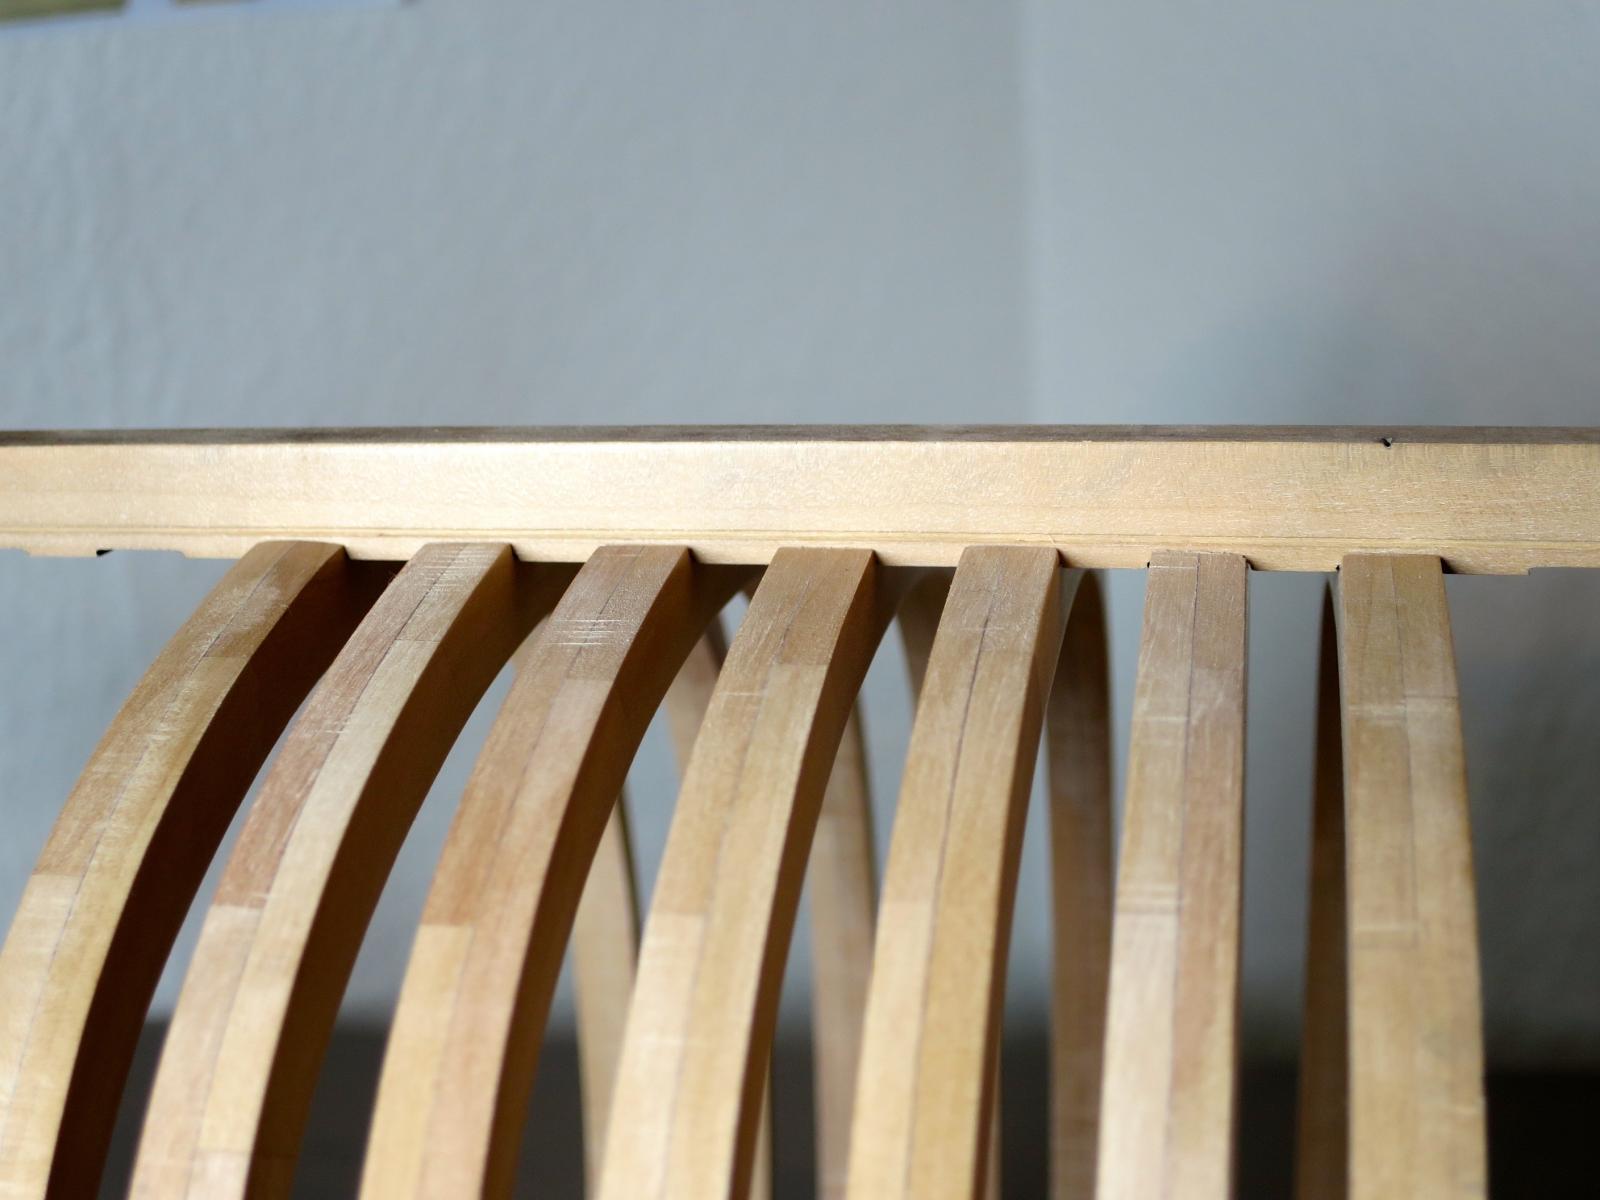
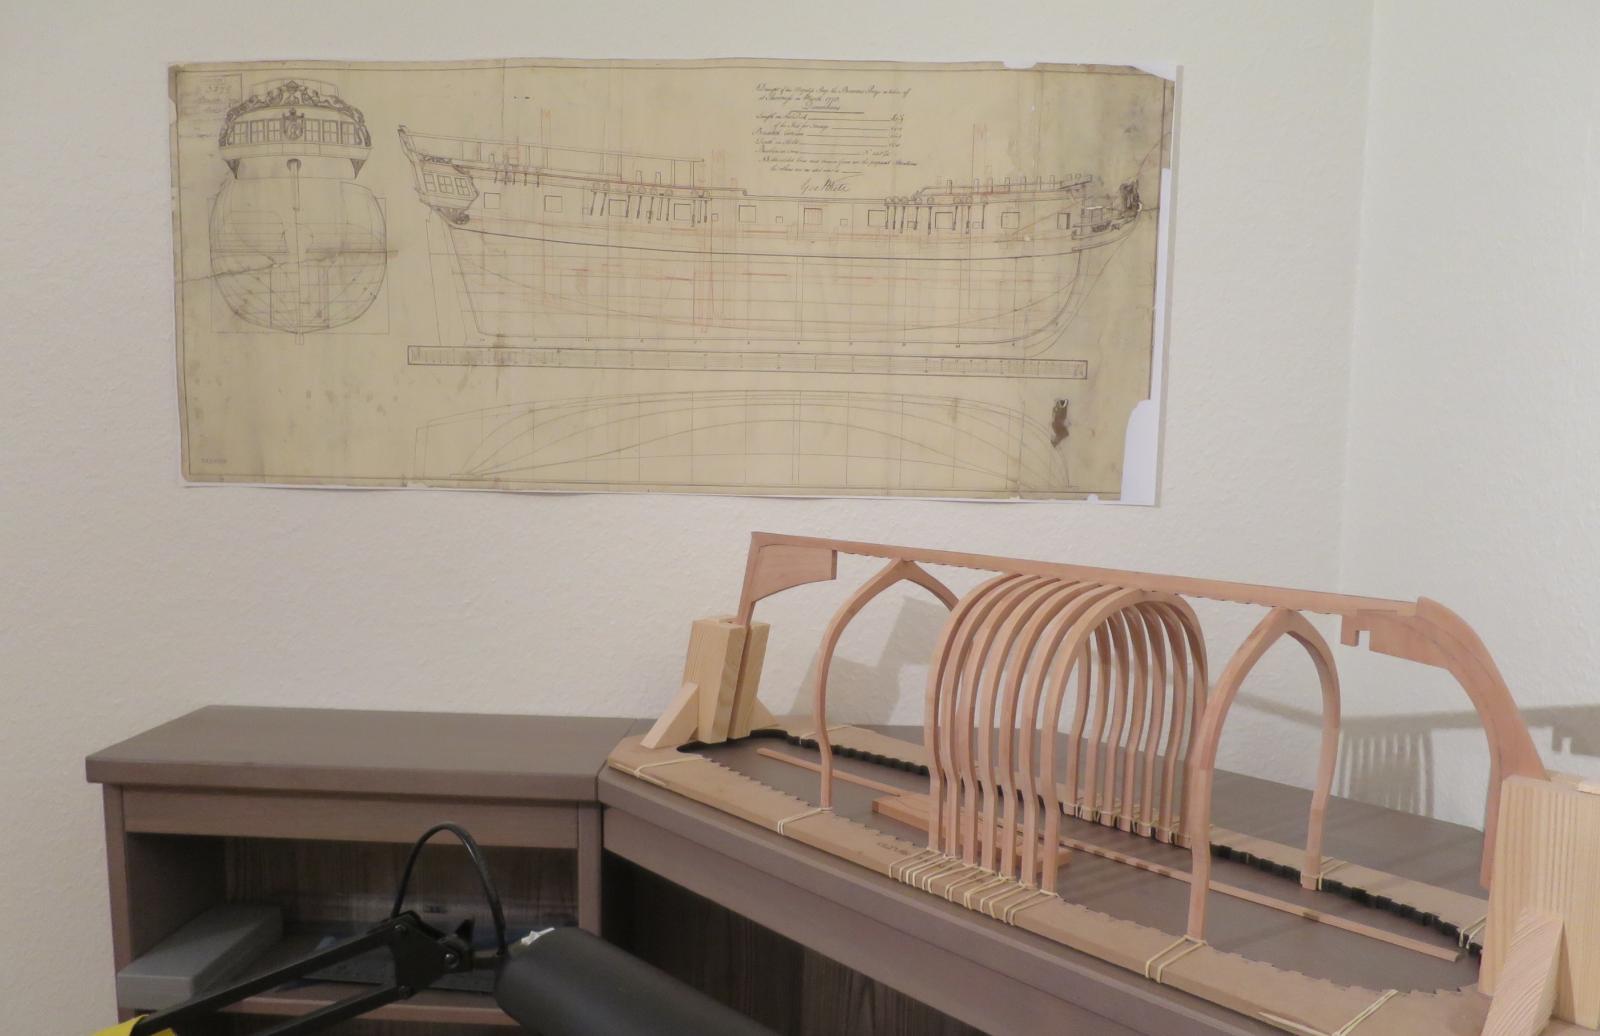
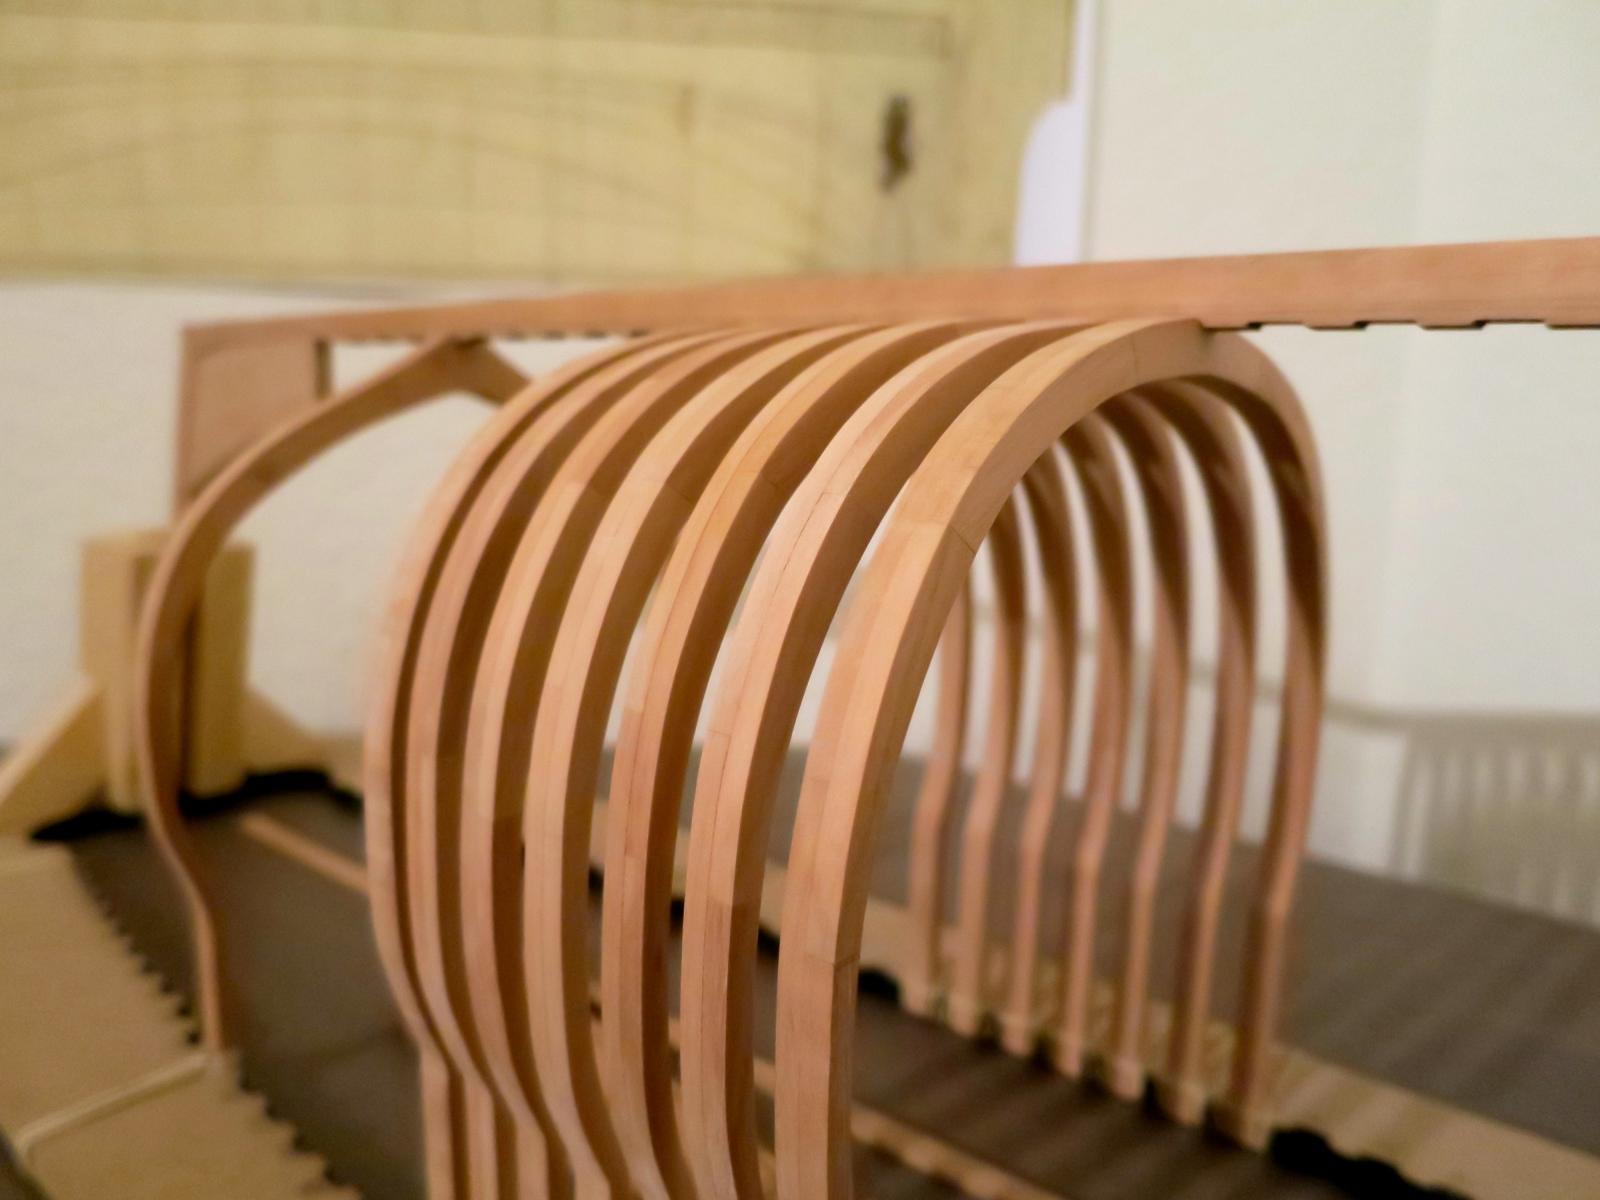
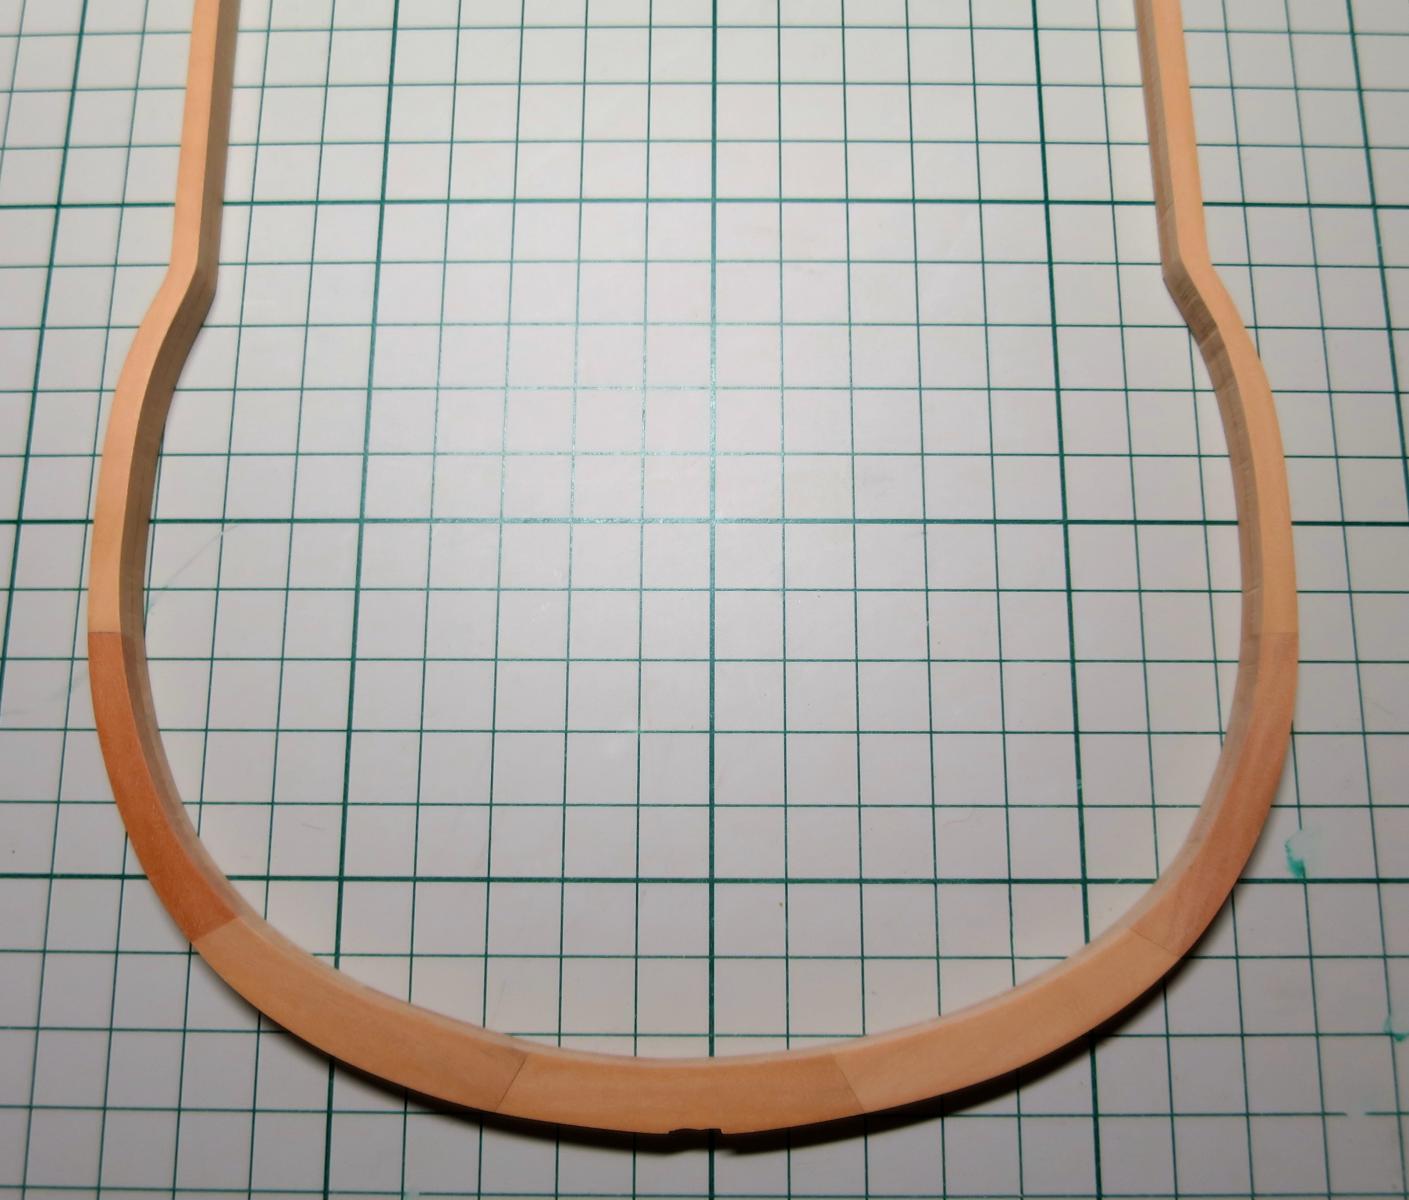
Installed 7 frames around midship to see how the all look together.
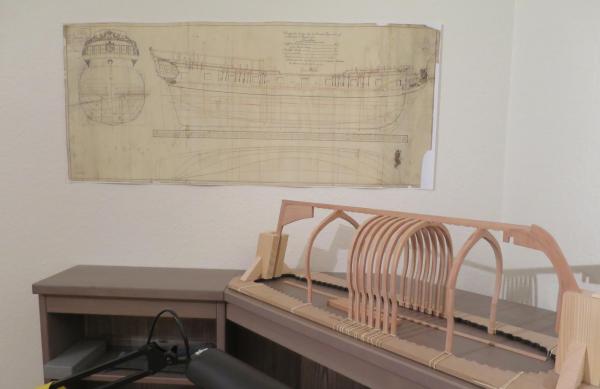
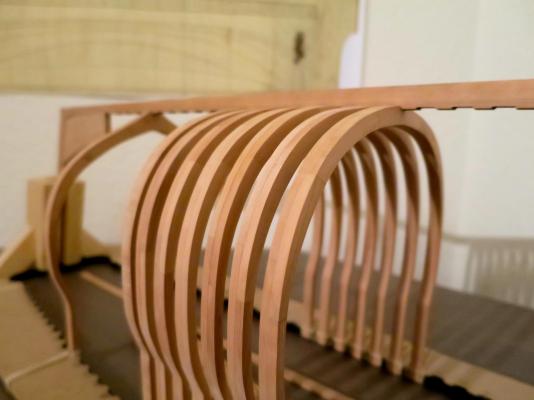
Now it is starting to look ship-alike!
Very curious how the edge of a frame will look like when faired and sanded...
A shot inside the hull promises that there would be a lot of fairing to make it smooth
-
-
-
Making around 5 frames in two weeks, can't spend more then 20-30min every evening
But it is a pretty good relaxation.However, the result is frustrating. Yep, the wood colour difference again.

It looks like a frame built with three different kinds of wood, where only one of them is pear, and others are only technically pear, not something you consider as pear for a modelling.
Got really tired of that. But then I found a promising build log - La Belle by Hans Christian, where pear looks like pear! And colour is not varying, and finish is already nice. Thanks Hans for providing a better photos
His wood is from ArkoWood - www.arkowood-shop.de
Ordered new frame blanks there, all 60 meters of a cute pear. They do custom milling, and the order processing time is just 1-2 weeks.
The price is ok, just 150 EUR / 190 USD, plus cheap shipping, plus no import taxes or customs (because it is inside EU).
Will report when I will receive it, looking forward. It would be great to have a high quality supplier nearby, at least 4 out of 5 stars on a HobbyMill grade
Truly hope it is my last whining about the wood quality. -
Proxxon is probably the only option for a livingroom modellers, where the bandsaw is fitted to the table and stored in the shelf later on...
Other saws are larger.
I have proxxon one, it is really good, precise and easy to setup. But a bit louder then I expected - the plastic case acts like a resonator. See http://modelshipworld.com/index.php/topic/5807-proxxon-micro-mbs-240e-band-saw-review/for details.
Lack of a fence is disappointing though..
-
Markus, followed your advice. Thanks!
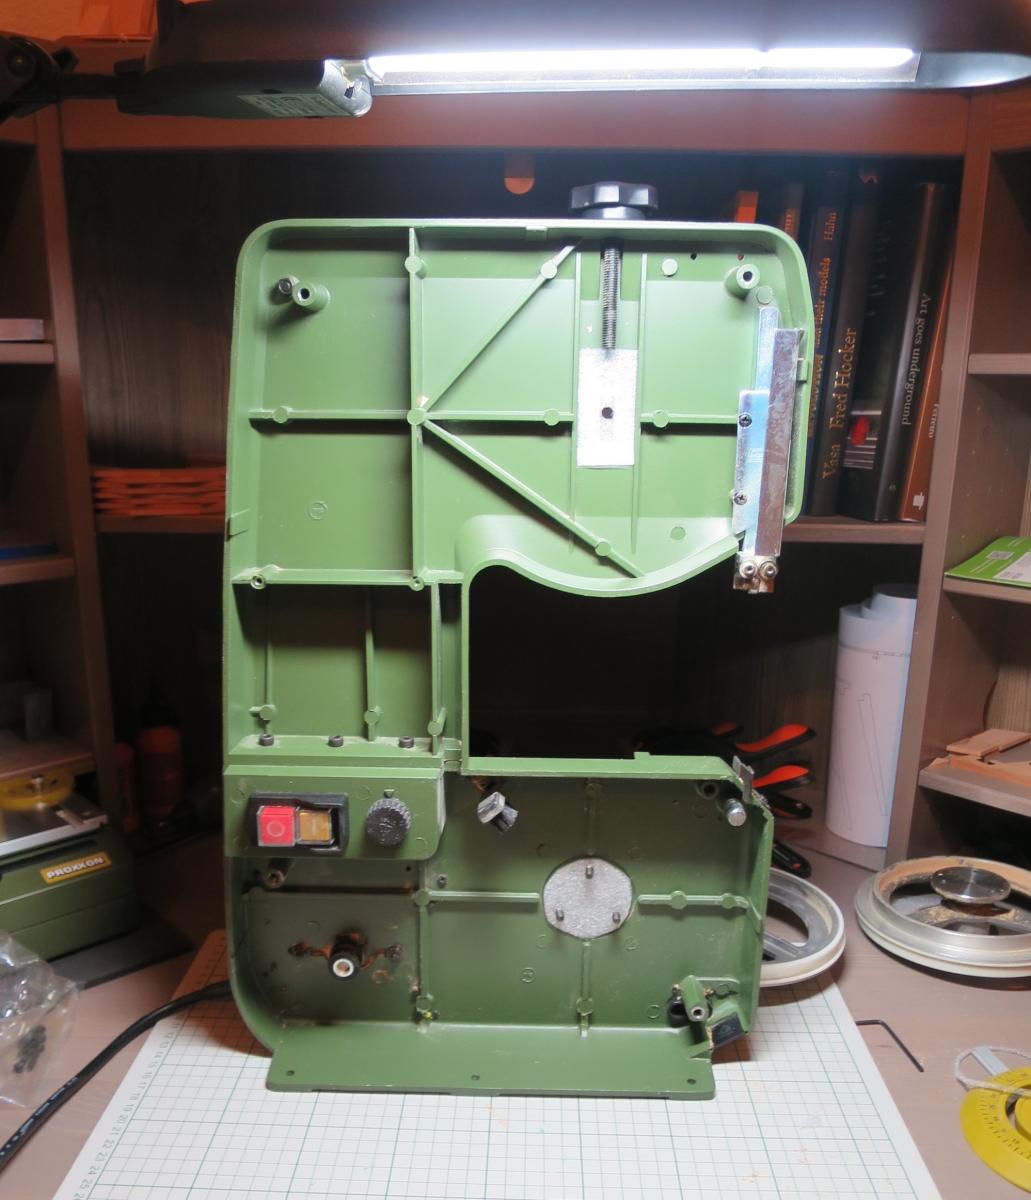
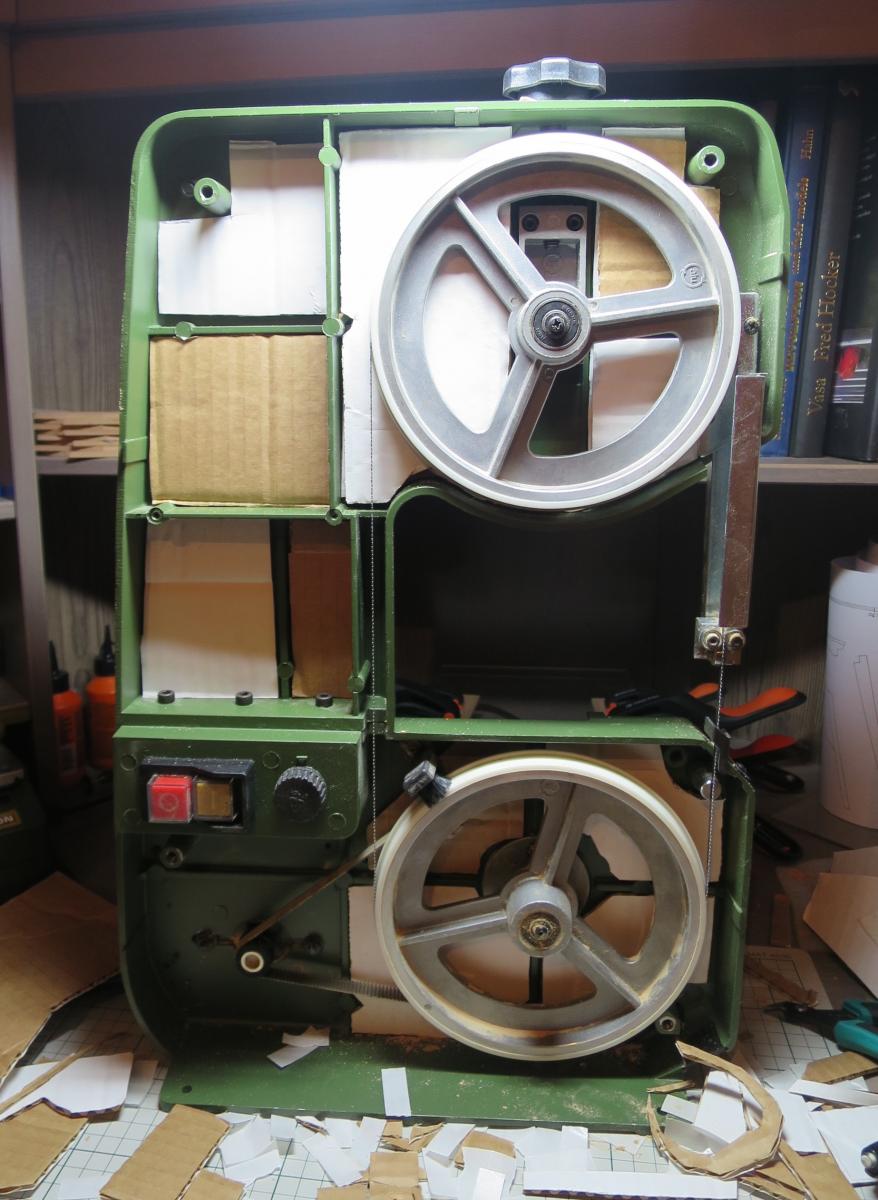
Before:
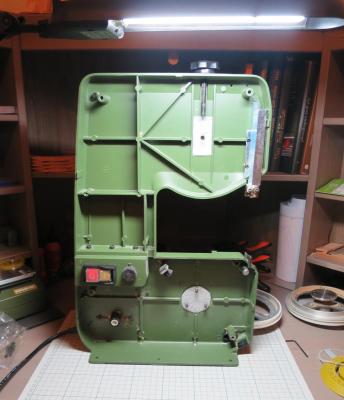
After:

It is 2-3 layers of a thick corrugated fibreboard, glued with a thick double sided sticky tape.
Plus some foam-style packaging material between the case and wheel mounts.
It does make a difference. It is not dramatically silent, but definitely less noisy then before. The method is very cheap and has no drawbacks, so why not
To make it really silent I am probably need to make it from a massive wood piece. But that is an overkill. At least now I can use the bandsaw without worrying about my neighbours
-
I wonder how they patched that holes while being in the sea.. How the ship looked like after a first battle.
And here is a good slo-mo of the hull damage:
- Karleop, CaptainSteve, JesseLee and 3 others
-
6
-
David, I did not have a courage to draft the first scratch build based on original drawings... So many research and chance of mistake is so big.
But that sounds exciting! I will follow your log.
-
I am also using that saw a lot. I even started to use it for straight cuts instead of a cheap table saw
There is just one problem. It is quite noisy, and looks like the main source of a noise is a ball bearing in a top wheel. I reduced it a bit by adding some soft material between the top wheel mount and the case, but it is still too nasty loud. The main issue is that the plastic case of a saw acts like a resonator, enhancing the sound. Anybody had the same issue?
-
Thanks Mark!
The hardest part is to decide how I want it to look like. Trying to imagine an image of a finished model, and fit various coloring on it
best way to drive yourself crazy into a modeling block! - mtaylor, JPett and Landlubber Mike
-
3


Where to buy wood
in Wood discussion...Where to use it? Where to get it? What types are best? How to Finish it?
Posted · Edited by Mike Y
Tried Arkowood (https://www.arkowood-lossburg.de/). Was looking for a high quality wood supplier in EU, who have at least pear, Castello boxwood and ebony. Looks like I found it!
Wood quality:
Other:
The photo of what I received.
Left - swiss pear (steamed pear), center - castello boxwood, right - ebony: