


keelhauled
-
Posts
778 -
Joined
-
Last visited
Content Type
Profiles
Forums
Gallery
Events
Posts posted by keelhauled
-
-
My admiral thought that she might like to make a model and work beside me while I worked on mine. I bought a small solid hull viking ship that she picked out. We chose a very simple kit. It lasted a day. She became frustrated cutting the laser cut pieces out with the xacto knife. But, she tried.
She also does not sew my sails. I had to go out buy a sewing machine and have my mother-in-law show me how to operate it. Then the admiral come to me with sewing jobs that she wanted completed!!

- Omega1234, vossiewulf, src and 6 others
-
 9
9
-
Very nice jig! more milling and lathe magic! the plates are really coming along.

- CaptnBirdseye and Charter33
-
2
-
Seems odd to me. Is there anything inboard that the sheets would foul with when the rest of the running rigging is in place?
When actually sailing I don't think it would be an issue - the windward line would be slacked and the lee would most likely be off the shrouds, at least I think I have that correct. But it does look off on a bare pole model. I've seen some schooners at the docks with the sheets coiled and stowed near or beside the windlass - might be an option if you are sure of the run and you don't like the look.
-
-
More catching up on the build.
I built the billboards and installed them before the surgery. My painting might not be the best, but I think it turned out ok
-
-
Congratulations! A beautiful build.
thanks for allowing us to follow along!
Marc
- Canute, Tigersteve and mtaylor
-
3
-
Hi Graham,
Very nice work. I love the way you incorporated the Actual Ship's materials into the model. Well done! It appears that you're very skilled in fabricating metal work - very beautiful mounting pedestals.
Thank for the clear descriptions of the tools, jigs, and approaches you are using.
thanks
Marc
- WackoWolf and Tallshiptragic
-
2
-
I wish that I could work as fast as you operate! I see that you have work completed on the masts already! I'm enjoying the build!
Marc
- Piet, Omega1234, Old Collingwood and 3 others
-
6
-
Popeye, You're no dummy, I'm missed installing the rails on the actual ship.
 then I realized that I had glued the chain on the deck without allowing enough slack it feed it over the gears of the which!
 It's been bothering me since I went into the hospital three weeks back. For some reason it hit me while I was laying in the hospital bed. After teleworking, I went into my shop and and addressed the situation this afternoon. Don't tell my Admiral, I'm supposed to be in bed recovering. But now that I can walk and stand I had to take a shot. I only lasted an hour before I needed to go back and rest, but I managed to break my anchor chain, tear up the deck planking and break my windlass.
 one step forward two steps back seems to be a recurring theme for me lately!
Shiphile, thanks for the compliment. Do you have a build log yet? I'd like to see your progress.
Nenad! I'm so pleased you checked in! You have so much going on now!! I hear your Cutty calling, but she'll wait for you! Hopefully once I've recovered I can make up some build time while you take some away from your build -- you are always showing me up with all of your progress
 . I still think you'll finish before I do. Not that it is a race.
Thanks!
Marc
-
Chuck,
Very nice anchors. I'm sure that I couldn't tell that they were not metal. The execution is the key to all of these illusions.
Very nice work on the sling. Thanks for sharing your technique!
Marc
- Canute, popeye the sailor, mtaylor and 1 other
-
4
-
Michael and Lou,
Thanks for the complements.
Michael,
I did about 50% of the needle work on the sails. Redak of www.radekshipmodels.cz did the other 50%. He worked with me on getting the initial work and a basic suit of CNC sails. You can check out some of my post on page 8. I added all of the bolt ropes. served eyes, etc. as well as 100% of some of the sails (As my sewing skills improved, I took a shot at experimenting with reshaping a couple of sails). I really like the translucence of the cloth. Our cloths are slightly different, but at six inches you can't tell the difference.
It took about the same amount of time to sew and detail the sails as it did to plank and copper the hull - maybe longer.
Lou,
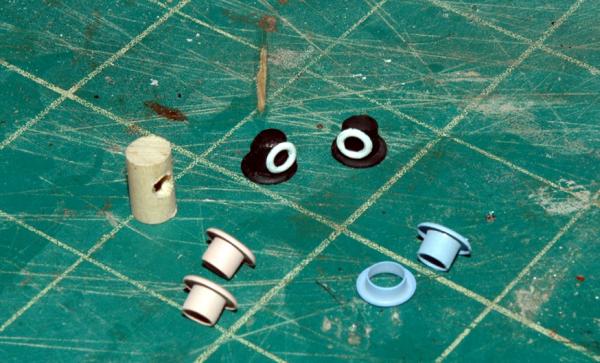
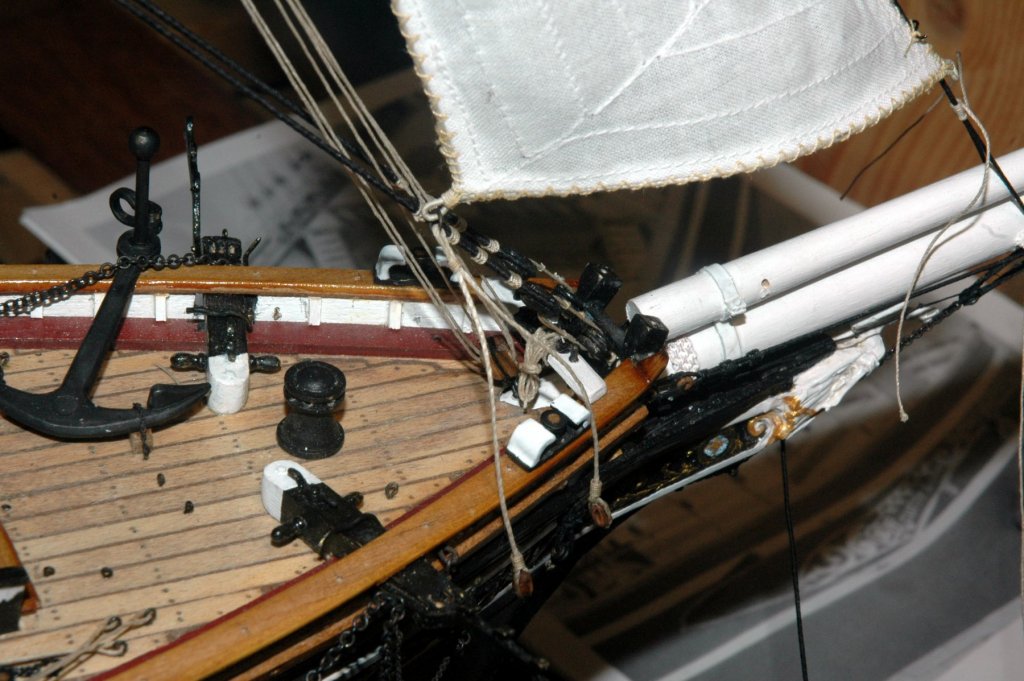
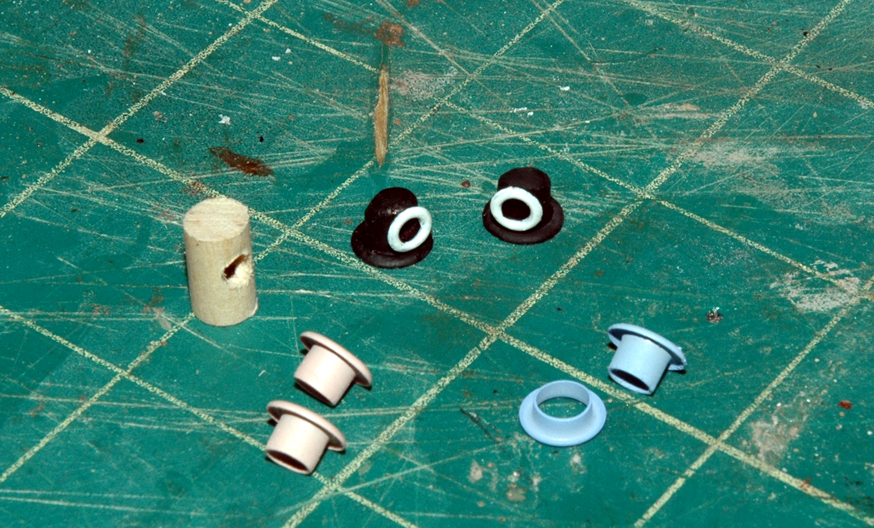
The actual hawse pipes on the bow are made from scrap booking eyes, which I've bent and shaped into ovals with a rat tail file and heating.
For the anchor chain pipes that I made from eyes for scrap booking and a wooden dowel. I drilled the dowel from the bottom and side so that the chain can actually run through them. I used two sizes of the eyes.
Thanks
Marc
-
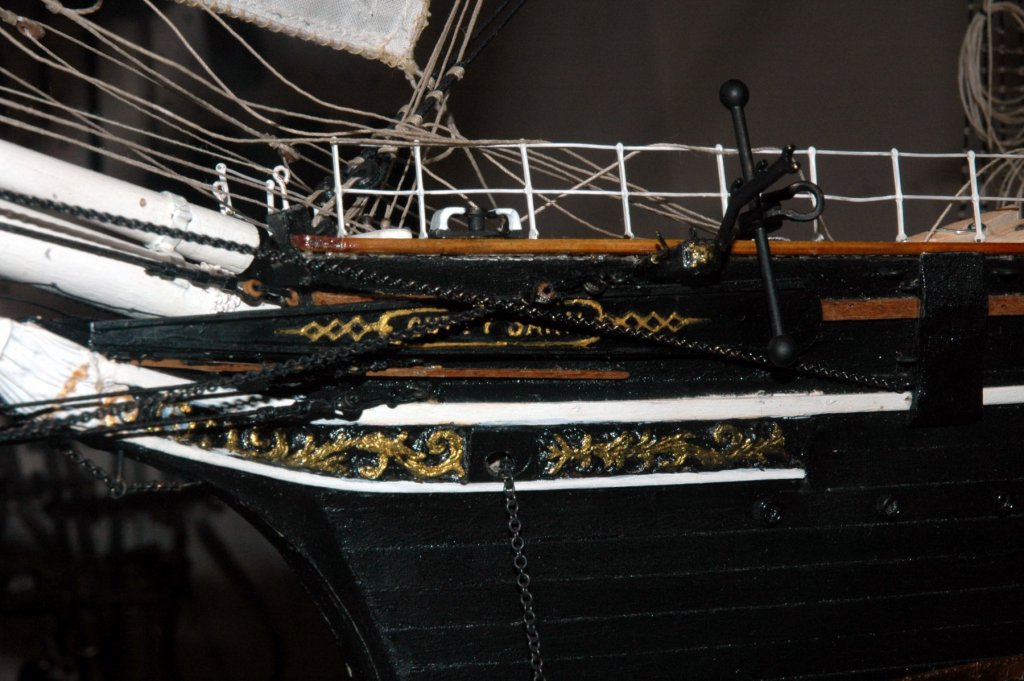
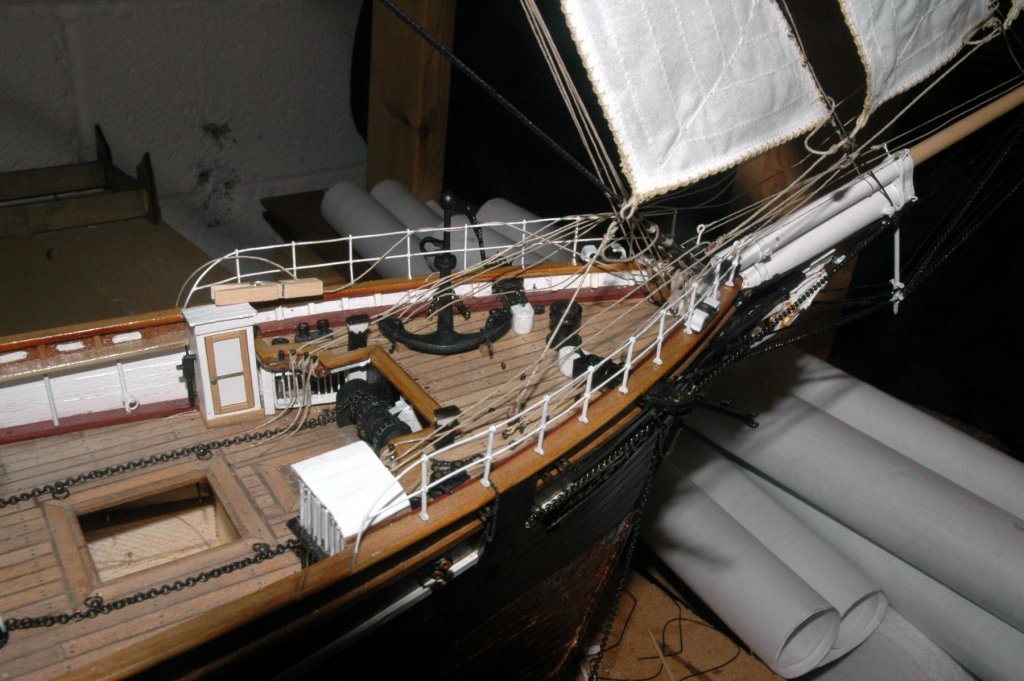
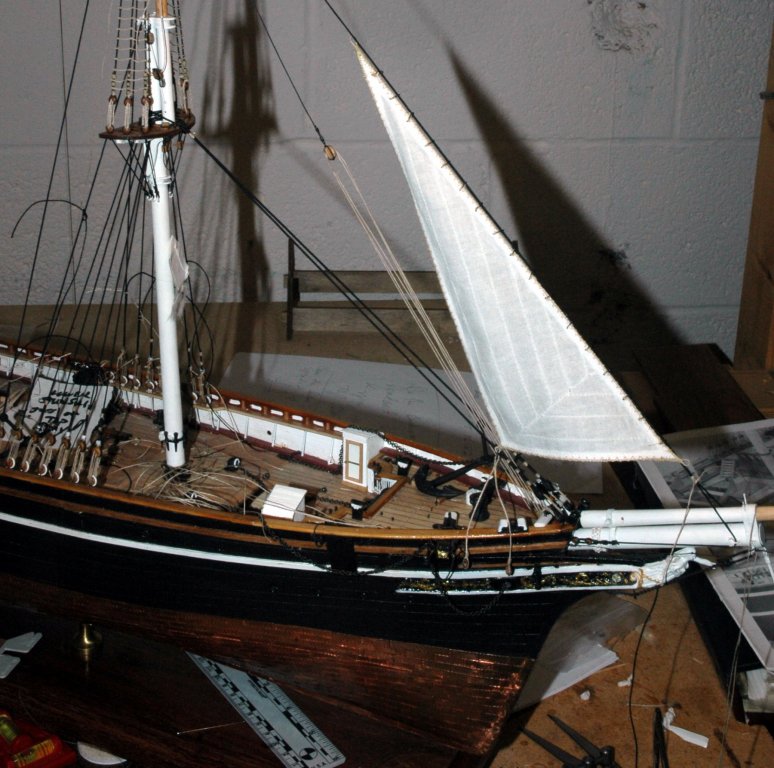
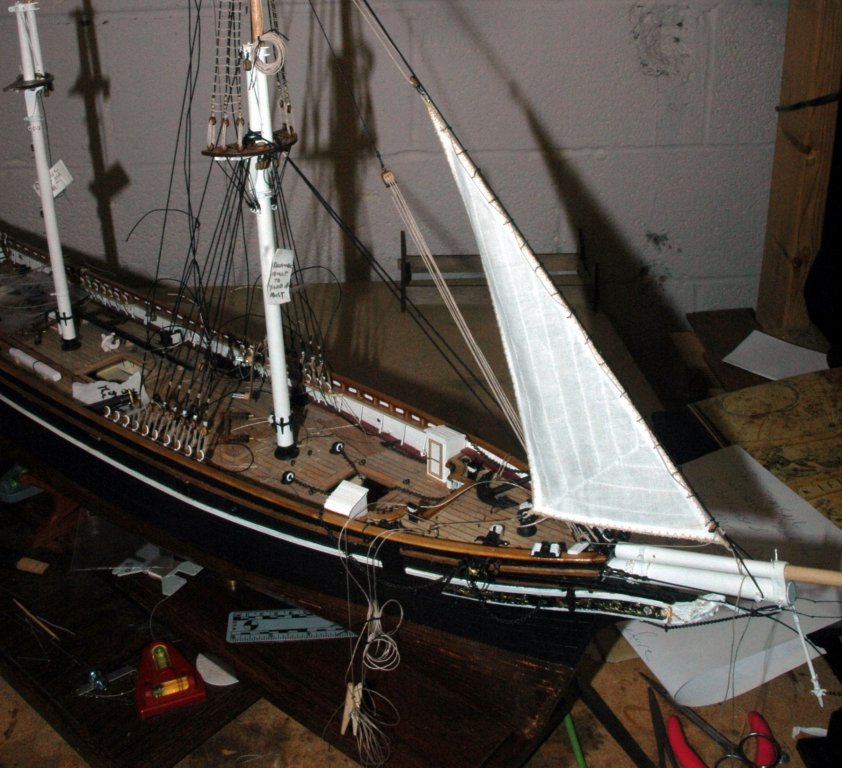
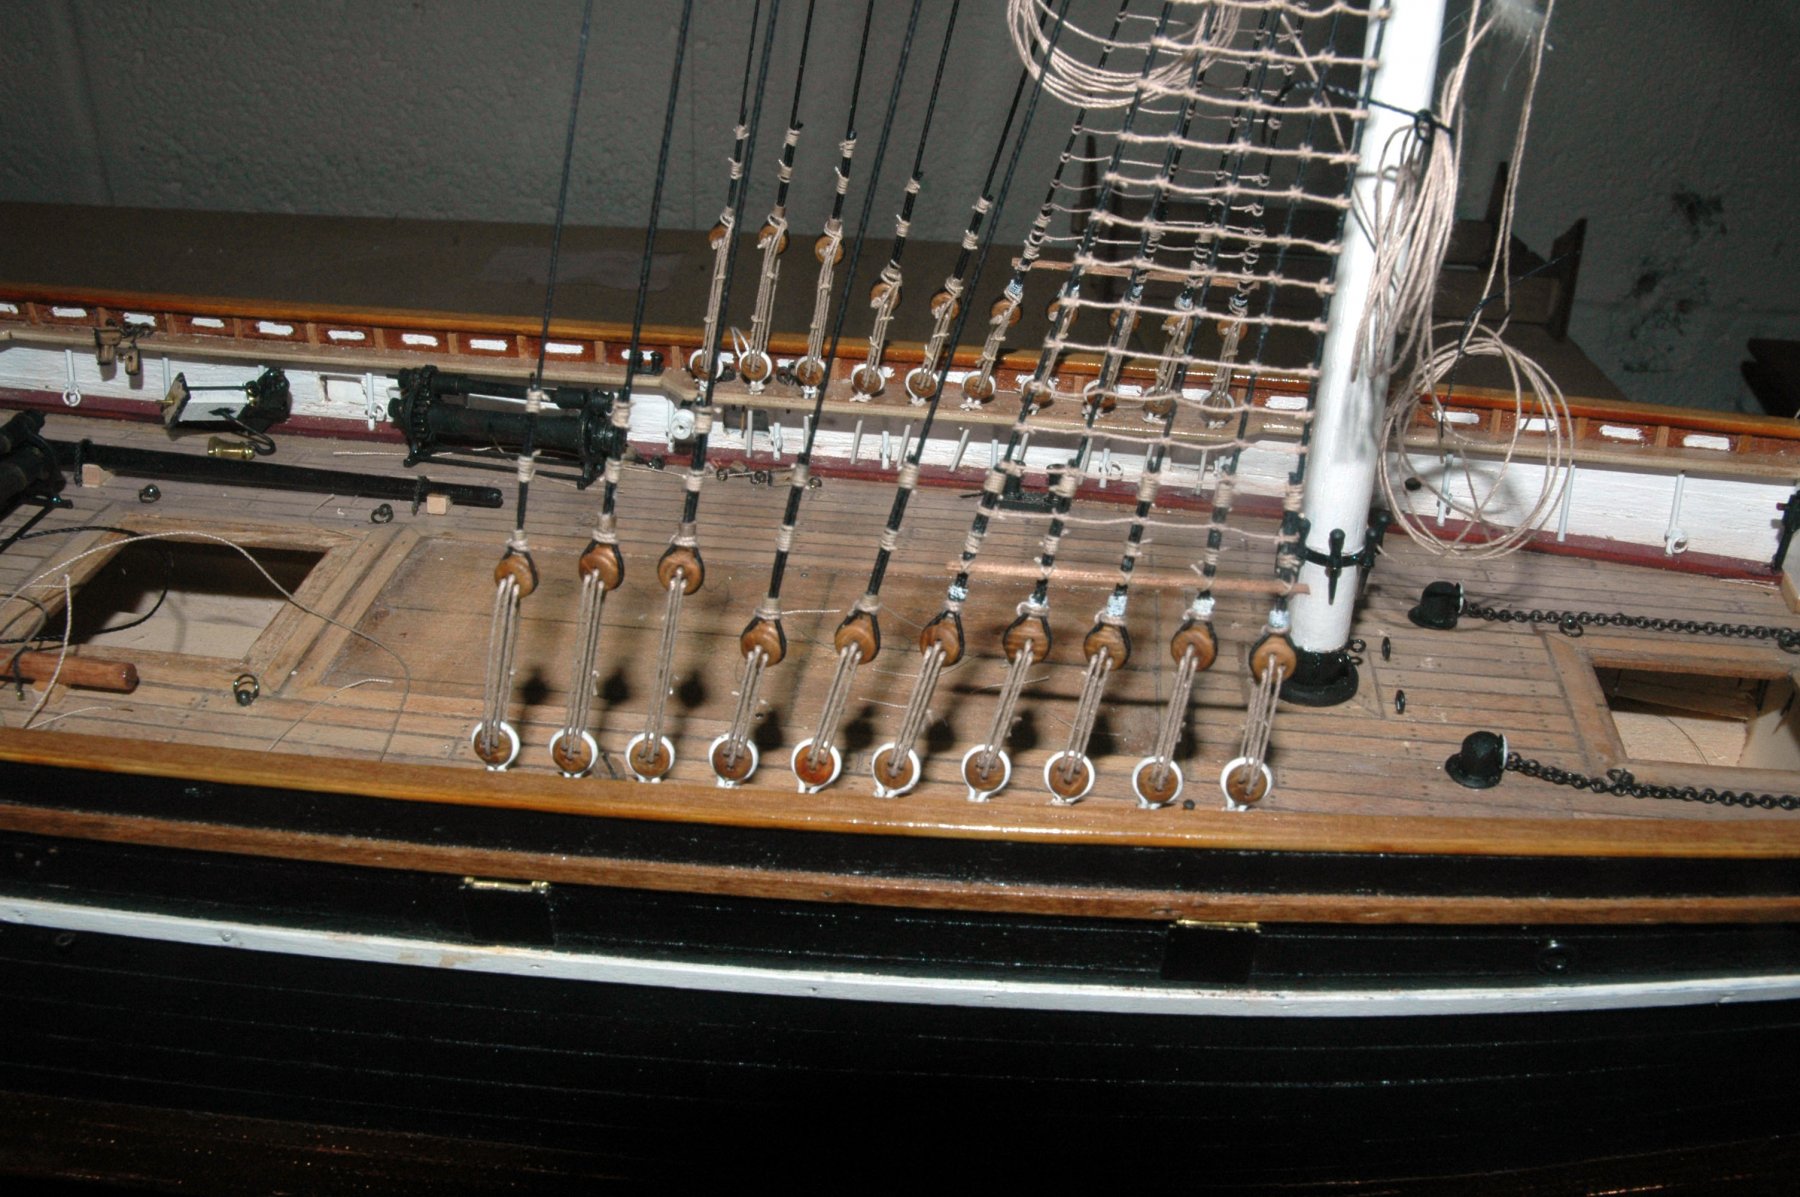
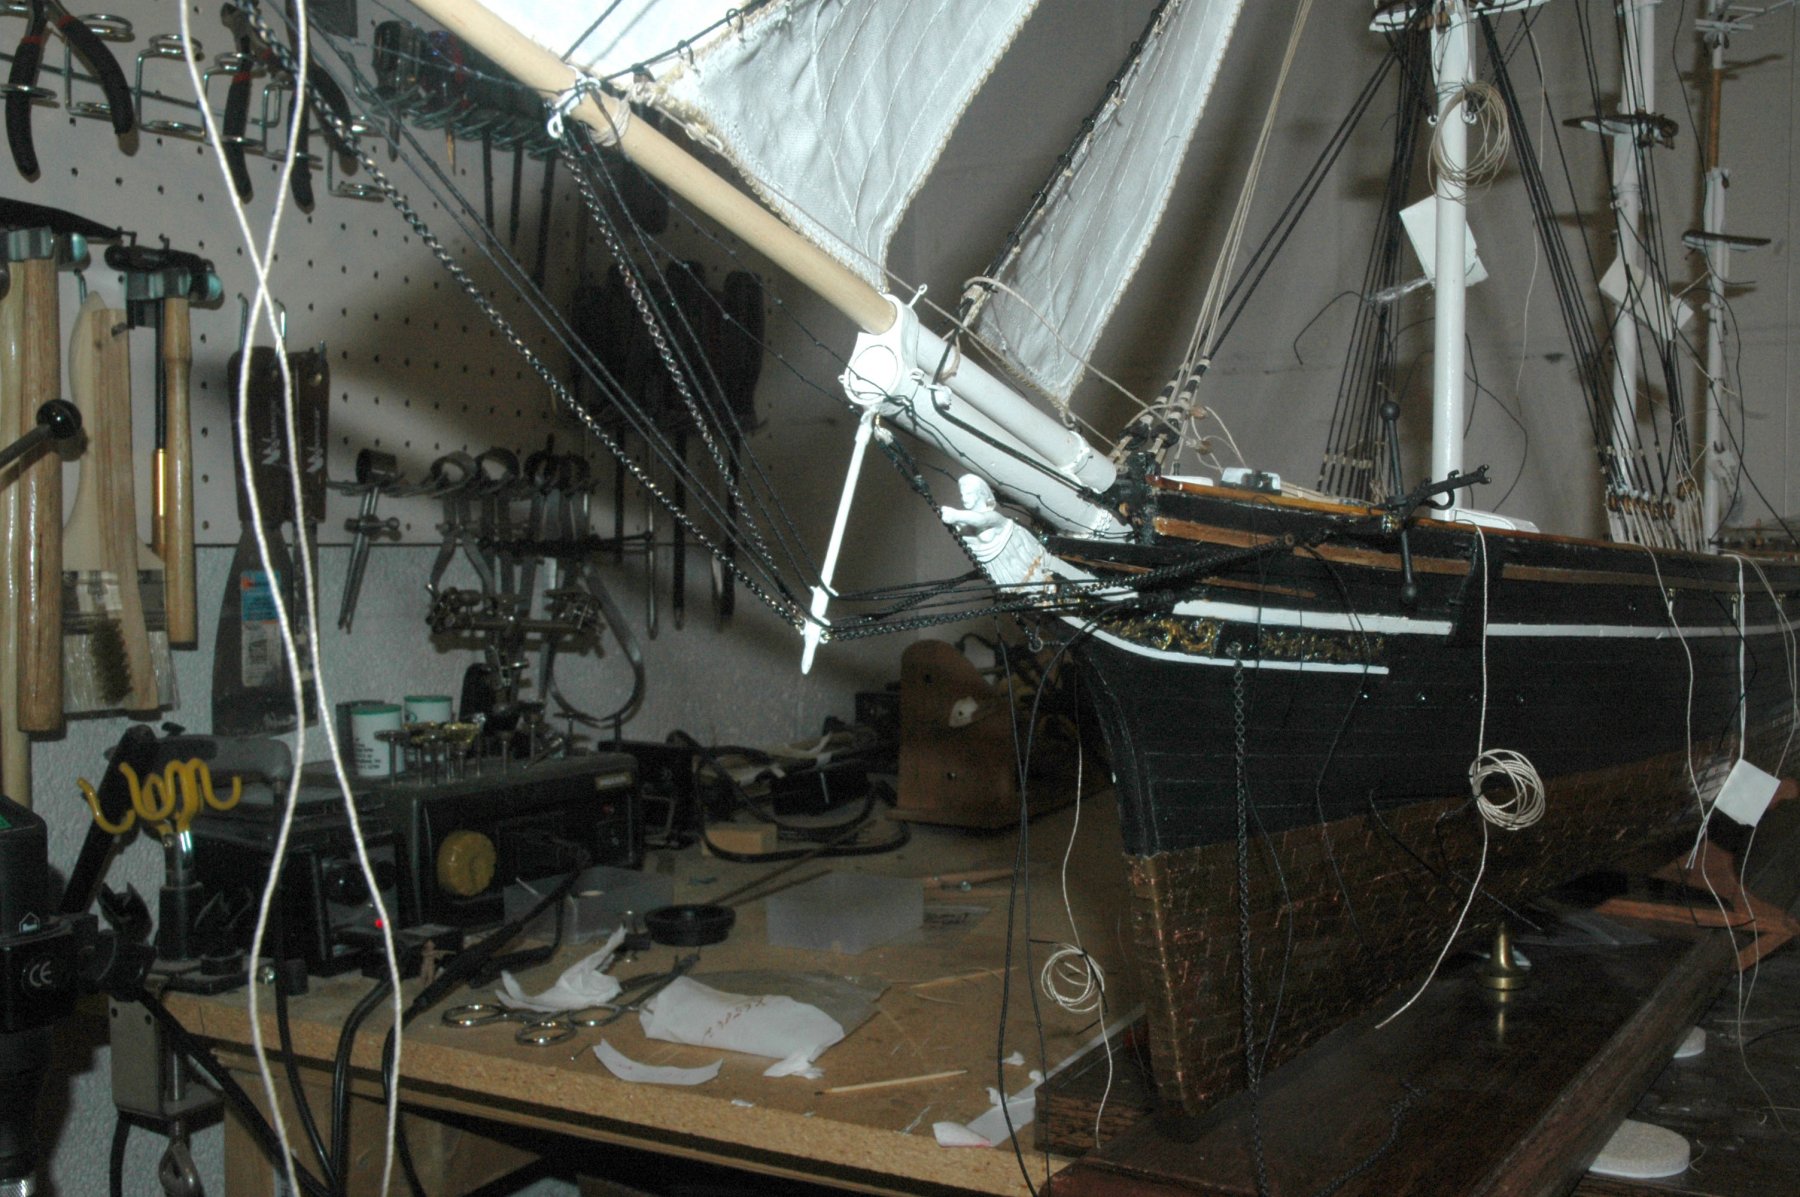
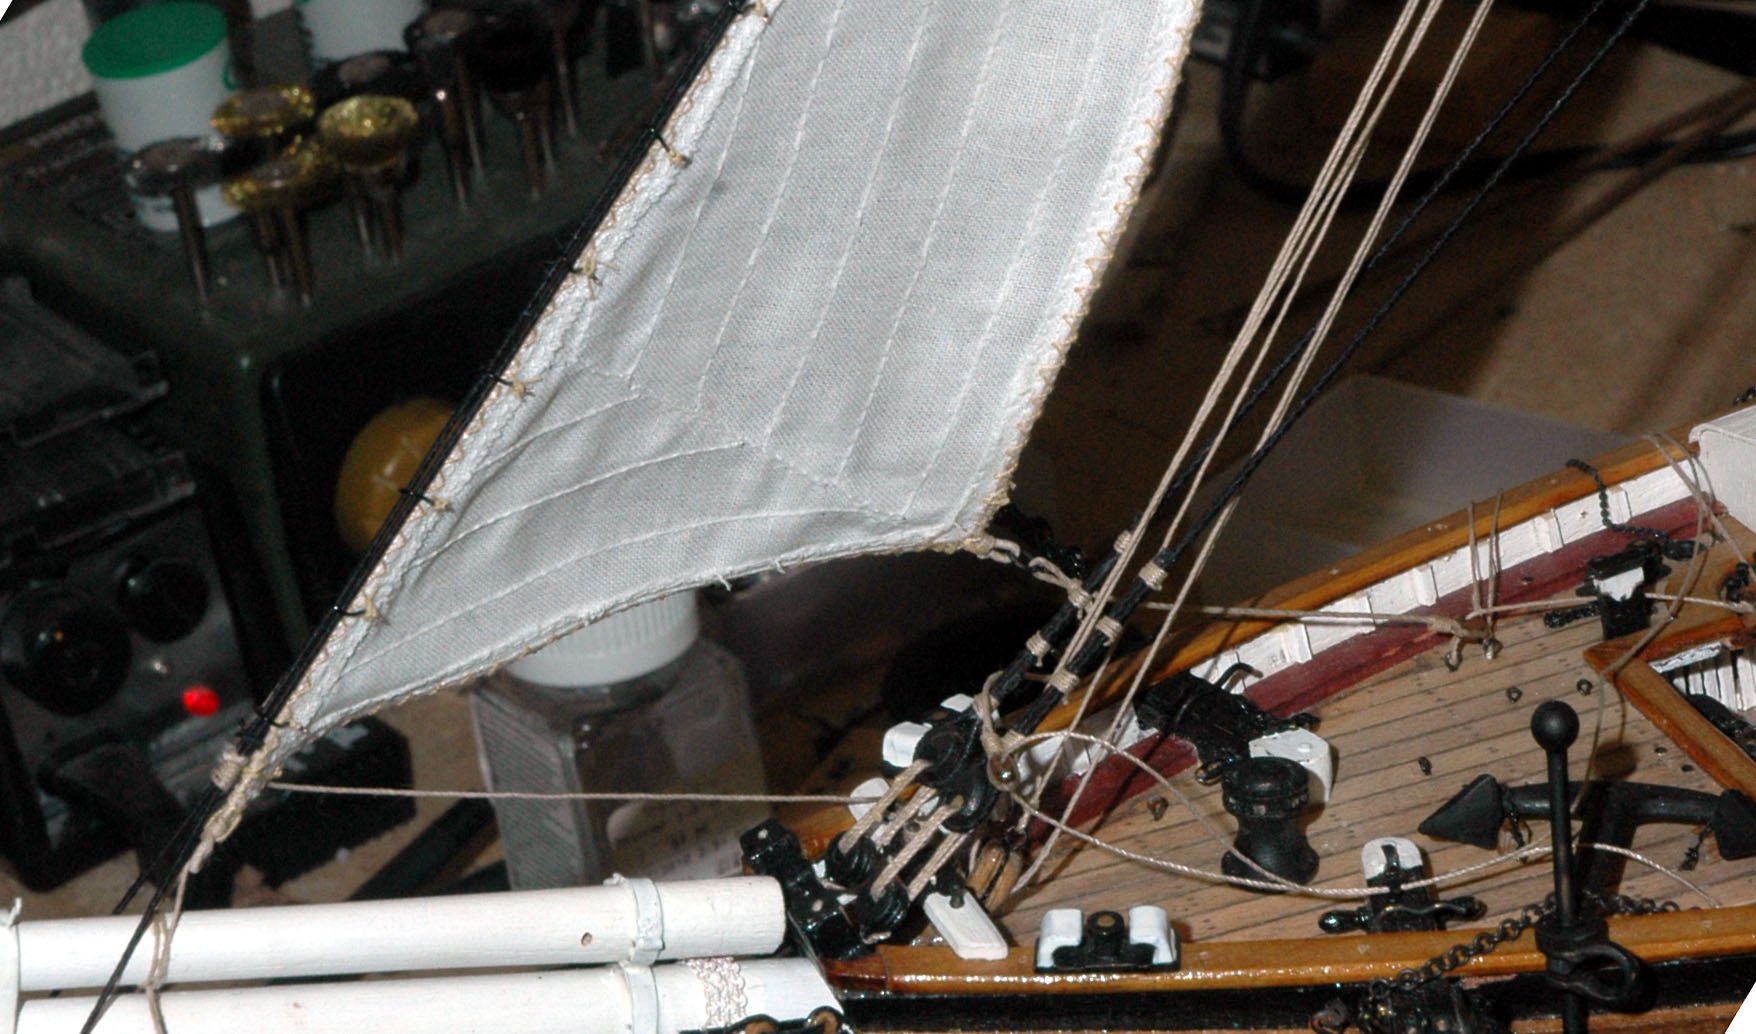
So, as I was admiring my handy work. and how nice the sheets looked -taunt to the pin like they were keeping the sails from flying away. Then I noticed a big problem. take a look - did you notice the problem?
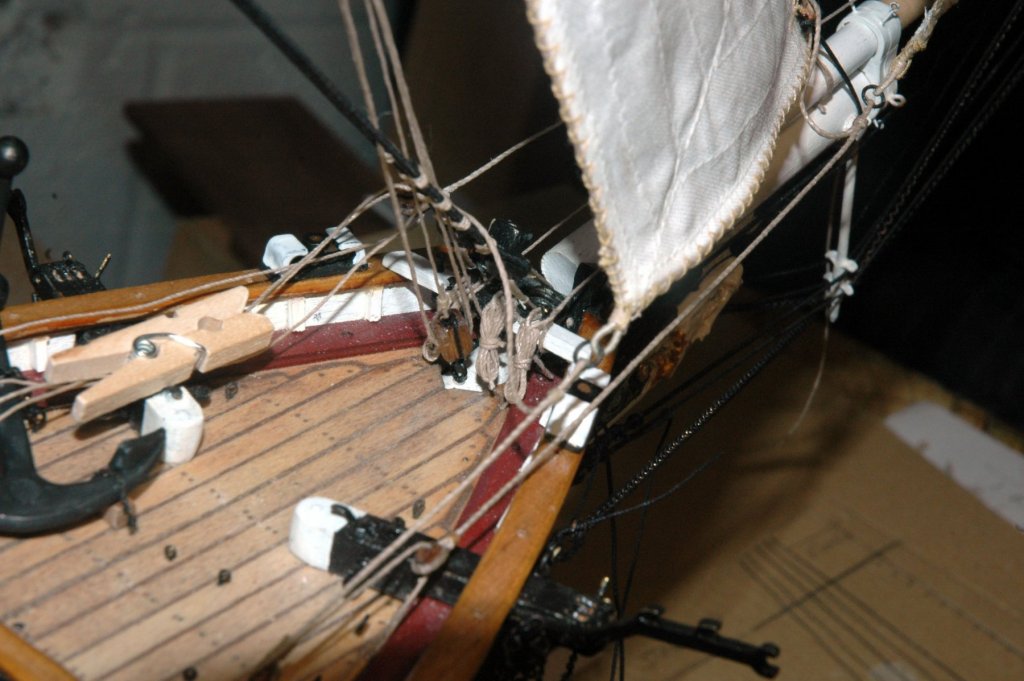
The sails and sheets are too low. There will not be any clearance for going over the rails.
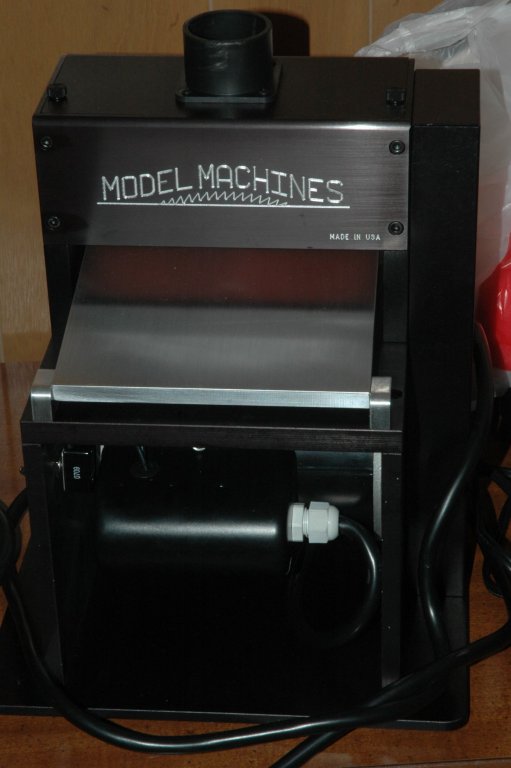
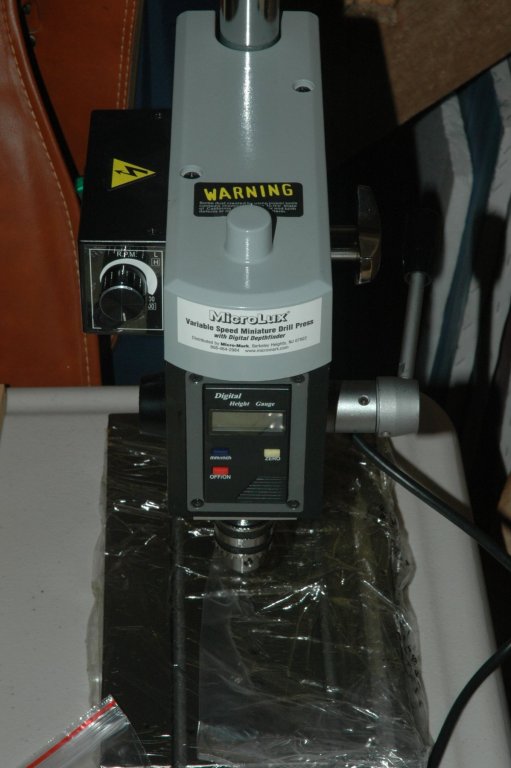
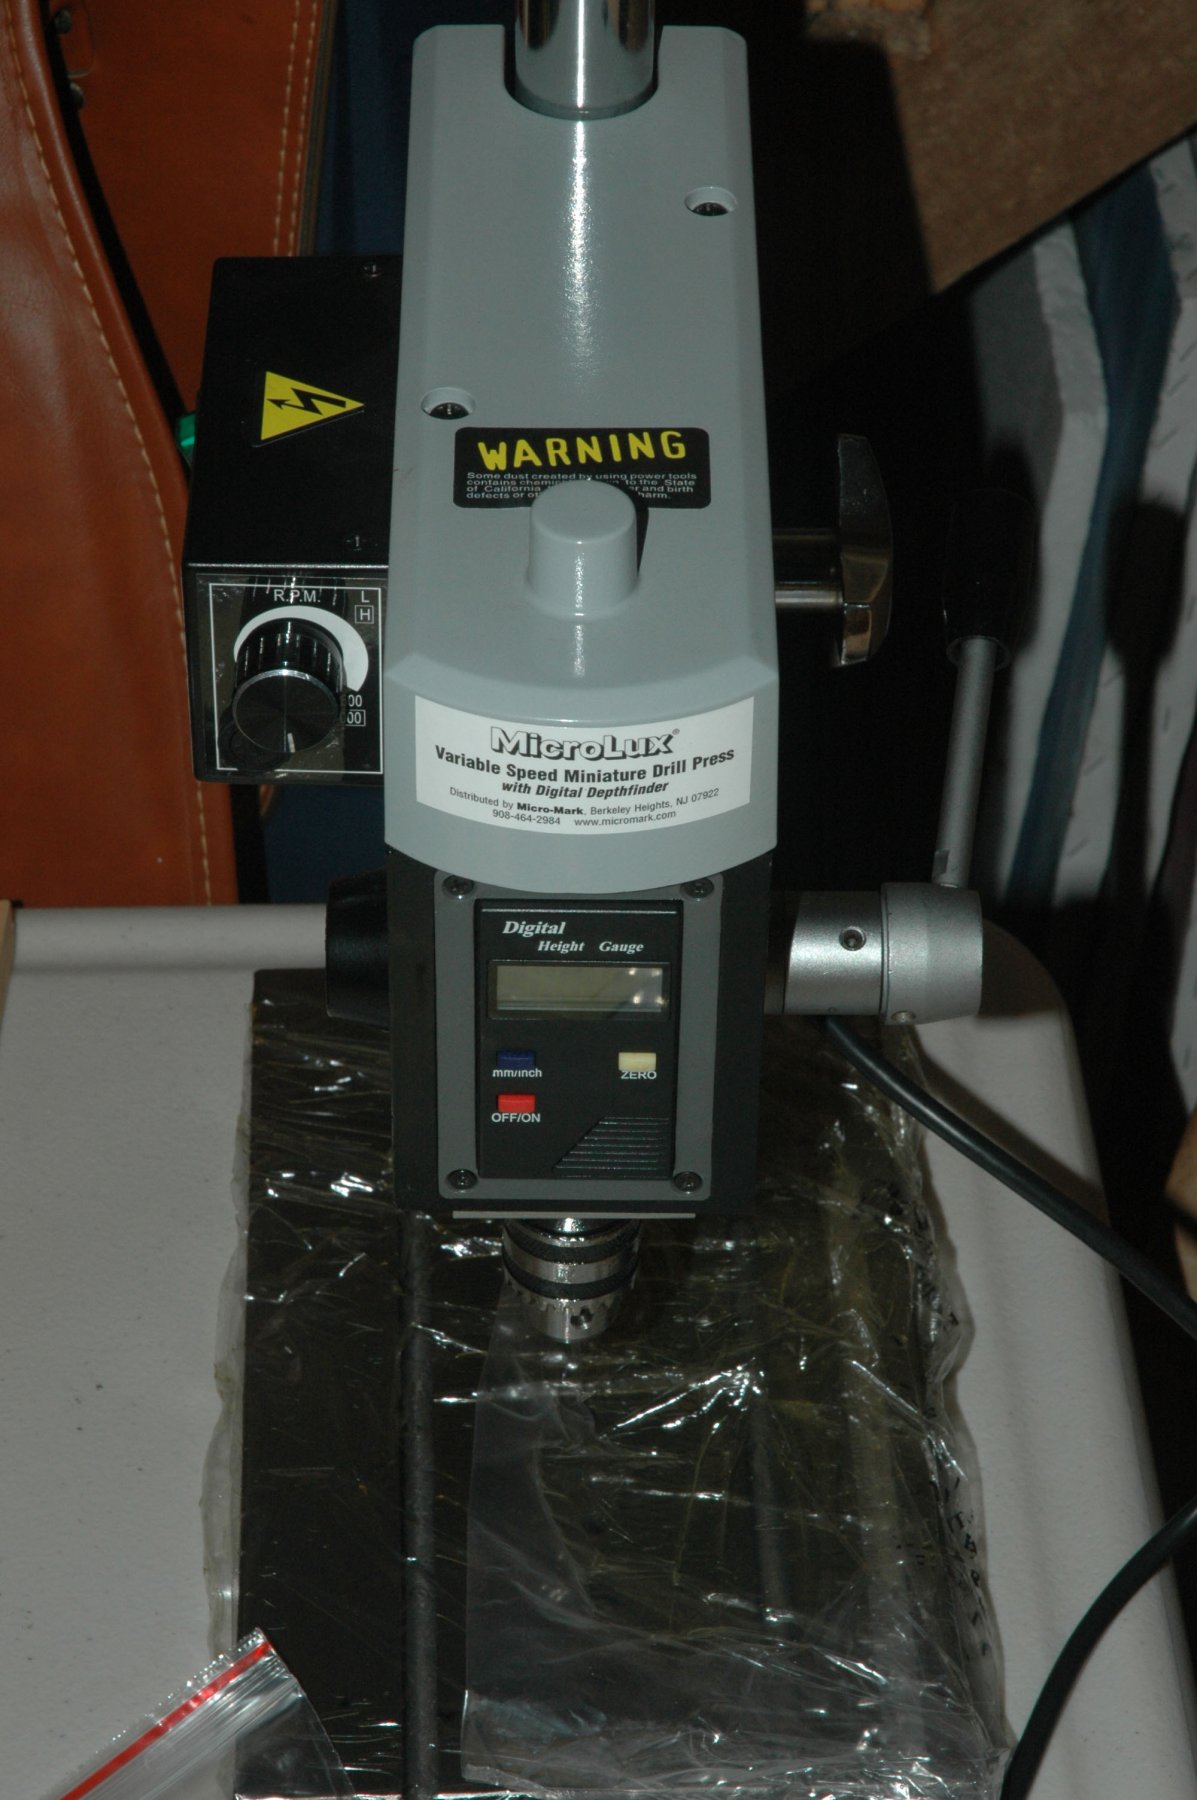
So, instead of dealing with this, I went and finished the ratlines for the shrouds. I bought equipment and built a nice workbench for the new equipment (new Byrnes toys!). Who says that shopping isn't fun? It's the type of shopping.
My New Disc Sander, thickness sander and drill.

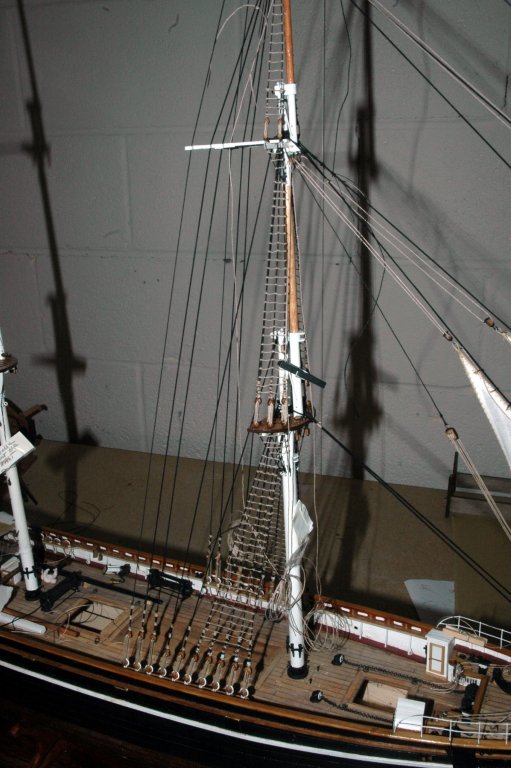
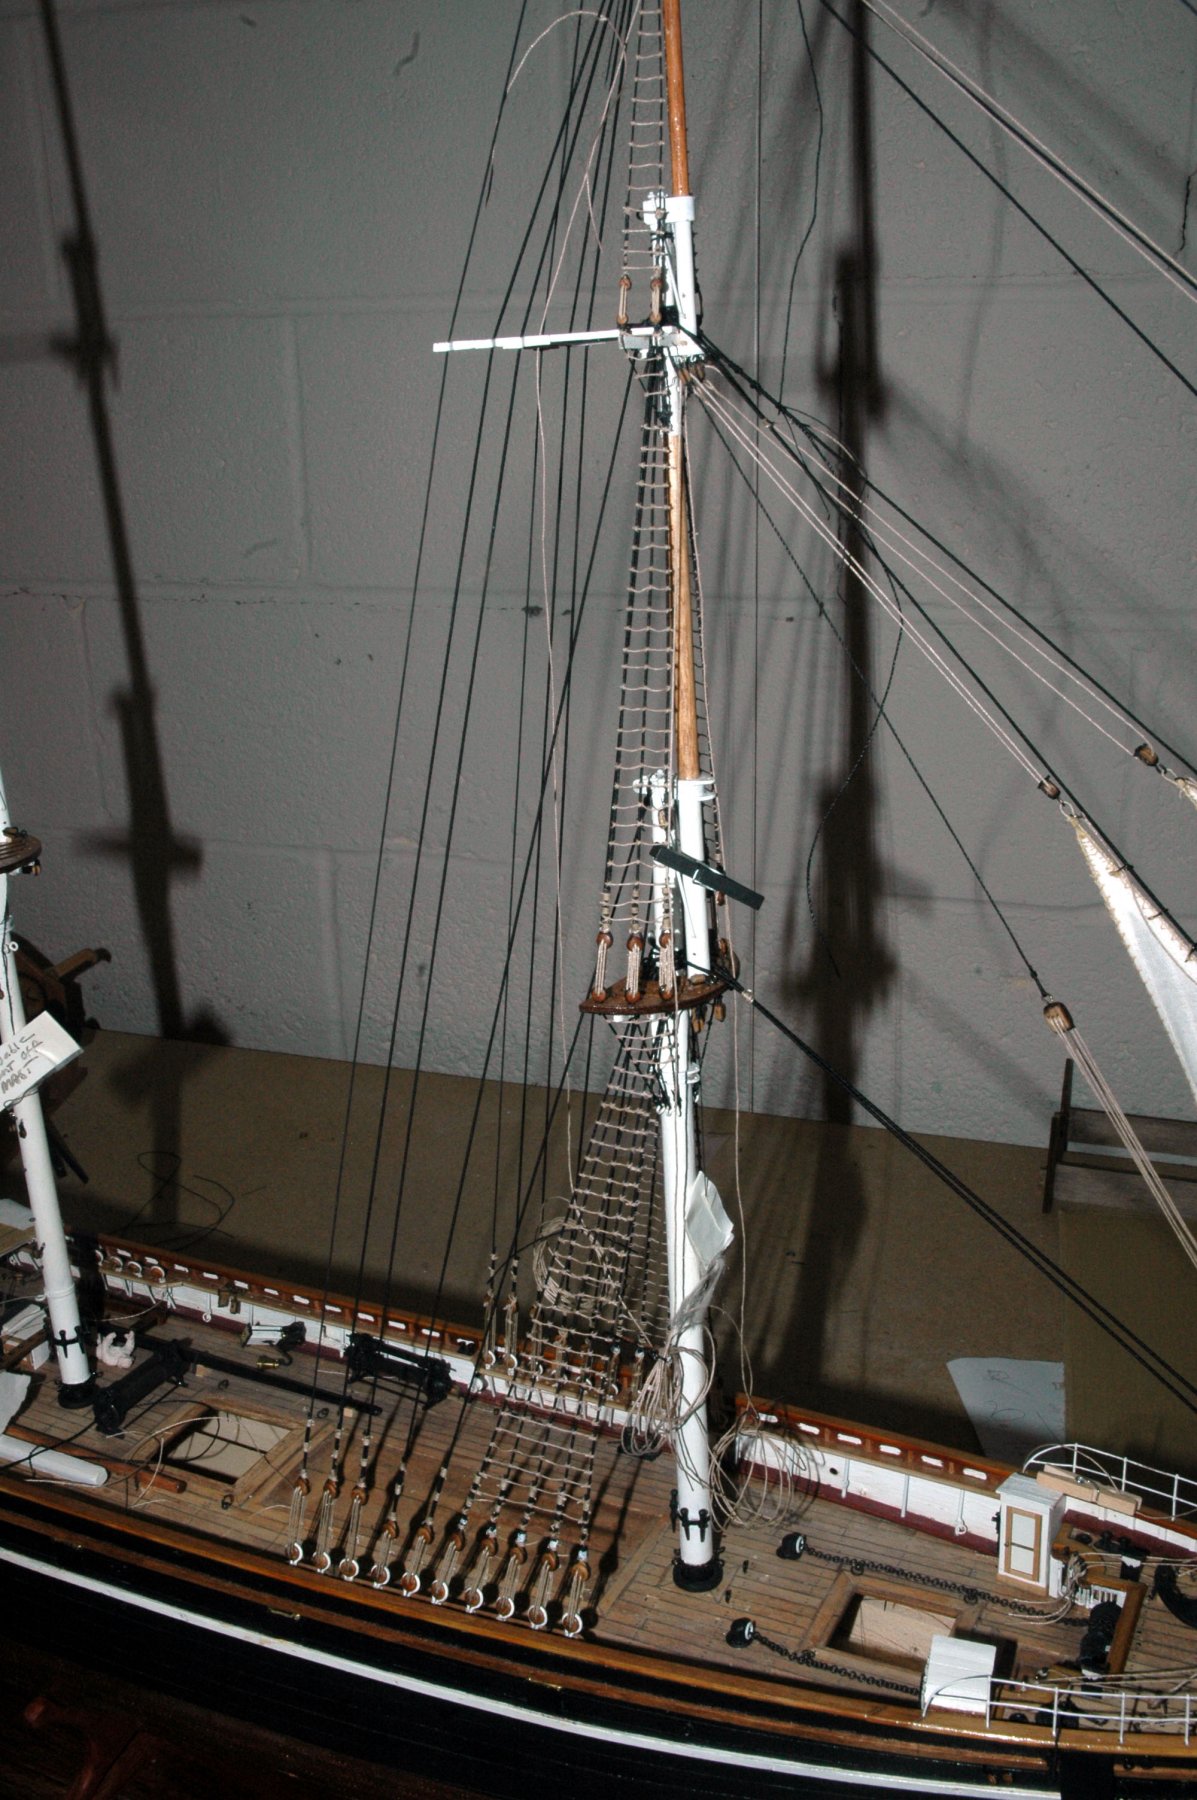
My ratlines finished for the fore mast

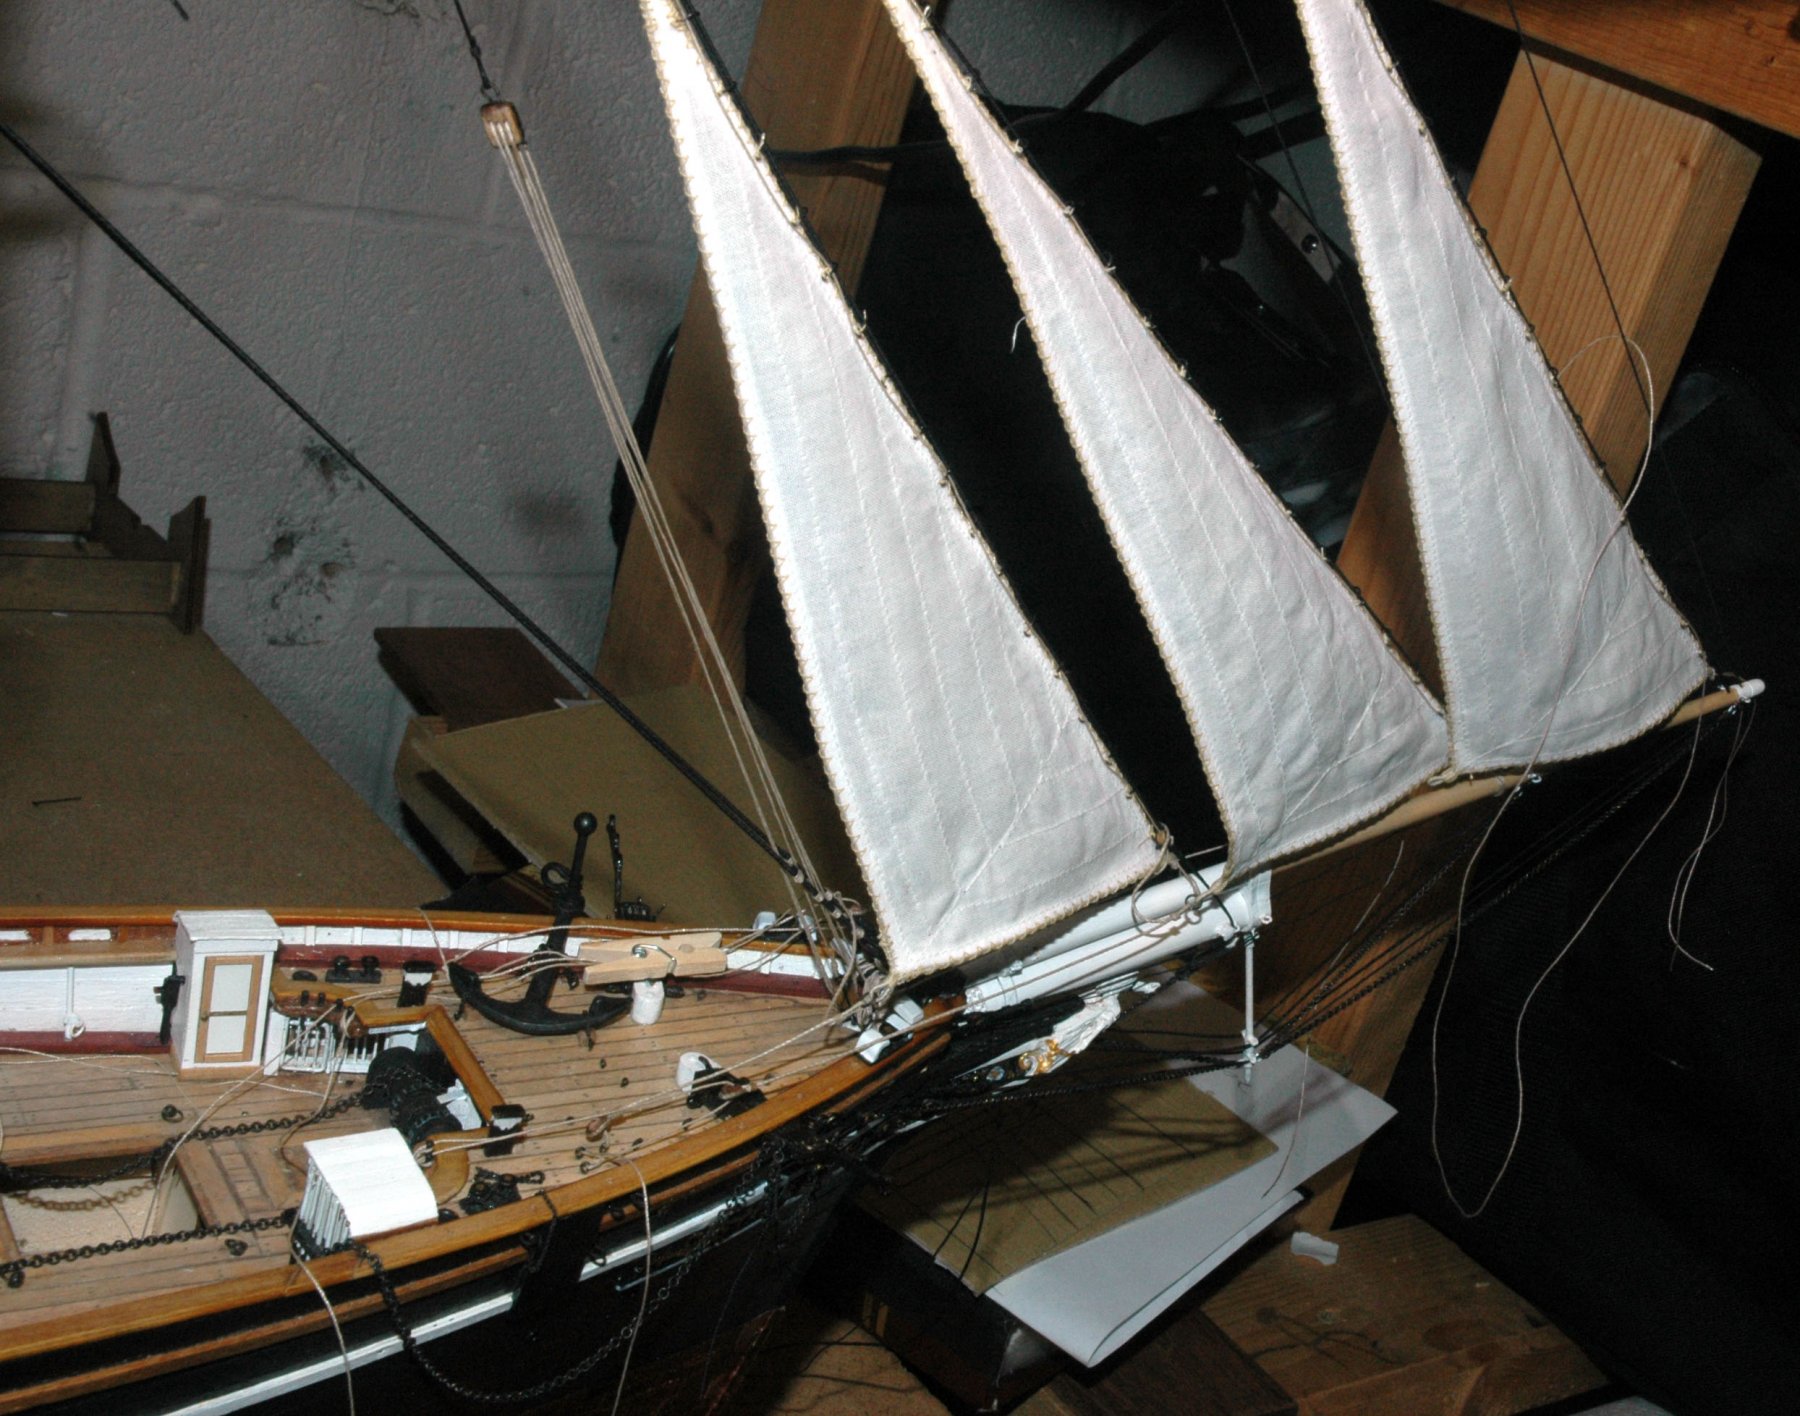
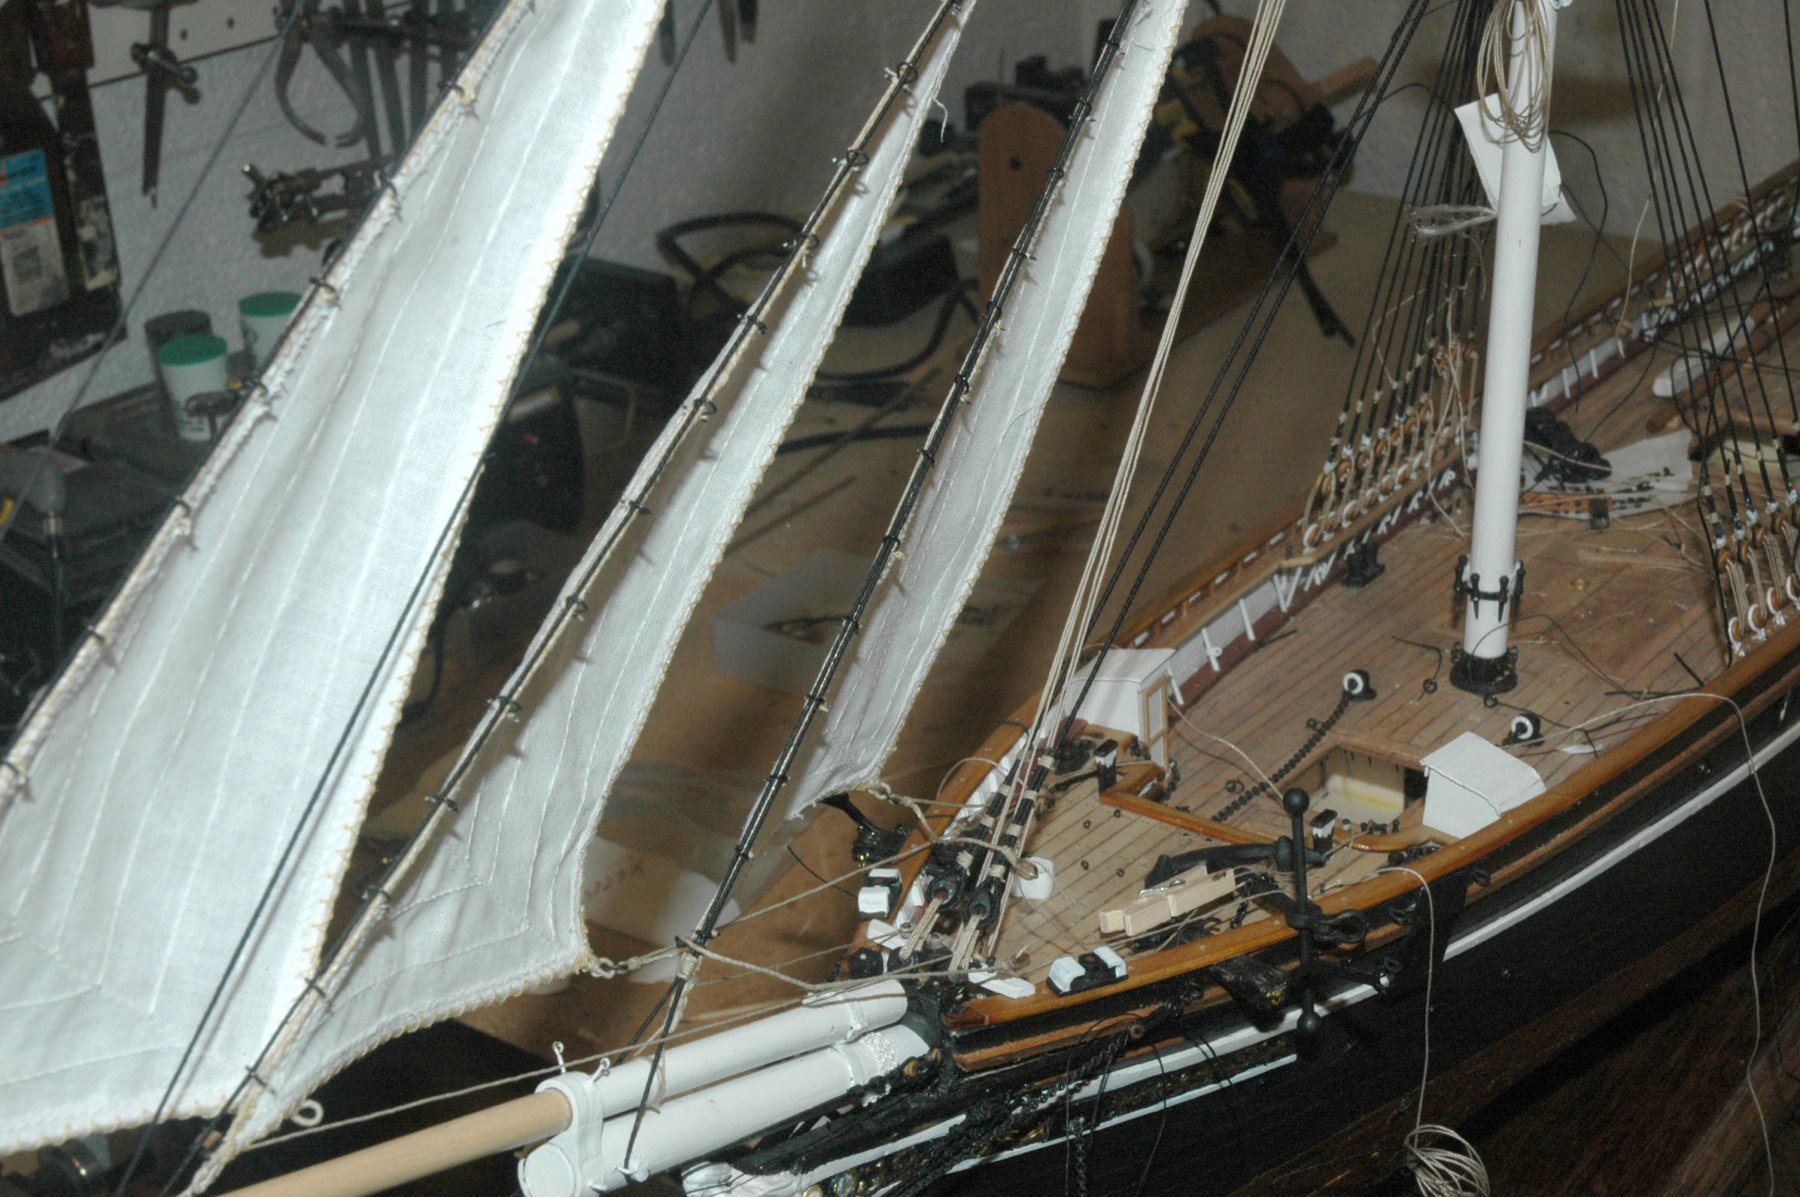
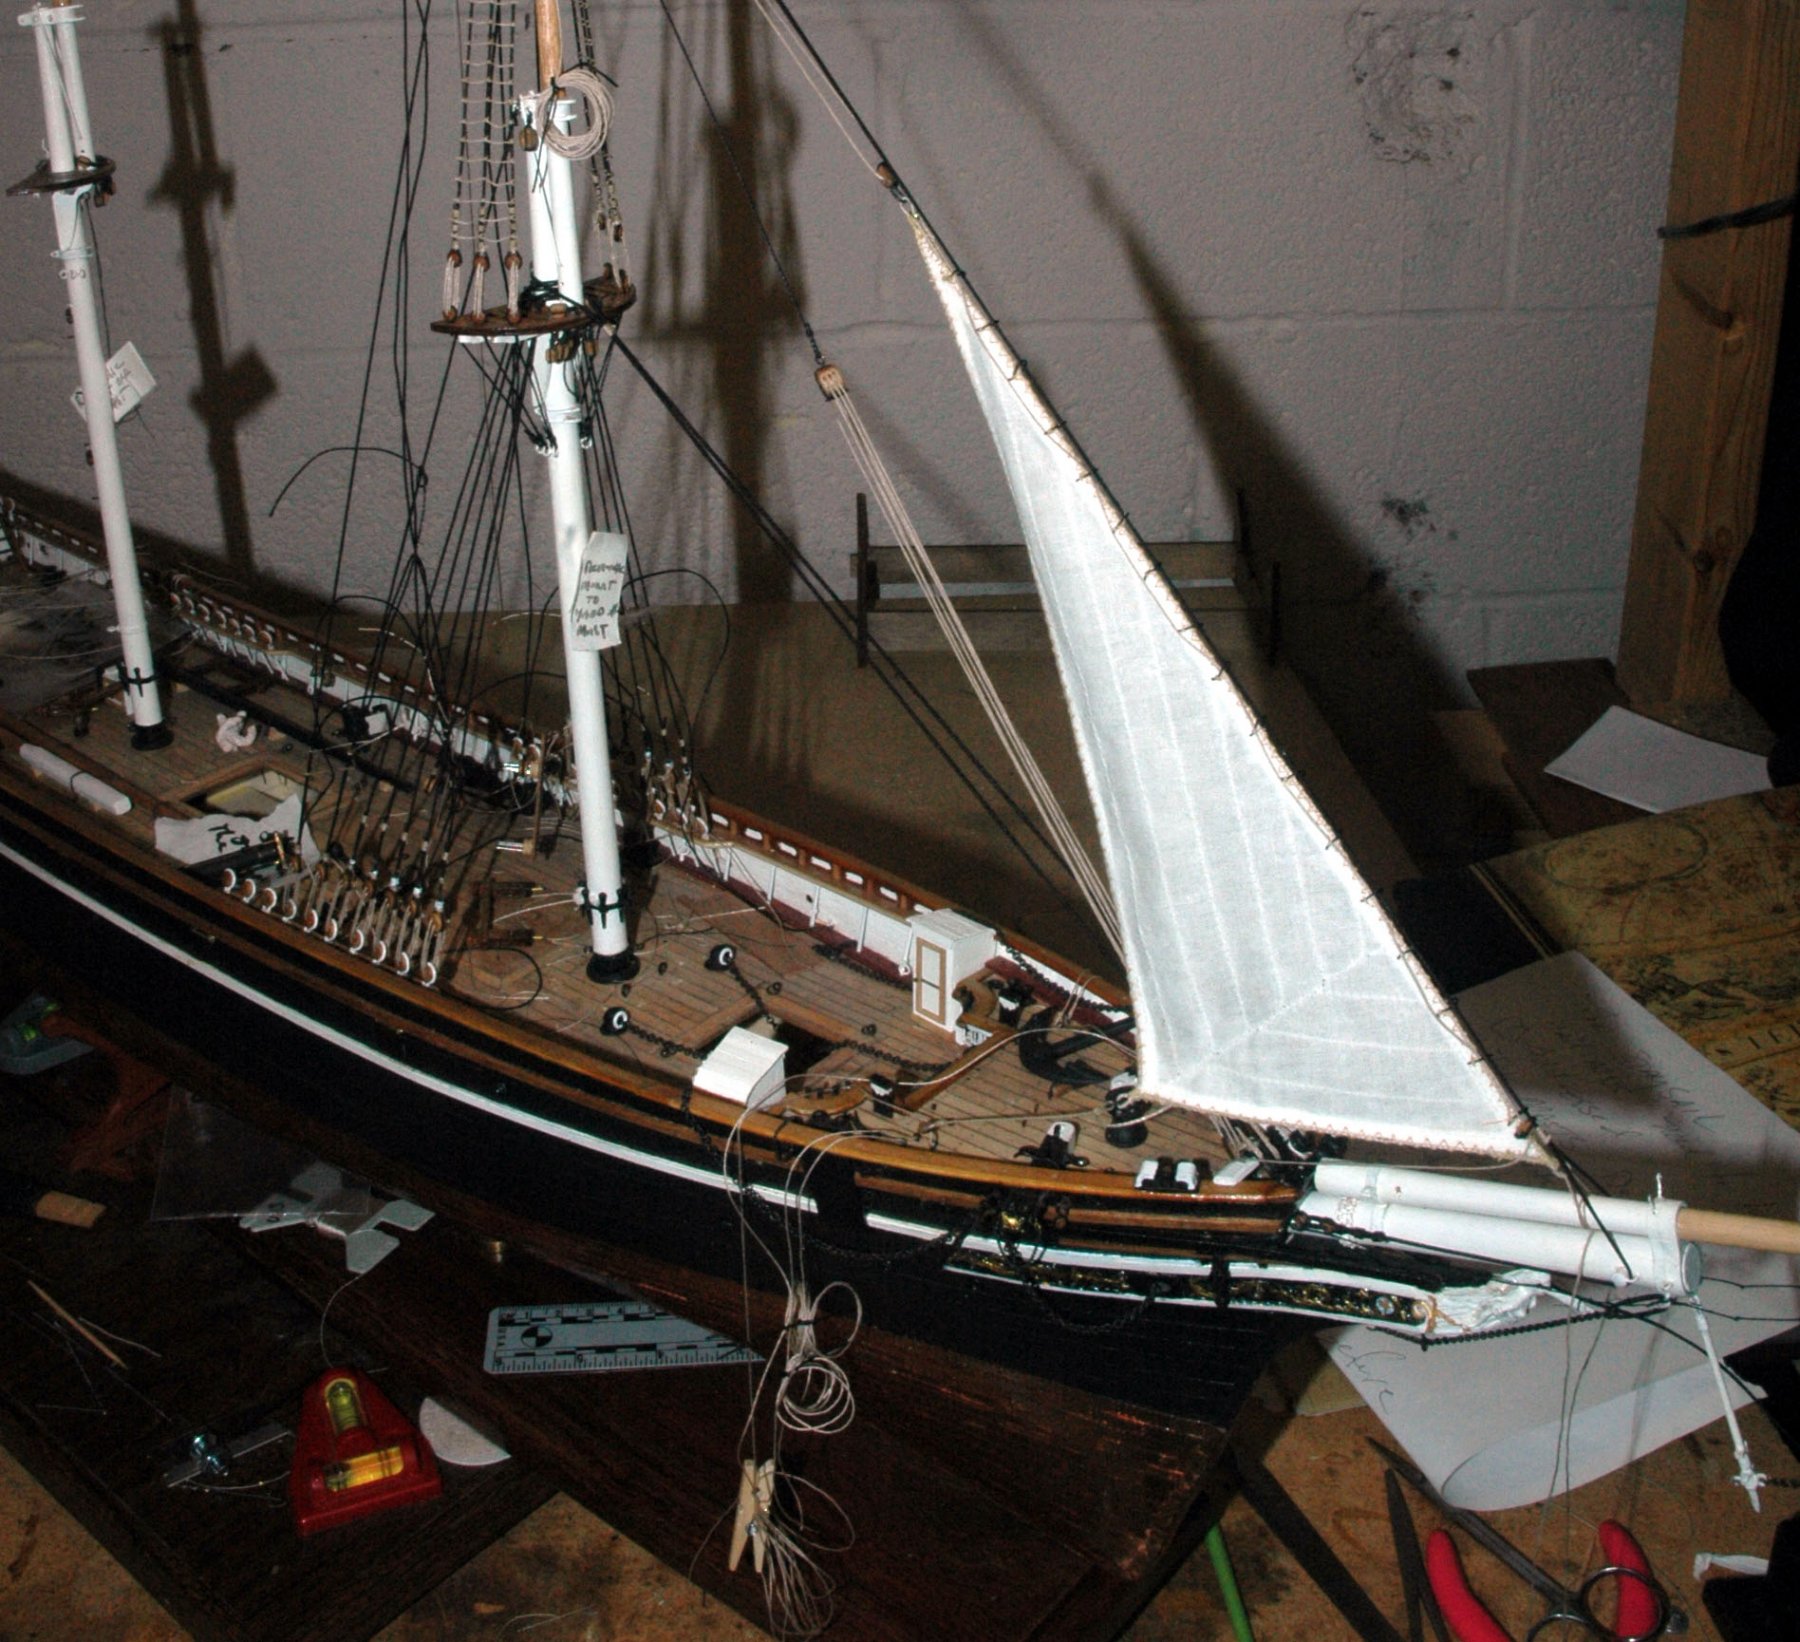
After admiring my toys and rigging, I un-bent the sails. removed the sheets, blocks, etc. I installed the rails and then bent the sails and rigged the sheets
-
just catching up. Great progress! She is really taking shape
Marc
- popeye the sailor, Piet, Nirvana and 1 other
-
4
-
Sorry for the delay in response. I ended up in the Hospital and recovery for a few days. They love to cut you open.
Thanks for the reply Popeye. No big issues on the ship just a few steps backwards.
Sailor1234567890, the method you describe is probably the better way. in my model Clove hitches are used for the middle shrouds and then a cow hitch is used at the ends as an alternative to using clove hitches. The cow hitch prevents the nibs at the end of the shrouds that occurs if you fun clove hitches to the end. just another way of representing the terminal end of the ratline.
Thanks
Marc
-
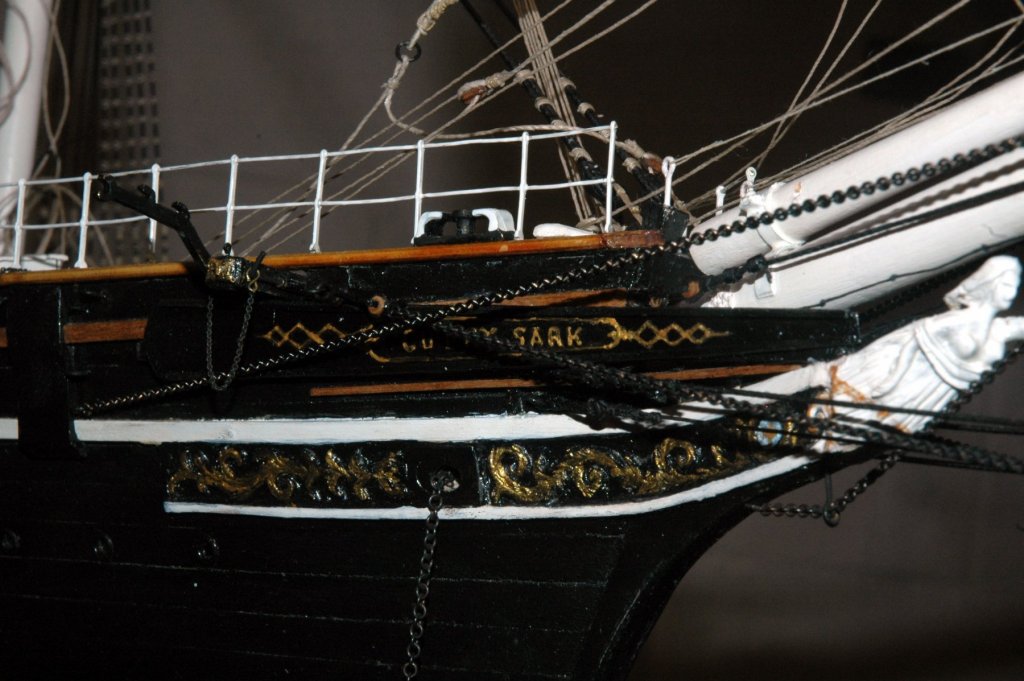
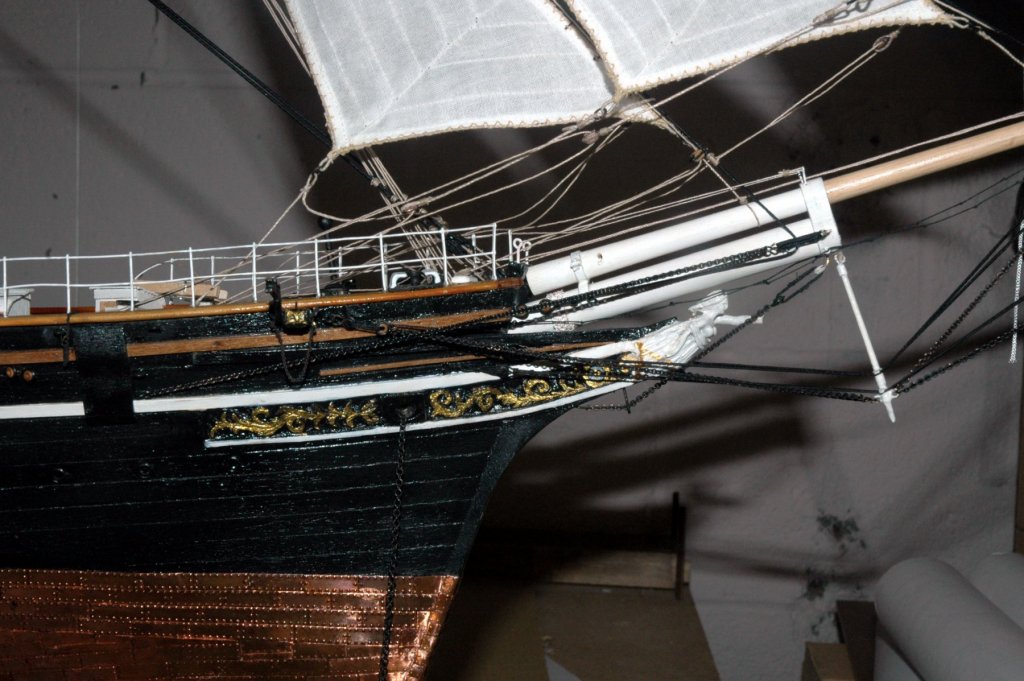
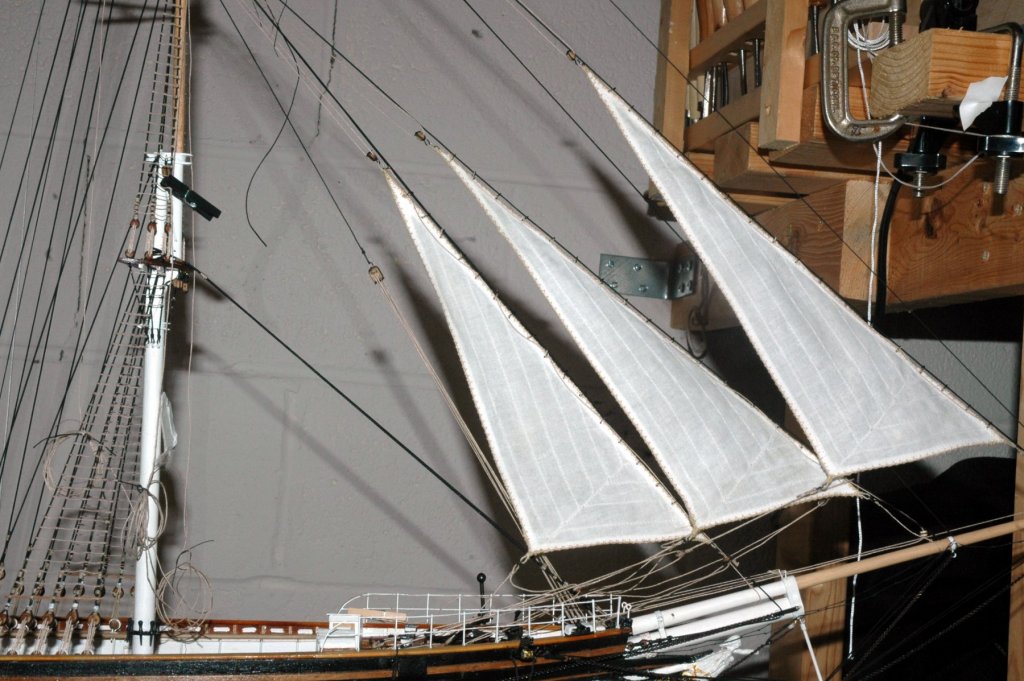
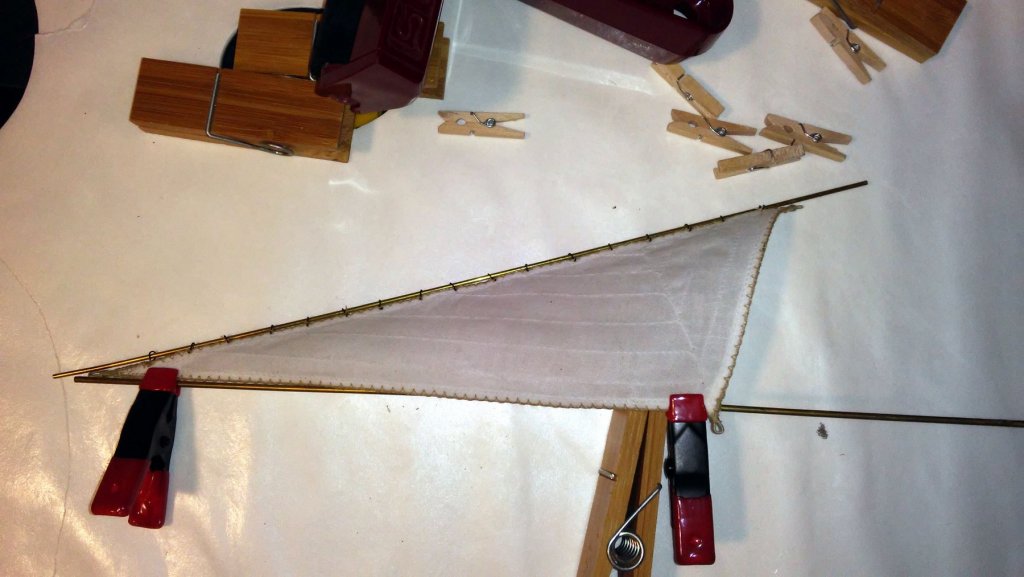
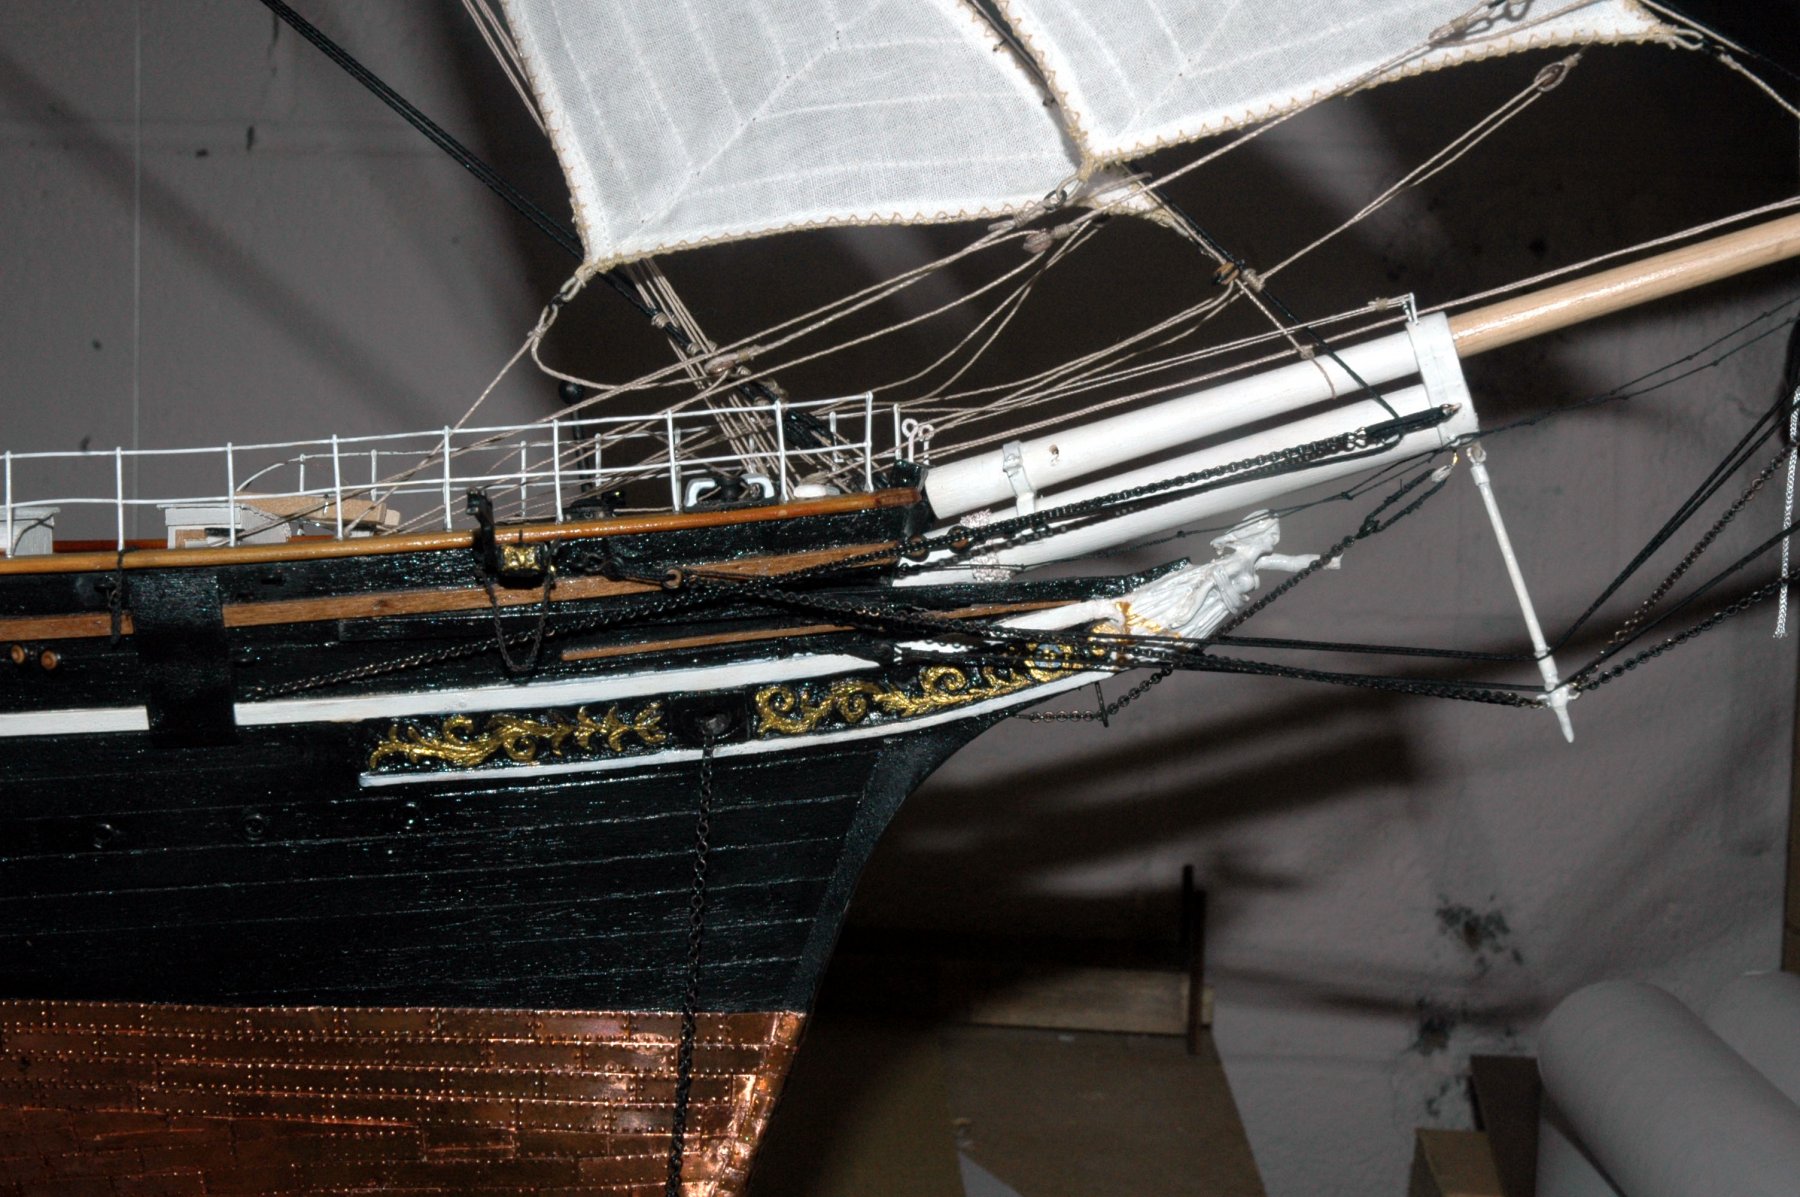
In addition to adding the fore staysail and jibs, I added more stays to the bowsprit and boom
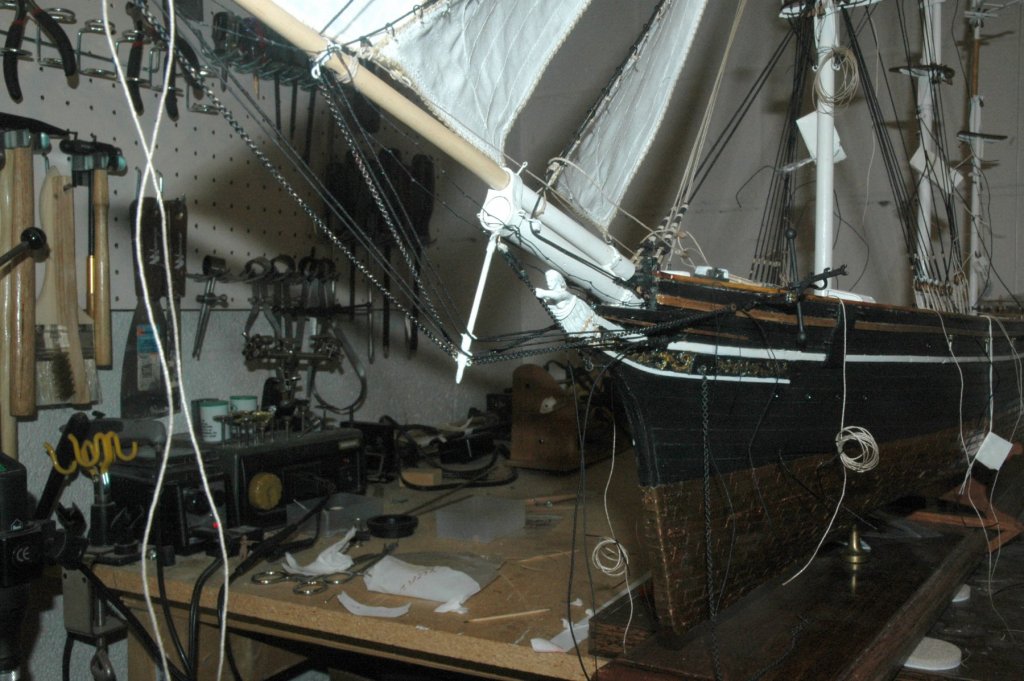
So here are the results for the fore stay sail and jibs. In these photos the otter jib hasn't been rigged and thus the droopy appearance. But I'm happy with the forming of the sails.

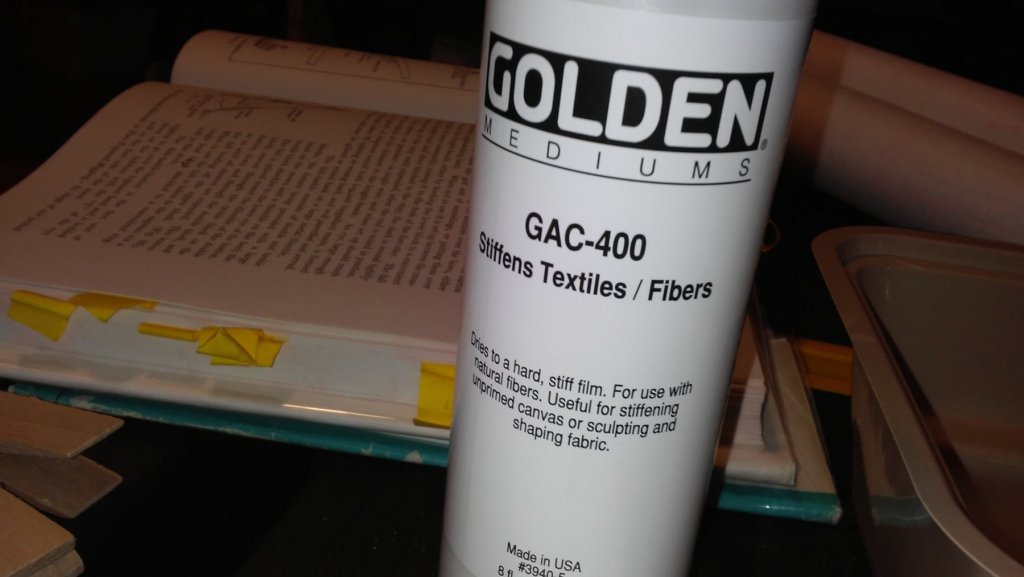
Also, i found that I could stiffen the lines using the CAG-400. I placed it on the sheets which allowed the sails to keep their form and preventing the sails from rotating on the stays back toward the center line.

hopefully, you can see how much the fore stay sail and inner jib stick out overboard and that the sheets are angled back onboard to the forecastle.
So I got to this point and was proud of the way that the sails and sheets looked. Then I noticed a big issue. next post I'll explain why I had to take all of the sails back off the ship.
Marc
- petervisser, bhermann, tasmanian and 4 others
-
7
-
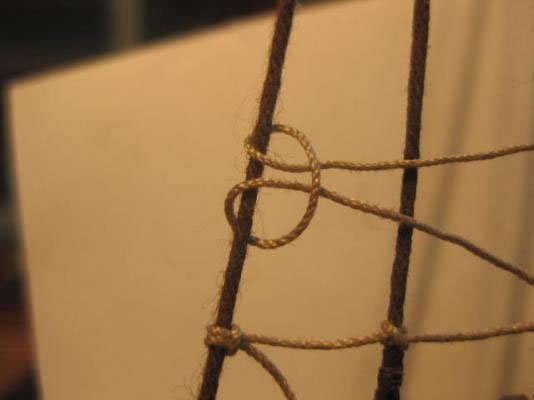
The name of the knot at the end of the ratline is the cow hitch. I can't find the link back to Danny's page right now, but here is Danny's image. I'll keep looking
marc
- NenadM, popeye the sailor and md1400cs
-
3
-
26 minutes ago, keelhauled said:
Hi,
I don't seem to have photos of setting up the ratlines, but I'm sure that you've seen plenty. Also I do have photos earlier of the ratlines. I did make one change which is a knot that Dan Vadas uses to finish the ratline. I'll take a photo and post it later, but he has a great explanation. I'll also look for the link to his post. All of the stay at this point are served with chuck's machine. Also the sail's eyes are served. I used a method for forming the sails used described by Jersey Frank
I used the Golden acrylic primer and applied it to the front and back of the sails. I put brass rods through the eyes to keep the sail strait. As it dried I pulled and used a hair dryer set on low to help form the belly.
So here are my first results.

-
Hi,
I don't seem to have photos of setting up the ratlines, but I'm sure that you've seen plenty. Also I do have photos earlier of the ratlines. I did make one change which is a knot that Dan Vadas uses to finish the ratline. I'll take a photo and post it later, but he has a great explanation. I'll also look for the link to his post. All of the stay at this point are served with chuck's machine. Also the sail's eyes are served. I used a method for forming the sails used described by Jersey Frank
I used the Golden acrylic primer and applied it to the front and back of the sails. I put brass rods through the eyes to keep the sail strait. As it dried I pulled and used a hair dryer set on low to help form the belly.
So here are my first results.
-
Hi everyone,
It's been quite a long time since I've posted any progress. But, I have made quite a bit of progress over the past 5 months and although I haven't posted anything, I did take photos to share. Over the next few post I'll try to catch up on where I am.
marc
-
Hi HOF,
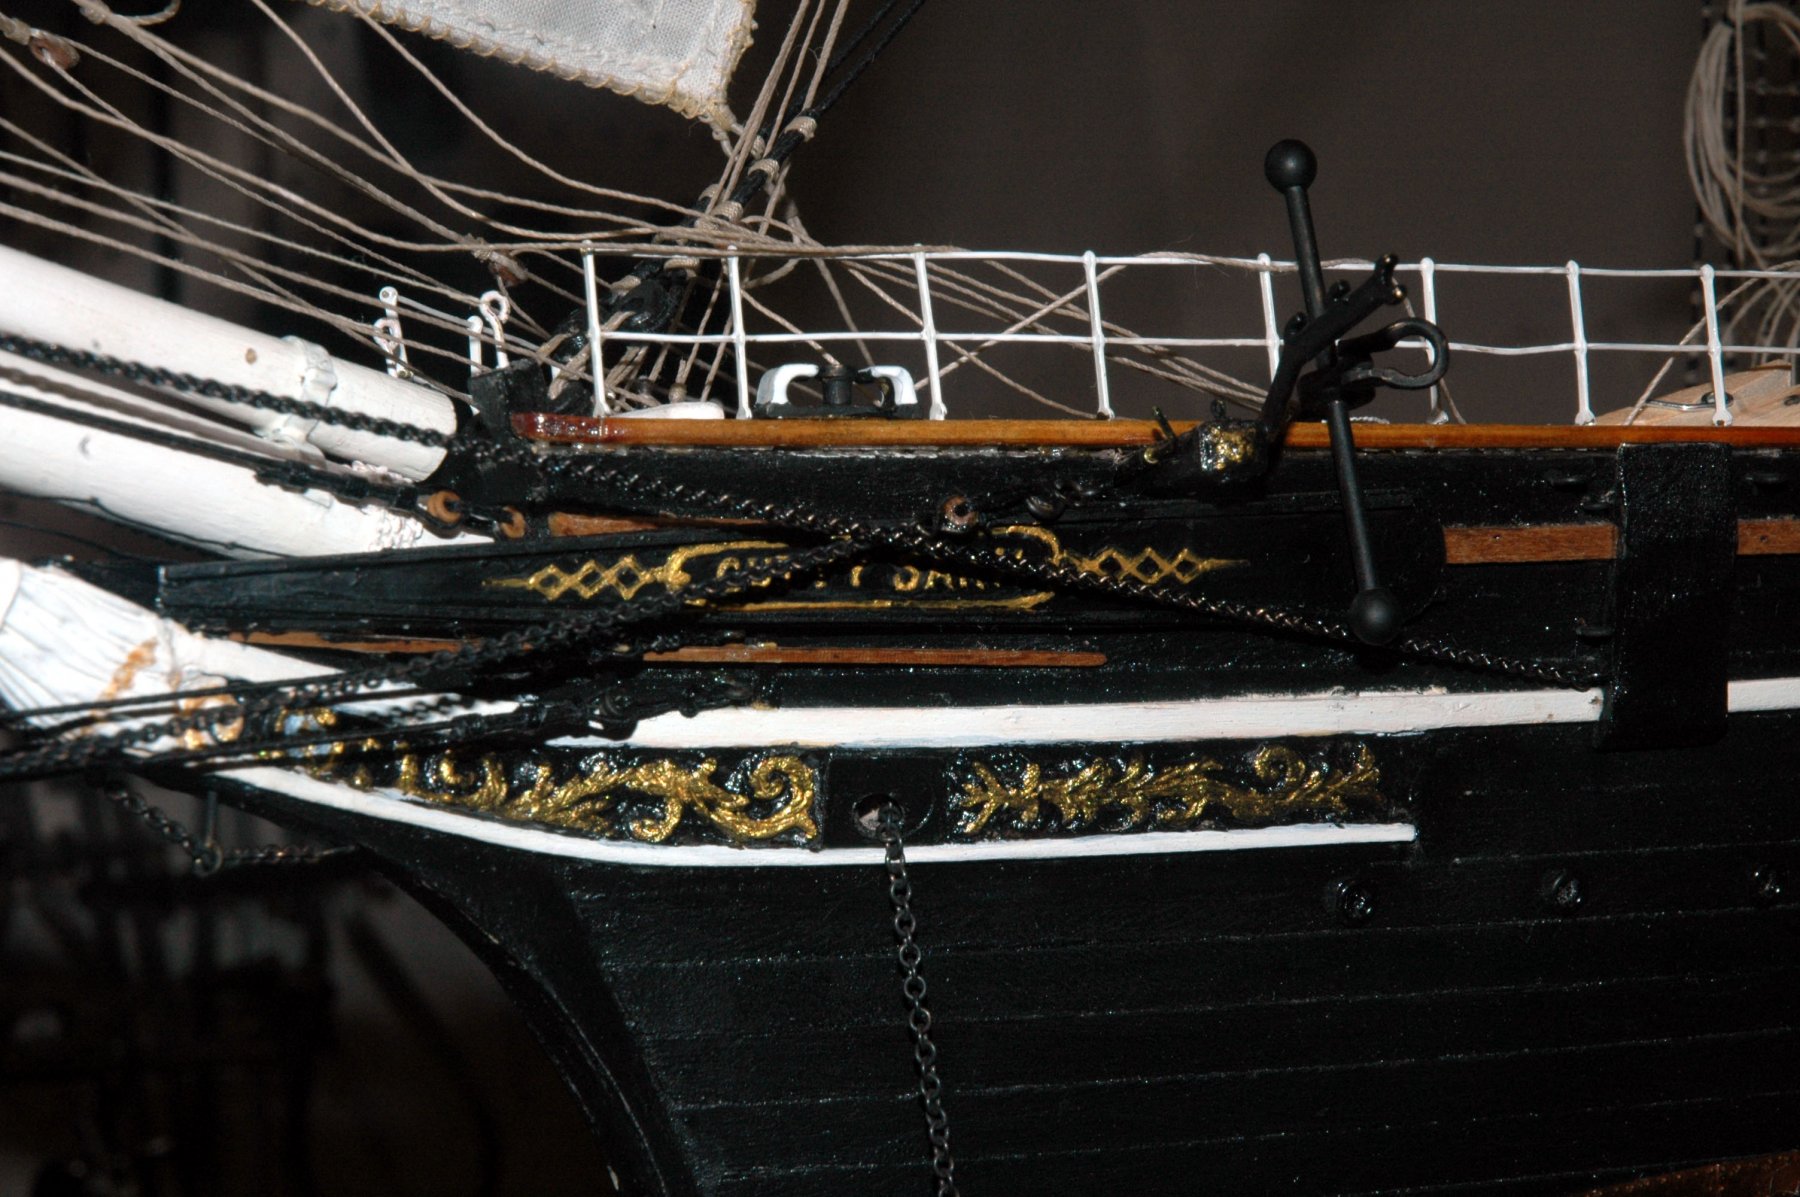
Great idea, but I'm way past the point of being able to go back and redrill the pinrail. oh well. I can't believe anyone will really notice. the missing stays were really just the doubling used for strength on the actual ship.
Cheers
Marc
-
-
-
thanks Frankie.
I thought that there might be a rule. It doesn't seem like there is.
I spent more time looking through period photos and painting with the same observations that you made. It does appear that the majority have the furled yards raked like those yards with their sails set.
Thanks again!!
Marc


1949 Chris-Craft 19' Racing Runabout by gjdale - FINISHED -Dumas - 1:8 Scale - RADIO
in - Kit build logs for subjects built from 1901 - Present Day
Posted
Hi Grant,
I'm just catching up with the build. Unfortunately my jaw is hurting from it continually hitting the floor. The work and the results are just amazing. Love the wheel, the planking, the finish, the whole package. Just amazing!!!
marc