SkerryAmp
-
Posts
809 -
Joined
-
Last visited
Content Type
Profiles
Forums
Gallery
Events
Everything posted by SkerryAmp
-
 You are a bad influence my friend! (You and many others here). I am actually very interested in giving a scratch or heavily bashed ship a try... just still quite tentative of jumping in that pool! The urge is there though! Thank you Frank, am glad others think so as well. The metal ones were fine and all but there is no way I can paint it to blend in with the rest of the ship. Glad I took the shot at it! Although, between yours and others weathering and scratching techniques - I am being influenced by some very bad people (and it is great!)
 -
Thanks Dave! Or do you prefer sawdust . Welcome aboard and glad you stopped by. Am glad some of it is useful, I am far from an expert but if someone can pick up anything from my valiant attempts all the better!
-
Augie that is simply splendid work. Happy Anniversary and it has been a year already? That floored me when you said that - wow does time fly by eh? However, to the issue at hand. . . LOVE the pear! I have found pear to be a really nice addition to a ship for trim and accents, never though of decking with it but now I will after seeing yours - fantastic! Yeah, it can be a little hard - it is the cause for my goign through blades like they are going out of style, but hey- the final result is worth it right? WONDERFUL job!! Simply wonderful.
- 2,191 replies
-
- 1
-

-
- confederacy
- Model Shipways
- (and 1 more)
-
YAY, WAYNES BACK! Great to see the emma underway again, and that harbor bench is a fantastic investment. Have one myself and may get another one once I get a couple more power tools so I can set up a powertool bench and have one for work work. She is looking great wayne! Cant' wait to see her go! Welcome back!
-
Well hello Dee Dee - going through and catching up on build logs I have missed in the past. You are putting some incredible attention to detail into this and it definately seems to be paying off, really enjoyed this so far and think I will stick around a bit!
-
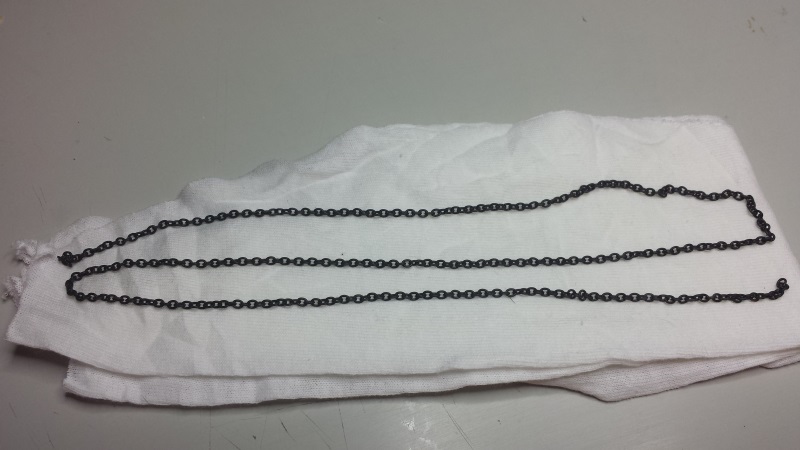
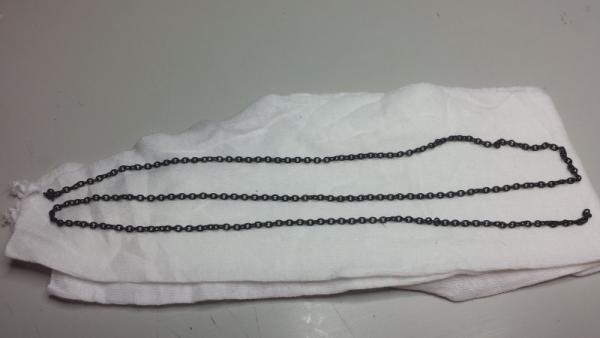
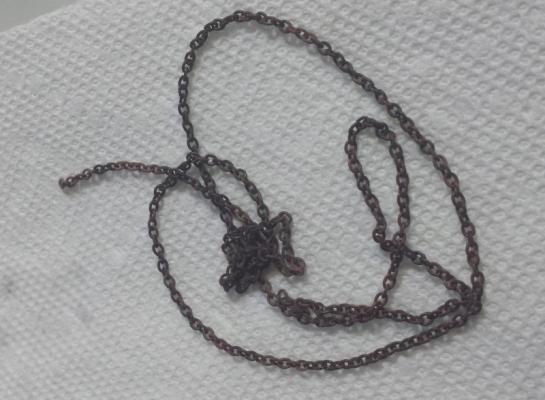
Nothing super duper to update this round. I installed 2 of the kevels and stained the rear pin rail as well as add the belaying pins, that was about it. I was pleased once the kevels were installed, they looked quite nice on the ship and am glad I went that route rather than the white metal. Oh, and managed to pull off a captsan of sorts, not the best (compared to some of you folks out there) but finally came up with one that would make it. And lastly, I decided to run the chain through one more bath of blackenit, trying to darken it up a little bit. VERY glad I did, really nice black finish on it now that should look pretty good once cut and set in place. Until next time - ENJOY!
-
Thank you Russ, that is what I was hoping. Still not 100% comfortable manufacturing parts, but those seemed to break a barrier of sorts Thanks DC - I guess I am dabbling in some dark places much to my nervousness Although I do have some curiosity towards that stuff. Thanks Aguie, I am nervous about that dark side, although curiosity is peaked.
-
Excellent! Good to know, thank you!
-
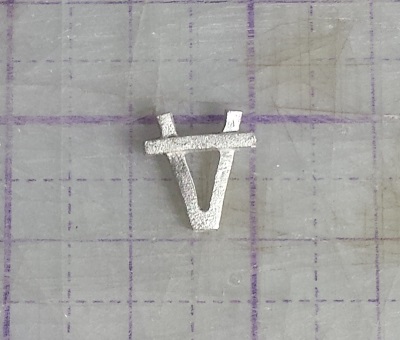
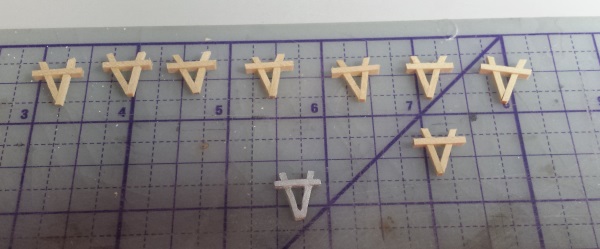
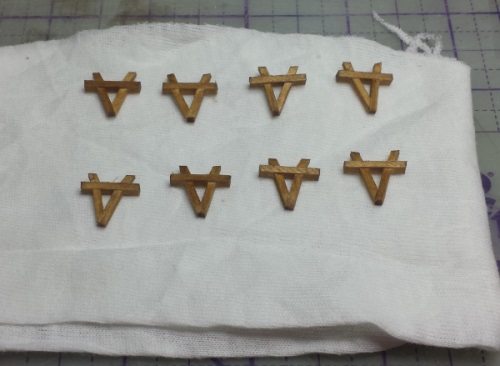
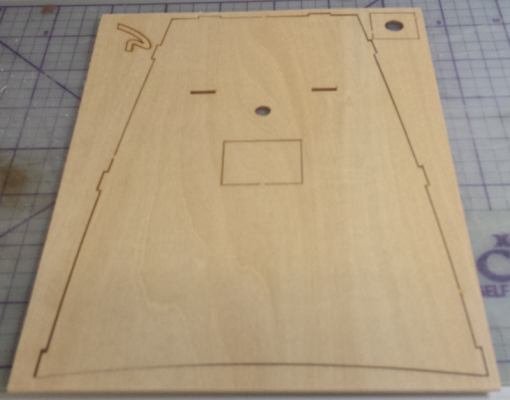
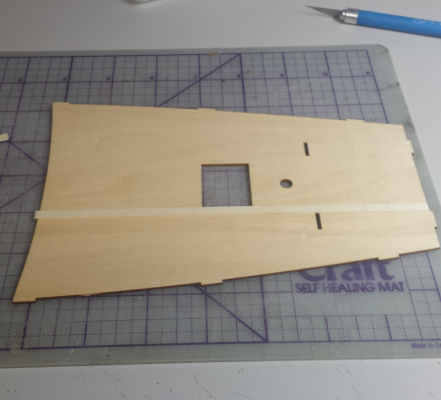
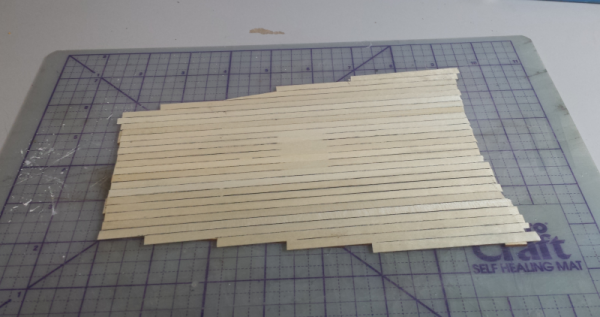
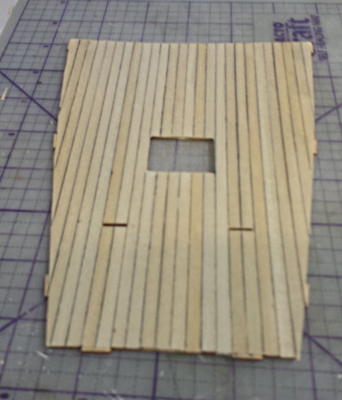
So tonight was spent doing a lot of hemming and hawing over the Kevels. I am not all that comfortable scratching stuff yet, heck I still can't get the gersh-dern capstan right (am on attempt number 15 I think on that one). But in the end, I looked at the cast metal Kevels and decided I would take a crack at it. Even painted up I felt they just wouldn't fit the ship well but stand out as "metal". I am sure others can paint simulated wood, and I would love to learn - but decided to take a crack at scratching up some replacements out of some spare wood I have laying around. So, here is what they look like out of the kit. Not bad really, cleaned up and painted right i am sure they are fantastic! But, like I said, wanted to at least try getting some wood ones in there... So, started by rough cutting some strips and creating the basic V shape. That didn't go too badly, started to get some hope . So, went ahead and trimmed them all down to about the right size based on the metal castings supplied with the kit. So far so good! Once those dried I found some stock to make the cross member and then used the trimmings from resizing them to make the ends of the posts. Starting to think this may actually work out Finally, once those were pretty well dried I wanted to stain them up. The first one I tried was so delicate that applying the stain caused me great pain. So rebuilt the one I wrecked trying to stain and decided to try dipping them! Well what do you know! It worked! Granted, they are not perfect, but they are usable (I think). They will definitely look better once in place. That will be tomorrow night!


-
Yeah, I am not sure either - was more of a "huh" moment . Most likely it was just how it went. The copper was new to me, I really had no idea what to expect, but it seemed to work out quite well. You mentioned doing it with aluminum? Does that blacken as well? Maybe a mad chemist but that is about as far as I can claim, I am definately going to do another round I think, I am used to them changing color a bit over time but they already have started lightening up so am hoping another bath will darken up better and have a bit more staying power. Thank you sir! I have tried painting in the past but never can get a nice clean finish, always too thick. I got turned onto blackening from back in my model train days That is pretty much my experience as well, usually another bath or a quick sealer has preserved it for me. This batch already is lightening up on me, so I need to soak em again I think. Thank you DC, appreciate that. I was quite pleased with the chain as well, pleasant surprise since I didn't know what was going to happen
-
Hey Rich, found your log and all caught up, a constitution of some kind is in my future, just no sure which vendor to go with so am very interested in your experience. You have done a tremendous job with this ship, very neat and tidy work - love it and it looks very well done. Will enjoy watching you continue!
- 1,756 replies
-
- 1
-
-
- constitution
- constructo
- (and 1 more)
-
David, that is absolutely spectacular work. Love the shot down the ship - really looks well done. Nice Job man, nice job!
-
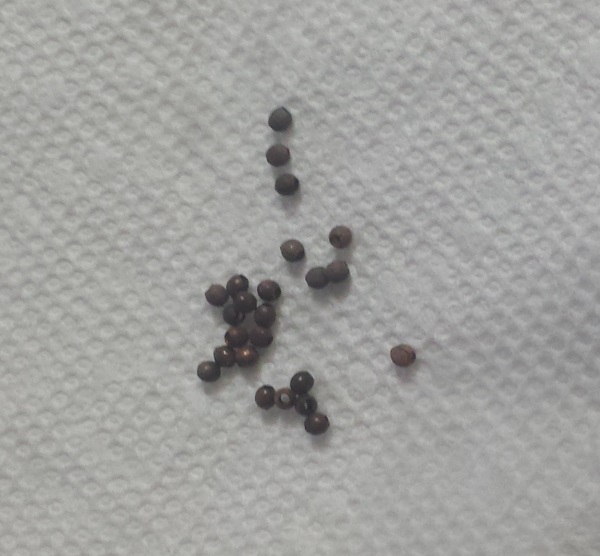
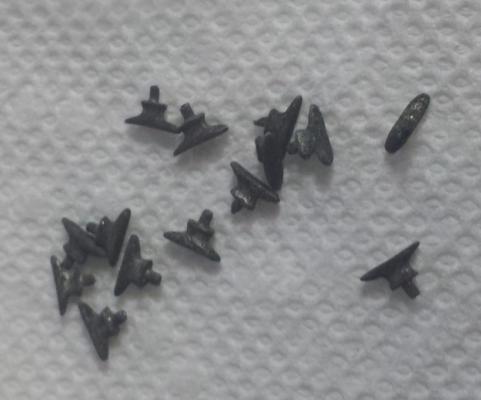
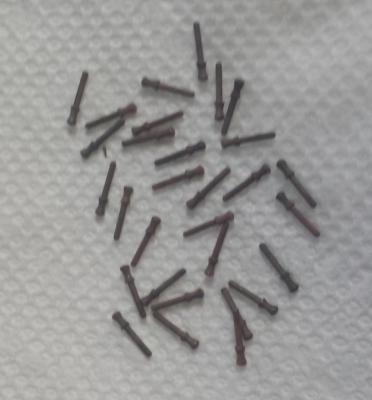
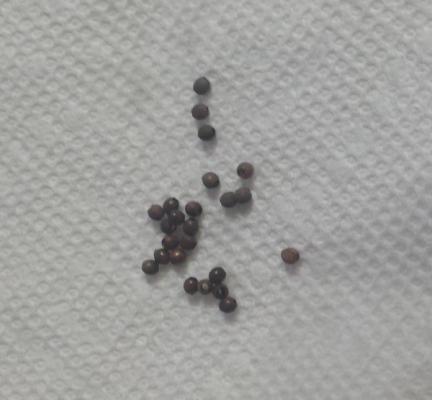
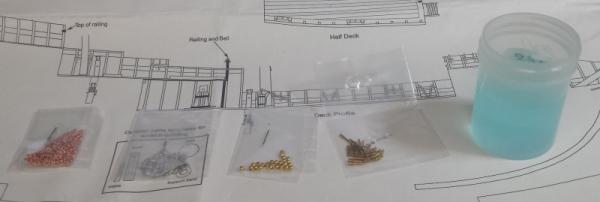
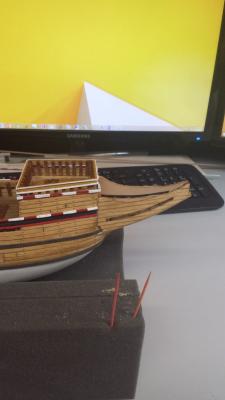
So, finished up the build log entry on the Santa Maria and am back here a moment to post the results of the blackening. I think I like it. The cleats are White Metal, which usually (for me anyway) come out a wierd brown, however this time around .... Not to shabby! The belaying pins and parrel beads are brass parts which always tend to blacken well, in this case they came out a mix of shades of browns, blacks and brown/blacks. I like the variety, will actually make it nice to mix them up a bit for effect. The one I was actuallly most impressed with, mainly because I had no idea what to expect, was the chain. I have never "blackened" copper before so this was purely for my own experimentation. What i got wasn't black, but was a rusty, brown/black.. what looks like super weathered chain. I am happy with it! Curious what others think. I am wondering if it was the mixing of materials in the same batch that gave the results I got. I usually do one type or one part at a time, this time I just threw them all in at once and soaked them for about an hour and a half or so. The results are just different from my normal results and my expectation sthat I am curious. Enjoy!
-
Thanks Russ, every little bit counts right? Each part, no matter how little is one less step to do tomorrow
-
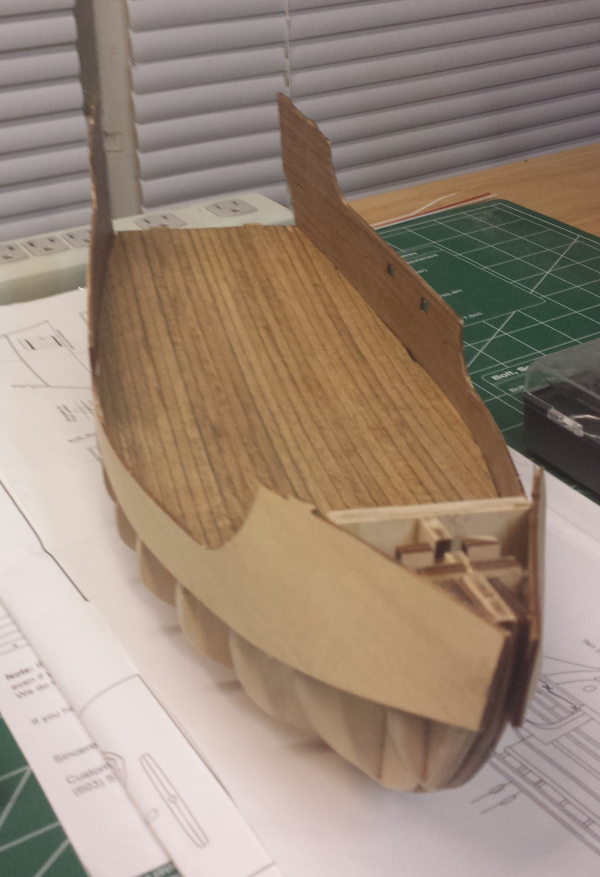
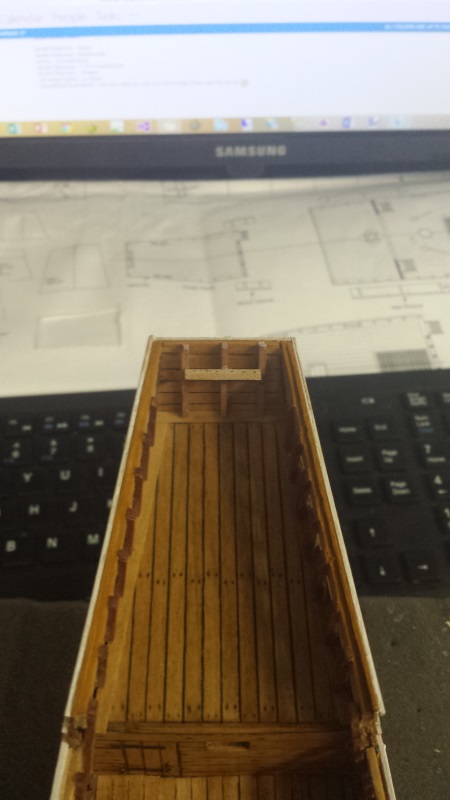
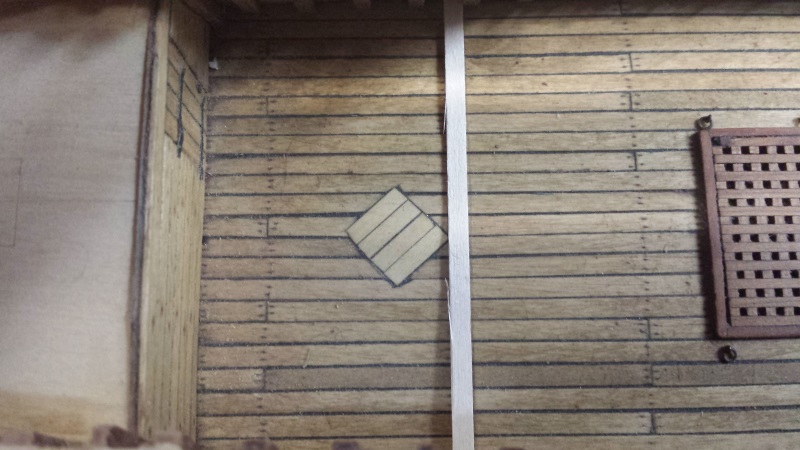
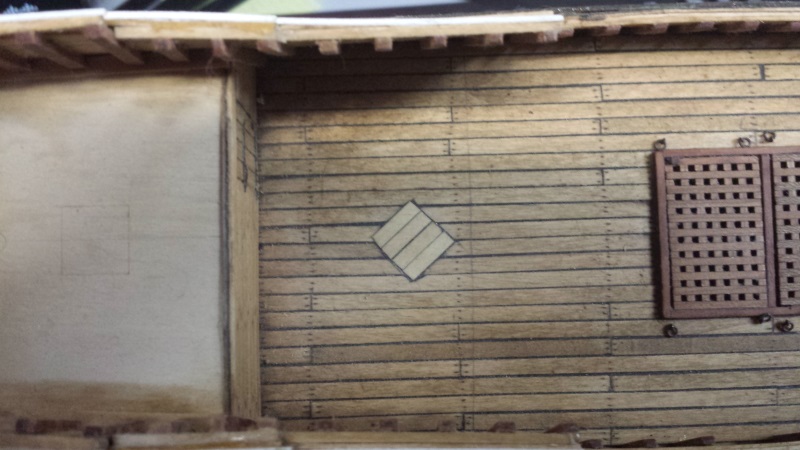
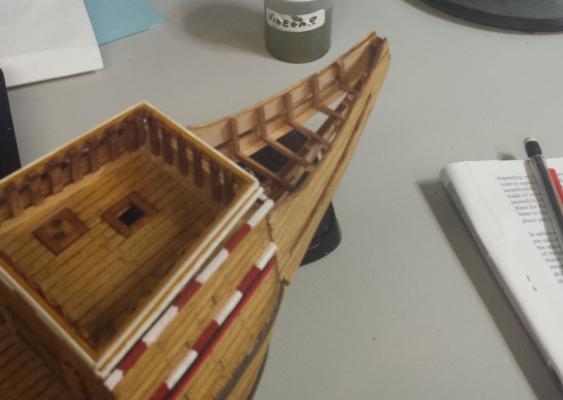
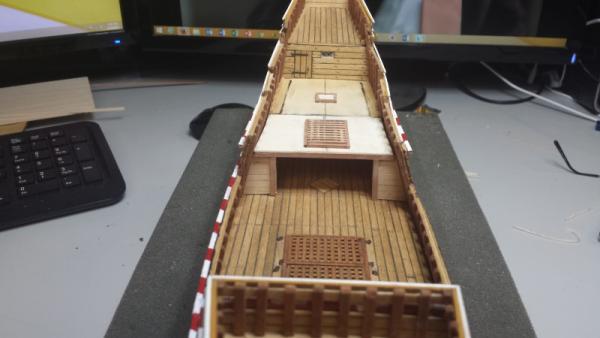
Good Evening! After doing a little bit on the Mayflower and having that sitting in a drying stage, I wanted to keep building so pulled out the Santa Maria for some updates. It was a fair amount of work but only one piece this evening The Quarterdeck! Well, first I installed the other Bulwark so at least the vessel has two, instead of limping around with only one Okay, NOW time for the quarterdeck Here we have the false quarterdeck ready to go ! Once it is popped loose from it's sheet, the initial reference plank is laid. I learned a long time ago it is very important to get this first plank and straight as you can as it will most certainly effect the alignment of every other plank after it Plank after plan was laid, as in prior projects the Archive Pen was used to caulk the boards. Finall we have a rough planked quarterdeck Some careful trimming around the edges, done easily by flipping the part upside down and tracing the edge with a VERY sharp blade. A dull blade can easily grab a plank at the edge and potentially yank it loose. Finally the part is lightly wiped down with an alcohol rag in order to clean up any lose dirt, glue mistakes etc. Once dry, I wiped it down with wood conditioner and then finally stained with the same mix of Dark Mahogany and Natural stain to match the rest of the ship. This is a dark ship, very different than what I tyipcally like but I am starting to appreciate the colors and the richness of it all. So, for the evening this is set aside to dry overnight Thank you again for stopping in


-
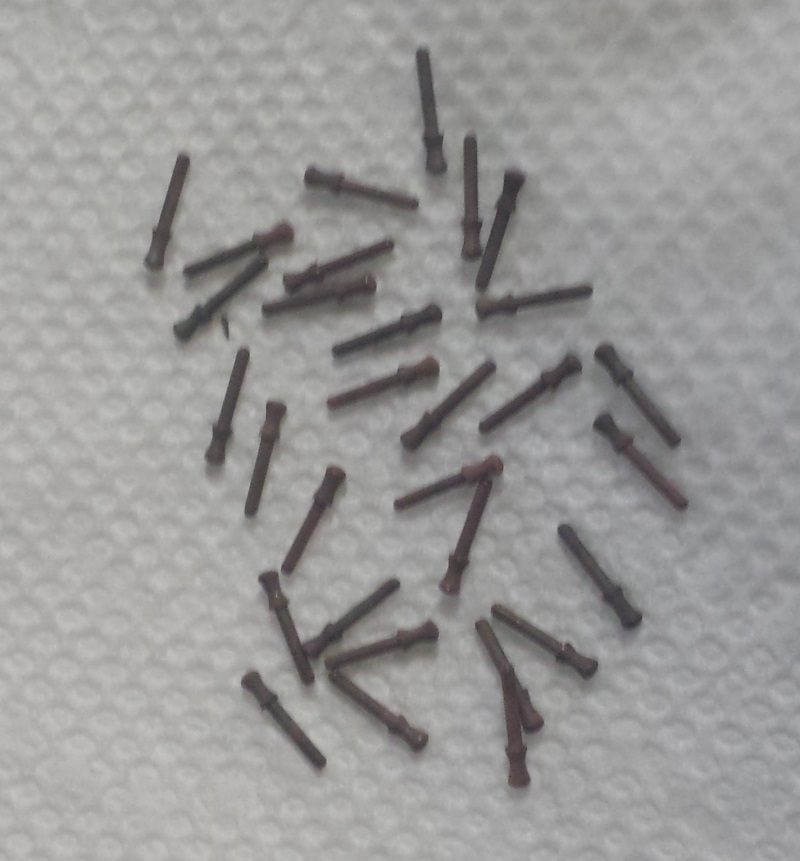
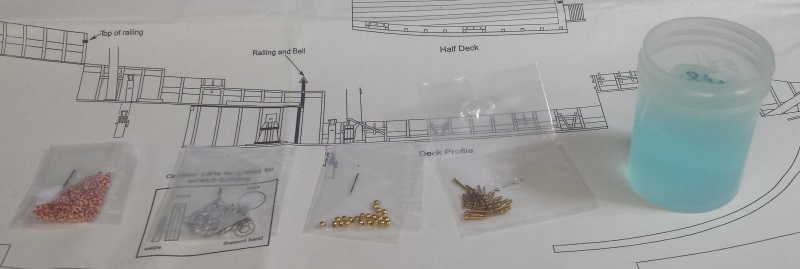
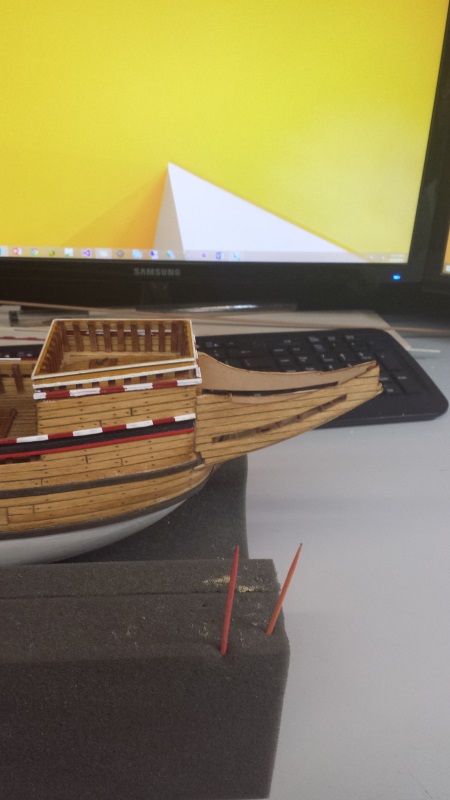
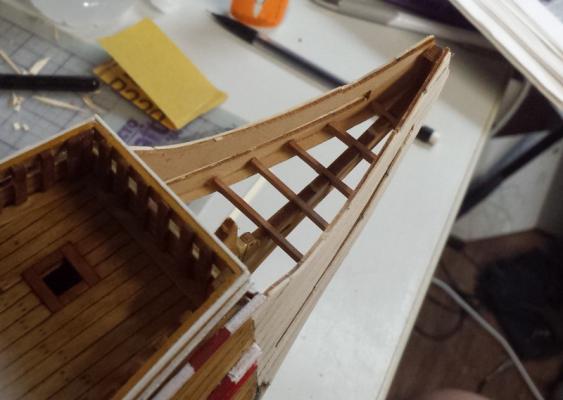
As promised back with yet another fun filled episode! (Although a little shorter this time). My goal was to work the beakhead up, however I seem to have run short on grating material. So, I did what I could. I finished up the inner stanchions which finishes out the framing of the beak head. There is a grate that goes in near the middle of the beakhead so I did rough out the frame for that. And that is set aside and drying. I then realized it was time to start working the pin racks and kelves(?). Which meant I would need pins, which means.... (trumpet blare) TIME FOR BLACKENING! Not sure why blackening is so cool to me, but it is so look forward to this activity. Decided since i was doing the belaying pins that I would blacken everything else that would eventually need it. Cleats, Parrel Beads, Belaying Pins and Chain, ALL went into the solution. The solution is a 60/40 Water to Blackenit. I threw the parts in all together and set aside to do it's thing. In the meantime I installed the rear stanchions (which I had forgotten) and the first pin rail. While that all dried I moved over to the Santa Maria to do a little work there. Will post back here shortly with the blackening update once i update the Santa Maria build log. Enjoy!!

-
Thanks Michael, appreaciate the good word and stopping by, feel free to pull up a chair and pop in some more (just watch out for that Sjors fellow, he will steal your pop corn!)
-
I was just thinking that I couldn't find anything recent from ya - started poking around to see if I missed a new one or something . If it is an idea in your head, your track record says you really should give in - I am sure it is amazing!!!
-
Congrats Fish, you made a new piece to correct the broken one? Welcome to scratch building heheheheh. And yes - PICS please.. never can have too many!
-
In my opinion (for what it is worth) I have come to the belief that the idea of an easier kit is in the time and effort, not in the kit itself or the complexities of what has to be done.. They are all essentially a box of wood, some parts, some string and some plans. Granted, some may take more time and effort than others, but I do not believe there is a "perfect starter model ship". All are complex in their own ways =) It isn't like plastic modeling where there are snap together versus crazy 4 foot long 1000 part photo-etched air craft carriers. I think wooden ship modelling is actually an advanced hobby, so within that advanced hobby the easy kits are still complex . Likewise what is easy for one builder is hard for another and vice versa. (Scratch built and/or plans kits are the exceptions =) ... those are crazy skills ) You can do it Fish, you can do it! Patience will pay off and every mistake is a skill being honed. What is difficult today, won't be so difficult the next time around
-
Thank you sir! Appreciate that! I agree Wayne, fun is the main goal - I do try to ignore that bugger, but he is a big bugger and stalks me everywhere I go - figured I may as well give in a little bit . Besides I have a shelf of kits just taunting me after neglecting them for so long and a closet waiting to be gotten to and a wish list the admiral says will stay wishes until the current collection gets a little bit of TLC (She says that is my motivation to finish them because she wants to see them on the shelf hehehehe) Thanks Augie; yep - the looking back is sometimes hard though but definitely is fodder for the future!! The worst for me is when something isn't clicking .. then several steps later after doing the best that can be done it just suddenly (for whatever reason, I think it is the brains way of tormenting us) the mind goes OH YEAH! THAT is how that should have been... . Ah Dennis, indeed Hindsight, oversight and a little bit of shortsight I am afraid . I have started to drift from the instructions are law and more of the have to make this pile look like that thing (saw someone mention that in one of the other logs and it resonated quite a bit). Use the paper and instructions as a guide to do that! I do have to get better with the dry fits, i sometimes get a little overconfident The stain was a bit of a worry, I had a batch mixed from the start but enough time passed that it dried up and matching it was a bit of a chore, but I was lucky - I remembered the ratio ! And yep, there is more coming... tonight will be more of the beakhead (if I can find my grating material) and more deck fittings (rails, etc).
-
Welcome aboard Fish! I will be happy to follow along on this one, I have eyed the Scotland a few times, looks interesting - but as I am on a kit buying hiatus (until the closet I have dwindles a little bit) I will live vicariously through yours! Some great advice so far on your first steps into ship building - those frames can be pesky sometimes. Whether to replace or repair a broken part is sometimes a toughie, to me it depends on how badly damaged it is. If the broken peice can be aligned properly and look "good as new" with a little bit of effort I will usually try to repair - and creb has a good drawing and plan to do just that!. Then again I am impatient\ and don't like waiting for parts Am sure you will get a handle on it though!
-
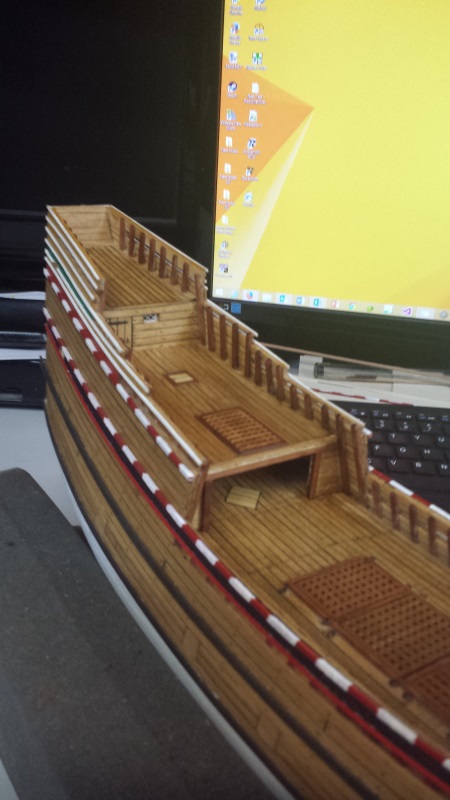
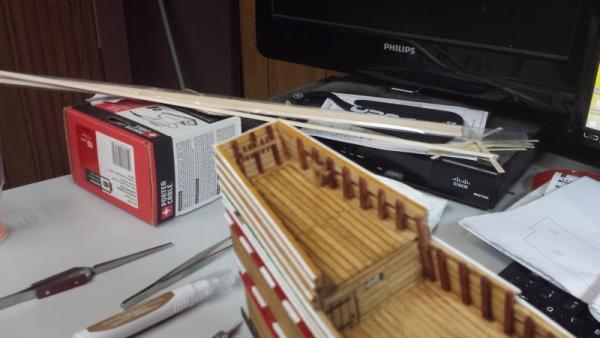
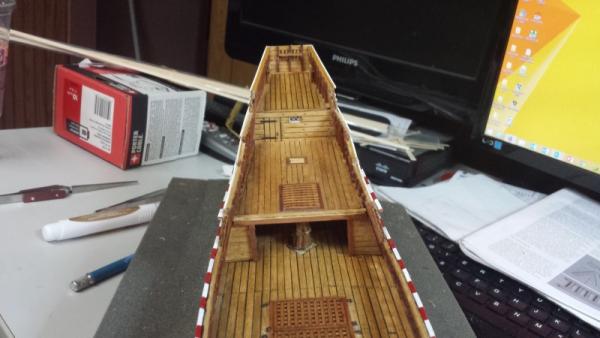
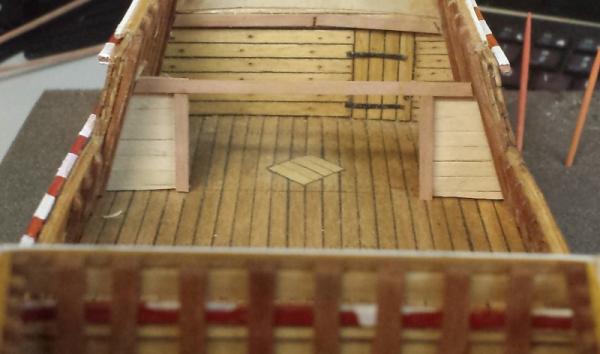
Well ladies and gentlemen we are back with another thrilling installment of To Build a Mayflower!! Please hold the applause till the end of the episode, thank you thank you. Have sort of started hitting this project with a bit of a vengeance I guess. I have a lot of catching up to do (by my own timeline and goals, granted ... it will be done when done yes, but I have gotten far too behind on these projects so.... rawr!! ) I started this last session off by identifying a couple places I could work simultaneously. First, the quarterdeck needed to be put on and the beakhead needs to be finished off. So, used a scrap of plank to get the stright line used to line up the locations of the bulkheads used to support the quarter deck.. Drew me a nice straight line (well, line is straight but those nails don't seem to be any more... good thing there will be a deck over those =( ) By the way, trying to do some close ups... even though I am not comfortable that my work is close up worthy, I figured I needed to break that comfort zone and put it all out there ( ) Like I have said before, my ships are 3 ft ships - look at them 3 feet away please With a nice straight line I added the bulkhead frames and overhead support beams. the rear one broke - luckily it is still valueable as a support beam and since it is not seen I could still use it. While that was drying nice and solid, I went ahead and added the cross beams to the beakhead. It was a bit of a bear to cut but with some diligent cutting, recutting and sanding and shaping got them all to fit relatively well. Once those were in and they were haivng their turn to dry I returned to the quarterdeck and installed the false deck, rear hatch and grate. (kind of ugly without the decking and finishing.... luckily it is only temporary ) That was really driving me nuts so , installed the decking, cleaned up the hatch and grates, used a little of the putty that was used on the rest of the ship to weather it a little bit, then stained it all up! I went over some of the surrouding areas with a little light stain to blend the old and new parts a little, worked out kind of well I think. And finally, since i had the stain mixed and ready, went ahead and stained the beakhead. I know the instructions suggest doing them all up and then installing them, I tried and it just wasn't working for me, so installed the beakhead and will dress it all up in place. You may notice the capstan is not in place. This is because I am trying to not use the kit supplied white metal one, it is kind of .. well, it is okay. I am attempting to scratch build one but after 7 attempts still dont' have it down. Will get it though, fear not... I will get it!!! So, thank you again for stopping by all - glad to see folks again.... hope you enjoyed your stay and happy modeling!!!


-
Mike, that is fantastic!! I just caught this one and read it through and such beautiful work!! Nicely done, nicely done!
-
double planking glue
SkerryAmp replied to leroy's topic in Building, Framing, Planking and plating a ships hull and deck
Yep, PVA - althought in my case I use Aleene's Original tacky Glue, it isn't specifically wood glue, but it works great, plenty of time to move pieces into place and once in place hold and sets pretty well. I usually thin it with some water and brush it on with an older artists brush.