SkerryAmp
-
Posts
809 -
Joined
-
Last visited
Content Type
Profiles
Forums
Gallery
Events
Everything posted by SkerryAmp
-
 Nice job with the Hammocks, love what it adds to the ship - looking like filling them all may be the way to go.
- 1,756 replies
-
- 1
-

-
- constitution
- constructo
- (and 1 more)
-
Love your work Russ. Really appreciate clean crisp work - something I am still striving for. The deck structures look fantastic!
-
Really nice looking Wayne, I like the framing on those ships and it just looks all fancy And continue to love the on location shots!!!!!
-
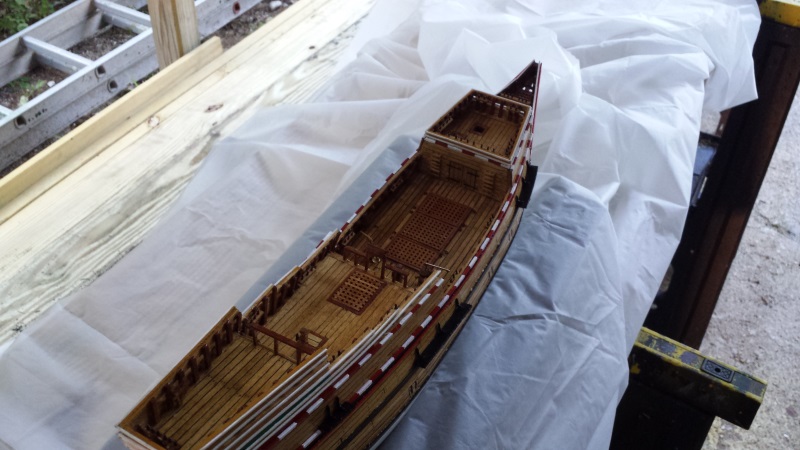
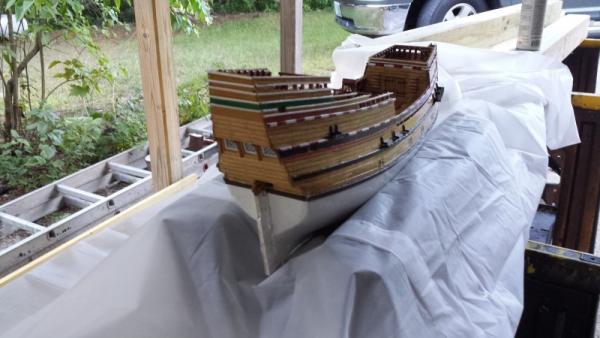
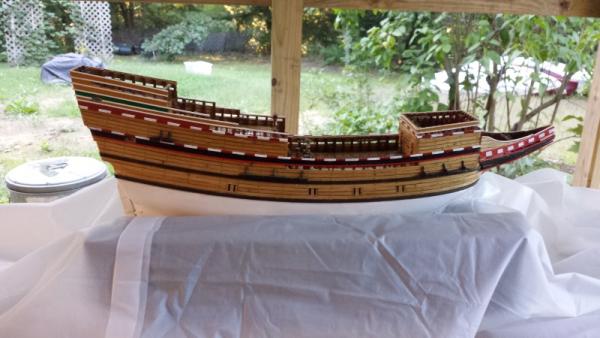
Well, my goal was to start rigging this week, however the set back on waiting for a few loose end parts and my approaching vacation this weekend will push rigging off to a start time of next week when I return. Taking the wife and brother down to Hershey Park in PA tomorrow night and I don't think they will be too keen on me packing my ship and materials and working on it in the hotel - although it is very tempting!! So, got my parts and finished up all the little loose ends. Finished the pin rails; pretty straightforward really just basswood and golden oak to blend it all together. Put the "hinges" on the gun lids; just used some pactra black trim tape. Cut it to size and stuck them on! Then sprayed the whole thing down with a couple coats of sealer to bring out some of the colors and deepen the stain a bit and that is where she will remain until Next week. So, as I head off to finish up some other work and tasks I need to wrap up before tomorrow night i will leave some pics of where she sits today, the hull for the most part finished and now waiting for some masts and rope! Then it will be to attach the anchors, the flower the rear pole and mount on the base and wallah! Until later all! Enjoy and happy modeling!!


-
Thanks Frank! The dead eyes are indeed very cool and I am really looking forward to hooking them up!!
-
Absolutely!!
-
That is a great idea with the stand. I would never have thought about planking the cradle - and it looks great! (I may steal that idea someday )
- 1,616 replies
-
- 1
-
-
- caldercraft
- agamemnon
- (and 1 more)
-
Hi Janet, welcome aboard. I have too admit I am not familiar with that so can't add much to help
-
I agree, that is one incredibly smooth hull and the paint looks airbrushed. Awesome!!!! Whats next, whats next huh huh huh?
-
Mayflower by SawdustDave - Finished
SkerryAmp replied to SawdustDave's topic in - Build logs for subjects built 1751 - 1800
I always seem to hit the point of "time to sleep" and then convince my self to do "just a little more". Sometimes it works out well for me, others well - But your build is fantastic! -
Absolutely amazed with the overall full shots. I mean, impressed as hell through every step but the whole thing together was just amazing. The masts look fantastic and so crisp and neat!!!
-
Wonderful job!! The walnut looks really good
-
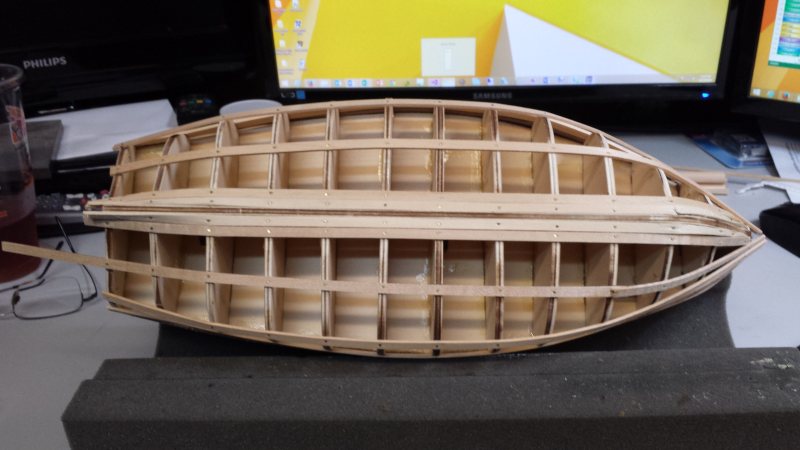
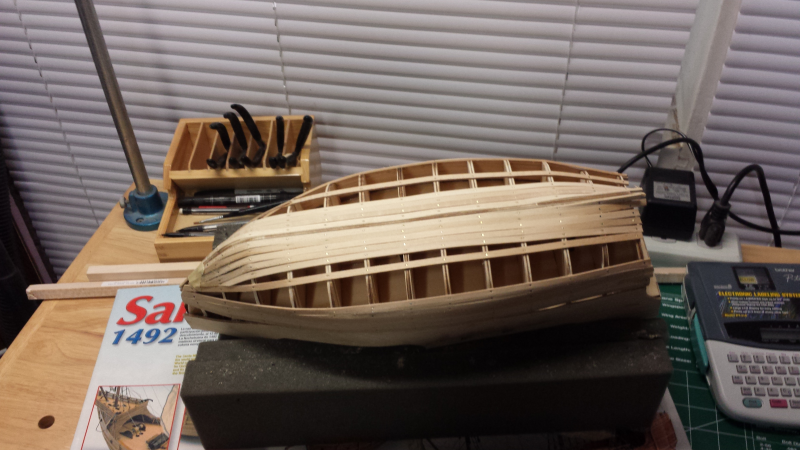
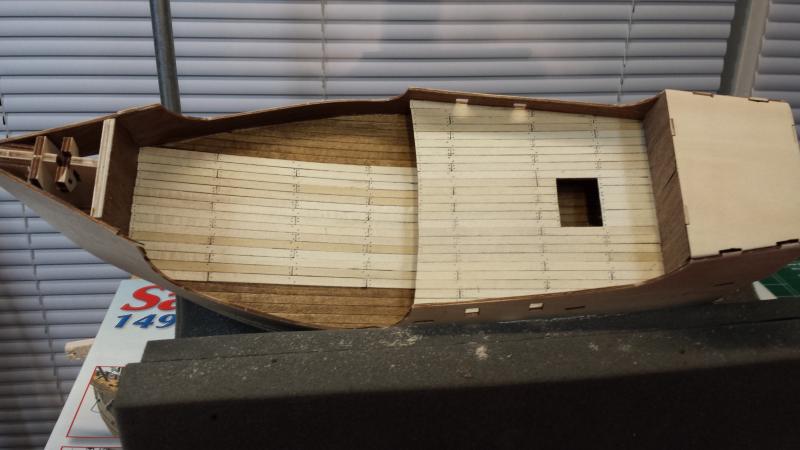
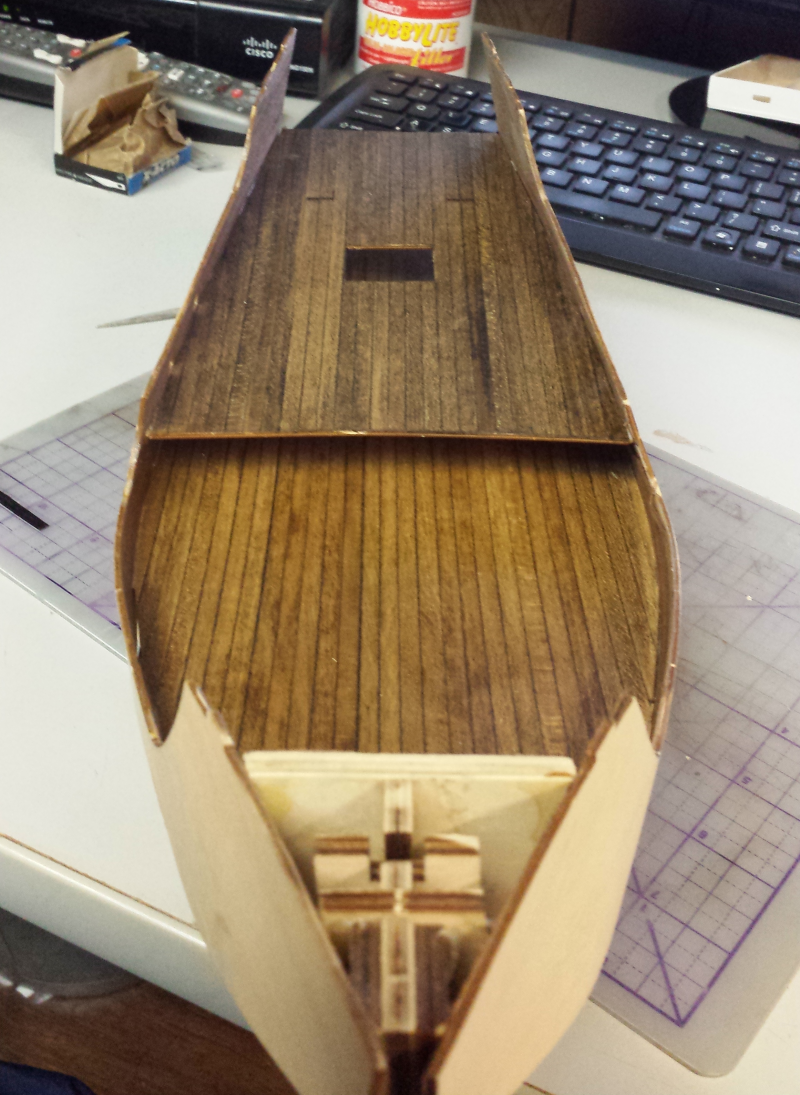
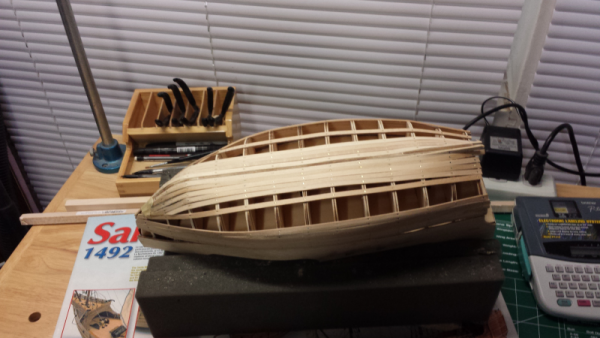
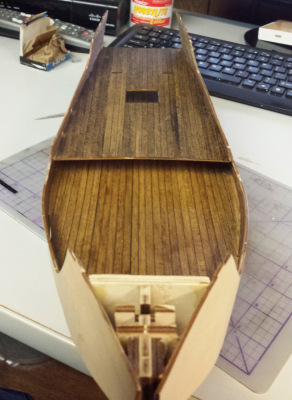
Well, my idea was to bleach the decks and then golden oak them back to a reasonable color, however - chalk one up to Miniwax stain, bleach didn't touch it!! So, then thought about sanding it away - but really wasn't sure how I would go about that with them installed without damaging the inner bulwarks. So, final decision! Replank them. The planks are are 1/64 thick so it really doesn't jump the deck height up noticeably and was easy enough to do. However... PROBLEM! (as always right). I was hoping there was enough plank to do the deck and the final decking (fore and poop decks). I was sadly mistaken. I used up what I had and am now out of decking material. Guess what, finding that size is NOT easy. So, what I will be doing is seeing what the Nina can do for me. I am thinking about decking up the parts necessary with the Nina and then using the excess wood to finish up the Santa maria. Until I decide that, here is where the Santa Maria sits currently. I started to plank the hull according to the instructions. I am still not happy at all with my planking abilities, my 10 year wedding anniversery is coming up so the wife and I are exchanging gifts and from what I understand she is doing I had better figure this planking thing out - and fast!! (Ugh). So, plank plank plank.... Really kind of embarassing - that hull is going to need a LOT of work regarding sanding and shaping! I did however (as I said up above) get sidetracked with the planking and that is when I applied my magnificantly short sighted idea for decking up the Santa Maria. Here is where that sits at the moment.... I did decide to vary the lengths and do simulated treenails with a mechanical pencil this time. The solid planks and dark wood just were not doing it for me. Once I fill in the rest of the space I will give it a VERY light stain of natural and Golden Oak (probobly like a 10:1 ratio) just to give it a little color and blend it all together, darken the nails and caulk etc. The idea is to keep it very light. So - enjoying this one, but the deck debacle and really painful planking job so far is a slight spirit killer.. but I will get it all cleaned up and happy - I am pretty good at filler and shaping hulls (you should see what is under the mayflower second planking and filler hehe. However, with all that said. my parts have come for the mayflower, so tonight will be finishing up all those fiddly bits, sealing it and getting ready to move forward with that one.... Until later - ENJOY!!


-
Mayflower by SawdustDave - Finished
SkerryAmp replied to SawdustDave's topic in - Build logs for subjects built 1751 - 1800
Beakhead looks fantastic, really well done and I like the styling you did on it!! -
Nice job so far Mundie, came across your Connie log and had to stop in. The MS Constitution is on my wish list, would love to build it someday but it is so big I have no idea where to put it. So until I solve that little dilemna I shall live vicariously through all the MS Connie build logs I can find.
-
Yeah, that deck is very dark. It was an experiment I wanted to do. Wanted to see what that particular stain (mahogany) cut with natrual would look like. It still came out much darker than I wanted. I have a plan though... it involves careful masking, bleach and a whole lot of patience
-
Thank you sir!
-
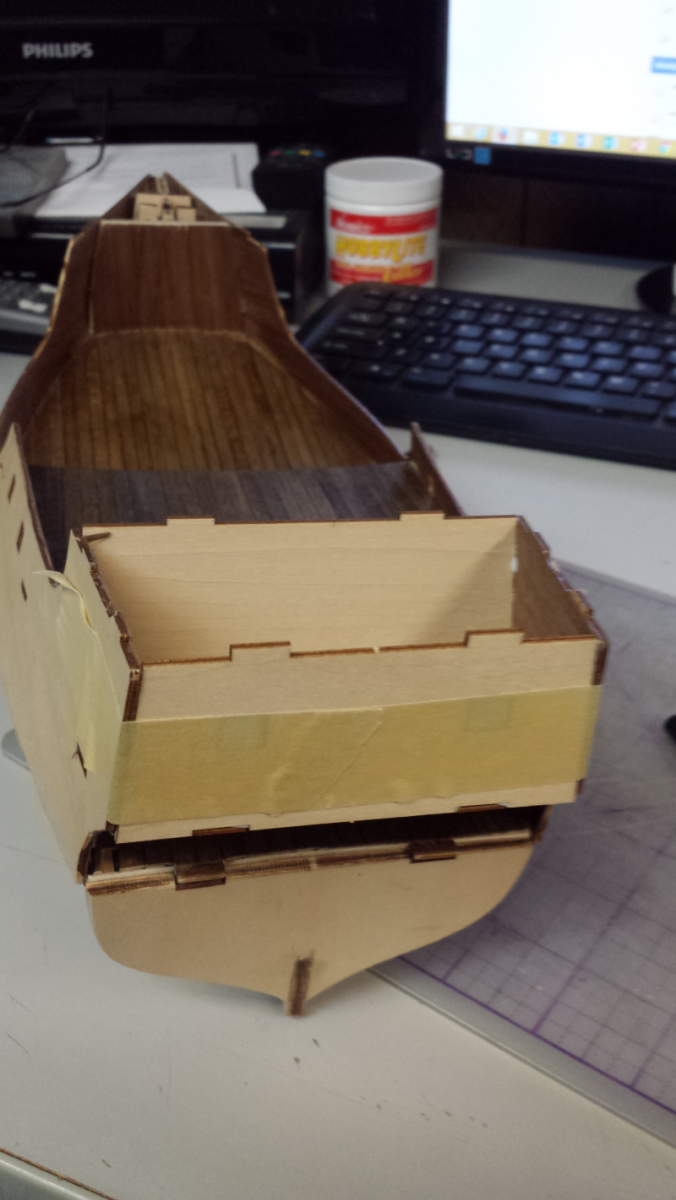
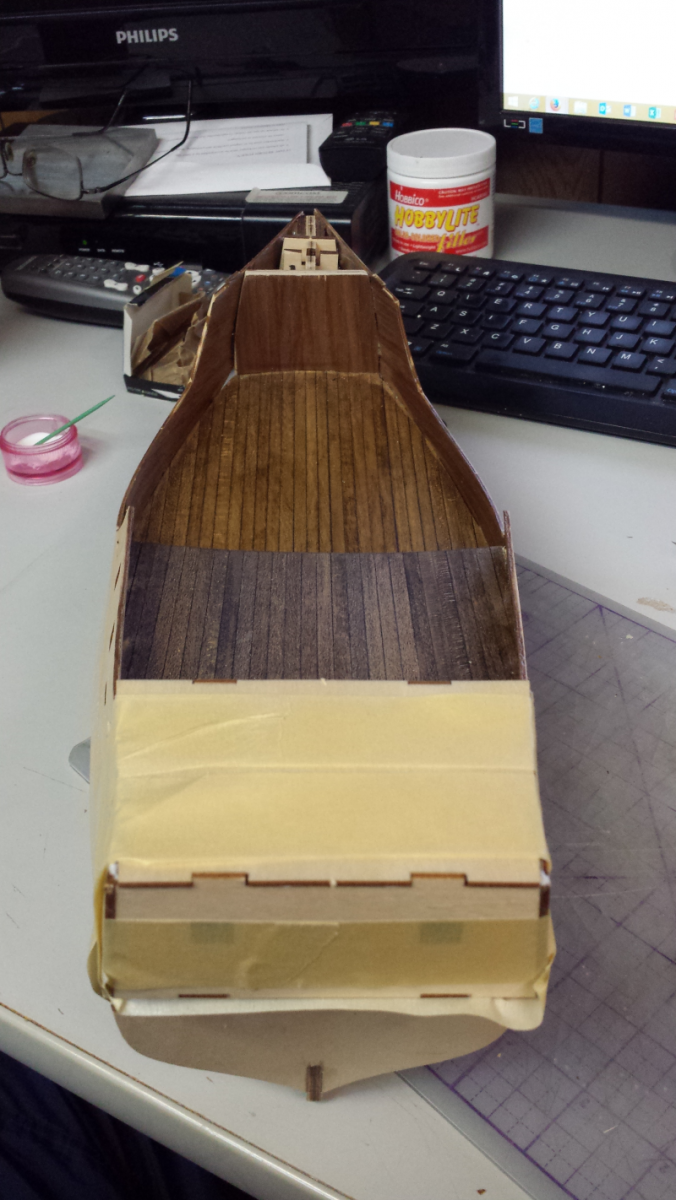
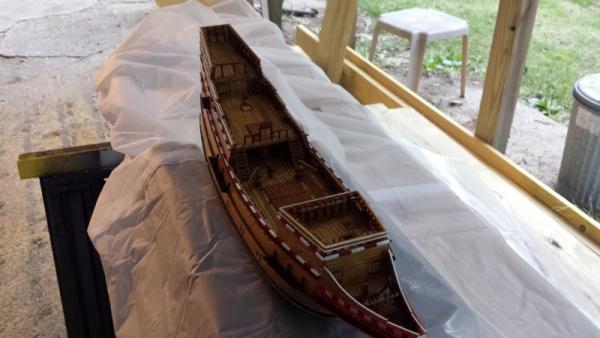
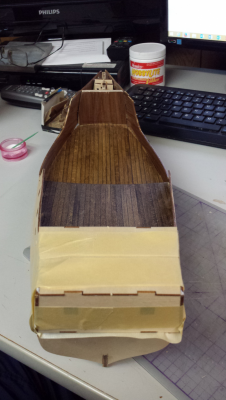
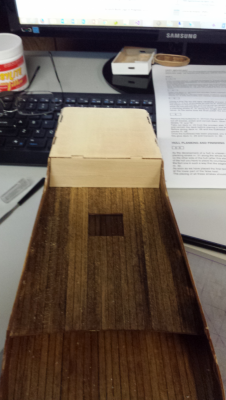
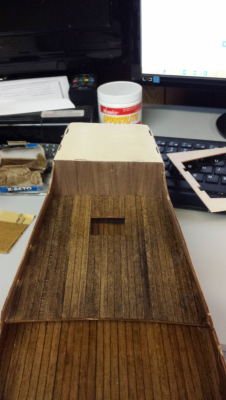
Ah, Santa Maria - We Meet Again!! With the mayflower in a holding pattern until supplies are delivered I decided to come back to the SM for a spell. When we last left our Maria we had a quarter deck done up, but sitting along side. So, let's start by installing that. The tabs lined up nicely with the bulwarks however they didn't quite fit nicely. Between carefully filing the slots and reshaping the tabs I was able to finally get them to line up and pop in nicely. However, once lined up and in it was a rough keeping them in there but I used some Masking tape to wrap it while it dried and it all worked out okay! Let that dry and started on the poop deck/rear cabin. The framing was laser cut, which was nice. Popped out the parts cleaned them up and started installing. First the innner wall.... Then the transom wall. I have some alignment issues on the stern but am addressing them as needed and so far all is cooperating. Once again, used masking tape as a clamp to hold the part in place (really starting to like the masking tape clamp method). Then all that was left was to install the poop deck itself. It went in like a champ. Being my first run with an AL kit, so far so good! Decent stuff (in my humble newbie opinion) As you can see masking tape clamps all together until it was dry and then quick slice, peel away, sand and clean up and walla A base poop deck! All that was left for this evening was using the supplied veneer to finish off the inner wall and we are set aside for the evening. Until later my friends... Enjoy and happy modeling!


-
Quick progress update - None Well, not really.... I did finish up a bunch of the little stuff, however came up short on some materials to truly push it over the edge. So, ordered them up and waiting for them to show at which I point I will get back and wrap up, seal it up and start rigging!! Until then - I think I shall spend time on the Santa Maria!
-
I did add the spouts and some more of the details , but then hit a small materials snag (which I will update shortly) so am in a holding pattern for the moment... but found something to keep me busy till the new parts arrive! Those patriots.... is there ANY chance that was just another preseason means nothing game? ANY at all?? Thanks Vintage! Appreciate teh good word and can't wait to start rigging myself. That is the sign the end is near (for this one that is) Ah Dave yours is fantastic and am enjoying following along with it. You are right - much ahead and MUCH more behind I understand the excitement! Yes it was! School and work has eased up a tad so taking advantage of it. My current classes are in things I have been doing professionally for 20 years now but they wouldn't let me test out of them, so I am coasting and enjoying every minute of it! Thanks Denis.. the length is wrapping up and onward and upward....I am quite lucky to have maintained that finish through the multiple batches of stain I had to mix up,, not sure I will be so lucky on the Santa Maria but we shall see.
-
You are doing great David, give it a shot see how it lines up - don't condemn it to the wall side QUITE yet, often what may seem daunting turns out not that bad - plus you avoid the moment of looking back and thinking "Man, I should have....." You can do it!
-
Looking good neighbor, lookin good!! Your necromancy is going well - let's just try not to shed TOO much blood by personal injury shall we? That I do believe is taking necromancy and building by blood sweat and tears a LITTTTTTTLE bit to far
-
Ahem, Mr. Sjors. Pictures? Hrm.. hmmm? LOVE seeing the pictures of these fantastic builds!
- 1,616 replies
-
- 1
-
-
- caldercraft
- agamemnon
- (and 1 more)
-
Okay.. I'll be that guy. ONE critique, ... MINE do not look like that. I love this hobby, this craft... but when I see things like what you are doing you truly see the art of it. I am sure you see every ding, oops and aww cruds .... but trust me my friend, It is missed on me - that looks absolutely fantastic!!!