SkerryAmp
-
Posts
809 -
Joined
-
Last visited
Content Type
Profiles
Forums
Gallery
Events
Everything posted by SkerryAmp
-

Announcing the Model Ship World Ship Kit Database Project
SkerryAmp replied to SkerryAmp's topic in Wood ship model kits
Hi Jim, any criticism is always welcome!! Thank you for the heads up, I will check those and see if I put them in wrong or if there was a problem with the query! -
Announcing the Model Ship World Ship Kit Database Project
SkerryAmp replied to SkerryAmp's topic in Wood ship model kits
Thanks Fred, Code is indeed a strange language if you are not used to it - I have been coding in one way or another since a kid and my dad brought home an old HoneyWell/Bull dumb terminal hooked to his mainframe at work. Been at this a while - just trying to learn new languages and technologies (keeping up can be a chore) -
Announcing the Model Ship World Ship Kit Database Project
SkerryAmp replied to SkerryAmp's topic in Wood ship model kits
You are correct that no good deed goes unpunished. However I am not overly concerned with it as the information is just that information and guidance only. There will be no purchase ability or links to buying the ships so if anyone does purchase one they will have to go find it. This is simply to let folks know what is out there and is directly in response to the several questions I have seen regarding availability of certain types of ships. It may not be a bad idea to put a quick disclaimer on it though JUST in case As for simple vs complex listings. The other half of the motivation for this project is to continue to use programming skills that I either don't use often or are trying to learn. So it is a win win - info for the club and practice for me . And while it is true I am just reproducing the info from the manufacturer (in fact literally that is what I am doing), it is aggregated into one location. Again, many of users have an idea of what they would like to build but no real idea if it exists. Some, especially new builders, aren't aware of the variety of manufacturers out there. So it is a compendium of kits to give a resource to MSW that others don't have or do not have to this extent. Future additions will include links to the build logs from the kits (once I finish my mad scientist experiment of scraping the site for build log links). This way anyone coming to the list from outside the site will have an in TO the site and maybe drive some traffic to this terrific resource. Additionally, MSW will soon be able to give their own reviews of the kits they have built giving even more information to the inquisitive ship builder. -
Announcing the Model Ship World Ship Kit Database Project
SkerryAmp replied to SkerryAmp's topic in Wood ship model kits
Thank you very much! You are correct that this most likely will be an ongoing project. Partly due to the great ideas I keep getting, as well as the amount of material AND my less than regular updates. But, keeping it as a side project is keeping it interesting and low stress so I will continue it as long as folks are using it =) -
David, really really nice work - classy looking! You should feel really good about that project!
-
Mike, the planking came out really well, on your way to a great looking ship!
-
Mayflower by SawdustDave - Finished
SkerryAmp replied to SawdustDave's topic in - Build logs for subjects built 1751 - 1800
Wow, your lifeboats look great - I havn't put mine on, mine kind of look - well, sort of like a boat. It was upsde down on my table and the lovely admiral asked me what the peanut was doing on my desk =( (She didn't know what it was from where she was sitting , she said it innocently enough ) -
Augie the cannons look superb, nice coloring!!
- 2,191 replies
-
- 2
-

-
- confederacy
- Model Shipways
- (and 1 more)
-
Rich, your project really is coming along quite nicely. I know how you feel about the ratlines, I think half the reason I am stalling a bit on my mayflower is that ratlines is right around the corner!!
- 1,756 replies
-
- 2
-
-
- constitution
- constructo
- (and 1 more)
-
Love that you broke out the dollhouse electronics! Can't wait to see those wired up - surely will add a great touch! Framing looks great Dennis, coming along VERY VERY nicely. Just plain love your builds.
-
Wayne! LOVE the nets and blanket - those are absolultey great, nice touch - and compliments to the admiral, knitting with common pins? WOW!
-
Horrible Detail? PFFFFT!!! That will be enough of that! Curve looks just fine!! Nicely done!
-
Oh man, don't worry about it - bulid away, build away!!! the DB will come =) You are doing a fantastic jobo on this project, the planking looks fine and the chest is terrific. This should be outstanding when finished. Nicely done sir nicely done.

-
Larry your Niagra is really coming along nicely!!! A little behind but caught up now. The deck came out fantastic - nice recovery and the ports as well. Enjoying this, very good work!
-
Always good work, but seeing them lined up like that really is incredibly cool looking. Such tight work!!! Always a mystery trying to figure out what you are going next but never a dissapointment!
-
Excellent color tone on those cannons, they look slick!!!
- 2,191 replies
-
- 1
-
-
- confederacy
- Model Shipways
- (and 1 more)
-
Thanks Dave, appreciate that a lot. They didn't come out 100% how I wanted, but with each accomplishment something is learned Thanks Frank, slowly but surely she is getting done! Ugh, 84 is horrible!!! hehe. Mainly through CT. If 91 is anything like it, no thanks I will pass! *** for the Anniversery Gift, yessiree. 1 Syren sitting on the shelf. I have an order in to Jeff before he closes up shop. Boxwood and Holly just for the Syren build. Won't be milled until mid January, so will gather up other stuff between now and then (Chucks rigging, cannons, eyes, blocks etc etc) and Mid January is the target time to start the Syren! Thanks Augie, appreciate it! That micro chuck is great!! and I do indeed enjoy the drill press. Has made some things SO much easier!
-
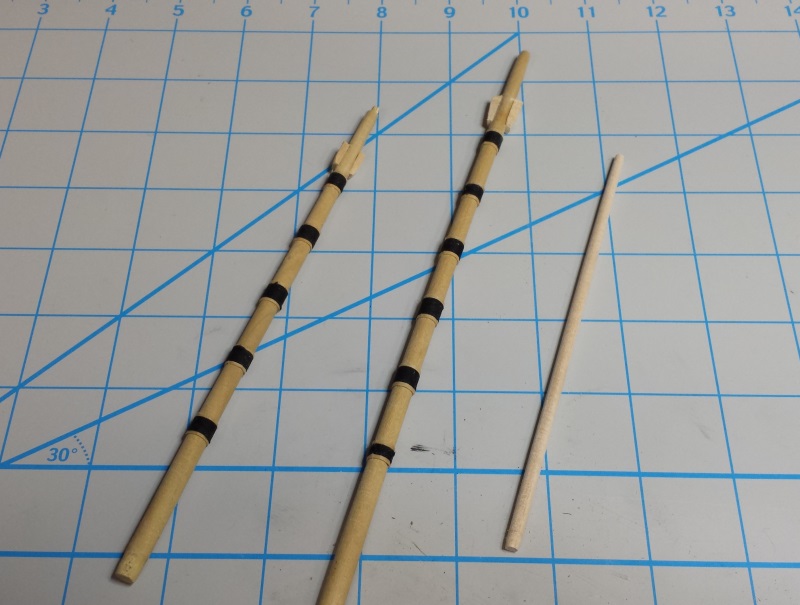
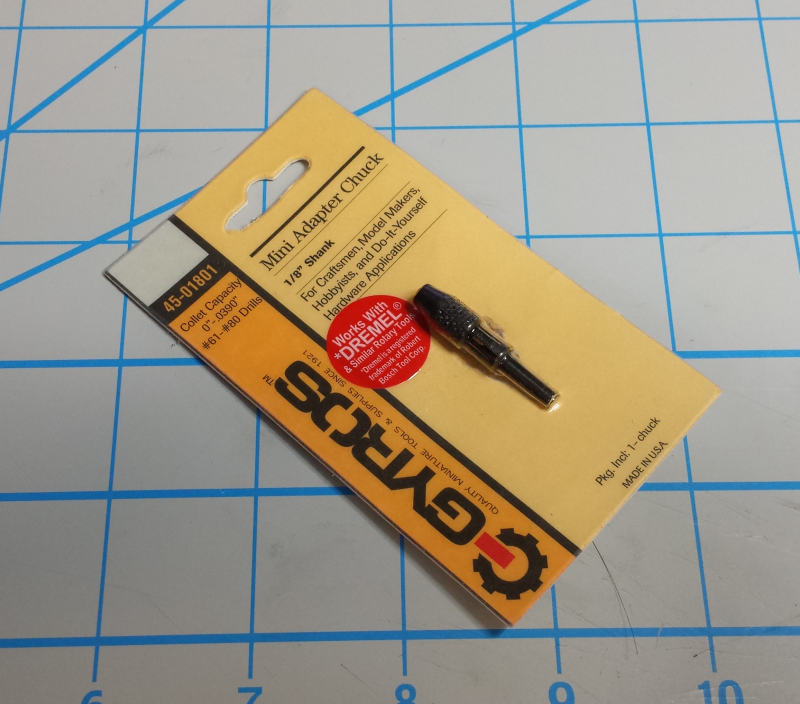
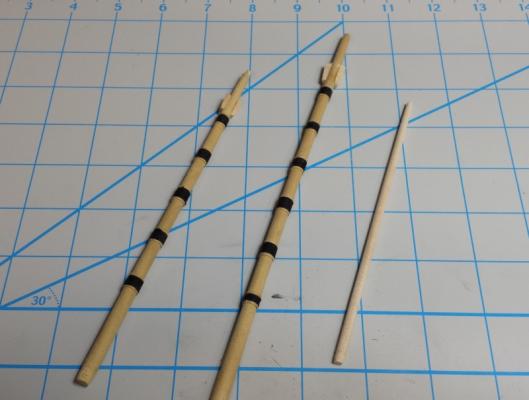
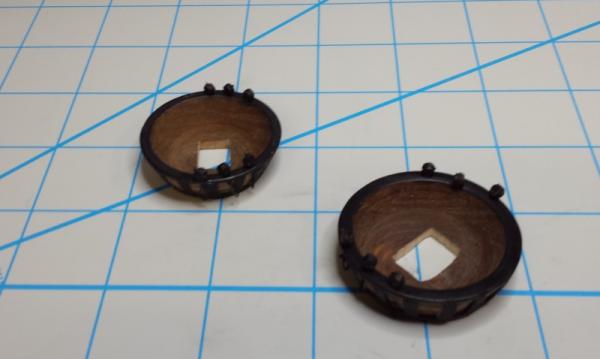
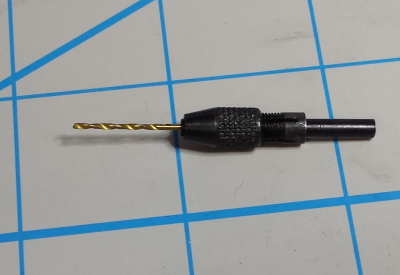
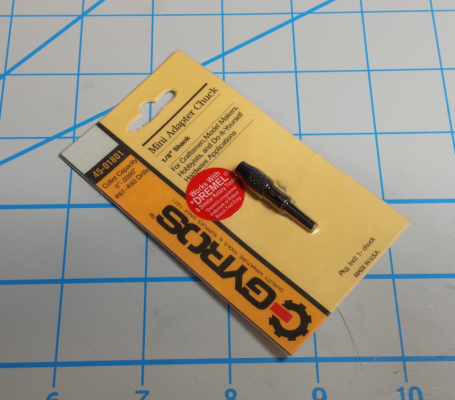
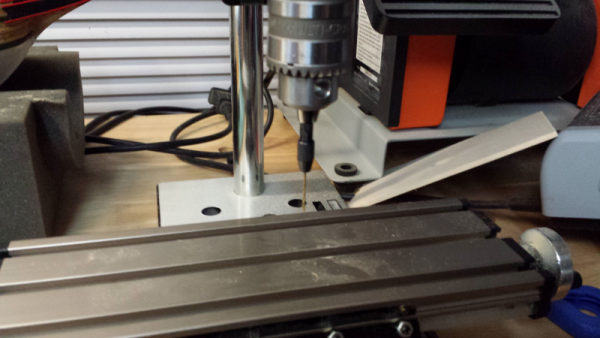
Hi Dave, As it so happens I have been working on the mayflower, albeit a bit slower than I had hoped. Have been stealing moments here and there to work on the Mayflower, the other ships, the database project =). The Mayflower is at that portion of the show which I have the least confidence in my abilities. Wihle I am excited to get the masts and rigging up (after all that is the final stage right, in the home stretch), it is where I get the jitters! . So I hit it with great trepedation! Granted, I need to ramp up skills in all aspects of the ship building, but the masting and rigging is my biggest struggle - planking is a definate runner up to that, so far I can HIDE the oopsies with the planking though However, I did get some work done as I had mentioned. I will apologize, I took pictures as I went along but am not exactly sure where they are. It is enough to make me think I am losing my mind. I am SURE I took pictures of the crows nests being built up as well as the mast work in steps - but alas, I could not find them all. Anyway..... I have the masts started. They were tapered using my Robbe Cordless Drill as a lathe and sanding them down by hand. IF anyone should try this apporach PLEASE be sure to wear a glove. I wore Mechanix gloves which are nice in that they fit tight (no bulk) and offer great protection from the friction. If you try to sand a mast down on a drill bare handed you will definately have a bad time! Once I got the masts tapered I wrapped em up and attached the rings using chucks suggestion of manila folder cut into strips, stained and glued in place. Below is a picture of all three mast bottoms. I still need to attach the cleats and chocks, but once those are on they should be ready to go. The crowsnests were a struggle. I used the kit supplied part as the base and per chuck's instructions sanded out the center ridge. The trouble i ran into is no amount of sanding evened out the color. I have a clear pale stripe around the center of the crowsnest outer wall. I sanded the HECK out of that thing and could not get rid of it . So, it is here to stay. I was hoping that the stain would even it out a little, but alas - no. So, there is a stripe, not seen in this pic but you will see it when they get installed. The deadeyes were done up per the instructions and was pretty eas (towards the end) to get them going. The first couple were a pain but by the last one I had it down so that when I was done I was kind of disappointed I didn't have more to do. The holes were drilled on my newly acquired micro mark drill press. I have been looking at it and some of the other tools for a while and finally decided to pull the trigger on this one. I was looking at the Proxxon Mill believe it or not, even had the Admiral on board with it! However in the end I really wasn't sure all I was going to do with the mill other than be an expensive drill press. So, got the drill press - should the day come that I find a need for the mill, at least i have pre authorization! Anyway the one problem I had was the drill bit really didn't fit well in the Micro Mark chuck as it was hard to get it centered well, however after a litle digging - problem averted... That little guy right there made it so adding a tiny drill bit was a snap! Then it, with the larger shank, took to the chuck JUST fine! So, if you use the little drill bits and have a hard time getting it lined up a chuck, or get a lot of breakage from chucks - I highly suggest it. Although I do know some companies sell the tiny drill bits with the 1/8 shanks, this will work for me until I can afford to pick some of those up! The final result.. Some crowsnests which will suffice. (fear not, that one deadeye is not way off center just flopped back a little bit on the thread. Will striaghten in line when rigged up). They are not perfect - but they are not to shabby I don't think. So, like I said a tiny update for now. I have been working - just not with hours to go as I was for a little bit, but still plugging along.... Until later all - thaks for stopping in and HAPPY MODELING ALL!! Thanks! Adam.
-
Yay Pops! Saw you mention you were able to get your boundy so have been looking for the log, finally found it.. look forward to seeing this one come along. It is one that has caught my eye a few times but never added it to my wish list but always tempted. Looks good so far, I like the look of the planked transom.
-
Really like the colors. Reading yours and some of the others makes it hard to resist pulling mine off the shelf. I already have 5 kits going right now, I am sure I will cause a ruckus if I start yet ANOTHER... but you guys are making it look like so much fun!!
- 55 replies
-
- 1
-
-
- 18th century longboat
- model shipways
- (and 1 more)
-
Mark.. if you are a Padawan than I am a newt!! LOL. You are much much more than a padawan my friend, that vessel is a work of art as it stands. Amazing work, love watching it come together.