-
Posts
15,993 -
Joined
-
Last visited
Content Type
Profiles
Forums
Gallery
Events
Posts posted by popeye the sailor
-
-
-
so this is what you do, beside moving the equator and creating Bermuda triangles?!?! I just got a new set of bits myself...as soon as they hit the table, I'm on the look out for more.....I know what will happen......sooner or later

...and I thought I had patience.......does it come with the bits? look'in good though!
- mtaylor, Old Collingwood, Canute and 2 others
-
 5
5
-
you invite.........I come
 I have an idea for your length dilemma........if the kit your modifying has a three piece keel { bow stem, stern stem, separated by a keel spine, you can likely do it from the mid ship. you will need the measurement of the bulkhead spacing to figure out the length, and the number of the center bulkhead. say the center bulkhead is #5........create a second one #5a. factor in the spacing for the bulkhead......if the spacing is 48 mm.......you will be adding 48 mm to the overall length of the keel. I did this when I built the hull for the trawler Syborn.......you can check out the log on page ten, here in the scratch build forum. I don't have a lot left to do on her........seeing her that far back....WOW, I gotta get her back on the table and finish her
you gonna have fun............it's almost necromantic! BWAAAhaaahAAAAA! 😈
-
back in the day when I built my first wooden ship, the Nordkap, I happened onto pictures of this model. noticing how closely she resembled the Nordkap, the idea was burned into my mind to build her one day. I have some pictures of the finished model.......I've adapted through time, the knack of building, using pictures to guide me. even in regards to the Nordkap, I have never seen any actual pictures of these ships.........I've been told that the Nordkap was a real vessel........the origin of the name means North Cape. finding information to confirm that this was an early Billing's offering was hard to come by.......even my friend Tom was unsure about it. so, all the while I was building the Nordkap, I would take stabs at finding information about the model. the folly of a lost opportunity was later realized, when I was experimenting with parts panels from other model kits.........that the hull parts could be replicated from them, creating other hulls to outfit differently, creating other vessels. it was lost anyway.........there were no parts panels to save, since all the bulkhead parts were pre-cut out, so it seemed. all of the bulkhead parts had these characteristic holes in them, as if they were stapled to a board or pad and cut out. I should mention that this was an old kit, produced well before laser cutting came into the picture. a few of these older kit have been built on MSW......some before the great crash, gone and never to be seen again.
this past Christmas was very good to me.....the admiral got me another Nordkap kit. this one was much older....by how much I can't really say. the significant sign that the kit was older, was in regards to the wood used to print the parts....not being laser cut either. again I found it odd that the bulkhead parts were all pre cut out.......right along with the same characteristic staple holes, strangely it seemed, in the same places in the wood. Neither kit came with the fitting hardware, as this was sold separately....the norm of the early Billing Boats kit. I have a thread in the nautical forum that will explain the two kit further:
it seems like such strange luck that Billing Boats added the Nordkap fittings kit to their product listings. in the beginning, this was my biggest problem.......I didn't have the fittings for it. by the time I had the hull planked, they were comm'in out of my ears!....Harold found his kit, and I had gotten one {or a reasonable facsimile} from Tom! took a while to use them up.........they were quite handy
 I enjoy old kits........plastic, wood.... no matter. dunno.....I think it's kinda nostalgic to assemble something...........kinda like finding the old bones, and then put the dinosaur together. I also like to find out the history of things....although for this model, it seemed like pull'in teeth. well low 'n behold........some searching yesterday pulled up some interesting stuff. I can confirm that "yes Virginia, Billing's did make the kit.........not one, but two! it all started with these sites....
https://www.modelboats.co.uk/forums/postings.asp?th=94284&p=1
http://www.modellbau-web.de/galerie/progress/progress.html
I have some of these pictures.........originally, I thought I had gotten them from the Hull Motor Boat Group website. Billing's carried a junior version of the vessel in !:60 scale:
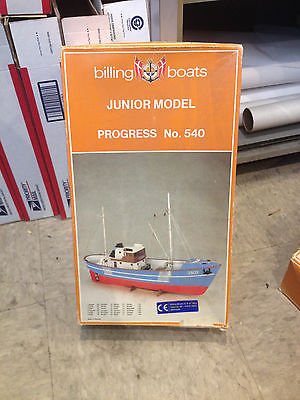 it comes in a blue box as well
and a 1:50 scale kit, Nr101
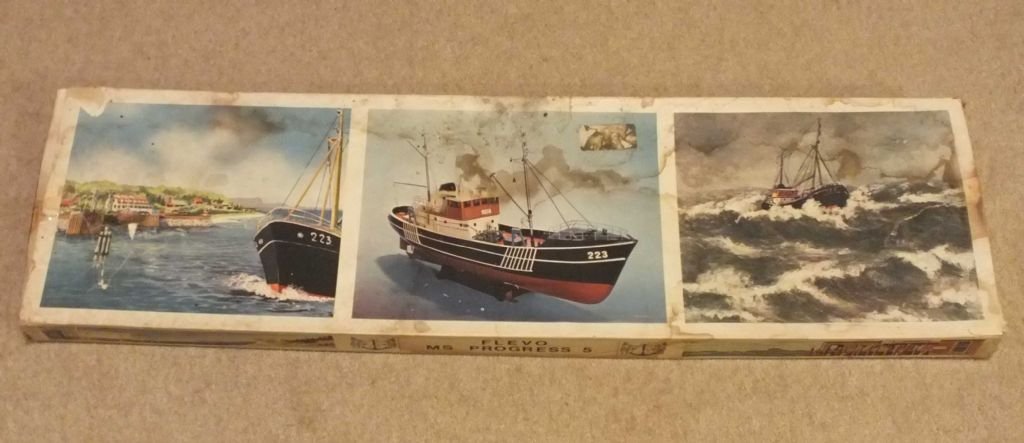
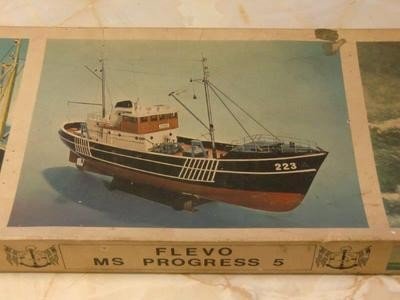
I did see another vessel that looks similar....a big difference was that the cabin structure was all the way back to the stern. an even better turn of events, was that I was able to find the main sheet diagrams {front and back}. a lot of this info was dated 1978........the model or kit was sold and long gone. I will venture to say that these kits were likely sold in 1950 / 1960.....of course, this is my best guess.
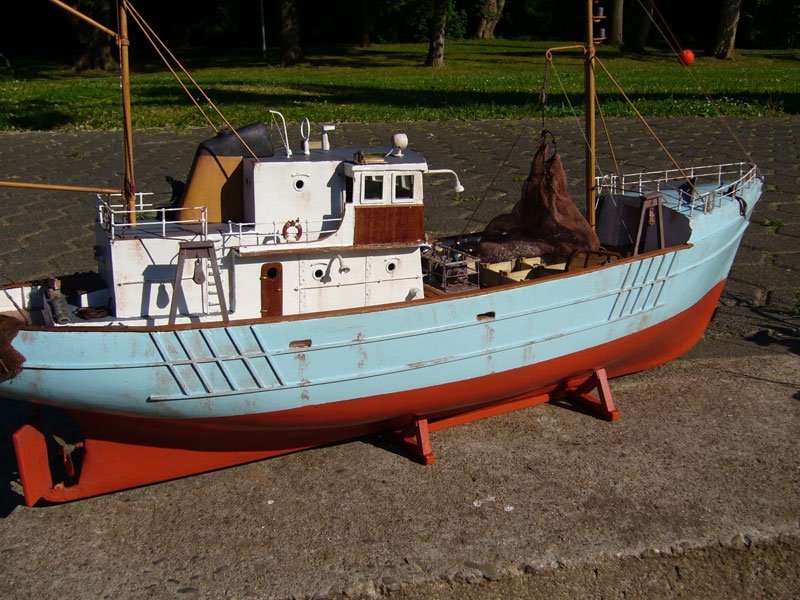
as with the Nordkap, I hope to be able to come up with a worthy model. I was so green back then.......but there were plenty of folks here that helped me along the way. I hope you enjoy this log as much as I will creating it

-
looks awesome! congrats on a great finish OC..........visibility speaking........it would look better in a regular case
 the main thing is.....no dust will get on it, and that's all that matters! super great job.....nice camo paint and all!
- Old Collingwood, Canute and mtaylor
-
 3
3
-
BOOO!!!
 hope I didn't scare you.......thought I'd visit an old haunt {after all.....it is October}
  . great month for beer too. as I mentioned in another log.........{I must be on fire}........I haven't been doing much of late. fingers crossed to change all that. I had cut pieces of planking on the table, gathering dust, while I played with other projects. in pick'in stuff up, I picked up some of the planking and.....and I dunno, adding glue into the mix came to mind. I was in the process of planking the outside of the upper level structure and began continuing with it. I need to stain some smaller planking to do the end fascia. what I did was later trimmed, but needs a little stain touch up.
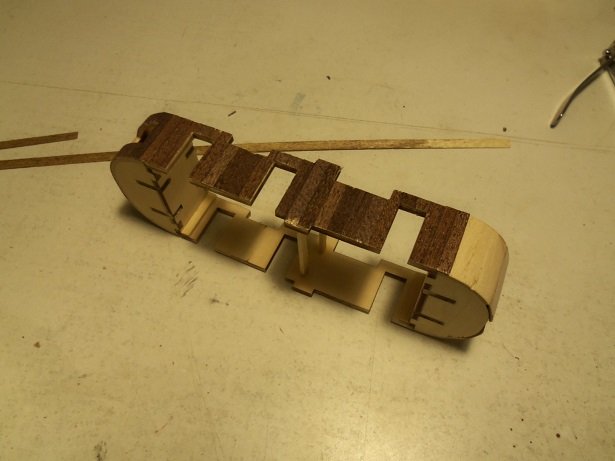
while this was drying, I marked off and started to plank the third level deck.
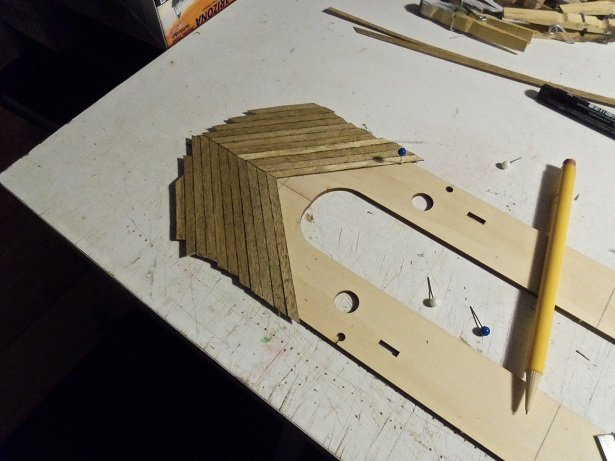
the lighter colored ones are no real concern........I'm going to go over this deck with stain, as I did with the other decks. I'm using the archive pen for the simulated calking. I'm going to plank this deck the same way as I did the second level deck. the midway point is visible in this picture........I will add the center strip along the line as I get closer to it and border it off. the other end will go in the opposite direction, and then I can open up all the holes and stuff.........
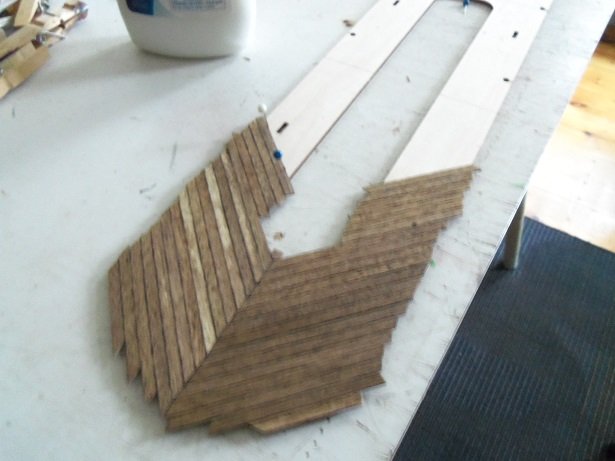
I got further along, before I got called away. I will get back to it tomorrow
 staining more planking is definitely in my future
-
good to hear you've made progress with the dead eyes....what size are you going to use? due to the scale of this kit, it is logical to go with something smaller than 5 mm. spoken like a true modeler........don't settle for anything less than what will make YOU happy

thread color is a personal taste really.......you've likely seen what I meant about the way companies gauge the diameter of their thread. here is the stuff I use:
a few folks use what is called EZ line.......there is enough stretch where you can have it taught, but still loose enough that it won't distort the masts or yards. this is important, because if you rig the lines too tight, it will bend them and make the ship look terrible. I've mentioned this before {I don't mean to sound like a broken record} about how to find 'absolute zero'. keeping the lines taught within this parameter will help to prevent other lines from fowling what is already done as well. take a piece of the thread your using and hold it by both ends {doesn't have to be a big piece}. while concentrating on it, pull it so it is taught.....as taught as you can without snapping it. slowly relieve the tension you've put on it, until it goes limp....
....then pull it tight again and repeat. do this as many times as you want, to see what happens to the thread. the point where it just begins to go limp is absolute zero. you'll get an idea of how much tension the thread will handle, before it distorts the masts and yards. standing rigging should have more tension than running rigging...after all, standing rigging is the support for the masts. the natural order for taught-ness is stays, shrouds, and then running rigging..........to me, the stays are the main supporters......the shrouds are too, but can be slightly less, and the running rigging have the least, with the exception of those that have pulley assemblies. what I mean by pulley assemblies, are those that are of a pennant, two block configuration:
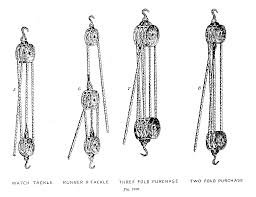
there are many tutorials and books out there on the subject
 keep going, your doing fine!
-
that's true Lou..........it would also depend on how much fertilizer is added
 compost anyone?????
hello Sam
 actually........I'm still up in the air. I'll continue with this kit.......should I go to Hobby Lobby in the future and see another one, I may pick it up. the kit is cheap enough to expand on I think. thanks for the birthday wishes........it's not too bad being another year older
no.....the project is still on-going.....I've just been lost in my own thoughts. even though the outlook may still be cloudy, there's no reason why I should let it spoil my fun. >here, here.........well spoken Bruce< >rule No #1.............NO POOFTERS!!!!<
I was pondering over the kit one afternoon, when I began looking at the second level to the main structure. some of the pictures I've seen do not show casements all around it. I decided to leave the gun casements in place, and whittled away the ones between each one. the ones on the fore end were left alone, but is subject to change. as for the two guns and casements I mentioned earlier, I'm going to leave them.....I like armament

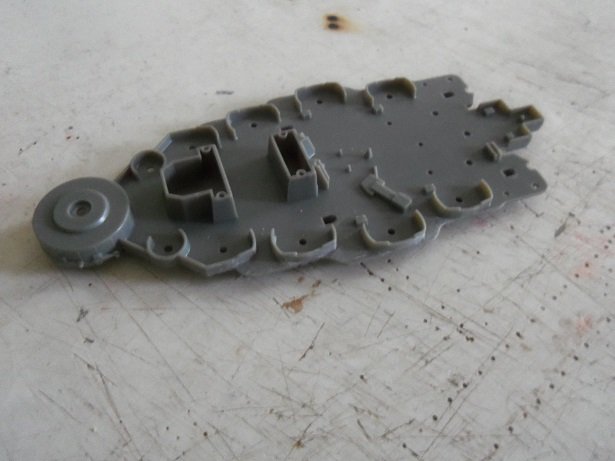
the way that the forward casements are shaped, is the reason why I kept them. then I started to drill out the portholes in those modified hull gun placements. the port bow went ok.............
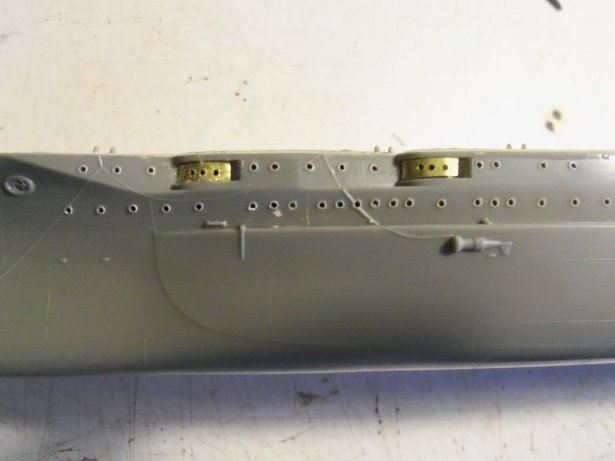
.....but the stern, I goofed on the second one. I will have to put in a new piece and redrill it.
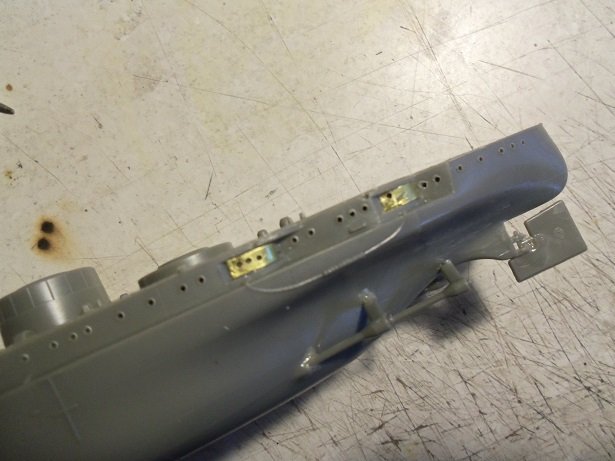
once these are done, I can start on painting the hull. I've also been looking at other stuff molded on the deck....what can be removed and replaced with PE. other than playing with some of the PE, trying to decipher the TMW instructions, this is as far as I've gotten. I hope to have more soon.
thanks for hang'in in there with me.........

-
that would be taking a giant step into the dark side. I've used Billings plans for the Andrea Gail. I'd never sell her. recently, I learned how to resize the parts panel diagrams in the back of the instructions, and capture it using the snipping tool. this will be very useful for models that I'd like to do in a larger scale than presented in the kit...I have two of them in mind.
-
really cool what you did to the hull....the rivets make for some really great detail. looks great primed over
 good news on the new job
- Omega1234, kees de mol and mtaylor
-
 3
3
-
-
-
I have found nothing for the kit......although since it's a clipper ship, you may try looking for parts related to the Cutty Sark or Thermopylae. if this is the 1:96 scale kit, you'll be in luck. not sure about the 1:150 kit. most folks scratch build the fittings and such, but you could also check out some of the wood kit sites too. they may also have something that will appeal to you.
-
-
dynamic use of color.......very well done on the detail as well
 sweet!
the comment above was for the finished bridge........I forgot there was another page here
 seeing it on the model is simply jaw dropping! the ship is drop dead gorgeous!
- Old Collingwood, mtaylor and Canute
-
 3
3
-
On 9/23/2018 at 2:24 AM, lmagna said:
Thanks Mark
Compared to your family health issues, my present situation is just transient and to be honest rather minor in relation. You will be battling yours long after mine are gone. I do have to agree though that getting older is not only not for sissies but gets harder every year.
Hi Denis
Yes I have noticed your absence, but didn't want to intrude. I am sure in one of those journeys through your thoughts you will find the spark that lights the fires again and you will be off like a comet on something new and exciting. Just don't forget to post it here so we can tag along.
are you sure about that? insanity has many levels you know
 ..........and I even learned a new trick with the computer
  all the daydreaming I've done, and to find that it was only a keystroke away!
- mtaylor, src and Old Collingwood
-
 3
3
-
very nice work.........looks better and better with more railings added to her

- Old Collingwood, mtaylor and Canute
-
 3
3
-
looks good Dave....as you mentioned, a good faring will straighten them out

-
-
-
-
jee Frank........I check in hoping to see some of your amazing progress, and I find you've had cause for pause
 I hope that it's nothing serious, and can be dispatched quickly. hope you and yours are well.......I'll look forward in seeing your continuance
- Canute, thibaultron, Mahuna and 1 other
-
 4
4
-
-
now that they've looked at her and are satisfied with the job you did on her, are they going to crate it, or are you? here's hoping all goes smoothly and she has left the building..........a job well done!
 is there an echo in the room now?


IJN Mikasa by CDW - Wave Models - 1:200 scale - PLASTIC
in - Kit build logs for subjects built from 1901 - Present Day
Posted
you've made such fine progress....the funnels look superb and the mast look great too New Hampshire is a great place........you gotta like snow though