
Supplies of the Ship Modeler's Handbook are running out. Get your copy NOW before they are gone! Click on photo to order.
×


popeye the sailor
-
Posts
15,993 -
Joined
-
Last visited
Content Type
Profiles
Forums
Gallery
Events
Everything posted by popeye the sailor
-
 hello Frank! Man.......I wish I had looked in on this build sooner! getting caught up was a testament to the splendor of sculpted wood! I enjoy looking in on builds like these......they give so many ideas, but I lack the sort of tools that you have. levels above my meager work, I can tell ya that! just a super log all the way through personally, with all that there is to see.......no one will ever see the scarf joint mishap. if that's the only minor {yea, I call it minor} boo boo you made, then you still an expert in my book! fantastic workmanship!
- 649 replies
-
- 6
-

-
- dunbrody
- famine ship
- (and 2 more)
-
she borrows my stuff all the time Carl...........my nail clippers {used to cut light metal rod and rigging}, my x-actors {used to cut everything else}. I wish she still did her ceramic houses.....used to have fun helping her out with them. I laugh when she asks for something, and I tell her they are on my table....she looks at the table and then asks...........where?!?!?! Hello Gerty....so good to see you as with most Midwest kits, the rigging has a few things that can be changed........the rigging diagram is really good though. it even shows the lazy jack lines. I was hoping that I could get 'round to tapering the mast, boom, and gaff yesterday, but I spent a lot of time at the table. I hope to get more done today. thanks for looking in and the good word..........hope to see you resume on the W.L.B.
-
using the cast off wood is a good idea, but looks a bit shy in a few areas. to be sure your making a whole 'slice', you could get some 3/16 - 1/8 flat stock. it can be found in basswood, but Midwest sells birch flat stock, if you prefer something other than basswood. super job on the hammocks.........very nice progress
-
nice job on the dory..............
-
I could try to sweet talk her into doing them.........but I haven't succeeded yet. she's pretty good about sharing her toys.
-
nice when you find a book on the ship your build'in..........that's really super!
- 56 replies
-
- 3
-
-
- sd-14 cargo ship
- card
- (and 1 more)
-
so........your mess'in with the metal glue, are ya?!?! soldering isn't too bad once ya get used to it.........a little goes a long way I haven't done too much of it either, but finding it hard to avoid, with some of the stuff I want to do. hope to see some of your progress soon
- 250 replies
-
- 5
-
-
- willie l bennett
- model shipways
- (and 1 more)
-
yepper! it will also dissolve some glues as well I was hoping that this will be a quick one, but I'm not even at the masting stage yet. I also need to make two sails........I haven't used the admiral's sewing machine for a while, so that should be fun thanks for look'in in and the good word
-
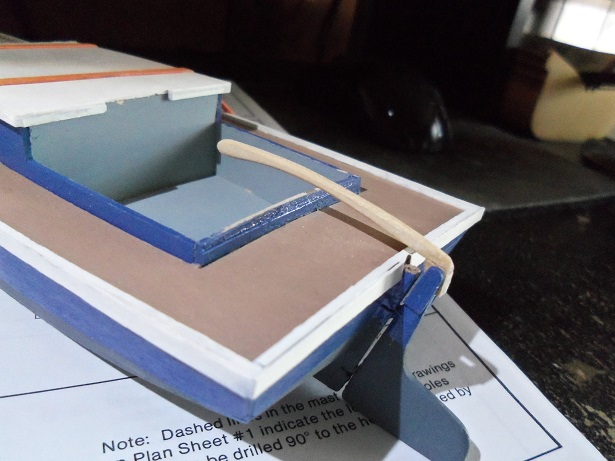
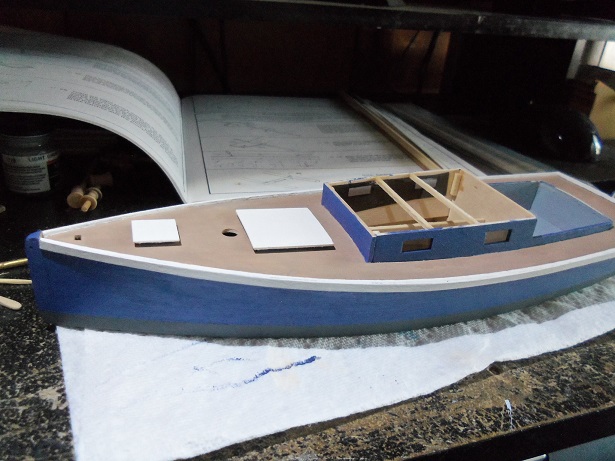
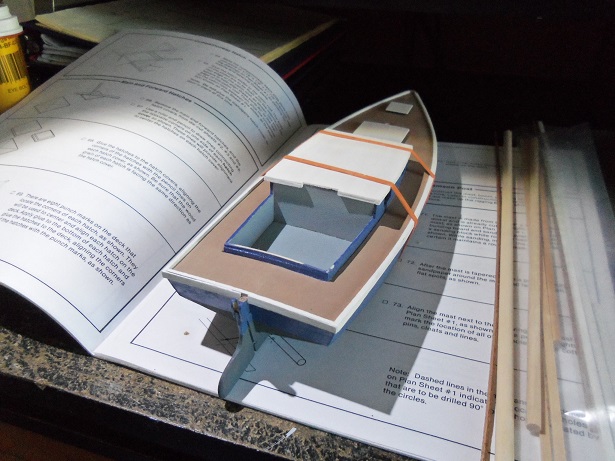
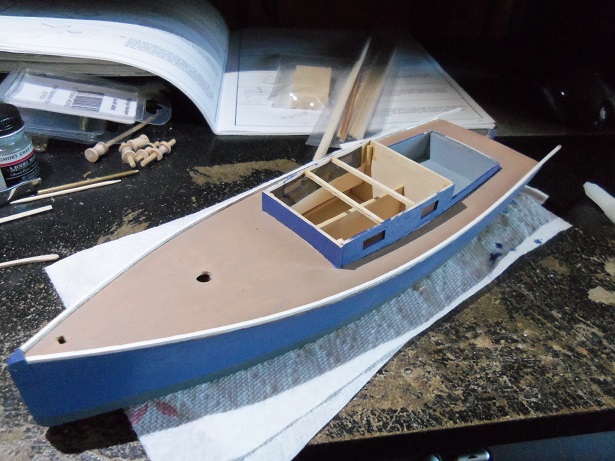
I went into the camera today, and found these two pictures I had taken. the tiller has been going through small changes, since cut from some scrap wood. I think I still need to make it a little shorter, but the shape is getting there. then, there is the front cabin roof edge. giving it an outer frame work like I did, it brought the front edge flush with the fore cabin wall. I gave it a cap. I'm sure I'll get to do some more to her.........soon!
-
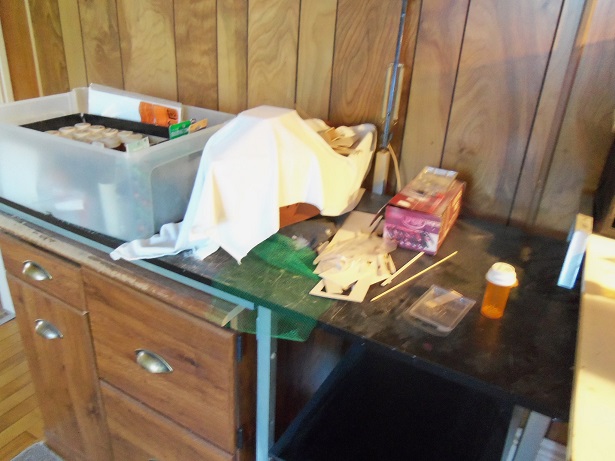
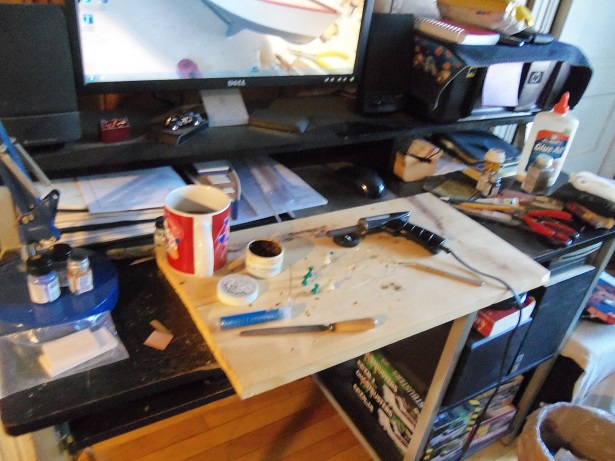
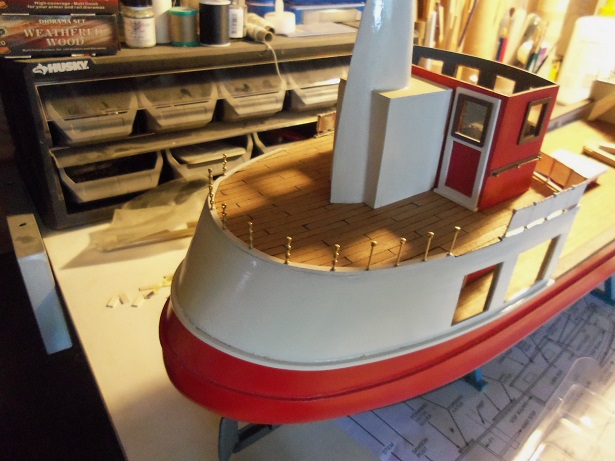
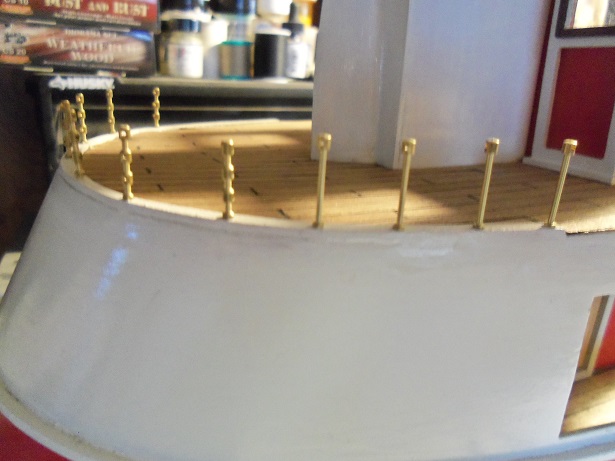
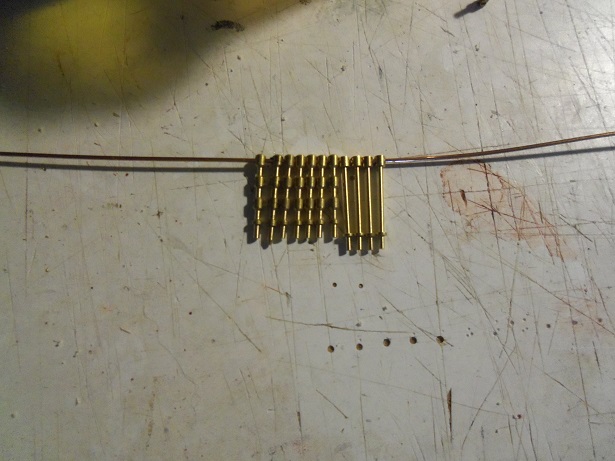
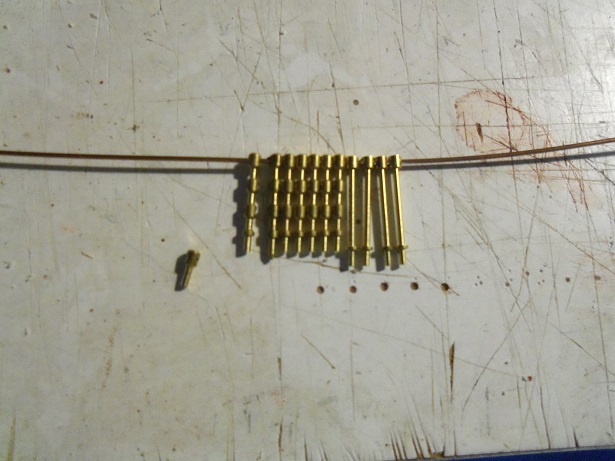
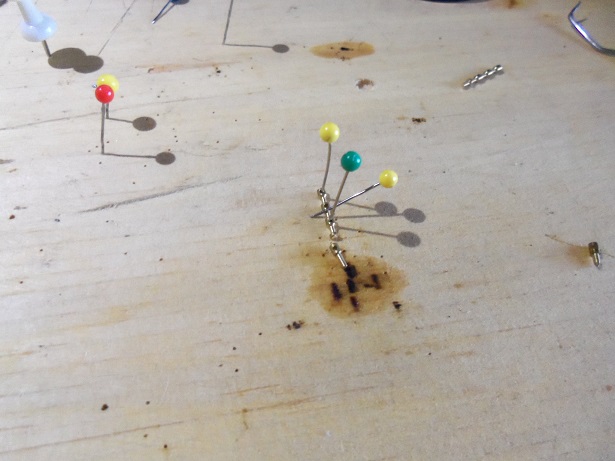
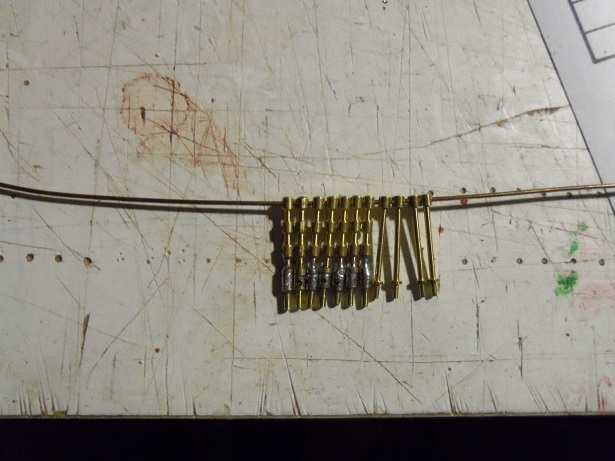
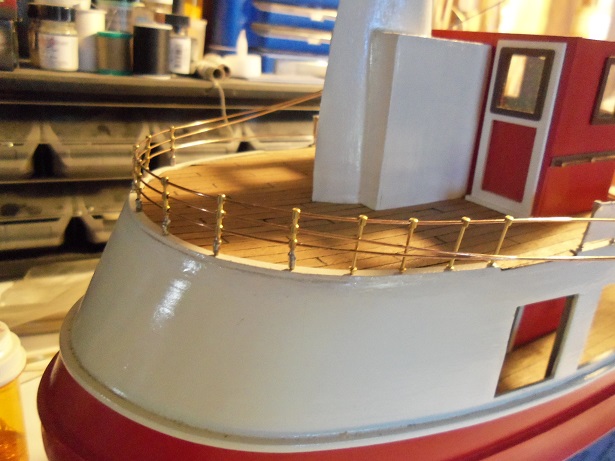
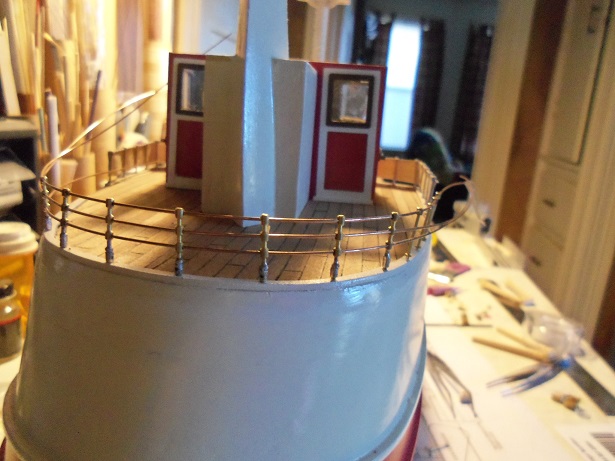
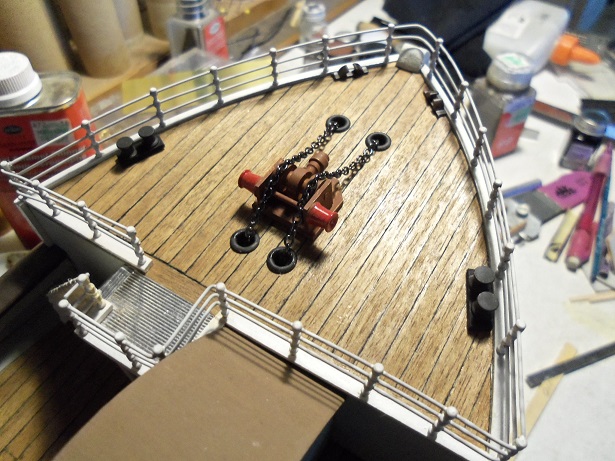
for those just starting out: oh my........what have I done to myself. I used to be this happy go lucky guy, playing with my plastic models, in the seclusion of wherever I opened the box. I even had a solid mantra for myself.....only one build at a time. then one day {those who have heard this before, can start yawning now}, a wooden kit fell into my possession......and that opened the floodgates to a new and wonderful hobby {more like a Pandora's box, in my case}. that was in 2009.......... I've come away wishing it was a lot sooner...........a whole lot sooner I have evolved toward having two tables....the main table, and a side table, in the event I wish to do a second build. I have gone way beyond that! we won't go there at the moment.......I'll leave it as "I'm pre-destined" I will never lament..........I consider them my children, born of hair brained ideas and envisioned thought. there are others..........but I dare not open the lid again, fearing that they'll escape. ..........and they will, you know................they always do. of late, the main table is a collection of tools and cast off wood, with metal bits scattered for good measure. the trawler sits at one end of it, waiting eagerly for me to add more to her............the second table has become more of a catch-all at this point in time, as I look for suitable parts to feed the aspect being worked on. the frenzy has also manifested itself on my desk as well, hosting my latest idea and a build in it's own right.........the Flattie. I sometimes daydream of a room..........a medium sized room {I'm not greedy}, with a work table, that lines three of the walls {in my dream, I don't even allow for a closet }. the fourth wall is dedicated for supplies and of course, the entrance way into the room. I can close that door....and leave the mortal plane behind.......and enter my own imagination. there is a freedom here..........but before I can get too cozy, I get roused to the present by the admiral, asking a question about something or other.........I never stay there for too long oh well........here I am I've moved to the stern on the trawler. there's more to do with the fore deck, but it's a lot of small stuff.......it can wait till the mast is permanent. I seem to have graduated from ladders to railings lately.....that's what I've begun to play with in this session. I have only seven of the 15 mm three hole stanchions...not enough to go the entire span of the stern border. so, what I've done is run the seven around the center of the span, and fill in the sides with the 15 mm single hole stanchions. I have enough to do the stern span with these, but I think it would look naked with them.......I'd have to try and fill them in somehow, with a second railing. this set up will also make it look a bit more interesting....and if I don't like it, I can add the extra railings. here is the stanchion positions that I have described. my eyes were play'in tricks..........I mentioned a problem in an earlier post. it seemed like these stanchions were a little taller that the three hole stanchions. in order to get a better picture of this, they were strung on a length of wire. I was amazed that the difference is greater than I thought it was..........at least 2 - 3 mm {I was too miffed to measure}. the original though was to simply counter sink the single hole stanchions into the border, correcting the height issue. I can see now that this can't happen. I want this to work........I think it will look cool...........so I entertained the thought of adding length to the three hole stanchions. anyone who has built billing's kits before, have run into their idea of eye bolts {in some of the kits}. they look like really stubby buttons with a hole in them. I will snip off the locator pins on the stanchions and solder these eye bolts onto them......I have plenty of these eye bolts as well. setting up the board at my desk, the operation began.........snipping off the locator pin, filing it flat, and solder the additions together. it wasn't too tough a job.......but it will pose a problem. I won't be able to solder the wire rails in place, the closer I get to the soldered joint. I can do the top rail........but the middle and bottom one will be very dicey indeed. I could do it, but it would take an enormous amount work to retain the shape. I can simply CA the railings as I have done before. the big problem is that I wouldn't have an adequate heat sink....bottom line with them all done and restrung next to the single hole stanchions, they look much better............perhaps just a minuscule of difference. the railings were re-posted back into their holes {I still need to do the port side}. I did leave enough railing wire on the lower rows, that I can solder them to the single post stanchions if I desire. of course, they won't be strung through a turnbuckle, like the three hole. I've seen Bob's railings......I like the way they look. this will give me the opportunity to try making them......really great idea........functional and realistic. now....I will get the port side laid out and solder the top rail, to lock in the spacing. then I can decide on the rest of the rails. I kinda wish I didn't cement the funnel/cabin in place.....I had an evil thought {I can still do it........remember,,,it's an evil thought}......icky mae
- 747 replies
-
- 18
-
-
thanks John..........I can't say that about my other builds.......I got too many oh....well, I'll get 'em cleared up sooner or later I can say though, that I know what I'll be doing for .....let's say..........for the next ten years! I guess, in a way.....that this is a good thing. I'm seeing more......learning more.....and experimenting more. as they say.........the next build always seems to look more enhanced. it's a great thing to tell someone who is just starting out.........they have so much to look forward to never give up the ship!
-
Cutty Sark by NenadM
popeye the sailor replied to NenadM's topic in - Build logs for subjects built 1851 - 1900
another interesting point.....where are the third steps to the masts?- 4,152 replies
-
- 4
-
-
- cutty sark
- tehnodidakta
- (and 1 more)
-
well on your way now.....I see nice shape to the stern...........the first layout looks good too. we'll see just how much you can stuff into this one! really nice so far!
-
super progress Sjors! looks like you have some adjustments to make with that mid ship deck
-
a kit can fall out of production at any time.........difficult to tell. it takes quite a bit of time for any kit to deplete really, depending how saturated it is in the market place. one of the scary things, in purchasing a kit from like E-bay and such, is that the kit may not contain some....or even all of the instruction sheets. it's too bad that including these in the database, could result in some serious repercussions. to date......the most common ship kit {that I know of} that suffers from lost instruction sheets, is a plastic kit....and that is the Revell Cutty Sark 1:96. I posted them on my Blogger blog site, so folks can acquire them {I have gotten quite a few requests}. every kit that I build, be it wood or plastic, I save the instruction sheets. most manufacturers also post the instruction sheets as well......although some do not include sheets like rigging and profile diagrams. I believe Adam is limiting this to only wood kits......to add other gender kits would expand the list tremendously. great job so far Adam.......just browsed through and am amazed with how many are here!
-
thanks Patrick.....and those who hit the like button well.....perhaps not fish...that would probably pop the needle in the detail-o-meter, but there is much more to be added. the mast will most likely need shroud lines.......dead eyes or turnbuckles? also the rigging for the booms......Billing's never show lines that move the boom outward or inward...... it's a thought in progress can't play hooky any more.......I worked today. one more day to go
-
thanks Carl..........and Mark for the likes I was mapping out the aft railings for the stern. I'm going to be using two different types of stanchions.....but there is a very small problem. not to worry though.....I have the solution for it I was able to fix the botched pulley too....I might need it.......not too sure yet. thanks again for looking in
-
your all mapped out.......it's going to be a very interesting build. smelly? after all........it is the 'bowels' of the ship
-
thanks Carl.......I think I've been scratch building too long. that and I'm too used to the billing's instructions would that be Pepsi, for the can? thanks for the likes Mark
-
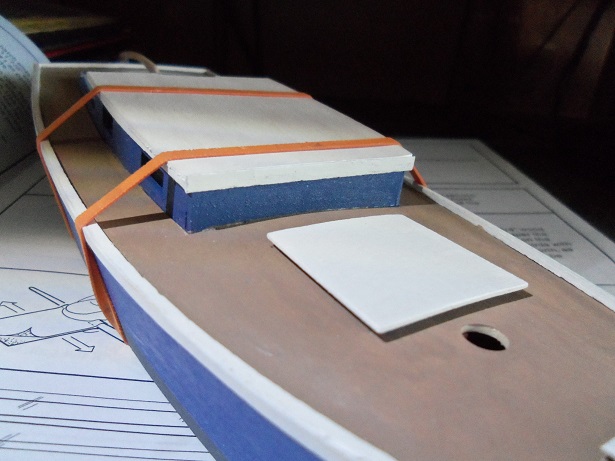
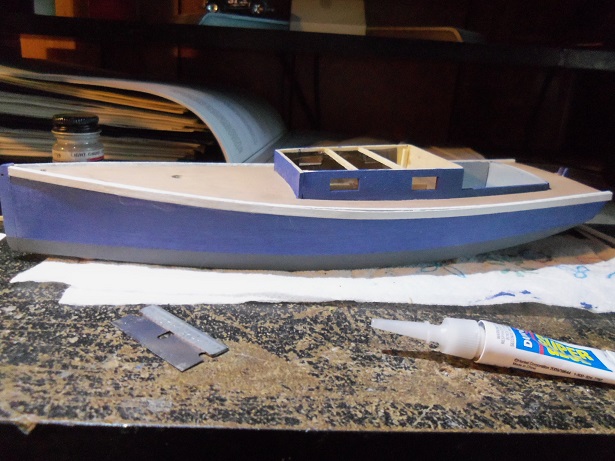
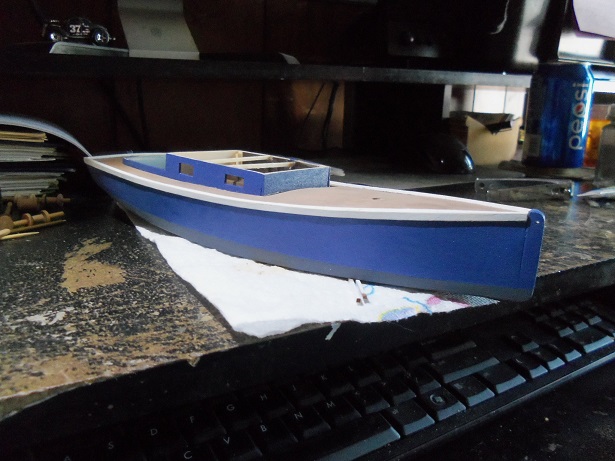
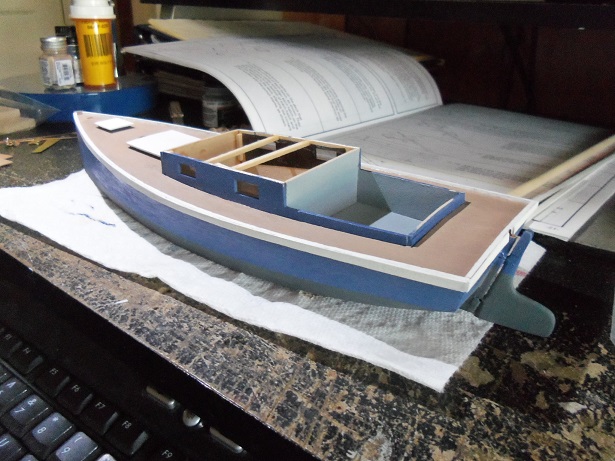
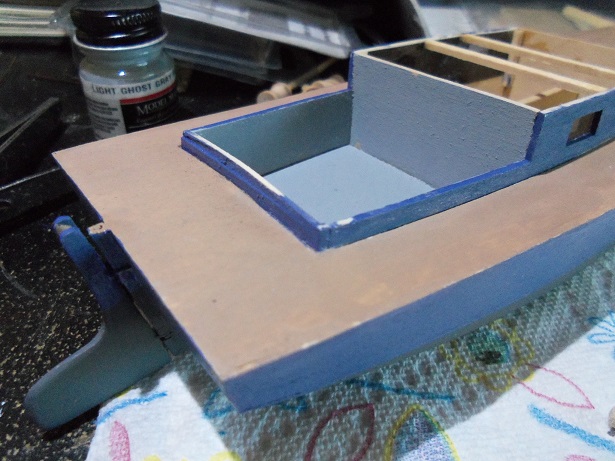
so......both sides of the sheer deck molding is in place.........there is side rub rail molding as well. I really didn't like the way they have it......a notch like channel running along the hull {I should have taken a picture of the instructions......you'd see it more clearly. I painted some more molding strips flat white, and I added 2 strips of .05 x 3 mm mahogany. I ran those along the hull instead. there are a couple gaps there, but I'll fill and paint them. they will be gone. I ran them from along the top of the deck sheer molding. some light sanding.......filler.......paint.....no problem. then I did the transom. the holds were cemented in place next. it might be hard to see, but the square piece under the cover {what would be the hold's 'box'} has been painted cobalt blue as well. painted strips were cemented along the sides of the cabin roof {the underside edge}, and under both sides of the cabin door way. the roof was then cemented in place....I used white glue so that the windows wouldn't cloud up. if I had used CA instead...there is the possibility that could have happened. I need to address the front edge of the roof........that seemed to run flush with the front cabin bulkhead { F2}. I have an idea of what to do. I'll show the progress with the tiller.......I cut it from one piece of scrap wood, and I've been sanding and trimming it ever since. the cabin door way and the cockpit trim needs to be done as well. gee......get this all done, and I can start masting this bad girl!


-
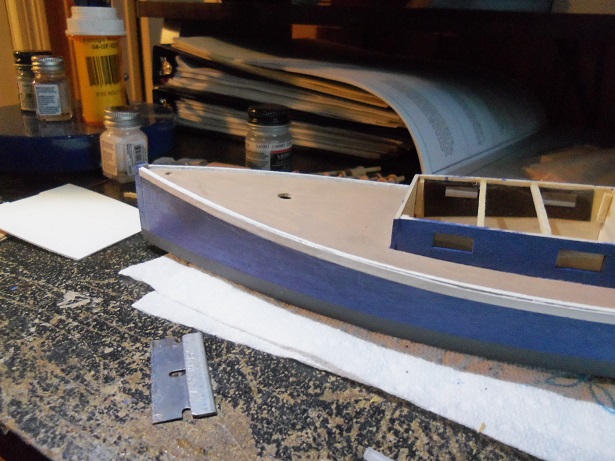
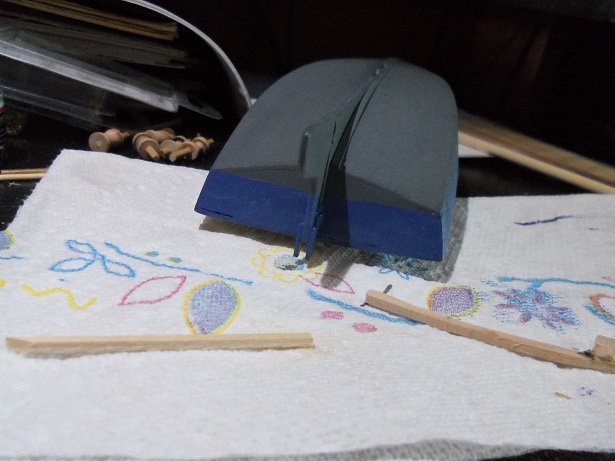
I had gone a bit further with the Flattie.........first was to address the transom and get that done. then......there was that gap in the starboard side aft cockpit wall. I cut a little bit out of the F4 bulkhead, and fitted in a small piece of 1/16 square stock. after a bit of sanding.......you'd never see it, if I put paint to it. then, the molding work began.......I only got this far in this session.......the deck sheer molding. the instructions say to do it later in the assembly......but I've pretty much decided to use them as a reference. I played hooky today.........I got more done. I'll be back in a moment
-
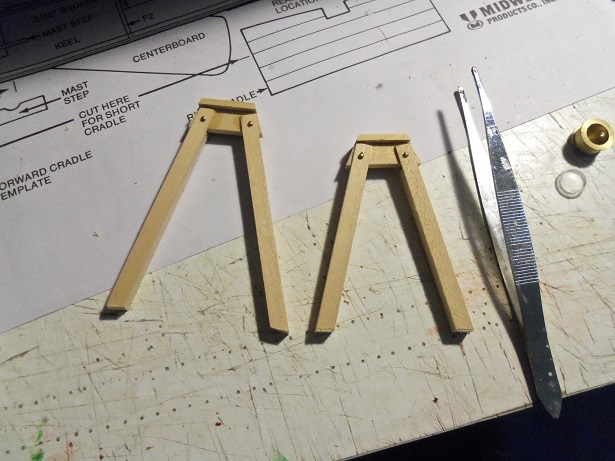
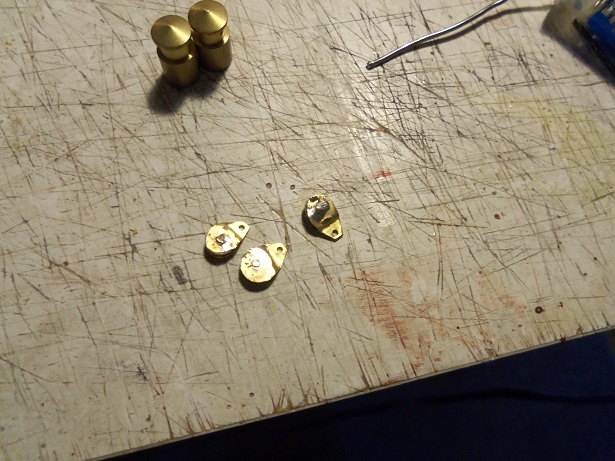
thanks for all the kind comments and the likes I hope that one day, I get to do one of those passenger liners like Nils is doing.........I have so many of those eyelets...and in so many different sizes. as mentioned, it's not 100% correct, but it finishes that task that prevented me from cementing the mast in place......that will happen very soon I did promise an update.....I've gotten a bit further than I can show here.....it just means that the next one will be even bigger. I've shortened all of the gallows now.........and I assembled a bunch of pulleys. this was the first one I had shortened......it'll put them more in the ballpark. I set up the soldering gun again at my desk and churned out the first pulley.......came out looking a little fat. I made four others.........another got ruined when the drill walked off the top of it. I will try to save it somehow here are three of the better ones. I added few more parts to the fore deck......the fairleads and the bollards. I need to make some vents and add a few eye bolts here and there. I'm sure I can come up with more ideas. thanks Nils.......the access ladder came out better than I had hoped. even the railings weren't hard to do. they are cemented rather than soldered.........I wasn't as bold as I am now, when I did them thanks Frank......until now, that hue of decking was all I could hope to create. I now have a huge supply of .05 x 5 blonde basswood thin strip. all I need to do now is buy the stain, to achieve any hue I want. being 5 mm wide though, it does limit me to the scale I want to use them.......smaller scales will still require narrower plank widths. oh well.....I'm still anxious to use them thanks Tom and Bob...........and Pat......if you think she looks the part now, just wait till I get the booms up and running! can't wait to get to that point

- 747 replies
-
- 15
-