


popeye the sailor
-
Posts
16,007 -
Joined
-
Last visited
Content Type
Profiles
Forums
Gallery
Events
Everything posted by popeye the sailor
-
 I learned from my dad........I had forgotten all about tinning very neat method and jig you have there. pretty darn good copy of the one in the picture......supeer job
- 348 replies
-
- 5
-

-
- pequot
- cable ship
- (and 1 more)
-
great to see some planking going on.....I like the changes you made to the holds and the mast steps. perhaps figuring out a way to sand a group of the strips to the same thickness, before you cut them to plank length.........might lessen sanding in such close quarters. that's going to be a task and a half! she's looking good!
-
thanks everyone for the kind comments....and for the likes as well. of all the ladder experiments I've tried.......I am very happy to have tried to do this again I'm sure there is a better method out there........but I'm just as satisfied with the way I did it. now to expand on it I did some work to the gallows.......I won't scrap them as previously thought.....I'll just cut them down some so they look more to scale. the hold had been modified and is in place on the deck.....I just need to change the color of the cover. I'm back at work..two more days to go......perhaps I can post something before then
-
well......that's true in a sense Keith.......I was using this build as sort of a springboard, so I'd gt off my duff and assemble the syborn's mast. I have done that now........at the expense of not going any further with the Flattie. I did do some sanding to the rudder.....it looks a bit better, but I still have to make the adjustments to the stern post. once I do that, I can paint. that's how I got into this mess in the first place Carl.......working on one, while paint is drying awwwww.......what the heck, it's all in fun I never tire working with wood.........I've said it once......I'll say it again......I should have ignored my thoughts about these wood kits, and jumped into one at a much younger age! glad you found the log Mark...always a pleasure to have you following along. I may not go too crazy with this one......but you never know the shock does wear off Nenad........to show a picture of all my projects together, would be stunning. I've done it in a small scale with the Holiday Harbor build.....made even larger now with an extra hull to build. looking back at some of the builds, I have made progress........a few of them are getting close to being finished. they'll be like pop corn on the hearth thanks for the likes my friends.........I will have another report on her progress soon.
-
congratz to you Kevin on the start of this mammoth build. will you be able to join it together at some point, to show it's size? that would be so cool to see!
- 56 replies
-
- 1
-
-
- sd-14 cargo ship
- card
- (and 1 more)
-
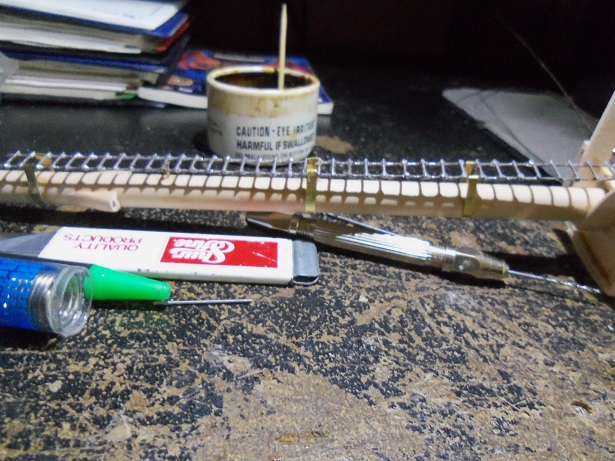
thanks for the kind comments and the likes progress continues slow, but the mast is almost complete.......which I'm pretty happy about almost ready to do that Carl, but in doing that, I found that I needed to revamp the hold. I got that done, but I might repaint the top part.....the light gray I used for the bulwarks had dried up, so I used a flat white instead. I got some ghost gray.......it might be close. I'm sure that the next time you see the mast, it should be painted and cemented in place....I hope. I want to do the anchor winch / fore deck.......at odds on how I want to set it up. thanks Rob.......I have both means......but I though the flame method might set off the fire alarm. I also soldered the railing on the mast, so the flame might have caused a bit of an issue this has been more soldering than I have ever done.....and I liked it
-
looking great Marc.........very nice indeed!
-
sounds like someone is being his own worst critic.......just keep doing the best you can do........in the end she'll look great! nice pictures BTW
-
Cutty Sark by NenadM
popeye the sailor replied to NenadM's topic in - Build logs for subjects built 1851 - 1900
they look excellent Nenad.........very well done!- 4,152 replies
-
- 7
-
-
- cutty sark
- tehnodidakta
- (and 1 more)
-
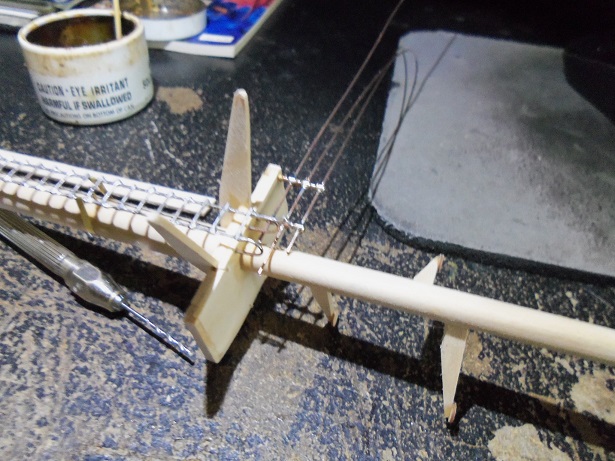
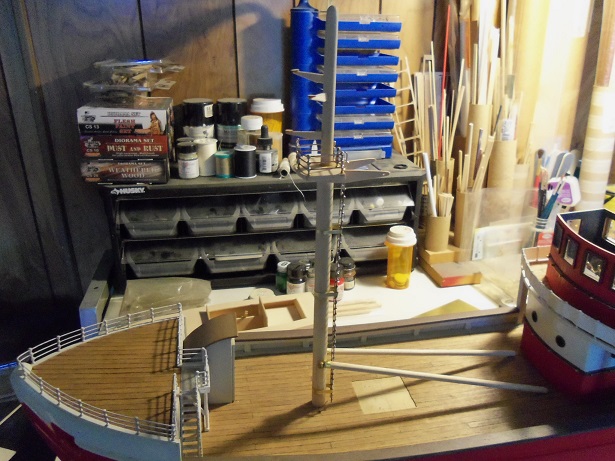
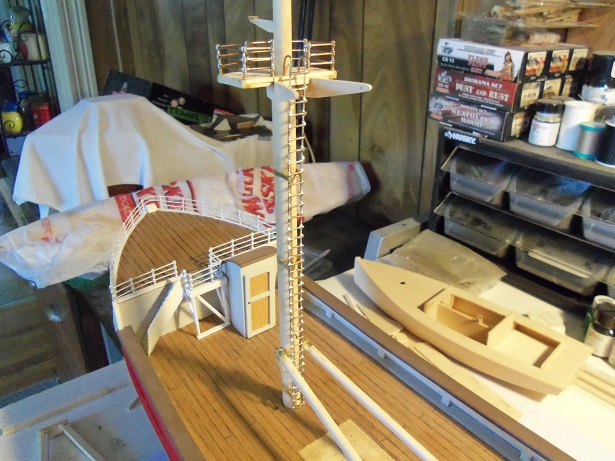
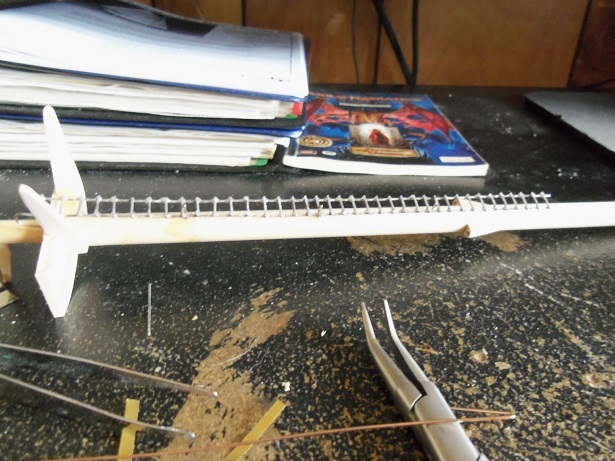
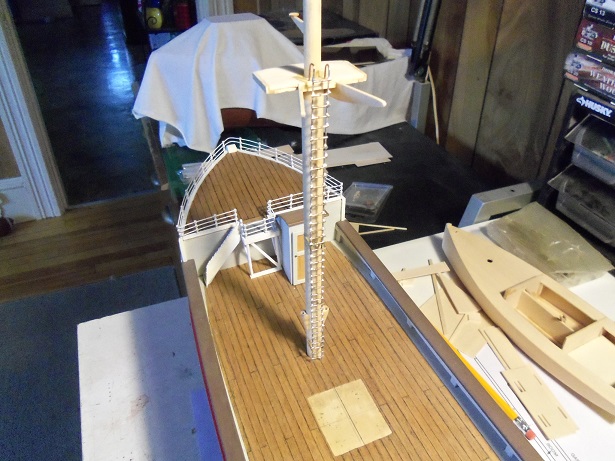
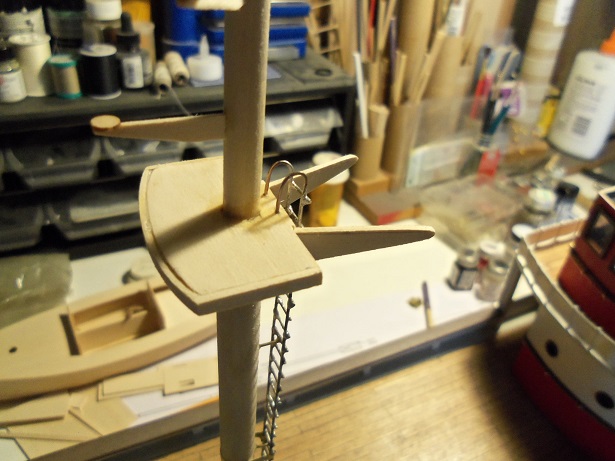
the mast is close to being done. seeing how other folks assemble their masts {Kees}.....I saw a lot of good aspects , that normally I wouldn't do. .........a lot of neglected detail thanks for the belated birthday wish Pat.......and yes Patrick......I had a great day yesterday it was further emphasized by reading all the PM's and posts I got.....I have such great friends in the community, and many of them After putting on that third strap.....I began to set up for adding the railing around the top. silly me had put everything away, and I had to set things right back up at my desk. did I actually think I was going to get away that easily? I was simply going to use CA to assemble the railing.......but in looking at the ladder, the railing should be a piece of cake. more practice time too the good thing was I didn't need the board.....yea!!!!! I don't have to reach for the back of my desk for the mouse!!! I have some one rail 15 mm stanchions.....might look too open up there, so I went for the three rail 15 mm stanchions. the holes were pre drilled, so I'd know how many I needed. I still have the aft section to do. the first part: here's what the ladder looks like with the three straps. I used the vise to bend the railings to do the second part of it. it was used again to do the third part, which has three partitions {across the front}. it needed to be curved to follow the shape of the top. the railing was soldered in place on the top.......I had messed it up at one point, making an adjustment. I wasn't going to have it happen again. during this task......two of the light brackets became loose. I tried to be extra careful. it was at this time that my older son and his four kids came over......so work ground to a halt! it was a nice visit.......my oldest grandson, Chase, stuck to me like glue. he loves the boats.......especially the lobster boat I was very watchful that they didn't get too cozy with the table......being real poor at being child proof. soon, it was time to say good bye.......{they got to have ice cream and cake too}........and with that, I got back to work. the fourth and fifth sections were done. it was trim and file the ends of the railing {s} at the ladder........and it was then cemented in place. the mast was placed on deck to see how it looked. .....and then the camera died. so, while it is being recharged.......I'll be thinking of what to do next.
- 747 replies
-
- 17
-
-
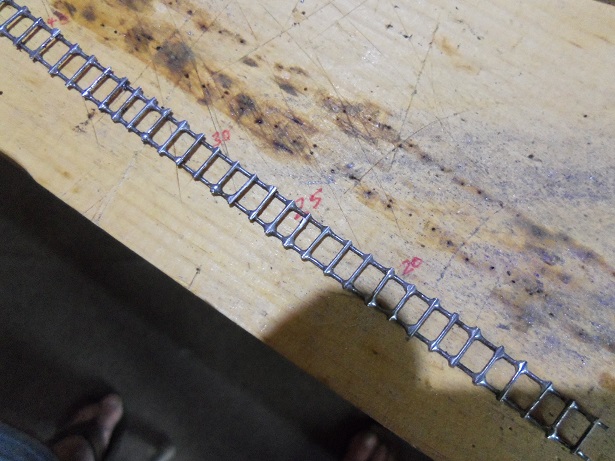
thanks for the kind comments also for the likes as well. the third strap makes the ladder look more complete......there was quite a gap after the second one I put on. a Z scale train Nenad is the smallest you will ever see a train at. the whole set up would sit nicely on my desk. I would say that four cars, side by side, would fit nicely in a cigarette pack. unfortunately......I don't own one......I do have a G scale for around our Christmas tree though. it is another hobby that I would love to get into........but I think that after a while, the admiral would shut me down. the expansion would drive her crazy :D I don't know Sjors........I'm still learning too. it's not too hard though....the only thing I really need to watch, is not to gob on the solder >continued in next post<
-
looking good bob.........you must have been reading my mind.........I did some railings this morning nice shaping!
- 348 replies
-
- 4
-
-
- pequot
- cable ship
- (and 1 more)
-
Cutty Sark by NenadM
popeye the sailor replied to NenadM's topic in - Build logs for subjects built 1851 - 1900
I have the Sergal Thermopylae. another fellow built the same kit.......or is still in the process of building it {I haven't heard or seen any progress since} http://modelshipworld.com/index.php/topic/4738-thermopylae-by-tomasg-timotej-tristan-sergal-scale-1124/ I haven't looked at the plans for a while now {i'm trying to be a good boy}, but I believe that he built the accommodation ladder for his model. one thing I would take into consideration........if your going to put sails on your model, I wouldn't include it. I have a peculiar feeling that it was left at the docks. I think something like this would be the property of the dock owner, and was only affixed to the ship at boarding time. the only ladders I feel you would see on the ship, would be escape ladders.......and they would would be made of rope. I think this is more logical........I hope someone with more knowledge, would add to this.- 4,152 replies
-
- 6
-
-
- cutty sark
- tehnodidakta
- (and 1 more)
-
interesting build Mike.........looks good from what I've seen so far
- 225 replies
-
- 3
-
-
- chaperon
- model shipways
- (and 1 more)
-
just read through your log.......such a nice job your doing kit like these are perfect, if you want to go off the beaten path. then again, most kits are 'open ended'.......you can go just about anywhere you want with them. a little modification and bash {or necromancy} and your in business. I've done a few and I think they can be more satisfying than the actual kit it's a bit late to share comments and tips for the hull.......you've done a great job of overcoming the planking and painting. but I'm going to watch further. I have a Flattie, and these two boat have a lot in common super looking boat BTW
- 165 replies
-
- 7
-
-
- cape cod catboat
- Finished
- (and 1 more)
-
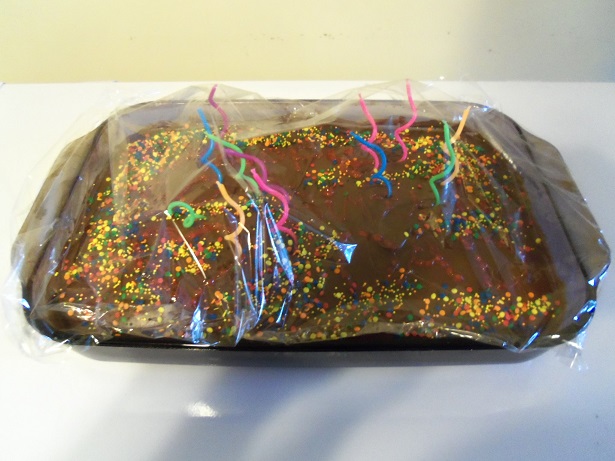
all is perfectly well Patrick had some pizza and beer......followed with some cake and ice cream.......I'm feel'in like Hoss cartright right now I didn't get much further, I'm afraid.........I added another strap to the ladder and was in the process of installing the railing, when company came over. I hope to resume tomorrow thanks for the kind comment and the likes all. oh.........I almost forgot the cake!
-
thanks for the likes everyone........didn't get much done on her today. hope to have more progress soon
-
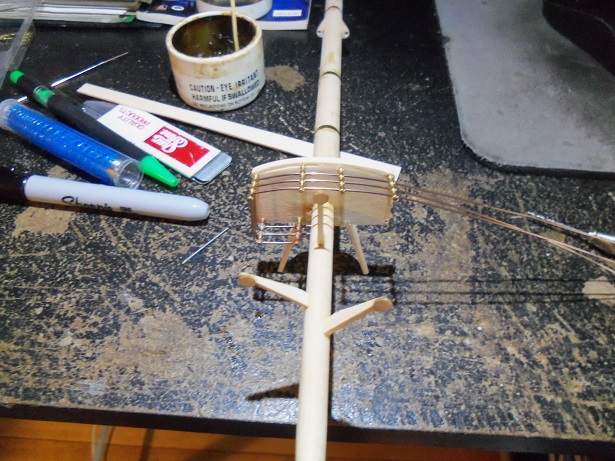
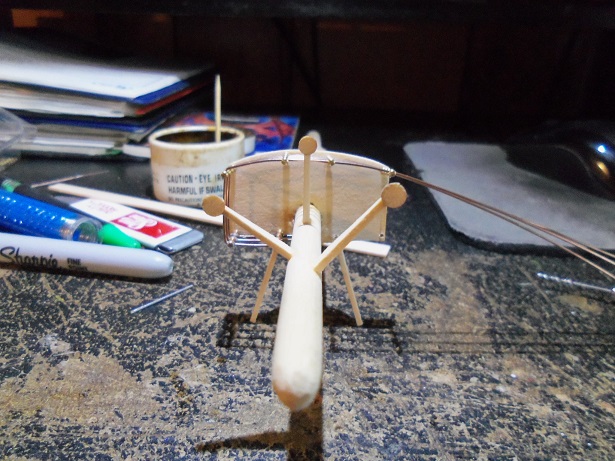
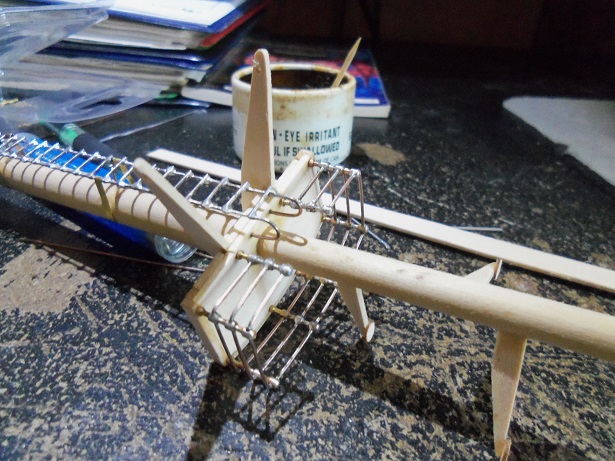
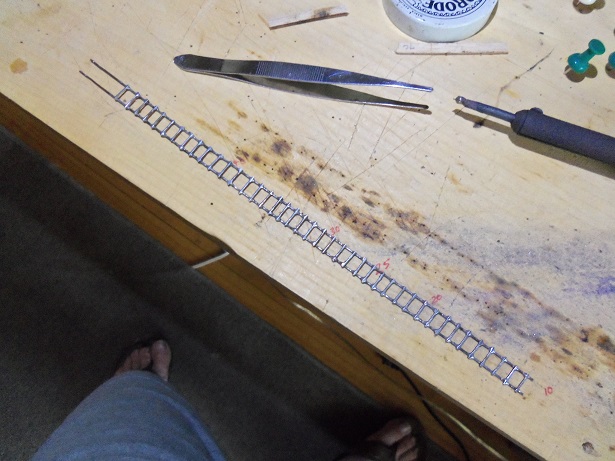
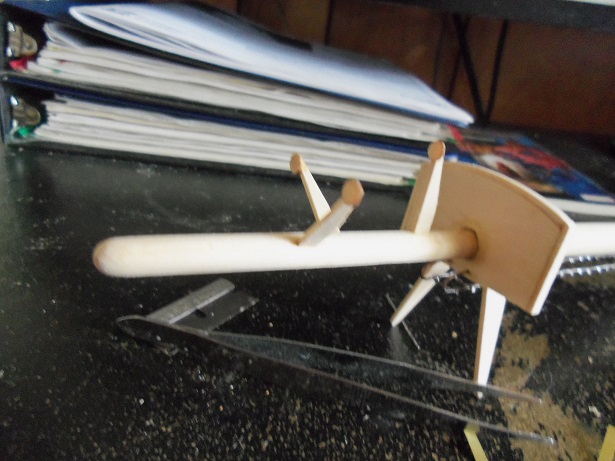
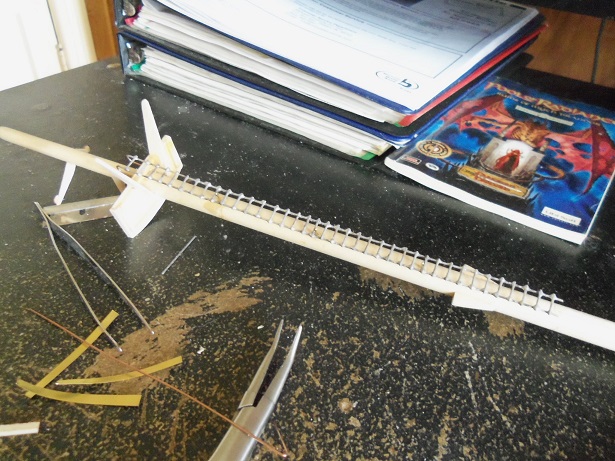
and so....the ladder is complete. it's not quite as good as I would like.......but now that I see it on the model, it's good enough. this morning, I removed it from the board and straightened the eyelets that I had bent into the top end of the uprights. knowing that the cutter would send the trimmings flying, I perched the waste basket between my legs and pointed them into it. quite a few of them went through the bag! when I was making these small pieces for the rungs, I would capture the length of wire between my fingers and snip the wire. doing this for a time, my grip became limp, and with a snip, sent one of them into my finger like an arrow! talk about bleed....... that was my only incident though.......so that was a good thing anyway.......once all that was done, I did some sanding and filing to knock down all the nubs while this was going on, some would come loose. in soldering them back on, I robbed the excess solder from some of the gobs, and made them look a bit better. filing should take care of the rest. again, I went into that little container of all the punch outs that can be had from kits. I save them and use them for a variety of things. I took a couple small circle.....cut and sanded them to {or about} the same thickness......I needed three of them. these are to be the mounting plates for the mast lights. they were cemented to the light brackets on the mast. curving the uprights at the top......I was able to locate and drill the holes in the backside of the top, to locate the ladder in place. I drilled four holes down the mast and fitted pins that will secure the ladder to the mast. somehow.......I wasn't pleased with it. OK to be secure, but what about side to side movement. I then got the idea about the strapping.........wrapping it around the mast, and attaching it to each side of the ladder. so, I cut some thin strips of brass and did just that. I have two on there now, and it seems pretty solid........I may add a third one further up the ladder {I'll need a longer strip I think}. I want to put a few more brackets under the top. then add the railing around it.....should be ready for paint by then. it will make the ladder look better.......I did a lot of filing between the rungs.......the shiny solder hides it at the moment back to work!

- 747 replies
-
- 13
-
-
thanks for the kind comments and the likes........I'm very glad to get back to this build. a couple of the builds, I still need to get stuff for, so I'm kinda hung up. I just got a fresh supply of dowels.......so that renegade fishing boat can continue, as soon as it gets it's color.........paint. perhaps even a name....... hi John........I couldn't agree more, a metal ladder would fit the bill here. I'm glad to say it's done! thanks Pat and Carl.........those are two very good ideas. I will remember them in the future. even though the rungs coming loose was a problem, it really didn't slow me down too much. I just needed to take the time to sit down and do it.........and that's what I did........I sat at my desk and did it. it feels good though to get all that stuff offa here though....it made my desk look as cluttered as my table thanks Jack, Patrick and Lawrence for the birthday wishes. to get to have a day like this, with no problems or mishaps, is all I would ever want it's been a great day thus far. I can't wait to show you what I have done this morning.........I think it came out fairly well
-
so good to see you back at the table John the beginning of the rigging looks great!
- 745 replies
-
- 3
-
-
- francis pritt
- mission ship
- (and 1 more)
-
she looks awesome on her stand.......you truly have created a wonderful model. It'll be interesting what project you do next a superb showpiece indeed!
-
looking very nice!.........the cap rails do compliment the deck!
-
if it were stowed, it would probably be brought below deck.........or on a rack, on the side of one of the cabins. if it's a rope type ladder, it may have been rolled up and stowed in some out of the way place on the deck. I'm sure they wouldn't clutter the deck.......too much going on. for something that doesn't have a lot of info.........I for one might not add it
- 525 replies
-
- 1
-
-
- cutty sark
- mantua
- (and 2 more)