


popeye the sailor
-
Posts
16,007 -
Joined
-
Last visited
Content Type
Profiles
Forums
Gallery
Events
Everything posted by popeye the sailor
-
 I don't use the dremel much either.....the dog hates the sound of it sweet looking carronades!
- 1,306 replies
-
- 5
-

-
- syren
- model shipways
- (and 1 more)
-
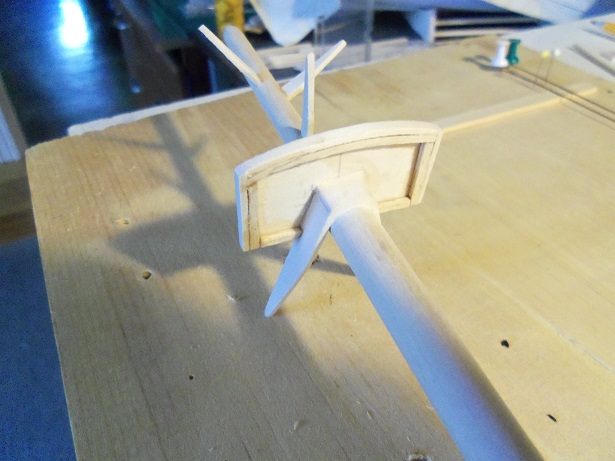
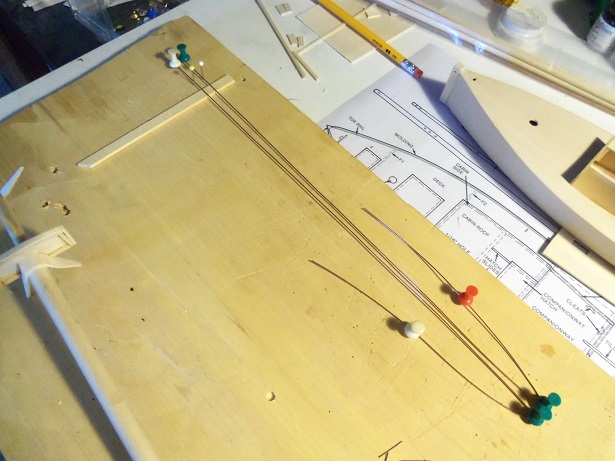
I made a bit more progress with the mast. there more to go, bu I gave it some frame work. then....if you remember, I made a mention about a ladder, if I went this route in adding the top. rather than try making one out of wood.........I'm going to try and solder something together. the welding wire is very stiff.....took like forever to get straight. I made up a jig to do this on...............making eyelets on the ends of both wires, they are fastened to the board with push pins. there is another piece of wood that has pins in it, to insure the width of the wire and to hold it steady while I solder the rungs on. the rungs will be held in place by other longer pins. this will be a long ladder, so it might take a while. I'll try and show you what it will look like.........I have a few done already.
-
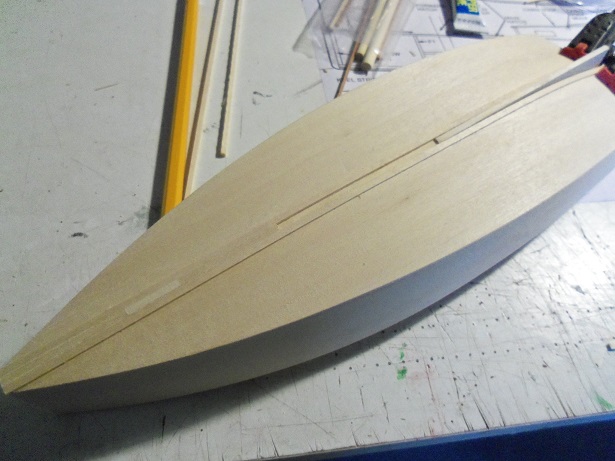
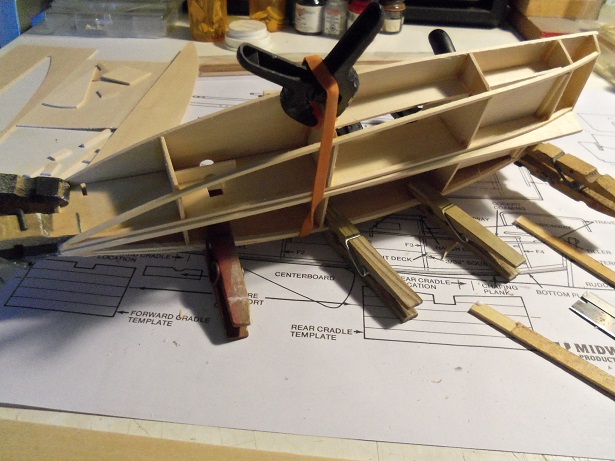
AHOY Patrick! welcome to my nightmare Midwest lives up to it's reputation......nice kit, but there are some things that the avid modeler can do to enhance the model. color can be an asset.....we'll see! thanks for the good word I didn't take too many pictures after the first hull panel. the other one was cemented in place.......I left most of the excess material up along the deck. it looked kinda cool........like a bulwark....all I would have needed to do, was to add posts along the sides. I then thought........a bow spirit......a second jib sail..........but the decking along the cockpit and cabin ruled that out. it would look silly. the bottom panels were also added to the hull......again with the excess over hang material. this will be trimmed off and the edge sanded smooth. the over hang along the deck was trimmed off as well, sanding the edges flush to the deck. it can be seen what I meant about sanding the keel........very uneven where it joins the bottom panel halves together. two chafing planks will be added along both sides the keel. since that isn't going to be possible, to produce a flat surface here, I'm going to need to sand the keel flush with the bottom and fill the center in. there is a center board {leeboard} that is to be installed just before the start of the incline, of the keel fin {term needed here......errrr, skeg?}. I left that slot open for it's location.........I will cut it down to show it in the retracted position. sanding took out most of the skeg's starting point.........I build it up with some 1/32 flat stock and added the stern post. I'll have to check the camera.........I know there were more pictures, as well as some of the progress made on the Syborn. I'll be back

-
hello Nenad.........yea........another one. this should be a short build though, or I might have thought twice about lay'in glue to it. now.........I could have made the admiral happy and started the Thermopylae, but with the thoughts I have about that kit.......everyone would have thought I really went off my nut! all I will say......is that the hull is well worth cloning enjoy the build my friend..........the possibility of bashing this build is tough at this point, due to it's construction. but.....there is still hope! this is a much larger session than the other ones {so far}.......I'll put a little meat to this post the frame is sanded at this time....time to install the side panels. makes me laugh that they call this planking. the overhang is also seen here as well........all of these parts are over sized for proper fitting. I had an evil thought to make another transom part, and move it back, but that would have made the aft deck look too wide, so I opted not to. I should have trimmed this beforehand, but I guess now is as good a time as any.
-
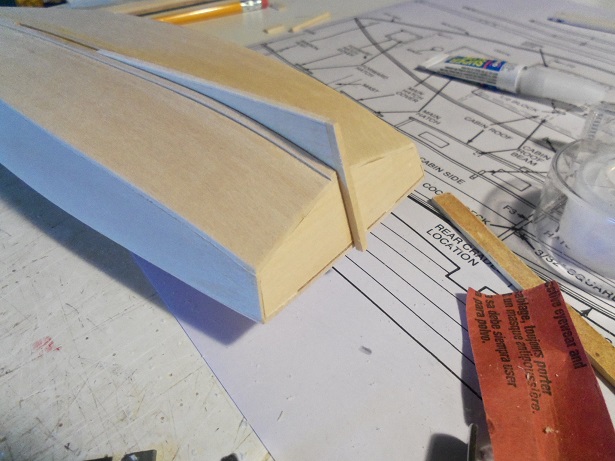
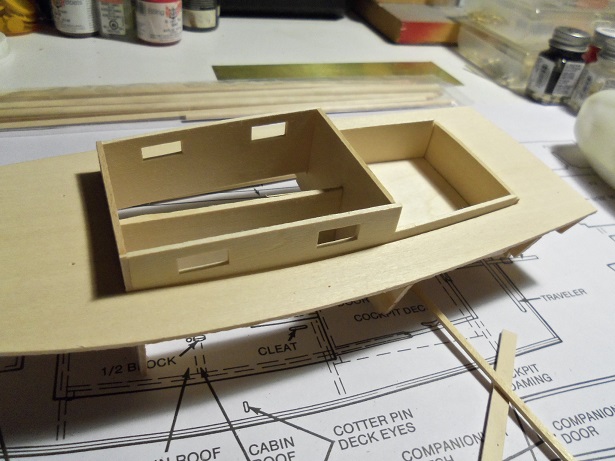
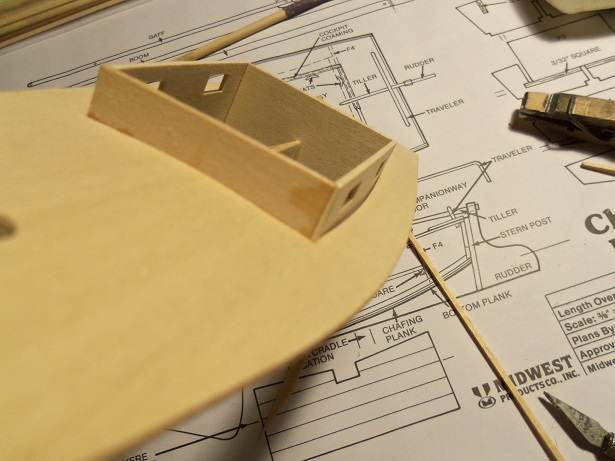
the next day heralded the second session. I was still plagued with the "headaches".......one being my son's car. for anyone who has car knowledge....in drive a car normally idles around 600 - 700 rpms.............his car, out of the blue, would shoot up to 2200 rpms! no rhyme or reason......and with no mechanical movement when it would do it. no check engine light either, which made it even harder to ascertain. I nailed it down to the AIC valve........I replaced it, and all seemed fine. he called telling me that his check engine light is on........come to find out, he had gotten some gas and didn't tighten the cap enough nice it's something to laugh about anyway..........enough about me..........how are you? I ask that of all my friends the cabin sides are fitted into place........I did a little more hand bending. perhaps I should have used a bigger pencil there is some issues with the fit.......the F3 cabin wall area isn't wide enough. I had to add about 1/32 to the width so it would even out at the port corner. I also had to adjust the height of the cockpit floor.....daylight can be seen in the back. the rest can be adjusted with sanding. it was time to add the chine stringers and the keel stringers. 3/32 square stock was used....and of course the openings needed to be made bigger for them to fit properly. the chine stringers needed to be trimmed at an angle so it could meet the keel stringers at the bow. you can see that a pair of "bow stiffeners" were added to the bow line as well. the two sides need sanding now, so the hull panels can be cemented into place. for now though.........I have an errand to be run >sigh<
-
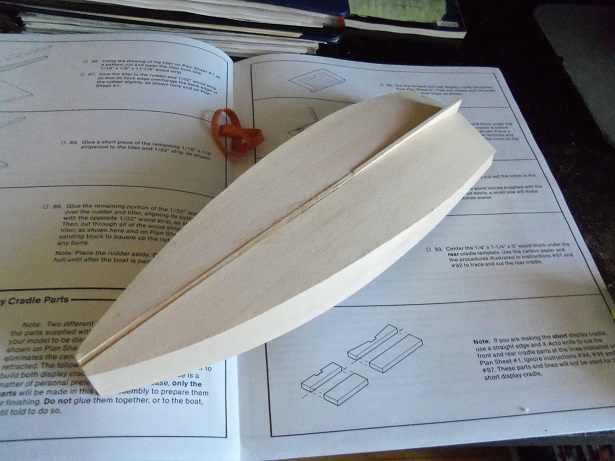
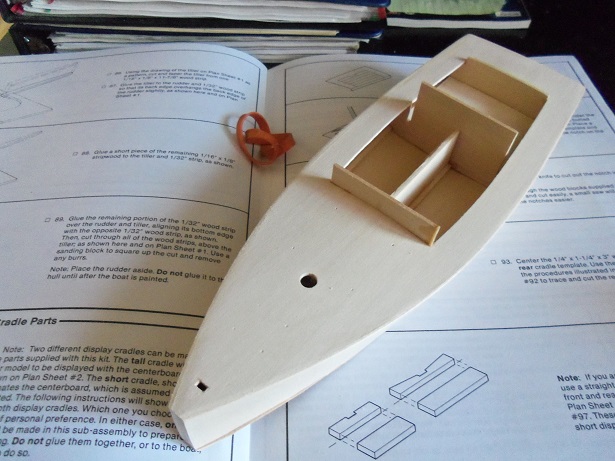
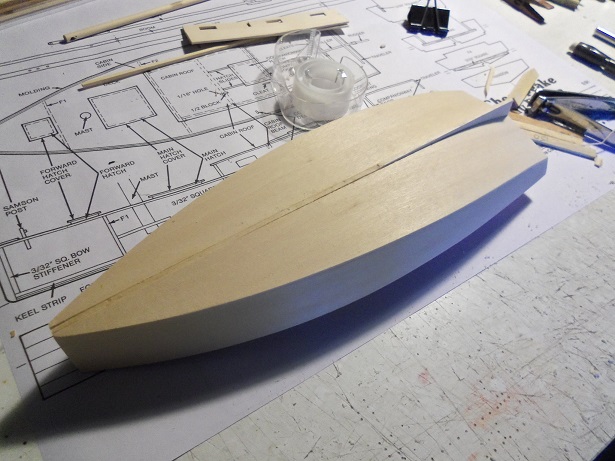
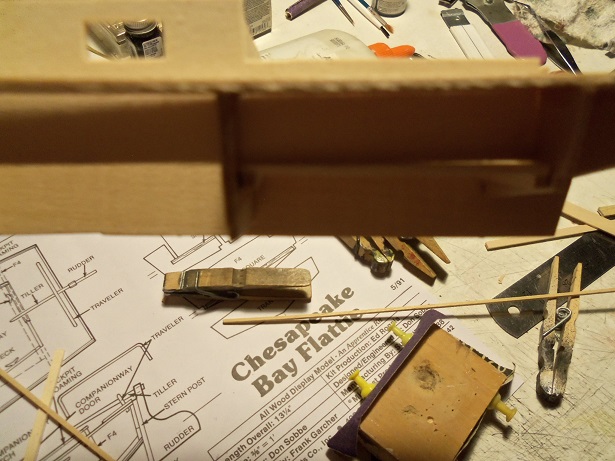
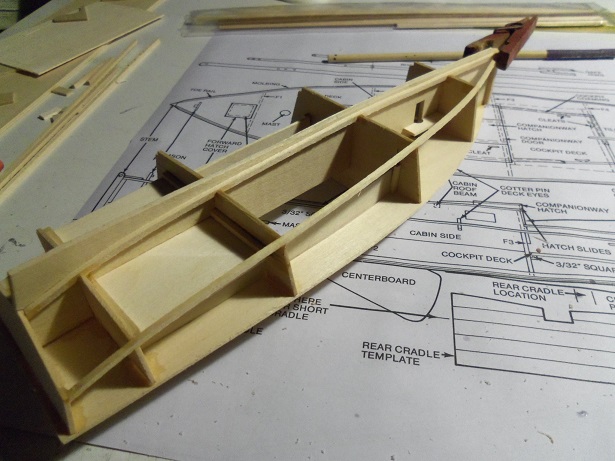
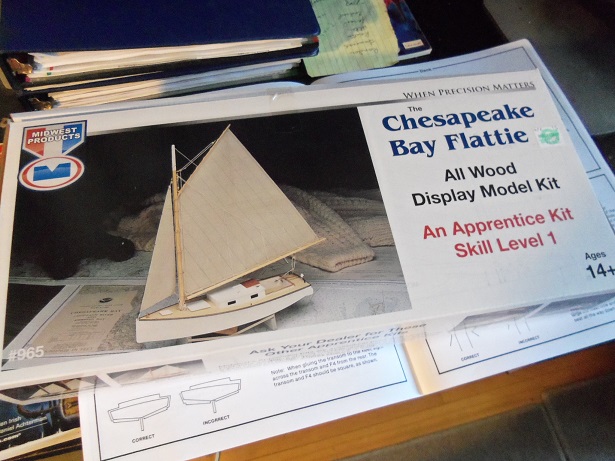
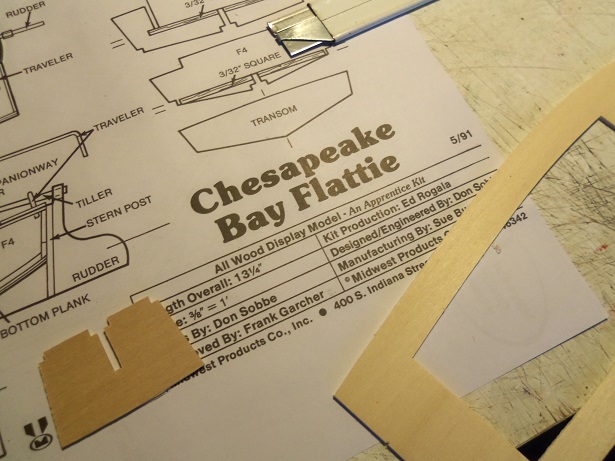
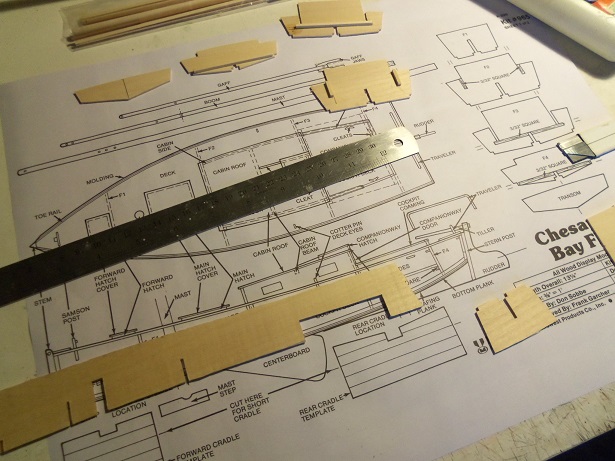
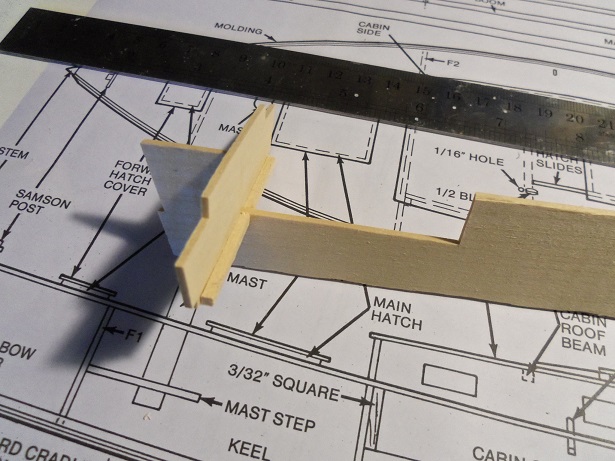
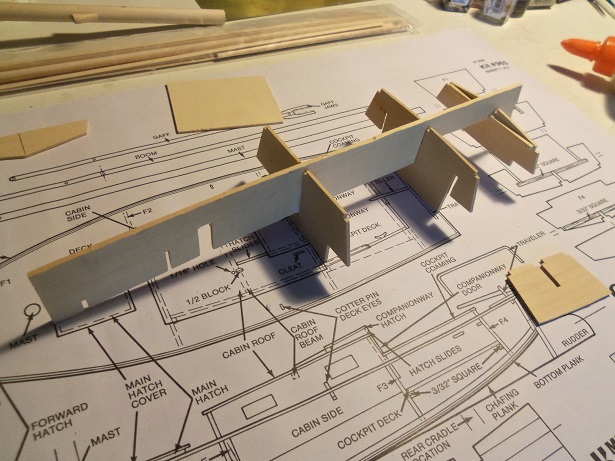
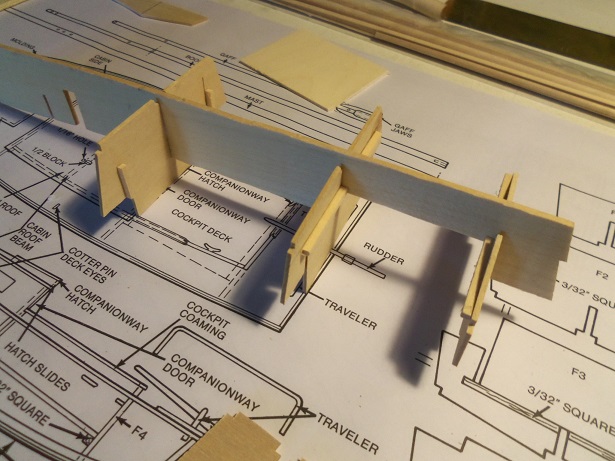
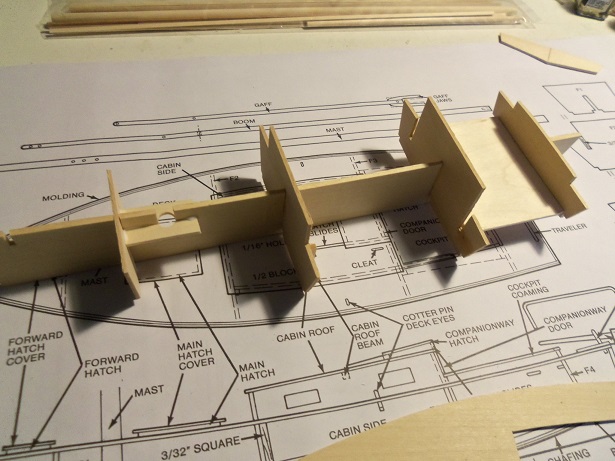
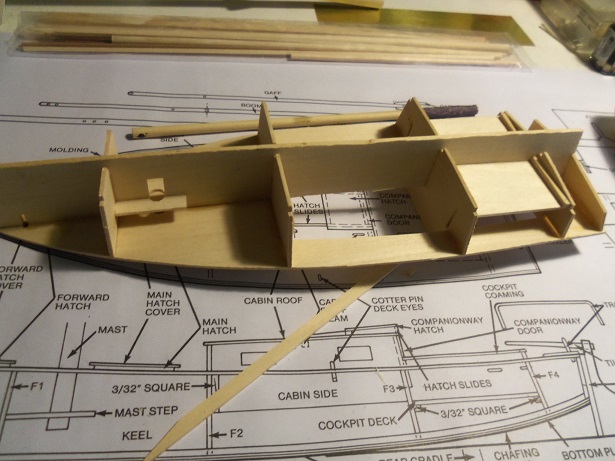
The Christmas tree boat is now a reality. I've been trying to break away to do other things, but it just wouldn't let me go! it wasn't due to the ideas that were running through my mind at the time.....it was just everything around me. from working on cars, and work in general.....to events around the home....it just felt like a weight was sitting on my head, weighing me down. one week........to two weeks..........I could only endure short stints at the table. I wasn't there.......and there seemed little use to push.........this couch potato crap had GOT to go! I've had this kit for about a year now.........the admiral saw it and thought it looked cute. I'd pull it out every once in a while and tinker with it......without the application of glue, when I'd sit at my computer hatching idea for the other builds. I had a few for this kit too......the reason for all the dry fitting. I was planning a multi-boat build with this kit, but I have since given up the project. there are much bigger fish to fry, rather than spend my time bashing the crap out of a level 1 kit. I should have done what I was going to do earlier........start the mast work on the trawler Syborn, but I was still suffering from the mental block........so I brought this kit out to tinker with. once the glue touched the wood.......there was no turning back. I didn't have to remove the hull parts from the panels......that was already done. small ans short pieces of 3/32 square stock need to be cemented onto the bulkheads, in specific places to act as assembly tabs. some trimming was needed to clear the assembly slots.........and of course, figuring out the lingo of sliding thing over and onto. but the assembly of the frame was under way........no real rocket science to make them straight. the deck platform and the mast collars were added to the frame at this time. the deck was cemented on next. I had begun to think that there was a problem......it had a overhang at the transom of roughly 1/4 of an inch. I later came to the conclusion that these parts are merely over sized, to allow for fitting and sanding. the cut of the keel part is pretty rough.........I did a little sanding which was a bad move {you'll see later}. adjustments were made and allowed to dry.........the two pieces of the cabin needed to be bent, in the meantime. I normally do this simply by getting the parts wet {water}, and bending them by hand. in the instructions, they say to use alcohol.......so that's what I did. it worked, but I still like my way better. I did get to do something to the Syborn's mast....I posted it already. through the sessions with this model, I've done a little more here and there....and the muddled mind syndrome is beginning to clear. glad to see that there is hope, and that pulling this kit out wasn't a complete waste of time.
-
looking sharp Isabella.......are there any more cannons to put in? if the instructions are anything like the ones we see.......your better off using them just as a reference! :D I believe constructo has a kit like that out there. glad to see your having a fun time with this kit.........hope to see you continue.
- 35 replies
-
- 3
-
-
- pirate ship
- pirateology
- (and 1 more)
-
planking is coming along really great! have a smooth trip
- 339 replies
-
- 3
-
-
- dumas
- Chris-Craft
- (and 3 more)
-
thanks Jesse and Frank......it's been a while since I last posted on this build. there's still much more to go on her....so there's still more to see welcome and hope you follow 'till the end thanks Pat.......I'm just glad {and fortunate} that it isn't 'cuz of sickness.......way too much of that going around. spending more time on the Tree Boat as I did, ........the thought process flows better doing timely things, rather than to make time for the transition of events. I should have started the mast when I was thinking of it. we'll see how much of what I was thinking about.......I can remember
-
I always say "insanity has it's rewards!" the railings are a nice touch.......and the bow looks even better with the new hardware. great looking ship Patrick, which is further emphasized by the scale you've done it at
-
so...these are made from the molds?........must have been tough to clean out the shieve holes. really nice work Daniel!
-
hull and deck looks great Frank! I have a hard time getting that color.........I use mahogany and Anegree. I just got a good supply of .05 basswood strips, so now I can stain to whatever color I desire I like your choice of hull color too
-
nice to meet you Isabella.....I hope you enjoy the medium enough to continue. there are plenty of kits out there for your age group Kudos Grandfather!
- 35 replies
-
- 3
-
-
- pirate ship
- pirateology
- (and 1 more)
-
thanks Lawrence......it just the beginnings of the mast....I have more to add. I have been disheveled of late.......the mind has been too cluttered to spend time at the table. I do feel better, now that the tree boat looks more in line to what it should look like. I wanted to spend some time here with the trawler, but the process to get me where I wanted to be was a bit longer than anticipated. I have one more day of work....... thanks for the good word...I appreciate it
-
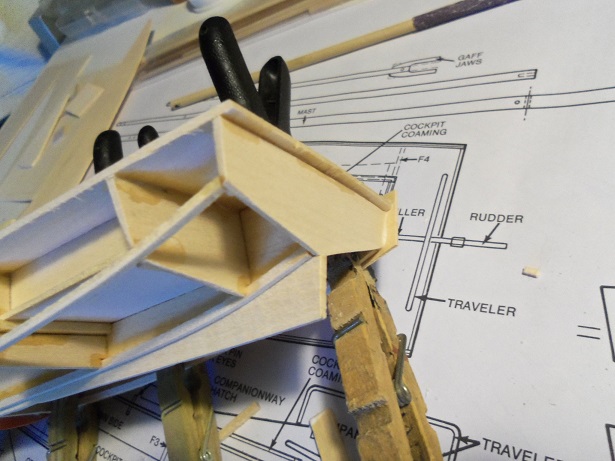
thanks Patrick and to all who hit the like button. Friday didn't turn out as I would have liked.......I wanted to add more framework and the pads for the lights. now I am in my work week....two more days to go. the catalyst for this flurry of activity, is upside down on my main table, awaiting the hull sides and bottom panels {they call it planking, but I think they have rocks in their heads}. if anyone remembers the Maine Lobster boat........I really stunk at doing this type of assembly.....and ended up actually planking the hull. more will come soon
-
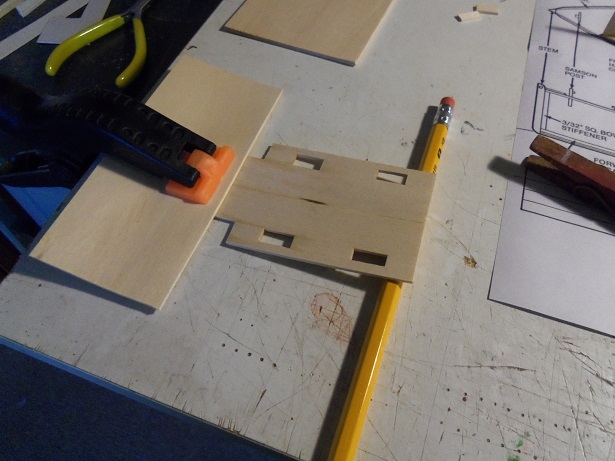
....I knew they were push pins! brilliantly done! of course.......if a plan was used, there would be no freedom. wonderful work and very resourceful. looking forward in seeing your next build
- 34 replies
-
- 7
-
-
- steamer
- sternwheeler
- (and 1 more)
-
you have some work ahead of you have you given any thought on the ship's boats........looks to be the largest hurdle.
- 2,625 replies
-
- 4
-
-
- kaiser wilhelm der grosse
- passenger steamer
- (and 1 more)
-
hull's look'in great Jerry.........super job on the cap rails! great that your following a practicum.......but what good is it if you can't cheat a little? just kidding......they are a wealth of information. but there are time when you have something that may work better...or even a technique that would make the task easier. your doing a fantastic job...........in good 'ole Jerry fashion!
-
sorry to hear your not feeling well paint can certainly be a bother sometimes.....but you learned something, so something a little good came from it. keep at it my friend......you've done some great work so far.
-
you did a super job of cutting all those ports out...........
-
hi there Sjors! can you do those little boats in your sleep yet? they look really good my friend! very nice indeed!
- 1,616 replies
-
- 3
-
-
- caldercraft
- agamemnon
- (and 1 more)
-
just catching up Bob........sorry to hear about the Cheerful. glad that you were able to repair her. I've had a few bumps with some of my builds {most were self inflicted}. no use cry'in.........just fix'em and move on. you did great very nice progress on the Granado.........very neat and tidy really nice work!
-
sorry to hear you've not felt up to snuff..........what you've done so far under the circumstances, is amazing. to what others have suggested to leave be, you've gone the extra mile to make them right....your awesome! I hope there is improvement in your future our youngest just left the nest..........funny, I was always the one who relied on 'tough love'. I'll admit..........I miss the little scrapper while it does leave one with an empty feeling, we all know that they need to pave their own roads keep that upper lip stiff my friend!
- 1,306 replies
-
- 8
-
-
- syren
- model shipways
- (and 1 more)
-
now.....that looks SWEET Bug!!! wonderfully done! finger's crossed the other side is just as good
- 2,191 replies
-
- 5
-
-
- confederacy
- Model Shipways
- (and 1 more)