


popeye the sailor
-
Posts
16,007 -
Joined
-
Last visited
Content Type
Profiles
Forums
Gallery
Events
Everything posted by popeye the sailor
-
 something the admiral said to me the other day, when we were at Hobby Lobby. I was looking at the large scale kits......yes....plastic. I saw a B24 Liberator........and a B25 Mitchel........I love those old bombers...........Richard Petty's race car at 1/16 scale caught my eye as well. by now, the admiral was beginning to go into convulsions.....and she blurts out........"but you haven't even built the Jolly Rogers ship I bought you!". hmmmmmm........could she be hinting at #9?.............Beatles revelation?.........?! I further made the eyes roll when I mentioned #9.........and even more so, when I told her that I wished I had a gift card for Hobby Town.......they have a better selection how many nails DOES it take to close a coffin?.........the world may never know :D :D
- 382 replies
-
- 3
-

-
- stadacona
- sylvan scale models
- (and 1 more)
-
looking at pictures of actual rigging, I'd say you hit the nail on the head.........superb work!
- 755 replies
-
- 1
-
-
- finished
- caldercraft
- (and 1 more)
-
I'll have to check it out........until you mentioned it, I didn't think you had more than one build going on of course, with the number of builds I have going on.........it all seems rather natural :D
- 208 replies
-
- 1
-
-
- meridea
- repair ship
- (and 1 more)
-
I airbrush in the cellar in the winter..........in the garage in the summer months. I'd love to make a booth for in the house......but the admiral would kill me! I'm not a big user of the rattle can, since I turned to the airbrush.......but I used my Christmas money. I was so tempted to buy the Ecto-1........they also had the Richard Petty car in 1/16 scale........that would have been cool too the admiral shares your thoughts as well John........you should have seen the look on her face when she found out about the eight builds in que :D :D I really don't need another airbrush........but at that price, I couldn't pass up the spare parts
-
yes.......it's true Bob.......I only had that one thing to do. she's back on the shelf now thanks for the good word! getting carried away is what caused me to build the two in the first place........but I'd do it again in a heartbeat thanks for the good word Bug! thanks Daniel...I'm glad you enjoyed it speaking of my other builds........I'd better get hopping on'em. thanks for the good word!
- 552 replies
-
- 1
-
-
- maine lobster boat
- Midwest Products
- (and 1 more)
-
awesome progress Andy!!! I'm gonna show this to the admiral.........tell her I wanna do this too!.....ummmmm, on second thought, I might wait........it might not end well! :D :D
- 382 replies
-
- 4
-
-
- stadacona
- sylvan scale models
- (and 1 more)
-
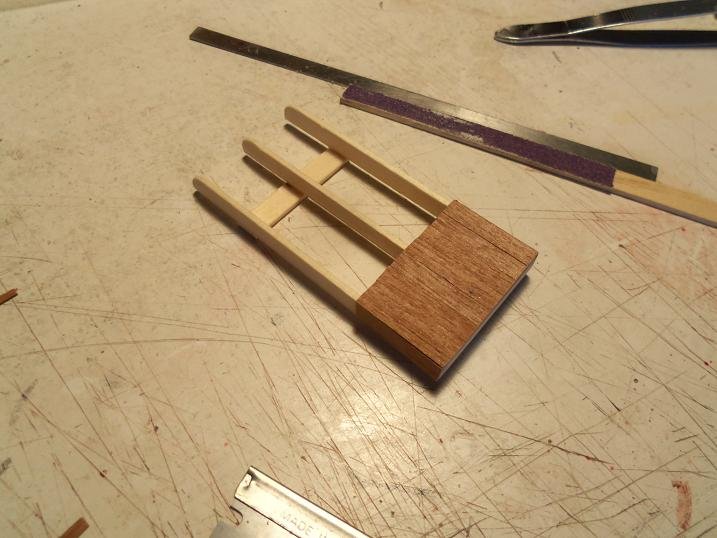
I did a bit more with the planking.......a small advancement here, but I cut out the parts for the stands, and thought I would assemble them, so they will be ready when I need them. one of the stand parts was cut inside the punch-out for one of the ribs, so I don't have the template. I traced them from the Boulogne stand. I did a little sanding after I had cut them out, and now I need to drill the holes for the dowels that connect the two ends together. the hull I dubbed Curly is almost done......I just have to close up one side. I can them do the filler and sanding........I've done some sanding already. the hull dubbed Larry is still the next in line ....and the hull dubbed Moe has retired to the closet....his ribs hurt from the laughing spell earlier. he's out of sight, but not out of mind. I also want to get a feel for the deck platforms. if your following the Boulogne Etaples build, you saw the hole in the center of the deck that I had to fill in. with these decks, I don't want to have to do that, so I want to try making them as a one piece platform. I will be doing one of them a bit differently, since LED lighting will be installed......that, I still need to do some testing and set up on. these are the parts panels the platforms will be traced from I'll be doing more with the stands soon.


-
I did a bit more with the scavenger hunt .......although I have a feeling that the holiday part of it might have to wait. it's OK.......I guess.......there's still a lot to do before the decor goes on. the hunt took a different direction as well. I went to Hobby Lobby in the hopes that they carried the model master semi gloss lacquer for the Half Moon. I didn't see it in the 1 oz bottles.......however, I did find it in the rattle can. they only had it in gloss and flat........I chose the flat {of course} I also took a look in the clearance area as well.........I didn't need it, but it was too good a deal to pass up! this is the 'Amazing air airbrush kit' that I have been raving about. this kit sells for about $30.00....it comes with the airbrush, adapted to a can of compressed air {included}......the caps for the 1/4 oz bottles....siphon tubes and wire cleaner.....and this one comes with five bottles of paint. this one, I found out later, comes with acrylic paints. I don't use them....but I'll find a use for them somewhere someone bought it......used it and made a mess of it.....and then returned it. the price in itself, was enough to make me snatch it up! the airbrush wasn't seen in the tray.......I later found it tucked underneath the tray inside the box. all I saw was the can of air, the caps, and the paints.....still looked like a good deal for me. I have had mine for well over a year now.........through repeated cleaning, the caps do get worn and I've had to throw a couple away. I adapted mine to run off of my big compressor.......I will probably do the same thing to this one. I haven't bothered to experience it, but I have heard that if the can is used, it tends to ice up when used for a prolonged period........when in use, the can should be put in a bowl of warm water to prevent this from happening. I noticed that there was another sticker under the clearance sticker........being curious, I had to see what they had marked it down to previously.......it was $10.19... what a deal! the airbrush itself.......it is a siphon system.......siphon tubes are inserted in the caps, which in turn, are screwed onto the 1/4 oz bottles {Testor's, Pactra, Humbrol }. the tubes are missing in the kit, but I'm sure I can find suitable tubing to replace them. Testor's sells empty 1/4 oz bottles......but you can buy the small bottles of thinner......I usually buy the larger bottles and just dump them in....there you go....empty bottles! I had to clean it up a little.......I can see what happened. instead of using the acrylic paint......they used enamel......and they didn't thin the paint. two of the caps were used, and they were caked with paint. since the caps are made of a soft plastic.....I soaked them in a soapy solution, and removed almost all of the paint........I just have to clean the nozzles. I can just imagine the mess that insued! closer inspection of the can fitting shows that there is some damage........not sure how many cans can be used before this has to be replaced........or, if you can get this fitting. this is a good reason for adapting it to a small compressor, or as I have done. I have two other airbrushes......an Aztek A320 siphon feed with every tip I'll ever need, and a Spraycraft gravity feed that comes complete with a compressor. I haven't had the need to use them yet......they are still new in the box. I had originally bought the 'amazing air camo kit'....comes with flat paints. the only thing I can say about this kit, is that you can't do fine lines.......but for general painting and stenciling, it works great. I figured I'd go off on this little tangent........at the moment, my battery drill is charging up for the next update........it should be ready by now


-
thanks Wayne.......it's about time I put the finish to this one
- 552 replies
-
- 1
-
-
- maine lobster boat
- Midwest Products
- (and 1 more)
-
I hope everything goes well for you Mick
-
well into your masting I see..........very nice start! wish I had a lathe like that.........I still do it the primitive way nice step work and the woolling addition is a nice touch very nice!
-
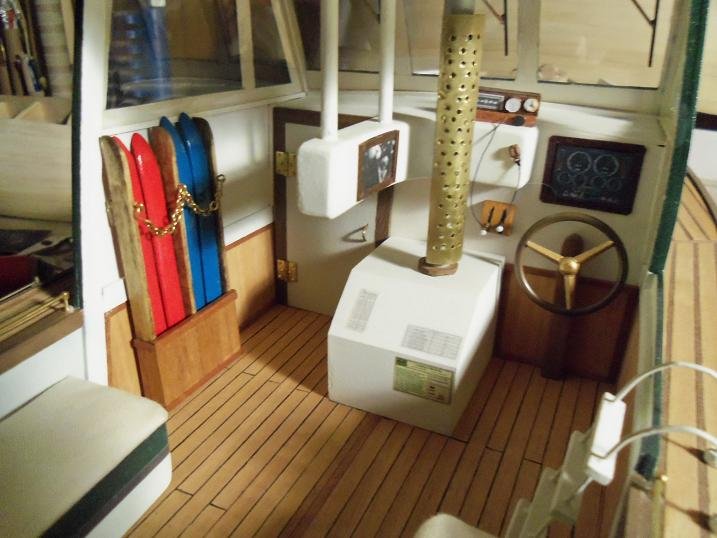
thank you all.........even though it is a bit of a cop-out, the skis are on the model now I don't have to keep track of them anymore.....YIPPIE!!!!!!! it would have probably looked cool to have them around the deck somewhere, but the rack might have turned out to be an after thought. since I failed to get a good shape for the bindings.......this turned out to be the next best thing. this completes the subject of the build.....and there you have it.
- 552 replies
-
- 1
-
-
- maine lobster boat
- Midwest Products
- (and 1 more)
-
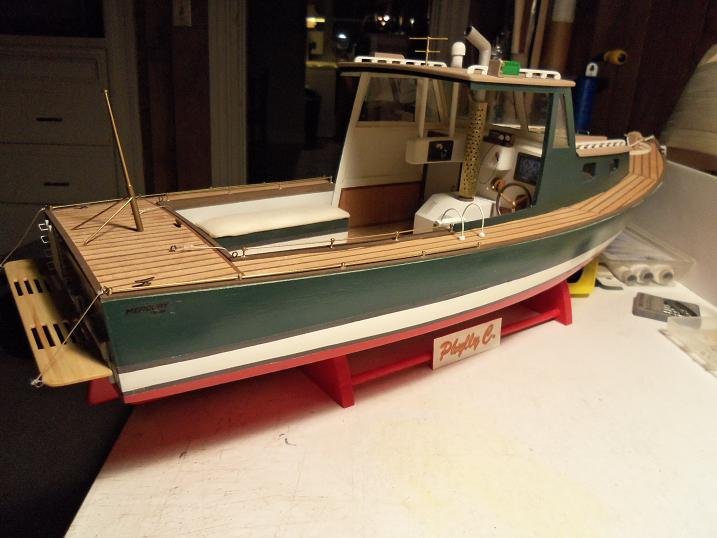
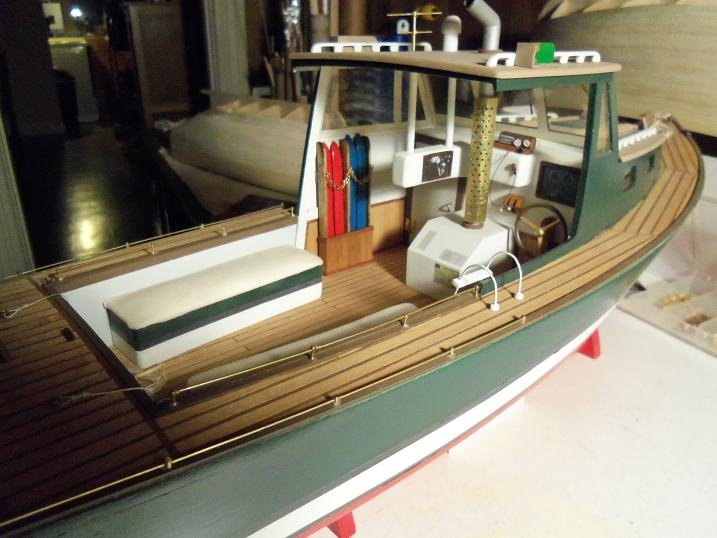
I finished off the rack........there really wasn't much else to do. in the last picture, I had drilled the holes and installed the eye bolts. I didn't cement them in in case I needed to remove them for any reason. I did have to remove the center one.....a piece of chain was captured in the eyelet. then all three were cemented in place. the skis were then cemented in place and the chains were hung on the outer ones with hooks that I had fashioned from a couple of other eye bolts. the Phylly C was ready to accept the new addition ........and then the rack was cemented in place. nothing to it I feel better already..........this build is hear-by finished. this build turned out to be quite a bit of fun, aside from my getting carried away. I still have the plans......who knows.......I may even come up with yet another variant.........I do have one in mind. but not right just yet.........the admiral would kill me if I did....LOL! thanks to all for the comments and looking in......I hope you enjoyed it!

- 552 replies
-
- 10
-
-
- maine lobster boat
- Midwest Products
- (and 1 more)
-
hee...hee......that was the industrial modeler in you......crying to get out! :D :D we had the same style of roofing in our gym....I too marveled at how symmetrical it was
- 382 replies
-
- 1
-
-
- stadacona
- sylvan scale models
- (and 1 more)
-
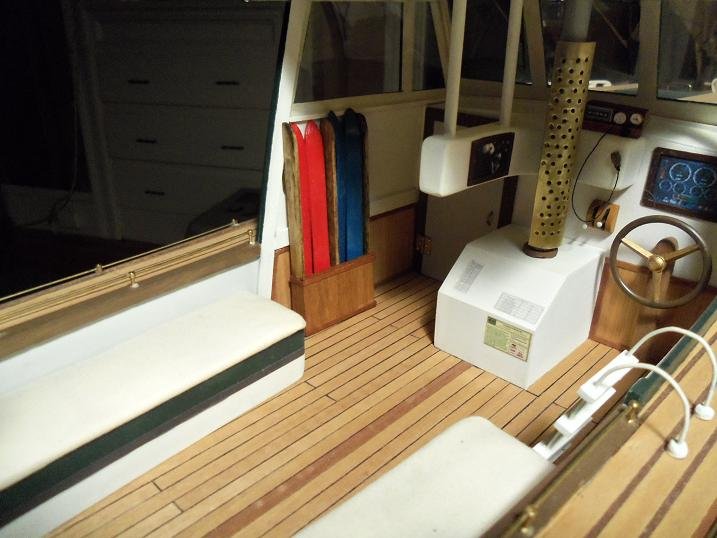
thanks Bug....once I get the bling on it, I can get it installed. then the build will be complete
-
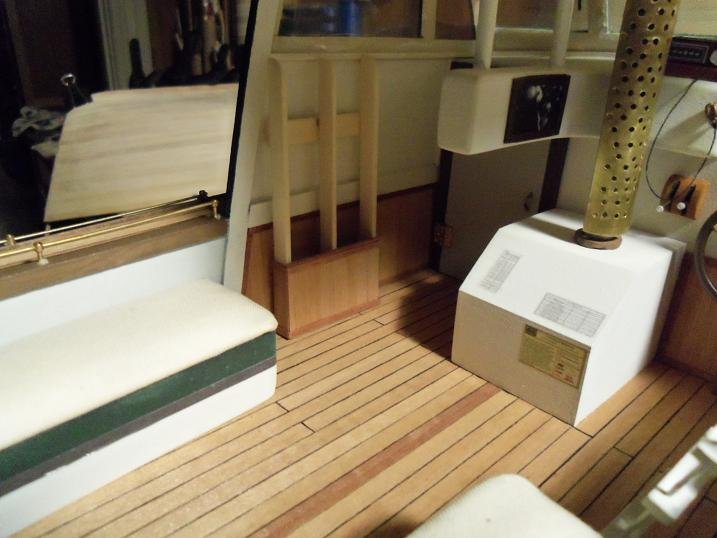
nice looking flooring.........as long as it is level with the keel, it's all good
-
but these are water skis Augie..............oh, I get it.........hard water....right?!?!?! :D :D thanks for the head's up thanks for the good word Bob.......next update should finish them up
-
your build is coming along quite nicely..........I can see what you mean about the prop size. hull paint looks great!
-
well.......it was a lot of work! but, you made short work of it the planking looks great! it will look even better with the keel and other bits of trim on there! great job!
-
looking very nice Russ........the starboard side is done {white}. so you'll be painting the port side the same? sweet! decking looks great so far........will look nice when done
-
she's looking mighty sharp.....you've made a lot of progress on the tower! nice work.....indeed!
-
looking sharp Mark.......but you might want to check that rail at the starboard bow.......looks like it crept up a little on ya. I can't wait to see the hull completely planks.........she's gonna look sweet!
-
spending lots of time in the ship yard........very good! Meridea looks real sweet! that must be your tug in the picture as well
-
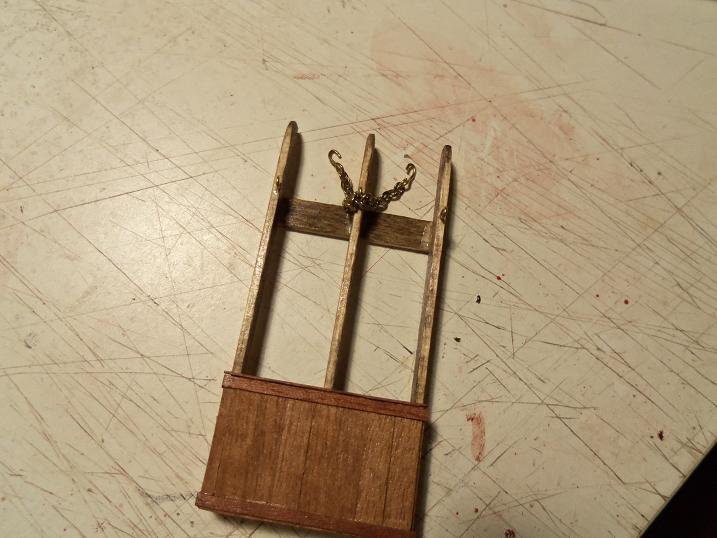
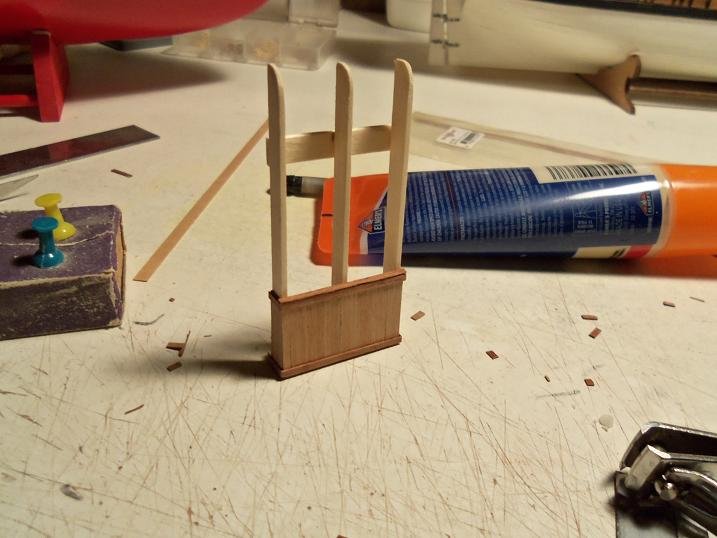
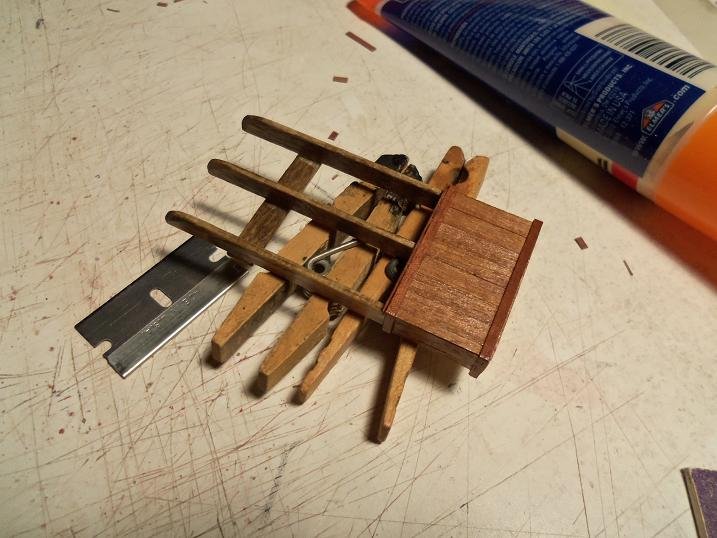
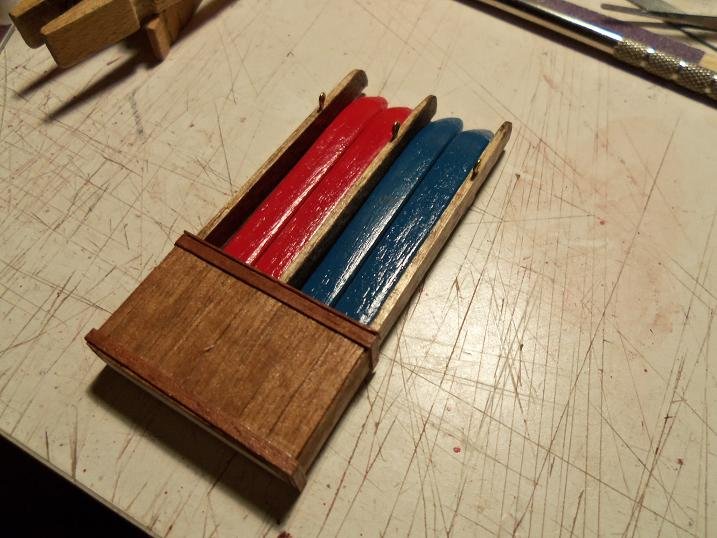
last week I did more work on the rack.........I thought it to be a small task, but it's kinda dragged on. I have had a nasty cold........it's now a dull roar, and I feel much better. I had done more sanding and shaping to the rack.....since I could not find the original wainscoting I had made for the build, I just improvised around the base. so it wouldn't get lost against the wall, I gave it a light stain and a coat of lacquer. now it's time for a little bit of hardware. as you can see, the depth of the rack, hides the fact that the skis have no bindings.
- 552 replies
-
- 4
-
-
- maine lobster boat
- Midwest Products
- (and 1 more)
-
gee........if I had known you collected chess sets, I could have mentioned my Civil war set..........just sold it last week


