popeye the sailor
-
Posts
16,007 -
Joined
-
Last visited
Content Type
Profiles
Forums
Gallery
Events
Everything posted by popeye the sailor
-
 very nicely done Vivian! I'm one of those guys that pull the brads out to use another day.........but hey..........it's all good you can buy flat lacquer.......gives a nice hard finish without the shine. I use a semi gloss......over time the shine begins to dull down. your doing some really good work.......keep going.....your doing great!
 -
however you do it Den..........I'm sure it will look great! pictures............yum...........pictures! cool idea with the flags...........I've been just painting them with diluted white glue and toss'in 'em on something wavy {just kidding}....I shape them before they are dry
- 555 replies
-
- 1
-

-
- sovereign of the seas
- mantua
- (and 1 more)
-
great looking ship Peter.........I've not seen one of these Billing's kit before. I was following it from the beginning.........glad to see your picking her back up. very nice!
-
nice progress.........the metal work is really sharp.......and it doesn't look bad painted
-
NICE!!! and you left more than enough room for the pin rails............looking good!
-
making some good progress there, Sjors..........the rats look great!
- 1,873 replies
-
- 1
-
-
- occre
- san ildefonso
- (and 1 more)
-
Cutty Sark by NenadM
popeye the sailor replied to NenadM's topic in - Build logs for subjects built 1851 - 1900
the overview of the Cutty looks great Nenad.......you've made some good progress with her. you've done so much to the starboard side, but have you done anything to the port side? it'll look great when you mimic the bulwarks. -
shrouds are looking great...that's a nice shot of her, the bow, looking aft
- 1,279 replies
-
- 1
-
-
- agamemnon
- caldercraft
- (and 1 more)
-
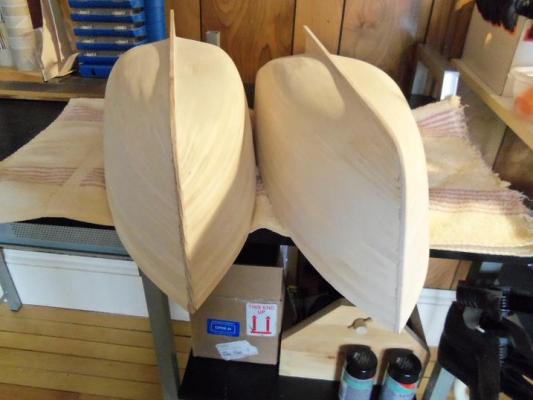
thanks Augie and Sjors.....now that I've seen both hulls together.......I'm happy with them. now.....to get them straightened out thanks for the good word! thanks Bob and Adam.....this is what I get for thinking that this hull was simple I should have known better, after the Boulogne. oh well...... thanks for the good word.......when I start to fit them out.....whoaaa...what a thought
-
good to see your back! that's quite a kudos..........congratz!
-
ahhhhh....the good 'ole "paint yourself in a corner " routine
- 555 replies
-
- 1
-
-
- sovereign of the seas
- mantua
- (and 1 more)
-
oh man! don't be doing that............you'll meet the reaper for sure! :D good to hear that your touch ups are working. you have to remember now, that you haven't done the sealer yet.........that could also have a positive effect.
-
looking really good Sjors........nice to see Fonzie back on the table! AYYYYYE! congrats centurion!
- 1,873 replies
-
- 1
-
-
- occre
- san ildefonso
- (and 1 more)
-
thanks John......two down and one to go I should pause, get these two squared away, get the rub rails on, and then give them the primer coat. hopefully soon, I can get on with one of my other builds.........long over due thanks for the good word! thanks Vivian, for the like
-
thanks Lawrence........one of these days, I need to get her in the gallery. I haven't done any proper pictures yet......or either of them for that matter. I should do that. we did a similar surf thing for our Valentines day......thanks for the good word don't be sorry........glad you found time to take a walkabout.
- 552 replies
-
- 2
-
-
- maine lobster boat
- Midwest Products
- (and 1 more)
-
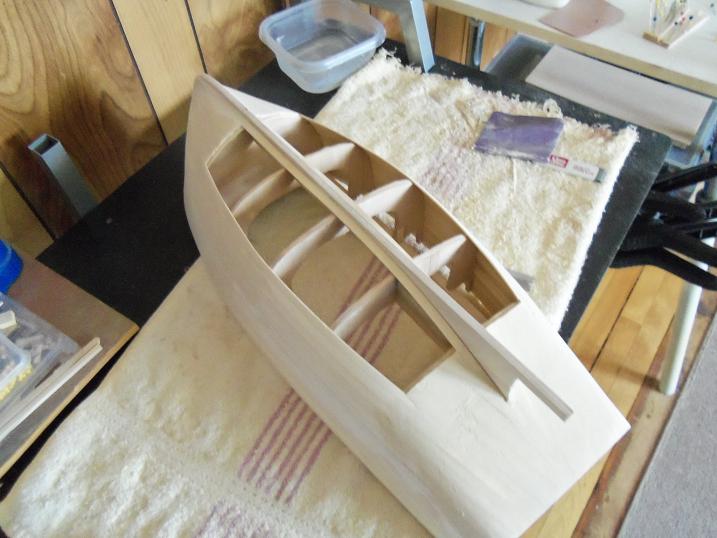
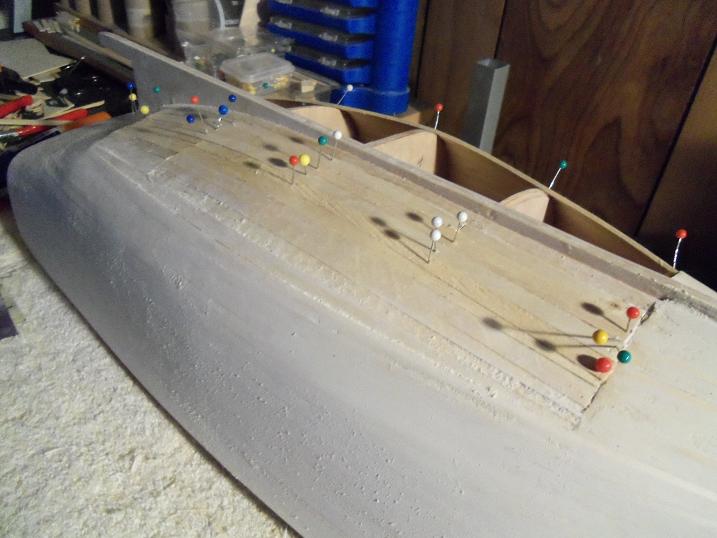
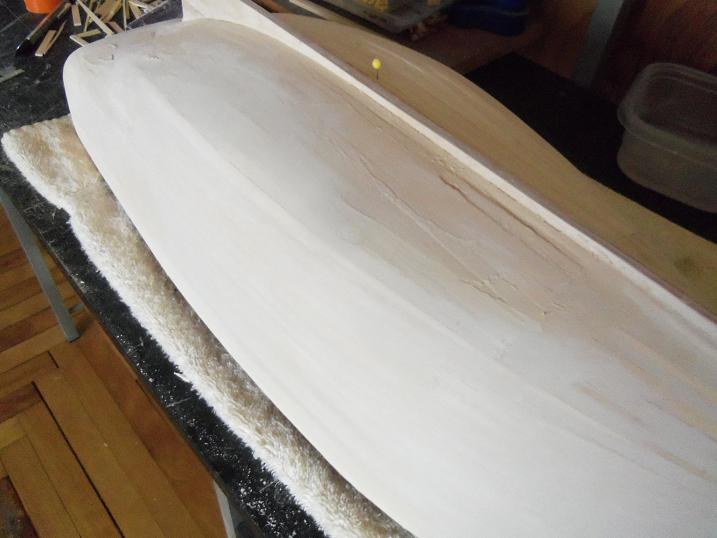
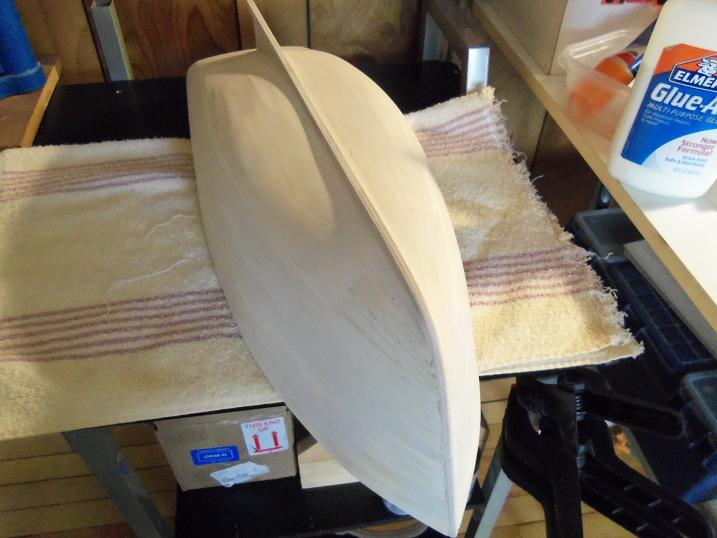
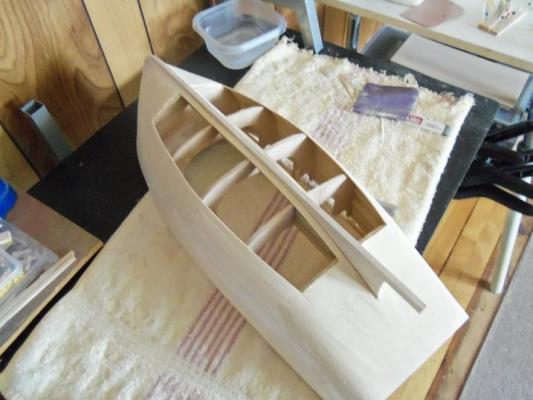
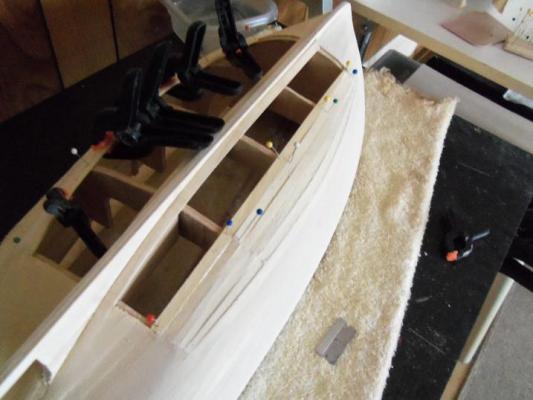
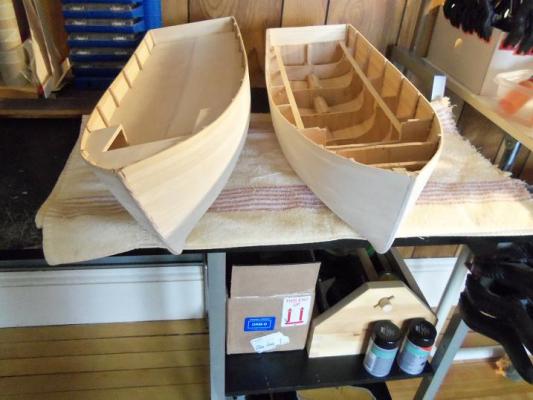
I have the pictures ready........I won't bore you with the messy details. I was going to rip off a row of planking......or two, but I thought about it. it's going to be painted anyway, so why don't I make the best, of a messy situation. so to cut down on the amount of taper, I closed off the bow and stern sections. the bow has been sanded......the stern has not. I didn't take any pictures of this procedure.....thank the image god.........it would have probably burnt out the camera's retina with this done, tapering was done to bring the line straight. the existing plank from the fill point was sanded down to meet the new planking........or...a reasonable facsimile thereof. when it was done and sanded.......it looked like this. the other side had already been done, sanded and filled. first filling looked like this and with both sides sanded.......it looks like this I compared it with the hull dubbed Curly. I didn't spend as much time with it, as I did with this one, but you'll see that ........Curly is on the left. I left Curly on the table, to give it a bit more filler. both still need a little more. I have been using that drywall sander.......it has a rubber layer under the paper.......thus accounting for the ripples you can see. I'm going to give it the wood block sanding when I do a second coat of filler.......not as much give. with the last hull, I have not progressed that far, so tapering.......and perhaps even staggered but joints, may be looked at with closer scrutiny. saving grace........with multiple hulls, I may find redemption yet.


-
I was going to go along the same line....with the Rit dyes, but I was told that over time, it would deteriorate the thread, and cause premature breakage. that's when I put it back on the shelf and went with the India Ink......I was doing standing rigging thread at the time.
-
looks fantastic! your attention to detail is amazing..........beautifully done!
-
Cutty Sark by NenadM
popeye the sailor replied to NenadM's topic in - Build logs for subjects built 1851 - 1900
I see a direction forming here...........excellent! your tests are looking very good......I wish you well in coming up with the finished product- 4,152 replies
-
- 1
-
-
- cutty sark
- tehnodidakta
- (and 1 more)
-
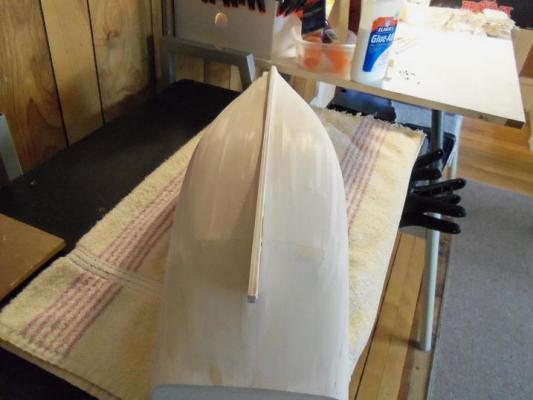
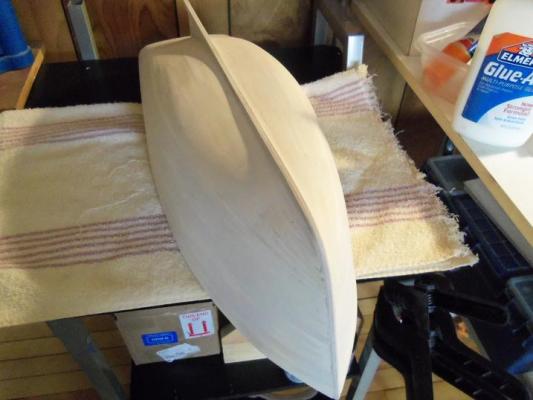
well........I'm happy to report that the hull dubbed Larry is finished as far as the planking goes. I have some pictures, but they are probably not for the squeamish. :D I was going to do some repairs from the botched planking earlier.........but I decided to develop a different coarse of action, and continue with the planking as it is. at the moment.......I'm applying more filler on the hull dubbed Curly, because for some reason, Larry looks better! of course, I didn't spend as much time on Curly, as I did Larry...........that might account for it when I get the pictures together, I will post them for you to see. I even have a comparison of the two hulls as well. thanks for looking in
-
....get used to the new colors in your hobby room.........you can keep it in mine, if you want :D you say the plating is like the others.....but I never tire with seeing the detail you put into it. beautiful work Nils........
-
to get a uniform color on a deck, is a very hard thing to do. gee........I see how some folks filter darker planks into their decks, make me wish I could get them to look that way perhaps there is a way to even out the color.....anything that will prevent ripping any of it up. your build looks superb!
-
now that looks great! the contrast is very nice.......really adds to the overall looks. the fish box lids look good.......a really sweet build!