popeye the sailor
-
Posts
16,007 -
Joined
-
Last visited
Content Type
Profiles
Forums
Gallery
Events
Everything posted by popeye the sailor
-
 thanks for the good word sherry. on the San Felipe, the knees can be made longer, so that they can be located along the side of the posts, butting up against the bulwark wall. I haven't seen these plans, but I'm guessing that is how the inner bulwark walls look. some kits even show this being done in their assembly to the bulwarks.
 -
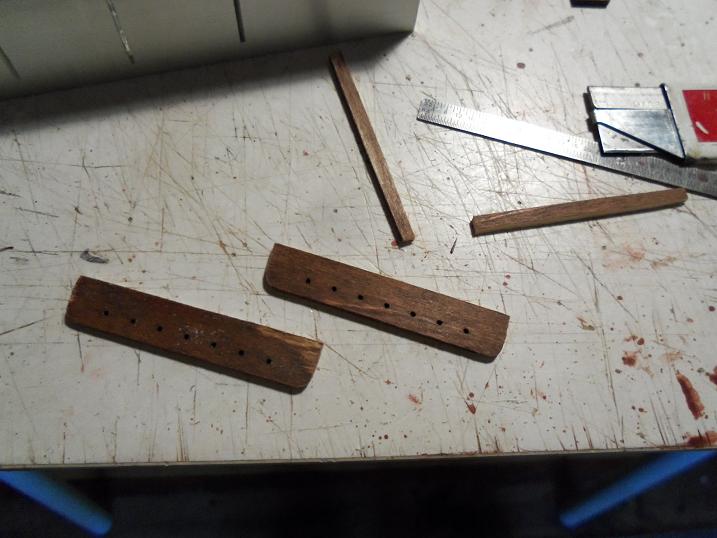
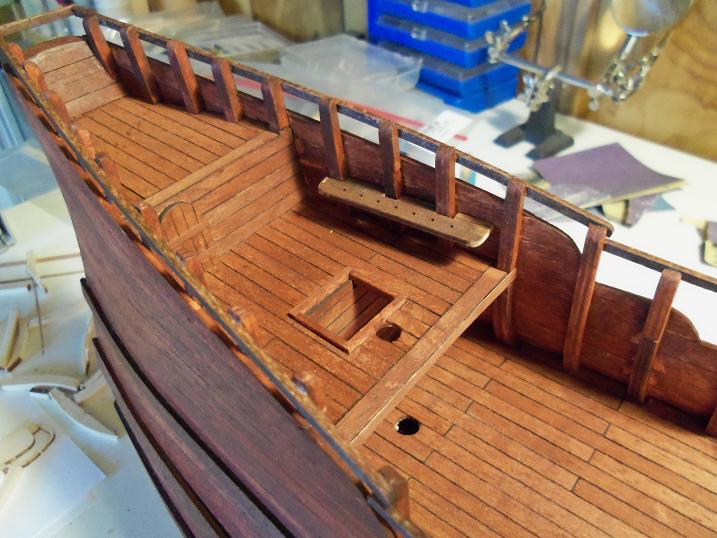
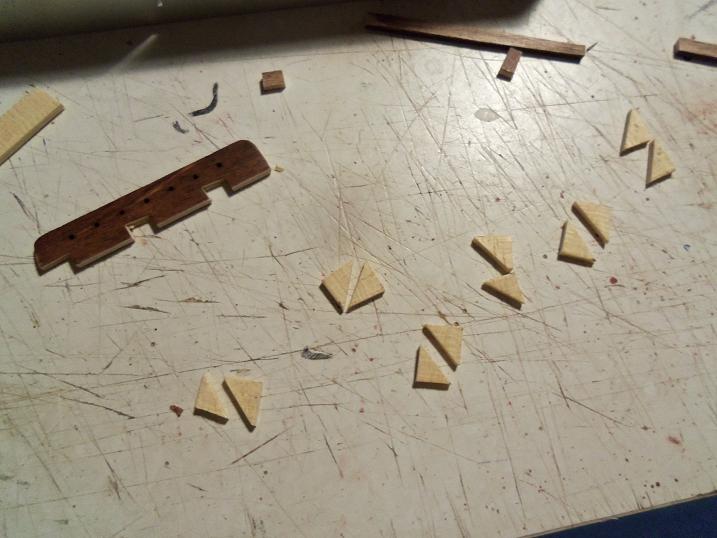
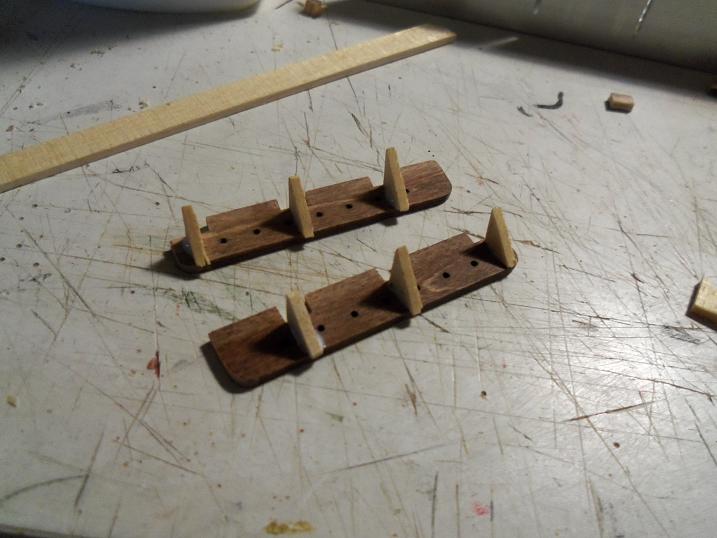
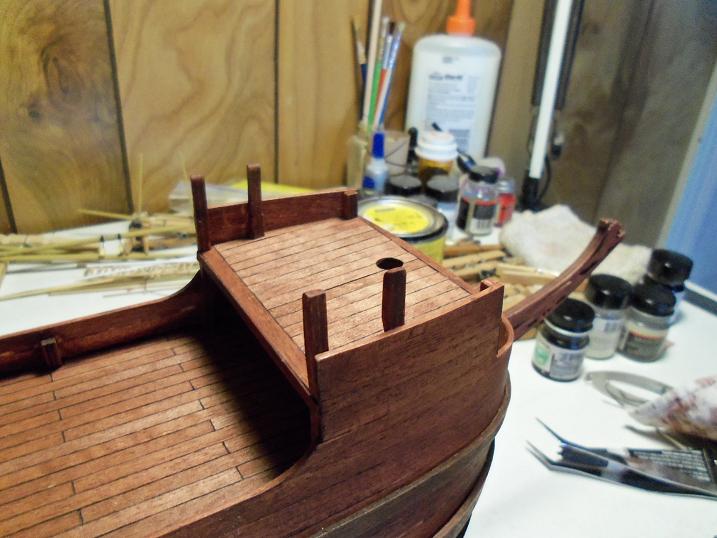
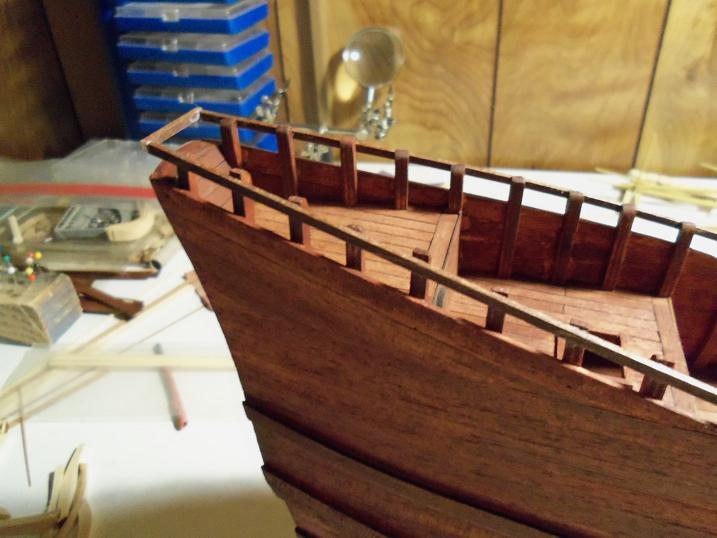
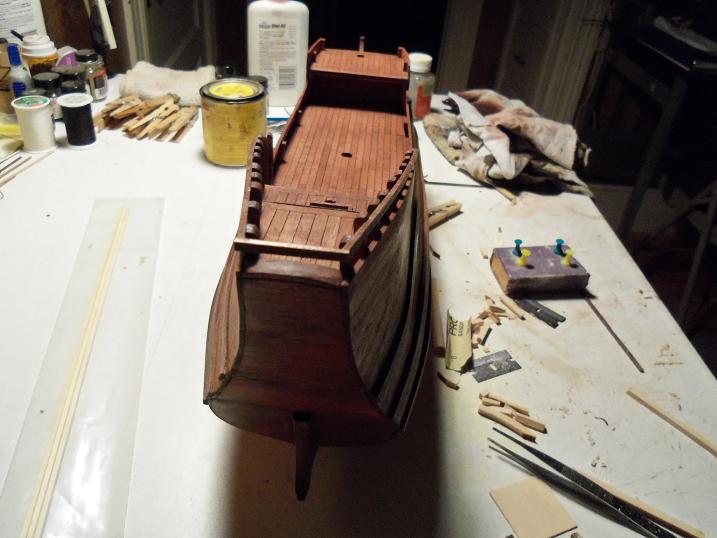
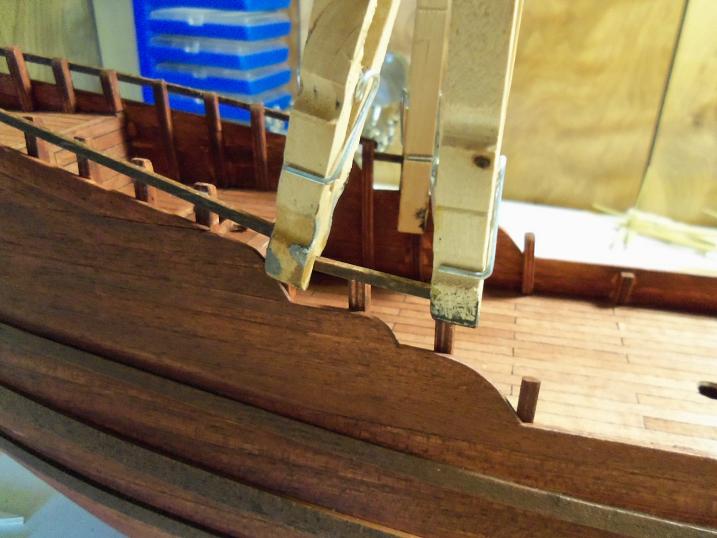
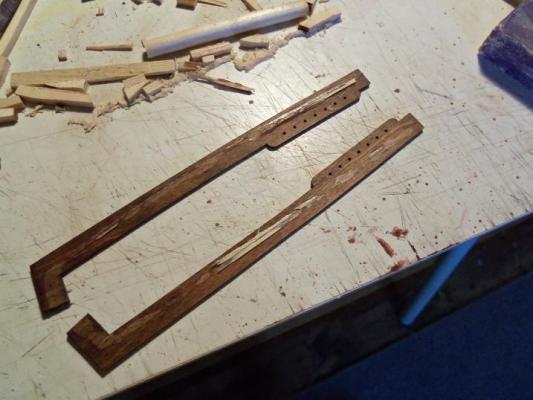
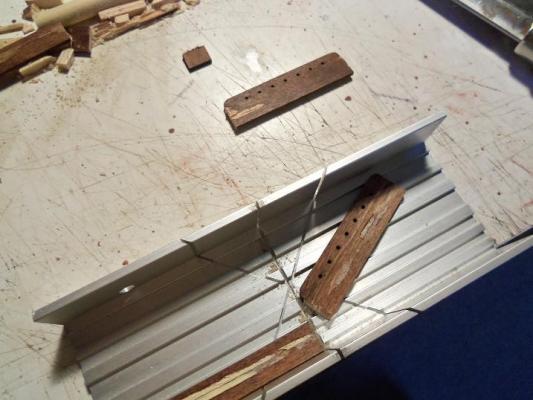
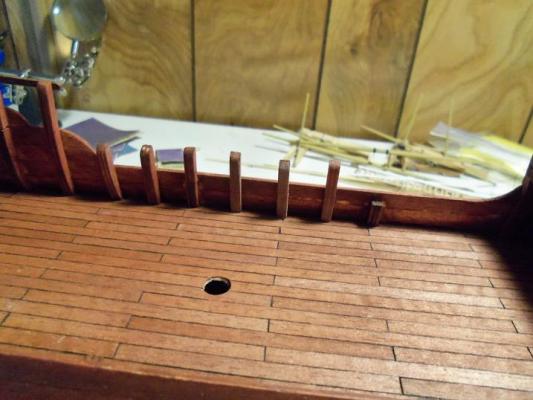
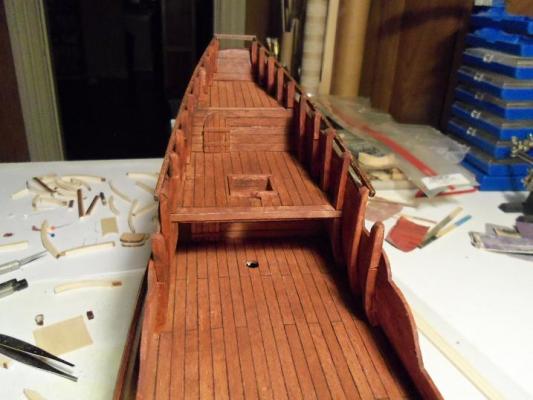
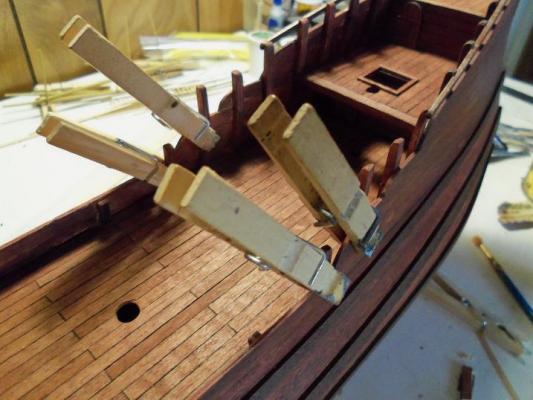
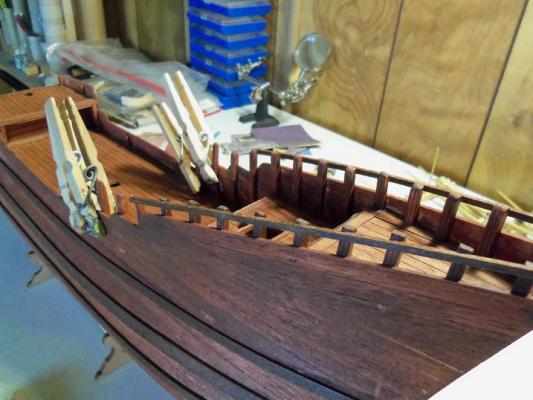
it is a bit funny that you ask that question Robbyn........just so happened that I did the stern pin racks today......I was equally as curious as to how they would fit into all this. rather than make a whole new pair for the masts, I'm just going to modify the cap rails....no sense wasting them. they were cleaned up, cut up, and sanded to shape. fitting them in place, meant to cut slorts for the posts, so they would fit against the bulwarks. of course there is no support for them, so I made up a batch of knees. this is simply just planking material, cut square according to width, and then cut in a diagonal fashion. they are cemented in place so they will rest against the posts. after thay are dry, the entire assembly is sanded and trimmed, and then touched up with stain. I did finally remove the clothes pin clamps from the step-down rails....here is how it look now. I have done most of the posts for the port side mid ship. and I also did some of the posts for the fore deck. the two front posts will need to be removed.....I have done this with another pair further back....at the stern. this way, I can install a full post. when the pin racks were ready, I installed them. one of them gave me a bit of trouble, so I had to prop the ship up in a strange way so it would stay in place, until it dried. now that it has had time to set, I can set her back in her stand. I will be doing this for the other two sets.........the knees are almost invisible {not that they need to be}


-
thanks Andrieke! I'm sure pleased with them as mentioned, on other models, I see the thinner cap rails......look to be around 5 mm. even with an overhang, they ate up the deck space. these were supplied in the kit, so I went with it. if it wasn't for Andy and Kester, they'd still be there. thanks for the good word there are many ways Robbyn.....for deck rails, the best method is to fit thin dowel in the bottoms of the posts and drill holes in the deck for them....you can even use brass rod. for locating them on the bulwarks......it's hard to do the dowel pins if you don't have posts to locate them on. so, I used another idea that I like to do......knees. I've done the mizzen pin rails.......I have to do some dishes {the admiral has been baking}.........when I come back, I will post the pictures of what I did today. you'll find it very easy to do......may be something you might want to try. I'll be back.
-
thanks Edwin........just cemented them in place when they dry, I can get a picture of them. thanks for the good word and looking in
-
I never thought to do something like that. sounds like a very useful tip.......please thank him for us all........I'm sure I'm not going to be the only one trying it......Hee.....hee simply terrific work!
-
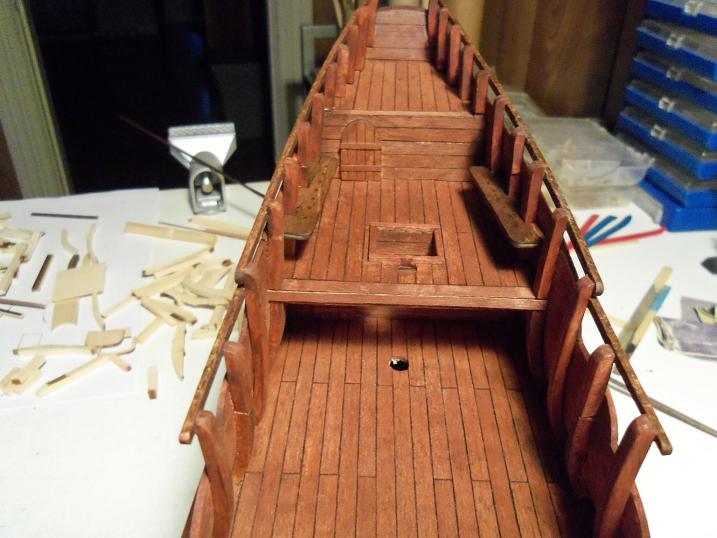
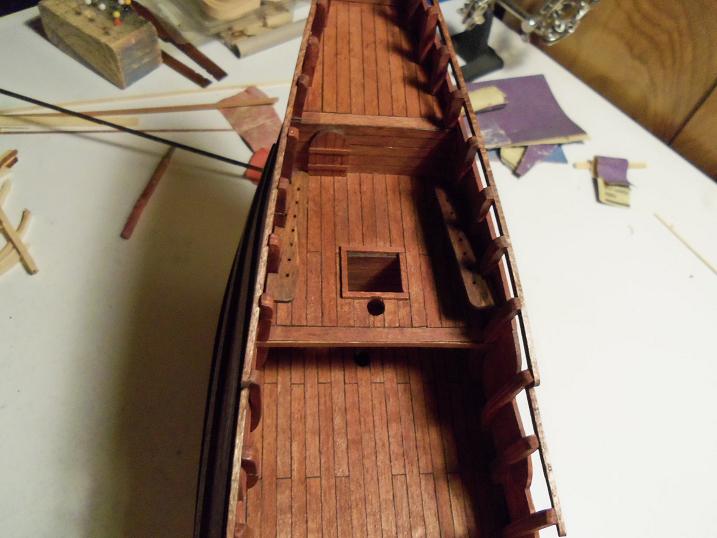
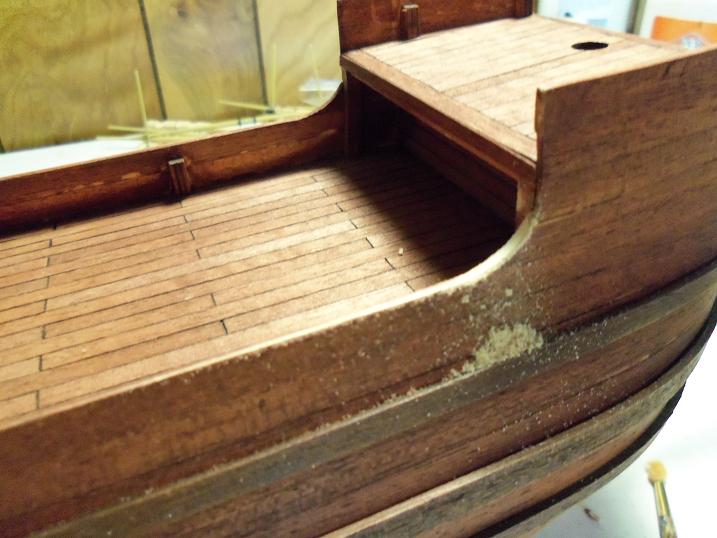
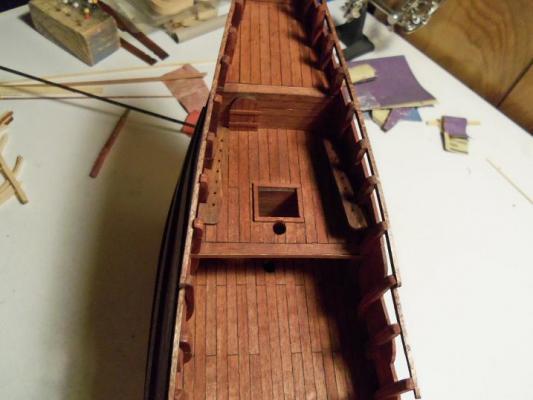
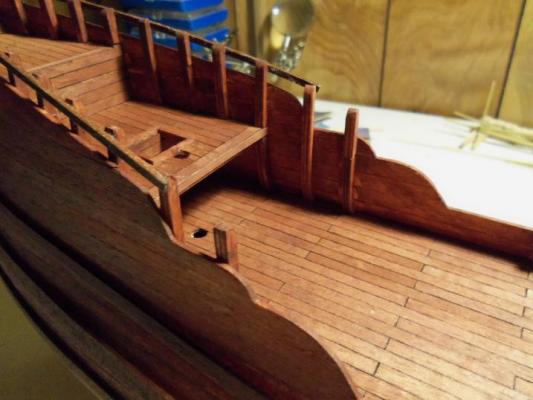
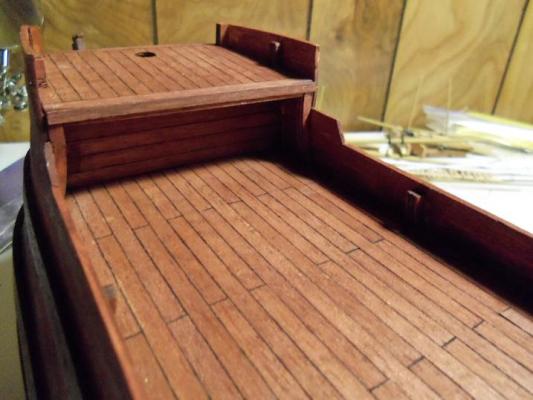
I still have a number of post to install........mid ship and fore deck. the stern decks are done now, and I was curious how it would look with the rails. so, I stained some 3mm strip stock and installed them on the stern. just before I went to bed, the cap on the end was cemented on. it will be rounded up and touched up when it's dry, as well as the tips foreward towards the mid ship. I did manage to shape the three step-downs that the actual ship has........I'm going to have fun trying to do the edge moldings ....hee.....hee the posts for the foredeck overhang are installed, complete with the cross beam and the cap board. one side has been trimmed and shaped.......I did the other side there is to be another section of rails for the step-down section. what I'm using doesn't take too kindly to being bent sideways, so I'm just going to go this route. the posts for this section will be the same height, with just a very minor step-down. when these are dry, I can better show them. now.......on to the mid ship and fore deck! I also have a cool idea for the pin racks........I'll do the stern racks and will be able to show you soon.


-
glad to hear your almost ready to start this build.........I will enjoy following along
-
nice idea........labor intensive, but nice just the same. on my United States build, I came up with a way to make grates. it turned out to be labor intensive as well, but there was some fruits to the labor. the only thing......they all came out the same. you must be using 1/32 square stock.......what are you doing to keep them from sticking to the jig?
-
:D :D
-
did you move?????
-
Cutty Sark by NenadM
popeye the sailor replied to NenadM's topic in - Build logs for subjects built 1851 - 1900
just what the doctor ordered........plenty of fluids! :D Nenad......I wish I had an easy fix for you. getting things to sit flush and level, is something I agonize the most over. hopefully, the aft deck can be removed without too much trouble, and sand the starboard side........and perhaps concentrating on the flat of the stern as well will make it flush to the main deck. I hope you fared well at the Dentist.- 4,152 replies
-
- 1
-

-
- cutty sark
- tehnodidakta
- (and 1 more)
-
thank you Paul....I'm finding it rather neat how I am treating stain. I'm staining as I go, using a paint brush to touchup where I sand and stuff. it's not that much different though.......I paint before I assemble anyway. thanks for looking in, my friend......too bad about work keeping you busy..........I miss your fine work I should have another update soon.
-
she looks superb Robert!
-
does this mean you have that Bismark, that you were talking about!?
-
did you glue two pieces of wood together the whole trip? didn't think so :D you were too busy being a social butterfly, dodging the morons on our nation's highways, and seeing the sights, to have any time for her at all. it was a great trip and never a dull moment. but now your home........you'll be able to sit back and continue with your fine build ........and that closes the book on "John's RV Adventures" :D
- 2,250 replies
-
- 2
-
-
- model shipways
- Charles W Morgan
- (and 1 more)
-
it's Ok Sjors........I left out the number 16........clever of me huh! cake.........WHY.....you got any? if I wasn't tied down, I'd be right over! you did say you had an extra room.....yes???????? :D :D
-
any progress is good progress. even when not in the plans......thin strips of molding can enhance your model, and eliminate the insightly joint lines. nice work Adrieke
-
second that John........a daunting assembly indeed! looks great Piet!
-
now you got me wondering Frank...........what if I did use it? perhaps a new 'spin' on things :D glad I could make your day Robbyn.....as I mentioned, I am no expert it could have been the easiest build in the world.........and all it takes is one mistake all I can say to anyone who hasn't got a build log up and running........get one going. the fine folks on this site........and even me {on my good days}........can help you in ways you can't even imagine. yea, you may stub your toe here an' there, but it's what you learn in the process that counts. I appreciate all those I forgot to answer....there's a few I'm sure..........and also for those who hit the like button. this build has been interesting...I can tell ya that!
-
thanks Bob. yea.....I know. the worse part is, is that I've seen these pictures before :D I'm not kick'in the can over it though, I'd rather find the fun in figuring out the solution, than get mad at it. I got my BashMan on!
-
Sjors the conquer.......let no space be untouched! today ???? straat.........tomorrow......the world!
- 1,873 replies
-
- 3
-
-
- occre
- san ildefonso
- (and 1 more)
-
your no worse off than me Augie........here I have a brand new dremel {still}........and I still preffer to do it the old fashioned way
- 2,191 replies
-
- 2
-
-
- confederacy
- Model Shipways
- (and 1 more)
-
the admiral just provided me with the quip of the day: me: hmmmmm.......I think I need a new piece of sandpaper admiral: stuff is still falling off........isn't it?
-
that's the plan Patrick. I posted some pictures earlier of the ship, and I can't believe I missed it. oh well......at least I wasn't too far into it.