HOLIDAY DONATION DRIVE - SUPPORT MSW - DO YOUR PART TO KEEP THIS GREAT FORUM GOING! (Only 24 donations so far out of 49,000 members - C'mon guys!)
×


popeye the sailor
-
Posts
16,007 -
Joined
-
Last visited
Content Type
Profiles
Forums
Gallery
Events
Everything posted by popeye the sailor
-
 inteeresting how you made the pinnicle........those parts of the ribbing were removed {am I correct?} are you going to do the same to the cutter? very nice
- 1,279 replies
-
- 1
-

-
- agamemnon
- caldercraft
- (and 1 more)
-
still a ways to go yet Sjors.........I have to make the helm room, the bow, and everything on the deck. I have two gallows from the Nordkap booty, but I'm not really happy with them.......I may make a set from wood. yea......the camera showed me the door....I was not pleased with my missing that. but, it was a quick fix........no problems! it would have been just as well if someone had told me.......it would have shown that I am human, and that they cared enough to point it out. either way, it would have been a win / win situation. it's been nice to work on her again......any progress made is a good thing thanks for the good word Sjors........always a pleasure when you look in
-
good 'ole Florida.........just as I remember it.....flat! I used to live in central Florida back in the '70's. my best friend {my second family} live in Kissimmee..........one of these days I have to make the trip to see them {a promise I made}
-
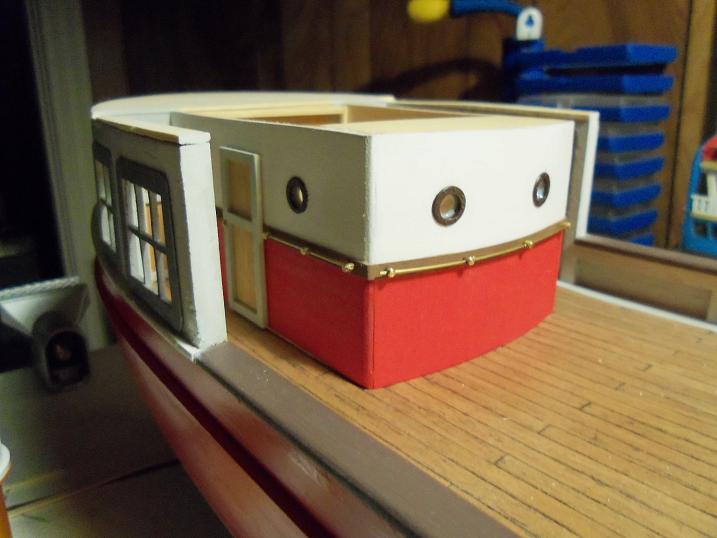
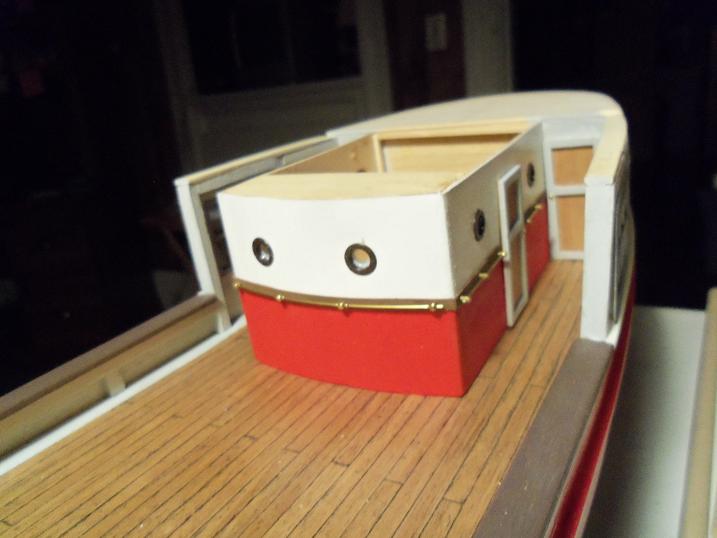
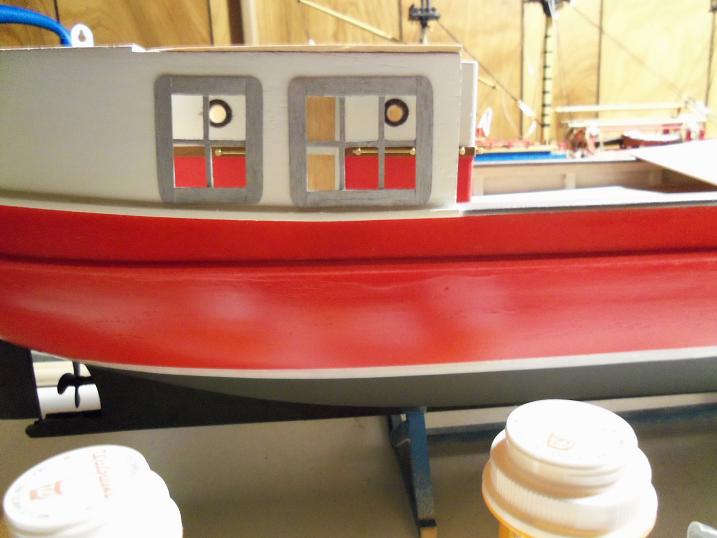
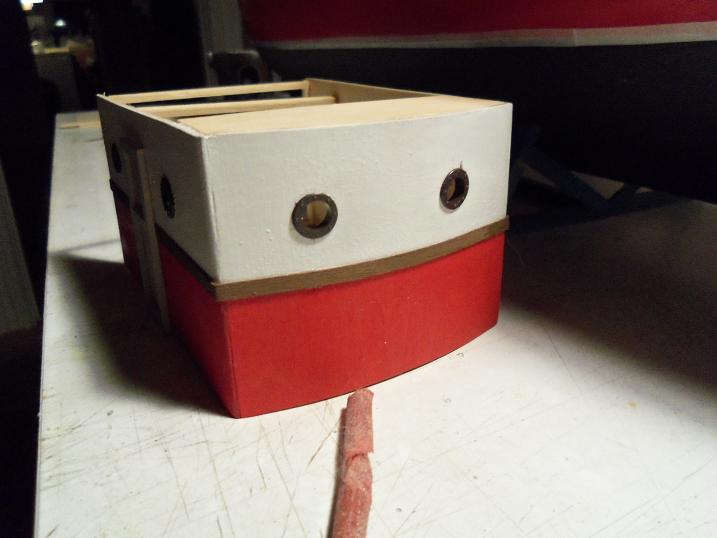
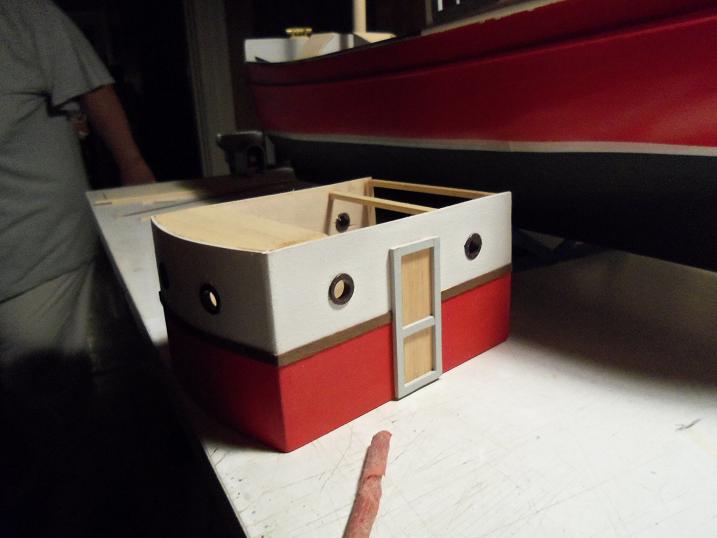
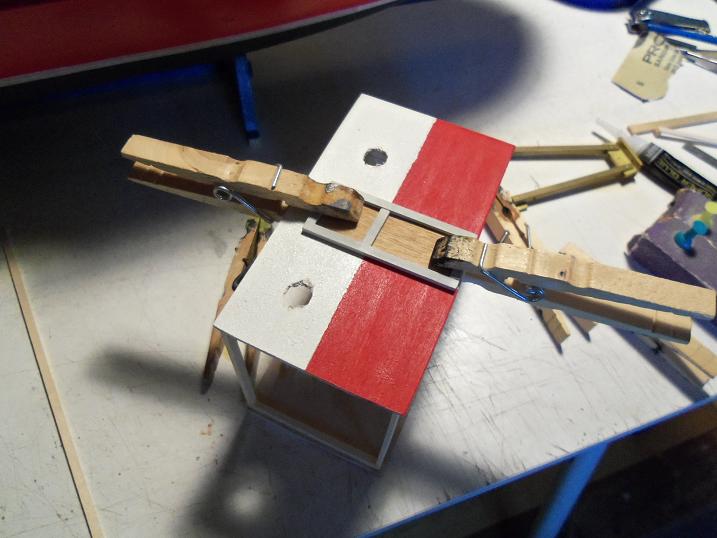
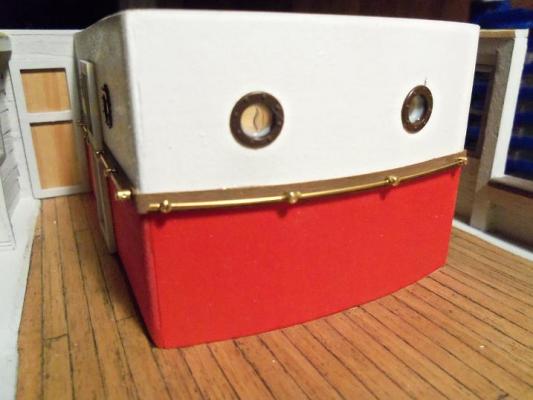
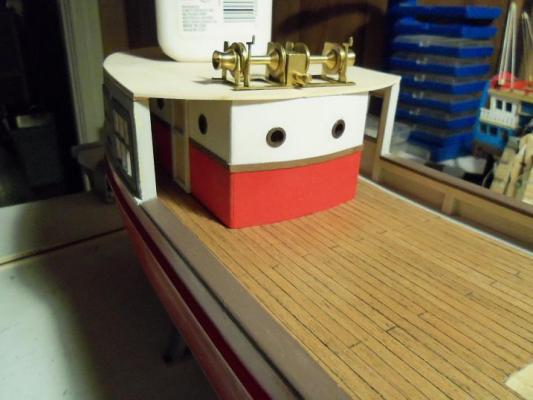
when the portholes were dry enough, they were cemented in place. there are also the brass hand rails that needed to be installed as well.......here is a before and after shot. the port side door corrected. I had to leave this open over night.......I'm not really sure if the CA will cloud the window maker. between you and me.....I'd rather not find out. once I can get to the table, I can see how things went, and perhaps movetowards the final step of this assembly.

-
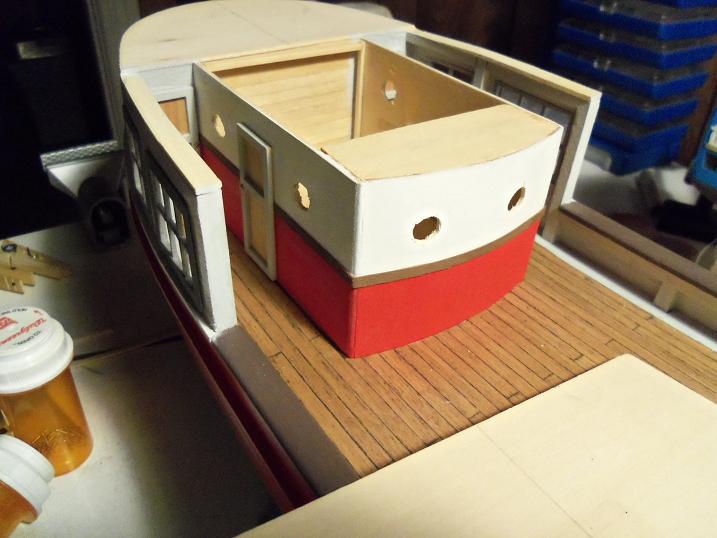
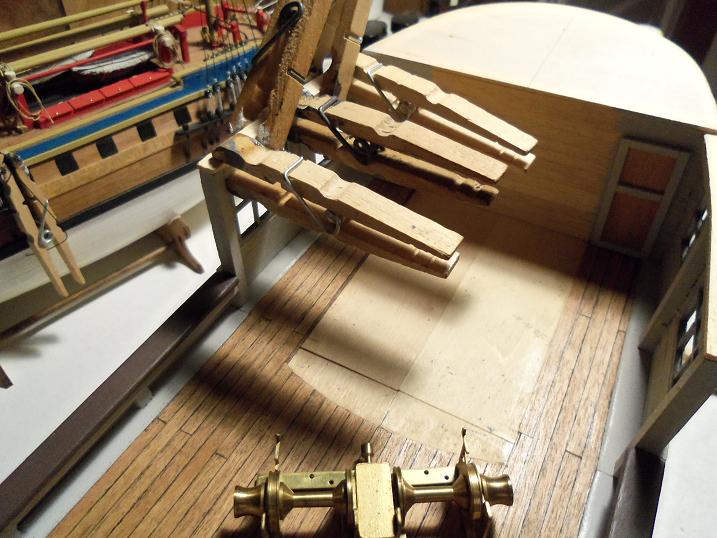
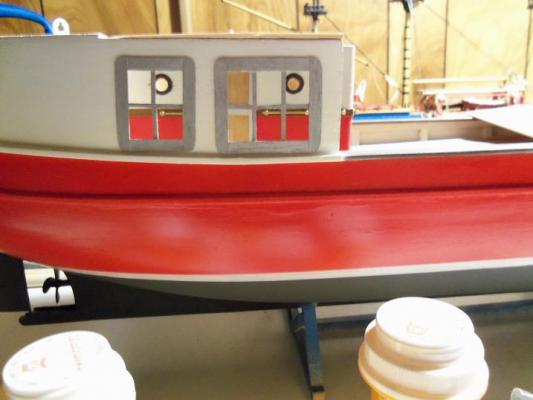
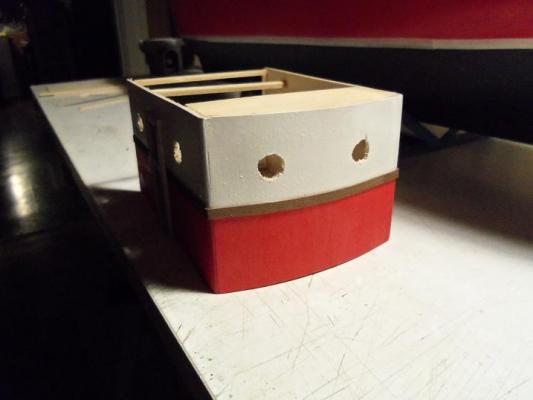
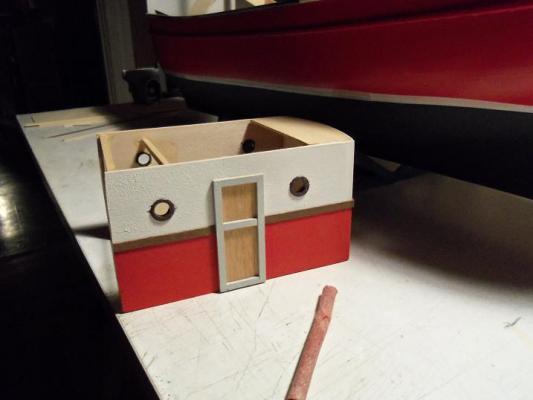
the gap between the side walls and the upper deck platform is only 1mm or so. checking this out a bit further, I find that the curvature of the deck, in relation to the structure, is what's causing this. it was decided that, rather than to tear anything up and cause additional problems, I chose to shim up the walls and repair them later. this is going to be minor. cutting and bending two pieces of planking, they were tapered at one end and then cemented to the tops of the walls. when these two were dry, they were sanded further to bring the taper down to a point. the platform was check fitted at different points of the process, to attain the flat fit. during all this, the structure was also made ready for the time when the assembly can be all put together. the front molding was put on, trimmed, and touched up. the portholes were then dry fitted in to see how they would look. I was not happy to see this........the port side door is upside down! in removing it, it was damaged and had to be redone......but I made the correction I used the window maker to create the windows in the portholes.


-
really nice work Piet.....more and more amazing, with the more and more you do
-
they look great Draggz! as for which ones to use........well, if they are to be open, I'd use the scratch made ones....might show the door frames. it's up to you my friend........you've done very well
-
it's good of you to say Randy....but I'm sure this has crossed someone's mind at one time or another. how would this work? it's the functionality of the aspect your working on. some folks even find a figure of the same scale to use as a gauge. I think this is one of the main reasons why I enjoy Dr. Dafi's work so much. his aim at creating the functionality and realism, is very interesting.....really puts himself into his hobby. very comendable if anyone's looking for a good tutorial for creating ratlines..........one only needs to look no further that sjor's build well done Sjors!
-
you've done a splendid job Sherry! the hull planking look absolutely beautiful.........and the idea with the trap door is so cool! your milling your own wood as well.........boy!.....you've really been bitten by the bug! simply awesome!!!!!!!
-
sweet looking hull so far Bob.......I like the deck layout, the bulwarks really make it. moving right along on her
-
it would have been even funnier, if Sjors slipped up and said the Aggie is on the bench :D well Sjors.......have you tried to envision it on the bench to see if it will fit? remenber that guy with the red union suit and the pitchfork......he's jabb'in you good buddy oh, that itch you cannot scratch..........you know you wanna........
-
I know the feeling....my Gothenborg recieved some bow stem damage in a fall. glad to hear you were able to get her back together
-
glad to see your build 'almost' finished Dee Dee she looks absolutely splendid.......nice wood grain colors, and very cleanly done. don't know what you mean about the rigging.......it looks really nice. you did a really super job.....sweet!
-
that's probably in the ballpark for the lower yard.....remember, they probably still need to be tapered .......or......are you looking in the Aggie box again? oh......woe unto the little children, who don't take their future build, and put it 'outta sight, outta mind' :D
-
airbrush is nice to have. I didn't use it a lot when I was doing the plastic builds, but I've found it to be a god-send with the wood builds. you don't need to buy these expensive ones either.......Testors puts out some that are economical, costing around $30.00 {US} Testors » Airbrushes » Airbrushes the one I've been using for a couple of years now, is so simple to use and clean. the only thing about them, is they use the compressed air cans. I was able to adapt it to my 25 gal air compressor with no problem. check out the EZ line of airbrushes.....they are simular to what I have. it's called the "amazing air" kit.......comes with everything you need. nice job on the planking.......gonna look great with the bulwarks around them
-
that's simple Augie...........SOMETHING BIG :D :D it's going to take some time to get through what I have on my plate at the moment.....winter's coming, I'll have more time things are going slow for the moment....just have to get my butt in gear and get a move-on. you've compelled me to put a list in order......this is my wish list for the extreme future. it is somewhat in the order in which I would like to do them 1: the multi-build. no, I haven't forgotten about them.....at the moment I have one set of frames done, and the keel parts fro the other two. there will be three in the set....undecided if they will be the same, or different in some way, touching os different aspects of the same subject. they will be unique.....I will say. 2: Gothenborg 2. I want to revisit this ship. I have so much information on her....it would be silly not to. I'm going to take the parts diagrams and blow them up......big-time. the window discrepancies in the stern, the poop deck ladder misplacements, and any other misgivings that I have found, can all be corrected and will enable me to go more into detail. it's going to be a long build 3: the ???????. this is one that I had mentioned, but haven't said too much on. I recieved some odds and ends from Tom And Susan when they closed Billing USA. this was all in one bag. seeing the parts that were in it, I did some searching to see what ship they belong to.......I was shocked to say the least. the funny thing about this, is that I have the plans for this ship, and I plan to do the same thing that I want to do with the Gothenborg.......blow the parts panel diagrams up to 1:1 with the model, and utilize all the parts that I have.......the rest I'll scratch build. the hull can also be fitted to create other ships as well......like the Cutty Sark...or even the Thermoplyae........with minor modifications, of course one day soon, I will mass all these parts together, and show you what I have..........it would be a great thread for 'name that ship' :D as you can see, a lot of the future is aimed at scratch building. it's not intentional....it's just the way the cookies are crumbling. saving all these parts panels opens a lot of doors for me.........I can take the keel strip from one kit, switch the bow and {or stern} parts, and come up with an entirely different ship. the possibilities are endless. I kinda like it......you never know what you'll see at the Wharf
-
you did a very neat job of cutting out that opening.........you must have been a surgeon I like the way you did the hatch doors.....nice detail. these must have been 'after thoughts'...due to your 'steps of assembly'. when building in this medium, aspect to be added in are usually antisipated and the cutting is done beforehand. this works out well for you in this respect, since you need to make your cuts through the inner framework. this will add even more detail, with the way the various beams and such, stops at the hatch openings. with some simple embellishments.......this can be quite pleasing to the eyes plans for these builds may have been drawn up in the past........we get them and enjoy them a lot! but we will never experience the build in the same way that the original scratch builder did, when he drew them up. I know your not following any plans........see what we would be missing out on.....if you had drawn some up
-
thank you Sjors.....it's about time I threw a little love at this poor girl I know.....money has been tight lately, but I'll be up and running soon........I promise! you'll be the first to know!!! thanks Mij.......this is my third scratch vessel. would have been my second, except the admiral wanted her M&M boat. nice to have you looking in.......enjoy thanks Patrick........can't believe it's been since May, that I've done anything with her. I'd tie a string 'round my finger' so I wouldn't forget again.........but I'd probably rig myself to a build by mistake :D got a bit more to do..thanks for looking in.
-
I think you beyond the problem part.........I was just over there.....she looks stunning!
-
well done Sjors...........they went quick, didn't they?!?! told you splendid........simply splendid! you're not keeping Aggie too far away............are you :D :D :D
-
have a good....and safe work-tour {can't find a good term for that in any of my books} the summer seemed too short, but you made lots of progress. I'll look forward for your return....and hope to see the finish of your fine vessel. nice to hear your going to be able to enjoy the Christmas holiday........I'm planning on doing the same, taking the week between Christmas and New Years off {two weeks of eggnog and dodging fruitcake. more to come in your adventure saga..........I'll be watching
-
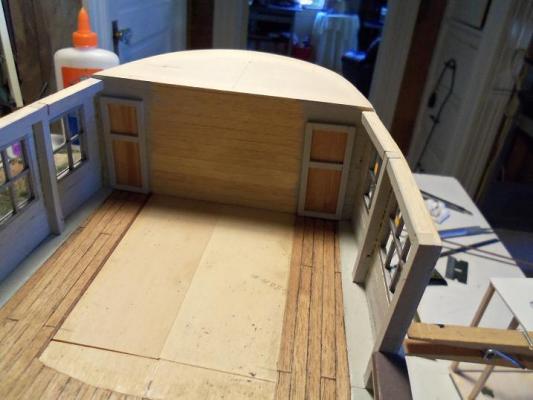
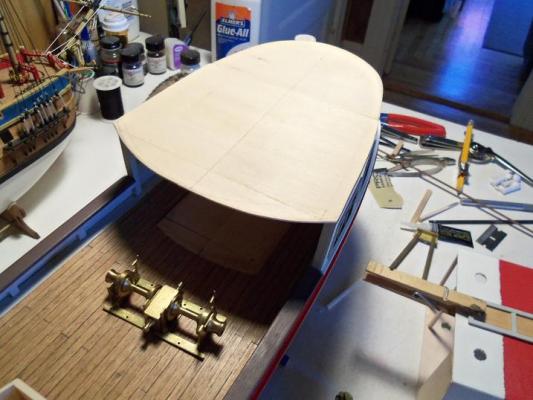
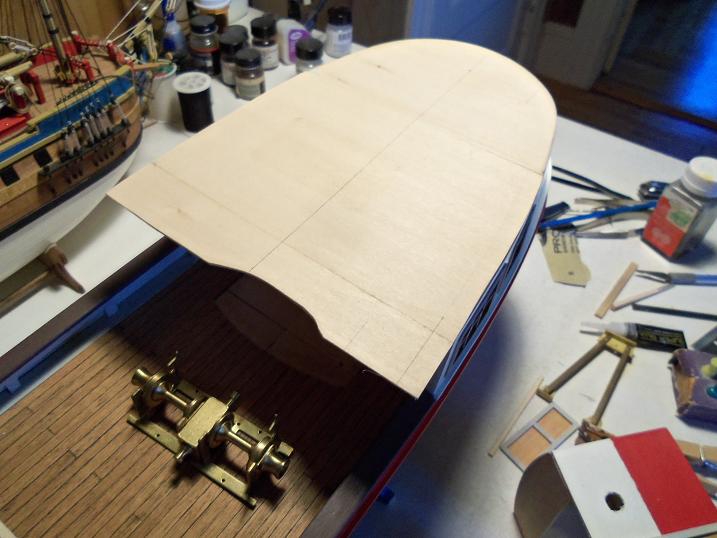
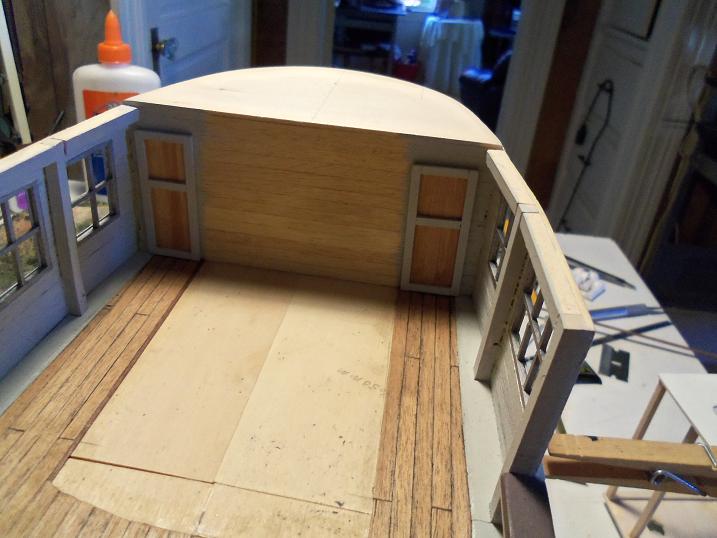
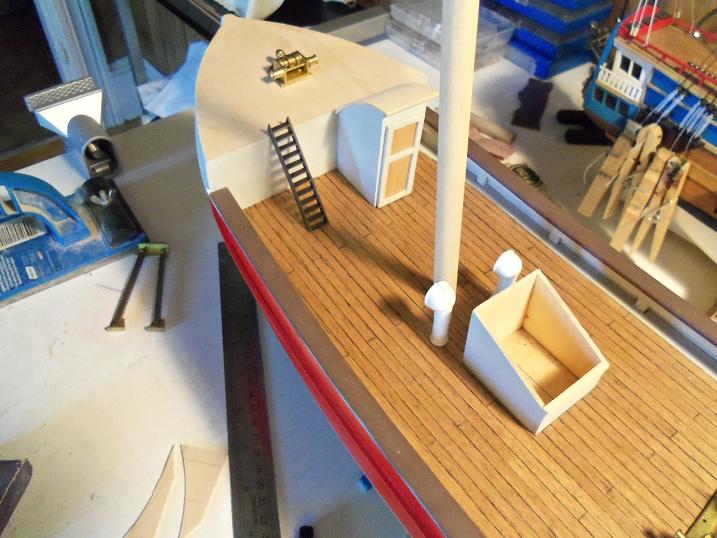
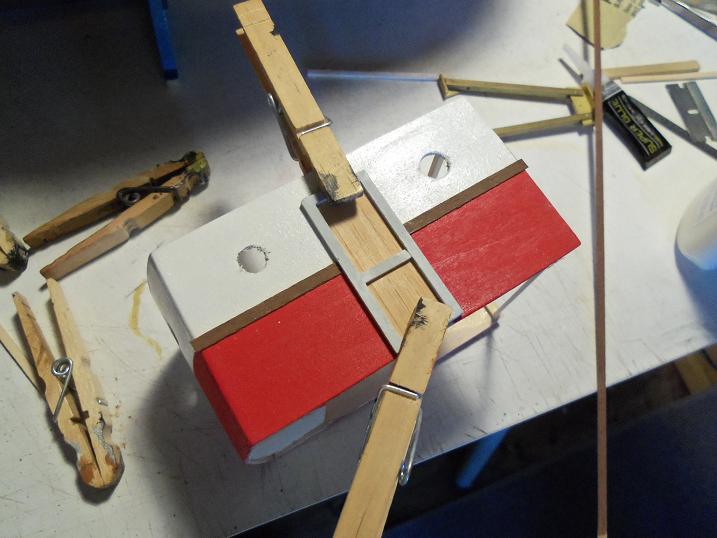
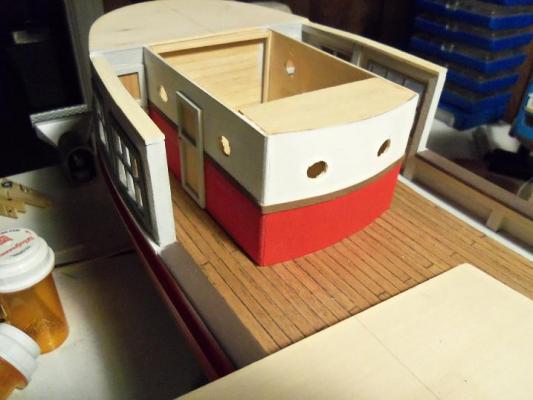
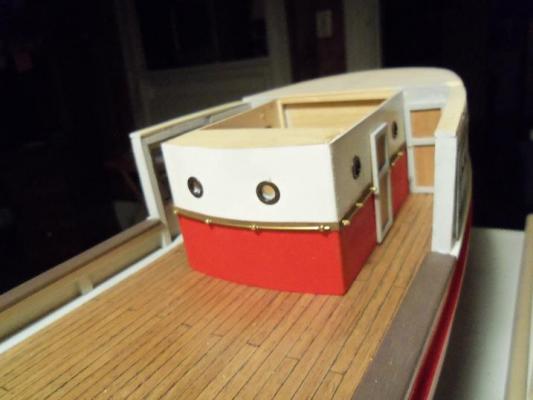
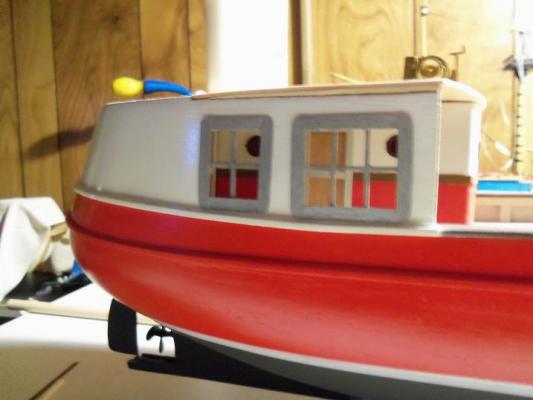
I decided to take a short break from the Gothenborg, to do a little on the Syborn.......I guess I felt a little guilty, for neglecting her for so long. I still have to do some touchups from since I've done the hull paint, but I'll take care of it while I have her out. I had made up the outer part of the upper deck platform, with the last of my flat stock. I have more now, but I chose to use what I had done already. I do have a small inconsistancy with the height of the lower structure, but I went ahead and put a second coat of white on it and cemented on the doors. I also cemented in the aft cabin doors as well. I used a compass to mark the outer lip...and made the cut. ....and after a little more sanding, dry fitted it into place I did another mock-up of the bow. it will be planked, and will have railings, instead of bulwark walls I have a couple of extra vents....in case I need them, but I think two will be enough. I have a few more things I still want to do......I continued with the lower structure, adding in the railing molding. I hope to add more to her soon.