


popeye the sailor
-
Posts
16,007 -
Joined
-
Last visited
Content Type
Profiles
Forums
Gallery
Events
Everything posted by popeye the sailor
-
 thanks Sjors.......I promised an up date......just a minute.....
 -
like I said......keep your fingers crossed. right now, I'm using a really crappy keyboard........I had to give up the keyboard I was using because it belonged to the other computer. everything sticks on this one.....even the spacebar ! this morning I set the other computer up and did a total recovery on it. now that it's back to factory specs, it's going to go back to the store. now I have to get another keyboard, but I don't need anything special. I'm sure I can find one cheap enough.......don't think it will be a factor. .....but keep 'em crossed anyway!
-
yepper.....me too Bob! I'm doing a few things to the Denny-zen at the moment and doing the small things to this one while things are drying. thanks for the good word.
-
the deck looks great sjors! nice to see progress on your build. it's actually a very nice deck layout.......very well set up
-
I shouldn't mention this.......I don't want to jinx it, but there is light at the end of the tunnel. the admiral has her original computer, that had gone on the fritz. she got another computer.....one of those rent to own deals. she decided to see if she could get it up and running again and found that it needed a part. we had to look around, but we were able to locate the part......of course I said to just get it, nice guy that I am. got it home .......I installed it......and the computer seems as good as new. she is so happy that she {after looking at the books} may allow me to get the dead eyes I need! keep your fingers crossed!
-
thanks for the good word Dr Per. the vent funnel on on this kit is located on the grating. I found it odd, so I cemented it to the deck derectly behind the grate.......but it bugged me, because that is not what the instructions said. I didn't have any good pictures of it to go by, so I put it back onto the grate. yes, I had another decal sheet sent to me Keith. what I have is the Testor's 'decal it' decal maker {standard edition}. you have to be careful, because the basic kit is out there, and you can't import designs into it. with the standard edition, you can. look at the Susan A build......those decals were all hand made. one drawback to this program.....it depends greatly what type of printer you have. I have an ink jet printer....these printers can't do white, or metalic colors {they look like the color, but don't have the sheen}. you can go here to see it: Testors since they are done with ink, they need to have a skin coat applied....the ink will come off. you'll also need a product called decal bonder....testor's sells that as well.......great product. The AmericA decal were too thin and lacked the approporiate filming behind them, causing them to micro crack into bits and pieces on the backing. I sprayed the rest of the decals with the bonder, and I was able to use them. when I got the new sheet, these were sprayed as well, and I was able to do the eagle decal for the stern. it is possible to fool the program (in a way) to do white......simply by printing the decals on white decal paper....it can be purchased in clear and white. you just have to adjust the colors, so that it will print the way you want them to. there is also a small transparency issue that I'm trying to iron out.......laid on a light colored surface, they are great.......but the darker the subject color is, the less you can see the decals. the decal on the Lobsie twins show the real good. I'm still working with it.....I don't use it all the time, and at this point in time, I've run out of decal paper, so I just can't sit and experiment. I have done some importing though.....stencils are the best! hello Mario........thanks for the good word! rigging soon, my friend!
-
thank you gentlemen......I'm just going where this build takes me....that's all. I should have more progress soon.
-
nice gratings Sjors. I'll look forward to those pictures.
-
I think you should repramand him for no drop cloth for the paint can!! LOL!!! that's pretty cool! now......THAT.....is really going to add to the deck work!
-
thanks Frank. getting closer towards being rigged! still have to do those darn reef lines! thanks for the good word!
-
I'm waiting for Dagwood to show up.......LOL!
-
thanks for the good word carl. it took me a minute to think of what you meant by towels..........but if it's what I think it is...that's the ironing board....LOL! glad you were able to wade through all the lobster jokes
-
yes Carl........more pictures soon.........thanks for looking in! hello frank........yea, the first one is OK....but I think I can do better. as I mentioned, this one trap is to be stored out of the way anyhow.....it's a test. I haven't even painted those buggers yet.......I've been too busy with other aspects. when I get to them, I'll get'em right on here thanks for the good word.
-
thanks Mobbsie and John.........if you liked that.......you'll like the next update.
-
{I just smile quietly to myself}
-
thanks Wayne........you had to say it.........yes, it's looking like snow Monday nite into tuesday. I hope it misses us thanks for the good word.
-
thanks MJD...I appreciate the good word. you got your feet wet......that's all that counts. now I'll have to see what your being so modest about thanks Sherry......just think of the word sailor as sail-taylor AK-k-k-k-kk-k-kk-k! thanks John......the light boxes are un finished......I still have to paint them and put the 'glass' in and paintthem as well it was only to show what the replacements will look like. plastic...........baaaaaaaa! thanks Pat.......I could have ten builds in the works.....and still not be as busy as Danny! LOL! he's leagues above me though. good weather's coming though.......I'll be doing the dreaded 'yard work' soon. the admiral and I went out today......she needed a part for her computer. I tried like crazy to steer her towards Hobbytown......but she wouldn't budge but, not to worry.......I leave my schedule open for the simplist of things thanks for the good word.....and your concern, good sir. now I must go, and install said part in her computer.....before she beats me with it!
-
howdy Phil......good to see your build back again! I look forward in seeing more of your progress.
-
thanks Augie..these part are always fun to do. there are parts in just about every kit, that might not look appealing. it's neat when you can make them look the way you want them to.
-
thanks Bob....I don't have another test subject. the other ones need to look a little bit better than that one. the joint of the frame needs improvement....looks too bulky. thanks for the good word and looking in
-
hi there Augie......thanks for the good word. that's what a lot of this finish stuff is....just wish it wasn't so tedious
-
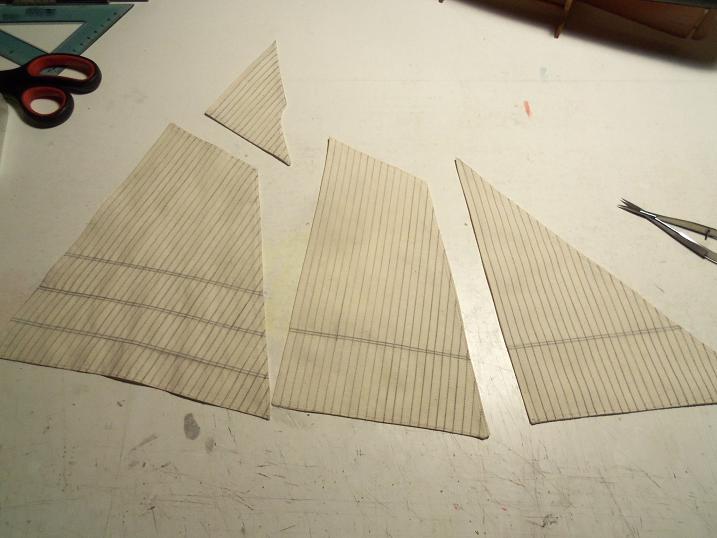
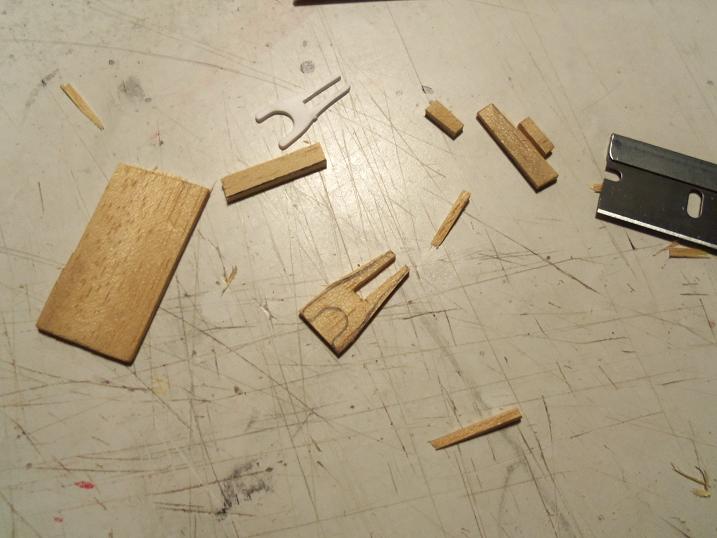
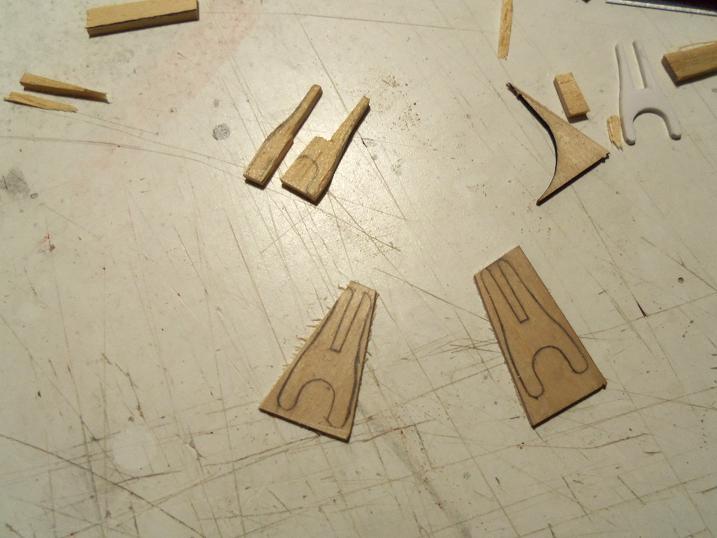
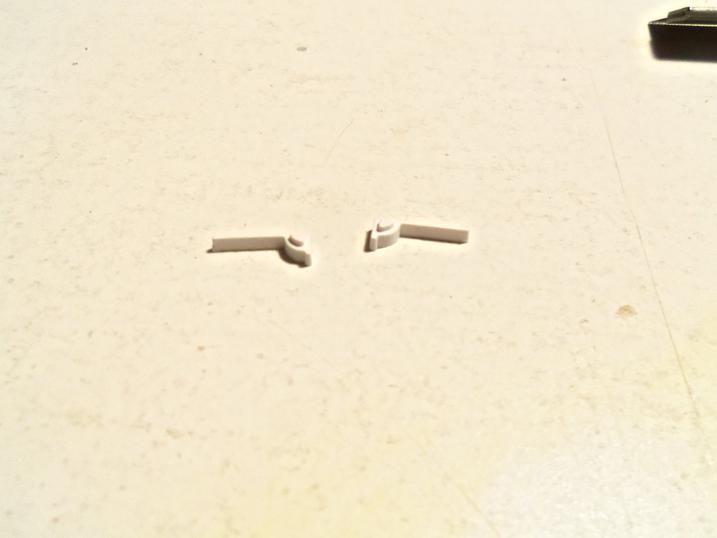
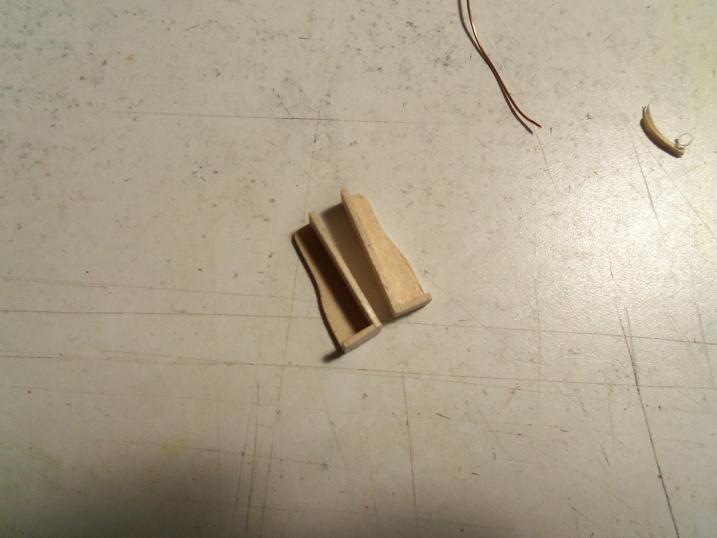
I looked ahead........and I didn't post those pictures. here are all the sails....completed. here are the pictures for the gaff yokes. my first attempt was with older wood. it seemed a bit harder with age, so I thought to try to use it.....it didn't work. it srarted out good, but in cutting out the mast insert, it split in half. I then thought of this thin plywood.......I'm sure you have seen this stuff in kits you've done........it's only 1/16 of an inch thick, very stiff and hard to work with. I had better luck with it. I cut one wrong, so I had to make one other........this worked out much better........finished picture above.
-
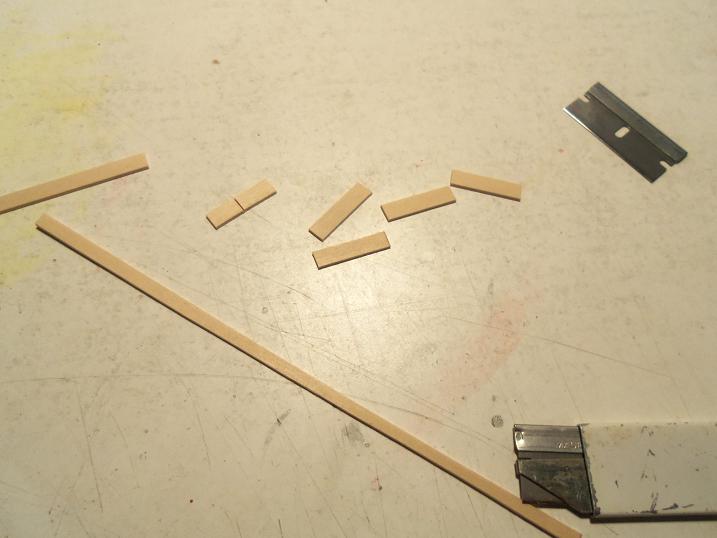
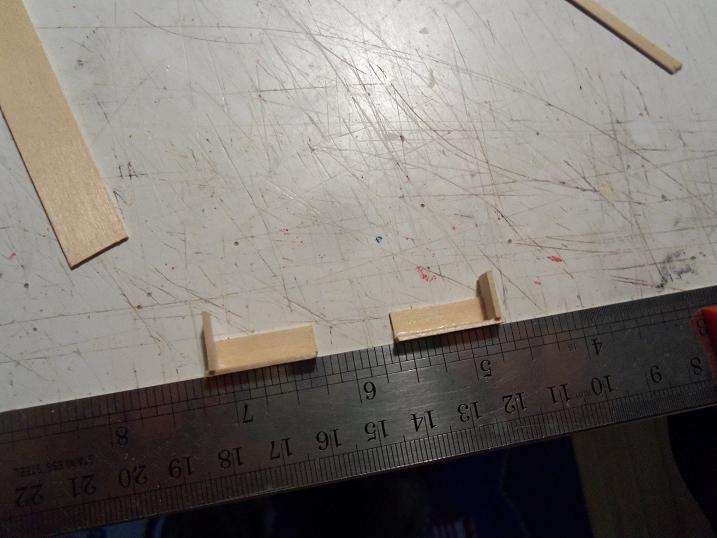
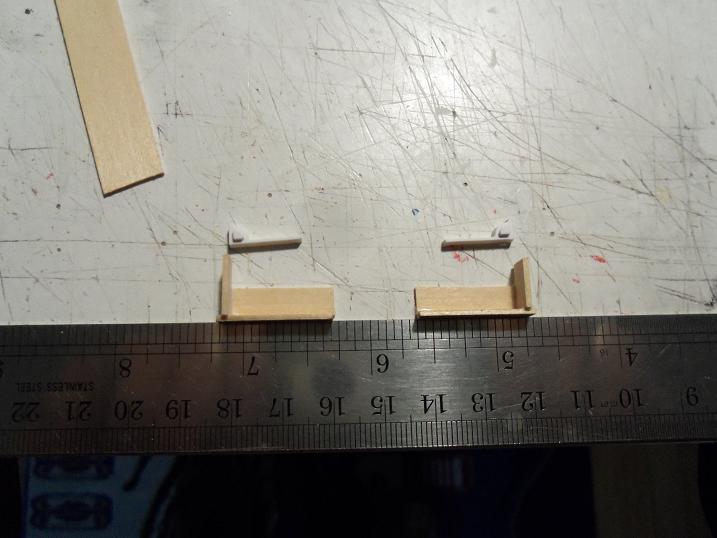
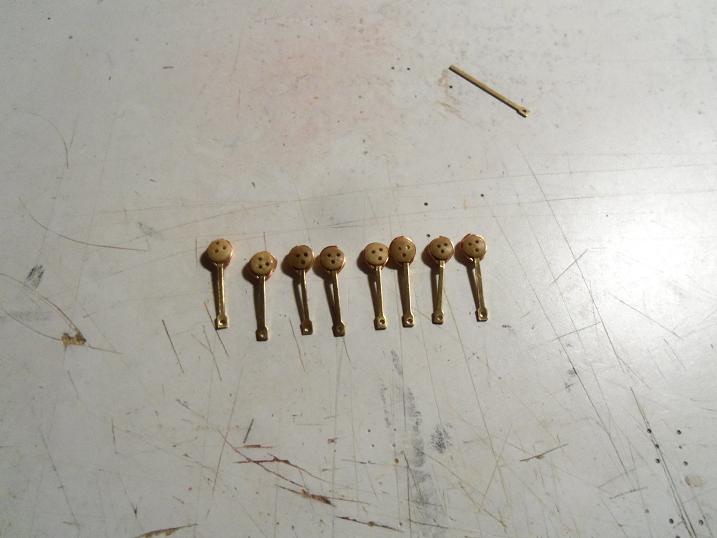
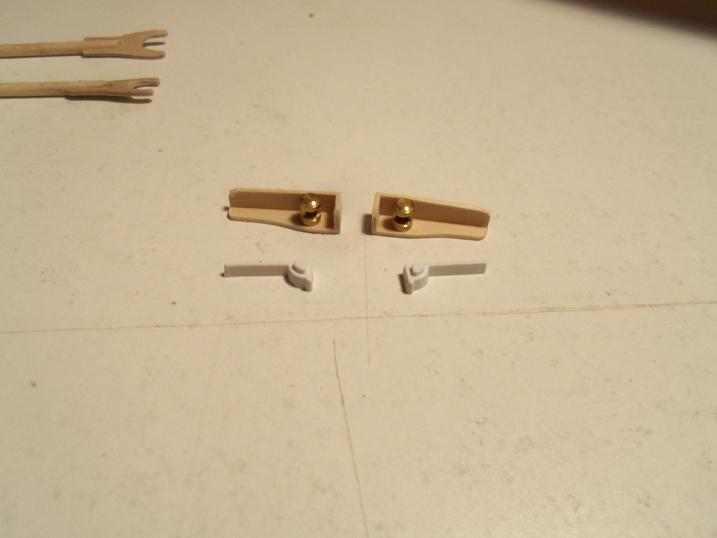
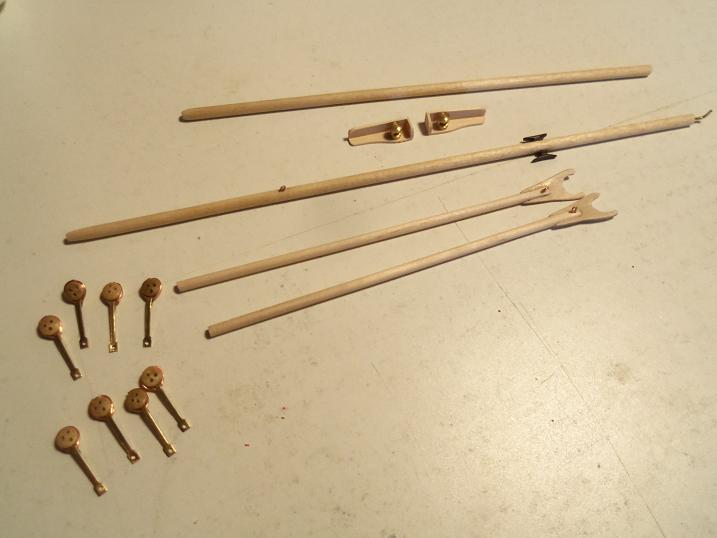
I made more progress on the AmericA. there is some prep involved, before the rigging can be done and the sails erected. the gaffs have to be assembled, the yokes for them are made of plastic. I think I posted the pictures of my easrly attempt at making them from wood. the 1/16 thick hard plywood worked out much better.......I only had to make one extra one, to get the pair that I need. they will be cut to size later, then fitted to the sail. the next aspect I looked at was the light boxes. I had mentioned earlier, that I didn't like them......I still don't.....their too fake. so, I cut the parts needed to make them, set up my jig again, and made them up while I was waiting for them to dry.....I made up the chain plates when the boxes were dry, I began to shape them......then to even them out to make them look alike I had ordered some lights.......with no realization as to how small they were. these will be perfect for the boxes. they will have the window maker treatment and then the glass will be painted the colors they need to be. eye bolts were added......the yokes were sanded to shape.....so far I have come up with this the next aspect will be the anchors........to me, there's smoething wrong here. the anchor chain comes out of the fairlead {which to me are in the wrong place}...........it should wrap around the drum, and exit through a hawse hole in the bow. I can do that......but it might look strange...any thoughts on that? I have extra chain.....enough to do this, I believe. the anchor is another story....it too is made of plastic and need to be cemented together. since there are two fairleads and two drums....I was think of making two anchors. I will cement the anchors to a piece of wood, cut them out and then shape them, to make the two anchors I need for this. any thoughts would be appreciated


-
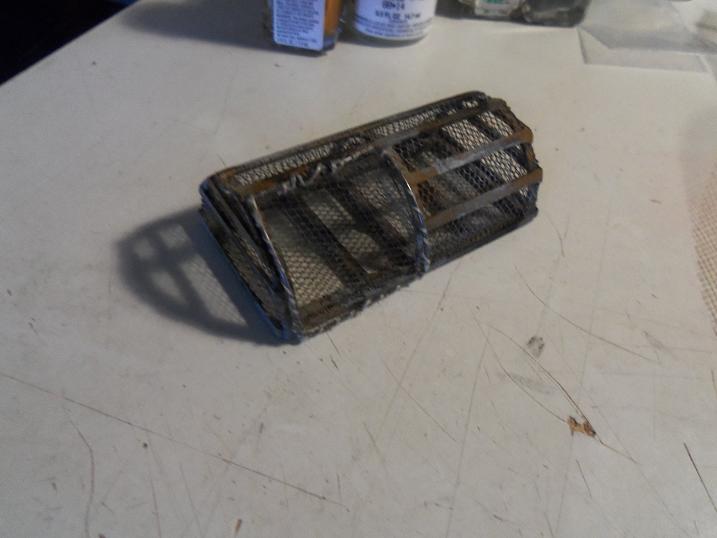
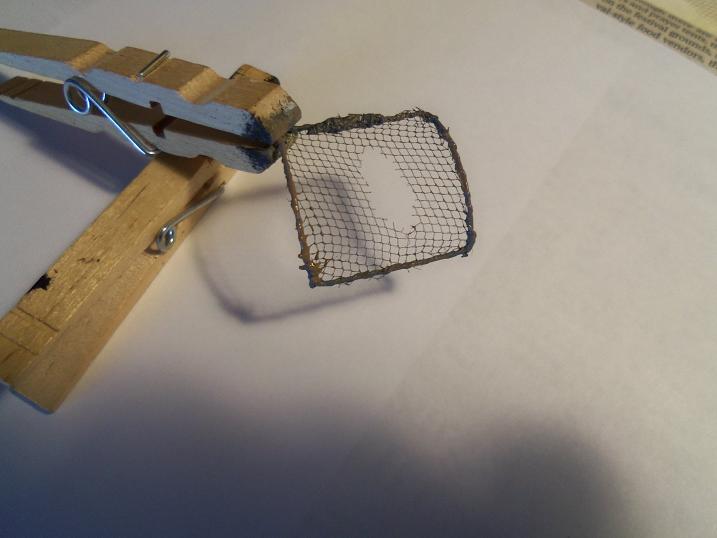
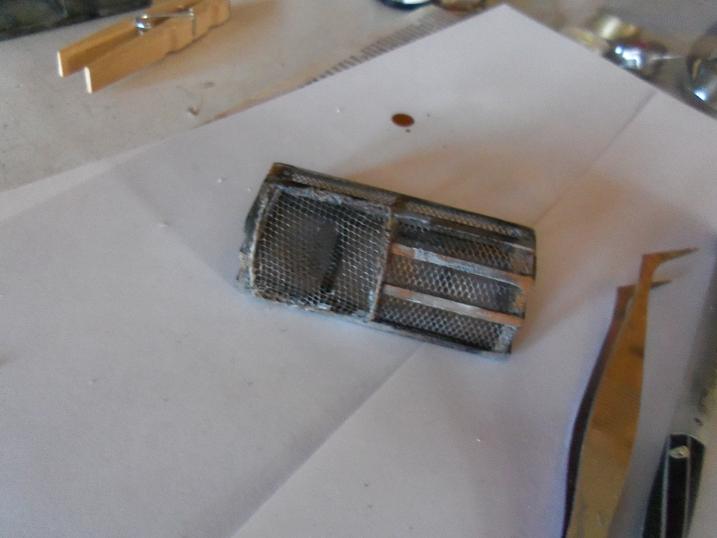
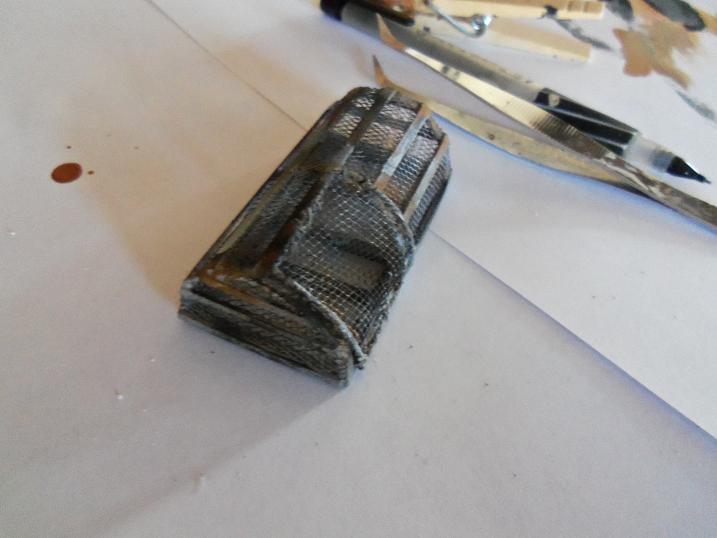
here is a little something I tried out yesterday. I have to make the front door for the traps......but I am out of the wood supplied to make the traps. I thought to make the door using wire....I have some really stiff steel wire, that I haven't found a use for. I also painted it it in quick steps.....the paint had very little time to dry.......but I think it still achieves the matching to the trap itself. the admiral bought this packet of thread for me......she thought I might be able to use it. there are different hues in the bag, but they are a bit too shiny, so I can't really use it in normal application. it will do for this just fine. I took netting and cut the center hole, and then lashed it to the frame. hee is how it will look on the trap. it was given the gray paint......then the brown hues.........and then the flat black and white ......to give me this. still a few more aspects need to be added to them..........the others will have a better door shape. this is the extra one that will be put in the compartment under the sheer. the progress continues........more to come soon

-
nice bit of progress Sarah.......the ablilty to 'think on your feet' is an absolute necessity with this hobby. there are many processes to do something.........but as long as the outcome is the same...then it's all good! I look forward in seeing them in application
