popeye the sailor
-
Posts
16,007 -
Joined
-
Last visited
Content Type
Profiles
Forums
Gallery
Events
Everything posted by popeye the sailor
-
 the observation deck looks great! with the detail your putting in Paul......you don't need photo etch.......but come to think of it, is there anything available for the scale your working on in the first place? superb Paul.......I'm in awe of your work
 -
very nice bit of progress! your fittings look really good. I'll look forward in seeing them on the deck. got some pictures of the entire ship?
-
that would be true, if there was a brass ring at the top there's really nothing to gain......and I don't think that it deters progress. there's really nothing wrong with a little small talk.......I think it's a great way to get to know the folks your talking to. builds and projects are nice, but I like to get to know the modeler as well......this builds the friendships that I see on the site....and I think that is the greatest build of all
-
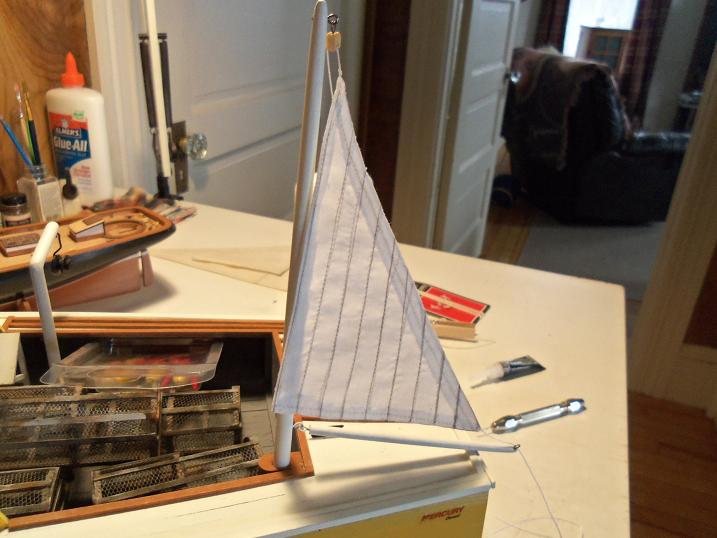
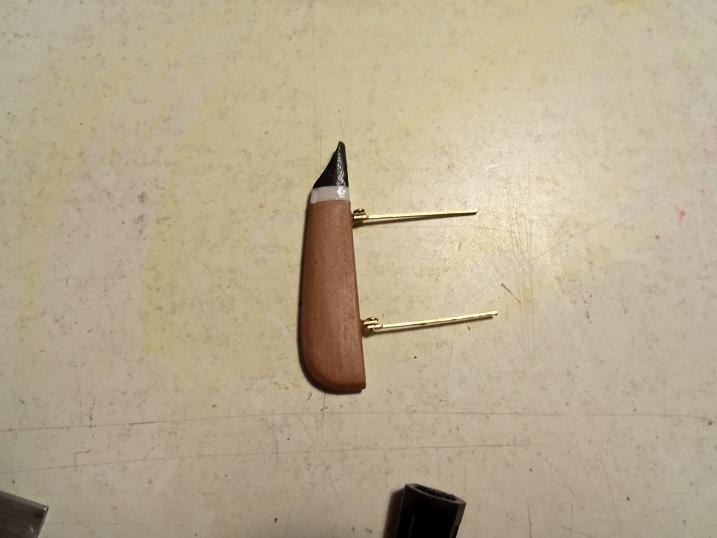
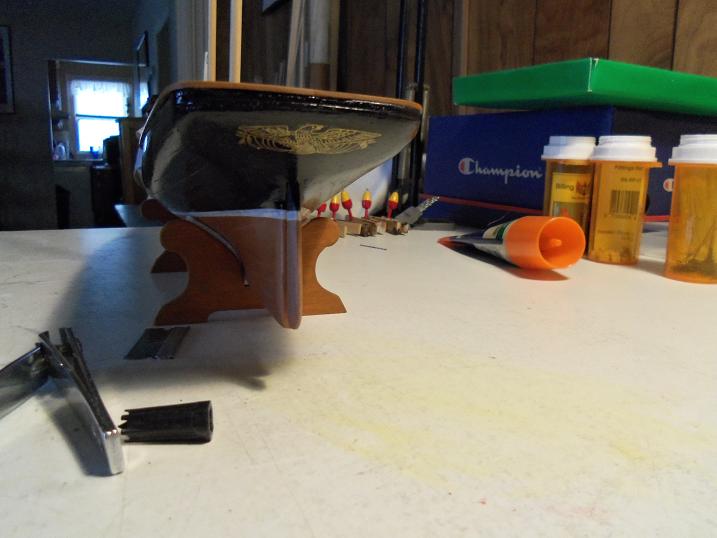
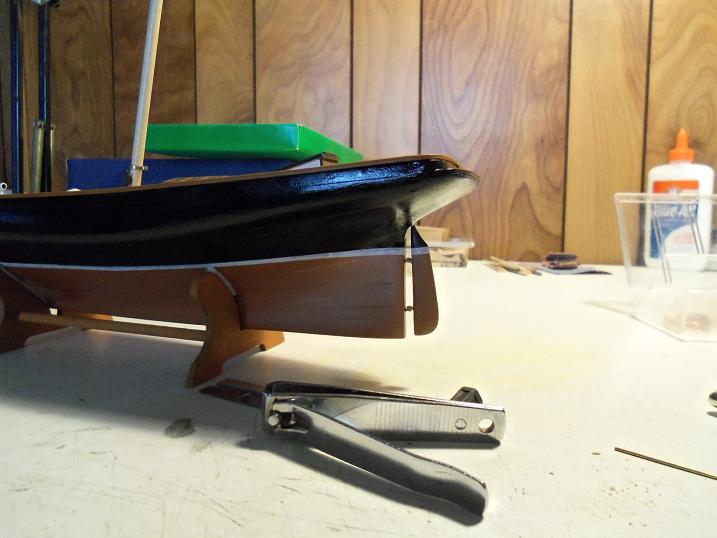
I used the supplied parts to do the rudder John.......I should have done what I was going to do, and used eye bolts. if I can change it, I will. later on, I might just order another kit.......I have other idea that I thought of 'after the fact' that I think would further enhance the build. thanks for the good word when the glue dressing dries, it tends to go clear. that's the sail material. I like the supplied material......it has a nice hue to it. I have some other material that looks like canvas, but it's a little bit thicker, so I stuck with this. the process I use to dry the sails can be altered slightly to put ruffles in the sails, to give them a wind blown effect. thanks for the good word Daniel.
-
I got rocky mountain oysters in mine.........I'll trade you LOL! looks like everyone's been watching animal planet. I do apologize if my crusty friends encroached.....on Peg's turf......I hope I took care of it.
-
ya BIG tease!!! LOL!
-
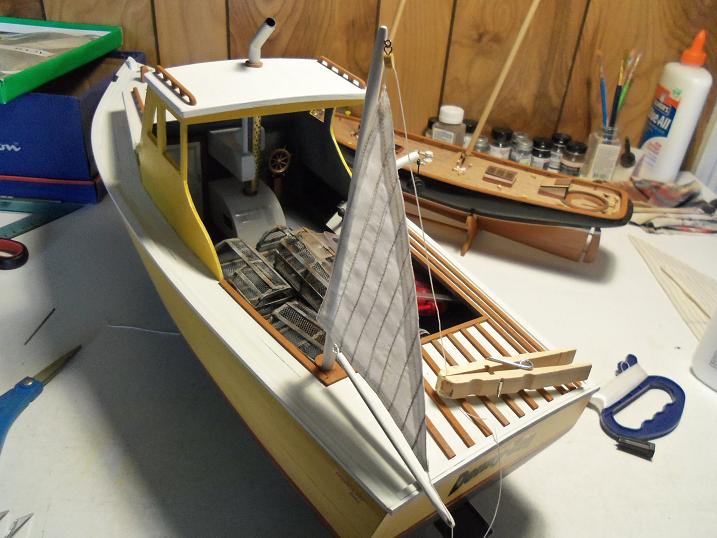
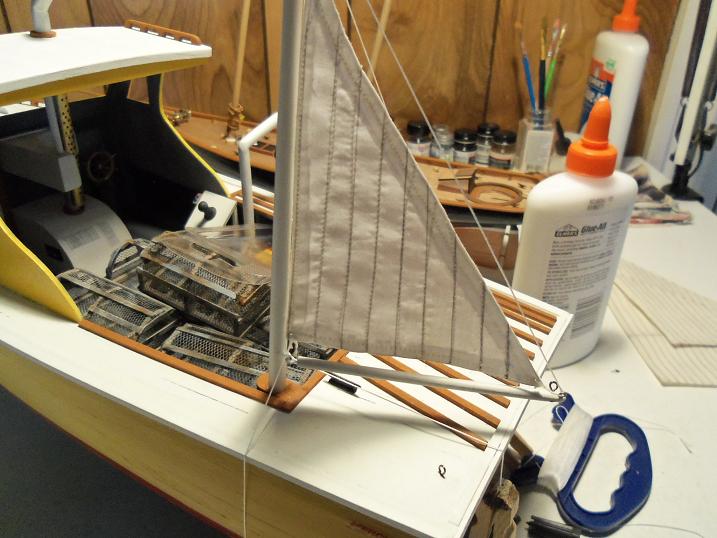
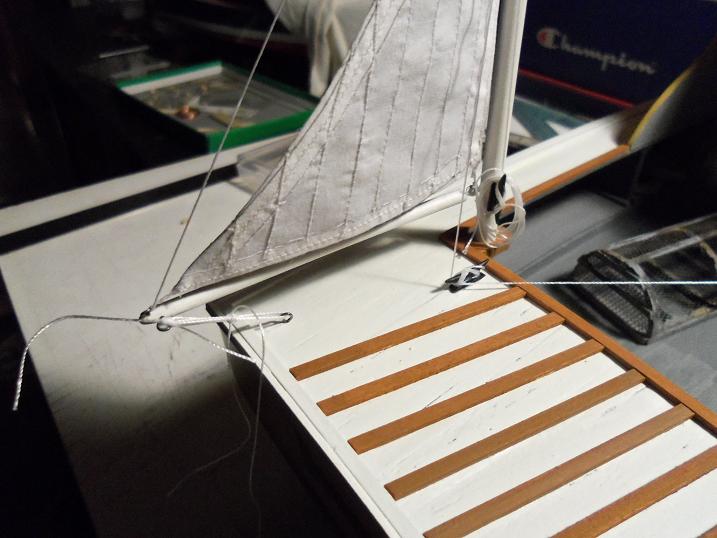
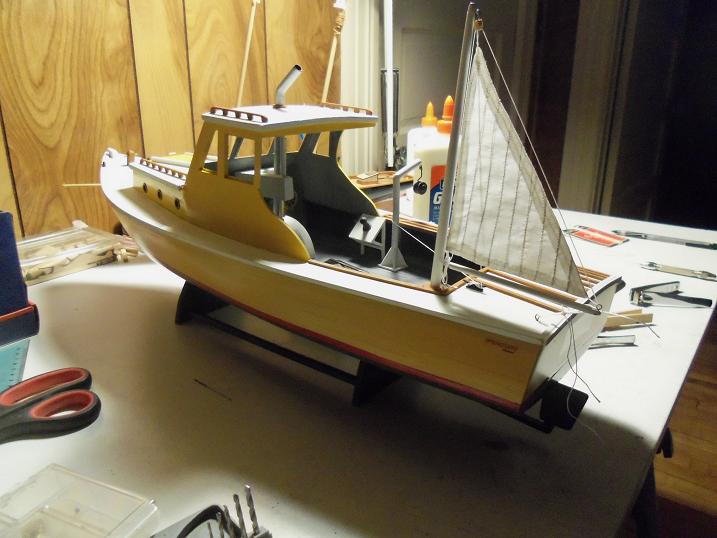
now that the sails are all done, the assembly process can continue. I figured that I'd rig this one first, before getting back to the AmericA build. the beauty of this sail, is that there is no manipulation to it. once it is errected it just stays put. it is merely there to keep the boat from rocking while the traps are being brought up, unloaded, and rebaited. the mast is removable, later the entire structure can be folded up, or even taken down completely and stored on the deck. there wasn't any tackle at all in the kit, just sail material and string. I added in the 5mm double block for the down haul and the boom lift. there's a bit more I have to do.........I'll finish this off when I get back to it.

-
thanks John........I should get back to this build soon........before I forget anything I have in mind...... thanks Daniel.......yea.....she thinks I have a one track mind, but I tell her.......no.....I think about ANY type of ship. there's a lot to think about, you know you do have me at a loss though.....what is Sjors buying?
-
very well detailed.....superb!
-
thanks sarah.......I started to write the last bit, and that just came to mind. I used to keep a pad in my pocket when I was younger. I'm glad you liked it as George Carlin once said: "takes all week to come up with a monolog........and ten minutes to use it up.
-
thought I'd stop by Daniel........I can see that it's over already! very nice work there........the ship looks superb! I bought a ship in a bottle on one of our visits to Hampton beach.......I love the novelty of it. beautiful work.....bet it looks great in the sunlight
-
in case the slippage problem occurs......you could always add your sandpaper idea into the mix......you'd have a clamp that won't stick .....and won't budge either
-
very nice!! they fit extremely well!........I can see when you fall into the dark side..........well.....we'll send out a search party! I'll bet you made jig saw puzzels in a past life ......the only thing I will suggest though, is be careful with the edges. these parts should fit flush together, with hardly a seam. I feel...like a heel....to make such a big deal, but perhaps a block, or a rounded chock, will sand them square, so when they're laid there, will be jointed flush and fare. sorry........I caught a bad case of poetry...... oh, really.......how long have you had it oh.......once upon a time
-
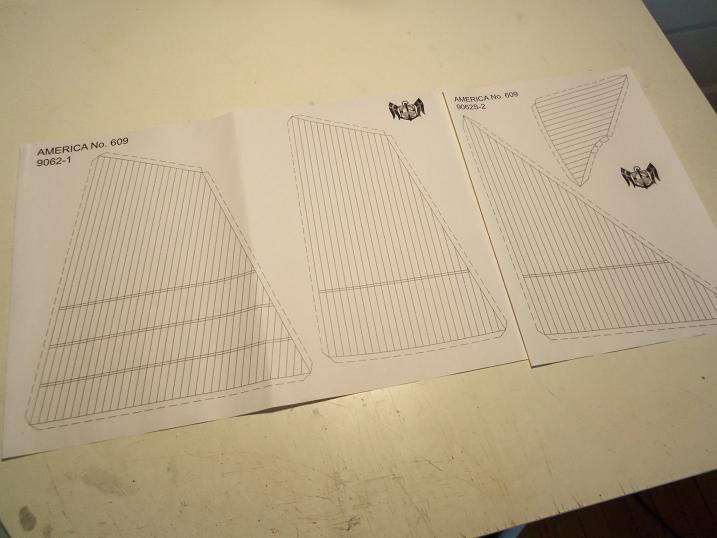
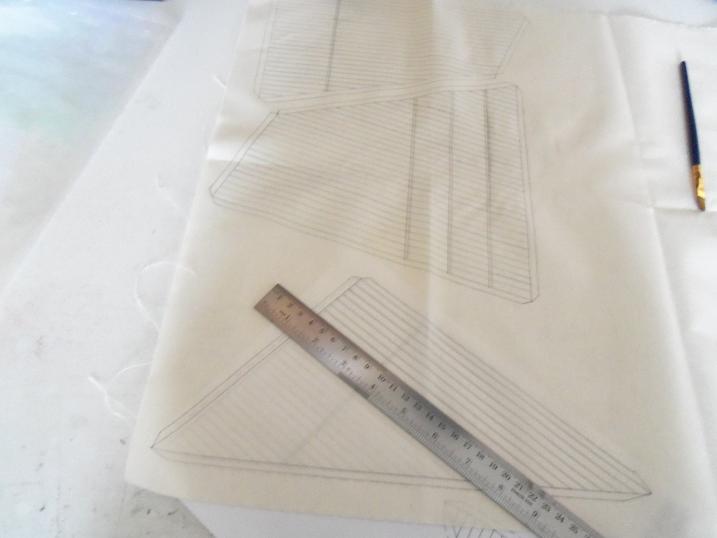
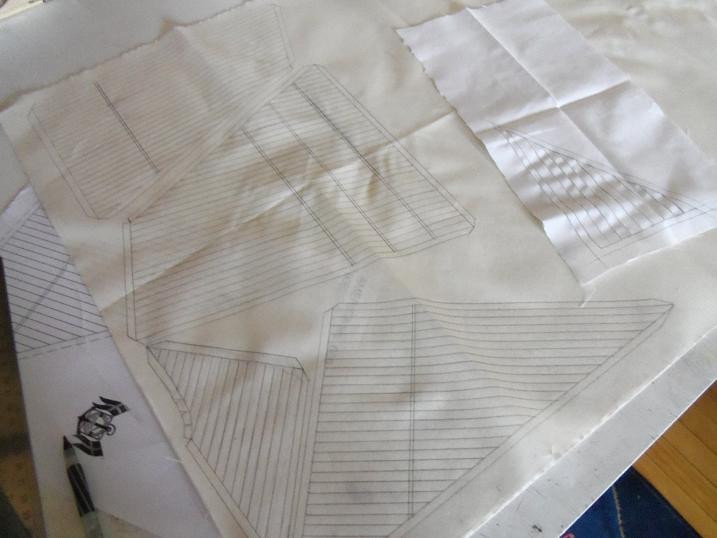
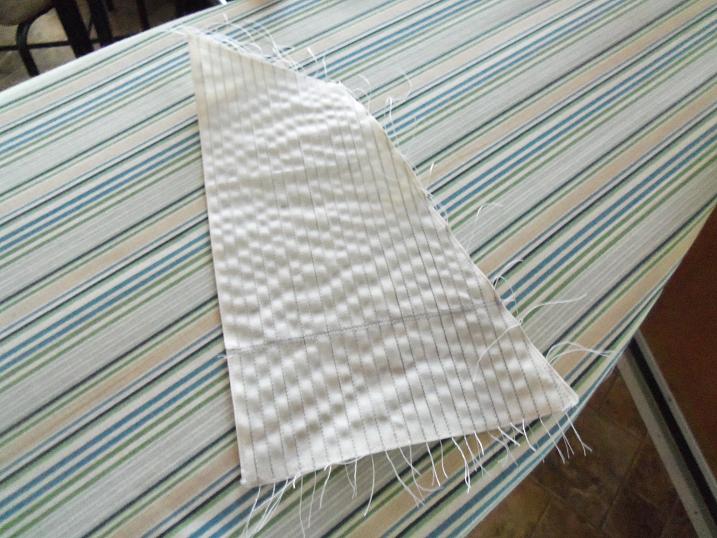
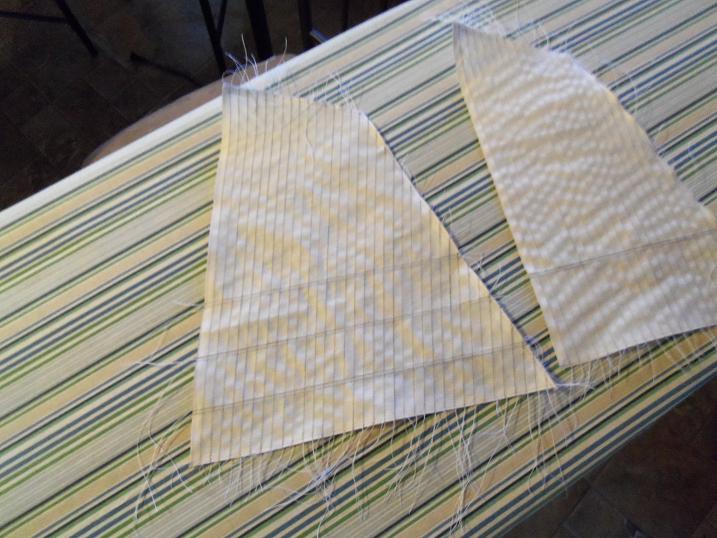
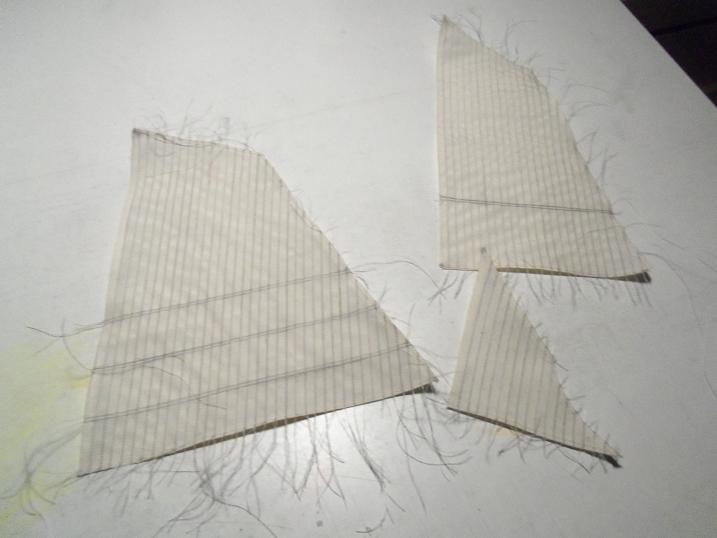
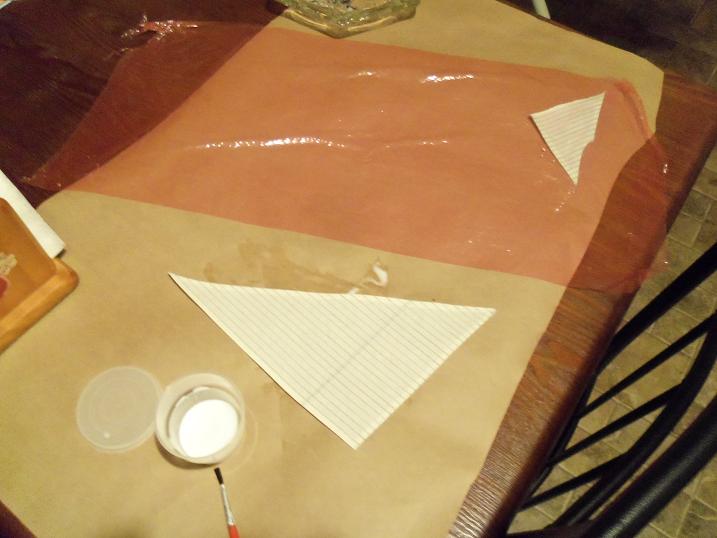
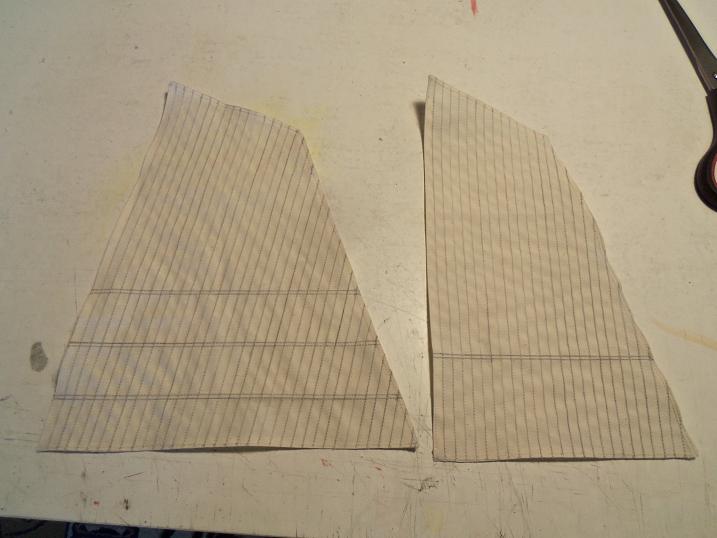
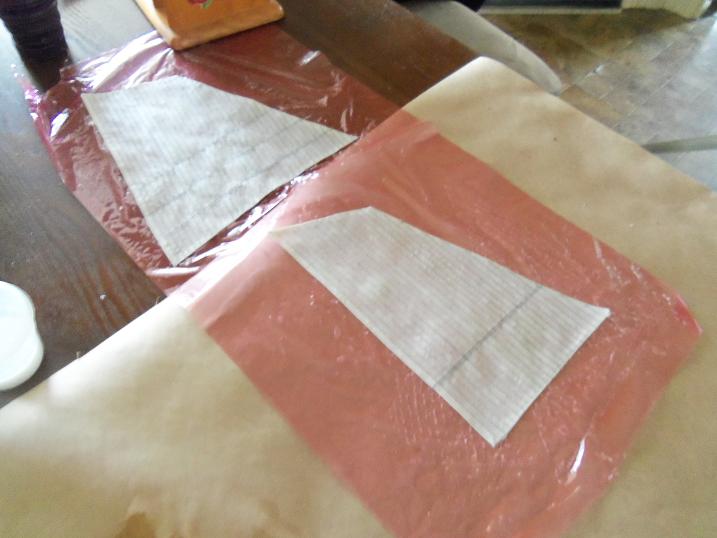
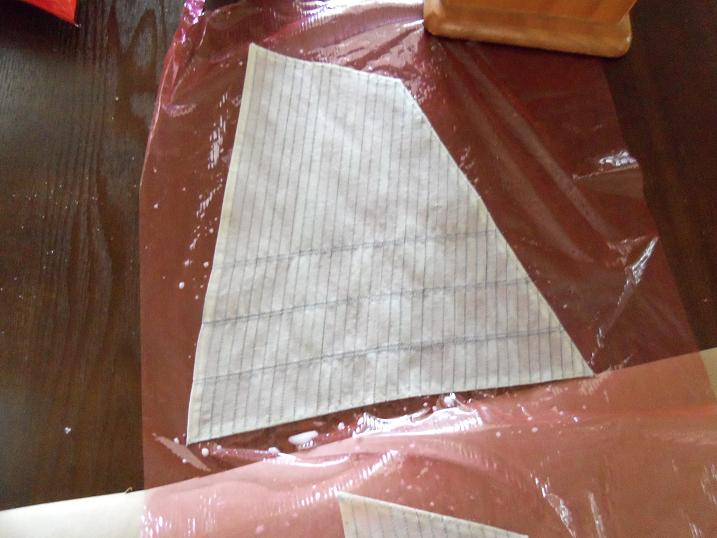
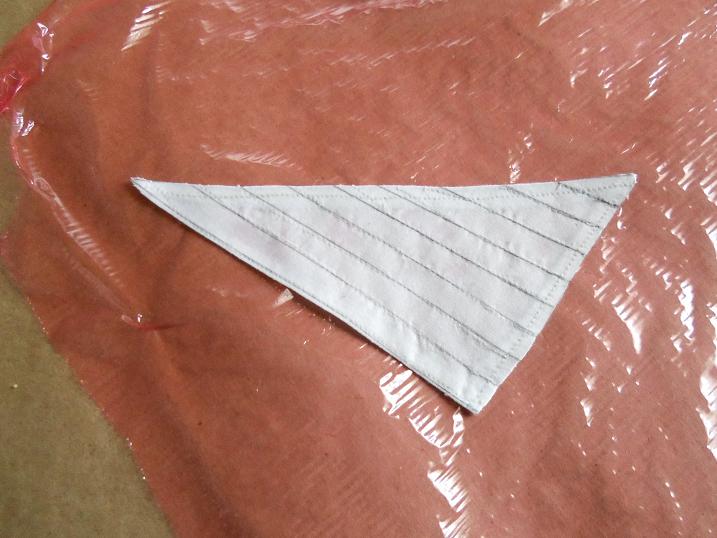
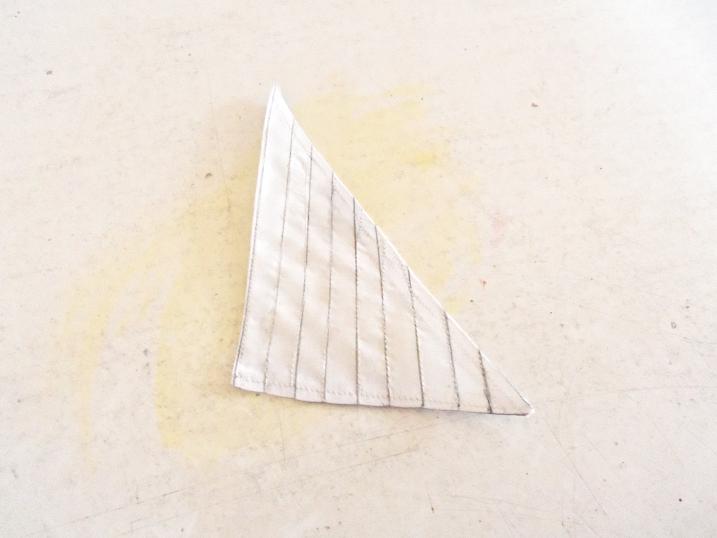
I finished off the rest of the sail work today. this kit supplies more than enough material to make the sails. first, they had to be drawn out......traced onto the sail material. while I was doing this, I also assembled the rudder and installed it. the sail diagrams.... then they were drawn out... then, it was off to the sewing machine.......to sew the edges and the pleat lines the fourth one was done as well........I failed to show it. after the stray thread was trimmed away, they were ironed and painted over with a dilution of white glue and water. that's about as far as I got........it carried over until today, when I could finish the task now the last two sails have to dry.......when they are ready, they can be rigged onto the build. I still need to make the booms for the fore and main sheet. more updates soon
-
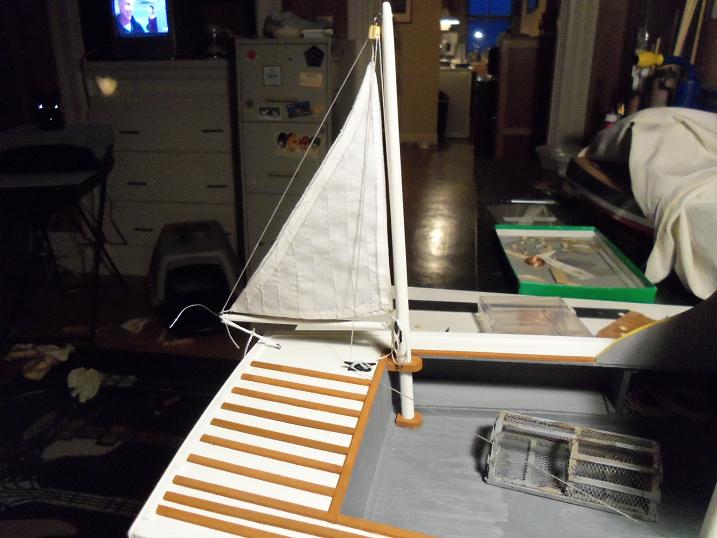
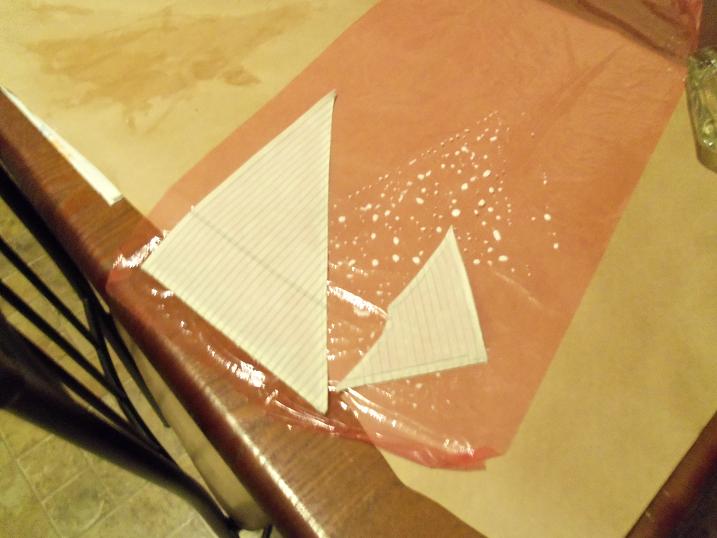
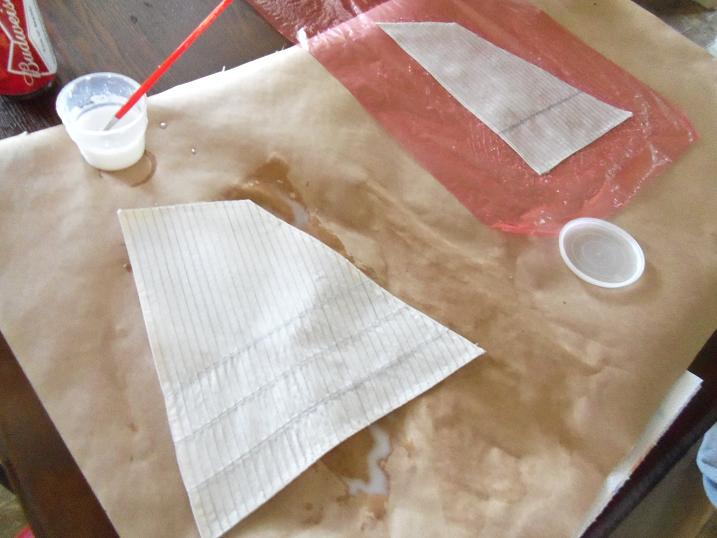
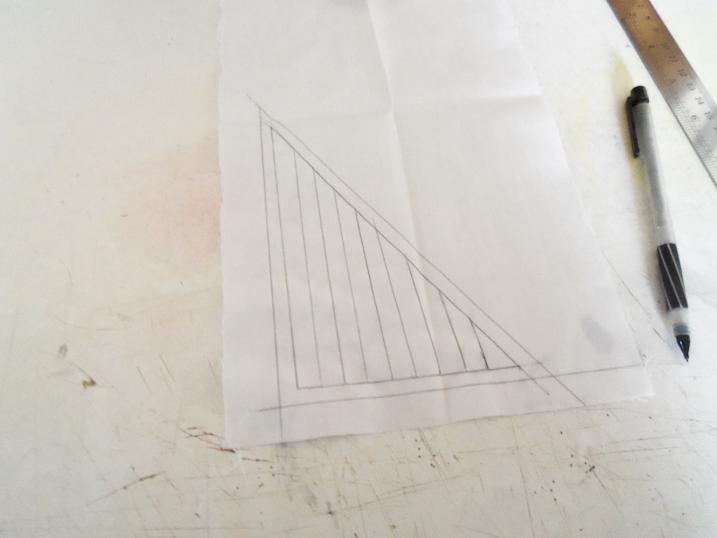
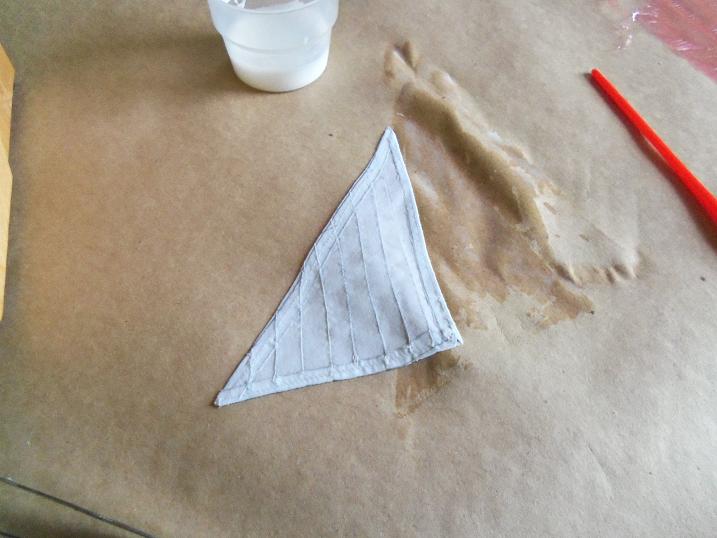
I would listen to it Wayne.......but it wouldn't work for me. thanks for thinking of me. I figure I had better post something on this build.......lobster fever is starting to overflow into other threads.........I'm going to get the riot act! anyway........I decided to make up the sail for the Denny-Zen, at the same time that I made them for the AmericA build. I couldn't find the diagram for the lobster boat, so I took some quick measurements and traced it out on the material supplied in the kit. it was then cut out, and the edging and the pleats were sewn in. once it was trimmed and Ironed, it was painted over with a diluted solution of white glue and water. then it was laid on plastic wrap to dry when it was dry.....it looks like this. I'll have another update soon........the sail will be rigged onto the mast.

-
thanks for the picture Wayne......but the color is a bit off. Atlantic lobsters are a bit darker
-
thanks Bob......the Goth is my first sailing ship........I'm a bit out of my expertise. I'll get back to her soon.
-
see what happens when you have to wait for glue to dry.. although......I still need to download a couple pictures of 'em, so I'll know how to paint them.
-
it's just all that mushy stuff........I get all warm and runny.....LOL!
-
hold me Sjors...........LOL! cool site........good folk........what more could one ask for. I'm glad to be back.........and that a lot of you came back as well......I missed you while the site was down. the site is getting stronger.......folks are trickling back in......we're doing fine!
-
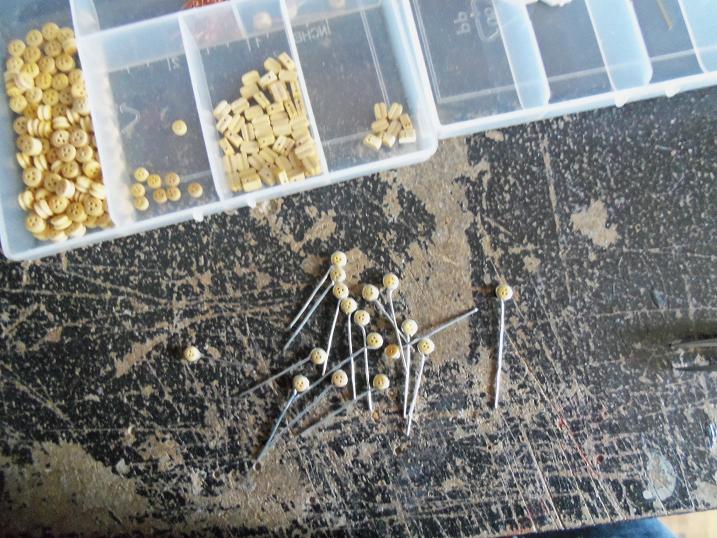
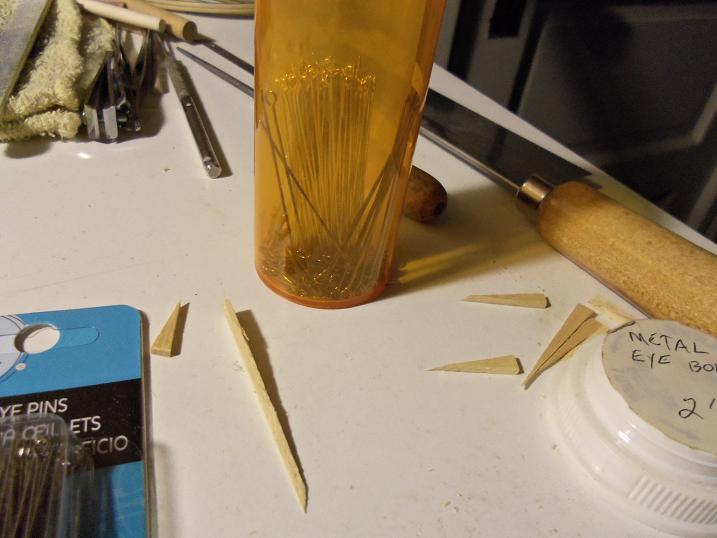
yepper........I've already looked....that's where I'm getting them from. I need to paint them black, so it doesn't matter what they're made of, and at this point.........I don't care. want to hear something really stupid.......after I had canceled the order with those people, the admiral was looking at our bank statement online.......there was a charge from them for $3.99. she asked me about it........and all I could think of was that they shipped out the grating I had ordered {I ordered one of them to see what they looked like}. I had told them when I first talked to them, that since they did not have the 20 pack of dead eyes, I would buy the bulk pack {150 of them}. they didn't even send them. I'm not cross that they did that........it ticks me off that they didn't send the dead eyes too. anyway, I got the grating.......I like the way it looks, so I might order a few more to have on hand, when I order the dead eyes. I hope to get them within the next week or so....I need to talk the budget director into letting me get them though.........that might be a hard sell, after my last purchase spree....I spent a little too much. thanks for the good word, I'll keep you informed
-
I used to write a lot of poetry at one time Wayne..........when I ws doing the Susan A build, I wrote a really good one for her: http://reginajagtdrydock.wordpress.com/2012/02/24/the-susan-a-a-regina-build-part-29/ I also used to do short stories......thanks for looking in and the good word! yepper Patrick.......I hope to get to her soon.......thanks a lot!
-
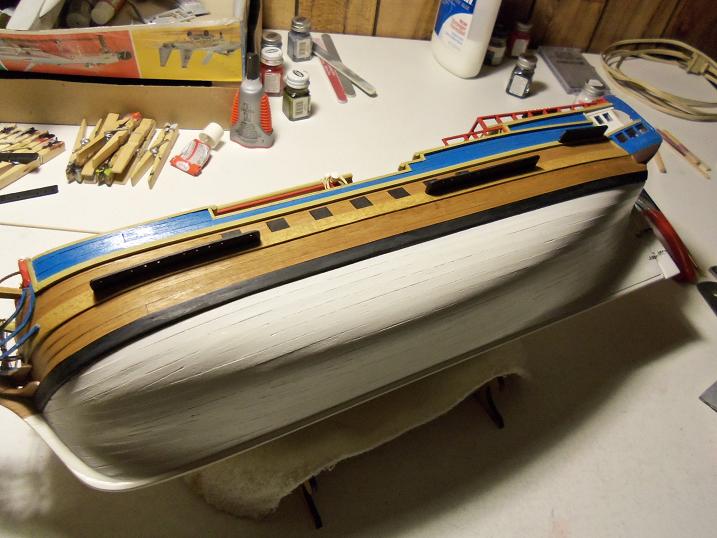
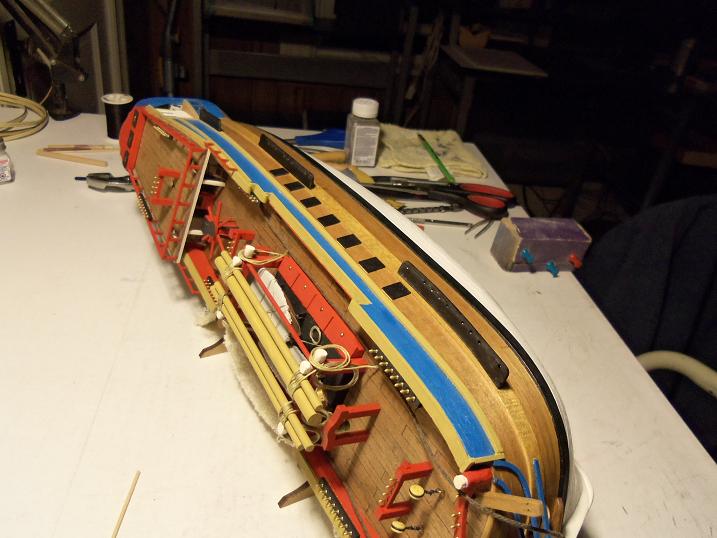
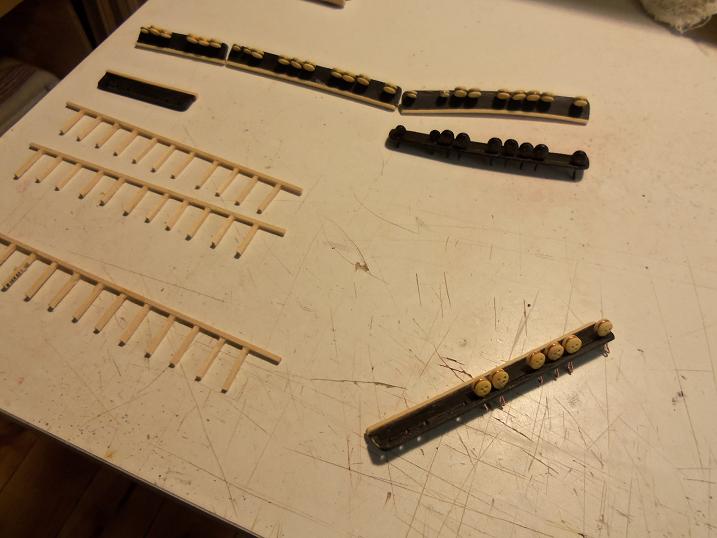
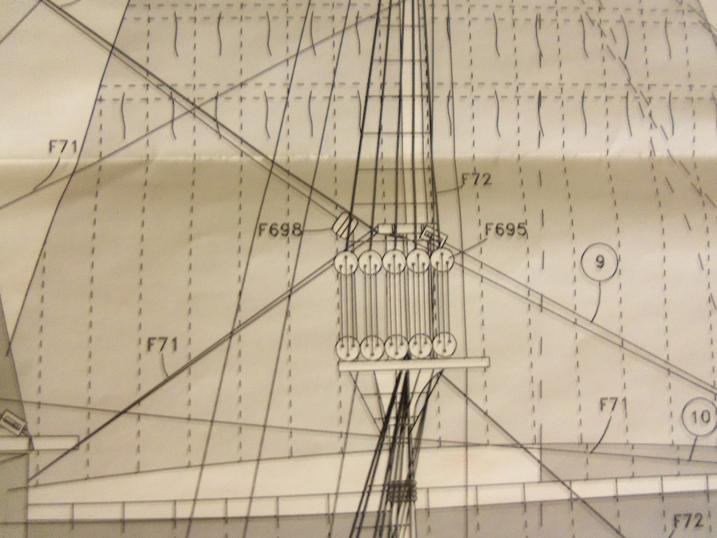
.......and so, here it is........the end of the progress. I am all caught up with this build, in where it stands now. I'm still waiting until I can order the correct parts to continue the build. perhaps I can get something going with her......there are a few things I can do. to me, this build has gone on too long.....I'm not used to having a build last over a year. true, it's my first wood build of a period sailing ship, but I'm usually not in the habit of tabling builds this much. wood build have been a total eye opener for me.....the ideas and concepts are endless! now that I have built myself into a corner again......I have to build my way out. I find this hobby to be quite habit forming........when something pops into my head......I feel I have to get it out....or it bugs the heck out of me, until I do. I think I have a handle on my manic constructive disorder, and I look forward to the day, when I only have one.......or maybe two builds in the works at any given time. this last bit of progress deals with the dilema that I am faced with at the moment. the dead eye assortment is not correct as we have all discussed. the tops and upper crosstrees require a smaller dead eye. I have been trying to get some of them......but after one failed attempt, I still don't have them yet. I also found that the holes that are pre-drilled into the tops are not correct as well. I am having to redrill them...even if I get the proper size dead eyes - 3.5mm. this is with the 5mm dead eyes.......clearly too big! they are even too large for the tops.......I would never be able to get the correct number of dead eyes on any of the given tops. the crosstrees are not even correct......something else that I have to do. I have pretty much used up all of the 3.5mm dead eyes that came with the kit........I wished that I had done the masts differently.......I would probably have the first level ratlines done already. I would be reveling in the fun that the rest of you folks are having I feel like I'm at a school dance, sitting on a bench.....like a wallflower. I do have one picture that I have here, that has been in my computer for a while now.......I was hoping that I could get back to the build. I had done some of the 3.5mm dead eyes on one of the tops. so, that's it my friends.......here I am at this point. the AmericA build is almost done.........as well as the lobsie twin build.........I will make a promise to you all.......when these are done, I WILL have the deadeyes......and then......look out!

-
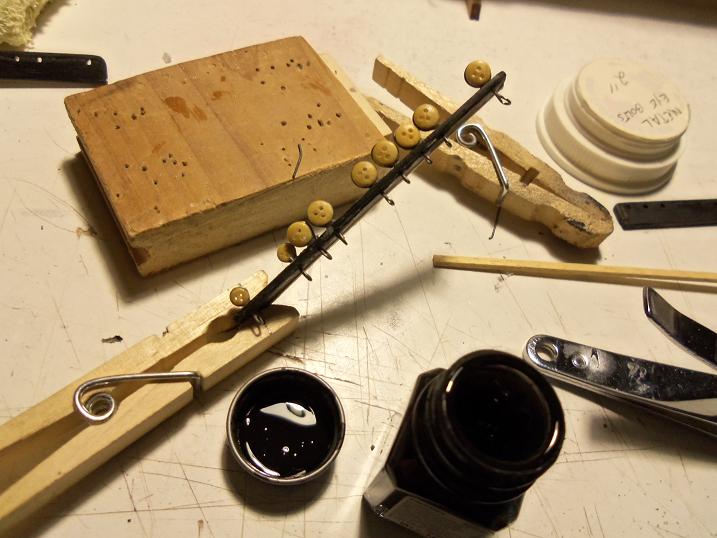
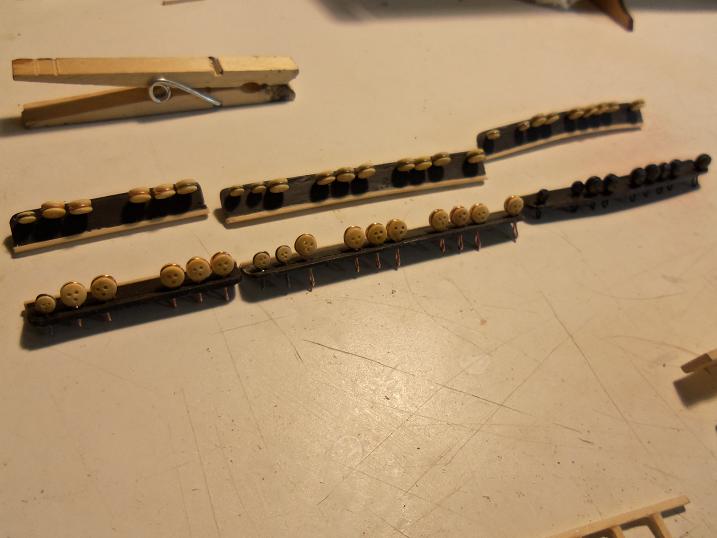
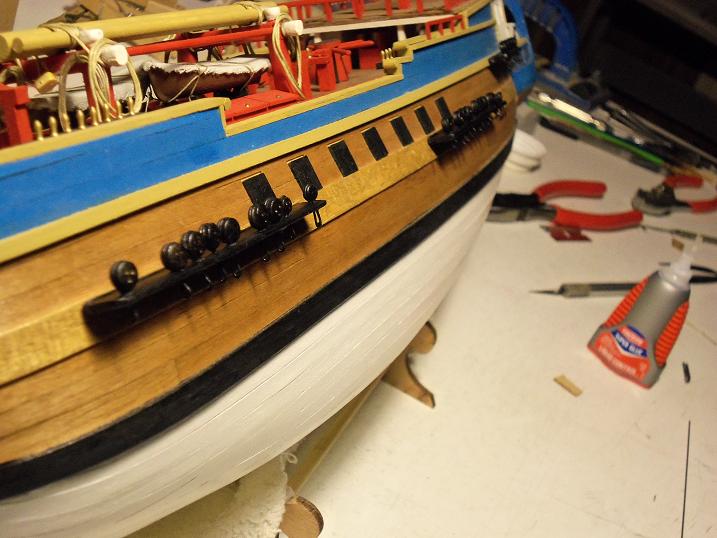
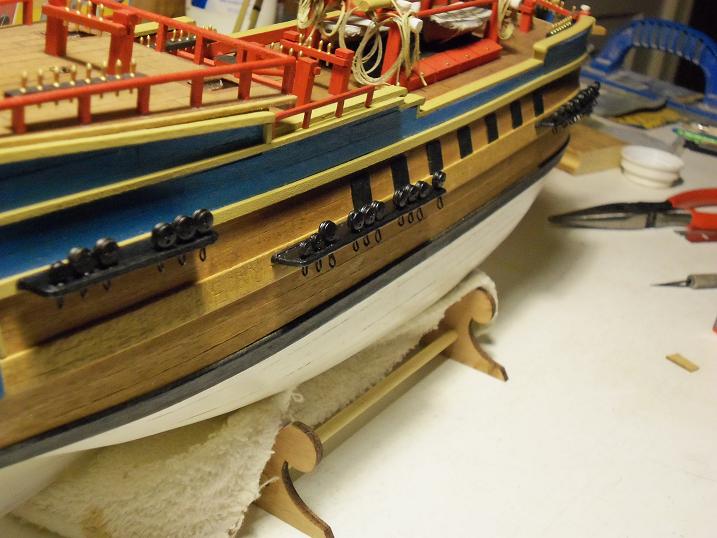
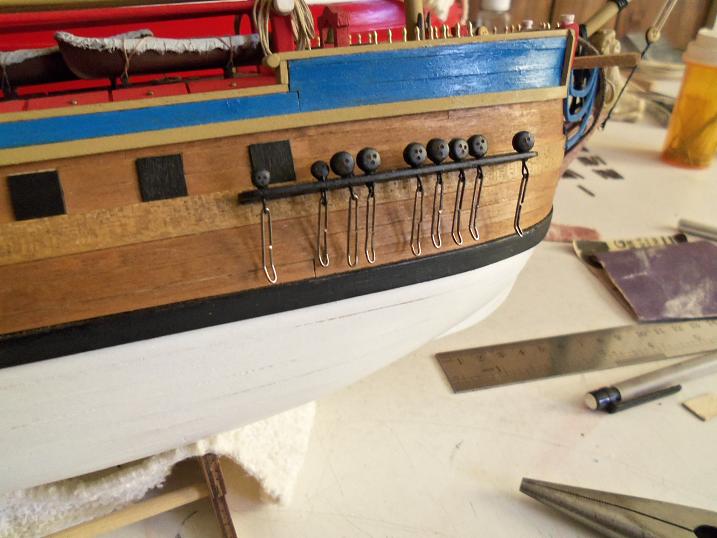
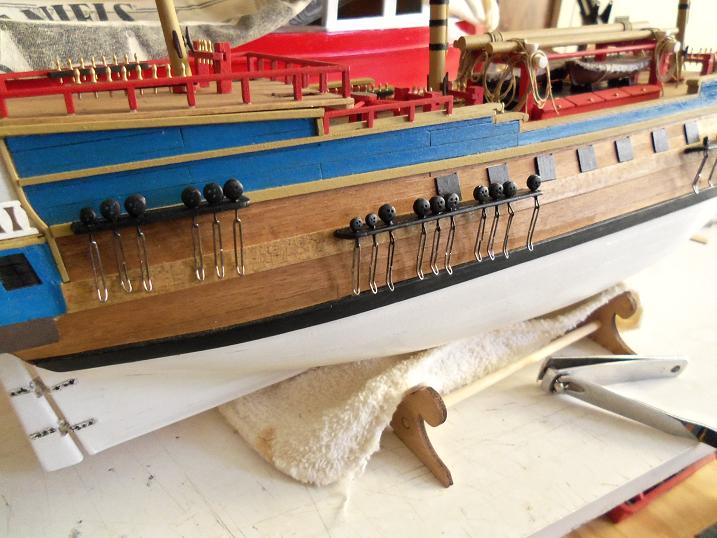
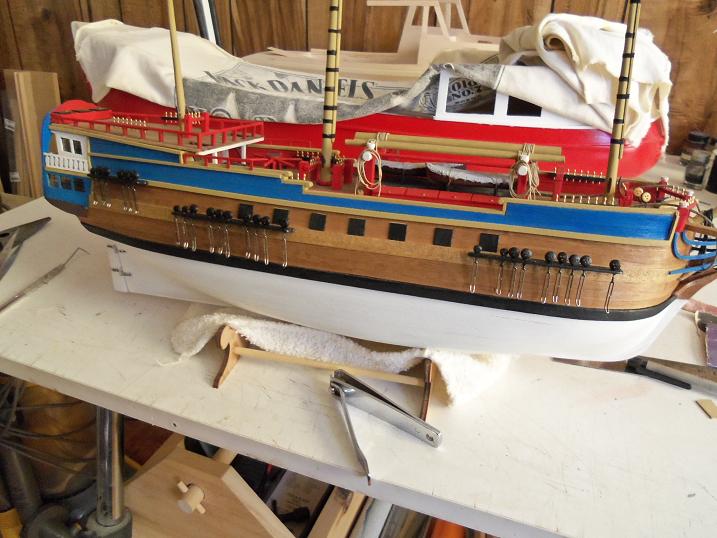
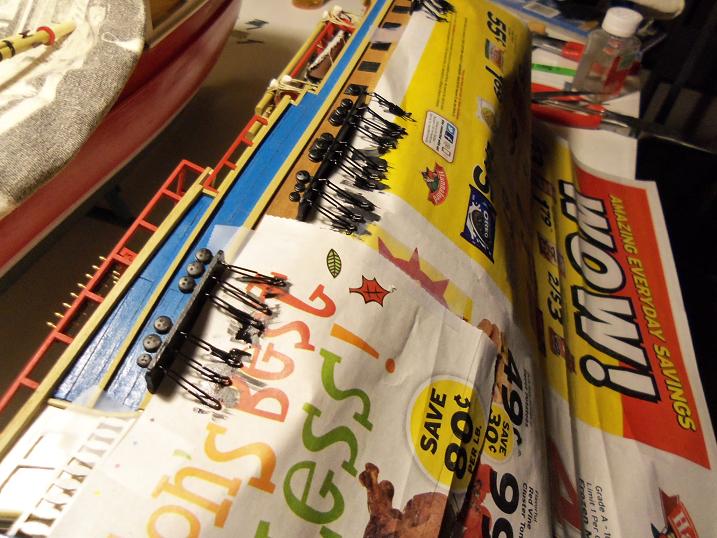
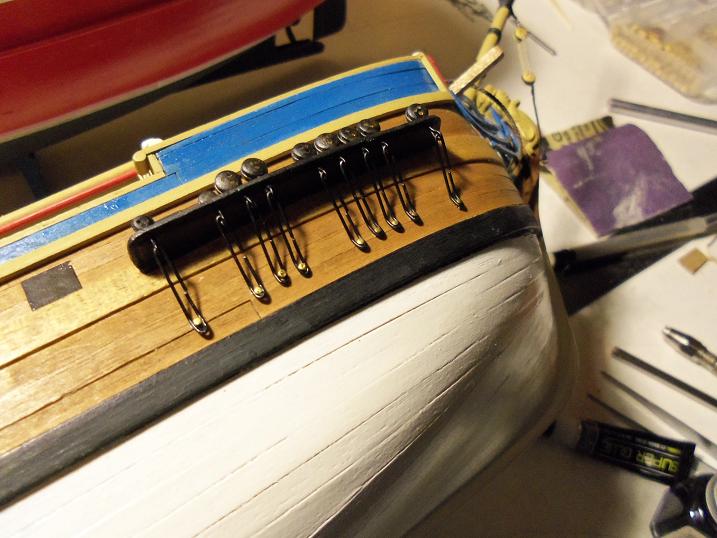
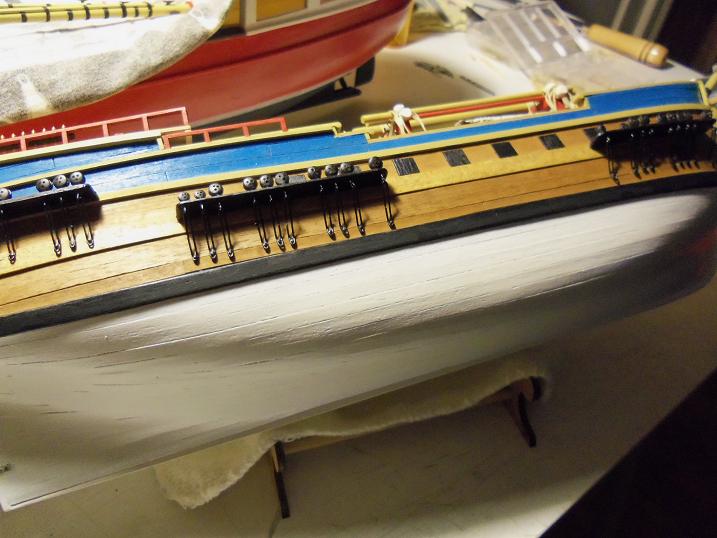
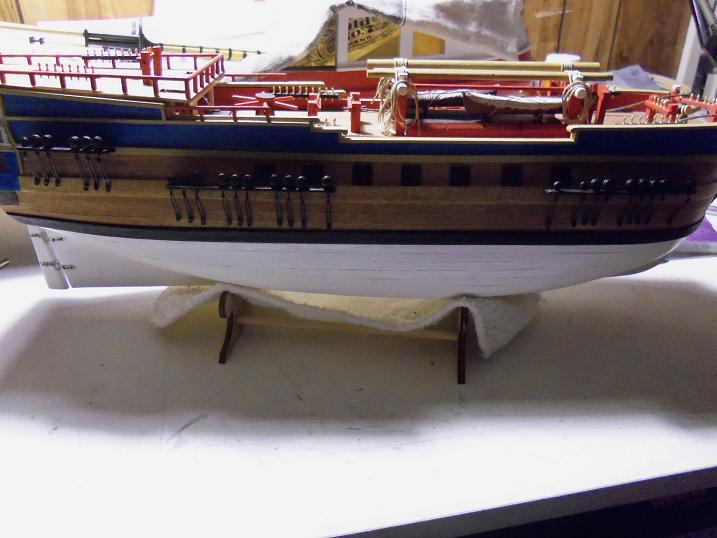
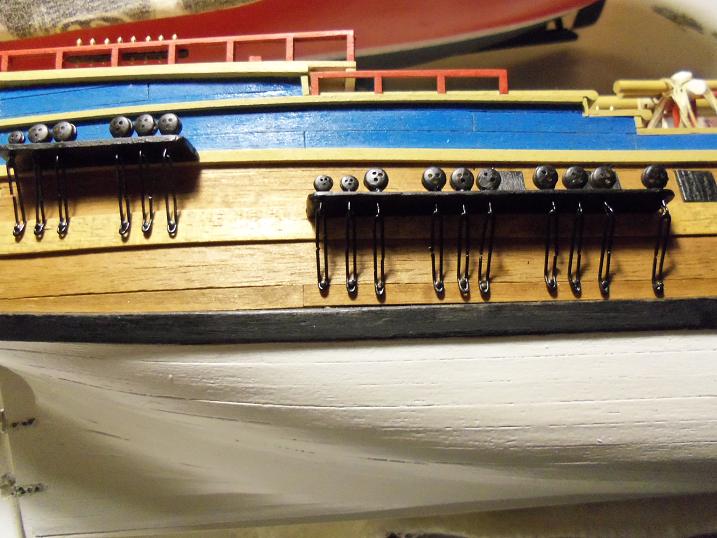
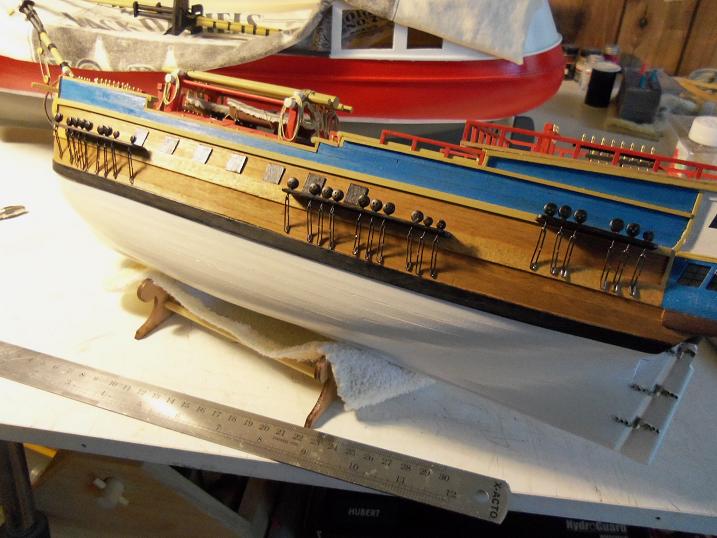
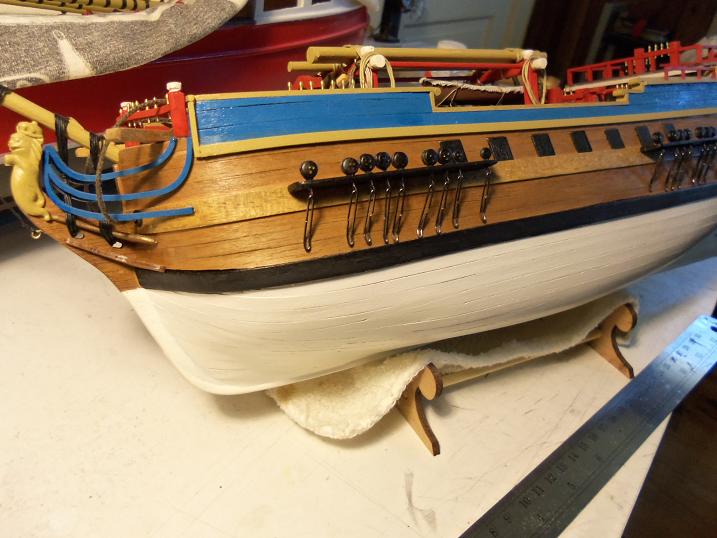
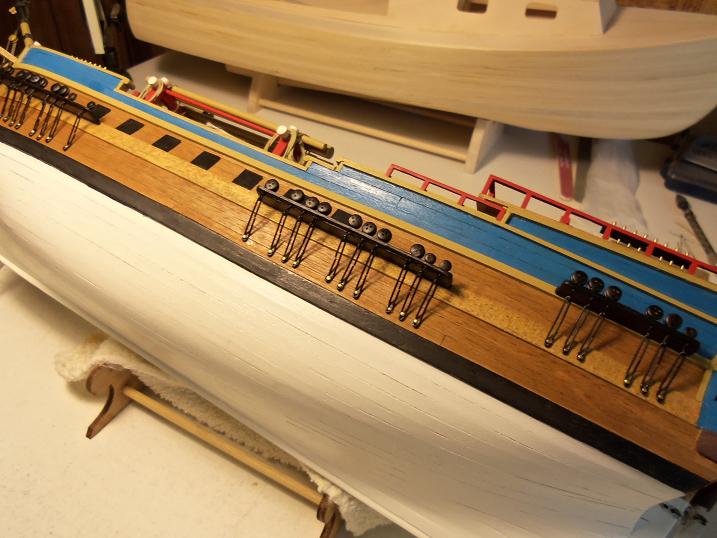
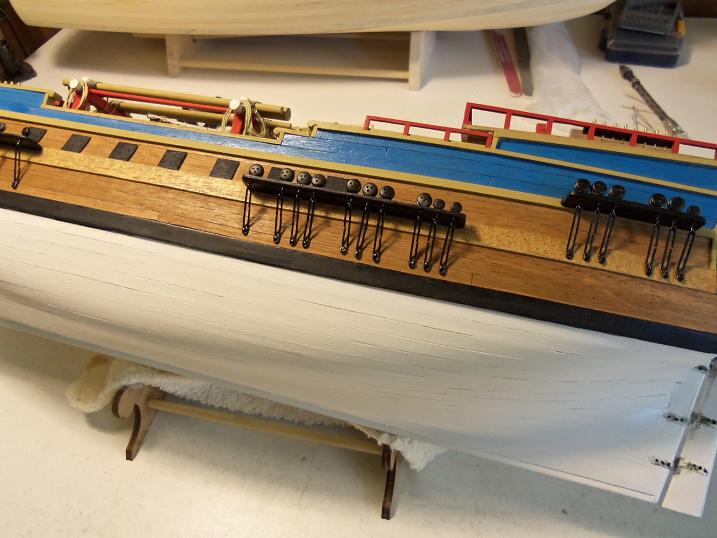
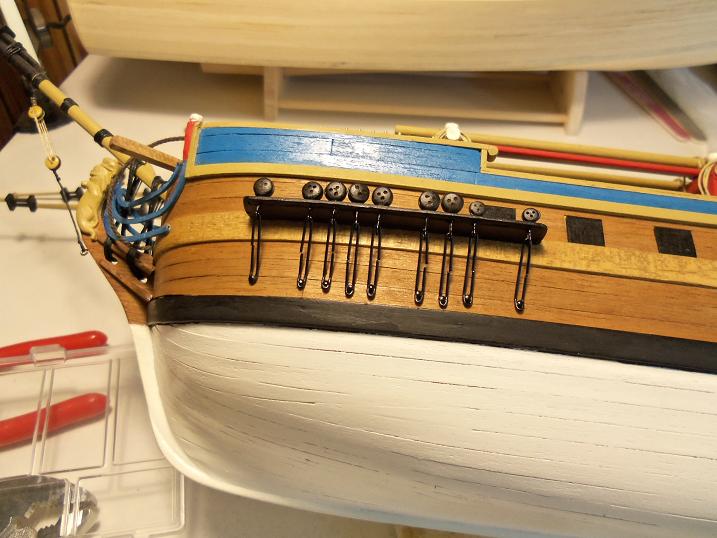
you'll note that I had also cemented a length of wood on the the inner edge of the chain plates.....this was to get a better cement point, and to bring them out just a tiny bit more. 11 - 14 - 2012 with the chain plates assembled and cemented in place, it is time to make and install the actual chains for them......here is how they were done. cutting off all the eye bolts on these wires, really built up my eye bolt inventory.......I'm so filthy rich! they were all hung on the hull side with care.......a slight bend to the bottom would soon be there (SIC) with masking underneath...a definite must.....they were given some paint, to protect them from rust they were nailed in place.......but wait, there's more.......they were touched up with paint, to match the decor. with the starboard side done, all painted with black........I turned to the port side, where the progress did lack. when I was done, with this new batch......I checked them all over, to make sure they match they were painted as well, to protect then too.......I bet you can guess, the next step, I did do the touch ups were done, the paint brush was clean.......the chain plates were finished, flat black, a light sheen. I looked her over, up and down......from front to rear, and all around I came to the conclusion, from what I could tell.........for my first time, I did rather well I put her aside, but not out of sight.......happy modeling to all, hope you think it's alright!
-
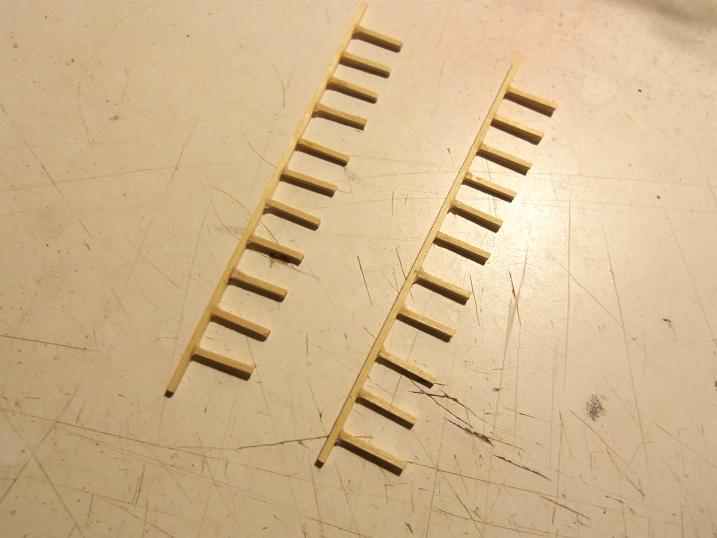
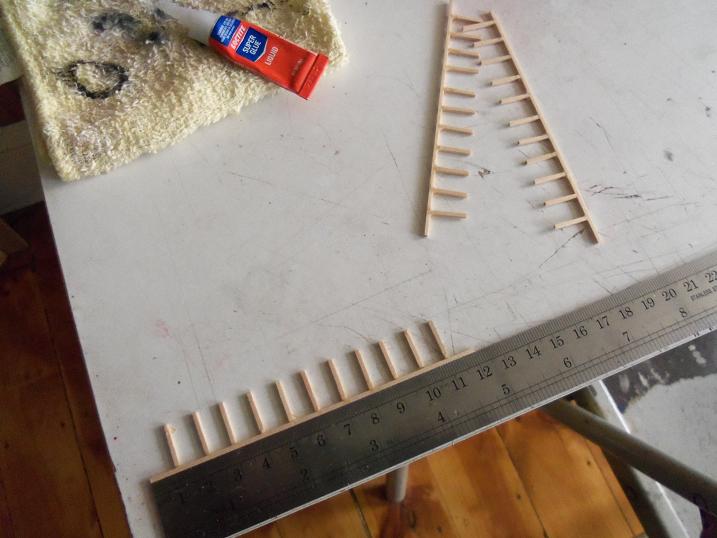
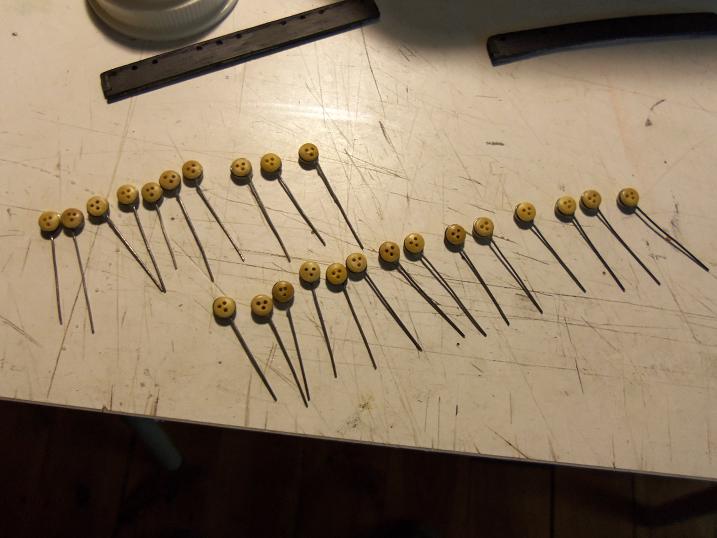
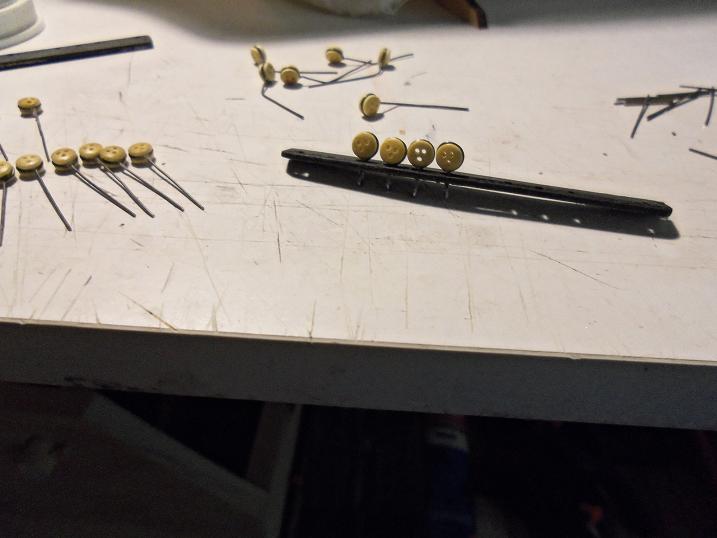
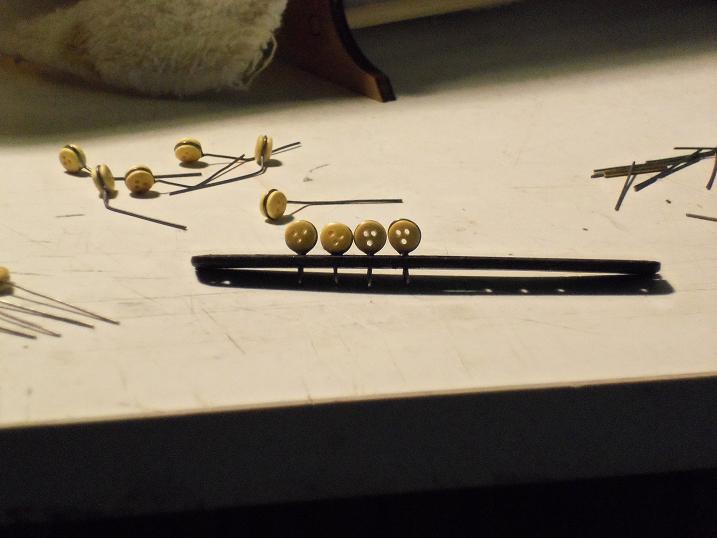
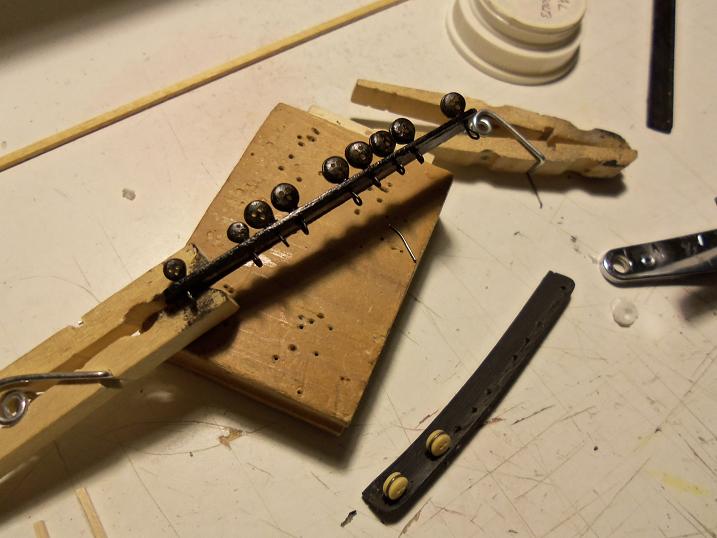
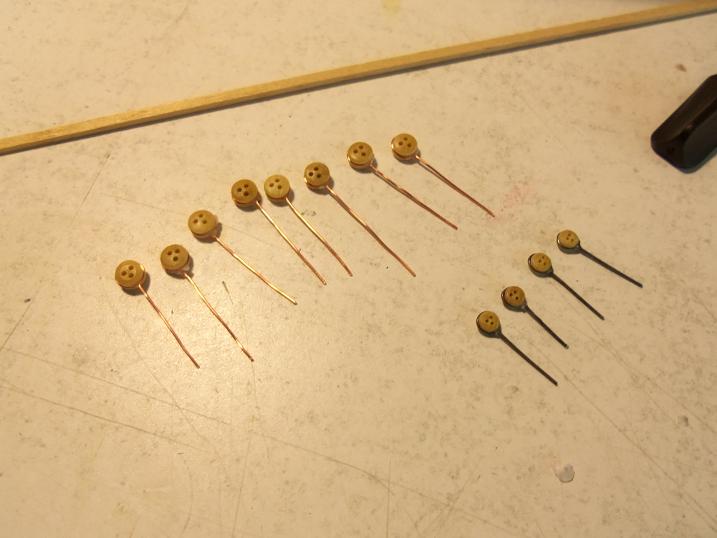
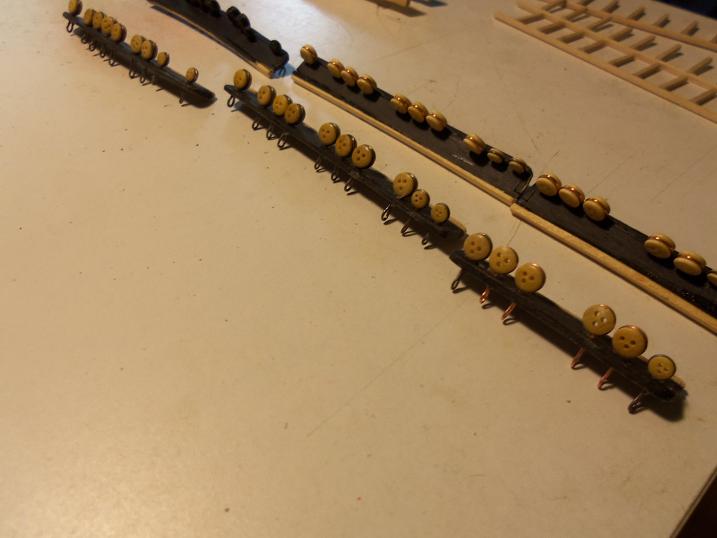
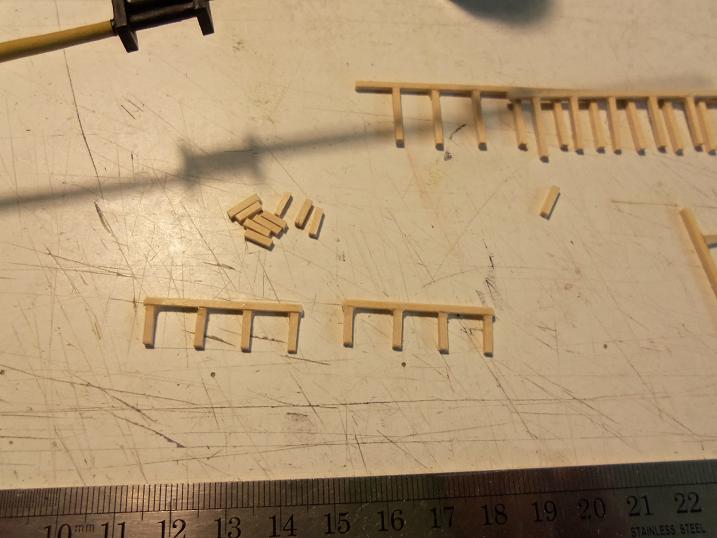
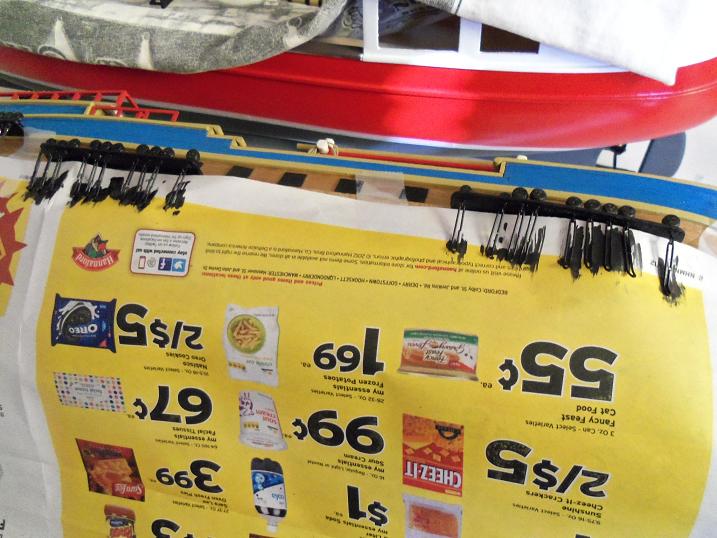
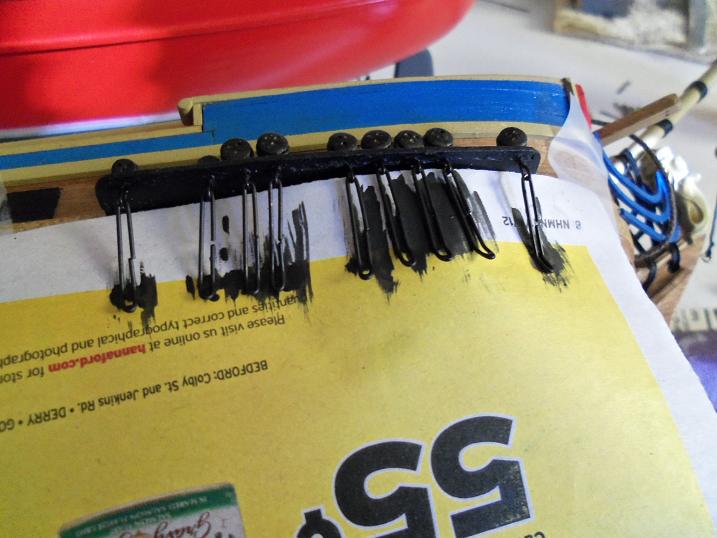
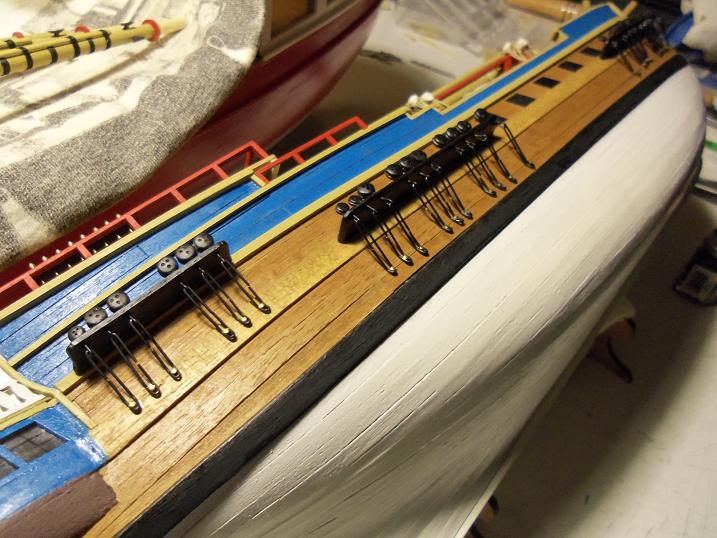
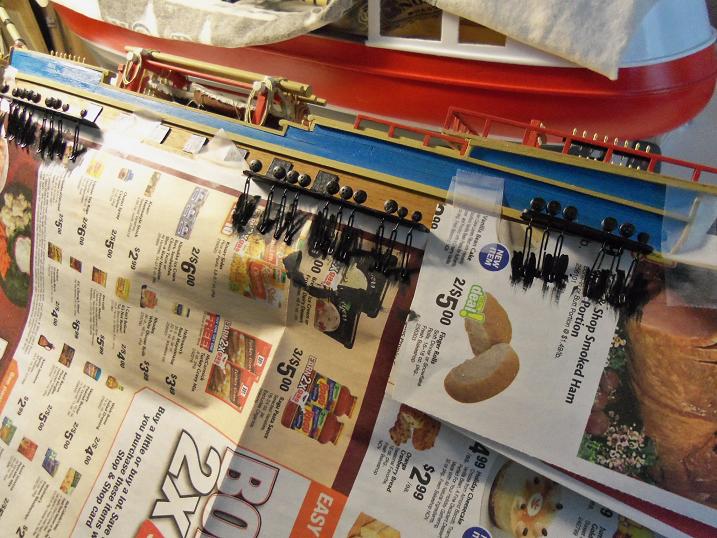
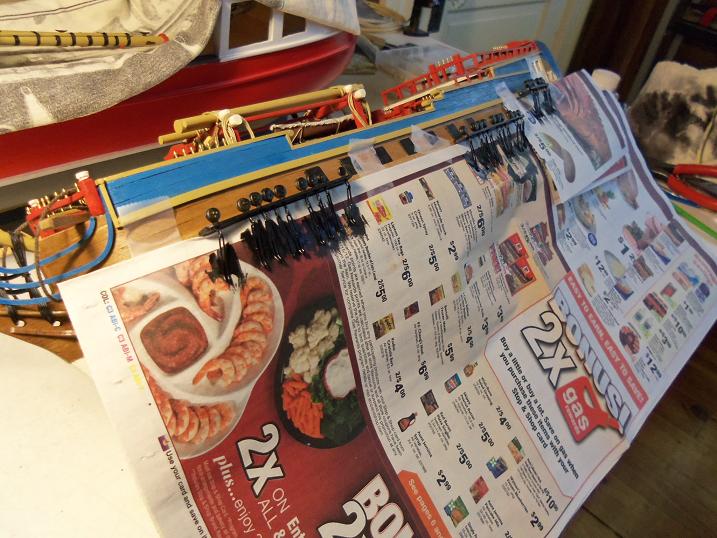
11 - 1 - 2012 I got back to the chain plates.......as well as a small forray into a bit more rail making. the dead eyes were added as well. the rail making.... getting the dead eyes ready railings were cut to size the progress so far......