


popeye the sailor
-
Posts
16,007 -
Joined
-
Last visited
Content Type
Profiles
Forums
Gallery
Events
Everything posted by popeye the sailor
-
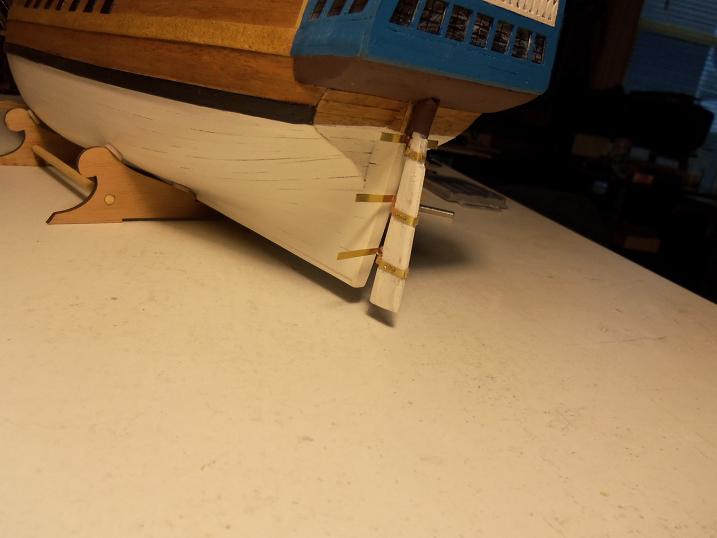
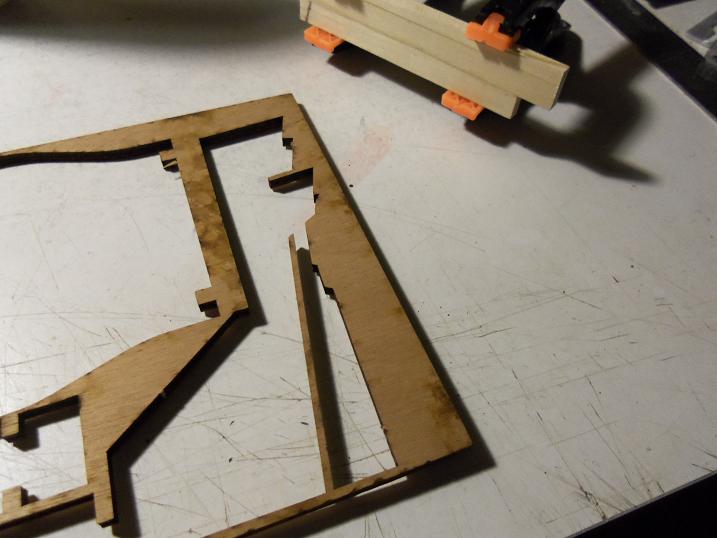
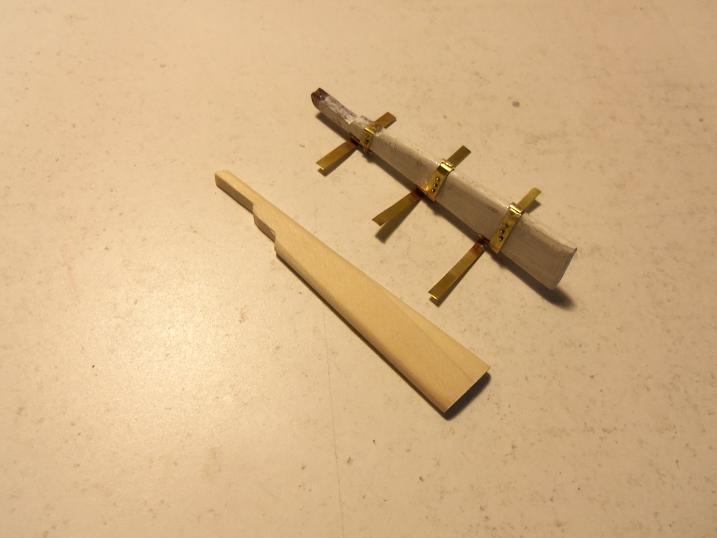
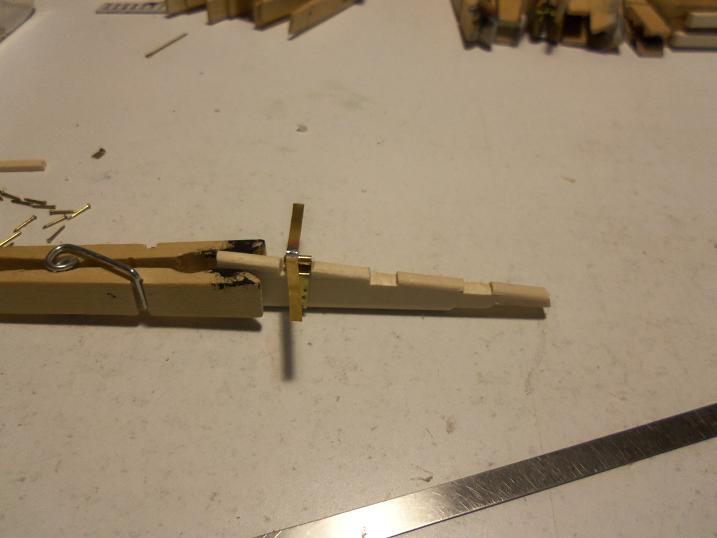
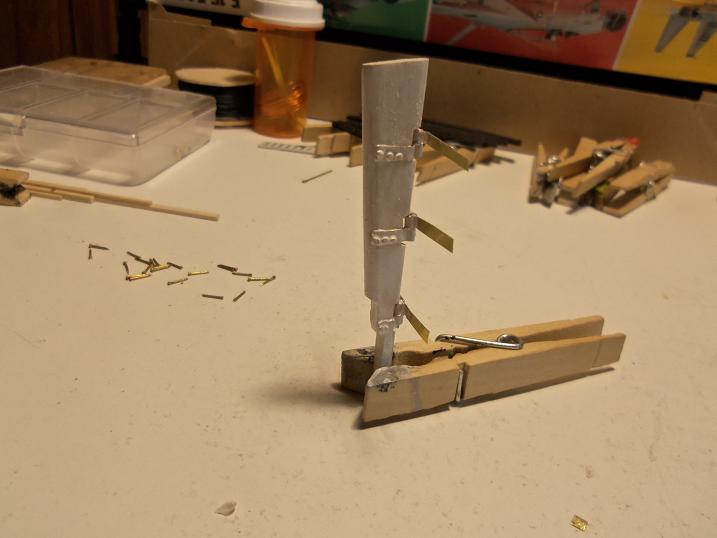
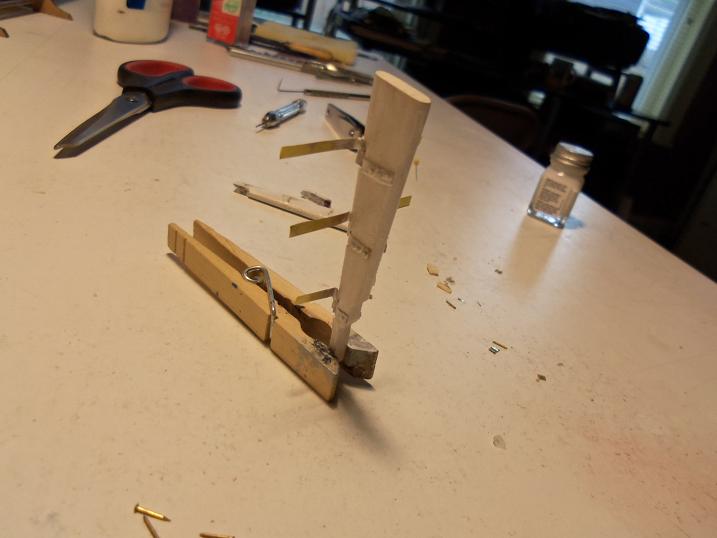
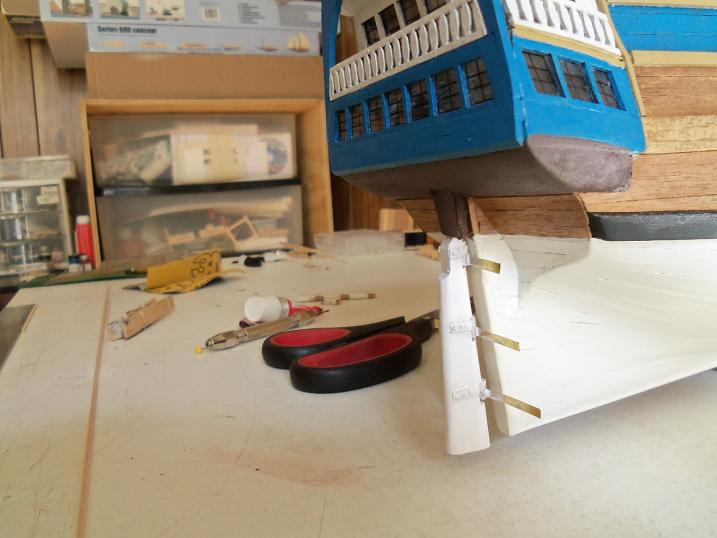
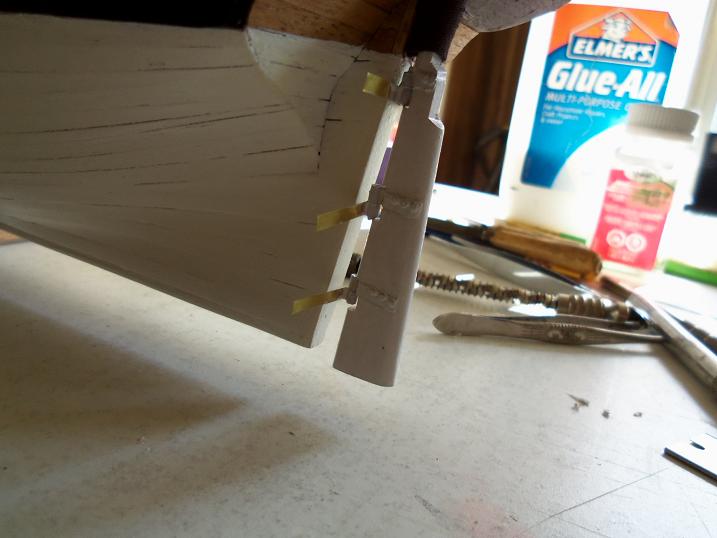
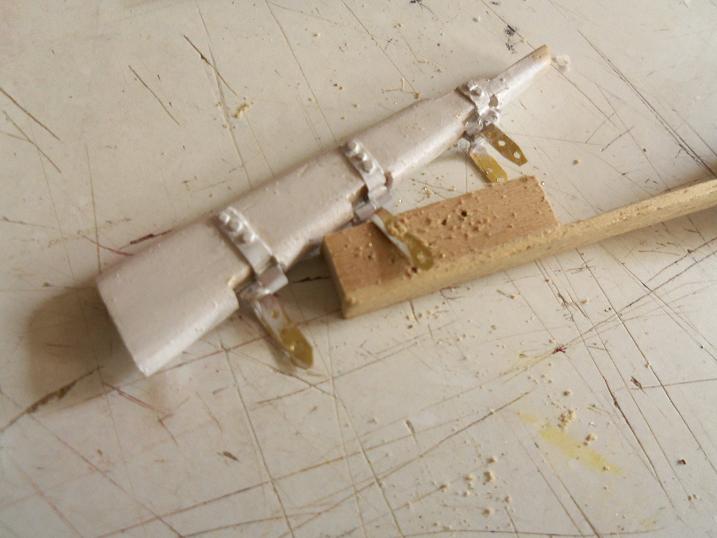
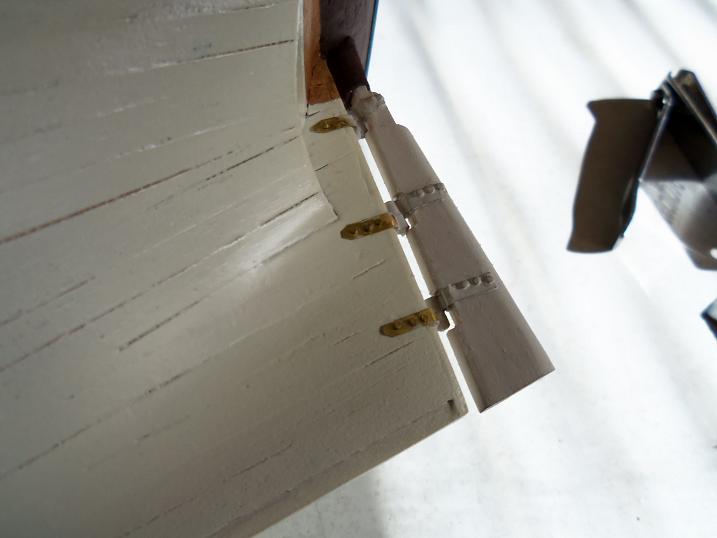
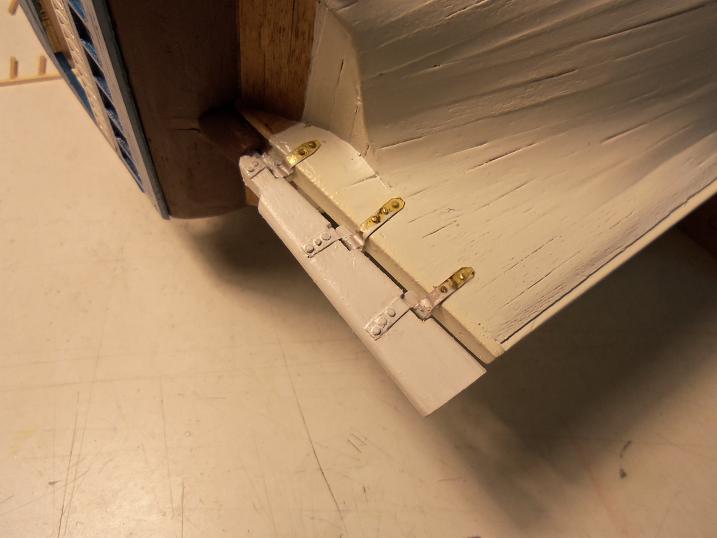
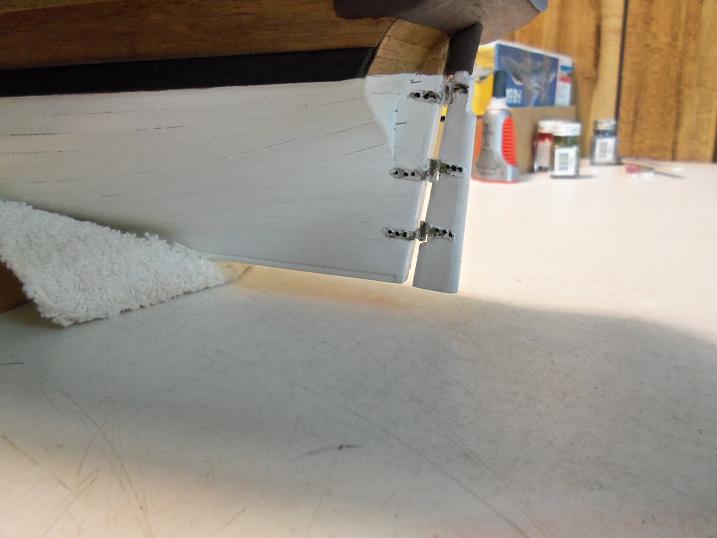
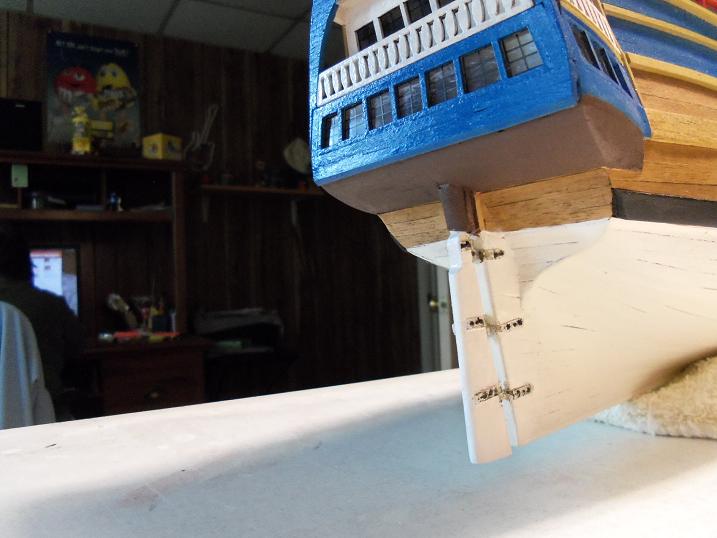
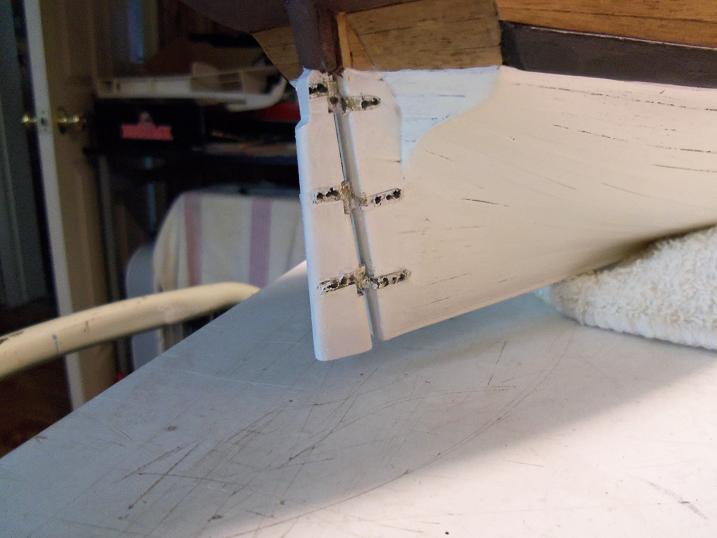
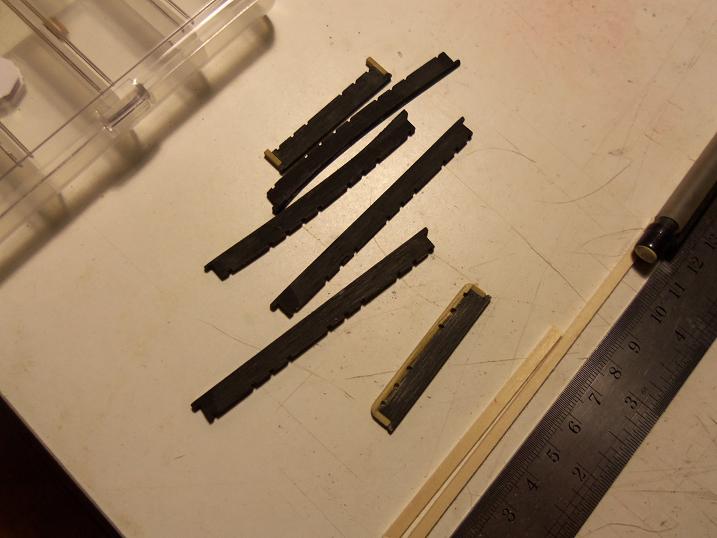
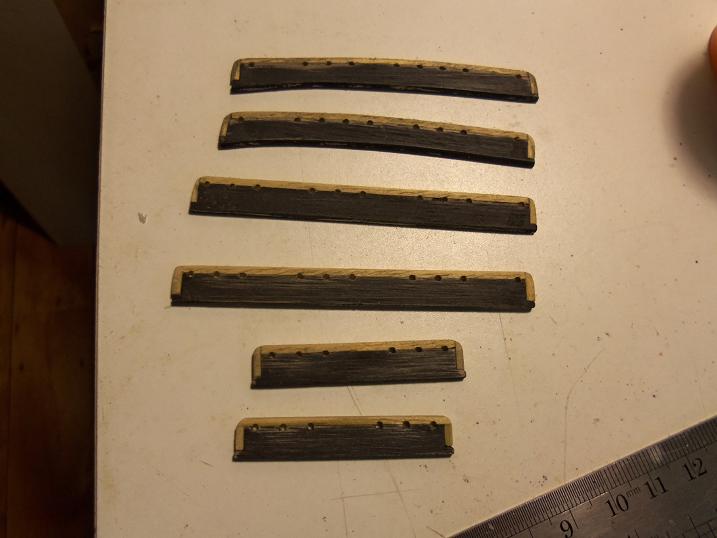
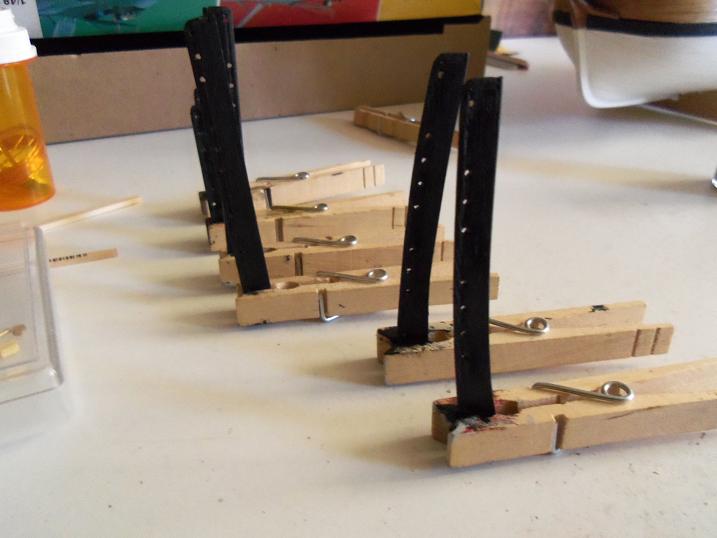
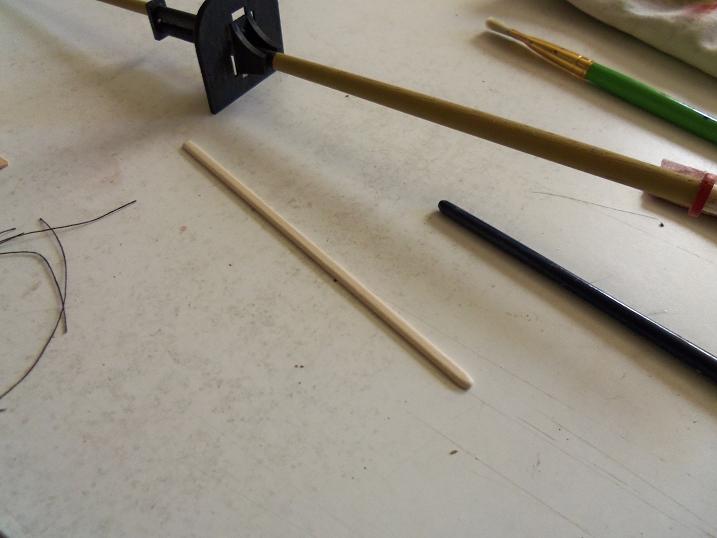
 10 - 19 - 2012 the rudder was the next little project I under took. too bad it wa all for naught.......I had my gungeons and pintles upside down. my thanks to John for pointing that out to me.....it's a good thing I didn't fasten it to the stern.......just a dry fit. I wasn't going to bore you with pictures.........but, in the interest of "he who shall not be named", I have. here is the redo of the rudder. I had to make another rudder to start off with.......the original one was riddled with bullet holes........looks cool........but, no. I did make up a few gungeon / pintle assemblies, to replace them......but I believe I did use one or two of the original ones I made. 10 - 21 - 2012 10 - 30 - 2012
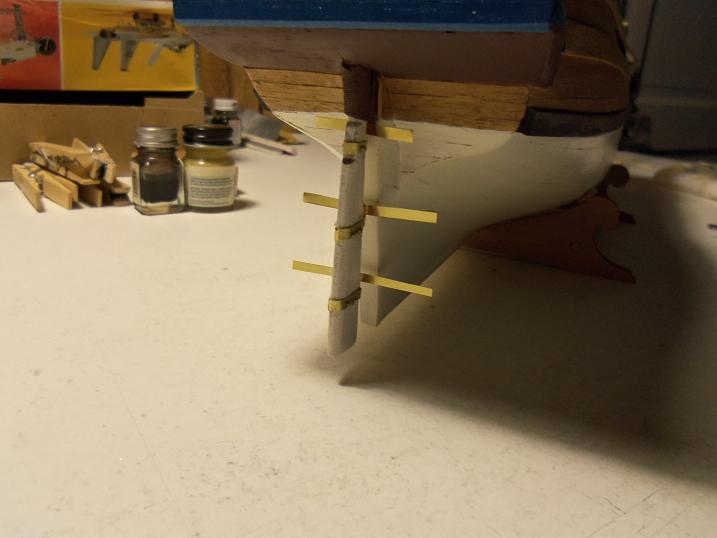
-
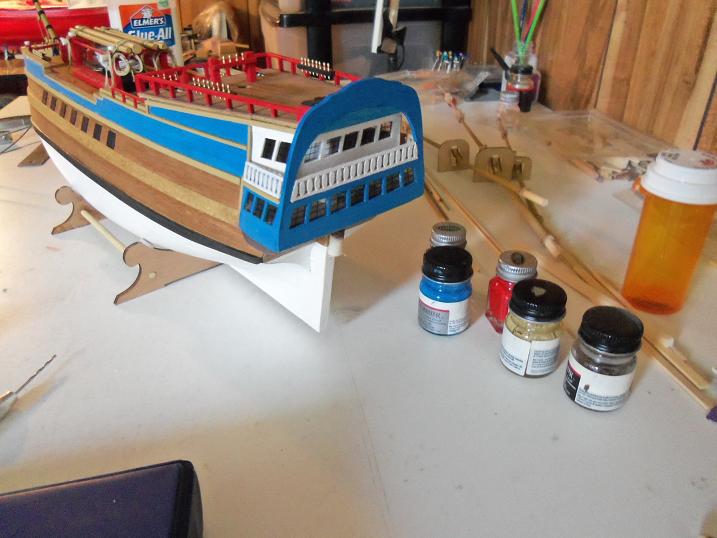
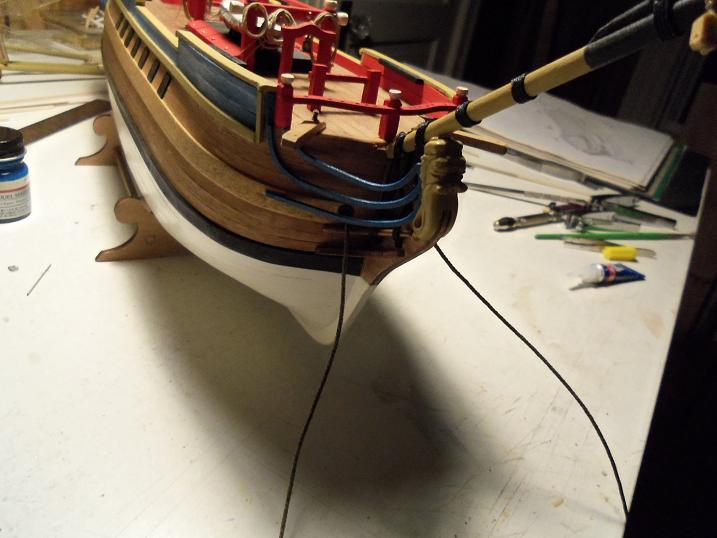
10 - 18 - 2012 I started to do some further work on the chain plates. I had seen some decorative work to theirs, that I liked a lot.......I started to try this out on the Goth. of course, the pictures don't lie........this was not done on the actual ship........so I had to change my direction on this.....just as well. the edges were built out, and a outer border was installed after they were fitted to the hull, they were painted.
-
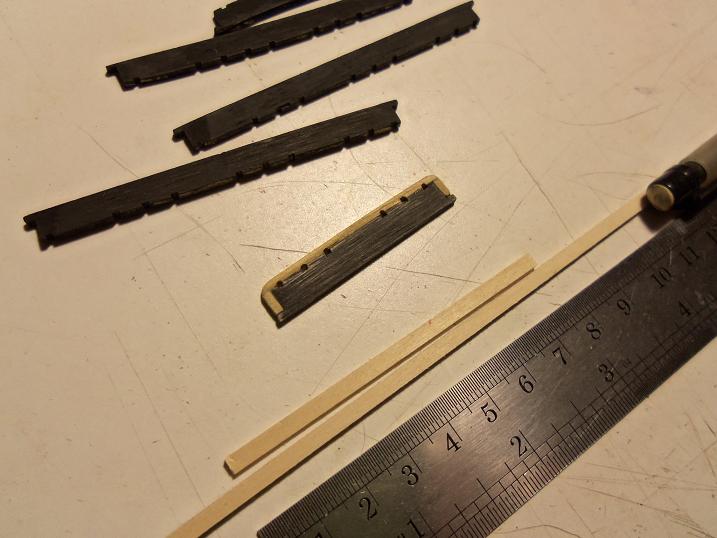
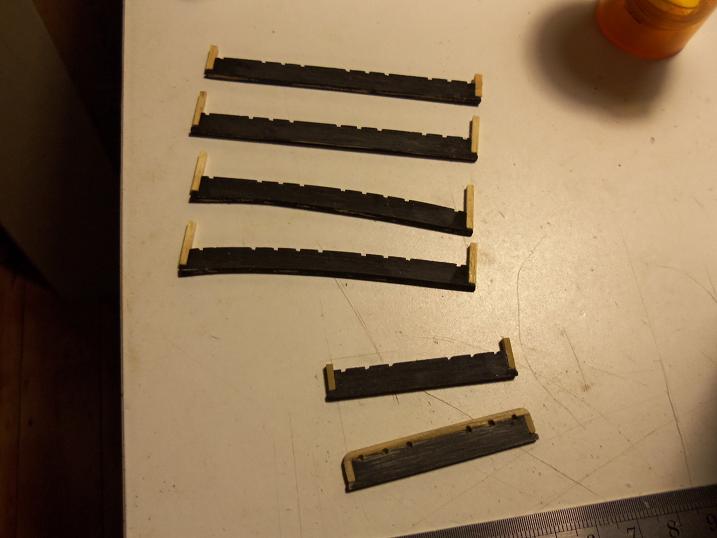
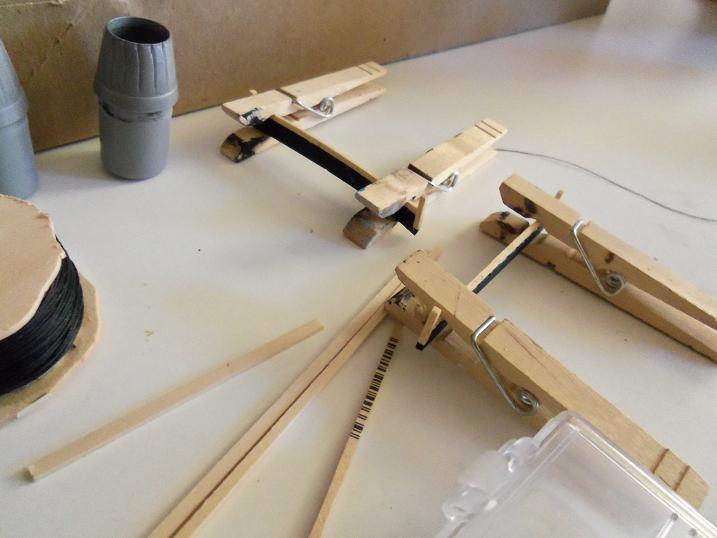
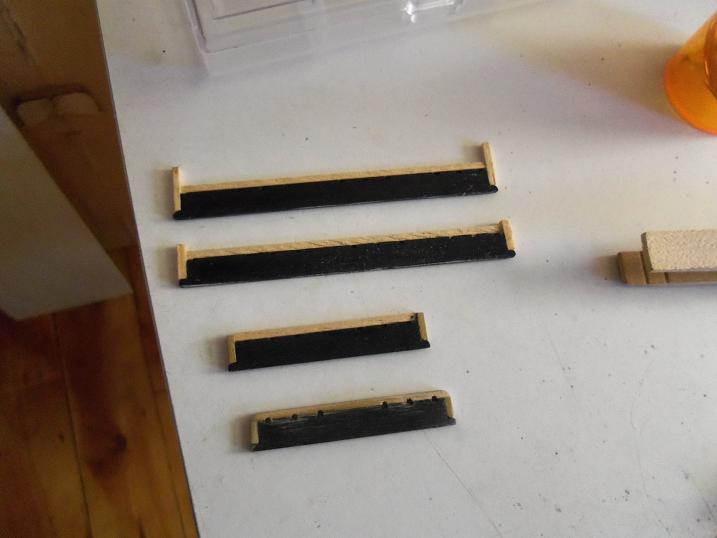
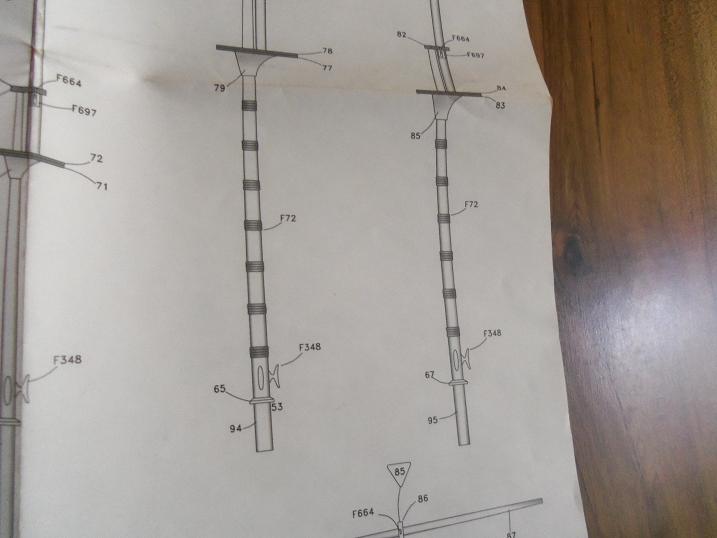
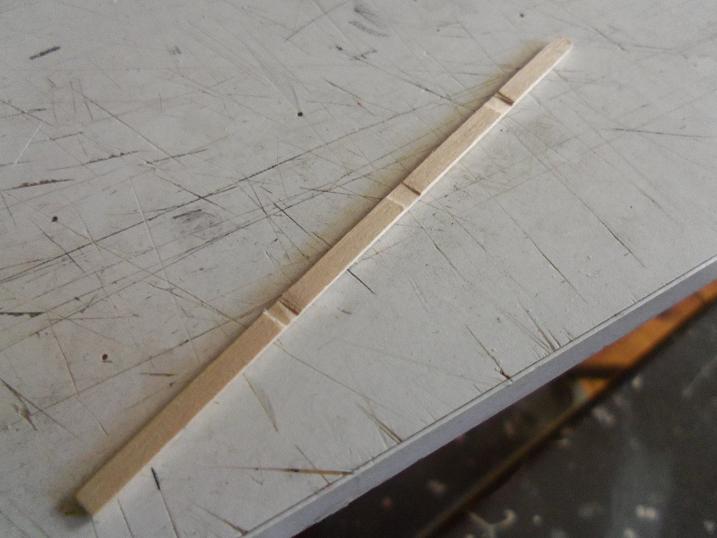
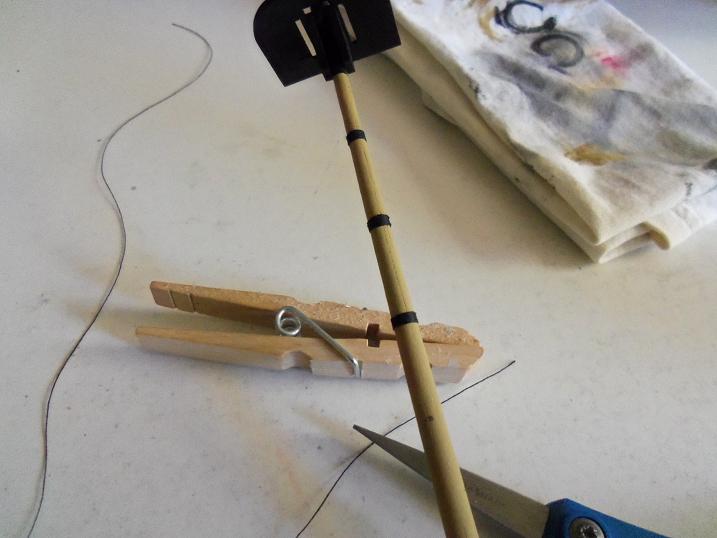
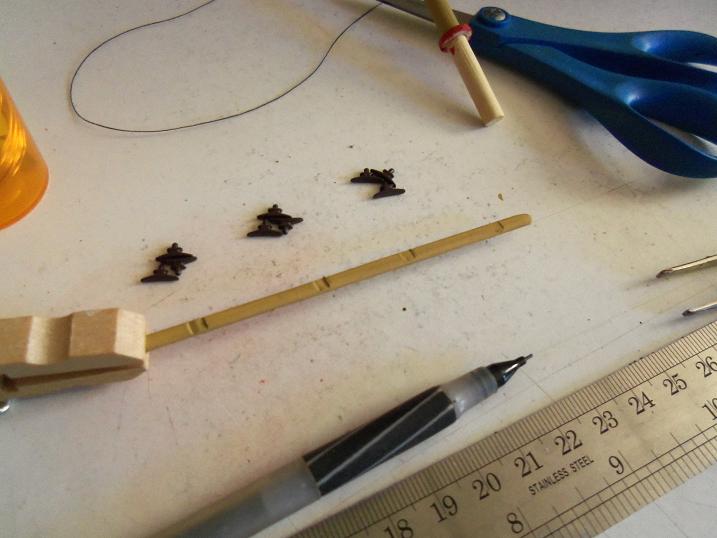
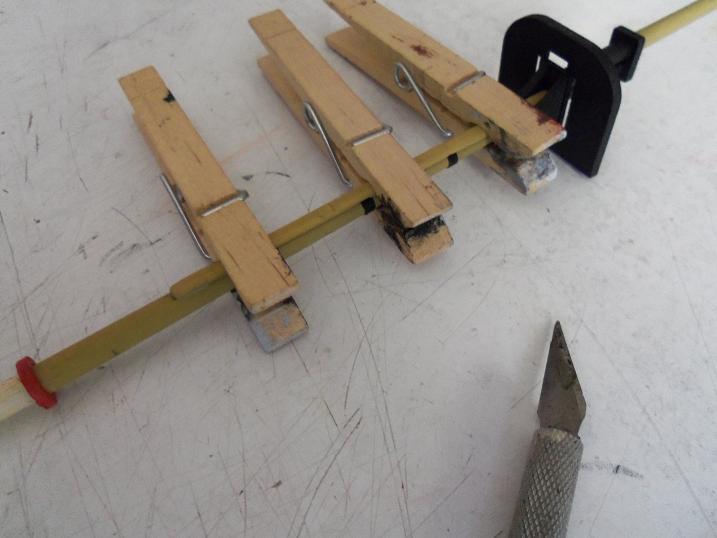
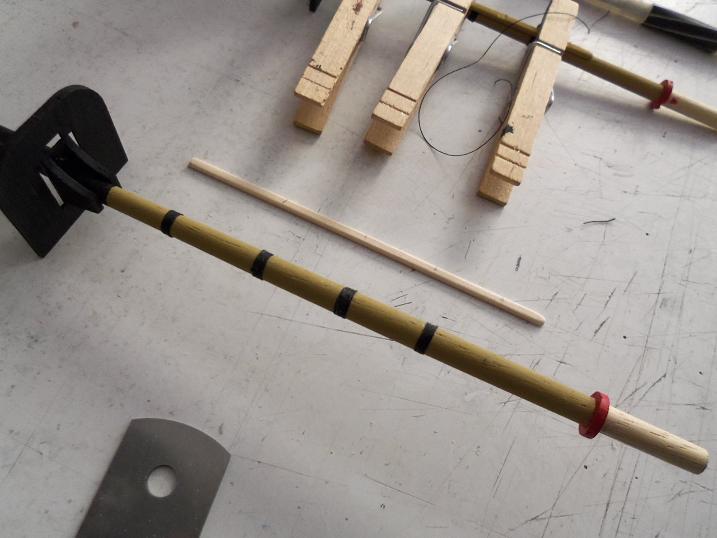
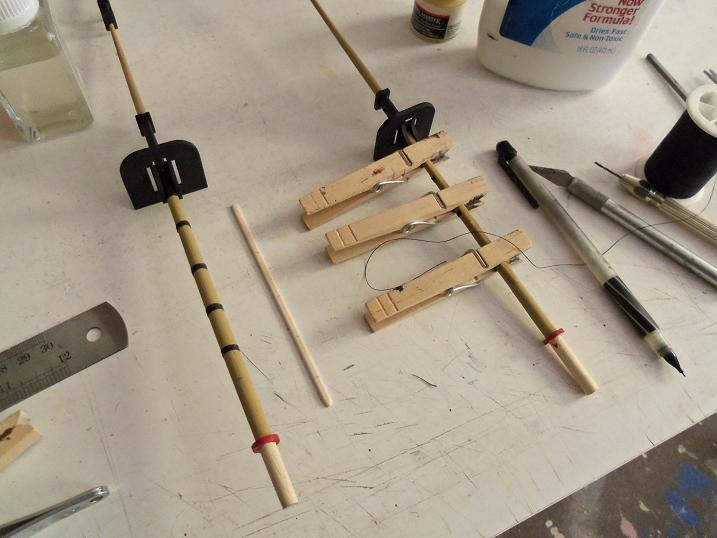
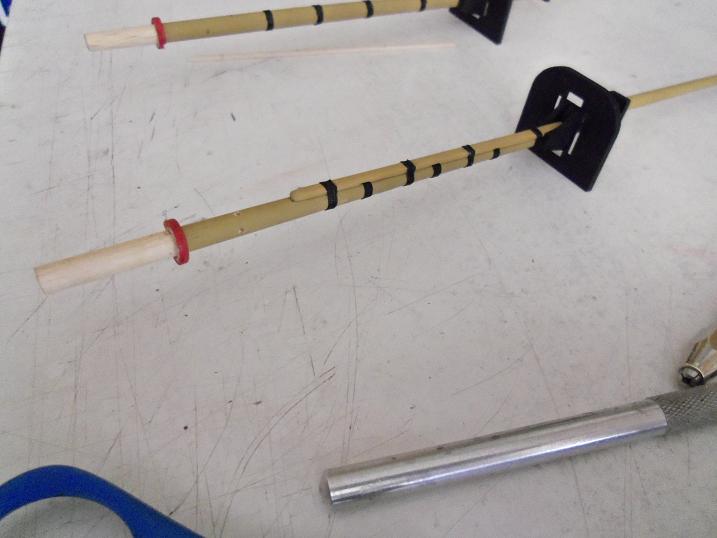
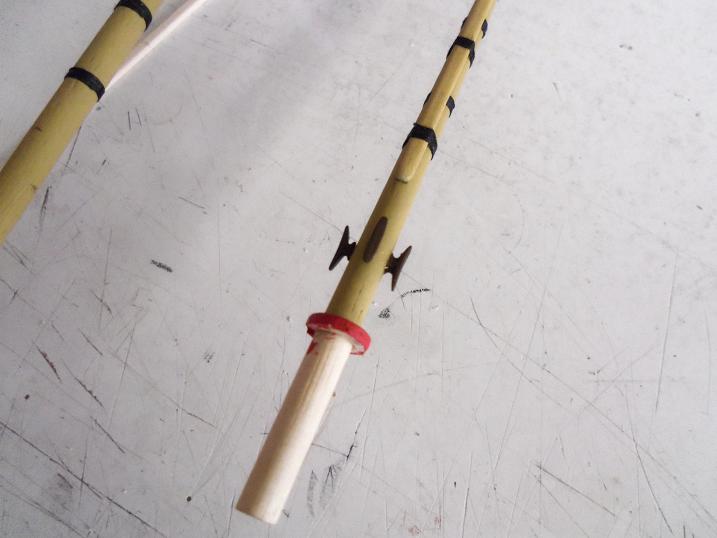
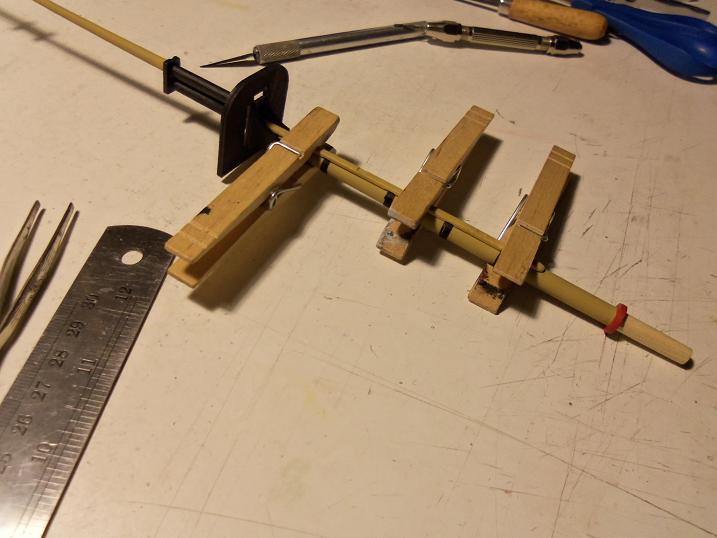
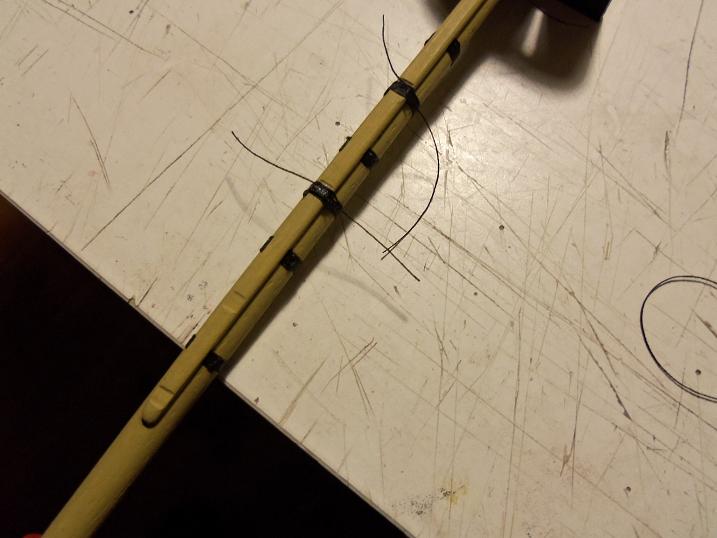
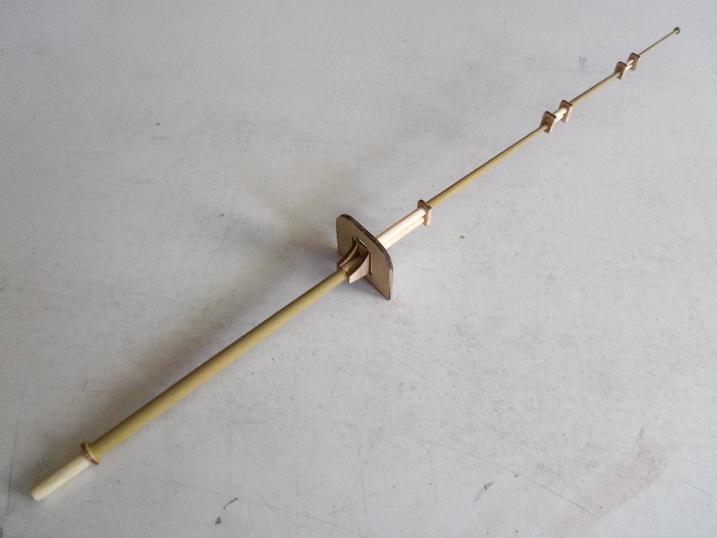
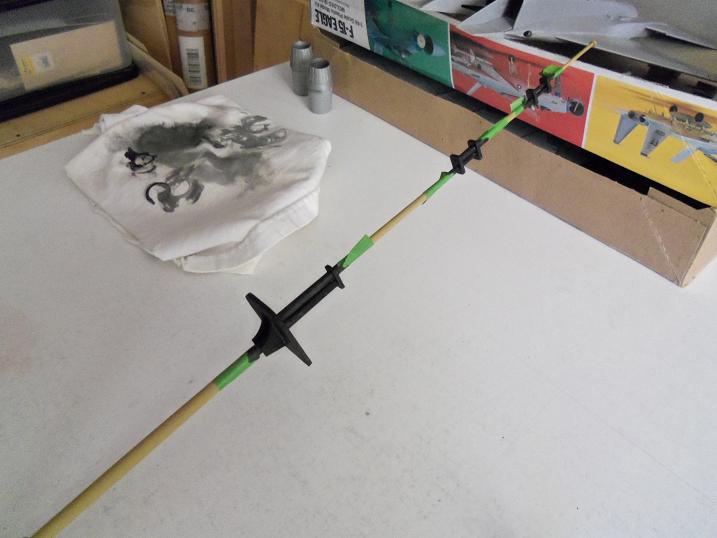
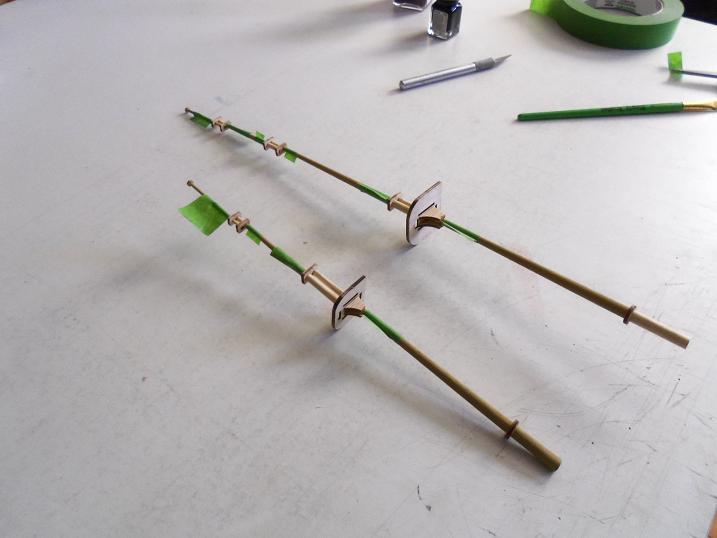
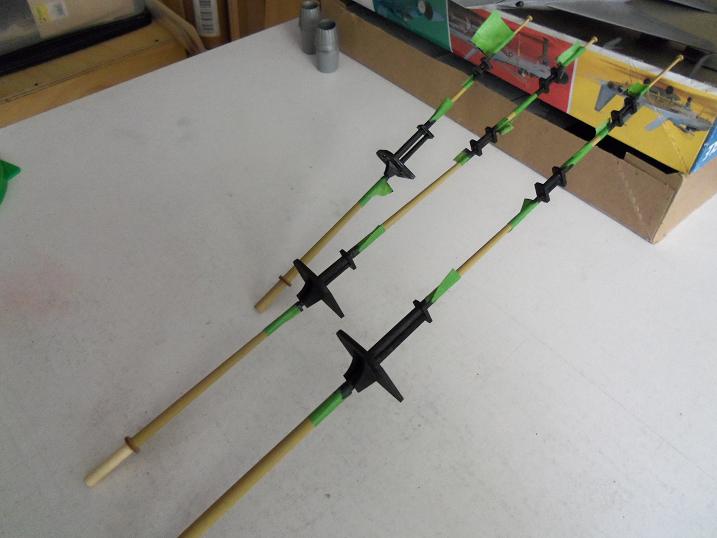
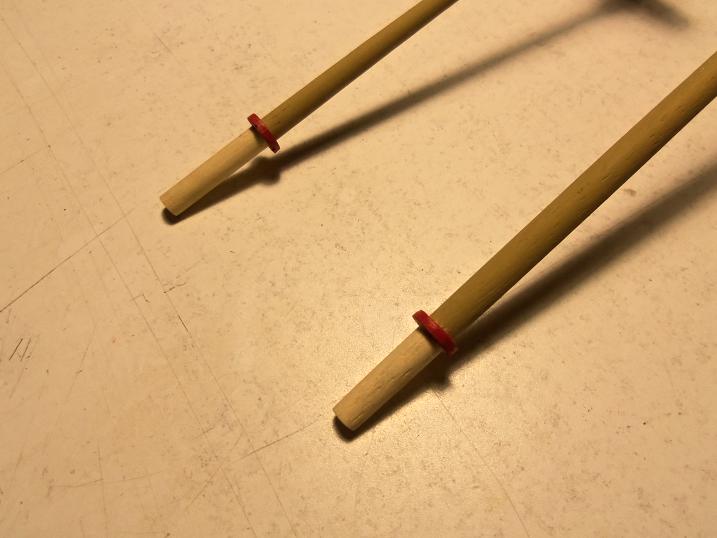
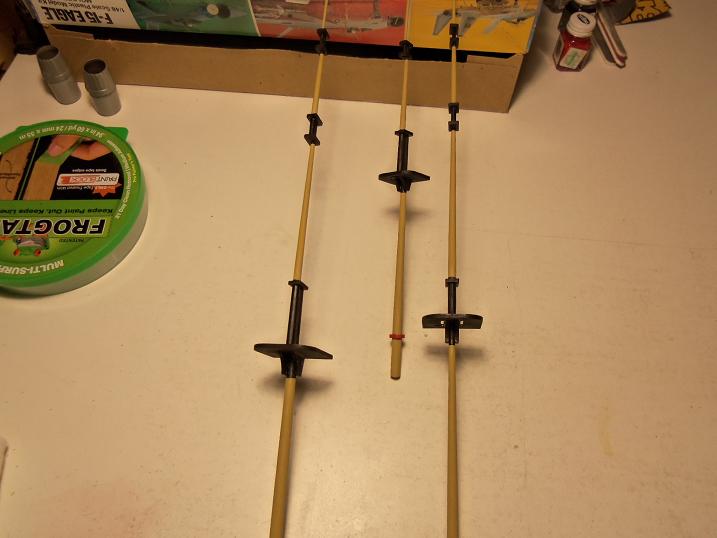
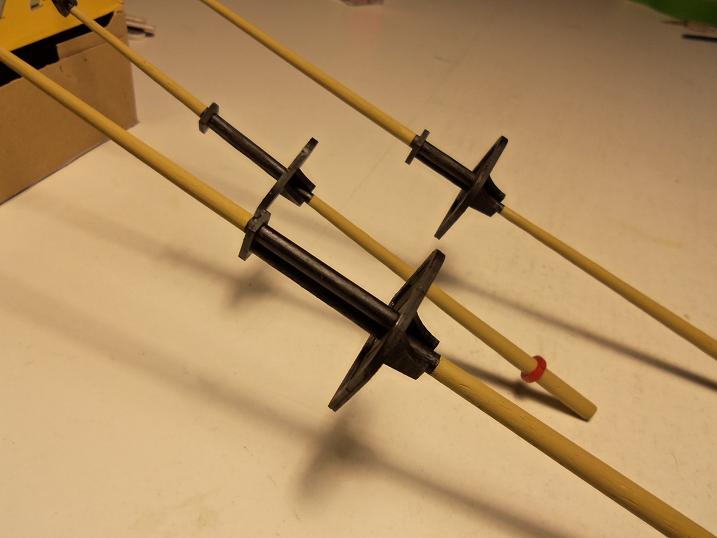
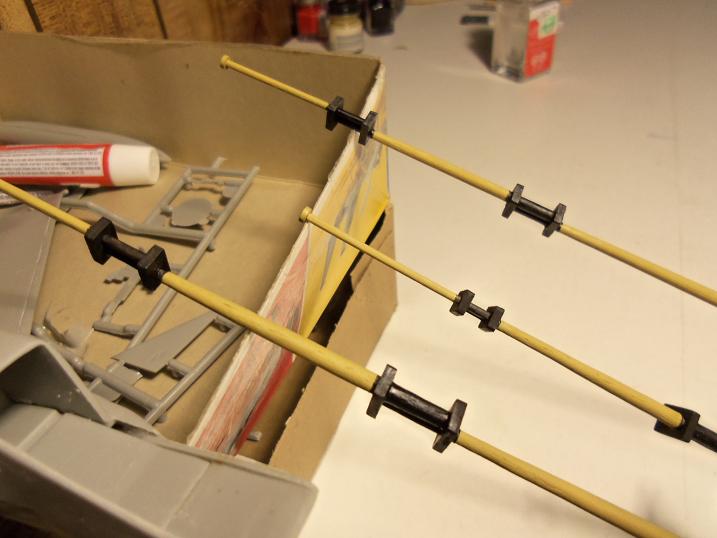
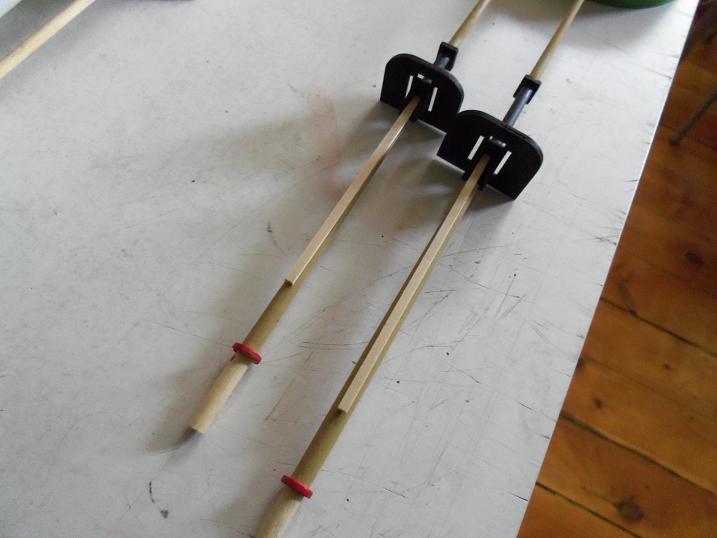
10 - 17 - 2012 this session pertains to the picture you saw earlier.......I was quite pleased with how they came out. on other ships, they were lashed to the sides of the mast.......added support {I suppose}, but on the Gothenborg, they were lashed on the fronts of the masts. they were sanded {edges removed} and notched to accept the wooling lashes. how and what they show in the instructions diagrams more on the assembly cleats were also added at this point as well and of course.....the dry fit


-
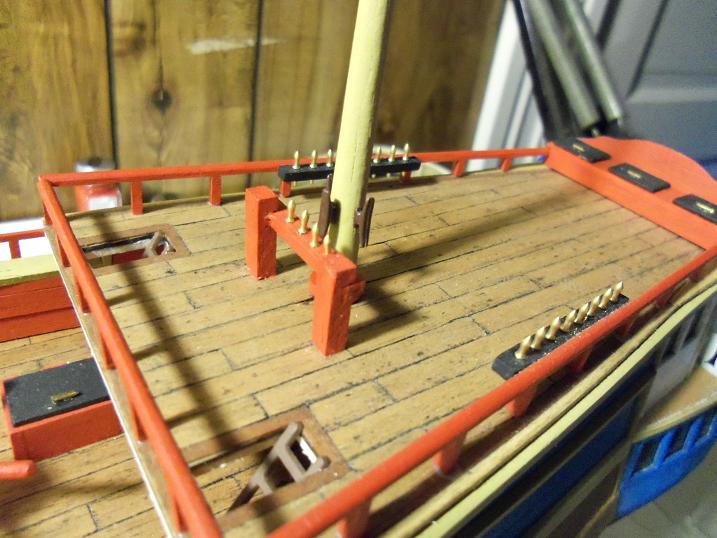
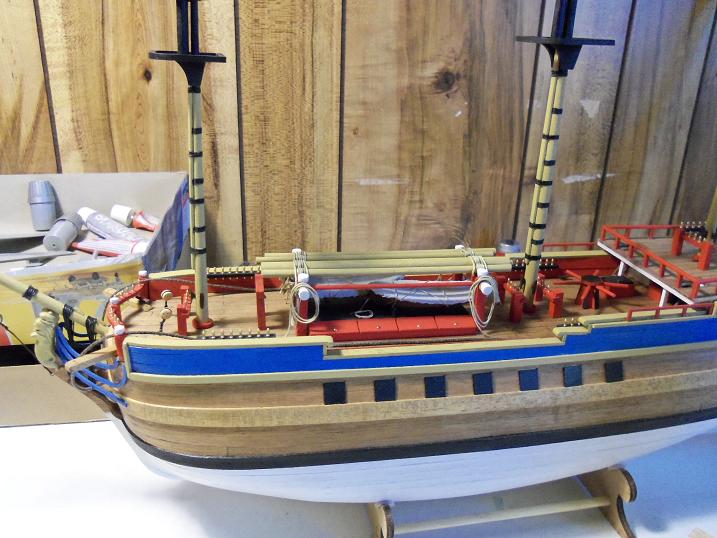
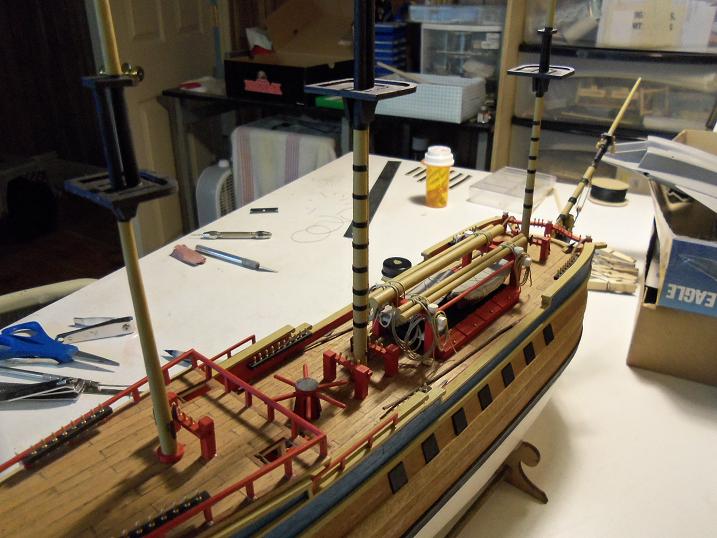
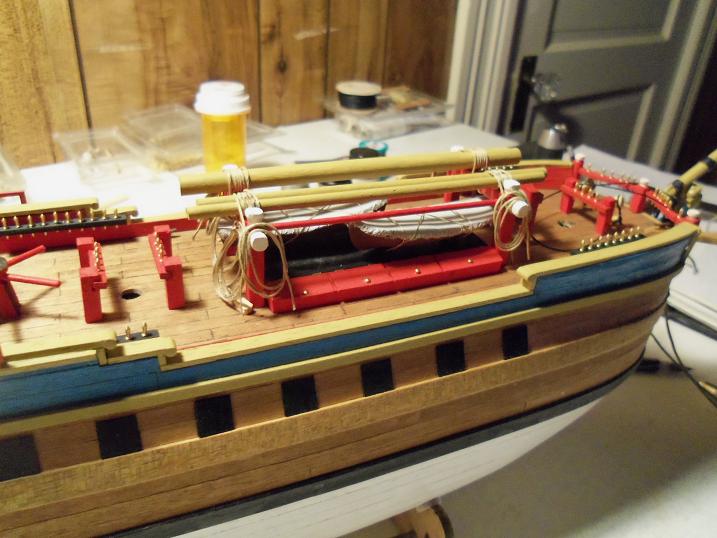
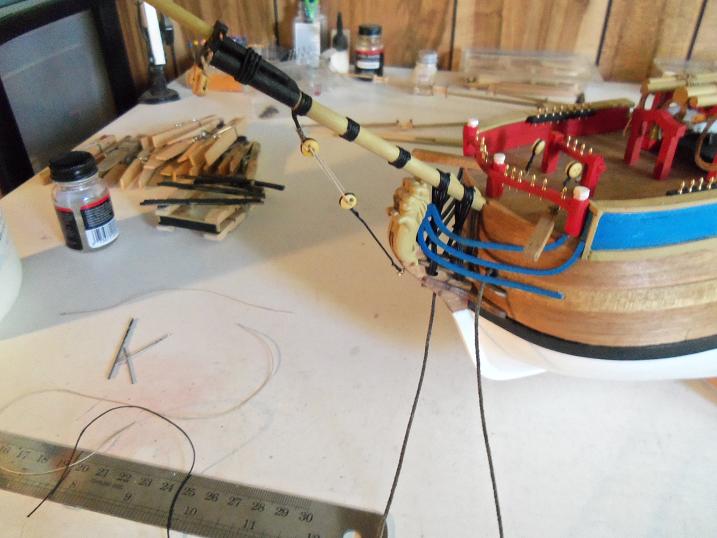
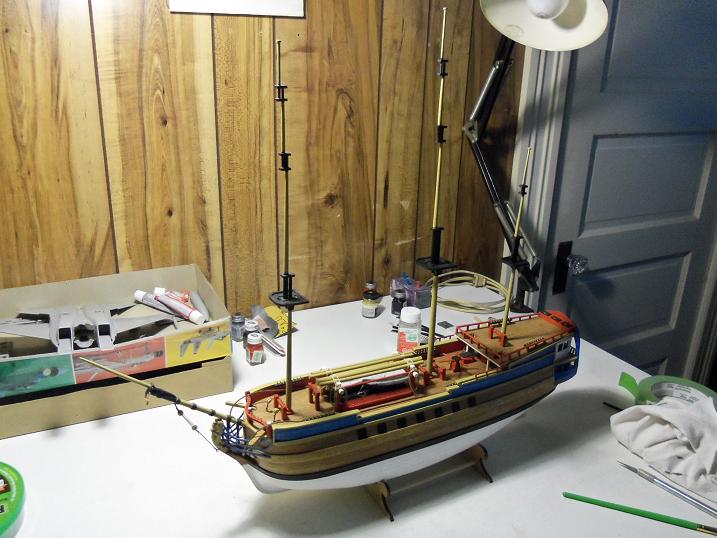
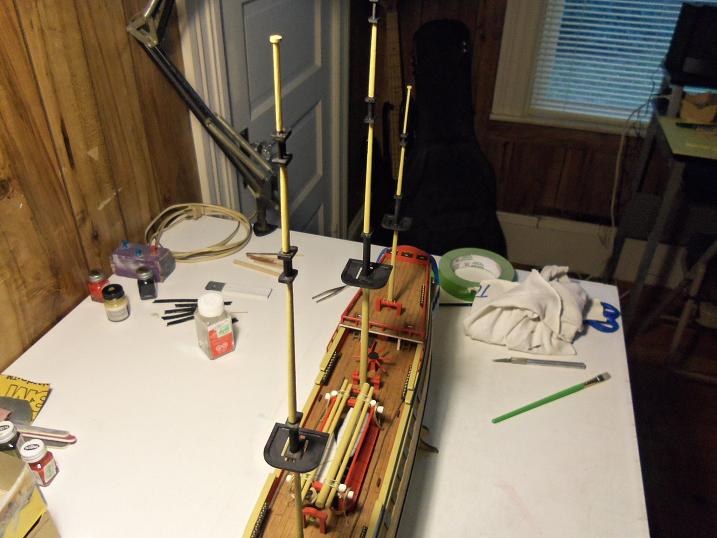
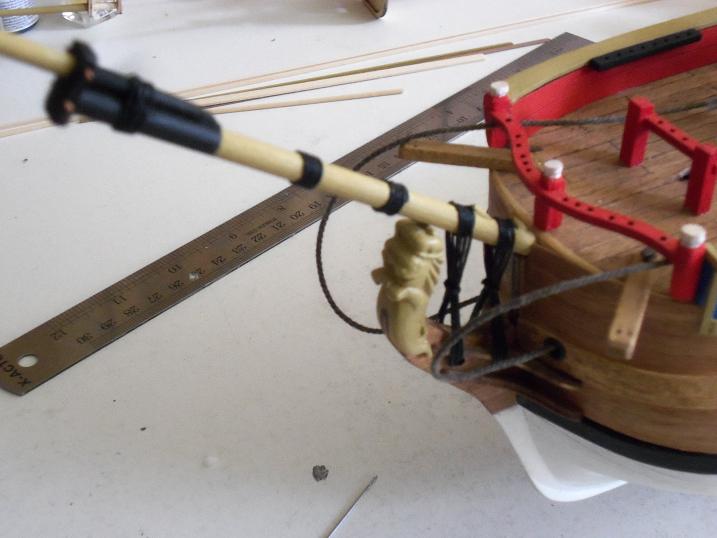
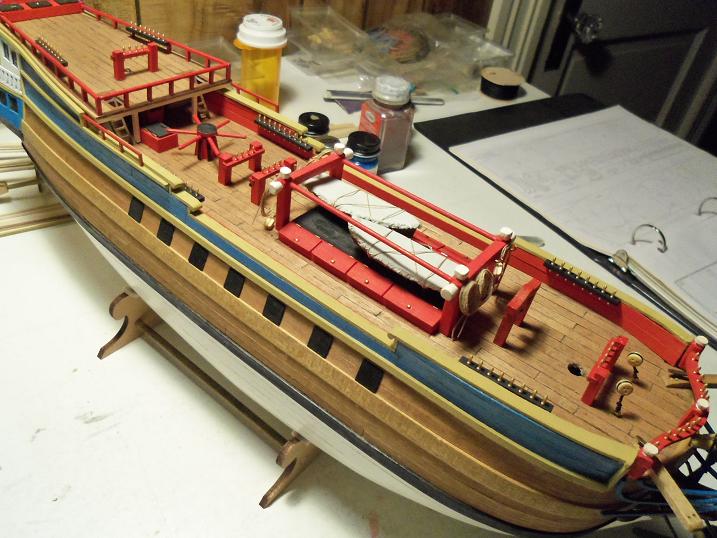
6-1-2012 I had gotten back to the Gothenborg build, to lash on the raw timber....in the event that repairs needed to be made during a journey. 10 - 12 - 2012 the gothenborg took another break......I forget why, but I got the jones again and brought her out. I did one rigging line at the bow....according to the instructions. after browsing through the pictures, I think better of this and I will change it. I did some touch - ups at the stern then I began to work on the masts, painting the tops and caps. the mast steps went on as well....I had to make new ones, because the kit supplied ones didn't fit. then a dry fit to see how they looked towards the end of this session.....I got stupid and knocked off one of the stern railings from the balcony......don't really remember what I was doing......so I can't safely say this won't happen again. I had seen this in the pictures.......I forget what this part is called, but they are quite prominant in the pictures, so they will be added, along with the woolings that hold them in place.


-
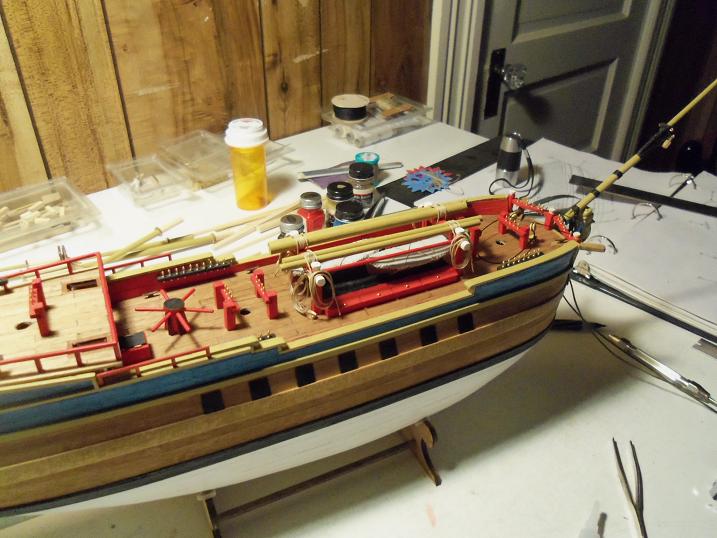
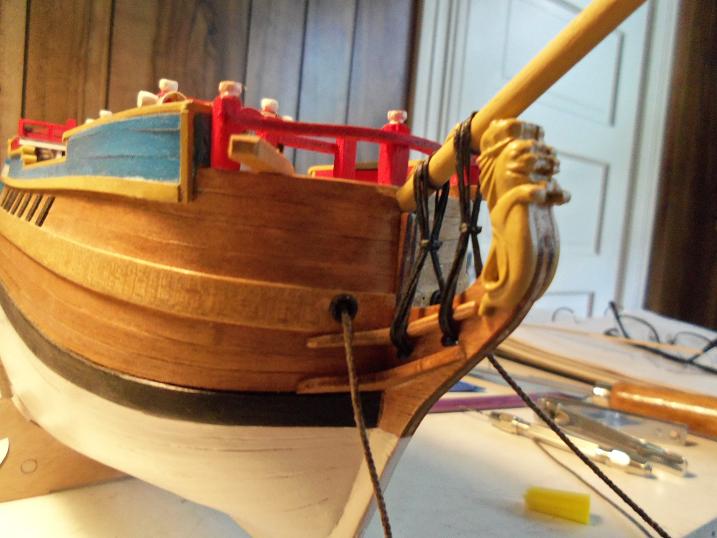
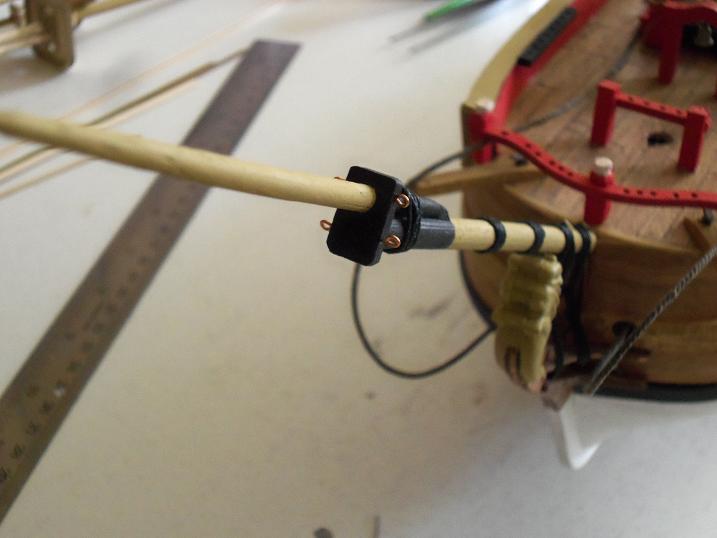
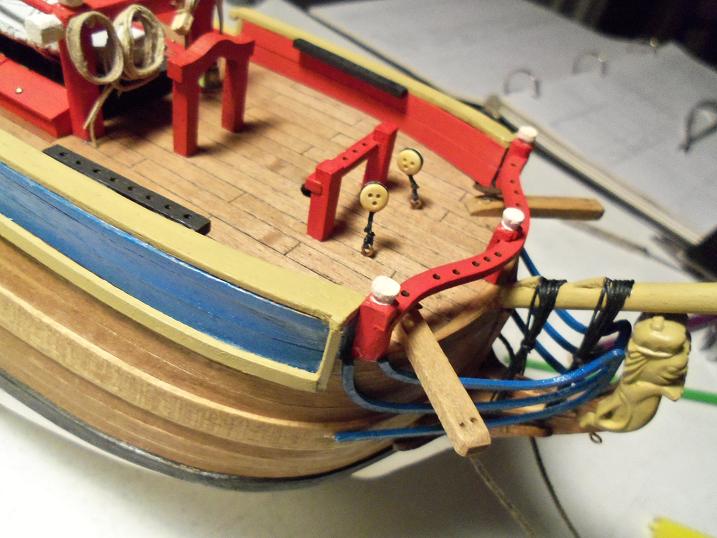
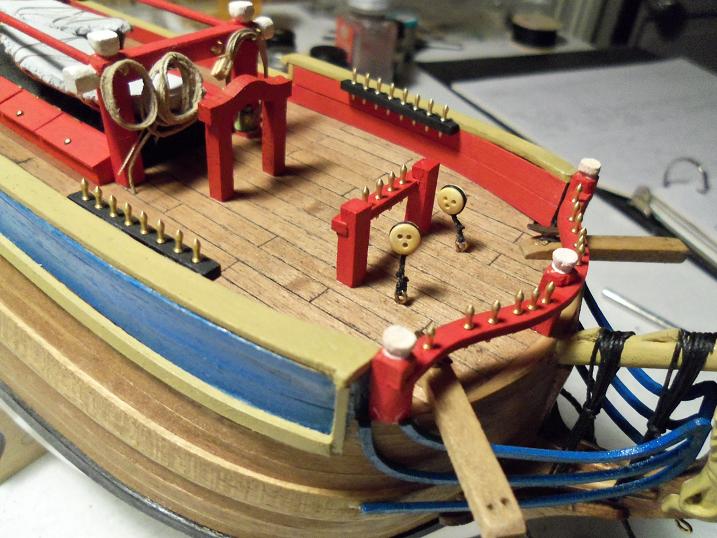
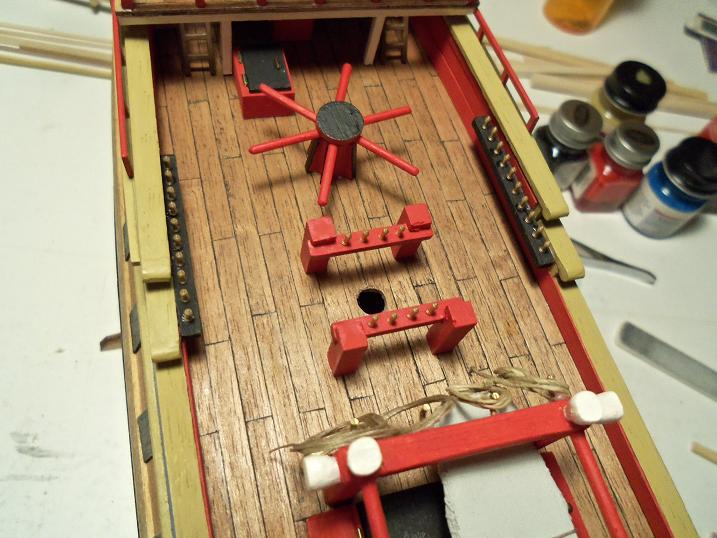
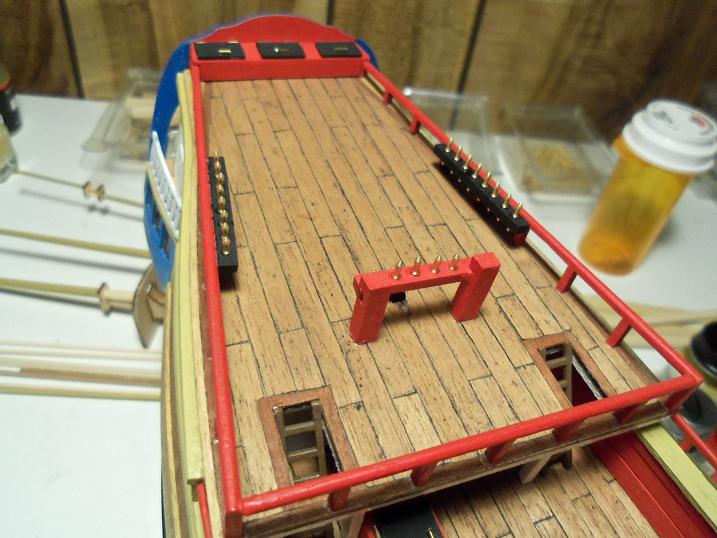
5 - 31 - 2012 in this point in time I worked on the fittings, the capstan, the fife posts, and the bow spirit. I did the gammoming on it as well. the bow framing was installed and the main mast deadeyes were installed as well.. then all the belaying pins were added......made the deck look even more interesting.

-
that's the bonus with getting the deck planked........so much more to play with! I thought too with what Pat mentioned, but I suppose with control on the glue amount, that little problem can pretty much be avoided. it does look great there, mark......I have to go look at it again!
-
rodger that Sjors.......I took the day off 'cuz I heard that you might have an update for us. this way I can sit back and enjoy!
-
I'll pass on 'em as well........sounds too much like a fetish....LOL! wouldn't have the foggyest on how to catch them .......perhaps the correct term would be snared......rather than caught.
-
glad to see your planking the deck.........looks so much better! I too love the clamps.......they seem to work well. superb decking!
-
all I see is .50 cents for the nose! I think I can still cash in after all these years!
-
could have even used 'dauntless'......looking forward in seeing some planks laid
-
thanks Keith............are you referring to the 'bovine' delicasy? LOL!
-
the chains look superb Andy........I kinda share the same notion about the popcorn.......it tends to stain the rigging thread.......and don't EVEN get me started about the nasty finger prints......LOL!
-
I tried the beveling idea for the AmericA planking.......of course the wood for that build wasn't cut in the best shape. it does work well though. I do wonder if a jig could be made so a perfect slant could be made every time.
-
no Sarah...it wasn't a pun.......just can't wait to see this one being rigged. I'm sure a man of your talent and knowledge will do a splendid job Andy........piece of cake
-
Sjors..........you are 'too cool!' tha's an interesting thought Augie.....must be so sad not to taste 'real seafood' that far inland....my brother in law lives in Texas, and he hates the seafood down there.....nothing like up here. that's an interesting observation John.......they say that every creature is adapted to it's enviroment......can you imagine what a mountain lobster would look like.........scarry!
-
chicken lobsters go for anywhere from $4.99 to $6.99 / LB around here right now. they can be found on sale for $3.99, if you look for them. I like to look in the tanks at the big ones
-
their best when cooked to order.........wow!! they're expensive! thanks Sjors.......now would I try to fool you with something else?
-
I've never seen that kit before.....by all means.....start a build log, I'd love to see it thanks Sarah......these decals were very thin. that's the main reason why the eagle {the first decal I went to apply} broke when I tried to move it around on the backing. Testor's has a product called decal bonder......I use in on the decal that I make, to seal in the ink from the printer. it has many uses too.......as you can see. when I built my Revell Cutty Sark, I had gotten a new decal sheet for it, since the kit supplied one was garbage. when I went to use it, I found that they were too old and that they had micro cracked. if I had the bonder at that time, I could have saved them. I usually don't have too much of a problem setting the decals, but if I do, I use a product called decal set, put out by Testor's as well Testors
-
great job on the standing rigging.......she looks superb! I hope my build {when I get to it} looks as good as your does! we just had our storm.......thursday into friday.......crappy, yucky wet snow. one good thing though.......it will be spring soon we have a couple nice day ahead of us, so most of it is pretty much gone now.......I think we have rain for tuesday. thanks again for those pictures......you build planes with just as much love as you build your ships..........simply superb workmanship!
-
terrific job Andy........glad to hear that your close to rigging......but don't fret about it yet.....I'm sure you'll see other thing that should be done before that time comes {usually what happens to me}. from the looks of your build, it's going to look superb!
-
yea......back in the old days {when I was a lot younger} there were so many of them, the fish and game used to pay 50 cents for the nose of every one you shot. they would wreak havoc in corn fields and gardens......and dig their burrows in just about every place imaginable. look forward in seeing morte progress on the stag John.......
-
I see you didn't waste any time......quite a vessel you've chosen. your off to a great start!
-
thanks Daniel......I'm getting to the the good part.......thanks for the good word. parhaps a larger scale of this one in the future thanks Frank.........I have two trimmed and treated at this point.......all they need is the reef lines
-
spent most of the day on just making the sails..........now they need to be trimmed and washed with diluted white glue. I should have an update soon
