
HOLIDAY DONATION DRIVE - SUPPORT MSW - DO YOUR PART TO KEEP THIS GREAT FORUM GOING! (Only 36 donations so far out of 49,000 members - C'mon guys!)
×


popeye the sailor
-
Posts
16,007 -
Joined
-
Last visited
Content Type
Profiles
Forums
Gallery
Events
Everything posted by popeye the sailor
-
 here's more.......... thanks for following along I really appreciate the interest. now I'll go focus on Ltn. Jacob's plane and get that one finished. I hope you enjoyed the journey.
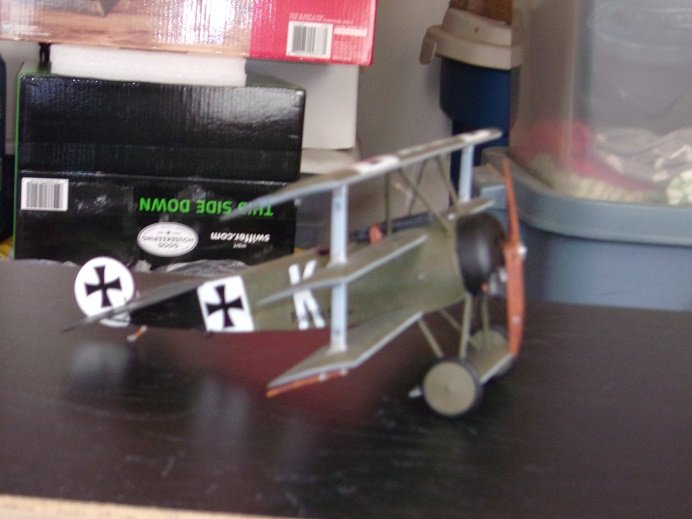
-
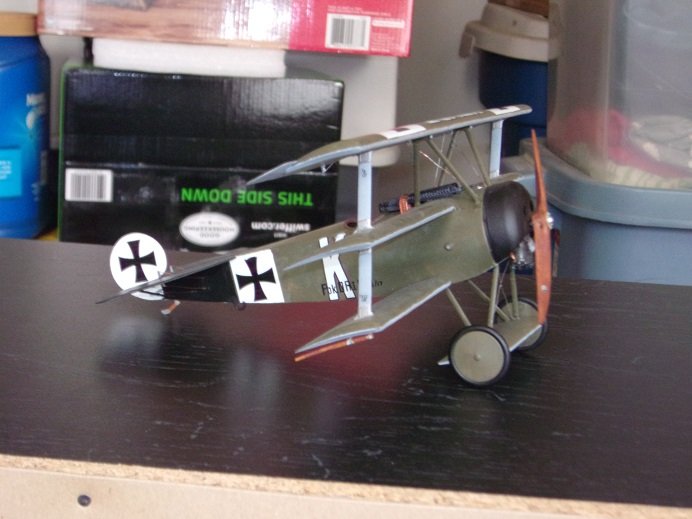
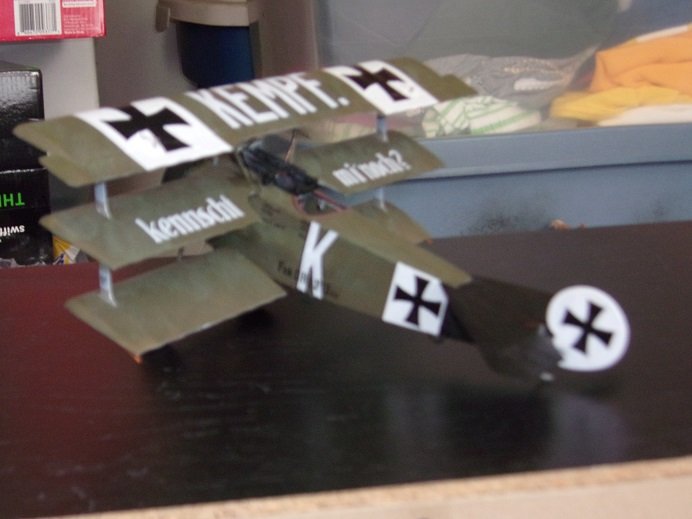
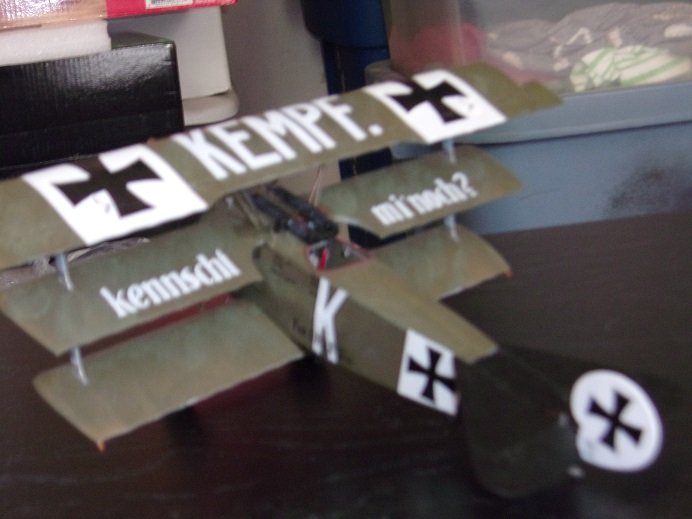
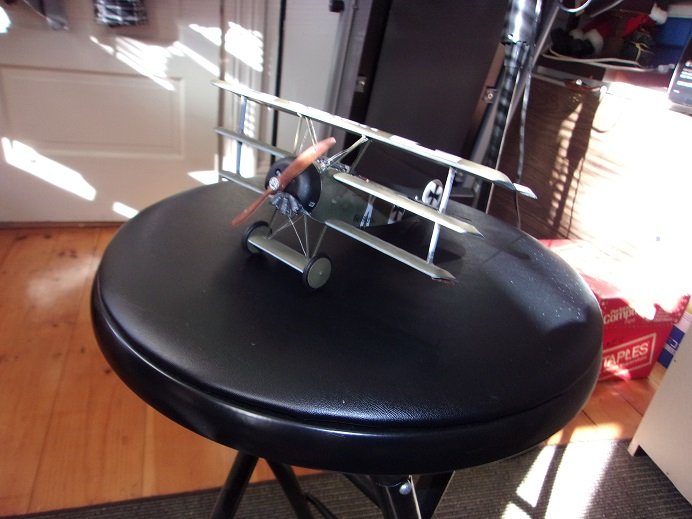
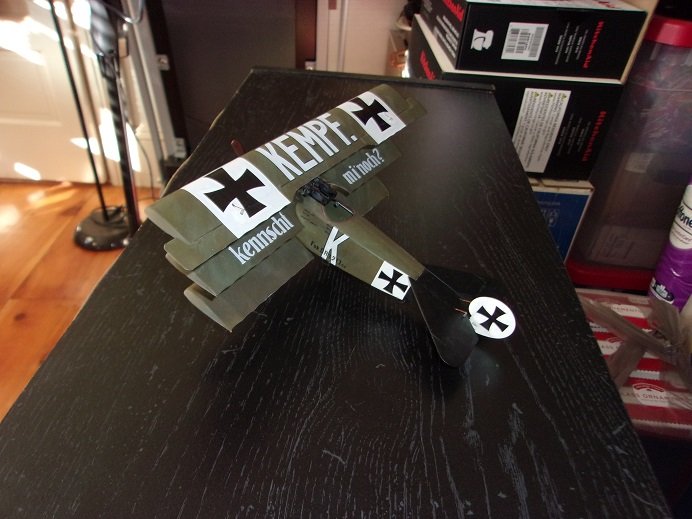
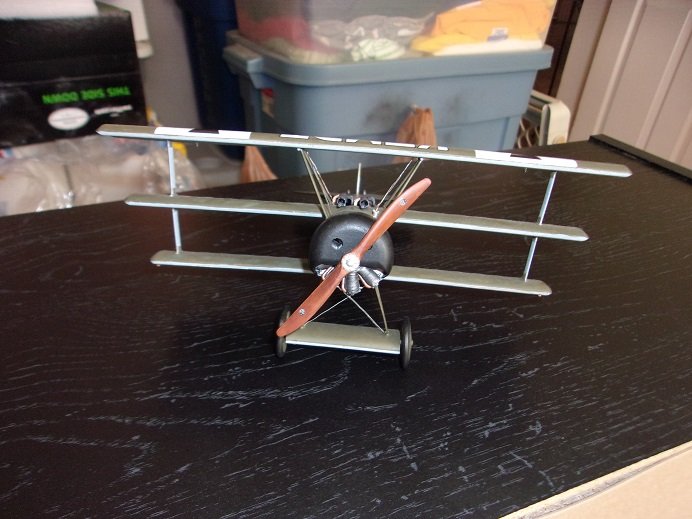
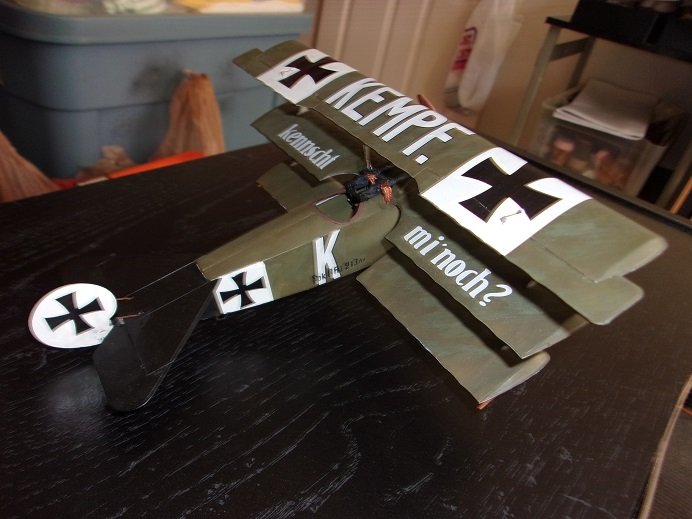
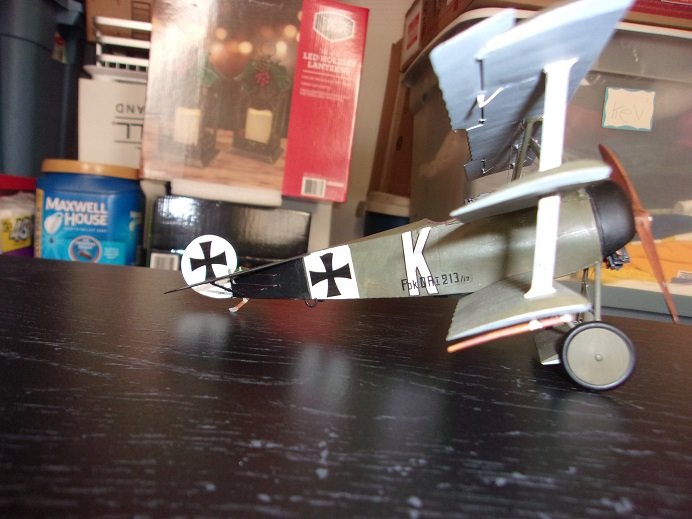
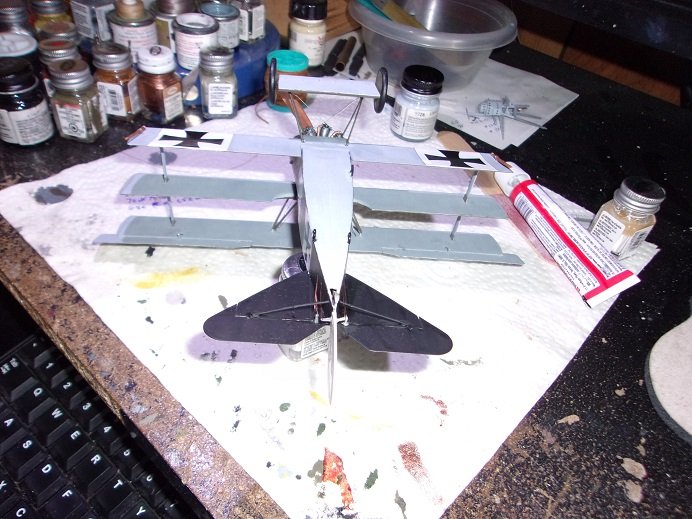
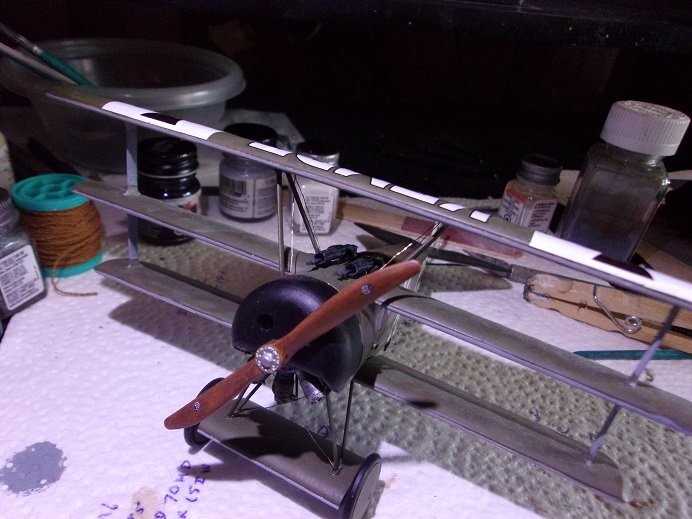
I tried the camera in my new phone........haven't figured out how to import them into my computer yet I'll try the ISO thing with the other camera too Jack......I may not have tried it, perhaps there is hope yet. so I finished up the touch ups and stuff with this one......still not totally happy with it, but it is what it is........I still like how it looks. Ltn. Friedrich Kempf, Jasta 2, March 1918..........................Fokker Dr 1, 213/17
-
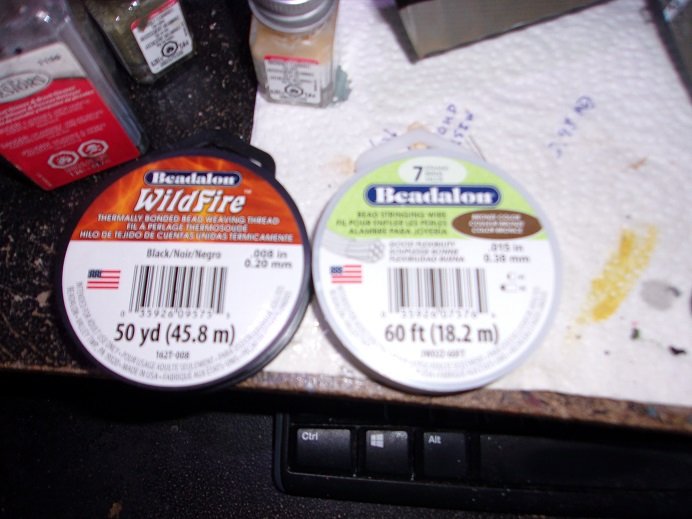
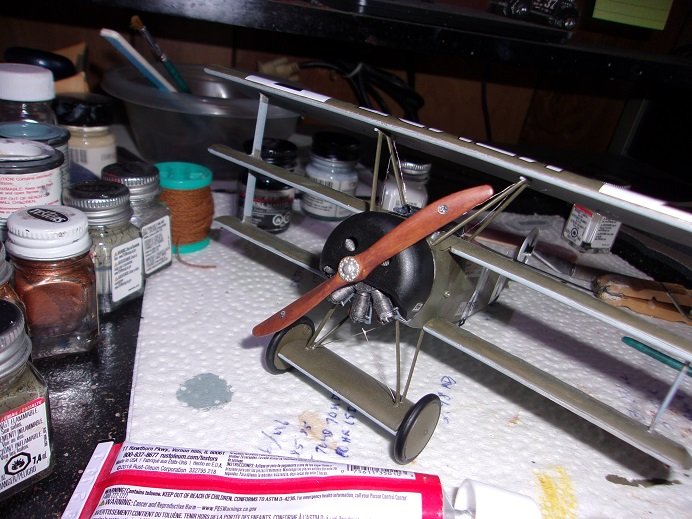
thanks Mike I painted the prop a while ago...tan dry brushed with wood brown. I had found in the jewelry dept at Michael's, a wire that has the flexibility of thread.......sad thing though, is that it really didn't match this scale. I hope you can read some of the label. the one thing with this type, is that it can't be seized or tied.......I think it might be a little too stiff for that. I'm not sure it it can be cemented in some fashion, I haven't done any experiments with it. I want to try this on ships......at those scales, seizing might be a good option. I think the ideal option would be to use metal crimps. I ran the tail control cables on the plane yesterday.......I still need to adjust them. I should have the gallery pictures in a short while..........Ltn. Kempf's Fokker is finished! I've downloaded the manual Jack.......haven't found how to access the defaults
-
that looks really snazzy great job on the paint! touching back on the battery arrangement.......I don't think twelve volt batteries were around then, neither was the ability to regulate amperage as with later cars. generators were the method for recharging the battery.......the plus here was that the battery could be removed once the engine was started.........can't really do that with an alternator. early cars were also positive grounded systems. later systems changed over to the negative ground systems.
-
look'in really good OC............did I see the Stark sigil there from game of thrones? I am a huge fan
-
interesting detail...cockpit looks really nice. I'm looking at the jigs your using to paint these parts.....do you make them as you go along, or are they universal enough to use them on other models too? it's a great idea.........I get tired of painting parts on tweezers, or sticking them on pins....really disheartening when they go flying
-
drop dead gorgeous Grant! the detail is exquisite.........the contrast of color is awesome too! this was a really challenging model........you pulled it off masterfully! congratz on such a beautiful model!
-
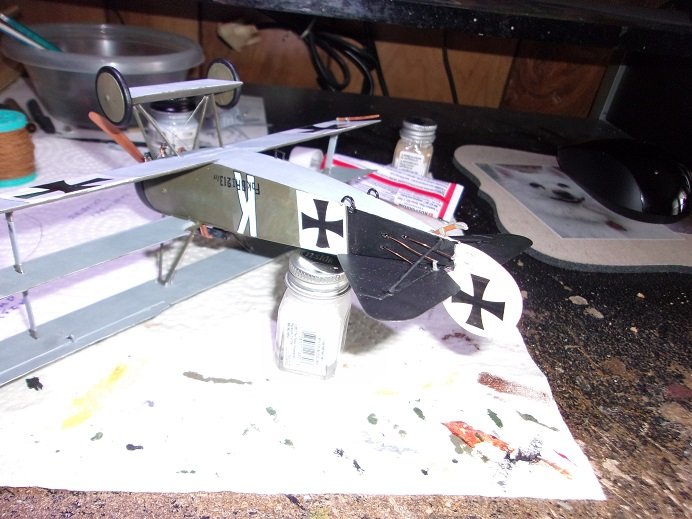
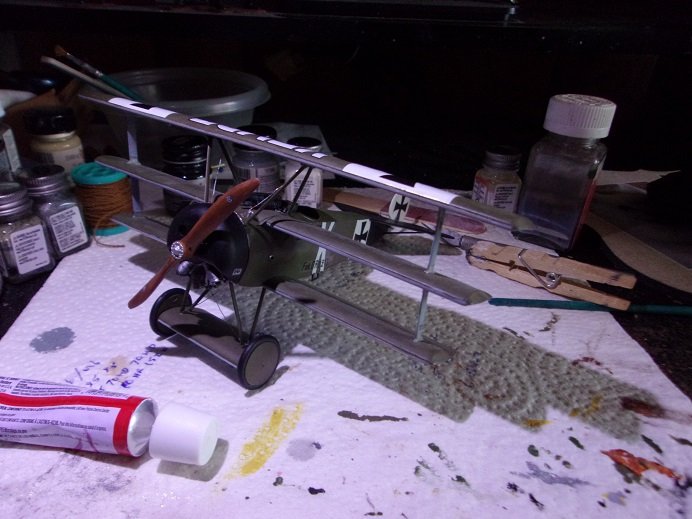
I do as well.......but there is also a lot of white out. I've had to toss and retake a few pictures. I'll find the happy norm as I get used to the camera. basically, it's the lighting I have here on the desk. I don't really have the space to upgrade it, although if I put some thought to it, I could pull it off { nothing is impossible}. I made some progress last night.......I took today off, so it didn't matter how long I stayed up there are a couple with flash.....the others I adjusted the light to greater effect. the prop is on, and so is the rudder! this is huge! I hand painted the rudder on this model, but I wasn't happy with the look. I gave it two coats of flat white...we all know how flat white lays down with a brush. looking at it last week, I thought it looked good enough, so I put the decals on. sadly, the control cables to the upper wing will end up being incorrect.......they will not be crossed. I cut them too short. it would be too big of an undertaking to correct them, so they are as they are, and I will live with them. using the wire was good, but they can get easily bent and disfigured....I've adjusted them to the best I can {I may look at them again and adjust them some more}. once bent.....they keep the kink...it's very hard to get rid of it. I painted them too........that was a pho-par.......as I adjust them, it flicks off.........and being a metallic paint, it remains tacky enough to stick to the surrounding finish {even as it's had plenty of time to cure}. I removed a lot of it by lightly scraping it with the x-actor....frustrating to say the least I might not bother to touch them up with the flat steel.......further adjustments might loosen it and send it on the finish again {just think it it as light rust areas}. All that needs to be done here, is to add the control cables to the rudder and stabilizer. I'm also doing more of the touch ups that I see as I finish this model. here I adjusted the light, without flash. as I'm finishing the model, I feel that the Roden kit isn't as bad as I earlier thought.......they're not a terrible kit, but they are challenging. if it wasn't for the malformed fuselage half, the model would have gone together better......I would have had to assemble it the way I did. outside of a couple decals and the tail control cables, the model is pretty much done. when done, I'll present good gallery pictures
-
thanks Mike ...thanks as well Ed
-
to be honest, I had my eye on the Revell kit........I've built two Cutty Sark models already. I truly enjoy the Revell 1:96 series of kits.....the Thermopylae I have yet to build. the admiral got me the Sergal kit for Christmas one year........I've gone so far with it......I should go the rest of the way. I have the rigging plans for the Revell kit, which is a lot better than the diagrams they included. I will likely use them as a guide, but I also have the museum pictures tro go by as well. there are other builds that I've looked at........due to the scale of this kit, it would be impossible to add in all the bells and whistles. I'll do what seems feasible, yet interesting. models are built on a concept........what the builder might see. sounds like you have a concept building for your rendition...this is good
- 74 replies
-
- 1
-

-
- mantua
- thermopylae
- (and 1 more)
-
thanks all for the kind comments as I was scrolling down, I made the realization that I had posted this update on the wrong log..... I won't bother to change it.....but I'll make sure in the future thanks for the likes as well! building a fictitious ship Richard does have it's rewards. it give one a chance to express a little more freedom, but still one has to be careful not to go out on a limb the Clotilda, on the other hand, is a known ship......I've found that I won't get this model as correct as I would like, but I will certainly get her in the ballpark. the Bluenose is looking awesome!
-
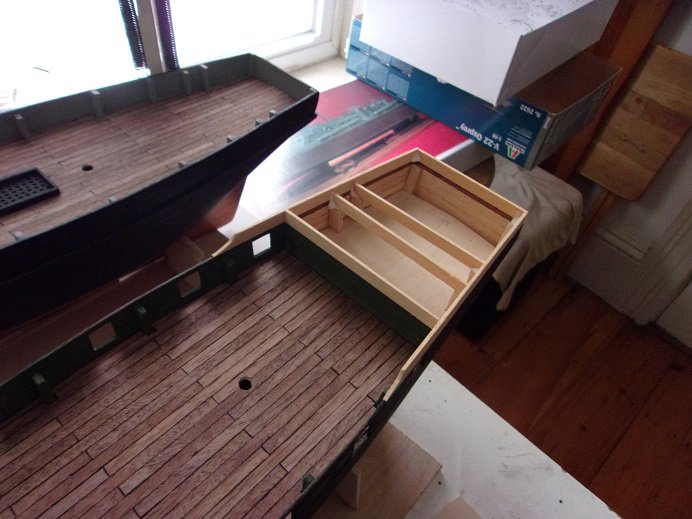
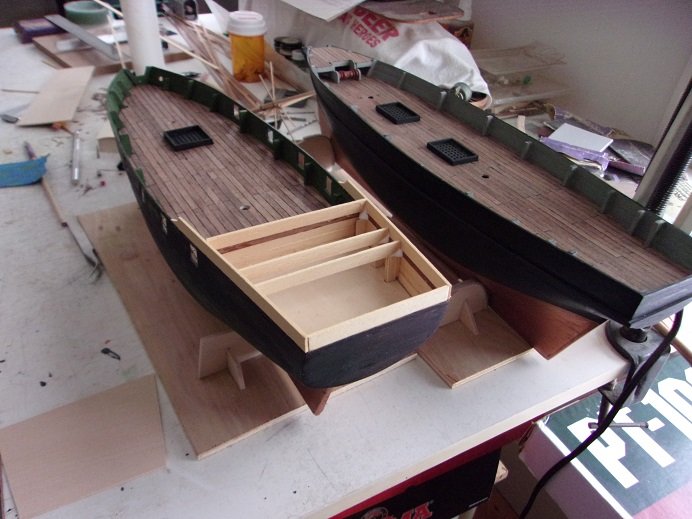
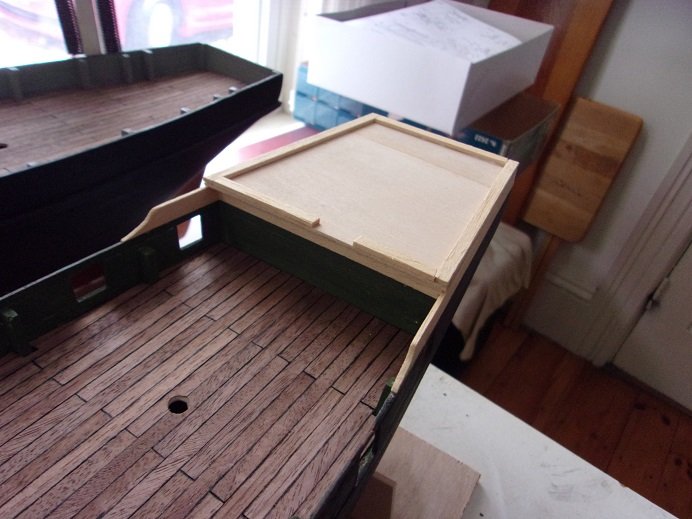
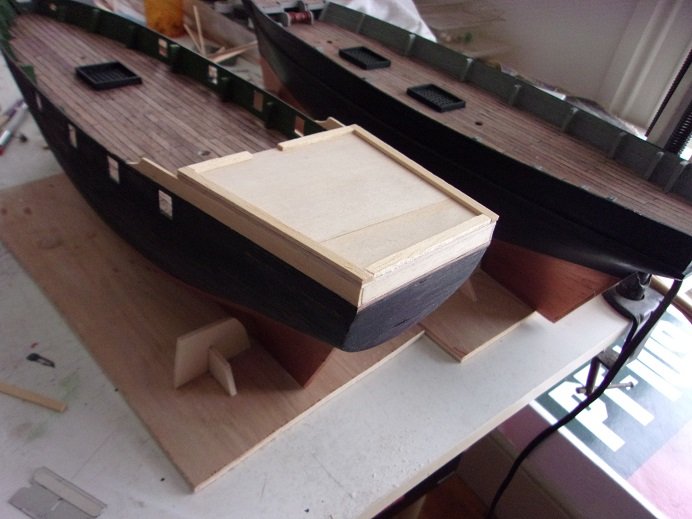
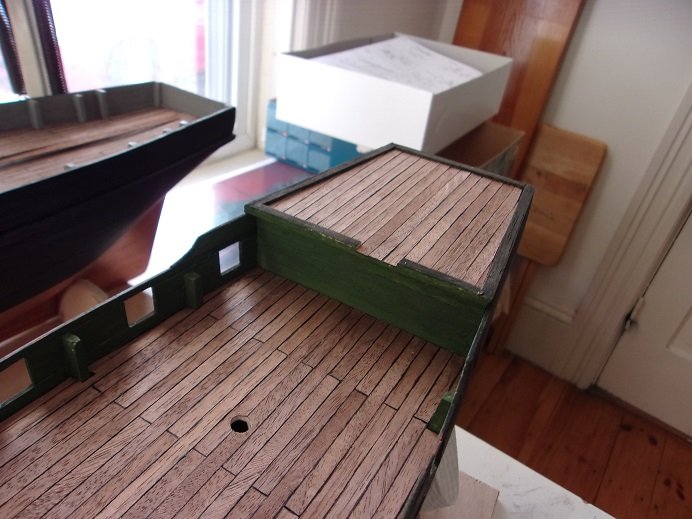
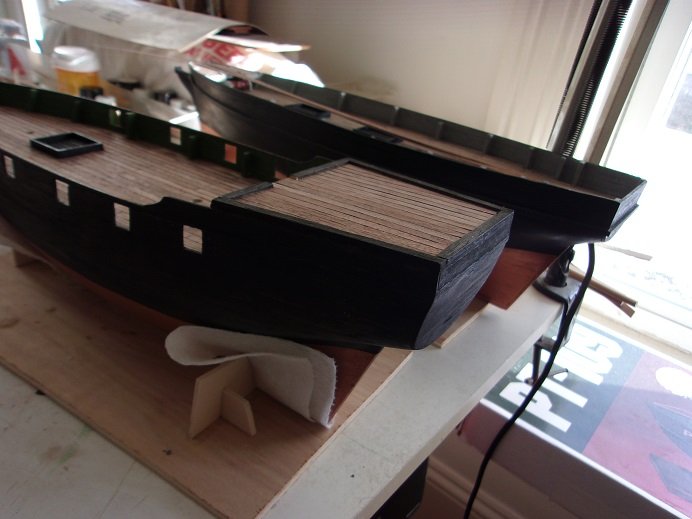
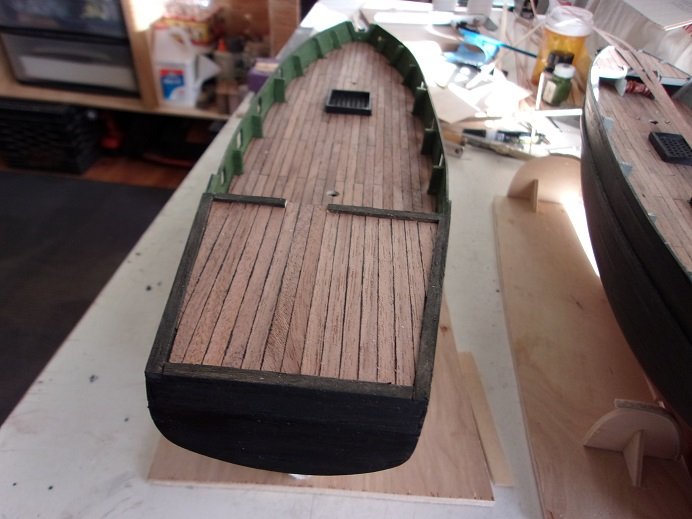
more progress on the Agilis........I fleshed out the aft deck. the aft section was raised by 5 mm. I got a little fancy with the sides........I'm not gonna go too crazy, but since this is a fictitious ship, I guess I can do a few things once this was sanded, it was capped off and cased in for the railings. I left an opening for the stairs. I also gave it a slight overhang. after some more sanding, it was painted and the deck planking was laid down. looks like part of the ship now sooner or later, I can involve both ships with progress. I still need to do the rub rails for the Agilis
-
......I'll git my helmet

-
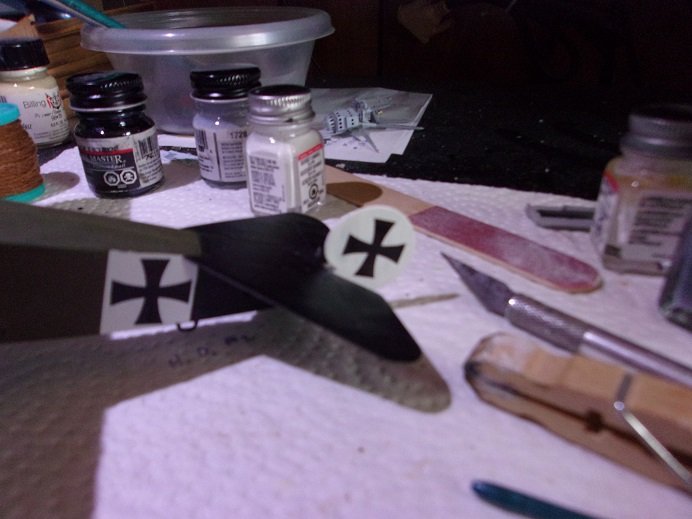
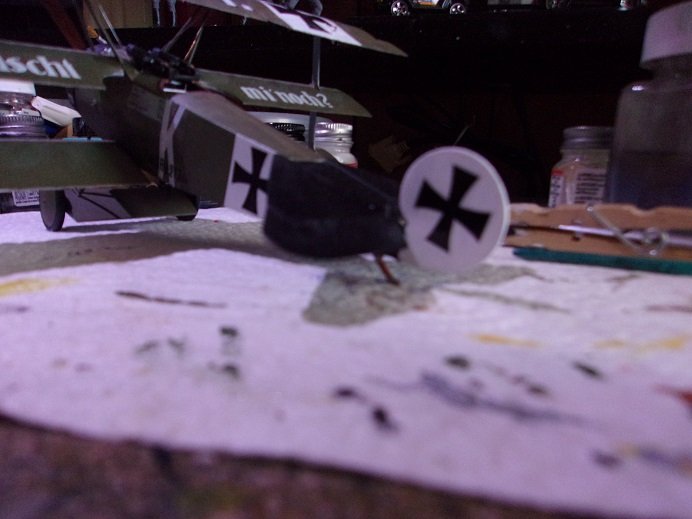
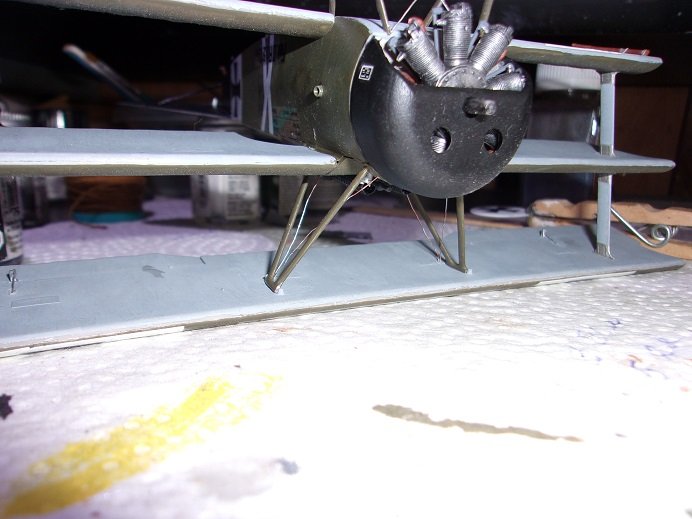
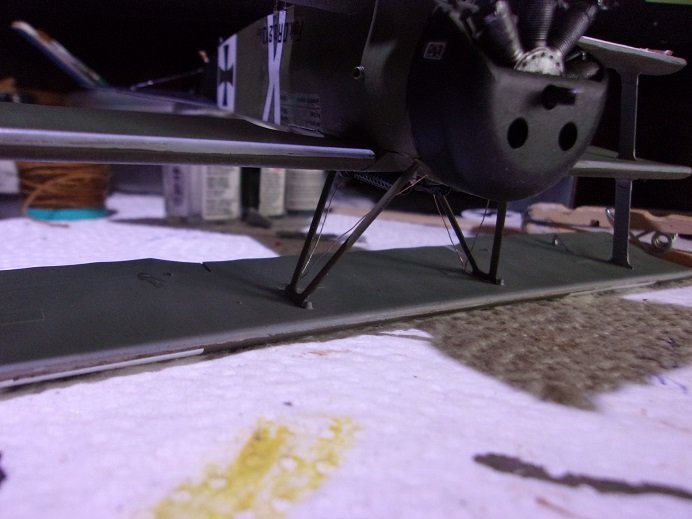
I went a bit further by adding the cabane struts and touching up the decals. I also added the struts for the stabilizer wing with flash........ and without..........
-
so this is where you got off to?!?!?!?! I'm glad I found your log before the plastic started flying! 1/350 is certainly small......I have the Vendetta that I still need to finish. look'in forward in seeing your progress great conversation by the way! speedy recovery Jack.........at least you can still lift a tankard rest up and get better!
-
superb job on the torpedo tubes......they have the caps for them, but I think it would look cool to have the front tubes showing a torpedo in them. you've done a great job!........wonderful!
-
very nice metal work
-
you've done very well with this kit. second hand projects usually have the little surprises you mentioned nice look'in model
-
I think it does.......I'll check it out thanks OC fleshing out the aft deck now....raising the area another 5 mm. perhaps I can even do the catheads and get further with the head gear.
-
look'in forward to it
-
yep......seen it too. I have a few instrument panel decals from the bombers.....I'll cut them to fit. of course, once together, it might not be very visible.
-
adjusted the 'toe' did ya? looks pretty good I had some of that with the funny car...hate bending stuff.......always afraid somethings is gonna break hate the way some instructions are done......there's always that one part that you just can't seem to figure out how it goes really nice progress though.......nice!
-
....a bit of a soaker over here too!
-
look'in great Mike...........quite a bit of surgery there I agree with Lou......easier to service if the wings were down.
-
came out look'in really nice OC..........the horse came out super too
