
HOLIDAY DONATION DRIVE - SUPPORT MSW - DO YOUR PART TO KEEP THIS GREAT FORUM GOING! (Only 36 donations so far out of 49,000 members - C'mon guys!)
×


popeye the sailor
-
Posts
16,007 -
Joined
-
Last visited
Content Type
Profiles
Forums
Gallery
Events
Everything posted by popeye the sailor
-
 nice progress so far OC........not understanding the significance of tilting the stabilizer ailerons downward for the rudder, as they are shaped to allow for it.
 -
some really precise work Andy the sides look awesome!
-
sweet looking engine.......yup.......definitely have to go back a few years to find truly sculpted cars. it was a sad day when we went into our 'square days'
-
hi J........yea small problem.....got it sorted out. I worked on her for a while, but I kinda got ahead of myself with the transom........boarded it up already. now planking the counter is going to be a lot harder, unless I come up with an idea around it. I got the fore deck figured out on the Clotilda. now to finish gluing it in place and plank it. yours is coming along nicely
-
look'in awesome J....your miles ahead of me now! slips my mind, but do you have the rudder done?
- 211 replies
-
- 1
-

-
- agilis
- steingraeber
- (and 1 more)
-
all I can say is WOW Daniel..........this assortment will look fantastic next to a finished model....... have you considered doing a 'two face' model........one side in one scheme, the other side in another. definitely be a 'one of a kind'
-
yes Ken....it's the gun mount for the top turret. the other part I spoke of is for the tail......an area that will never see the light of day. it looks to be the only part that was badly flashed. I found a couple other places that the set doesn't cover......this kit may be too 'new' for the set...the other way 'round did a bit more masking, but not much further. I notice that the kit omits a window just below the cockpit on the left side........of course I have nothing to fill it in with..... just as well......I'd be afraid to mar the plane up anyway. it's enough that, if I want the dive brakes, I need to cut them off of the lower wing halves. here goes nothing..........
-
guess I'd better get hump'in on that decal..........
-
North American P-51D Mustang by Asat - Airfix - 1/48
popeye the sailor replied to ASAT's topic in Non-ship/categorised builds
I see you caught a different type of bug Lou.......it's a good one great start.........I use Testor's decal set....works reasonably well. yes.....Murphy love to bugger up plastic projects too...he doesn't discriminate -
WOW! superb job on the Dauntless Ed! very well done I don't recall ever doing a Japanese plane before........might be interesting. I think the Russians have it beat though.......TU 95MS not sure if there's a kit for it........but then again, I've not done a Russian plane either I've got Tora Tora Tora in my library........my favorite is the Blue Max.......went through hell finding a copy

-
B-25 Mitchell "Meet Miss Runyon" by Javlin-HK-1/32
popeye the sailor replied to Javlin's topic in Non-ship/categorised builds
I think I know where Mark was going......we usually don't mix two projects together. what you might want to do is open a log with a paint and camo theme, and let others show what they've come up with. I myself haven't gotten too fancy with my planes, and I think it would be cool to see longenze and different types of camo. it's up to you -
B-25 Mitchell "Meet Miss Runyon" by Javlin-HK-1/32
popeye the sailor replied to Javlin's topic in Non-ship/categorised builds
she's look'in REAL sweet now! great job -
look'in good Tom
-
look'in super Martyn........very nice finish on her.........well done!
-
they are meer suggestions..........possibilities within possibilities I hear ya on the admiral's views {that's what we call our wives here on the site} {my wife actually likes it........I also call her my budget director, which she likes even more }. I got sworn off of plastic when I built my first wood ship model.......she fell in love with it. now if I build something in plastic, I get a lot of grief, although it has died down some since I started building the bombers as I told her........there are too many really good subjects that are not covered by wood kits.......and I have three or four of them in my stash that are plastic.
-
Hal and Eddie look dapper in those designer helmets! they look much better......looks like you did some fine tuning. the belts are a really nice touch. very good job there good buddy!
-
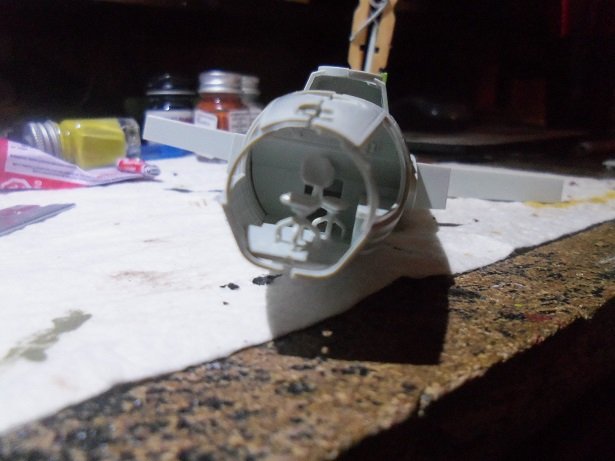
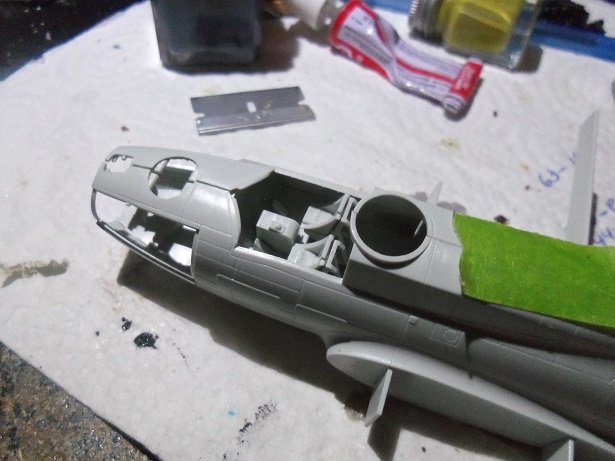
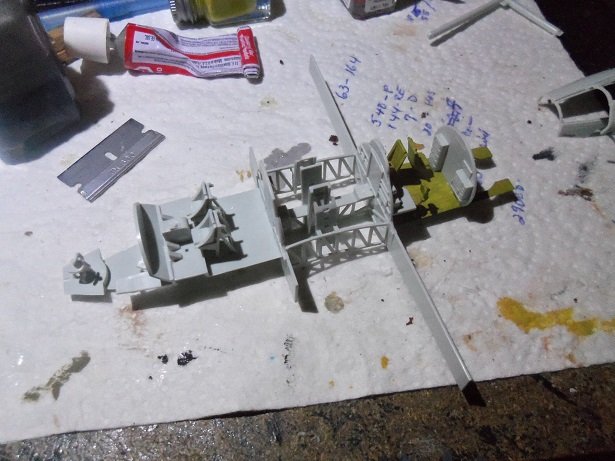
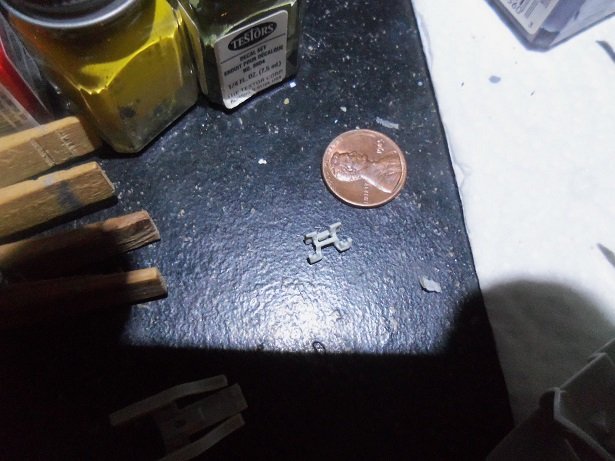
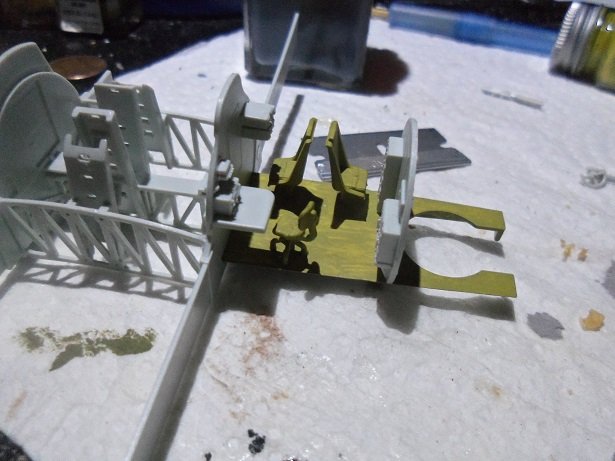
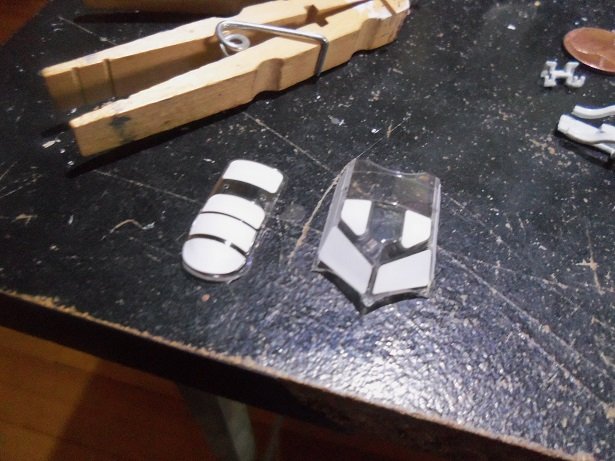
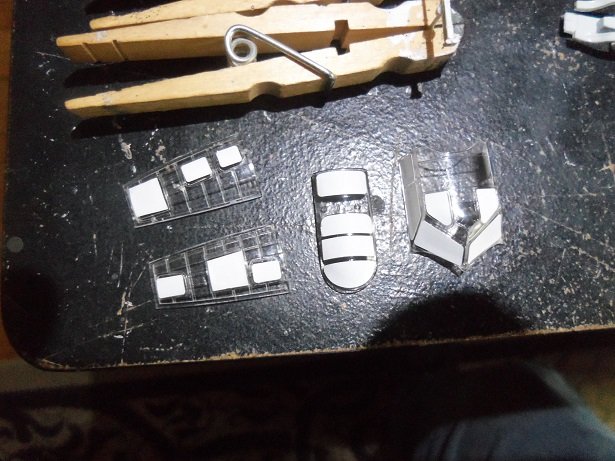
finally.........some progress on the Memphis Belle I took the day off yesterday............'cuz I wanted to, and not because of the virus. don't get me wrong......this is some serious stuff, but the more I hear about it.......naaaa, I better shut up.......chalk it up to one of the emotions felt during a crisis like this I had made a mistake in my paint choice early on......the Zinc chromate is too yellow........I could have used it on the Wulfe Hound, for cry'in out loud. to give it a green hue, I mixed in some olive drab.....it's much better, but not perfect. I will use it.....only for the reason of highlighting the interior more. you'll see it in a moment...... I painted the instrument panel and the navigator's compartment with a brush. it came out a bit streaky, so I will assemble the entire interior and use the airbrush on it. I can touch it up with the brush later. after assembling the interior, minus a few key parts that need detail painting, I slid it into the fuselage, so it would dry in the correct position.........I did it with every segment I added {rest easy.......no time lapse photography}. out of the 'box'.......it looks like this. you can see my Zinc Chromate Green....other colors will be added after the rest of the assembly is painted.....the seat color, ect..... then I started to play with the turrets...I couldn't find this one part. after a visual search came up empty, I referred to the number and searched again. I couldn't believe what I saw.........this part was totally unrecognizable......it was loaded with flash! I spent about an hour trimming it.....there was even a tiny rectangular area within the part that needed to be cleaned out.......a really small part to begin with. the part you see in the shadow is another part with a lot of flash........even though it's a larger part, it broke as I was cleaning it {it's drying at the moment}. here's a better shot of the navigation compartment with this, it will involve the clear parts. this is my first attempt using a window mask set. I think I'm a tiny bit off with the windshield........I'll fix that the two sides up at the nose were next.........these two panels are clear. they are the main reason why I chose to buy this set. each side has three windows, with one of them housing a machine gun. I was dismayed that the set does not have a mask for the gun window. I improvised a bit, cutting out a mask for them both.....not perfect, but they will do, although I could try and round off the corners. I've also done some of the painting that I felt I could do....some of the small bits. today I hope to get larger areas done more on her soon!
- 247 replies
-
- 11
-
-
I'll have to look this one up....how much modification will you need to do? your progress is looking super
-
you did a great job Egilman...you've preserved quite a bit of detail your progress looks good Andy !
-
......it's got camo /.........oooh-la-la!
-
perhaps you might find a 1:48 plane to put it into? they are an interesting plane with many variants
-
hello Michael......Jct and I are having fun with our project. I name mine differently though, but since I'm not using the parts and wood for this ship, I made another hull with the leftover stuff. that project, when I create the log for her, will be my Agilis project. so far so good for this one, though not having a lot to go on. it will be fine welcome aboard....... I seem to have developed a delaminating problem with the other frame....so far, the problem is small and local. I have taken steps to thwart it........more soon
-
hey there........got a couple dolly color schemes for ya. gray is good overall.......some are even flat black. you can go nuts with grime and rust.......depending on how old you want the trailer to look. s-cams, slack adjusters can also be the dolly color, but the brake chambers can be any color really....it depends on who made them. Omni cans are blue......MGM are black.......and some aftermarket cans can be a metallic color.....silver or gold. the exposed wood between the crossmembers can be painted.......very few are bare. if there is brake shoes or detail related to them, you have a choice of colors......Hamden is blue backing w/the leading pad a bluish color.....the trailing pad is gray. some also are black, but for the most part, grime will hide the color. I mention the leading and trailing pads, because manufacturers do that so the mechanic will know how the shoe installs. th funny part of it is.........they only install one way! just odd trivia, I know.....but I suppose that there's someone out there that will figure out how to screw that job up .........someone figured out how to screw up the locking hub nuts......lost a few wheel assemblies there......... for the life of me.......I don't know how they did it. I tried to figure it out.......but with the tabs {new design}, it's virtually impossible to put them in back azz two! relay and brake valves can be either aluminum or brass color. optional hoses......normal color........you can get creative and do crossovers for the emergency side. don't do them for the service side......that's a DOT nono!
-
hey ! finally got to look in on your {fairly} new project won't be the first time the pit crew had to tear down an engine to fix a problem........looks pretty neat!
-
she's coming along nicely.......I have that task to do on the Memphis belle {when I can get back to her}. I cheated though......I bought a mask set. I mentioned this on Craig's log, but have you seen the movie Midway? there are some great shots of the Dauntless, as well as the Zero......and even a Japanese bomber. the carrier shots were really neat too