glbarlow
-
Posts
4,134 -
Joined
-
Last visited
Content Type
Profiles
Forums
Gallery
Events
Everything posted by glbarlow
-
 As I have recently learned with Cheerful , moulding can be easily scraped from strip wood and a piece of filed brass. No need to increase kit costs. Even not scraped as a plain strip it can serve the purpose.
 -
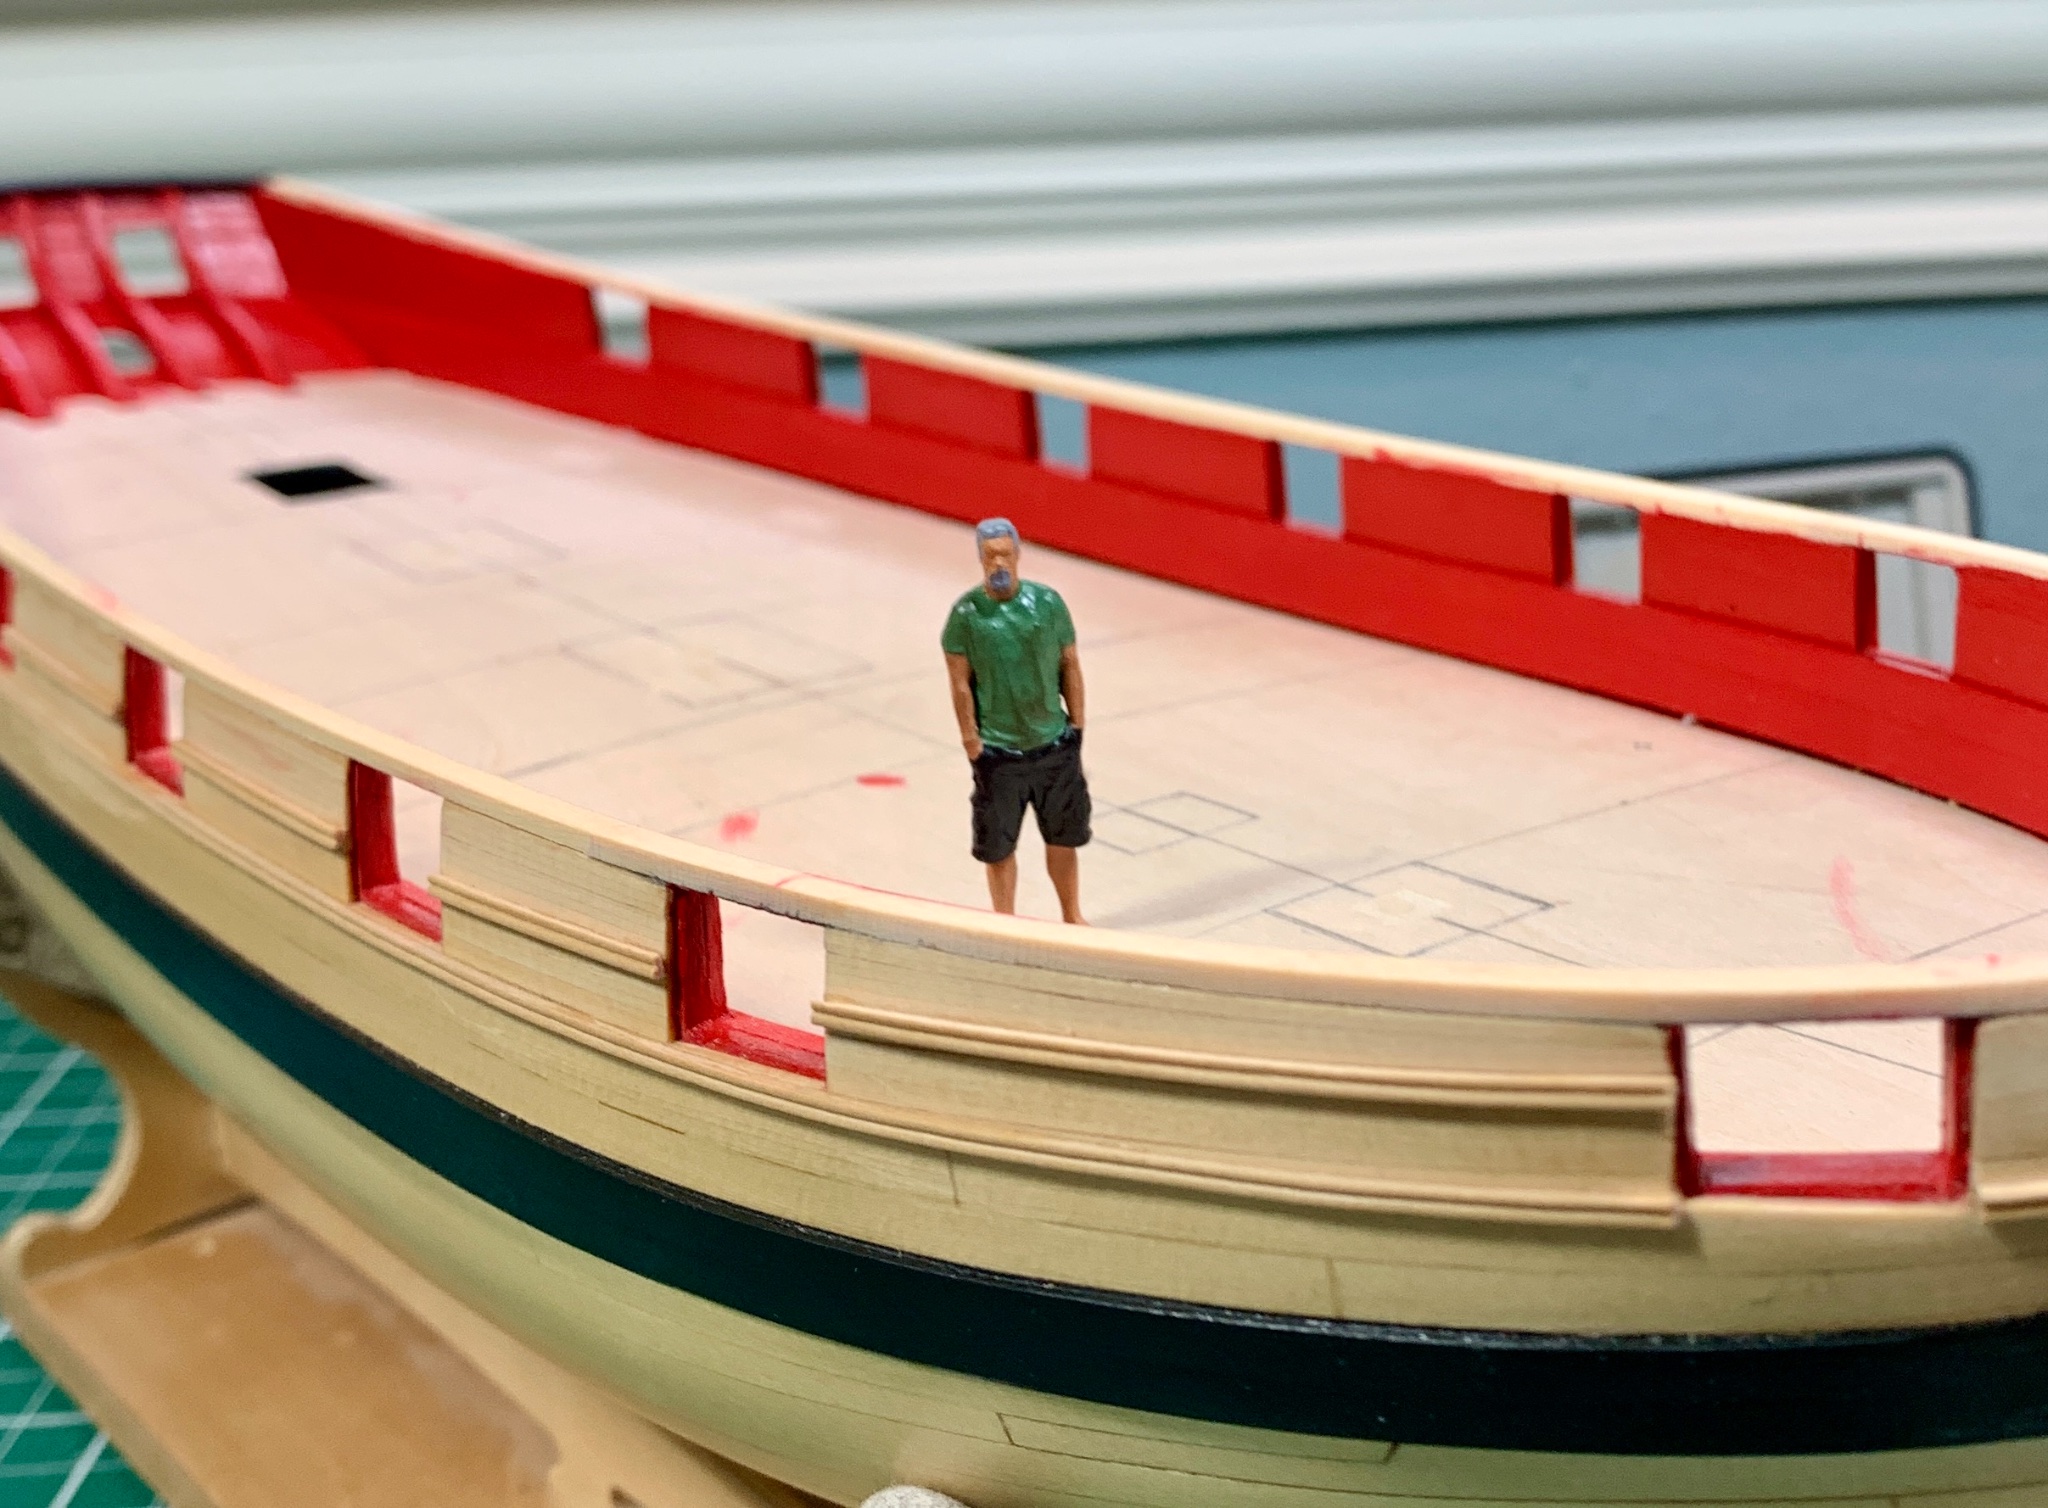
Thanks BE, your Cheerful log is one I frequently visit for ‘how-to’ as I move to the next step. So much about Chuck’s design just works right, it’s made my dive into semi-scratch building so much more fun. The mini-me is kinda fun, plus I like it for the sense of scale.
- 778 replies
-
- 2
-

-
- cheerful
- Syren Ship Model Company
- (and 1 more)
-
I don’t really know yet, it isn’t something I’ll use often and it’s a moderately priced unit. It does have variable speed, does both pin and painless blades, has a light and a blower. Those are about all The features I was looking for. I have a jewelers saw which was quite handy reducing the stern frames as I described here in my log. The scroll saw was quite smooth cutting out the bow portion of the cap rail. I don’t think it will be a big part of my modeling, I’m fine with my hand tools, but it will be handy when I need it.
- 778 replies
-
- 2
-
-
- cheerful
- Syren Ship Model Company
- (and 1 more)
-
That is kinda what I wear everyday - the valet is always furious.
- 778 replies
-
- 2
-
-

-
- cheerful
- Syren Ship Model Company
- (and 1 more)
-
The things I don’t know...thanks Derek. So what are the grits of your sandpaper row? So you put honing fluid on sandpaper? That guy has a lot of chisels and planes on his shelves, now I feel like I’ve neglected my tools. For the record I have a number of high end knives, and they are all kept sharp. I’m not a complete poser.
- 778 replies
-
- 3
-
-
- cheerful
- Syren Ship Model Company
- (and 1 more)
-
Thanks Rusty.
-
I love these tools, they are extremely well made. I use them a lot and for a lot more than a chisel’s typical use. I’m going to have to sort out how to sharpen them soon
-
Thanks Derek. I appreciate the kind words. I'm kinda happy with how its turning out. I like how the planks are a bit varying in color that stands out in that photo, it helps bring out the butt joints and that it isn't a single long run of planks.
- 778 replies
-
- 1
-
-
- cheerful
- Syren Ship Model Company
- (and 1 more)
-
For us Americans, I looked this up. Fettle: to prepare or arrange (a thing, oneself, etc), esp to put a finishing touch to. b. to repair or mend (something). Not sure if BE is in Yorkshire, there it means to put in order. It's a cool word, but one I'd never seen until reading BE's logs 🙂 Oh, and nice work as always BE. I enjoy your ever informative logs.
- 261 replies
-
- 1
-
-
- muirneag
- vanguard models
- (and 2 more)
-
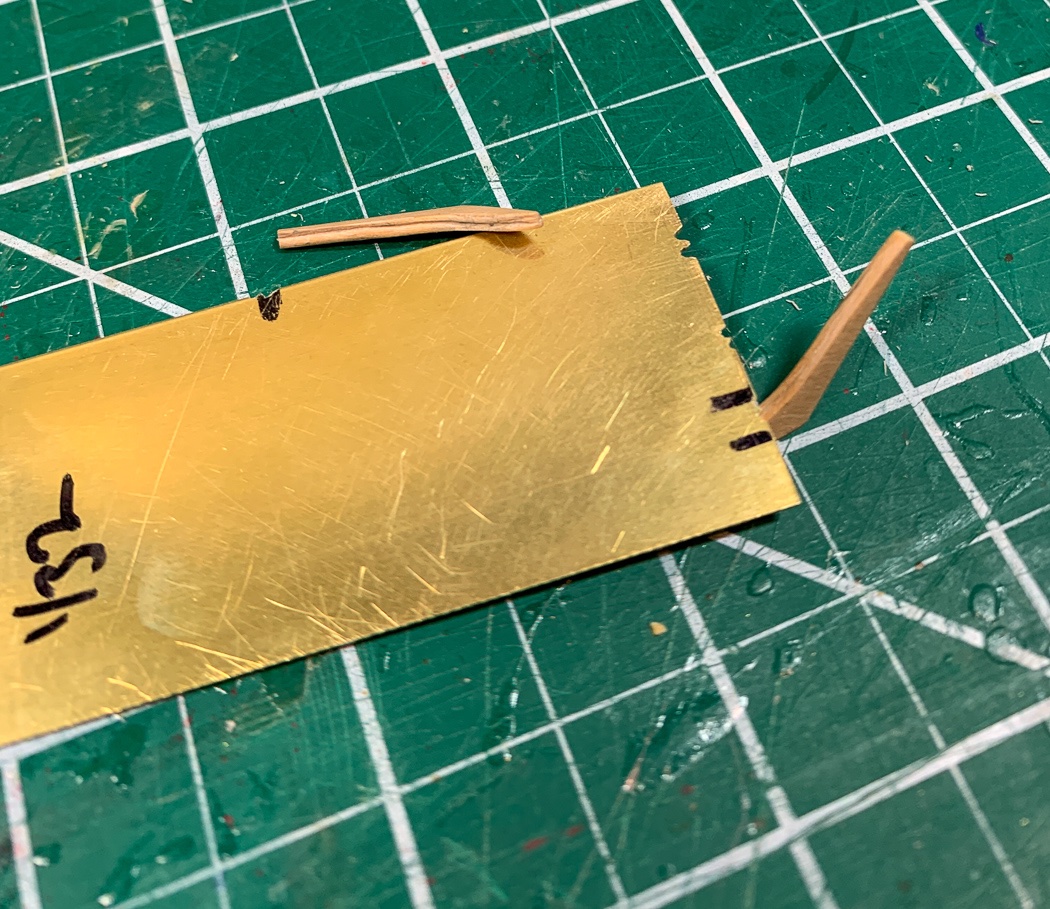
Thank you very much for saying so. Yes, the Amati scrapers were a bust, at least for this model. There are step profiles that would have worked on the 3/32 square strip, but I just didn't like the look of them. I'd recommend not going to thick on the brass. I had several sizes on hand and determined 1/32nd thick brass was best for me.
- 778 replies
-
- 4
-
-
- cheerful
- Syren Ship Model Company
- (and 1 more)
-
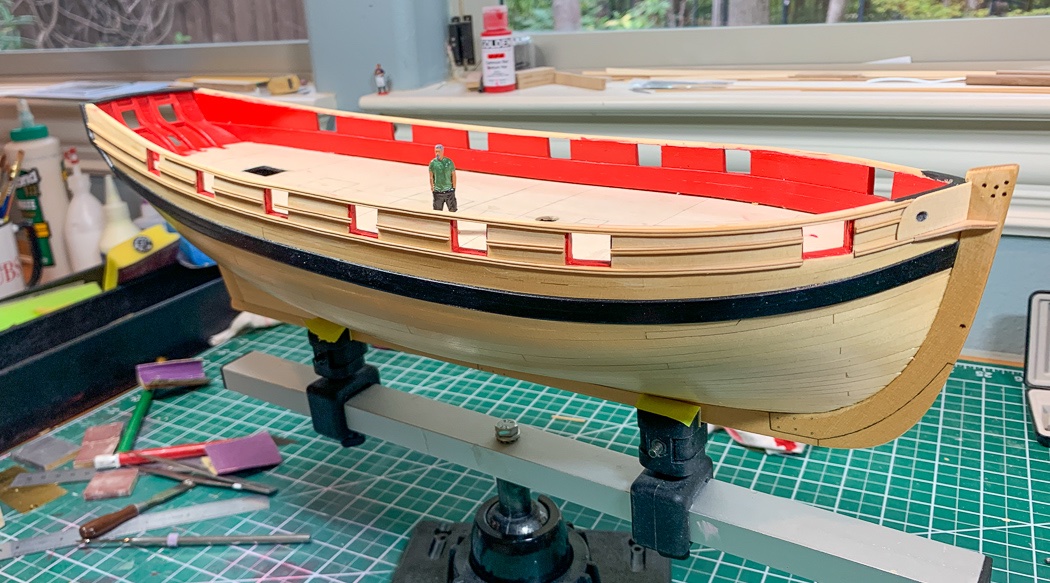
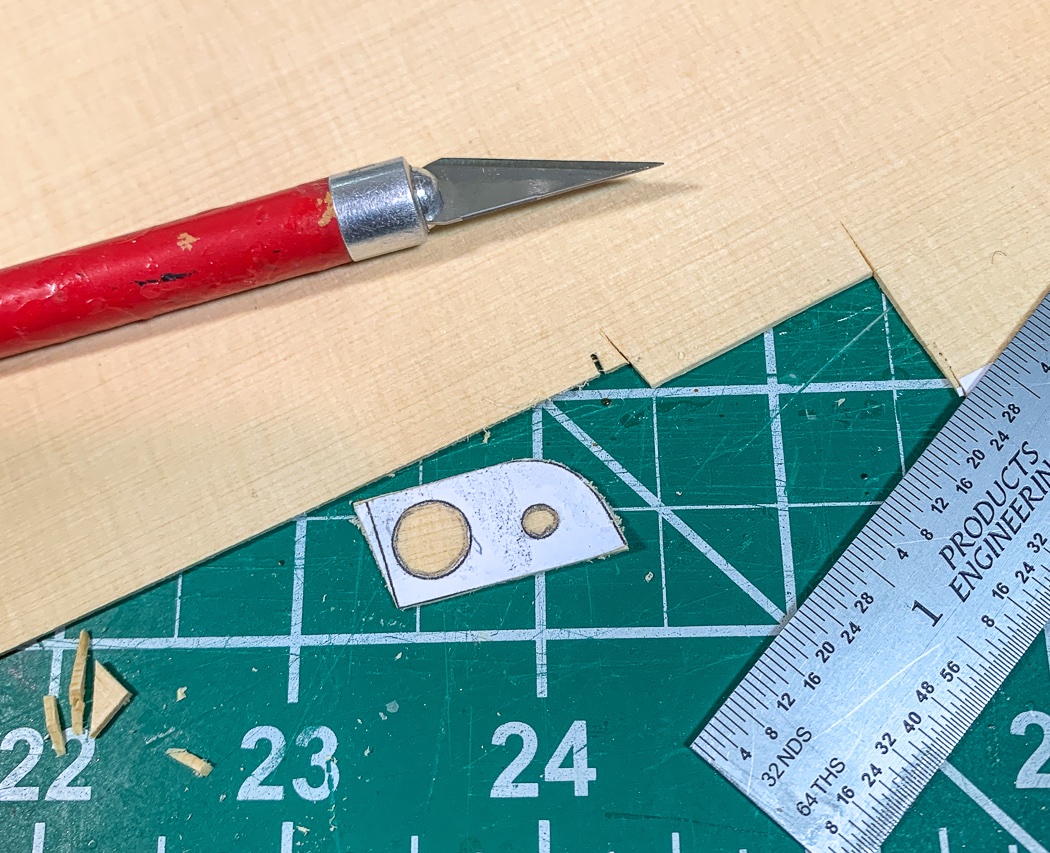
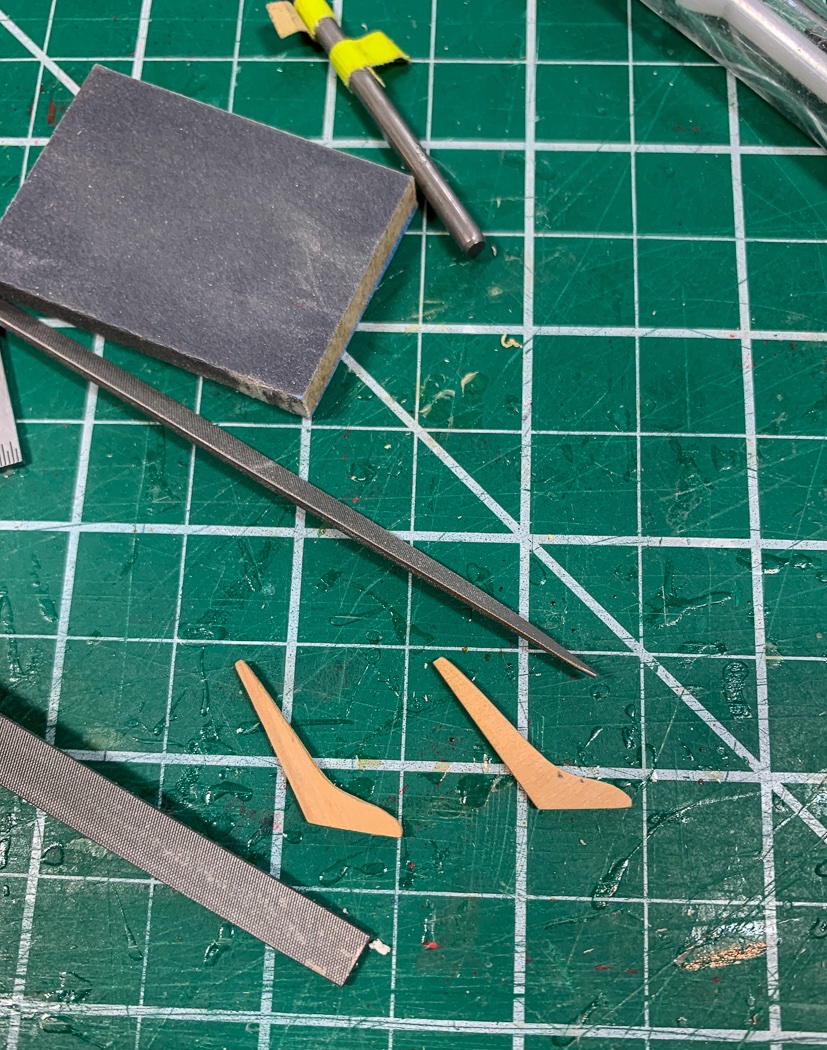
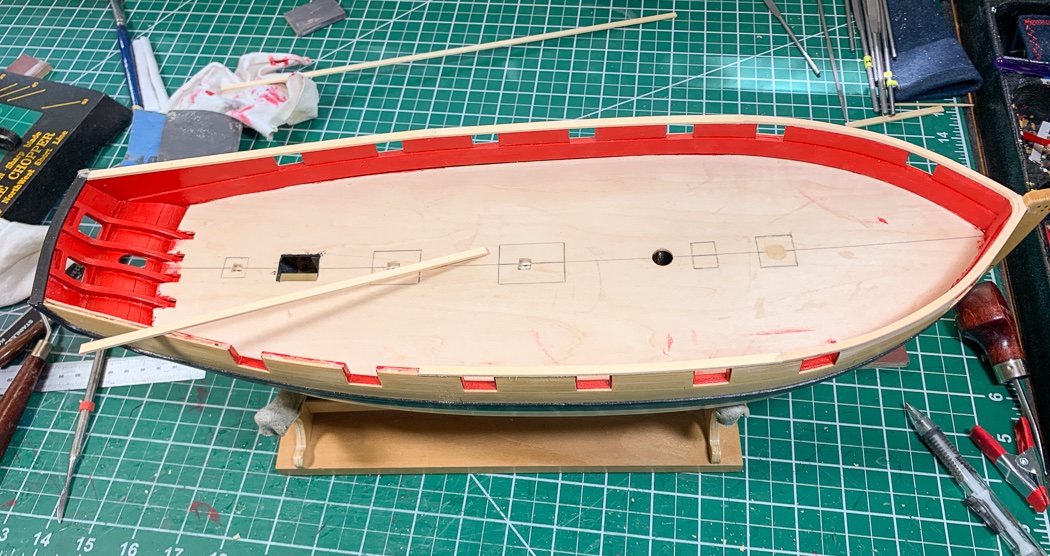
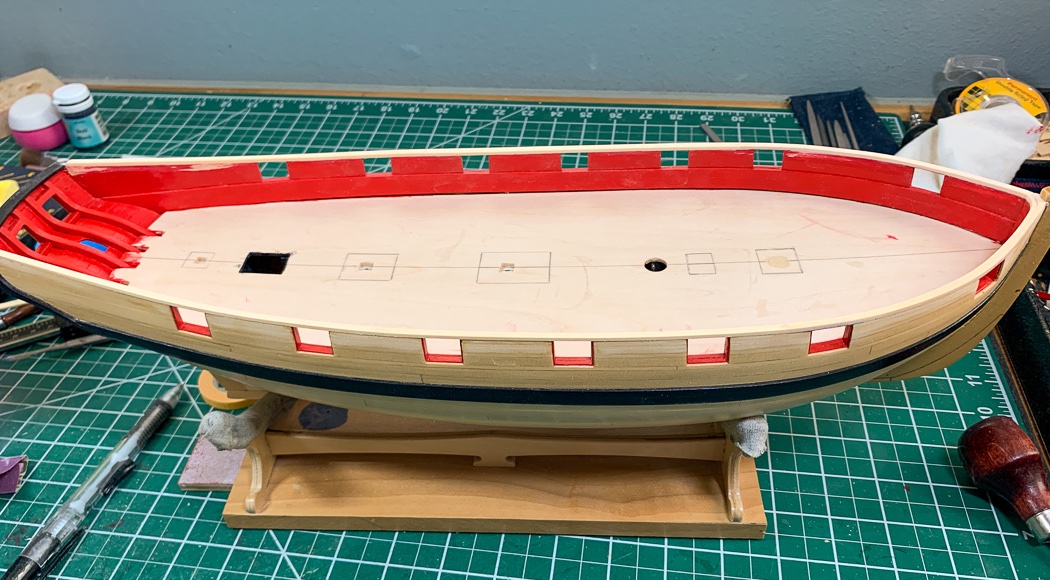
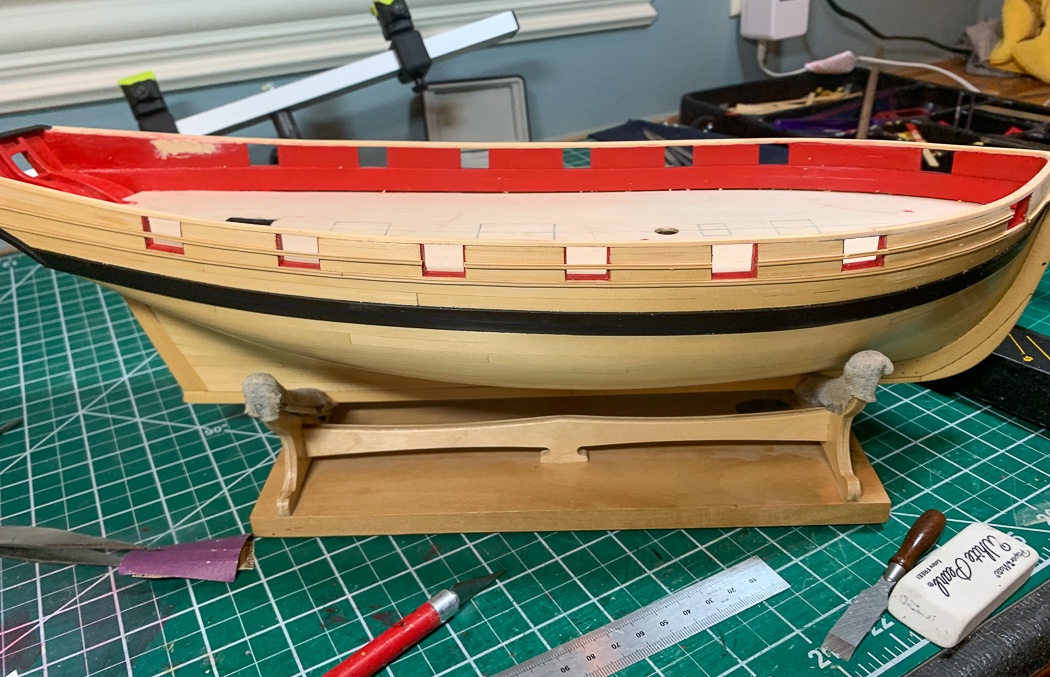
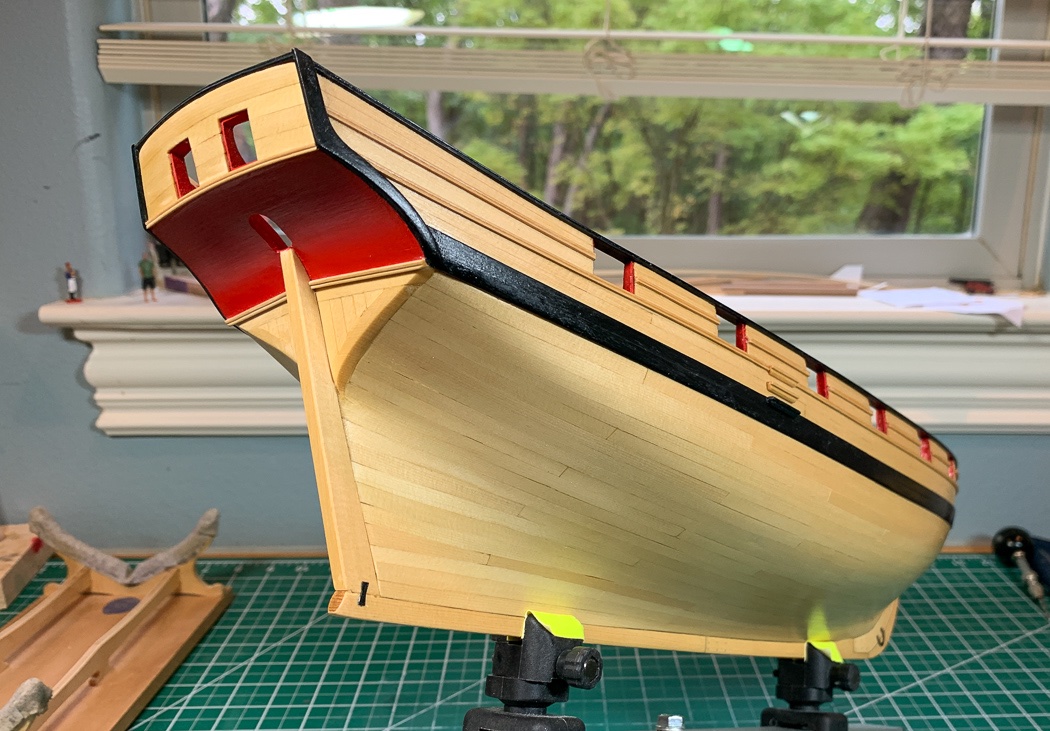
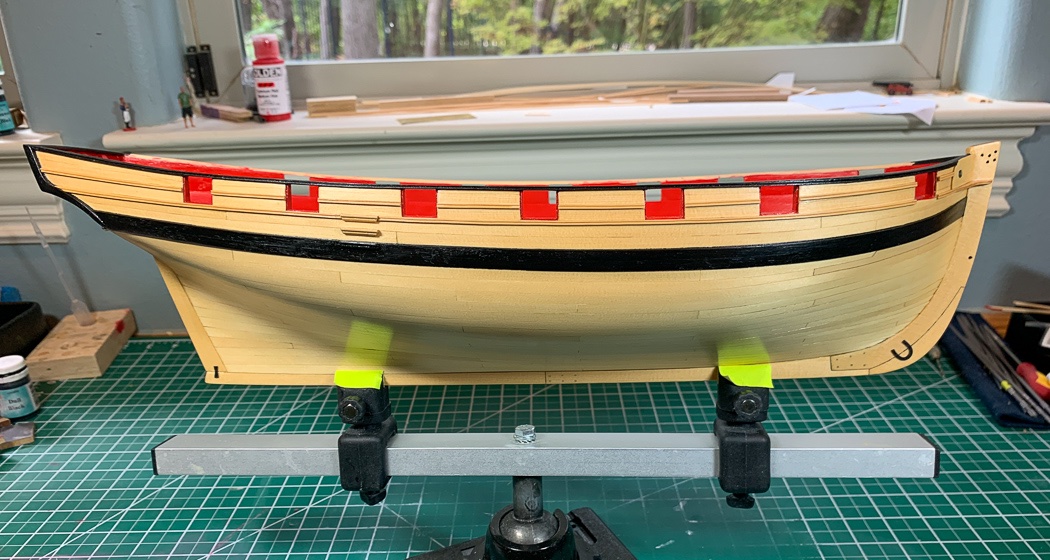
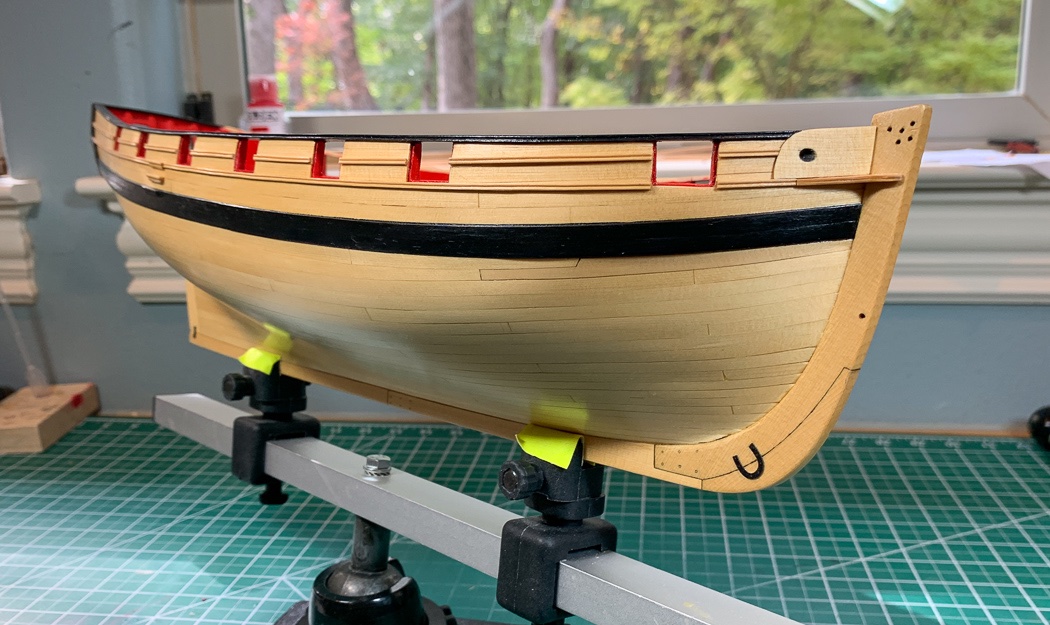
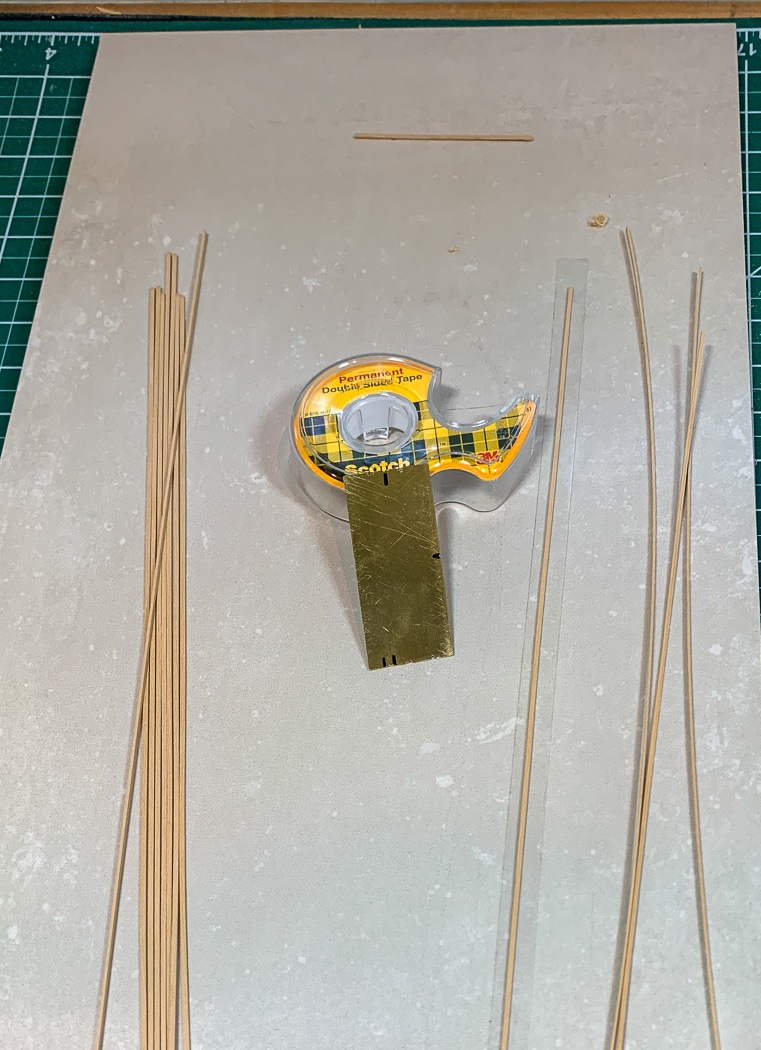
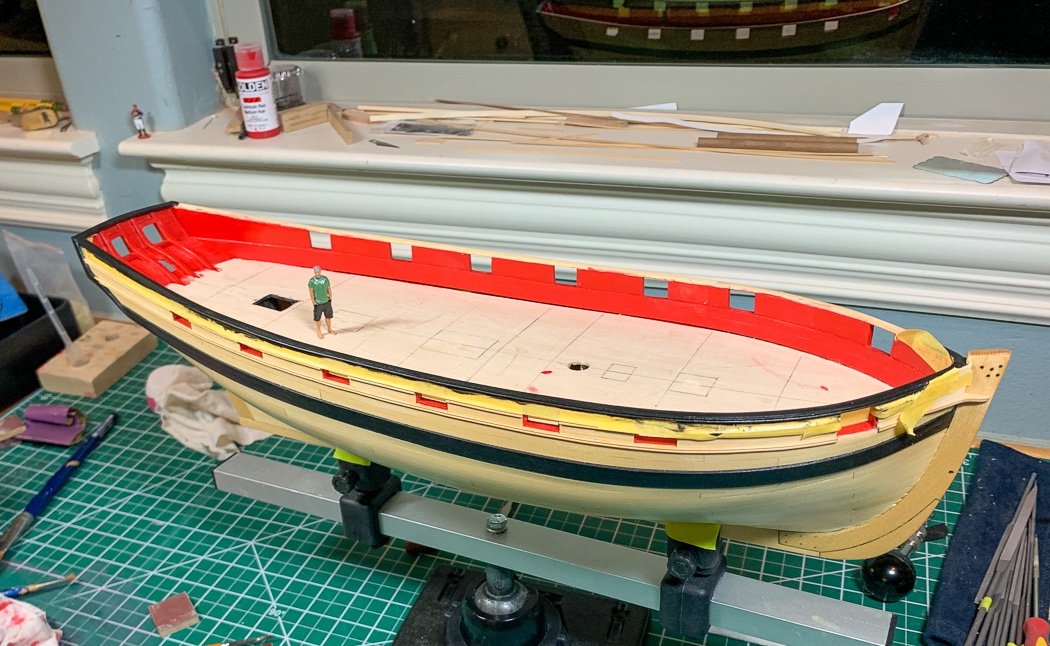
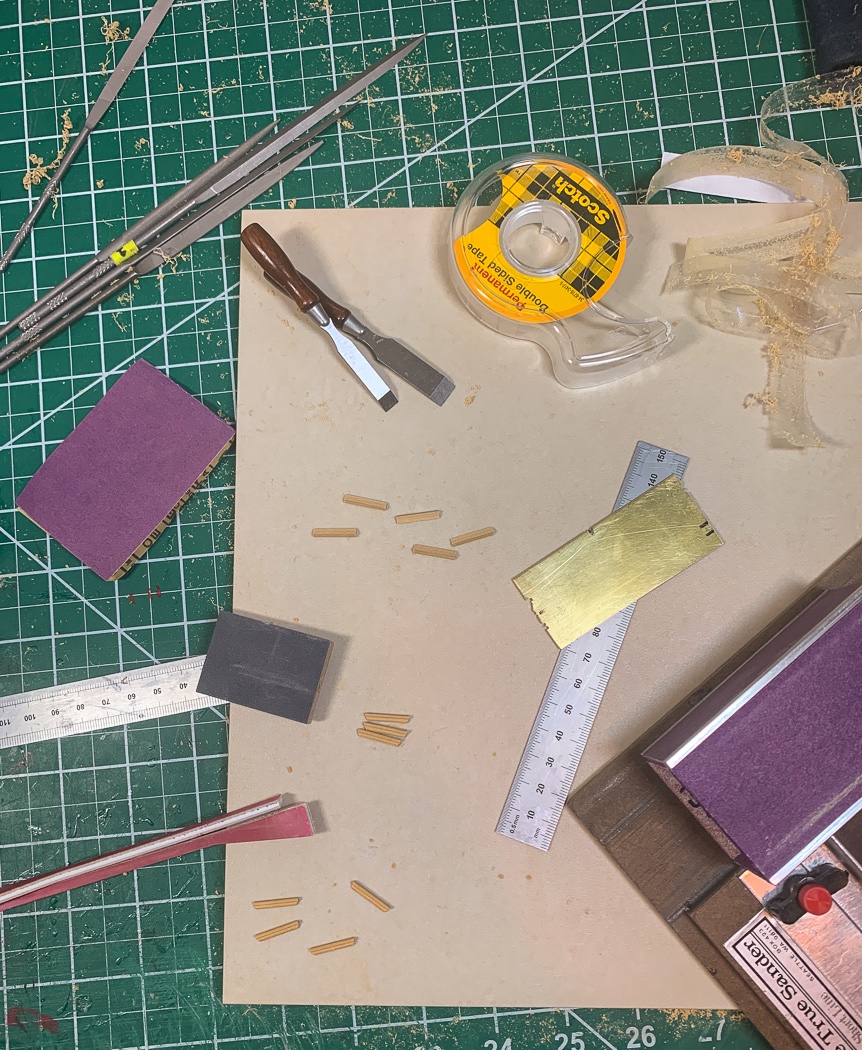
I moved to the cap rails next knowing I’d be doing a bit of sanding (and hacking up my nice bulwark paint job). I guess I could have cut out the bow section from 1/16 sheet with a #11 blade, but it was a good excuse to purchase a scroll saw. I cut out a template of the bow by tracing its outline on card stock and transferring that to the wood, along with a line 5/32 inside that one. Though a tool I’ve never used, me and the scroll saw made short work of cutting out the bow pieces, I then sanded the rail flush both inside and outside the ship. I elected to place my rail in three sections to make managing the curve a bit easier and knowing I could fill any gaps and cover with paint. I cut and sanded flush the tops of the fashion pieces (on many occasions I've snagged them and almost broke them off, no more of that) having added the taffrail earlier. I also decided to paint the fashion pieces black to match the wales and cap rail, for me it seemed to bring it all together. I’m happy with how the first phase of the cap rail turned out. As you know from my last couple of posts I’ve had a good amount of angst on how best to do the fancy moulding. In the end it was just as Chuck and others have described, cutting a profile into a piece of brass. The hard part was getting a small enough profile to work. A seemingly no brainer, it needed to be near exactly 1/16 wide and 1/32 deep. My first several attempts were just too big as were all 6 of the Amati scrapers I acquired. My approach was to use a long piece of smooth floor tile, apply a long strip of double sided tape, lay the strip wood on it and scrape. First lightly to set the groove, then tilted forward to cut, straight up to smooth, tilted backward to cut, and repeat until the bottom of the brass either side of the profile was riding the tile. By the last piece I said to myself “Self, that wasn’t so hard now was it..” Who knew. This again is where great design comes together. A long time ago part of building the sheer above the wales included two 1/16 strips. Those strips now are the guidelines for the two strips of fancy moulding, no guesswork or measurement required, just follow the yellow wood road. My favored approach is to run the moulding over the open ports to keep a smooth flowing line from bow to stern. I’m comfortable cutting them out with a #11 blade. It was bit more challenging with the rabbit, I could only use the very tip of the blade. Another reason I buy #11 blades in lots of 100, I change them often. Not being clever enough to carve two separate moulding designs, I was a little clever by turning one upside down from the other. At any rate I like the symmetry as it turned out. A note: I’ve repeatedly said how much I like the Alaskan Yellow Cedar on this model. However here it just wouldn’t work. the 1/32 strips shredded when scraped (at least scraped by me). Chuck was kind enough to ship me a selection of Boxwood strips which proved perfect and easy to shape. I cut the hawse plates from 1/32 wood by once again rubber cementing the template cut from the monograph but with an angle to match my stem, easy. I later mounted them to the ship, careful to follow Chuck’s direction to cut the holes parallel to the keel. I colored the inside of the hawse hole with graphite pencil to simulate lead sheathing as per Chuck's monograph. Next up is the “ear” at the bow stem, also from boxwood to match the moulding. Cutting one of these little jewels, which I first rough cut with my new scroll saw then shaped with needle files and sanding, was challenging enough. The real fun part was cutting as second one to match the first one, (you can see in the photo I wasn’t quite there yet). Then when you’ve done that, using the scraper to cut in the same moulding design as the strips. I was wishing for thinner fingers, yet I managed to pull it off with a good deal of time and patience. Did I mention patience and time... The last step before painting is adding a third strip of 1/32 moulding to the outer edge of the cap rail. I have to say it makes for a simple but elegant cap rail. I’m glad I asked questions, practiced, made prototypes, and wound up here with the three strips - it makes the hull really pop (even though its still sanded above the wales at this point). Then it's time to paint the rail black, touch up the red, touch up the black, scrape off the side, touch up again, back and forth. Though it's a process made easier by Tamiya tape, I’m pretty picky about paint lines. I used Admiralty Paint Dull Black for the cap rail and fashion pieces. Before moving onto the deck, I decided to add the boarding steps. I brought out my new scraping station and repeated the process with a new profile for the steps (I know how to do this now, and I didn’t care for the Amati scraper options). I thought of giving the mill a go, but for a cutter I decided a basic step would be appropriate and at this point I was comfortable scraping them, this time from 3/32 square boxwood strip. I needed six identical steps so naturally I made twelve and selected the best six, ok eight, to use for the final shaping and sanding. And with all that, along with a fresh coat of (not quite dry so I can’t polish it up yet) WOP the starboard side of my hull is complete. Now off to the port side and do it all again.

- 778 replies
-
- 17
-
-
- cheerful
- Syren Ship Model Company
- (and 1 more)
-
Nicely done. I know you did it all a while ago, its still nice to see what I have coming up next.
-
I think I’d wait to see how that clinker hull works for the average builder
-
I’m in on the Sphinx but life is too short to take on this beast. I can build three models in the time it would take for this monster. It will take James at least a week 🤣😂 It will be fun to watch others though.
-
Here’s the 1:48 me, courtesy of Shapeways and inspired by Chuck. My hand painting is not as good as his, but it was fun to do with my 10/0, 18/0, and 20/0 spotter brushes. I also added weathering powder to the clothes which both gave it definition and made for a dirty shirt. 😂

- 778 replies
-
- 20
-
-
- cheerful
- Syren Ship Model Company
- (and 1 more)
-
Reading is your friend as are those reference lines.
-
I should clarify - by keeping the bottle tightly closed and using it only to fill up my applicators my CA brand lasts years sitting in the cabinet. It's what is in the applicator, which isn't much, that will go bad after a few weeks. https://www.amazon.com/gp/product/B0000DD1QQ/ref=ppx_yo_dt_b_asin_title_o09_s00?ie=UTF8&psc=1 https://www.amazon.com/gp/product/B008LRT7TO/ref=ppx_yo_dt_b_asin_title_o01_s00?ie=UTF8&psc=1 I do make it a point to store the applicator standing upright in a little holder and clear the tip after each days use.
- 436 replies
-
- 3
-
-
- vanguard models
- alert
- (and 1 more)
-
I like the high end painting station, mine is usually taped up newspaper but since those don’t exist anymore and I’m not going to use my iPad I’ll try yours. 😂
-
So, the Scots weren’t prepared to defend their catch from marauders 🤣
- 261 replies
-
- 1
-
-
- muirneag
- vanguard models
- (and 2 more)
-
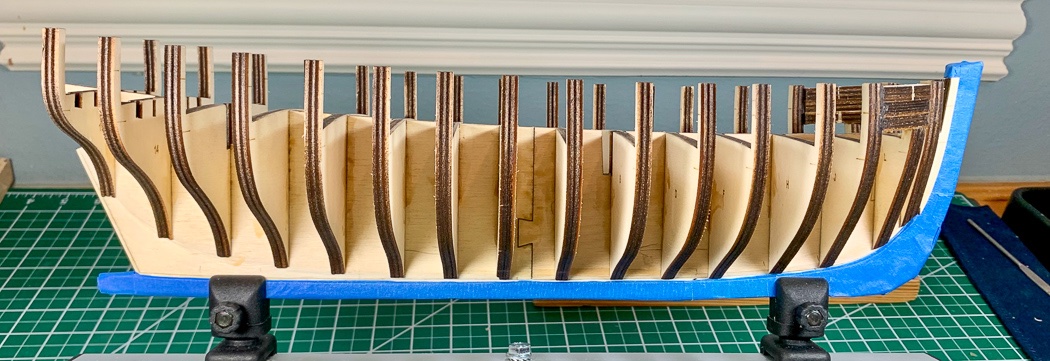
One of the things I like about Speedy and Flirt is the close distance between bulkheads, especially at the bow, there seems to be more the traditional kit spacing on these. Or maybe it’s just my imagination.
-
Ahh the secret is out. I get the first one, well the second one after James puts us all to shame. 😁
-
As well made as Syren blocks or any blocks might be I always push an appropriate size drill bit through the block in advance of the rope to clear our any debris and/or to ensure a smooth opening for the rope - plus doing what you are by rubbing a bit of CA on the end of the rope to effectively create a needle, of course that CA has to dry and it takes very little to make it stiff enough to push through. Yes, CA does go bad after a while. I use the applicators I think I've shared before - at some point I realize the CA is getting a bit gel like and just toss the applicator and fill up a new one. I use watered down white glue on all the knots, though I do use a tiny bit of CA on rope as well in some situations. All this to say, welcome to the club we all experience the same sort of things.
- 436 replies
-
- 3
-
-
- vanguard models
- alert
- (and 1 more)
-
All the cannon on my models are up against the bulwarks. I’d think they stowed them this way to prevent them sliding around on the deck. Everything looks great, an excellent model that shows the time you’re putting into it.
- 436 replies
-
- 2
-
-
- vanguard models
- alert
- (and 1 more)
-
It's your hobby, it's great to apply whatever quality you're happy and comfortable with doing. I'm sure I spend way too much time trying to make everything as well as I can - to each his own be true.
-
Looks like James has competition for fastest builder. Nice work.