glbarlow
-
Posts
4,134 -
Joined
-
Last visited
Content Type
Profiles
Forums
Gallery
Events
Everything posted by glbarlow
-
 Thanks guys. I definitely recommend both the weathering powder and the soft brushes to apply it - it's a subtle affect as you note but a very good one in making the guns look more realistic (but I'm not using the algae green on the water line of the hull just to be clear - its a metal only application for me.
- 778 replies
-
- 2
-

-
- cheerful
- Syren Ship Model Company
- (and 1 more)
-
It's supposed to be relaxing, not creating anxiety. I'd encourage you to check my two logs after you watch Chuck's videos and tutorials to see how I practically implemented them. As I said, I've built 9 models, but converting to Chuck's methods made a huge difference for me. I could have never single planked Cheerful as well as I did without having used it. It's not that hard once you get the hang of it, and it doesn't take that long to get the hang of it....
-
I had a very detailed Pegasus log that was lost in the great crash. Pegasus is my favorite build, in fact that’s it in my little signature bubble. I highly recommend you do two things, review and learn Chucks method of lining the hull and planking from the link Mugje provided and locate Blue Ensigns Pegasus build log since mine was lost). I converted to Chuck’s method and in my opinion there is no better way to learn how to plank a ship. Both my Nelson and Cheerful logs linked i. My signature line describe how I put it to work. Measurements and tapering planks are an essential part of planking, but every hull even of the same model are different. Chuck’s method ensure the measurements you get are for your hull, not what someone else got. The most important recommendation I have is not to overthink it and not get lost in details and too many sources of advice and tutorials. Pick one that works for you and make sawdust. Have fun!
- 164 replies
-
- 2
-

-
- fly
- Victory Models
- (and 4 more)
-
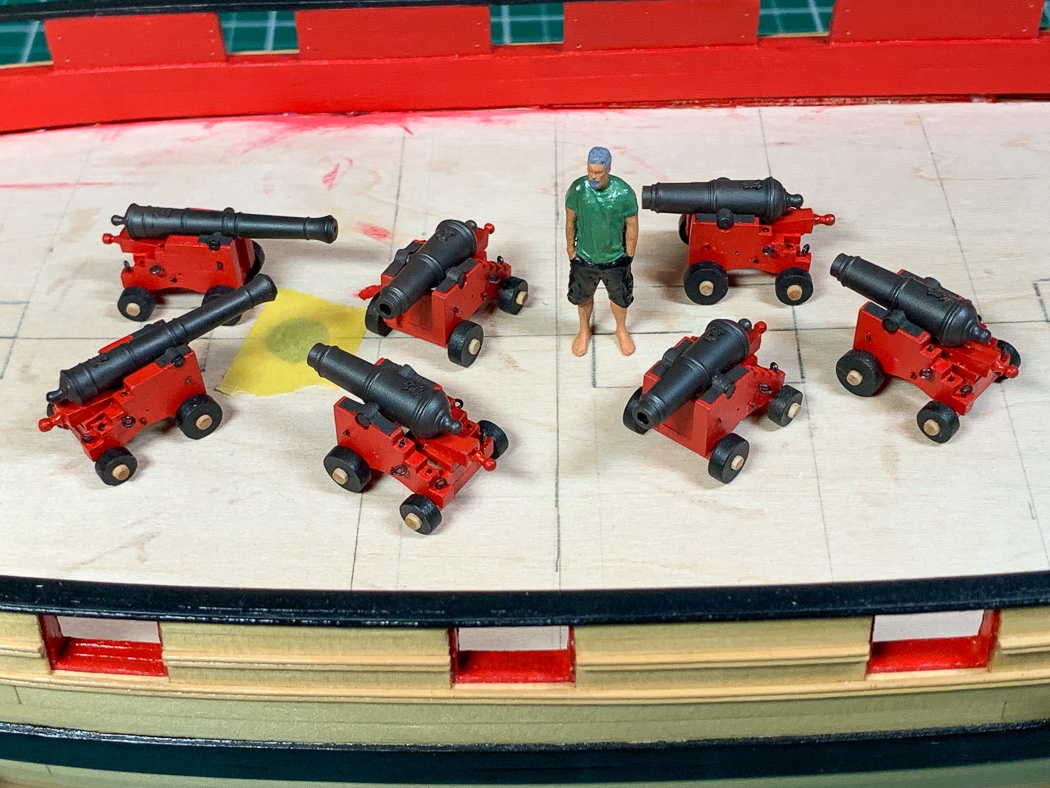
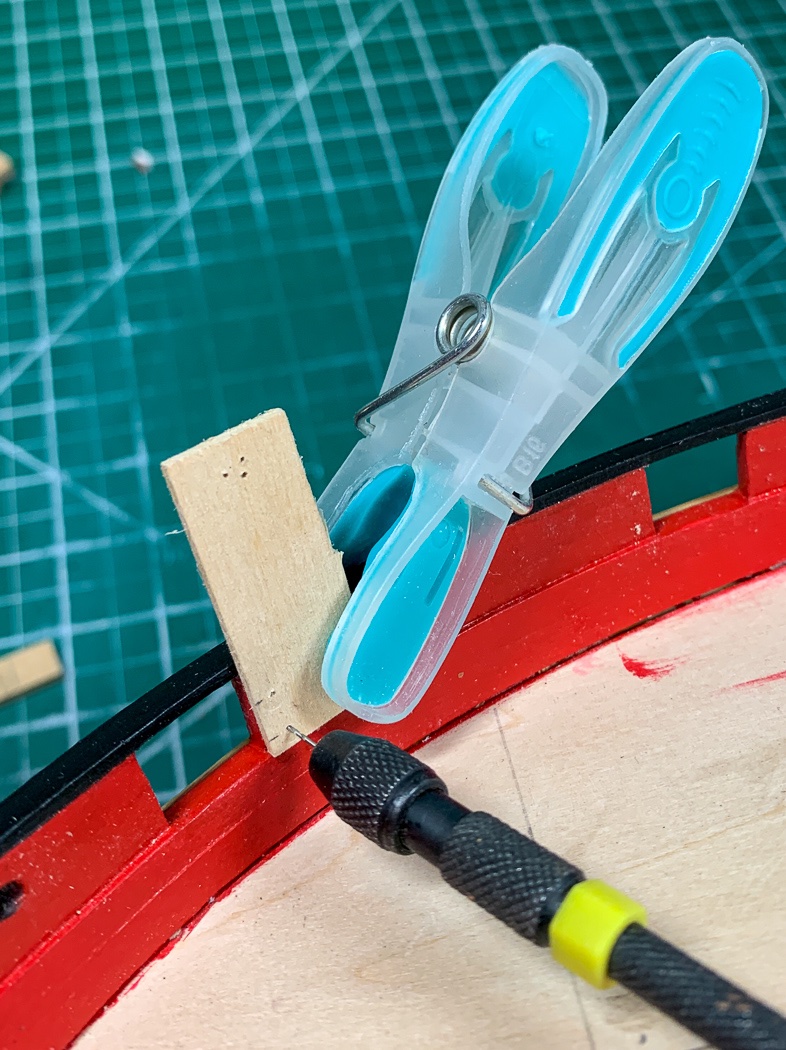
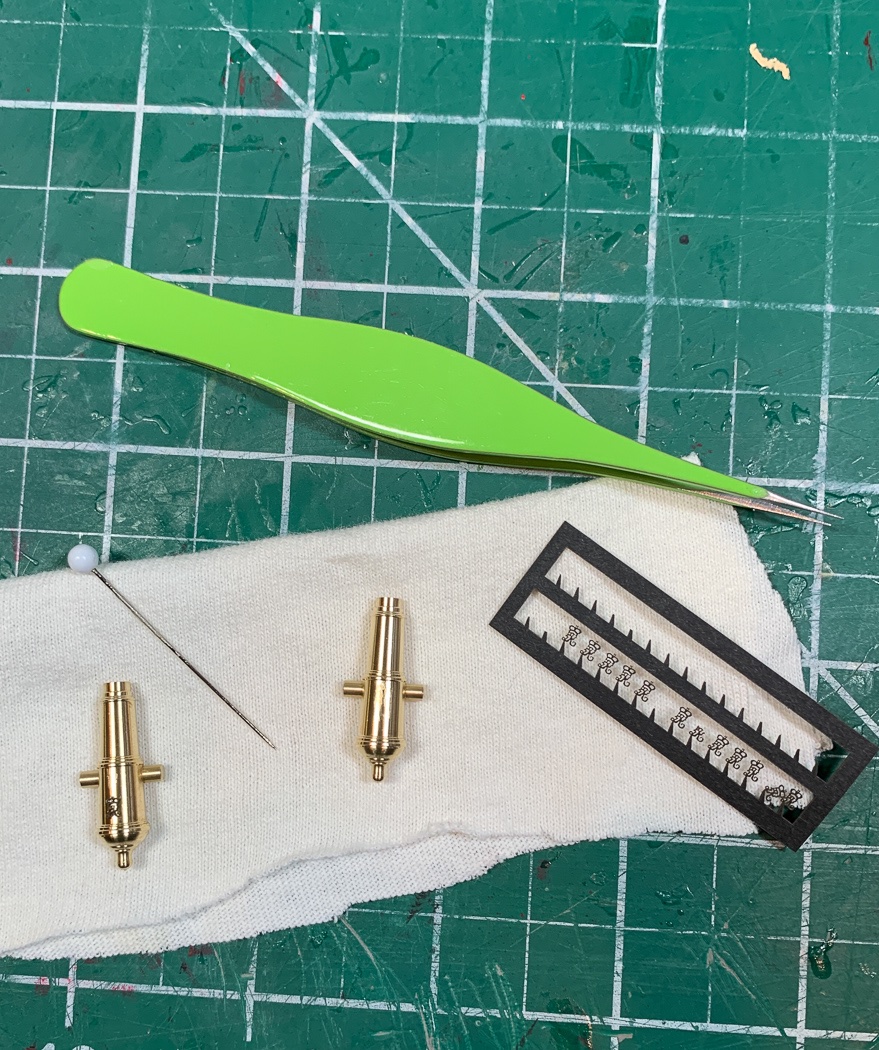
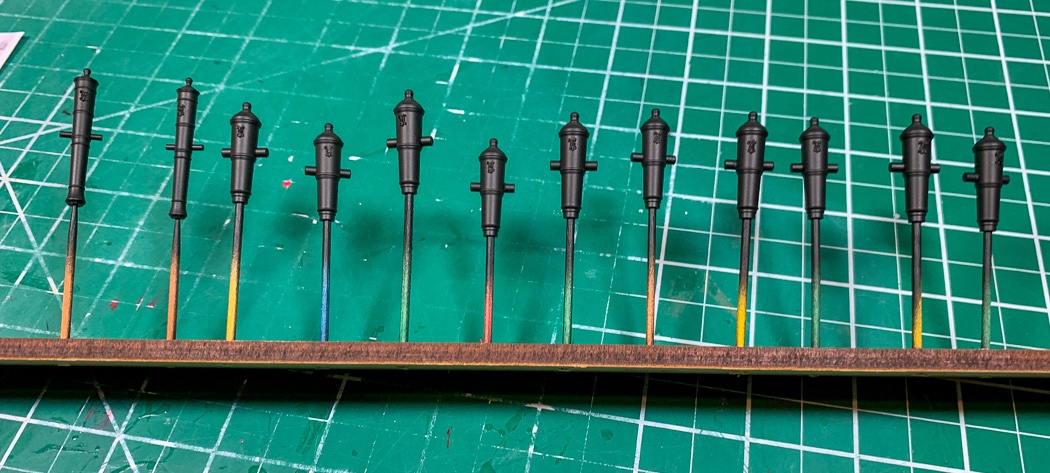
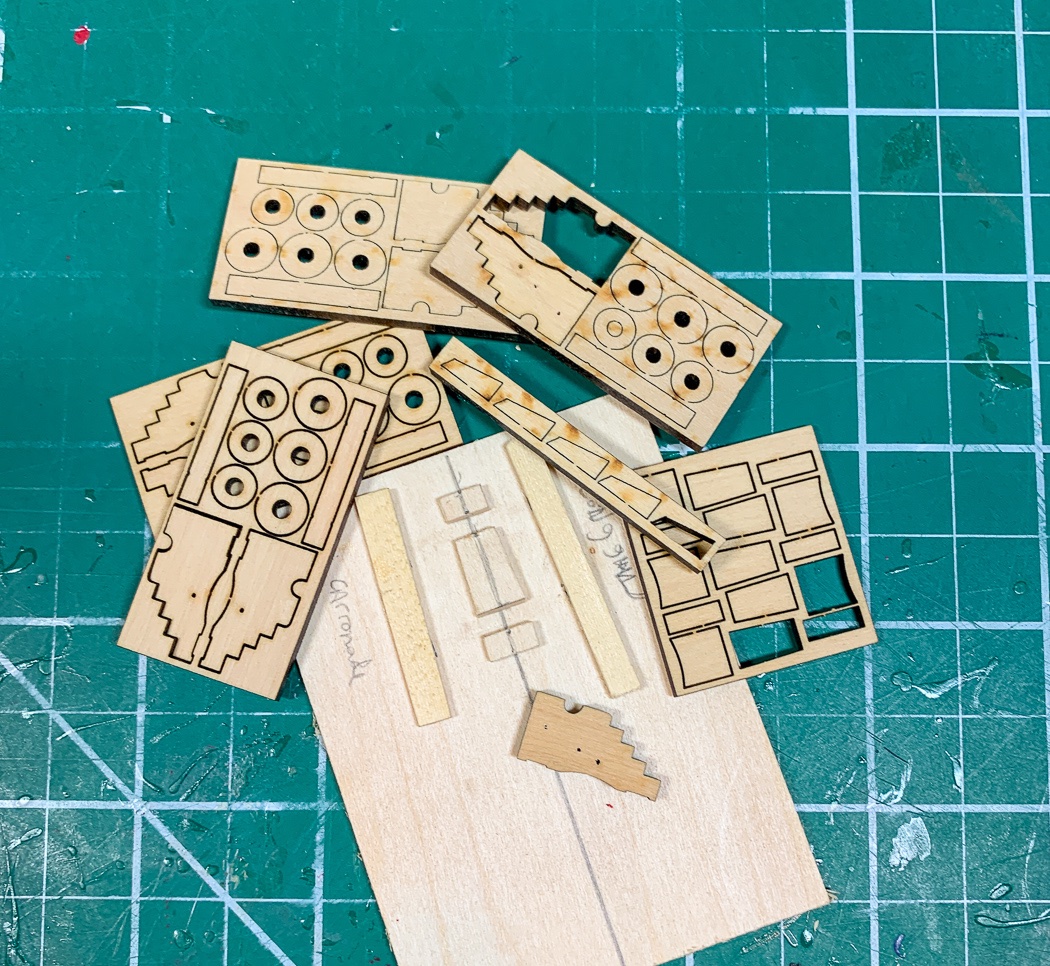
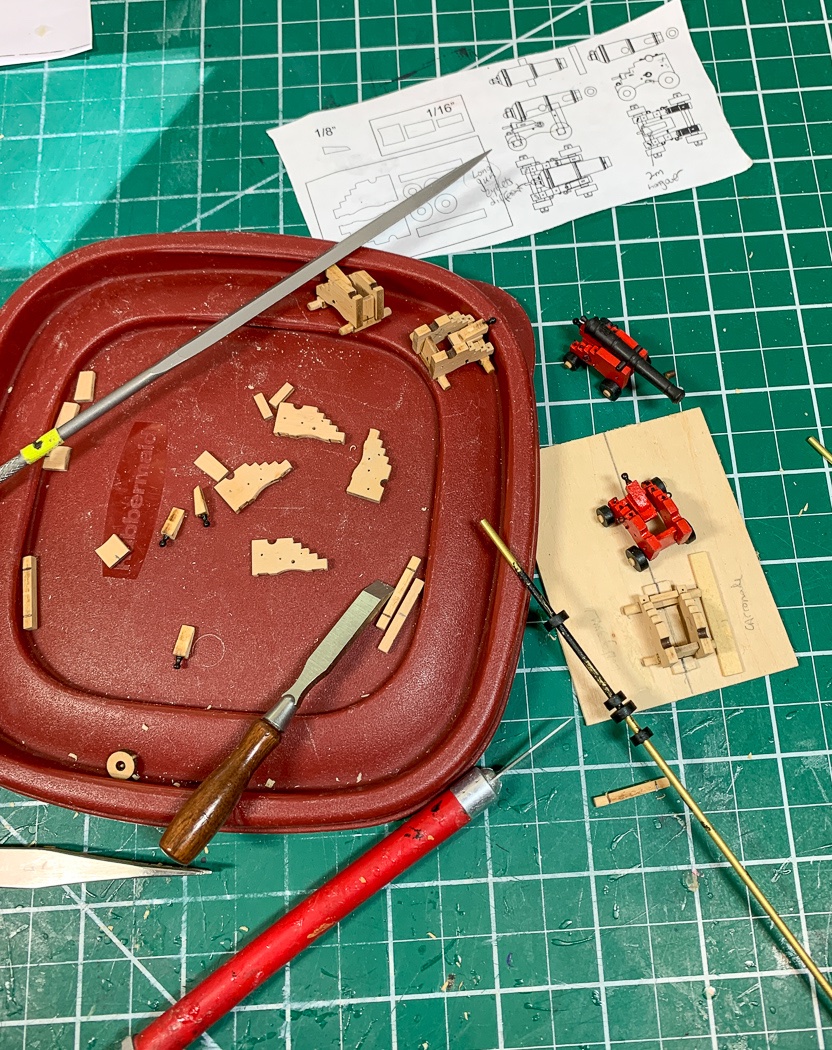
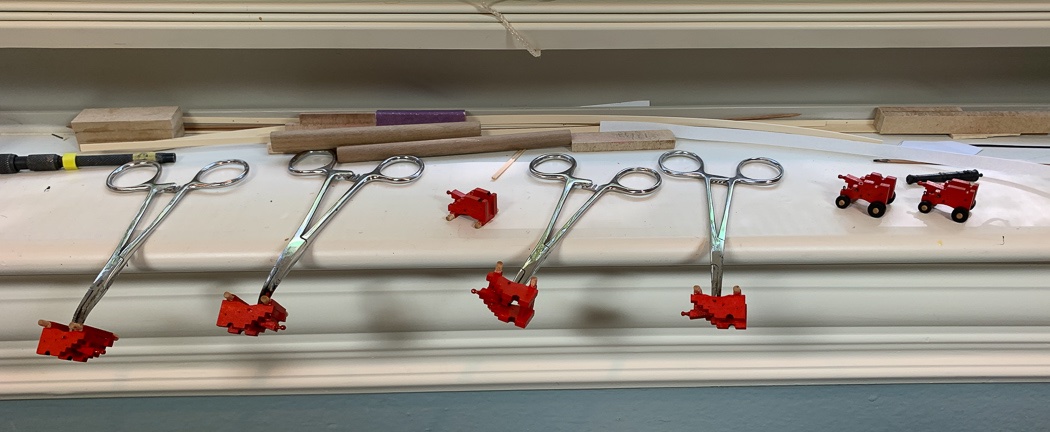
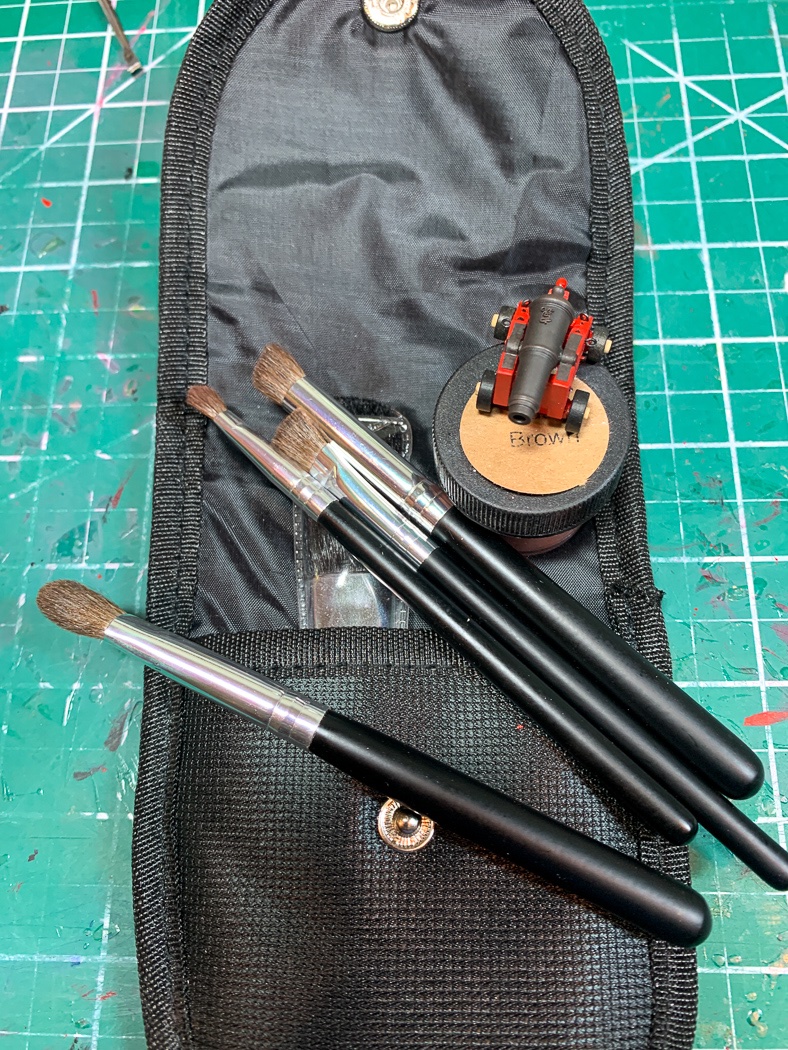
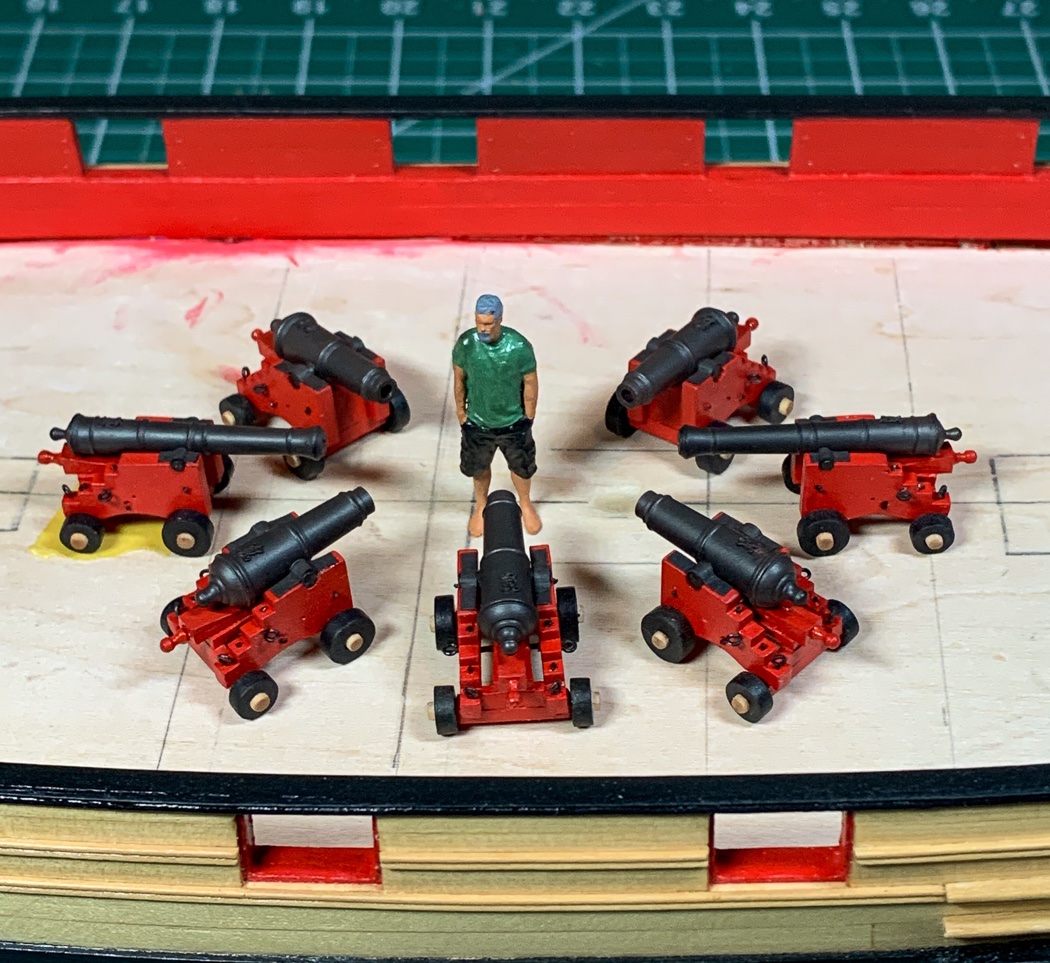
As I posted earlier I took a break from the hull to put together some cannon, turns out it wasn’t much of a break - it’s a process to assemble these guns. I thought I’d take a step back and show some of how they came about. Likely nothing novel, most of us have made plenty of ship’s guns. Before I left the hull I took the time to make a little jig to drill the holes for the gun eyelet’s and ring bolts at each port. I won’t add them until later, but it was easier to drill the holes with an empty deck. Next up was giving the brass guns an acetone bath as painting prep and then testing my eyes and fingers to put the tiny emblems on each barrel. I almost gave up, it does take some effort. It’s a good thing Chuck’s mini-kit provides plenty of extra’s, a lot died during the process. The secret is putting glue on a pin to apply it. Once you have as little glue as possible, then put less than that on the emblem. Fine point tweezers are essential. I’m not big on using an airbrush, I have a very basic propellent can model I rarely use. My thought is the ships of the time weren’t painted with spray guns so… (plus it seems more trouble than its worth, but to each their own, it looks good well done). It’s different with metal cannons, so airbrushed they are. I used a different primer paint this time as I noted in my earlier post. The mini-kits for the guns include everything needed to build the carriages from laser cut parts, so after making the first one it was time for a production line. As many have noted before, a jig is essential to aligning the axels to the sides. Cleaning off the laser char from all the small pieces is a chore but the red paint would show through if I hadn’t, so time well spent. Rounding off the axels is also a process, there are no extra axels in the kit so it’s a process done slowly. I suppose maybe I could have made my own quoin handles but my patience was already tested enough with small part assembly. Fortunately I had 5mm brass belaying pins that fit the bill. Then it’s hand painting each carriage and mounting the trucks. Someone said to paint them anything but black, I’m not in on that so mine are in fact black. Just to be different and because I like the look I left the axels natural (though I may not stay with that choice, we’ll see later). Added to my 'never done before' list is the use of weathering powder, I was skeptical but I have to say it made all the frustration of applying the emblems worthwhile. The Doc O-Brien’s Rusty Brown gave life to the barrels and really makes the emblems stand out. I went all in and bought this weathering brush set from MicroMart, I’m sure any brush would work but using one to apply, one to even out and the large very soft brush as a final buff really is worth the expense. No surprise, the key is minimalism - it takes very little power to make it work. I was pretty basic on the cap square, cut from black card paper, I may add a hinge later when I make the next five. I did use the weathering powder on the card strip, it’s just too black next to the barrel otherwise. So after a lot more time than I thought it would take I have the two long guns and five of the ten carronades finished. There are ring bolts that go on the sides of all the carriages (and the hull) but that comes later by making the breech ropes as a single unit off the ship, the holes for them are drilled and ready. The previous post actually show the barrels better than these photos, they have more of a rusty tinge to them than the blue black they appear here. Maybe I'll get better photos when my iPhone 12 Pro arrives later this week. I enjoyed making the guns, among other things it put off figuring out scarph joints for a while. There were times though when I felt like mini-me here and was ready to blow things up. I still have five more to do the next time I need a break from the deck work. Off to the deck I go - maybe to never be heard from again.
- 778 replies
-
- 14
-
-
- cheerful
- Syren Ship Model Company
- (and 1 more)
-
Amongst the many interesting aspects of this vessel, I wonder about the mundane fact of how many fishermen fell overboard in rough seas with so little to keep them from doing so.🥶
- 261 replies
-
- 2
-
-
- muirneag
- vanguard models
- (and 2 more)
-
I make my rope by selecting the size and quantity on Chuck’s website and a few days later a envelope with my rope inside appears. I congratulate myself on a job well done. 😂🤣🤪😁
- 436 replies
-
- 5
-

-
-
- vanguard models
- alert
- (and 1 more)
-
I think we've been down this road.
-
So the duchess will be loading boxes of the duchess. 😁
-
I guess you know to do a good deal of tapering to have the same number of planks at the bow as at midships and the stern.
-
Welcome to a great forum
-
I’d say it’s unusual to build the bulwarks off the ship. Sterns varying from model to model for the same kit is typical. I’d build the bulwarks to the height it needs to be to fit the ship and in this case the transom. It may require trimming some planks to create the necessary height.
-
Nice job making all those small parts, it’s looking really nice. Sharp attention to detail.
- 263 replies
-
- 3
-
-
- Medway Longboat
- Syren Ship Model Company
- (and 1 more)
-
This is quite amazing work - well done!
-
I’m going to leave them as is, no fixative. As you know there’s a lot of brush work with the powders to get the best definition. I don’t want to risk anything on top of the barrels, I don’t trust myself with the airbrush to not muck it up. I might to the same as you on the barge carvings though (I have it on the shelf now).
- 778 replies
-
- 3
-
-
- cheerful
- Syren Ship Model Company
- (and 1 more)
-
Thanks Rusty and BE. I frequently read both your Cheerful logs, as you can see I chose the black truck answer.
- 778 replies
-
- 1
-
-
- cheerful
- Syren Ship Model Company
- (and 1 more)
-
You're 'speeding' right along with this build - nice work.
- 164 replies
-
- 2
-
-
- vanguard models
- flirt
- (and 1 more)
-
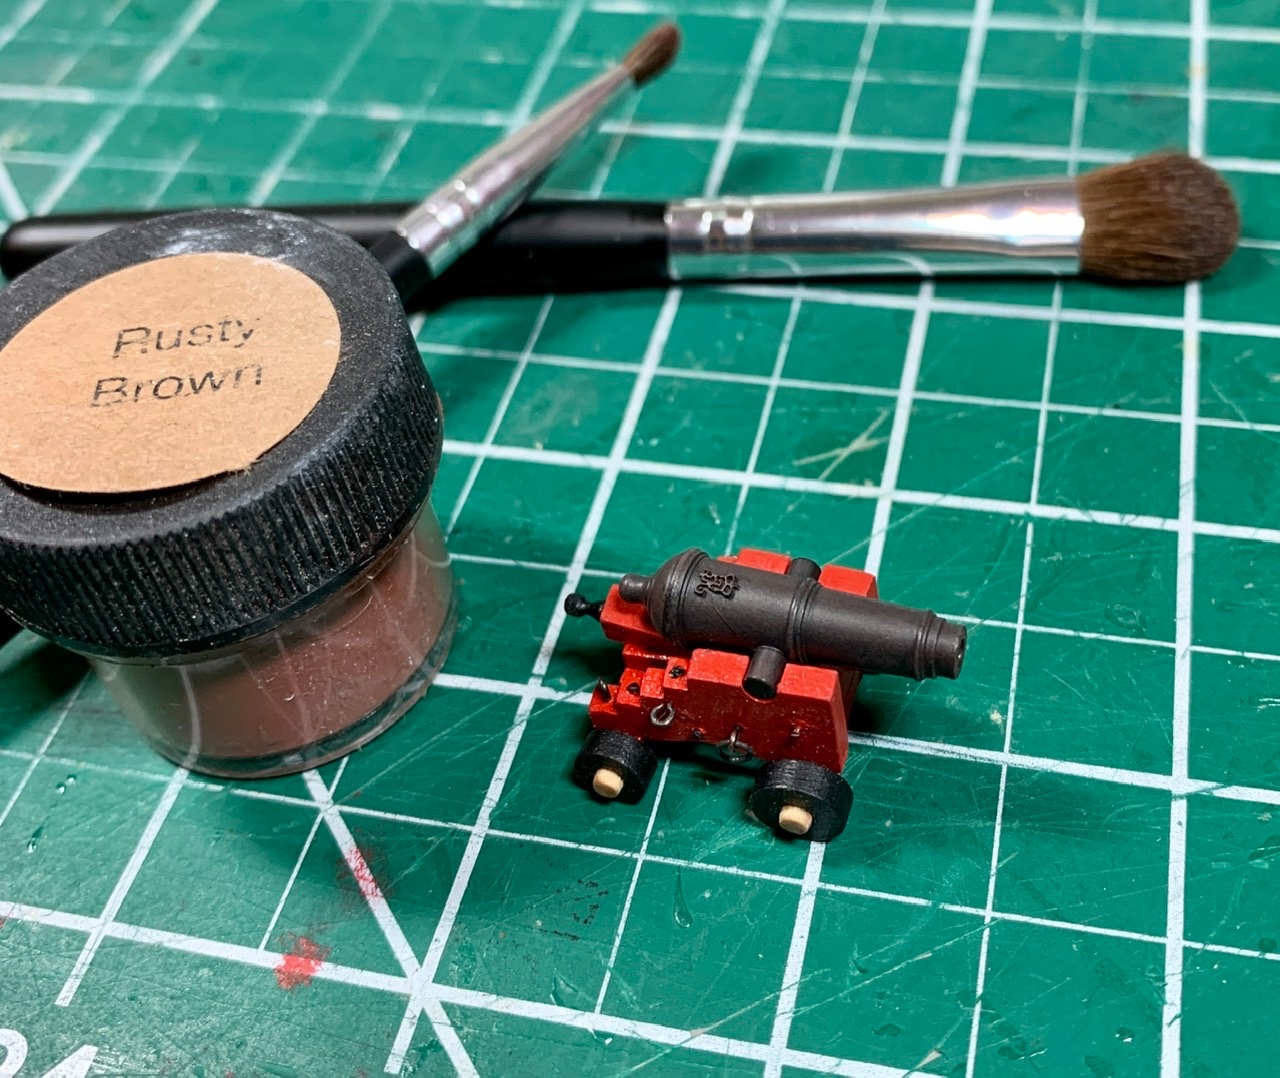
I’m not one to agonize too long. I added Rusty Brown weathering powder on the primed only carronade and I’m happy with it. Now just 11 more guns. Thanks Derek and Lou, both your comments contributed to this now duller primed only gun.
- 778 replies
-
- 14
-
-
- cheerful
- Syren Ship Model Company
- (and 1 more)
-
Thanks Lou, oddly of the hundred or so cannons I’ve painted I’ve never used primer. It’s so evenly spread I’m reluctant to add another coat of paint. Also thinking about dusting powder as Chuck does, so many decisions. 😳
- 778 replies
-
- 1
-
-
- cheerful
- Syren Ship Model Company
- (and 1 more)
-
I’ve used it on all my other models, no spares, if it goes on one it goes on all. But I do have the other models to compare. This finish is dull and flat, more than the photo would indicate. A bit silky perhaps but “factory fresh” looking. It’s a quandary
- 778 replies
-
- 1
-
-
- cheerful
- Syren Ship Model Company
- (and 1 more)
-
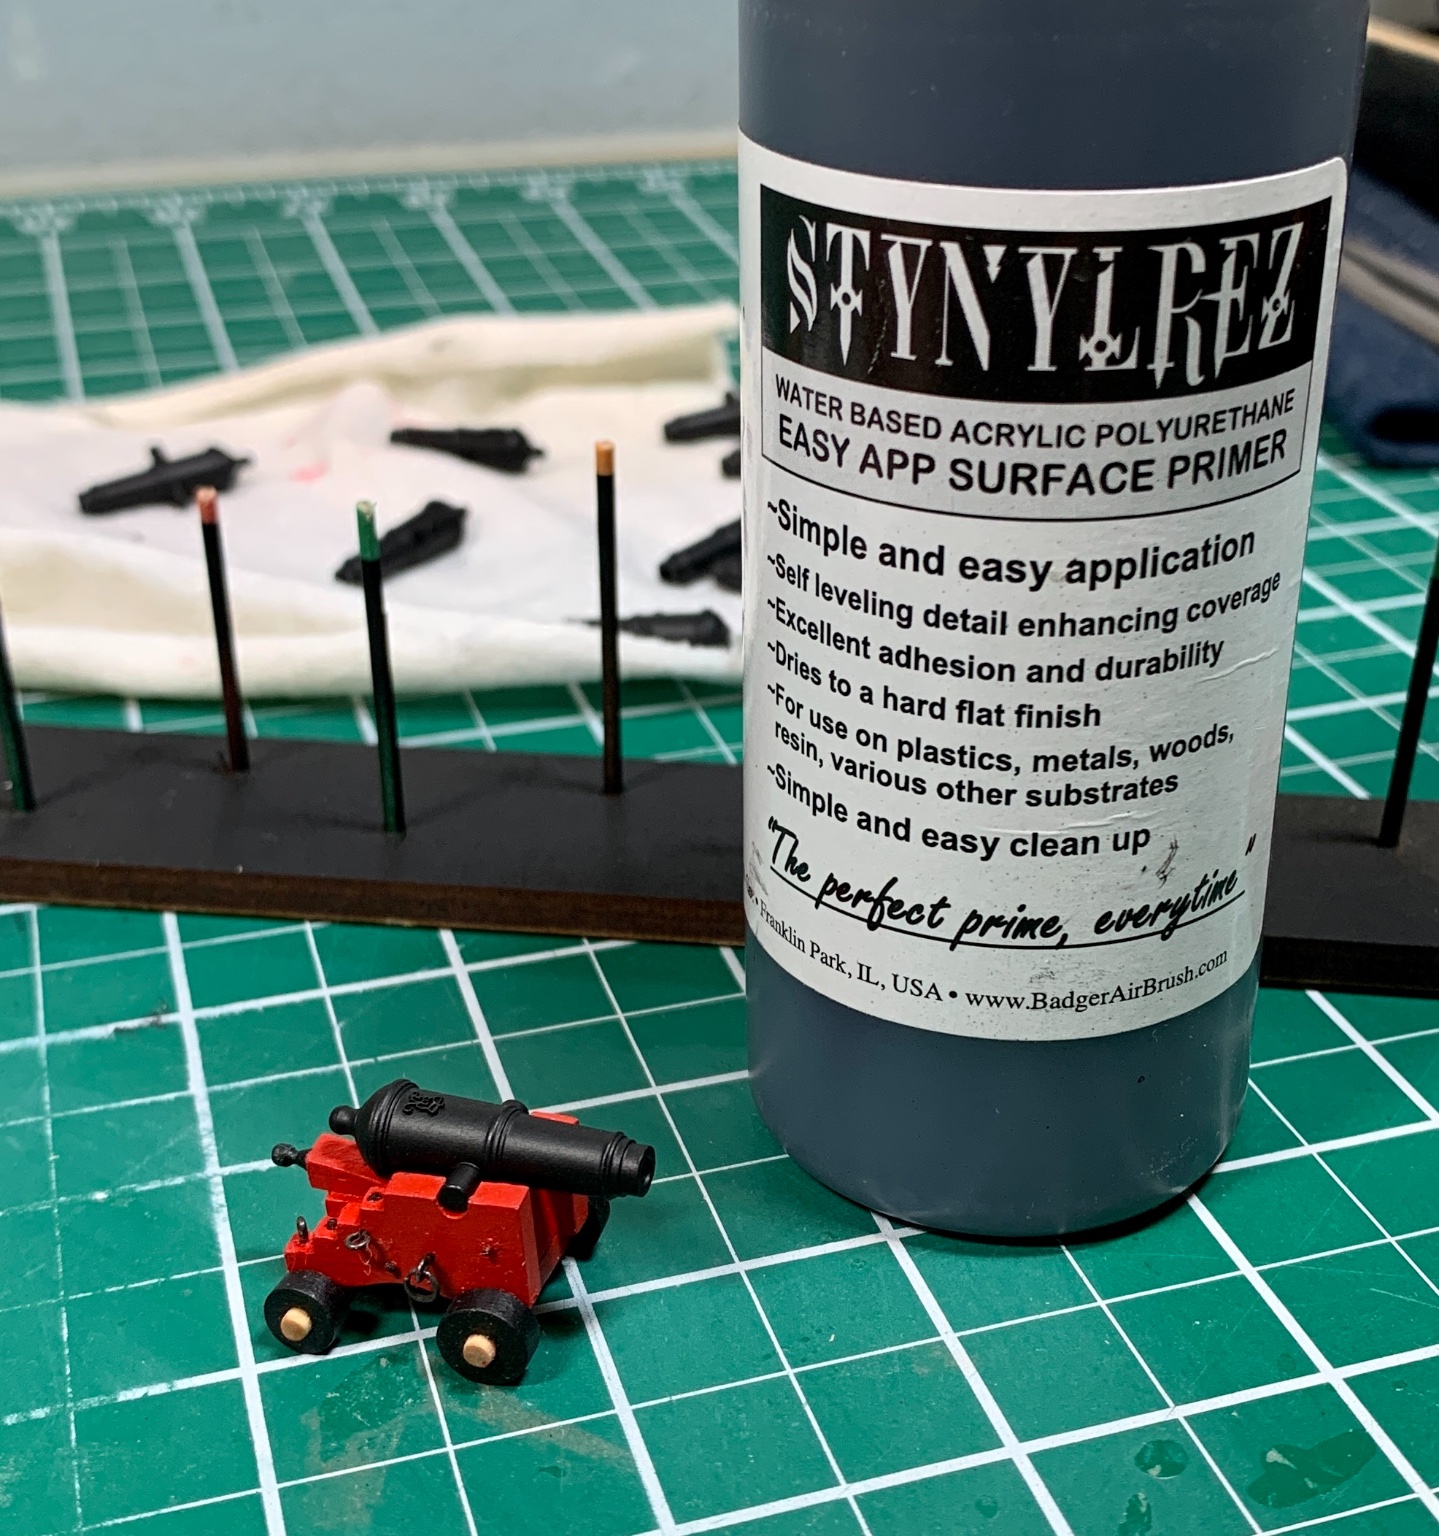
I decided to take a rest from the hull and start the process of building the guns. More on that later. So here’s a question. I did the prep on the brass cannon then used my el cheapo airbrush to spray primer with the intention to further paint them with my Admiralty Ironwood Black and and dusting powder on that. However, I like the dull flat metal like appearance from just the Stynlrez primer and thinking to stop there. I don’t have much airbrush or metal primer experience. So the question: Am I missing something important about just stopping with the primer and calling it done, will it last and stand the test of time or is primer without paint like coffee without water (I’m sure there is a better analogy but...)? wow that's a big photo

- 778 replies
-
- 7
-
-
- cheerful
- Syren Ship Model Company
- (and 1 more)
-
Great detail in the partners, and I just decided to paint Cheerful’s hatches black. Did you use Admiralty paint Flat Iron or Dull Black?
- 642 replies
-
- 2
-
-
- winchelsea
- Syren Ship Model Company
- (and 1 more)
-
Fascinating as always. Are thos SM61 and SM62 blades? I’ve noted your using them before, do yo favor them over a good pair of wood working micro chisels?
- 261 replies
-
- 2
-
-
- muirneag
- vanguard models
- (and 2 more)
-
2nd planking, tapering is important as is plank bending. Follow Chucks video you’ll be fine. Start at the top and work your way down about a third of the way. Then go to the bottom and do the bottom couple coming up 2-3 planks then go back up to the top and finish coming down. Why? Because if you’re not perfect and have to do some filling in you’ll be doing it in a place that can’t be seen once painted and mounted.
- 26 replies
-
- 2
-
-
-
- First Build
- lady nelson
- (and 2 more)