


glbarlow
-
Posts
4,035 -
Joined
-
Last visited
Content Type
Profiles
Forums
Gallery
Events
Posts posted by glbarlow
-
-
-
-
-
-
-
On 7/2/2020 at 3:06 AM, marsalv said:
moldings are made on CNC milling maschine.
To say your modeling skill is next level would imply there is another level beyond, there isn’t. Your work is superb.
I may have missed it somewhere, how to you get length for your moldings, a special table or home built mod? Mine Mill is limited to 5 inches.
-
-
-
-
-
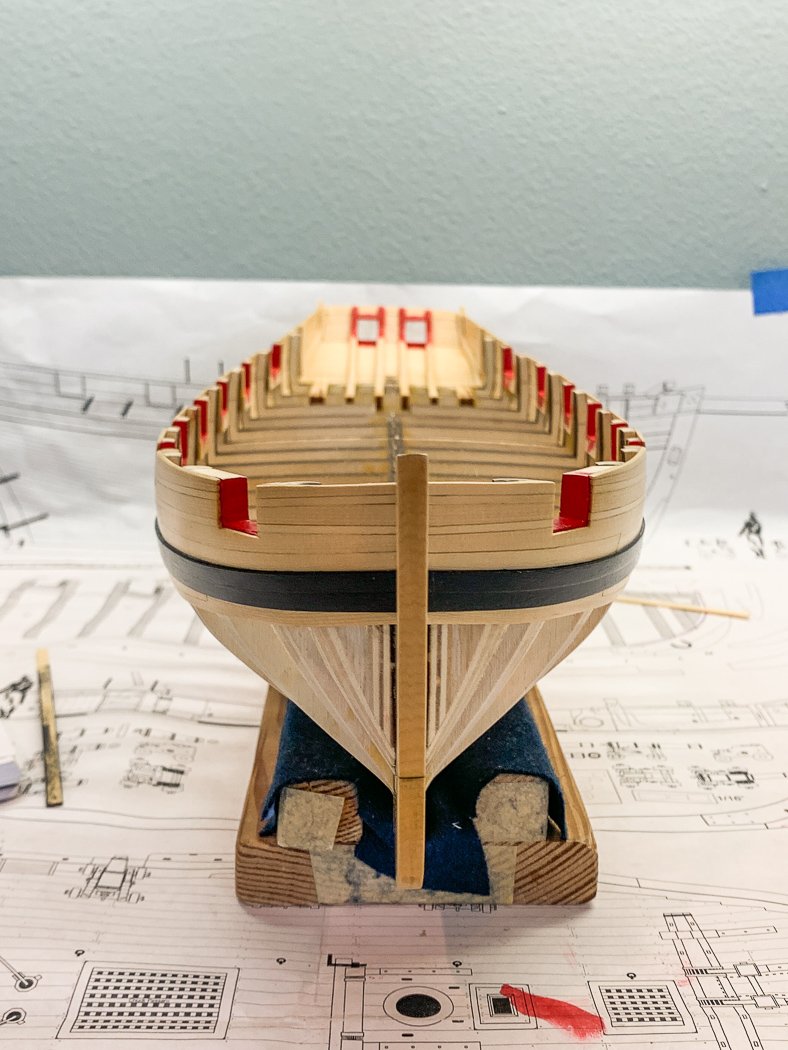
After completing the drop plank and the first two rows of planks below the wales (where the drop plank counts as two at the bow), plus installing more than one or two fashion pieces I’ve now completed the wales. I painted them using Admiralty Paints Ironwork Black, which oddly enough is duller (really more flat) than the Dull Black I normally use.
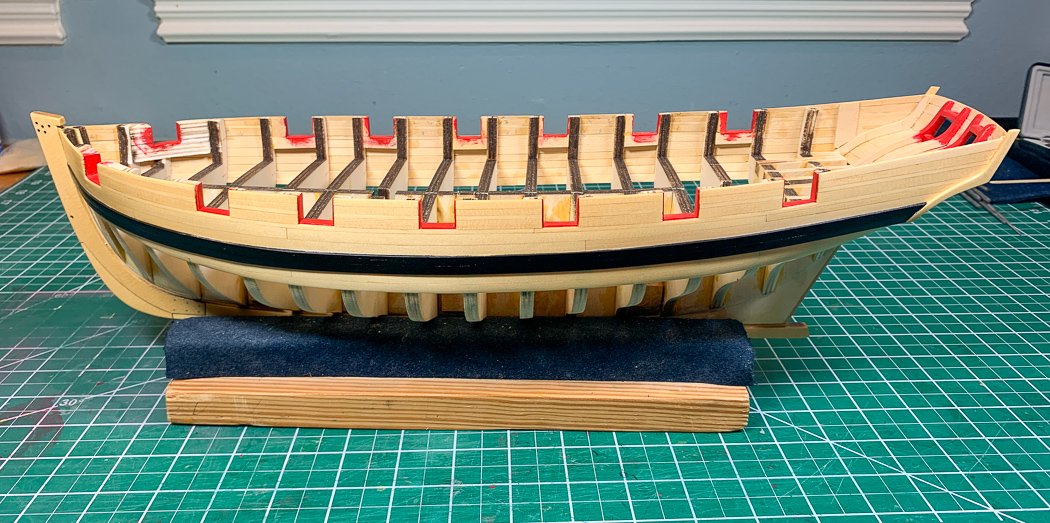
I was really tempted to also paint the counter but decided to wait until I’d at least had a dry-fitting with the square tuck I’ll somehow create after getting the next 8 rows of planks on both sides.
I didn’t take any photos of installing the wales, but it’s as straight forward as on any model - I did try extra hard on keeping neat paint lines. Me and Tamiya tape did ok with that, with some effort. It’s worth it to take the time getting the tape right, its either that or scrape, sand, and clean up where you didn’t. If you’re not familiar with Tamiya tape, get some. There is nothing better, blue painter’s tape isn’t even close, in getting a close tight seal for painting - for those of us like me who lack the skill to free-hand. Though I am pretty handy with an 18/0 brush to do touchup.
I also followed Chuck’s instruction to thin out the wales at the bow. I cut and dry-fitted both top and bottom planks then held them side by side on a work board and tapered them down to near saxophone reed thickness. In my case they actually did fit into the rabbit. They do look so much better this way.
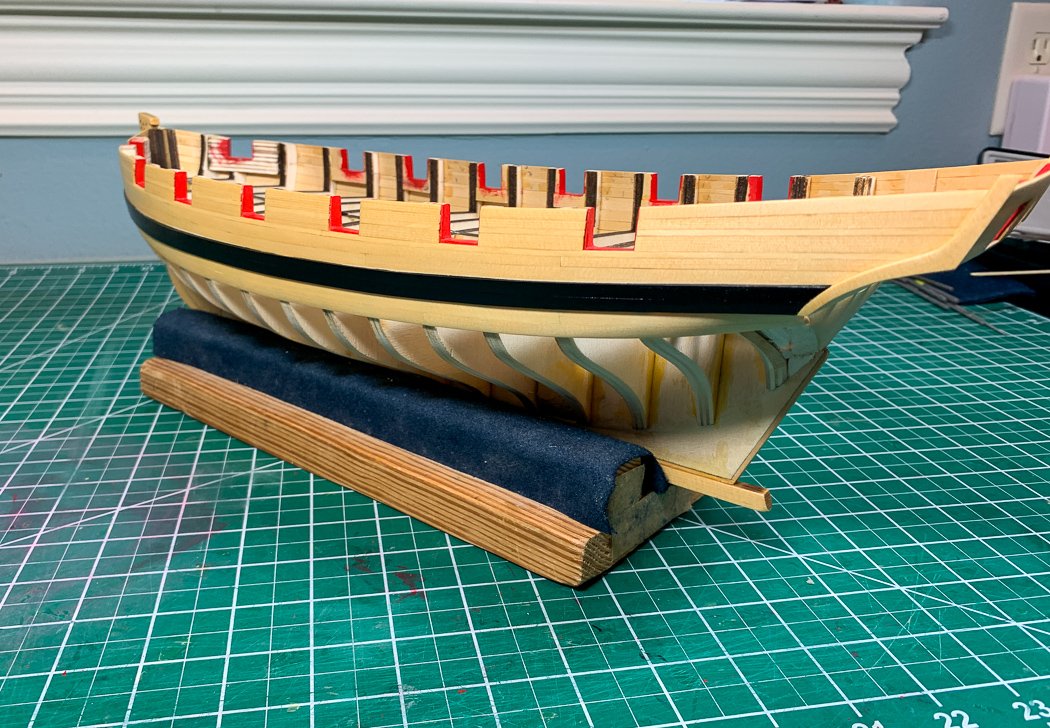
Since I’ll be working upside down it was time for a new stand, really an old stand modified. I go for function over form with these things so its nothing fancy, just a cut-down of a stand made for my Vanguard with some cross blocks added for stability. The fun part is I used my new mill for the very first time - for the very easy job of adding a slot down the center of the cross blocks. So now I'm a miller, sorta.
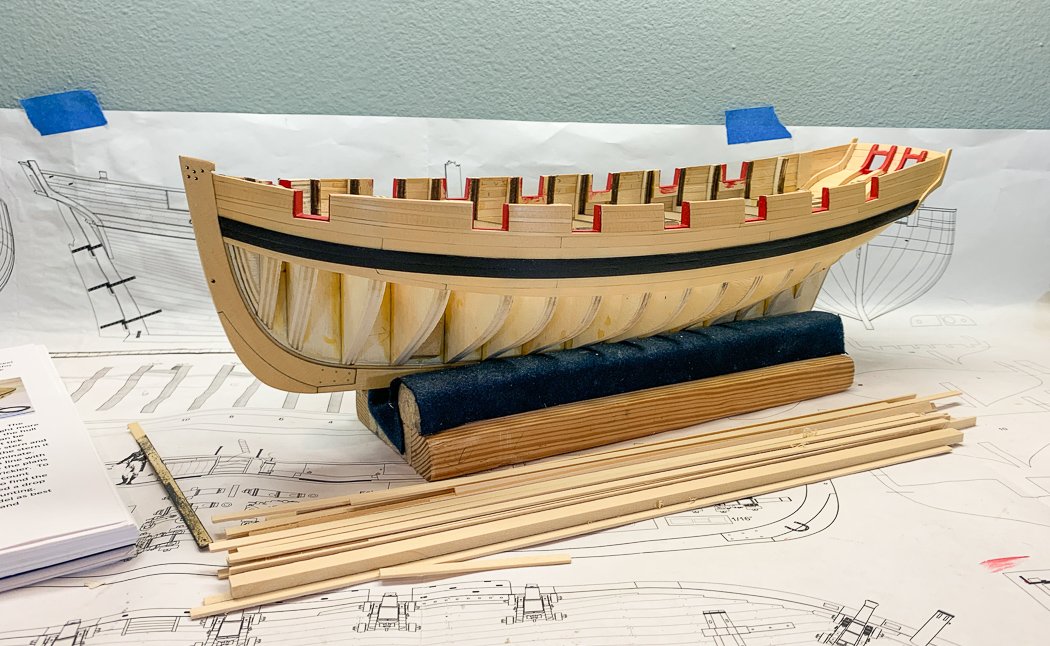
I added a fresh coat of poly across what is now the completed top third of the hull. Now it’s time mark the two belts with artist tape, get out the tick strips and line the hull as I start planking the 8 rows of planks that make up the top belt. Not that anything has been fast, but this next phase will be slow going to get each plank right - and as a bonus I also get to rip more planks, so Yay!
- Ryland Craze, Saburo, egkb and 15 others
-
 18
18
-
3 hours ago, DelF said:
So do your typos:
They aren’t typos, it is Apple making way too many decisions for me with predictive text on my iPad. I type the right word, Apple changes it to something it likes, and I don’t go back and edit.
But as long as it entertains then I’m fine with it, though I really should turn off predictive text.
- DelF and Ryland Craze
-
2
-
Your method looks great, and a good choice give the guns are so tiny. You may have converted me on frapping, at least on Flirt when I get to her, Cheerful is big enough I’m sure the coils will work. The difference in your ring bolts is striking, thanks for the detailed explanation on making them, which I’ll put to use.
In the book Chris recommended on Cochrane I learned he did replace all the guns with larger ones only to find the wouldn’t work for several reasons and he had to change them back. He could carry a full broadside of the shot in his pockets as he walked the deck.
See you on the other side.
-
-
20 hours ago, SpyGlass said:
there WERE detailed Operations Manuals
I've yet to have a cannon come loose after I've used a drip of CA to each wheel. I do use the medium viscosity version of CA just for this task but I guess if you're adverse to CA in the first place the pin makes sense, likely a good way to have the cannons consistently placed at each gun port.
I'll continue with my loose coils on my guns, and with the guns run out, it is just a model after all. Everything I've read, including the book on Cochrane says Captains had near total discretion on how to manage their ships. My Captain likes coils, and CA on his cannon wheels.
I'm looking forward to seeing how your Speedy turns out.
- Edwardkenway, chris watton and DelF
-
3
-
-
As I said, we modelers are of the obsessed. I perfectly understand having recently ripped off so many of my own models planking multiple times.
BTW: In the for what it’s worth category I prefer coils for the gun tackle, perhaps not the hyper neat Flemish coils, but natural coils either side. It seems to me this makes the guns more action ready, but perhaps not the best for routine sailing. Wrapped around the tackle makes sense too but again, in my opinion, makes it look a tad bulky. Either way is fine I think but I also think neither is better or more accurate than the other. I don’t see a British naval captain with a Operations Manual that designates ‘Proper arrangemention of gun tackle rope; chapter 4, subsection 3.2’ 😂🤣
-
I’m sure a British war ship sailing the Med during a war as Speedy was didn’t store the guns, and as this is a model. It would be completely wrong not to have them.
I wouldn’t worry about the size of the ring bolts, we all tend to obsess about things that won’t matter on the completed model. I doubt your friends from three feet away will say “why are those ring bolts out of scale.”Really nice work on those tiny guns. While historically correct I wish it had a bit larger guns just for looks and easier to rig😕
-
-
21 minutes ago, RichardG said:
printing the bulkheads and buying a scroll-saw.
Hi Richard,
If you’re referring to Cheerful, I’d encourage you to consider Chuck’s starter kit. He provides the plans and frame parts on his website https://syrenshipmodelcompany.com/. It’s a nice way to get off to a good start, no scroll saw needed😁that is unless your want to get a scroll saw
- JpR62, Ryland Craze, mtaylor and 1 other
-
4
-
I’d never considered a fishing craft before, but thanks to @chris watton great design and seeing what you’ve done with it I’m going to add it to my list. I’m off big models, cutters and brigs for me...and now a fishing vessel or two. Maybe I’ll even go for the th pink sails.
Your metal work On the steering gear is inspirational.
- chris watton, BobG and Blue Ensign
-
3
-
Thanks BE, Derek, and Jean Paul. I appreciate the encouragement and feedback.
I’m trying to provide a log that will help others just as I frequently consult BE’s, Rusty’s and Chuck’s Cheerful logs. I’d be nowhere with out Chuck’s detailed monograph, but it’s my belief logs from us of more humble skills will both help in construction and encourage others to take on building their own version of this great model.
PS: I wasn’t able to use great in a sentence for a few days there, but I’m past that now, or should I say I’m past that for now😜
- Chuck, EricWilliamMarshall, BobG and 6 others
-
9
-
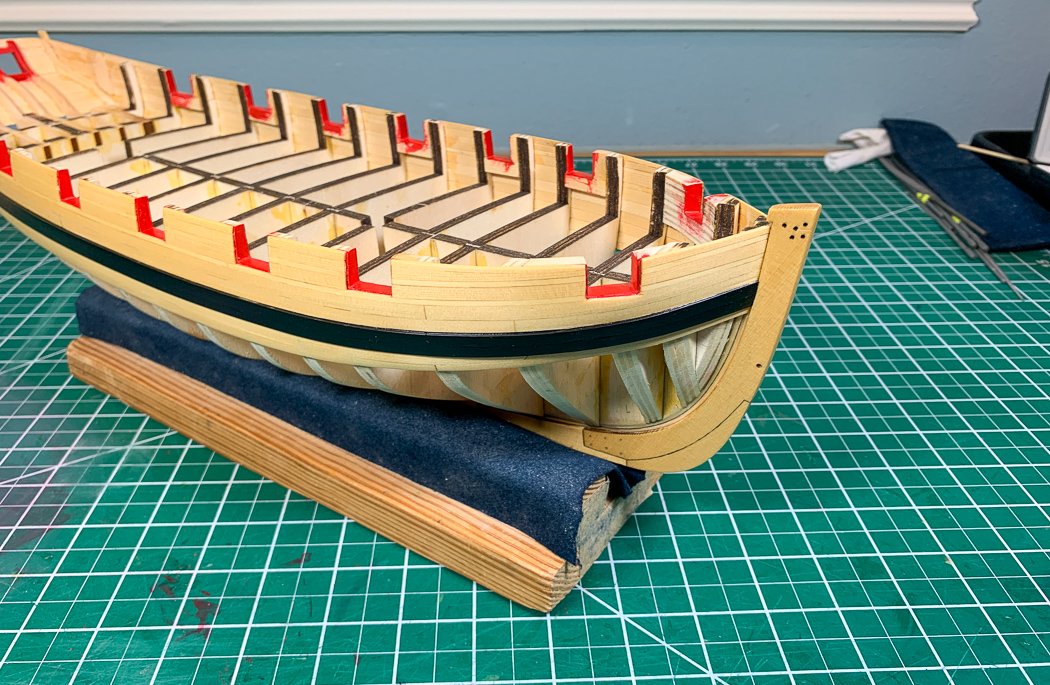
So who here besides me was expecting a train wreck after my last post. I cut the fashion pieces only to decide the plan size was too short for my ship, I decided that after they were glued on, because they curve into the ship dry-fitting didn’t help. So I remade them, more in a moment. The concept of a drop plank is simple and works great once you’ve done your first three and then it clicks - seems obvious and maybe that was my problem, trying to outthink it - figured it out eventually so let’s start:
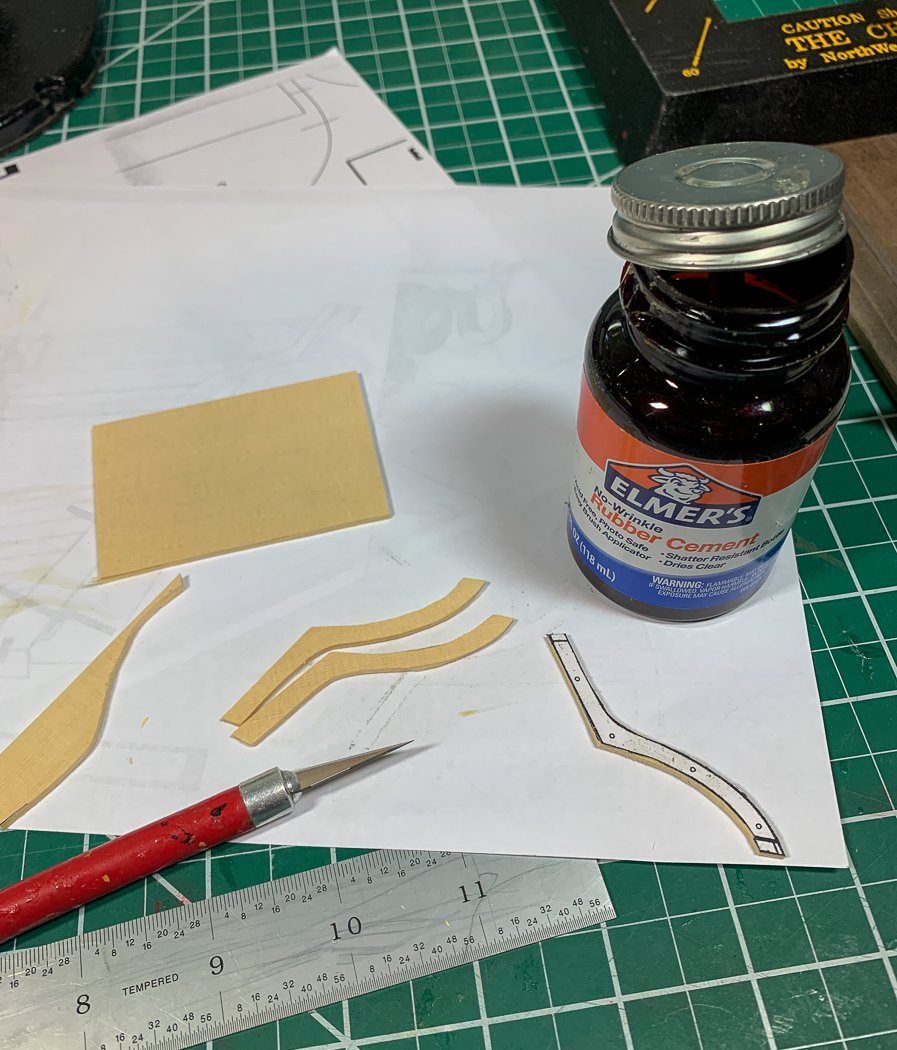
I “adopted” my process for cutting out the planks from Rusty. I made copies of a section of the plan, cut out the fashion pieces and then used rubber cement to attach them to a section of 1/16th board. This process worked well, but here’s what I learned - to be clear this applies to my model your milage may vary. I noticed right away the first ones I cut seemed to “small” so to make me feel better I enlarged the copy of the plans to 105% and used those for the template. As I mentioned those still turned out too short so as you can see in the photo I added a few marks to them extra long so I could trim to fit. I’m not going to say what iteration of cut-outs wound up on the ship, let’s just say more than four are in the scrap heap though in fairness a couple were intentional victim prototypes to try stuff like bending and curving. First-timers…
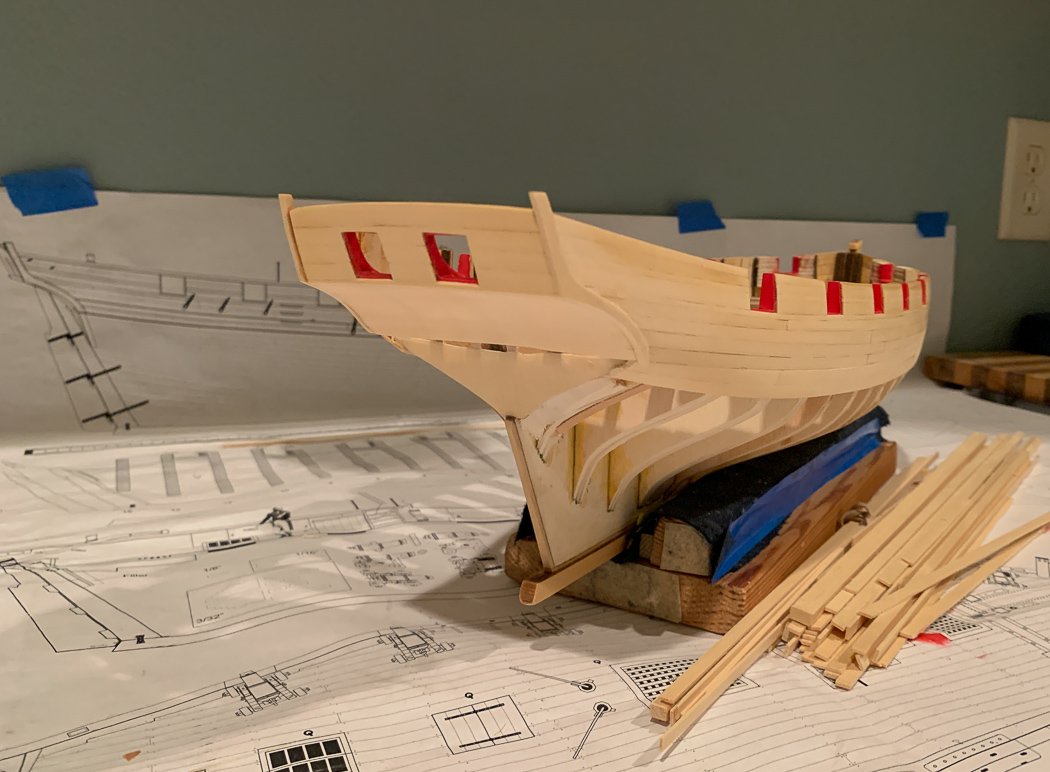
I found this simple little jig helpful. a strip of 1/32nd up against the hull for the right distance of the piece back from the transom and another scrap on top of it as a backstop to align the piece equal to the run of the transom. Yes that's a cracked plank but its the lower level of the wales so no problem - else it'd be gone.
A good place to note I ended up adding a 1/64th shim on frame 16 to get a better flow to the eventual square tuck -or maybe I'm overthinking it again, no this time I'm right, maybe.

You might note the two fashion pieces are on opposite sides of the ship, that didn’t stop me from making as near exact copies as I could as my multiple measurements (sorry Chuck, in millimeters) taken multiple times until I got them near copies. I'm not sure why I was going to the hundredth of a millimeter, seems obsessive.
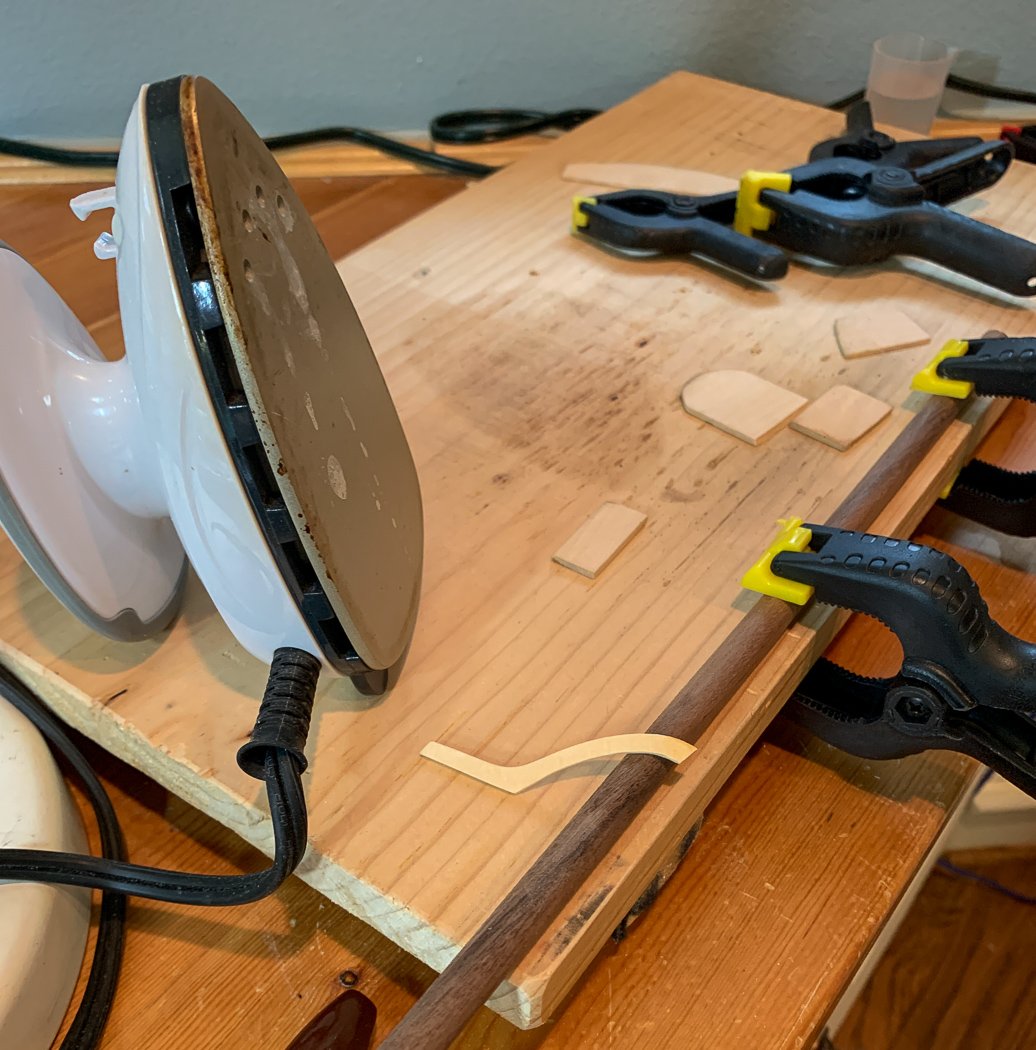
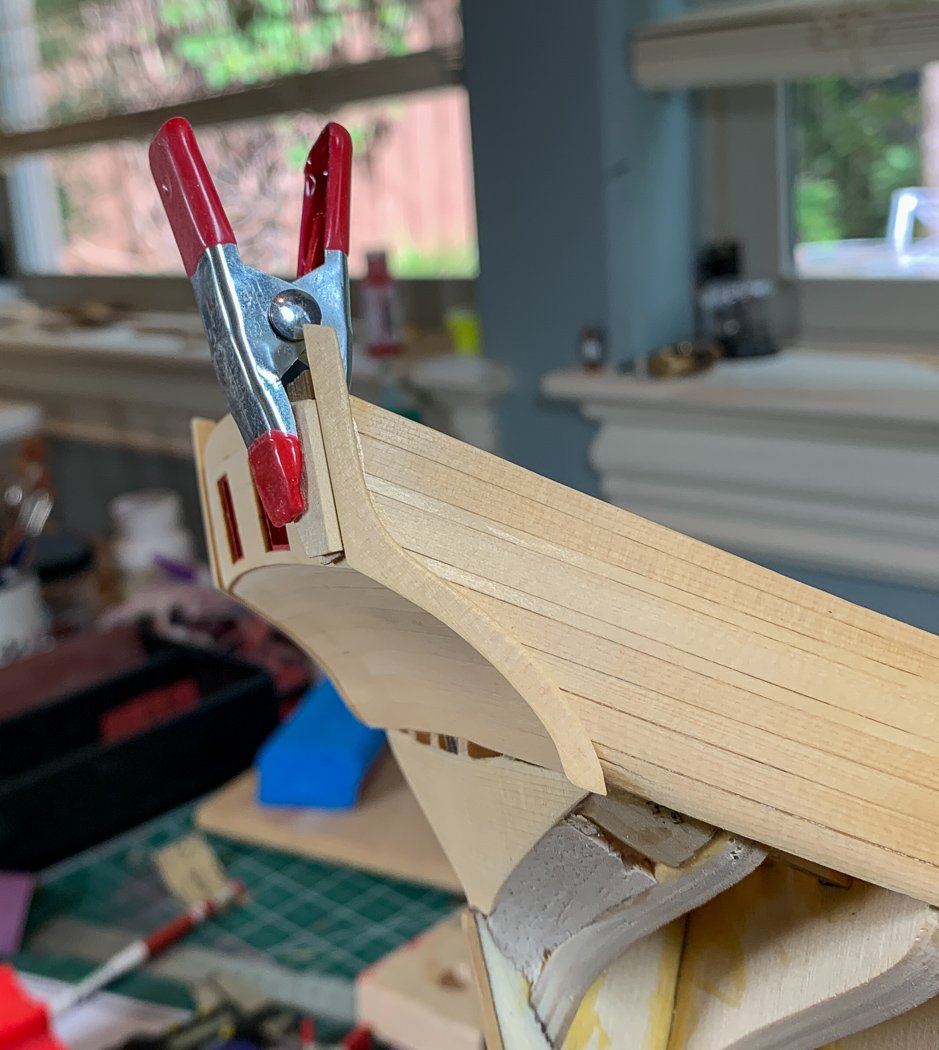
I learned from attempt one I have a bit of a curve on the lower wales plank, so to make the fit easier I modified my plank bending station to roll the fashion piece into a curve over a dowel. I did this having first “stretched” it because my counter was longer/wider/shallower that the plans - really not very much at all, but enough that bending the curve out helped. I would like to add - this worked and other than dipping it in water or wiping on a little water with a wet finger I soaked nothing (at some point I knocked my beer over, but that’s not the point). This advertisement of Chuck’s Plank Bending method brought to you by me.
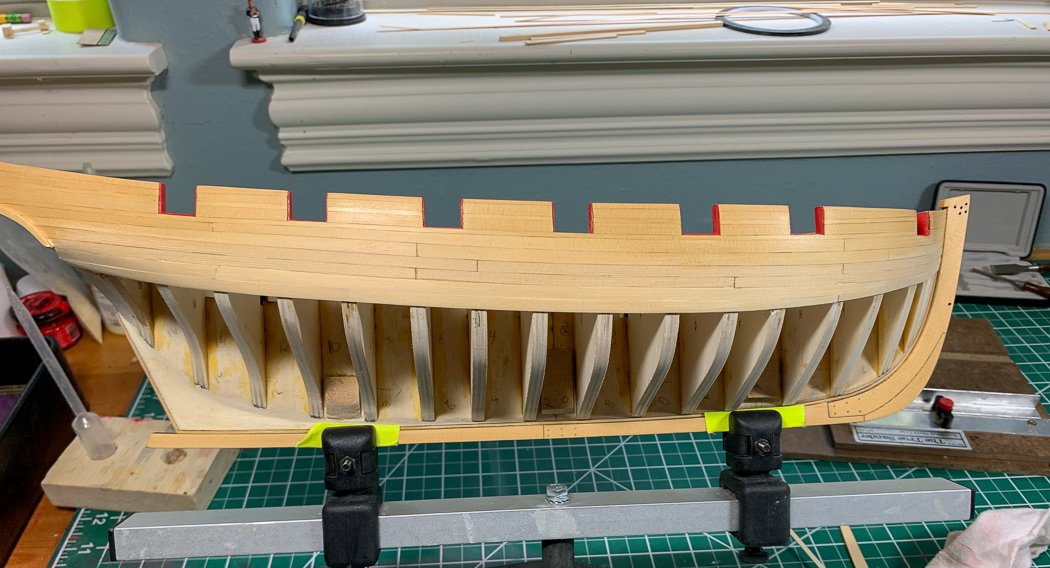
Don’t look too closely at this photo because those planks don’t exist anymore except as a waste of a perfectly good Alaskan tree. I didn’t like the fit (there is a gap at the drop plank, or would be on the next row of planks) and I just wasn’t going to compromise. On a double planked kit I know I could easily make it up with the remaining planking, but here I was concerned it would just compound as I went. The problem, for me, was the alignment of the drop plank extension. First I pushed it up too far, and then let lay down too much which makes the subsequent planks less than a clean run. I figured out, and while this might come as a surprise, to glue it down the way it wants to lay naturally…go figure. easy for you to say.
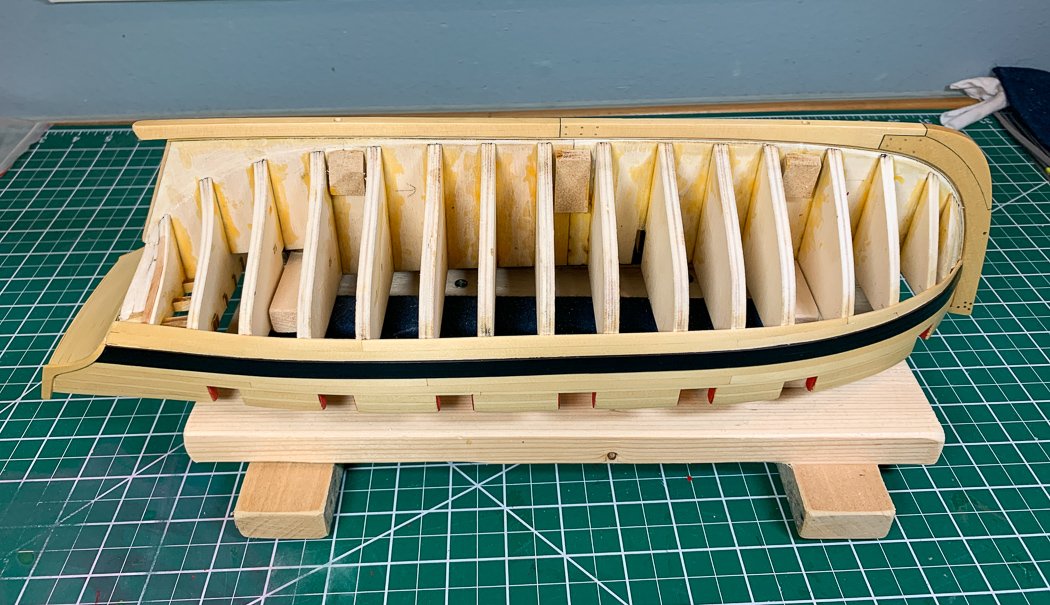
So I ripped off the below wales planks on both sides (you'd think you'd learn the second time but no. And while I was at it, see above on fashion pieces, taking those all off with the rest. I walked upstairs and told my wife - you know how I’ve been working on this ship for the last several days - well I wasn’t because everything I did is gone. At least the frame hadn’t dropped on the floor and exploded again, at least not yet - let’s not think about that…

I lightly sanded the entire hull down and will apply a new coat of poly after installing the wales and before moving on to the rest of the planking. I'll be using Admiralty Paints Ironwork Black on the wales. I did a test strip - it both looks fine with wipe-on Poly with a slight satin look or the Poly can be painted over if I want to keep it flat. I'll see when I get there.
So, anyway, I arrived to a point where I’m ready to move on. I’ll add the 2nd layer of the wales next then start the process of lining the hull, cutting more sticks, I mean planks. Did I mention I was impressed with myself for ripping the thin 1/32nd (.79mm) thick planks required as the top layer of the wales. I figured I needed 6 but I was having fun so I cut 12. I hope I don’t need them but who knows.
On we go.
- GrandpaPhil, egkb, JpR62 and 14 others
-
17
-
HMS Winchelsea 1764 by Rustyj - FINISHED - 1:48
in Member Build logs for the HMS Winchelsea
Posted
So the brass will cut the profile into the wood, it doesn’t need to be sharpened, or you sharpen it as part of the filing?