


glbarlow
-
Posts
4,135 -
Joined
-
Last visited
Content Type
Profiles
Forums
Gallery
Events
Everything posted by glbarlow
-
 I highly recommend doing the math, no offense but with planning, and adjustments as you go stealers should never be necessary, especially at the bow. Especially not on a relatively simple bow like this one. I’d pull several of the top level planks to get a more precise fit with tapering. Definitely something to think about. I try to demonstrate this in my Nelson, Cheerful, and Winchelsea logs. I’d also recommend researching by looking at lots of logs, doesn’t have to be this model, planking is planking.
- 152 replies
-
- 6
-

-
- Vanguard Models
- Cutter
- (and 2 more)
-
That’s correct about the multiple angled window choices, it’s great Chuck thought of that. The template will naturally lay in place as you have it. If I recall the key thing is for the gallery window sills to be parallel with the water line. I know I checked multiple build logs to compare, it is a big step. Looks like yours are fine, great work.
-
Actually Fred they’re just propped up and temporary, I’m going to make a little wedge jig when i do install them permanently. I really like the cabin floor but understand it’s not for everyone.
- 840 replies
-
- 2
-
-
- winchelsea
- Syren Ship Model Company
- (and 1 more)
-
Looks really nice Frank. Very meticulous work.
-
As Chris says, everyone has a method. In this case it seems to me, whatever method you prefer, the tapering at the bow, actually from several bulkheads back is insufficient. One easy method is to measure the distance at midships, divide by the width of the planks to determine the number of full width planks required then measure the distance at the bow and stern and do the math to determine the width of the same number of tapered planks to tit there and taper accordingly. I’m a fan of edge bending with the heat of a travel iron, but how ever you do it full width planks won’t work neither will insufficiently tapered or not starting the taper soon enough. we all started somewhere and most all got better from having done it. Enjoy the ride.
- 152 replies
-
- 5
-
-
- Vanguard Models
- Cutter
- (and 2 more)
-
The next and a very critical step with forever impact is fairing the hull. With a single planked ship it’s really important to get the fairing done well, I spent a week or more doing this. I don’t envy you this task with the plywood you used for the bulkheads and wish you the best in getting it done. The tick marks for the ports and wales are important to include if you haven’t yet marked them. Glad you’re enjoying the project.
-
Same stage I just completed for Winnie, we’re at similar stages. Nice work!
- 648 replies
-
- 2
-
-
- Indefatigable
- Vanguard Models
- (and 1 more)
-
Most of us are using Alaskan Yellow Cedar which Chuck supplements with boxwood for some parts. However there are some wonderful cherry ones as well and I know one of those supplemented with pear. All in what you want to do.
-
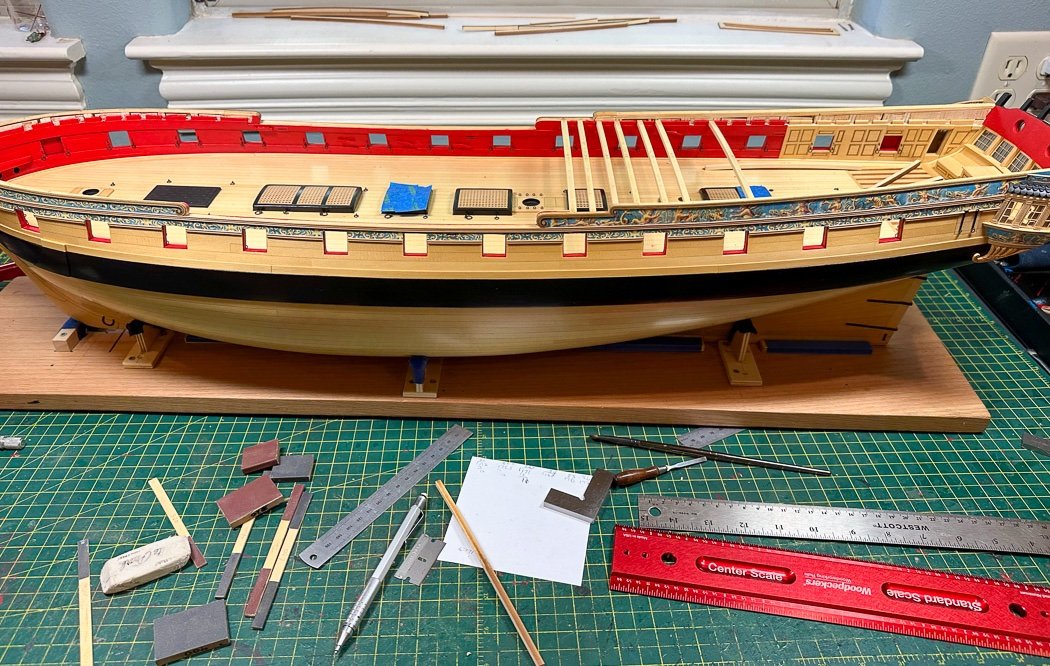
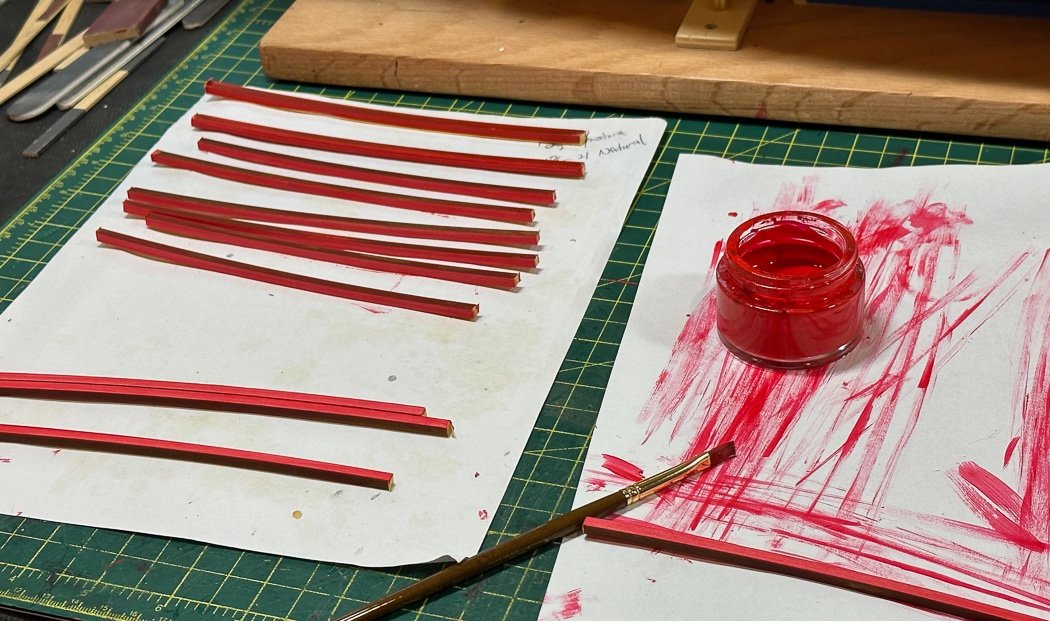
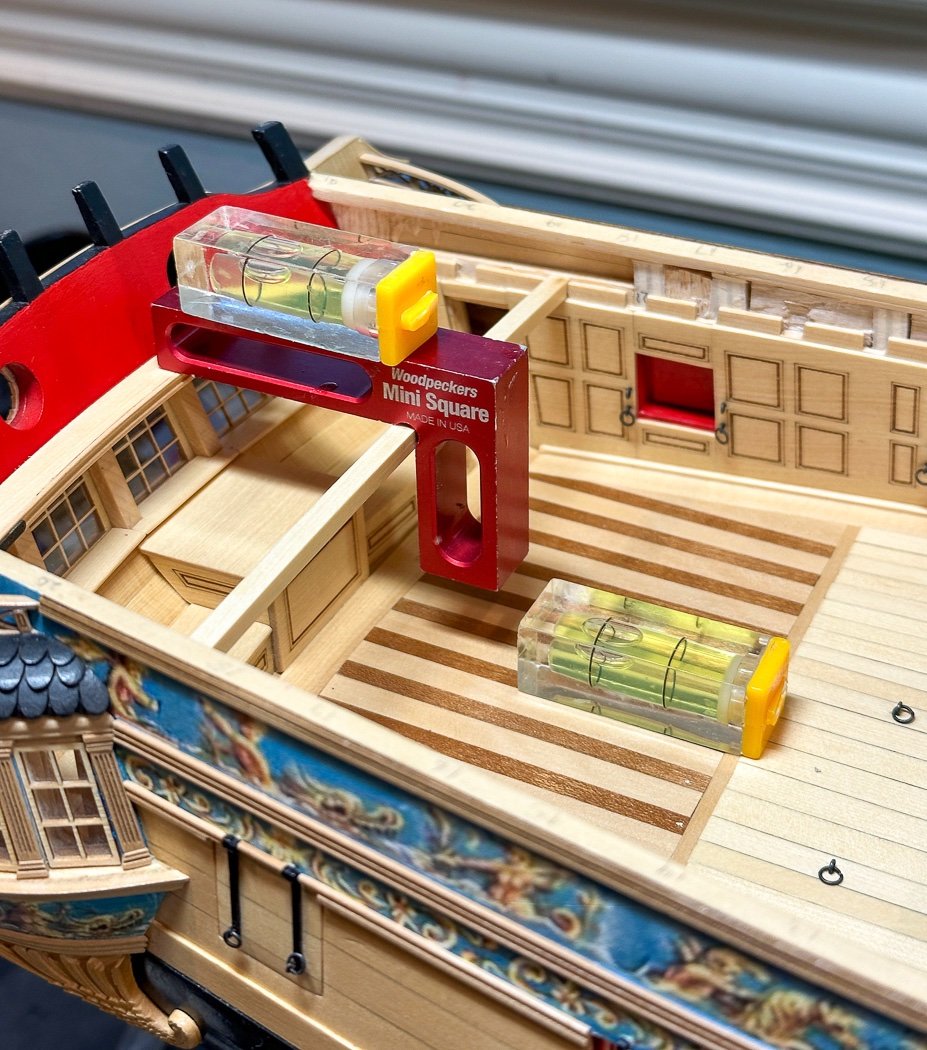
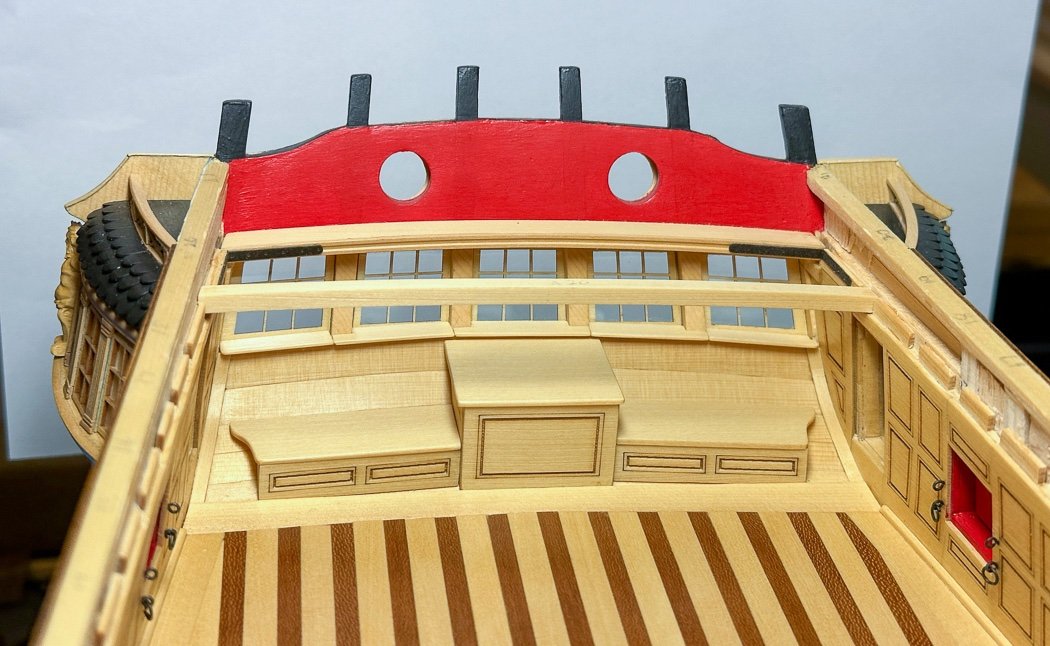
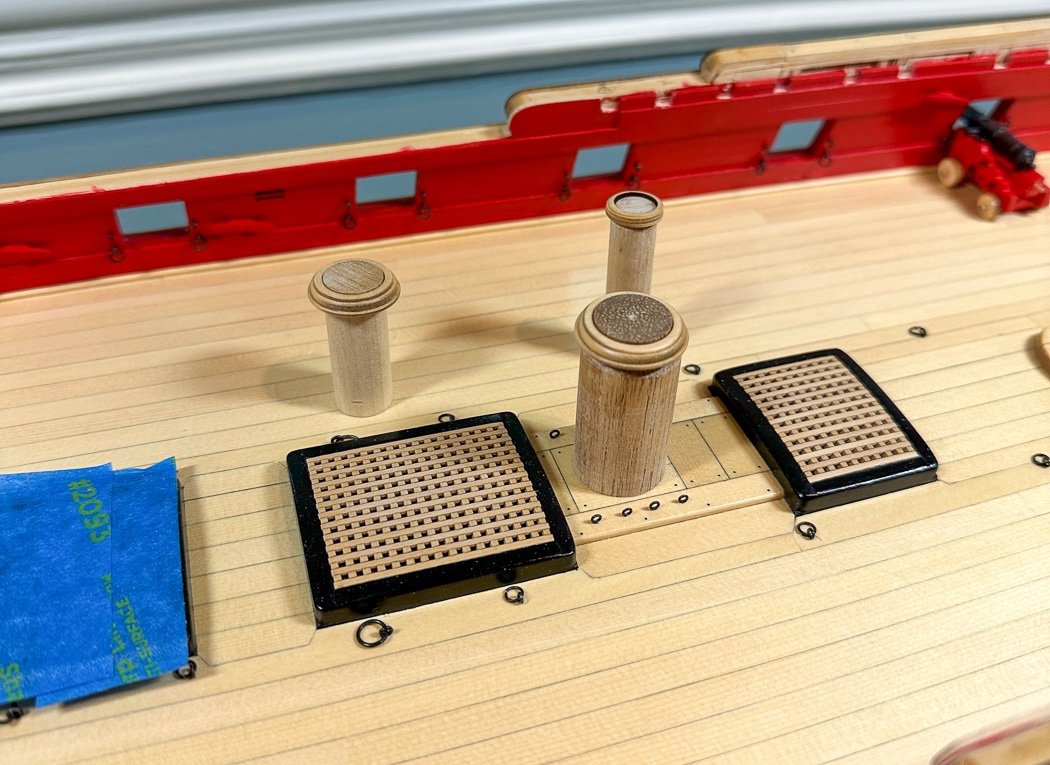
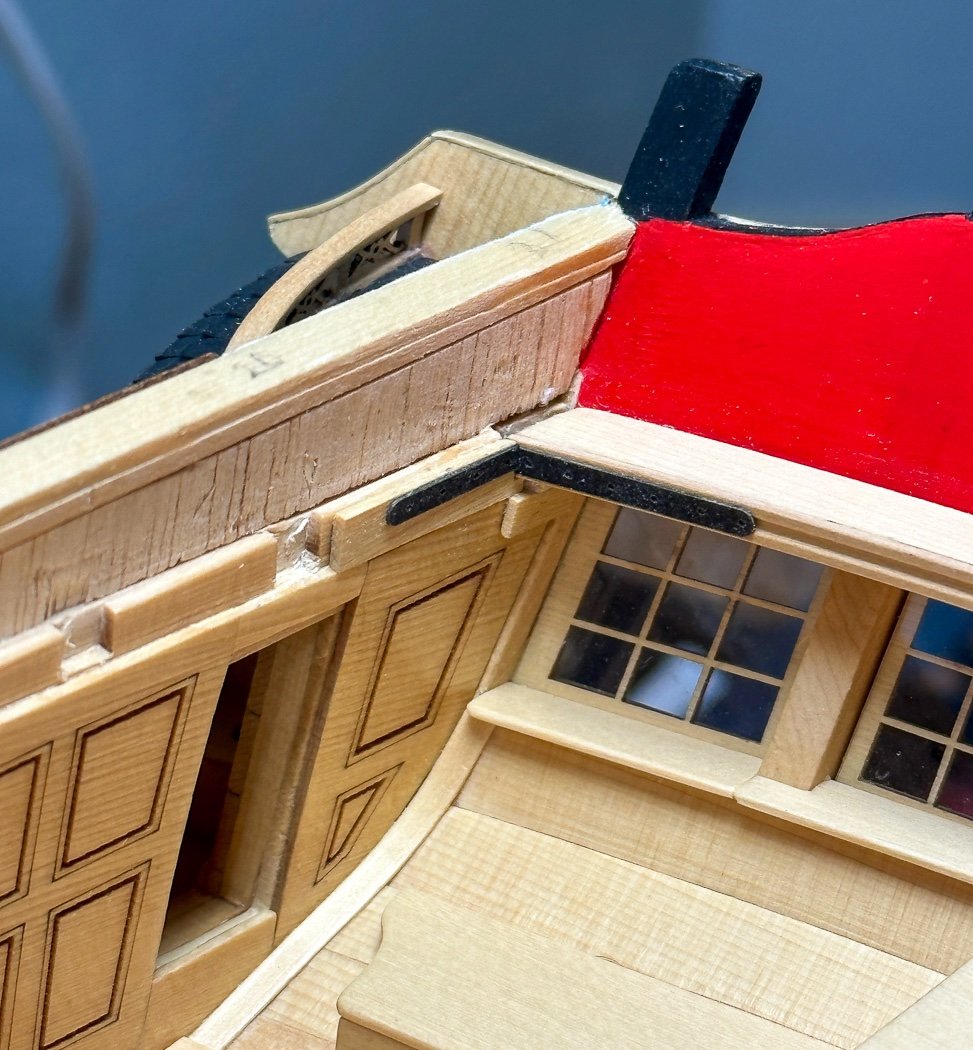
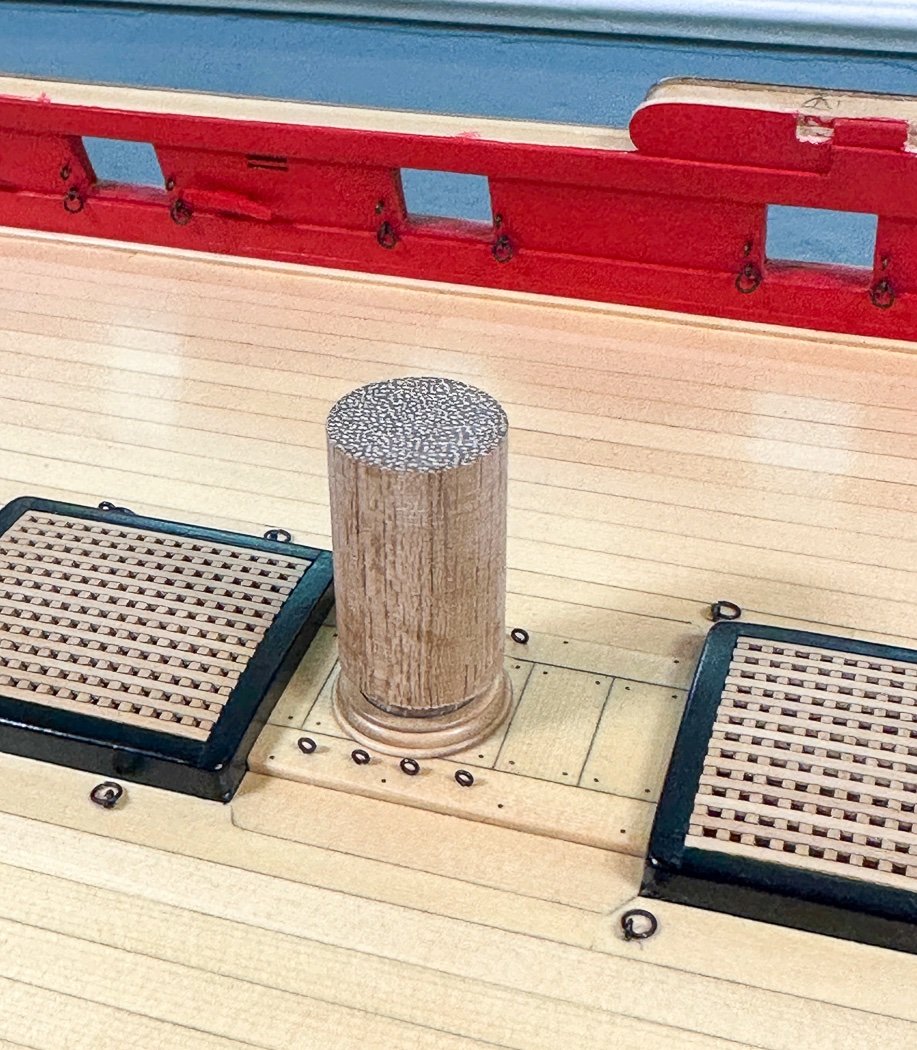
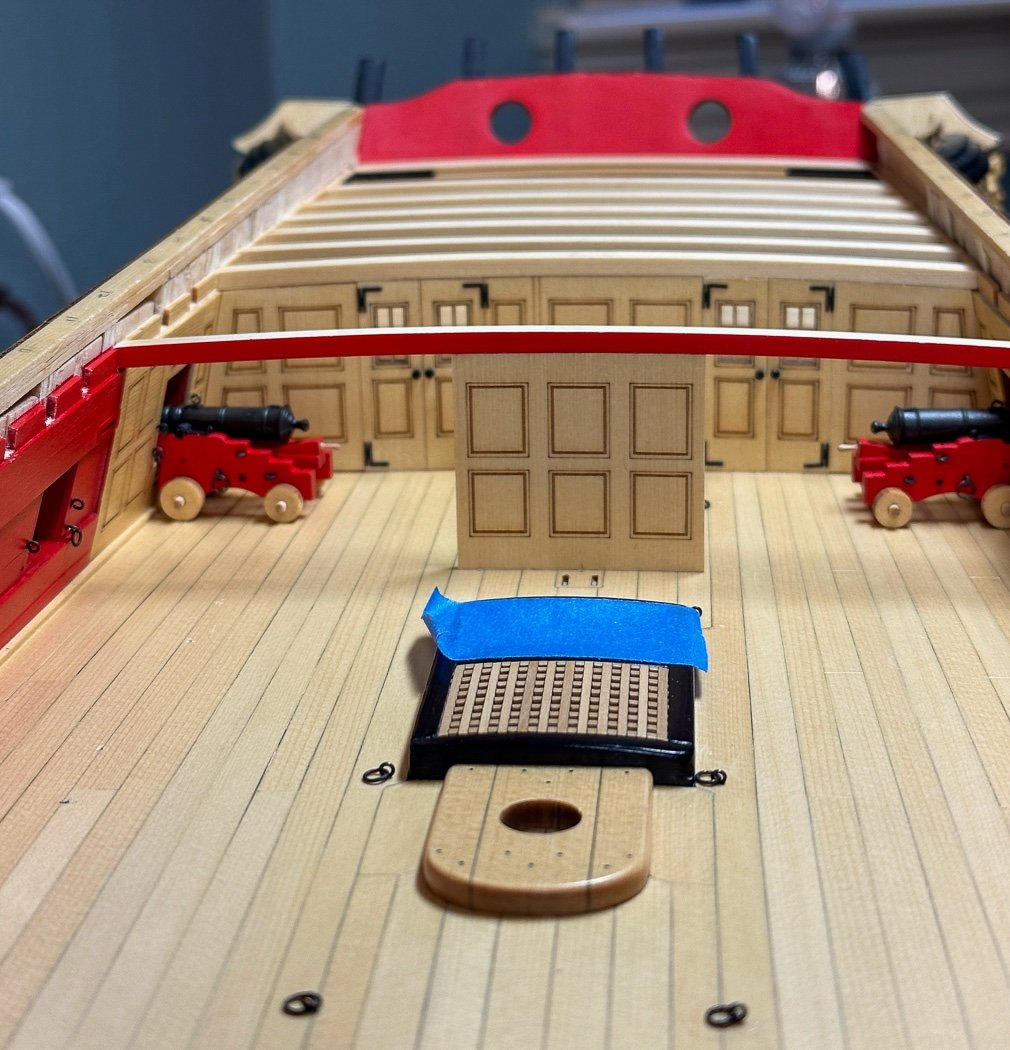
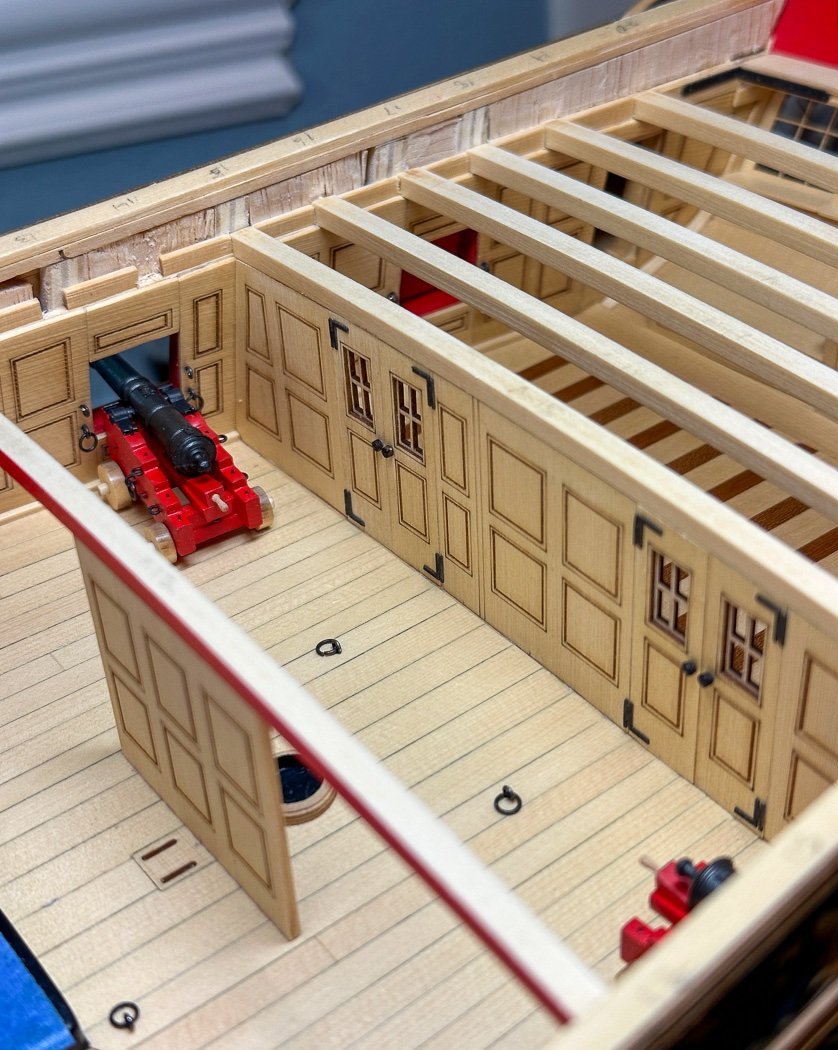
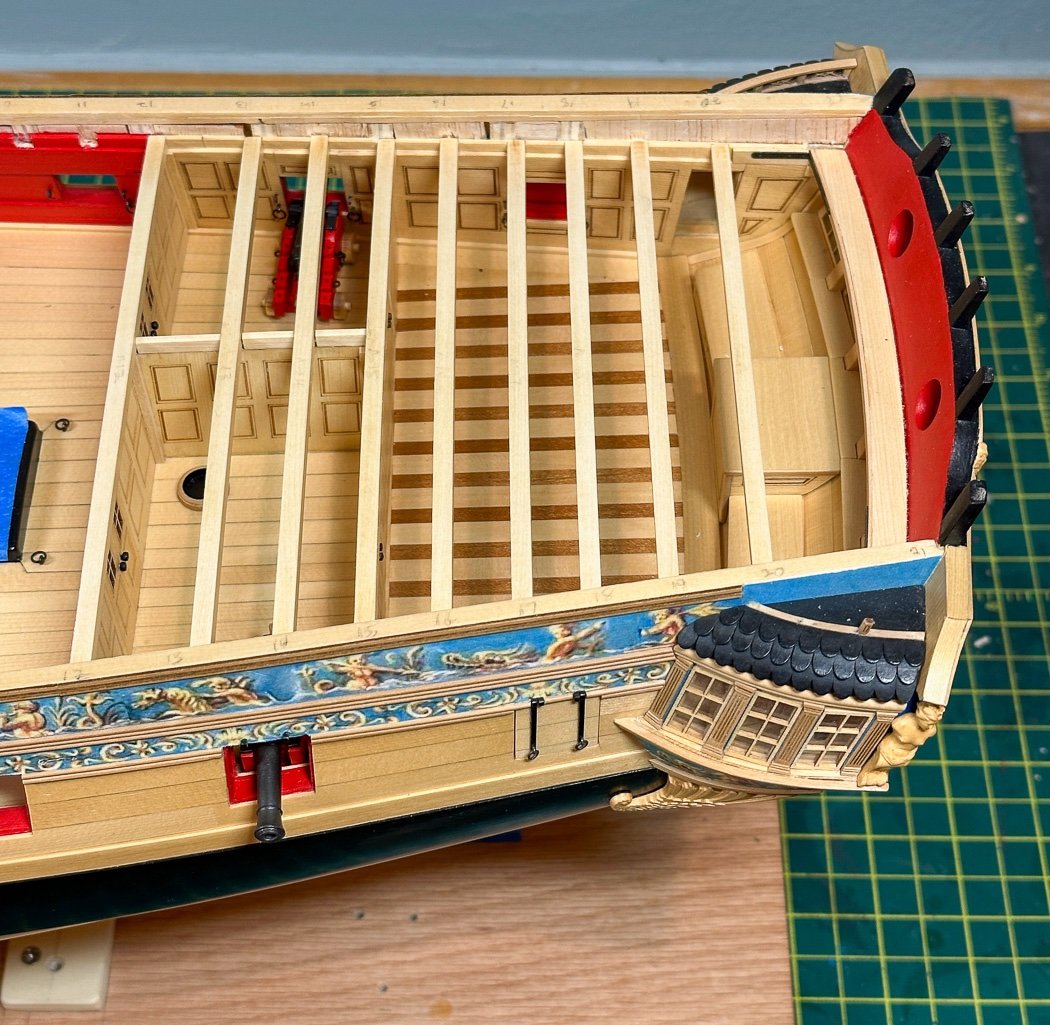
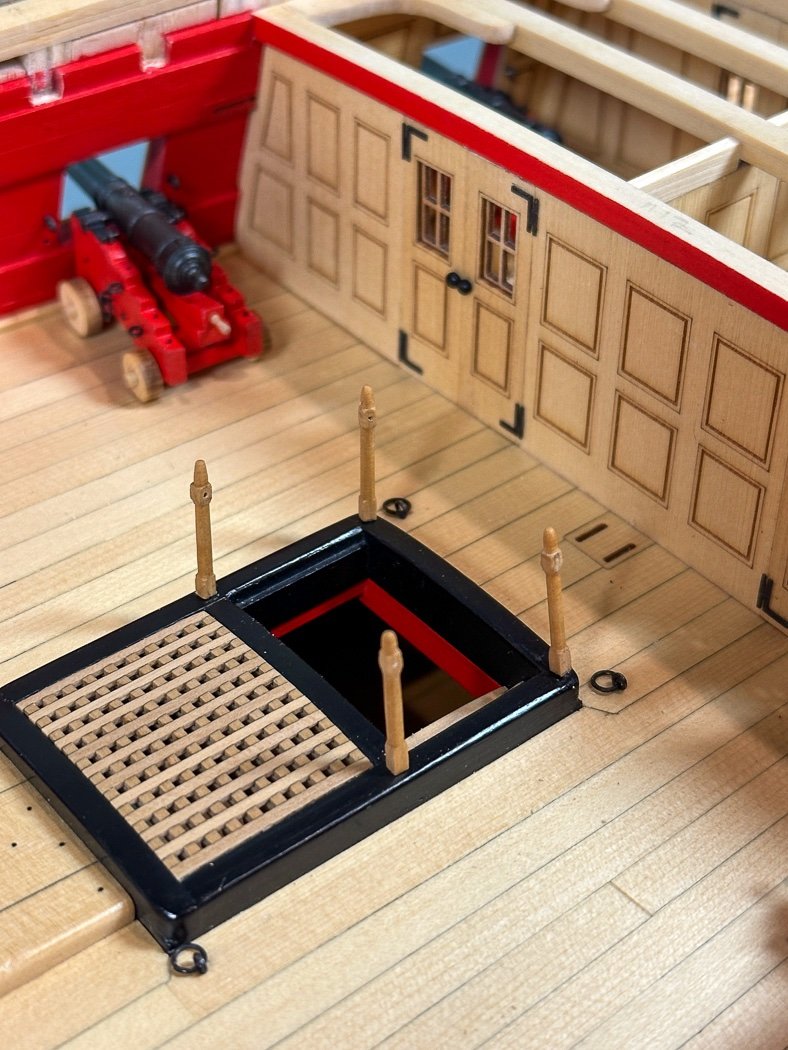
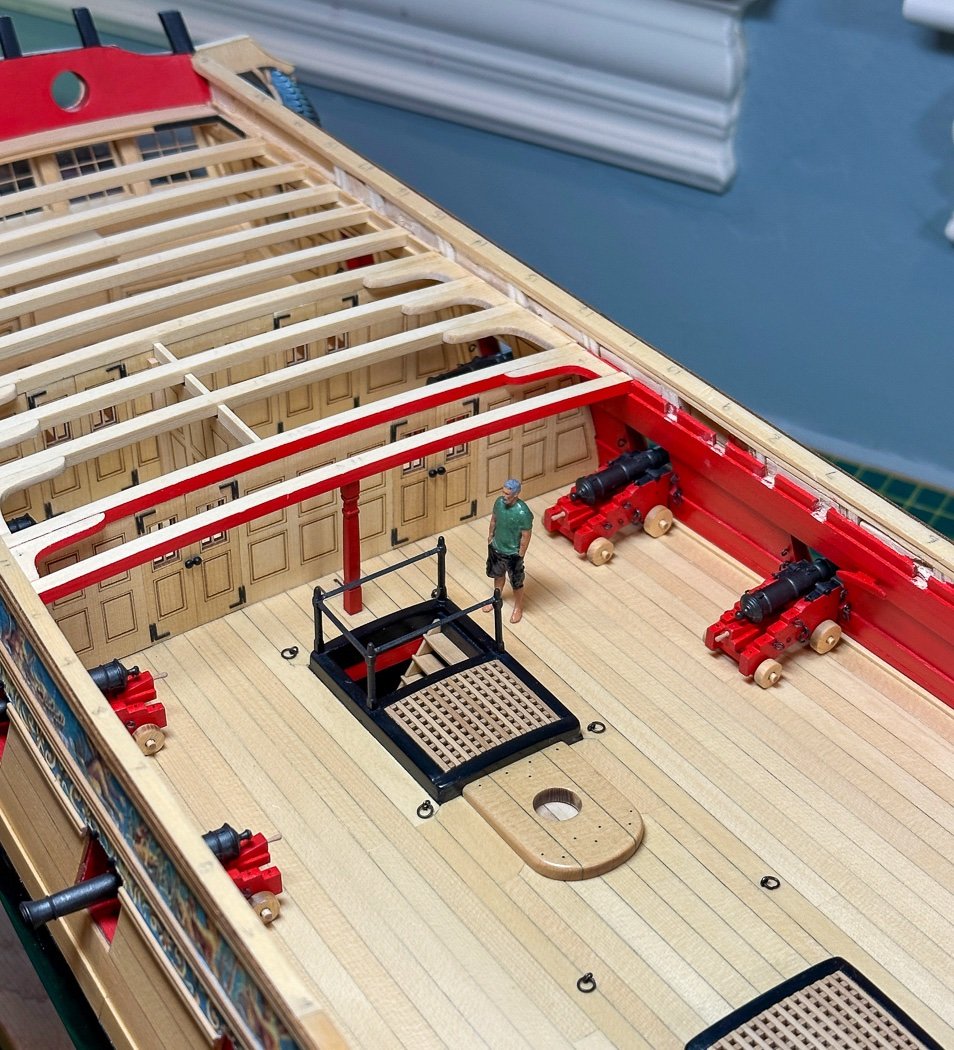
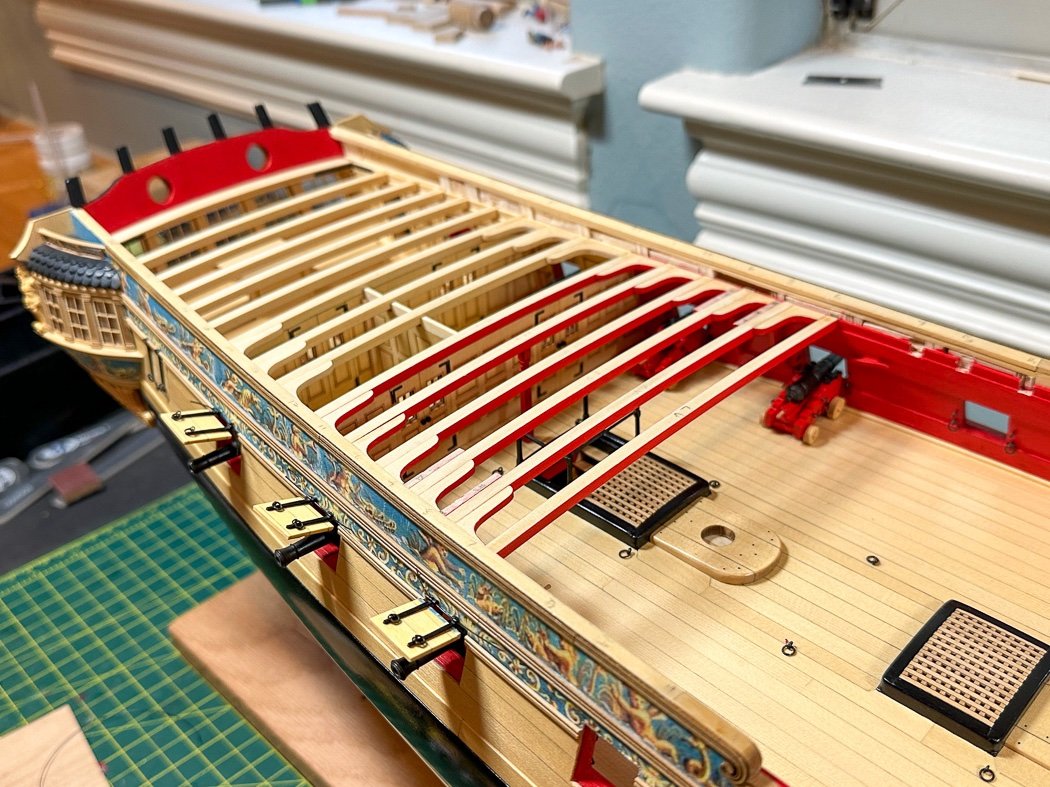
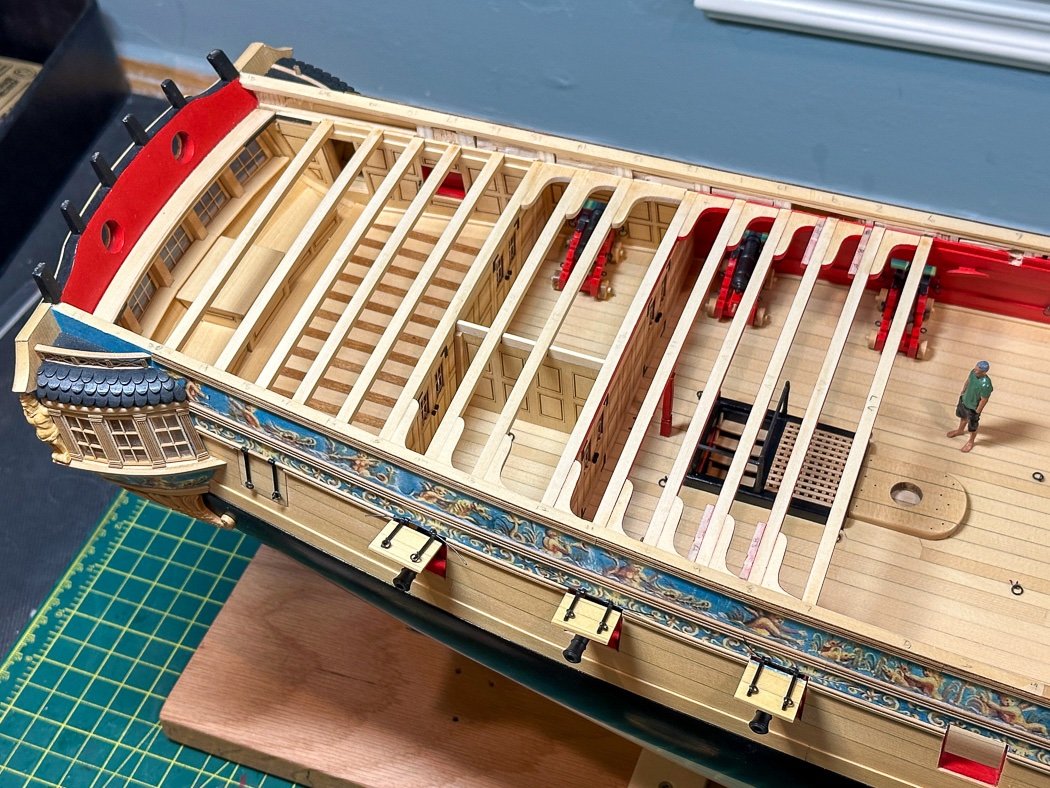
Half of the quarter deck There is a saying, or if there isn’t there ought to be, the small seemingly simple stuff, is neither small nor simple. I started work on the quarterdeck with the process of measuring and fitting the beams. Lots of char to remove on each (Lots Of Char To Remove should be the name of a rock band), then finding center, which the red center ruler is great at doing, then cutting the right size and the right angle for each to fit. Not complex but obviously accuracy is a must for them to fit properly in the clamps. I spent a lot of time long ago making sure the opposing clamps were both level and square, that paid dividends now as the alignment (distance, height, and square) of the beams was not a thing I had to be concerned about now, though I constantly checked nonetheless. Then came the laborious process of taping then painting the beams with multiple coats of red. While I don’t need them yet I went ahead and did the forecastle beams since I was having a scrape, measure paint kind of day(s). The final “beam” rests against, and has to conform to the curve of the transom along with a matching board that eventually will terminate the deck boards. It was back to the iron bending station for me to get a match to my particular transom. There was a lot of test, try, fit, repeat for me to get it where I wanted it. With that done the next trick is to make sure it’s level with the beams both vertically and horizontally. I probably made it harder than it needed to be as this took me some time to get the precision required - so simple in concept, not so easy for me to achieve. The transom beam is supplied as two laser cut boards glued together, I didn’t like seeing the glued seam on front once in place so I added a piece of moulding left from chapter 3. Hilariously in the photo it looks like the seam of two boards layered together, it actually has some relief, is boxwood, and I think is a better finish than just the layered boards (for something that largely won’t be seen once the deck is in place, but there’s a lot of that in this chapter). A nice “iron bracket” is achieved with laser cut and weathered pieces, it makes for a nice finish along with some side trim to bring it all together. This will be largely concealed by planking, but I know it’s there and it looks nice so there’s that. I took a bit of a diversion to assemble the three mast coats. They consist of three laser cut rings (two for mizzen) so to sand and shape each layer then assemble them together I ground dowels to fit the inner diameter, put that with each ring in turn on the lathe, removed char, shaped them, then glued the layers together using the same dowel. Reversing the coat on the dowel then made for a good way to center up and align the coat to the partners. Like the cannon trucks I don’t seem to get as much char removed as I’d like. But as Chuck points out that’s not easy to do with the end grain of the wood so it is what it is. His suggestion, and a good one too late for me, is not to add WOP as that accents the char even more, better to leave them natural. Of course I asked the question after I’d done exactly that. I think they generally look pretty good though. As you can see I elected to paint beam 12 red on front and natural on back to match up with the bulwark. Not sure why, seemed like a good idea at at the time. Next up was laying in the cabins and once again what is simple isn’t. All our models are different so each piece of the two walls have to be sanded and adjusted to fit both vertically and with it’s neighbor and a tight but not to tight fit below the beam, with the two walls consisting of seven pieces this took some time, especially match up to the bulwarks. The hinges and door knobs give it a nice look. Here I needed a little creativity. The layered door knobs are very tiny - the captain’s cabin doors used those. However more than a few disappeared somewhere in my workshop and I ran well short. My wife saved the day with a bottle full of tiny black beads I used on the forward wall I needed 28 gauge wire to fill the center, but with that and black paint I can’t tell the difference between the two walls. With the first two cannon permanently installed the cabin areas are complete (still happy with my custom cabin floor). You might notice the quarter gallery roof rail has been knocked off. I’ve done this multiple times, so many that I’ve had to ask Chuck for replacement parts as I’ve used up all the spares. I was smart enough to leave off the rudder and port lids, I wish I’d also kept those galley roofs off to the side for a while as well. I was stuck on the companionway railing for some time. I carved the first post on the lathe from strip wood to a shape I liked then did three more (well five more). I had the idea of using rope initially, after getting it on I didn’t like it and decided to go back to the recommended wood (fake iron) railing. After painting then treating with weathering powder the posts were pinned to the combing. Neither simple or easy is squaring up four posts on a curved combing then glue in three exact, and I mean exact measured rails squared and leveled. A couple of little jigs (not shown) helped but those feisty little posts and rails were a major pain for me. The fact they’ll be covered with decking didn’t make it easier for my mental state. Days, or maybe it was weeks and months, later I did get there. They are on and they are square. Mini-me says just don’t touch anything. With four more cannon permanently pinned to the deck I moved forward with painted beams supported by lodging and a couple of hanging knees. These required more char removal and more painting. The lodging knees are mostly an easy fit, the hanging knees require a good deal of fitting to conform to my bulwarks and around the deck clamps. For some reason the paint seemed to bleed through the hanging knees despite careful taping. I don’t seal the wood before painting perhaps I should have. Later these will all be fully covered with planking so I’ll enjoy these photos now. It is cool knowing they are there. With that I’ve reached installing the previously made capstan along with more beams and knees then some major fun stuff near the waist. Again the port lids are temporarily installed, but now I have a quandary. If I permanently install them am I more or less likely to knock a cannon loose (see quarter galley roof rail) that won’’t be the least bit easy to fix. The easy answer is don’t knock anything loose, too bad I seem to be good at doing so. Thanks for stopping by. Your likes and comments are always much appreciated.

- 840 replies
-
- 22
-

-
-
- winchelsea
- Syren Ship Model Company
- (and 1 more)
-
Welcome to the group, always nice to see new Winchelsea starts. Your use of CNC will be interesting to follow.
-
Nice looking work. It will be a sight to see fullymasted later on, good call not to have them fixed at this stage.
- 443 replies
-
- 4
-
-
- Indefatigable
- Vanguard Models
- (and 1 more)
-
Looking good. Your attention to detail at this stage is impressive and will pay off further down the line.
-
Yes, thank you Rusty! I don’t know why I can’t locate that download page from the top Group Projects menu. Clearly I’m doing something wrong. Back to beaming and kneeing it.
-
With these I just cut off a tiny portion of the tip when that happens, which wouldn’t as long as I remember to store them tip up and gently squeeze the tip clear every day. It takes very little CA to hold, hard to convince myself of that sometimes.
-
Chapter 7 references a diagram for knee and beam locations but I don’t see it at the end of the chapter. Where might I find that😁?
-
Sorry, missed seeing this. I use Bob Smith Industries CA products including their applicators. Here is the standard tip, there is also a fine tip version Here, I use both depending on the job. They go bad after a while (weeks) so I toss them and load another, keeping the tip clear and storing upright prolongs their use by a lot, I made a little stand.
-
Well done my fellow Glenn, she’s really taking shape nicely!
- 587 replies
-
- 2
-

-
-
- Indefatigable
- Vanguard Models
- (and 1 more)
-
This is the best way to plank, I converted to it several models ago and never looked back. Learning it for your first model will serve you well going forward. Remember if you don’t like it, take it off and do it again. My joke is my Cheerful model was replanted enough to have three sides,
- 8 replies
-
- 2
-
-
- Lady Nelson
- Amati
- (and 2 more)
-
So well done, congratulations for a superb model!
-
I recently completed the first 24 guns for Winchelsea. So fun to make one. By the 24th, in batches of 8, maybe less fun. Enjoy your gun factory works😊
- 648 replies
-
- 3
-
-
- Indefatigable
- Vanguard Models
- (and 1 more)
-
That’s just amazing work, wow, just wow!
-
Are you still out there?
