Chapter 7 Complete!
A long post as it’s a big moment for me, completing Chapter 7. And oh what a chapter it was. I started my Winchelsea build November 2021, two years to reach this point, three months of it on this chapter. Being retired I normally spent half a day most every day on the build in my never ending search, and failure to achieve, perfection. This summer though was a lot less build time, lots of travel including Kenya and our youngest son’s Colorado wedding plus every moment I could get spending time with my two grandchildren. Fortunately my older son and my grandkids live only 15 minutes away.
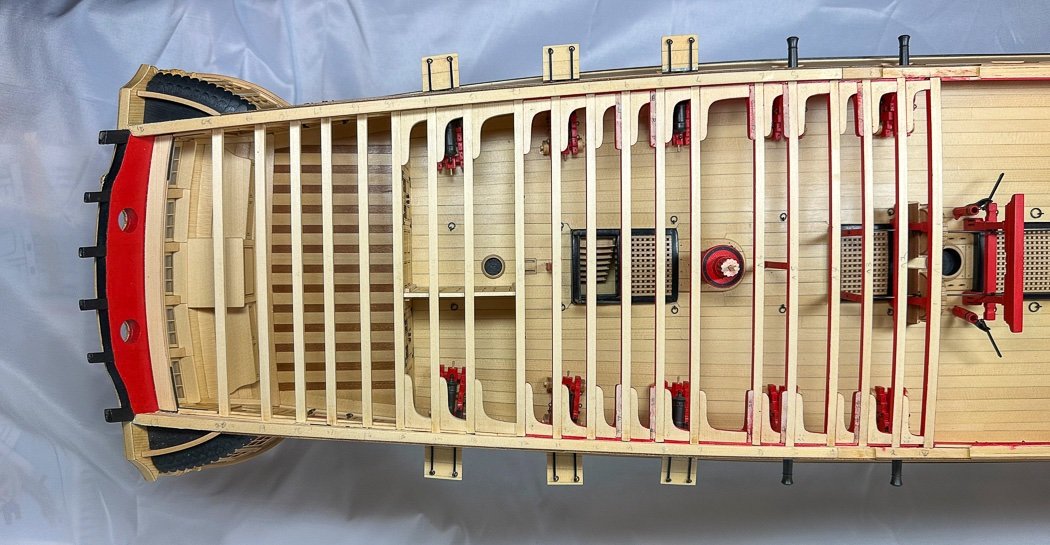
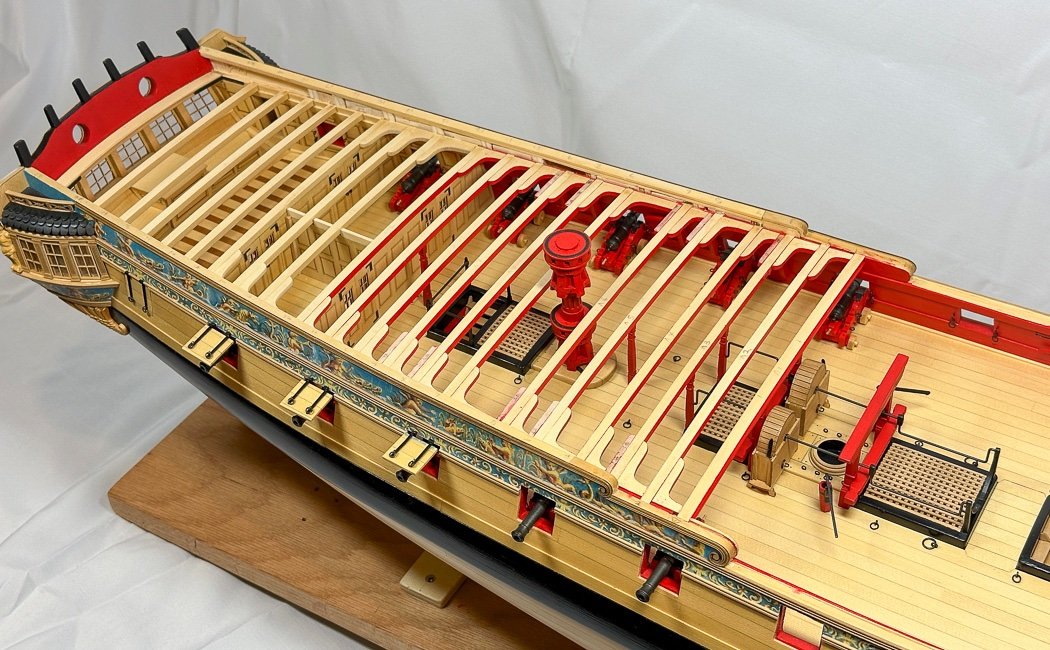
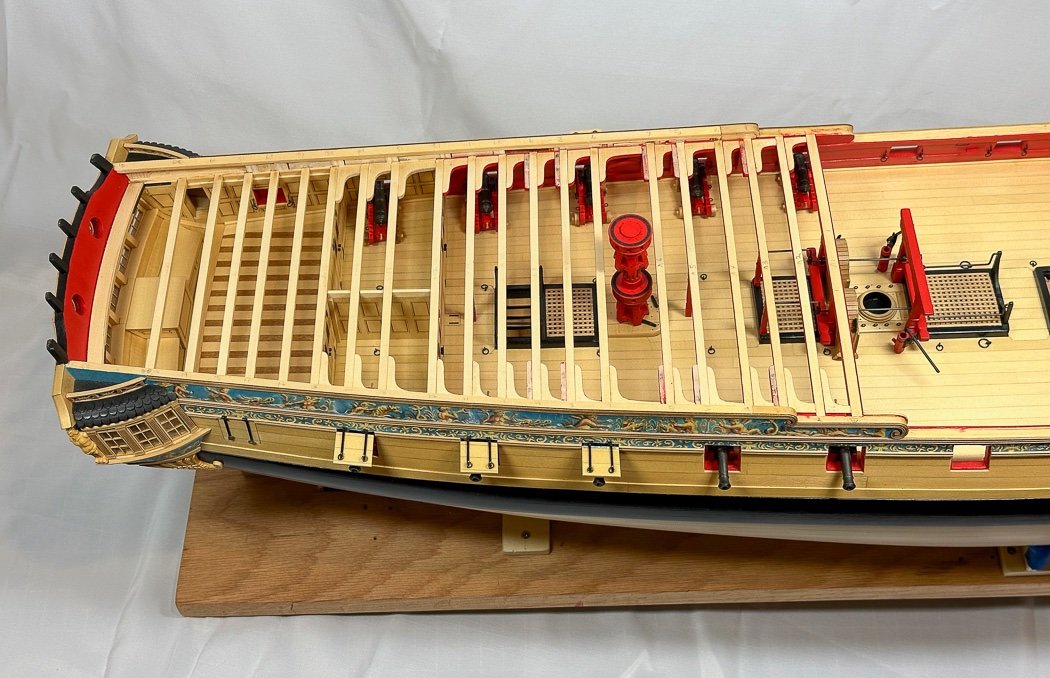
There is a lot going on in chapter 7. Beginning with the quarterdeck beams (I built the foredeck beams while I was at it) along with the lodging and hanging knees. I really like the look, unfortunately as I’ve noted and Winnie builders know, they’ll eventually be covered with deck planking….maybe.
There are also the cabin walls and doors. Each consists of three panels plus 4 doors, knobs, and hinges that are sanded to fit beneath beam and matched up to the bulwarks- fun stuff that was.
The four pillars are nice, matching four of them with the laser cut head start was fun. Even more was the posts and rails for the companionway, can’t wait to do that again on the quarterdeck. The capstan went in (the lower half), it was made long ago. All this I addressed on earlier posts, so pardon my trip down memory lane. That brought me to the next steps, the jeer bitts, gallows and pumps.
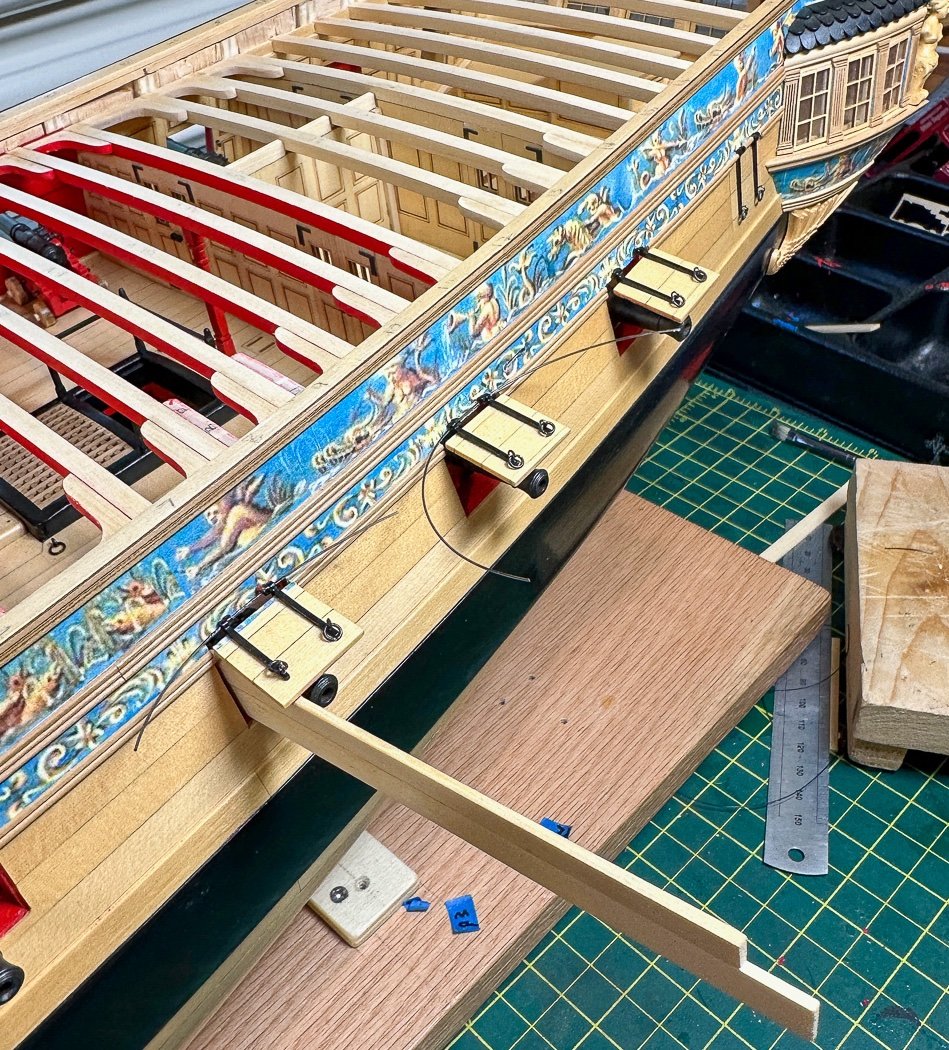
I am adding cannon row by row as I move forward. Before I got into the pumps I decided, at some peril, to add the port lids I’d stashed on my ‘built but waiting’ shelf a while back. My concern was well founded - it wasn’t long before I managed to knock one off reaching for a tool - I really need to stop doing that. Fortunately I got it back on ok. I’ve added “warning tape” to the sides to remind my hand not to hit anything.
I elected to run a single strand of 25pd black monofilament fishing line through both hinges. I made a simple little jig to keep the openings consistent. With that inserted I touched a little CA on the line just to the left of both hinges, pulled that into the hinge and once the CA set clipped the line on both sides of each hinge. It worked well with no shiny cut wire to deal with. I’m a big fan of various sizes of black monofilament for this reason.
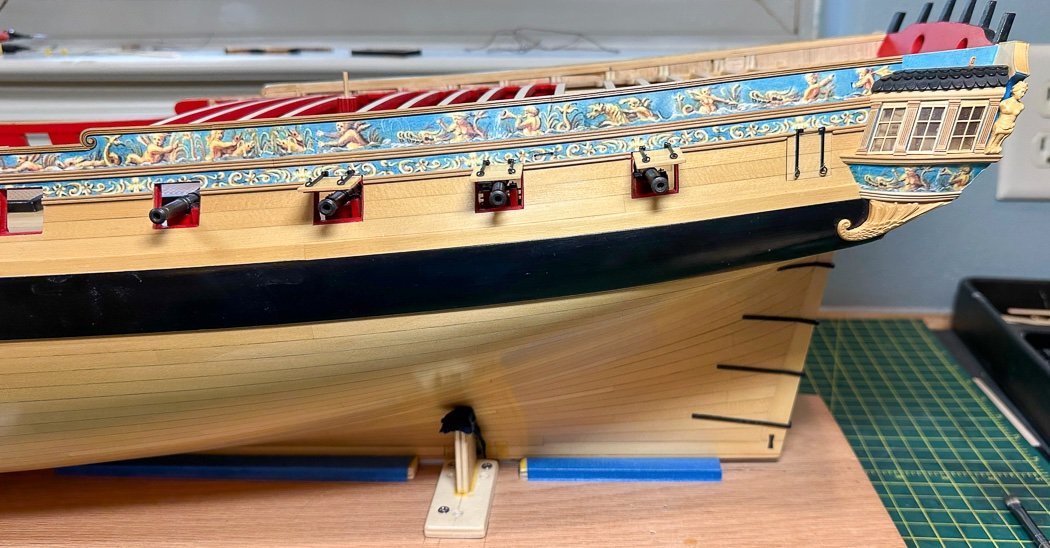
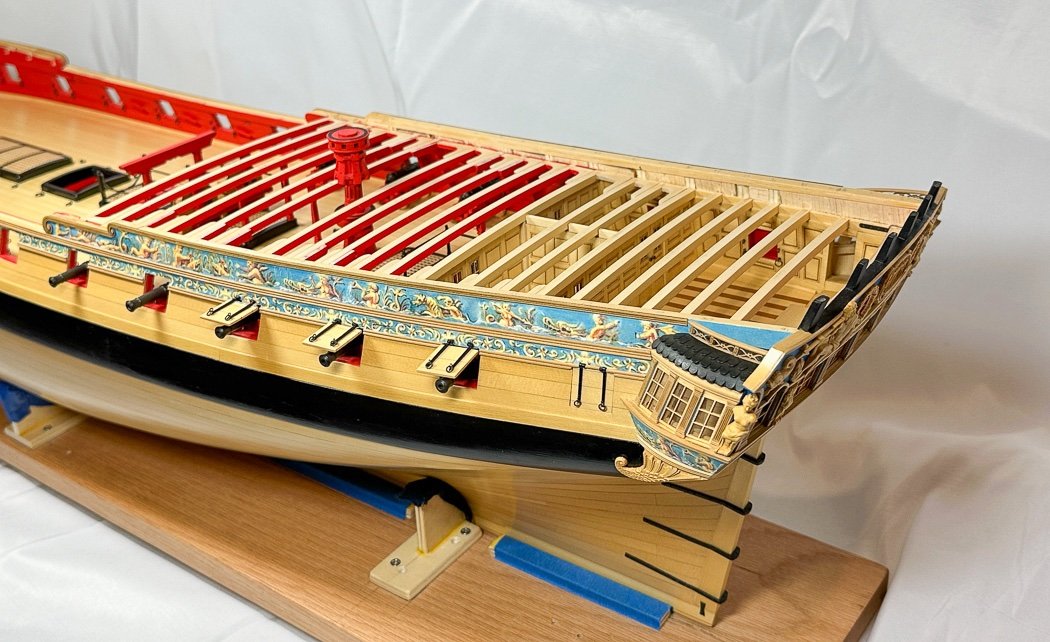
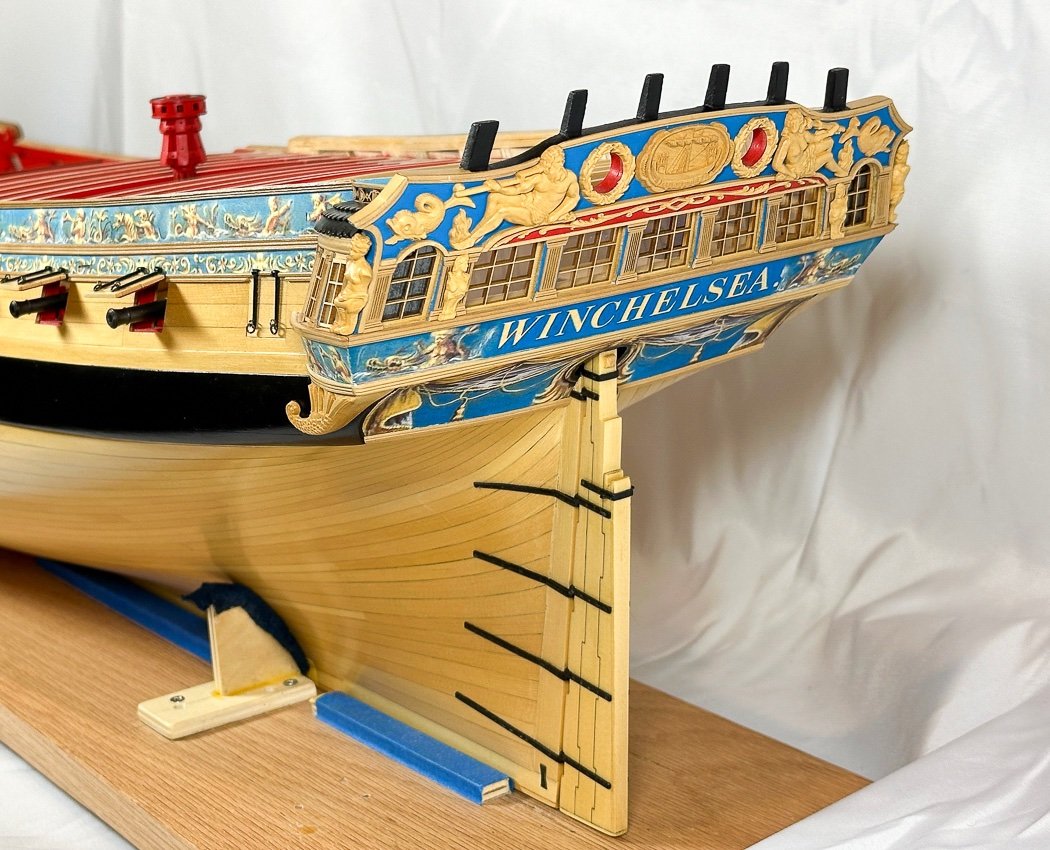
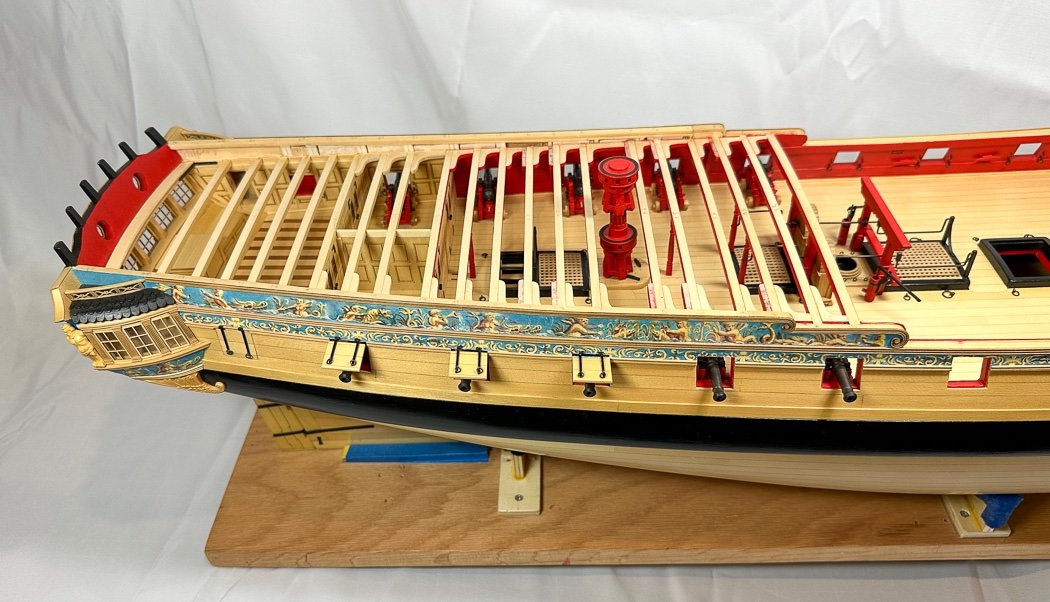
There are so many signature looks with Chuck’s excellent design - this one with the quarter galley, hull decoration, cannon, and now lids brings one of these nearer to completion.
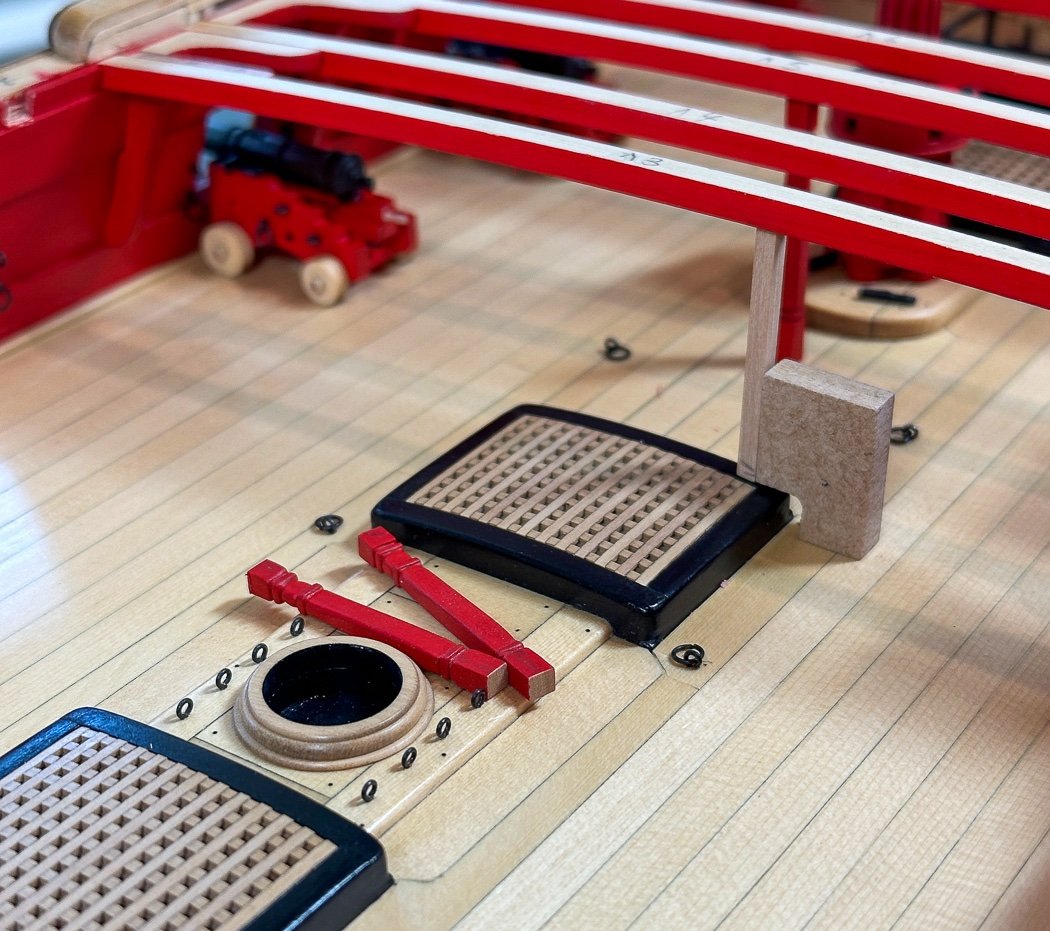
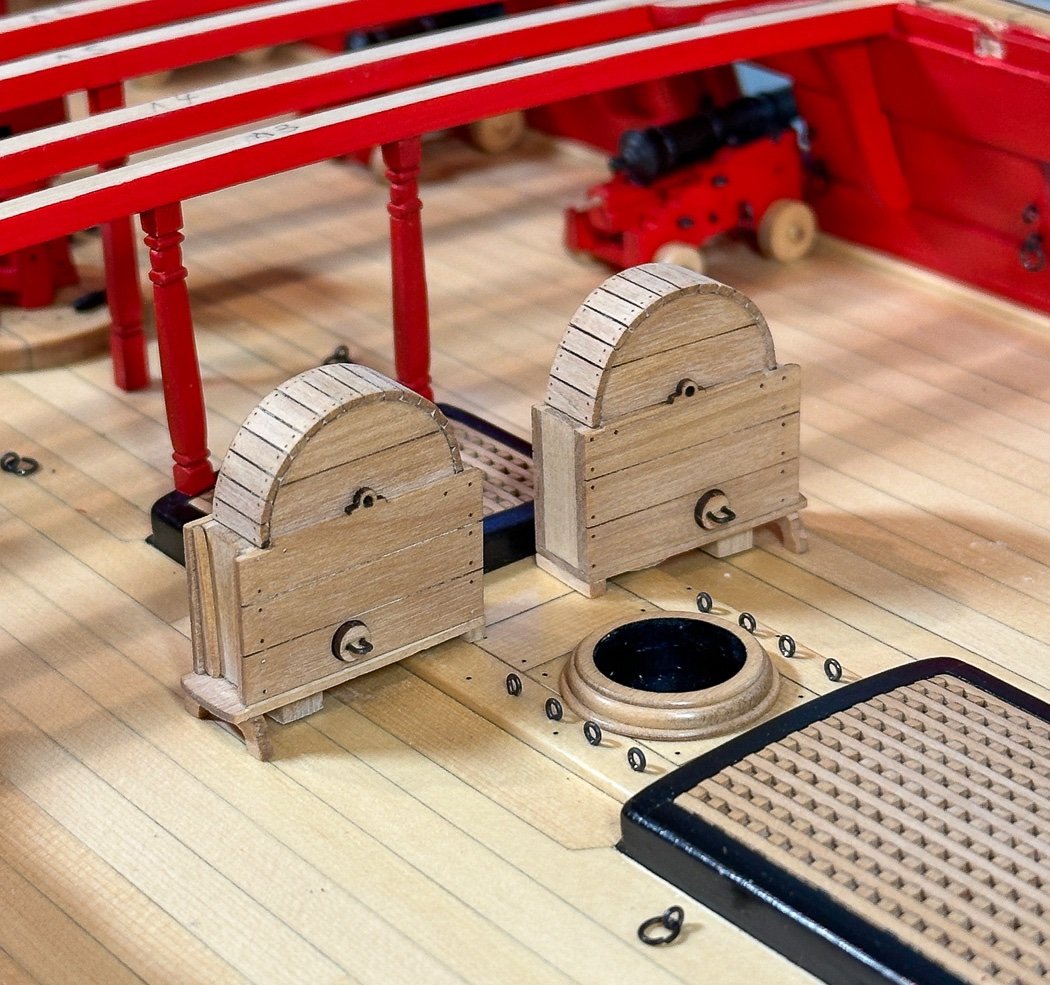
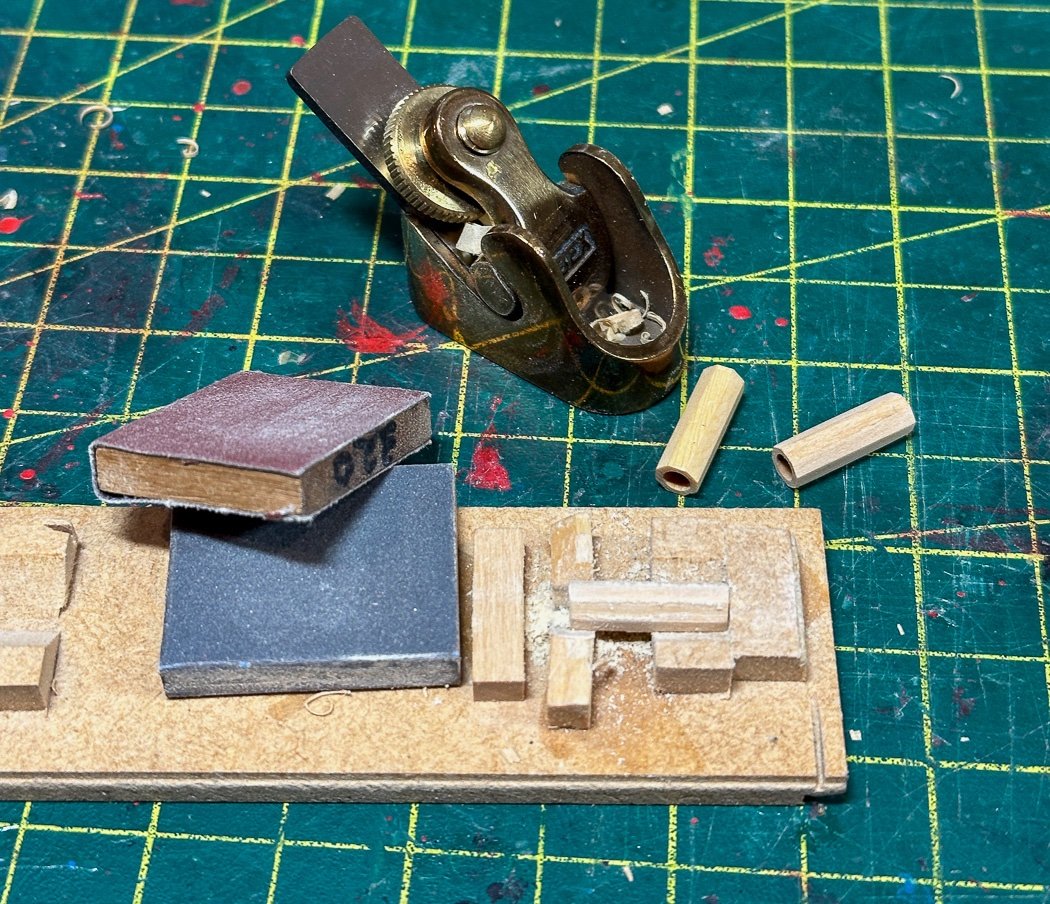
After adding a single center post a few beams back the first step toward the pump configuration is two pillars set atop this coaming. Aside from being reduced in height, shaped, sanded, and painted they require the correct angles both top and bottom as well as being identical to its partner. I fitted these but didn’t glue them yet (as guided by Chuck’s instructions ) They will need to line up with the jeers, pumps and gallows and a hole drilled at the right spot through the near center. A piece of scrap was handy in getting the right length and angles. I use a lot of purpose cut scrap MDF for various, non-scratching, jigs to check levels and pre-fit things.
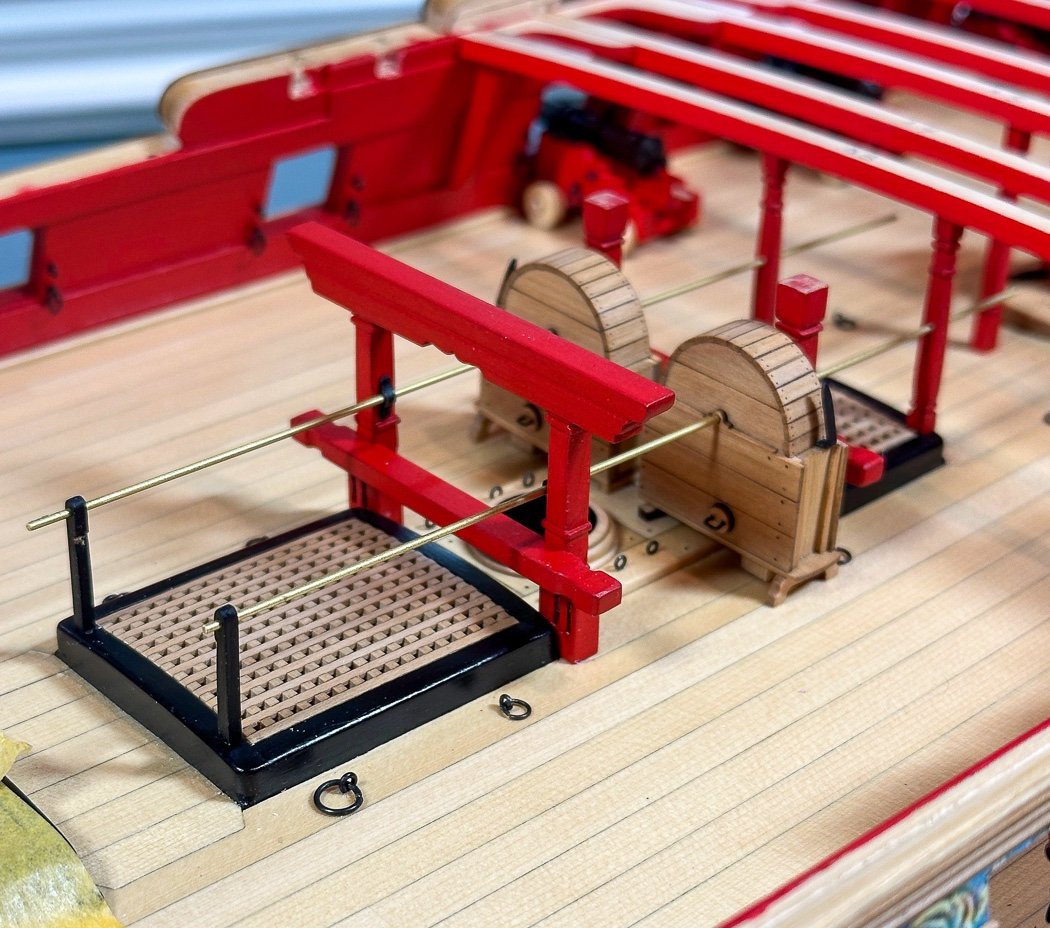
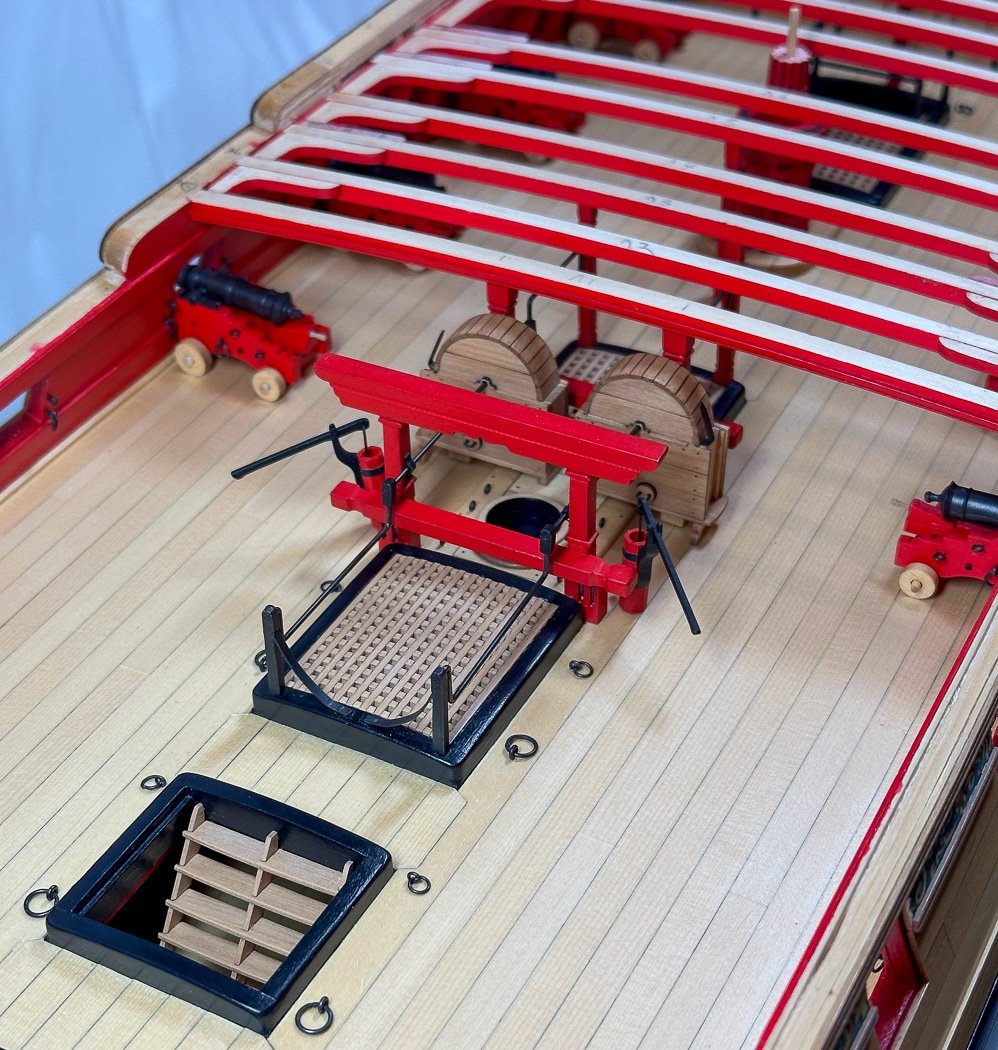
The last two beams were fitted then set aside to allow working room. Next up was the gallows and jeer bitts. I love the laser cut components for Winchelsea, they are always so precise and interesting. In the case of the gallows I thought the top piece could use a little more interest. I used my mill to cut a single groove through both sides. It seemed to add a lot by adding a little in my view.
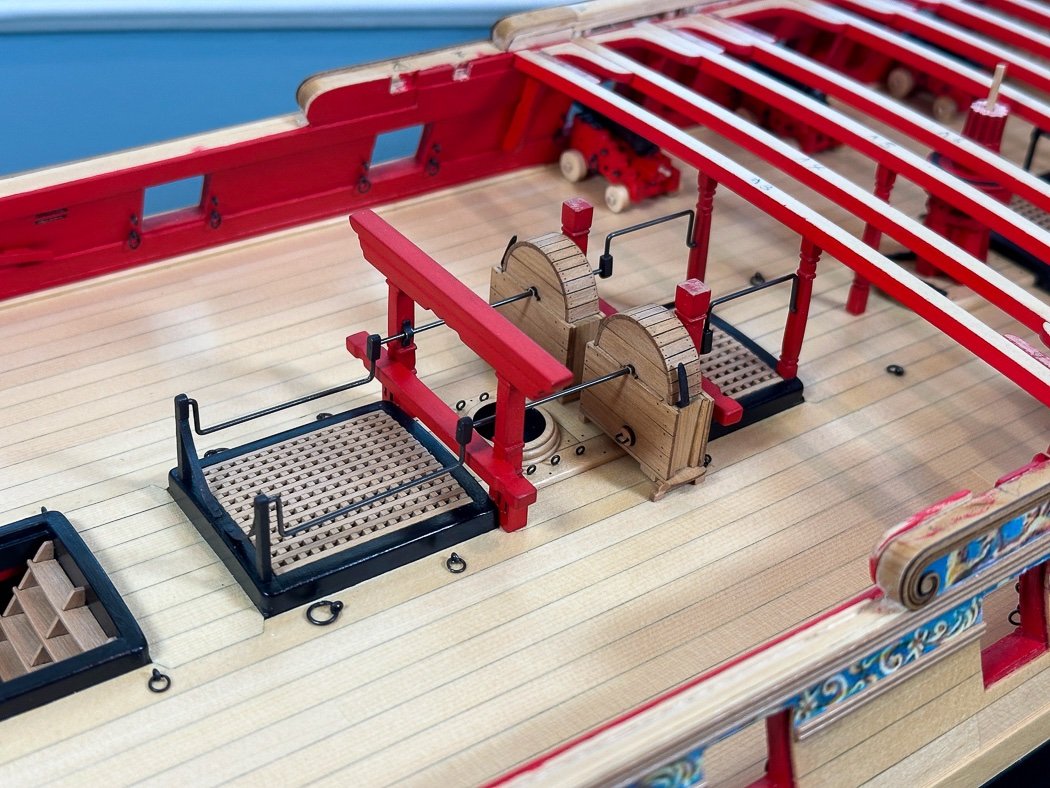
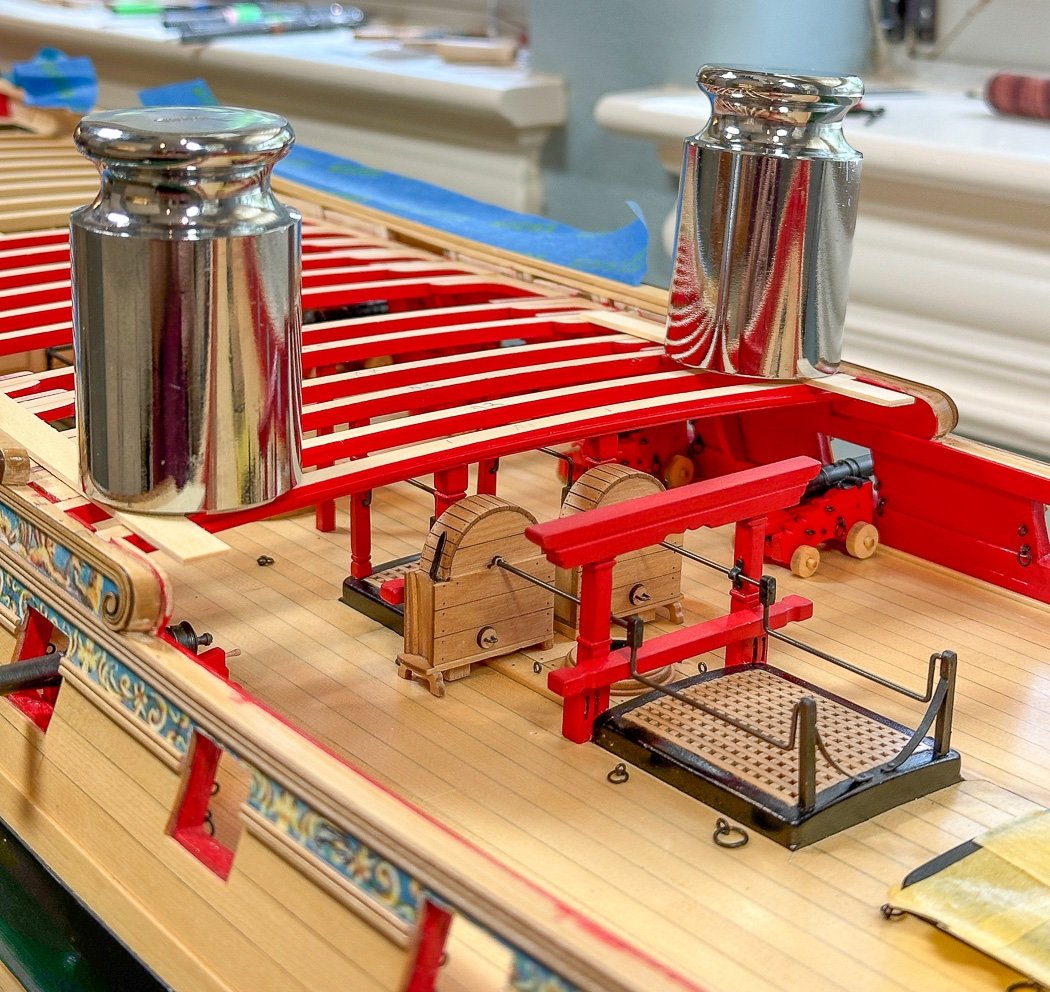
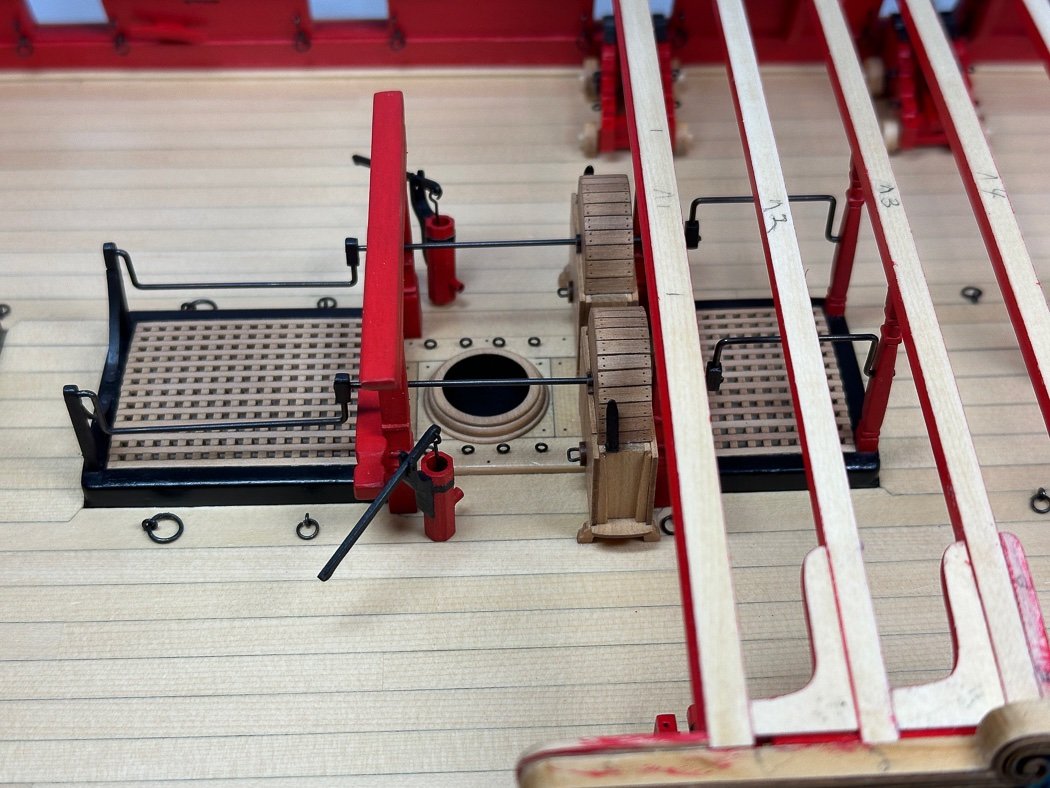
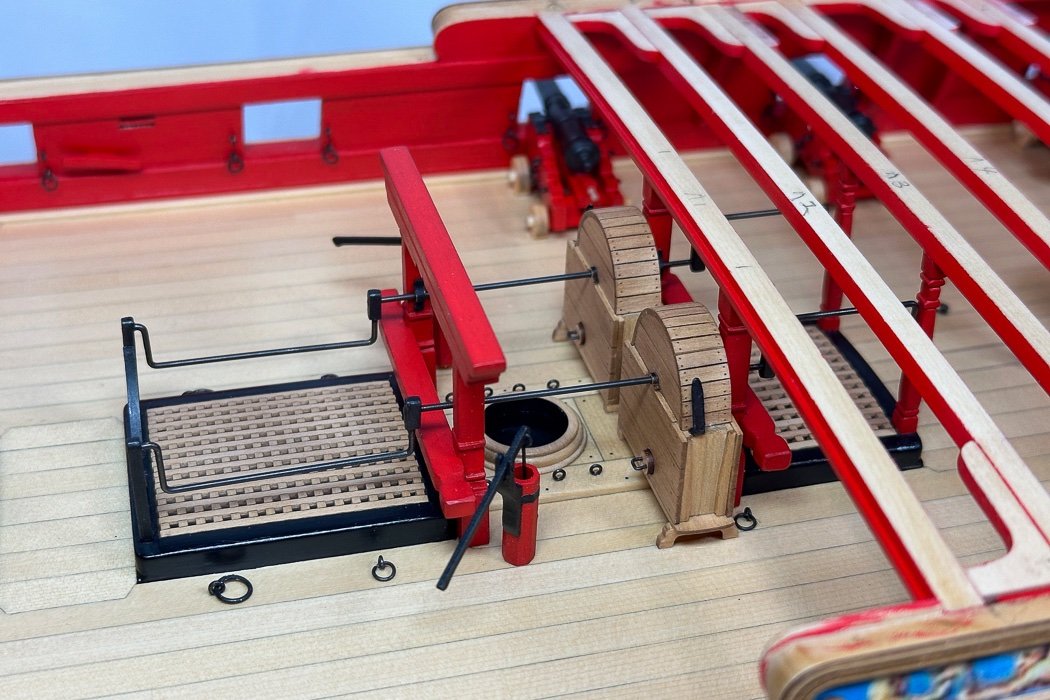
Once again my compliments to Chuck for the detail and accuracy this model provides. The pumps require around 30 separate parts each to assemble - each panel of the wheel beveled and aligned to fit among other detail. One panel, bevel, fit, check, glue, and repeat, from one side to the other…
The completed pumps (but not yet WOPed, which really defines the look) are temporarily set in place. Laser cut parts are a great starting point and assemble into nice completed components. Taken all together they make for a very realistic and fine looking model. This particular section from the forward posts through the back pillars involve a lot of those layered parts. However, though the end result is worth it - there is a lot, a lot, of char to remove. Red paint won’t cover it so it all has to come off. I use a single edge razor blade to scrape what I can and follow with very light touches using 320, 400, and 600 grit purpose made sanding sticks, I go very slowly, always in fear of removing too much, so it takes time. Wouldn’t it be nice to live in a char free world…I digress.
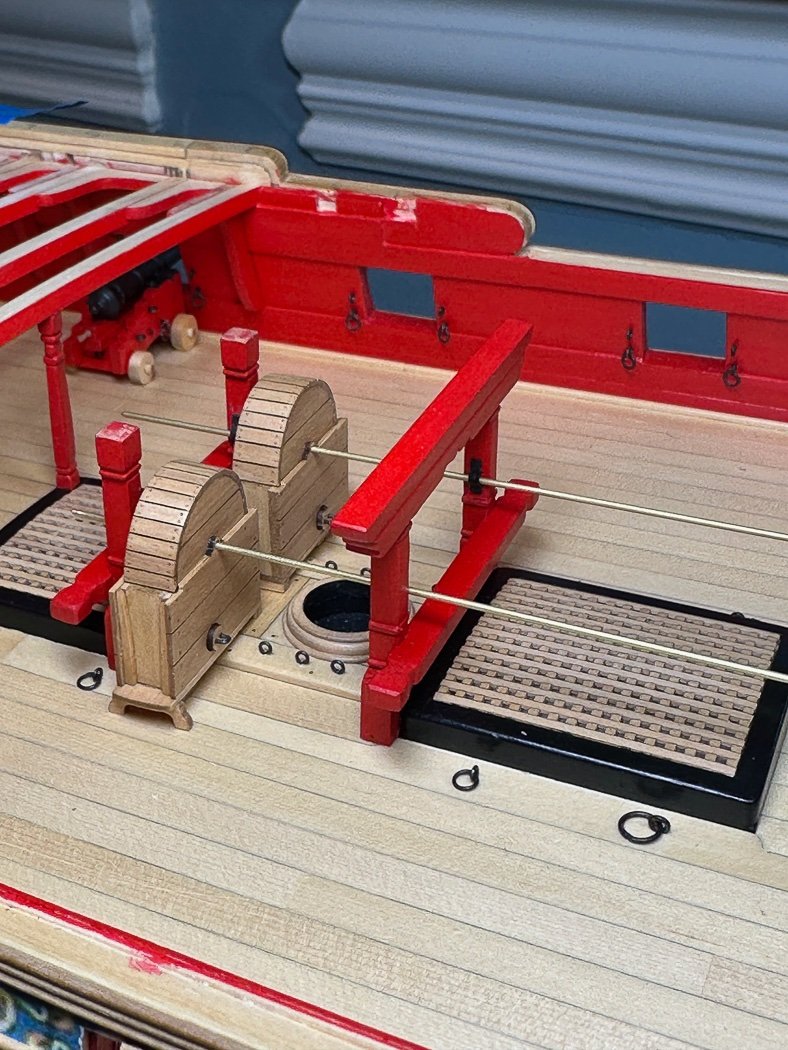
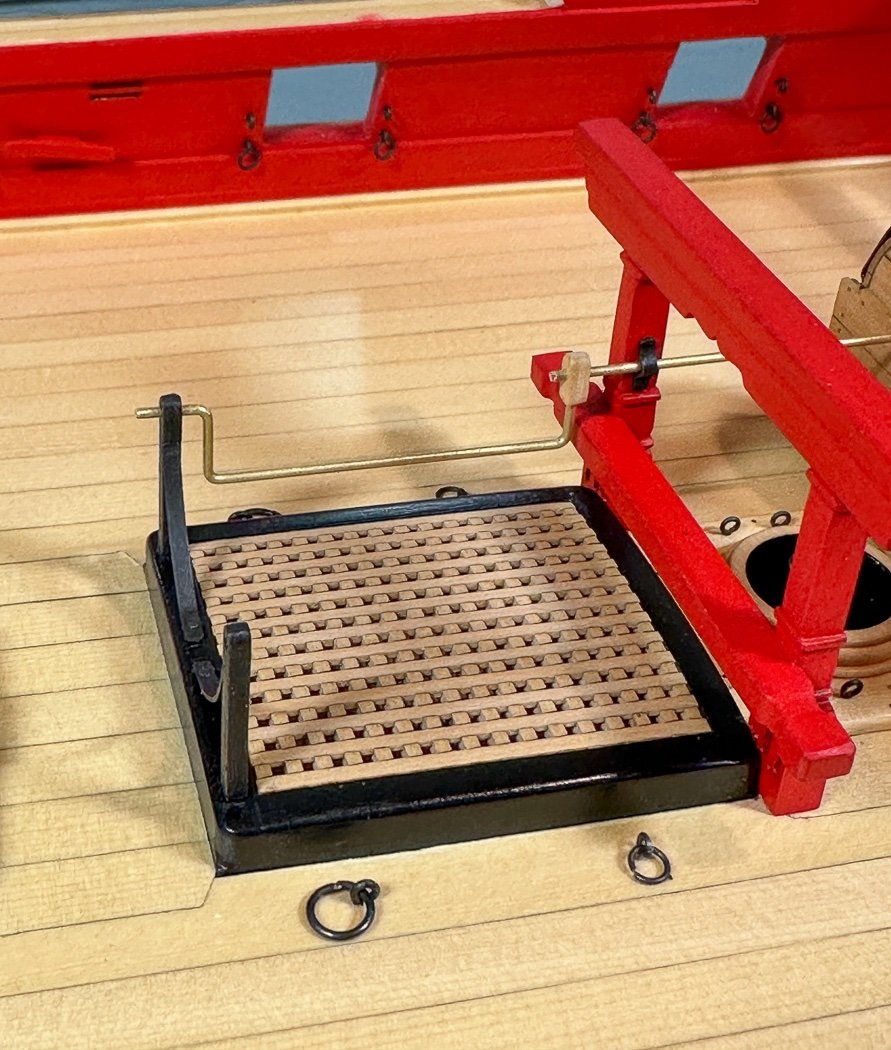
Though small, it was no small feat to make the four rhodings. I chose to do these from brass, bent, shaped, blacked, and weathered to attach to the gallows and jeer bitts. Not only to make them but installed in line through all of the above back to those earlier made columns. I must have pushed in and pulled out those brass rods so many times in measuring, marking, adjusting, and confirming this very critical fit before gluing anything down. It’s a long straight, level path through five components, times two. The height is fixed by the pumps, everything else must follow.
I wasn’t done though, the rods (and eventually crank handles) extend to the forward stanchions. I made these from wood and between my Ironwood Black paint and weathering powder did my best to make them appear to be metal (doesn't show well in these photos).
Brass, blacked bent into a gentle curve and “bolted” (those ubiquitous little nails did the job) to the coaming completed the look.
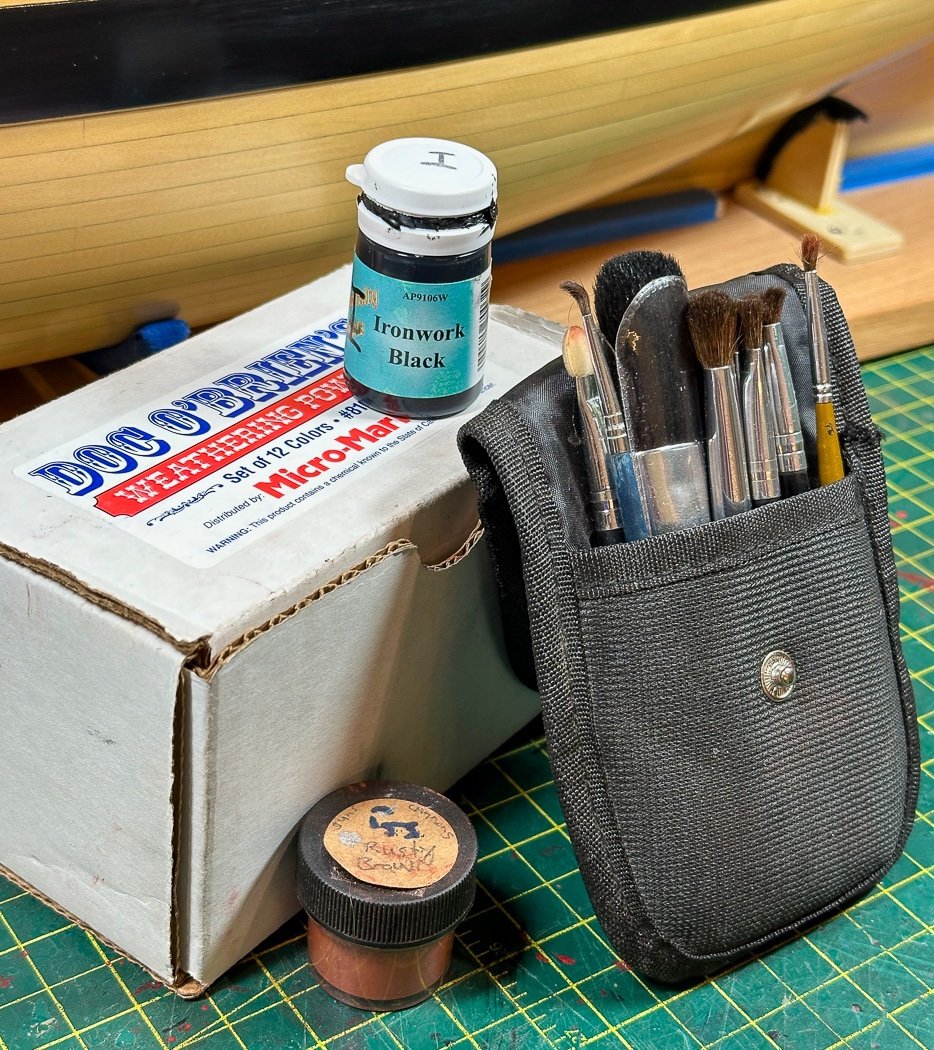
I mention weathering a lot. I did this, learning from others, the first time for Cheerful. It makes such a difference, one that probably doesn’t show in photos. I start with Admiralty Paints Ironwood Black, perhaps meant to paint metal I use it on wood all the time - it’s basically a matte black but has 'metalistic' character of its own. The Doc O’Brien weathering powder is great, for reasons beyond me Rusty Brown on the Ironwood black paint seems to make the best Iron Gray look. It’s the same combination I used on all the cannon barrels. While it may seem excessive, this brush set makes it all work for me - I use four for a single application - one for powdering, one for removing excess, one to lightly even it out, and finally the larger very soft brush to buff out and complete the look. Anyway…that’s just me.
With posts, bitts, pumps, rhodings, gallows, and stanchions all lined up and glued in - after many many repeats of measure, mark, check, confirm with long rods - it was time to make and add the cranks. I used the mill to make these “iron plugs” and purpose made smooth pliers and flush cutters to shape and bend to rods into cranks. The challenge of making one isn’t hard, making an identical partner isn’t hard either…he said being the guy who frets over ½ mm differences.
Once the rods blackened, the plugs painted and both weathered I glued them in (only at the end points) and flush cut the ends. And I’m done with another signature element - it all stands out so nicely. It takes a lot to get it this way. Every step is challenging, fun, and worth the end result. There is no reason or purpose to speed through this. It will remain one of the most visible elements of the completed model.
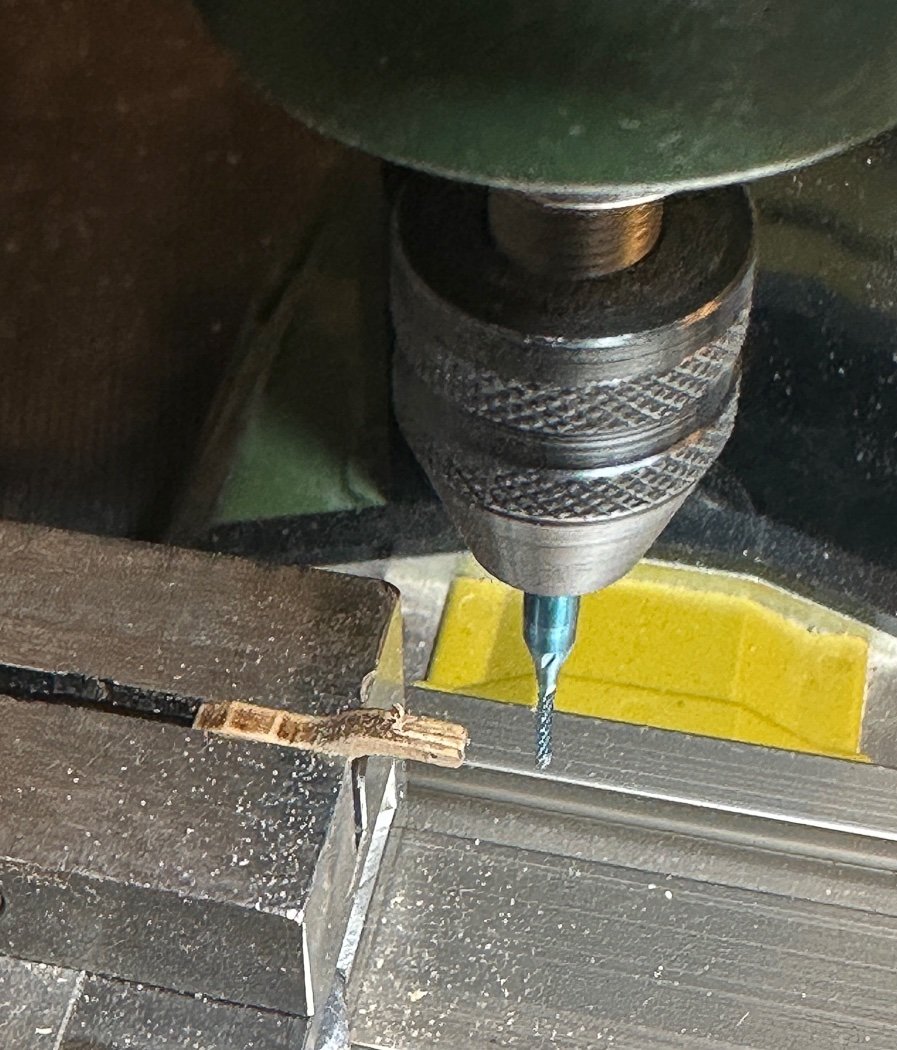
The final step for chapter 7 is the elm tree pumps. I cut the groove for the handle and drill out the pump itself about half through on the mill, Measured then planed/sanded the octagonal shape following the 7-10-7 ratio. With that, some painting, a small dowel drilled out in the center as the spout (I used my .7mm pencil lead the cover the inside of the spout, just enough contrast), and some black masking tape for the band the two pumps were added to the model. I drilled a hole and added a pin to the bottom of the pumps. Now that they are done and located for mounting off they go to the shelf until later so I don’t snag the handles doing something else. I’m good at that.
The final two beams and lodging knees are added and chapter 7 is complete.
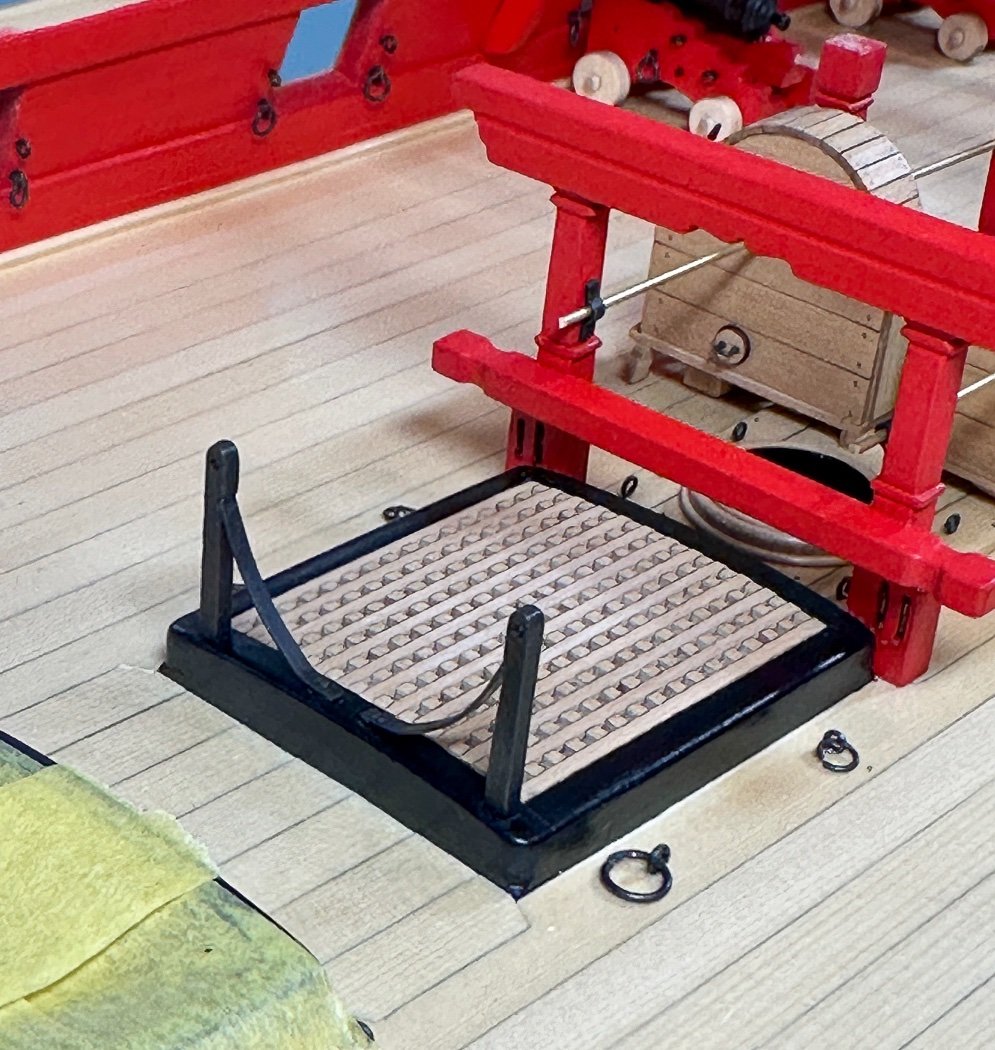
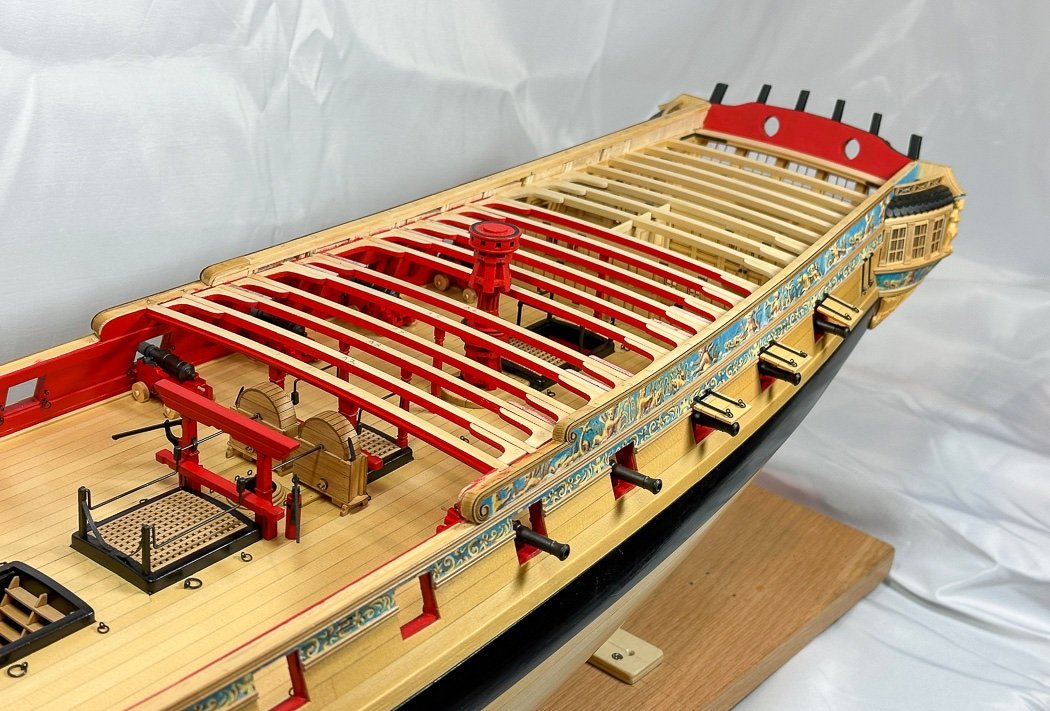
Chapter 7 Photos: To make a long post longer here are some photos of the stern quarter where I’ve spent the last three months (interrupted as it were with other things).
Thanks for stopping by, your likes and especially your comments are always appreciated. Before I move to Chapter 8 I’ll take a pause and sort out my Africa photos for a book I’ll publish as Christmas gifts for the family. It gives me purpose to get through the 10,000 I and my wife took while there. It’s hard work having two hobbies, good thing I’m retired. Until next time.


 I think to answer that fairly it would help to know your material costs. Certainly your time and your design has value but too high a price for the first two chapters without knowing what the eventual full kit cost would be makes for a difficult buyer’s decision. Not much help I realize.